WhatsApp Flow
Introduction
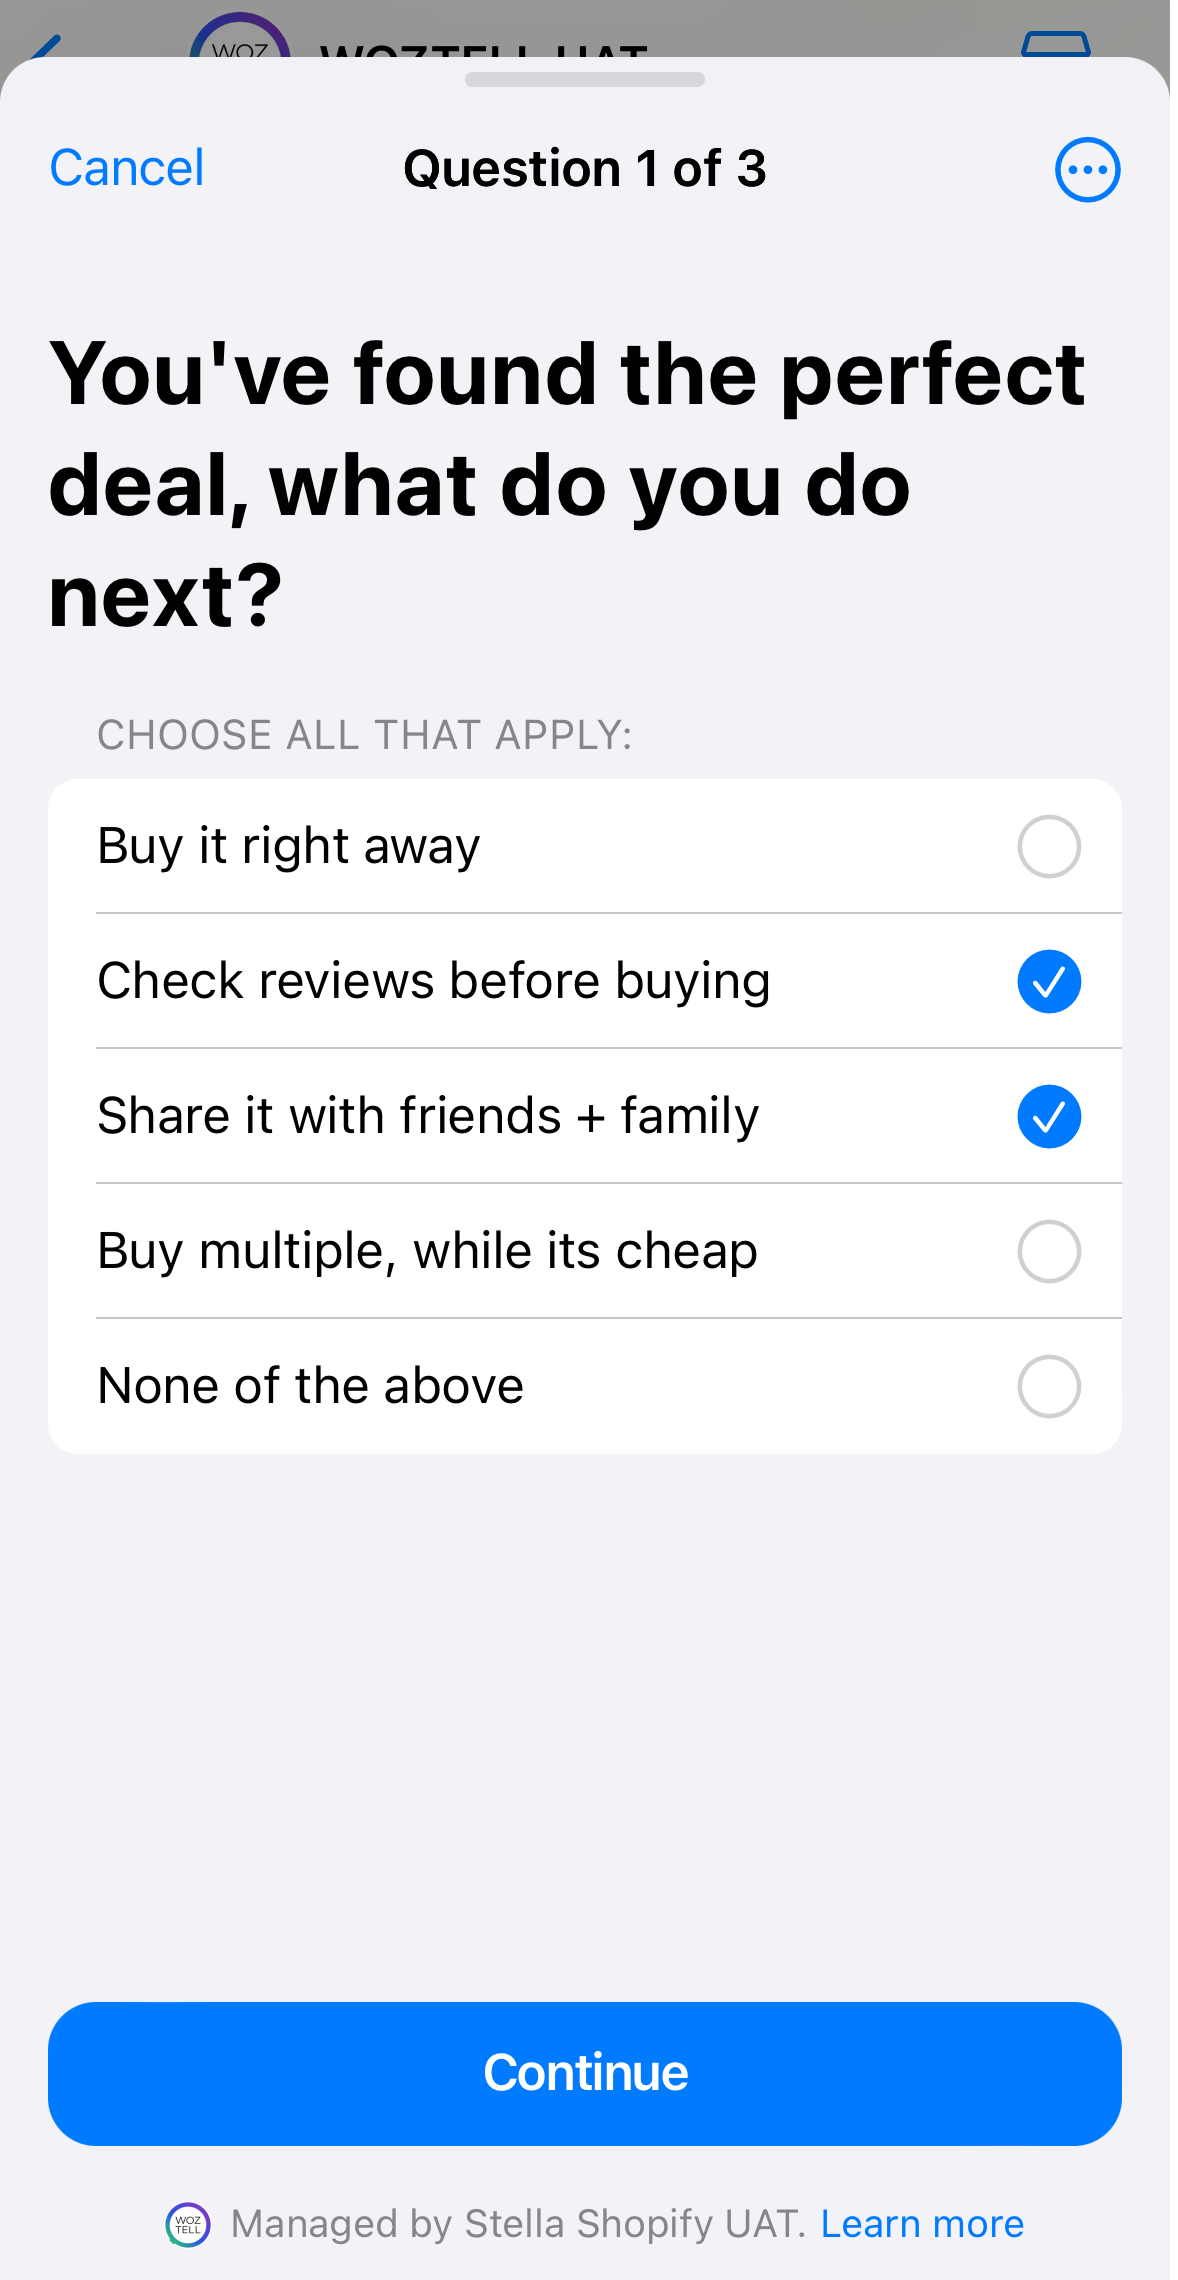
Flow enables you to build structured interactions on WhatsApp to provide an enhanced end-to-end experience. Flow is a kind of highly customizable and task-centric workflow, it can server specific purposes such as booking appointments, browsing products, collecting customer feedback, getting new leads, etc.

Create & Publish Flow
To create and publish the flows, you need to log into the WhatsApp Manager and enter the Flow Builder.
- In the WhatsApp Manager, open "All Tools" and select "Flows".
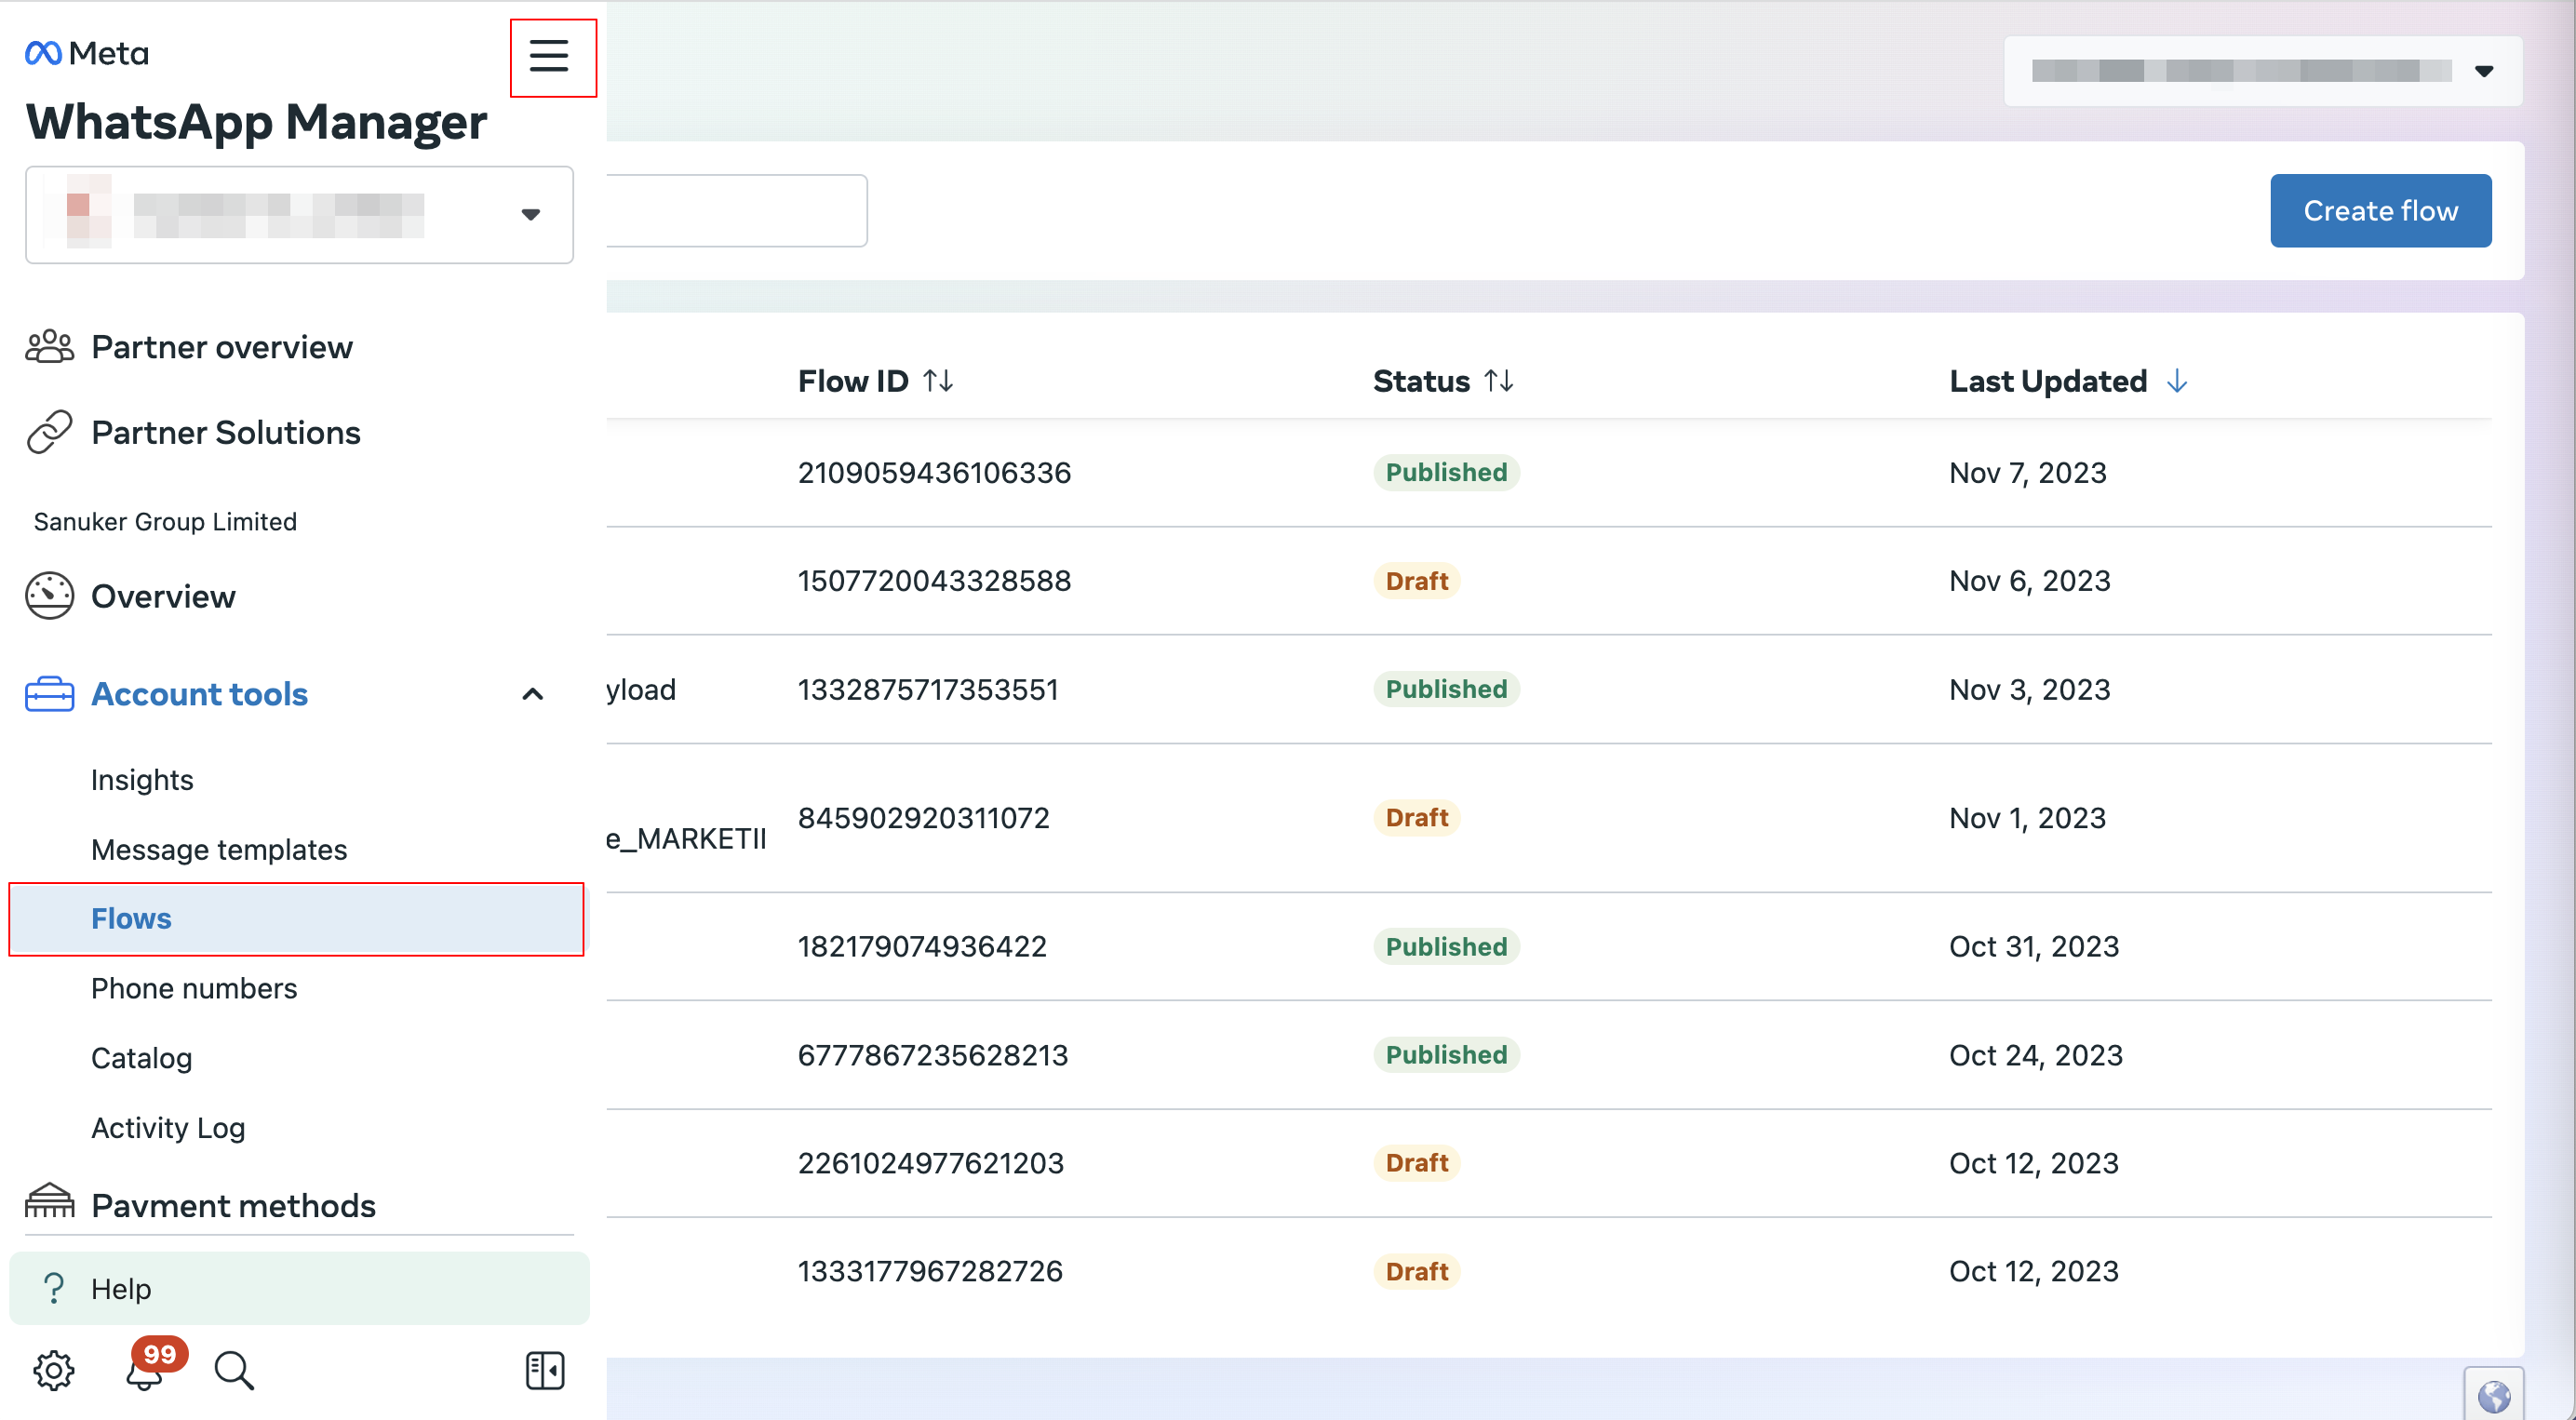
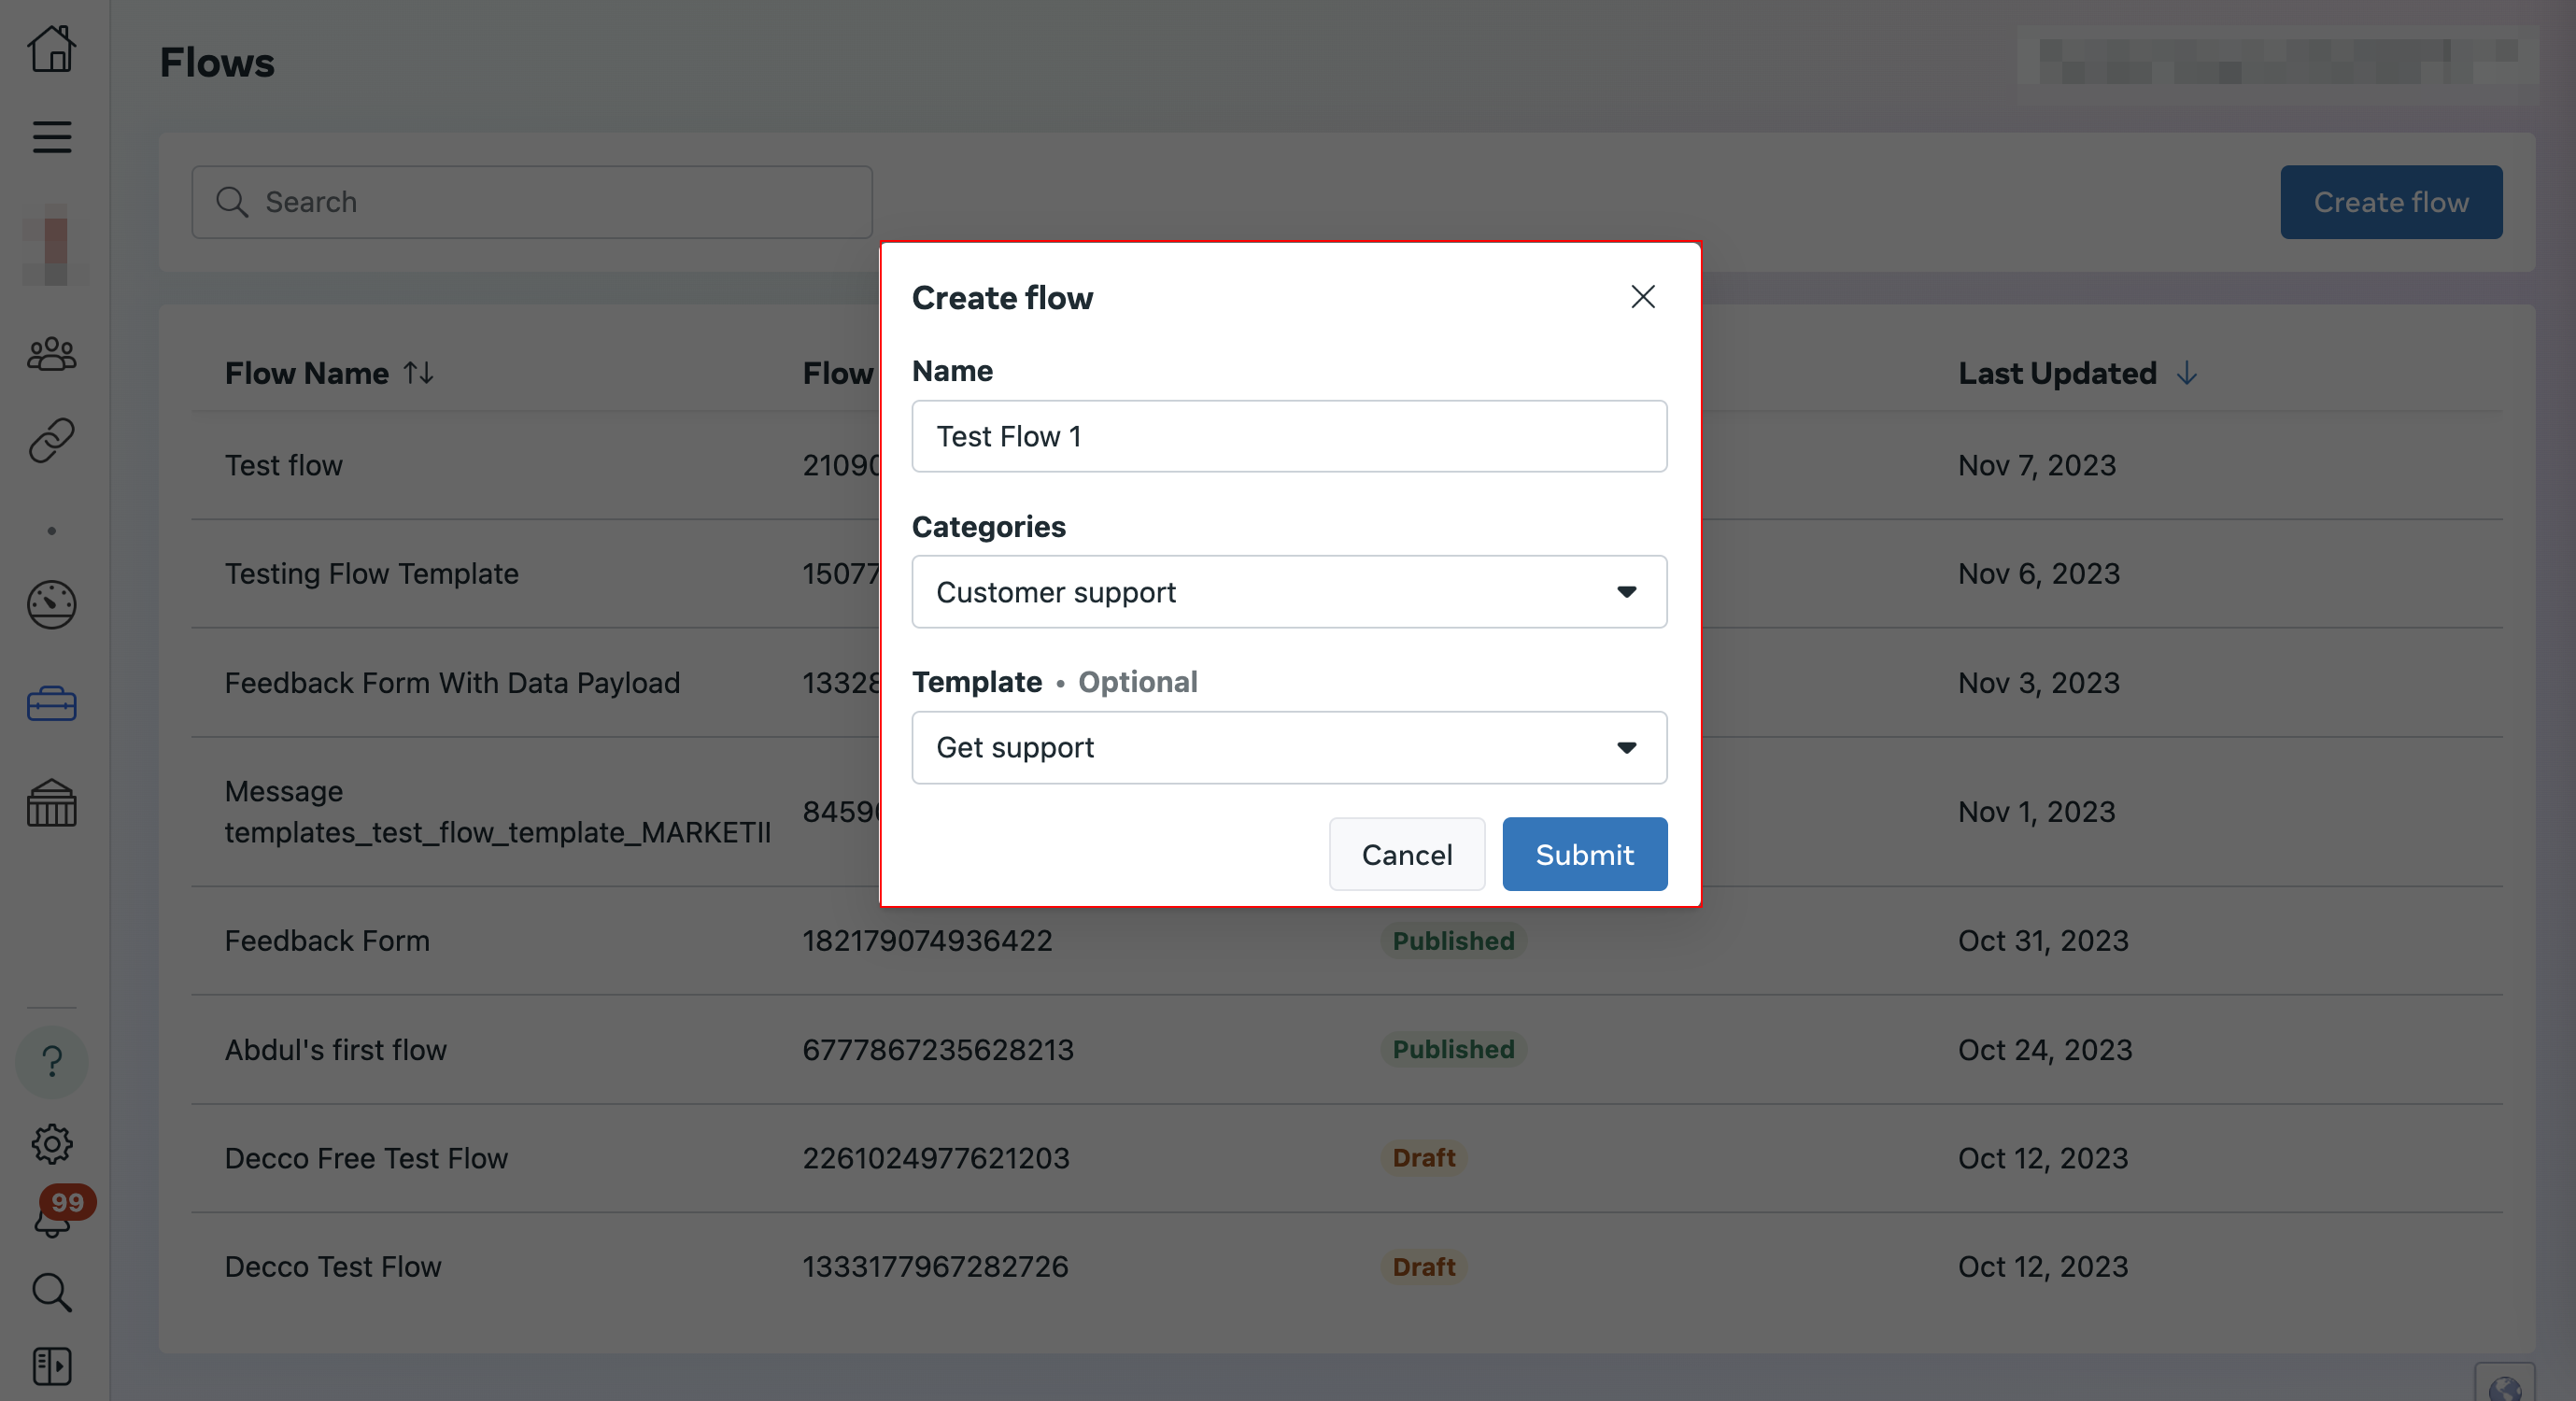
- Start by selecting "Create Flow".

- Name the flow and select one or multiple categories. By selecting an optional template, Meta will provide a template flow for you to start with.
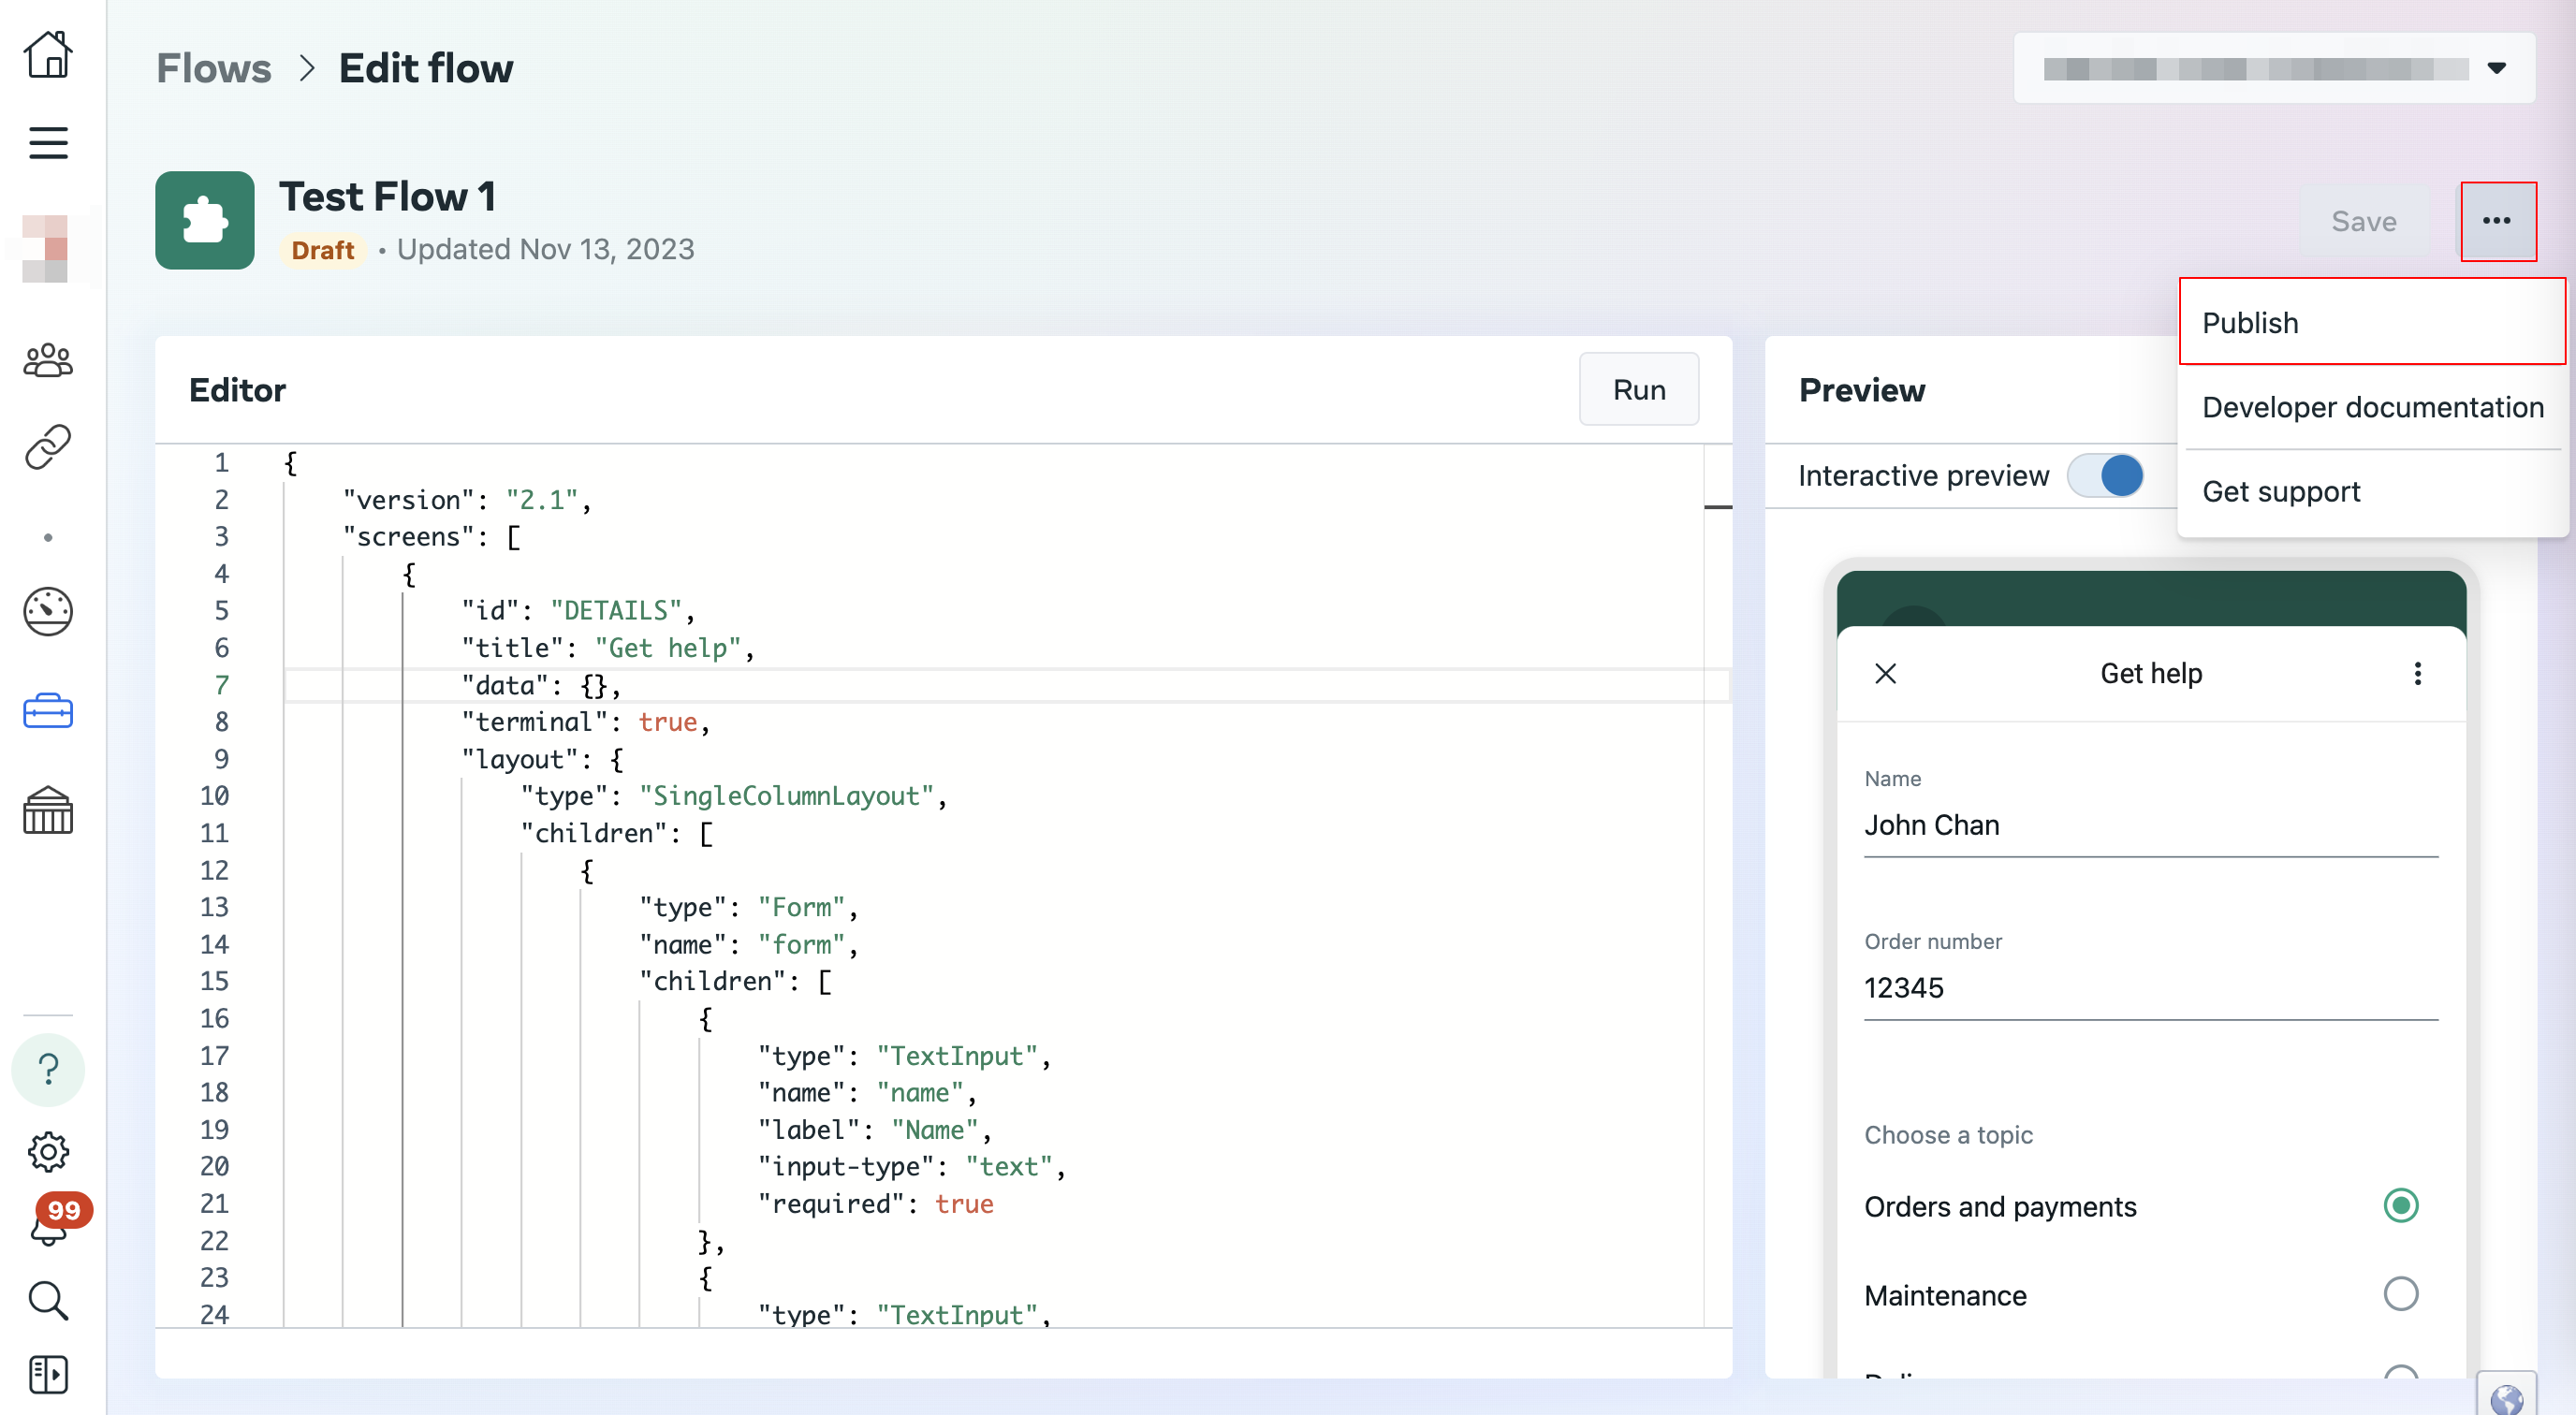
- In the flow builder, you can start configuring the flow in the editor.

- You can switch on the "Interactive preview" and test the flow.

- Once the changes are saved, "Publish" the flow.
Notes
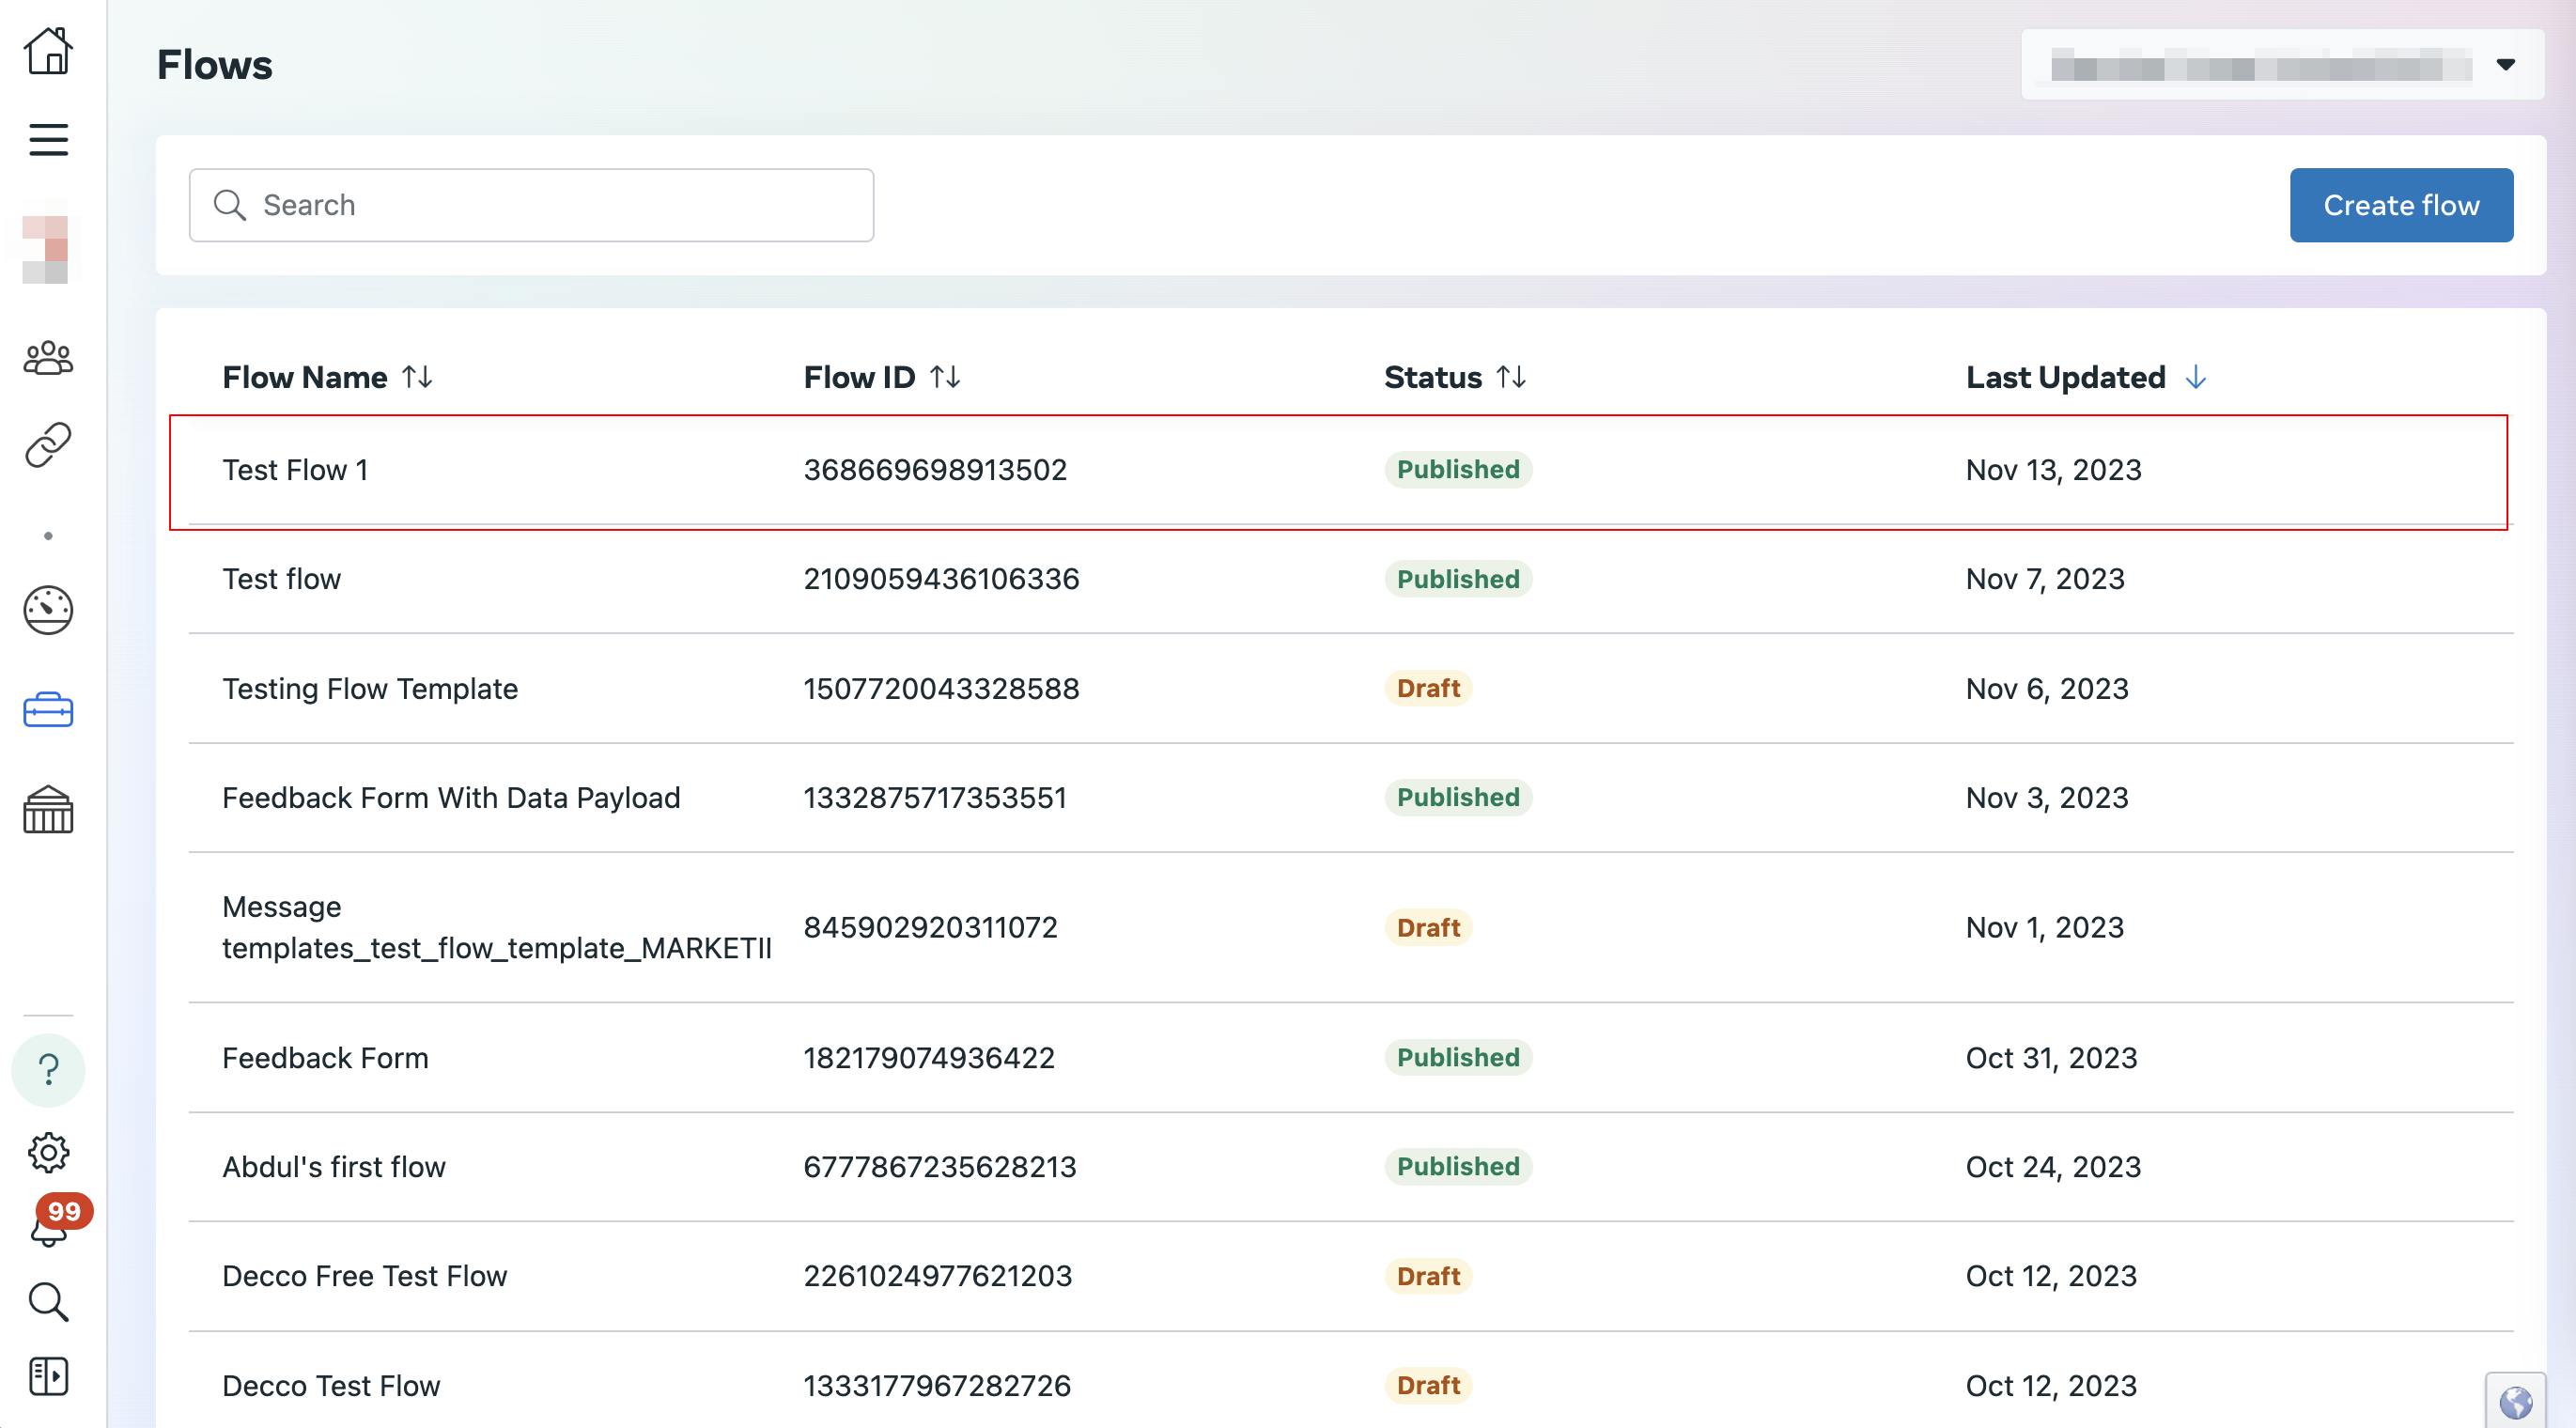
When you first created the flow, it entered the Draft state, which can be sent for testing purpose only. If you would like to send it to a larger audience, you will need to Publish the flow.
- The flow has been published now!
Send the Flow
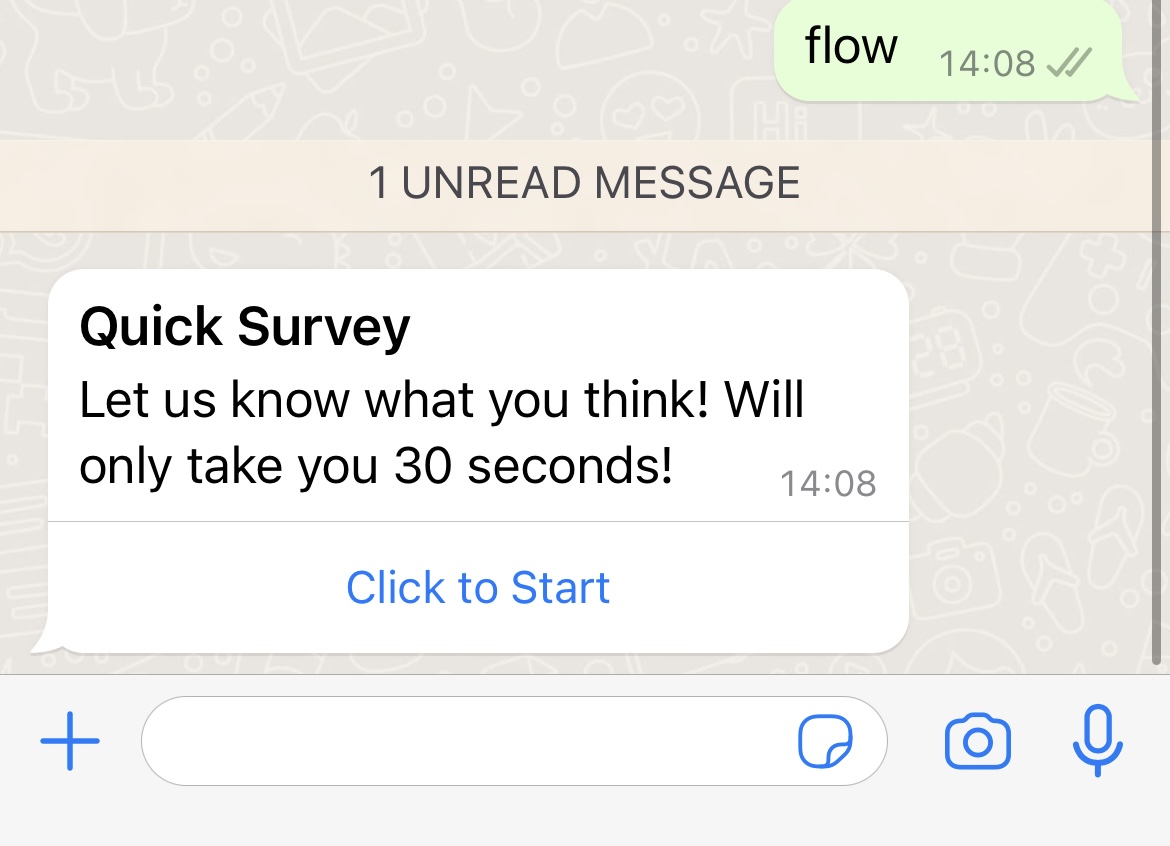
The flow can be sent in two ways, either being initiated by user using a CTA button, or being sent by the business using a message template. In the following sections, you can learn how to set them up on WOZTELL.
Message Template
To trigger the flow, business can send an message template containing a button. Once it is clicked by a user, the flow will be trigger.
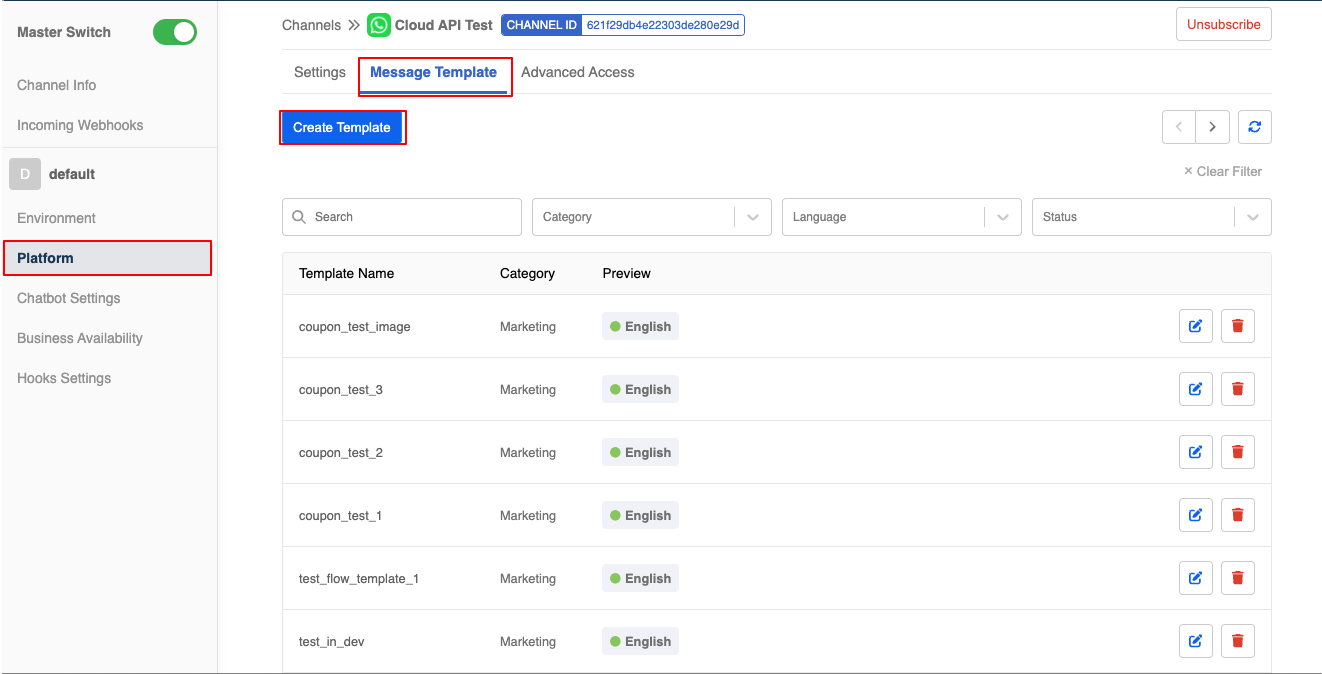
- First, in "Channels", click "Edit" to enter the WhatsApp Cloud channel.

- Head to "Platform" then "Message Template", select "Create Template".
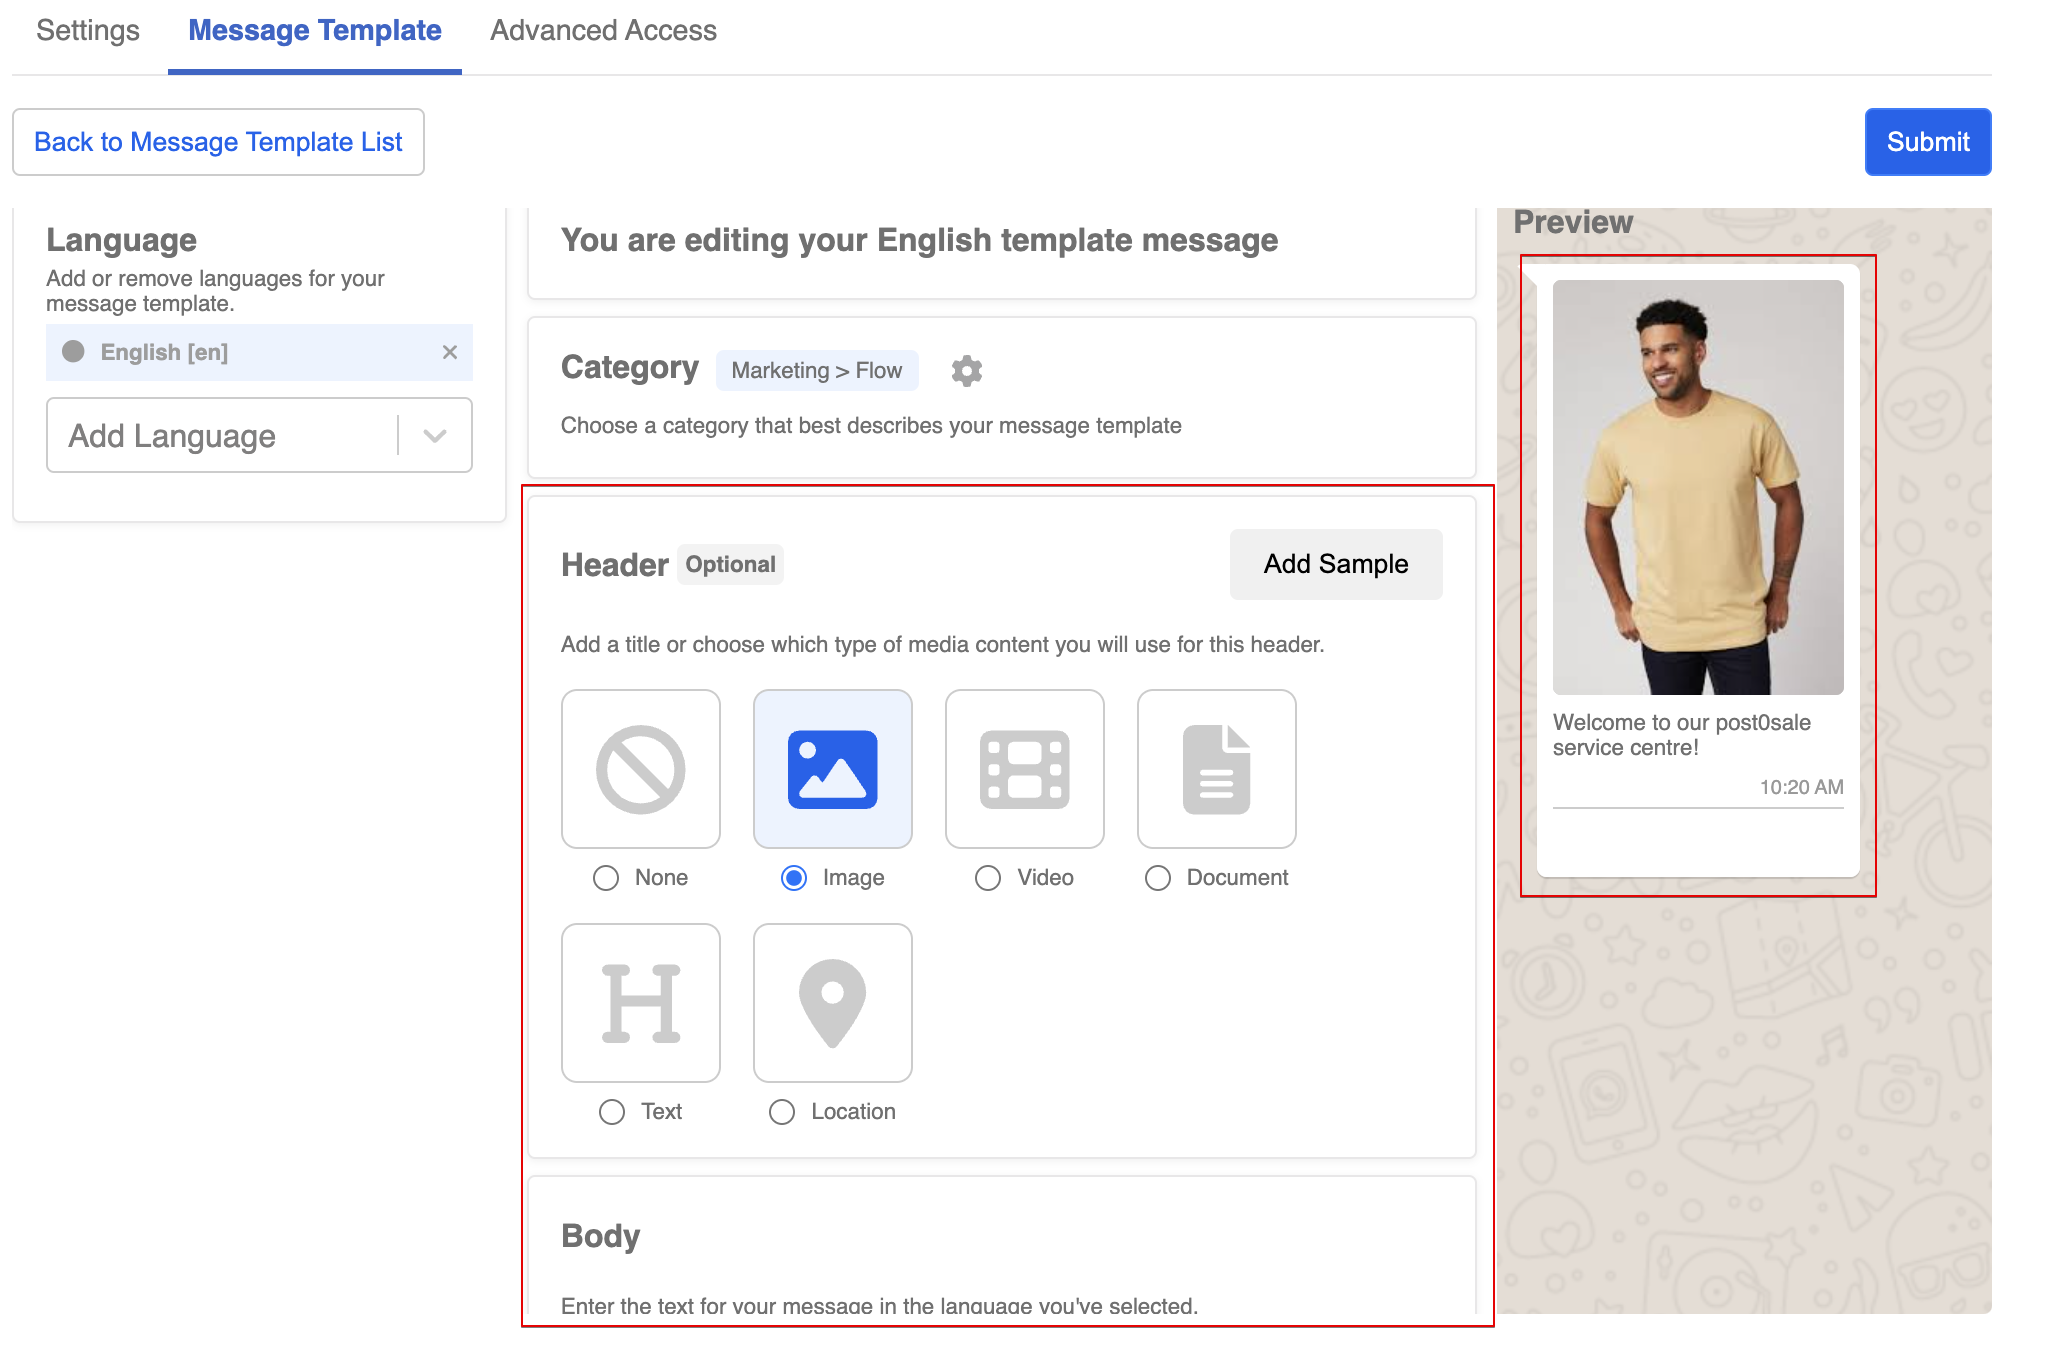
- Add the "Name", "Category" and "Language". Then, select "Flow Template".

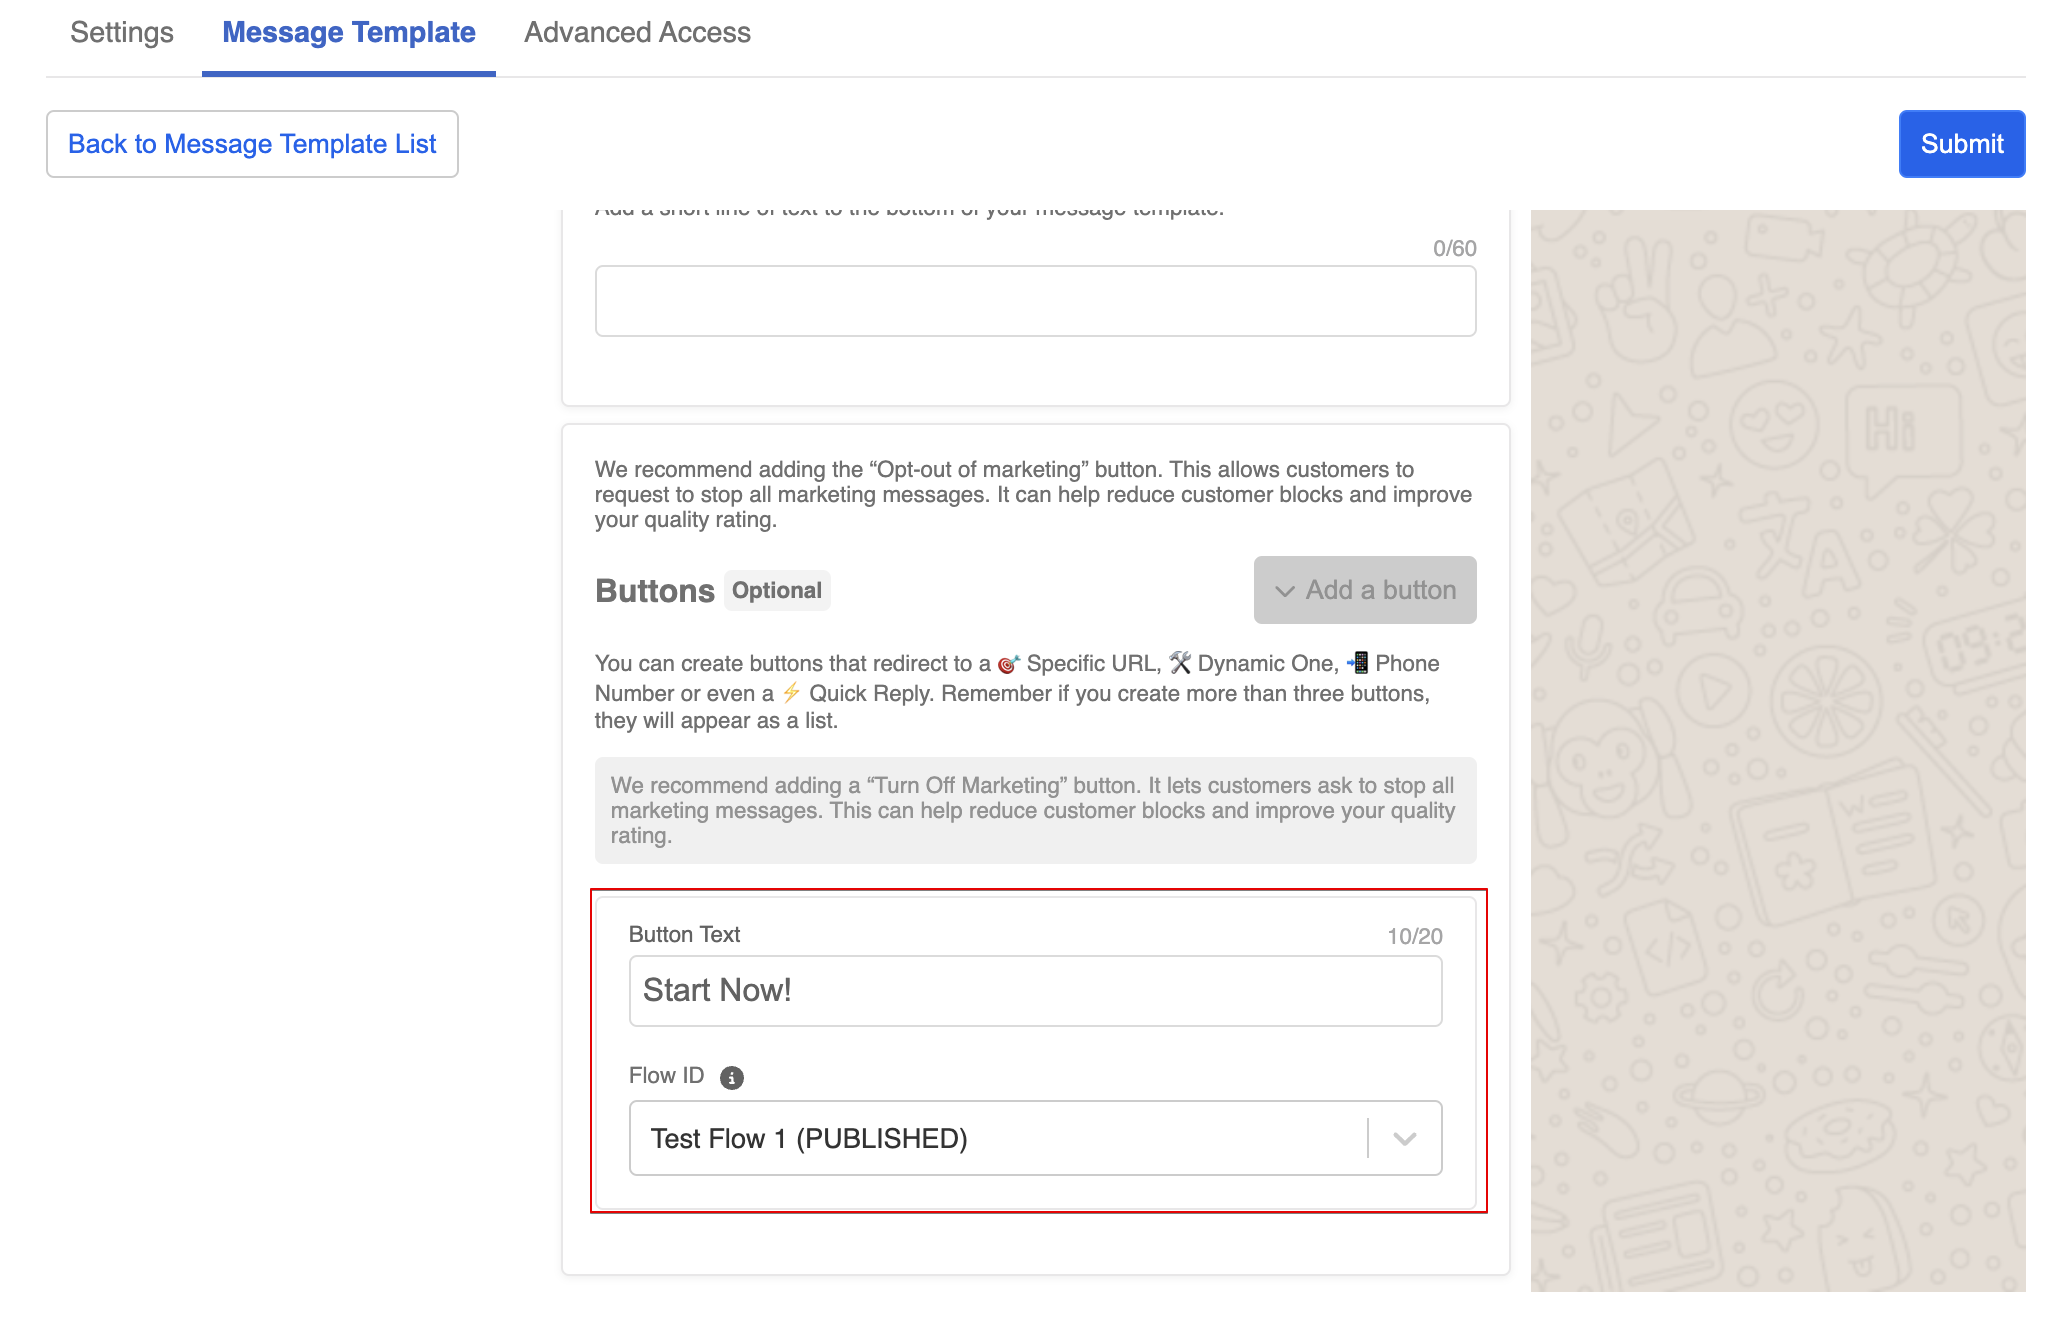
- Configure the template by adding the header, body and footer if needed.
- Add the "Button Text" and select the "Flow ID".
Note
Each message template can only be bound to one flow, if you want to edit the flow, you need to do it by editing the template.
- "Submit" the message template.

- Now the template is pending for approval.

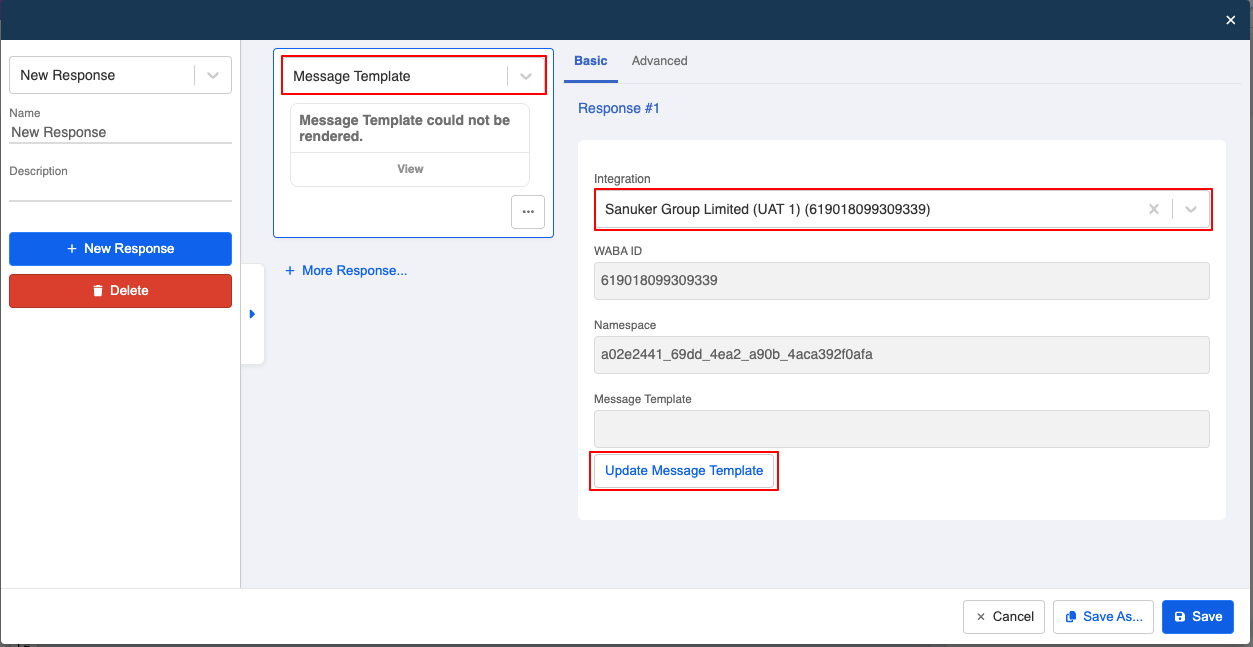
- To send the template, create a response with WhatsApp Cloud. Select "Message Template", then select the "Integration" and "Update Message Template".
- Select the "Message Template" and input the required details.
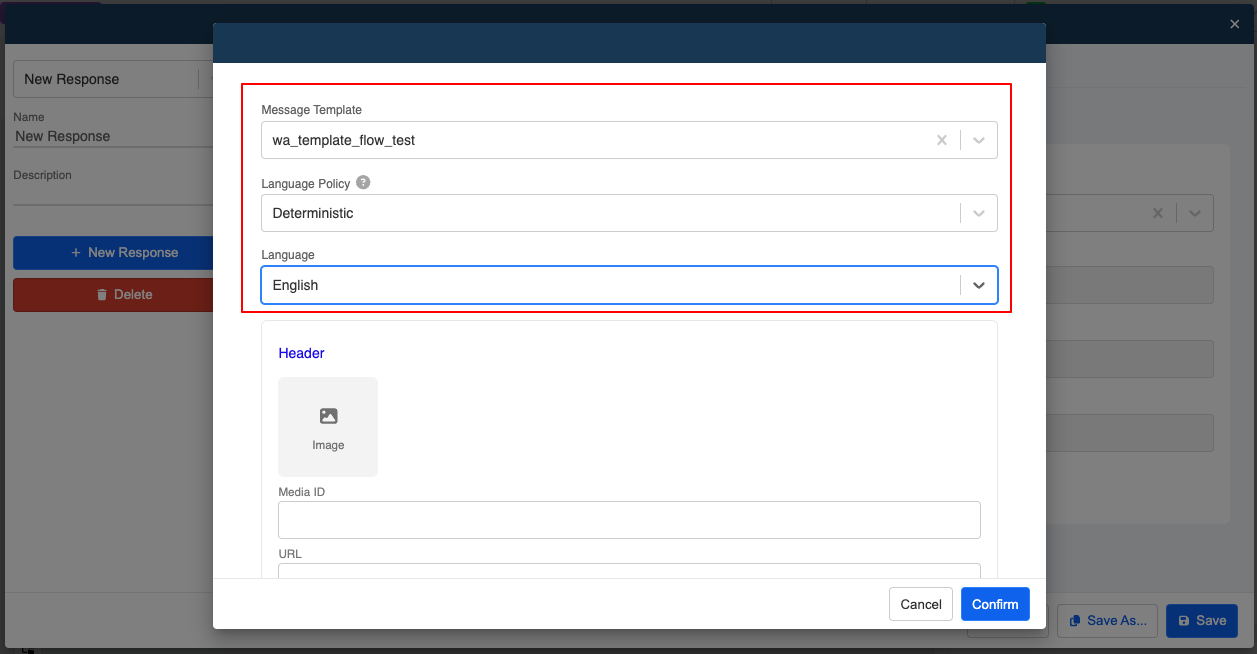
- Click on "Confirm" to save the template.

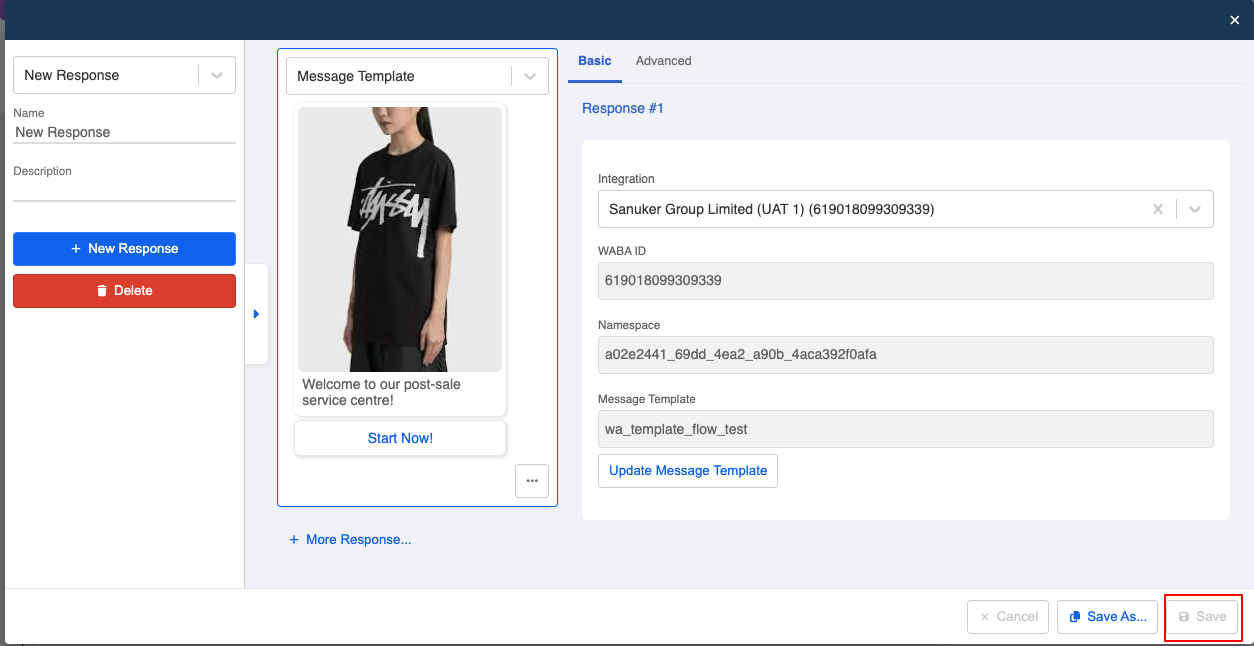
- Lastly, remember "Save" the response. You can start testing the flow by sending the template.
CTA button
To trigger the flow, business can send call-to-action (CTA) button as a bot message. Once it is clicked by a user, the flow will be triggered.
- First, create a chatbot and a general node. Create a response for the CTA button.
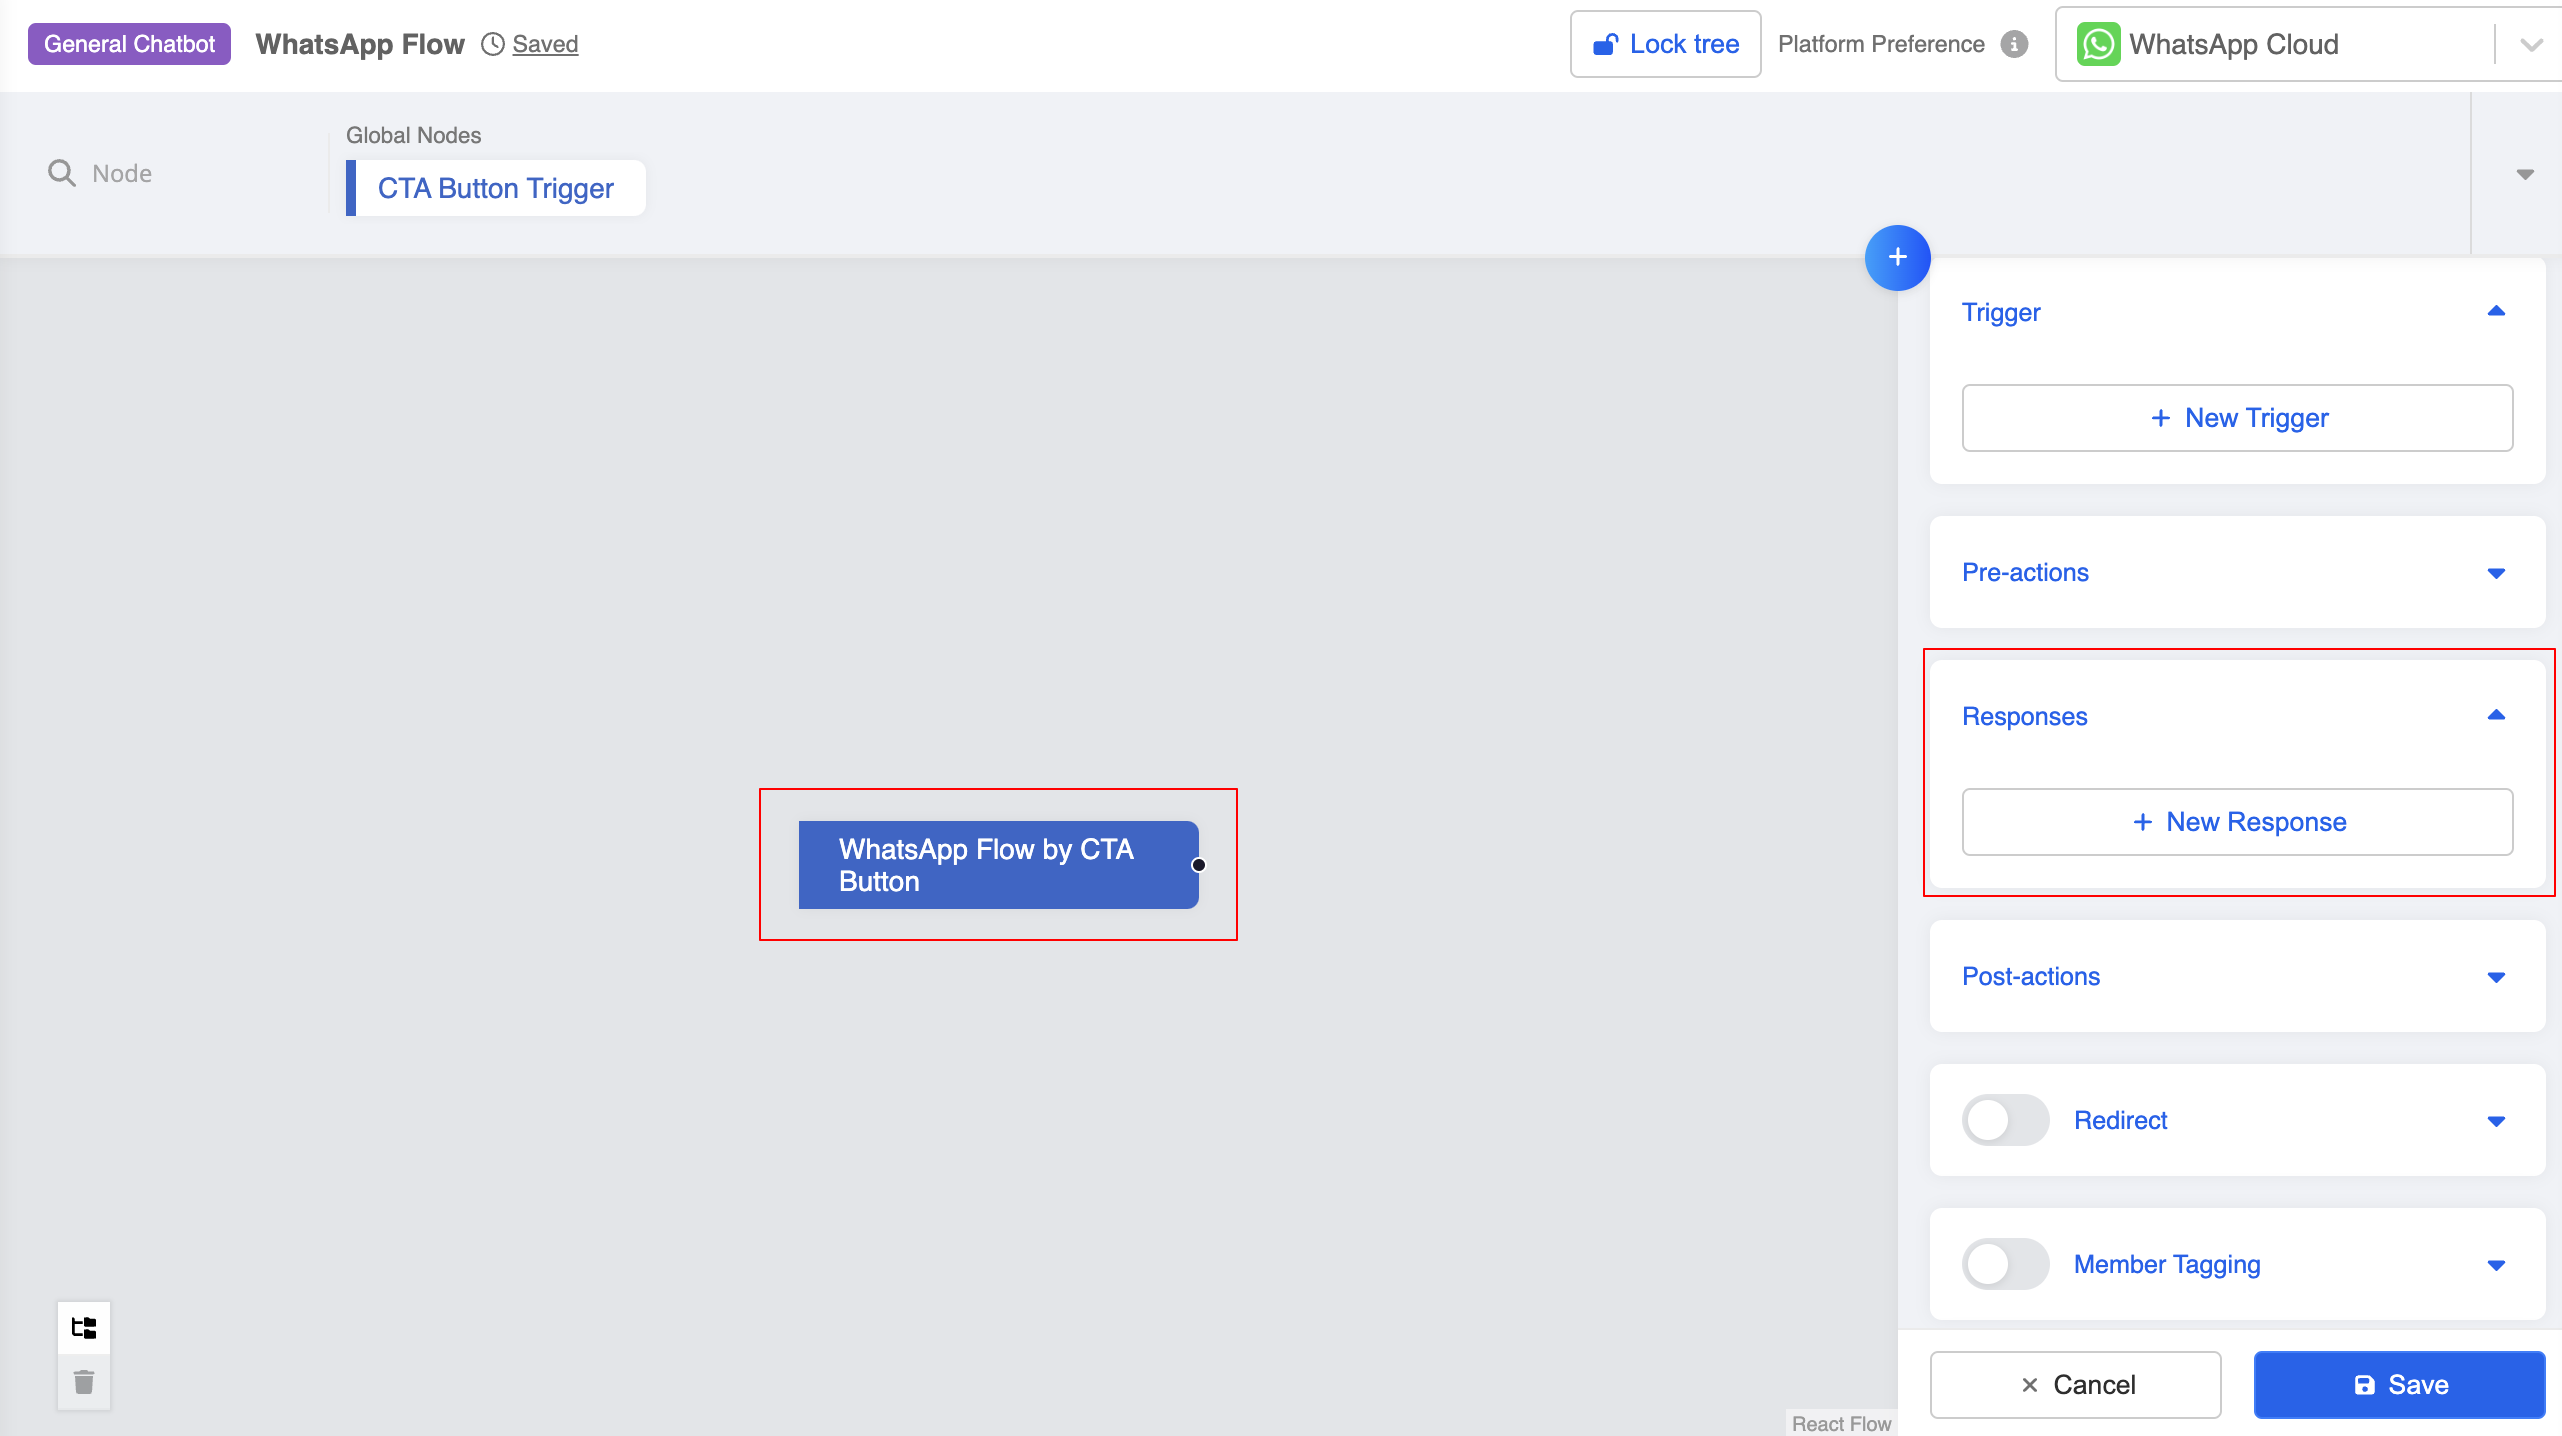
- Select "Flow" response.
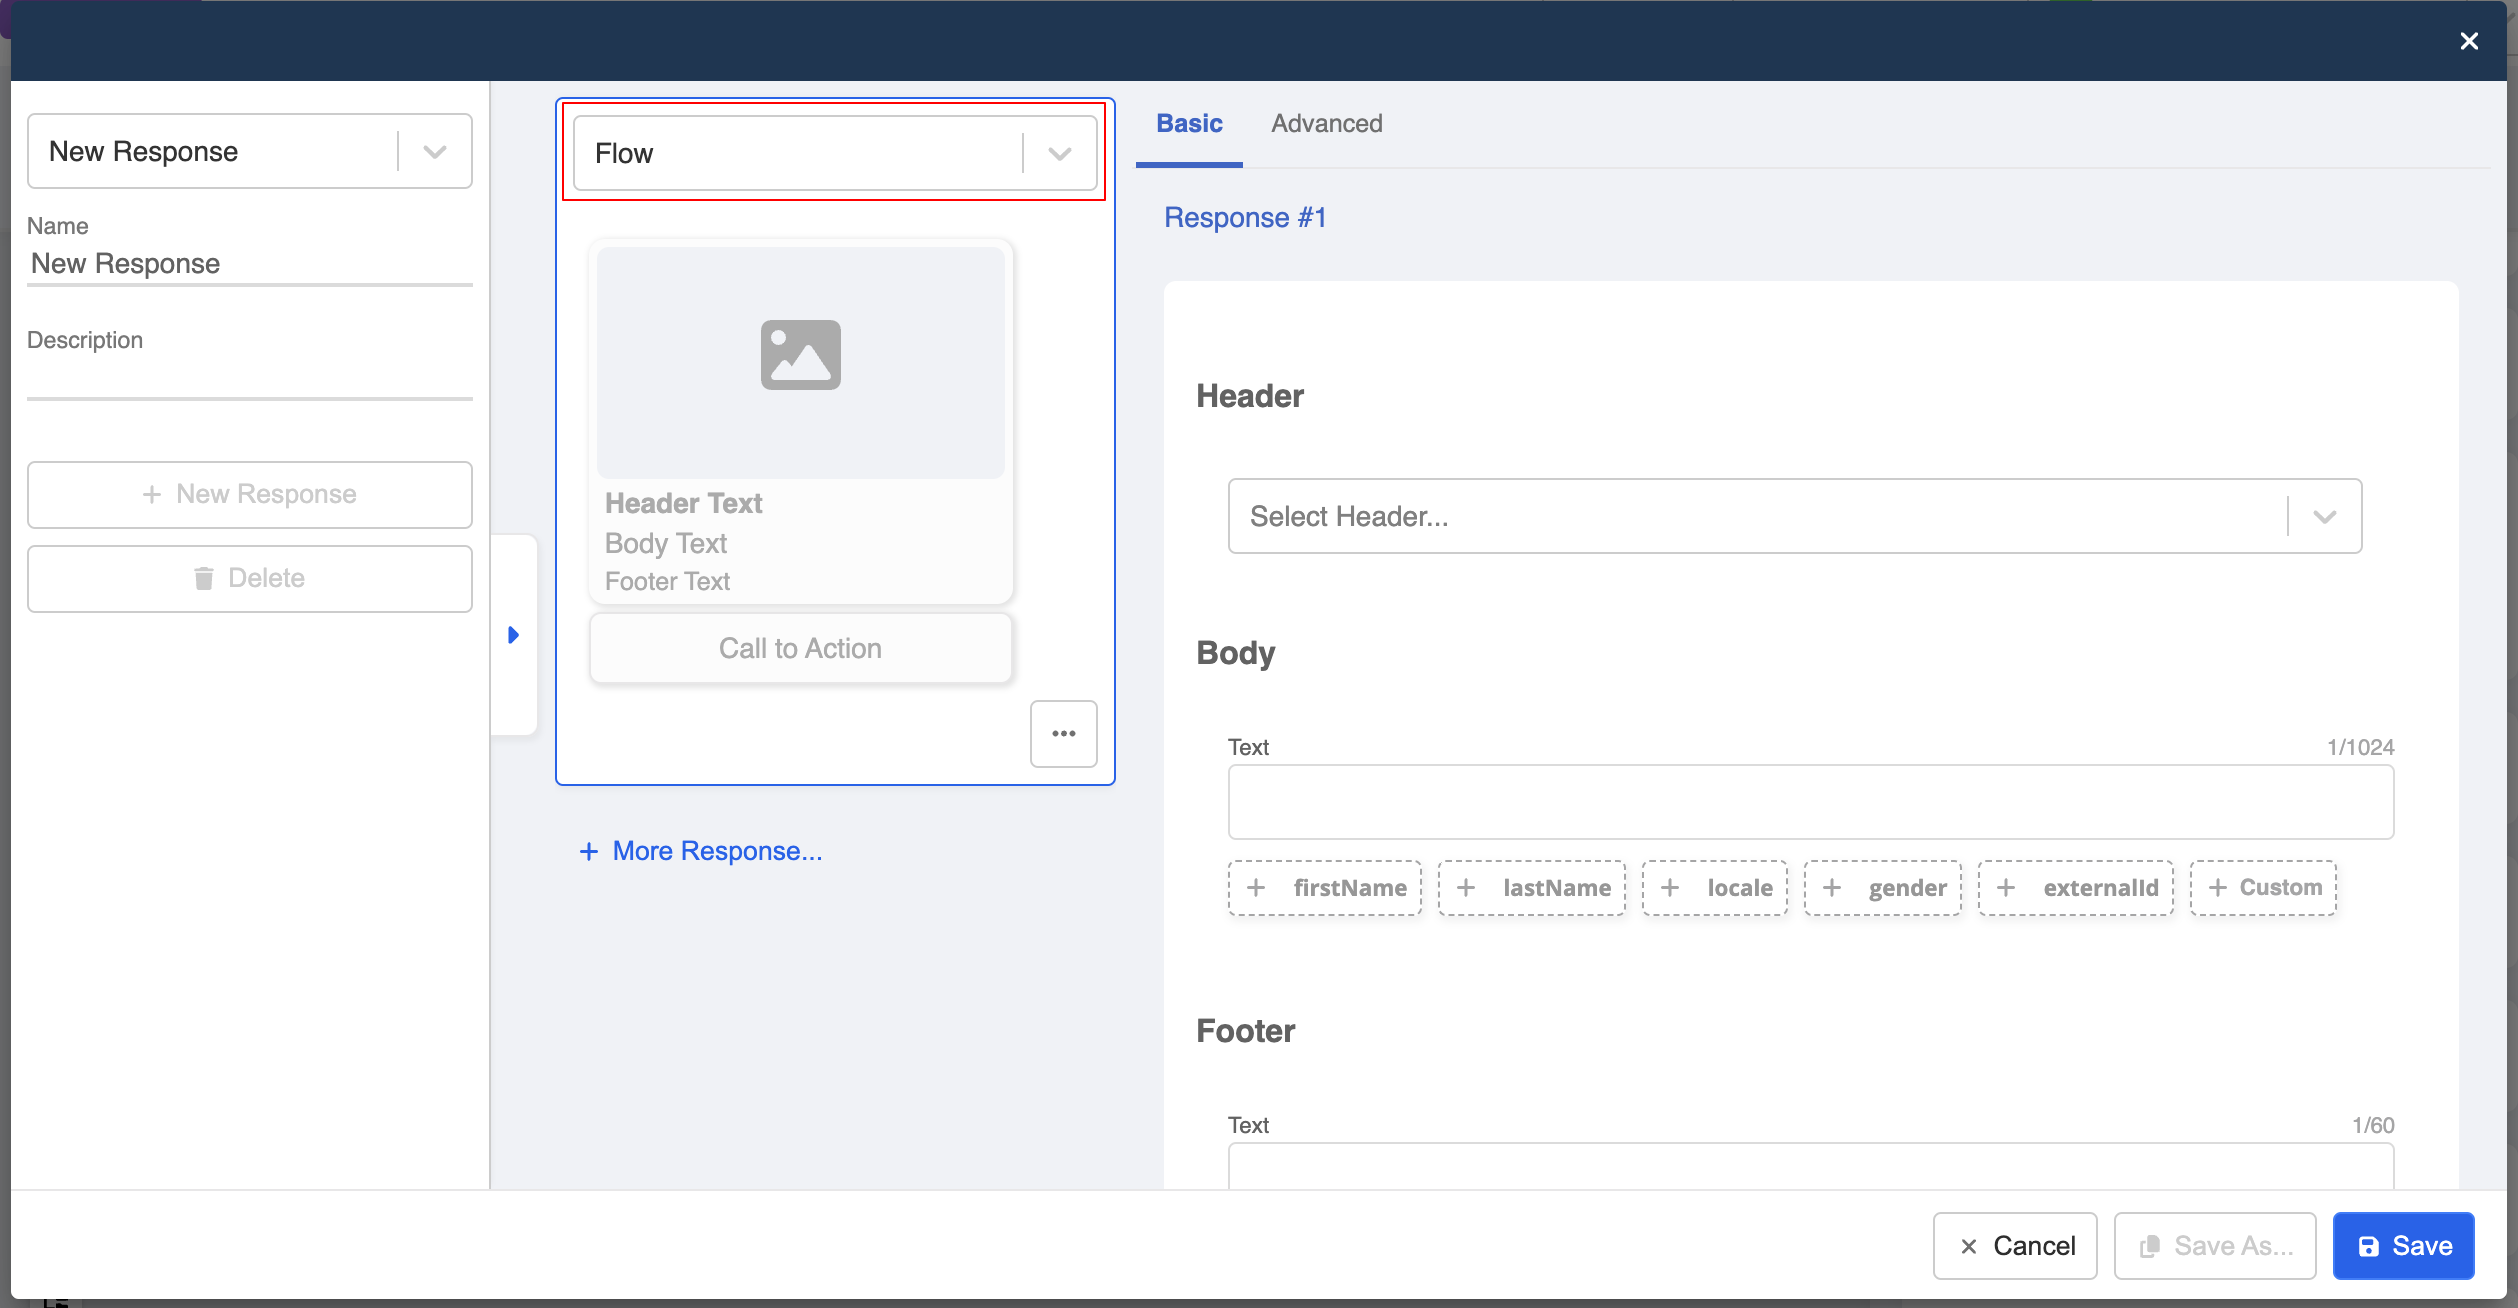
- Select a "Header" type.
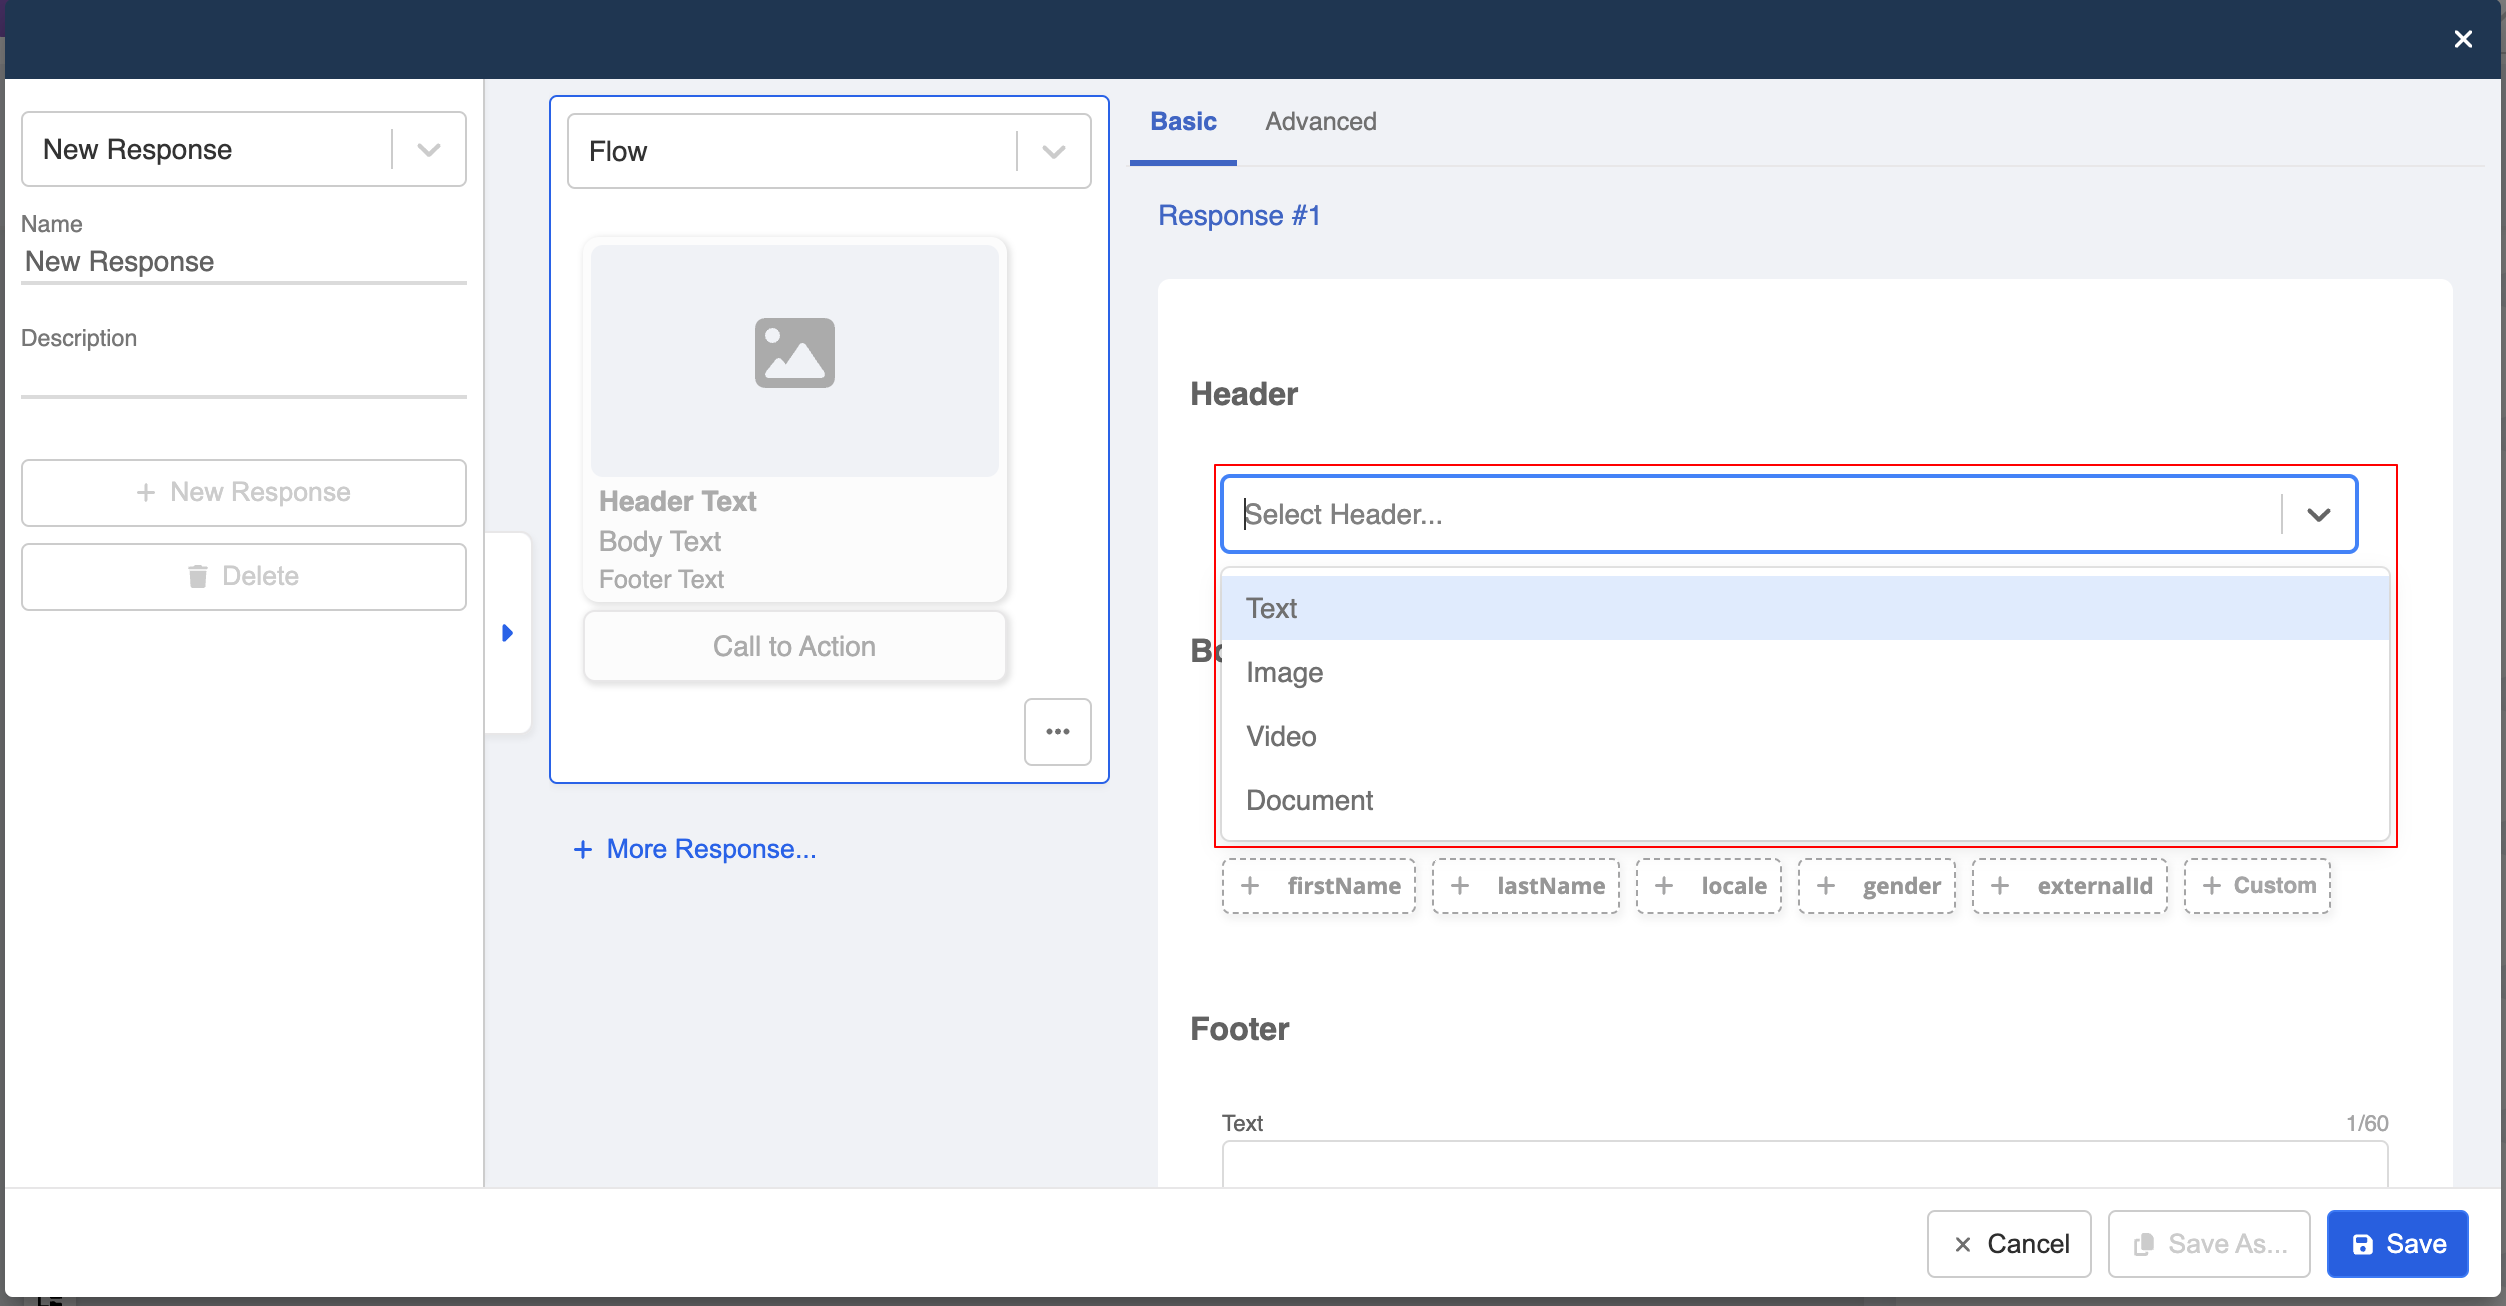
- Fill in the header content.
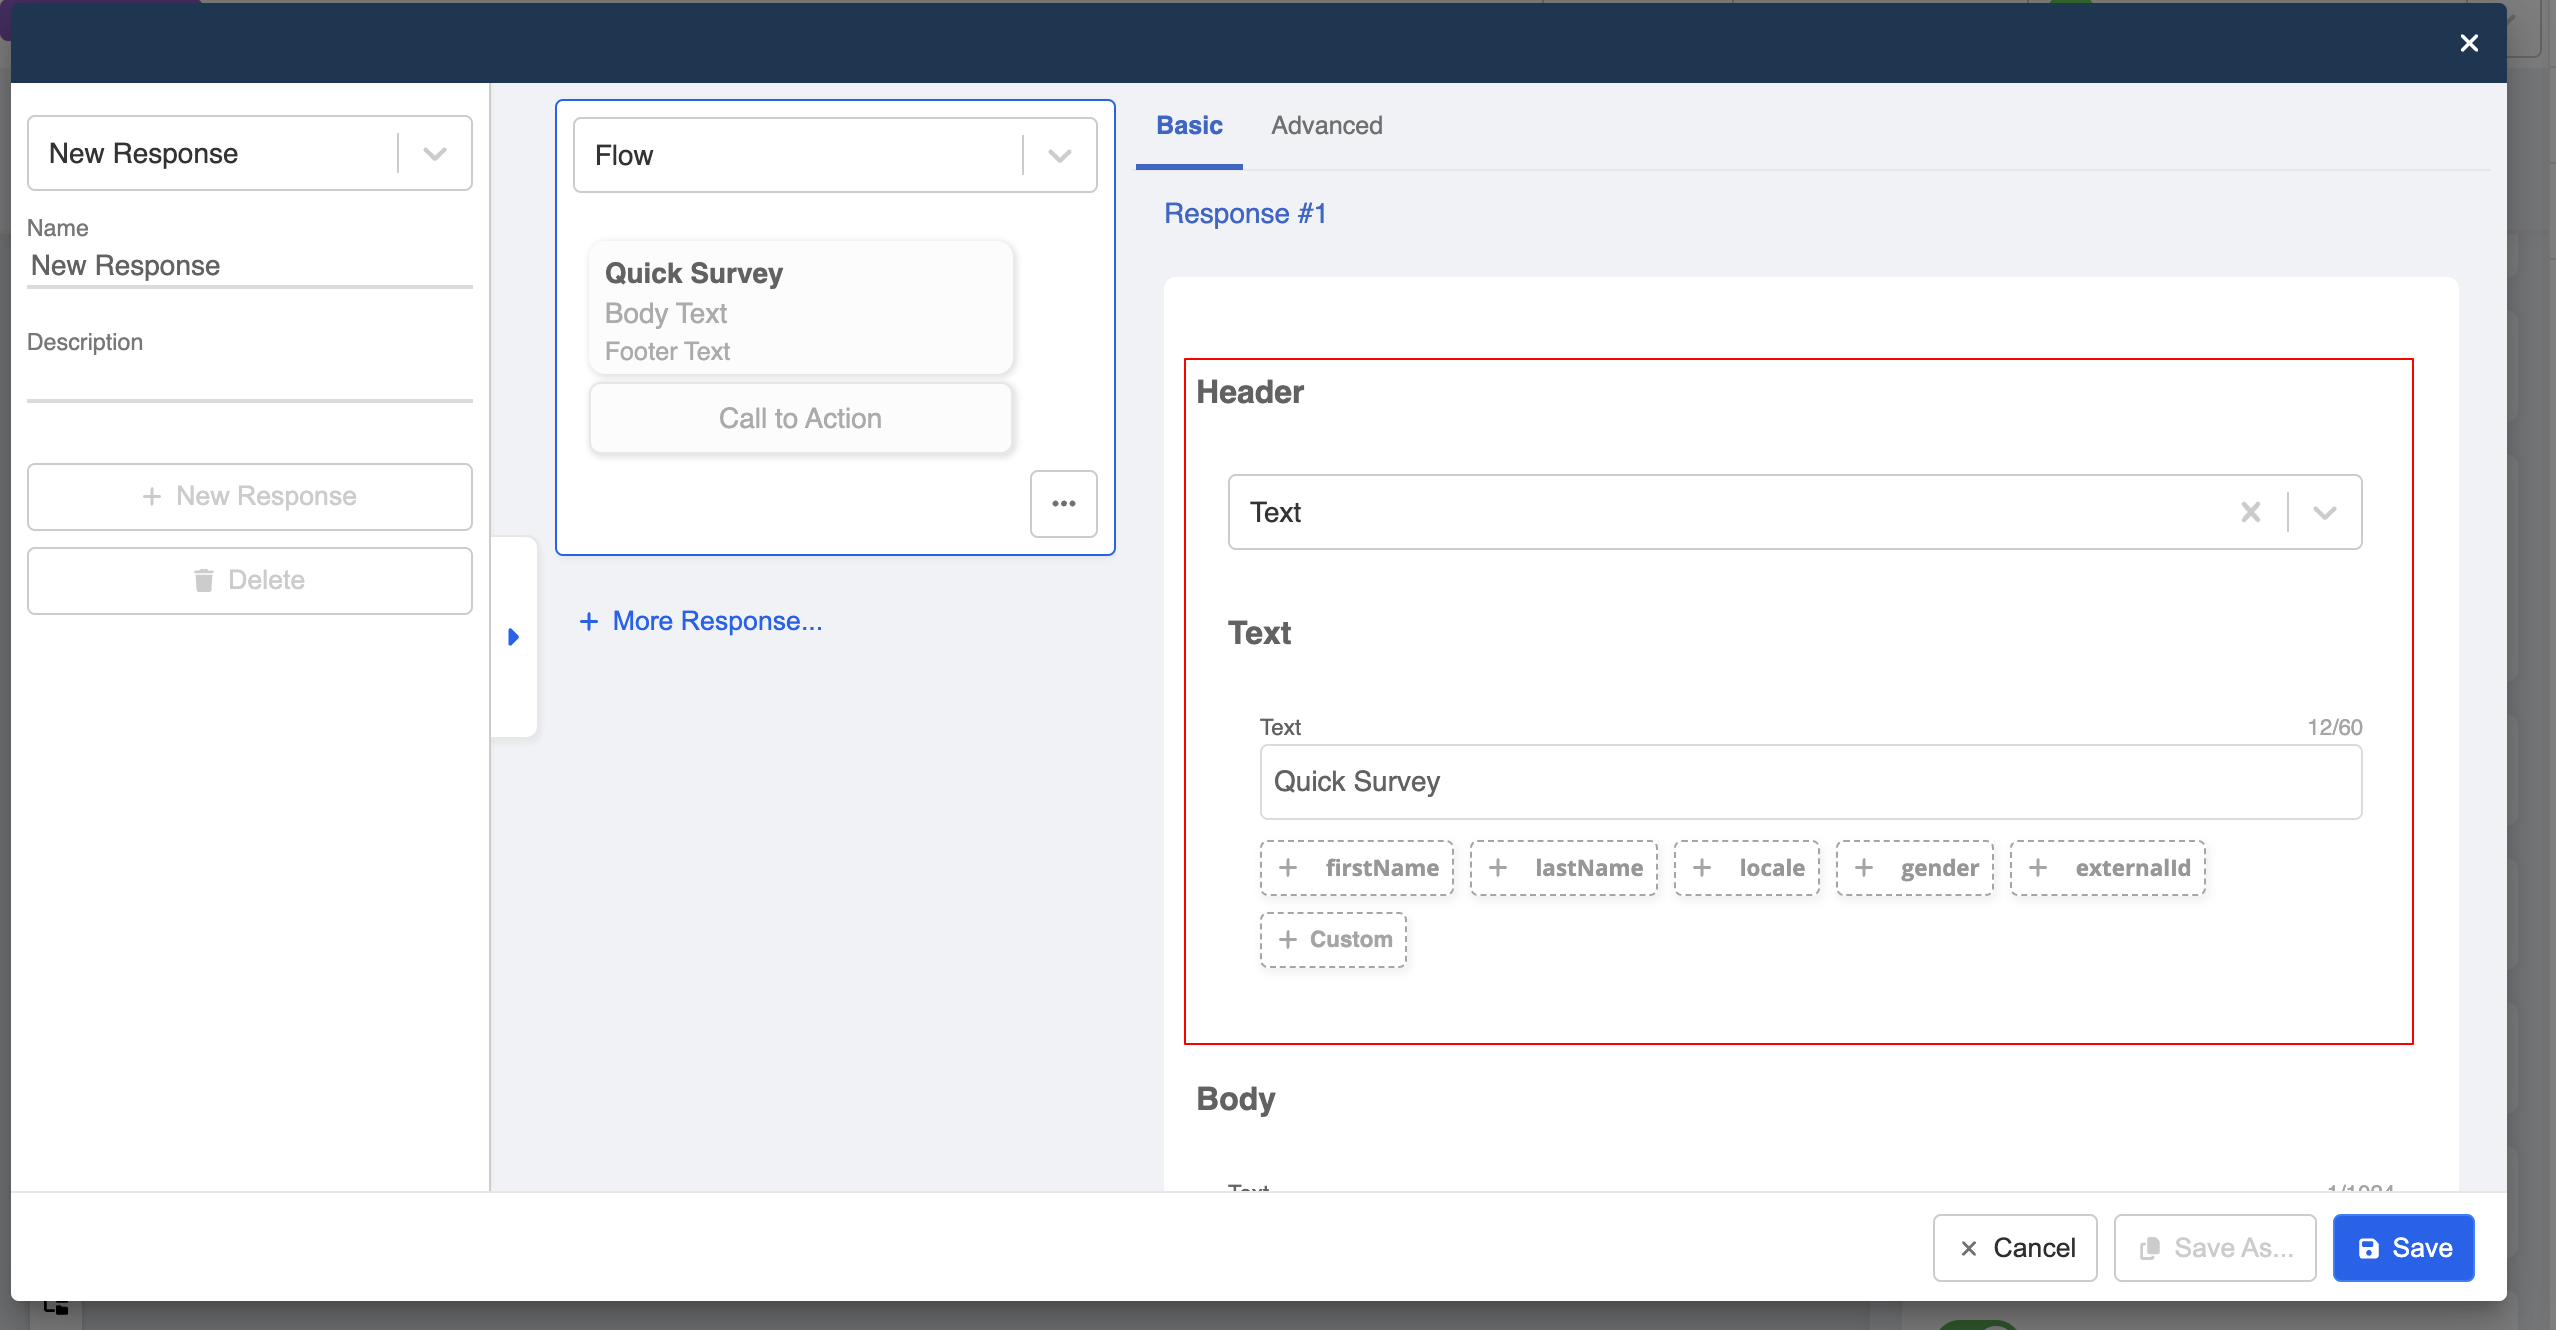
- Then, configure the body and footer(optional) of the CTA button.

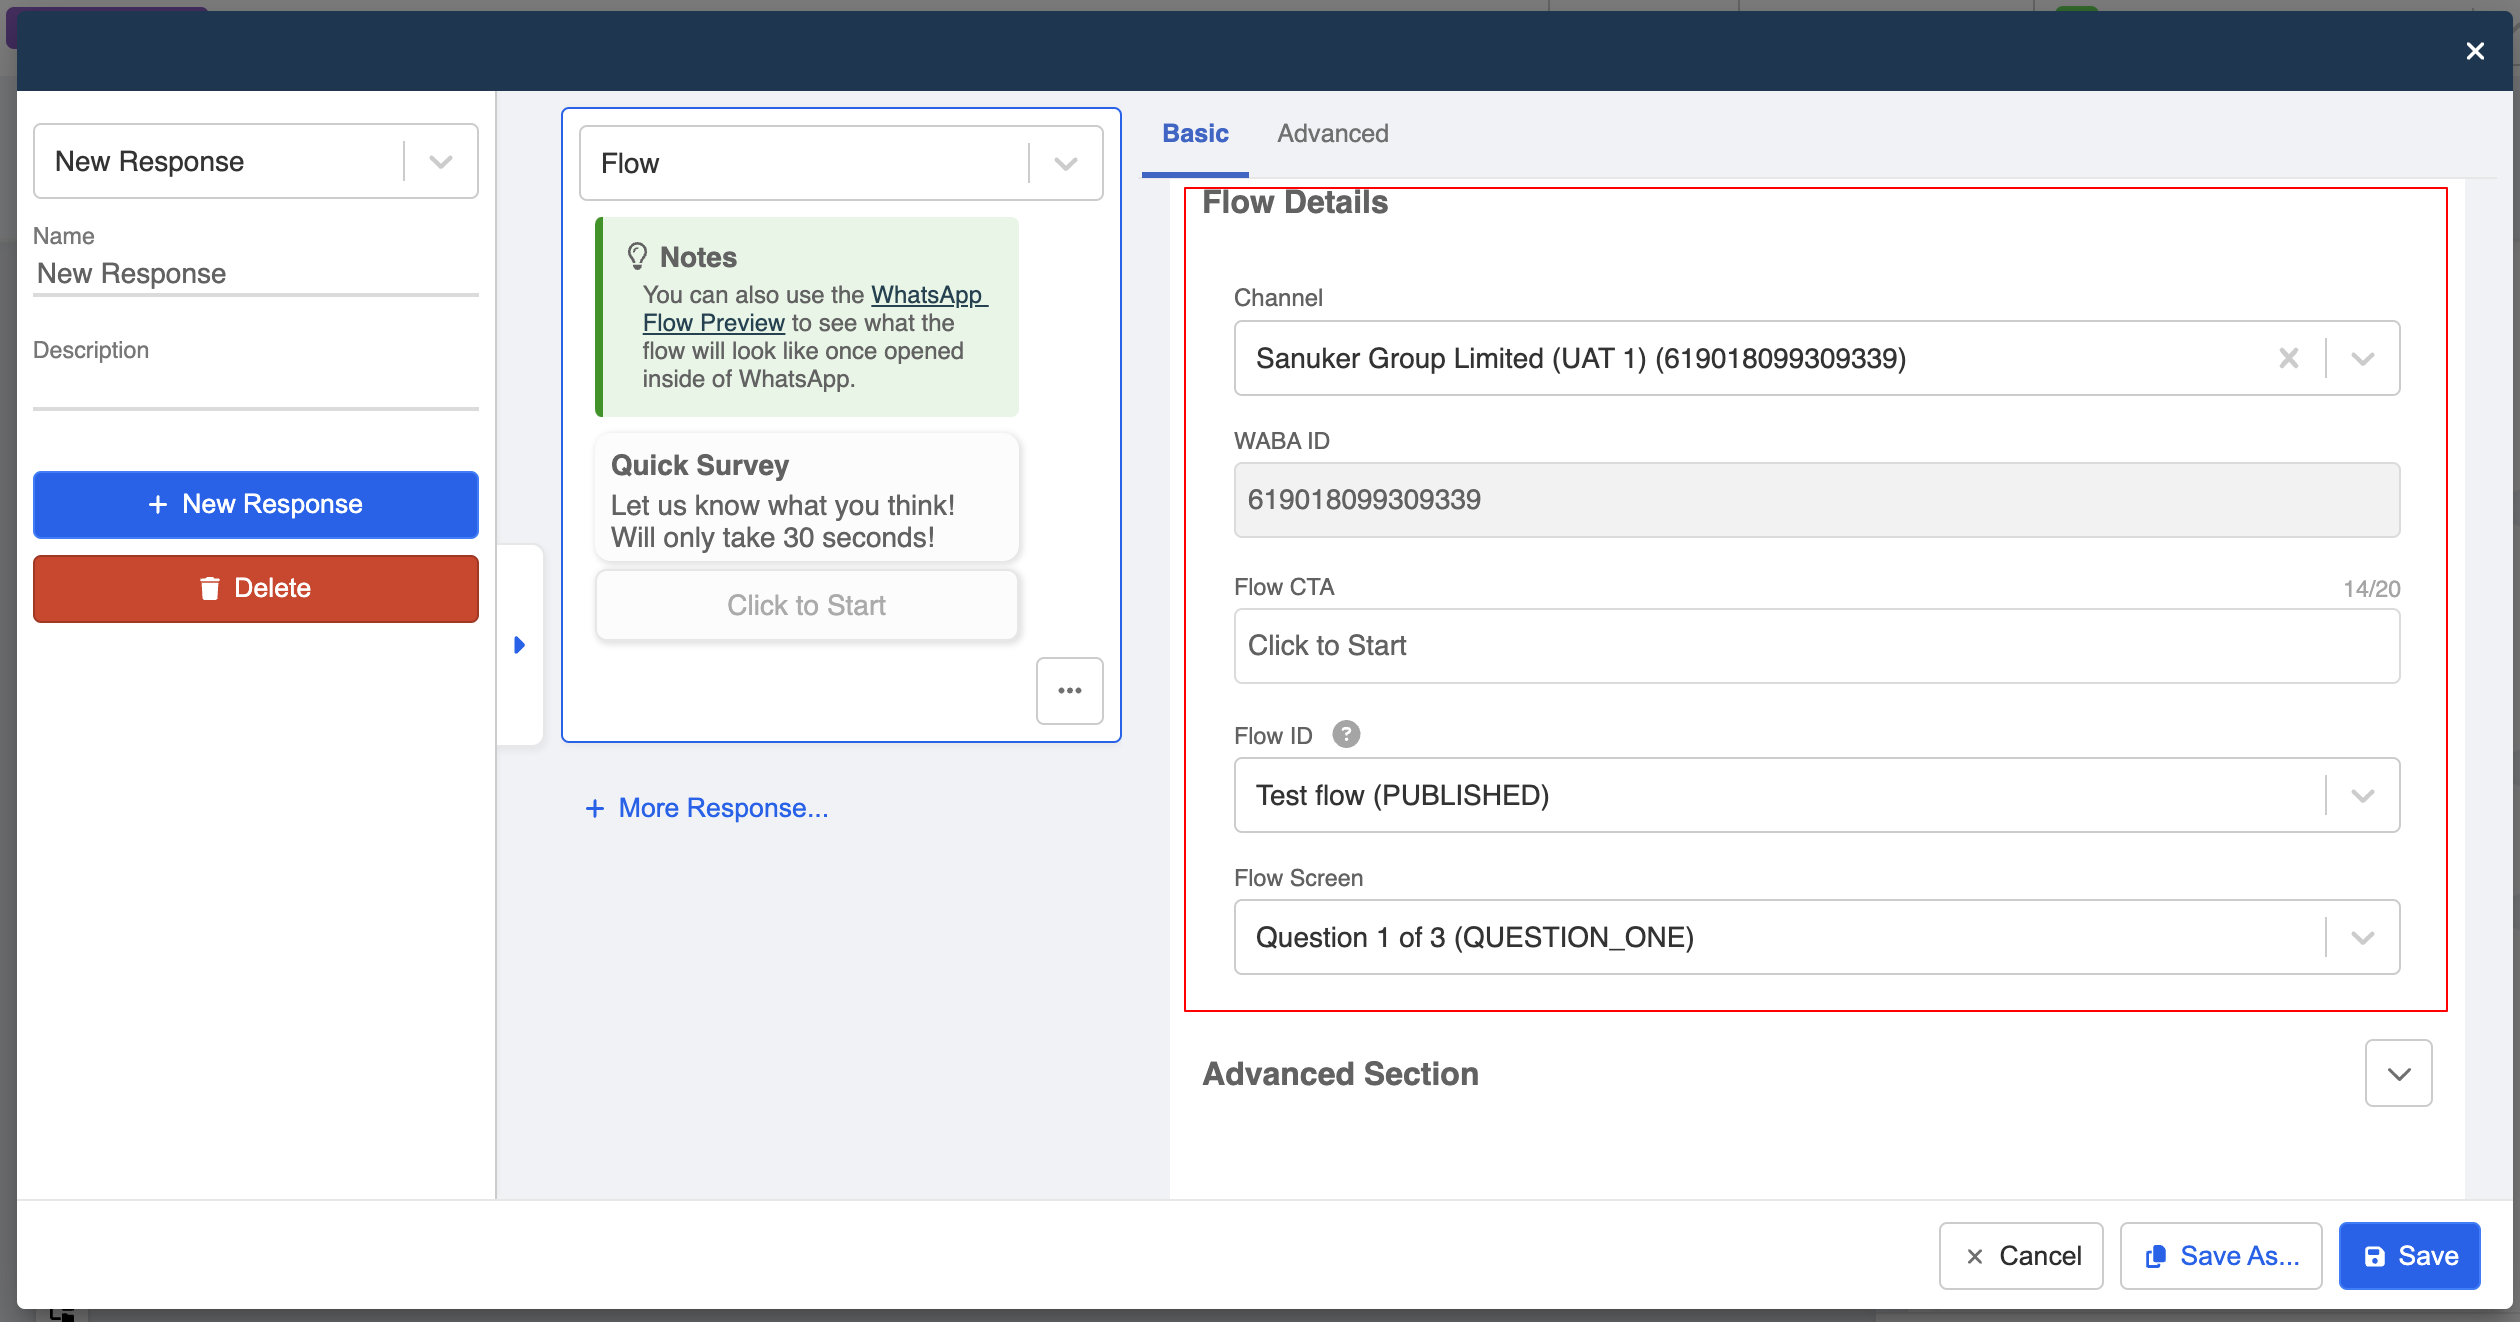
- Then, move on to the "Flow Details".
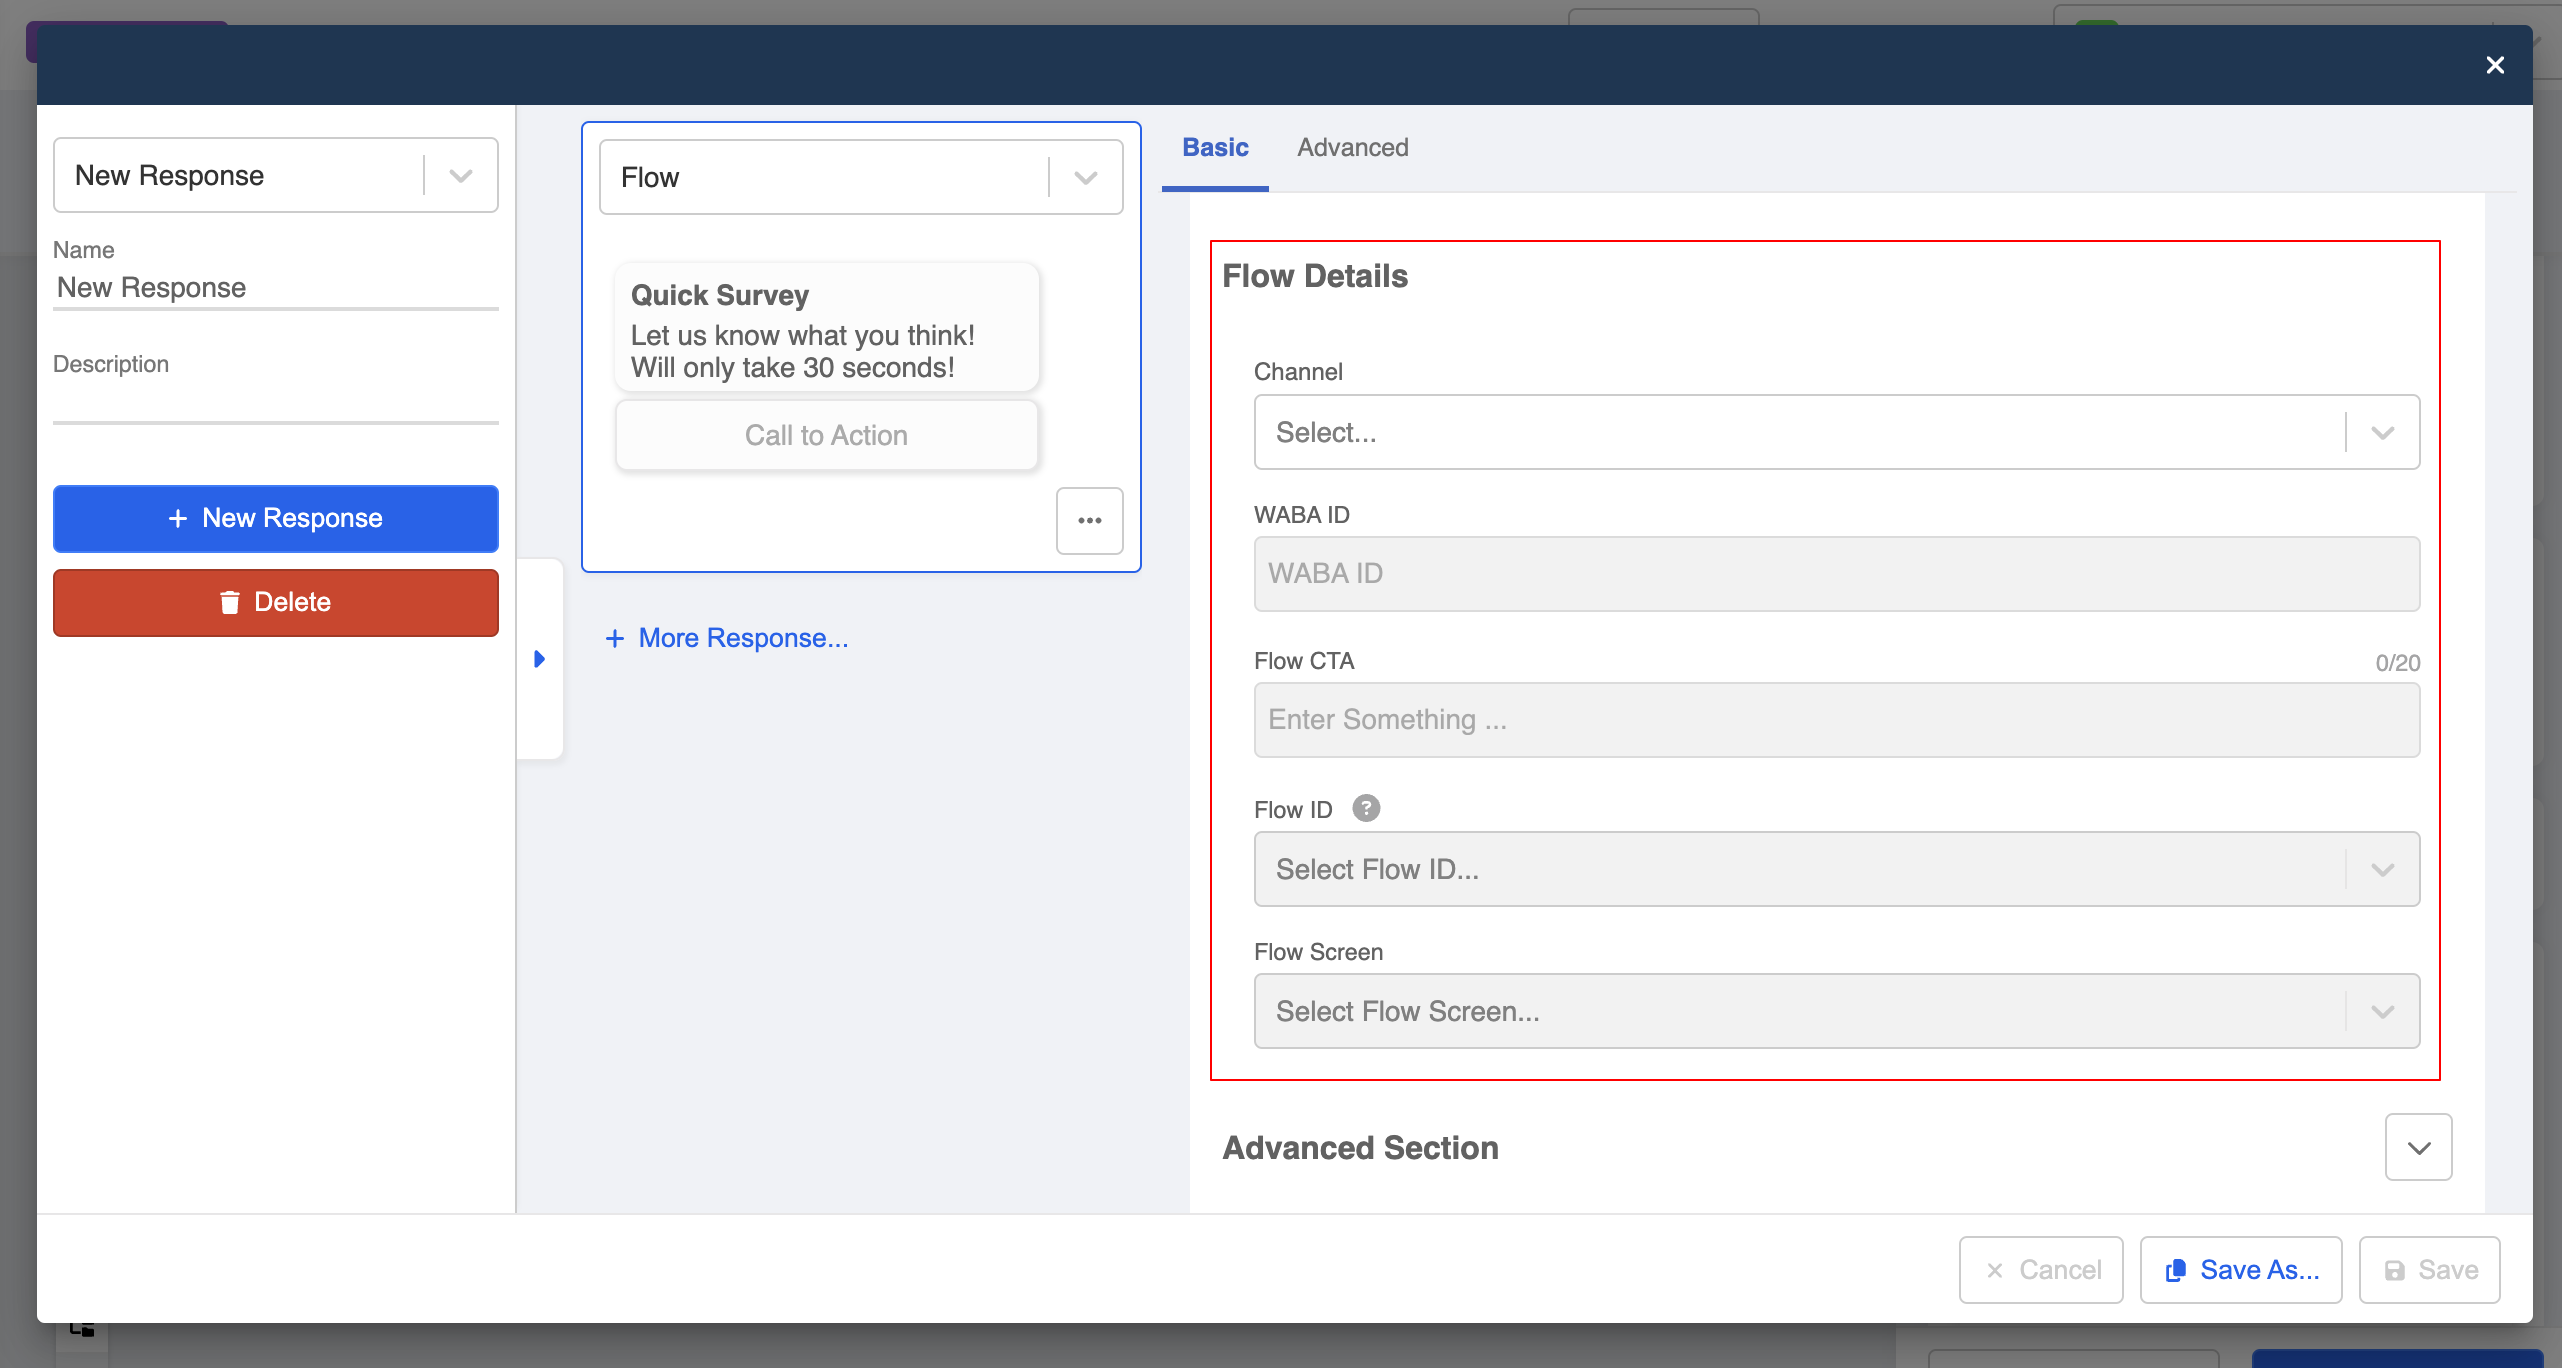
- Select the "Channel", add the "CTA button text", select "Flow ID" and the Flow Screen.
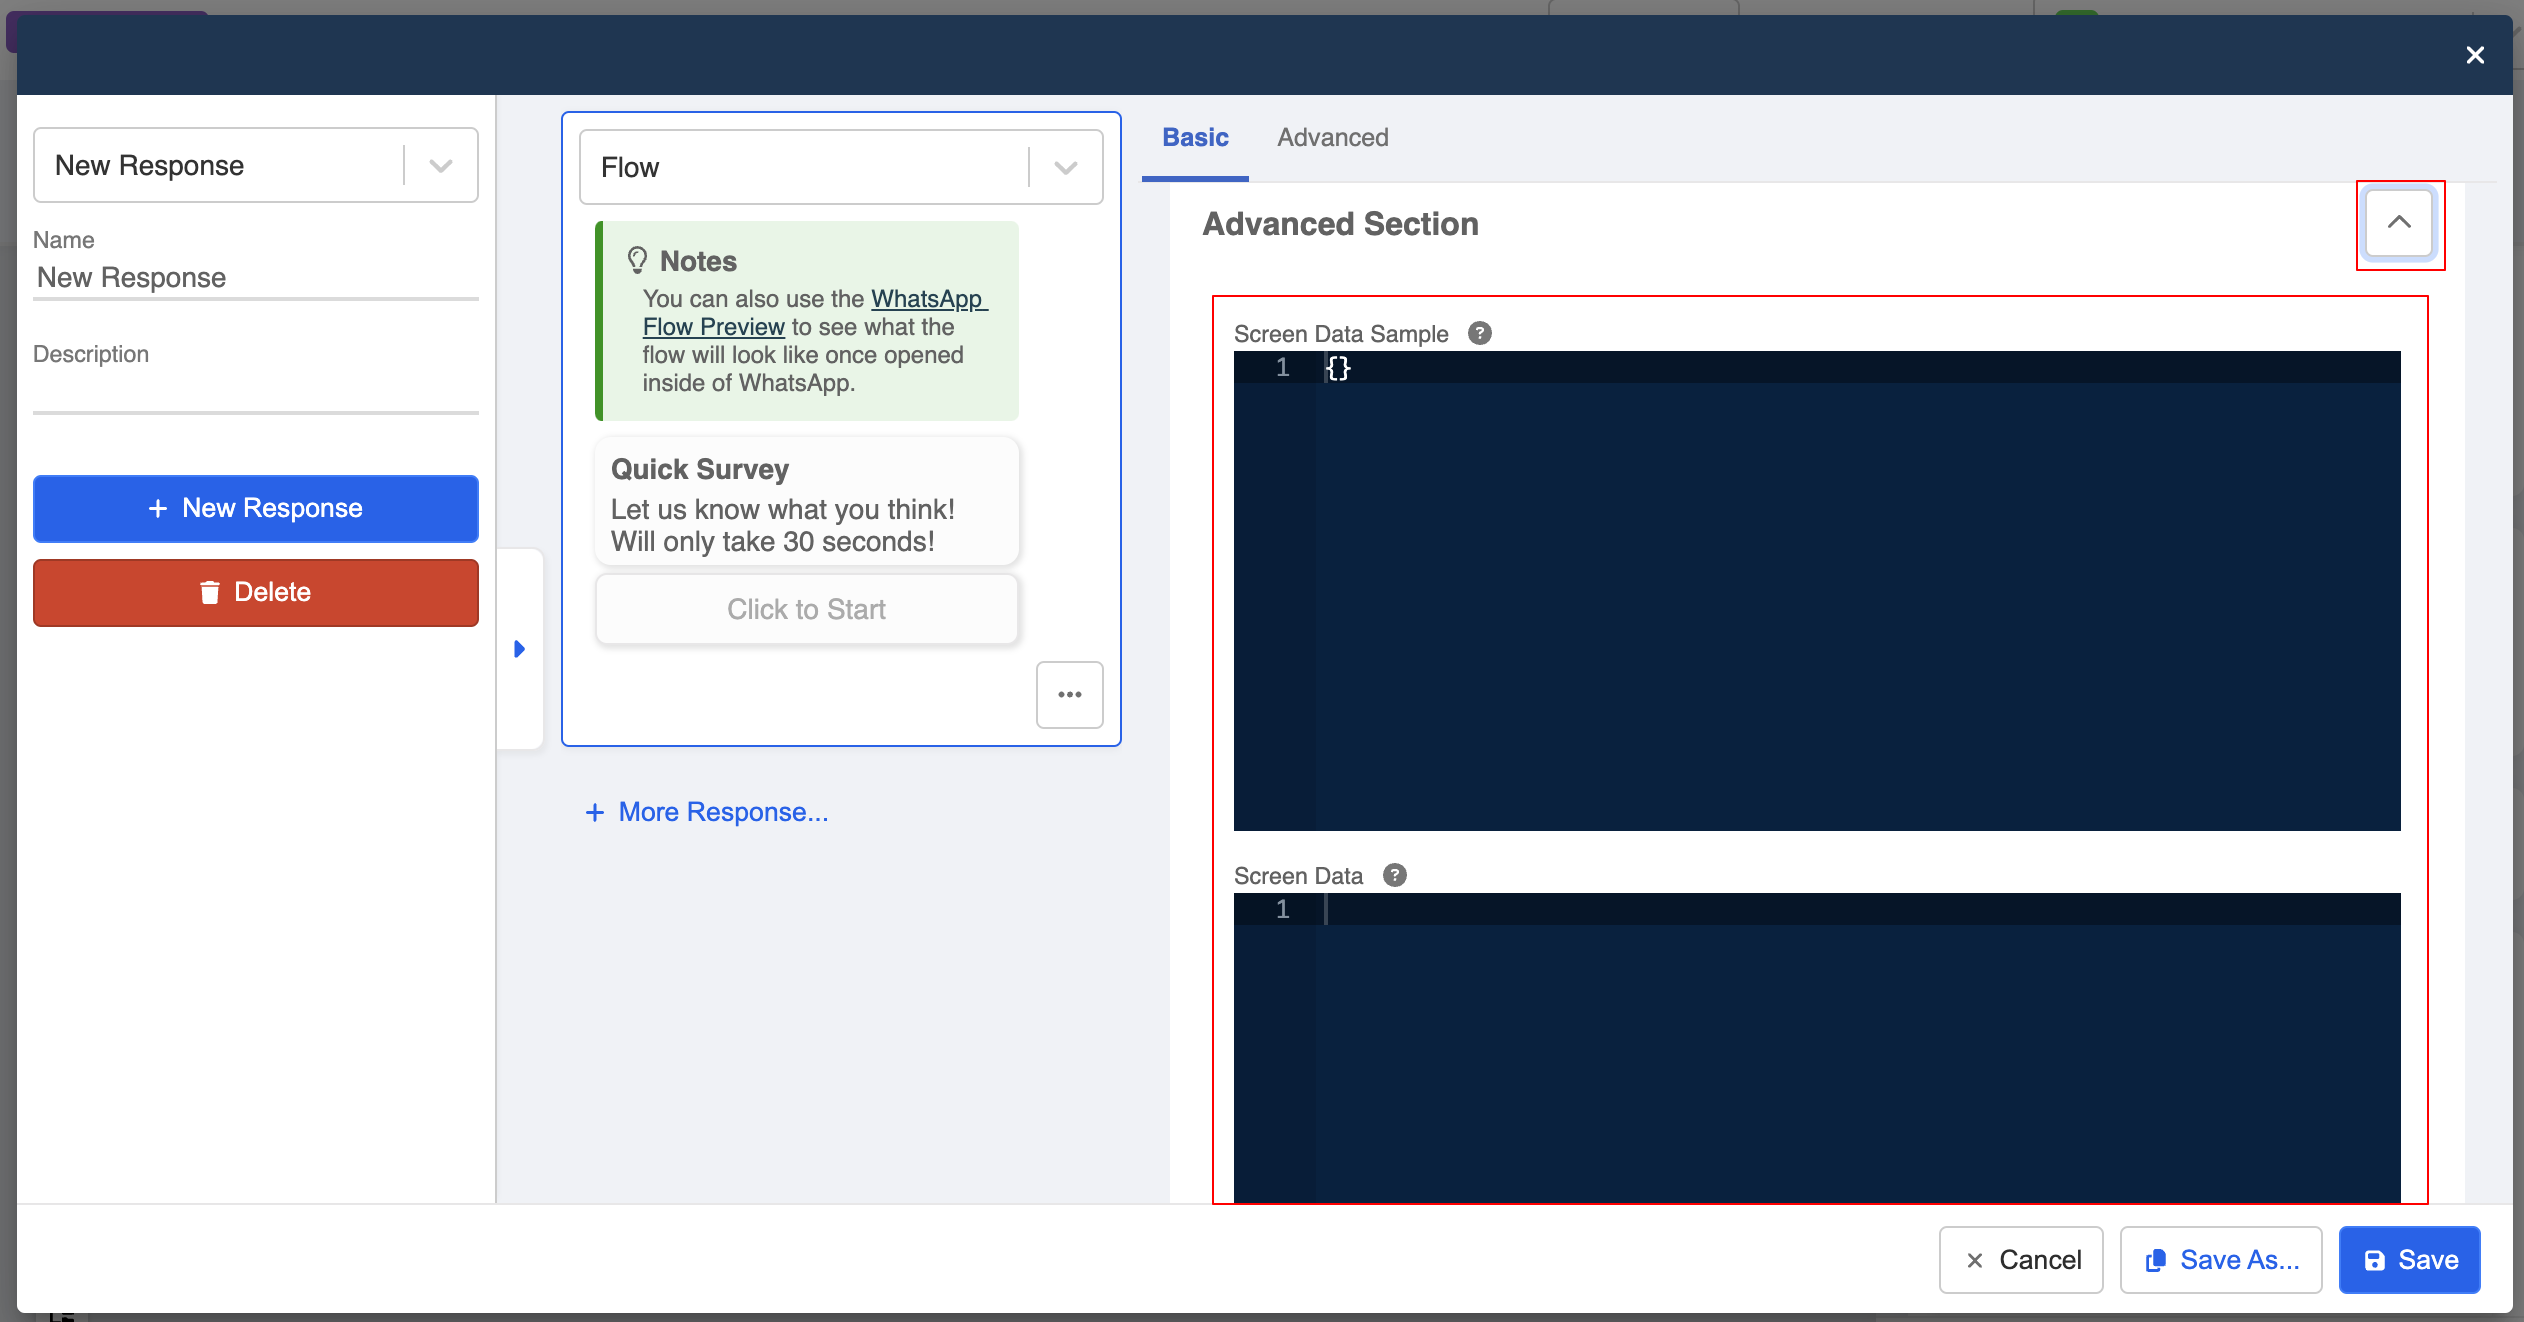
Besides, in the "Advanced Section", you can configure the data your flow screen needs to render.
You can refer to the Meta's guide for more details.
- Lastly, remember to save the response. You can start testing the flow after adding this chatbot to the channel!
Flow Trigger
Upon the submission of the flow response from the user, business can make use of the Flow Trigger to send follow-up messages or perform other actions.
Selected Flow ID
If you would like to send a follow-up message when the user has submitted a flow, you can make use of the "Selected Flow ID to match the submission of the corresponding flow.
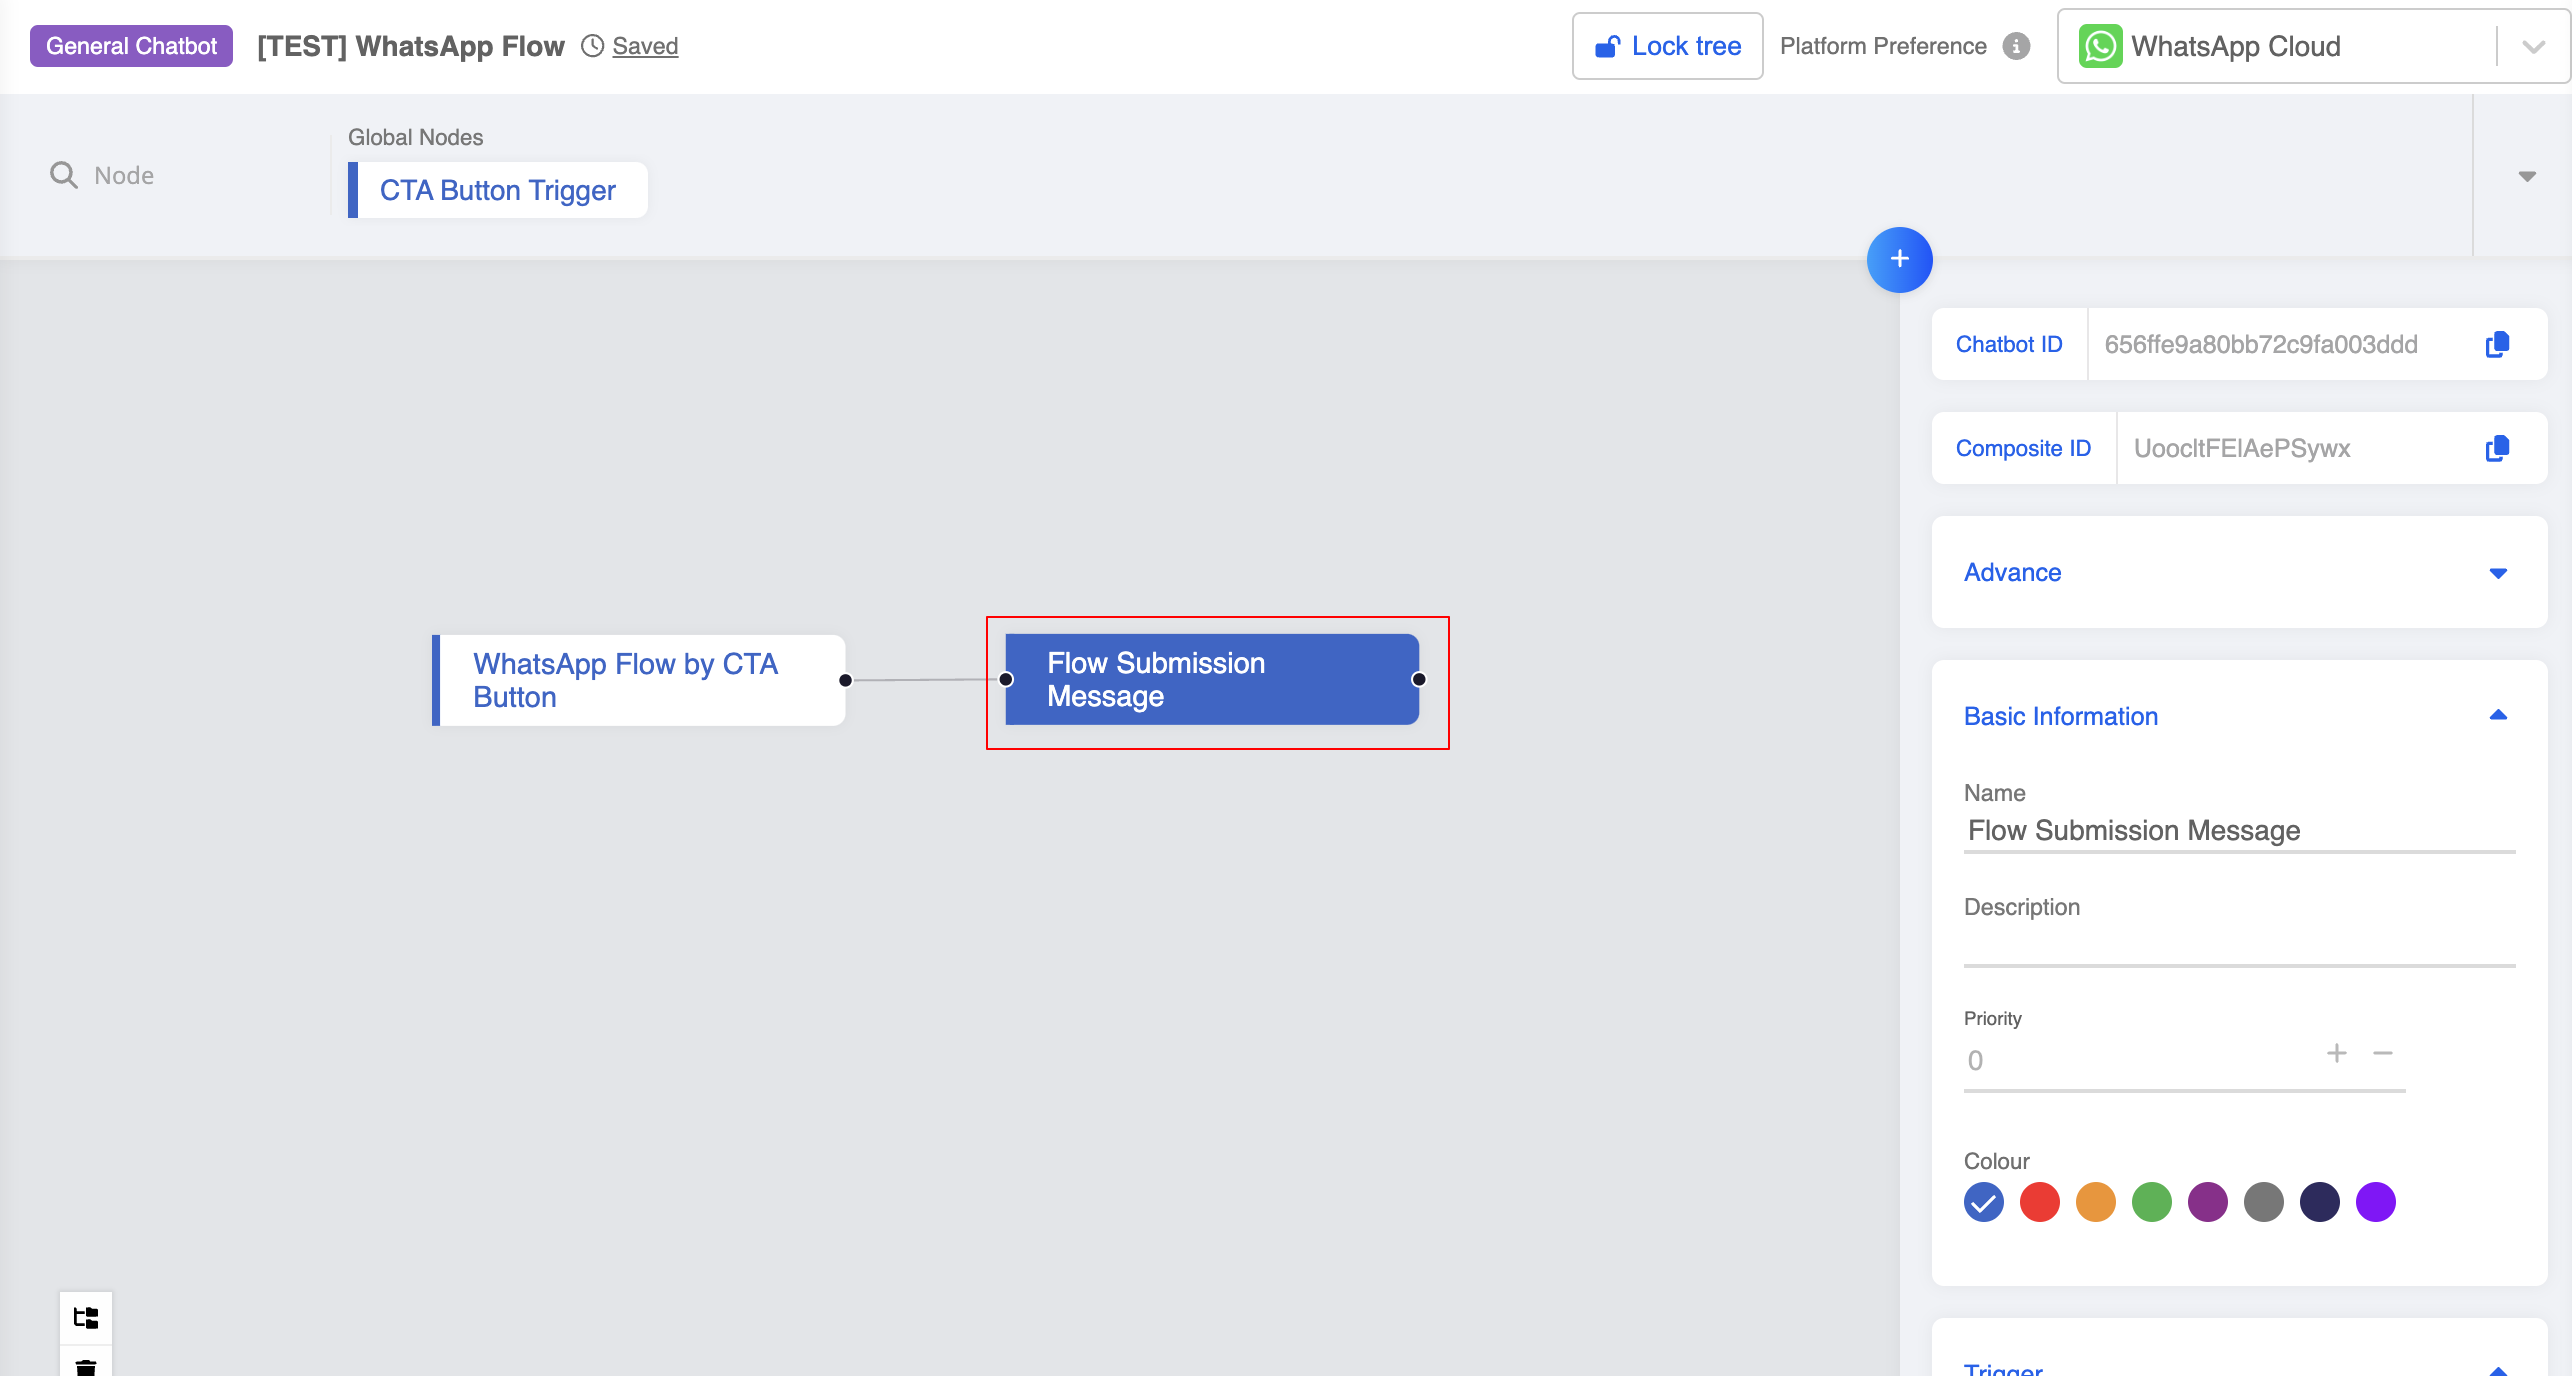
- First, make sure your chatbot has a flow response created with a selected flow ID.
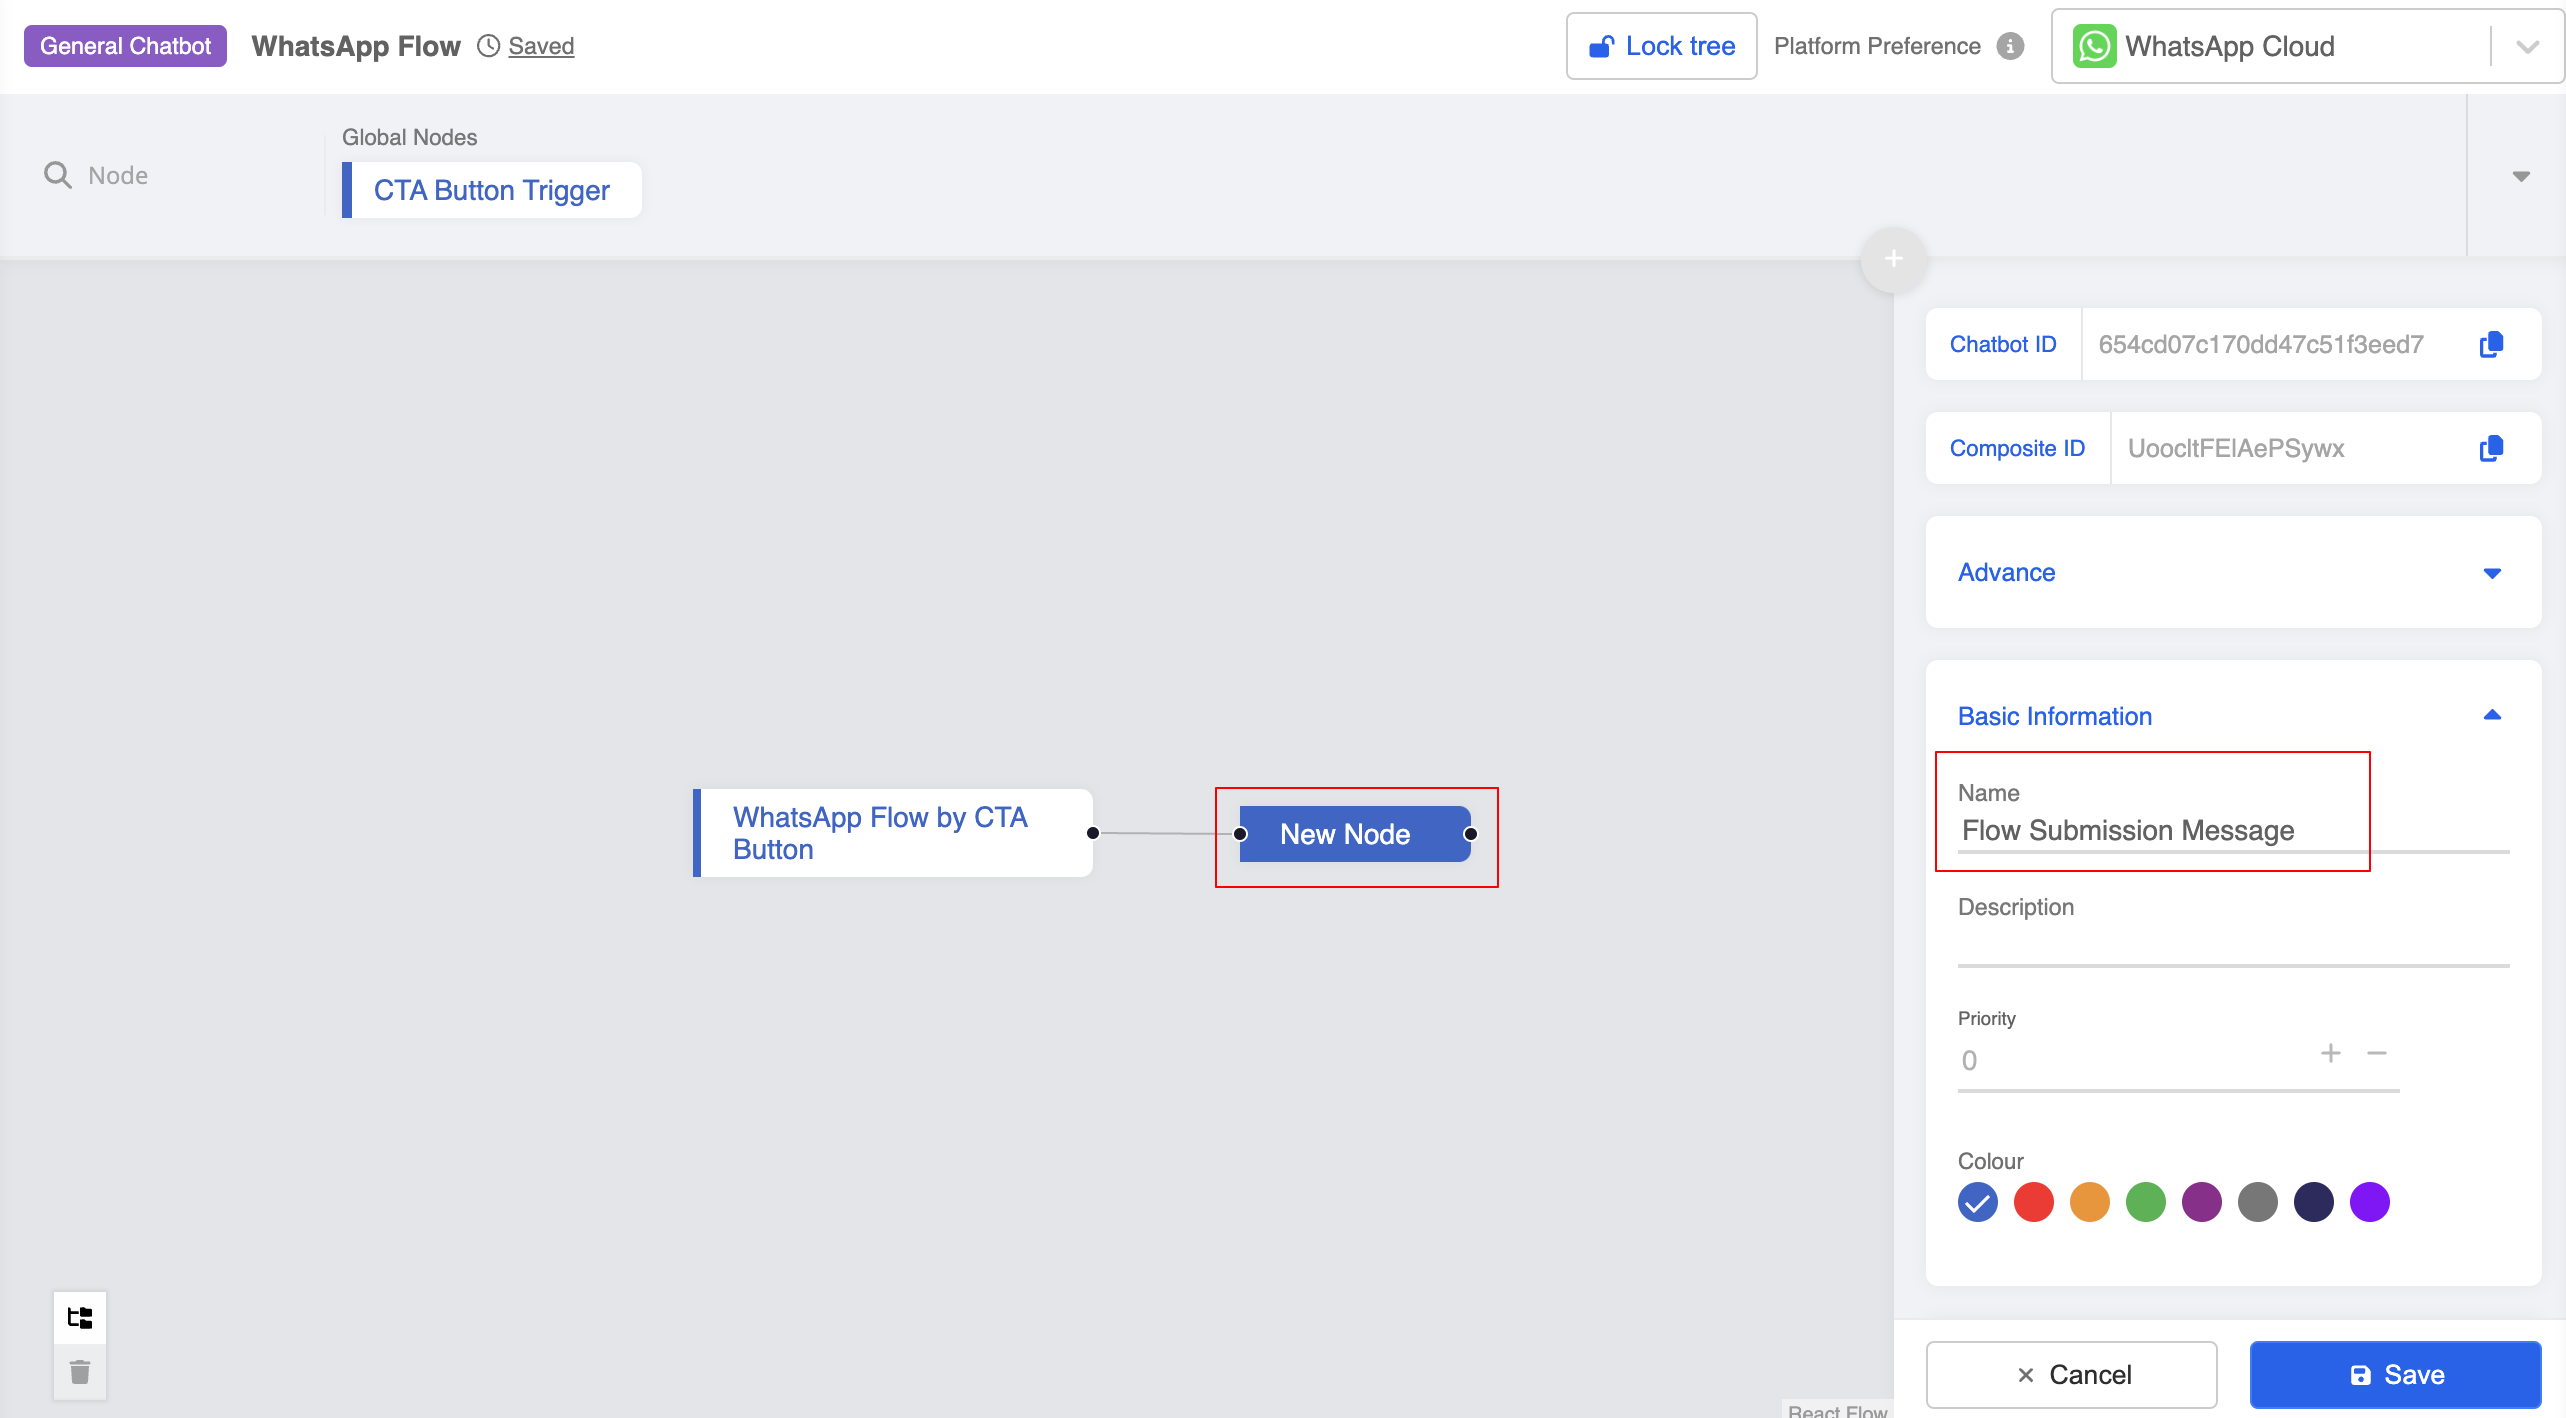
- Create a node following the flow response for sending the follow-up message.
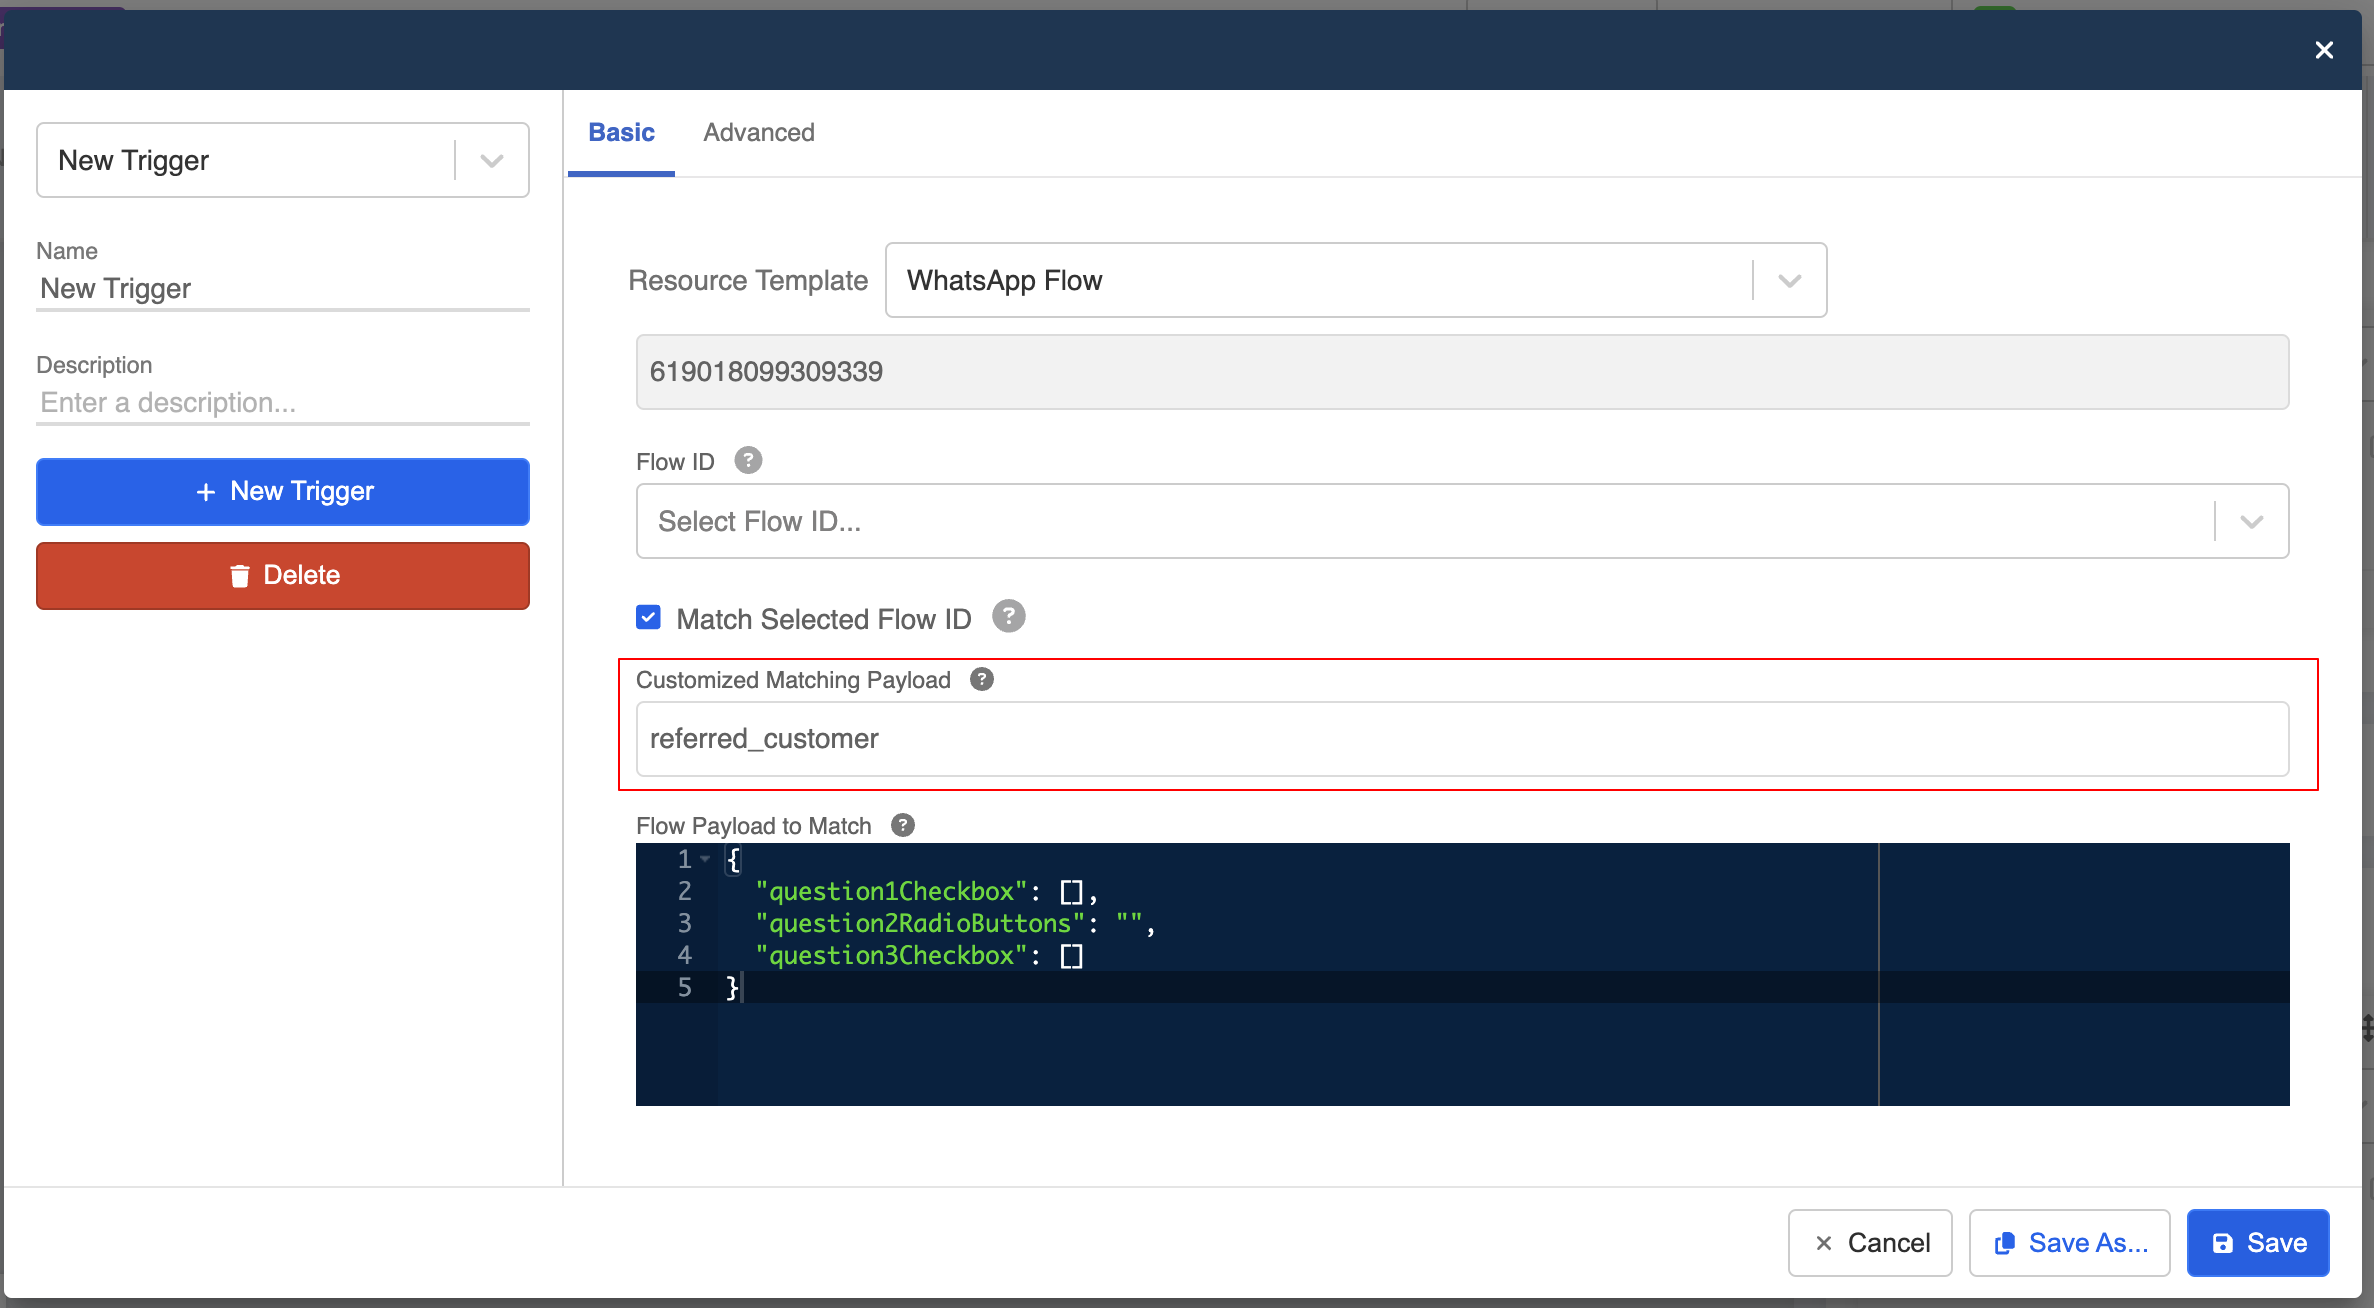
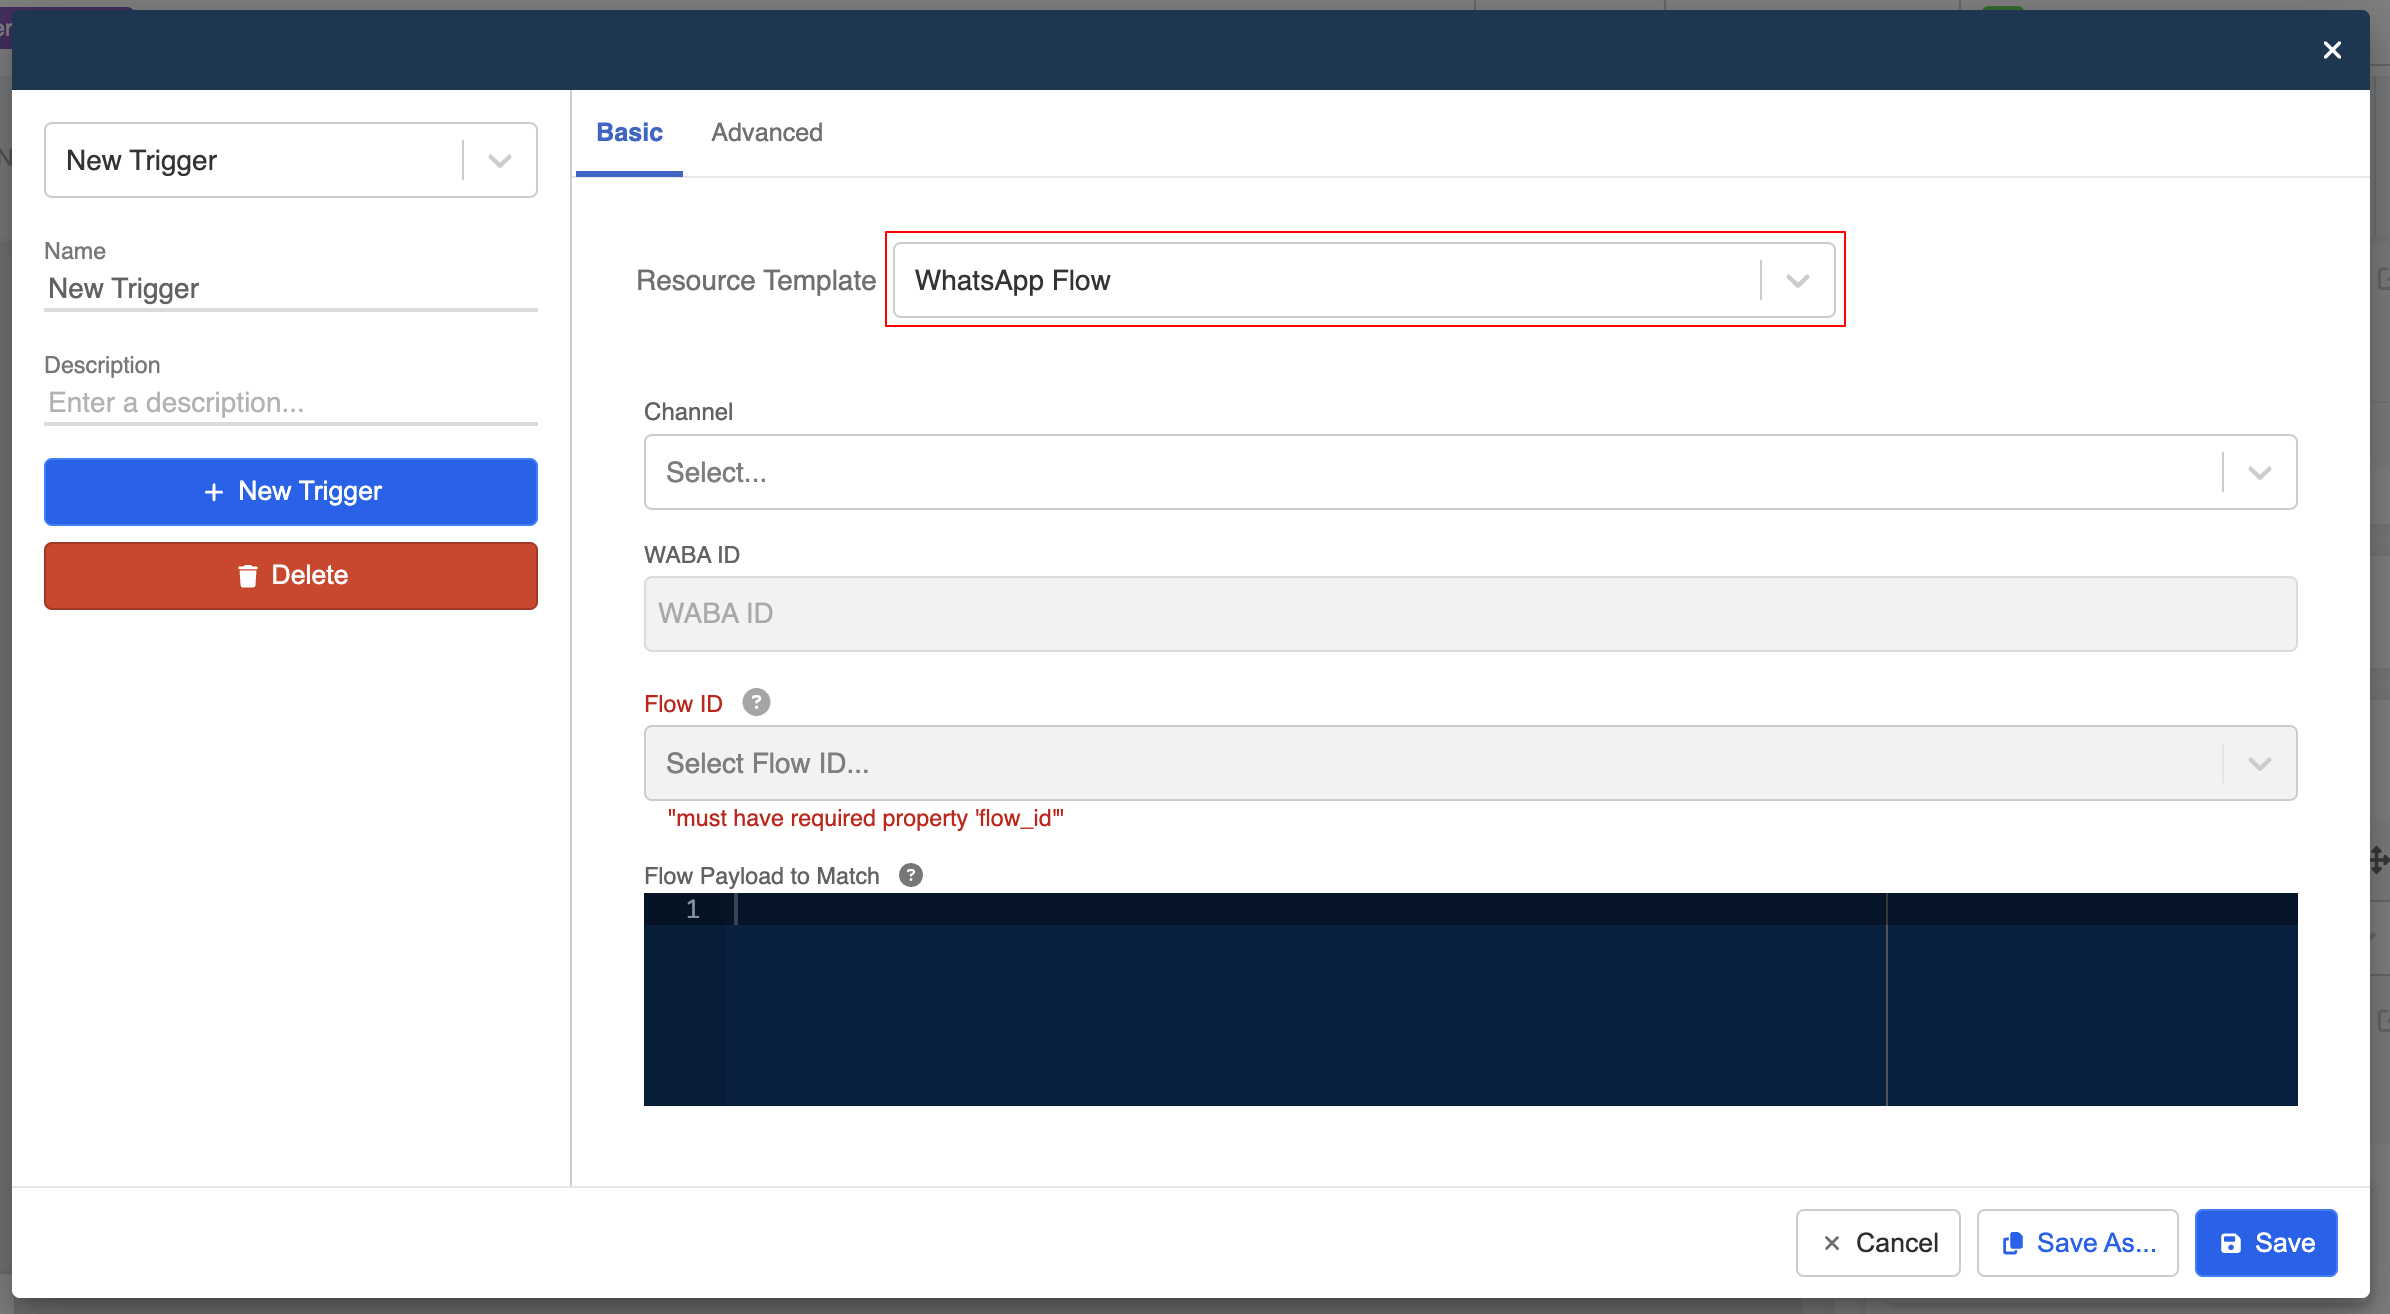
- Create a trigger, select "WhatsApp Flow".

- Select the corresponding "Flow ID", and enable "Match Selected Flow ID".
Note
When "Match Selected Flow ID" is enabled, the "Flow Payload to Match" with be disabled.

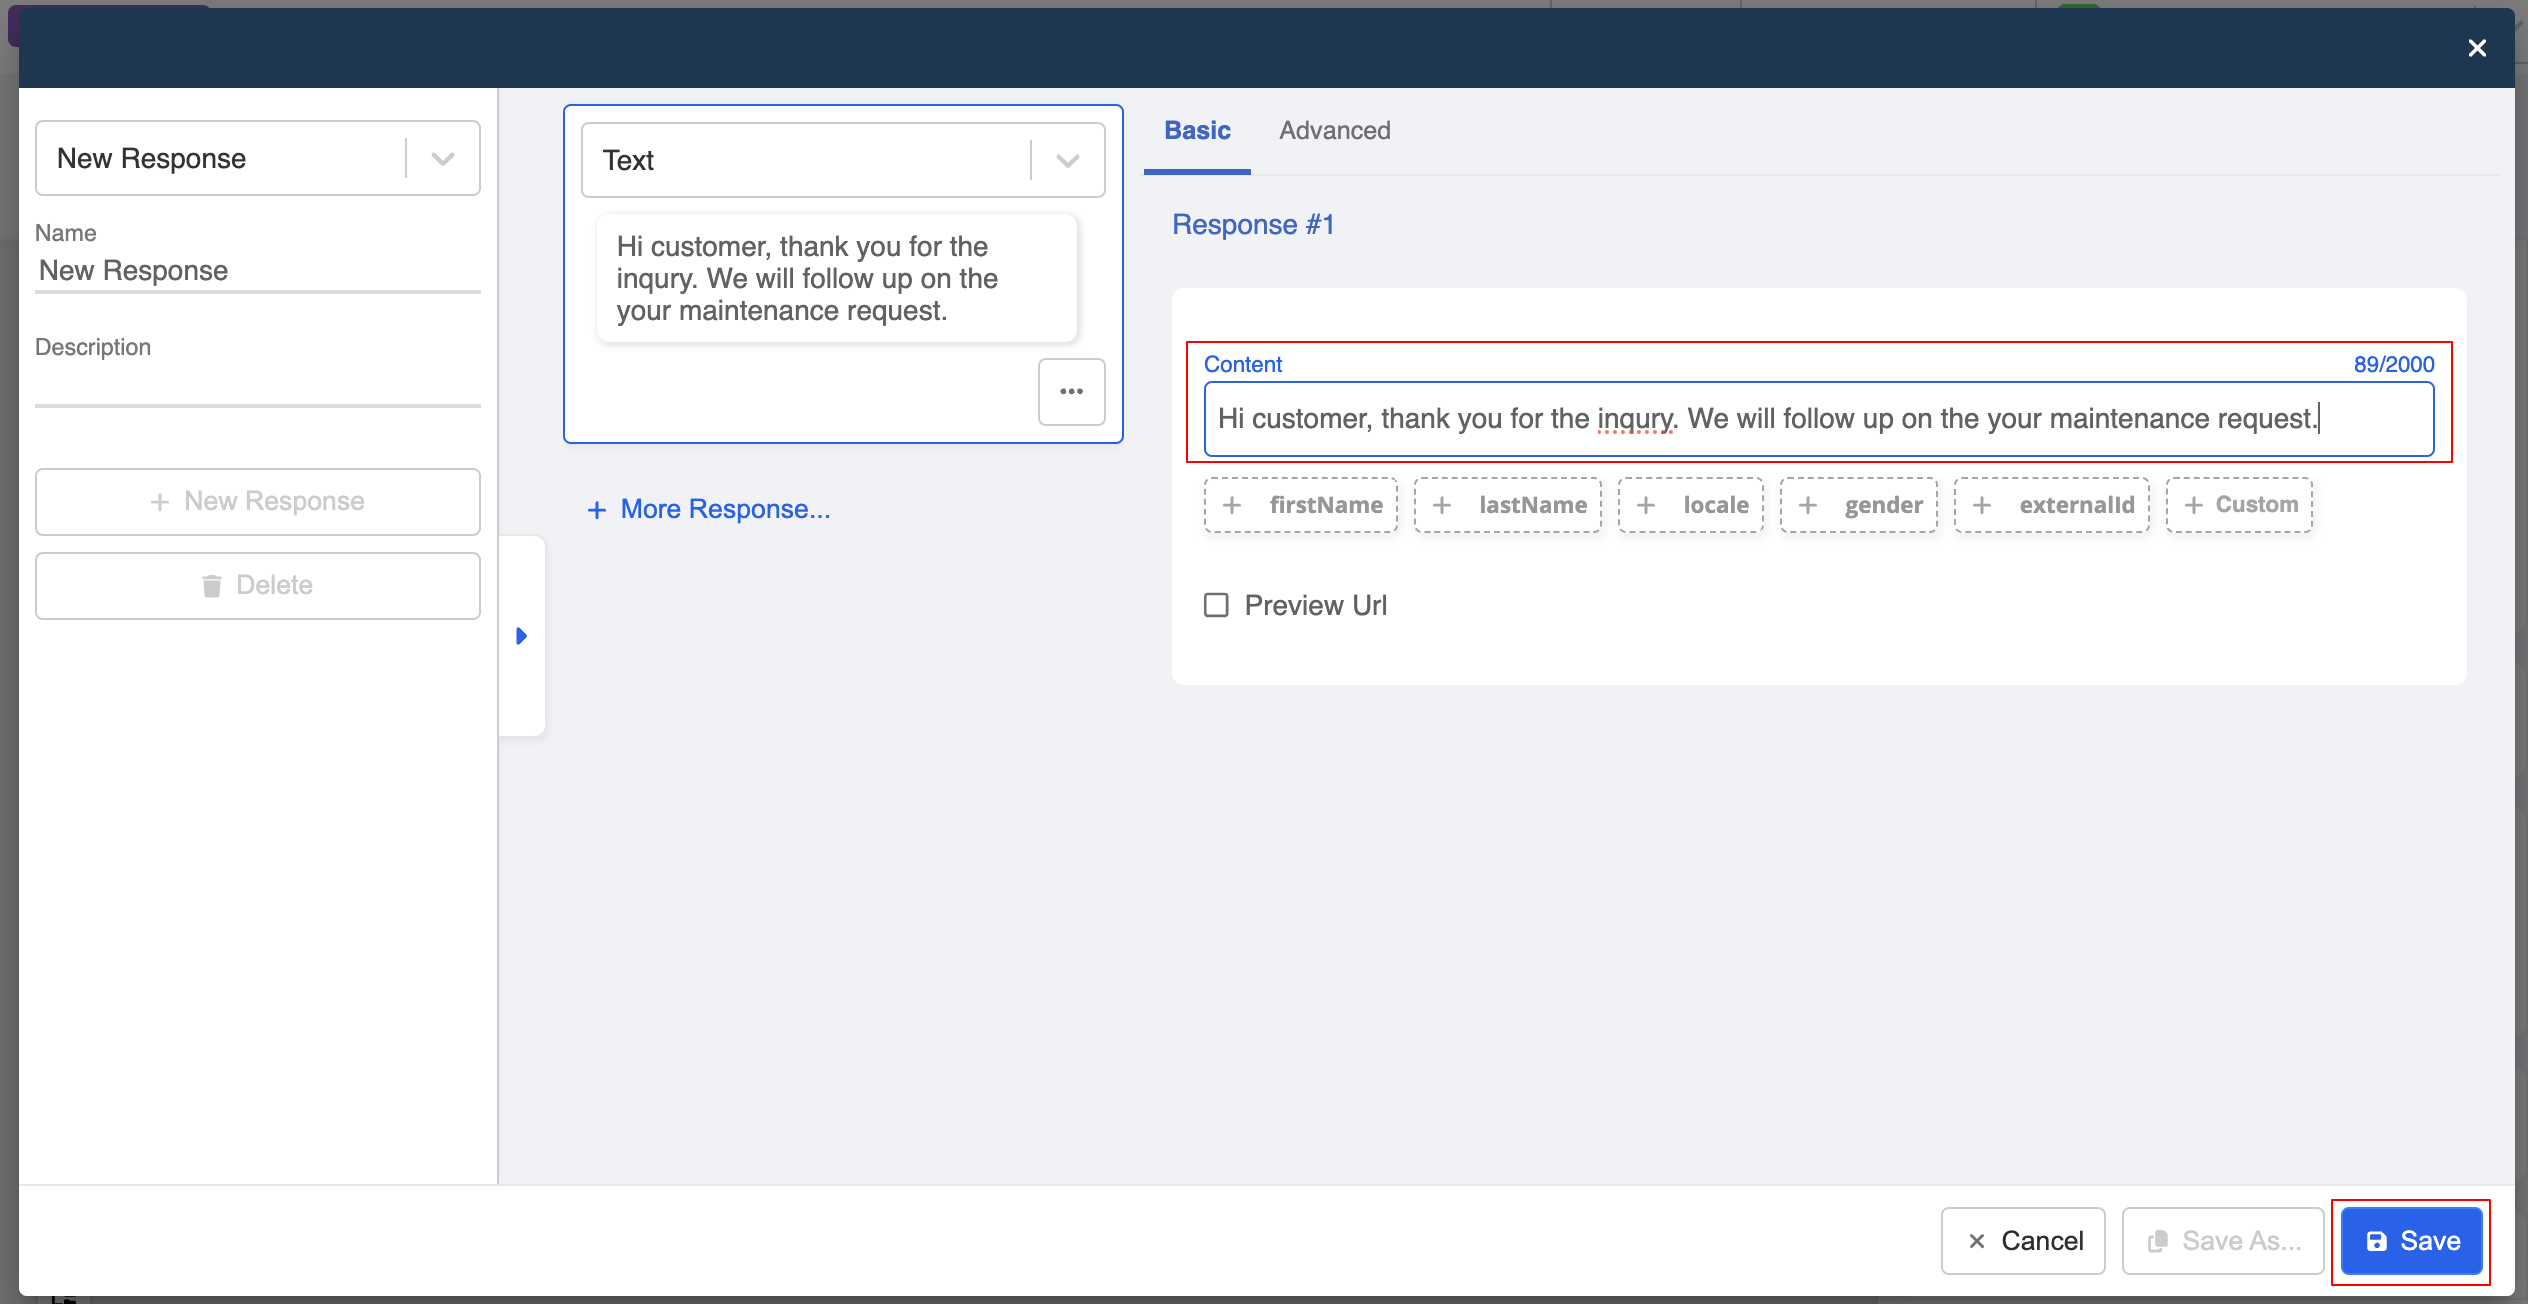
- Create a response and add the follow-up message.

Customized Matching Payload
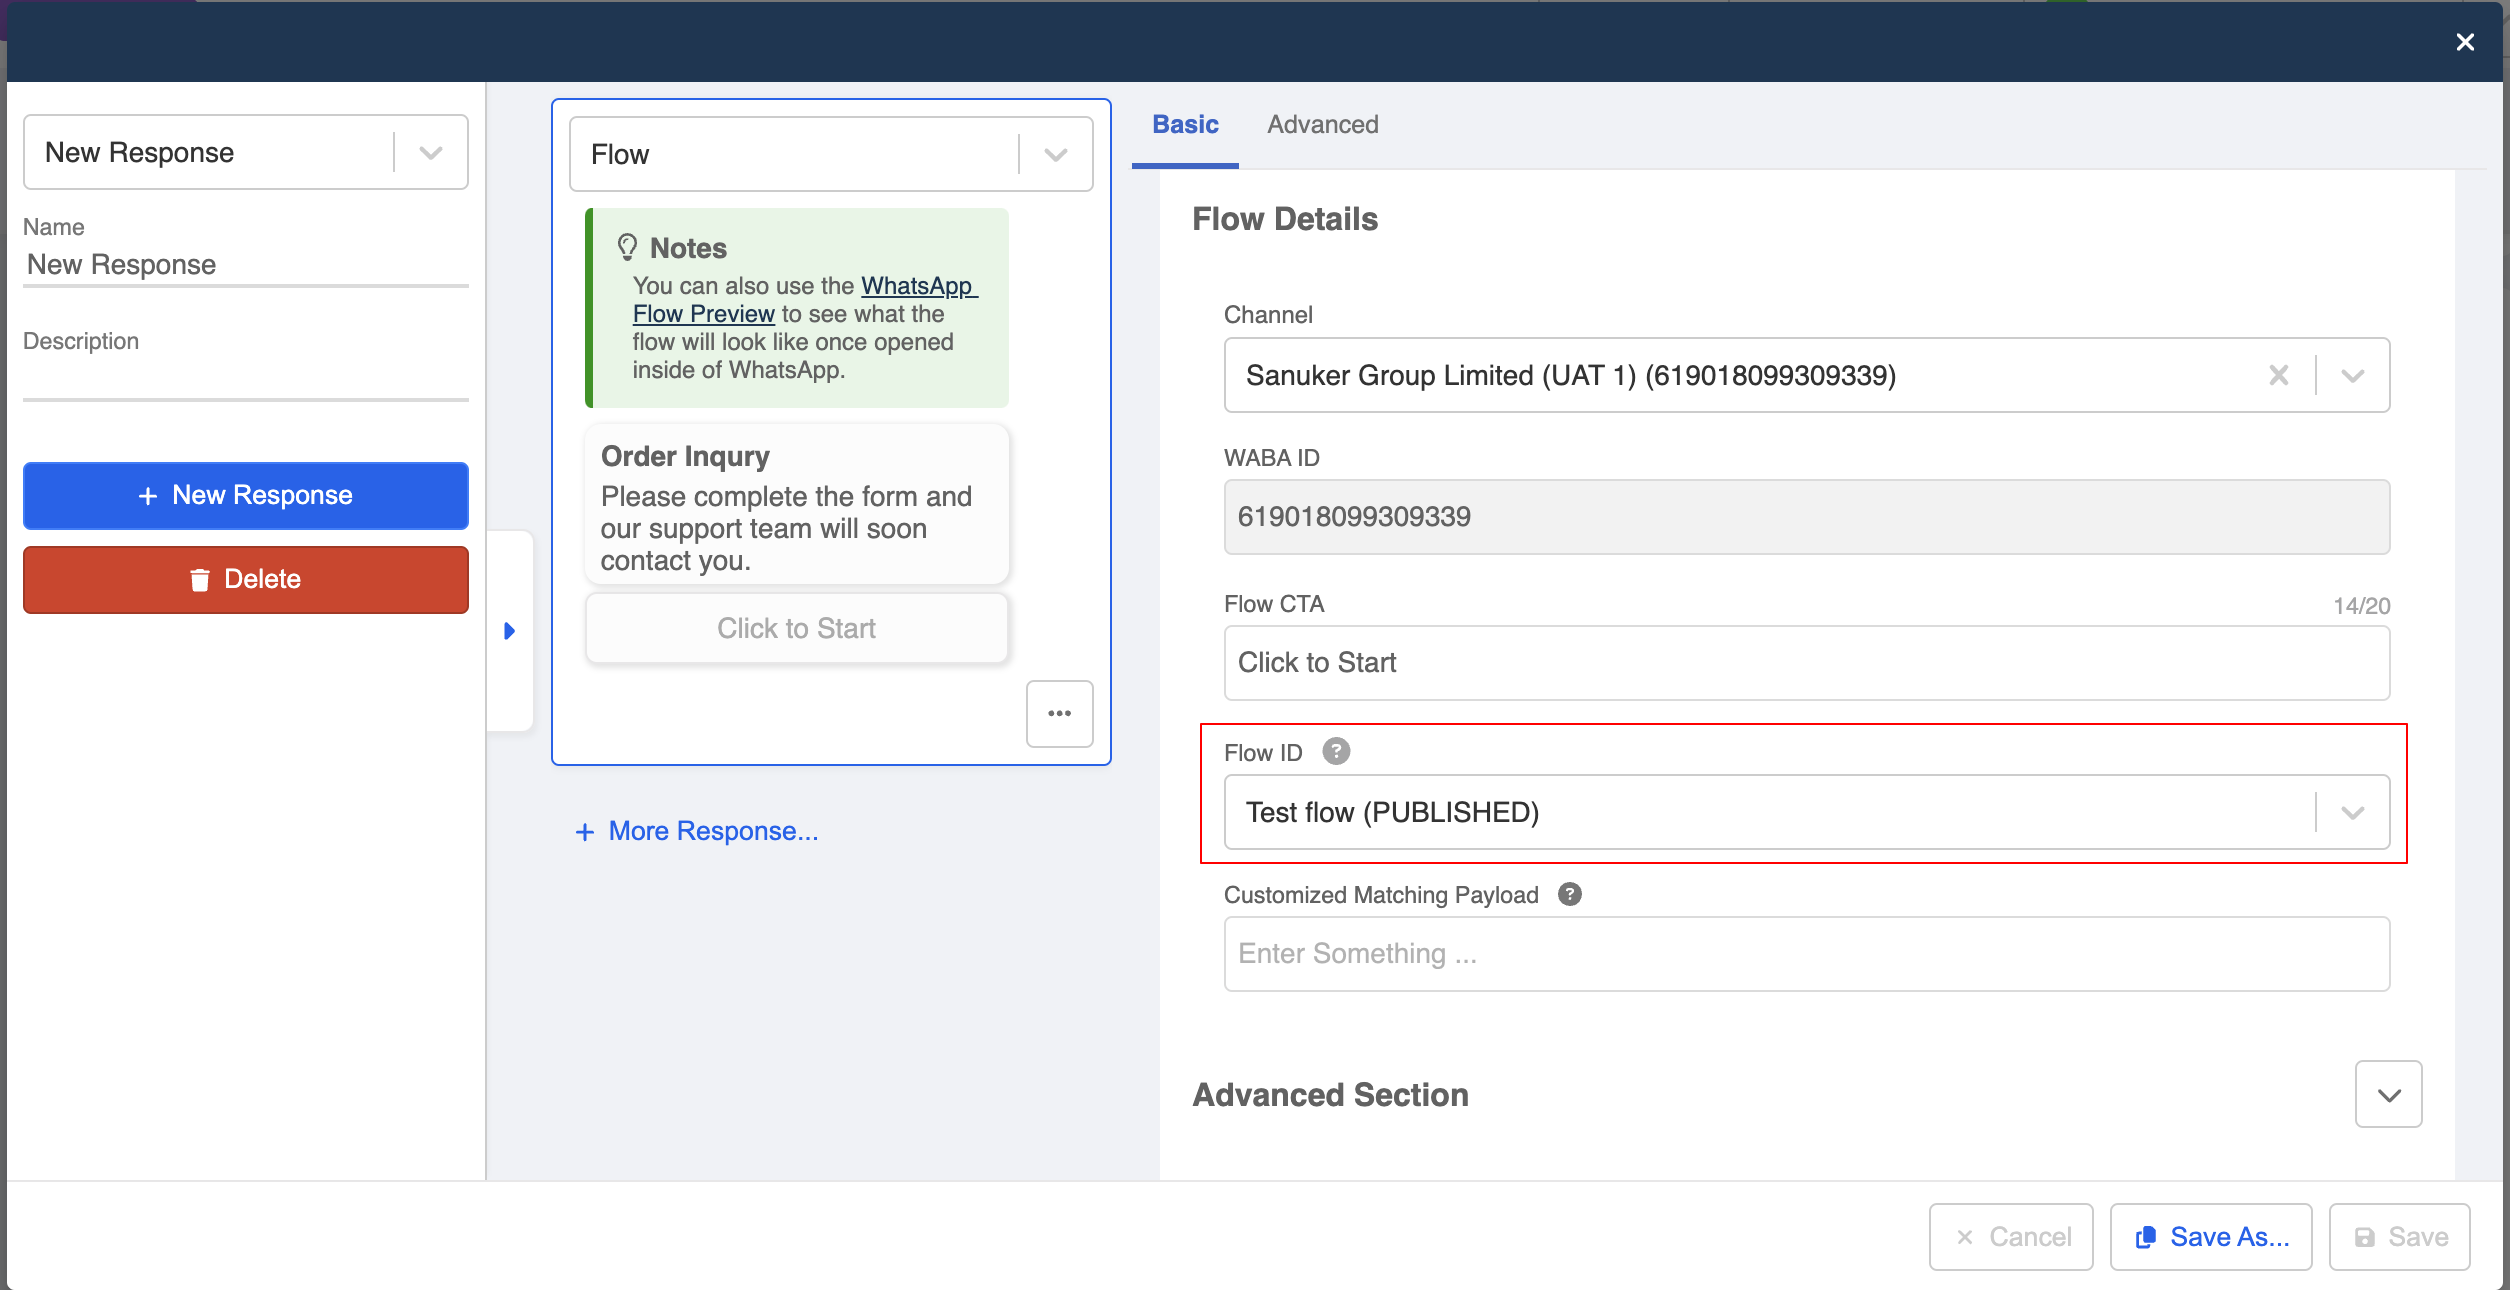
When "Selected Flow ID" is enabled, you can also add a customized payload. As a result, only the flow containing the same Flow ID and Customized Matching Payload can be matched by the trigger.
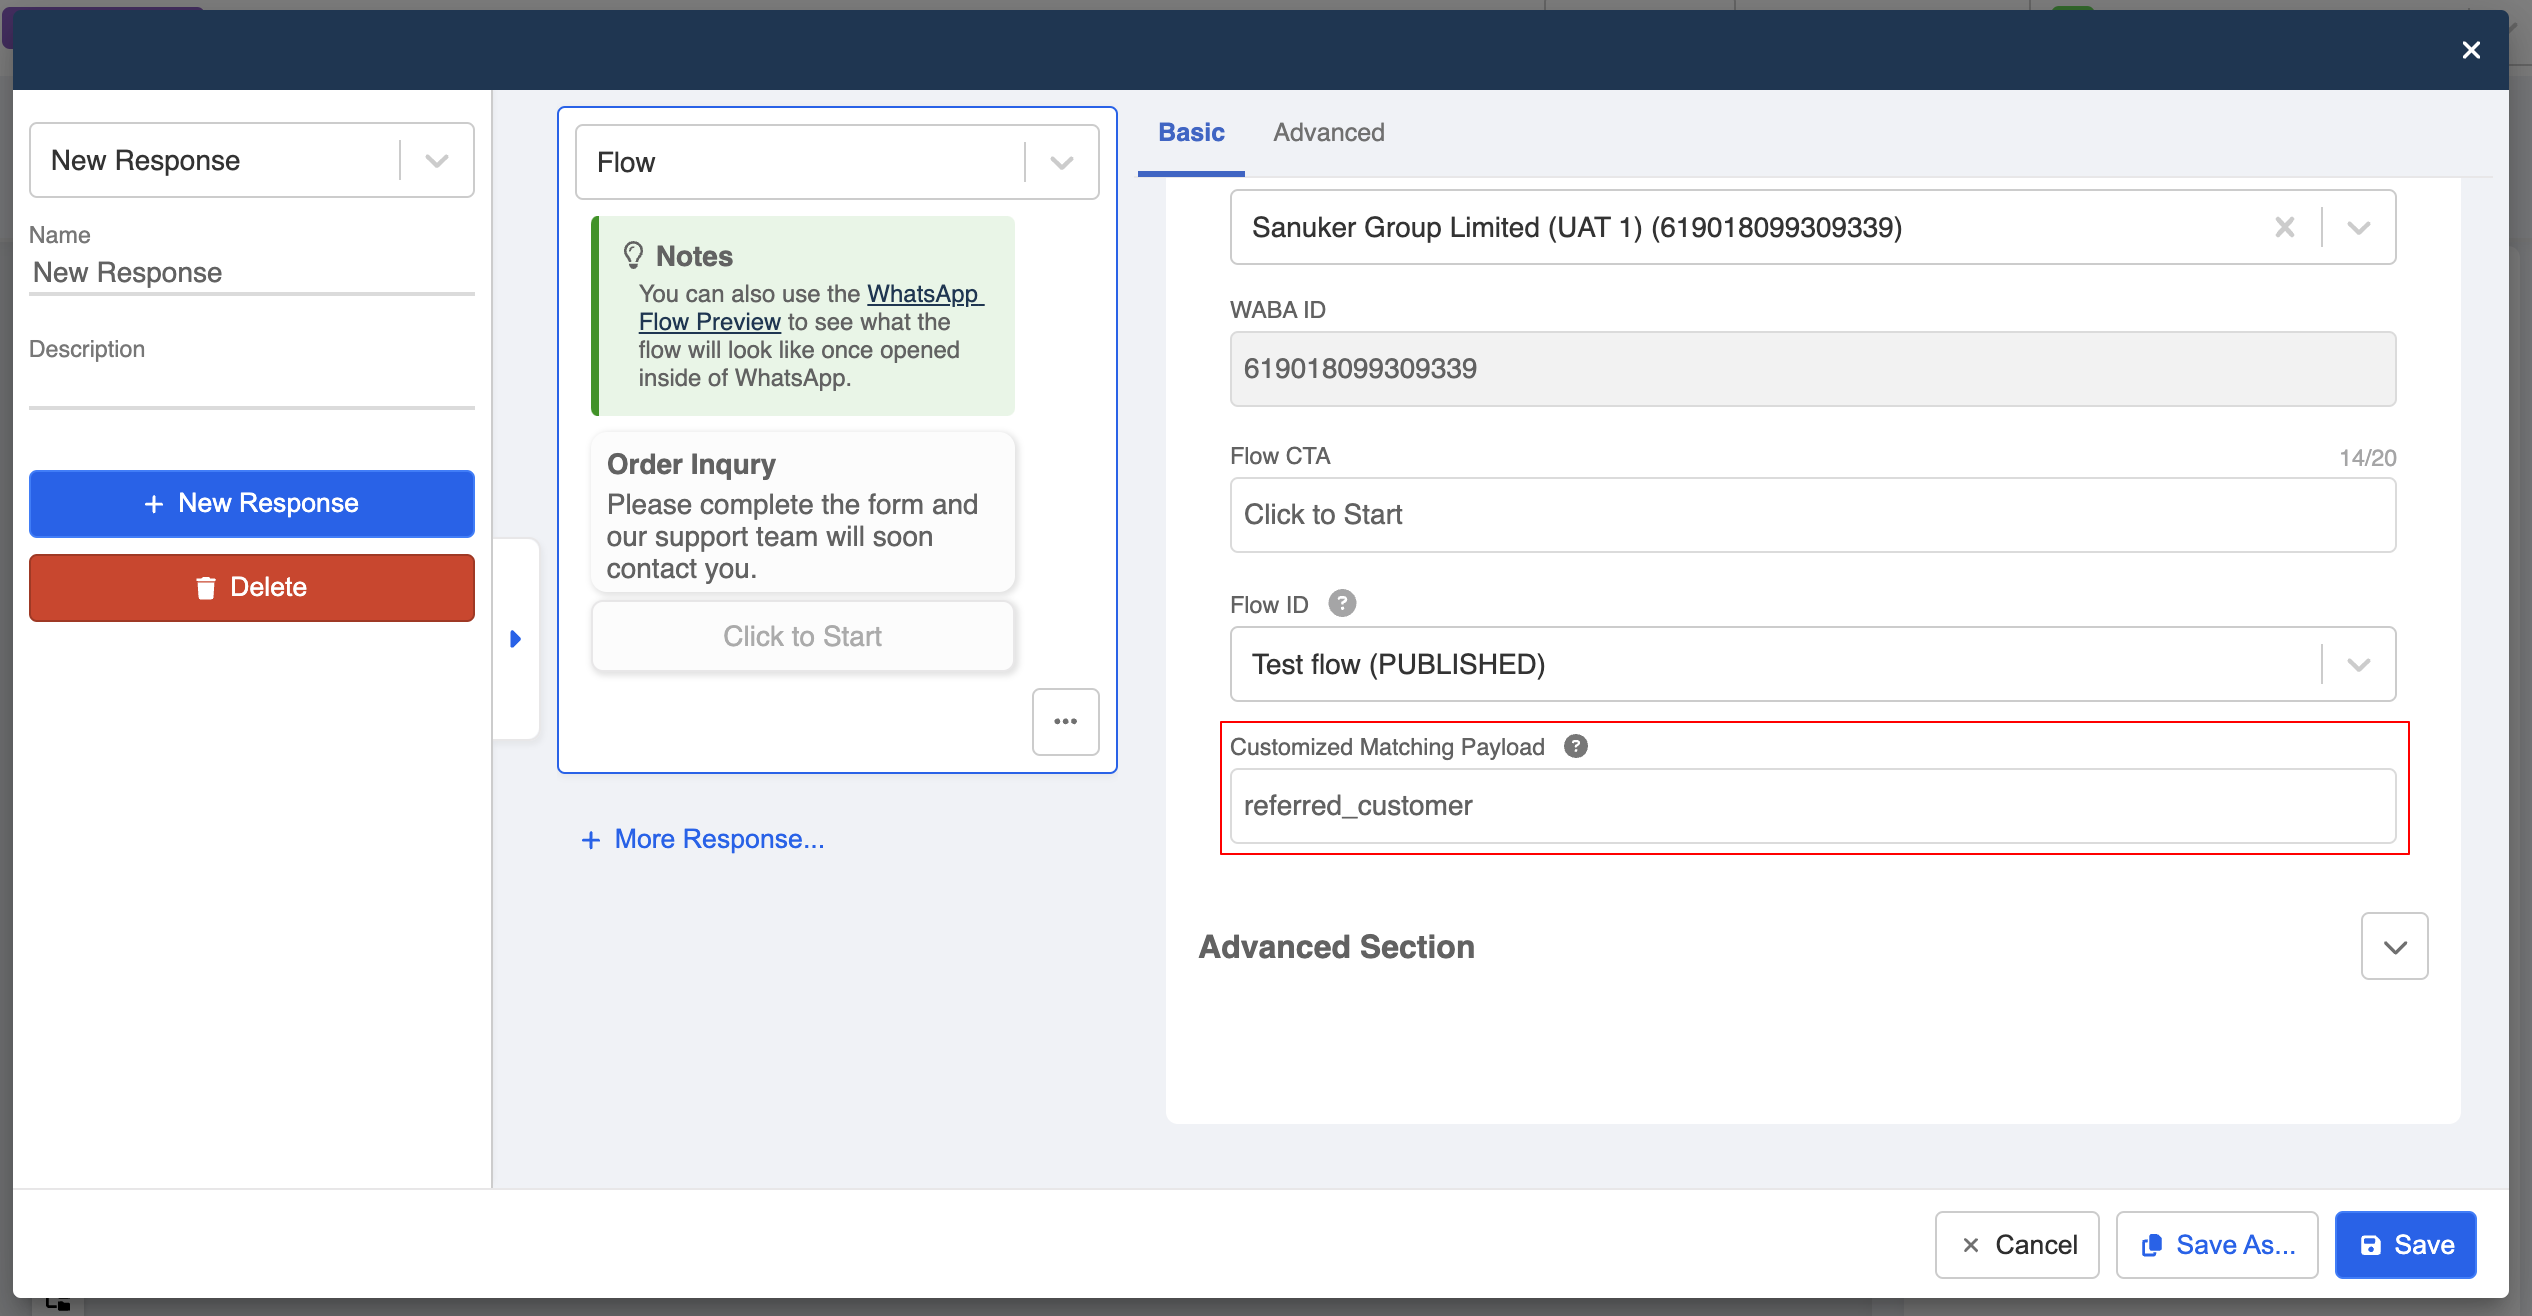
Optionally, you can add the Customized Matching Payload in the "WhatsApp Flow" response.

The Customized Matching Payload is also supported in the "WhatsApp Flow template".
Flow Payload to Match
If you would like to send different follow-up messages depending on the answers submitted with the flow. You can specify the expected input in the "Flow Payload to Match".
Note
When the "Flow Payload to Match" is applied, you need to specify at least one input for matching.

Expected Outcome
In order to match the flow response submitted by users, business is required to specify at least one of the user input. For example, the trigger will only react an a particular answer submitted by the user.


Create Flow Trigger
- Create a new general node following the node for sending the WhatsApp flow CTA button.
- Create trigger and select "WhatsApp Flow".
- Select the "Channel" and "Flow ID". The flow should match with the one you are sending in the previous node.
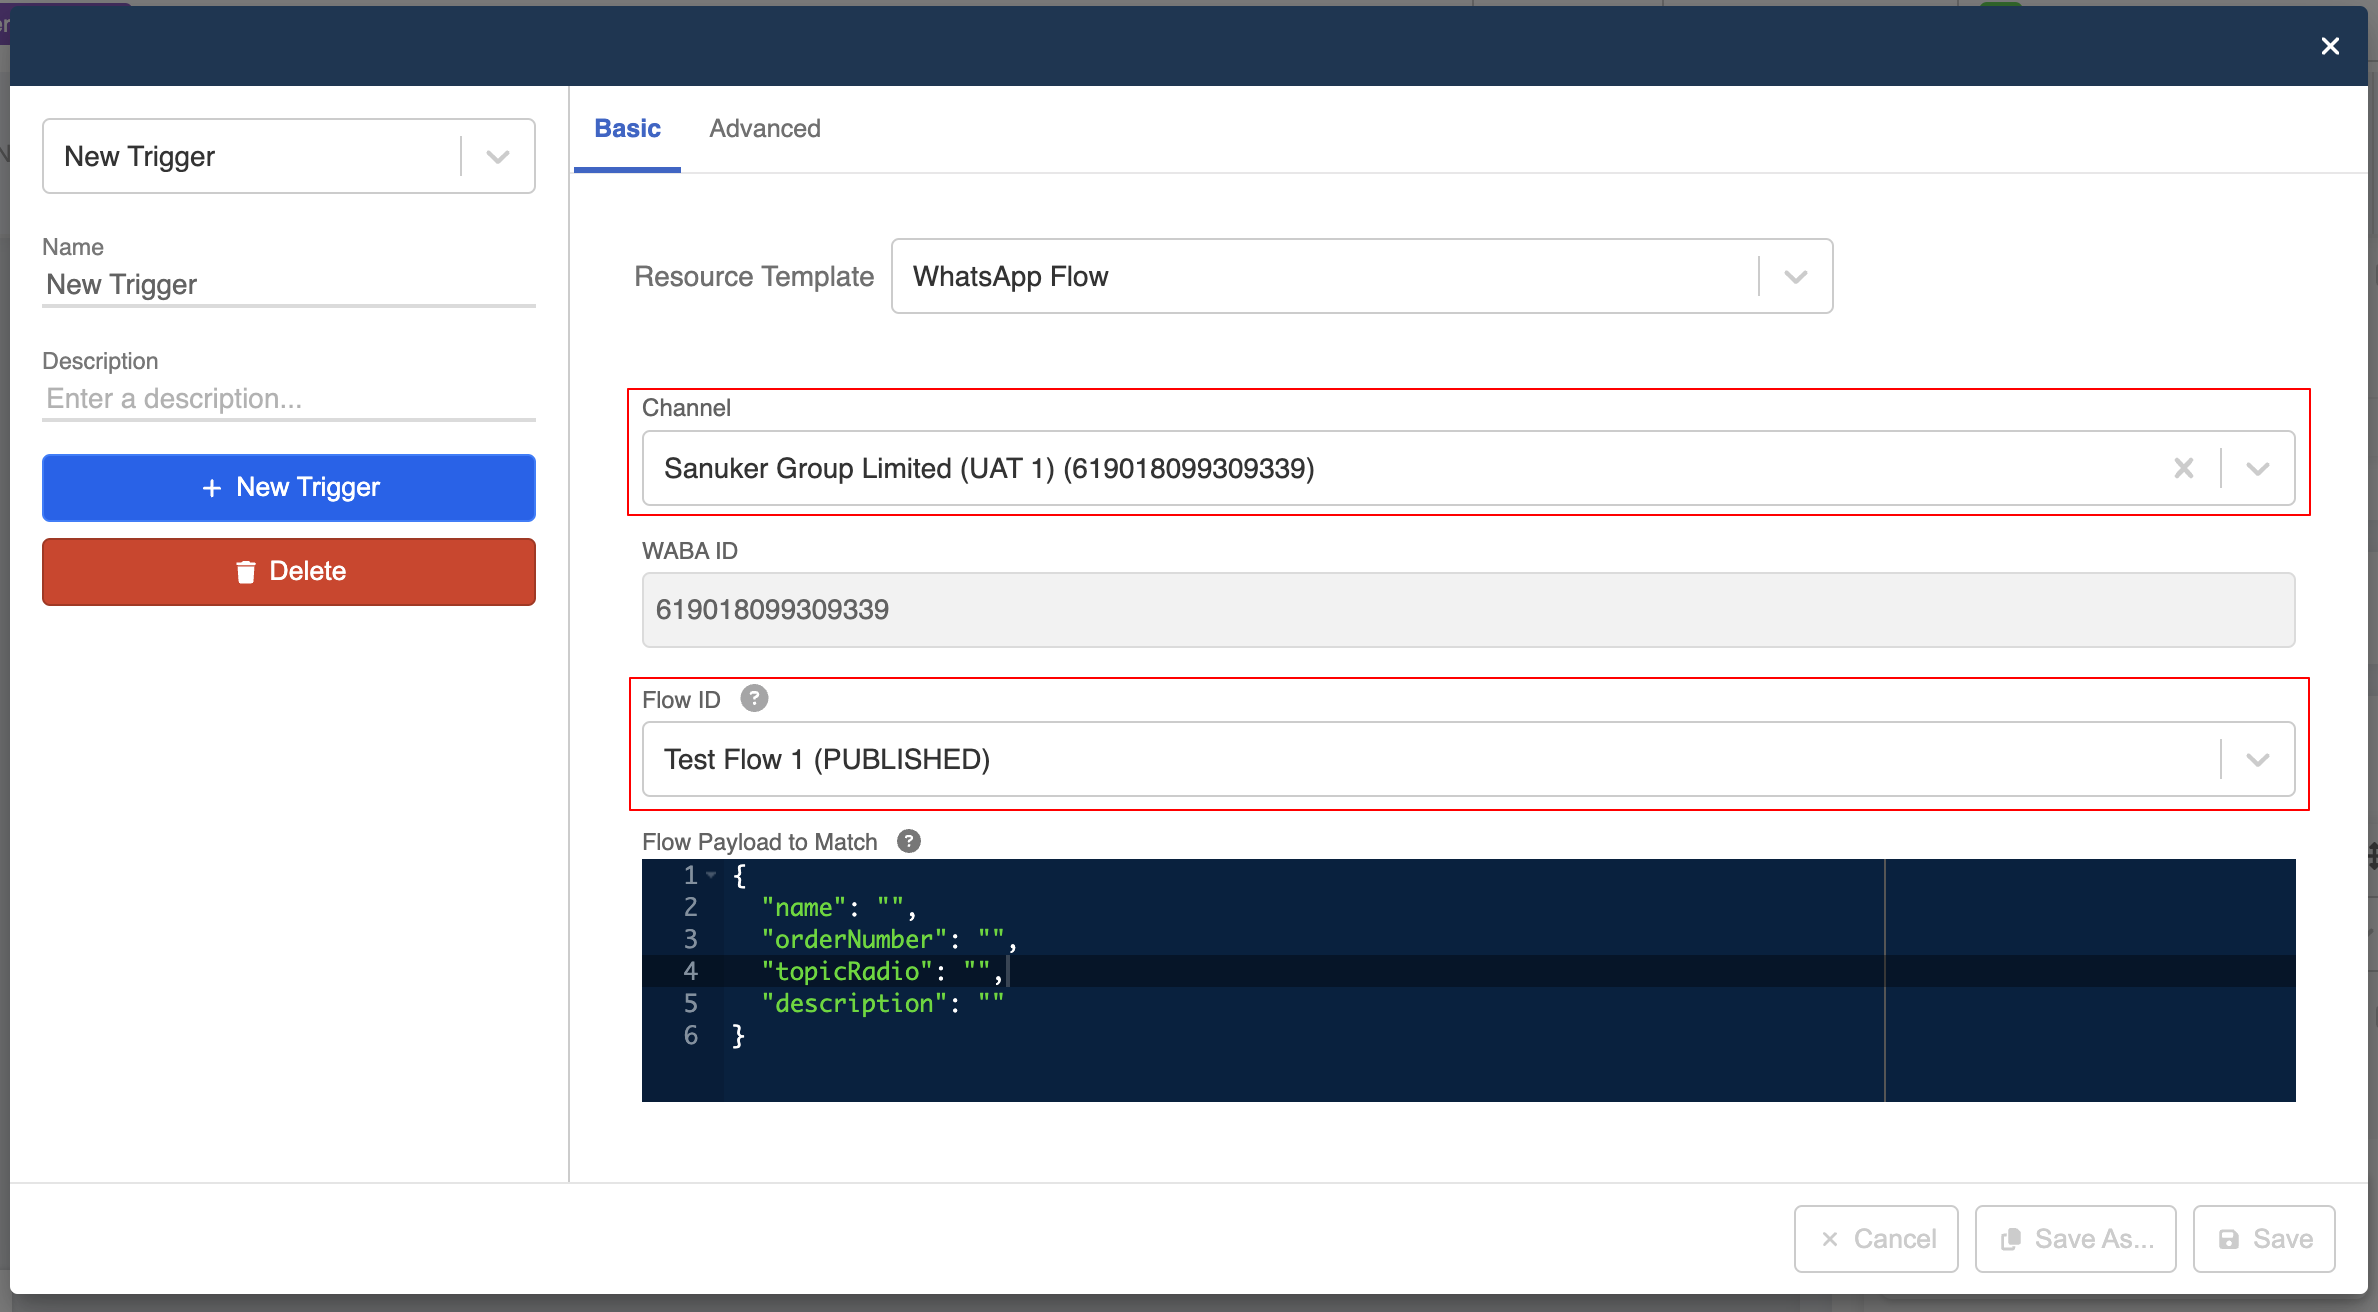
- Flow Payload to Match will display the relevant input fields belonging to the flow. You need to provide at least one expected answer for matching the trigger.
Note
With this design, you are able to display different follow-up messages based on what the user has input in the flow. For matching different types of input in the trigger, please refer to the table below.
| Input Types | Properties | Description | Example |
|---|---|---|---|
TextInput | String | The exact text input | "name": "John Lee" |
RadioButtonsGroup | String | ID of the radio button | "topicRadio": "1" |
Dropdown | String | ID of the dropdown option | "city": "0" |
CheckboxGroup | Array | List of IDs of checkbox options | question1Checkbox: ["0", "2", "4"] |
OptIn | Boolean | Boolean value of the optin checkbox | "OptIn": true |
DatePicker | String | Timestamp of the chosen date | date: "1729958400000" |
You can also refer to the source code of the flow in the Flow Builder under the WhatsApp Manager.

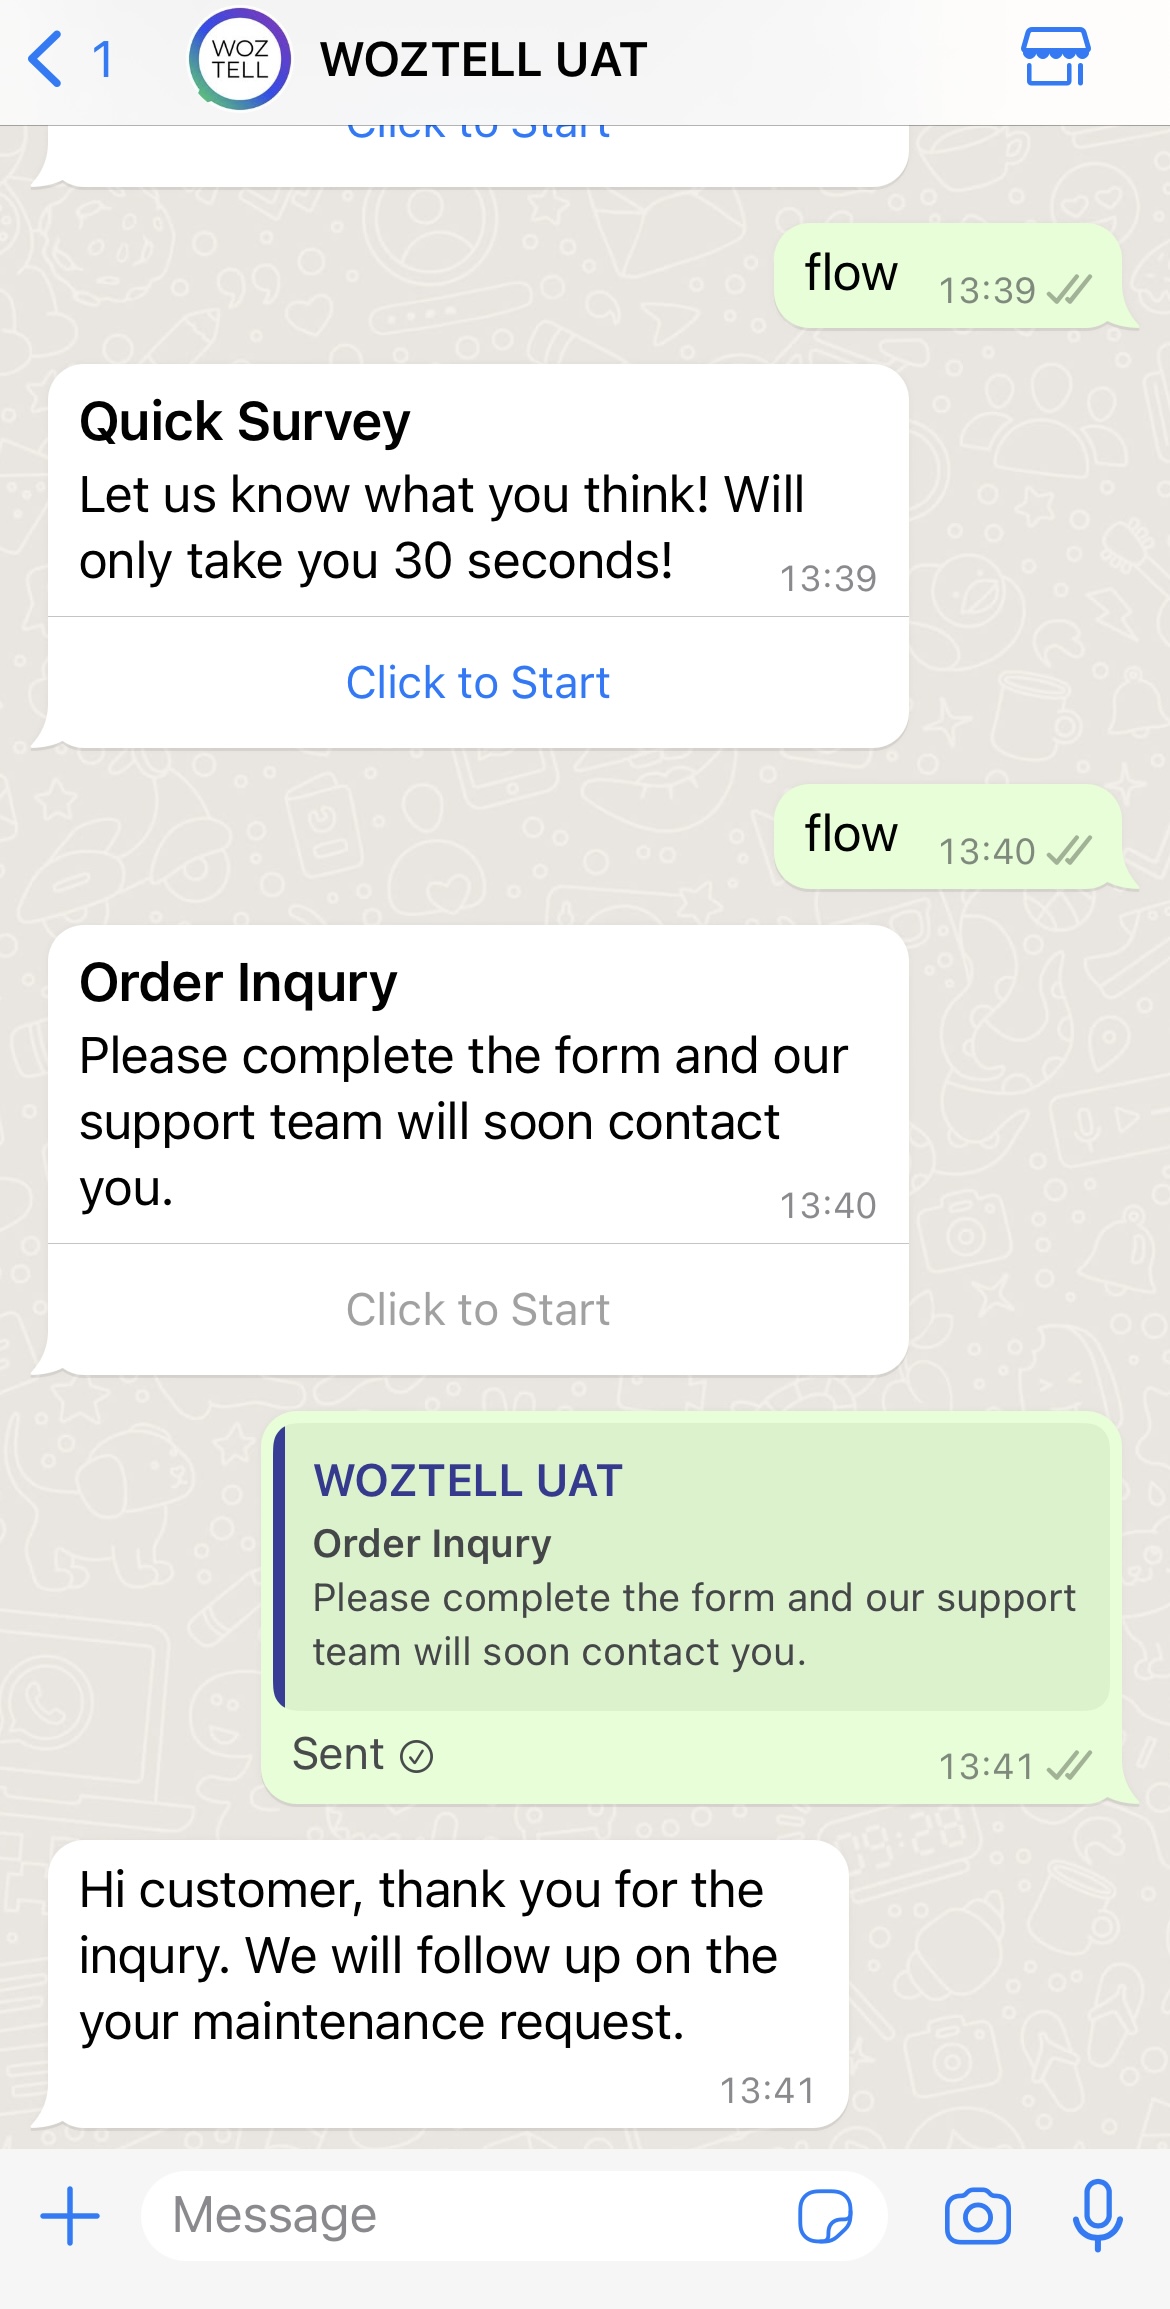
- Create a response and add the follow-up message.
- Now, try out the flow and input the expected answer!