WhatsApp Conversion Flow
Introduction
Click-to-WhatsApp Ad(CTWA) is a common way to provide entry point from the ad directly into the Whatsapp conversation. With the support of Ads Trigger and App Events, you can create a complete conversion flow in the chatbot builder.
Set up CTWA
To begin with, you need to set up a Click-to-WhatsApp Ad(CTWA) so that customers can be redirected from the app to your business number.
To set up the CTWA in the Ads Manager, you can refer to the guide provided by Meta.
Allow Ads Permission
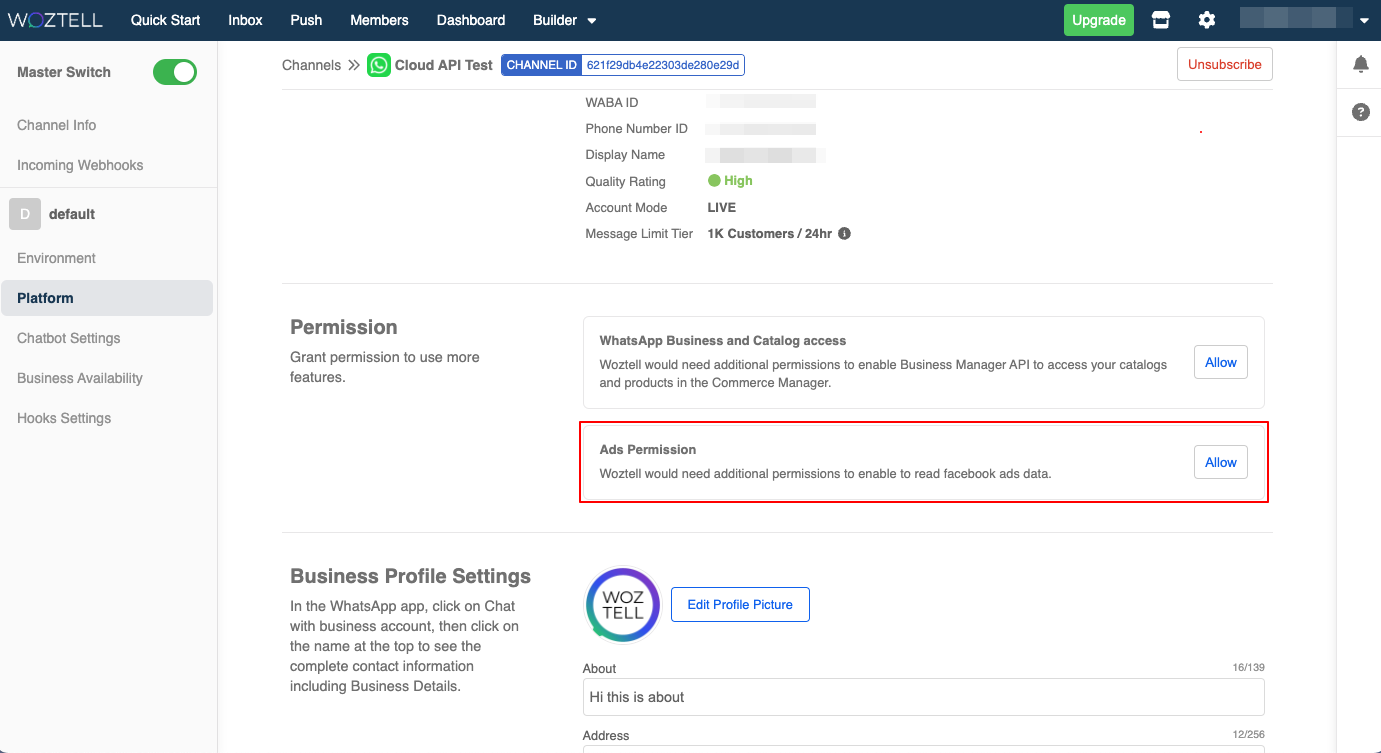
- To enable the features related to click-to-WhatsApp ads and Conversion Event on WOZTELL, please allow the Ads Permission on the platform page of the WhatsApp Cloud channel.
NOTE
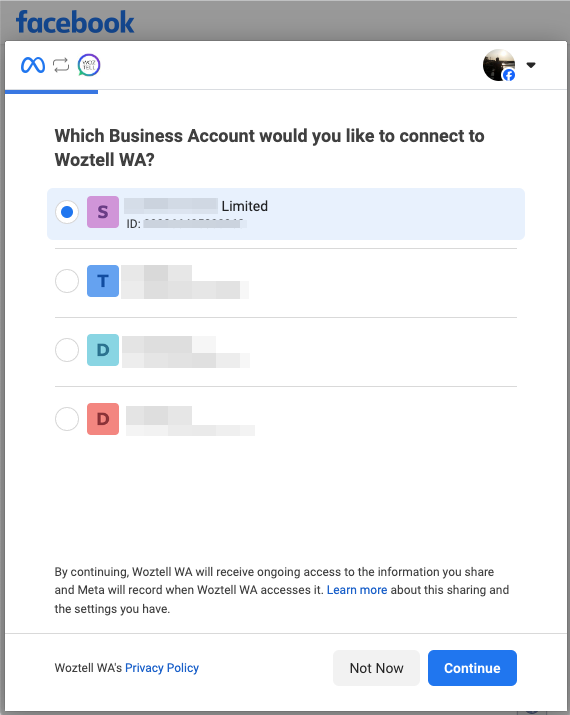
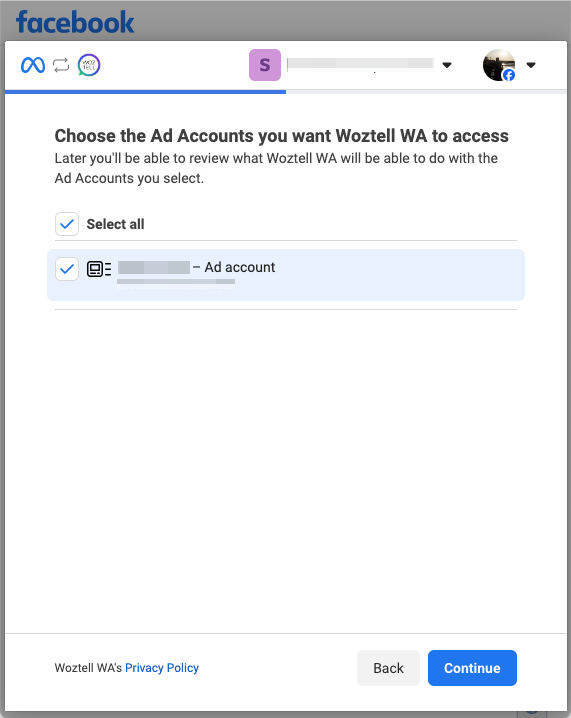
- At the first step of the Login for Business flow, select the Business Account to connect with WOZTELL.
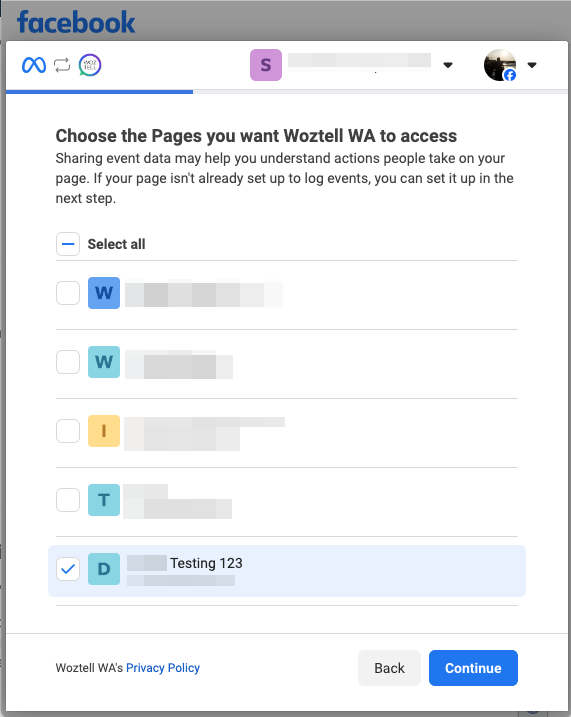
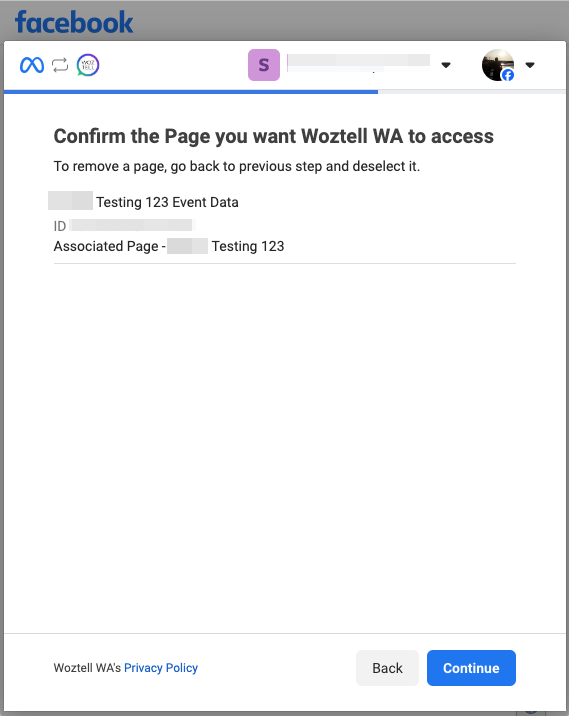
- Choose the page to be associated with.
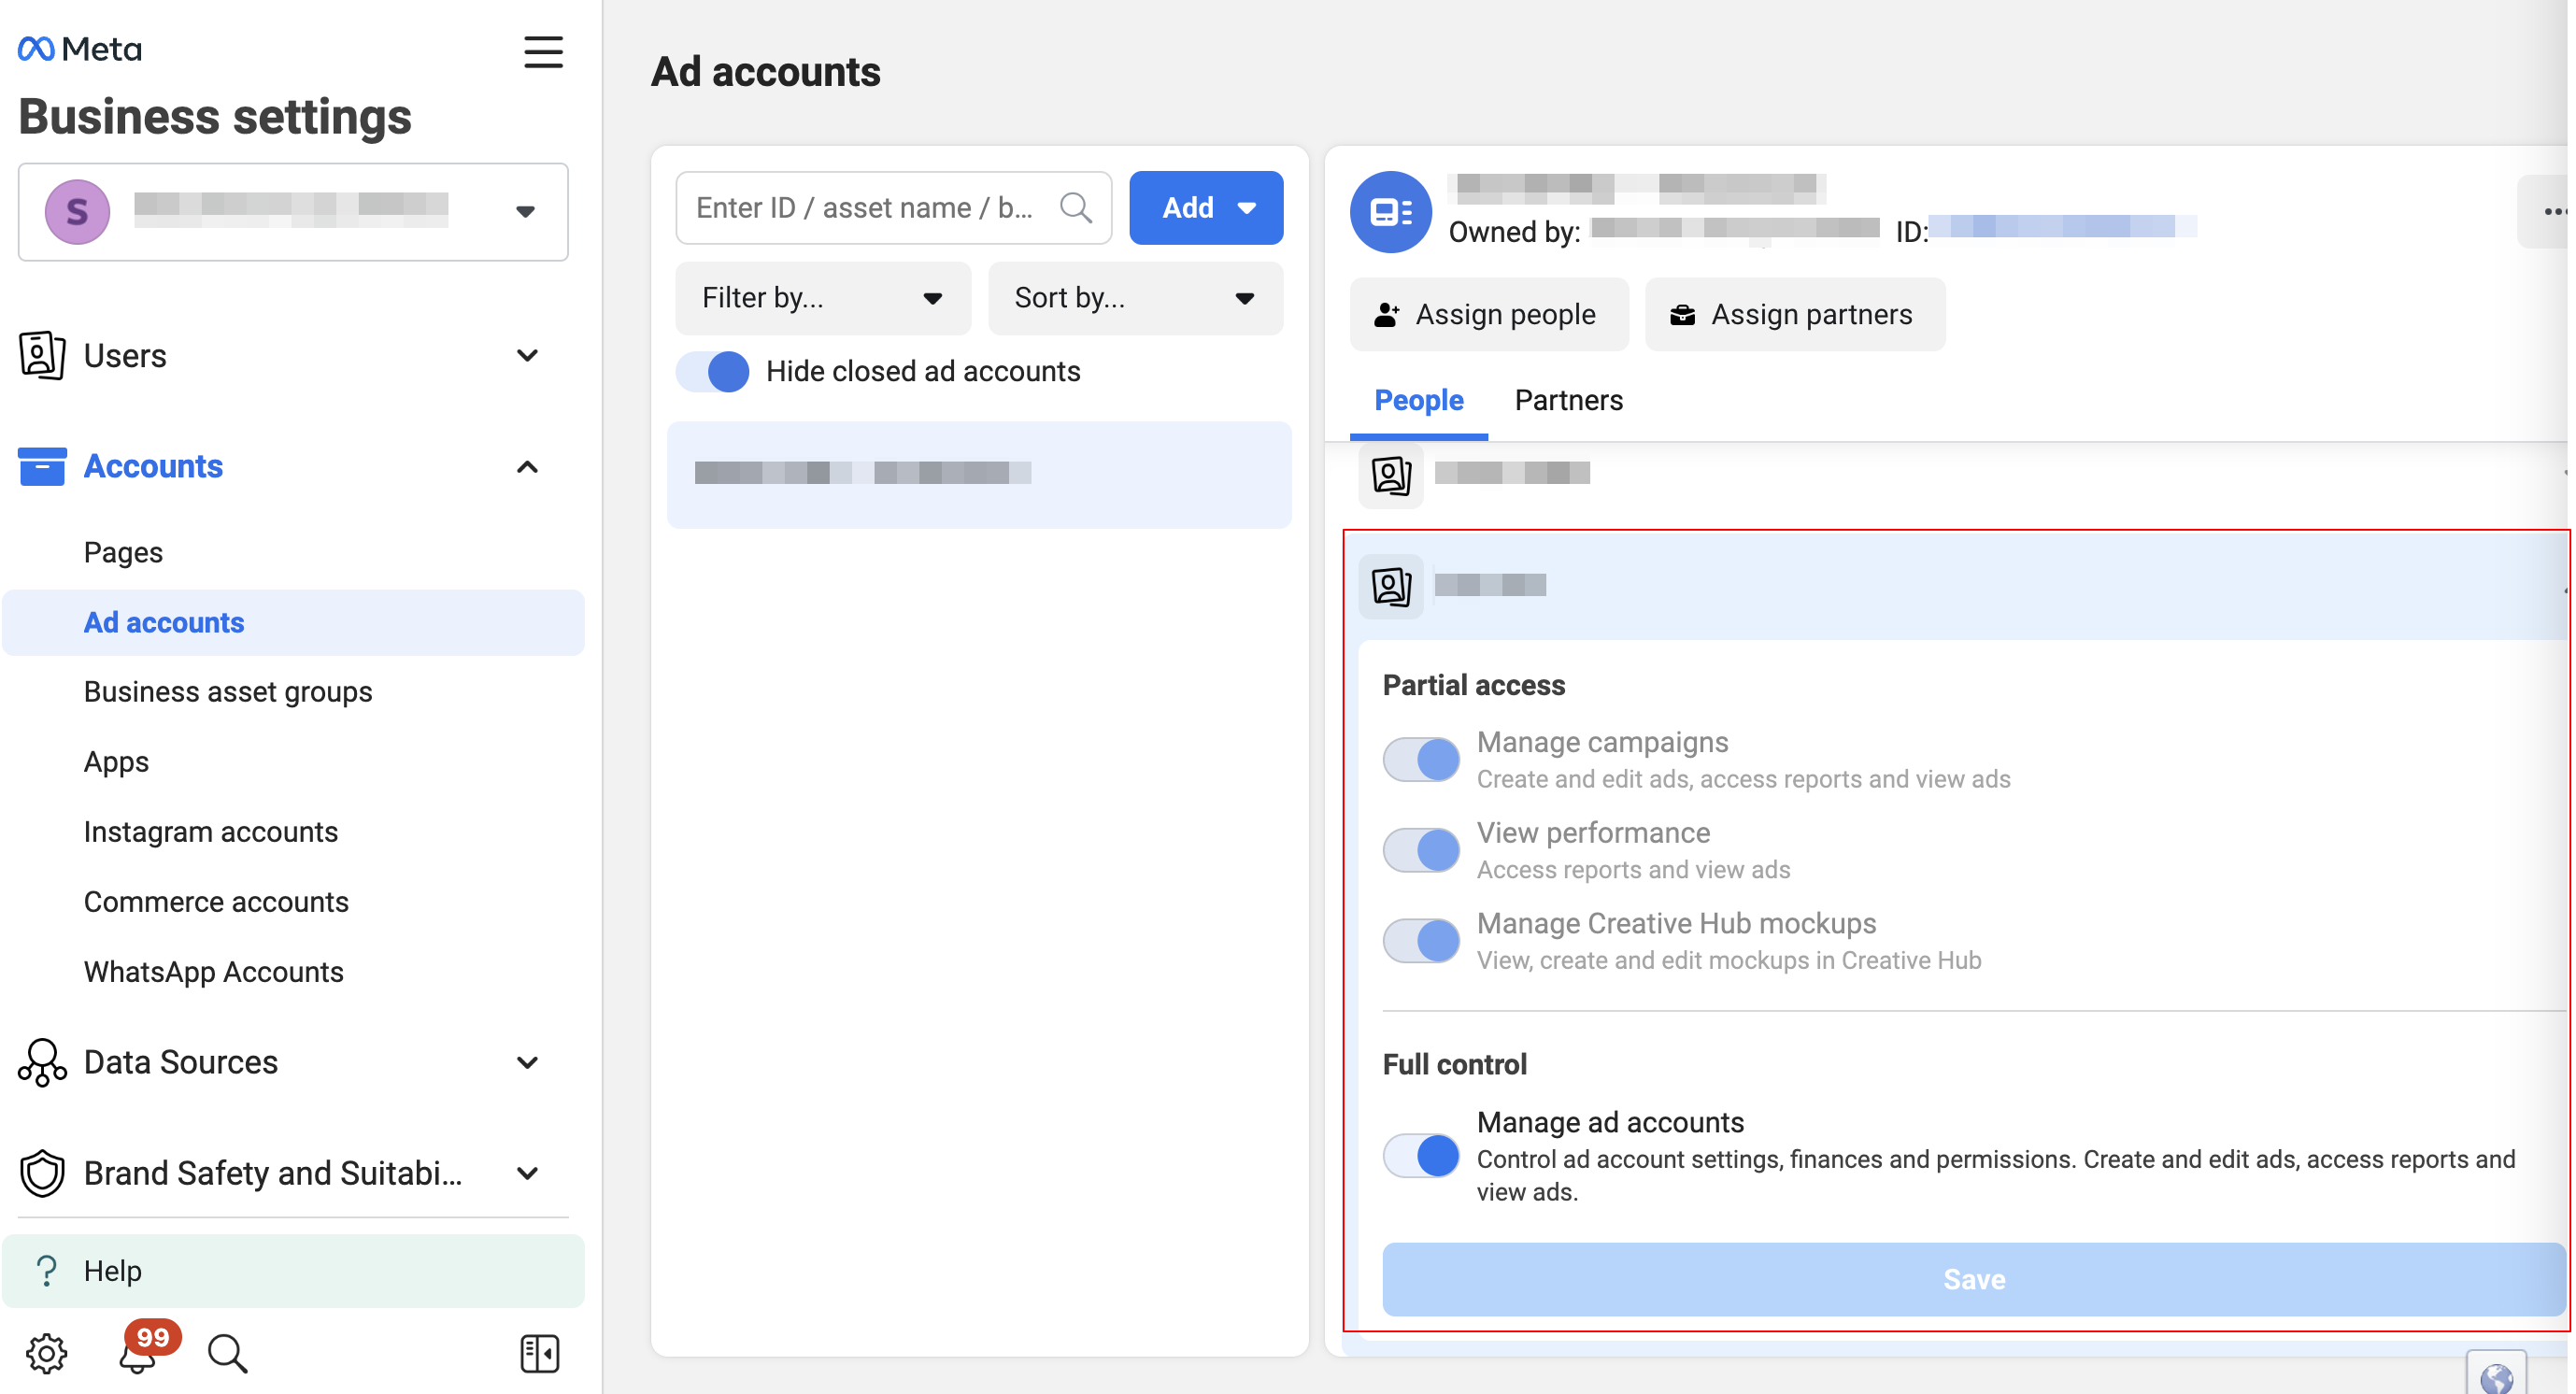
- Choose the Ad account to be connected to.
- For the conversion API, Meta will create a dataset in the evens manager, which is named after the name of the associated page.
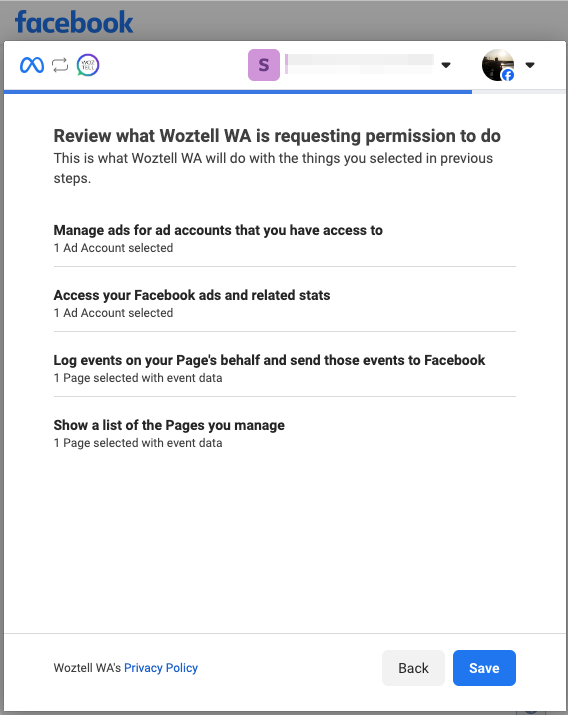
- Allow WOZTELL to have the following permissions.
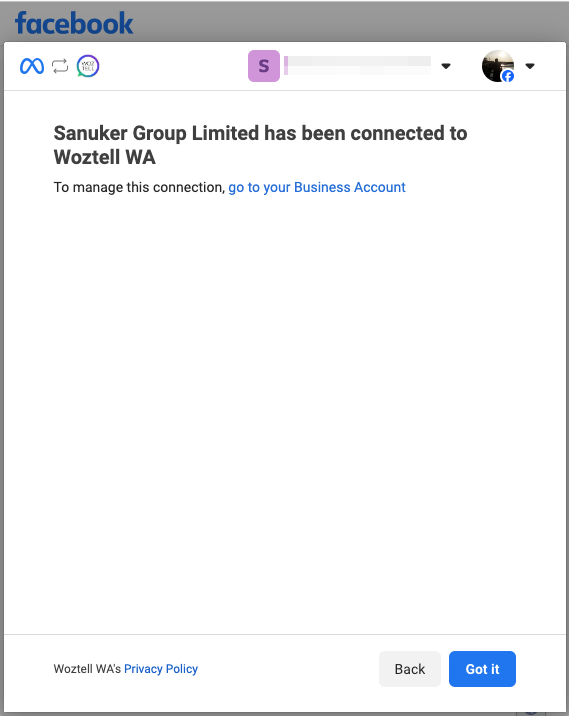
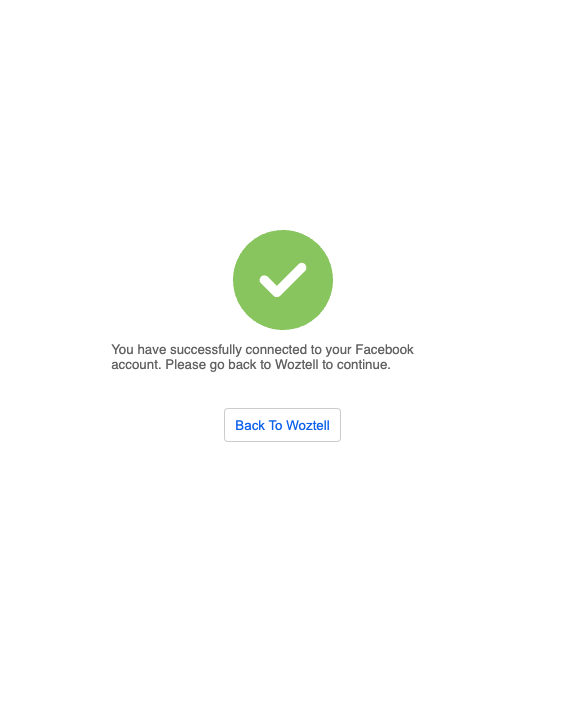
- Now WOZTELL has been connected to your business account.
- Click "Back to Woztell" to close the pop-up window.
Features
By allowing the Ads Permission, you are now enabled to make use of features related to CTWA and Conversion API.
CTWA Preview
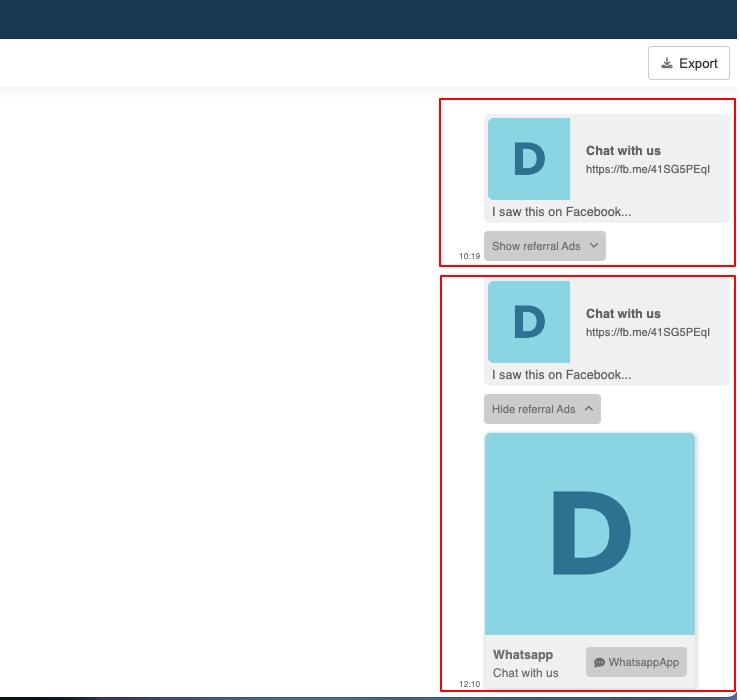
With the Ads Permission", the Click-to-WhatsApp Ad(CTWA) can be visualized in the conversation history in order to distinguish it from other kind of entry.
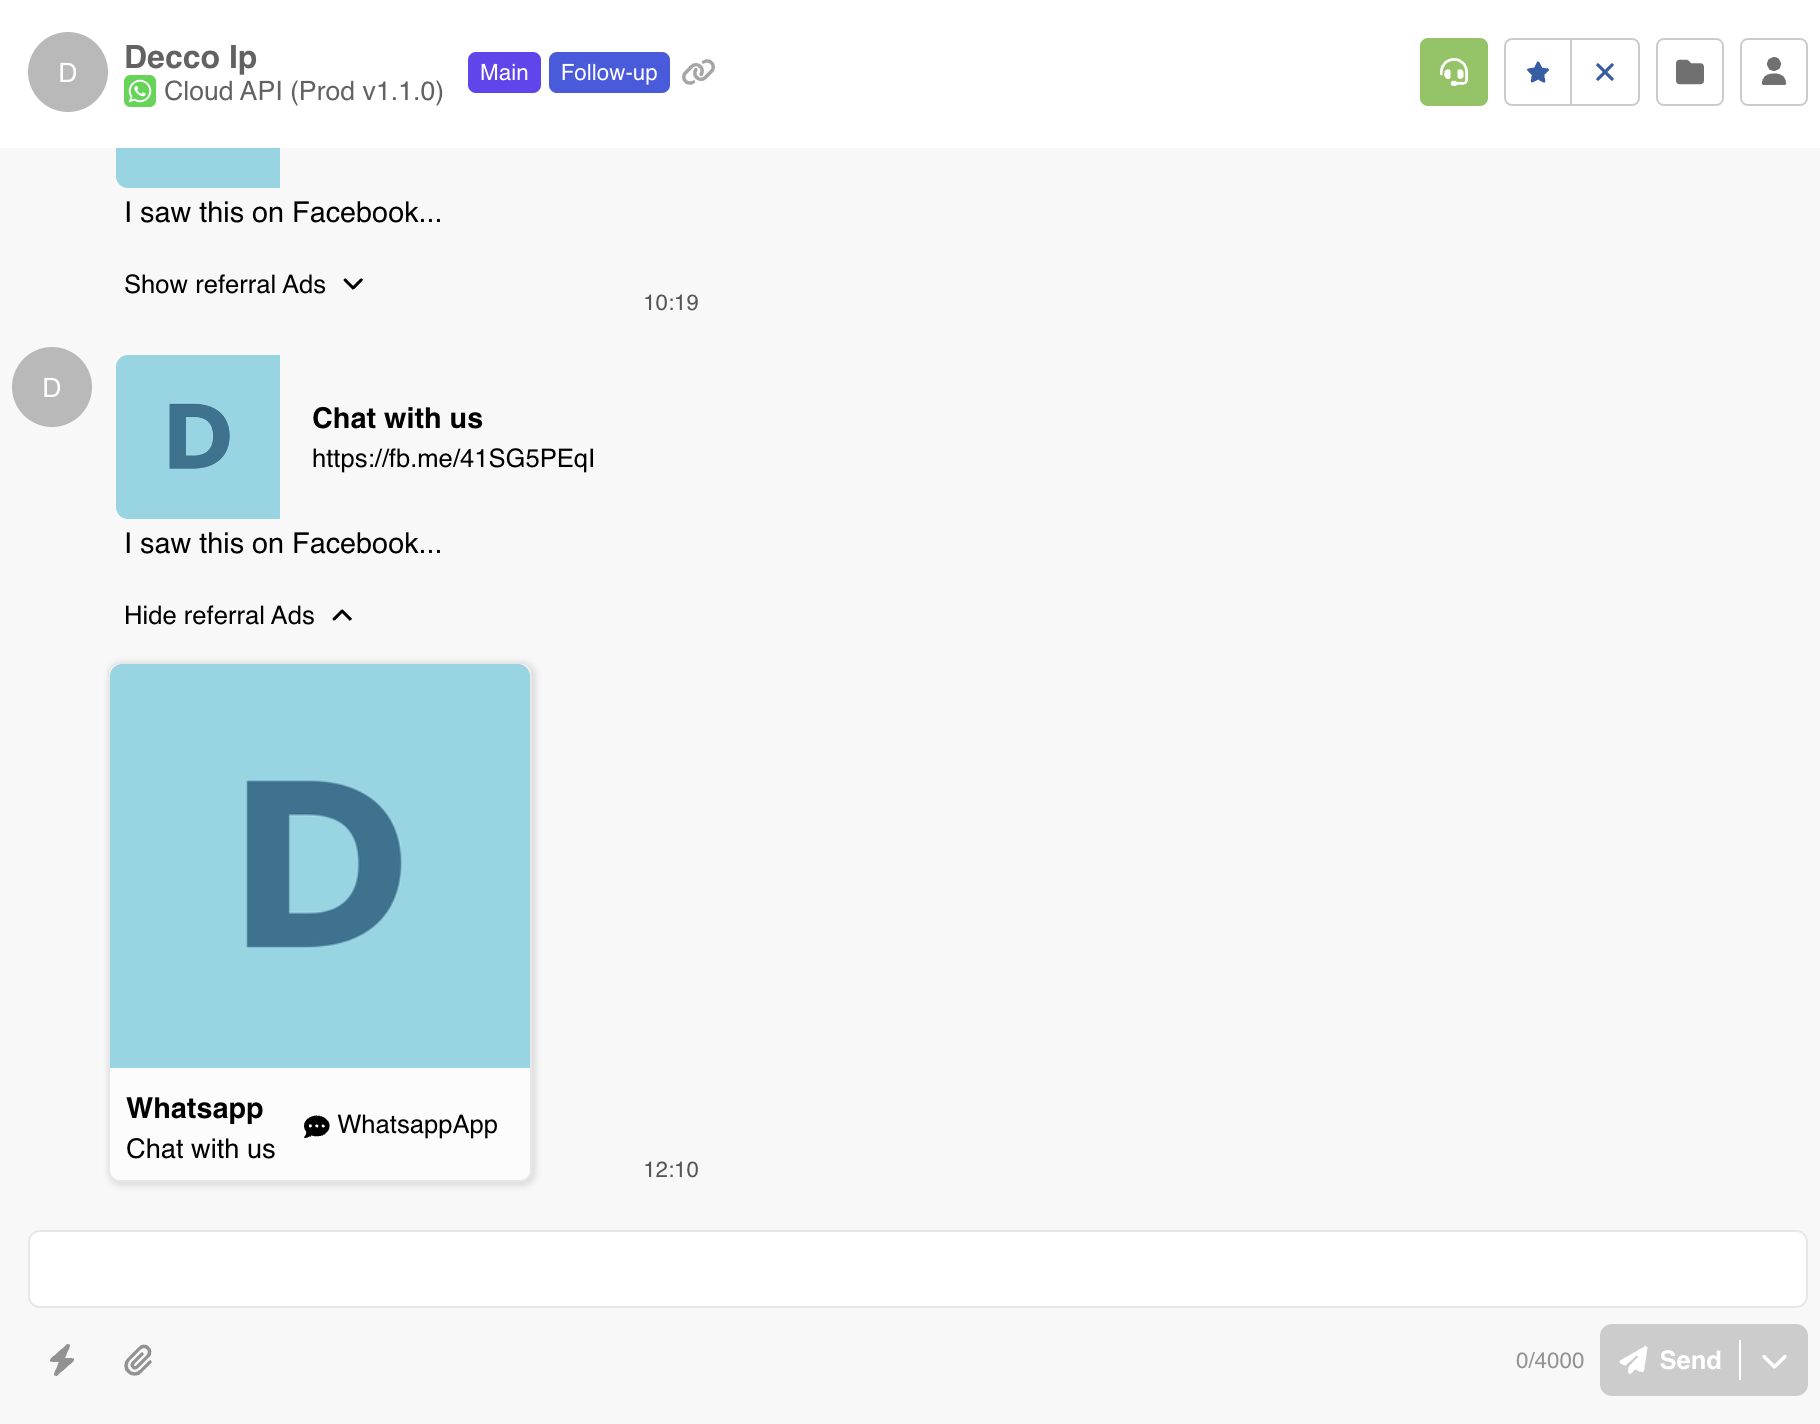
The Click-to-WhatsApp Ad(CTWA) can also be displayed in the inbox thread.
Ads Trigger
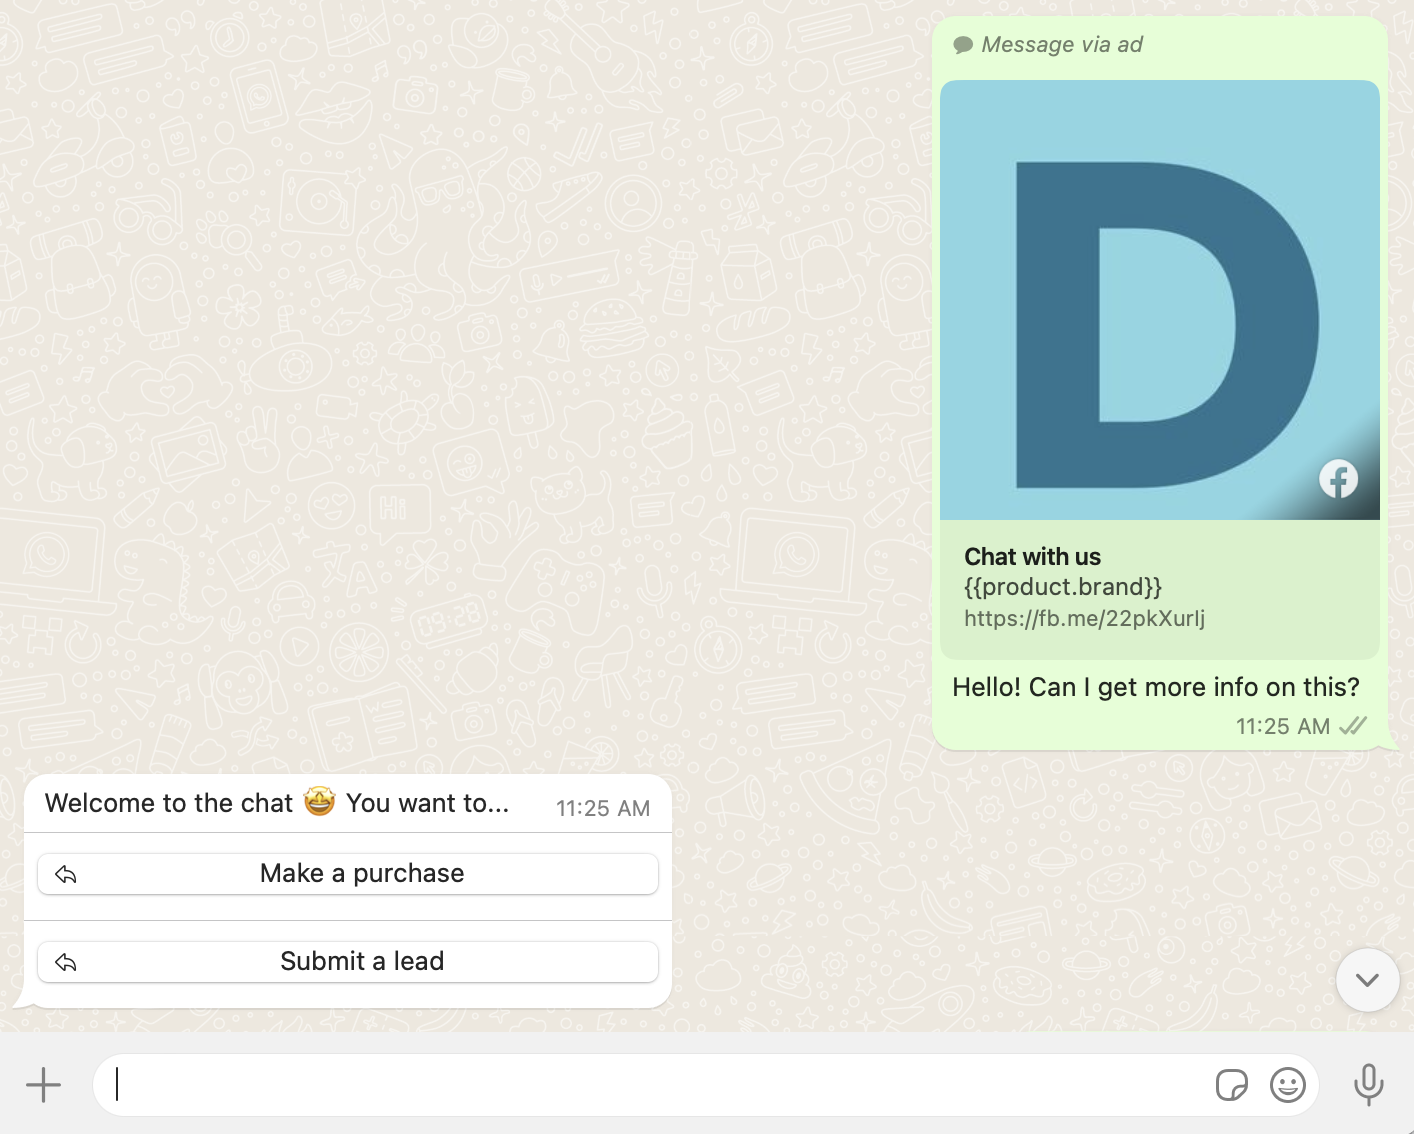
The Meta Ads Trigger allow you to create chatbot flow specifically for members who entered the conversation by CTWA. It is able to recognize entry via a "particular ad" or "any ads". On top of that, you can also add keyword groups to the trigger.
NOTE
If you set up the Ads Trigger without any keyword group, it will be triggered by any user input, if that member is associated with an ad.
Create Trigger
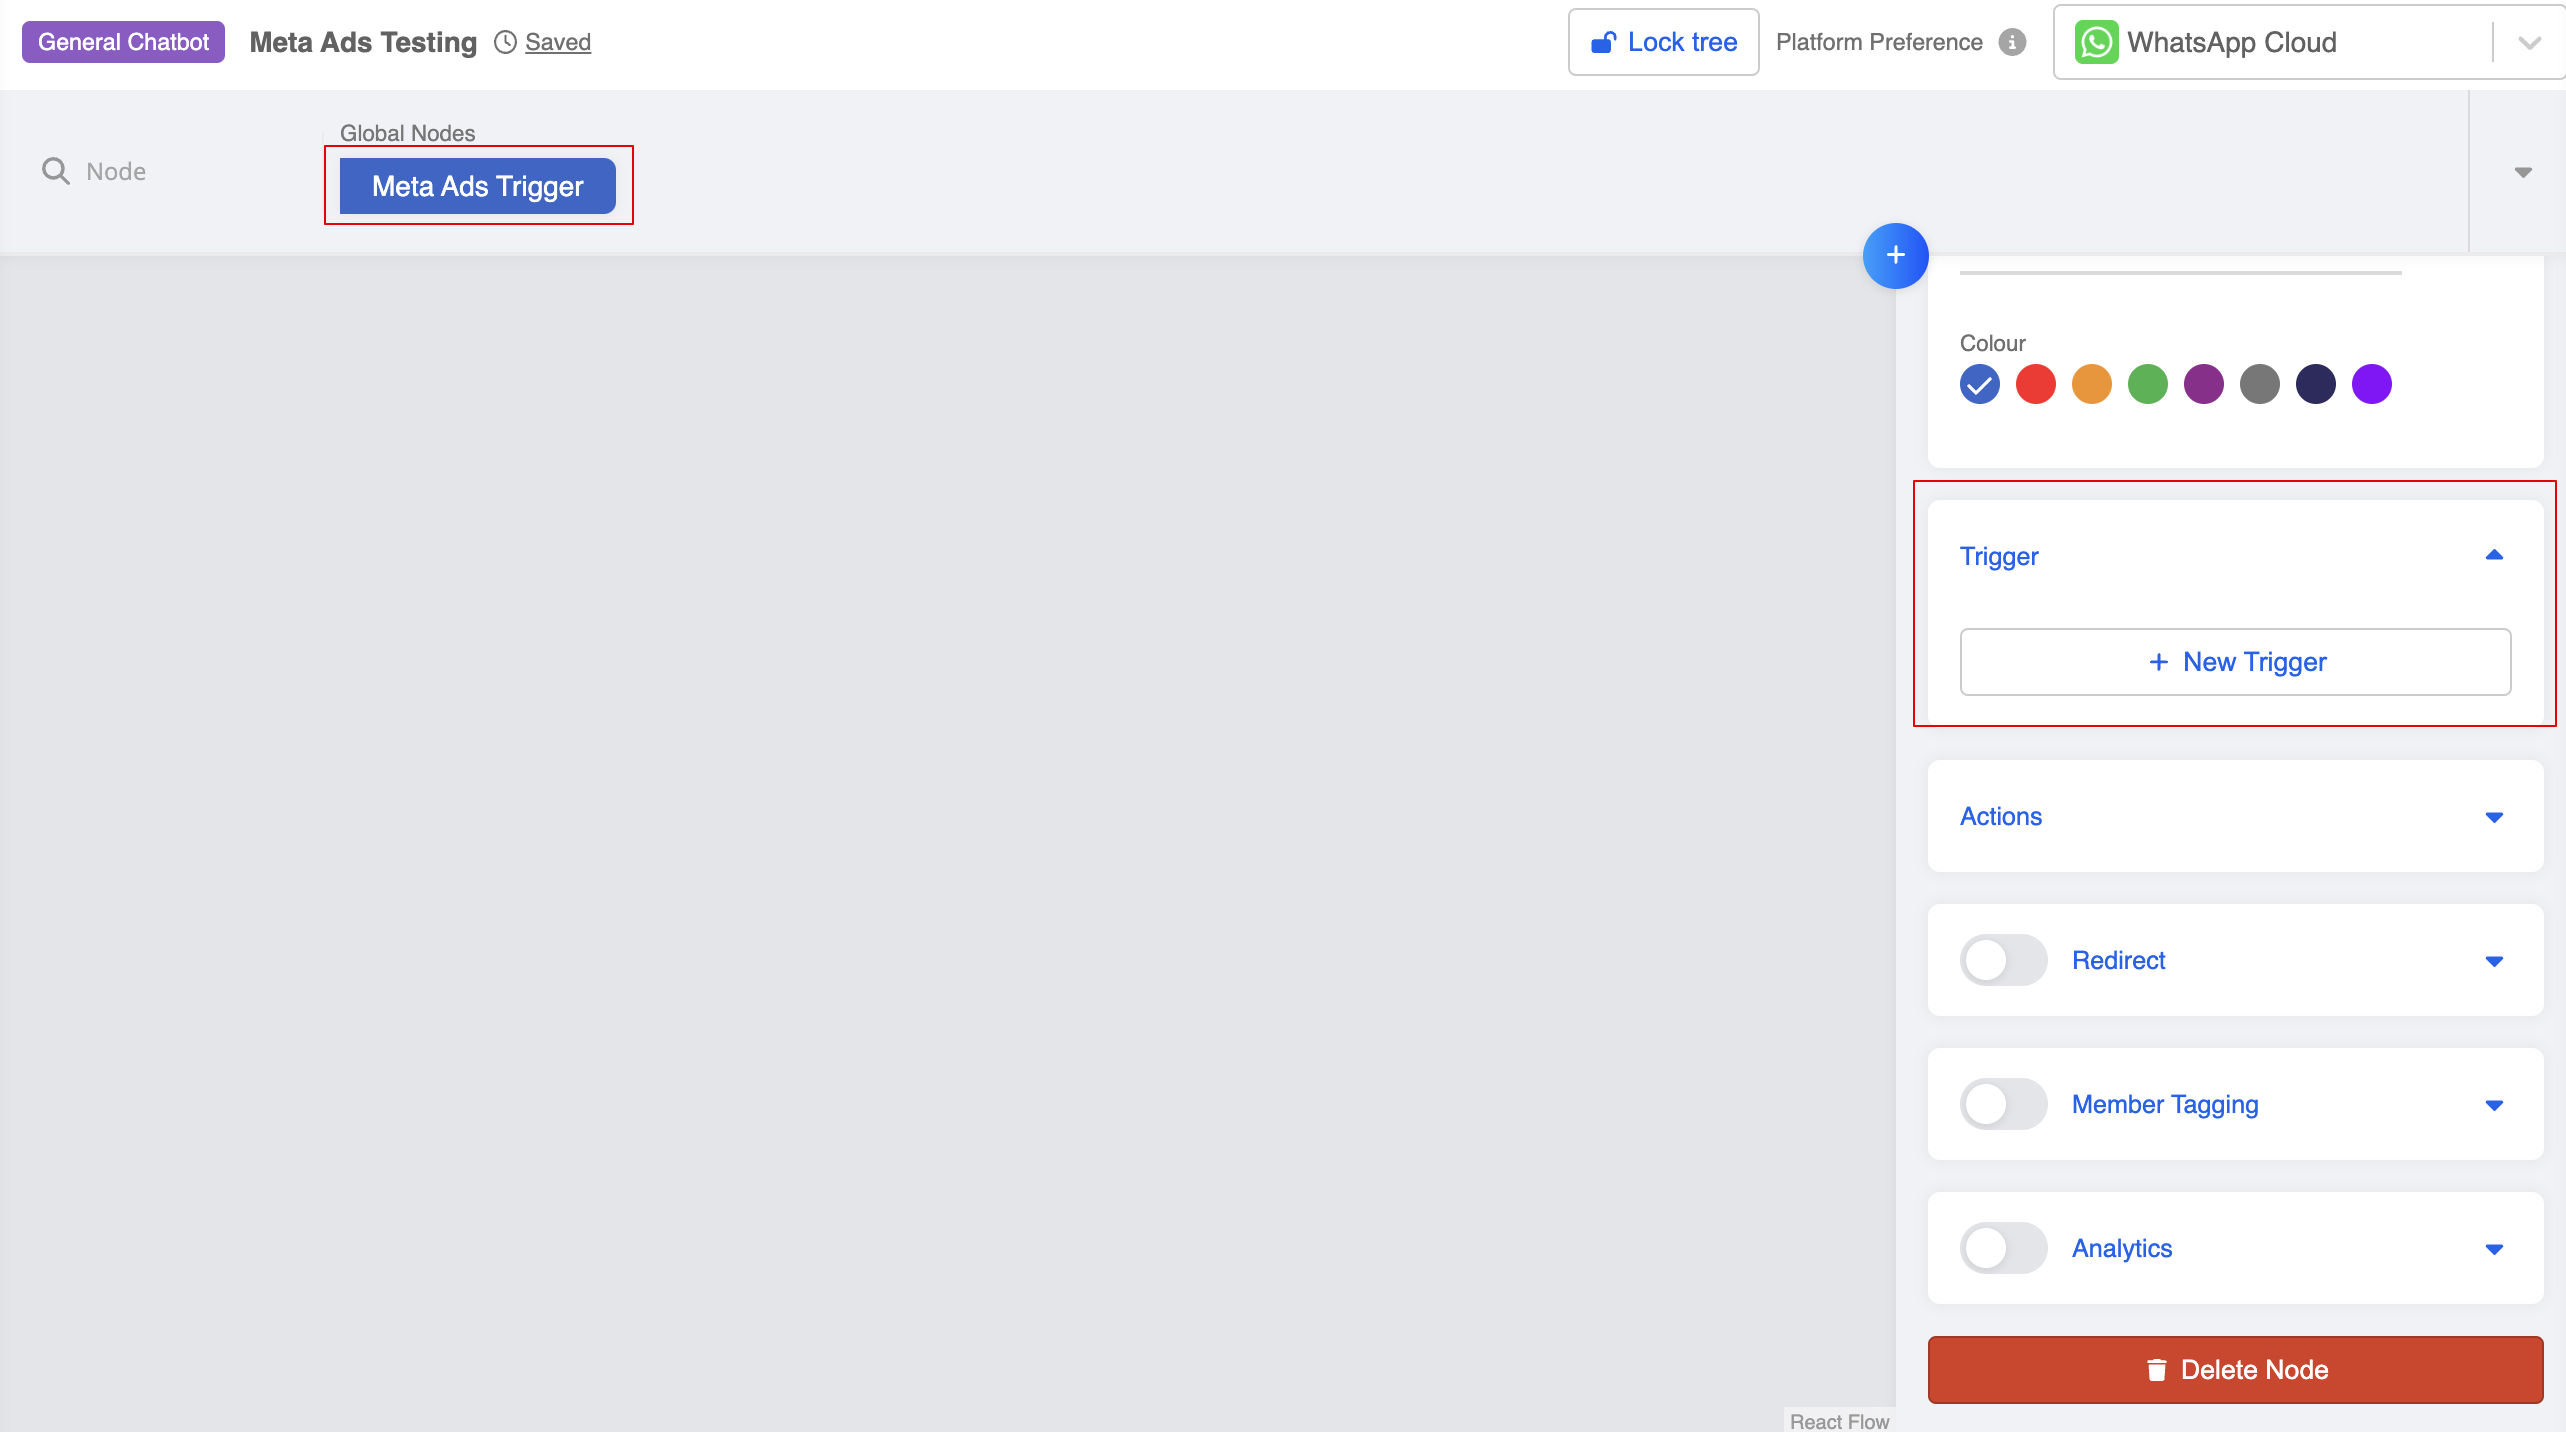
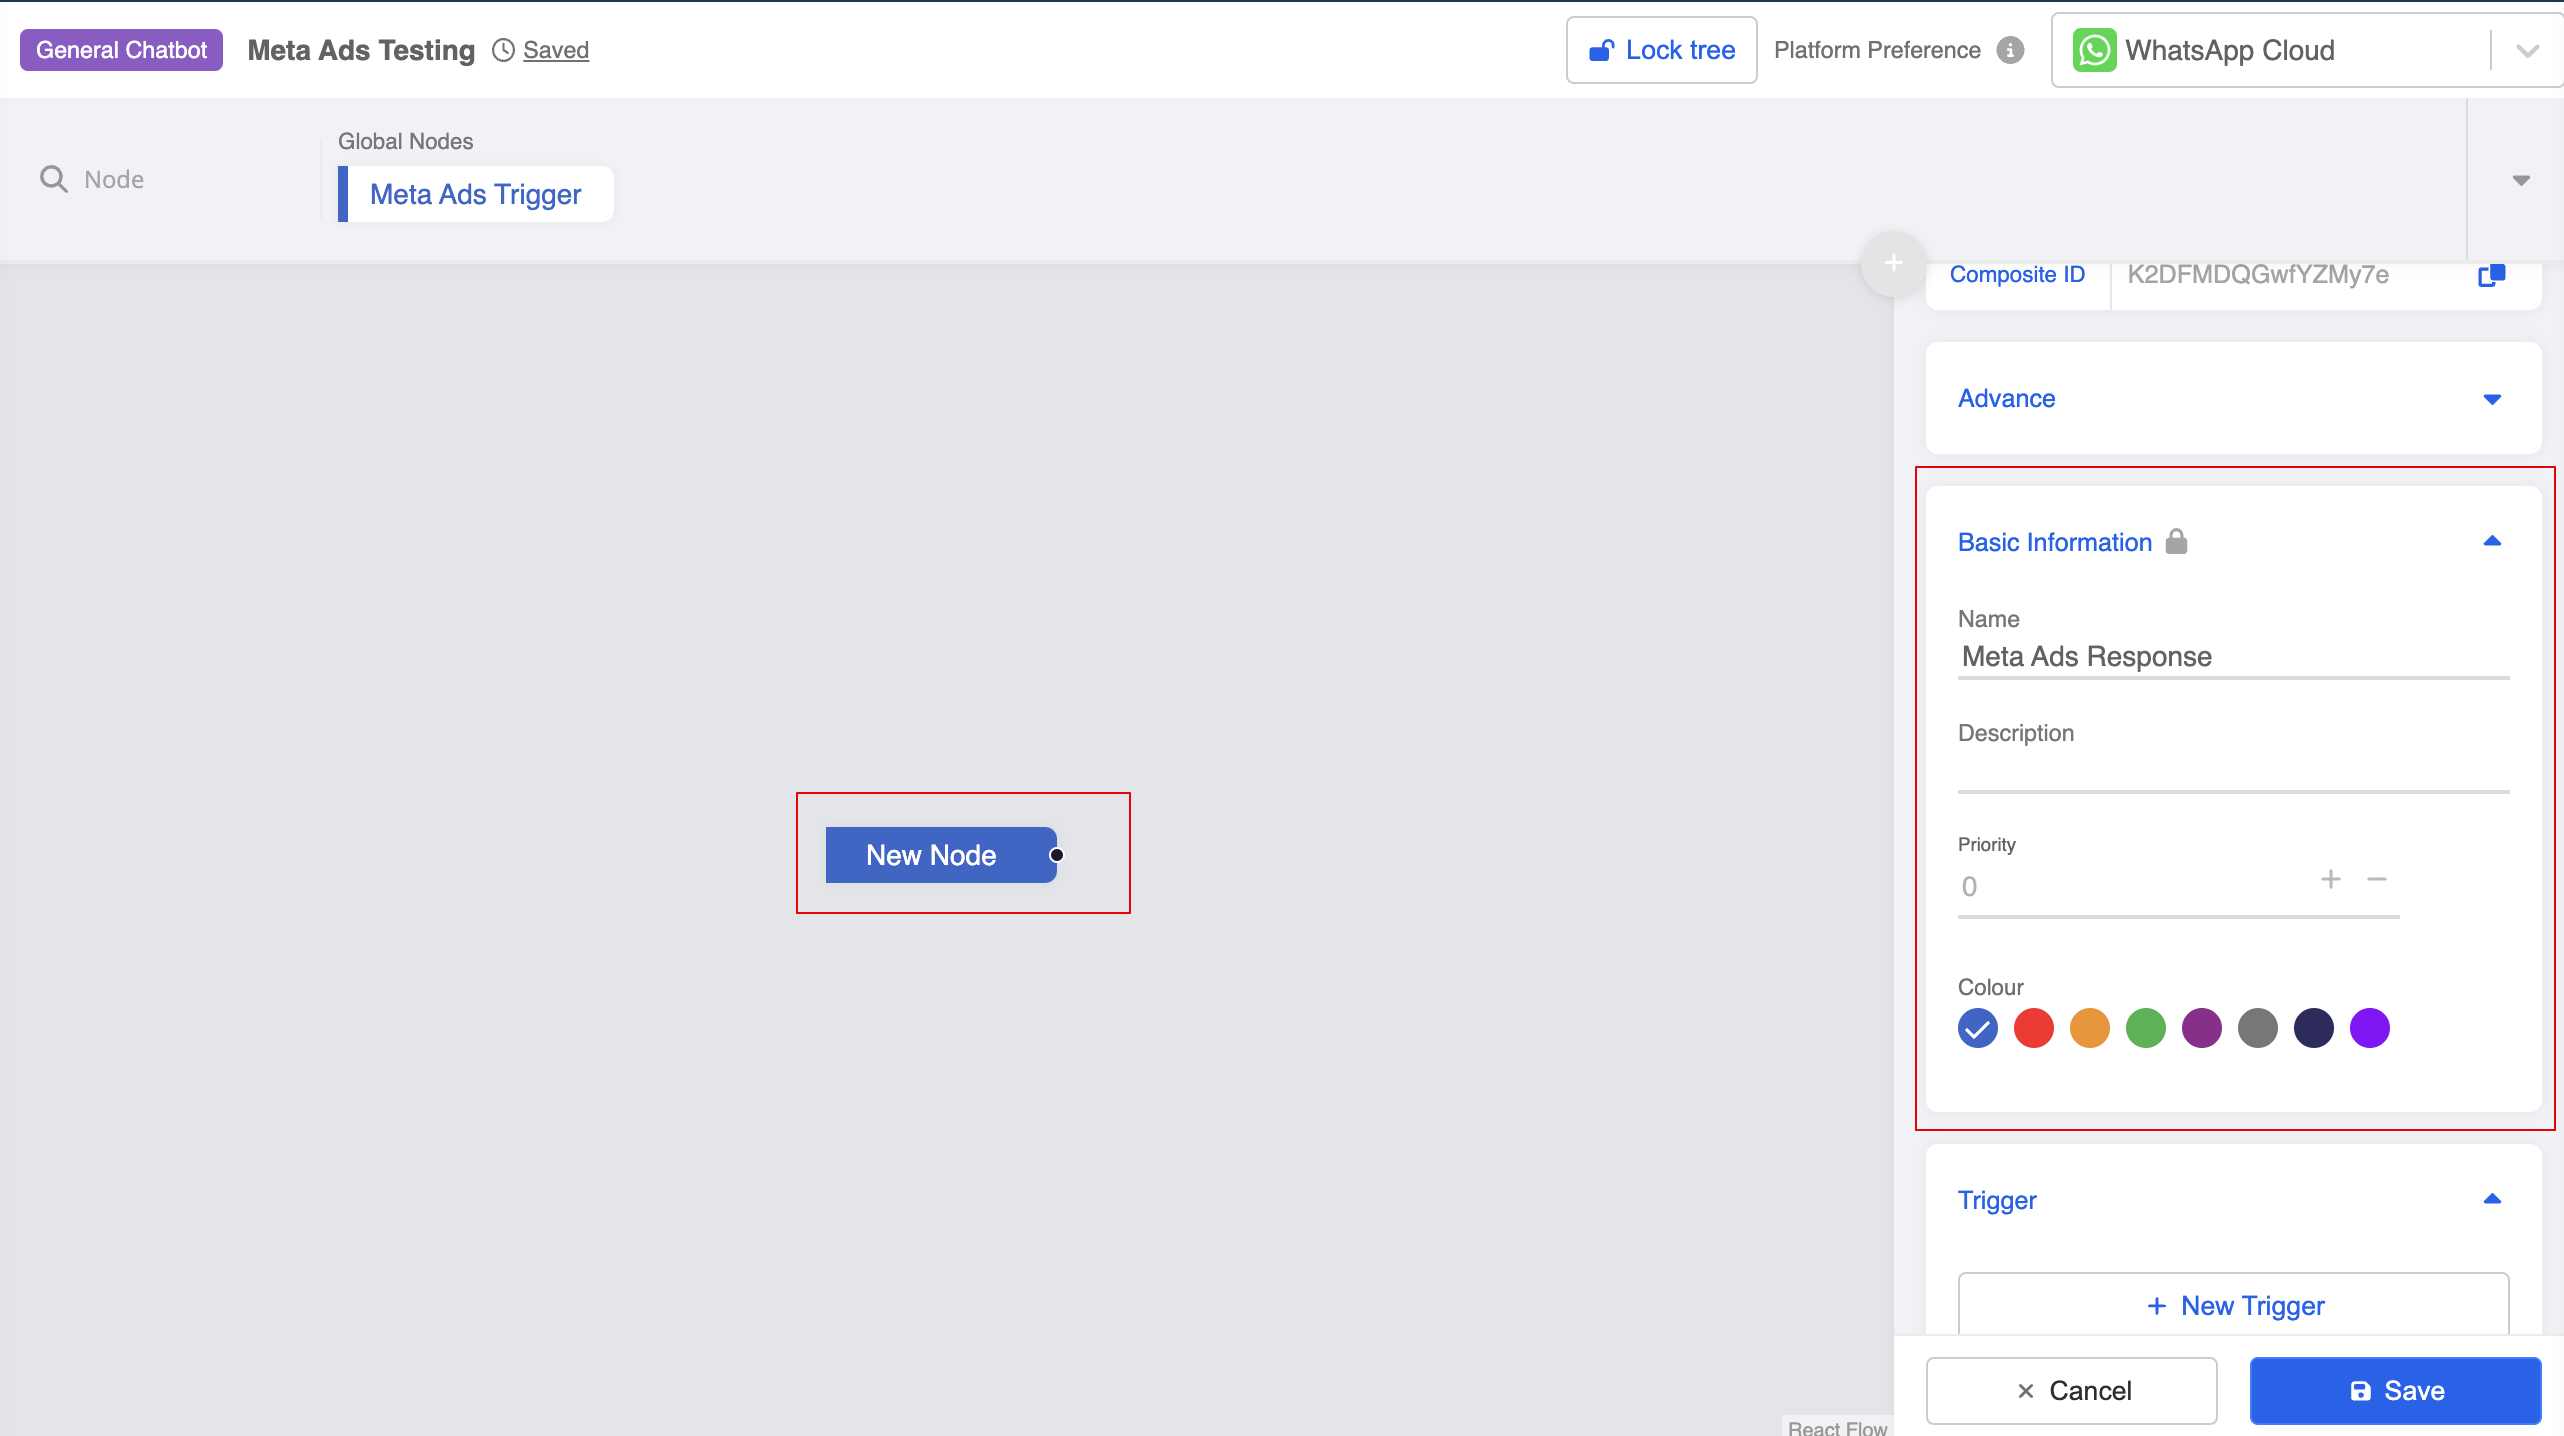
- First, create a global node.
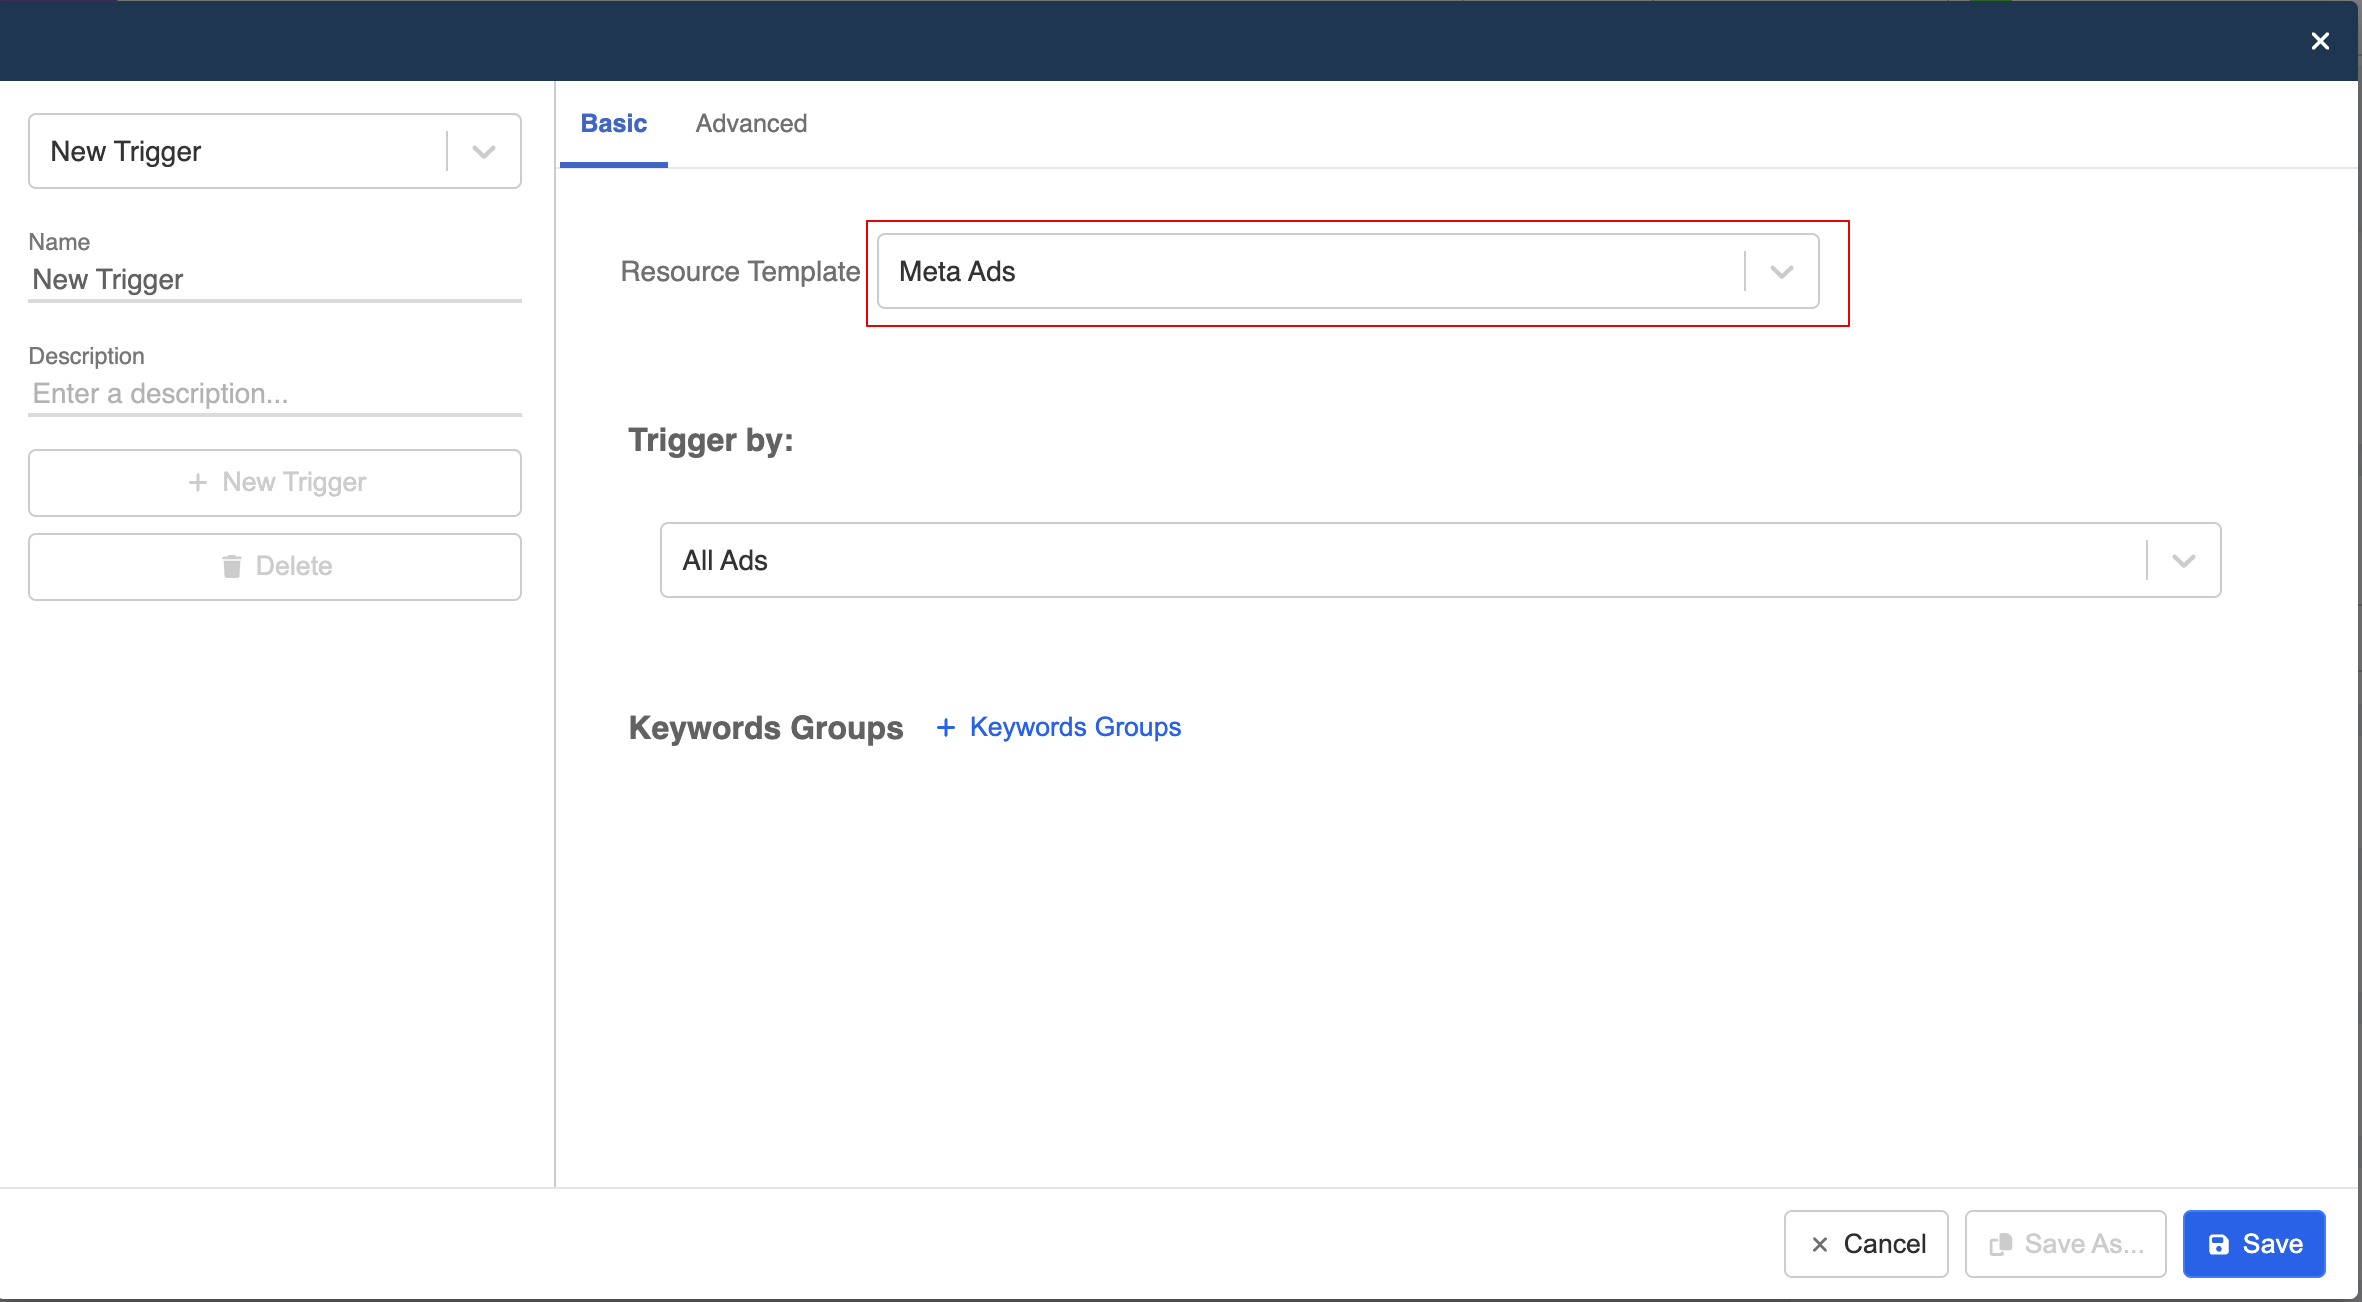
- Create a new trigger and select Meta Ads Trigger.
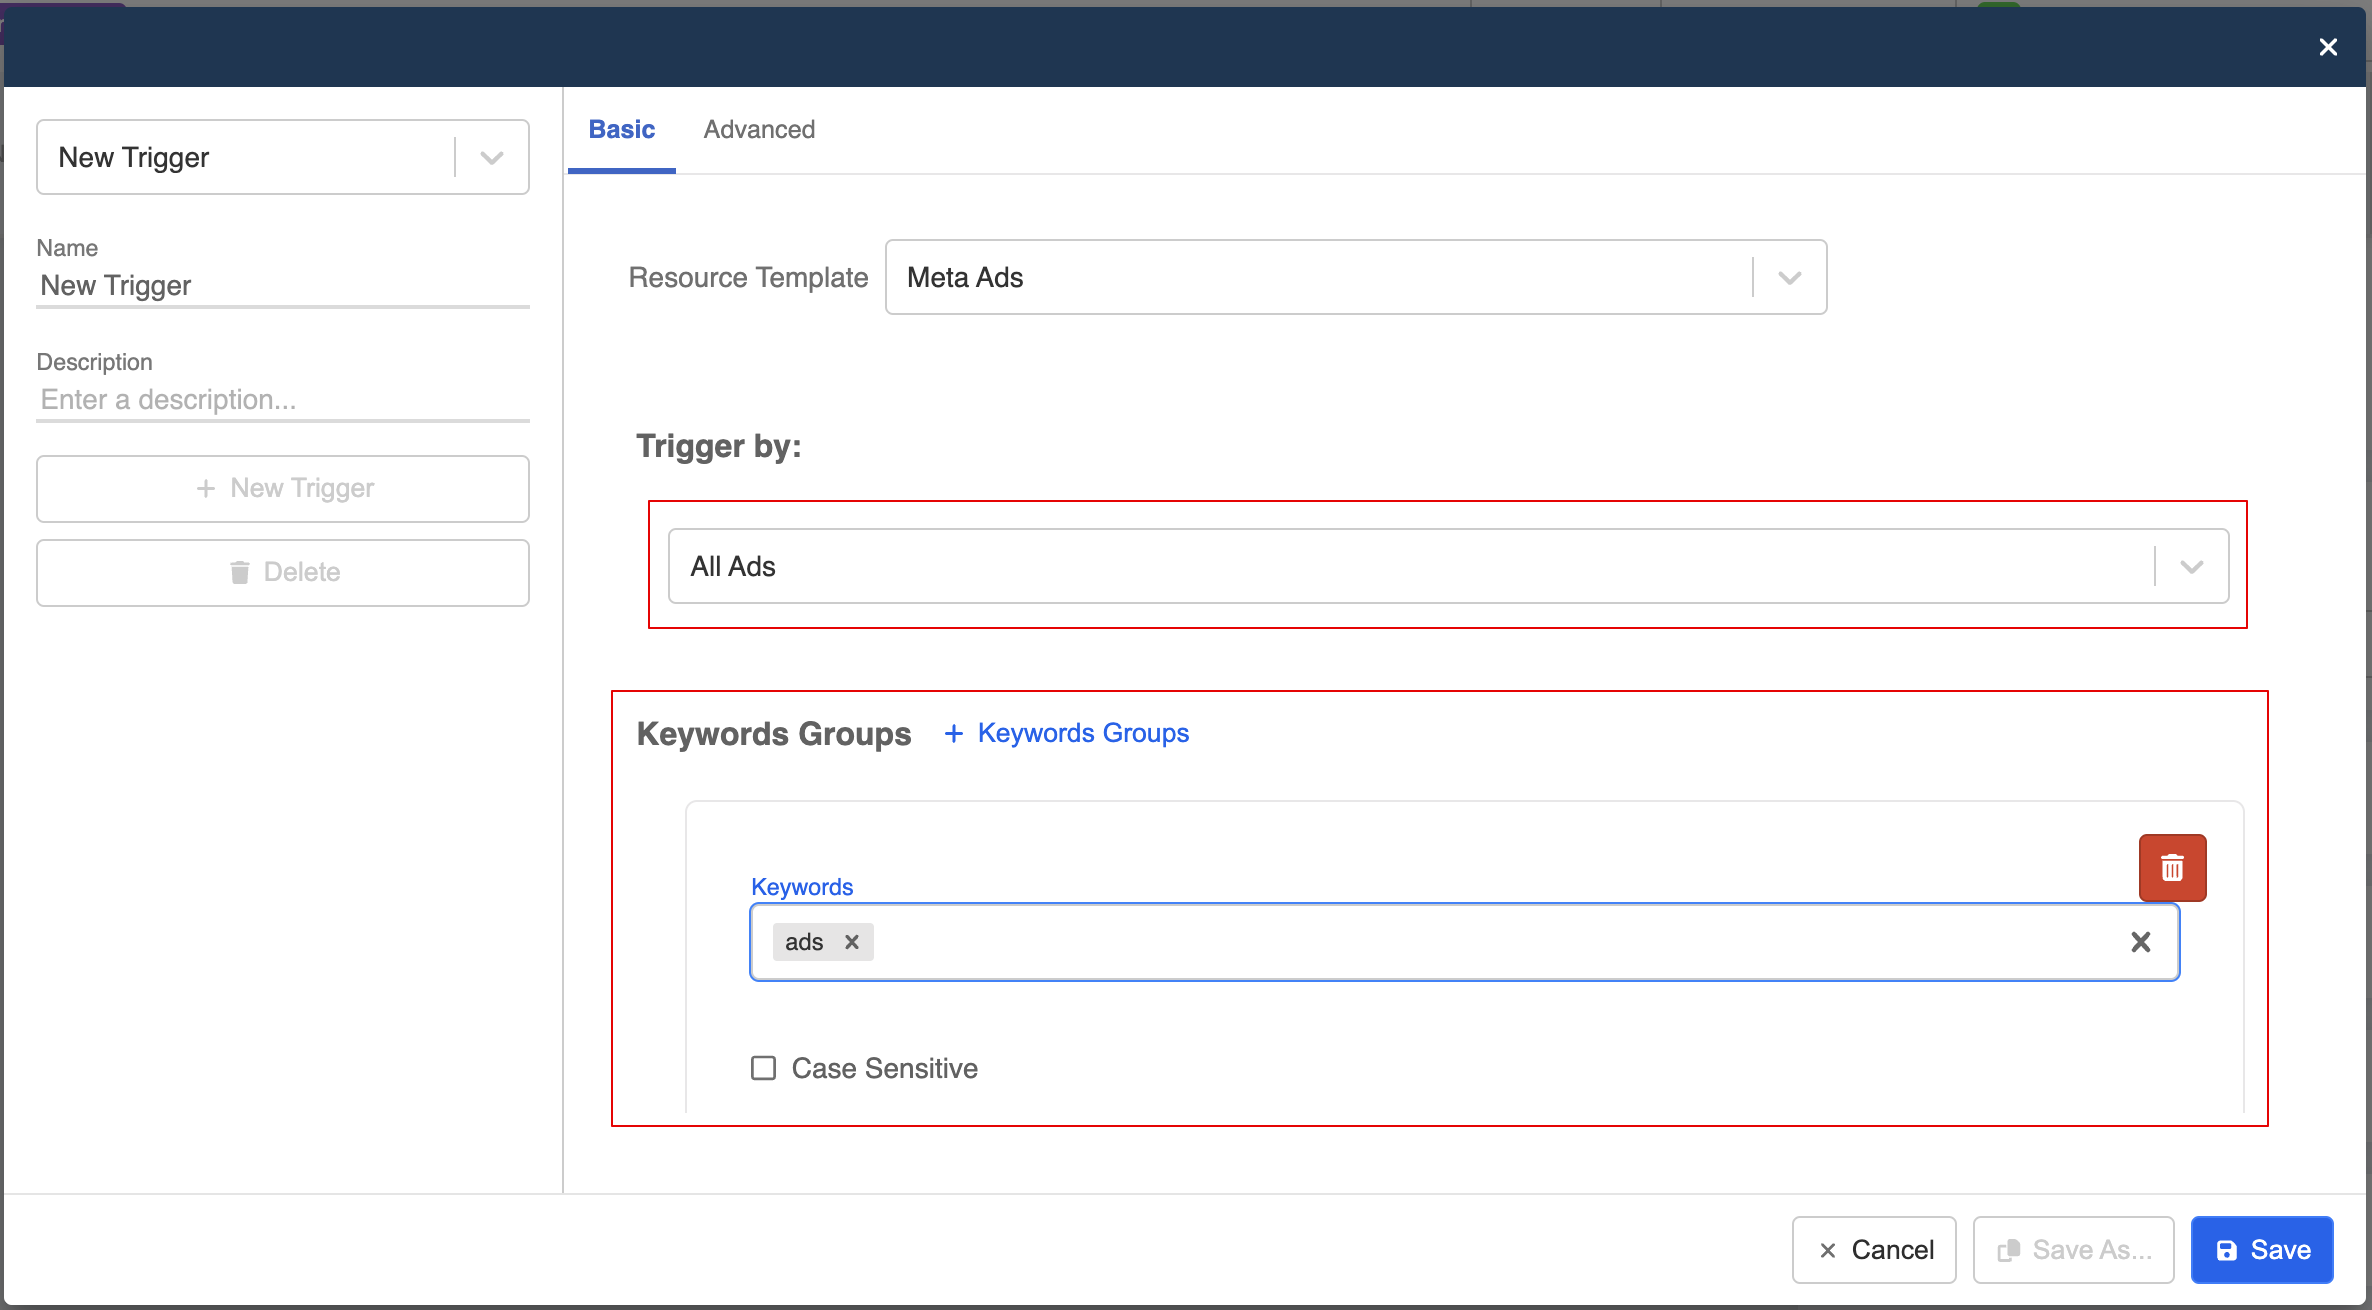
- You can add keyword to the trigger.
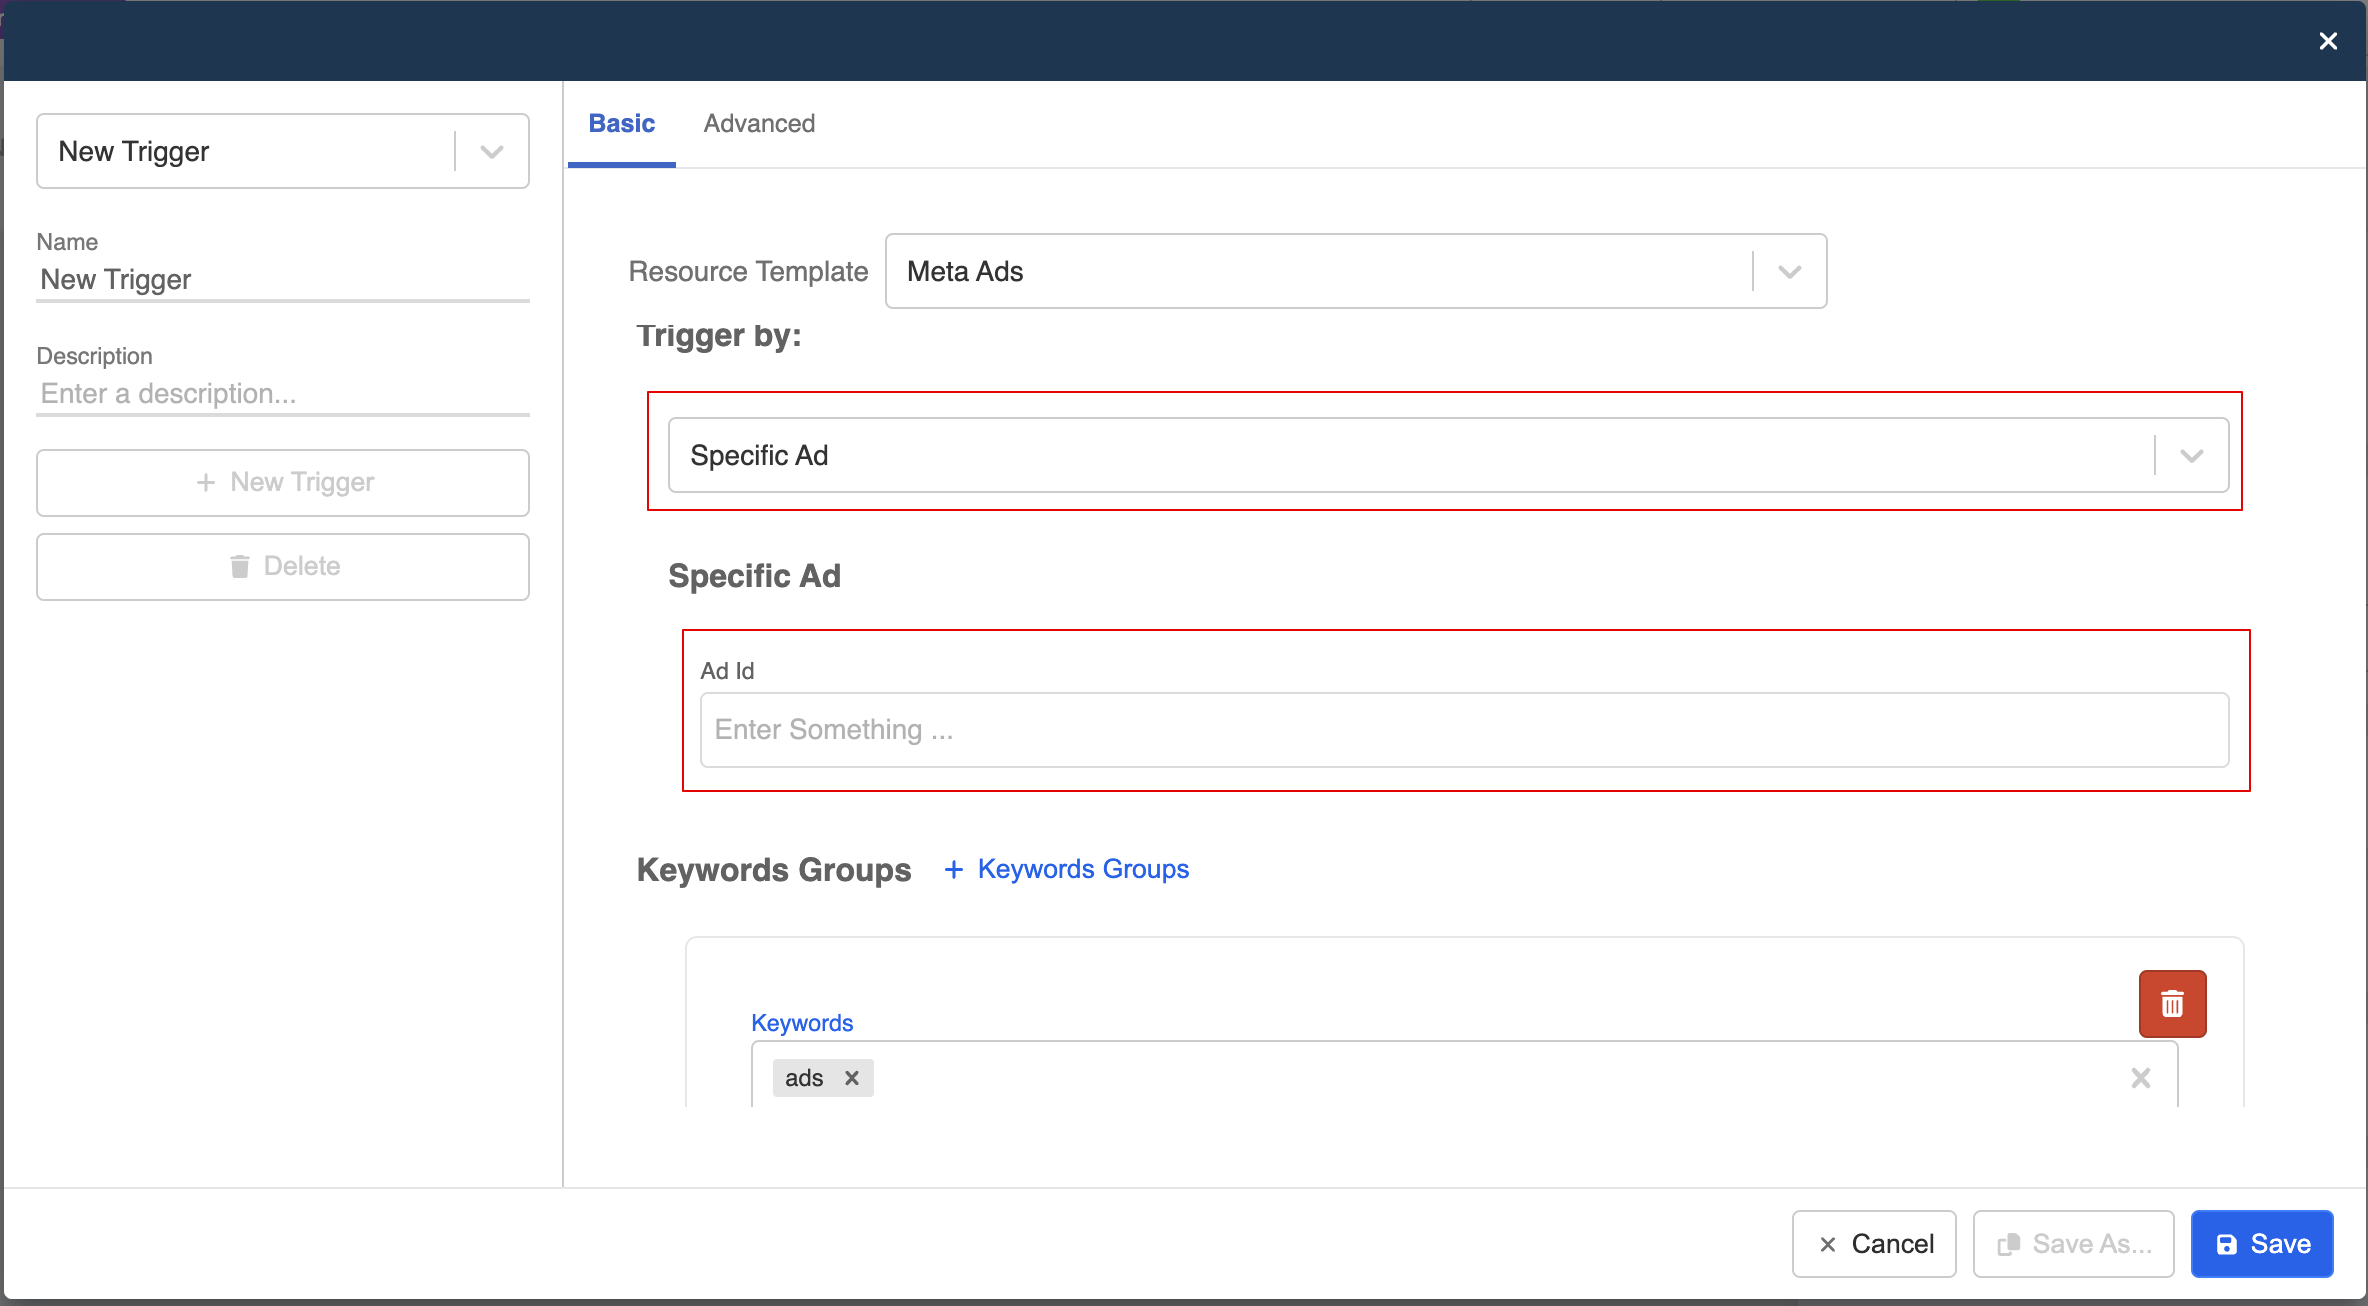
- Besides, you can decide if the chatbot is triggered by All Ads or Specific Ads with the corresponding Ad ID.
Create Response
- To place the response, create a general node.
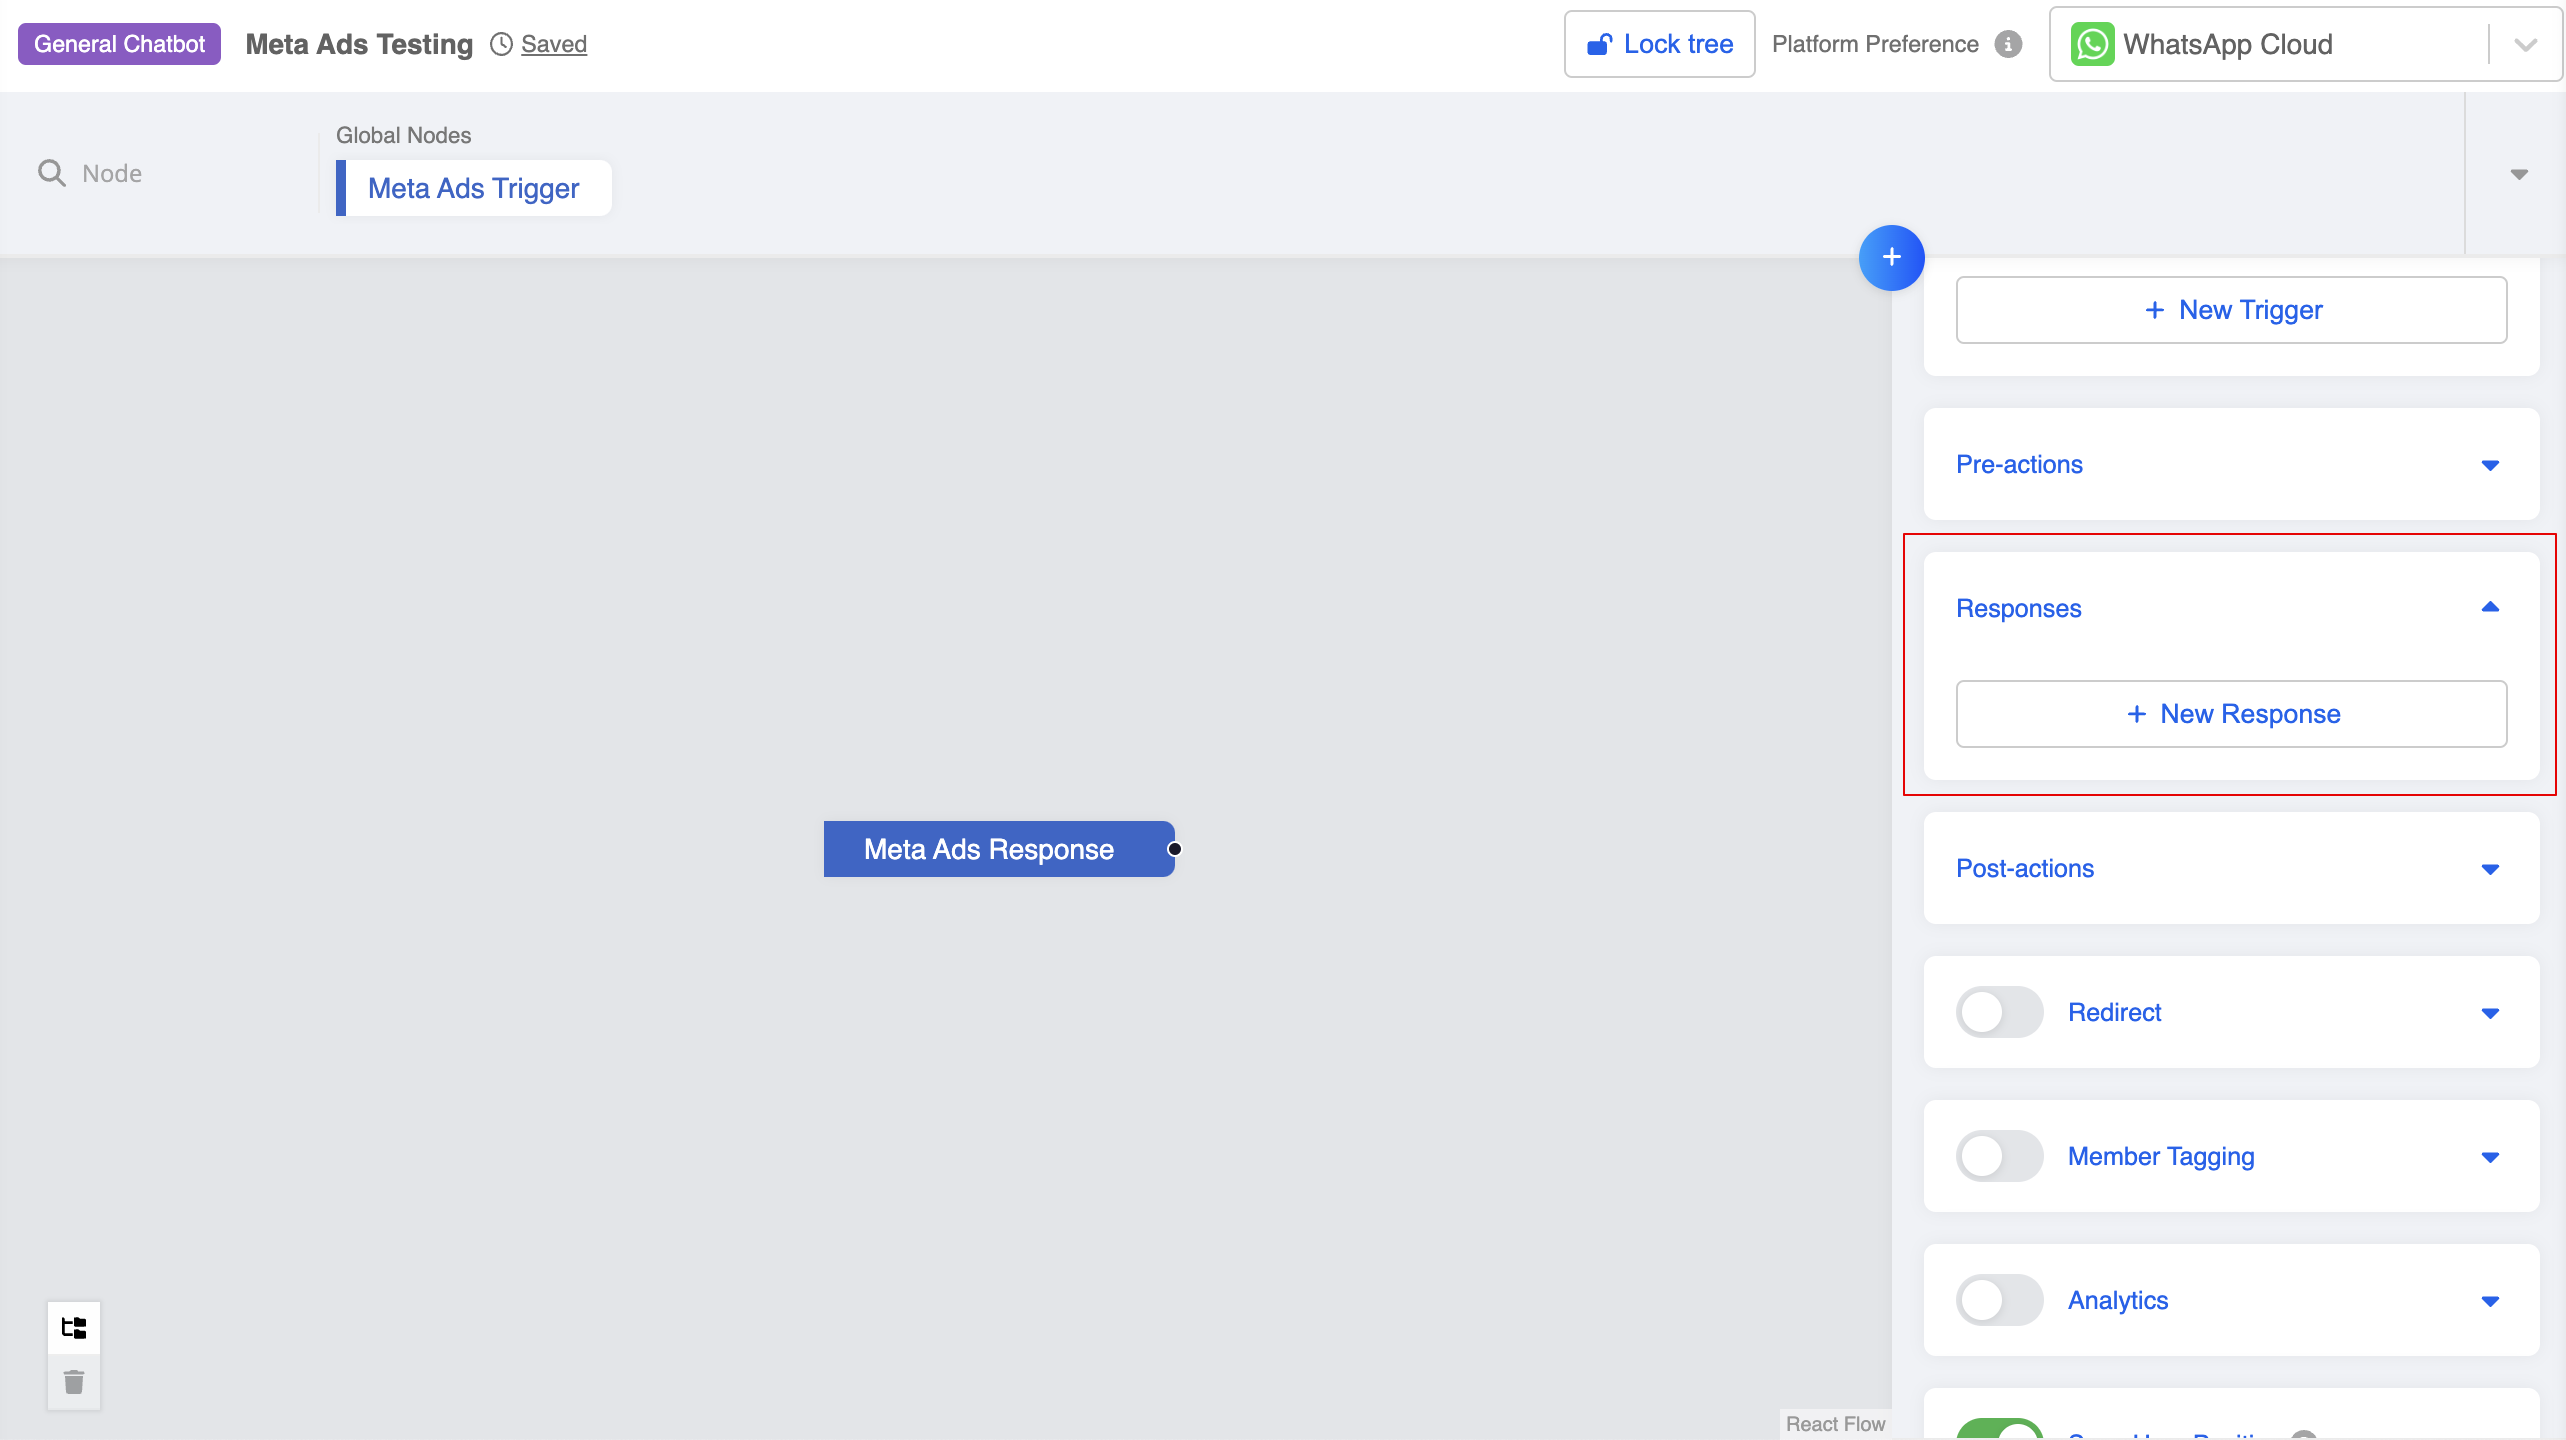
- Create a new response.
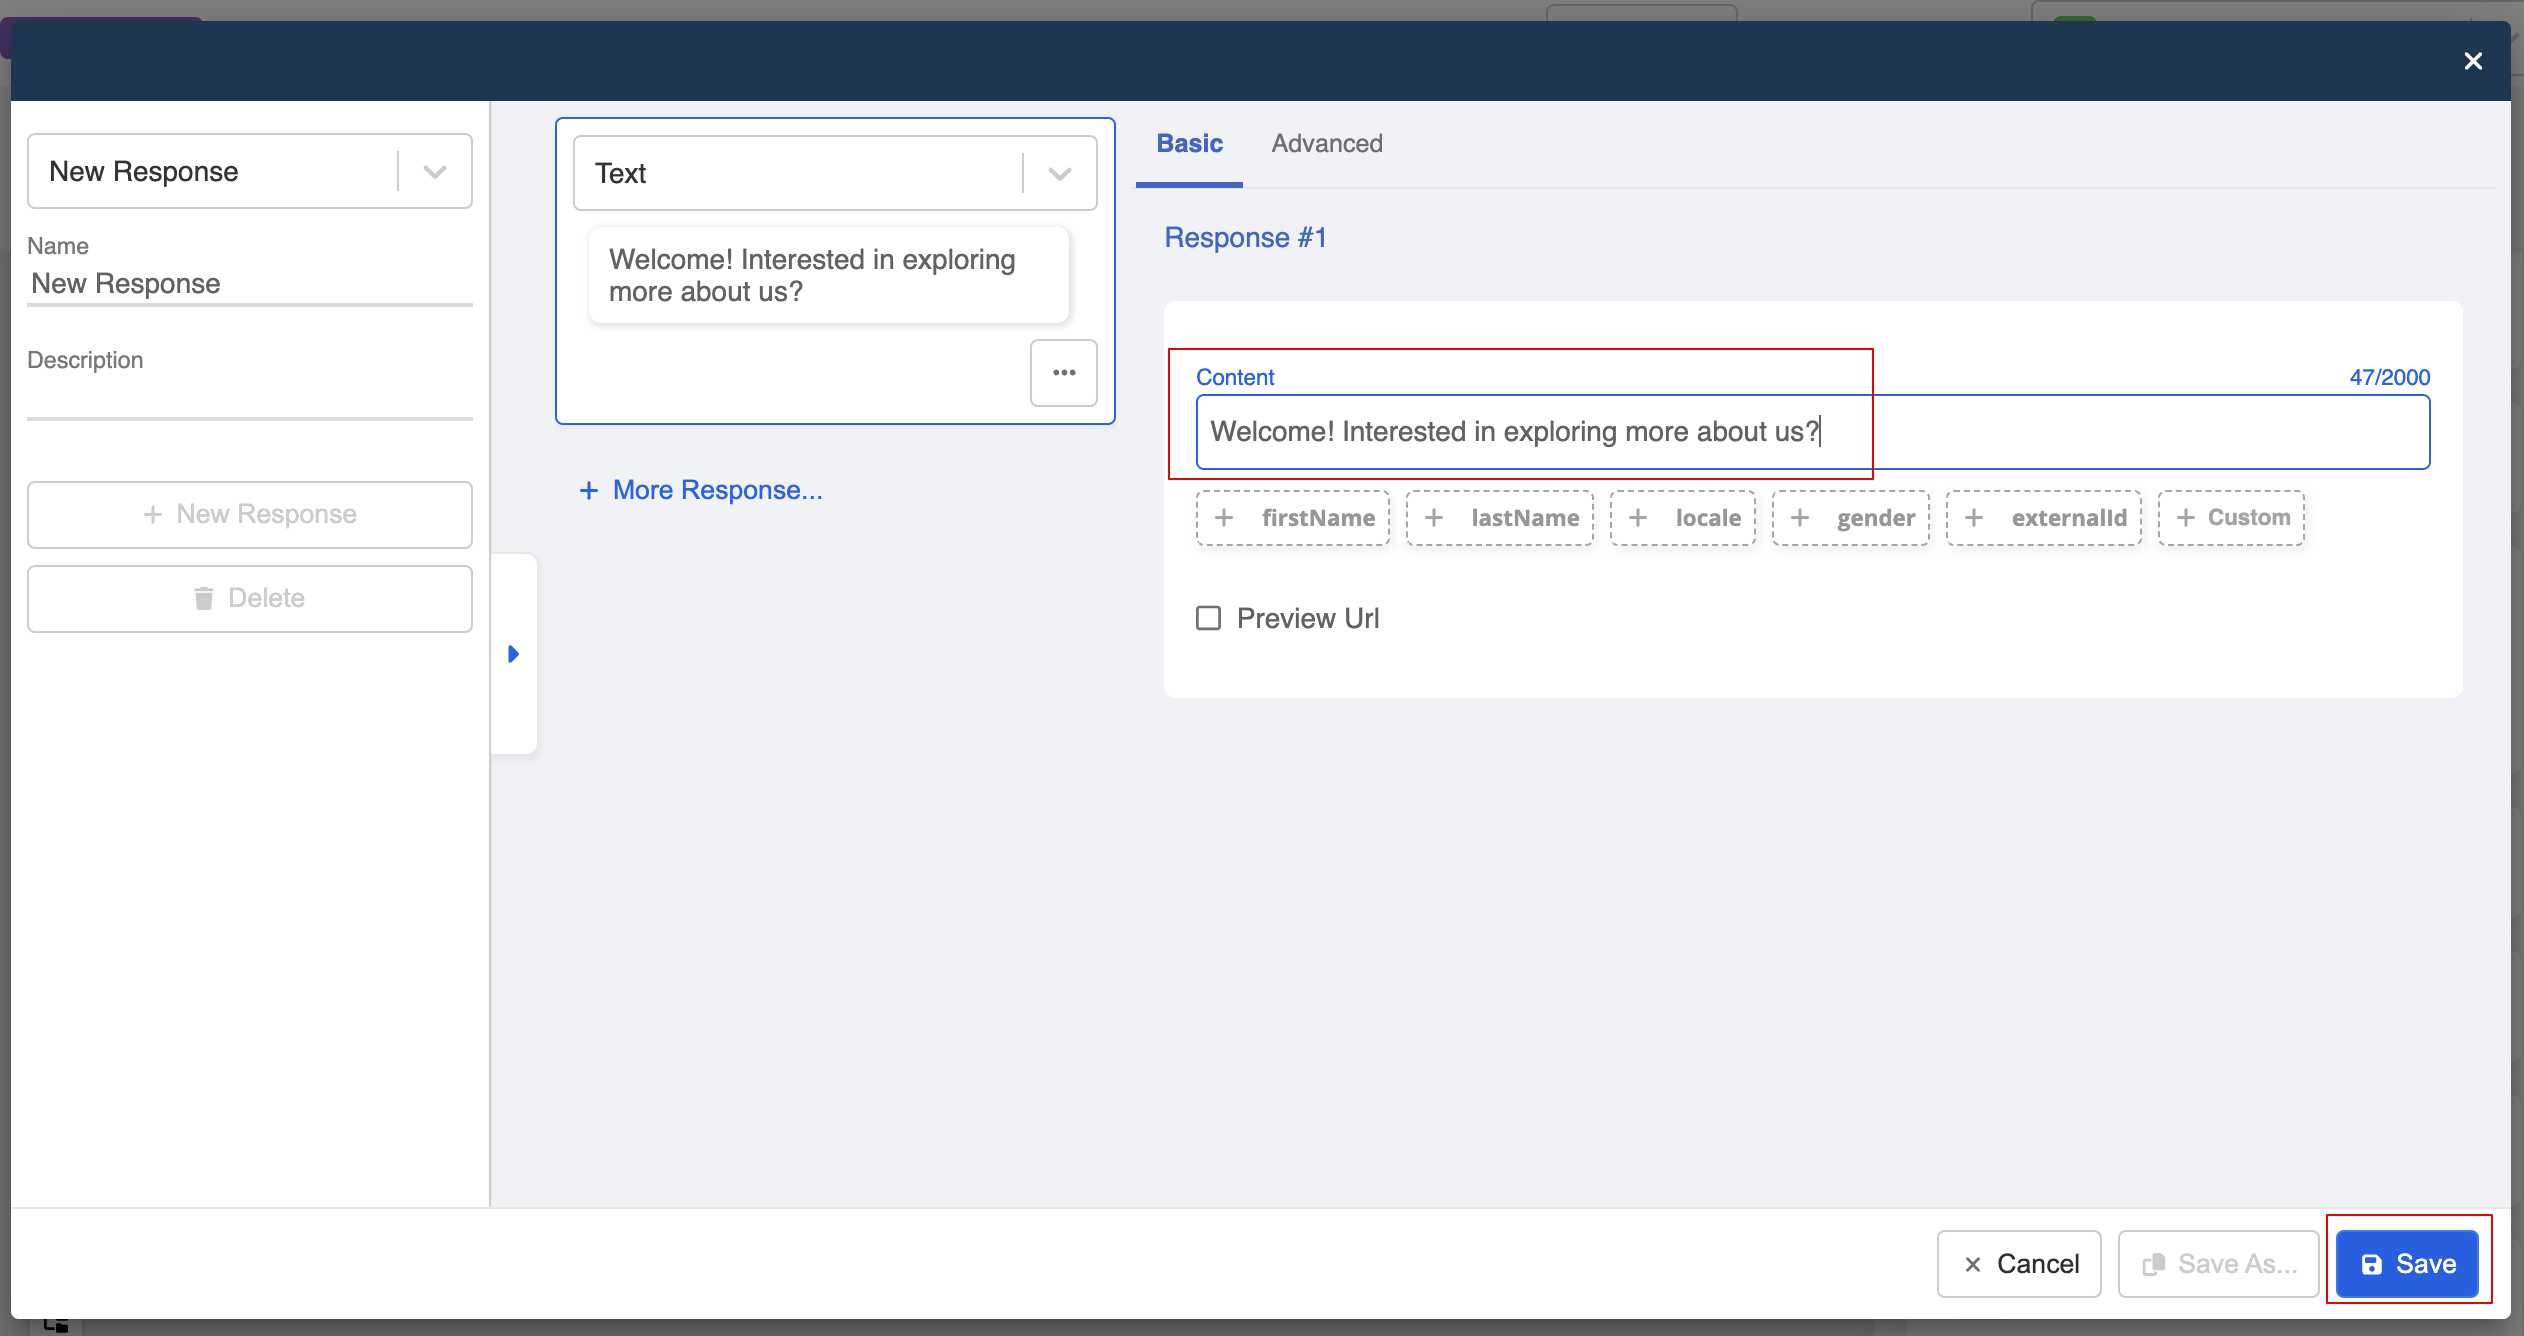
- Add the response message and save the node.
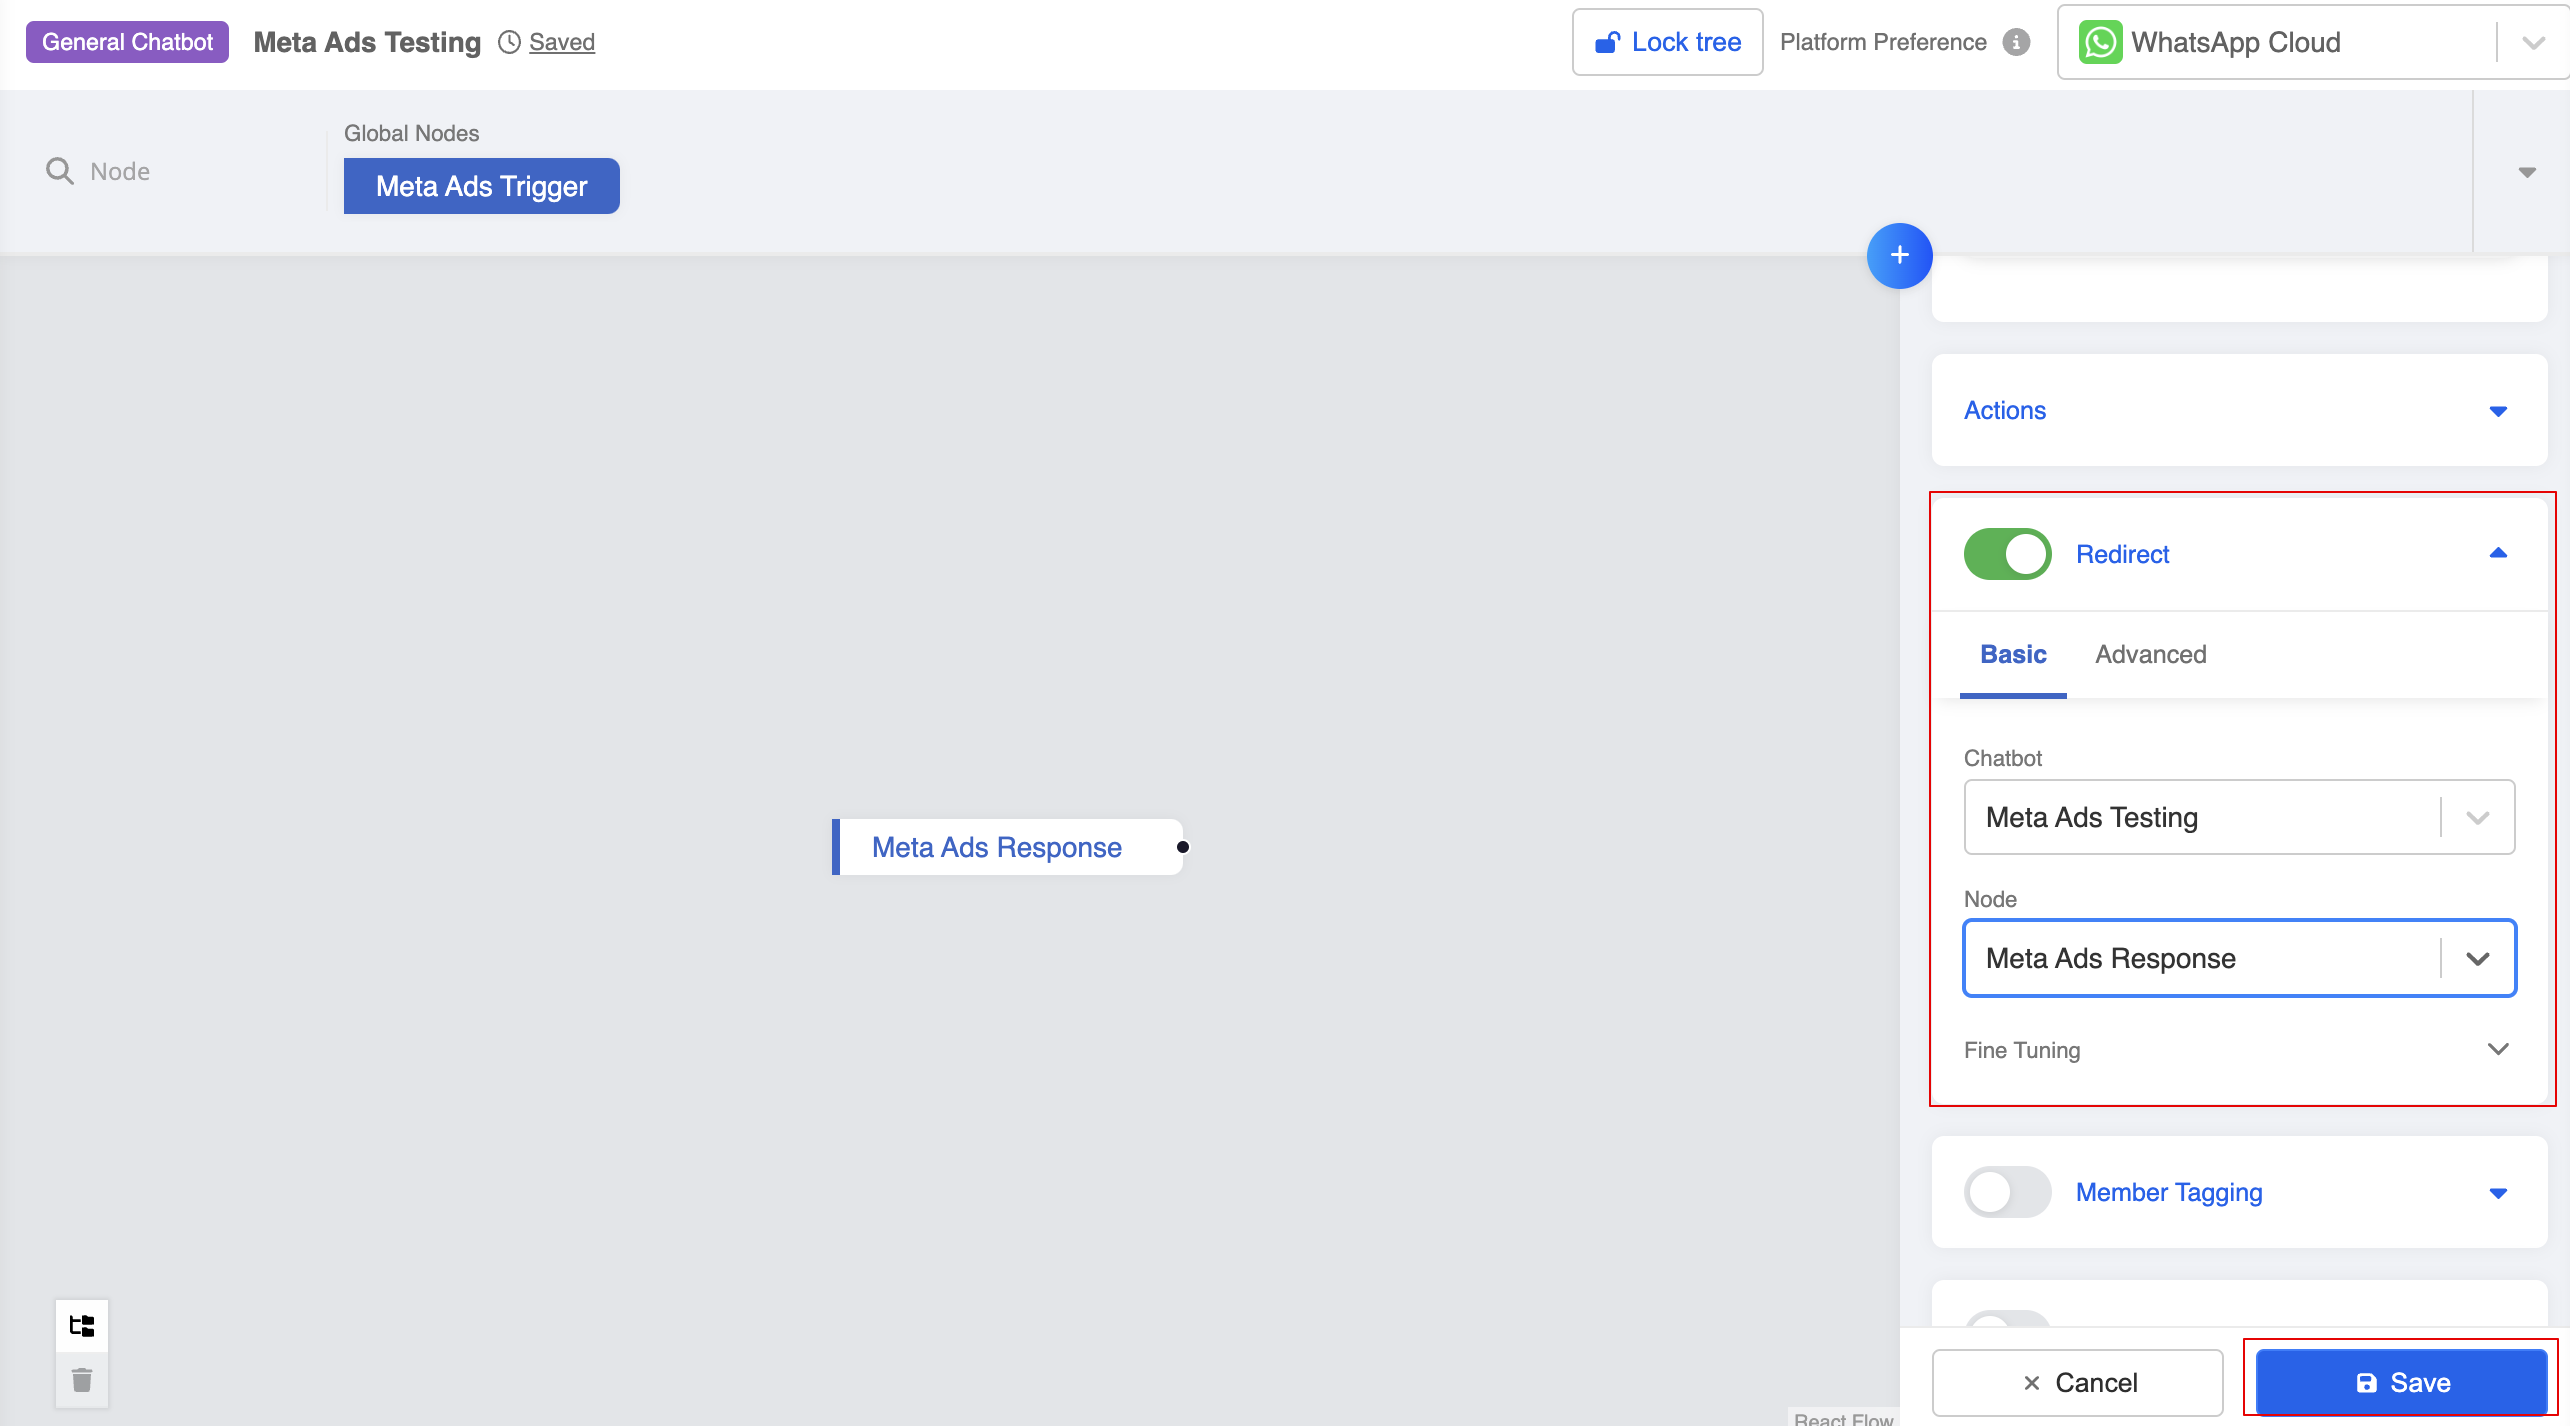
- Finally, make sure you are redirecting from the global node to the general node with response.
Send Conversion Event
For customers that enters the conversation via CTWA, Meta supports the Conversion events to help keep track on possible conversions. You can make use of the action to mark the a completed purchase or submitted lead at certain point of your chatbot flow.
These events will be sent to Meta and with association to a particular CTWA ad.
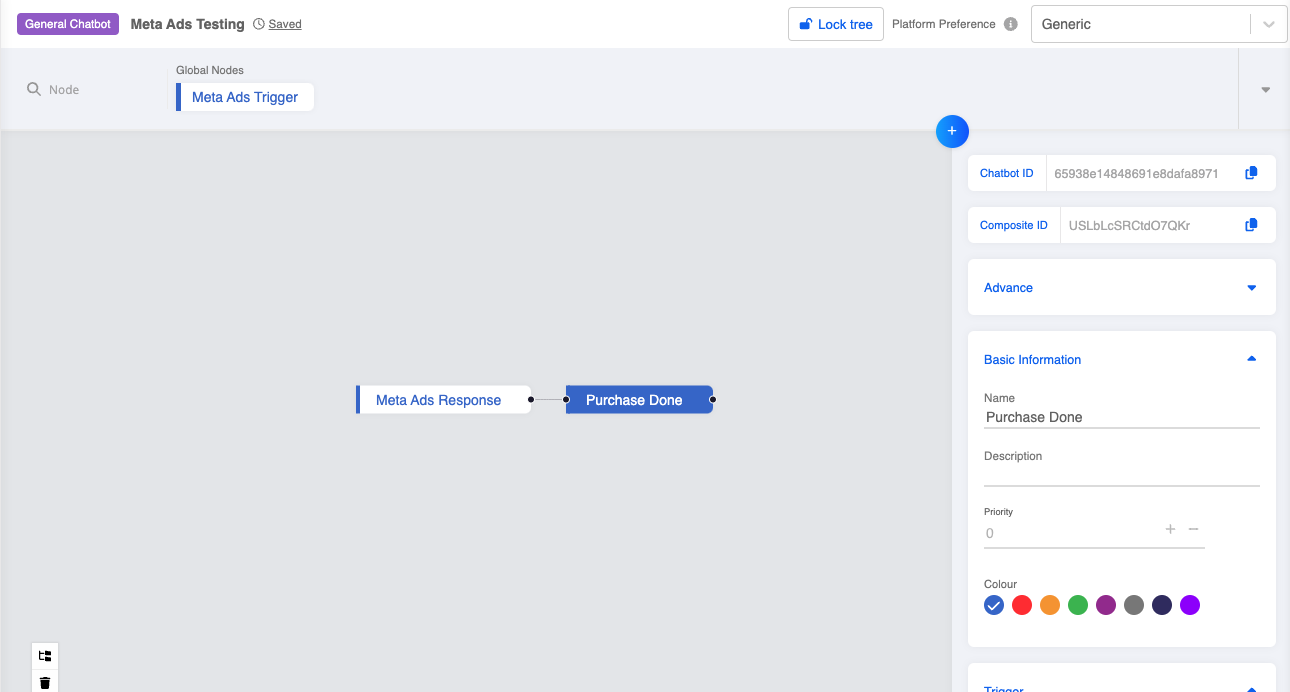
- Given you have a chatbot flow for user entry via CTWA, you can create a new node for sending the event.
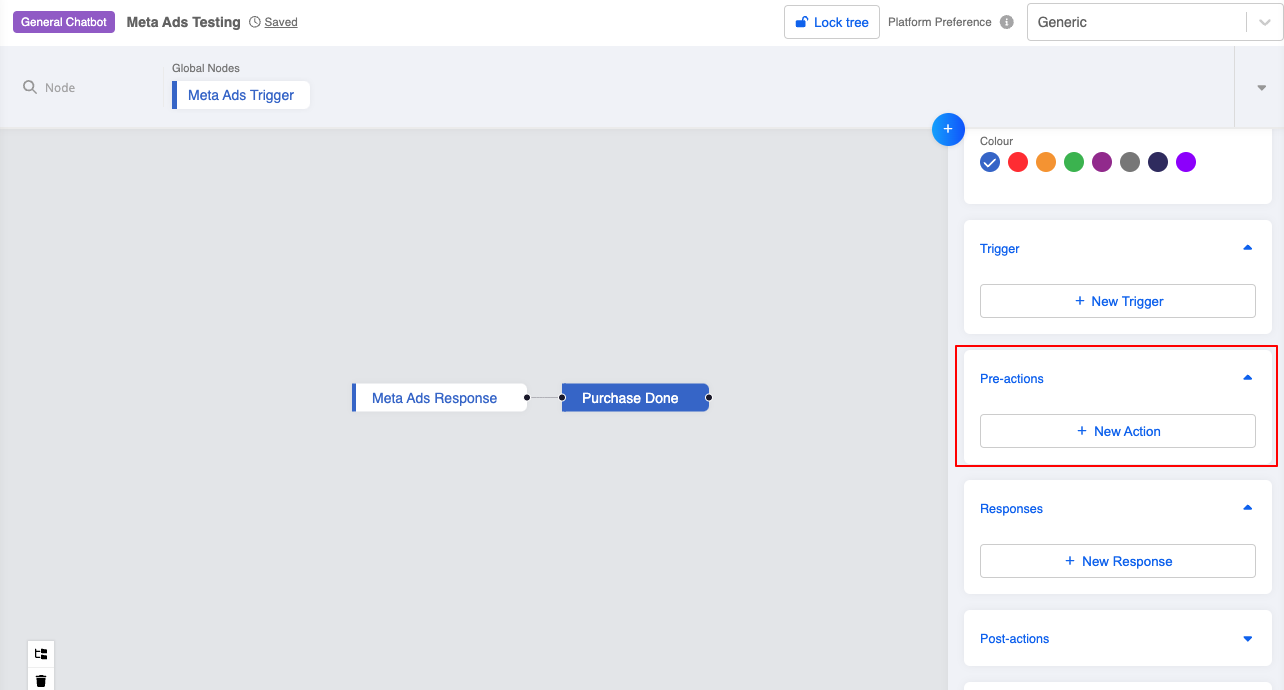
- Create a new action.
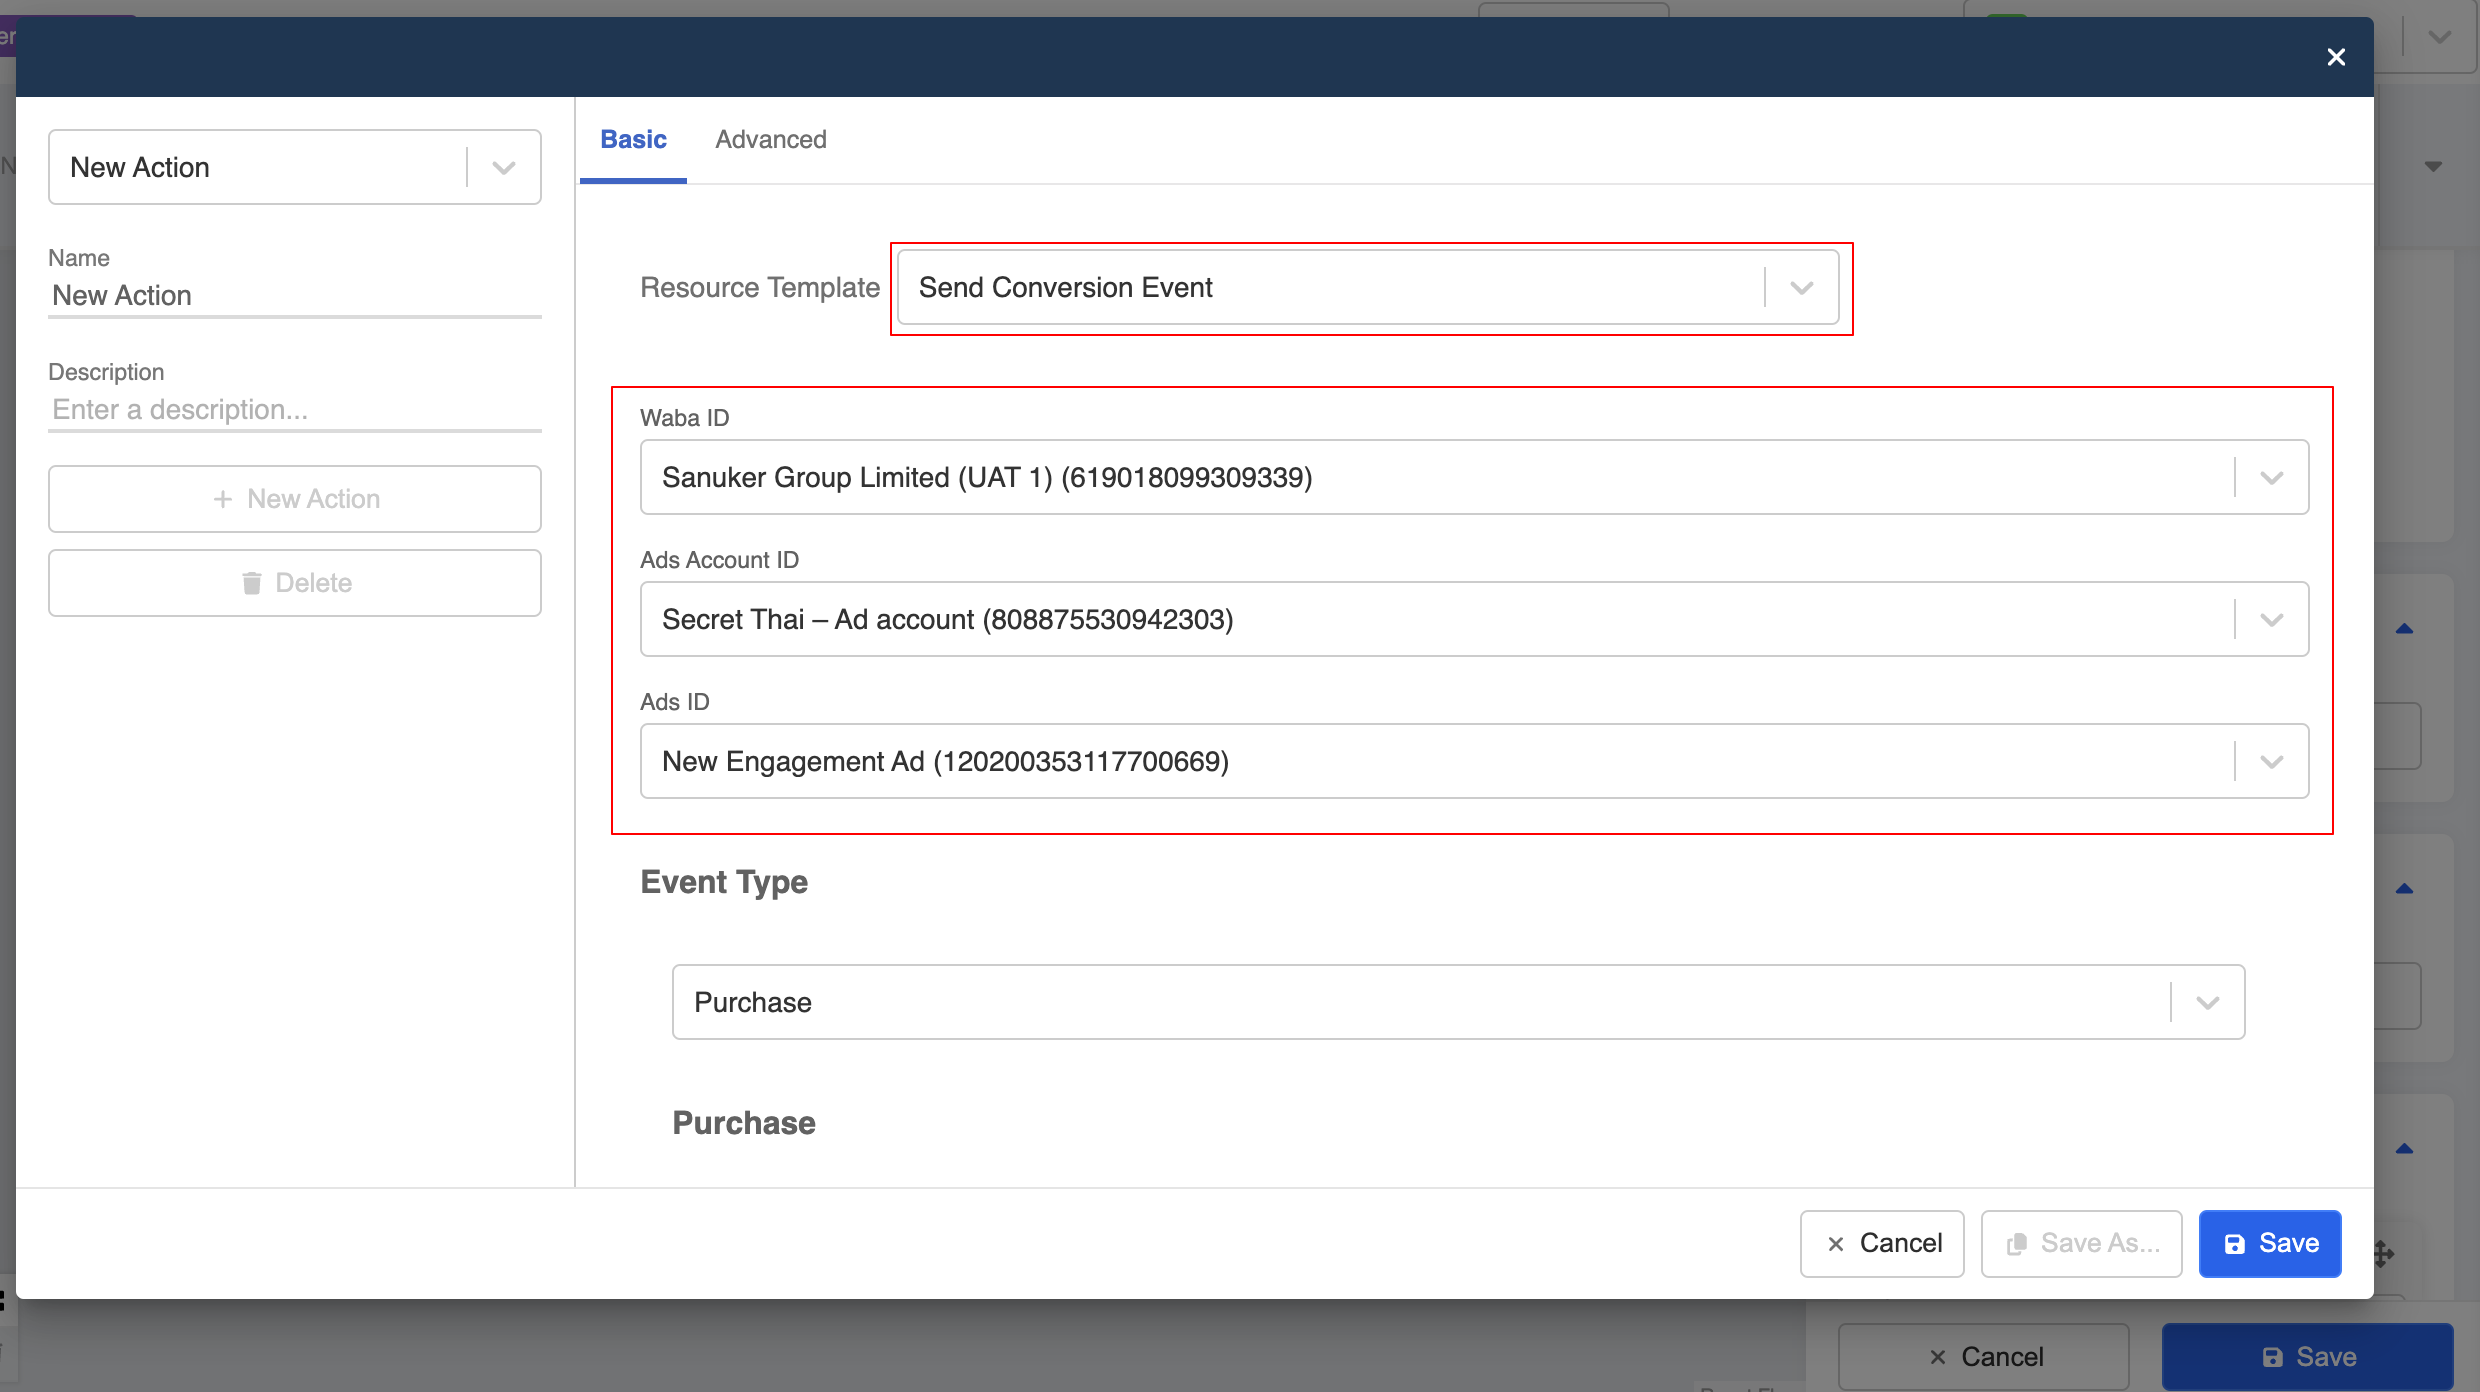
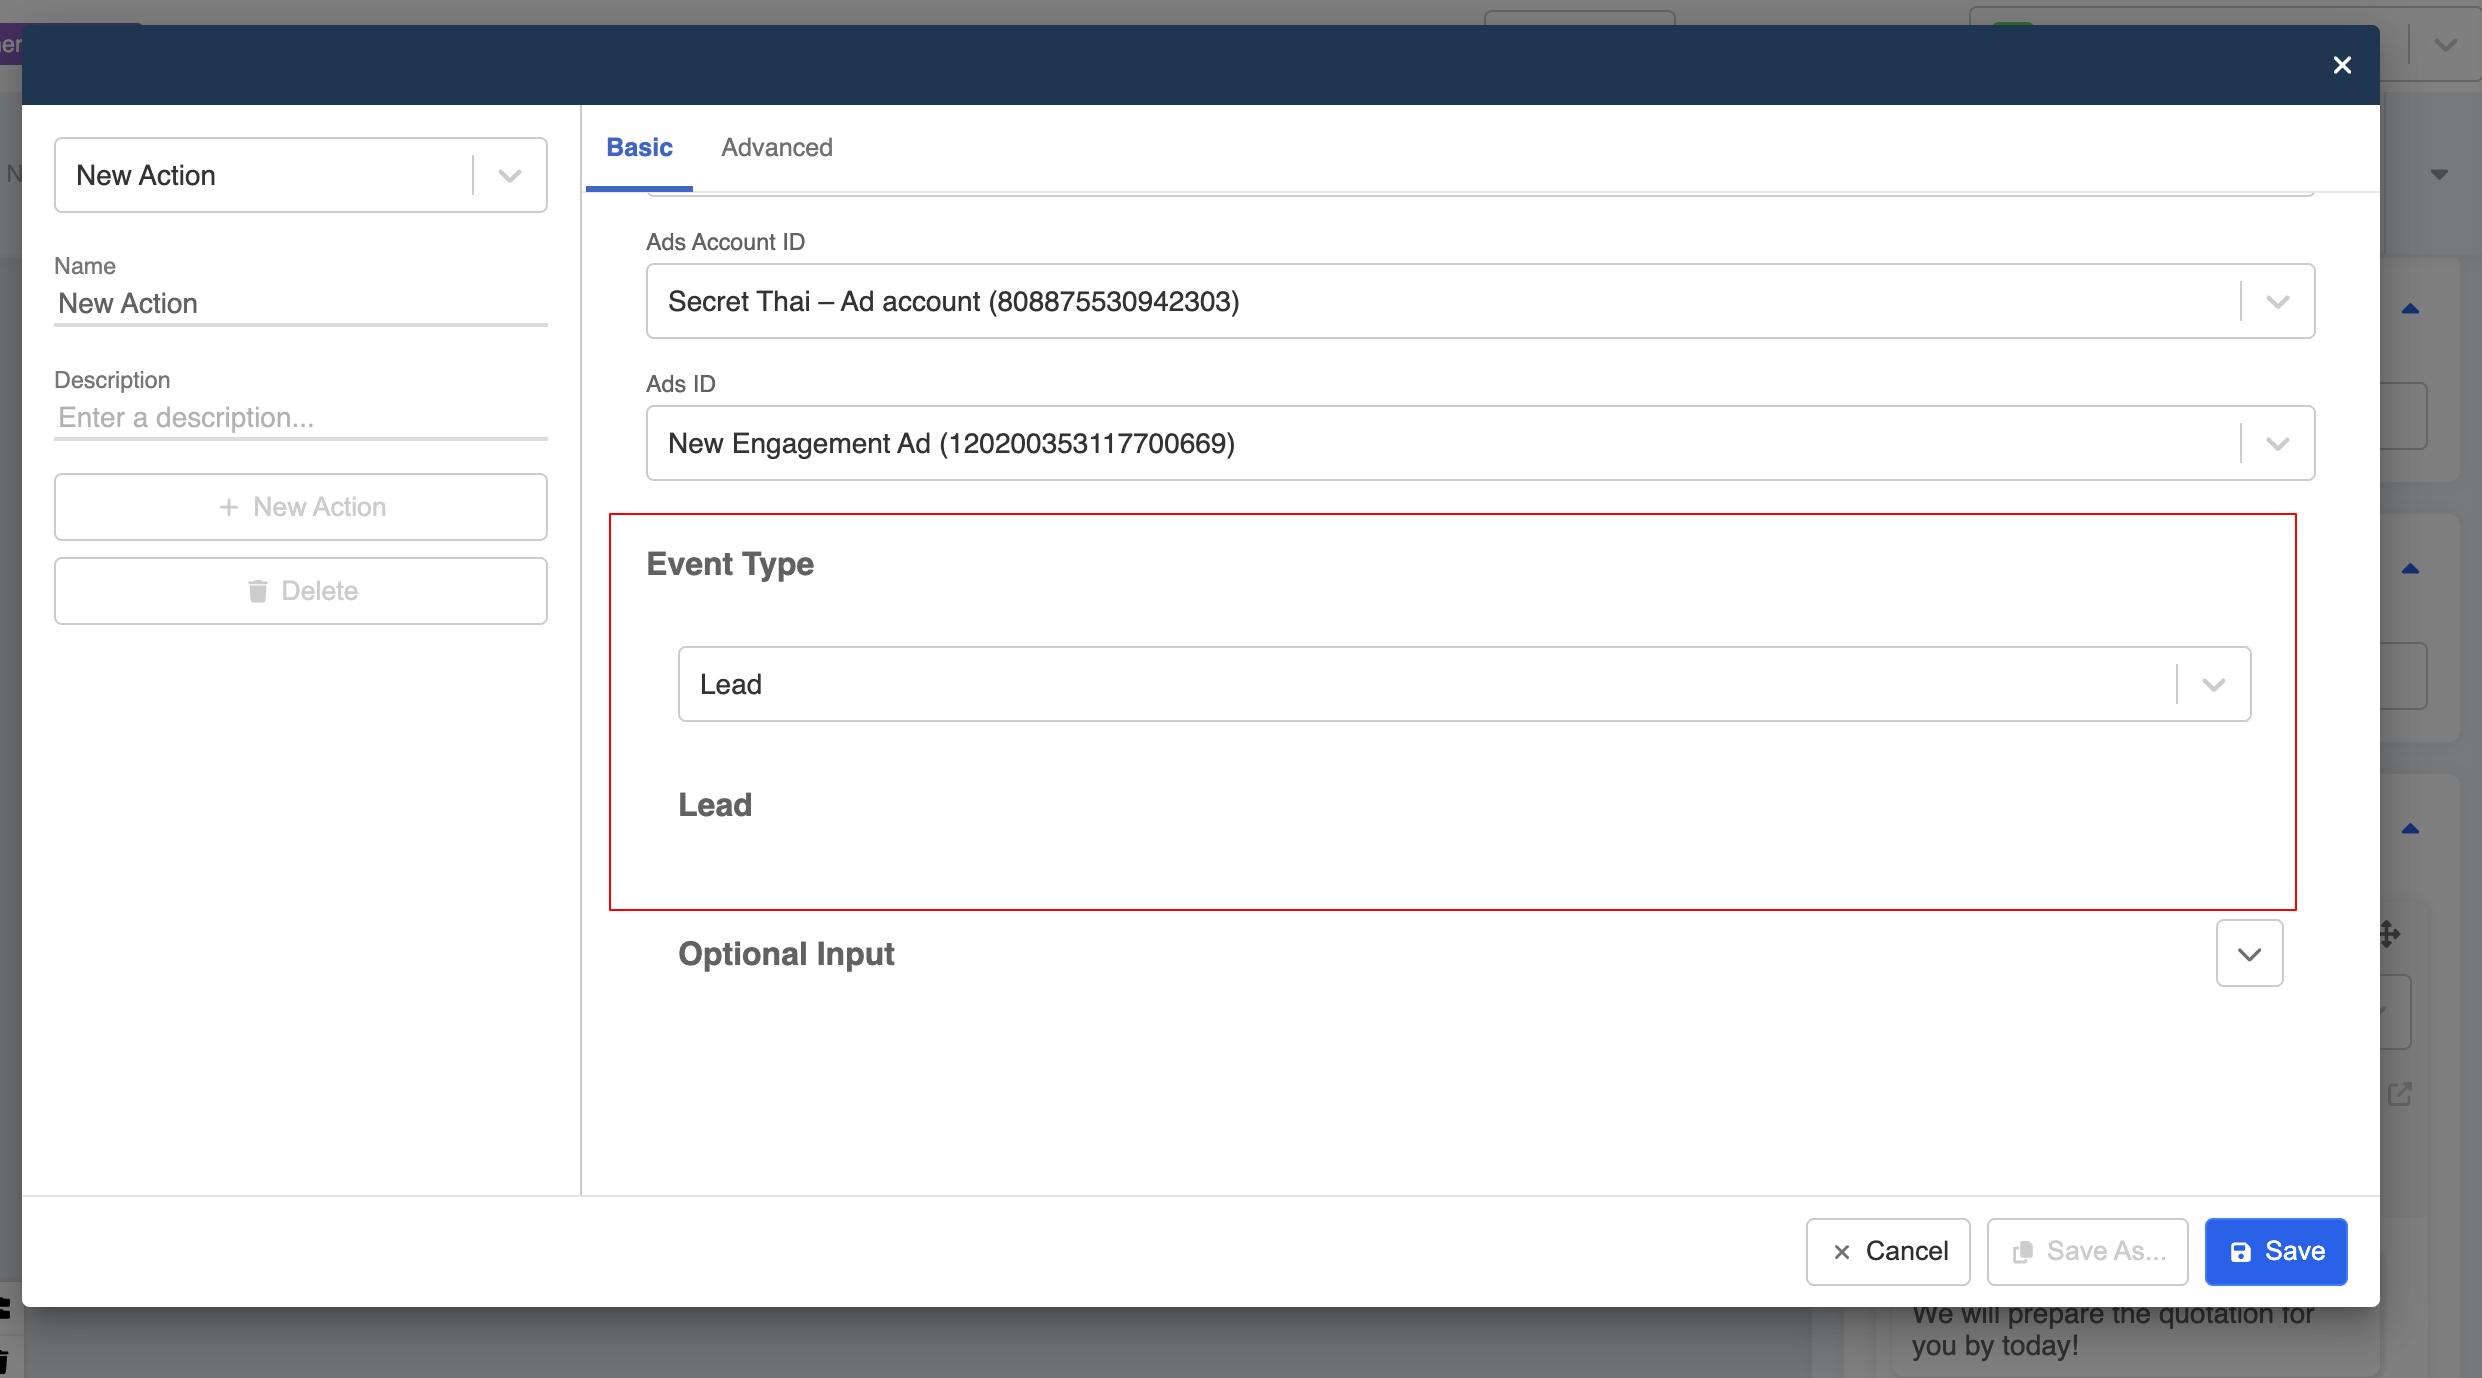
- Select "Send Conversion Event", then choose the corresponding "WABA ID", "Ads Account ID" and "Ads ID".
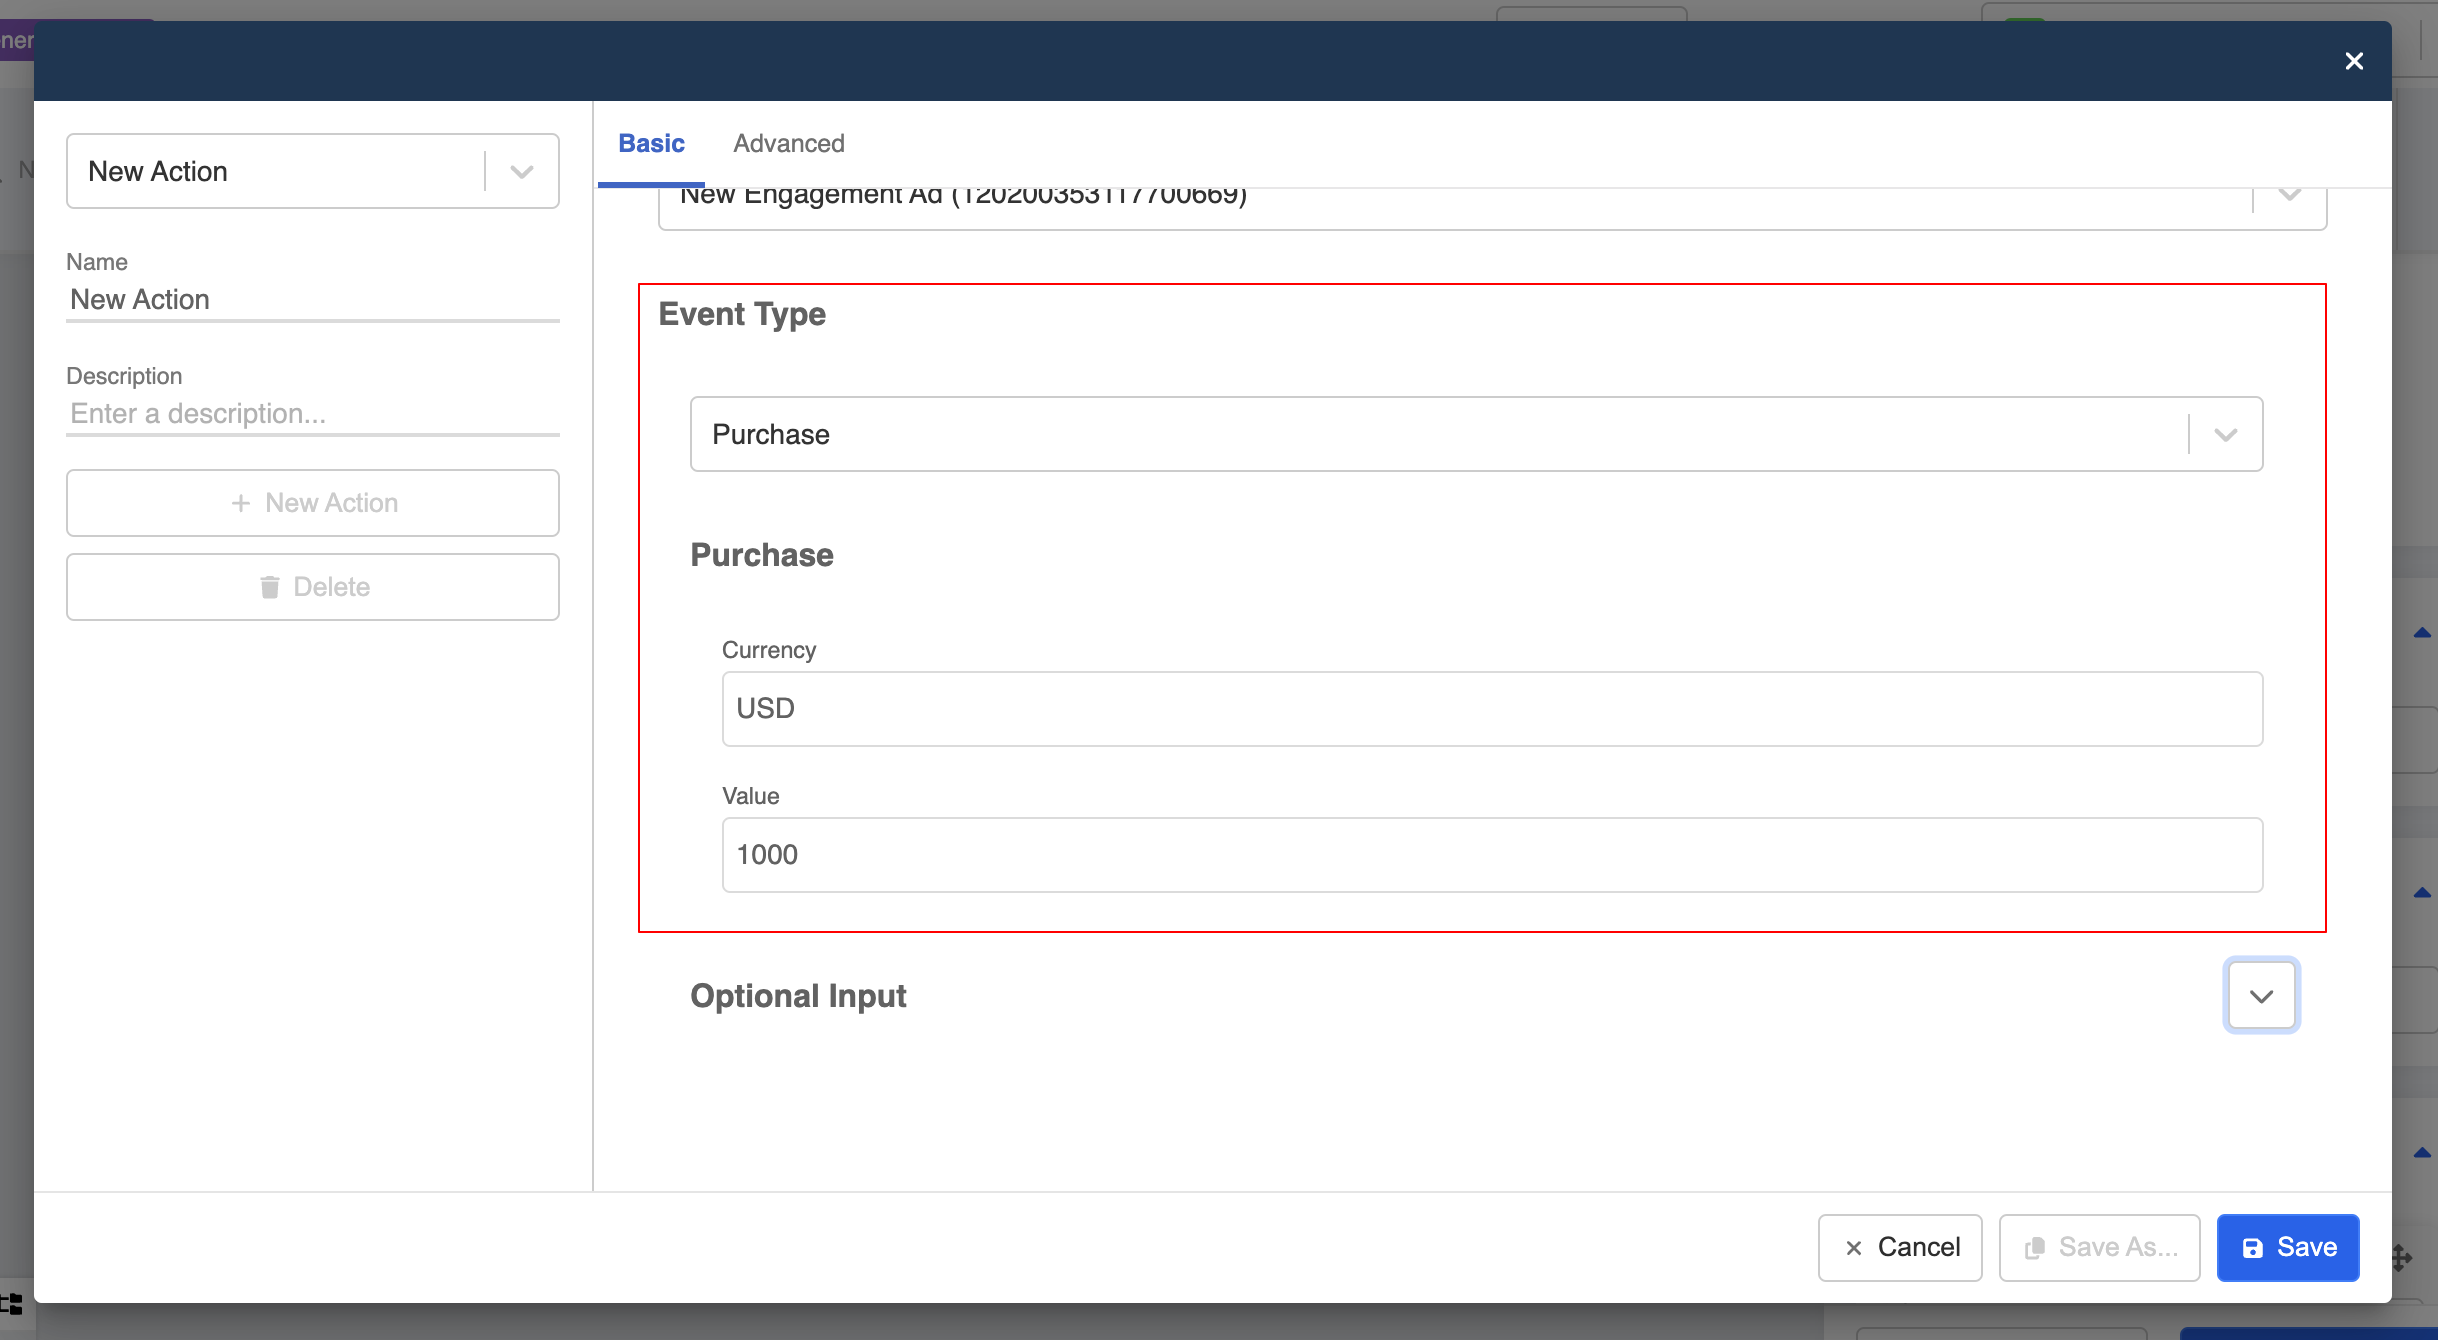
- Under "Event Type", if you are selecting "Purchase", please specify the "Currency" and "Value".
- If you are selecting "Lead" event, there will be no further field required to input.
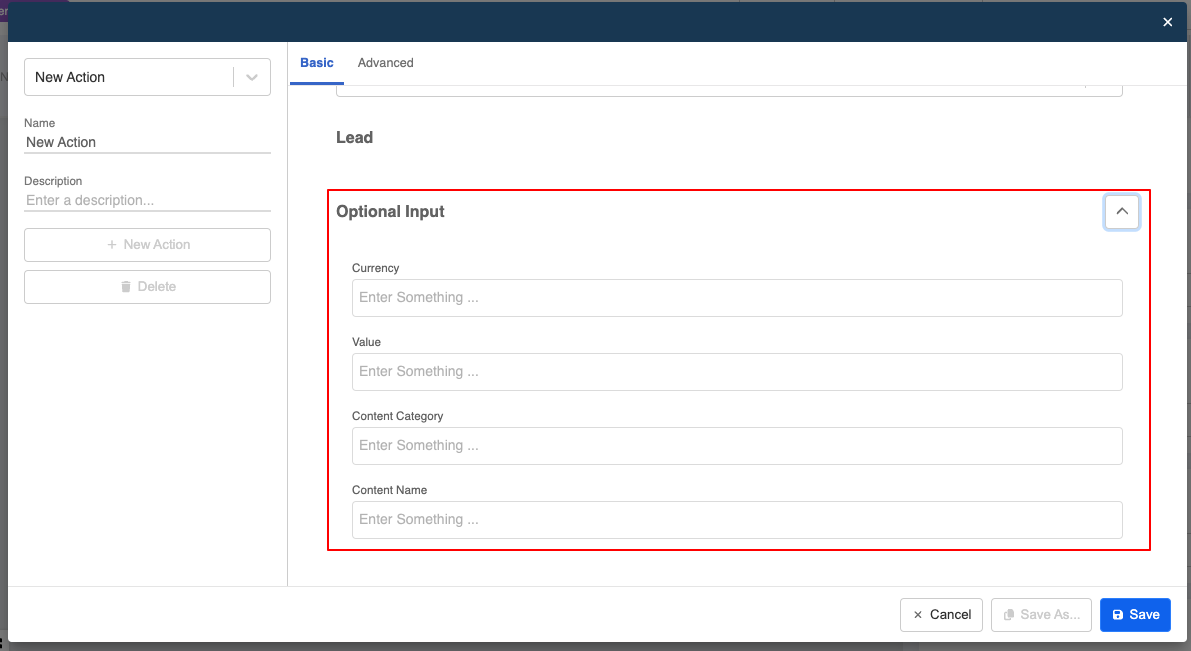
- If needed, you can also include additional information under the "Optional Input". Please refer to here for details.
- Once the node containing the "Send Conversion Event" action is executed, the Purchase Event or Lead Event will be sent to Meta to mark the a completed conversion.
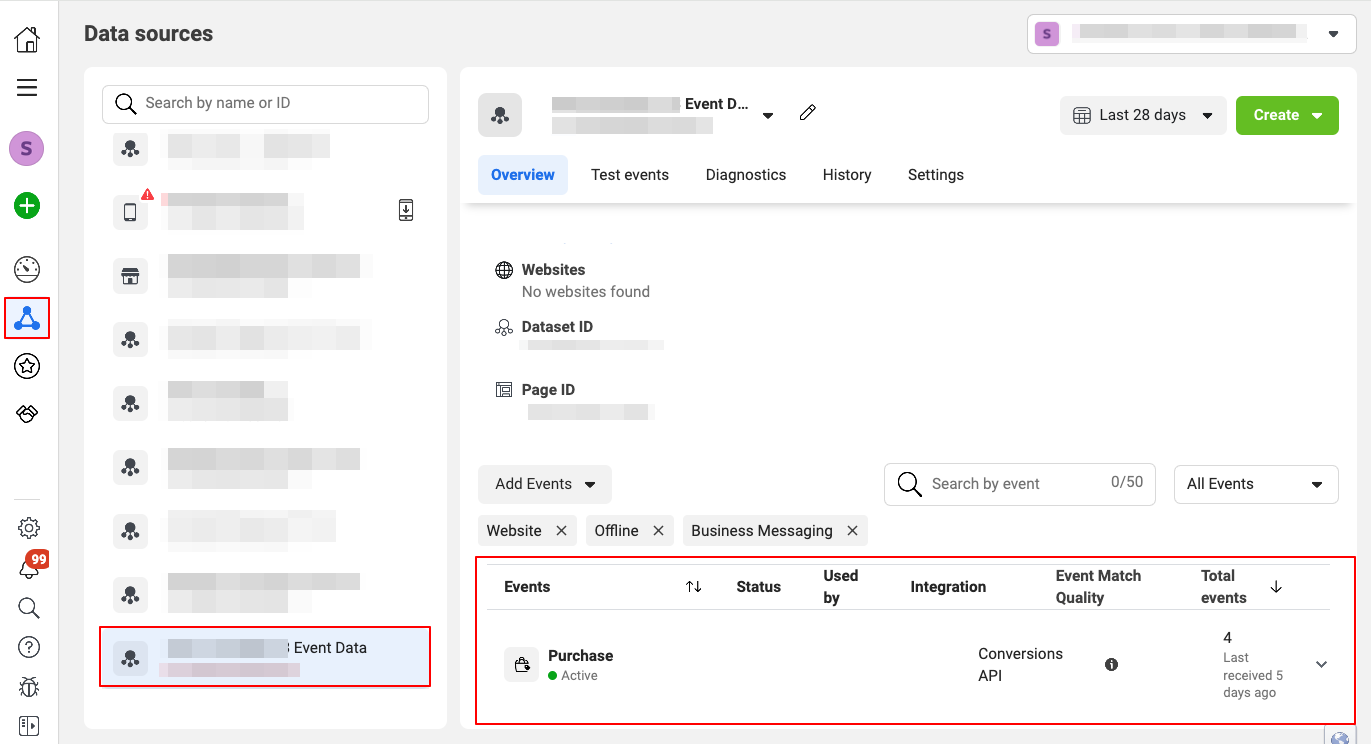
To quickly confirm if the events have been sent successfully, you can head to the corresponding Data Set under the the Events Manager of your Facebook Business Manager.
Now, you can create and send Purchase Event or Lead Event to mark the a completed conversion. The event can be displayed in the Events Manager within the Facebook Business Manager.
Note
The events data will be shown in Data set configured at step 5 of the ads permission.
