Build the First Node of a Conversation Tree
What comes after the Tree? The Node.
A Node is a set of message response(s) that can be triggered by following a designated path and trigger. A tree is basically layers of connected tree nodes. The First Node usually refers to the first message response of a Chatbot, and it is always a Tree Node.
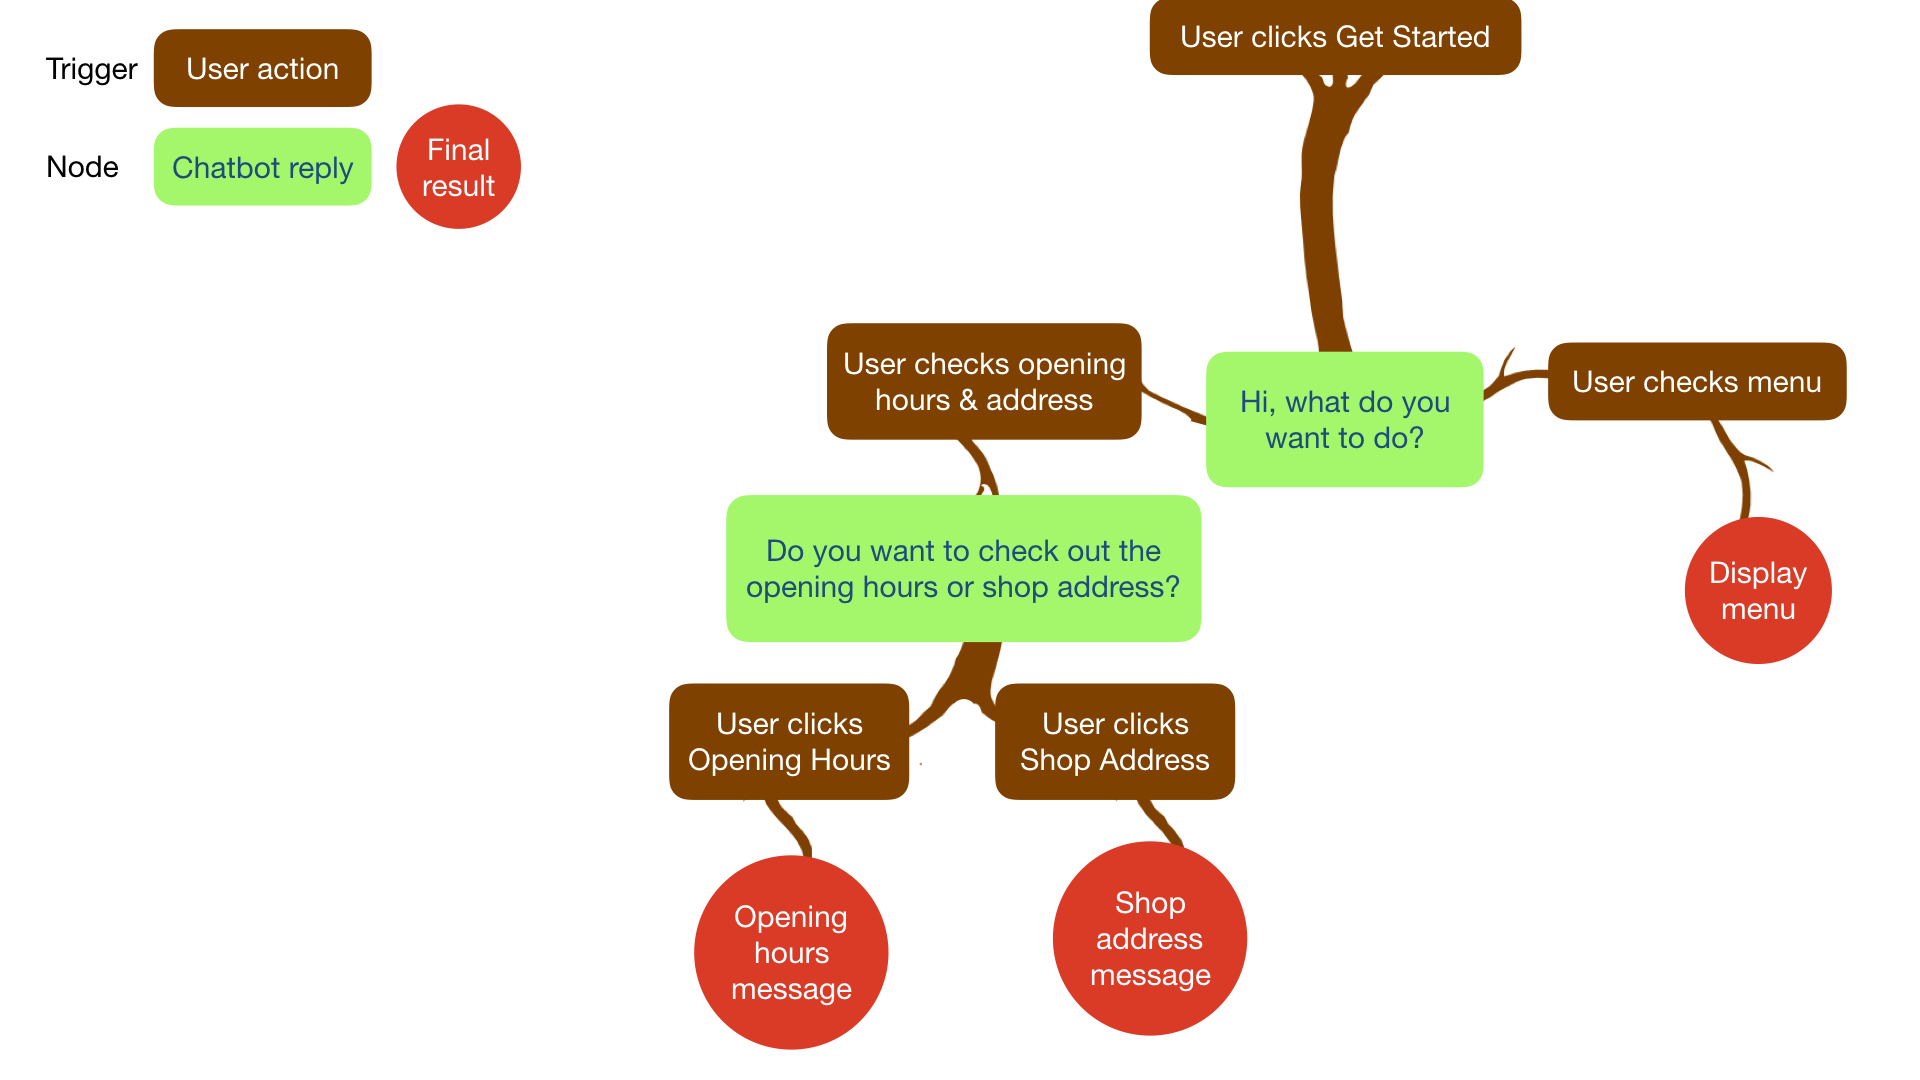
Please see the following example tree diagram to understand the structure of a conversation tree.
tip
Both chatbot reply and final result are nodes while the user action is the trigger that can leads you to those nodes following the correct path. The whole structure is a conversation tree.
Expected Outcome
You should be able to find your created first node in your workspace.
Add Your First Node
Enter your Bot Builder.
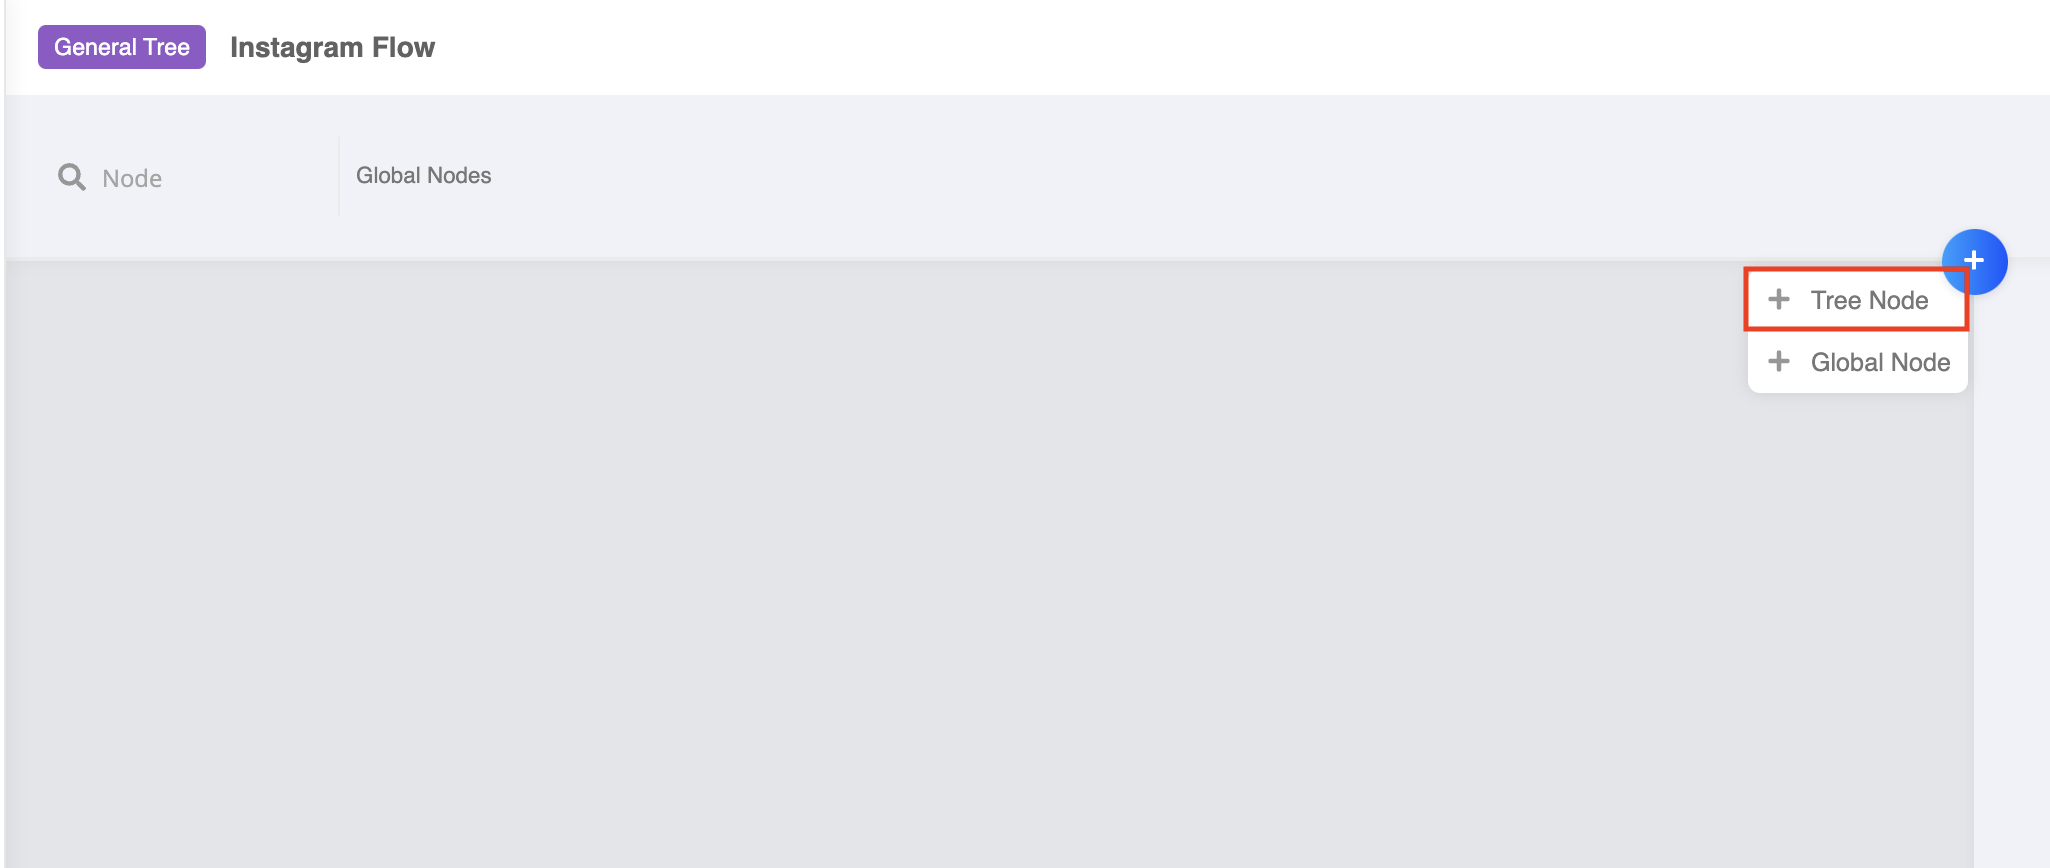
- Select "+" on right top corner of workspace.
- Select "+ Tree Node".
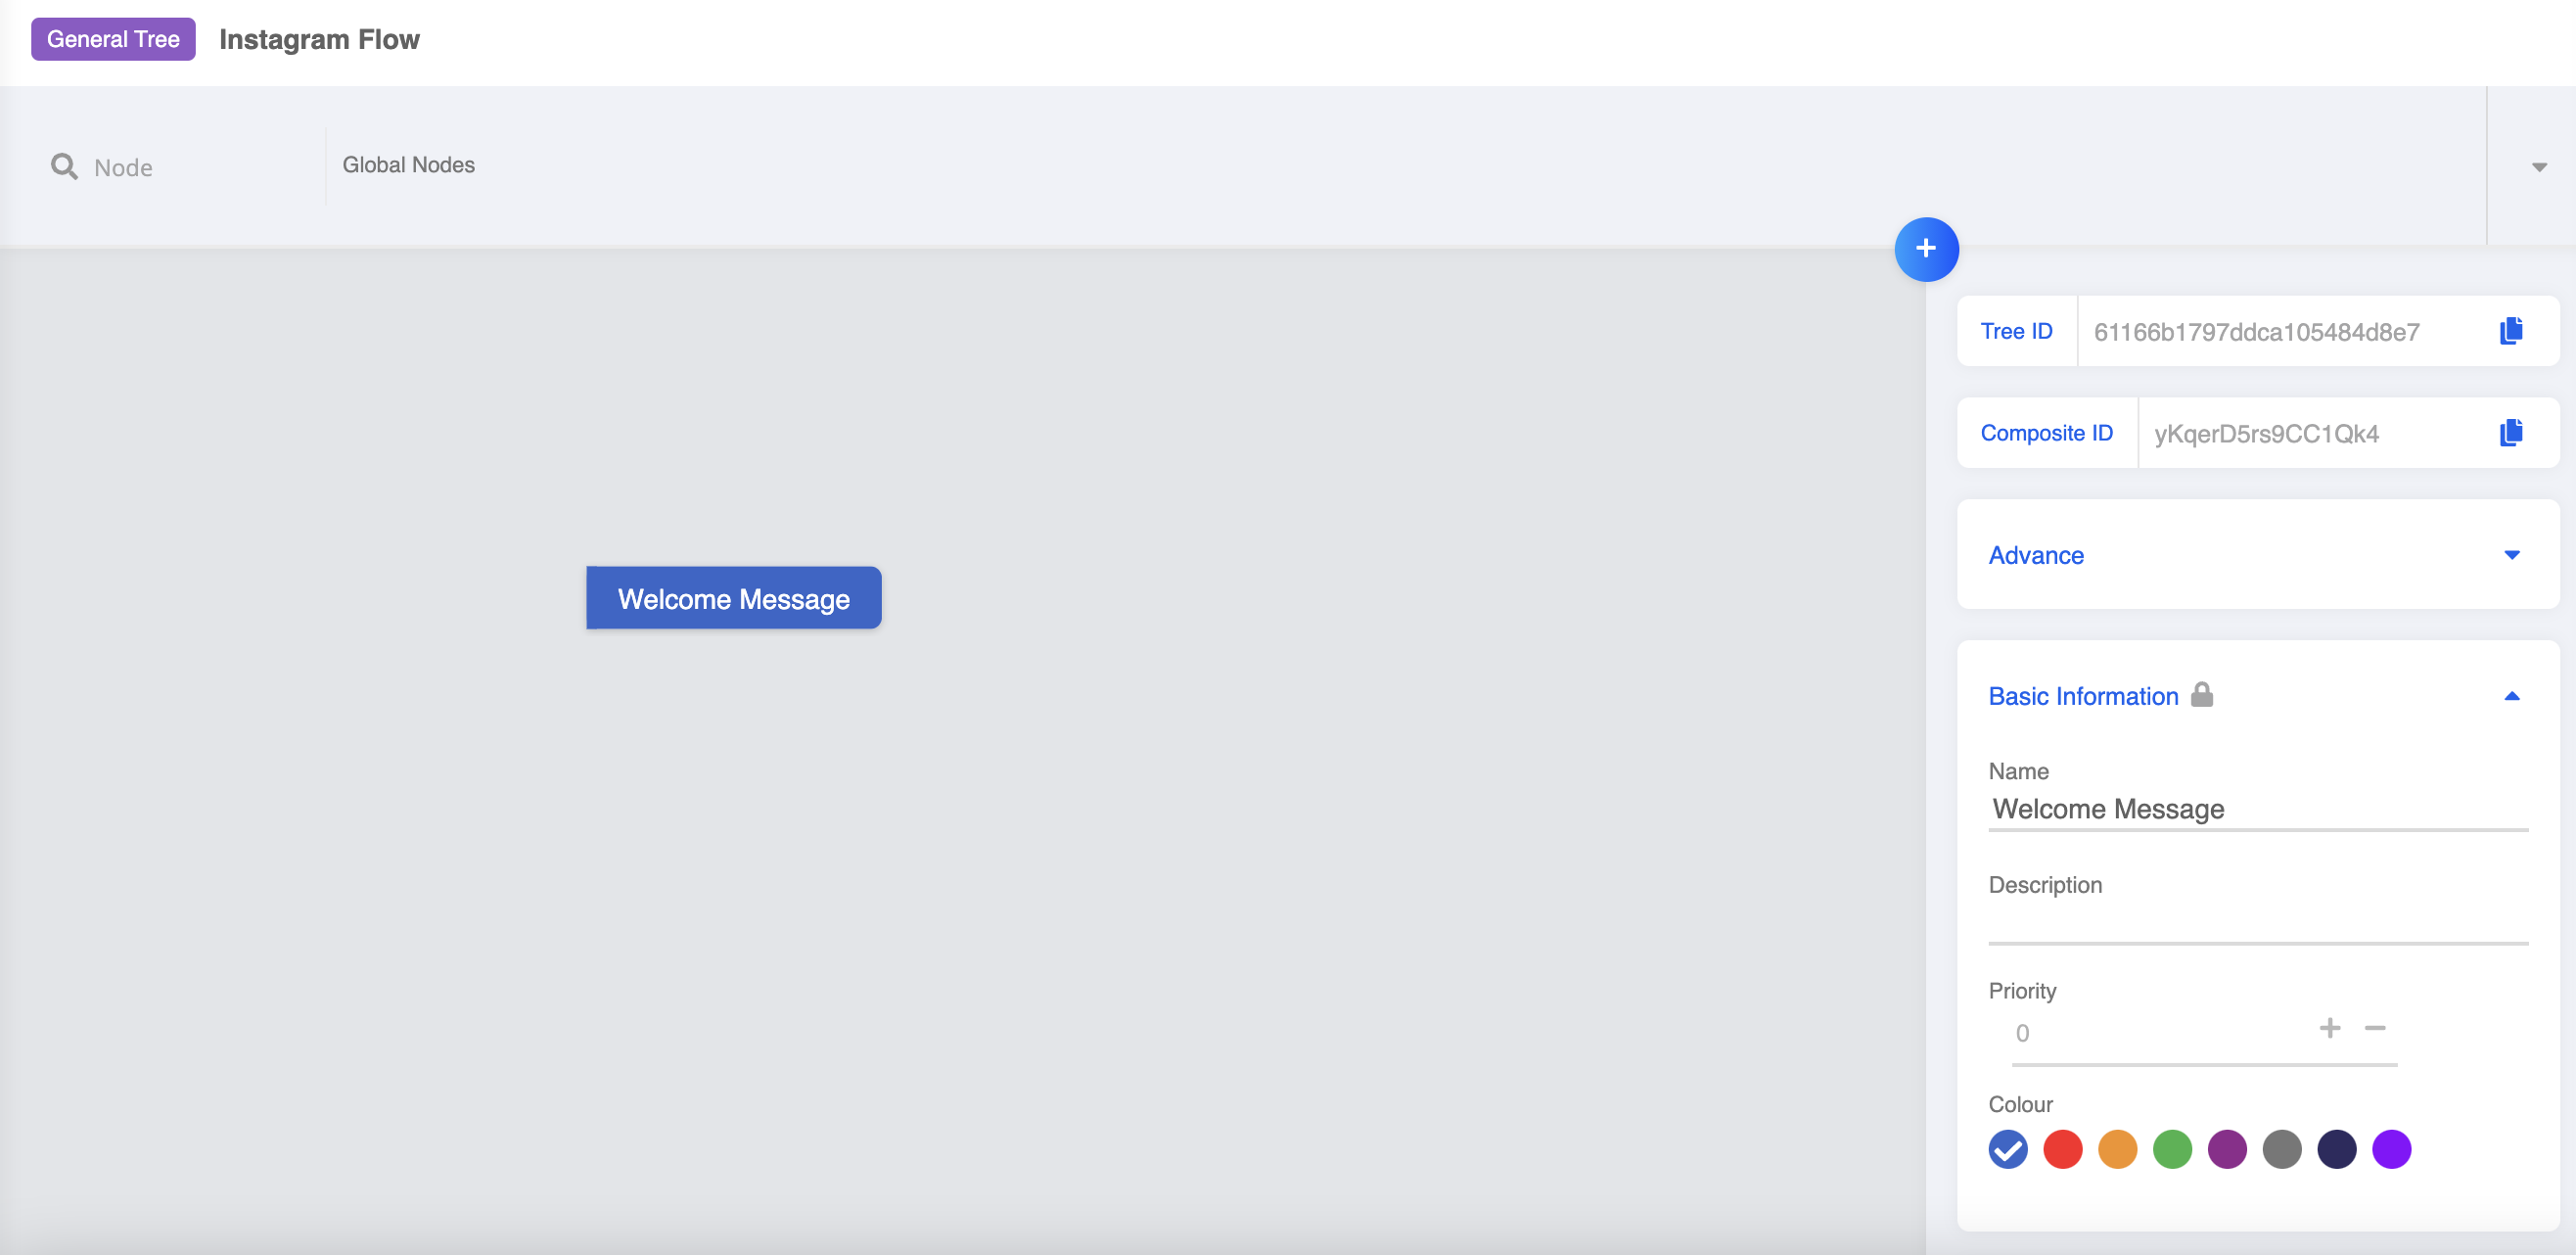
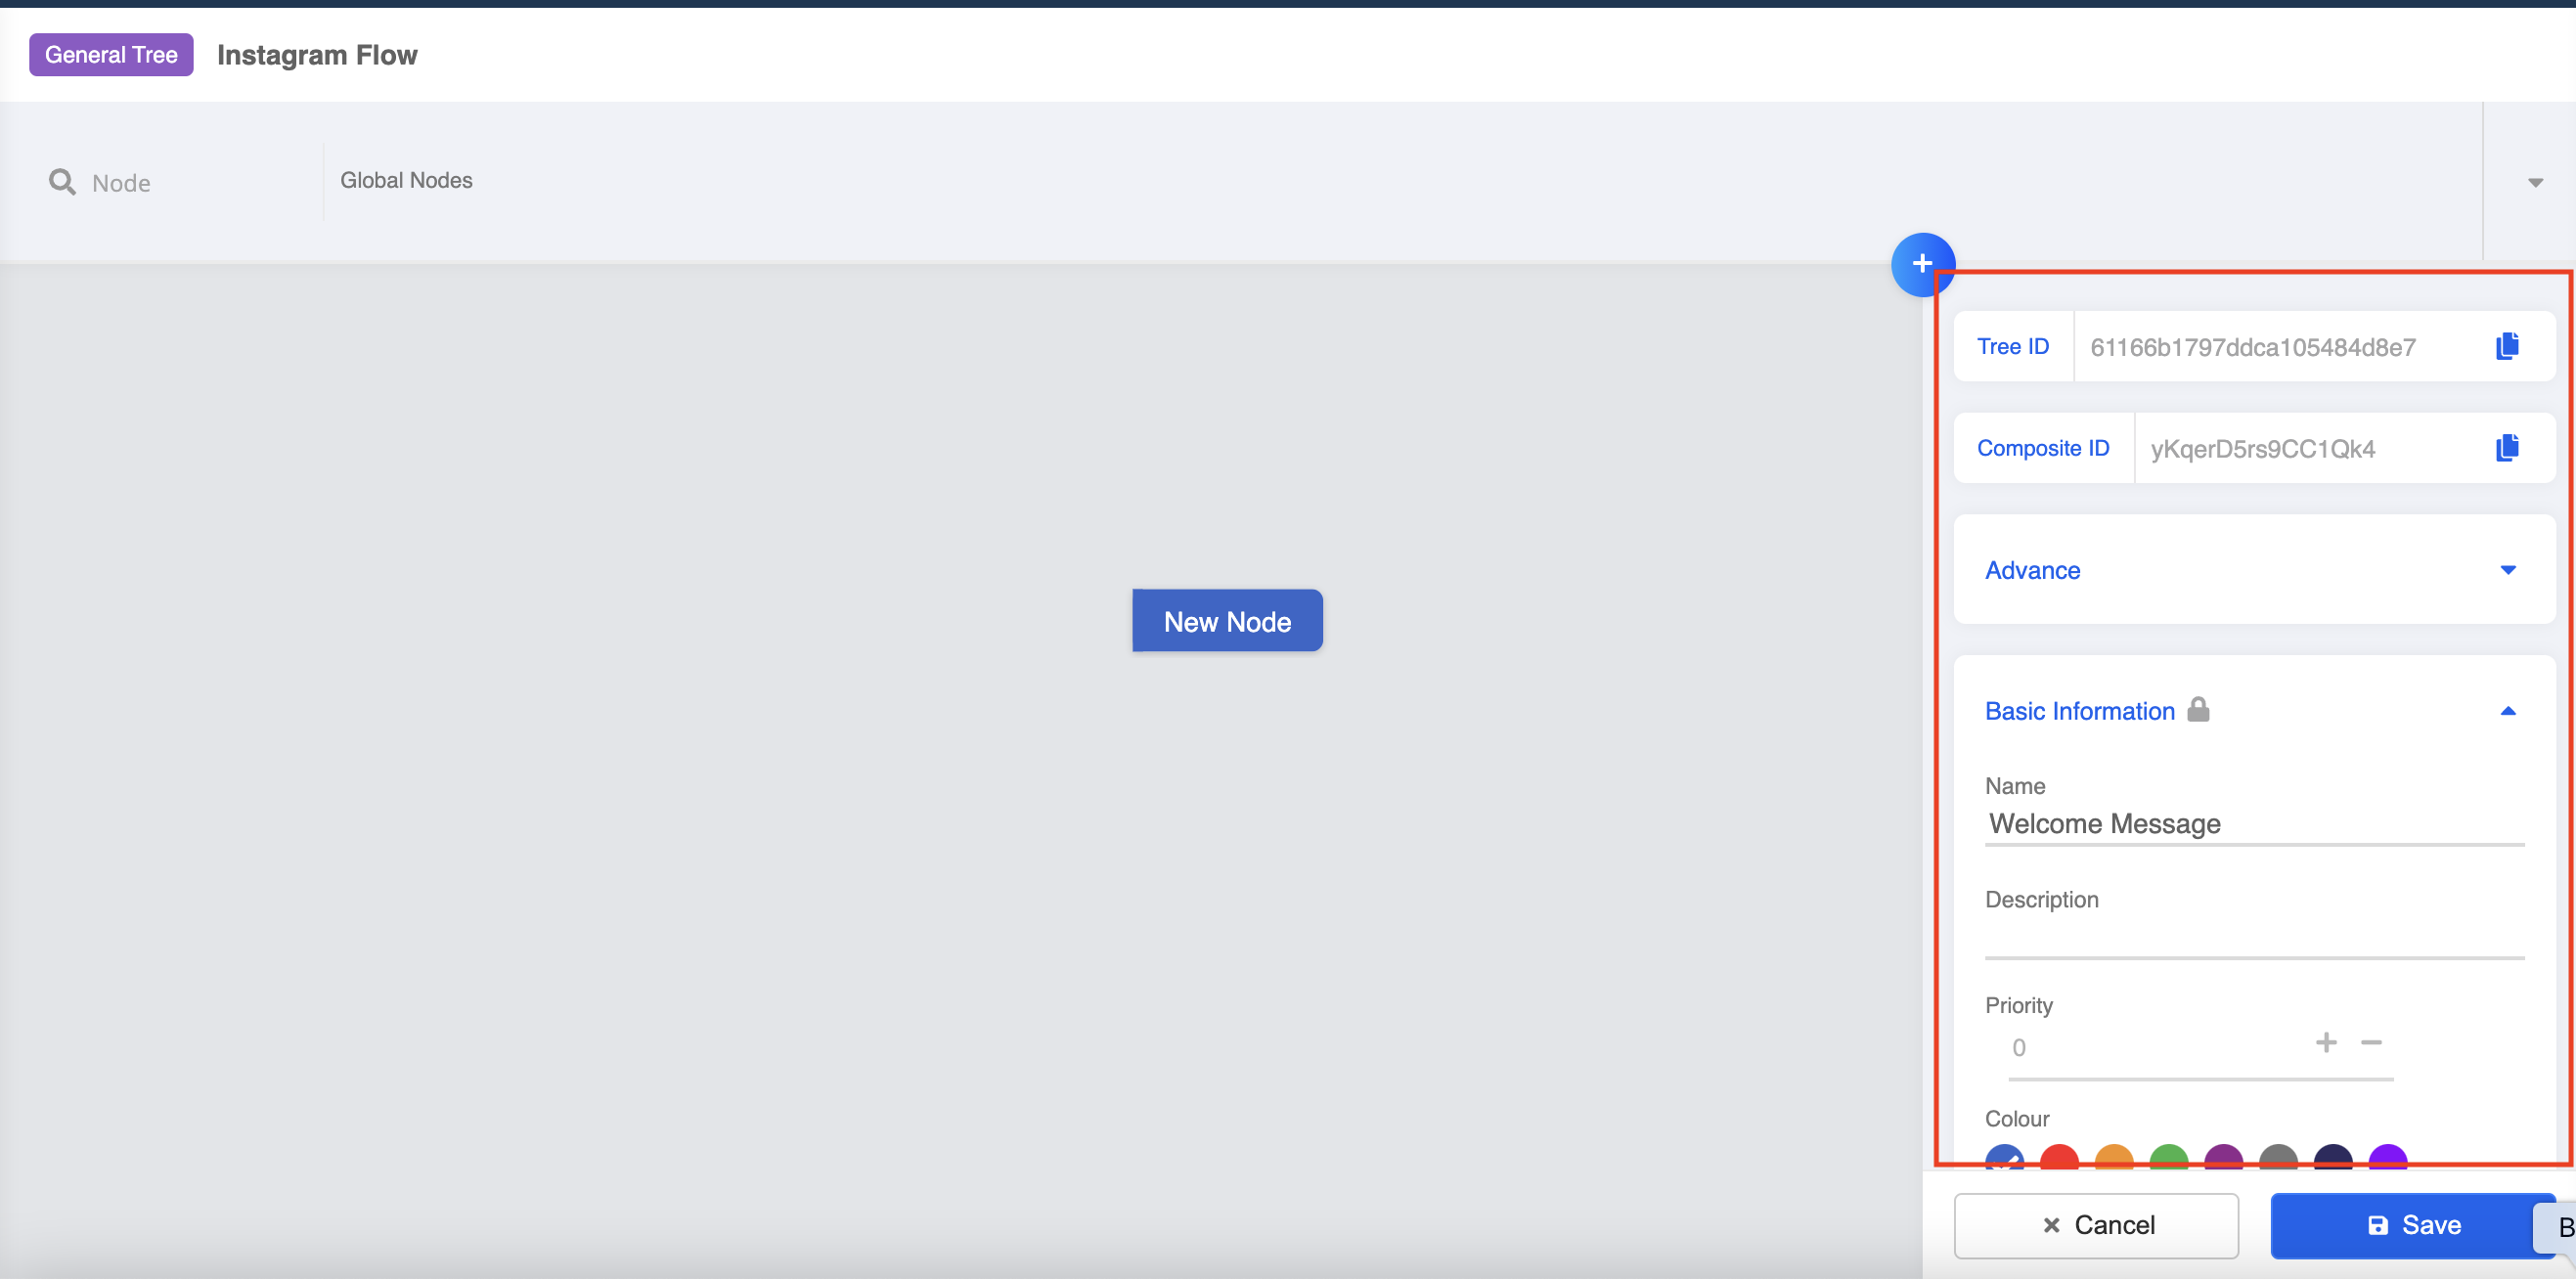
- After that, a panel will be revealed on the right. This is the Node Inspector.
- Fill in the node name and description.
Build Response
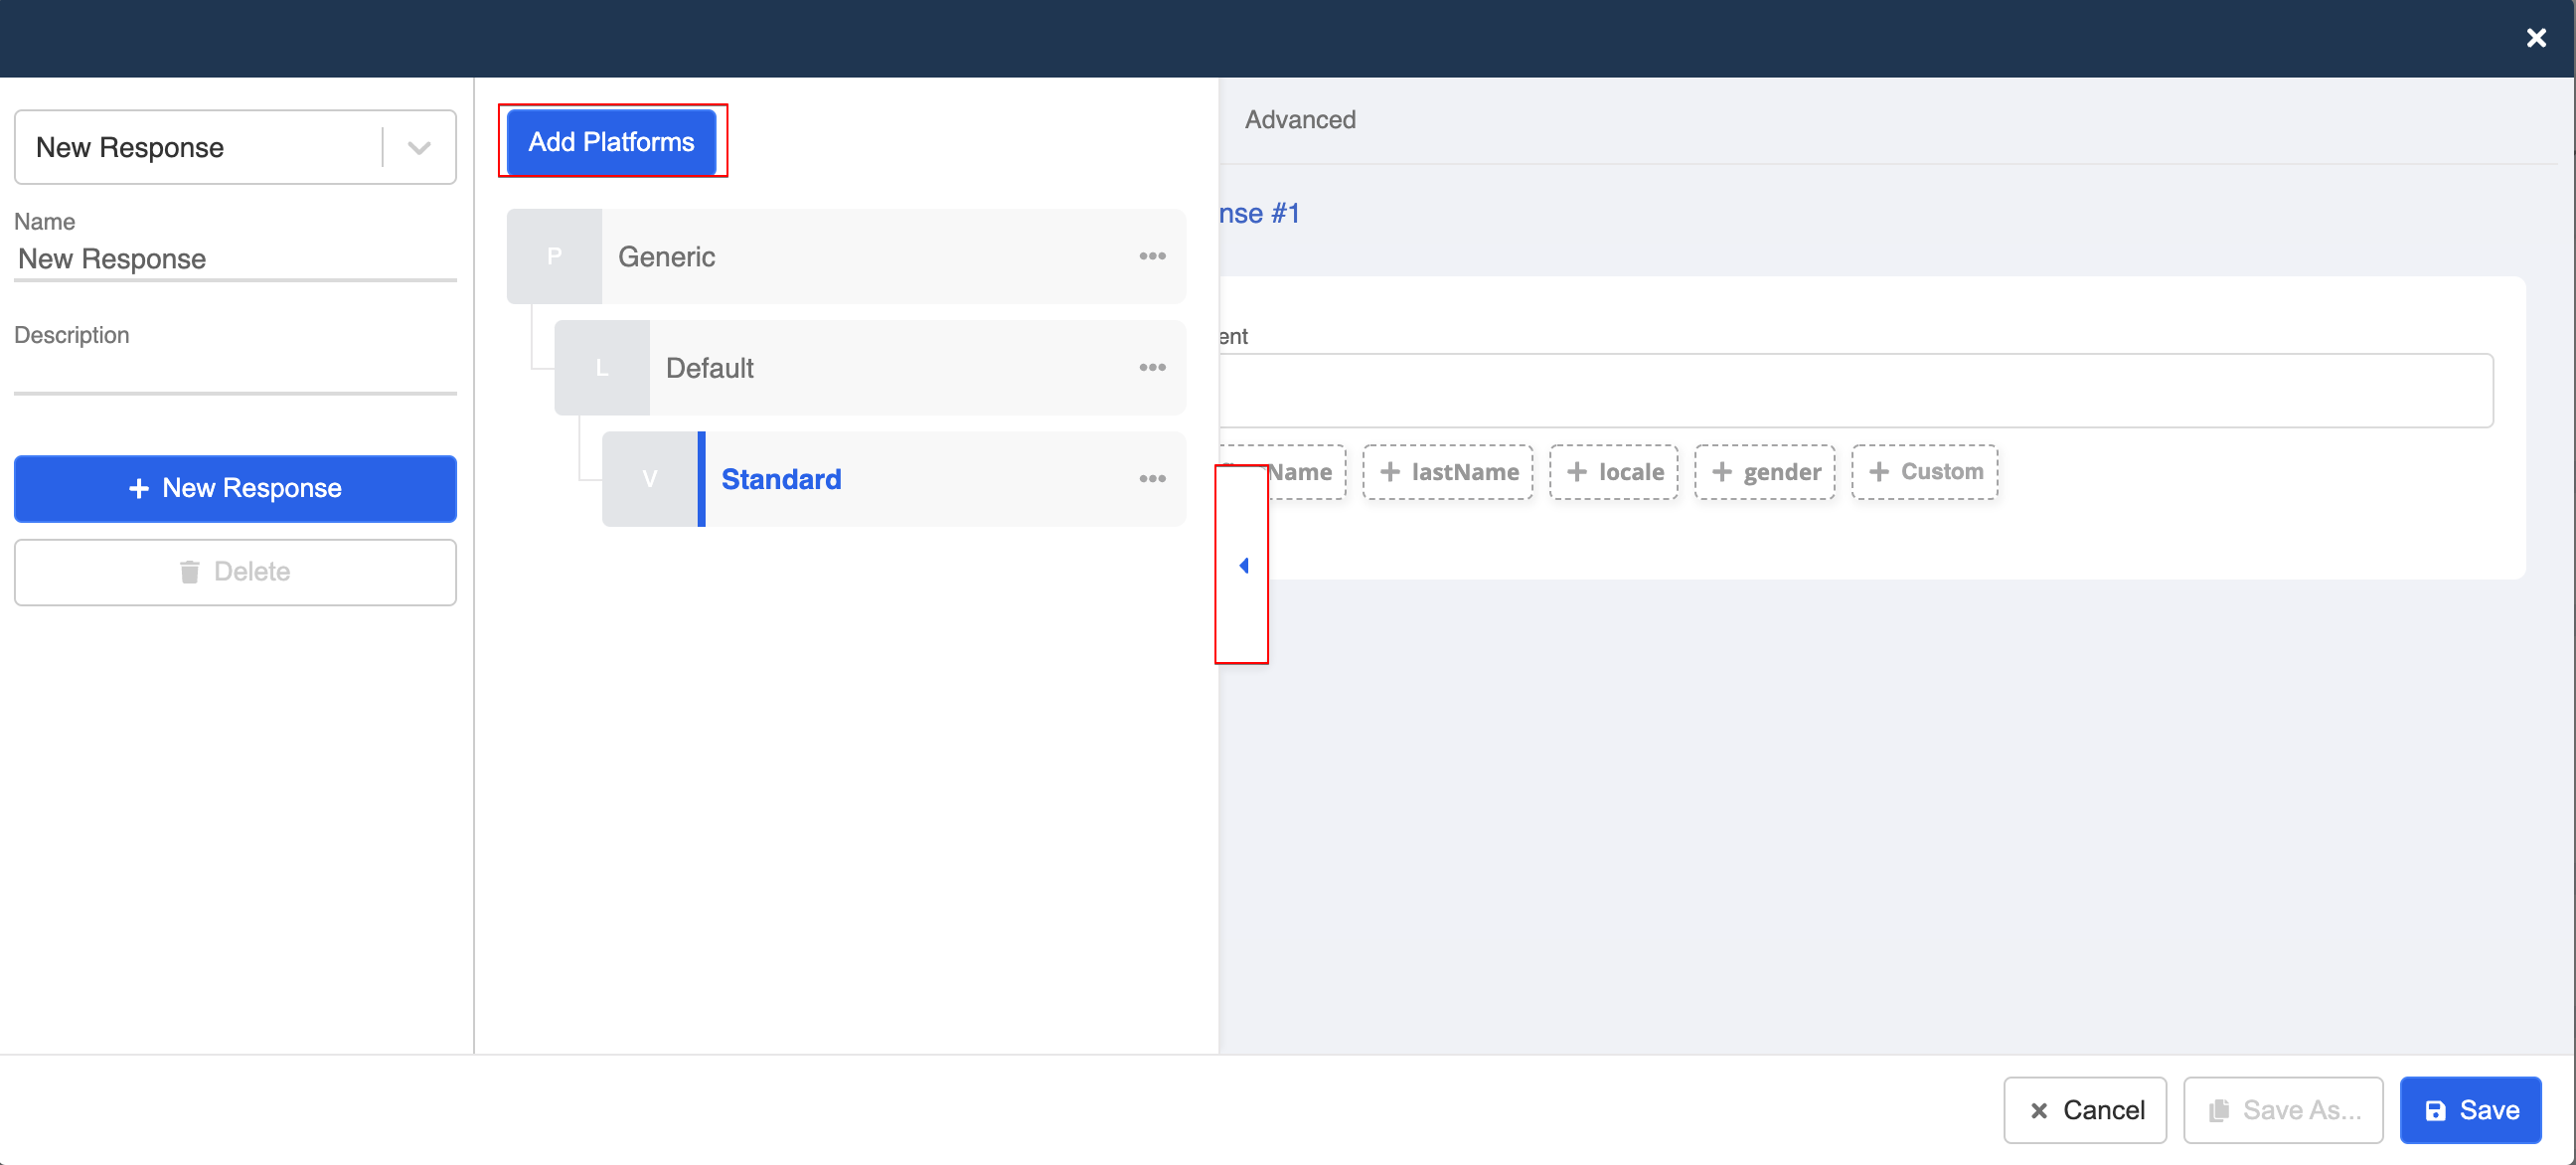
Scroll down in Node Inspector. Create a new response.
Open the "Platform Tab", select "Add Platform".
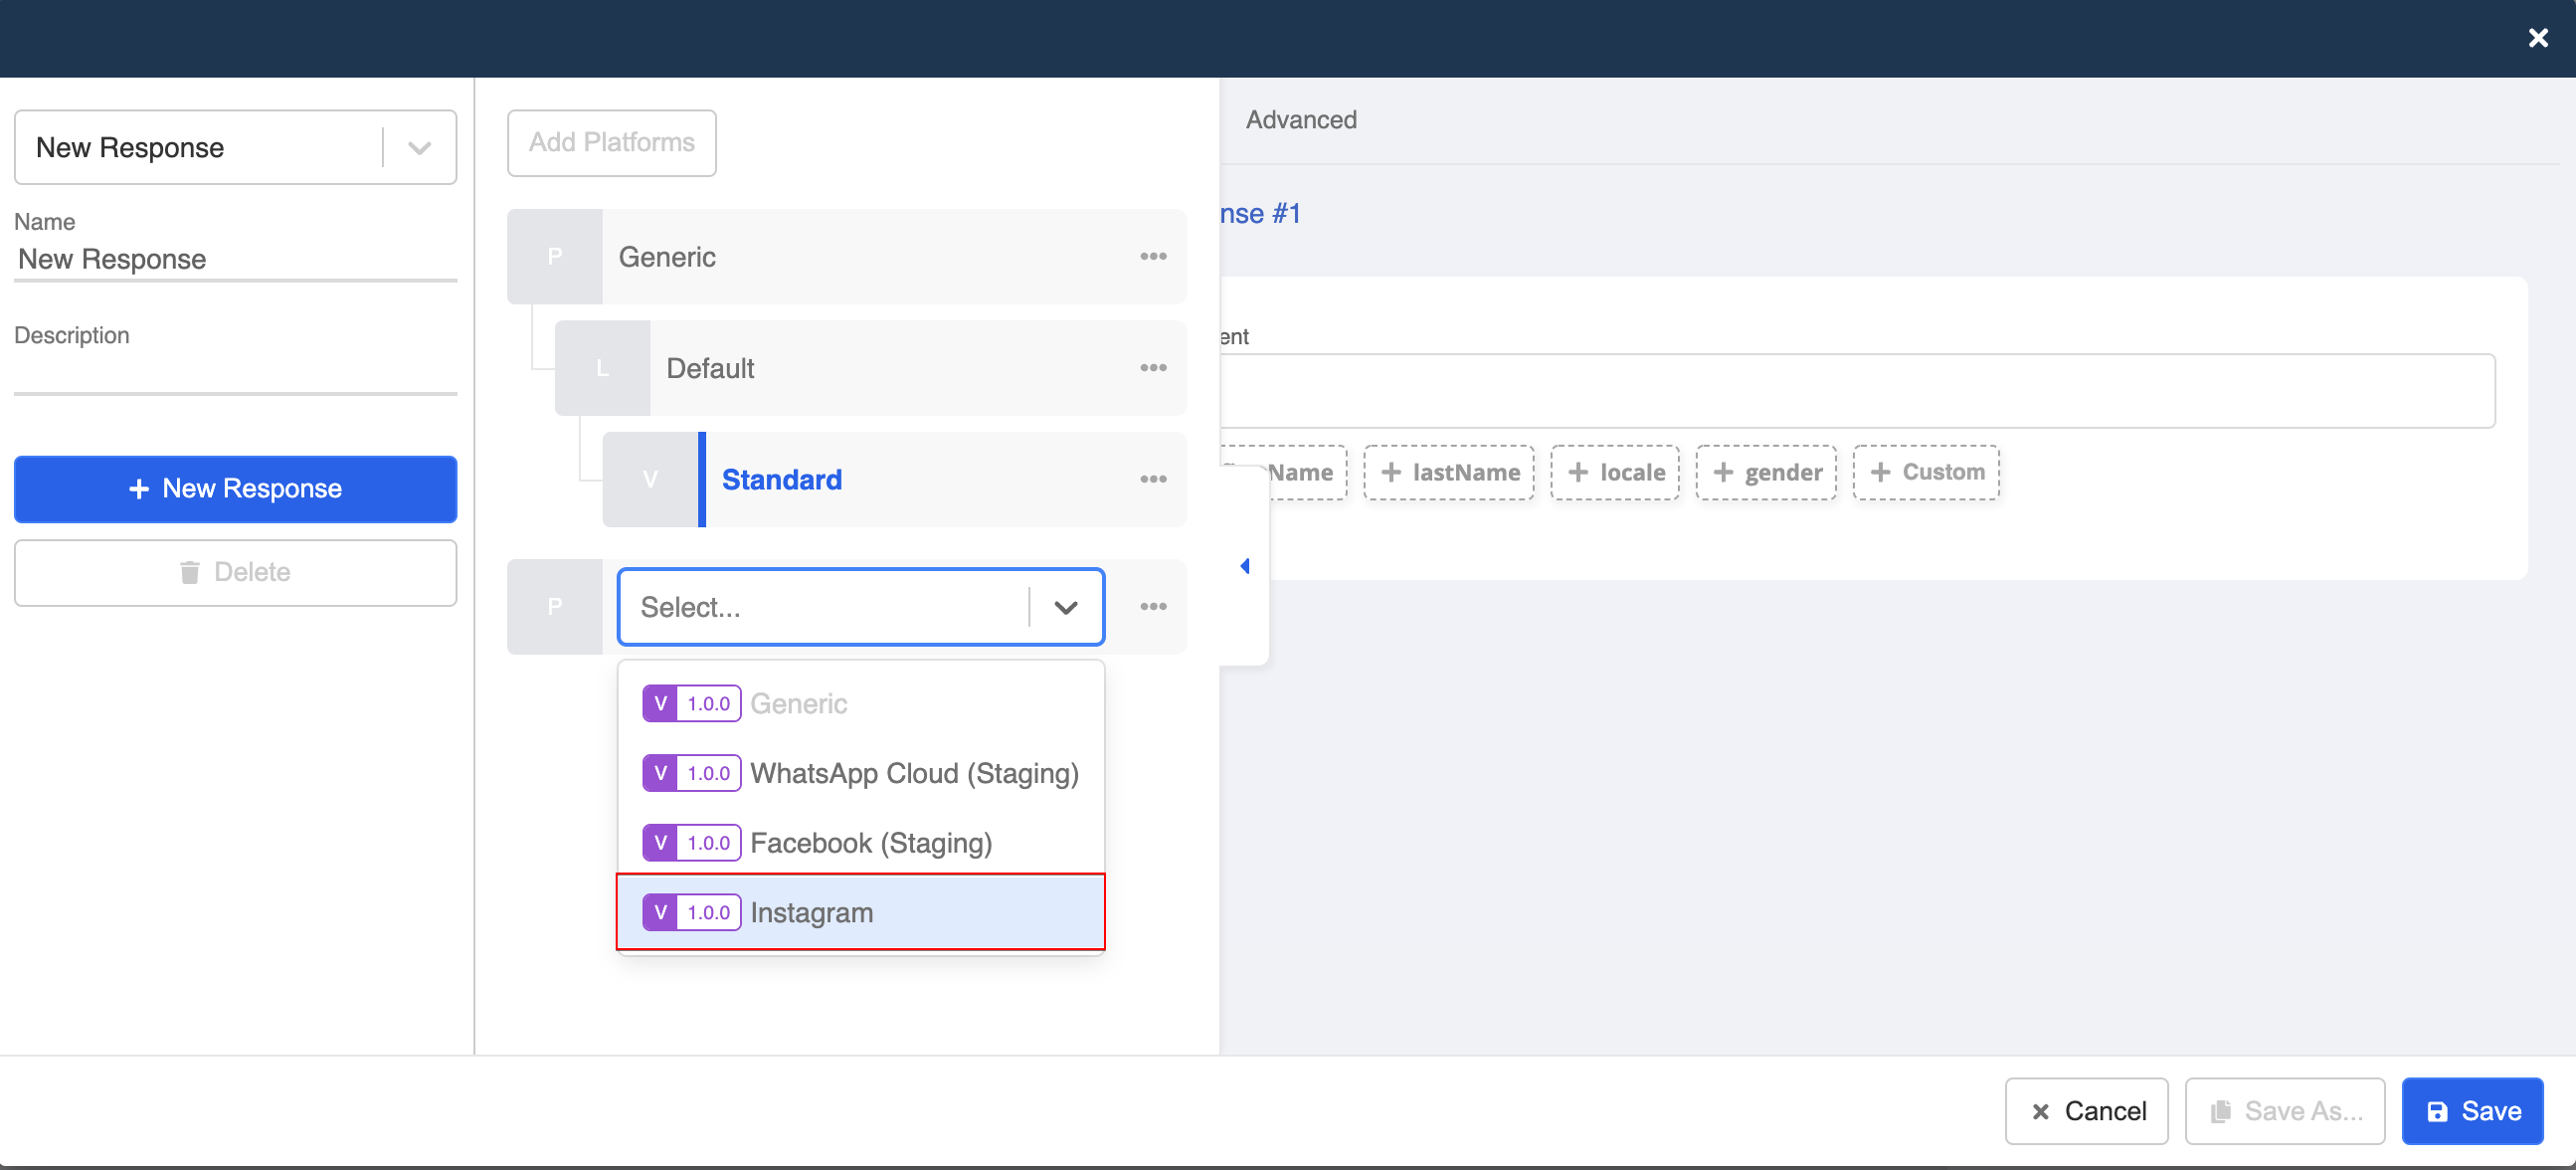
- Select "Instagram" from the dropdown.
- Select "Quick Replies" as the message type, and enter the text content.
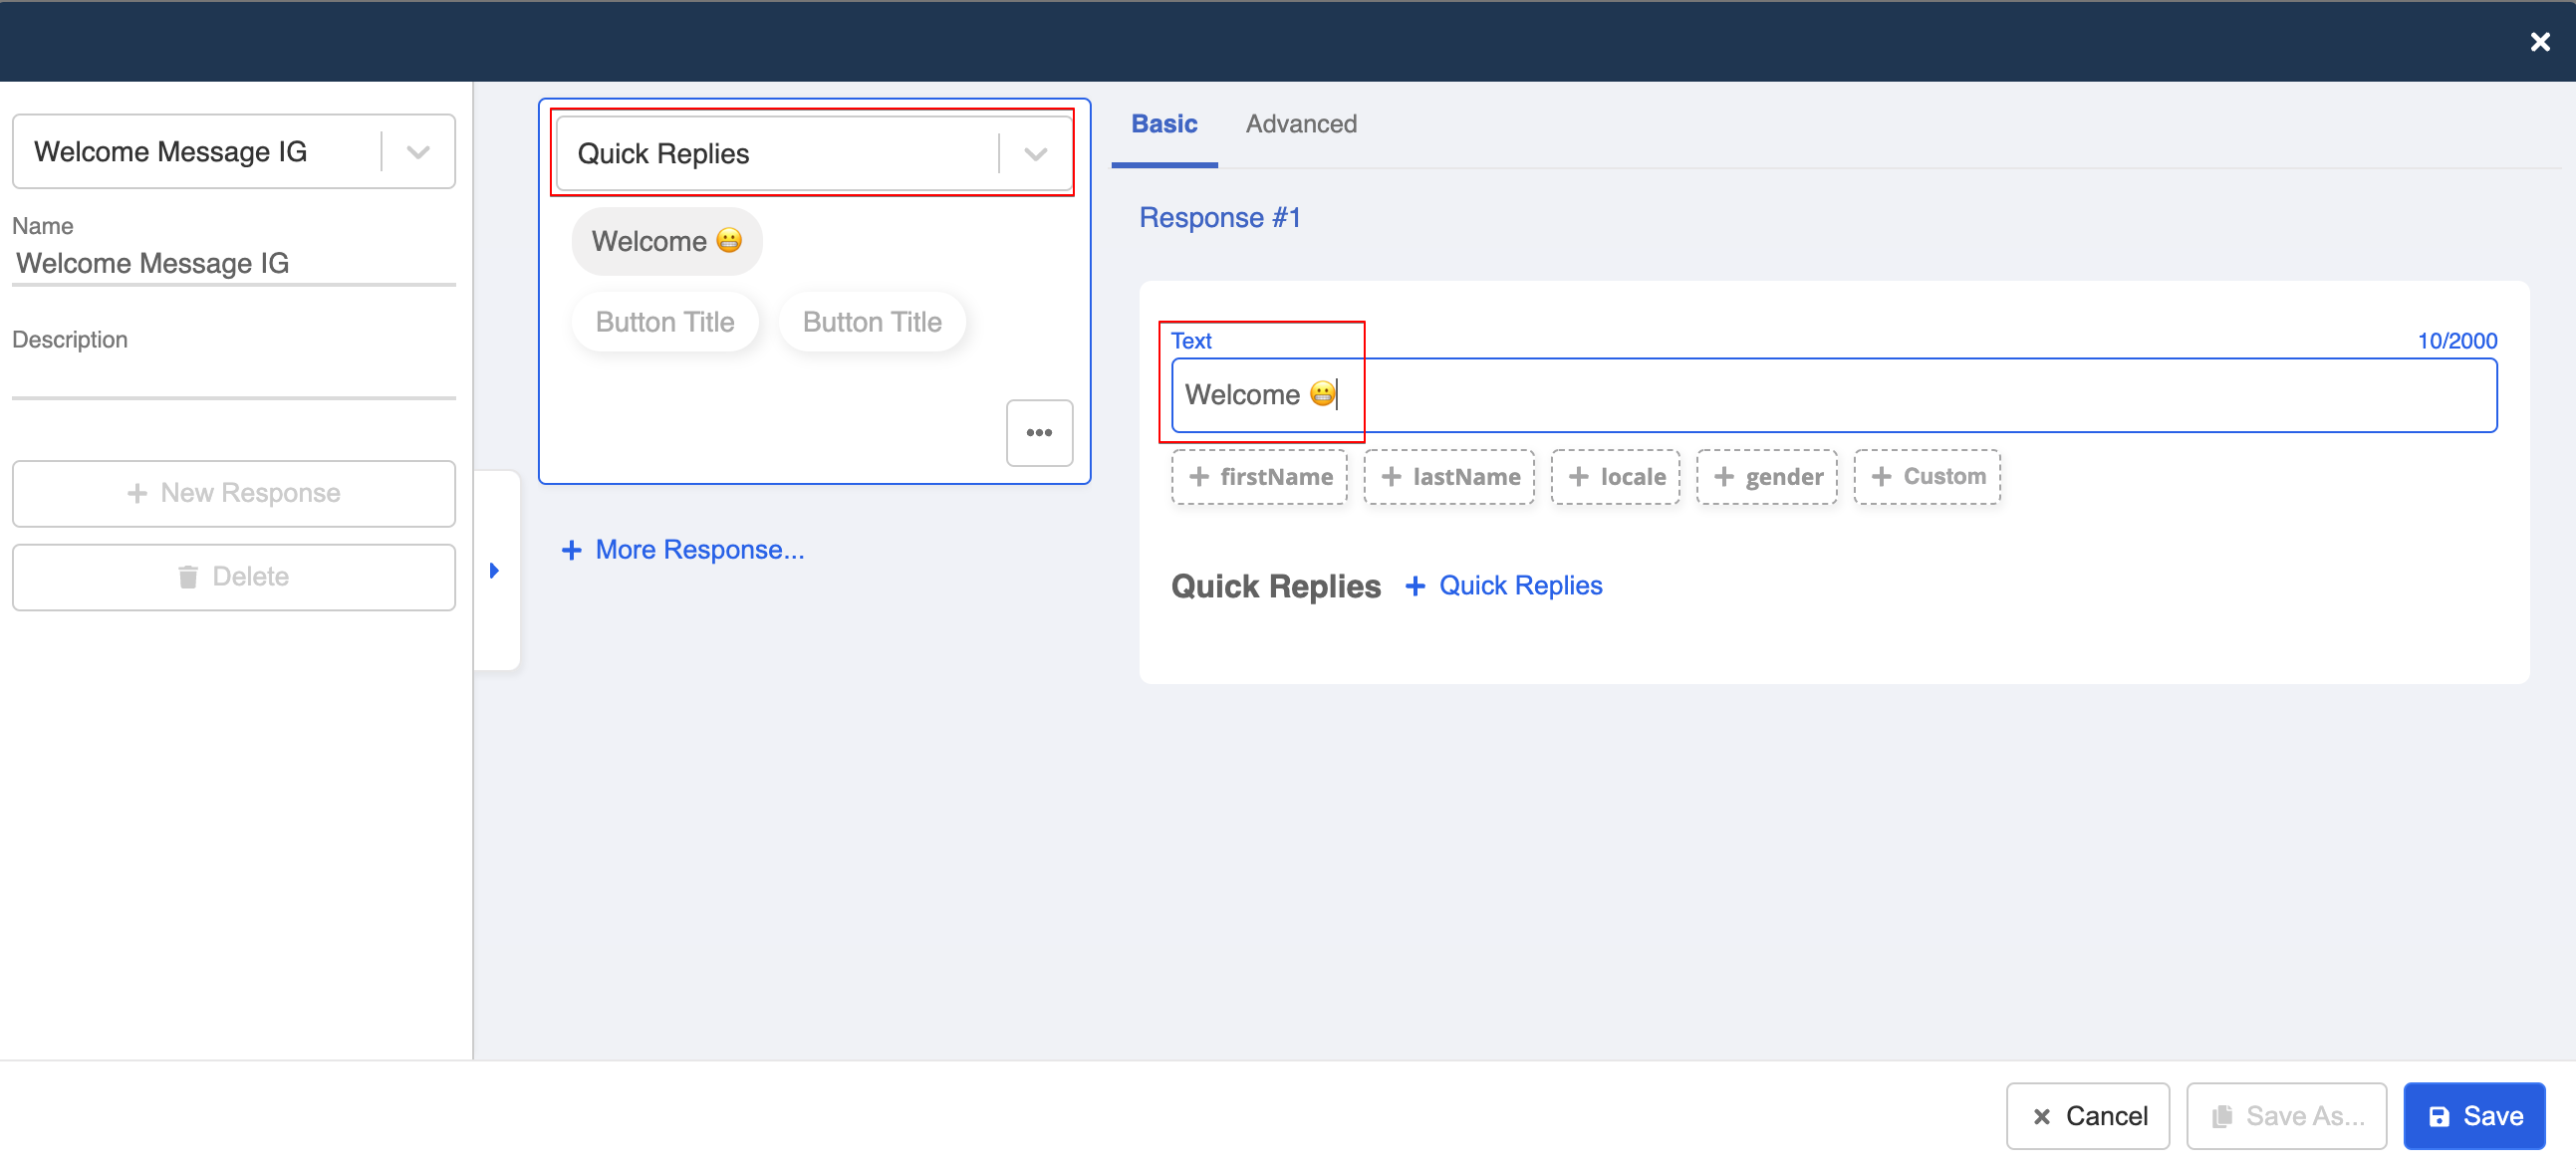
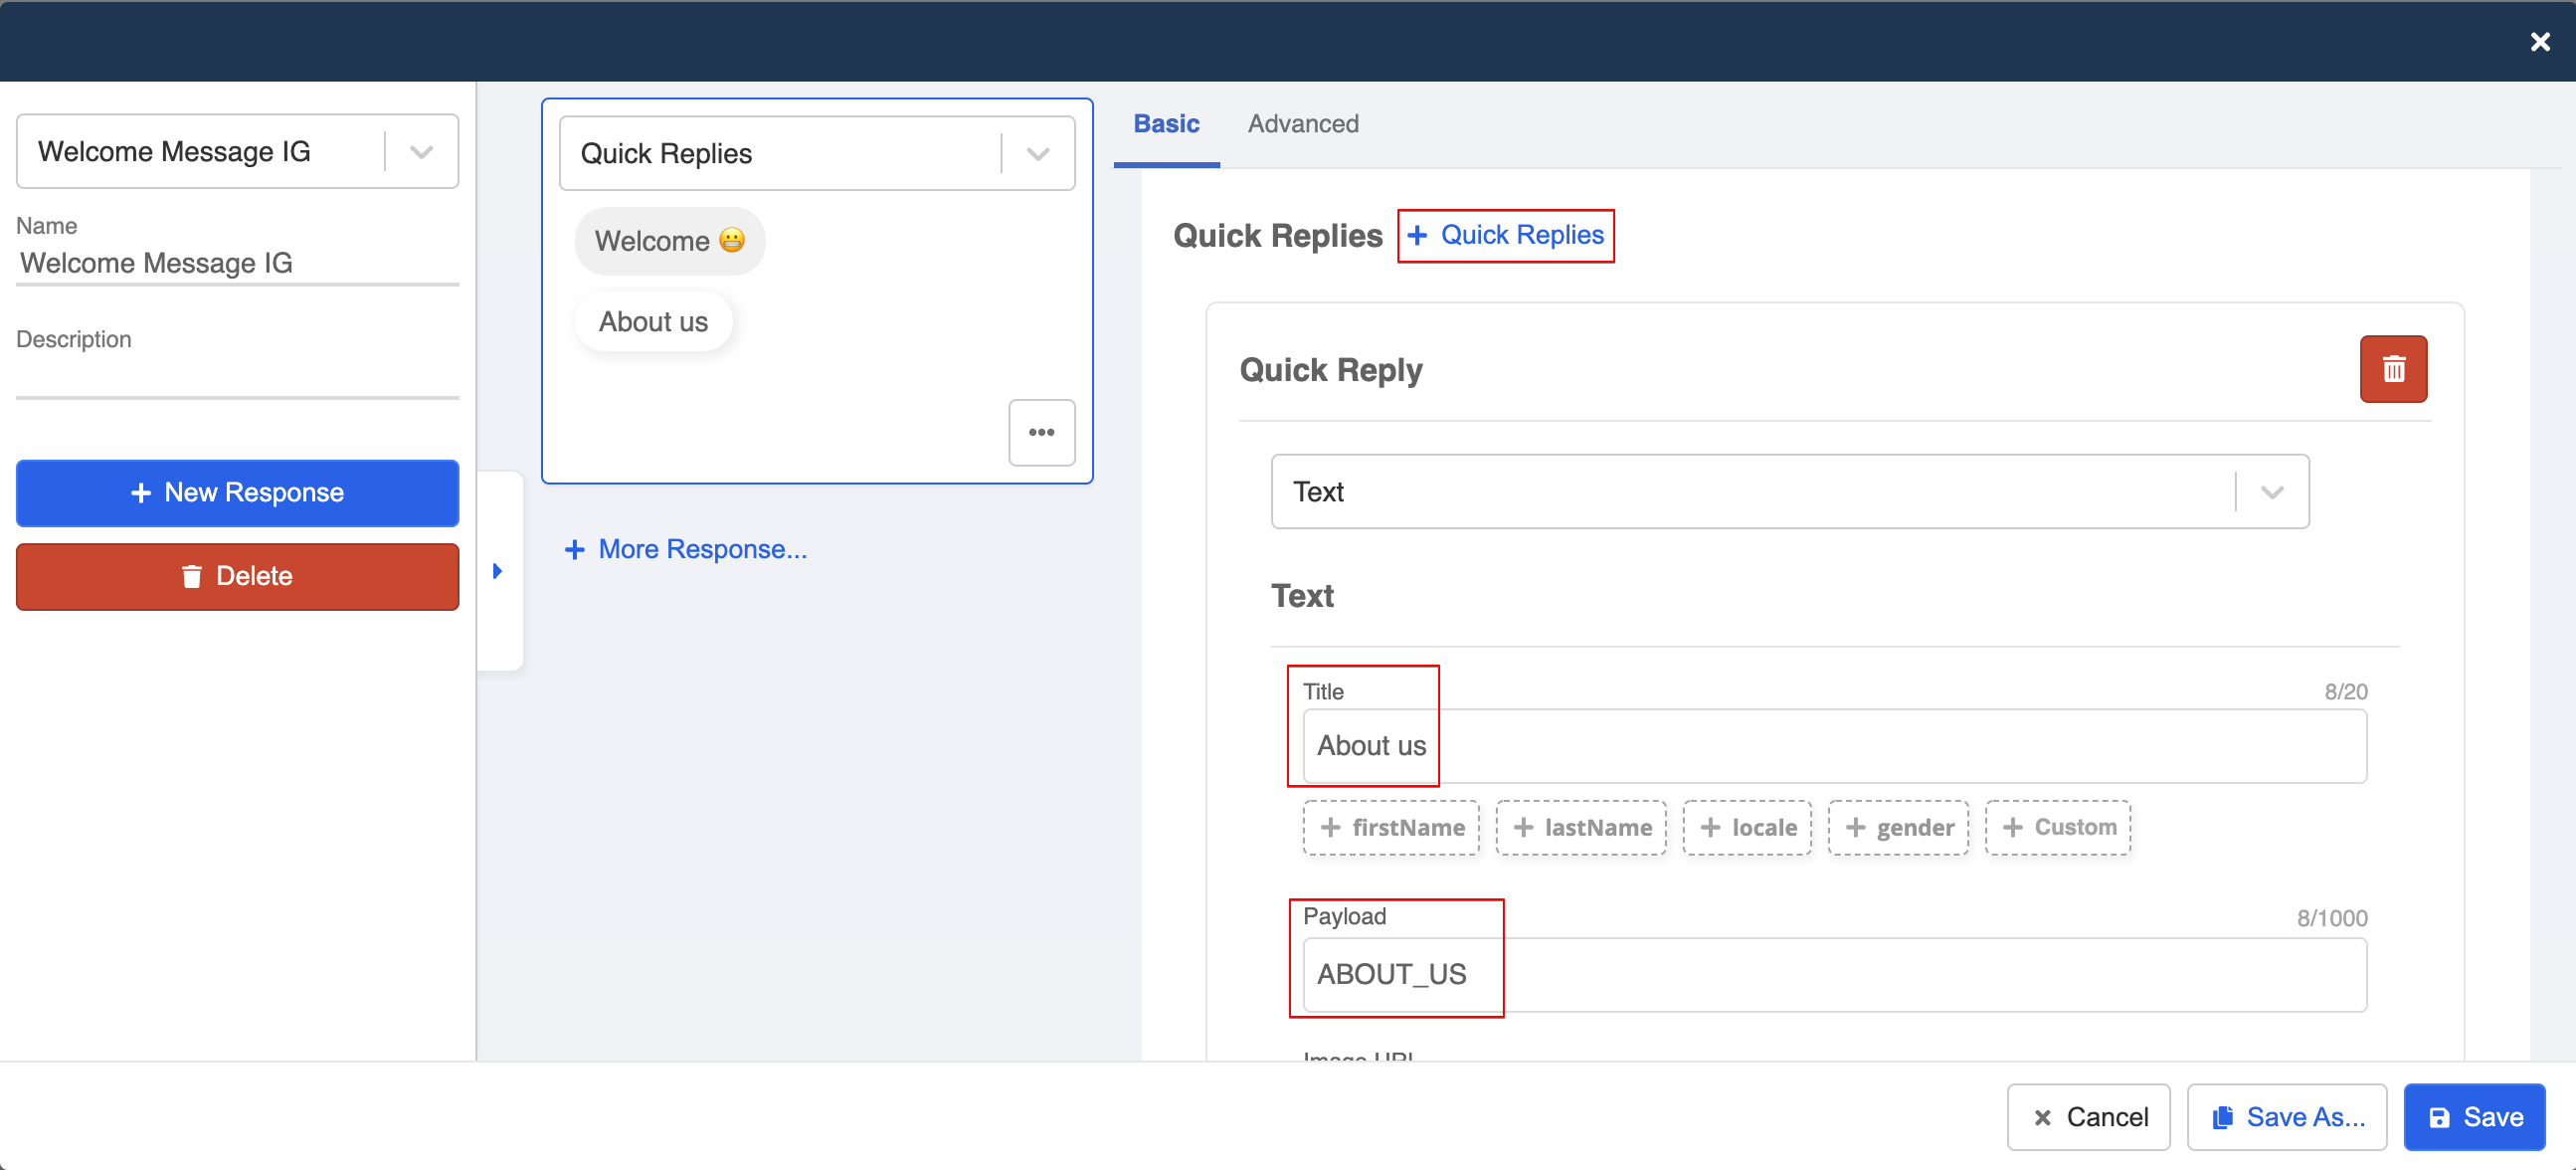
Click "+ Quick Replies" to add a quick reply button.
For the first button, enter the text in Title, and put "ABOUT_US" under Payload. This will help the chatbot identify the correct command when the users click that button.
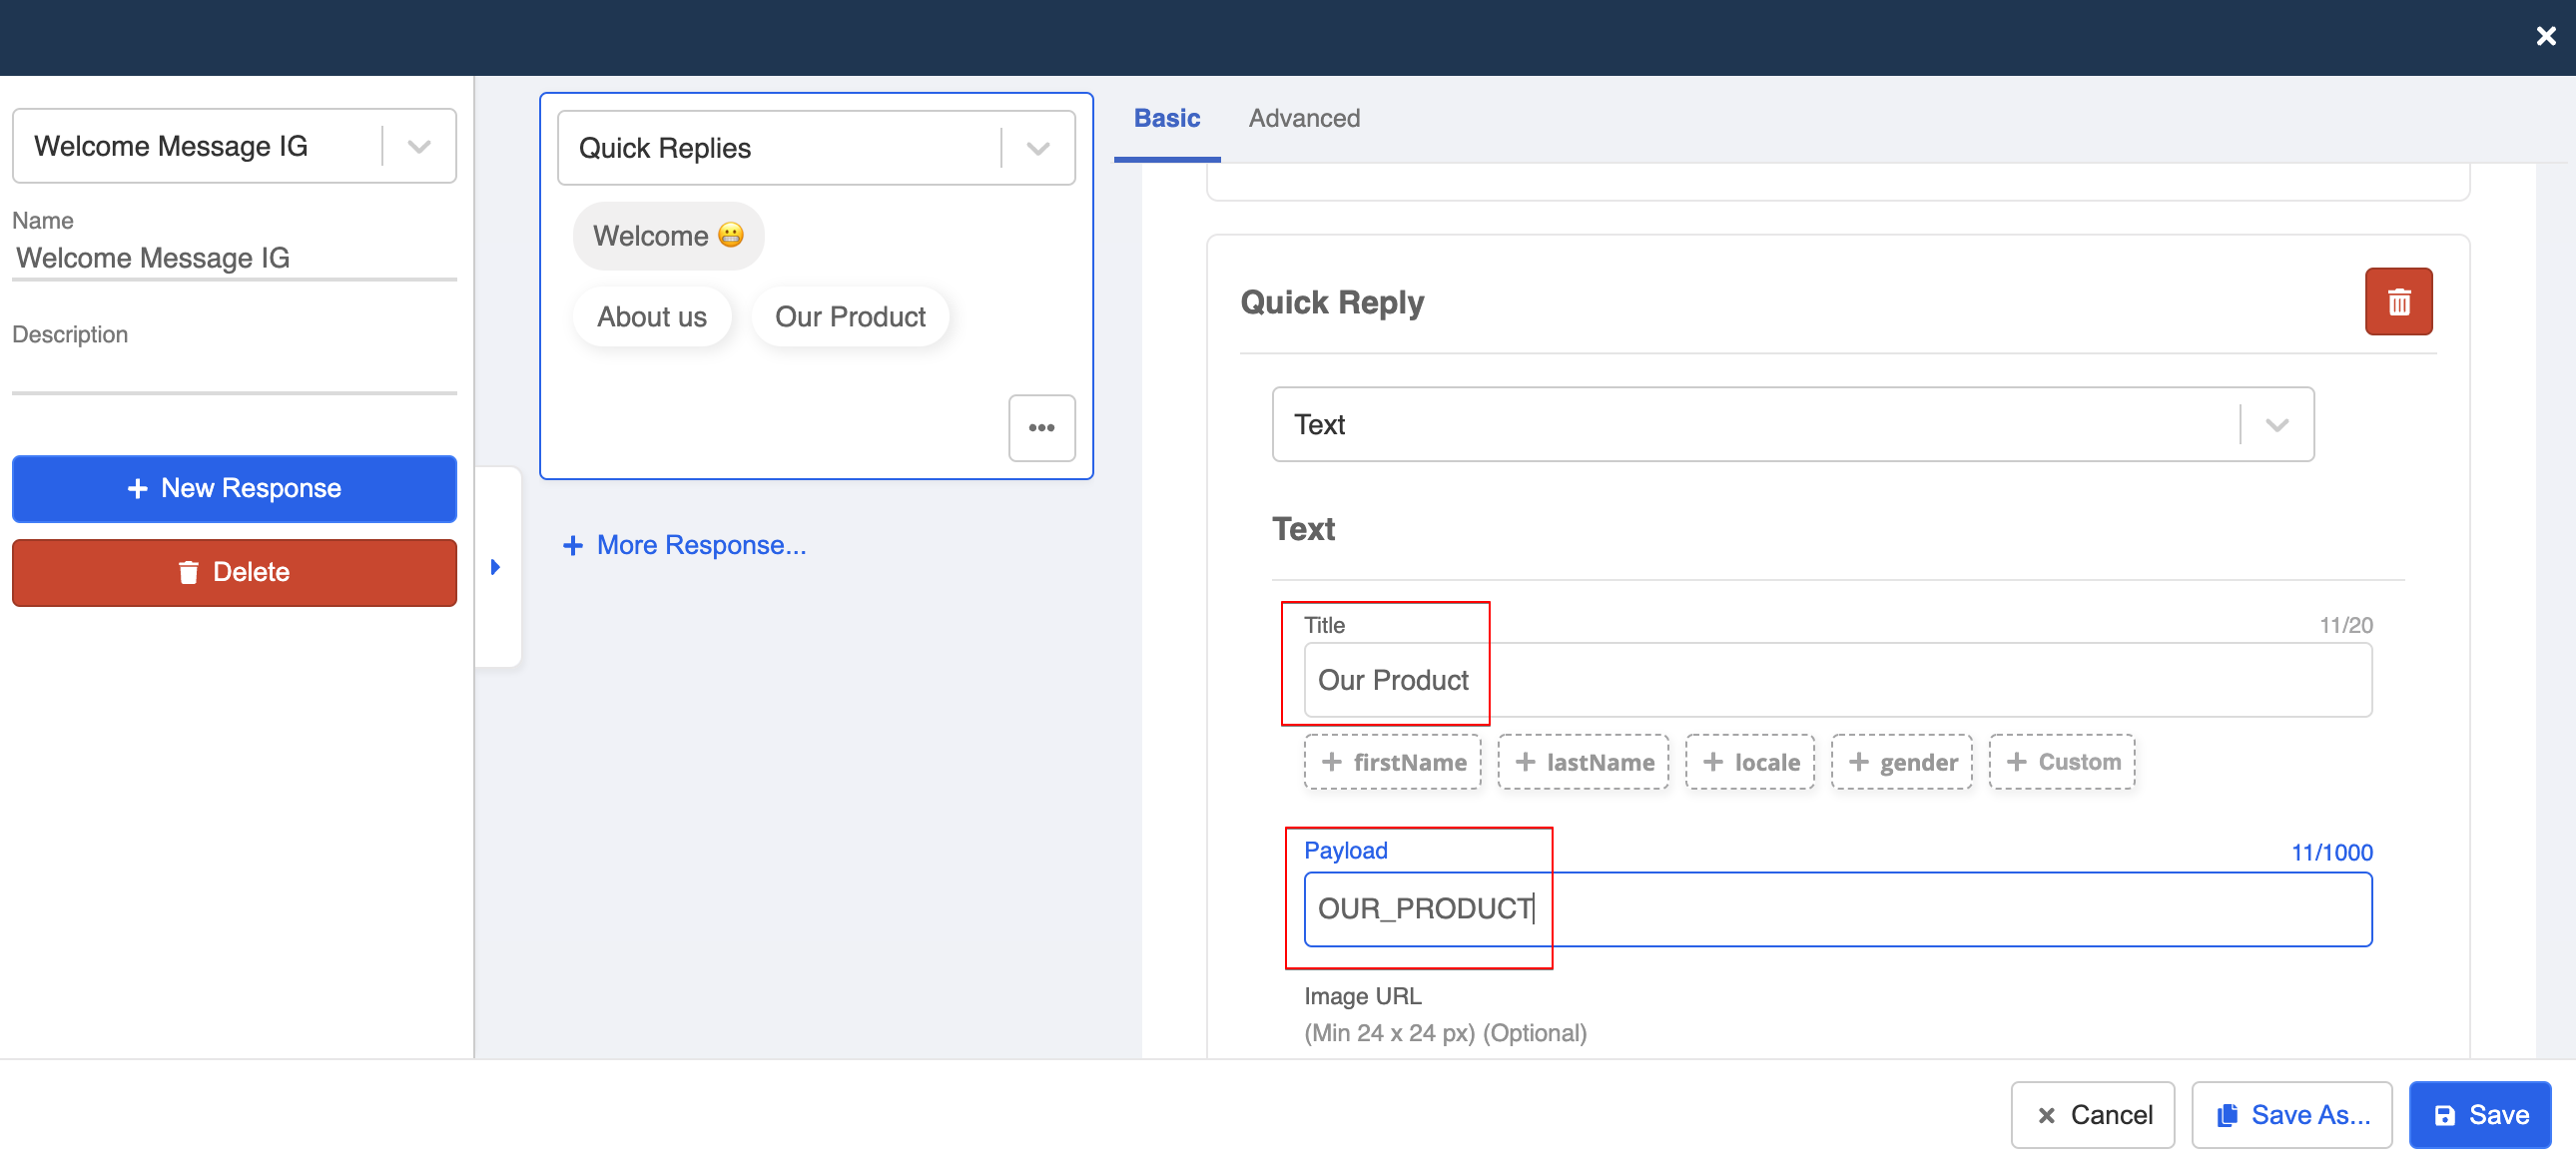
Click "+ Quick Reply" again and repeat the same steps for the second button.
For the second button, enter text content under Title. Similarly, put "PRODUCT" as Payload.
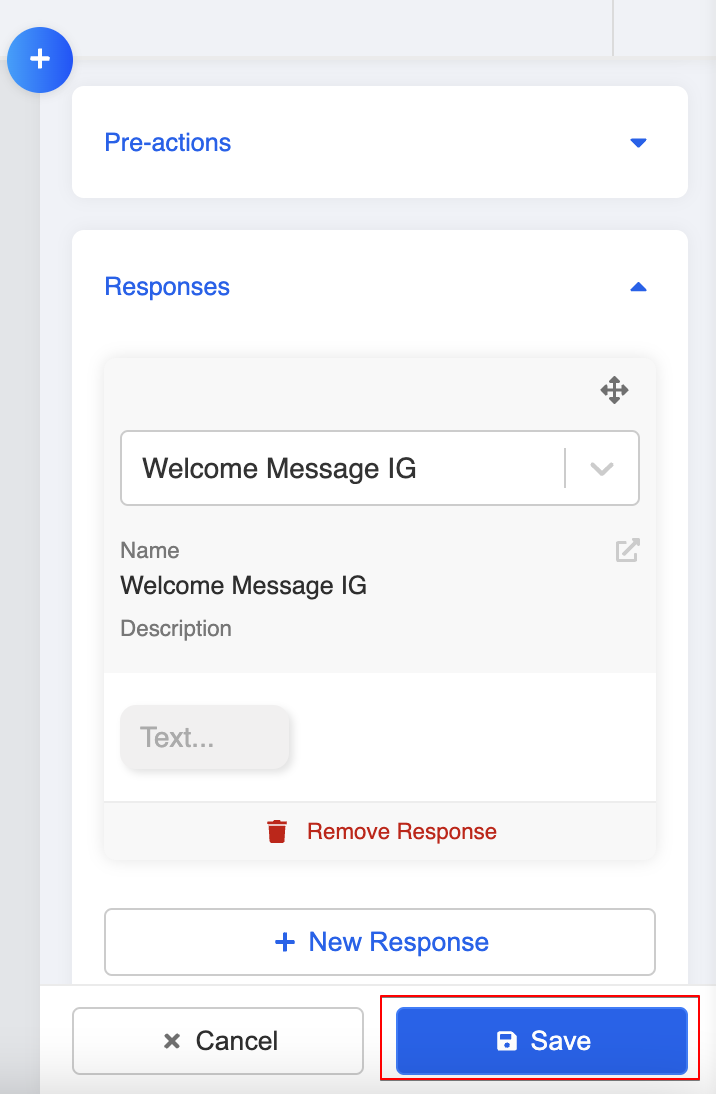
Check the response preview on the right side to see if the response content is set properly. Click "Save" at button right to save the response.
Close the pop-up. Click "Save" at the very bottom to save this node!