Connect Slack to Channel
Slack is a messaging app for business communication and collaboration.
In this section, we will help you set up a Slack integration developed by WOZTELL. Combining the application of chatbot, this integration allows you to create a live chat handover system to the existing conversation flow. As a result, end users are given the choice to experience both the chat automation and real-time customer support.
Create Slack Channel
Before proceeding to the next step, please make sure you have created a Slack workspace.
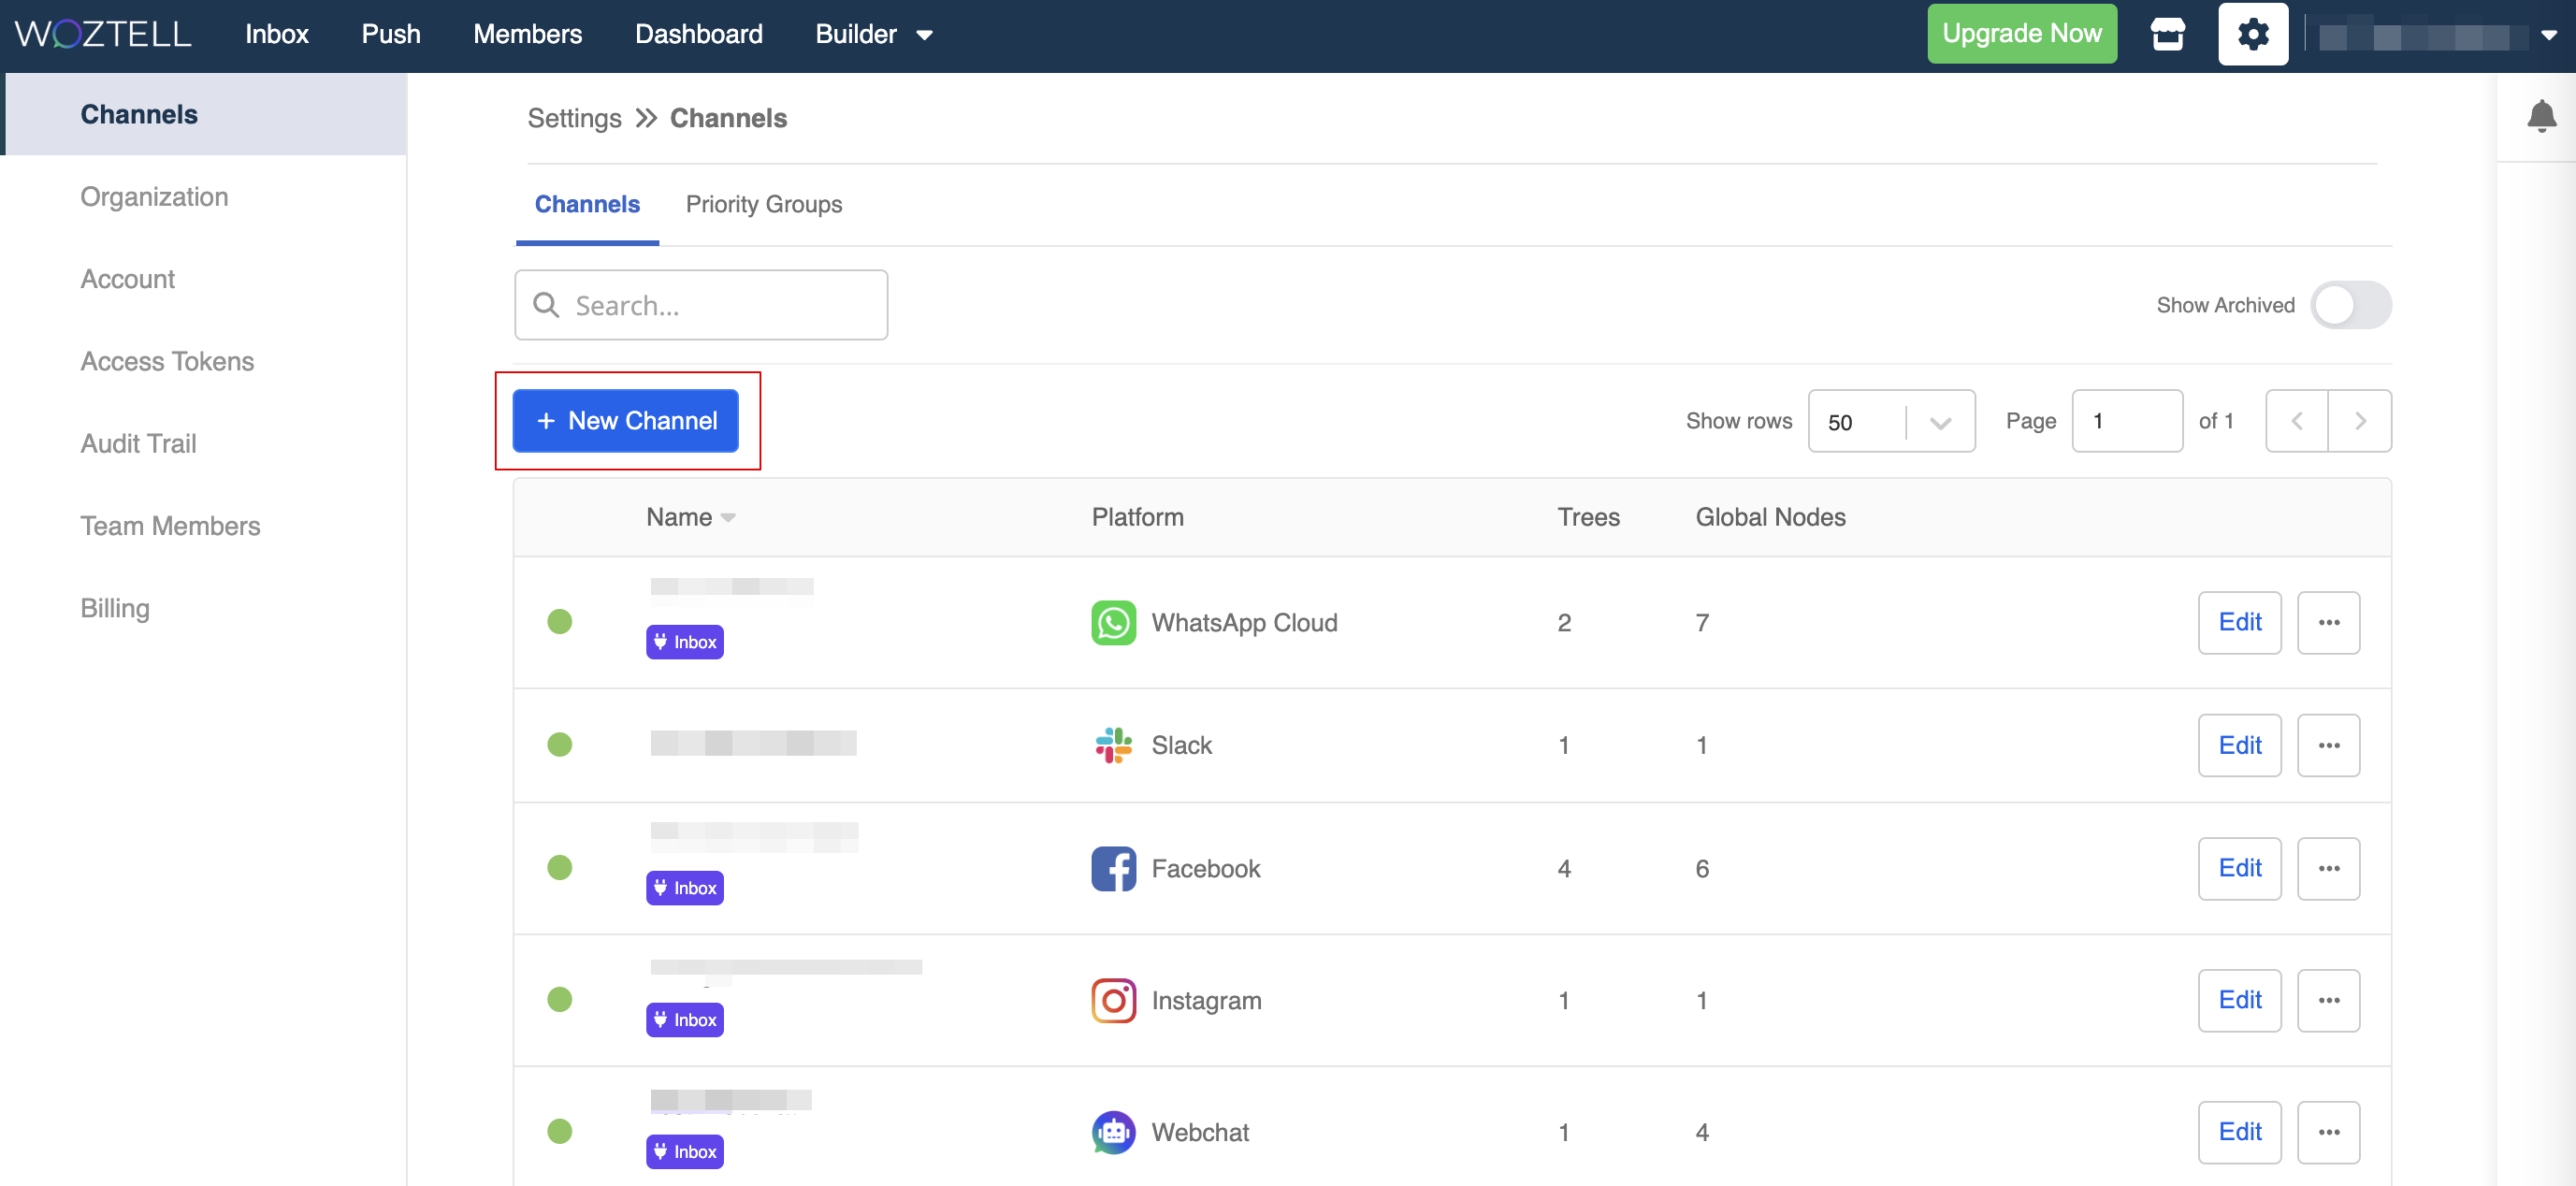
In WOZTELL, select "Channels" at the top menu bar.
Click "+New Channel"
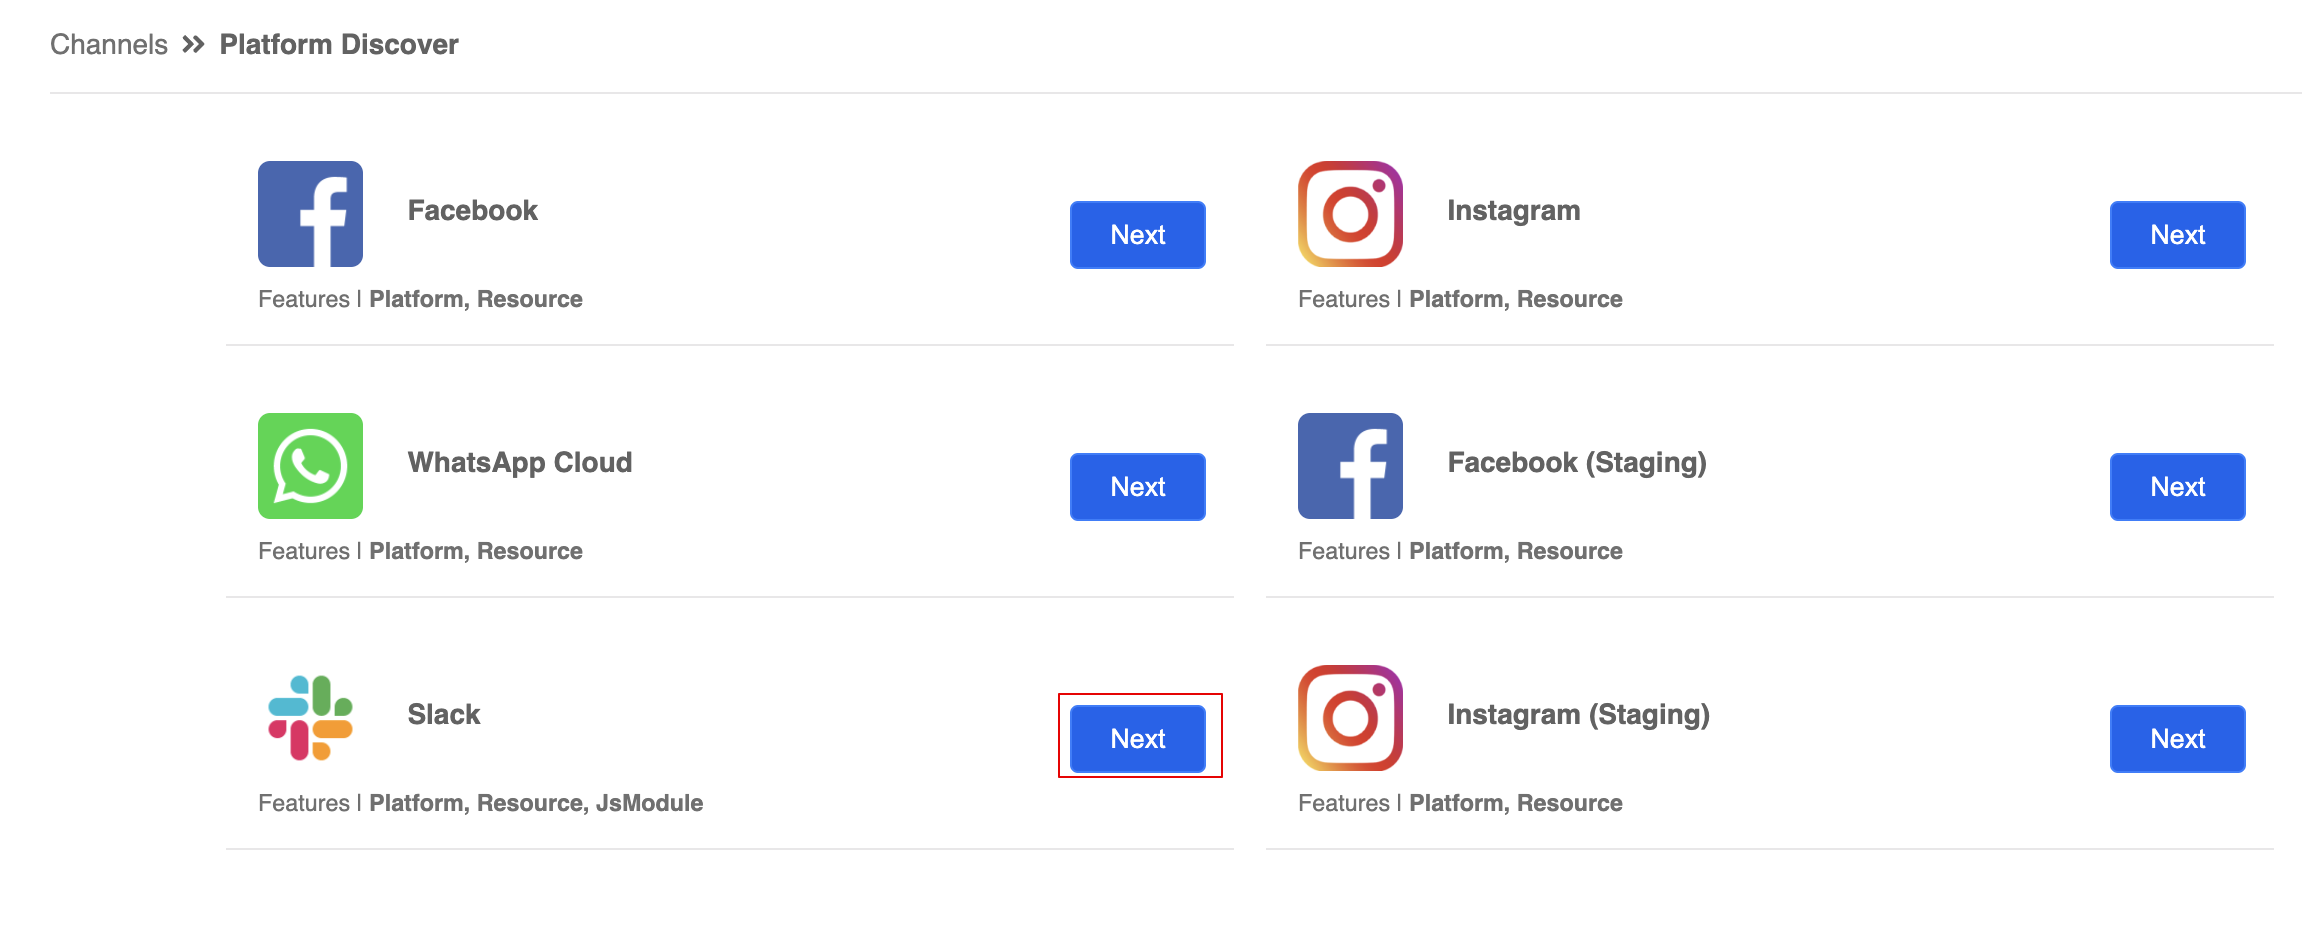
- Select the Slack icon and click "Next".
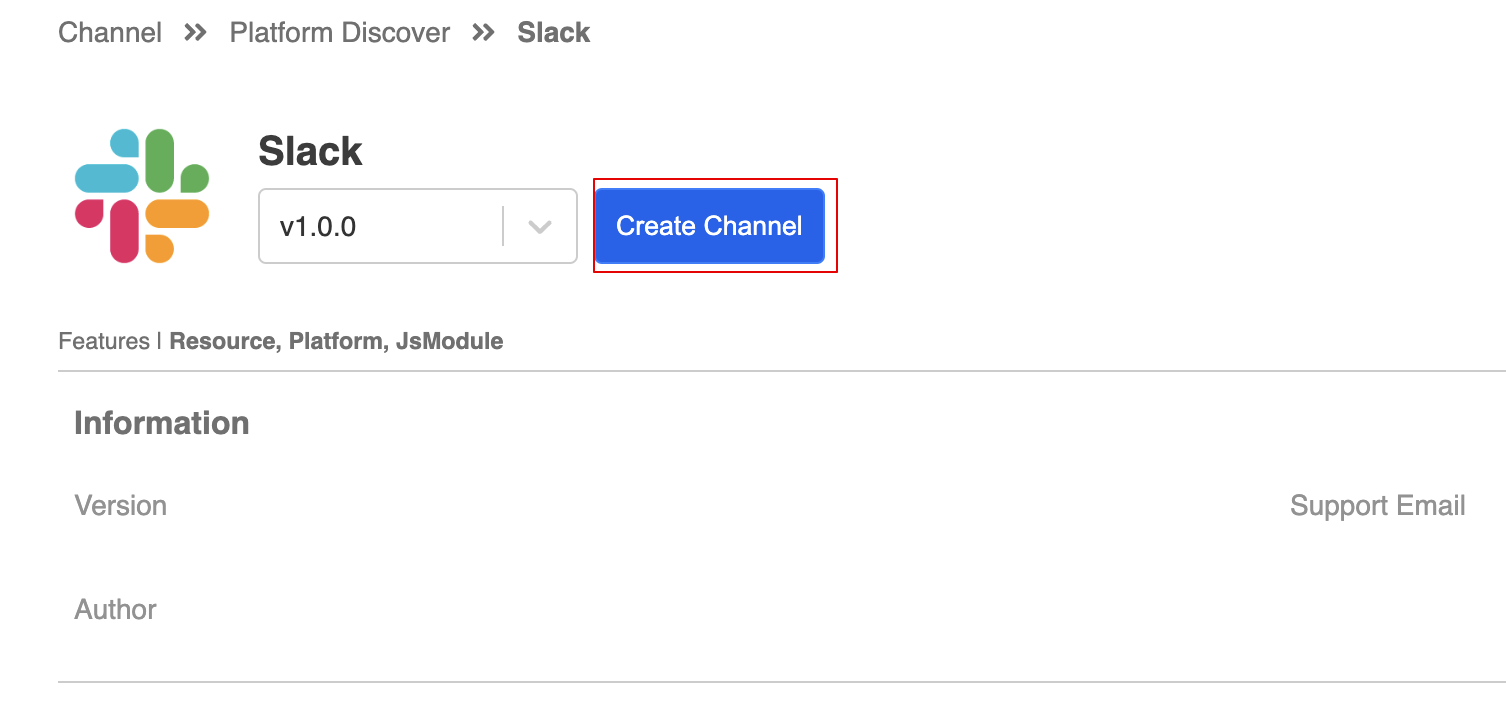
- Select the integration version and click "Create Channel".
- Enter a "Channel Name" and "Channel Description" (optional). Then, click "Create Channel"

- In platform, select "Connect".
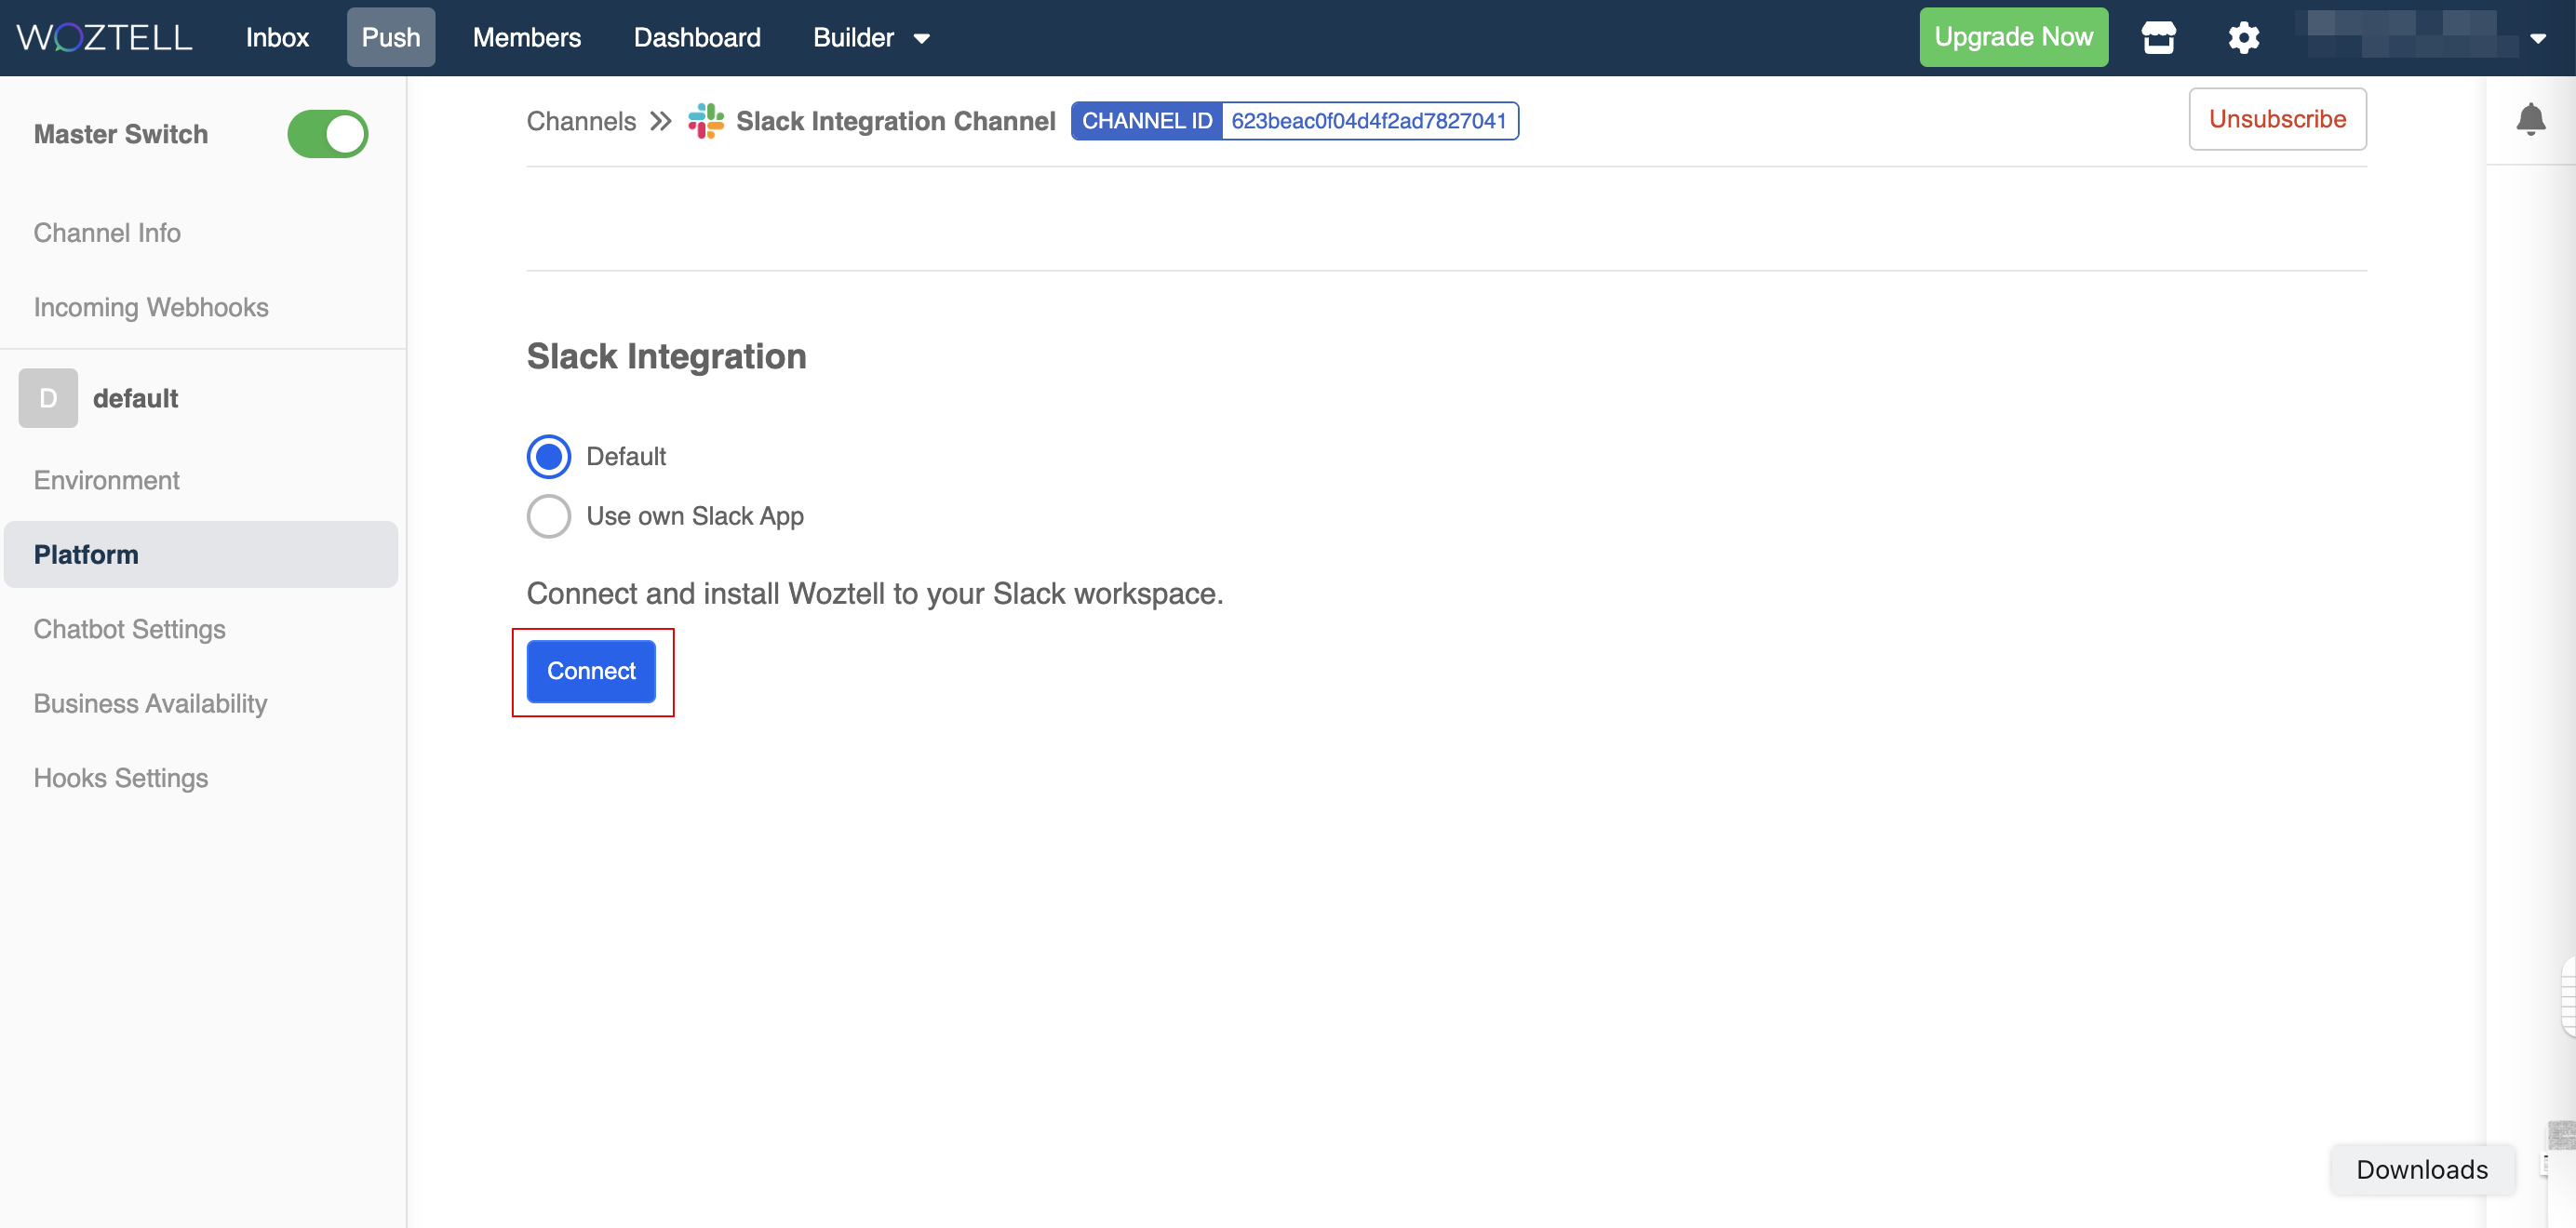
- A pop-up window will ask for the permission of letting WOZTELL gain access to your workspace. If you have multiple workspaces, you should be able to select one of them on the top right dropdown menu. Click "Allow" to continue.

- After that, head back to WOZTELL. Now the Slack integration has been successfully installed.

Add Command Chatbot to Channel
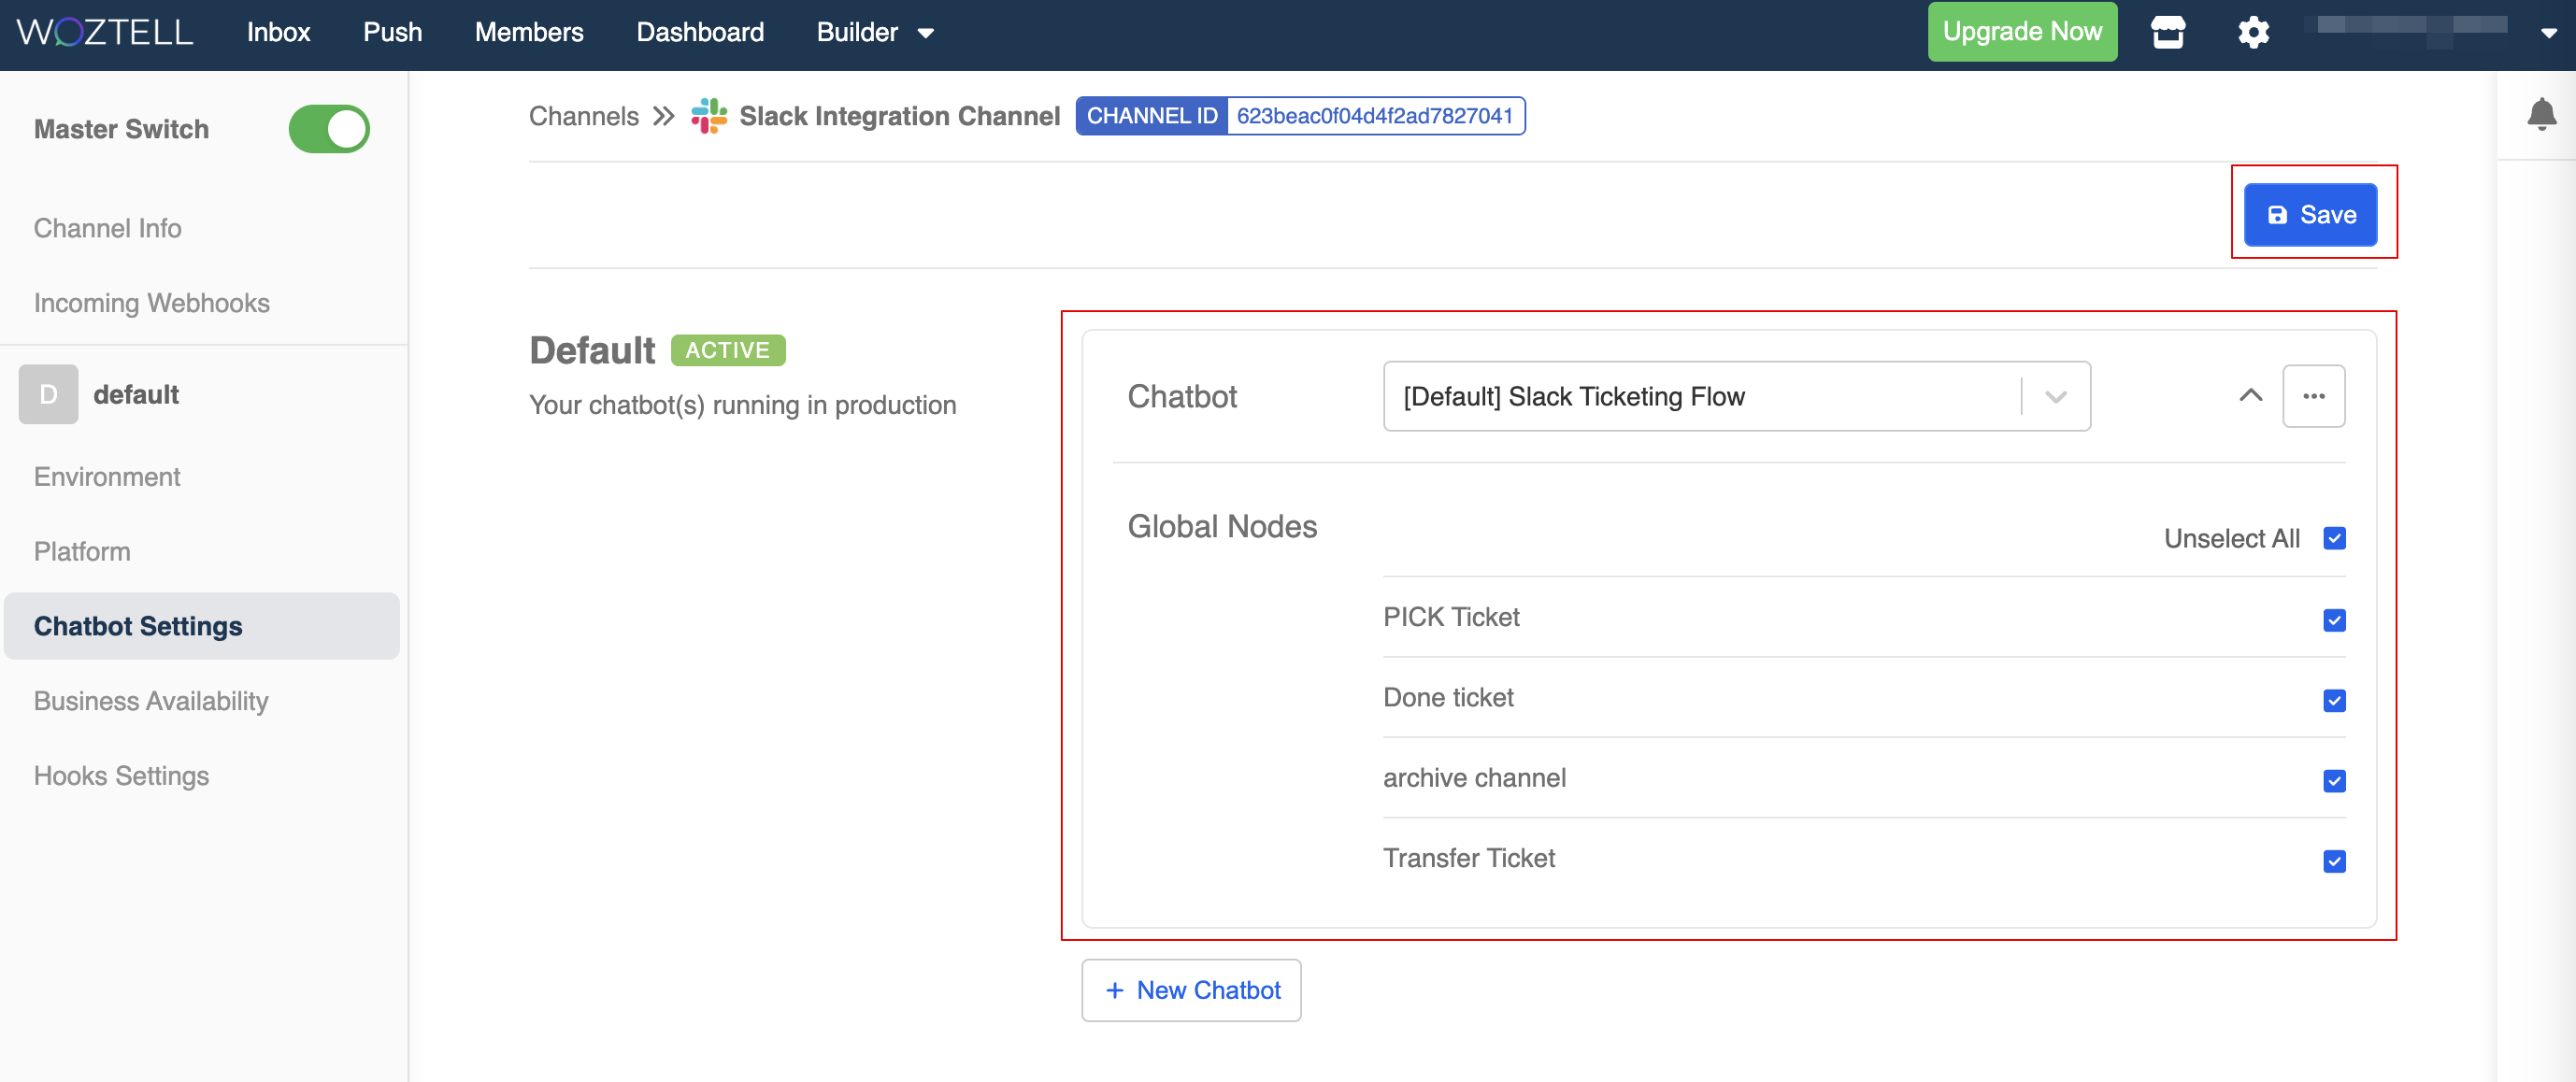
- Once you have installed the Slack integration, a chatbot will be imported automatically. This chatbot enables you to apply command and operations in Slack.
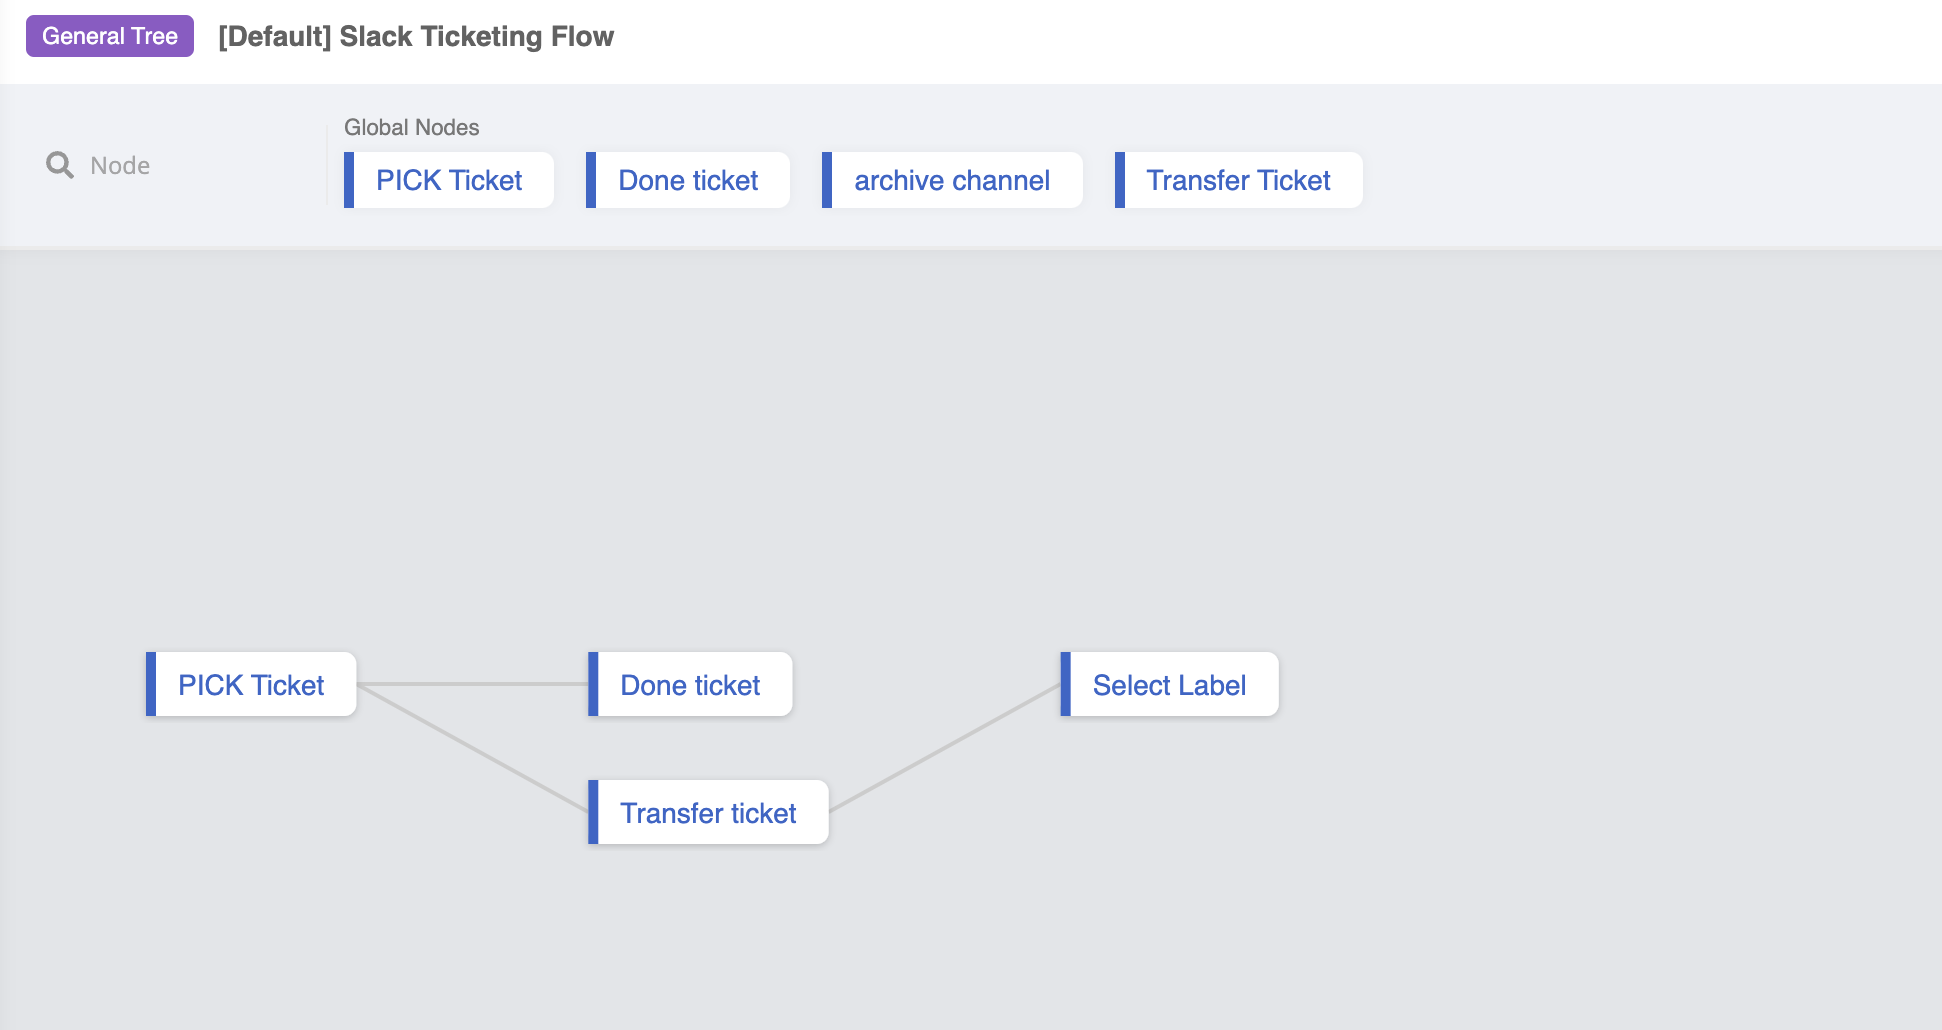
- In the "Platform" of the Slack channel, add this chatbot and check all the global nodes. Finally, "Save" the chatbot settings.
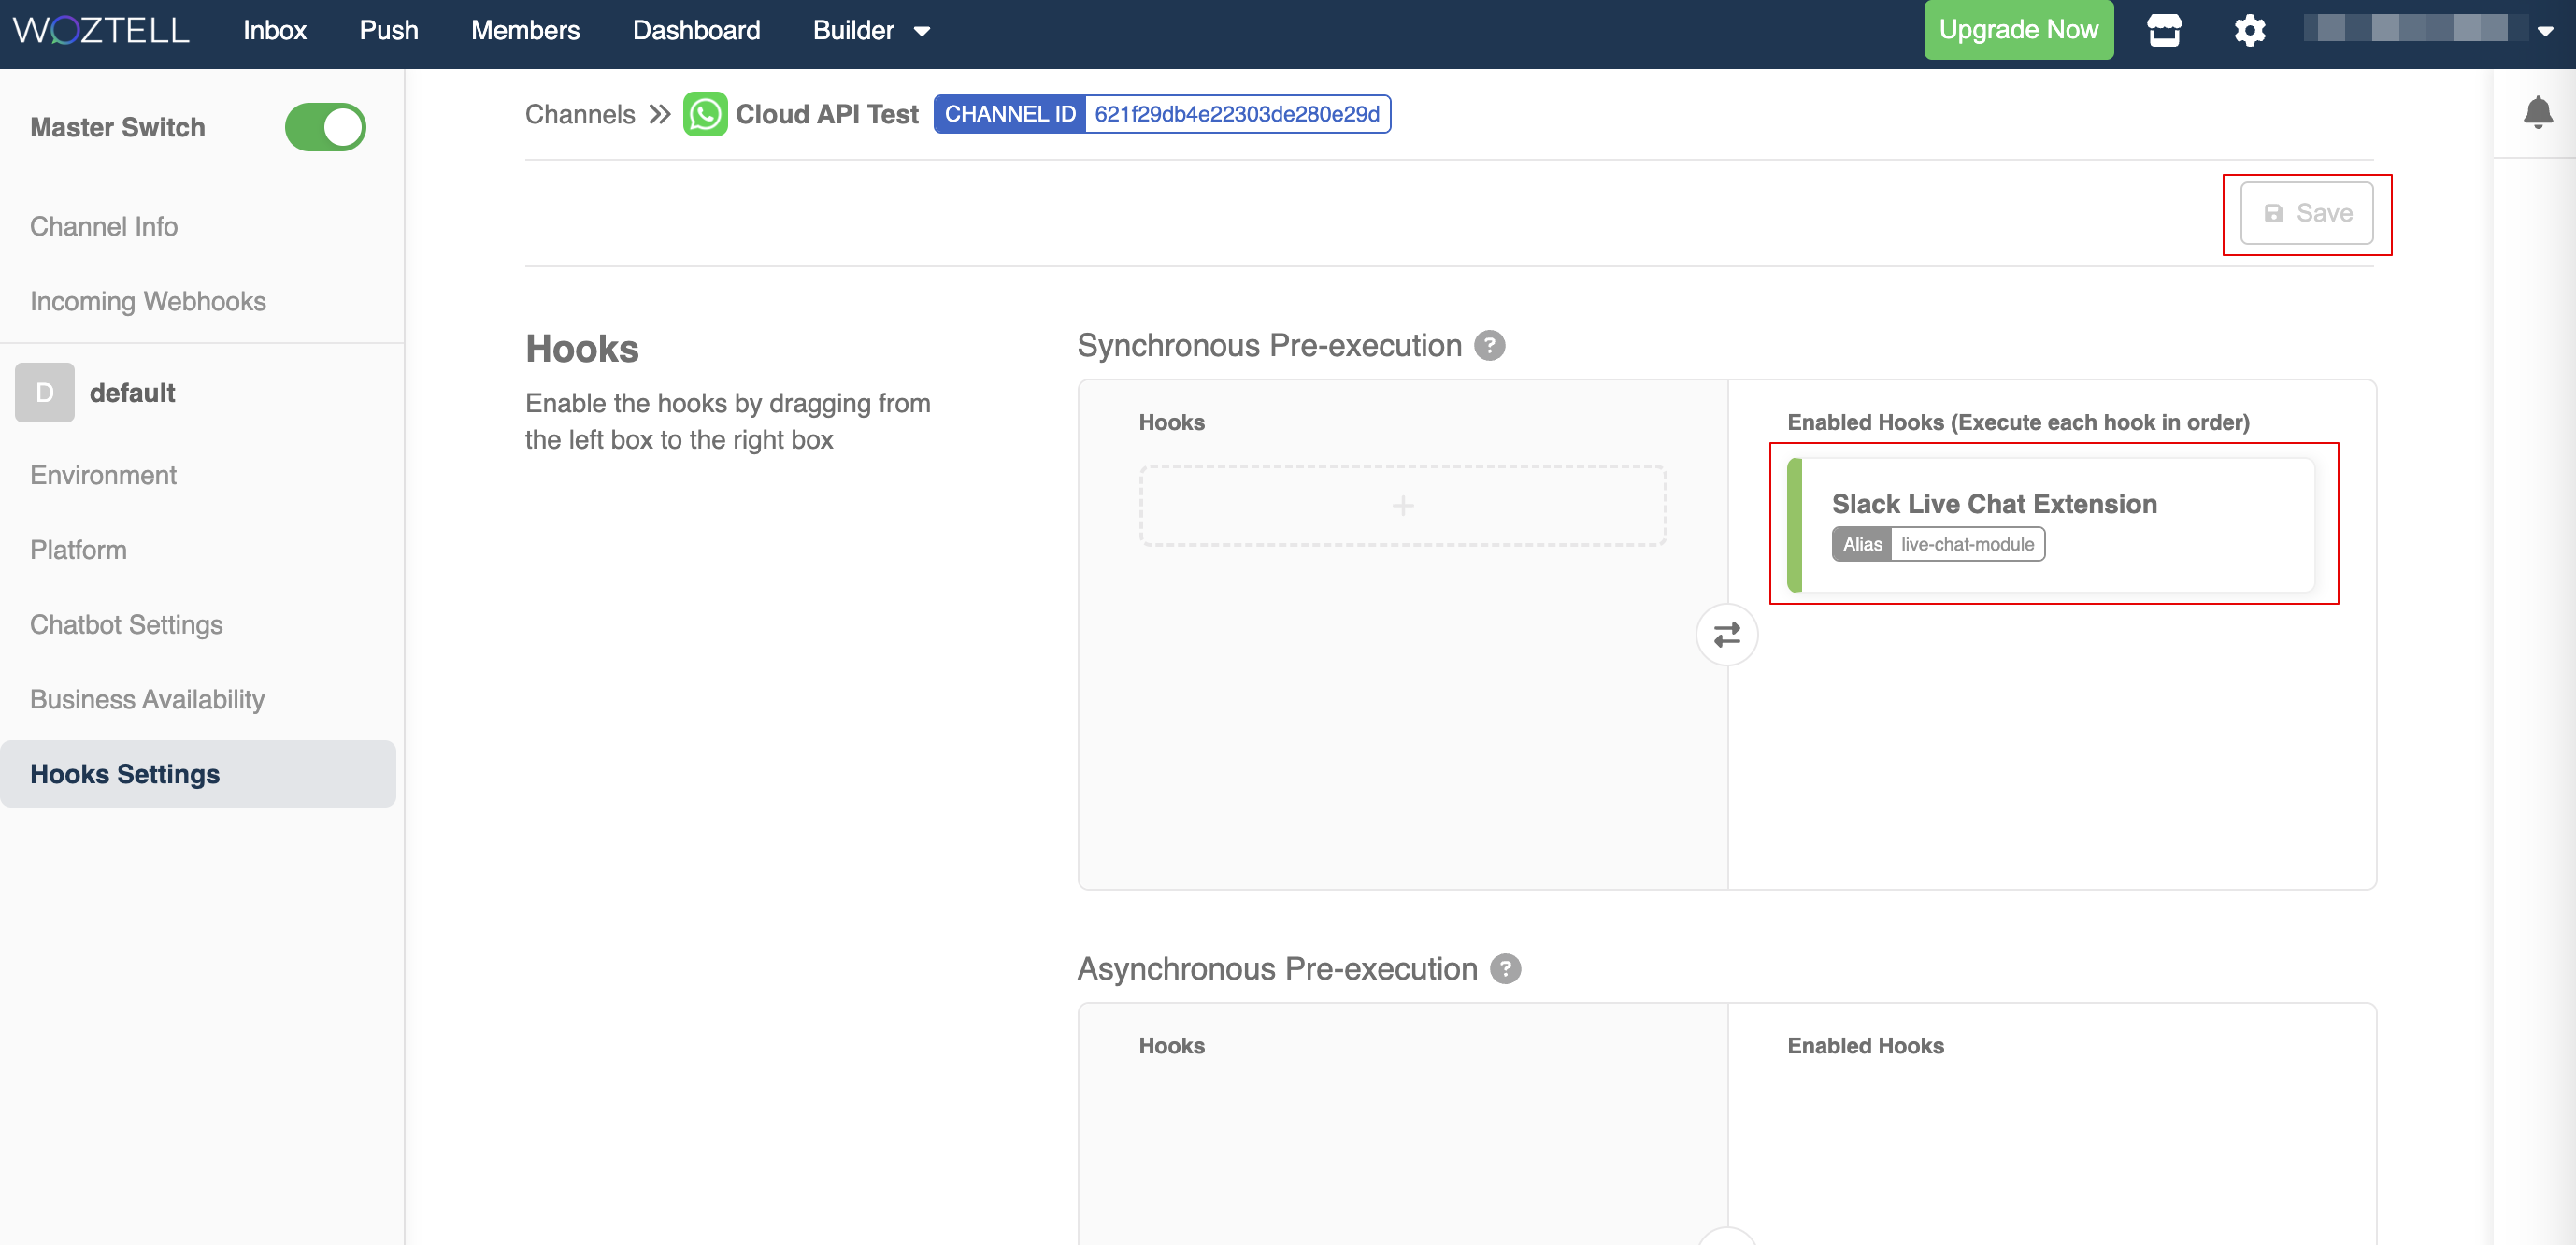
Set up Live Chat Module
In order to apply the live chat system, you also need to set up the Live Chat Module and enable it in Hooks Settings of both inlet and outlet channels.
- Head to "Integrations", and click "+ New Integration".
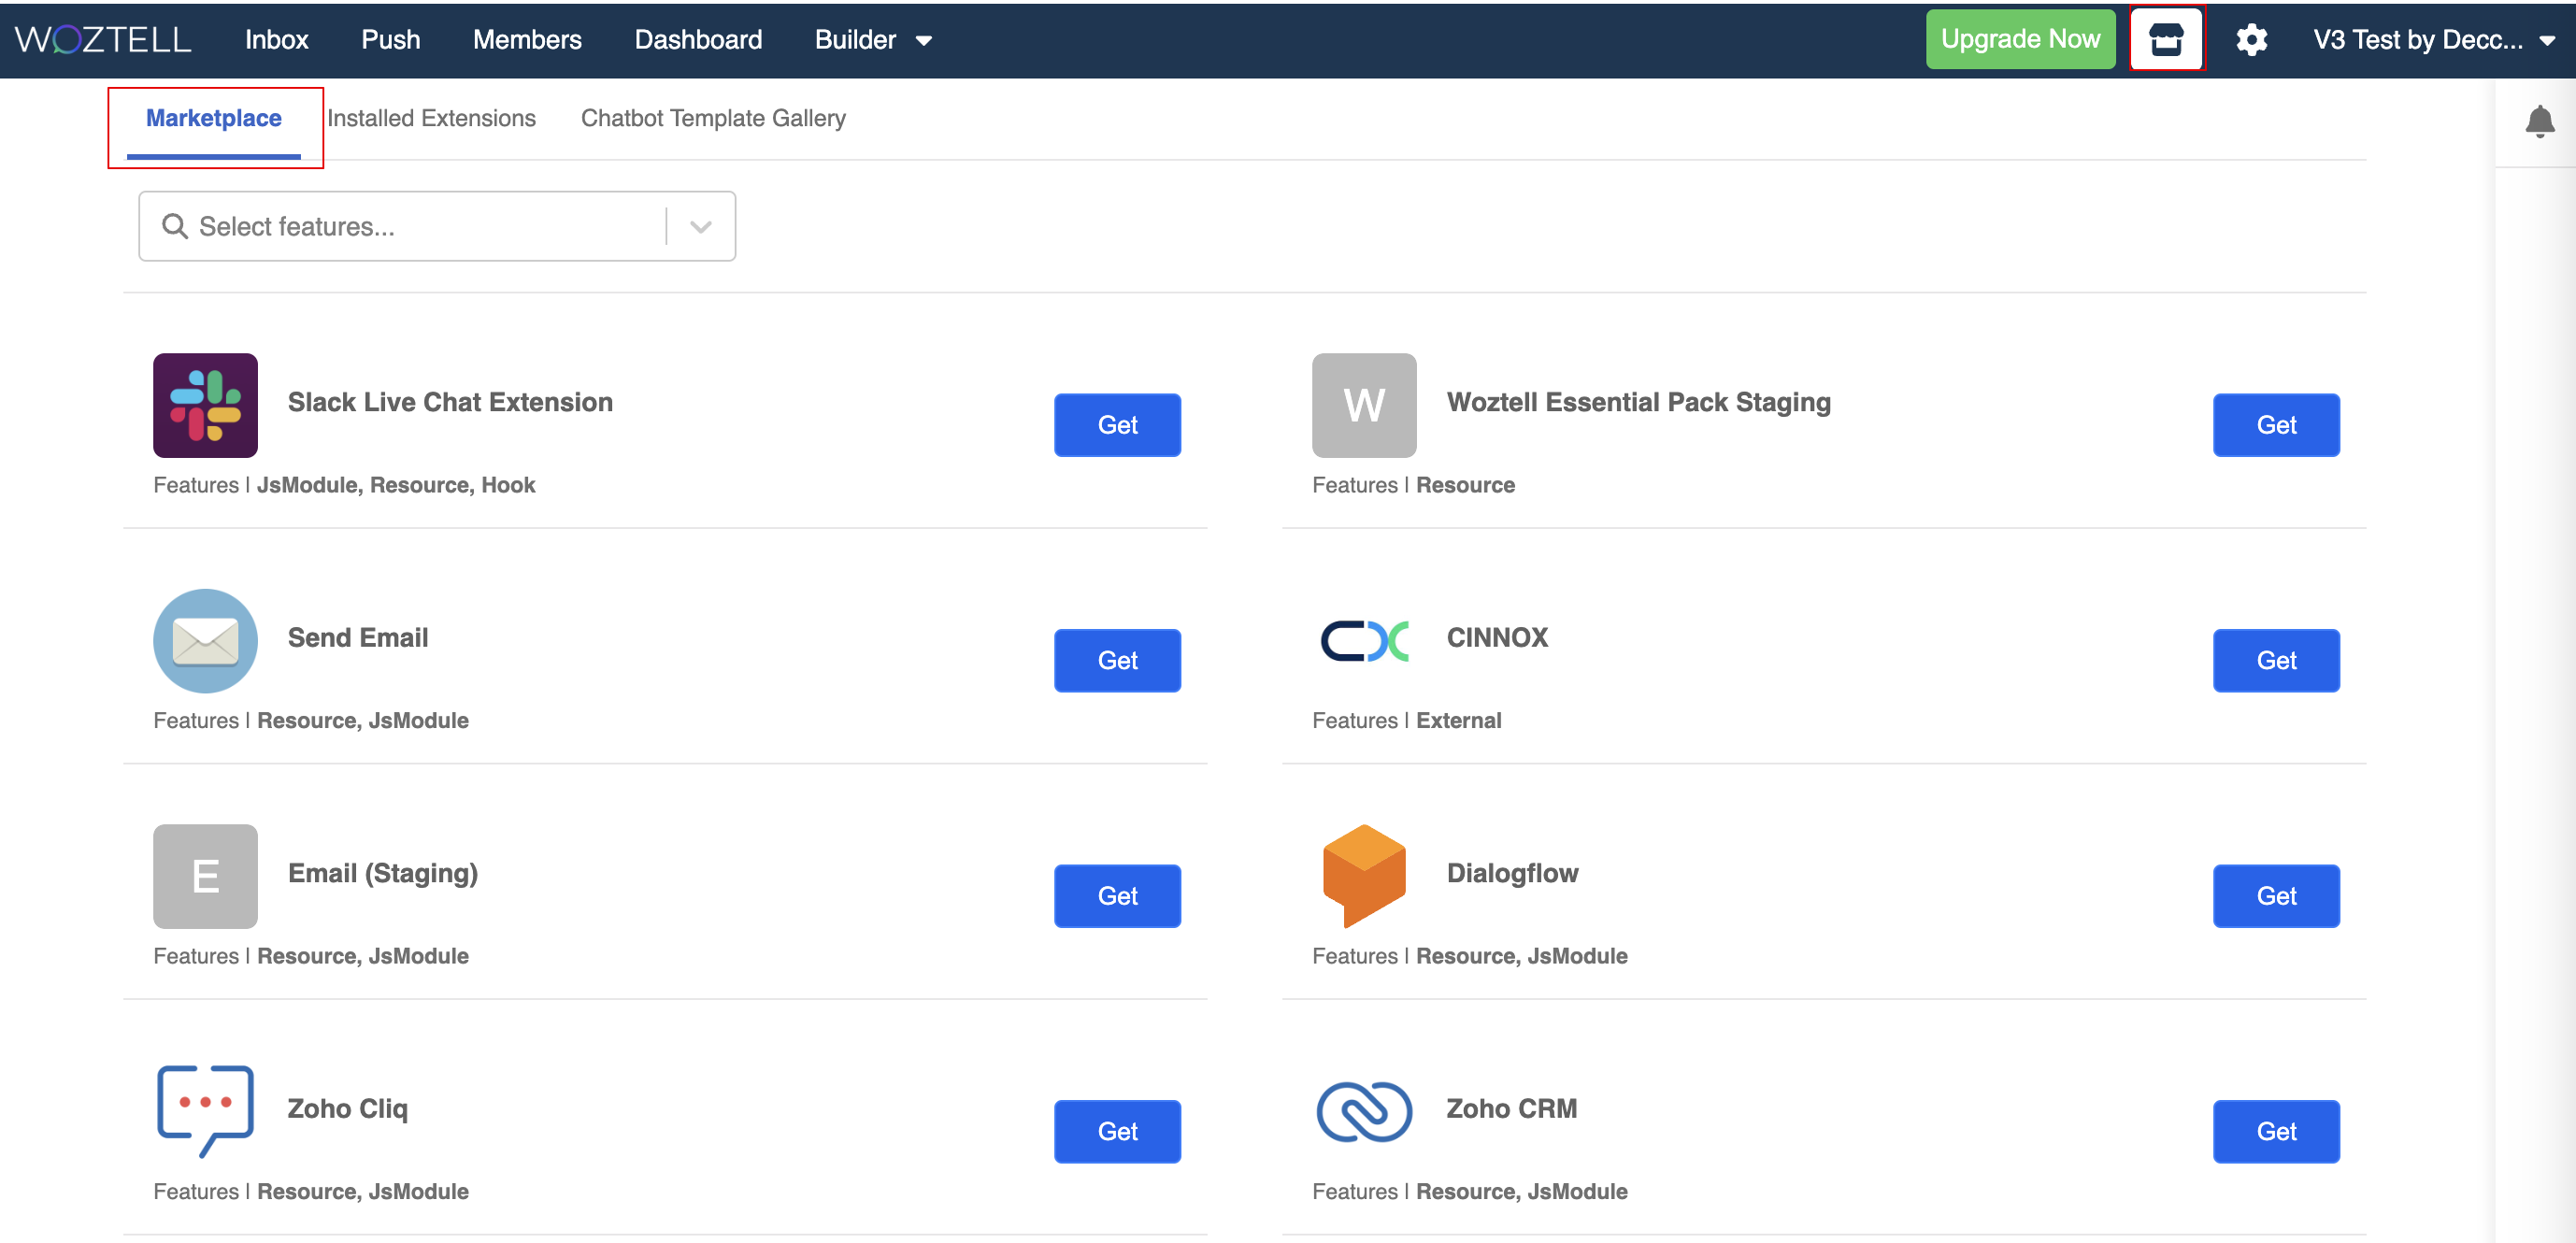
- Once you have installed the Slack integration, Live Chat Module will be available.
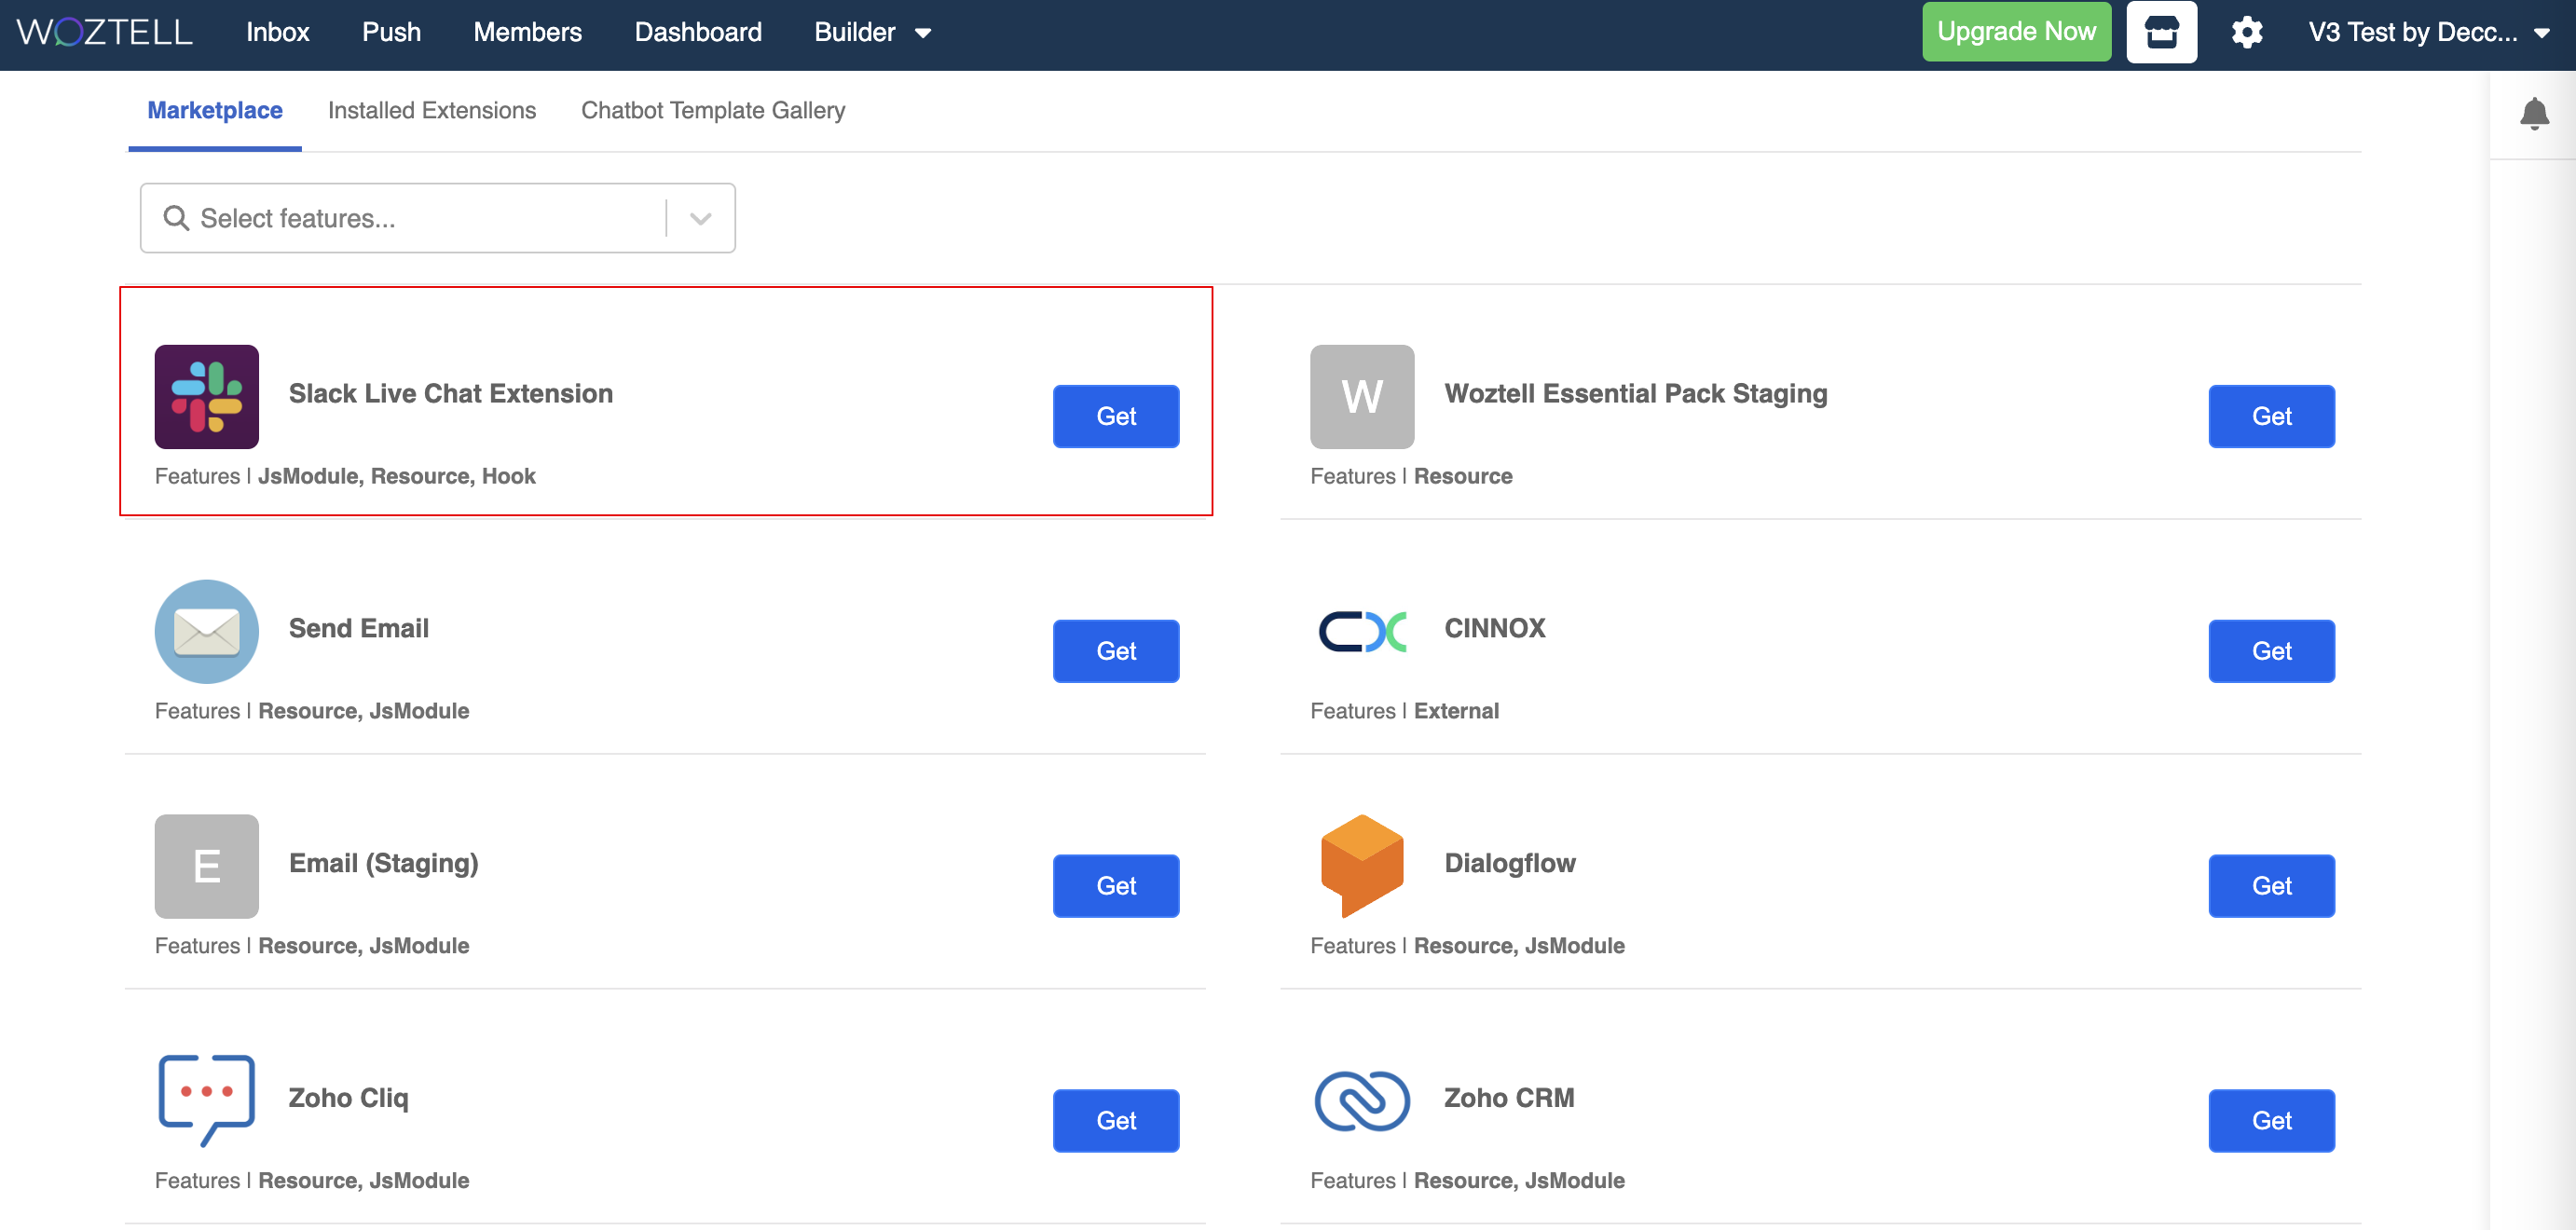
- Click "Get" to proceed.
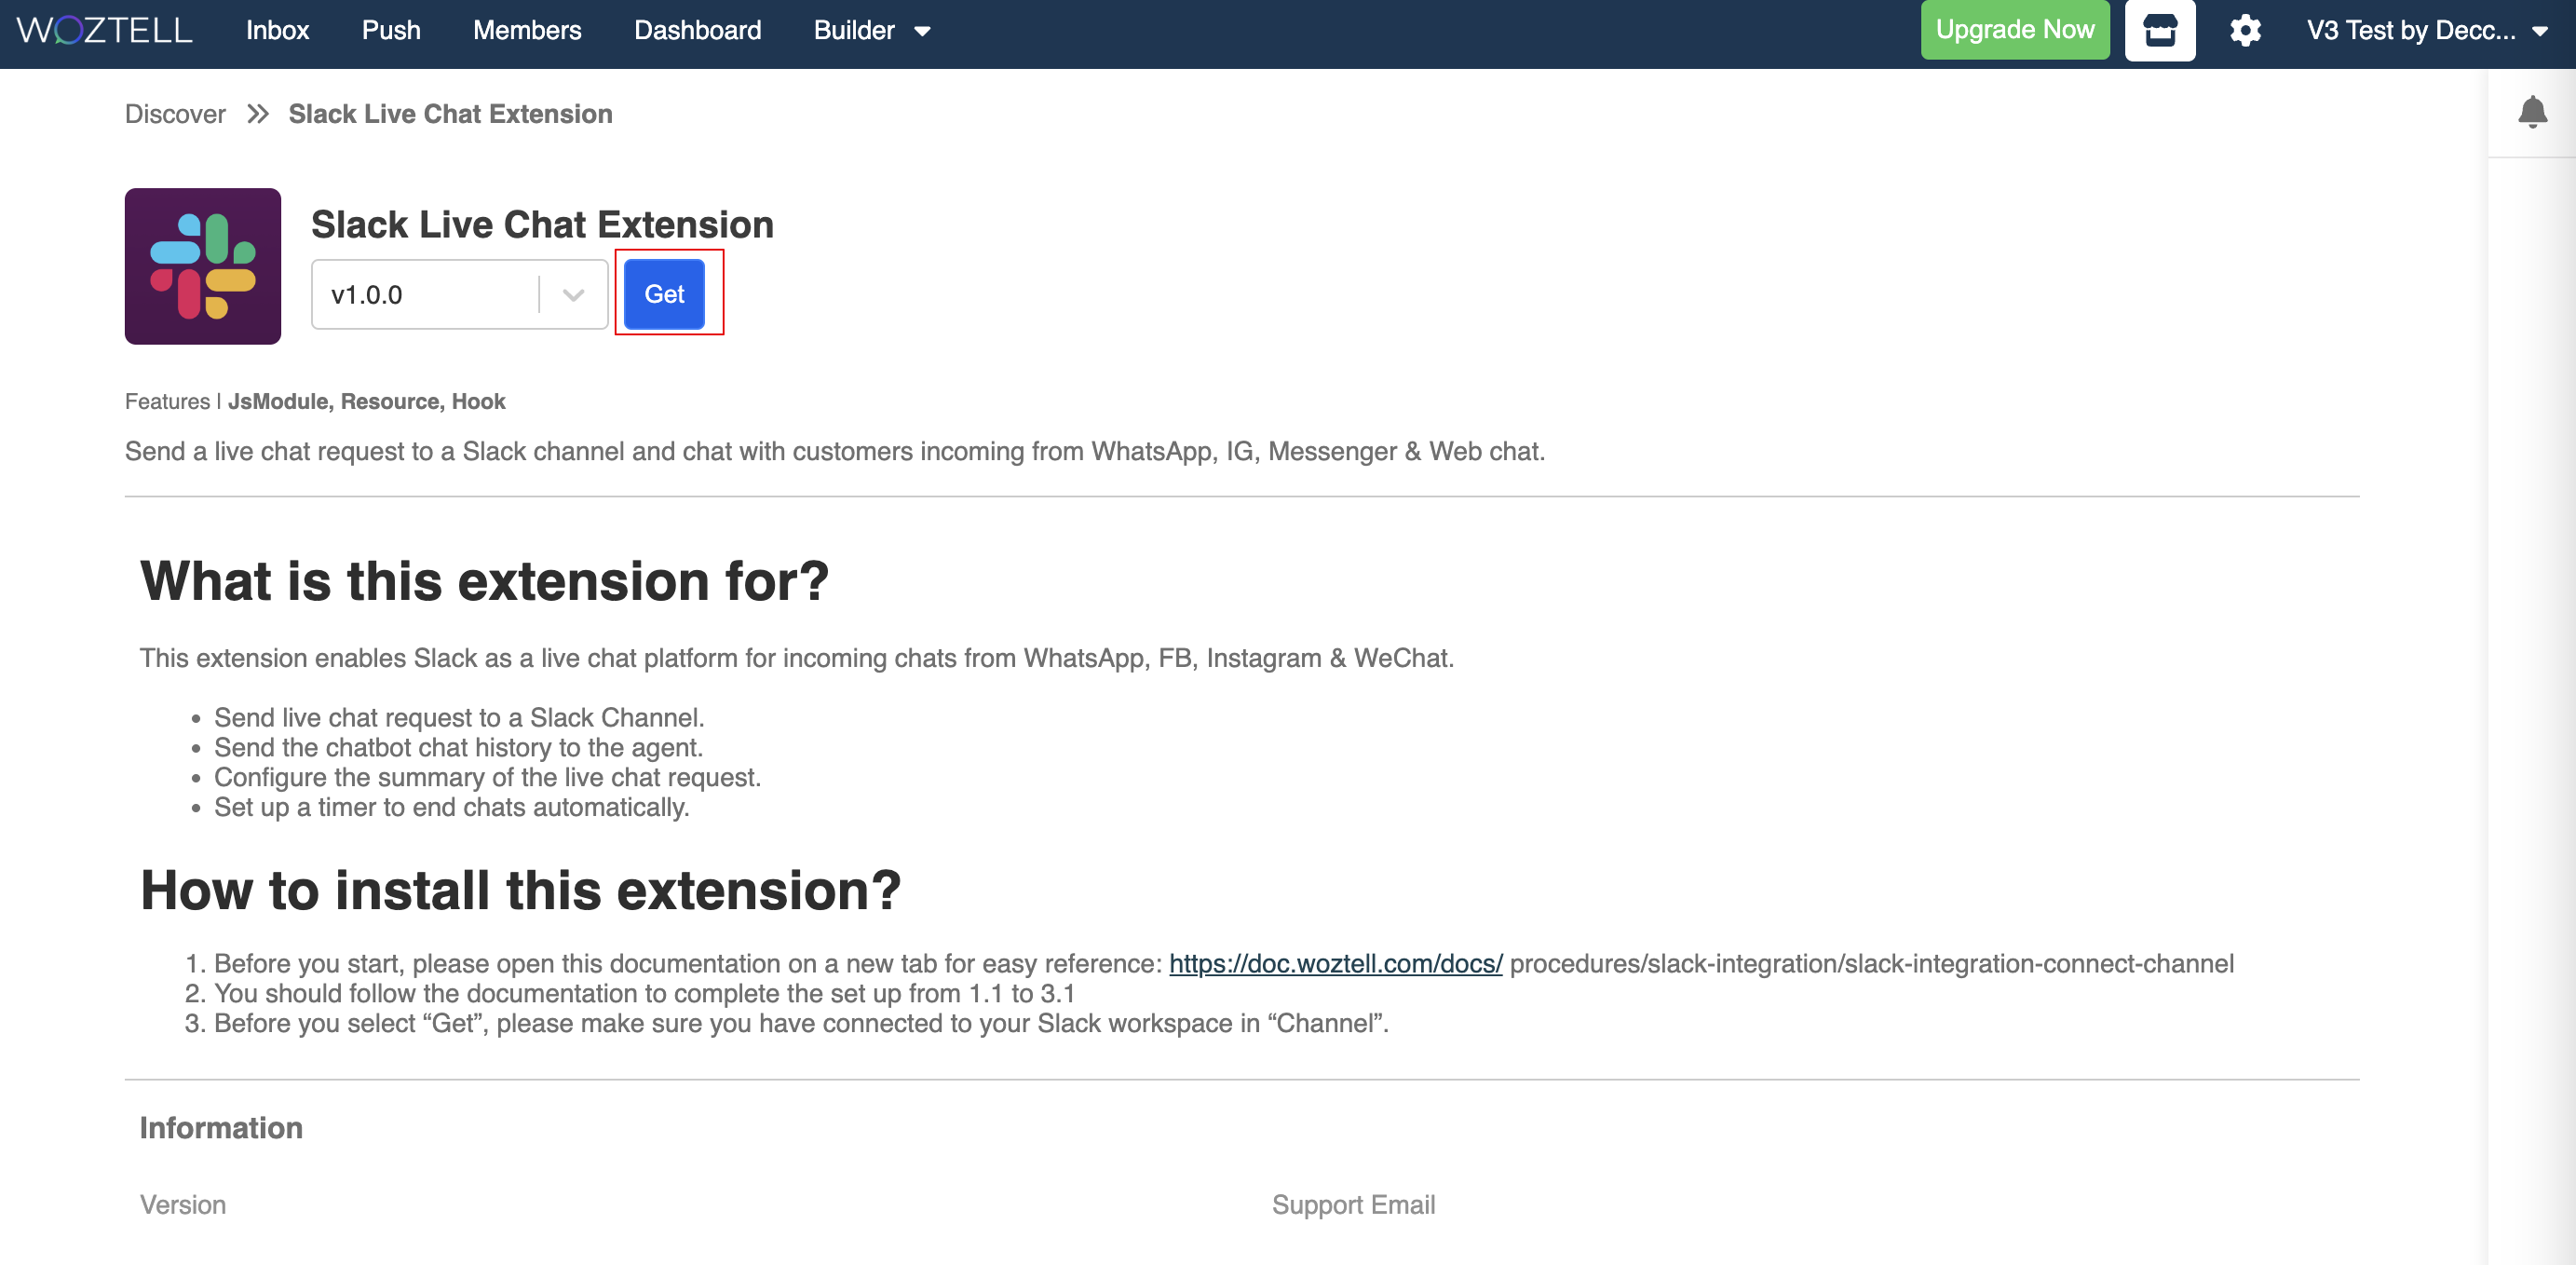
- Click "Install" to install the live chat module to your app.
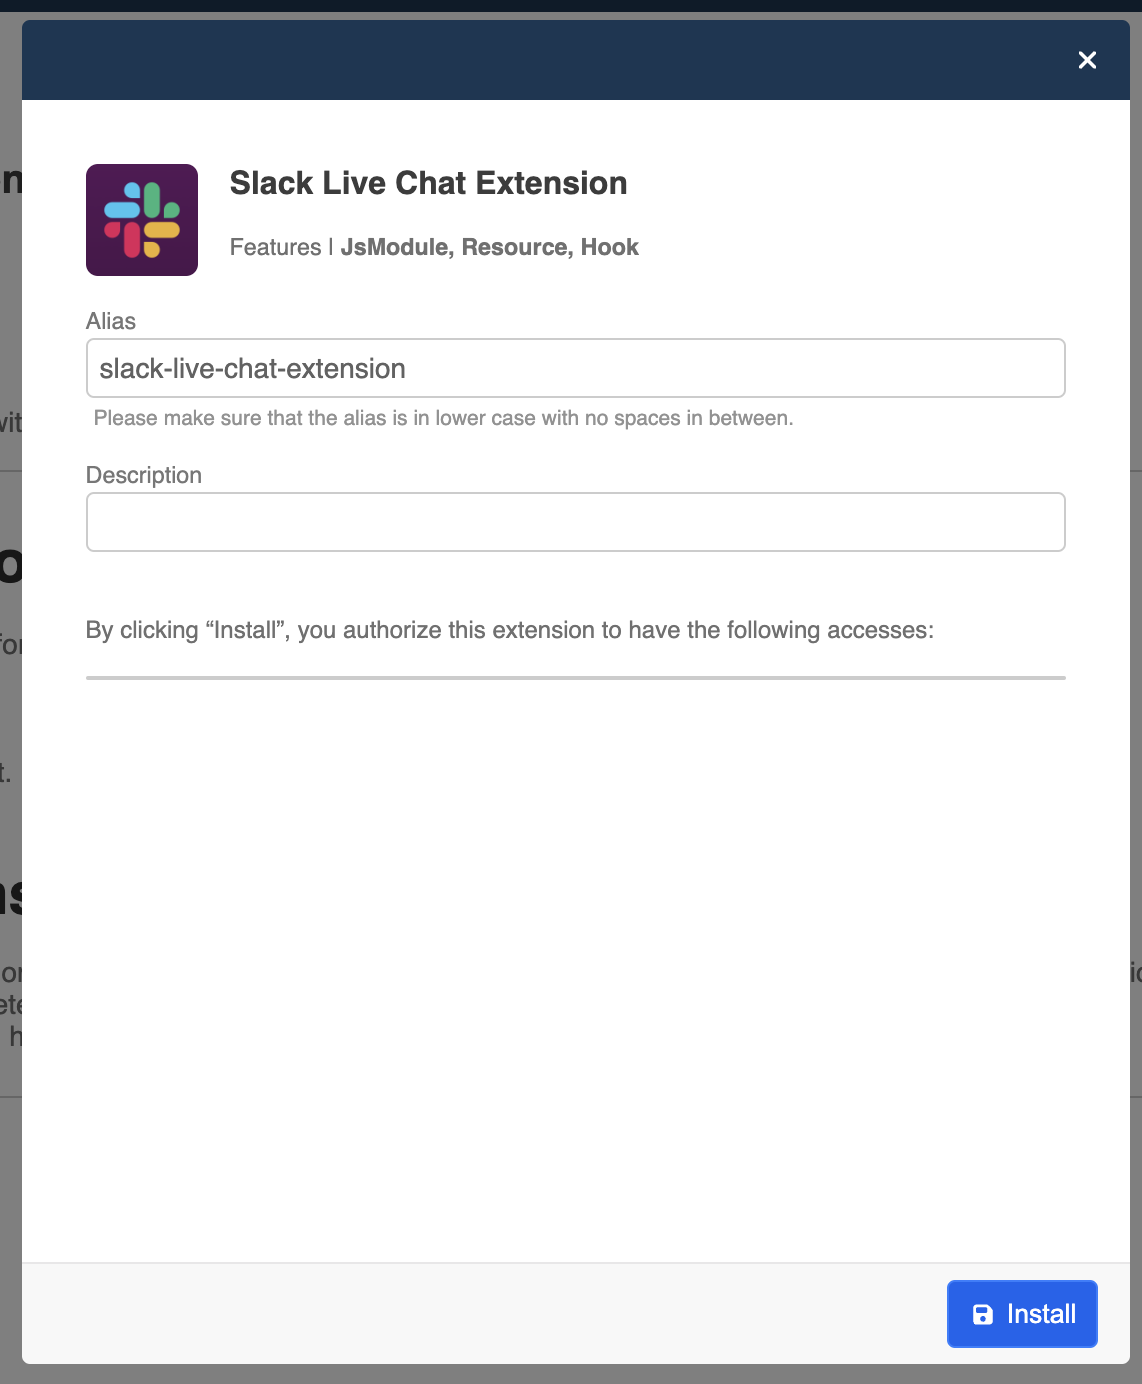
- After installation, click to open the live chat module.
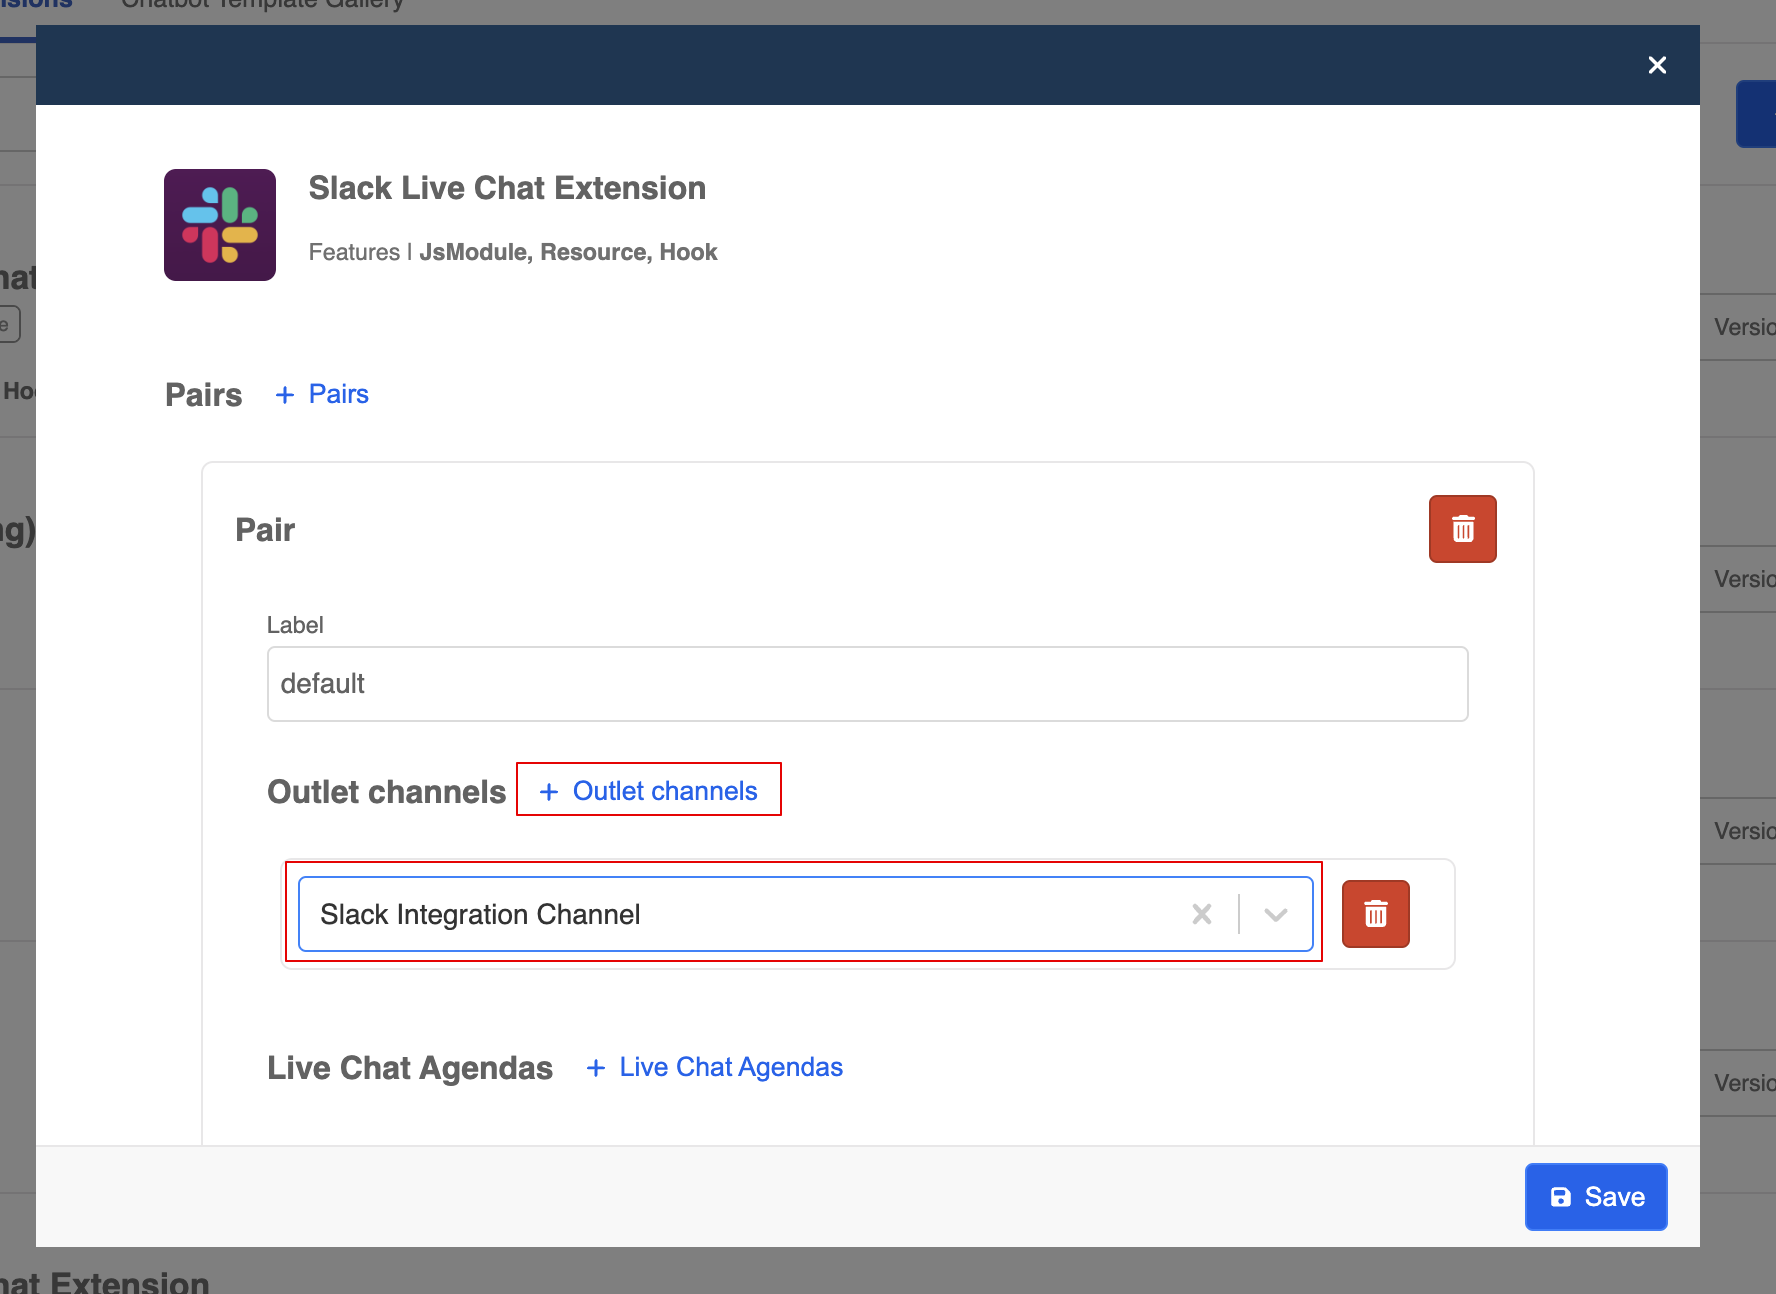
- Click "+ Outlet channels", and select your Slack channel. Then, "Save" the settings.

- Head back to the inlet channel (i.e. WhatsApp Cloud). In Hooks Settings, drag and drop the Live Chat Module to enable it in the Synchronous Pre-execution and Synchronous Post-execution.
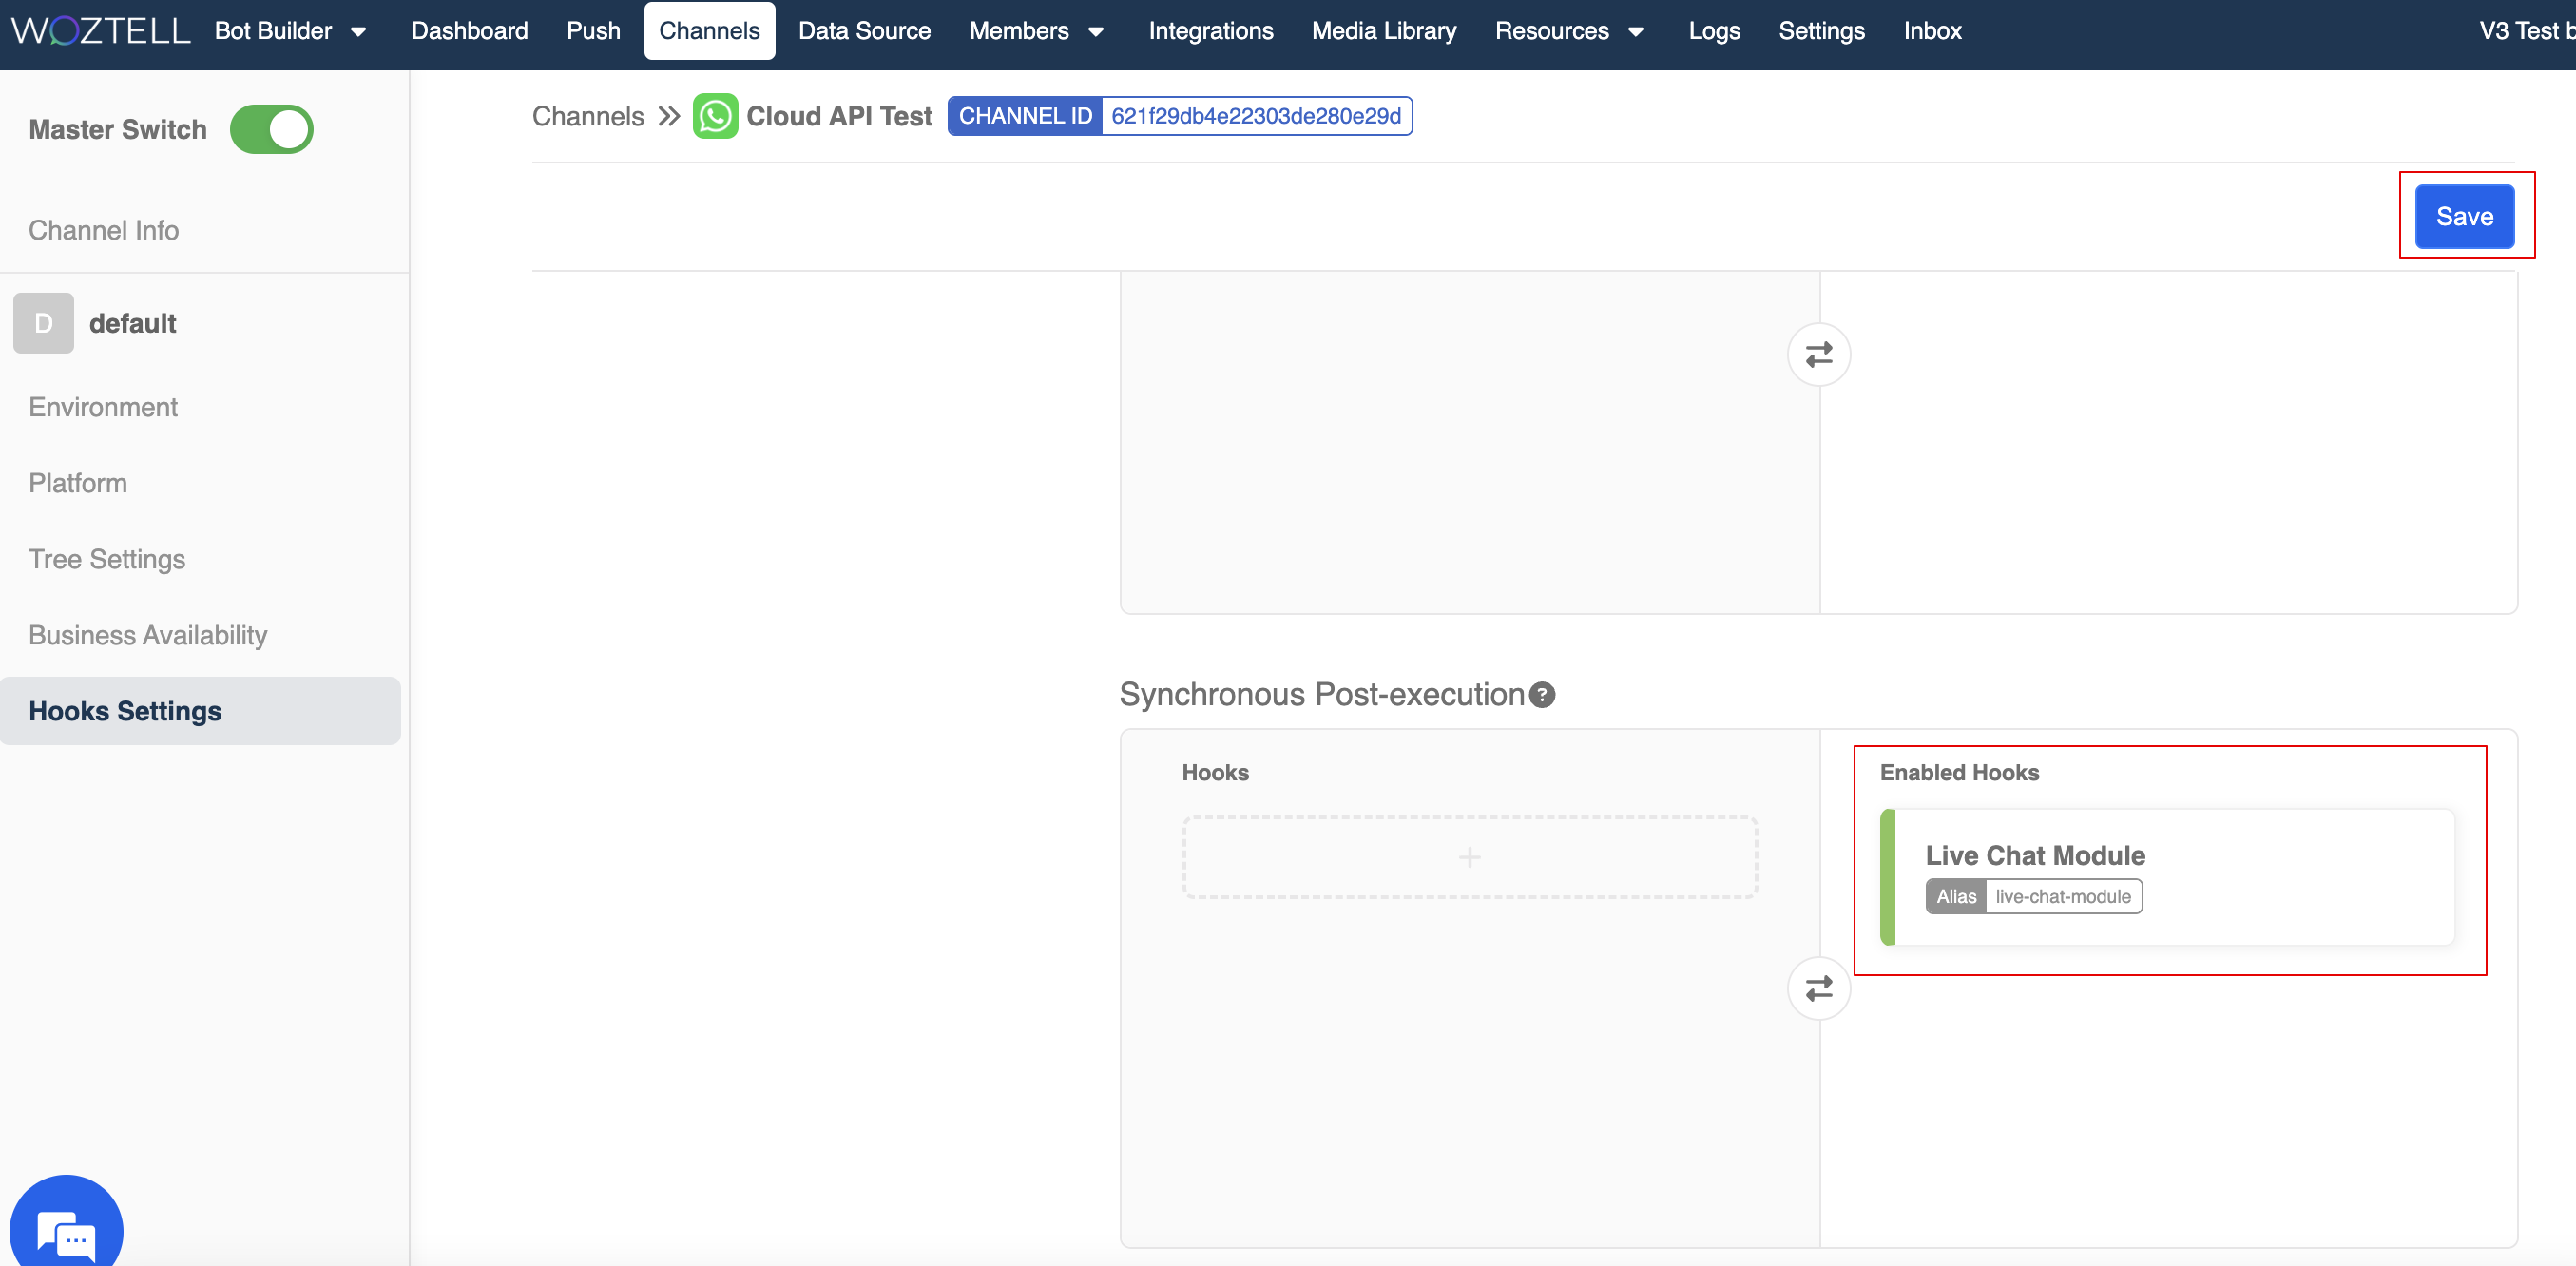
- For the outlet channel (i.e. Slack), head to the Hooks Settings, drag and drop the Live Chat Module to enable it in the Synchronous Pre-execution and Synchronous Post-execution as well.


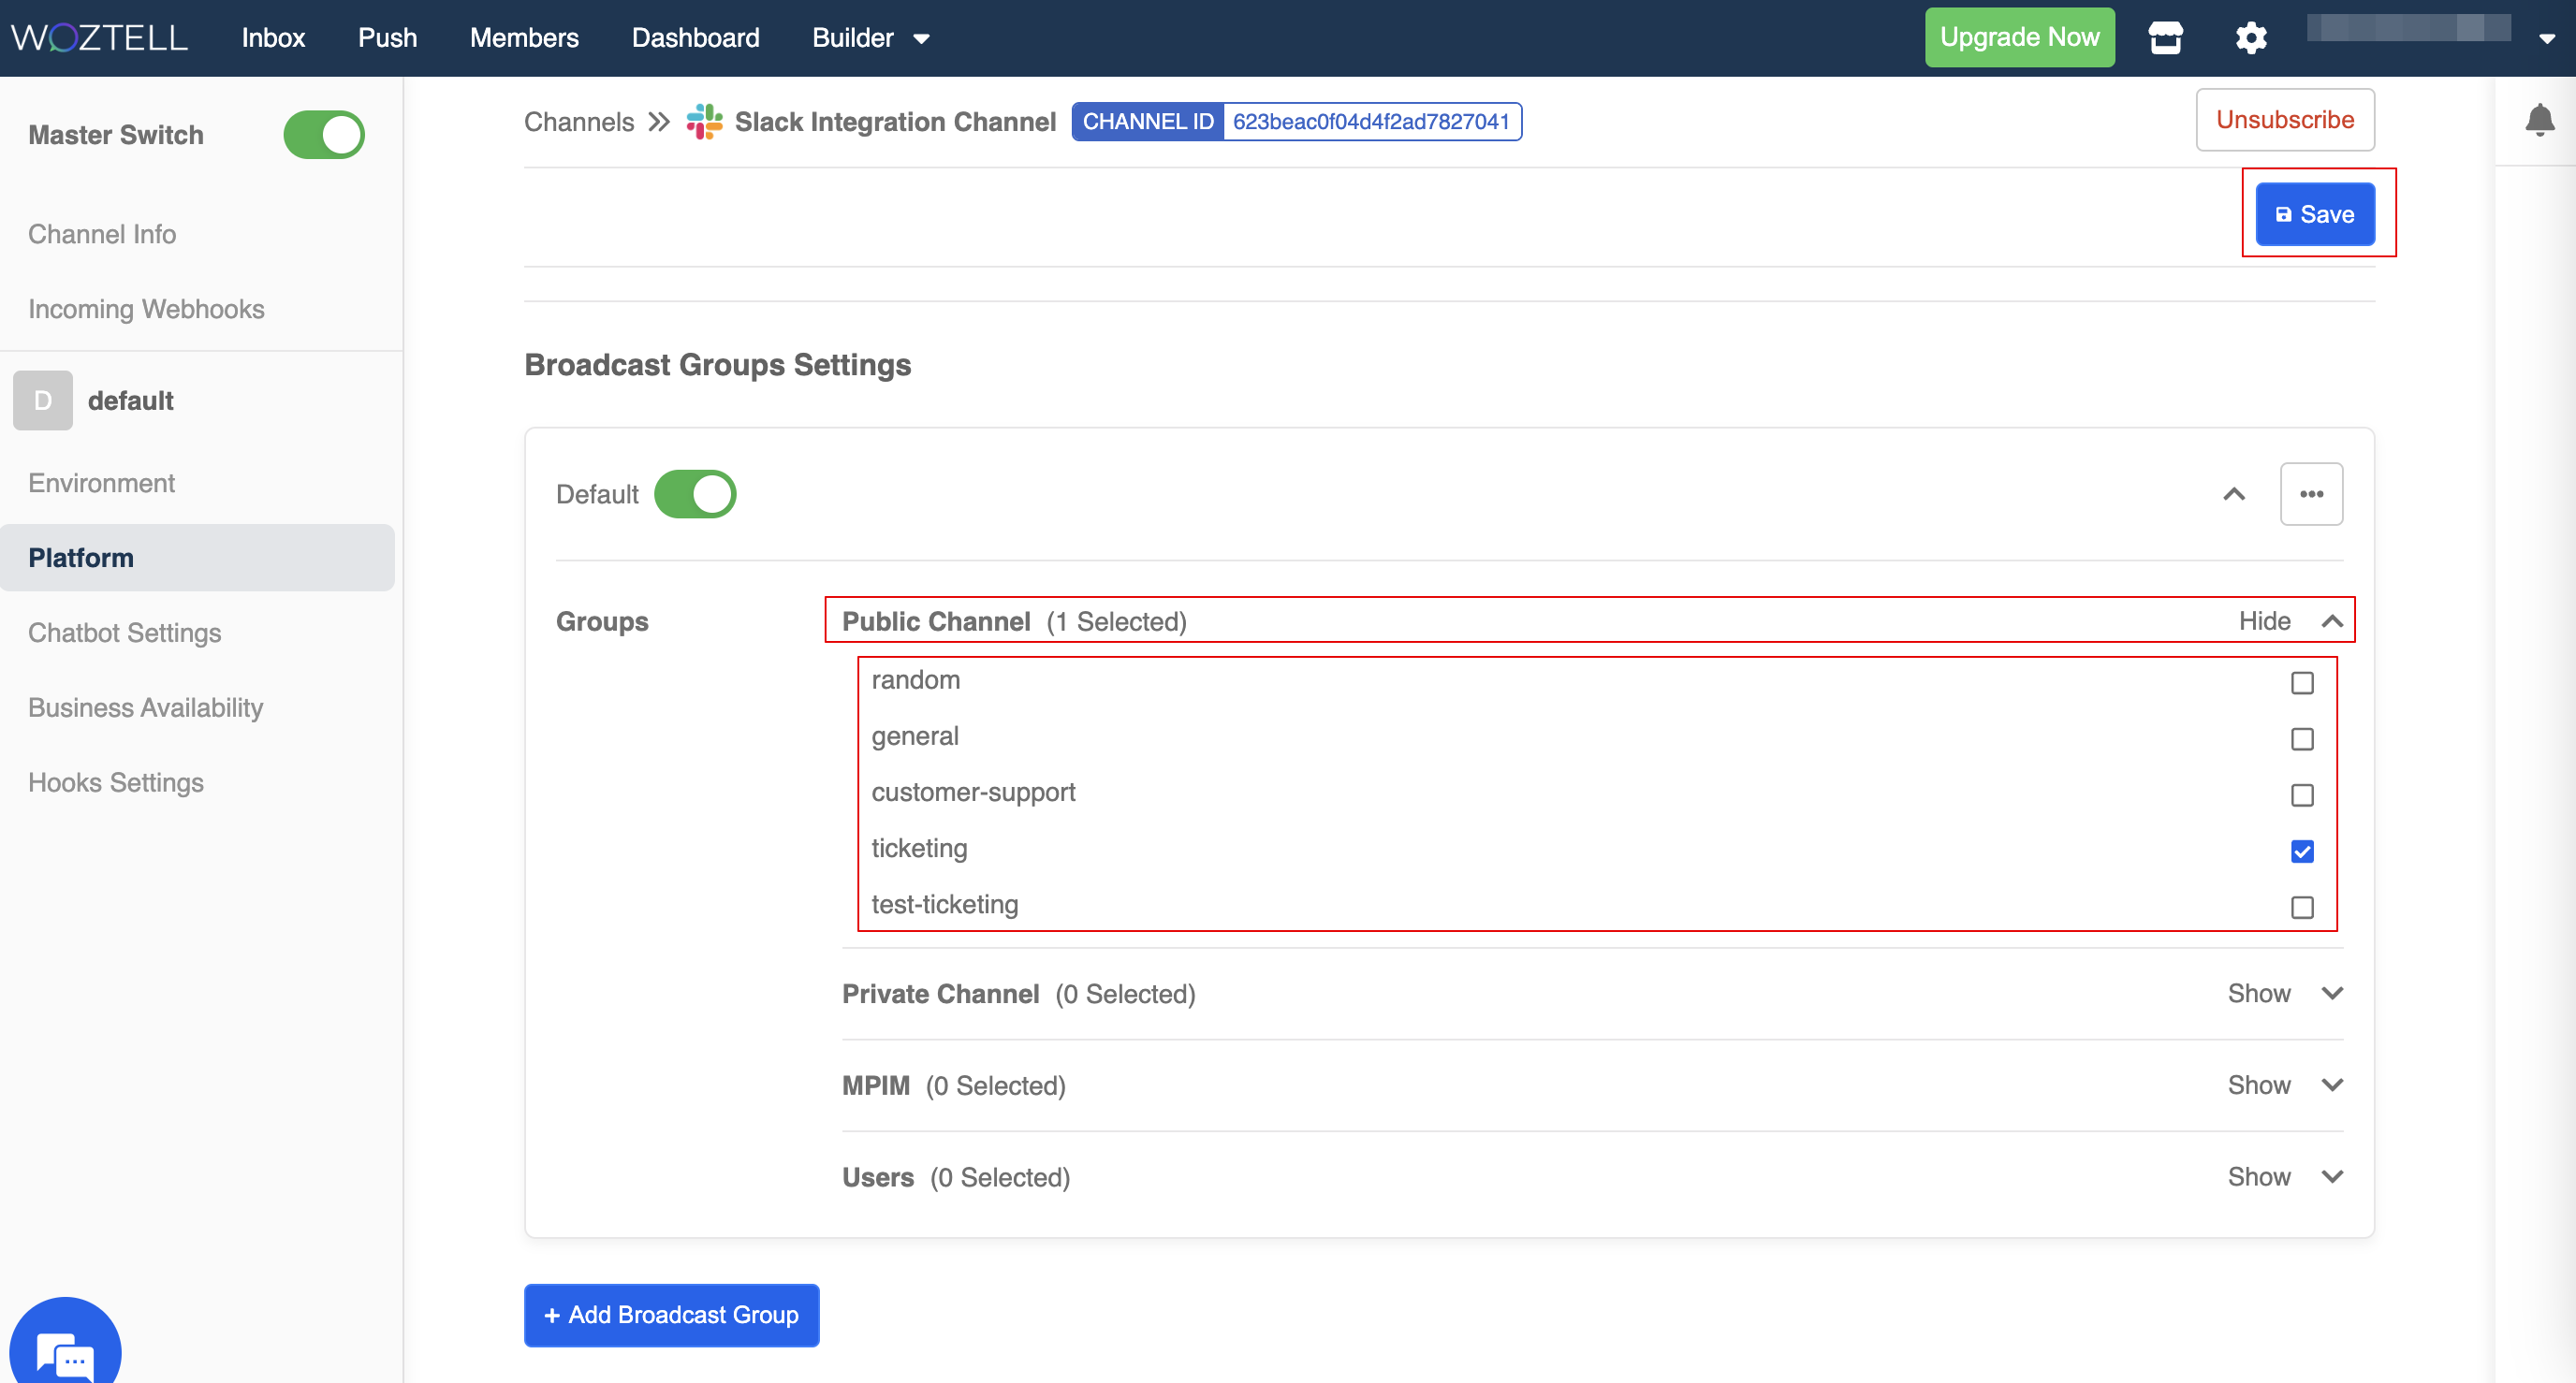
Create Broadcast Group
Broadcast Group decides the destination of the live chat tickets, which will be a channel in the Slack workspace. Each broadcast group is represented with a label.
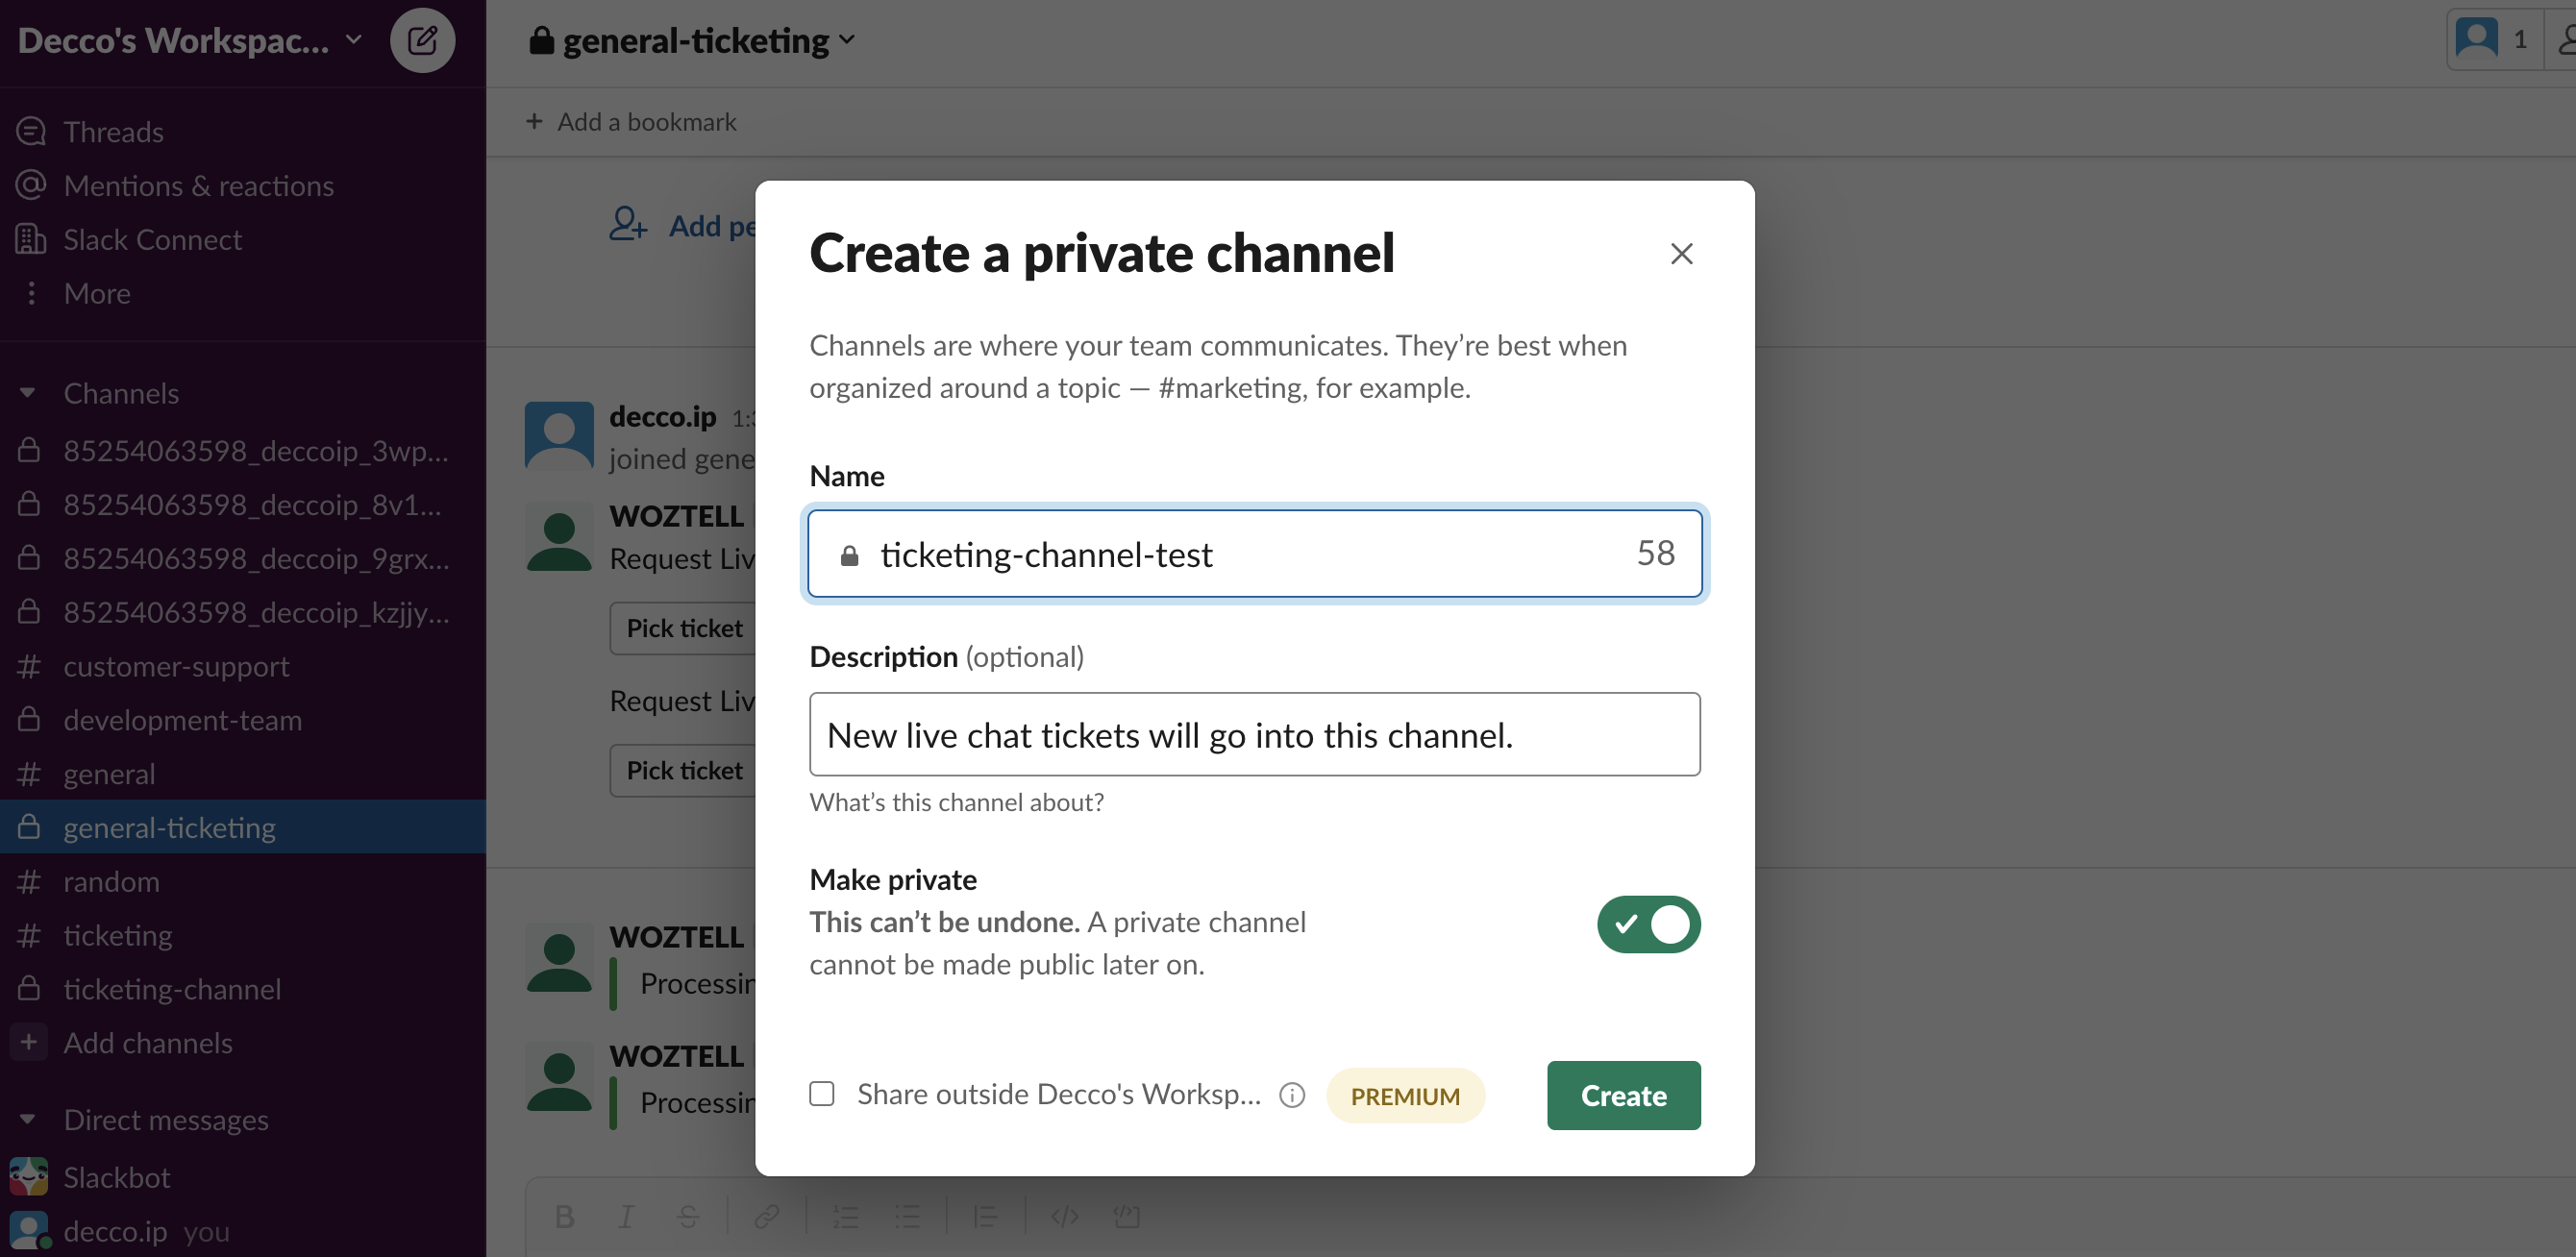
- Go to the Slack workspace, create a new channel for receiving tickets.
- Then click on the channel's profile, click "Add an App" under "Integrations".
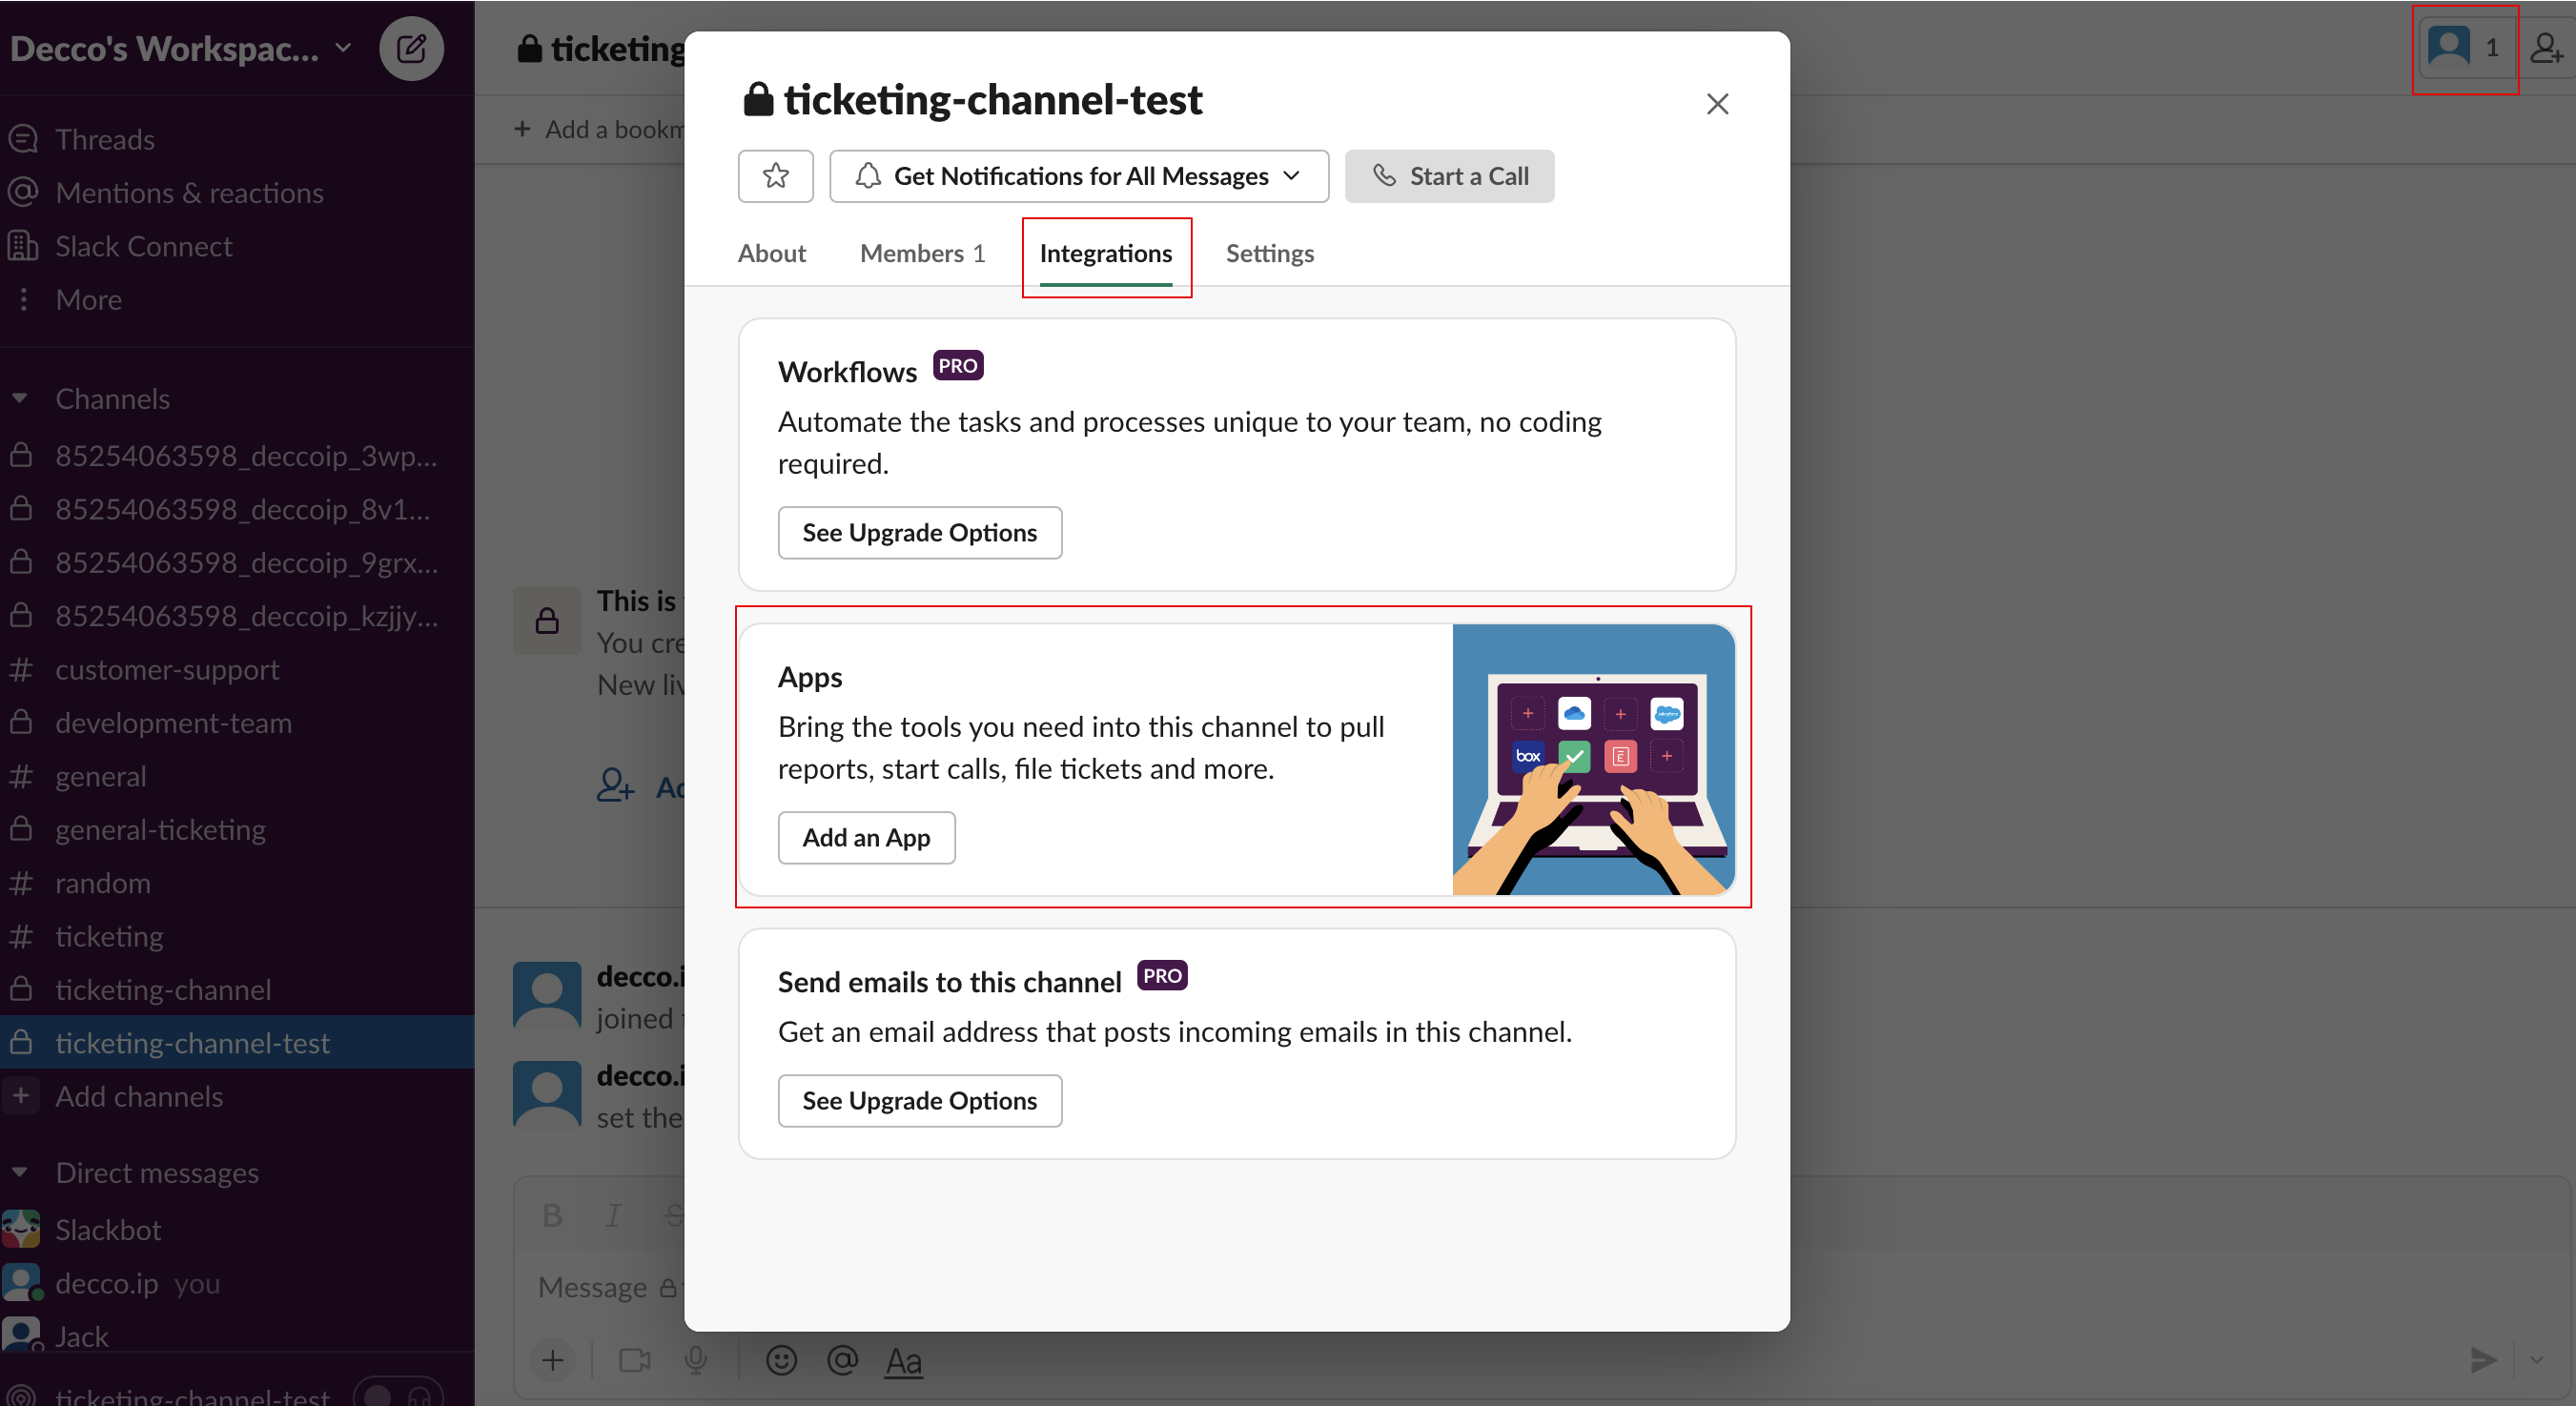
- Add the WOZTELL app to your ticketing channel.
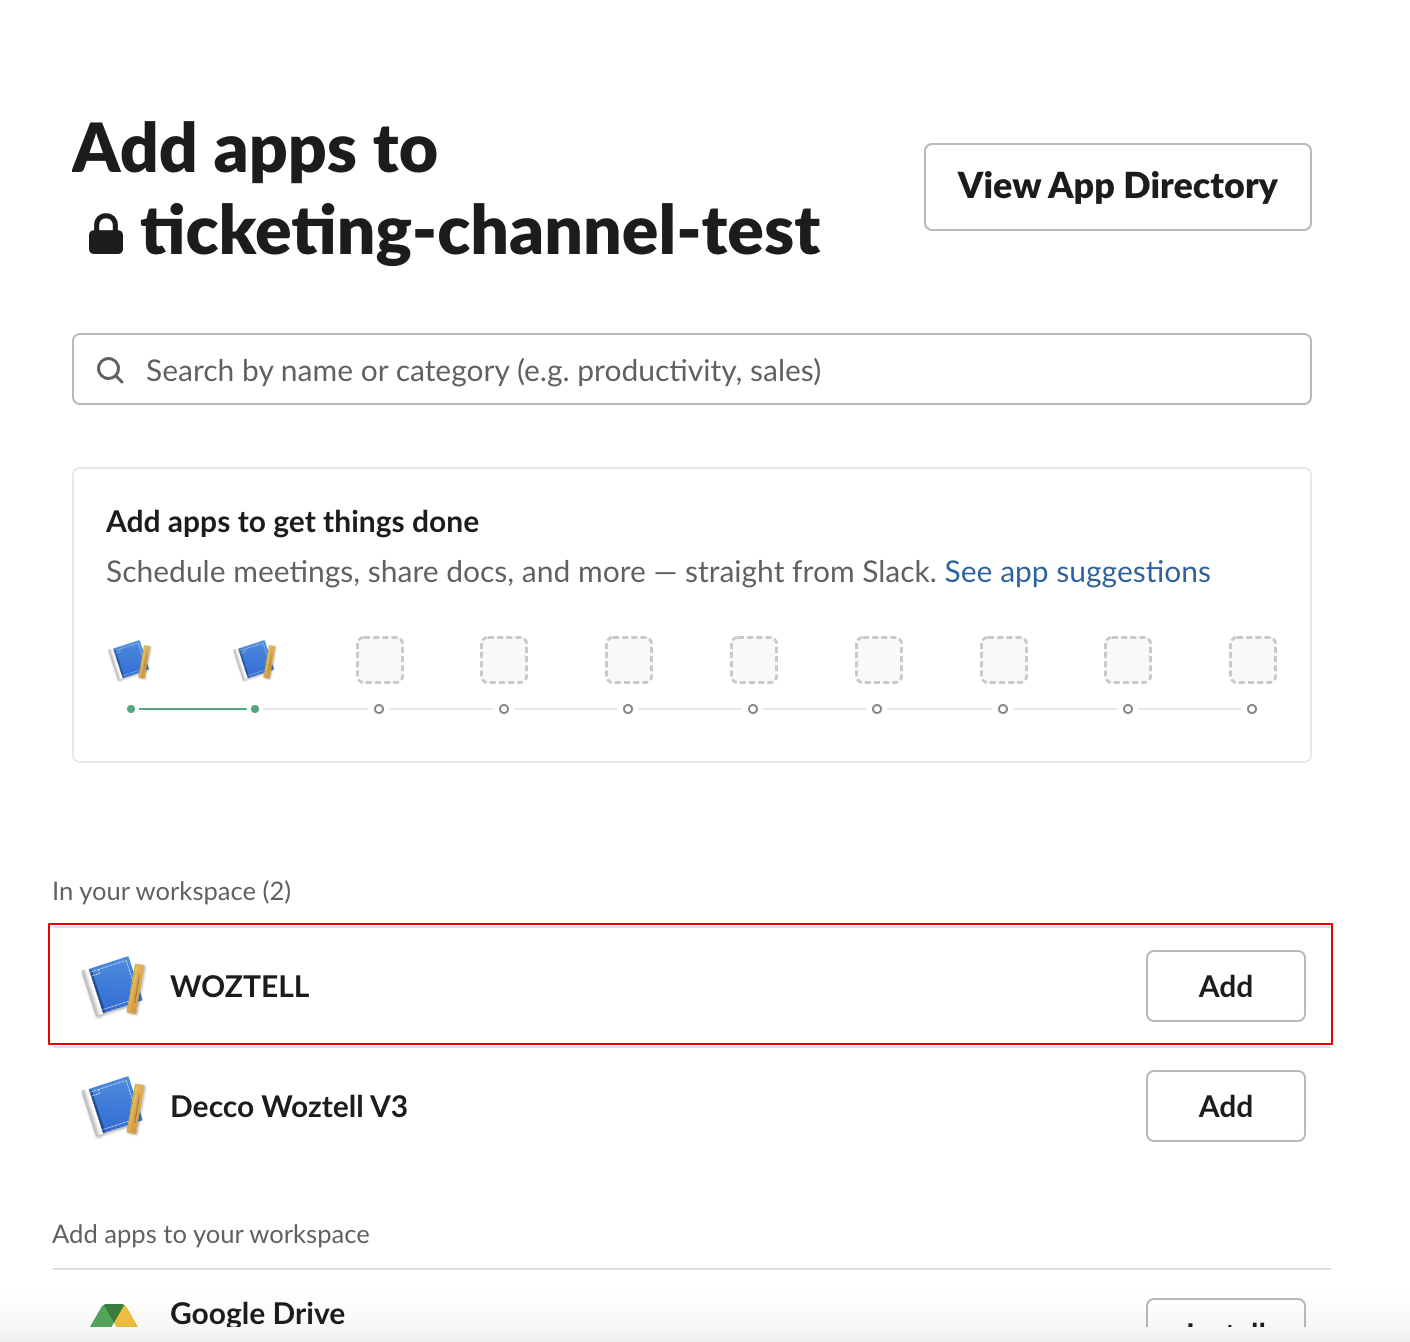
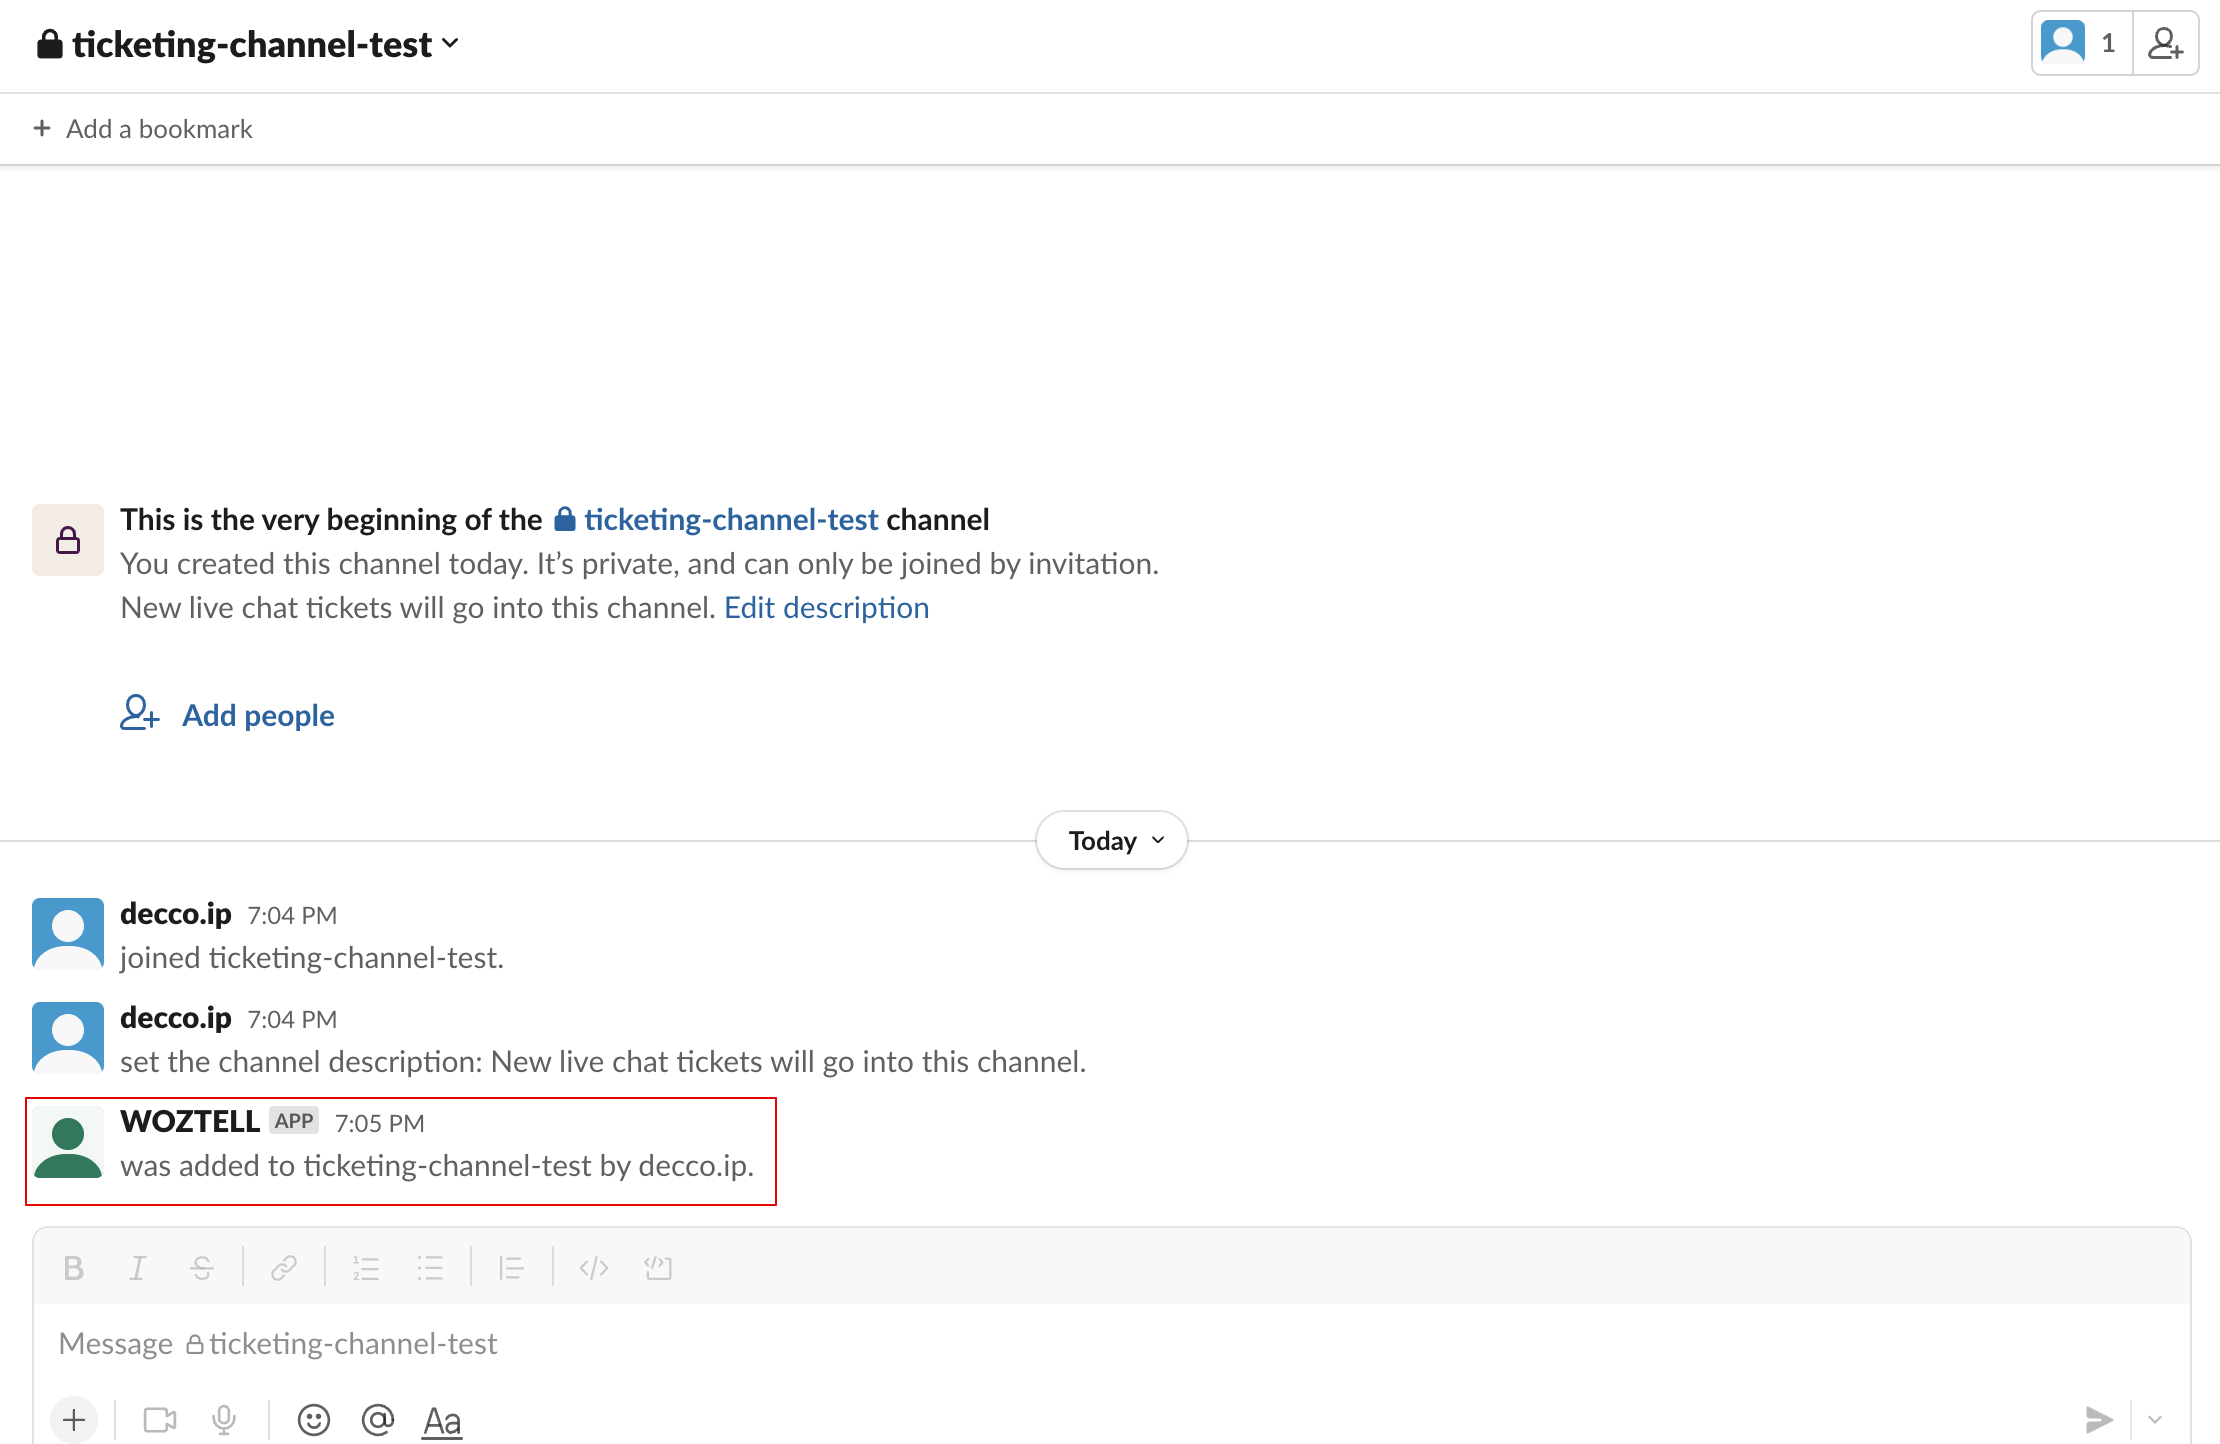
- The WOZTELL app has been added.
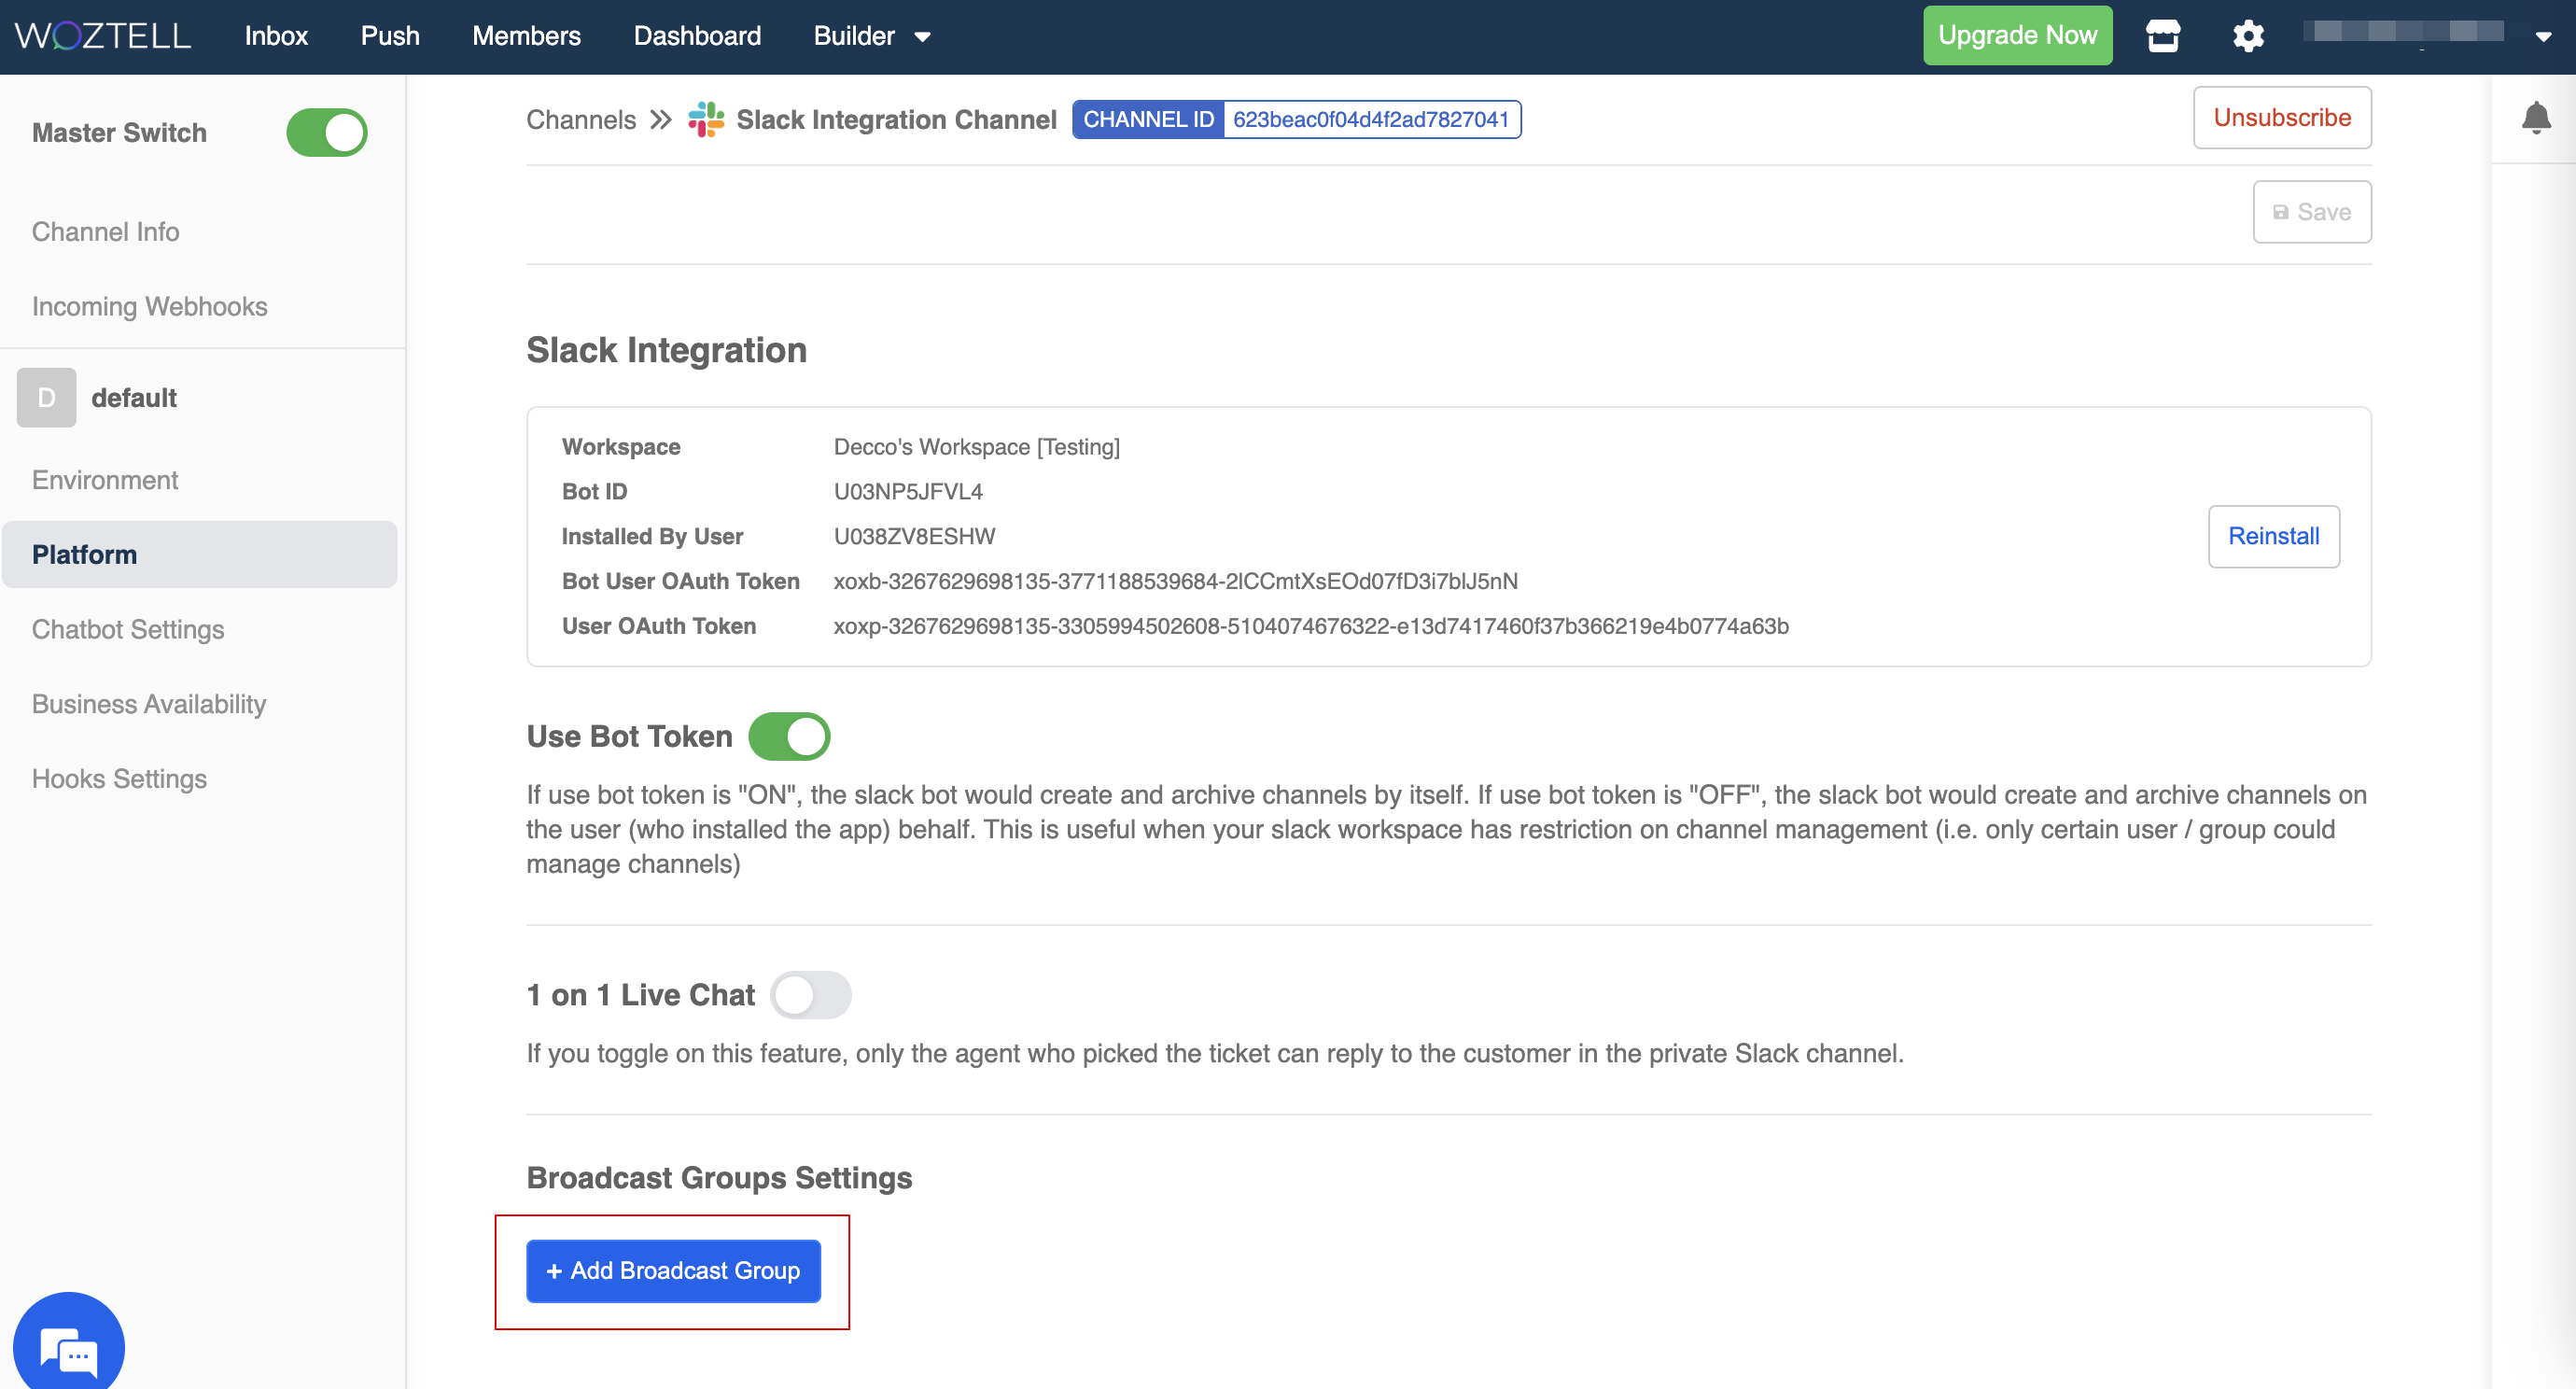
- In WOZTELL, head back to the Slack channel, click "+ New Broadcast Group" under "Platform".
- You can create your own label, or leave it as "default".
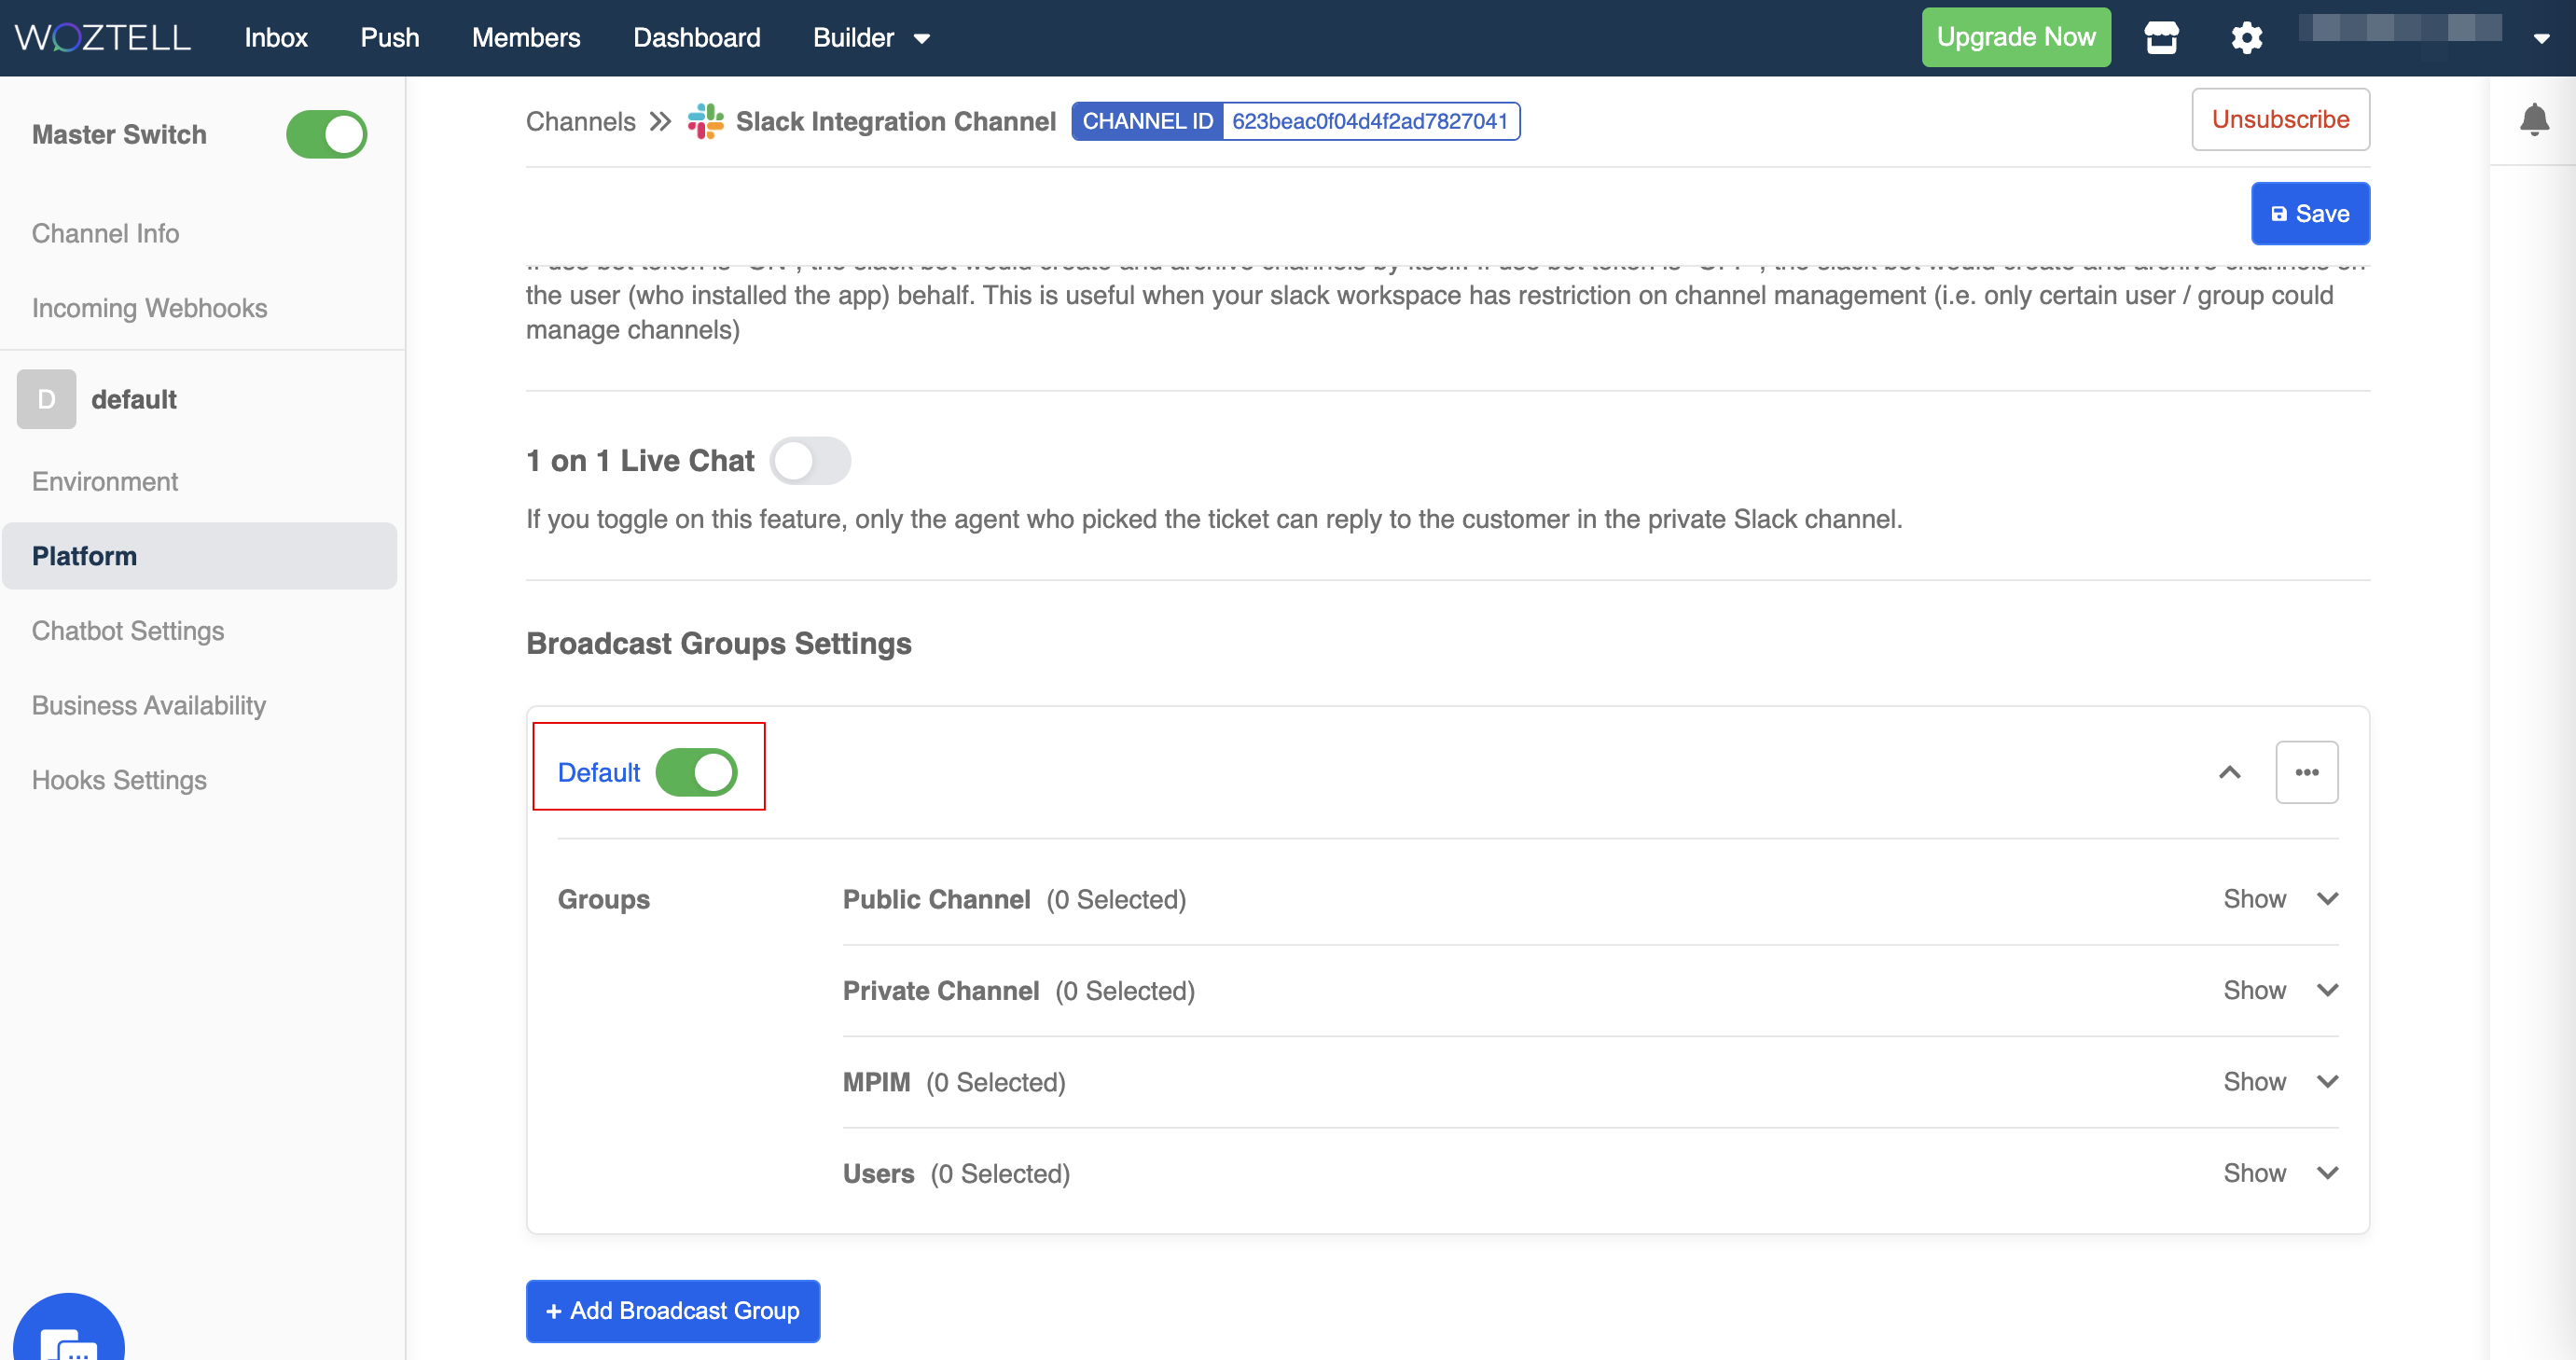
- The existing "Public Channels", "Private Channels", "MPIM" and "Users" in your Slack workspace will be displayed. Use the checkbox to decide which channel will be the primary destination of live chat tickets. Remember to "Save" the settings afterwards.
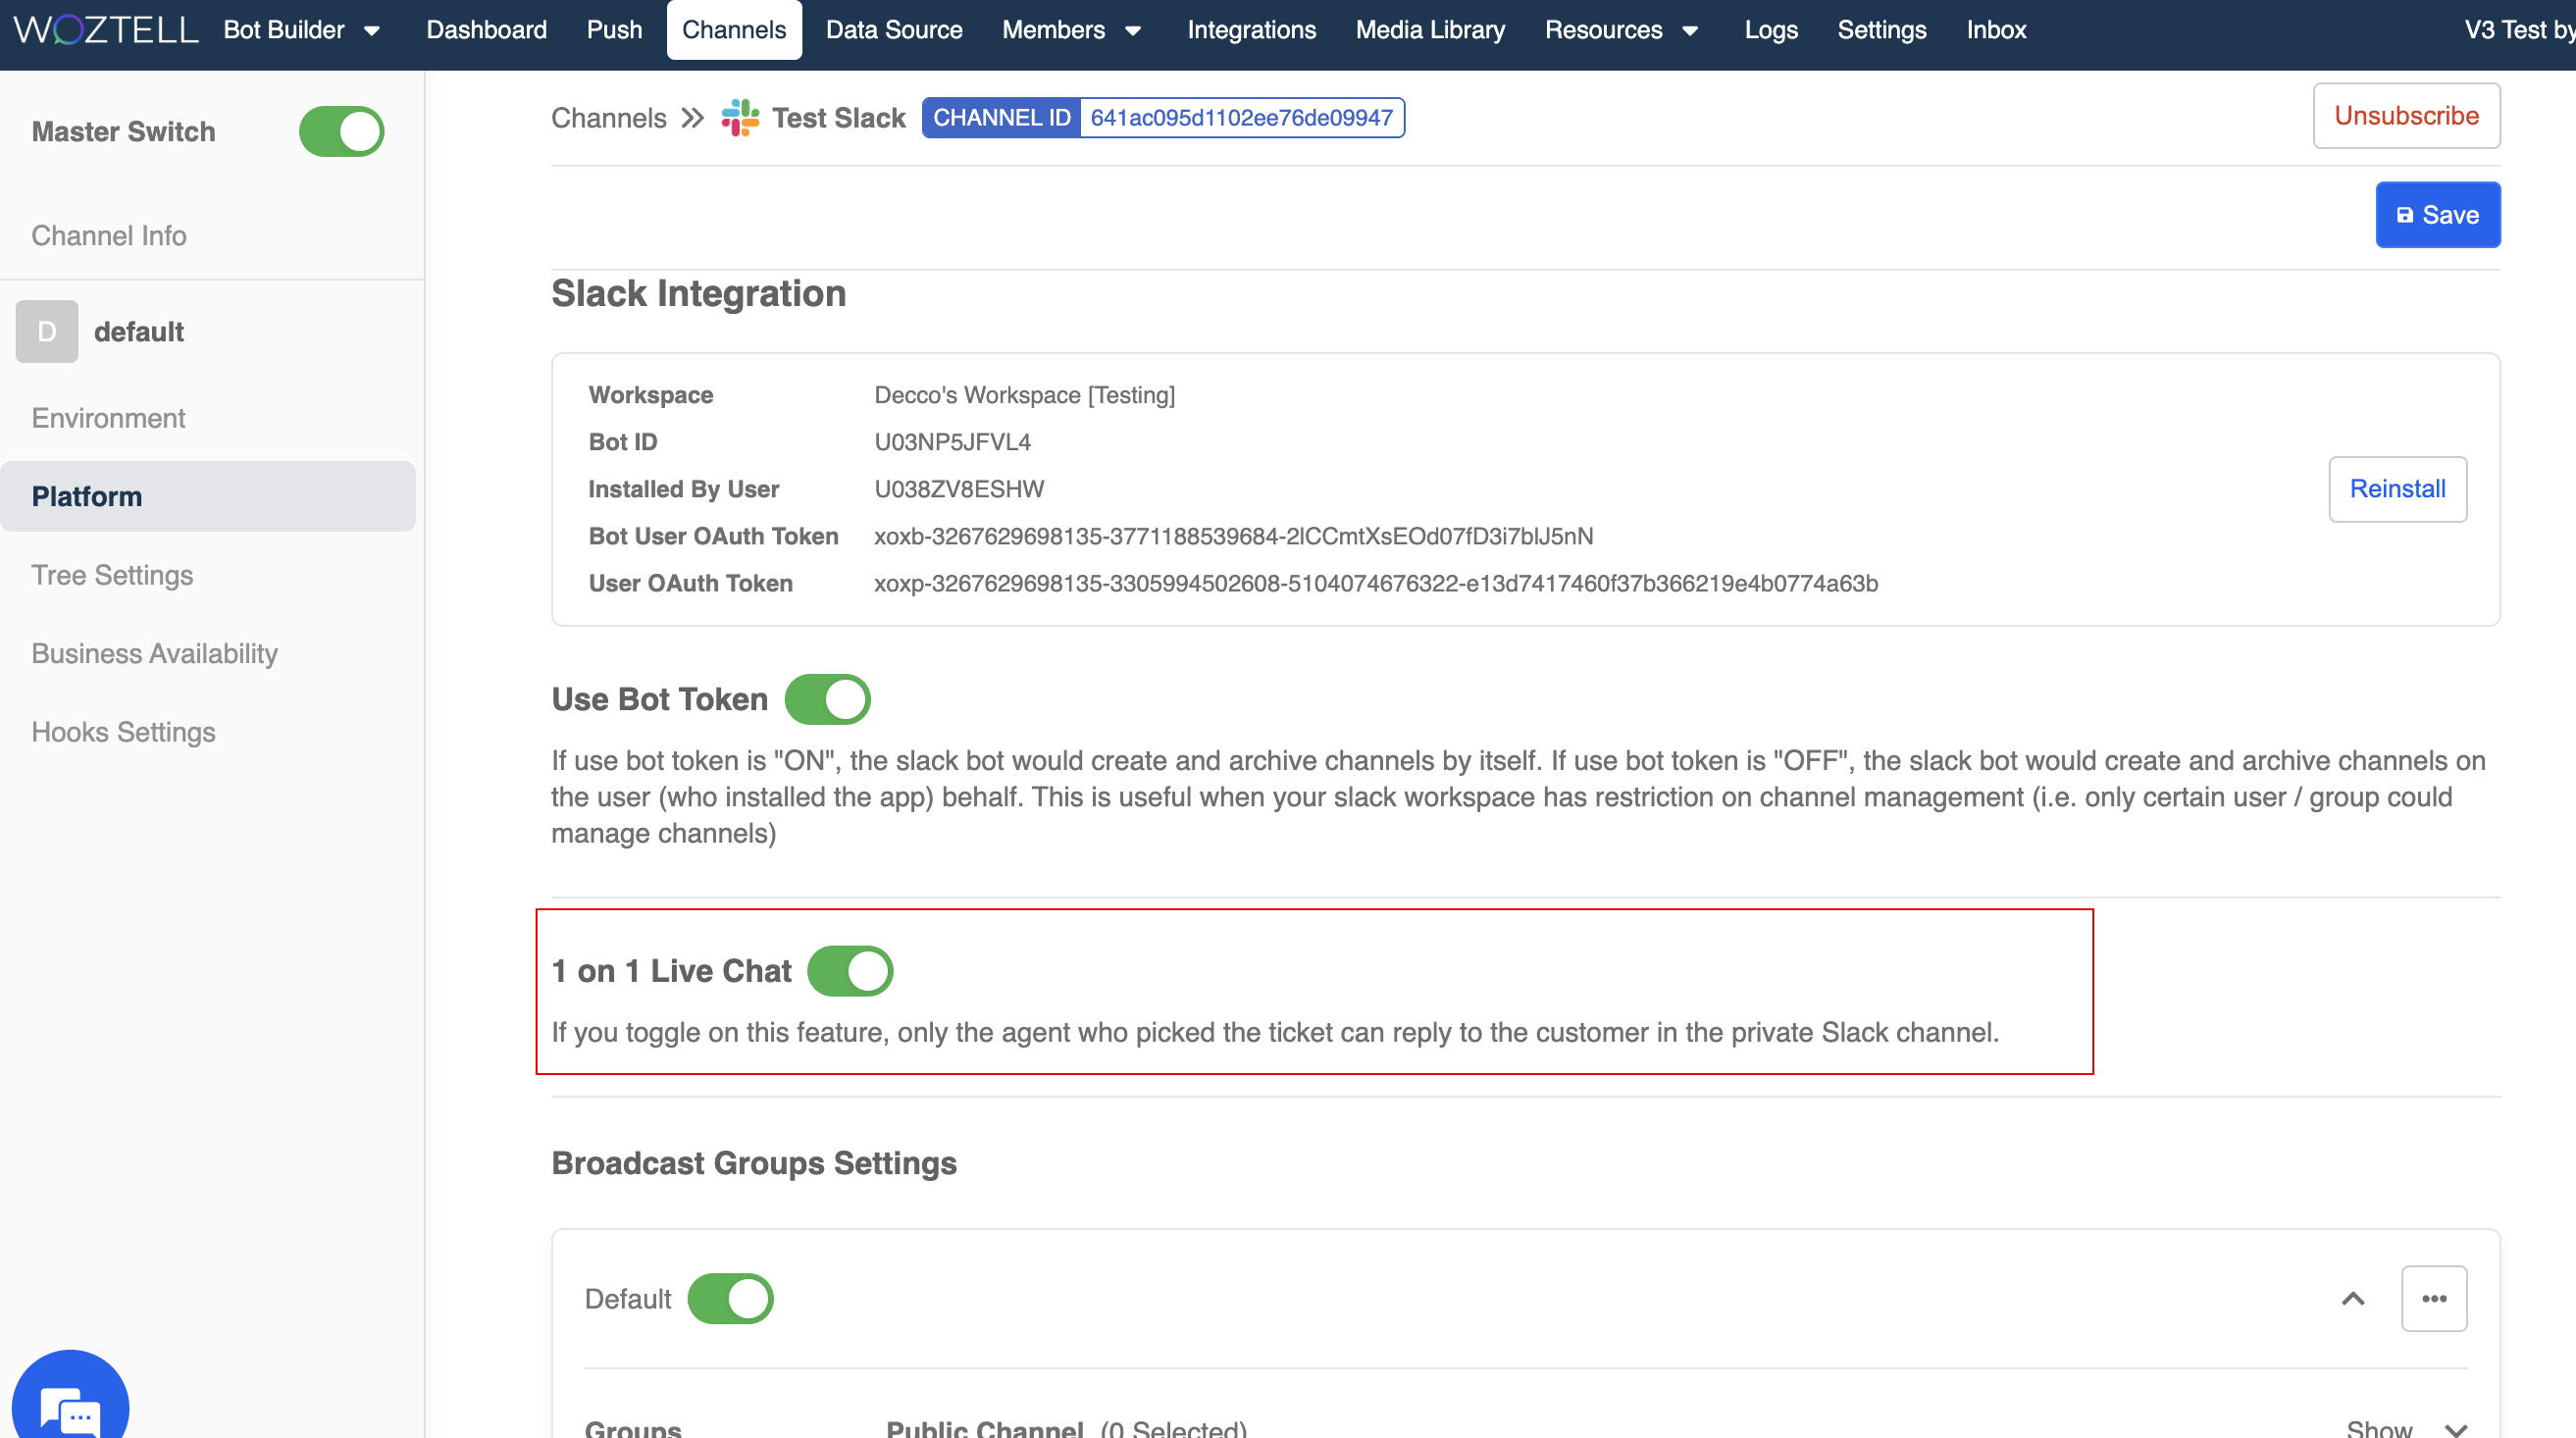
Exclusive Live Chat
The Exclusive Live Chat, also known as the 1 on 1 Live Chat, is an optional feature that limits the right to reply to only the agent who picked up the ticket. To enable this, you can simple switch it on.