Send Broadcast via WhatsApp
Introduction
Before getting started, you need to learn the basics about sending broadcast messages via WhatsApp Cloud Integration.
Conversations
WhatsApp Business Cloud API is conversation based. A conversation is measured in fixed 24-hour sessions, it starts when the first business message in a conversation is delivered, either initiated by the business or in reply to a user message:
| Category | Description |
|---|---|
| User Initiated | A conversation that initiates in response to a user message. Whenever a business replies to a user within the 24 hour customer service window, that message will be associated with a user-initiated conversation. Businesses can send free-form messages within this 24 hour customer service window. |
| Business Initiated | A conversation that initiates from a business sending a user a message outside the 24 hour customer service window. Messages that initiate a business-initiated conversation will require a message template. |
Message Template
The broadcast notifications that businesses would like to send, are usually outside the 24 hour customer service window. In this case, it will be a business-initiated conversation, which requires a Message Template.
Message Templates are message formats for common reusable messages a business may want to send. This allows a business to send just the template identifier along with the appropriate parameters instead of the full message content. Your message templates will be reviewed to ensure they do not violate WhatsApp policies.
WhatsApp currently supports the following types of message templates:
| Category | Description |
|---|---|
| Marketing | Send promotional offers, product announcements, and more to increase awareness and engagement. |
| One-time passwords | Send codes that allow your customers to securely access their accounts. |
| Transactional | Send account updates, order updates, alerts, and more to share important information. |
Message Template Submission
In order to send Message Template on WhatsApp, you must first submit the message content to WhatsApp team for approval. Only approved templates can be sent to users.
Create Message Template
- In "Platform", select "Message Template. This section allows you to manage your WhatsApp message templates.
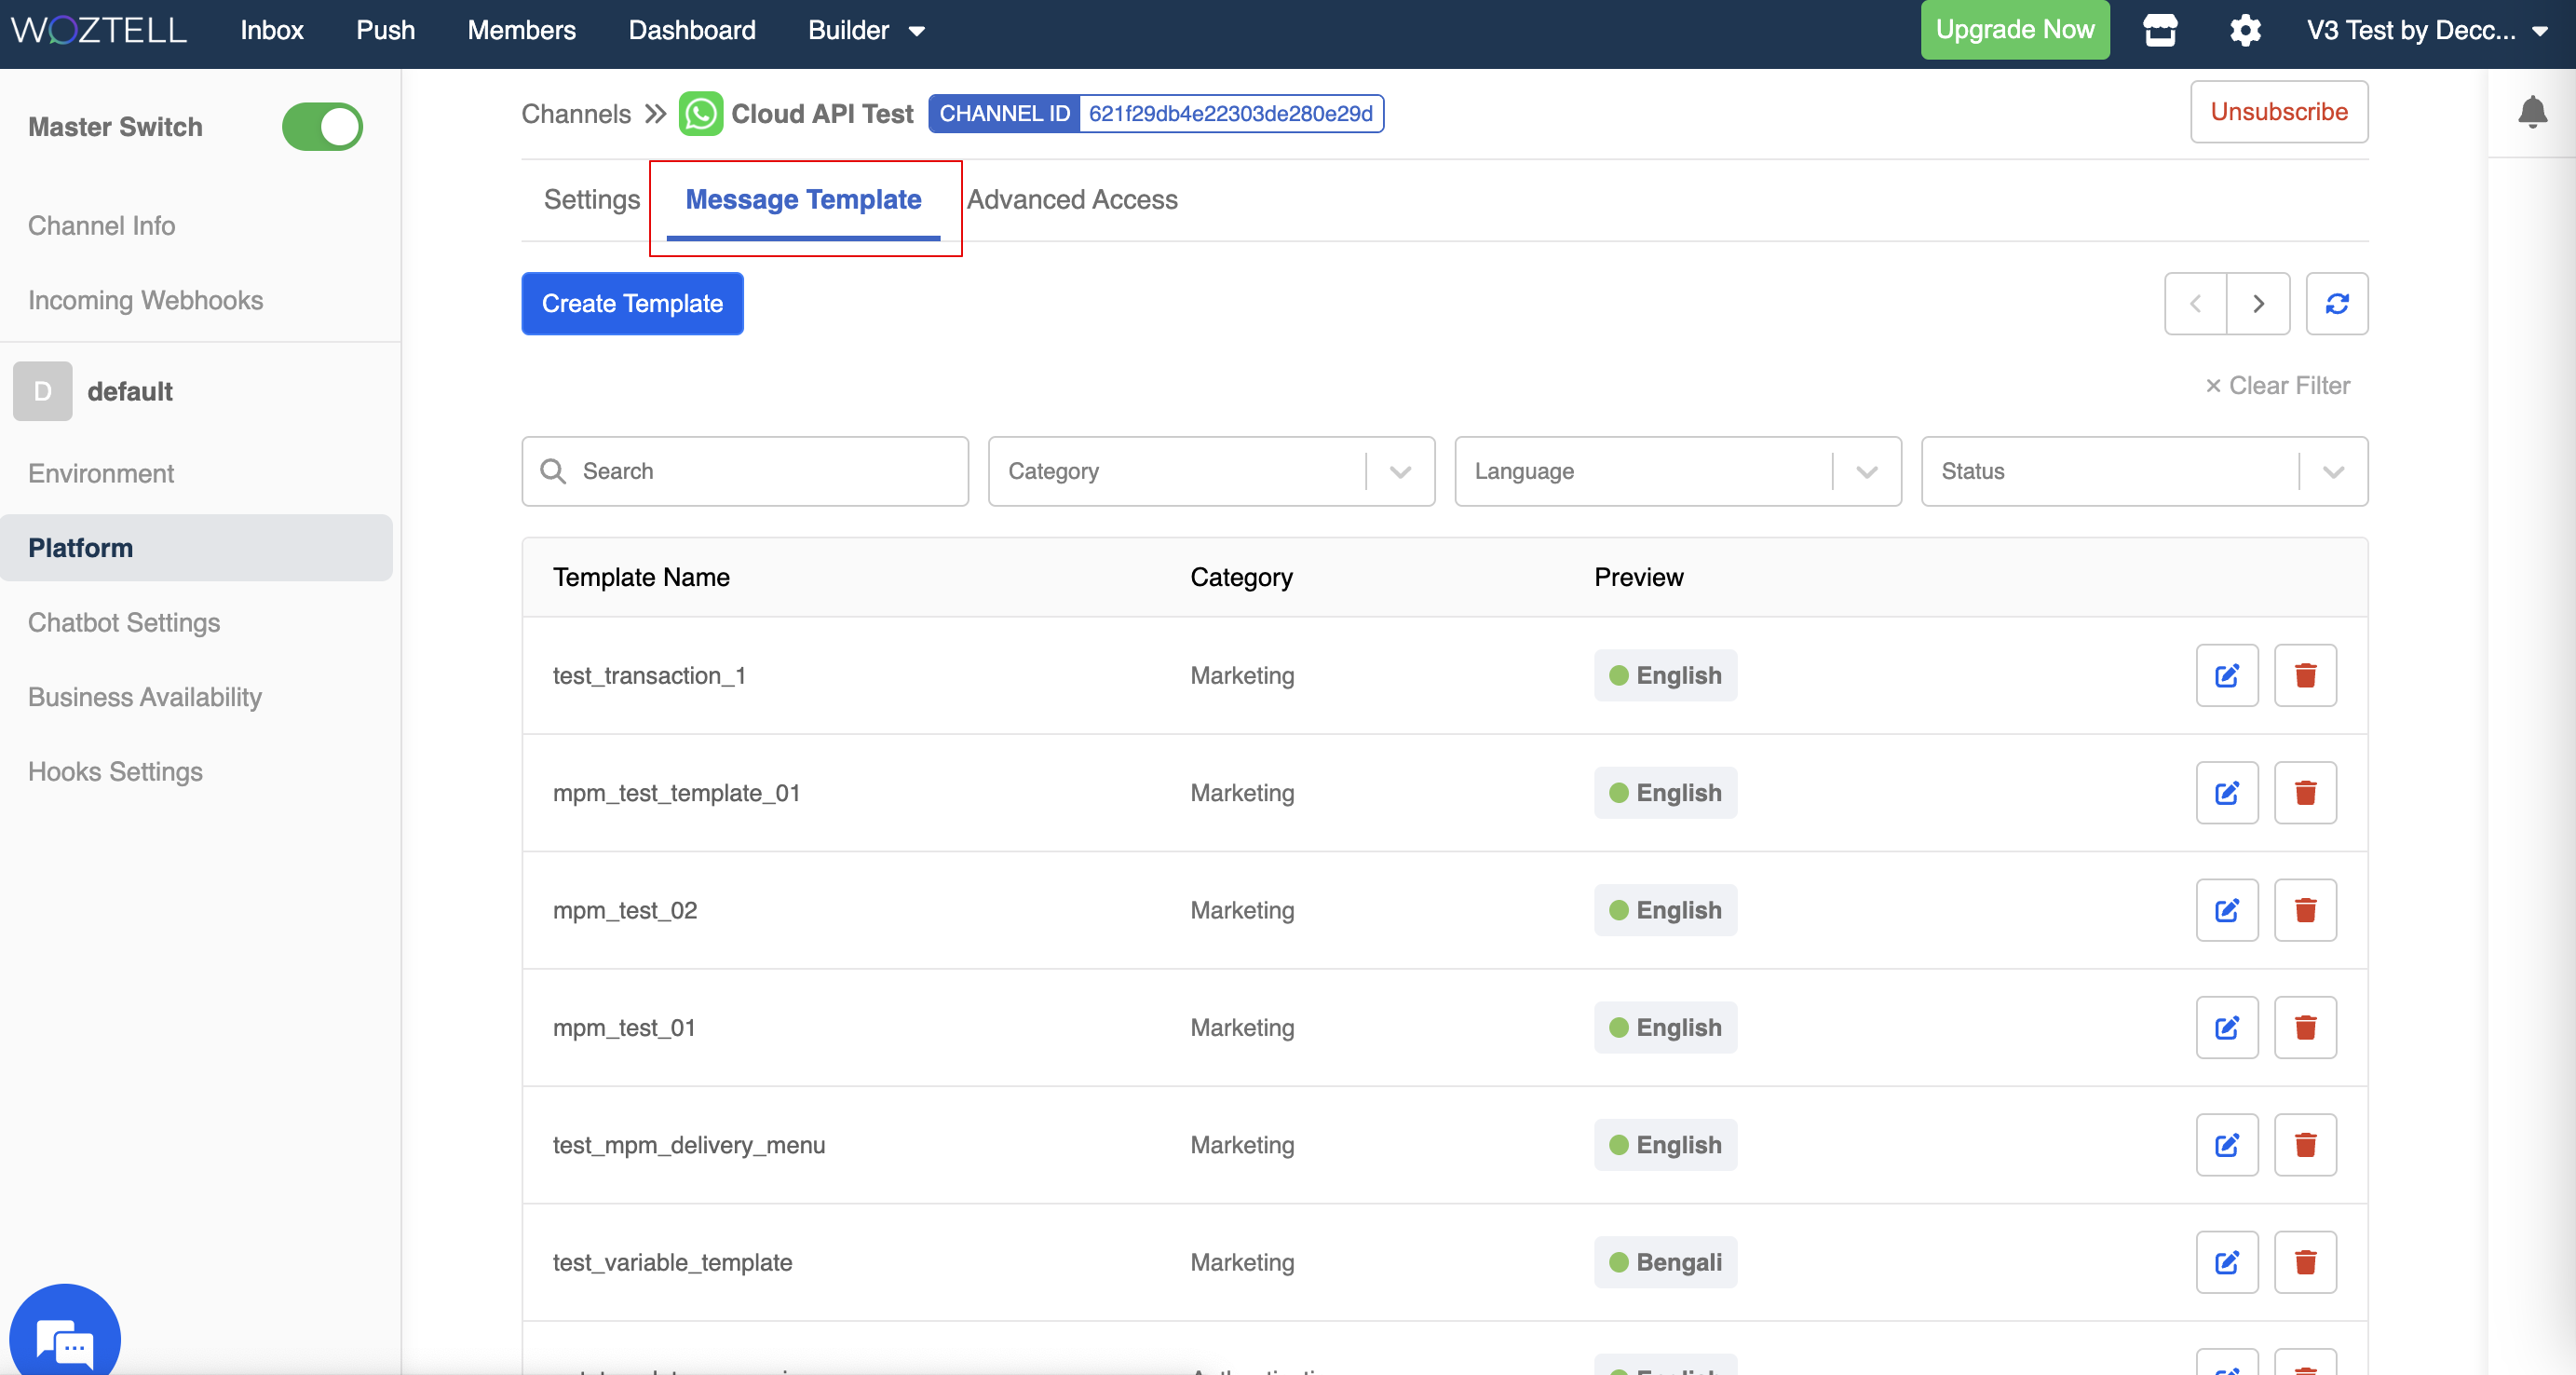
- Click "Create" to create a new message template.

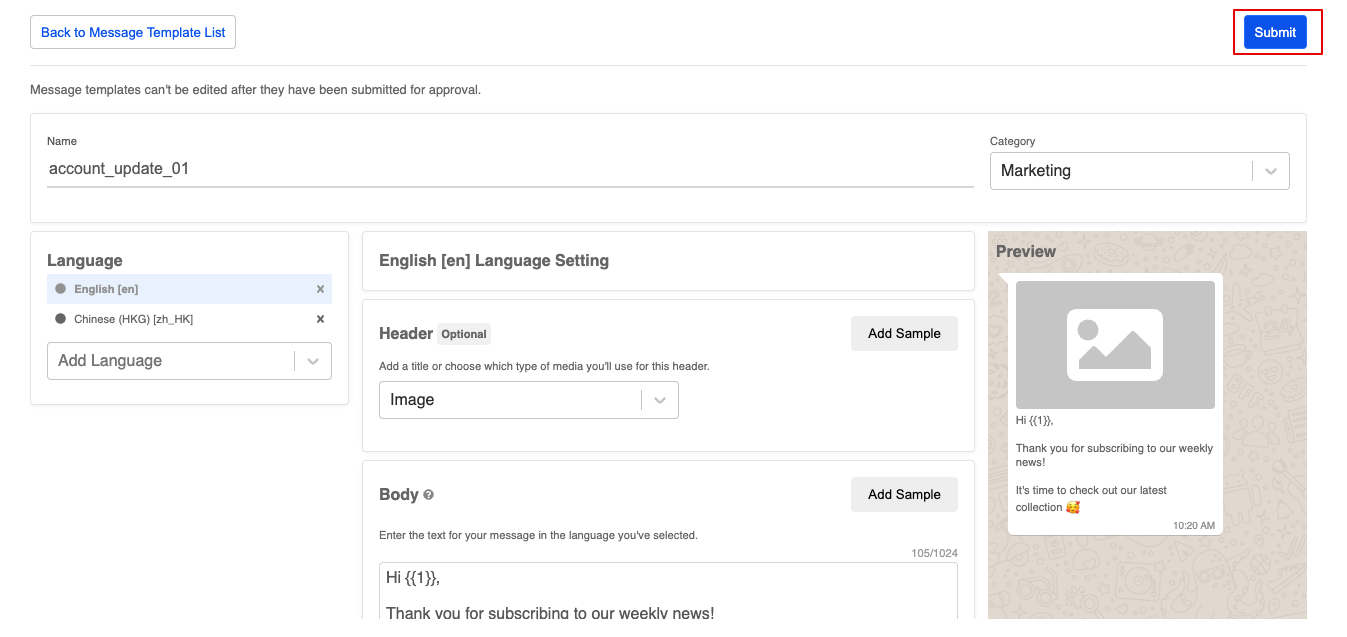
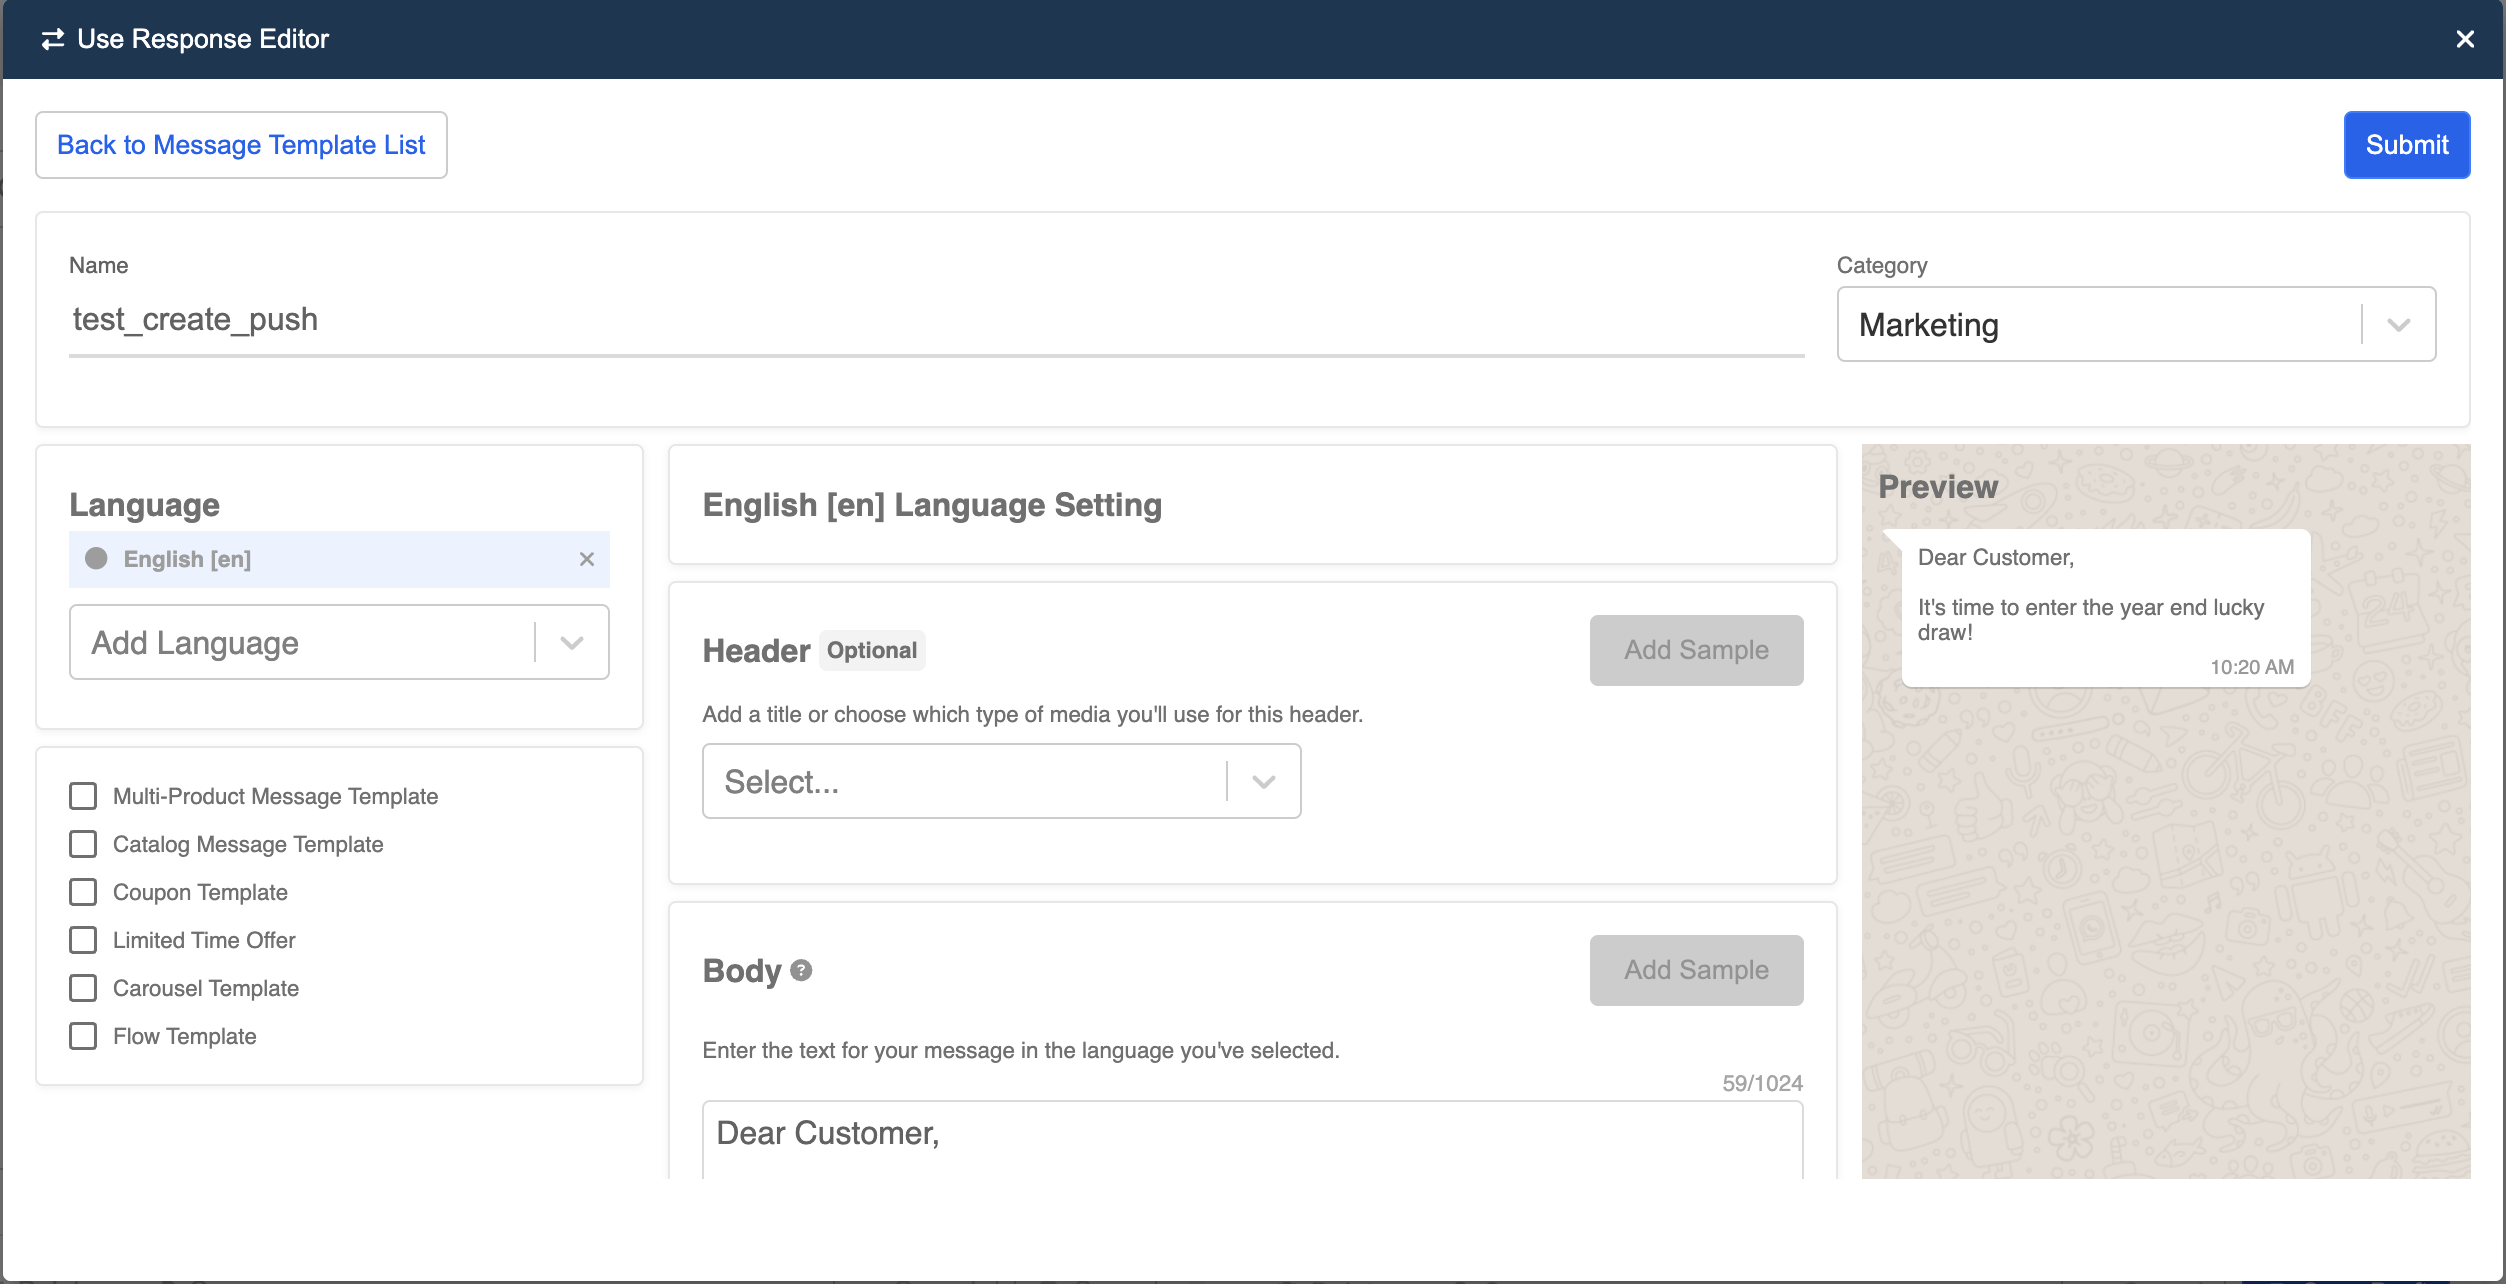
- Fill in the necessary details of the message template:
| Property | Description | Required |
|---|---|---|
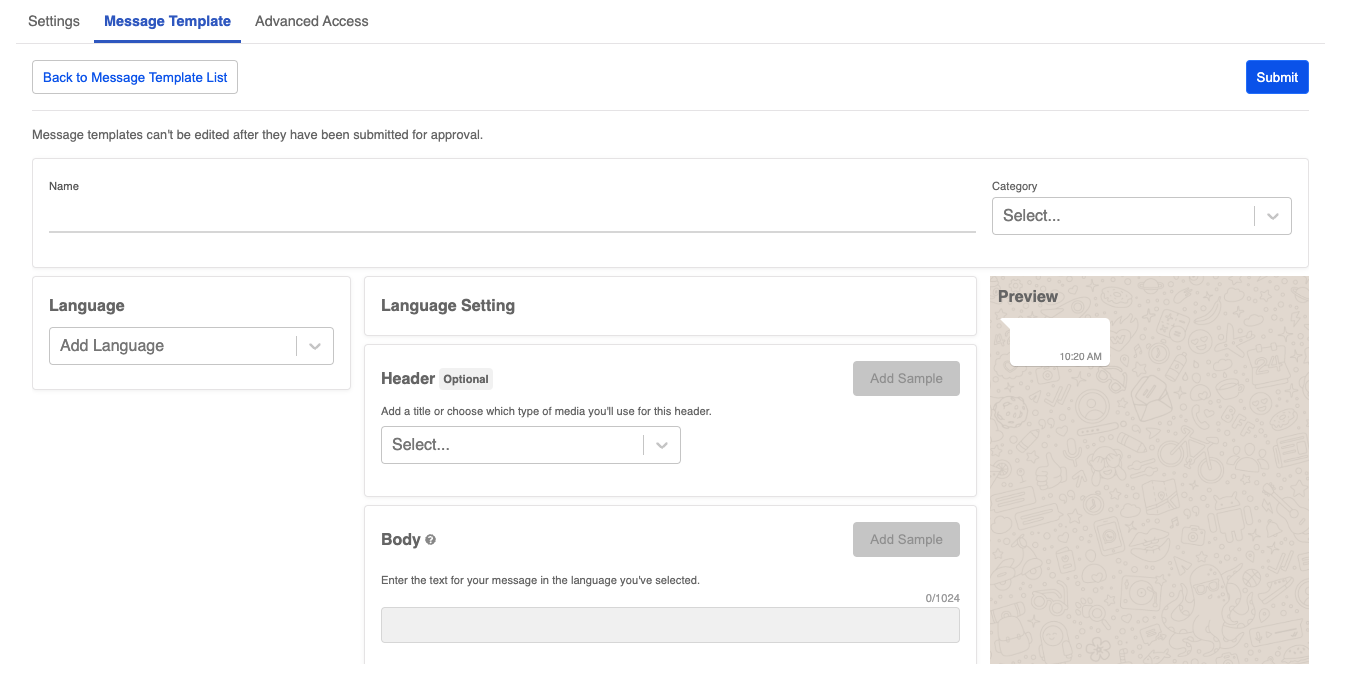
| Name | Can only contain lowercase alphanumeric characters and underscores ( _ ); No other characters or white space are allowed | Y |
| Category | Select the correct category of your template | Y |
| Language | Select the correct language of your template; The template name will be the same for all translations; You will specify the language field when sending out the template | Y |
| Content | The content of your message template; support parameter placeholders in the format of {{1}}, {{2}} and so on | Y |
| Header | The header of your message template; support "Text", Image", "Video", "Document"; character limit is 60 | N |
| Body | The body of your message template; character limit is 1024 | Y |
| Footer | The text footer of your message template; character limit is 60 | N |
| Buttons | The button(s) of your message template; call-to-action or quick reply; 3 buttons max. | N |
- During the creation of message template, please note that:
- You can fill in parameter placeholders in the format of
{{1}},{{2}}and so on - For any media or text with parameters, you are required to add sample as part of the review process
- You may click "+ New Language" to add multiple translations under the same template content
- You should create all translations of the same content under the same message template
- Click "Submit" to submit your message template. Once submitted, a new template will be created and pending for approval.
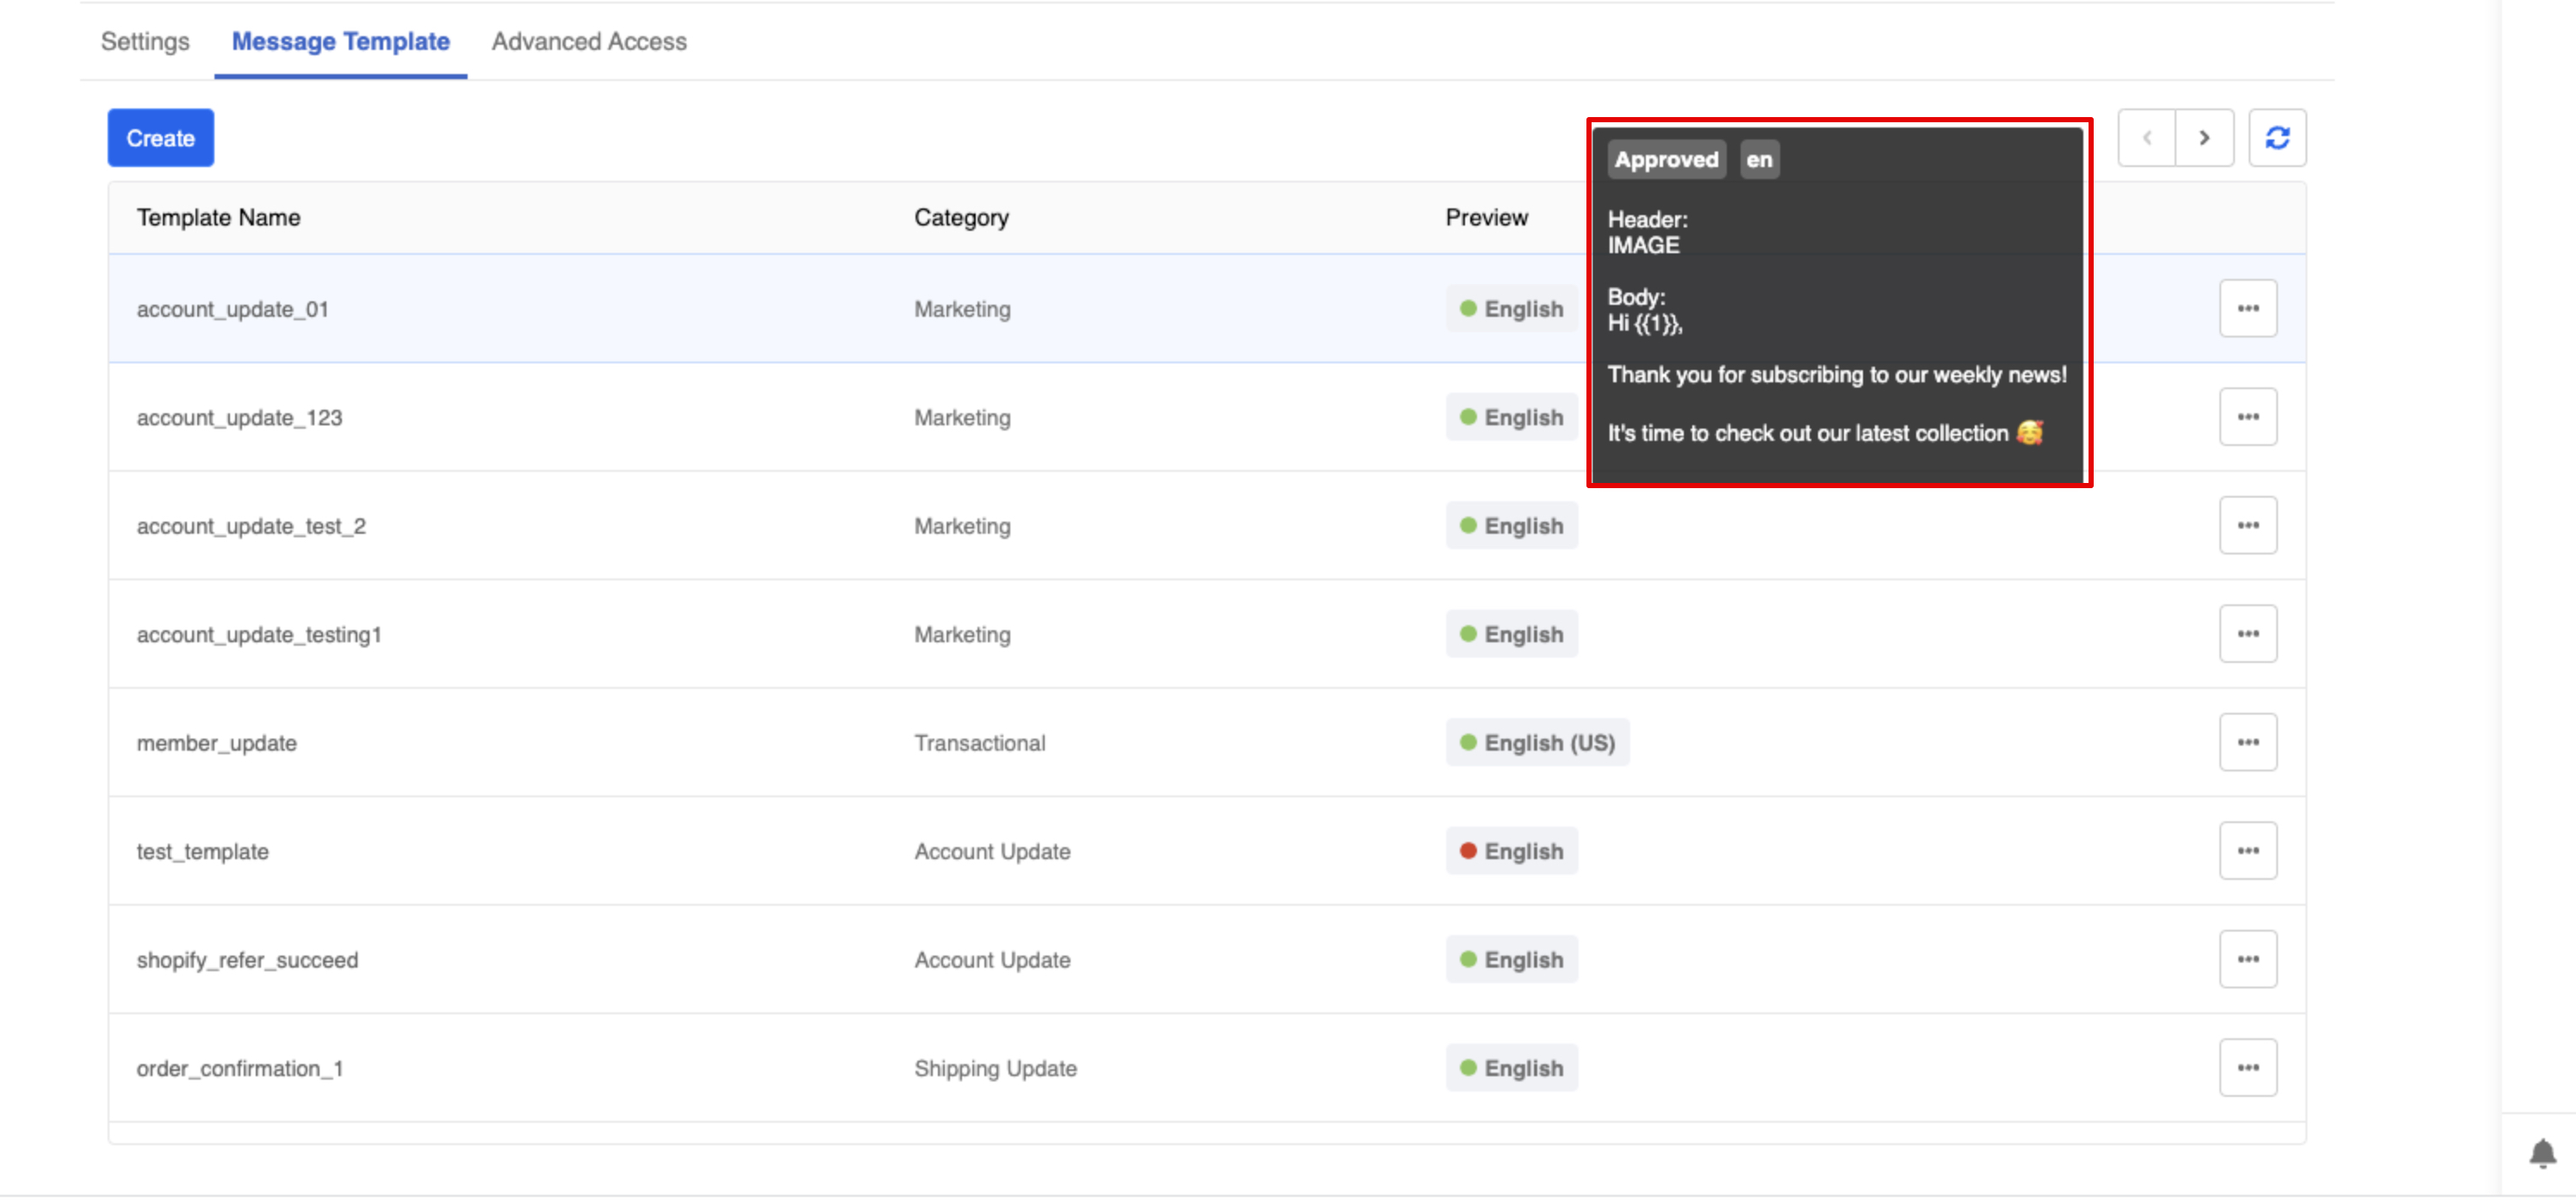
- You can hover over the template in order to preview the content.
Submission Status
After submission, your template might appear in one of the following status:
- Yellow: Pending from approval
- Red: Rejected
- Green: Approved
- Light Grey: Pending to delete
- Dark Grey: Deleted
Send Message Template
When the message template is ready, we can move on to Broadcast and proceed with sending the broadcast notifications.
Create Audience Group
Before sending the broadcast, we need to specific who can receive the broadcast by creating an audience group.
In "Broadcast", you can create audience group by select "+ New Audience" on the left panel.
Name your audience group, but the description is not compulsory.
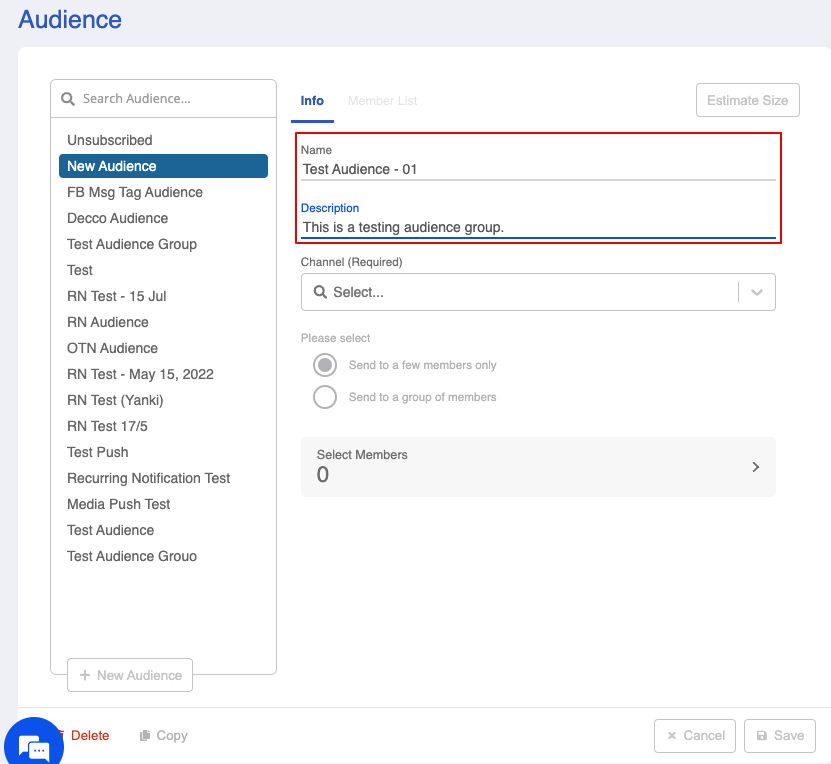
- Select your WhatsApp Cloud channel.
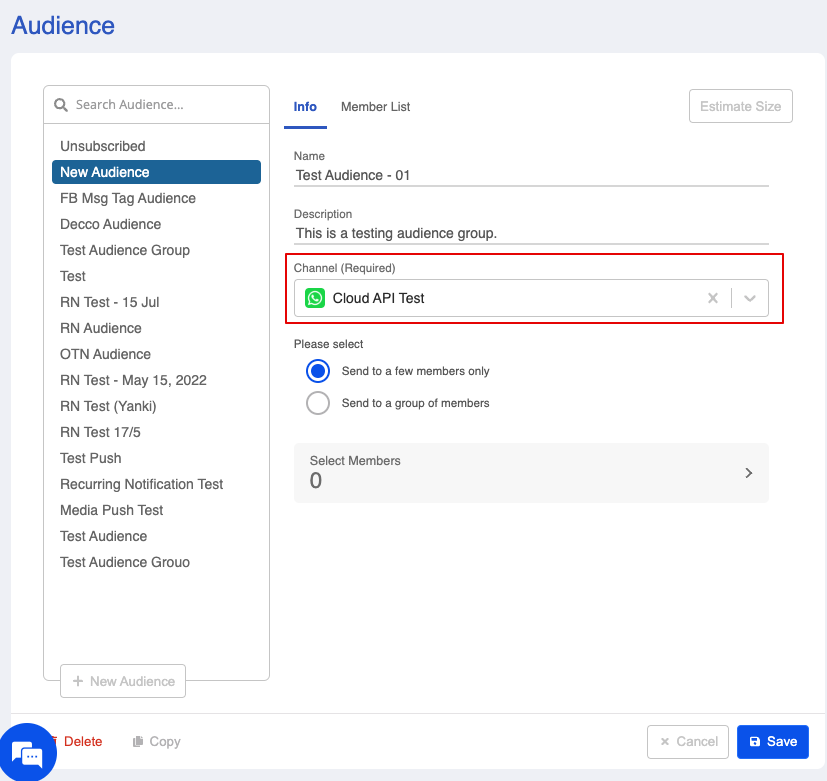
- The broadcast page provides 2 methods to select the target audience:
Select a few members
Send to a few members only is useful for manually picking a small group of members as audience. Once this option is selected, the audience size will start from 0, until you add more members to the group.
By checking Send to a few members only, the "Select Members" section will be displayed.
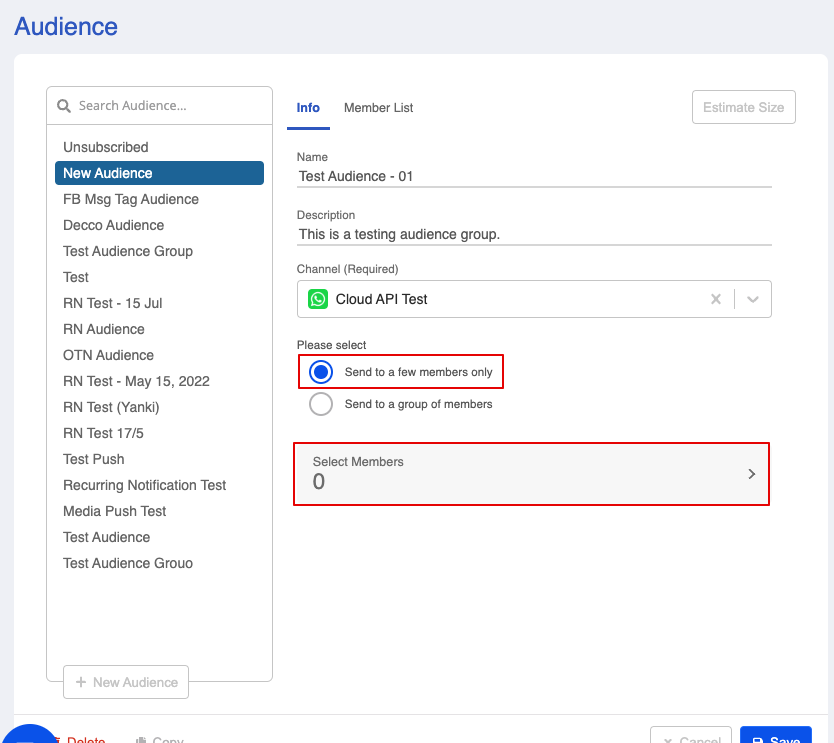
"Select Members" allows you to view the list of available members, click on the member to add him/her to the audience group.

Select a group of members
Send to a group of members is useful for filtering and selecting a larger size of audience. Once this option is selected, the audience size will start from the total number of audience of the selected channel. You can apply criteria to filter out the unwanted segment.
By checking Send to a group of members, the "Criteria", "Add Members" and "Exclude Members" sections will be displayed.
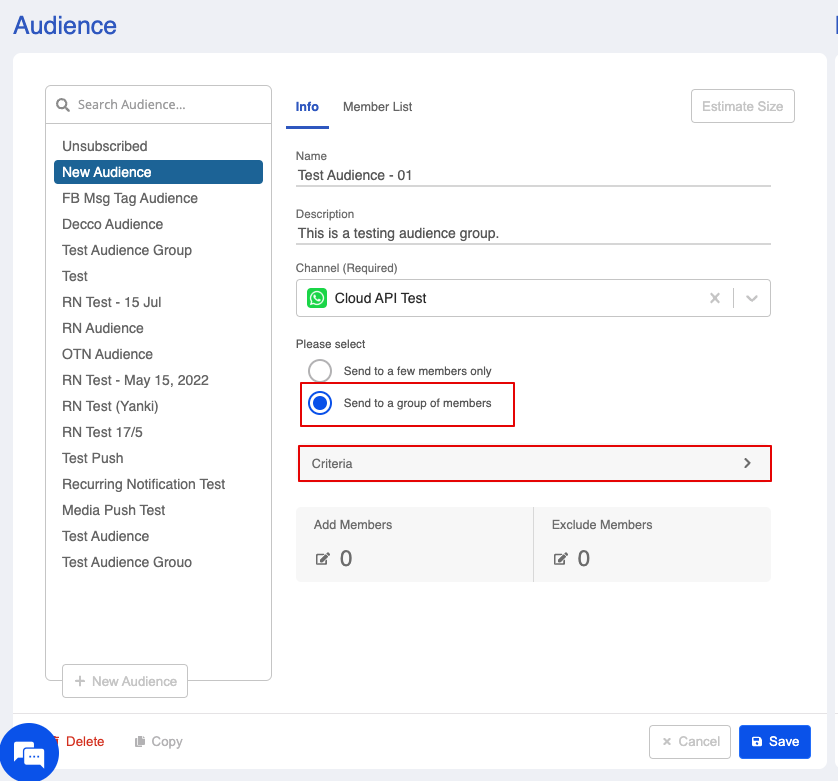
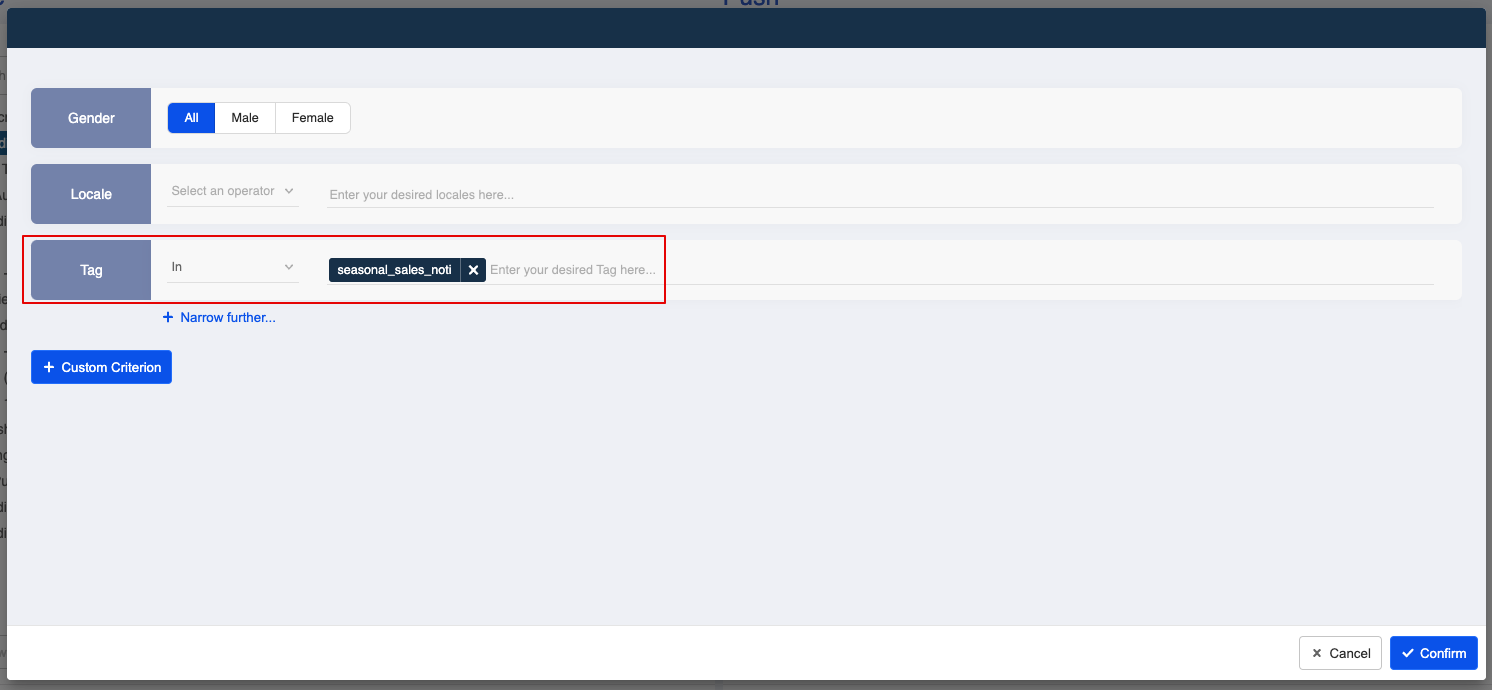
In "Criteria", you can apply the filters to get the target audience.
| Property | Description |
|---|---|
| Gender | You may simply select All, Male or Female to segmentize your audience |
| Locale | You can select In or Not In to include or exclude subscribers according to their language settings on the platform |
| Tag | You can select In or Not In to include or exclude subscribers according to the pre-defined member tags |
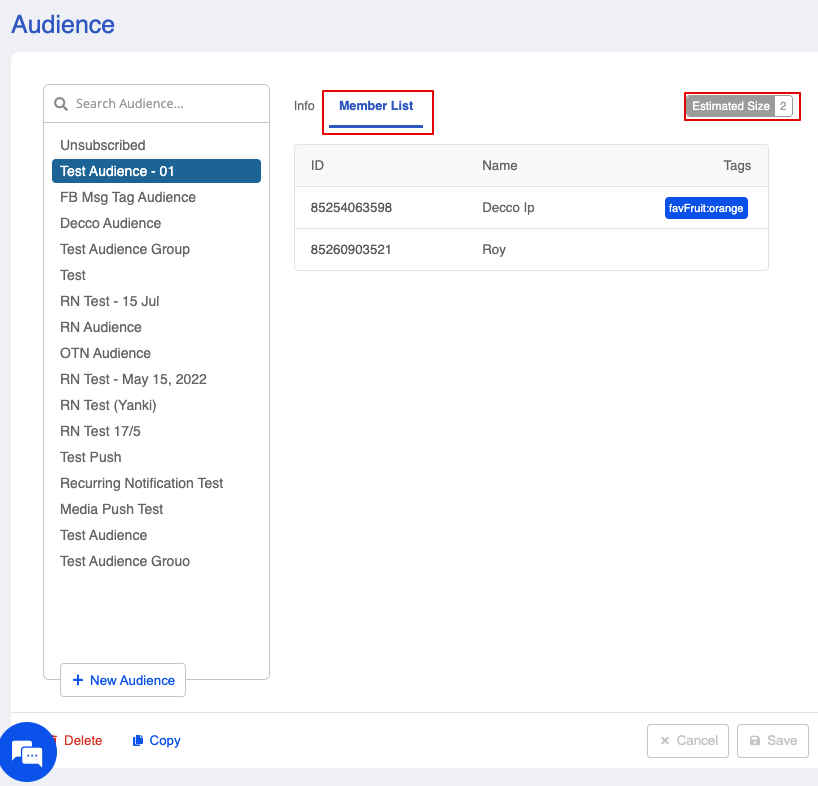
- After saving the audience group, you can view the list of members selected by selecting "Member List". And click on
Estimate Sizeto check the size of this audience group.
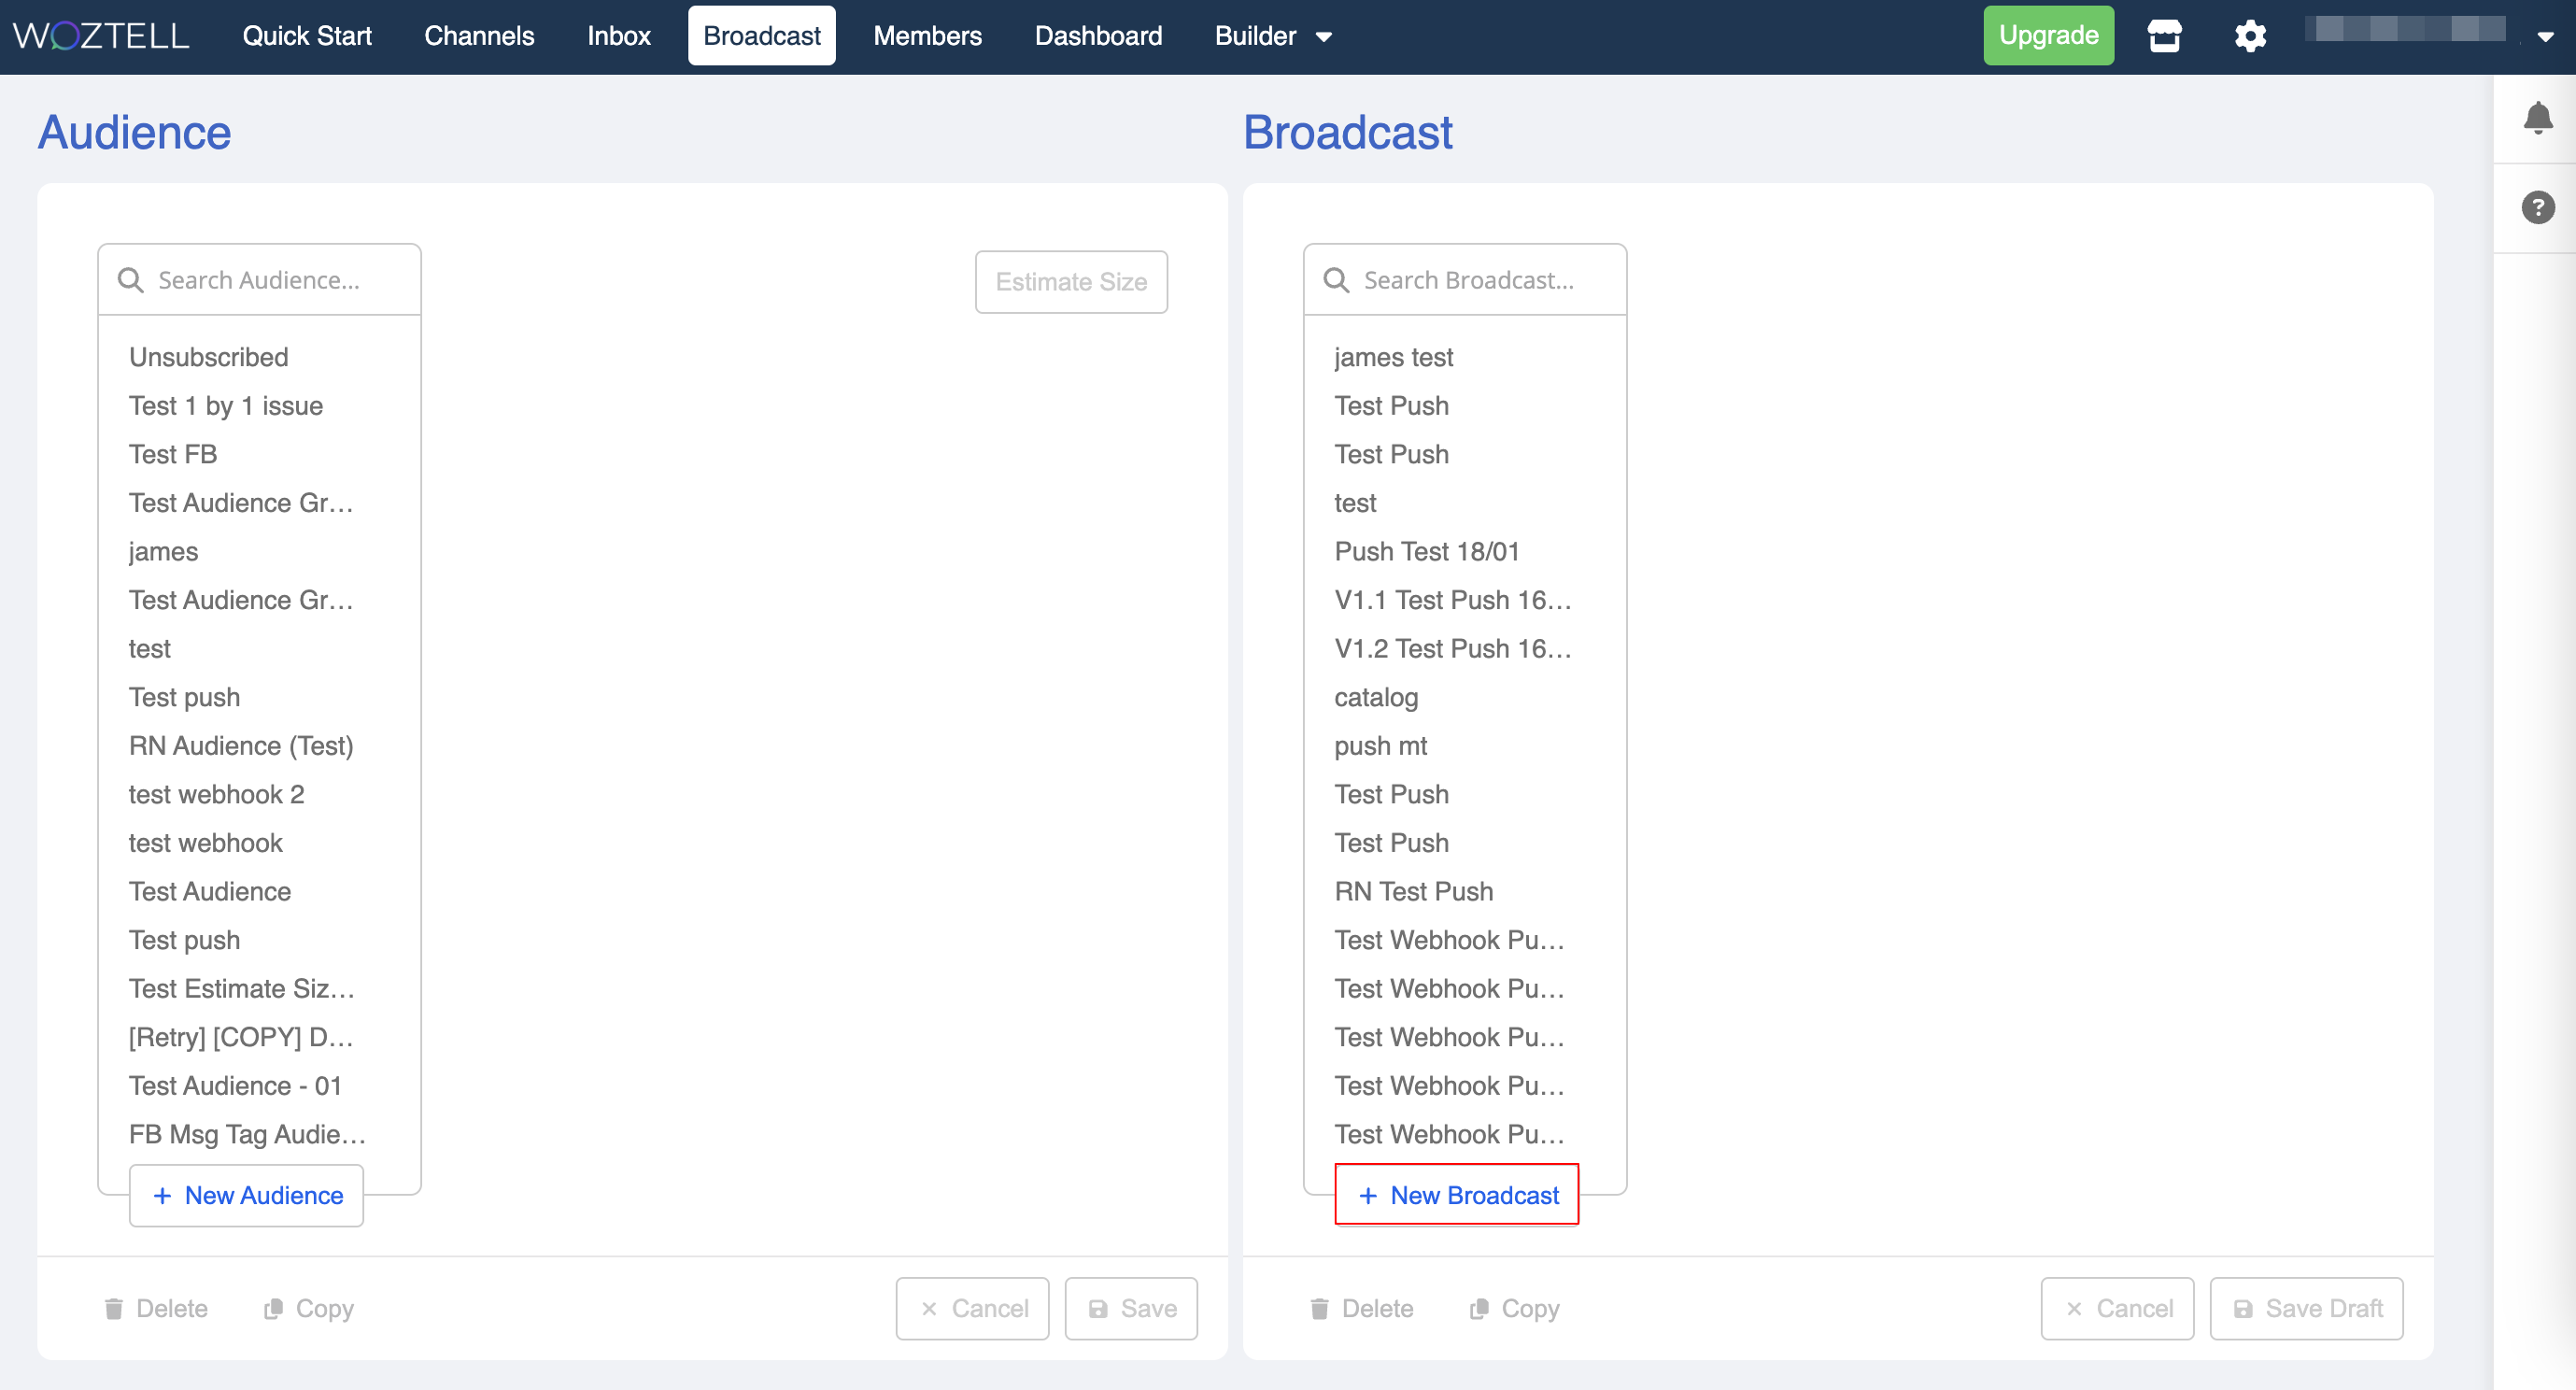
Create & Send Broadcast
Now, we can move on to the right panel and create a broadcast.
- Select "+ New Broadcast" to create a new broadcast.
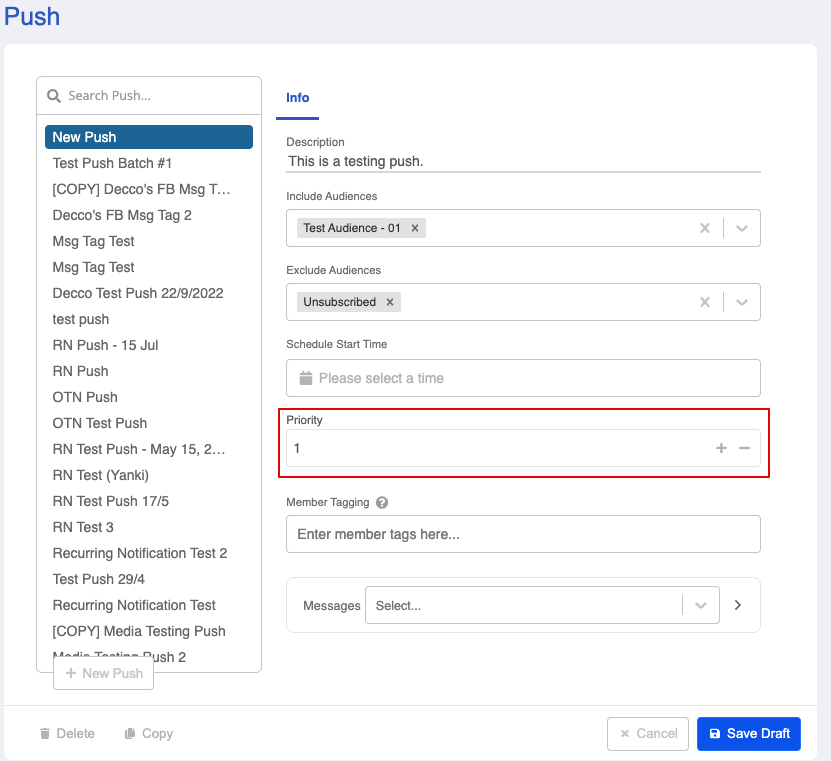
- Name to your broadcast message. The "Description" is not compulsory.

- Under "Include Audiences", select the audience group you have created.
notes
"Exclude Audiences" will always consider the "Unsubscribed" audience list by default.

- Priority is used when you have two or more broadcast messages on your sending list. The default value is 1.
NOTES
For example, if you are sending out broadcast A to your subscribers and would like to send an ad-hoc broadcast B to the subscribers because broadcast B is more important. In this case, you need to set a higher priority for broadcast B and it will interrupt the sending order and get broadcasted before broadcast A.
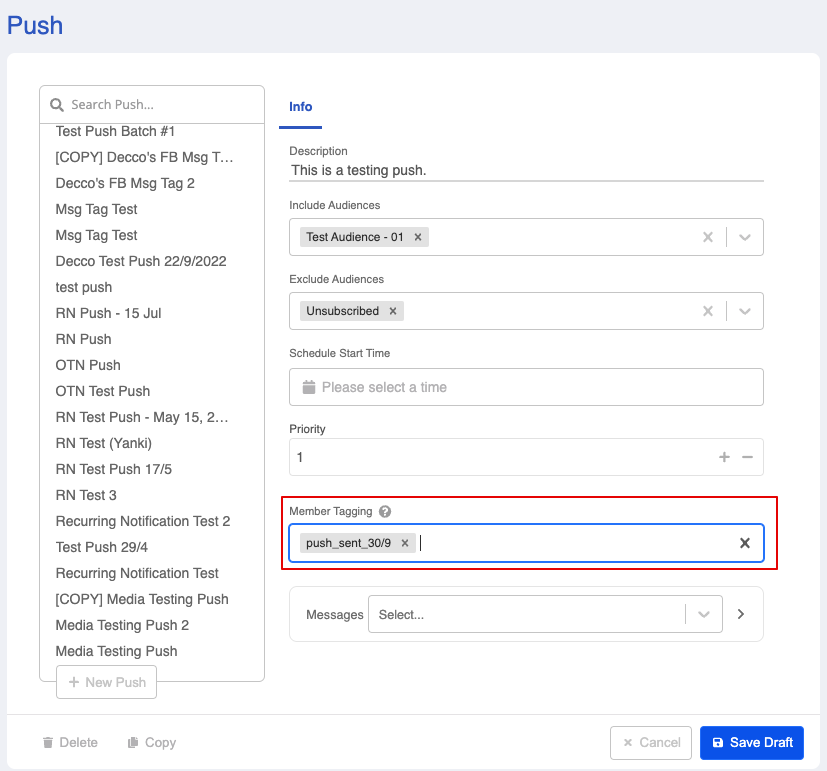
- "Member Tagging" allows you to mark the audience with self-defined member tag, which is useful for future analysis. In this example, let's add a member tag to keep track of which member has received this broadcast.
- Click on "Messages" to start configuring the broadcast message.

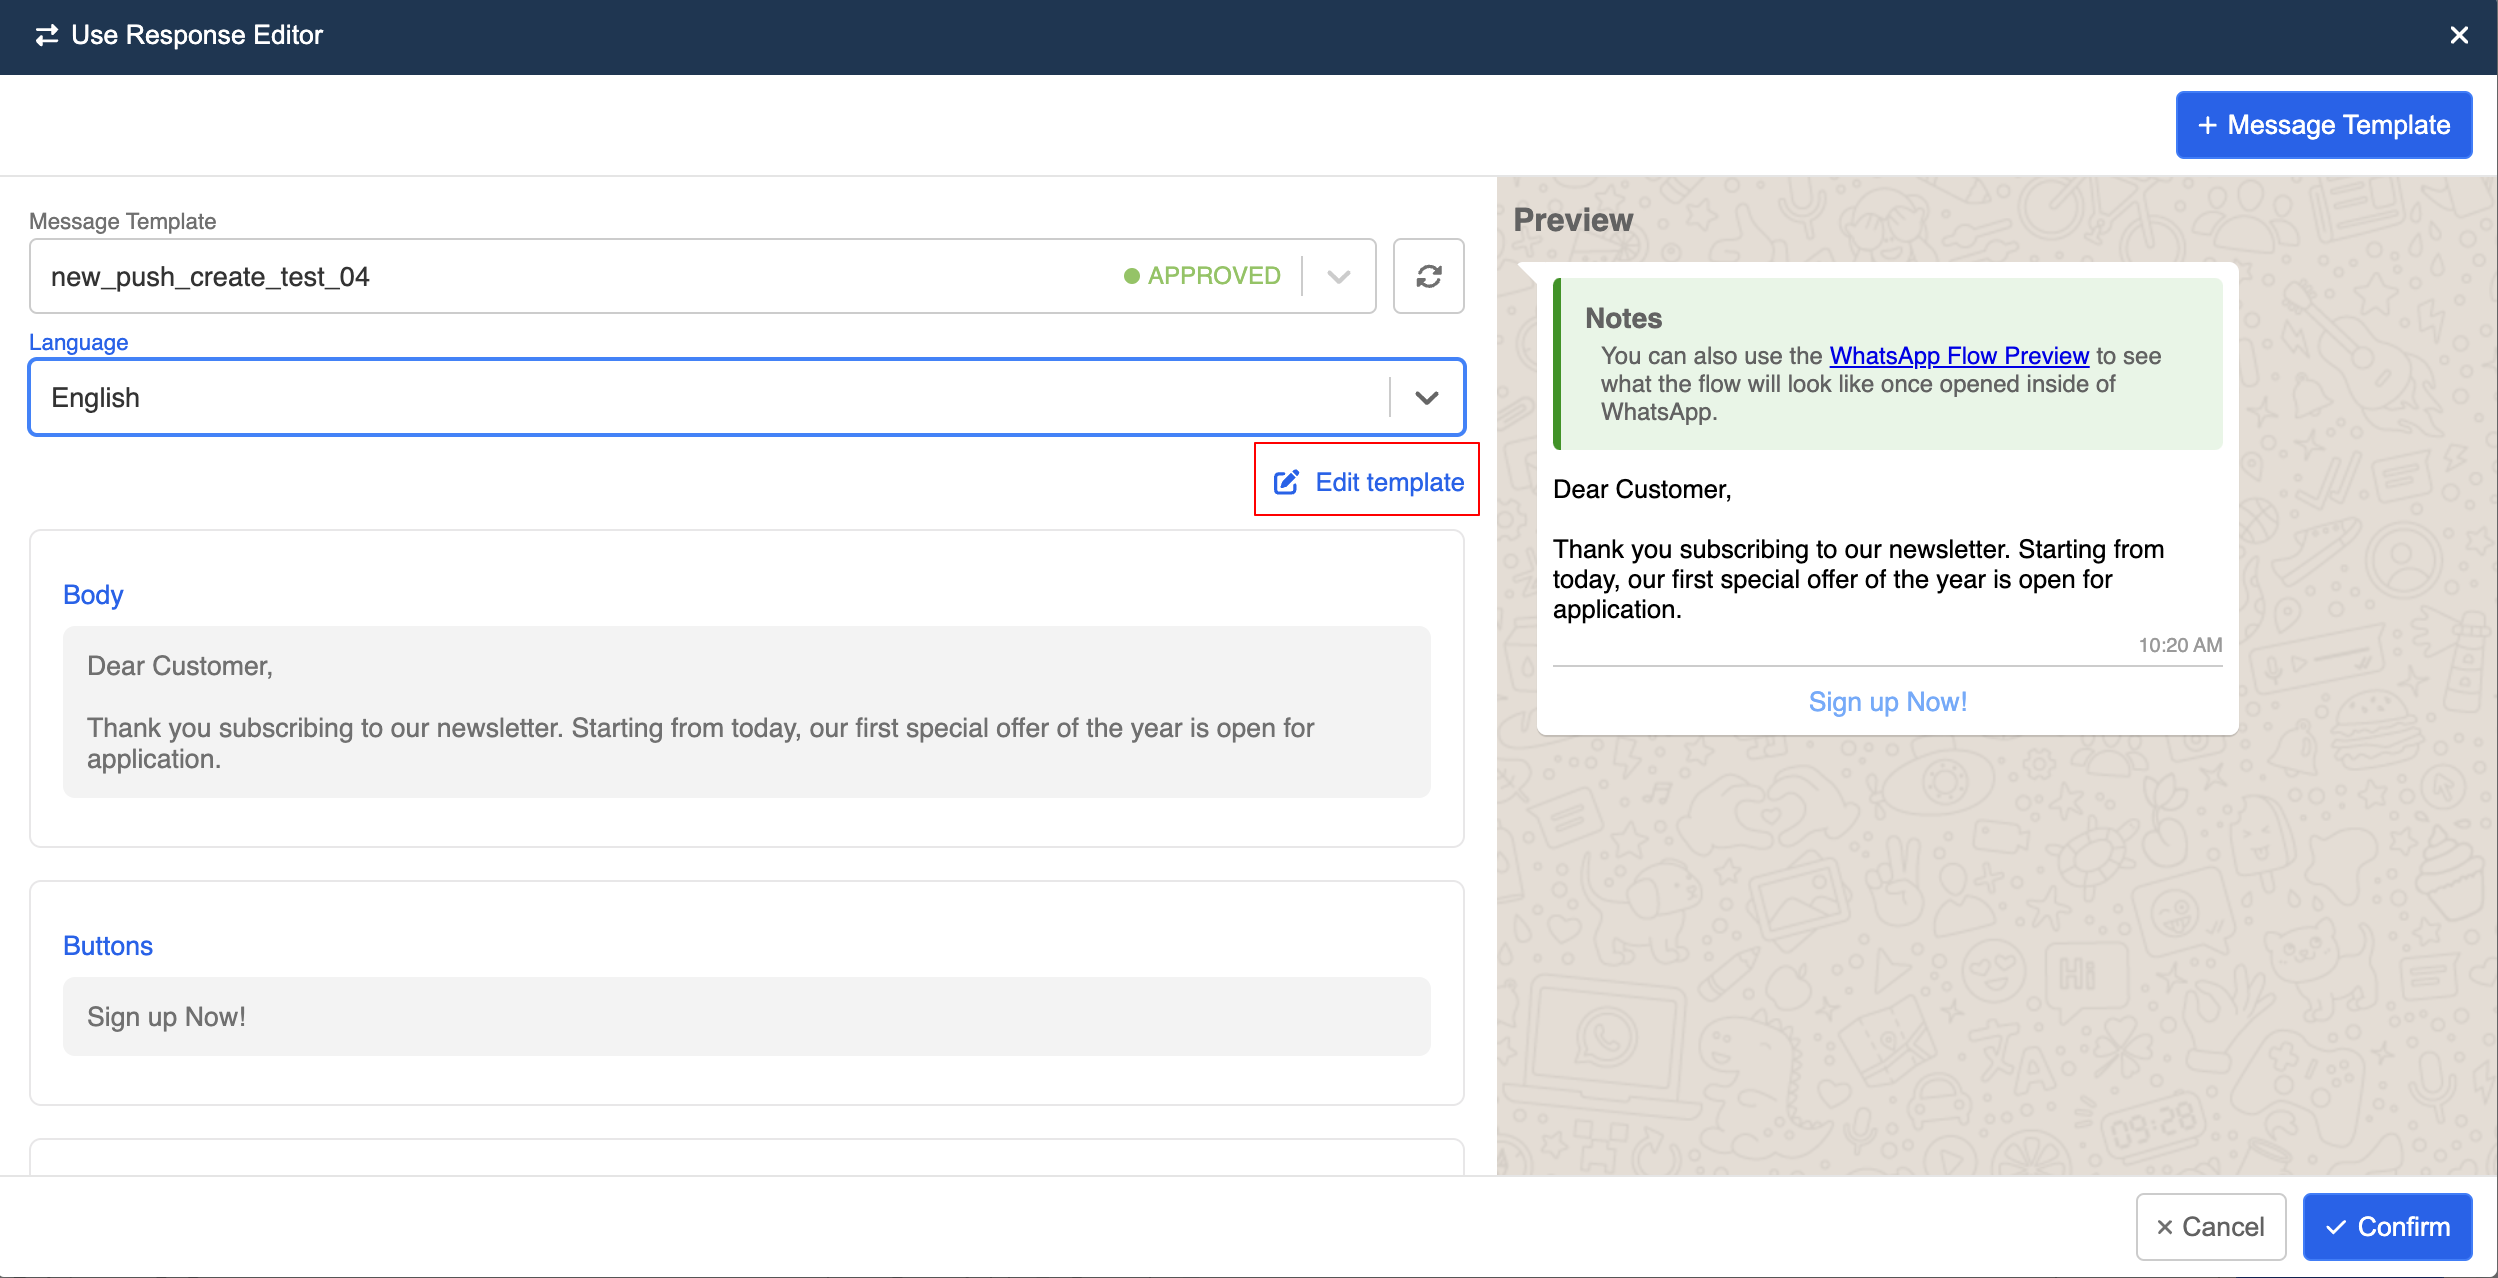
- If the audience added is in WhatsApp Cloud, a screen for configuring message template will be displayed.
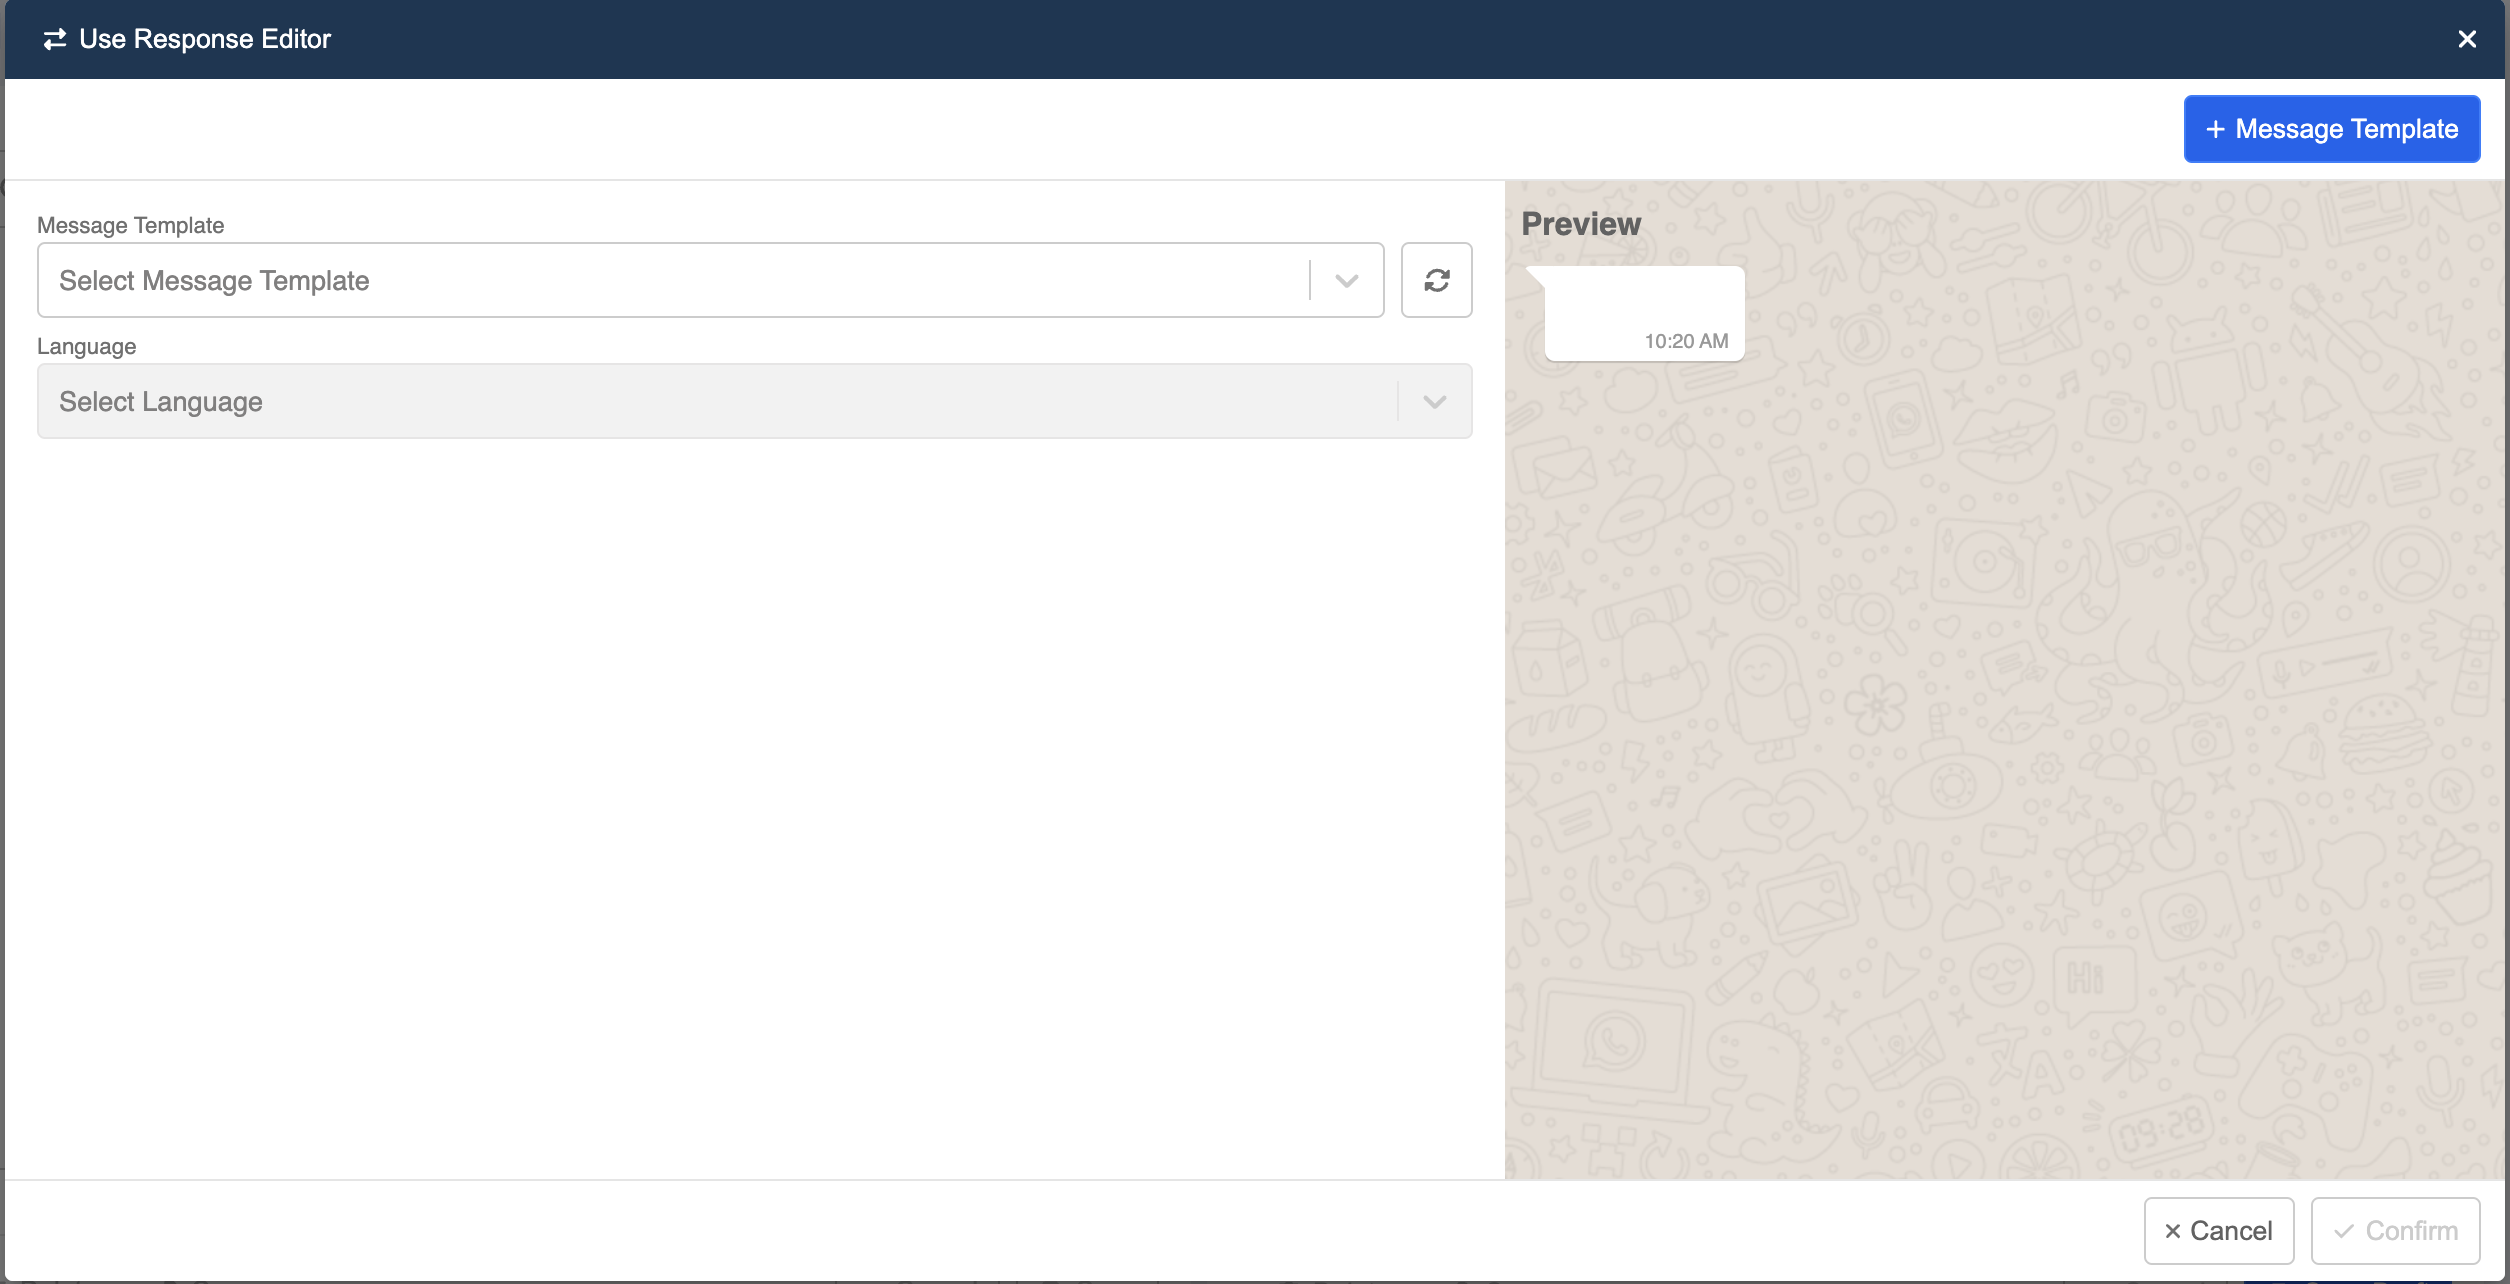
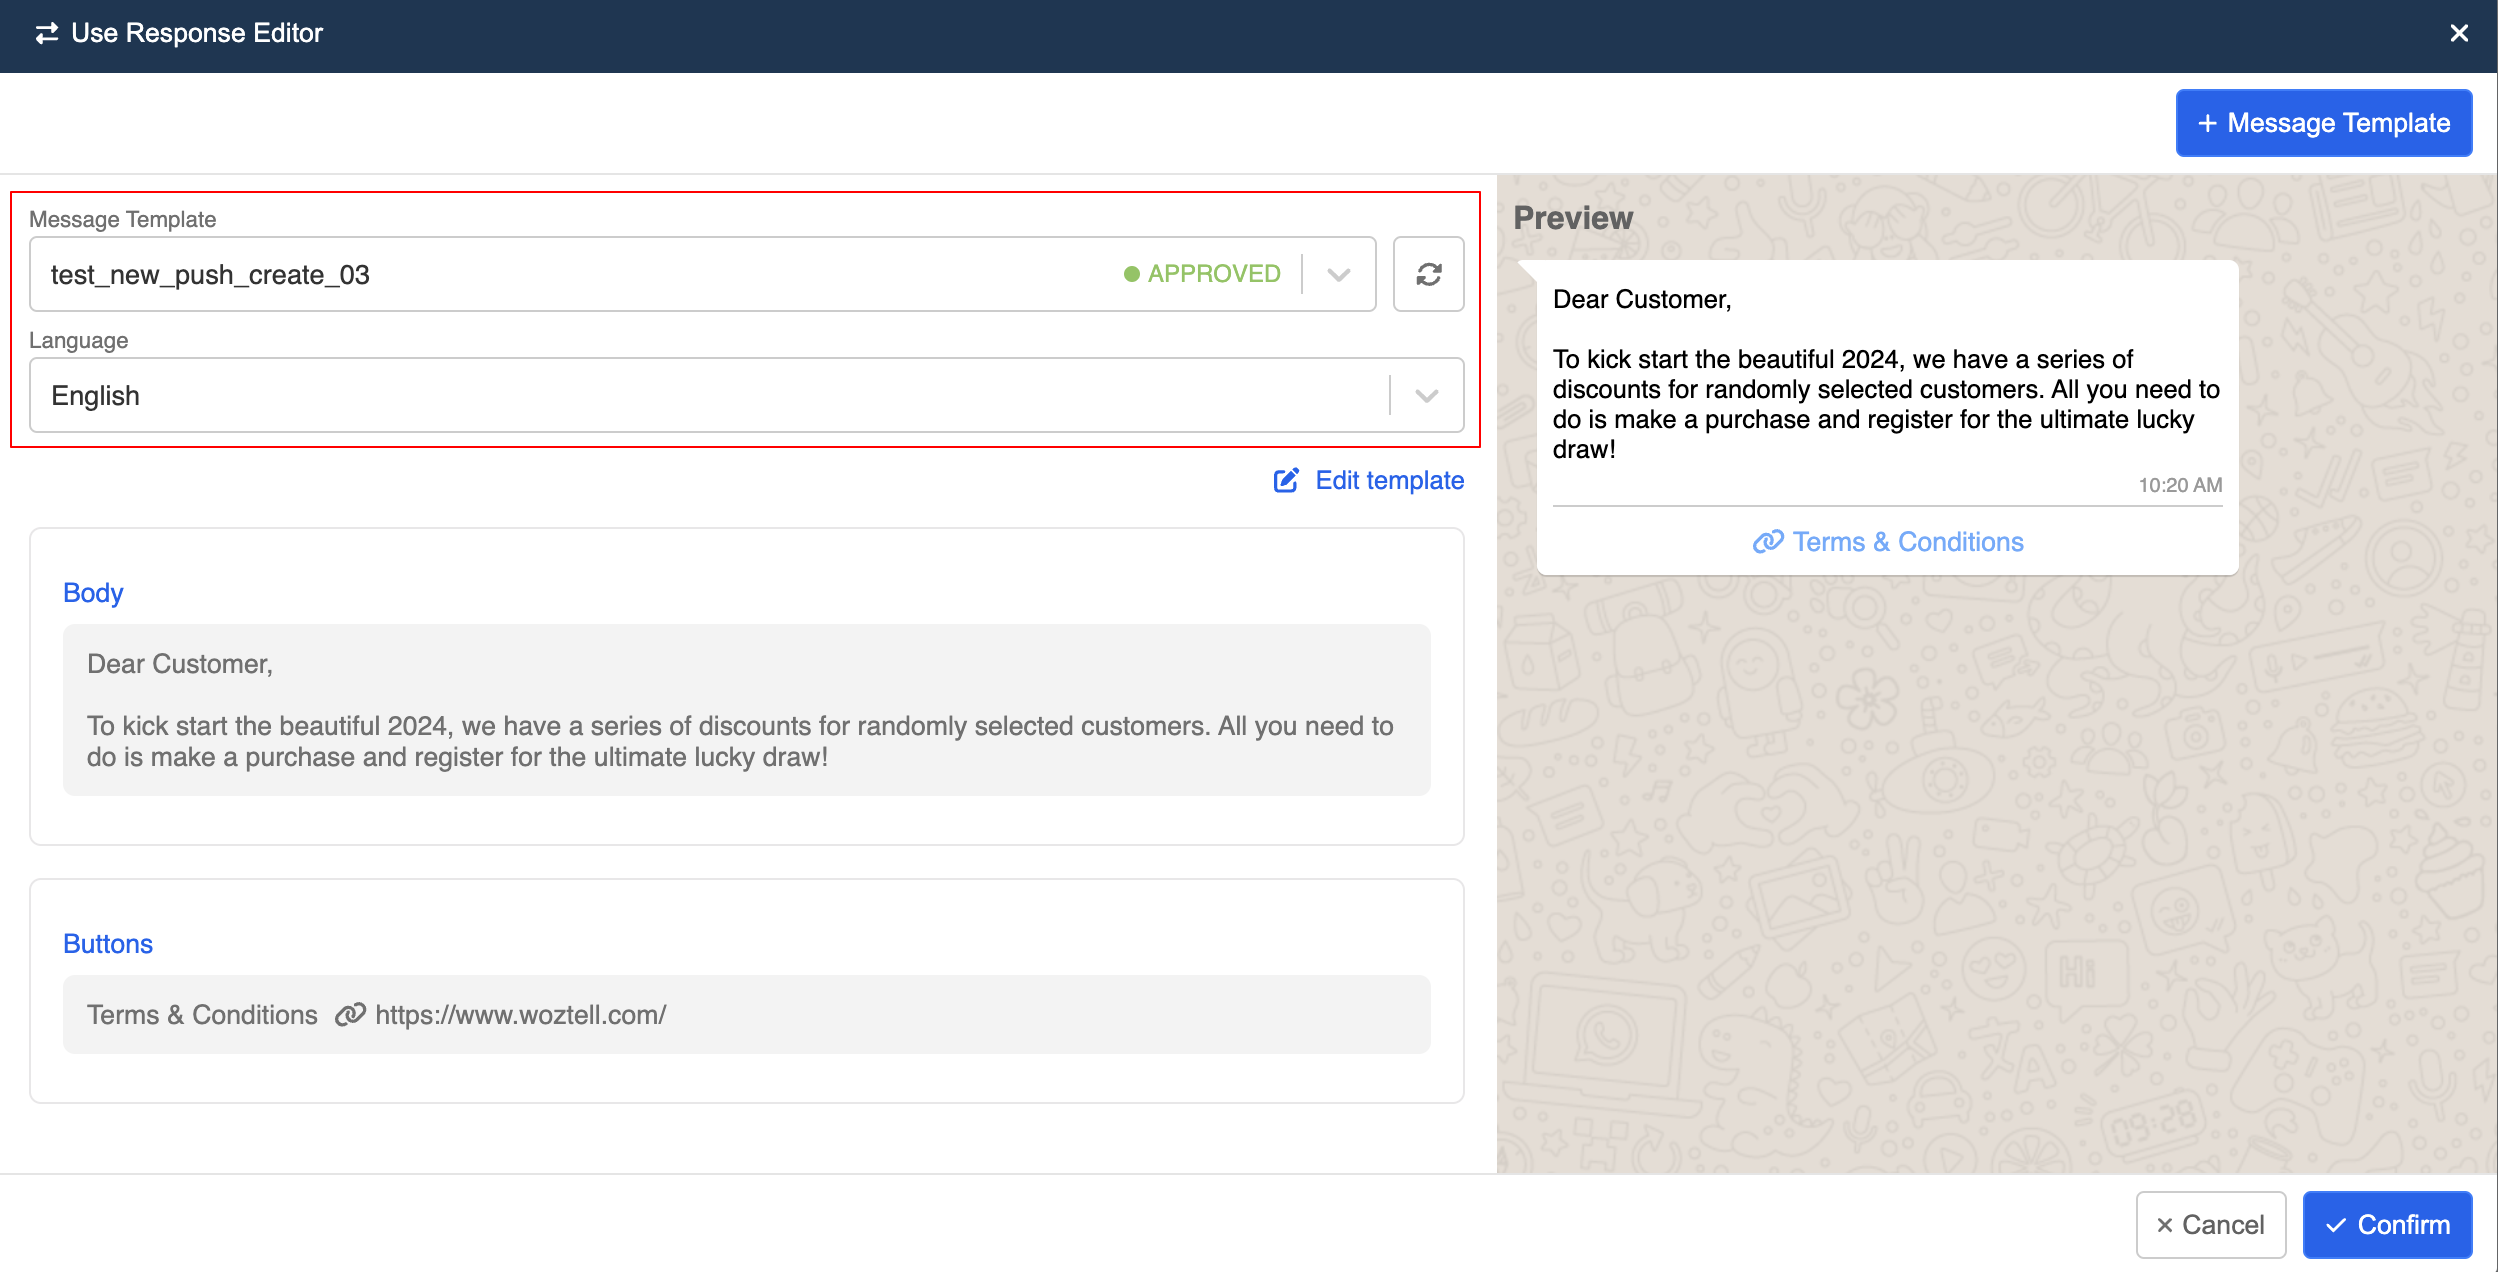
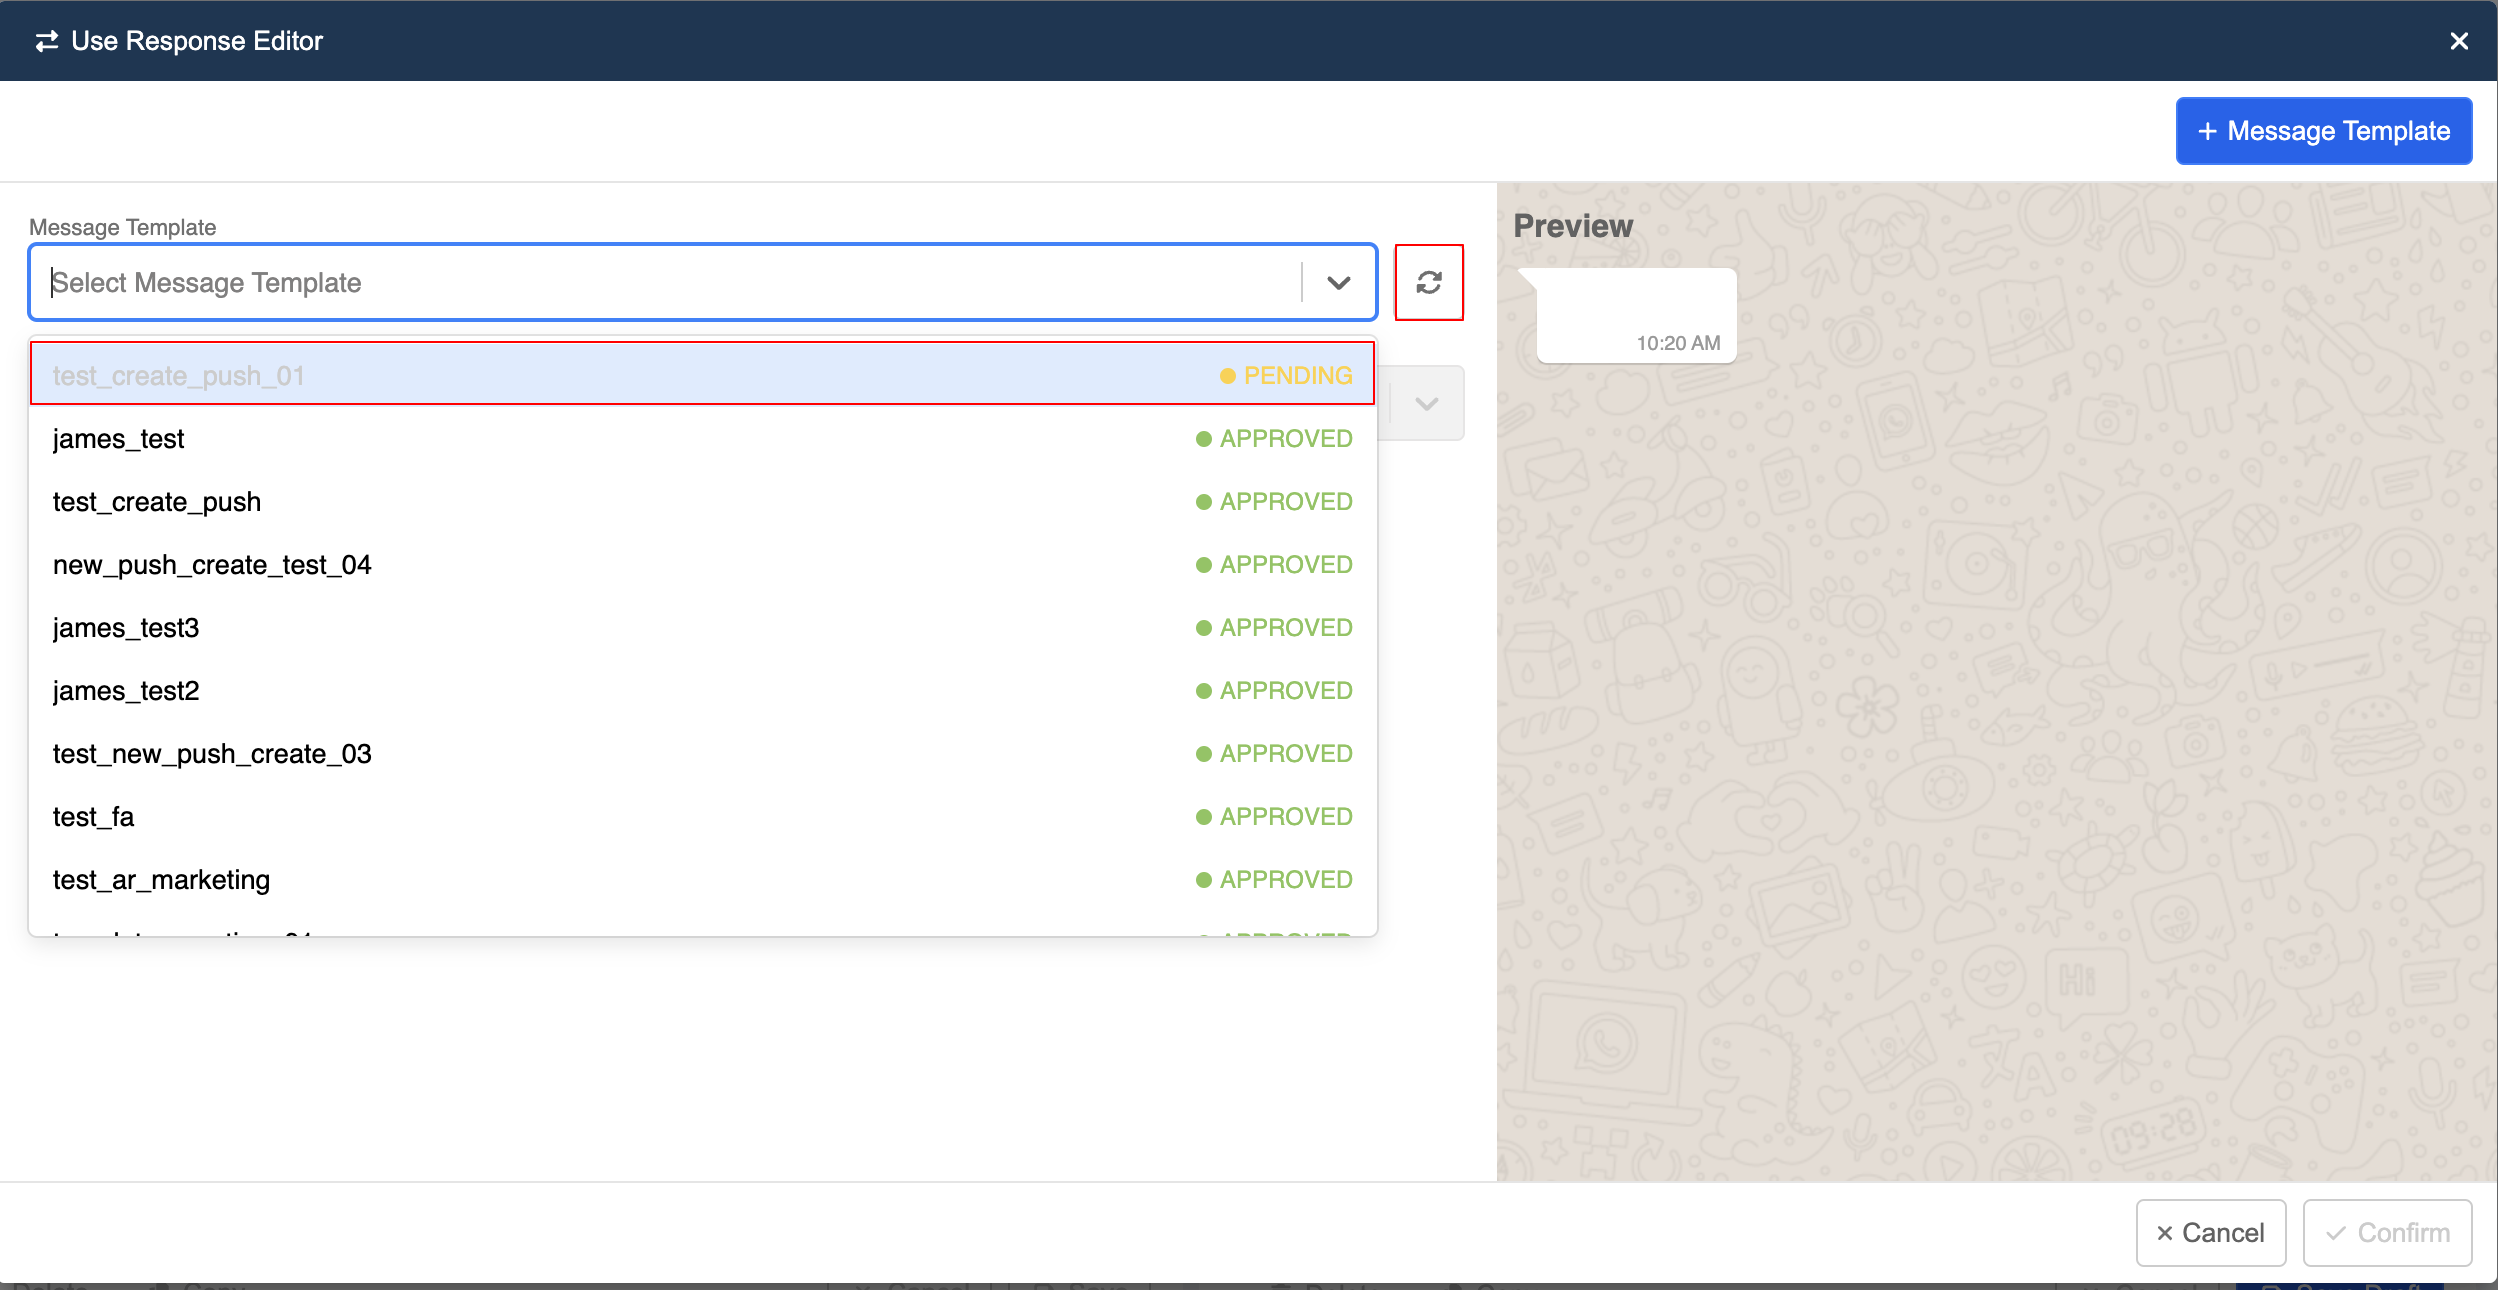
- Select an existing templates, the status of approval will be shown as well.

- Once an template is chosen, you can configure the template content and click "Confirm" to save.
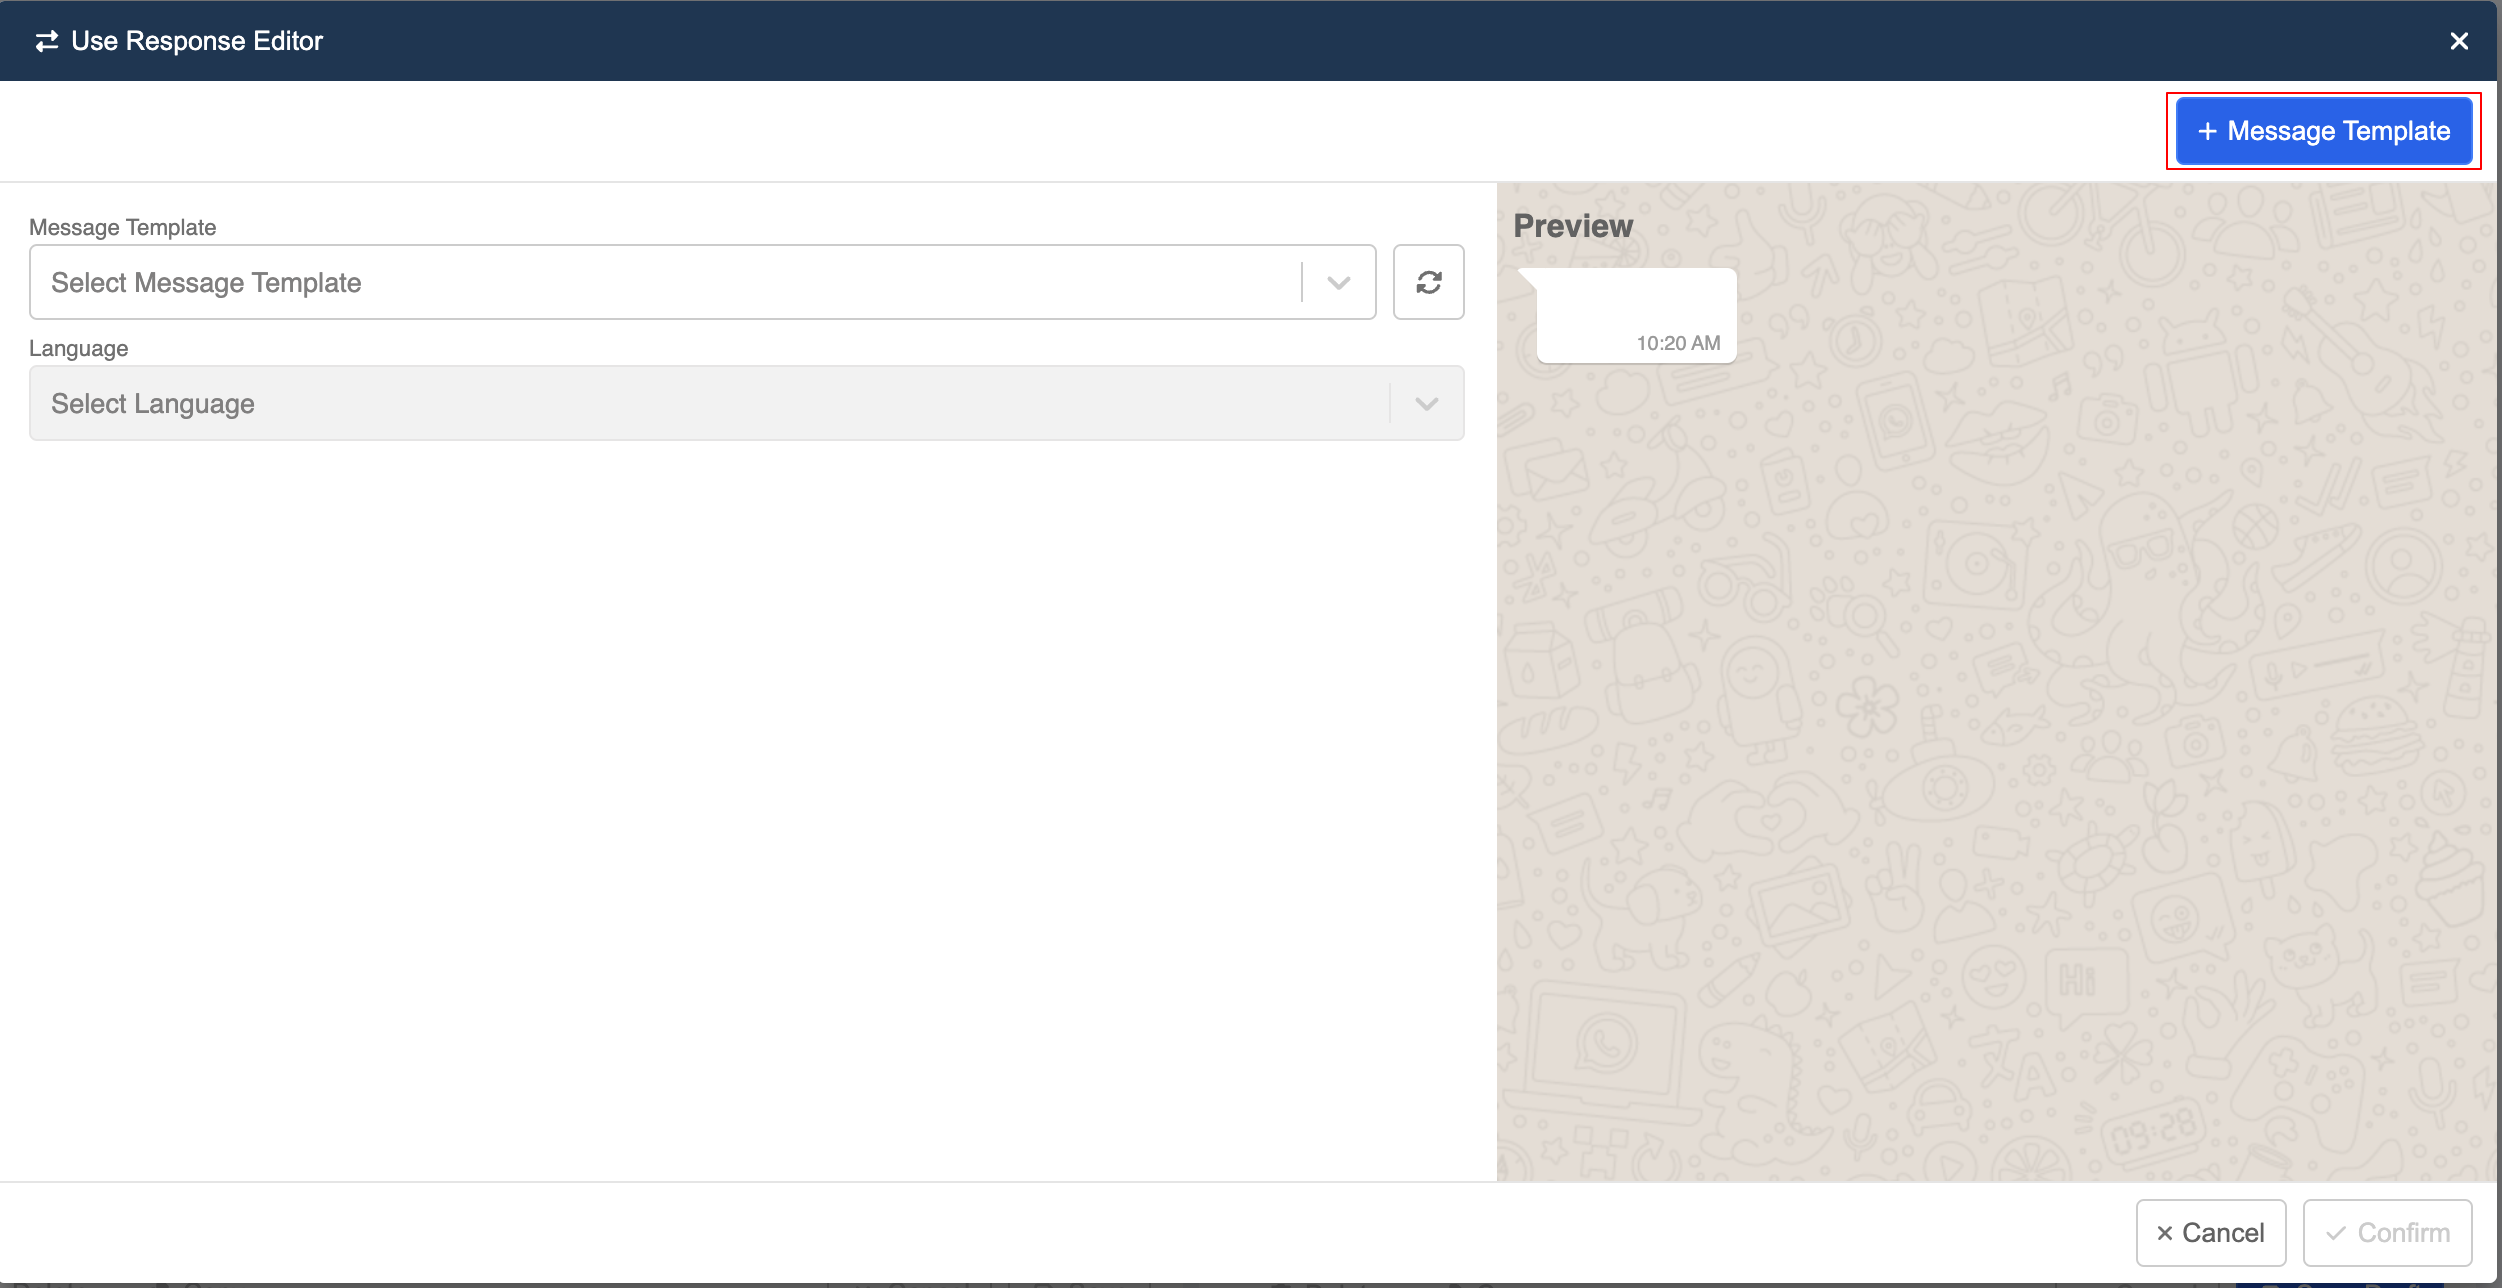
- In additional, you can also message template directly in this modal by clicking "+ Message Template"
- After creating the template, just click "Submit" to submit this template for approval.
- The newly created template will be "Pending" until it is approved to be utilized. You can use the "Refresh" button to get the latest status.
- You can also use "Edit template" to edit an existing template and submit it for approval again.
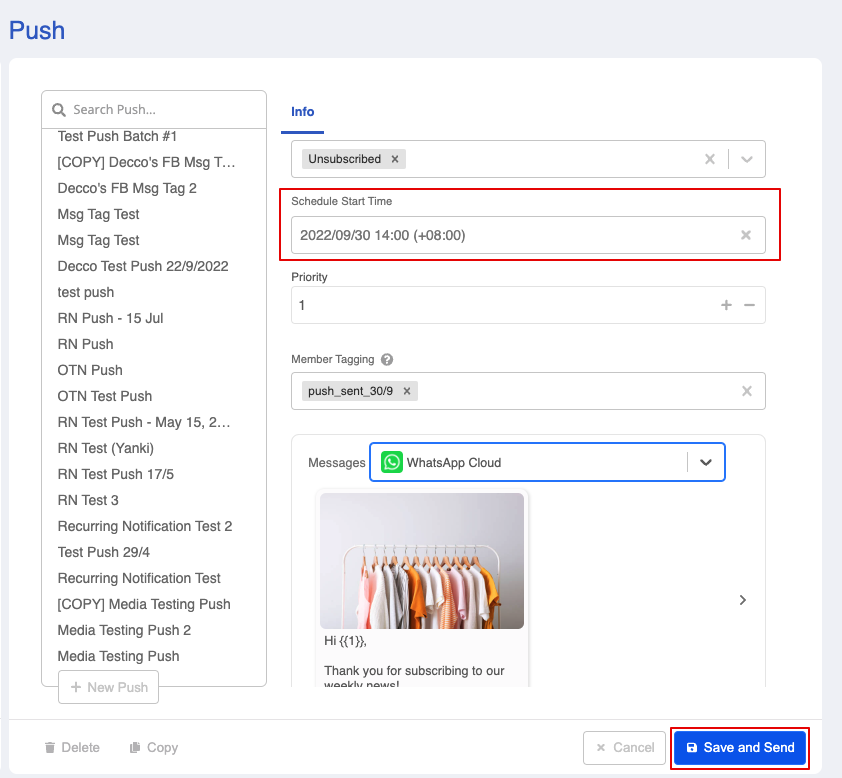
- Finally, set a scheduled date and time to blast out the broadcast and click "Save and send".
s NOTES
Without the "Scheduled Start Time", you can only save the broadcast as draft.
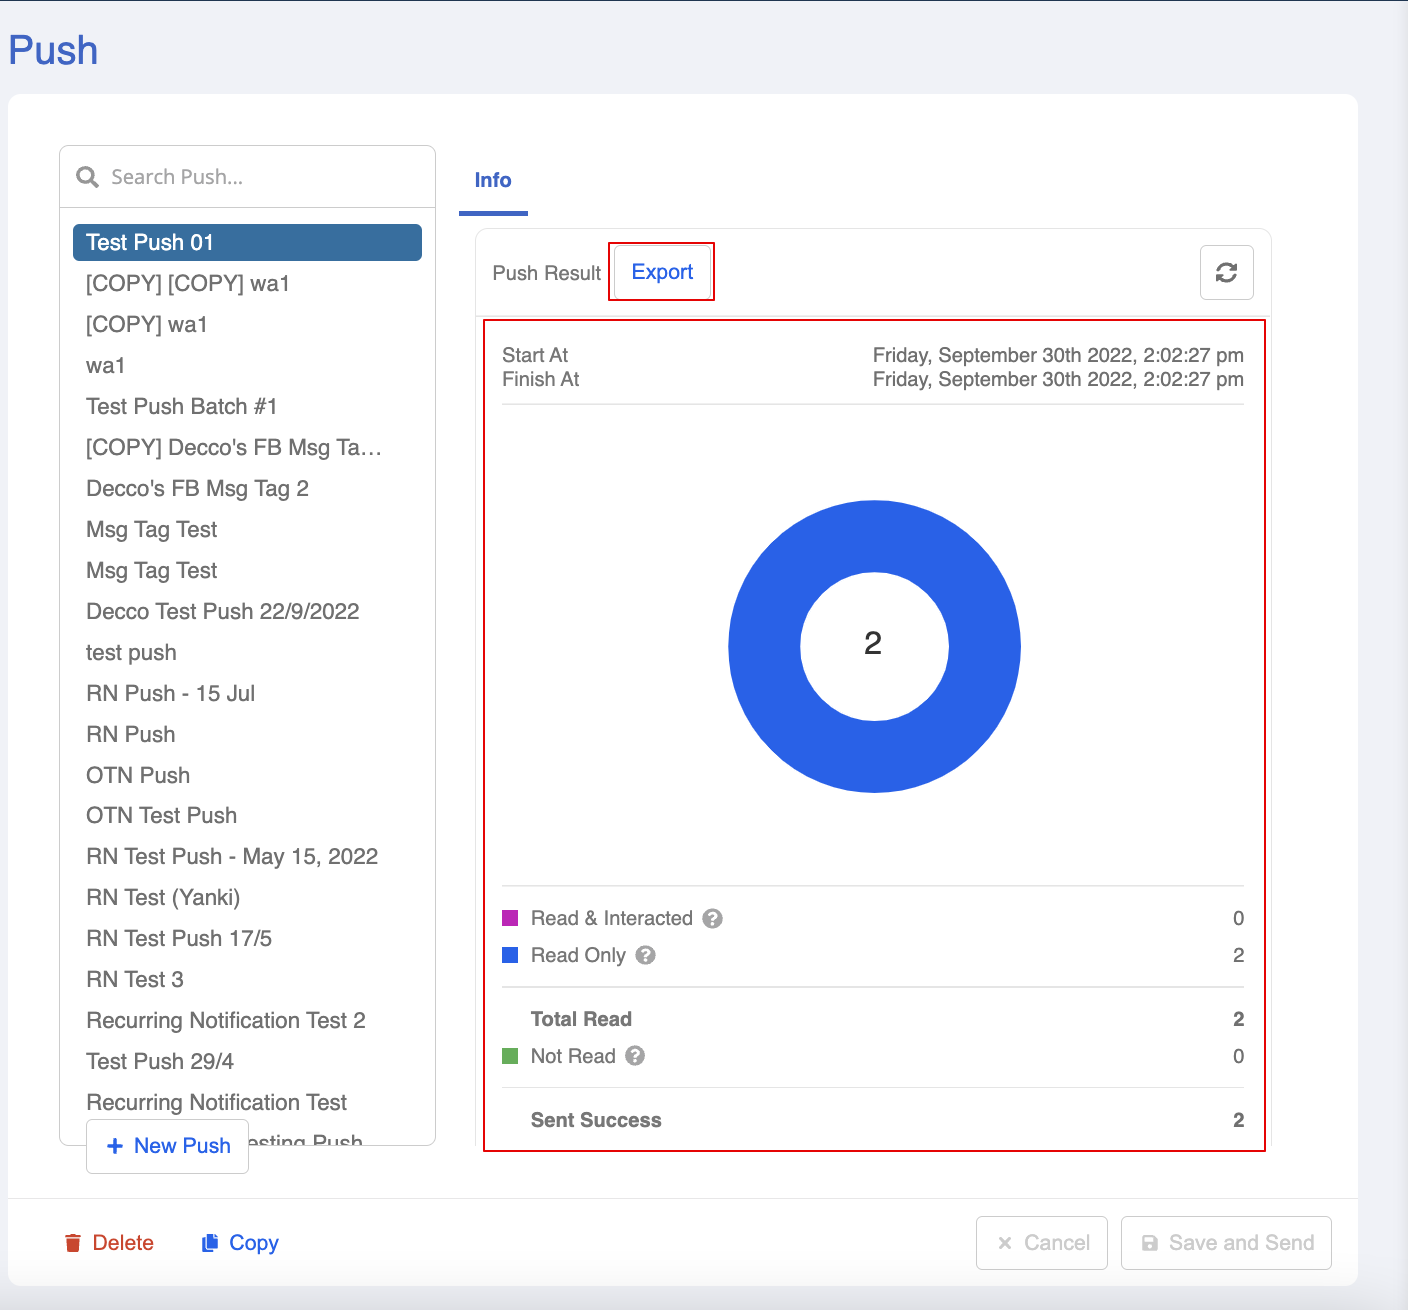
Broadcast Analytics
- After that, the broadcast result will be available under the same broadcast. You can make use of the analytics in order to evaluate the broadcast performance.
Besides, you can click "Export" to download the detailed broadcast report.