Build Child Nodes
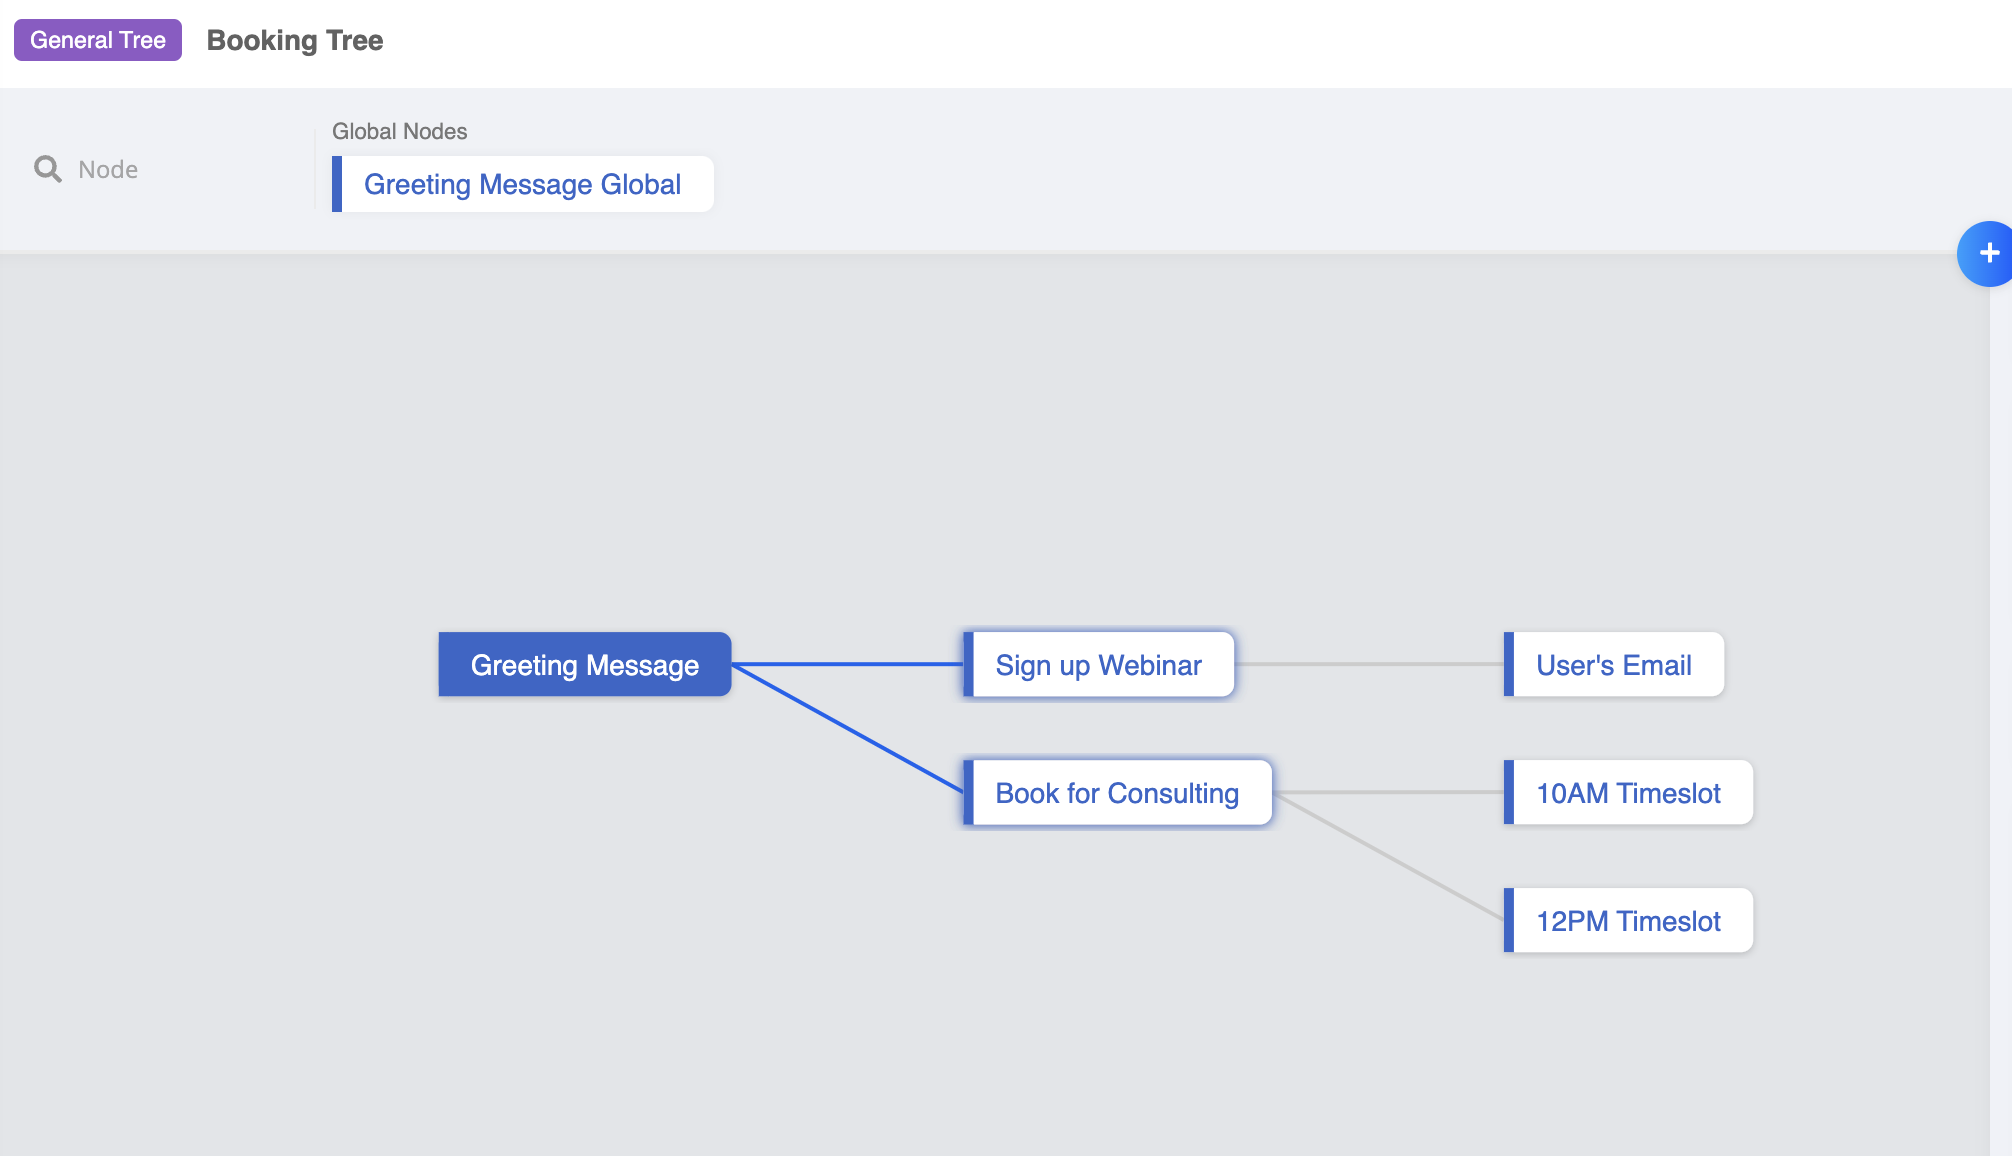
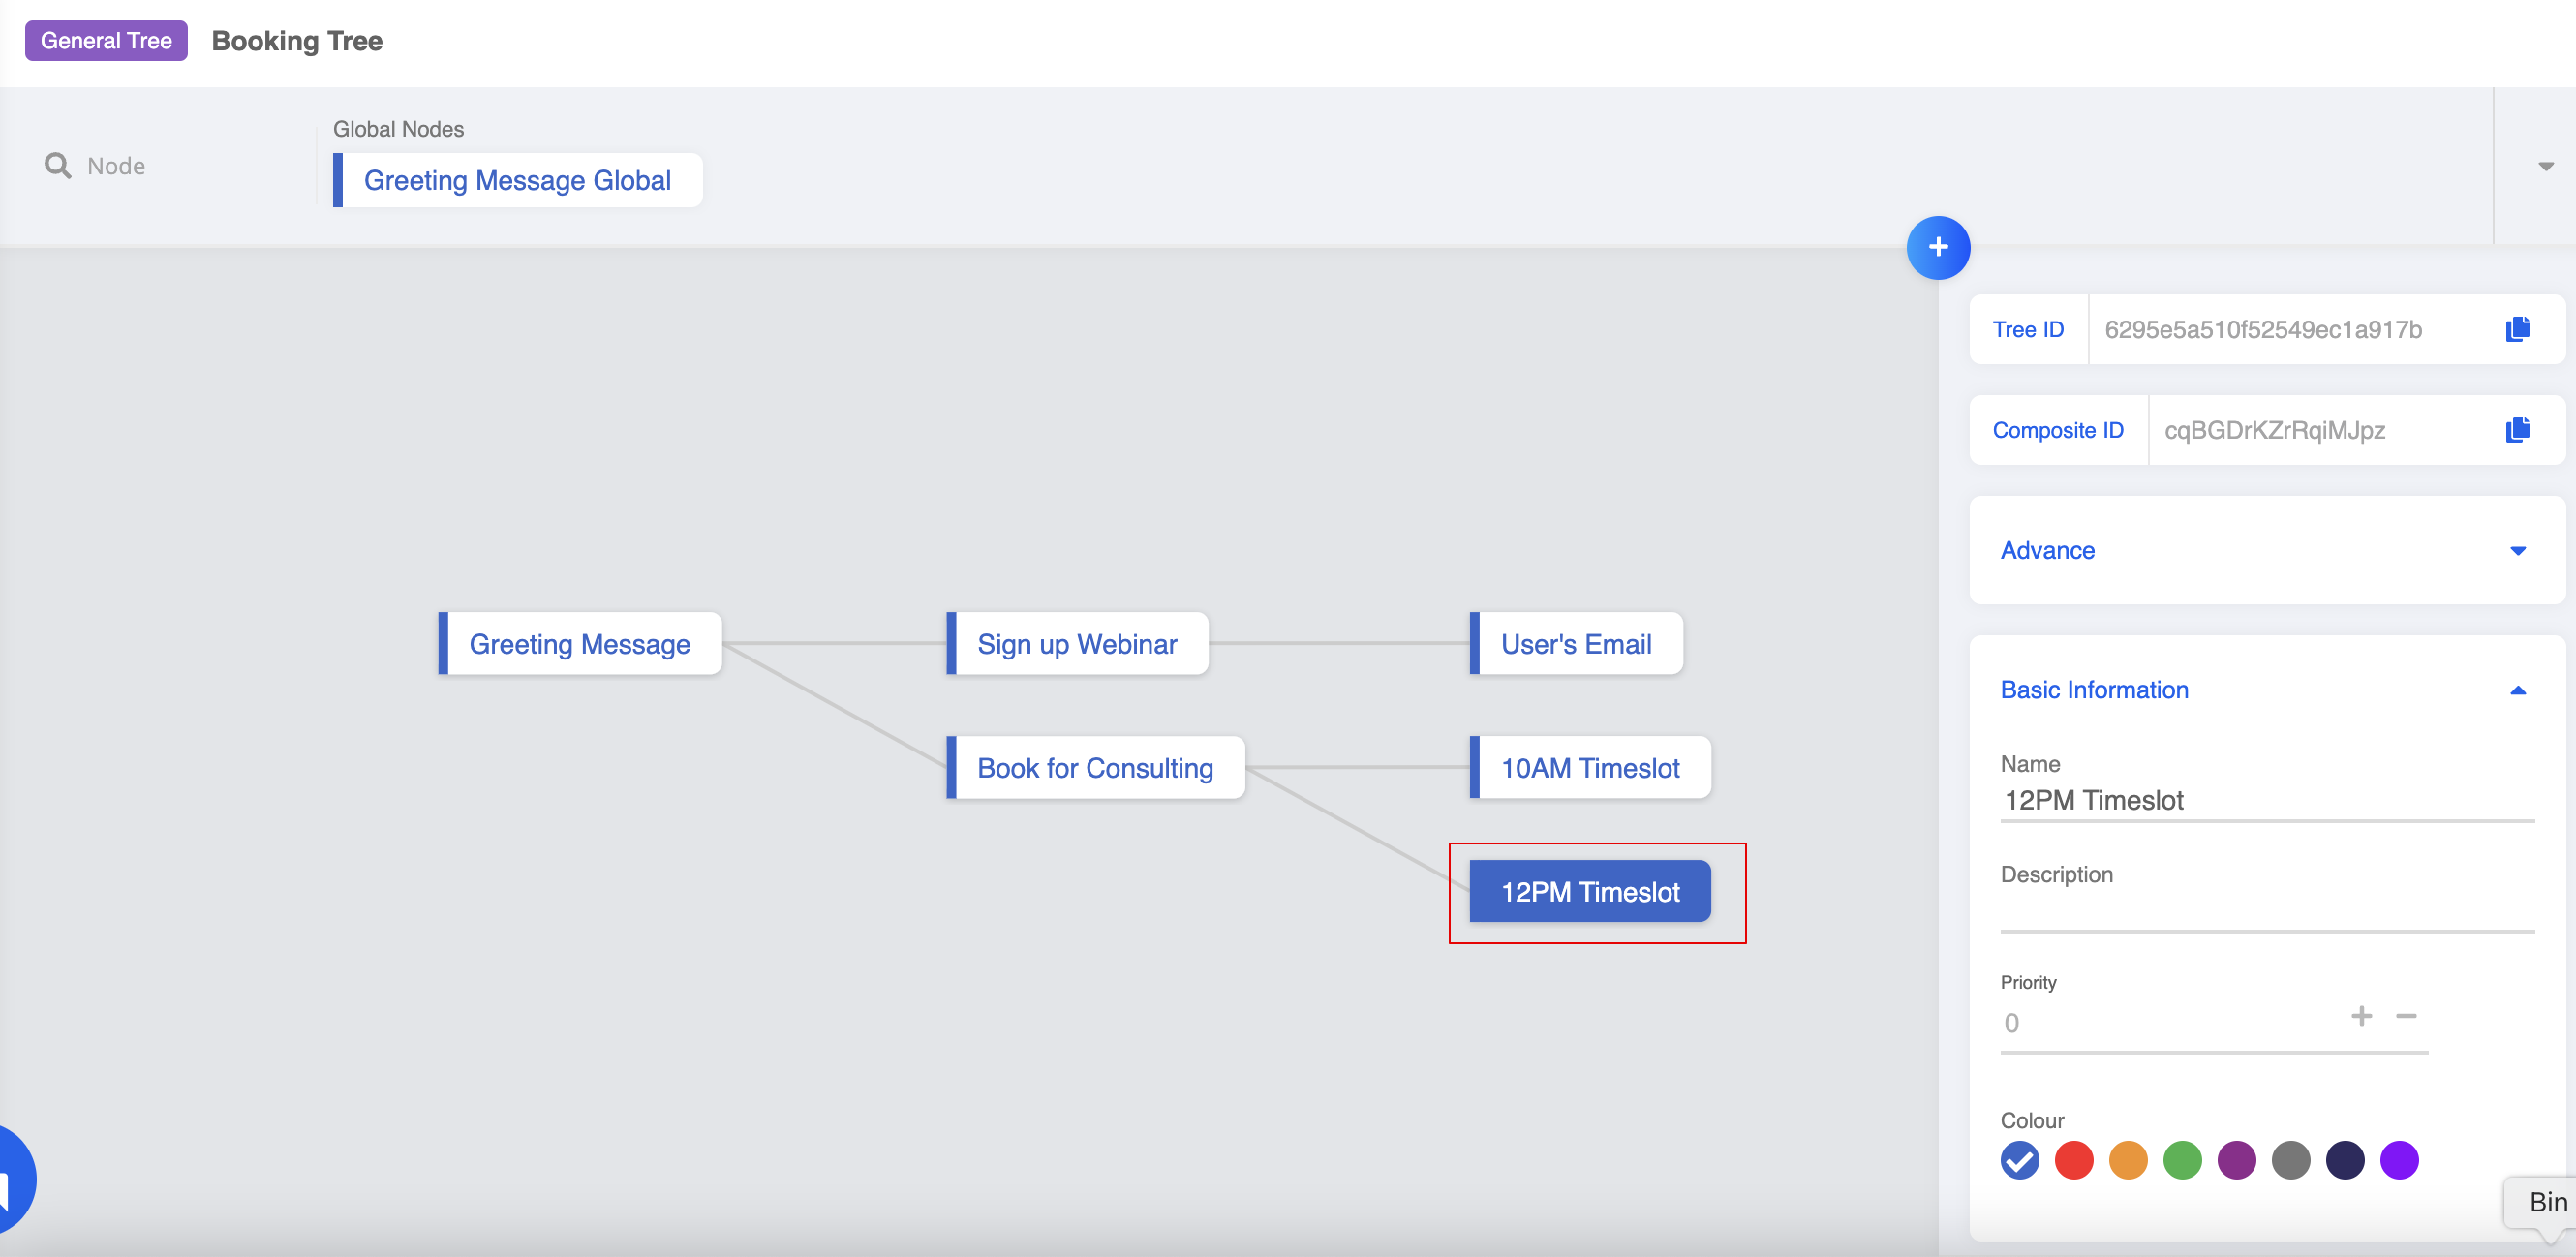
Let's continue to follow the tree diagram to build the remaining child nodes and you are very close to completing your first chatbot!
Child Nodes are the nodes that come after the first node and they can be in the second layer, the third layer or even the layers after. Users cannot access any Child Node if they are not on the designated path.
Expected Outcome
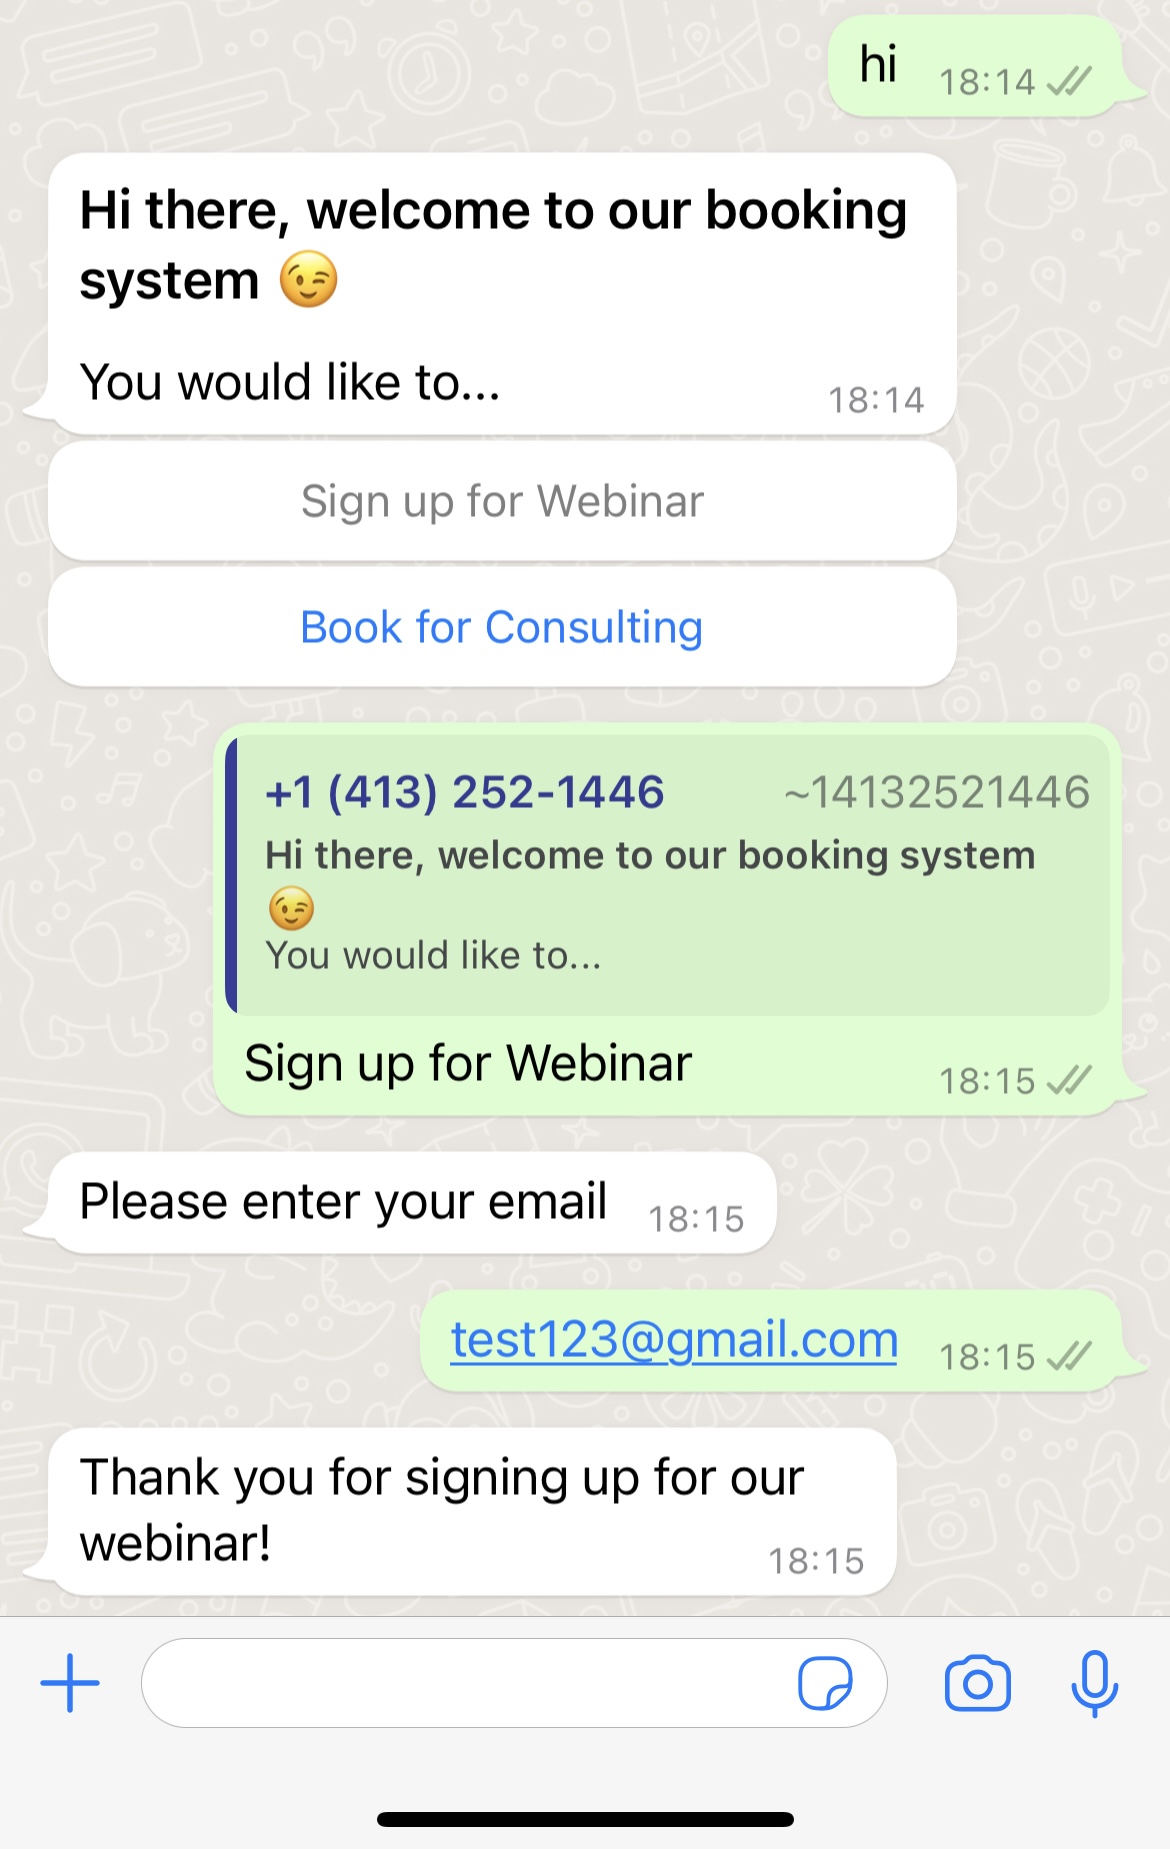
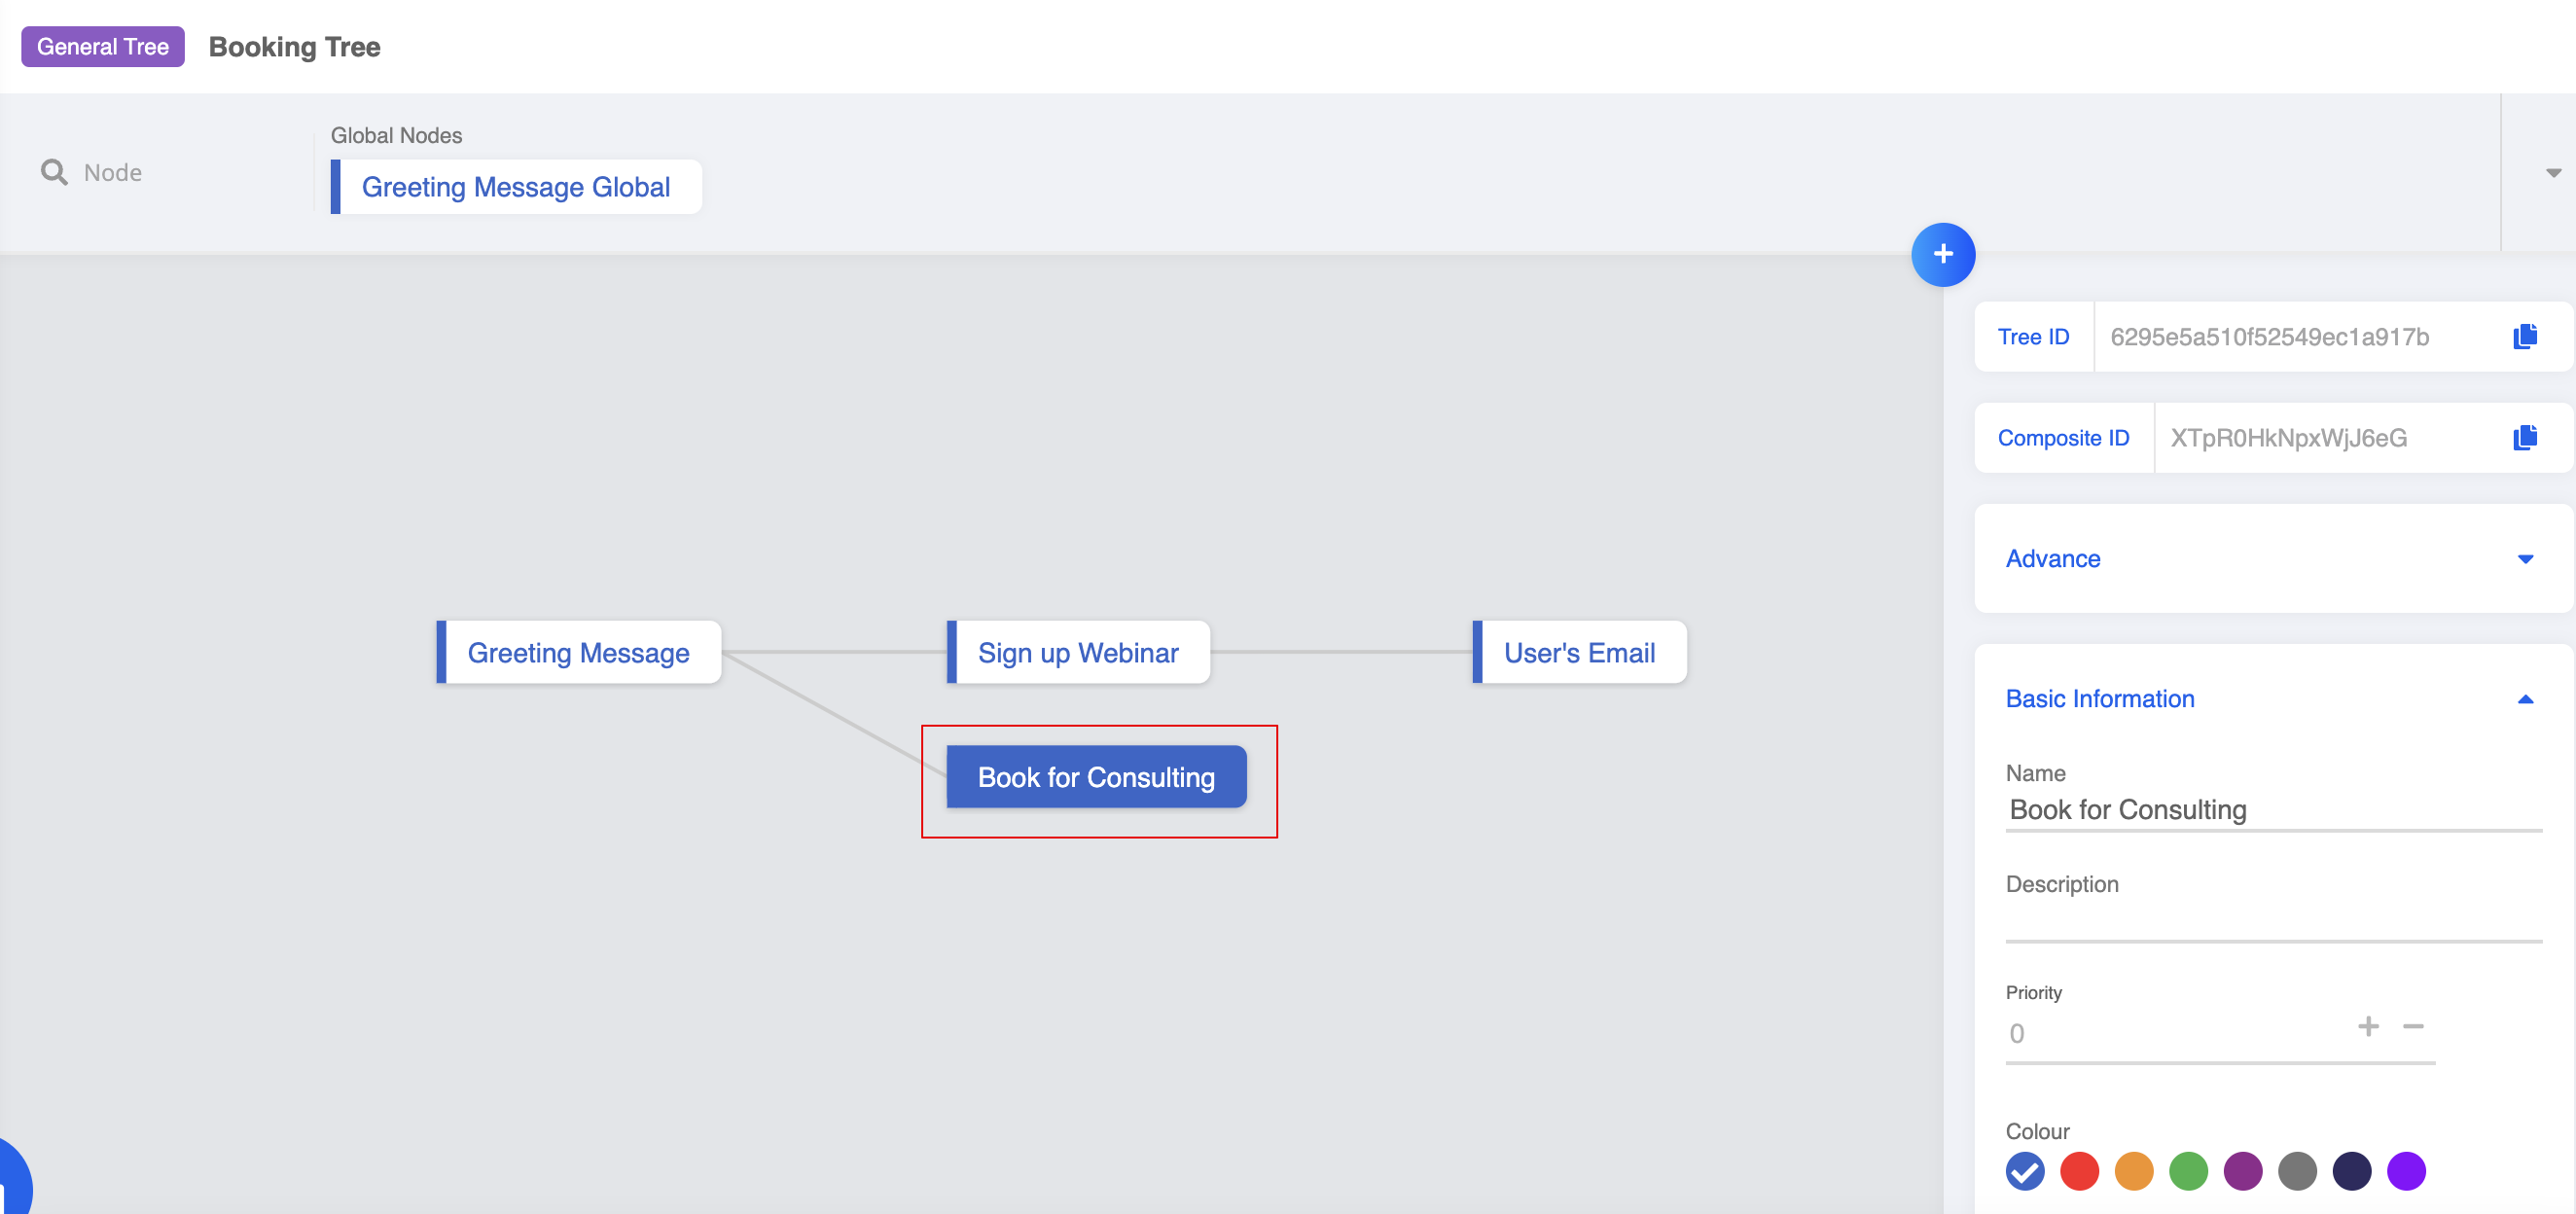
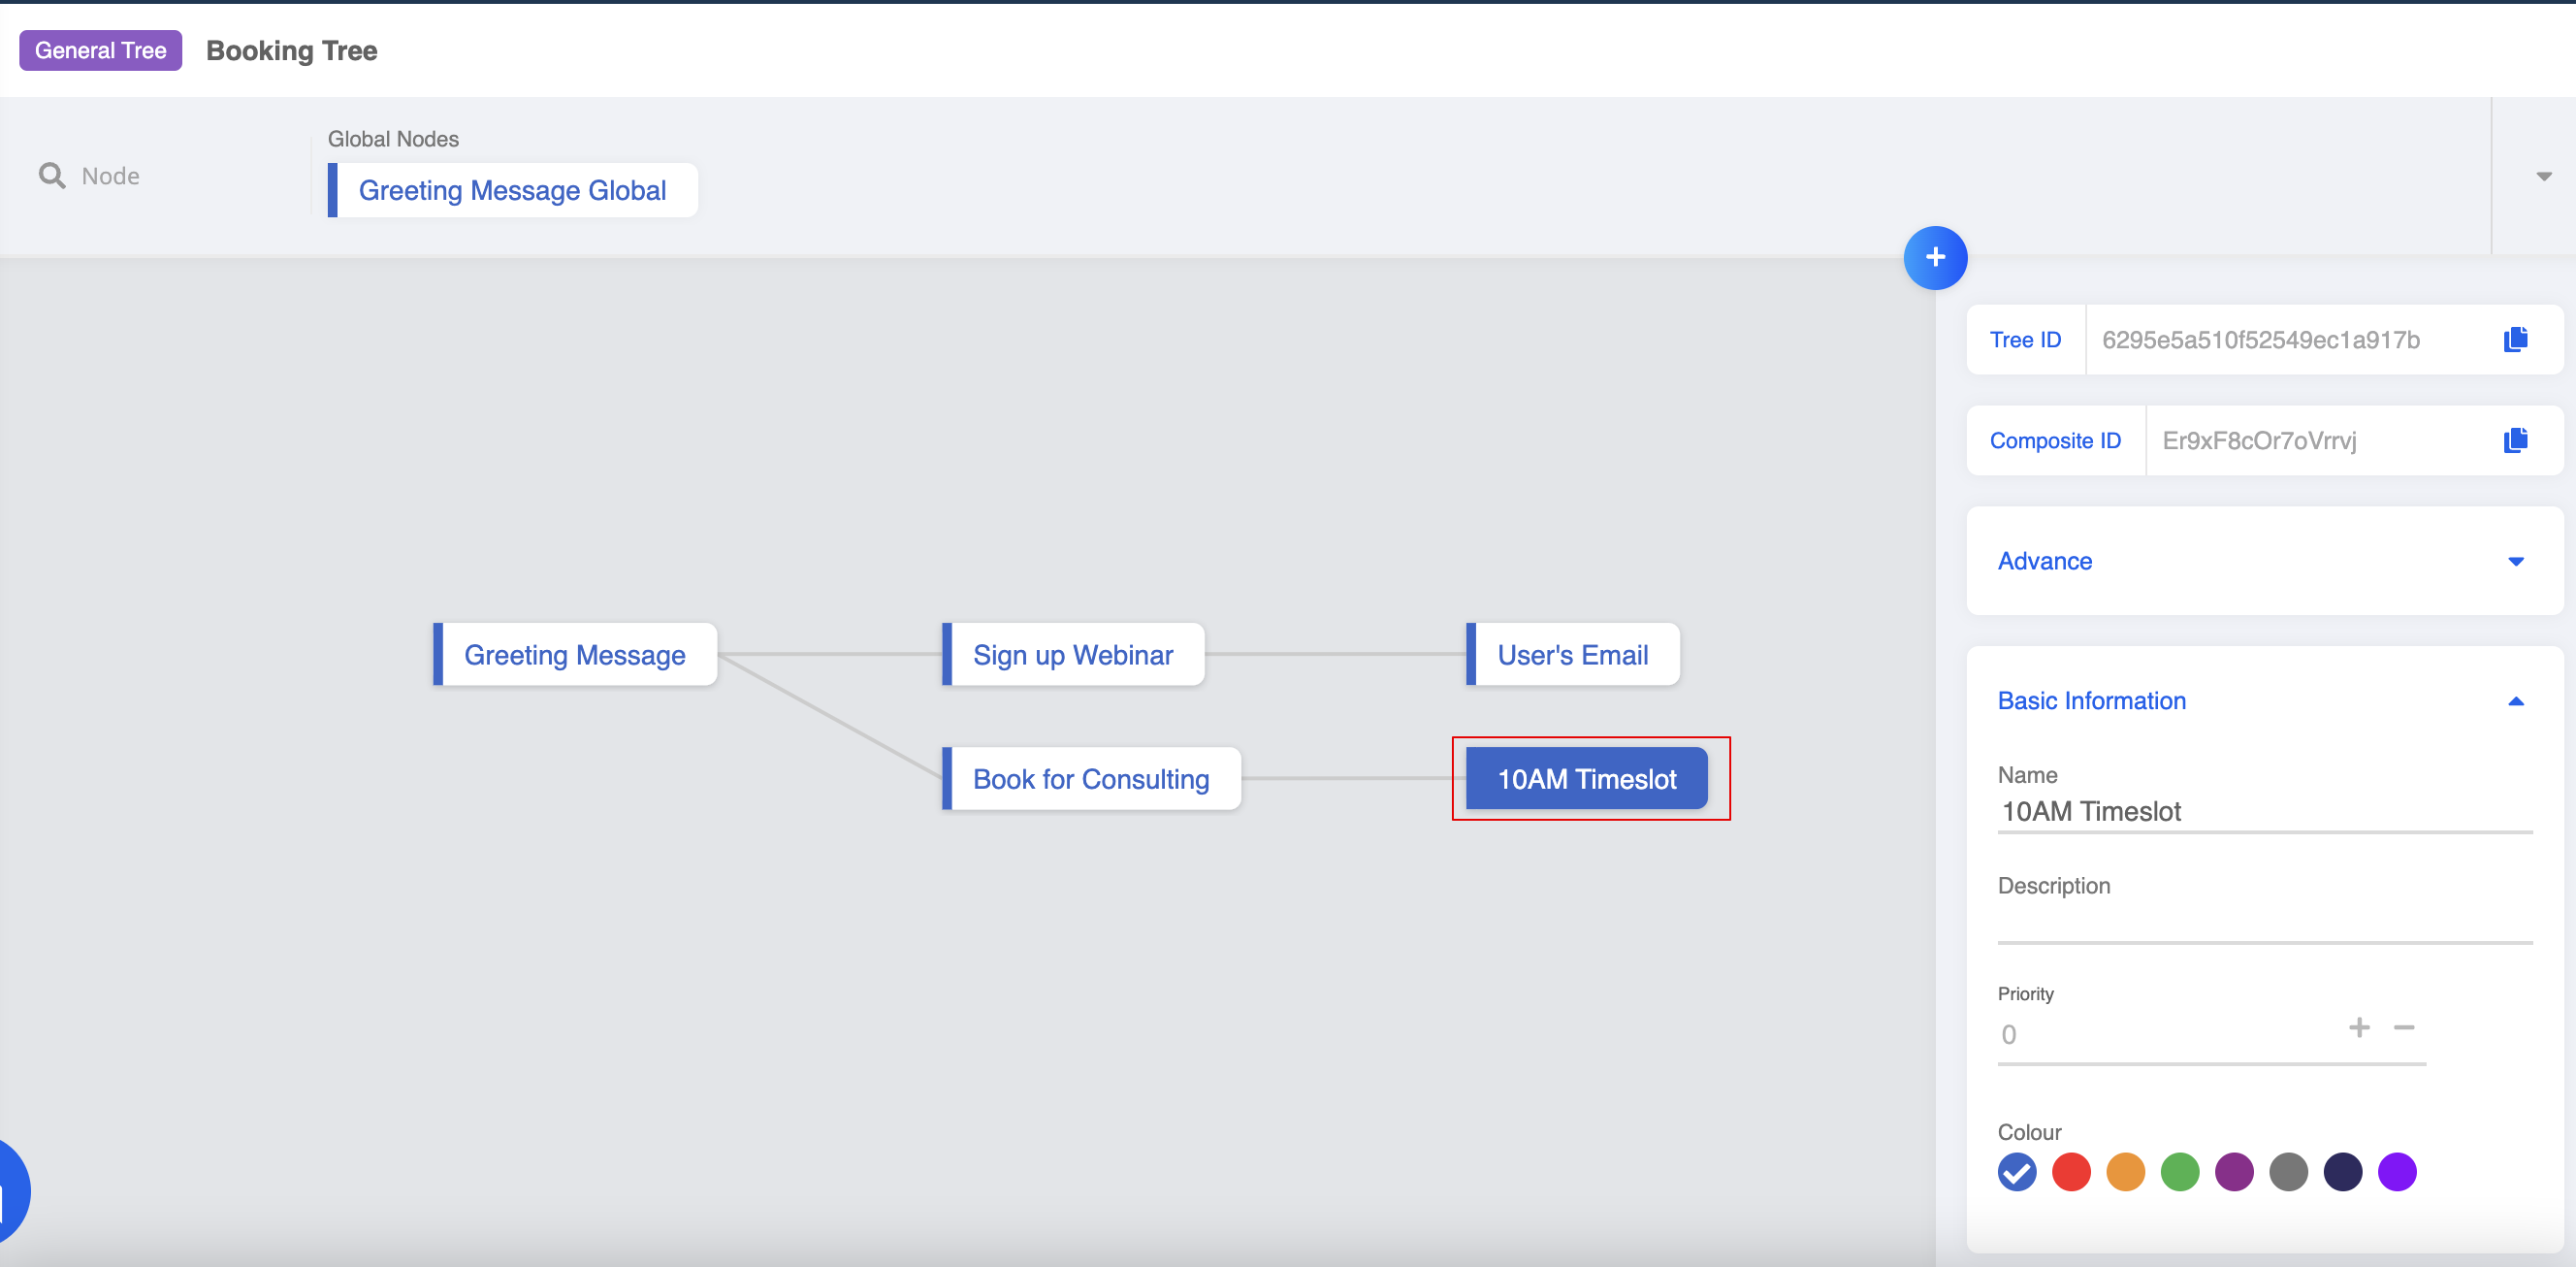
You will get a complete conversation flow on your workspace. There will be in total 4 general nodes and 1 global node. You can also try your first chatbot in your WhatsApp Business account!
Sample Chatbot
Build 2nd-Layer Child Node - Webinar
Enter your Bot Builder and starting building your chatbot.
Select your first node, and create a chatbot node following it.
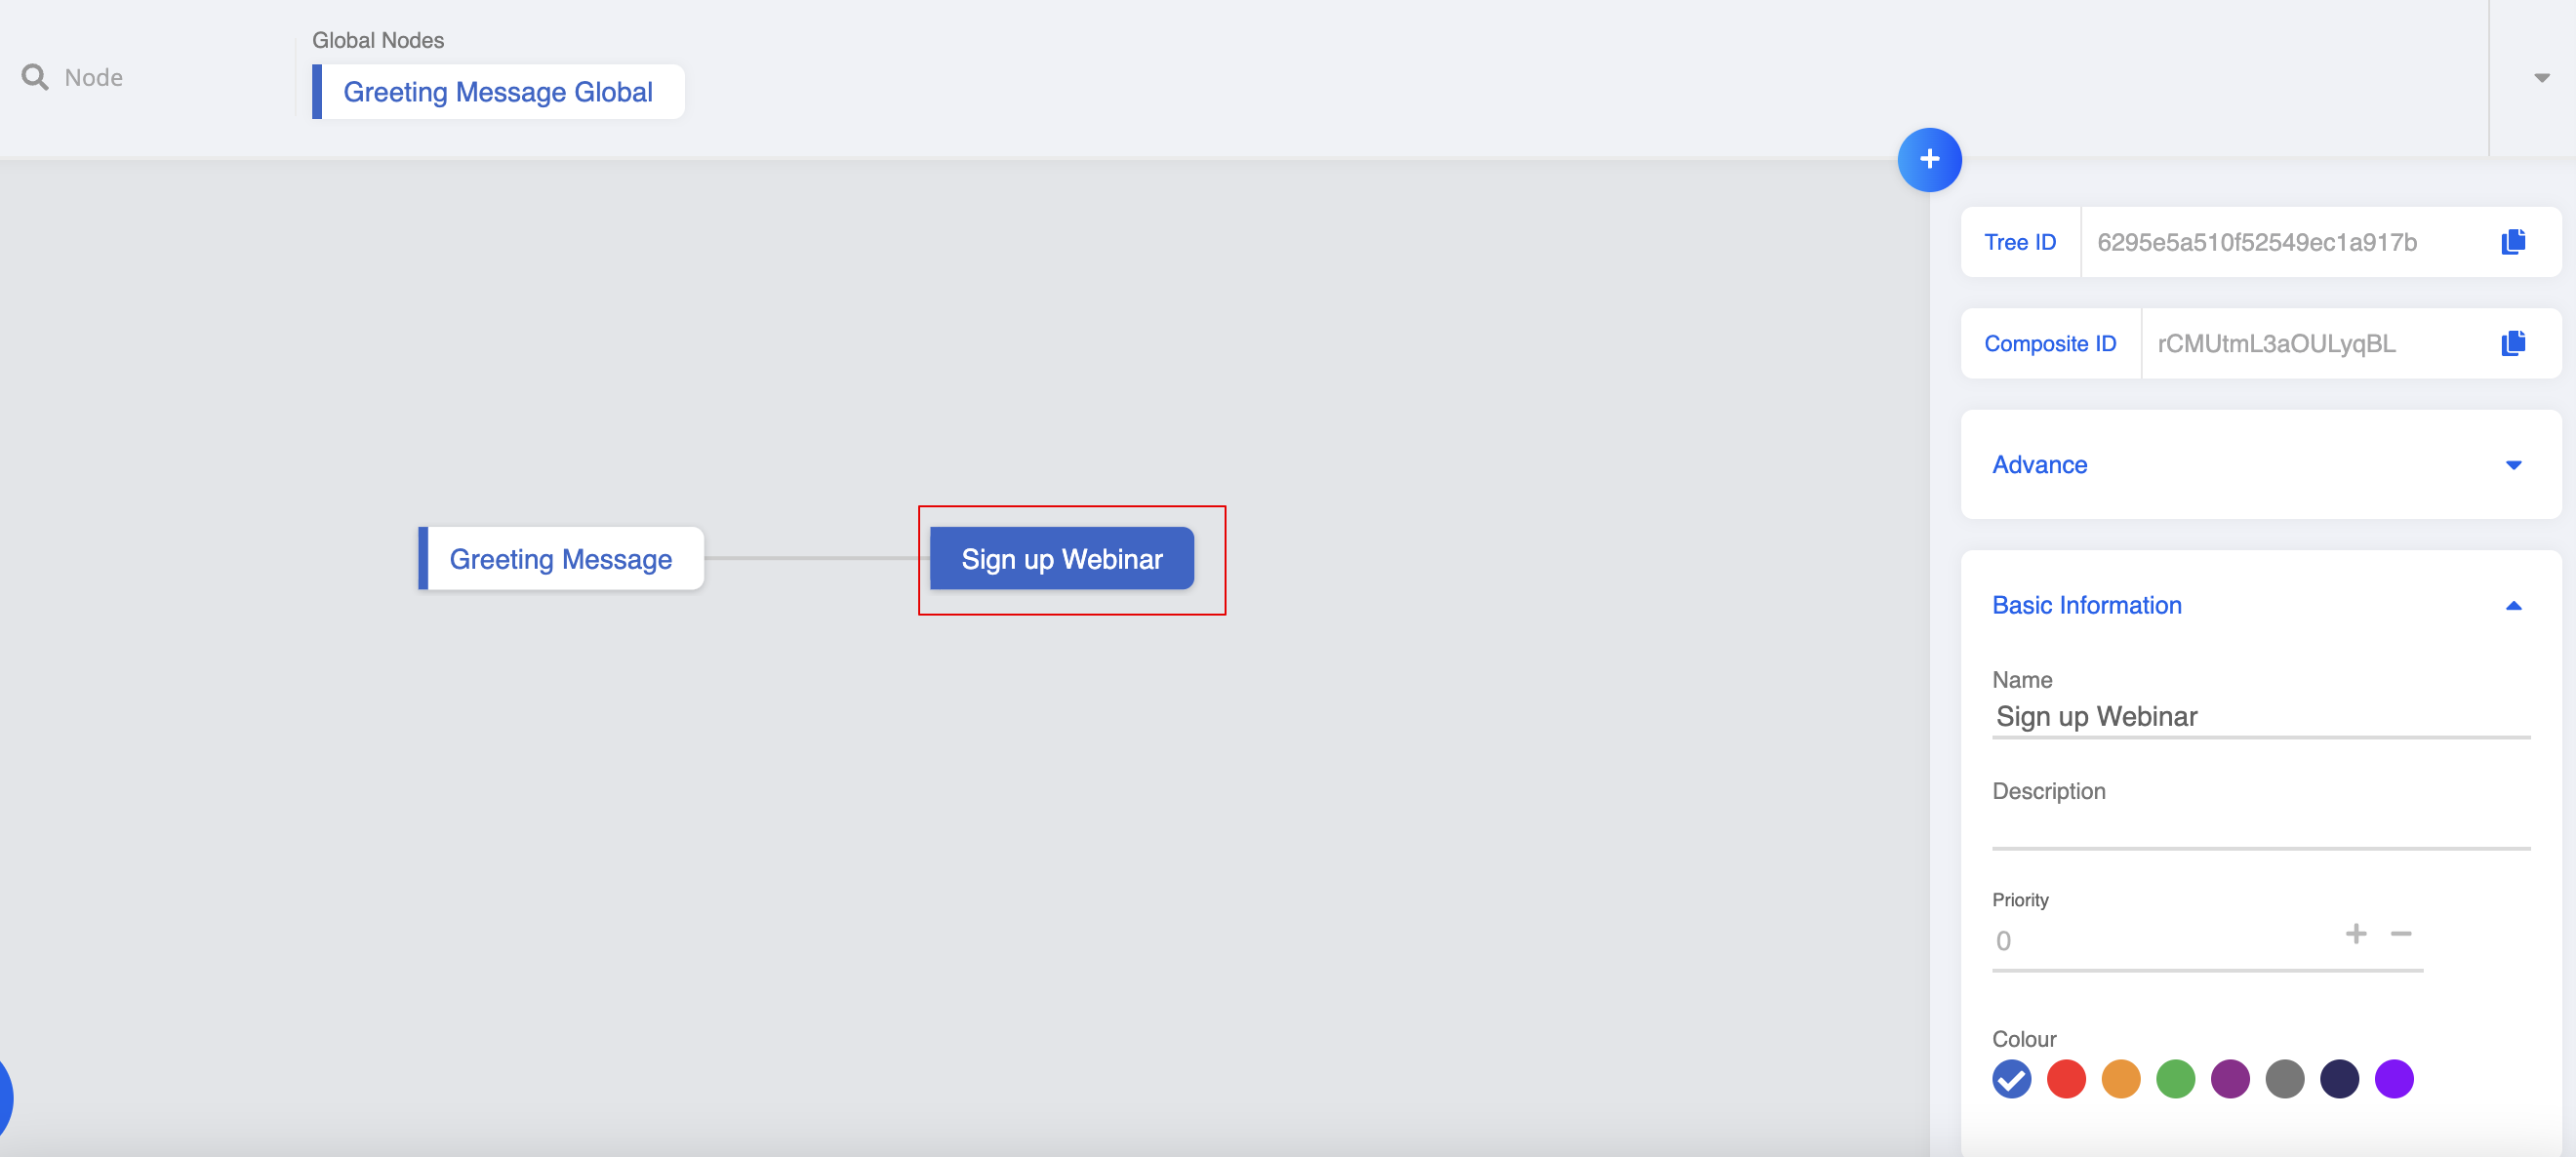
Go to "Node Inspector" and fill in the node details.
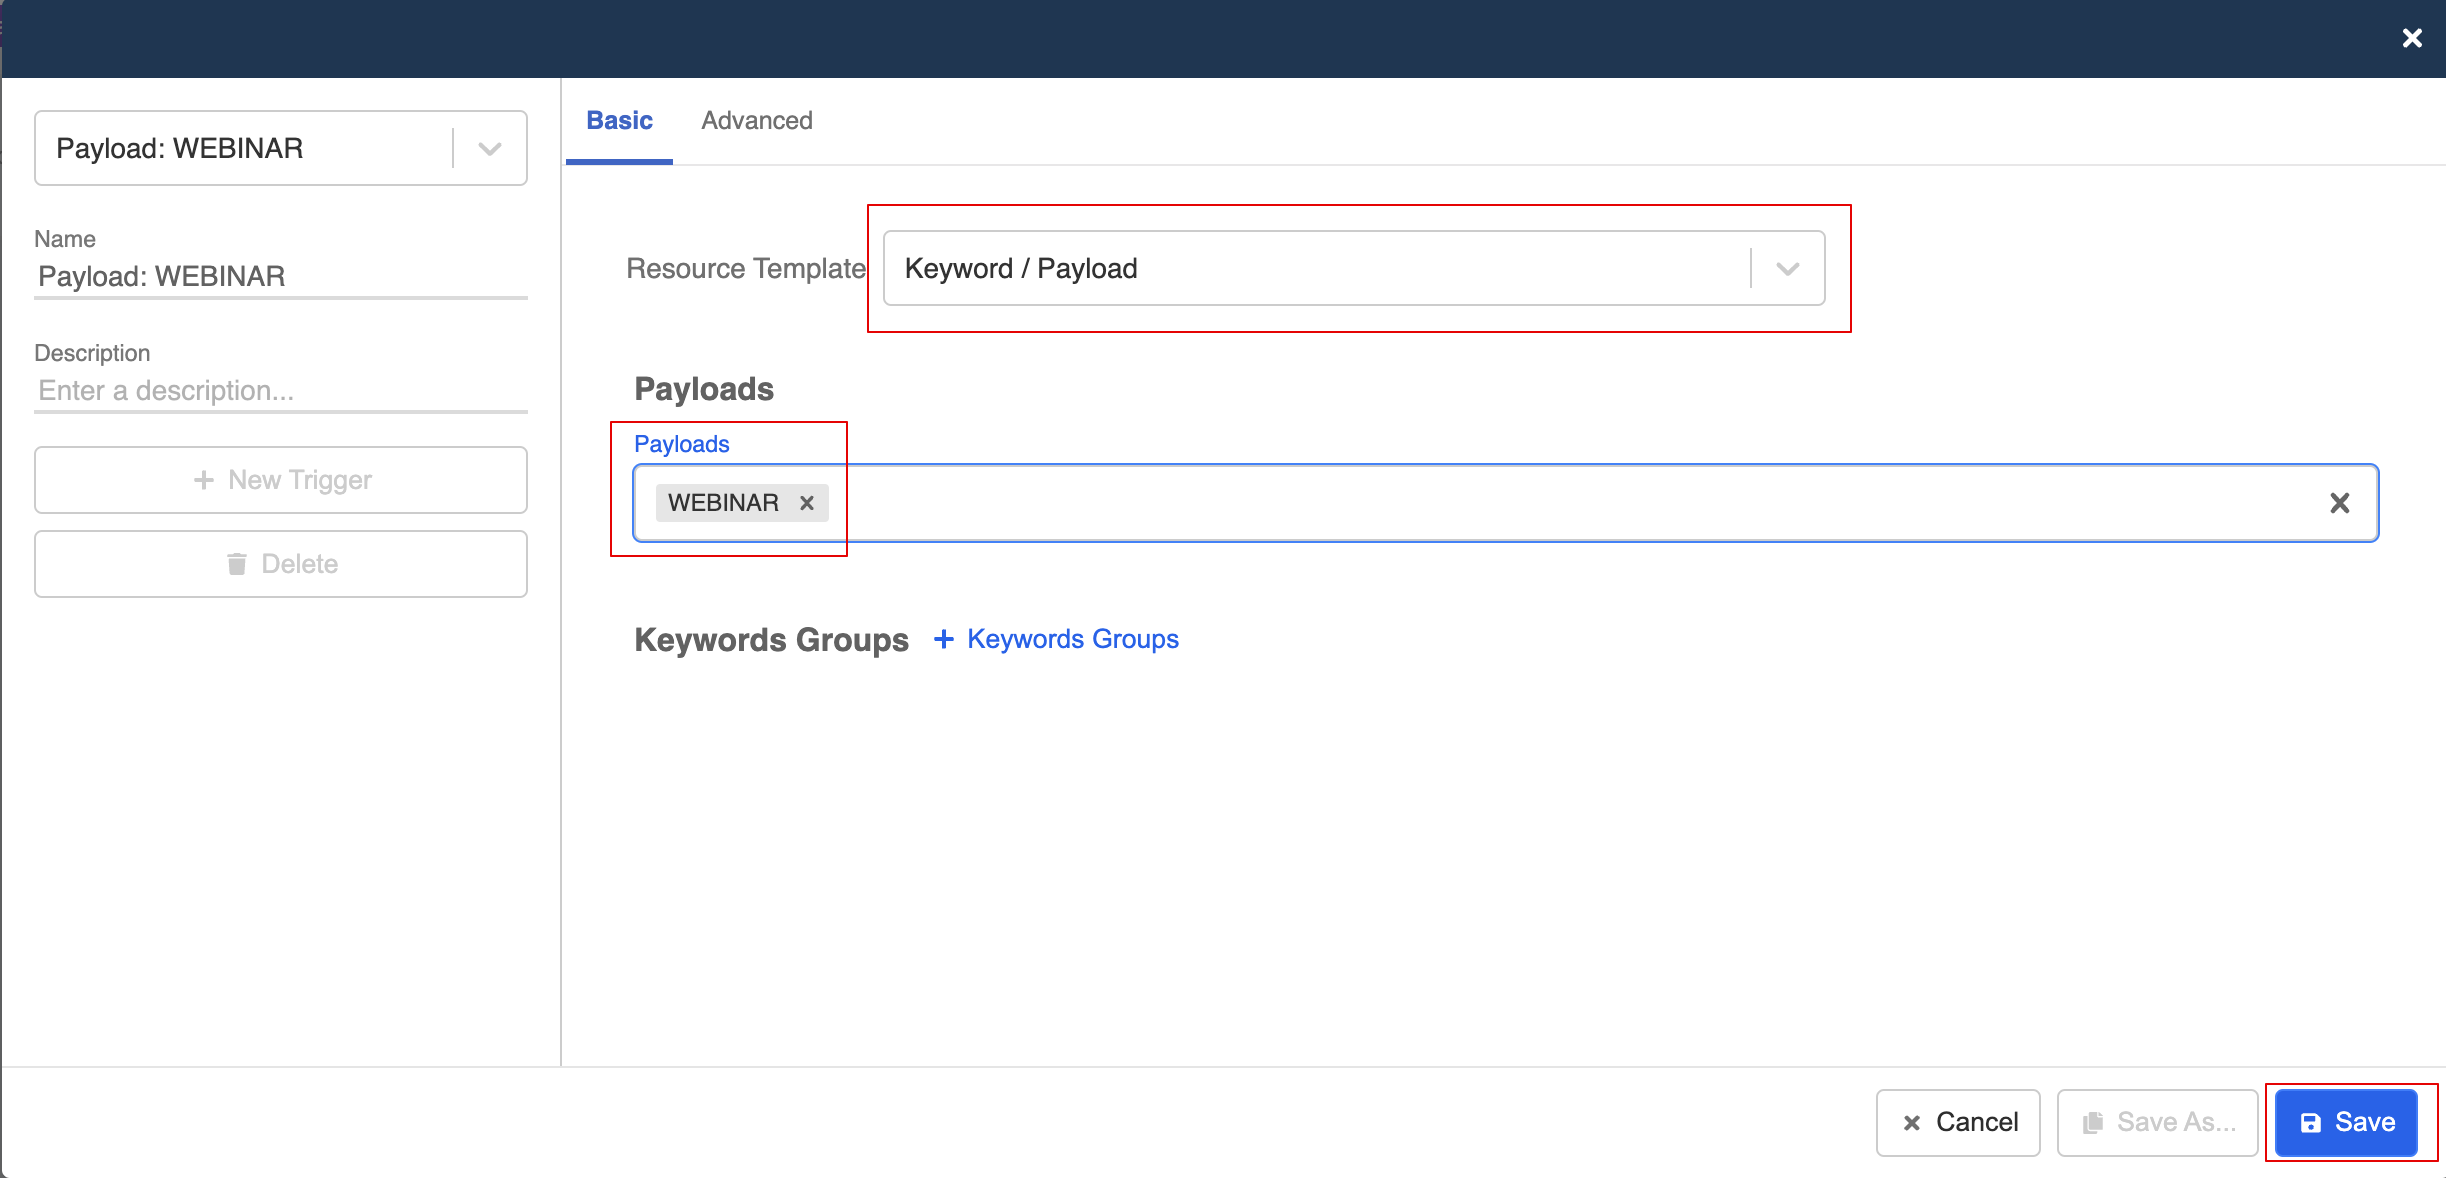
Create Payload Trigger
- Create a trigger that allows user to make a booking. Select Keyword / Payload, and match the payload to the one you created for "Webinar Sign up".
Create Response
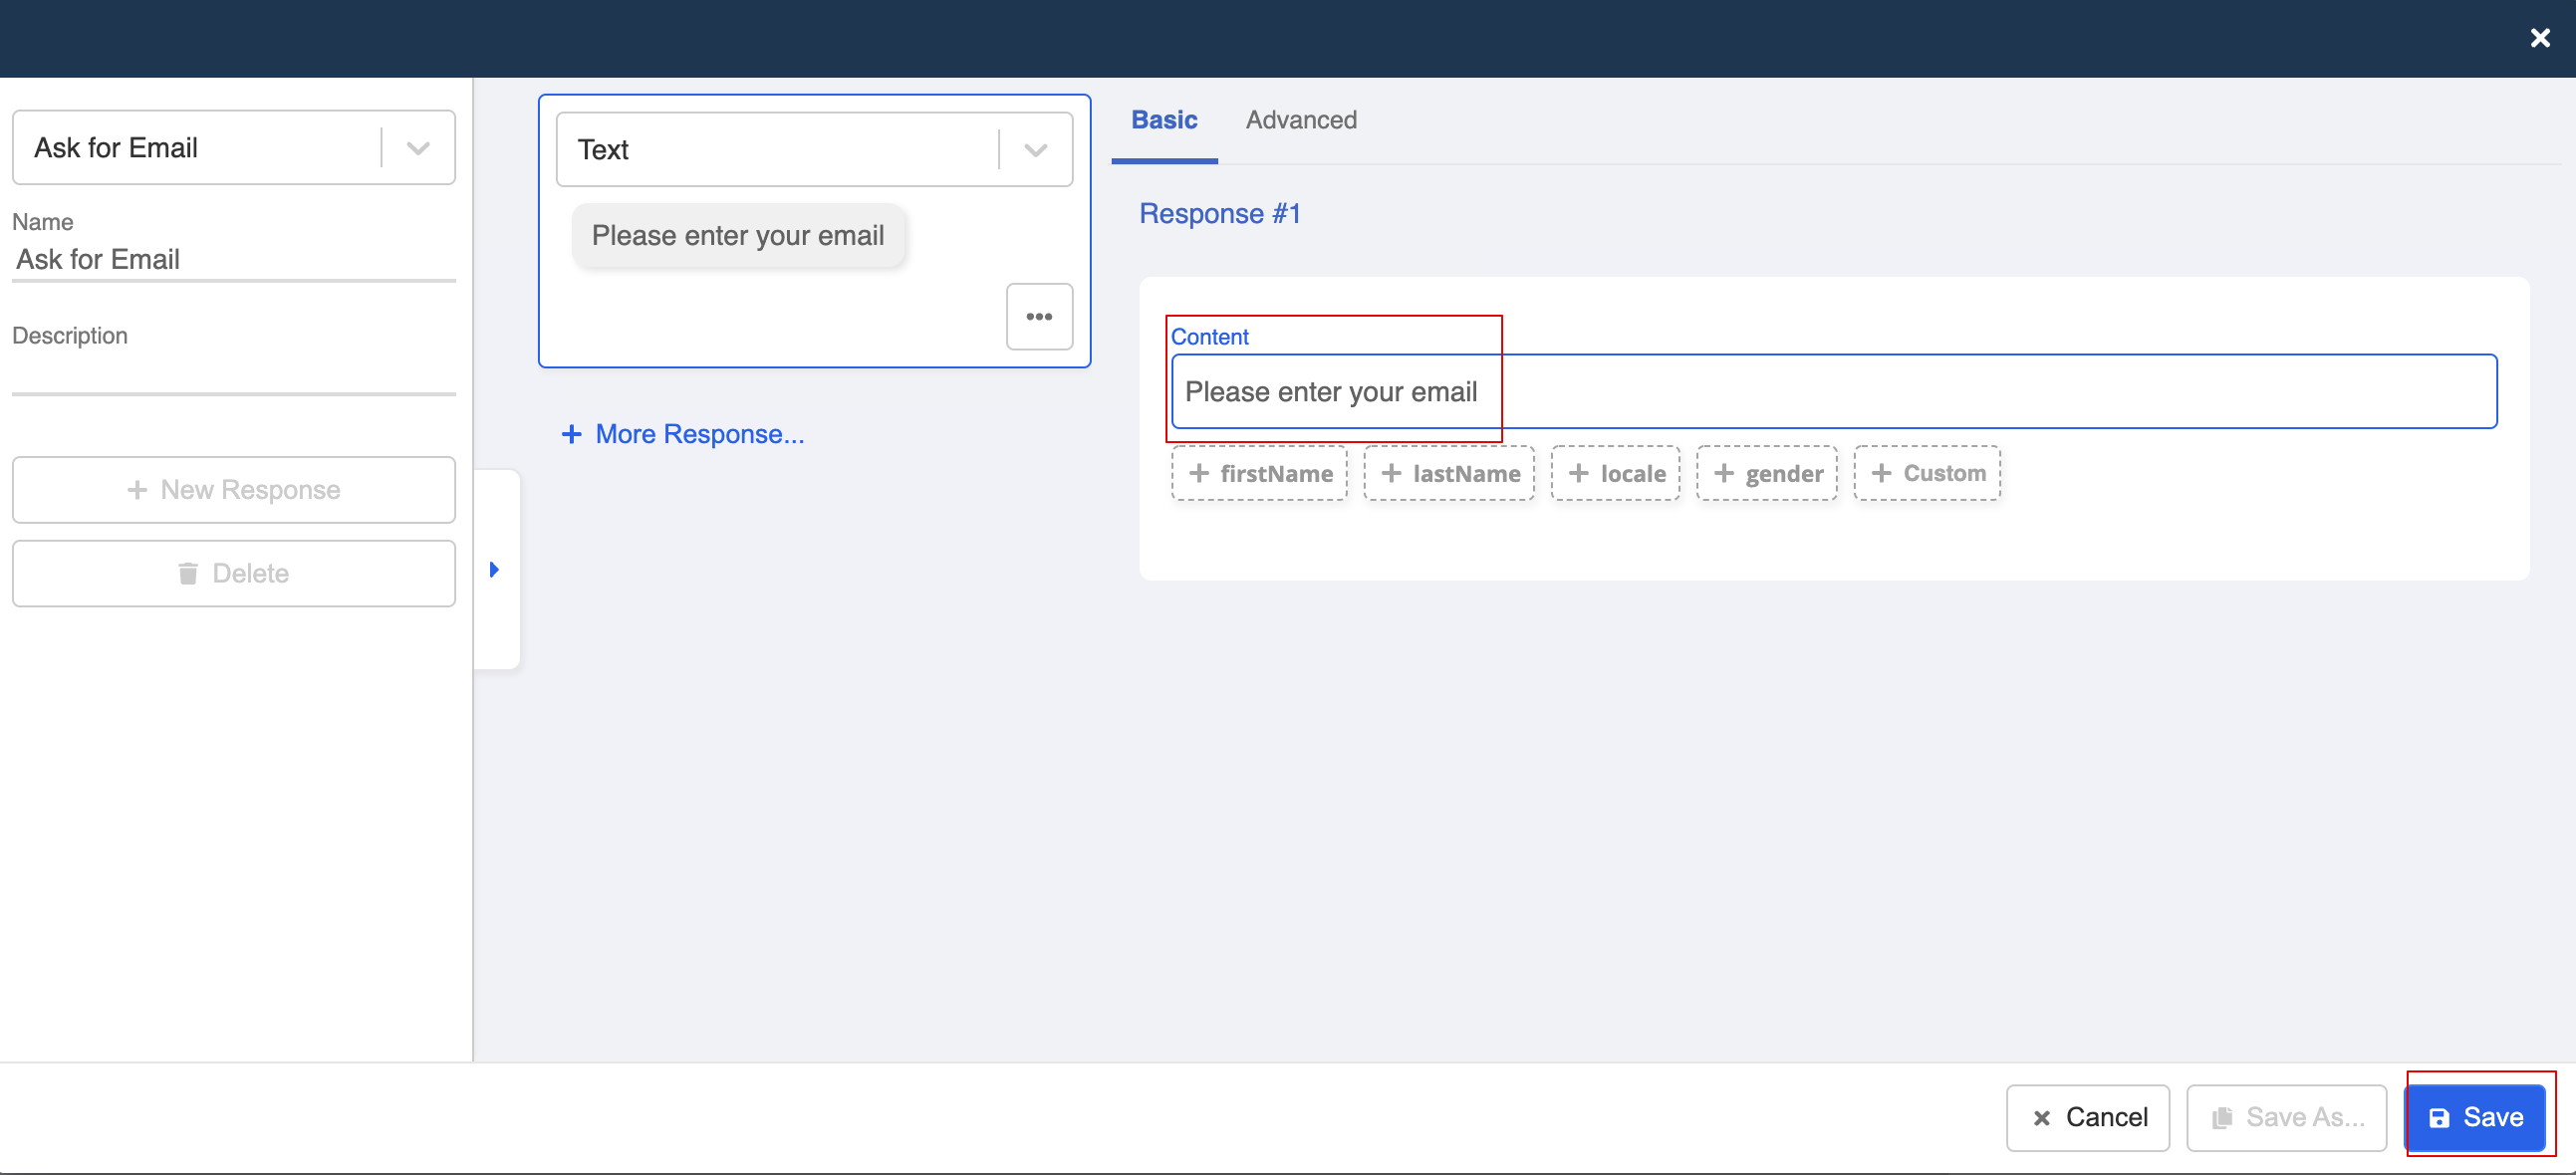
- Create a response and create a text response to ask for customer's email.
- Remember to save the response and node.
- Create a new response. Select "Text" as the response type and enter the question. Finally, "Save" the response.
Build 3rd-Layer Child Node - Webinar
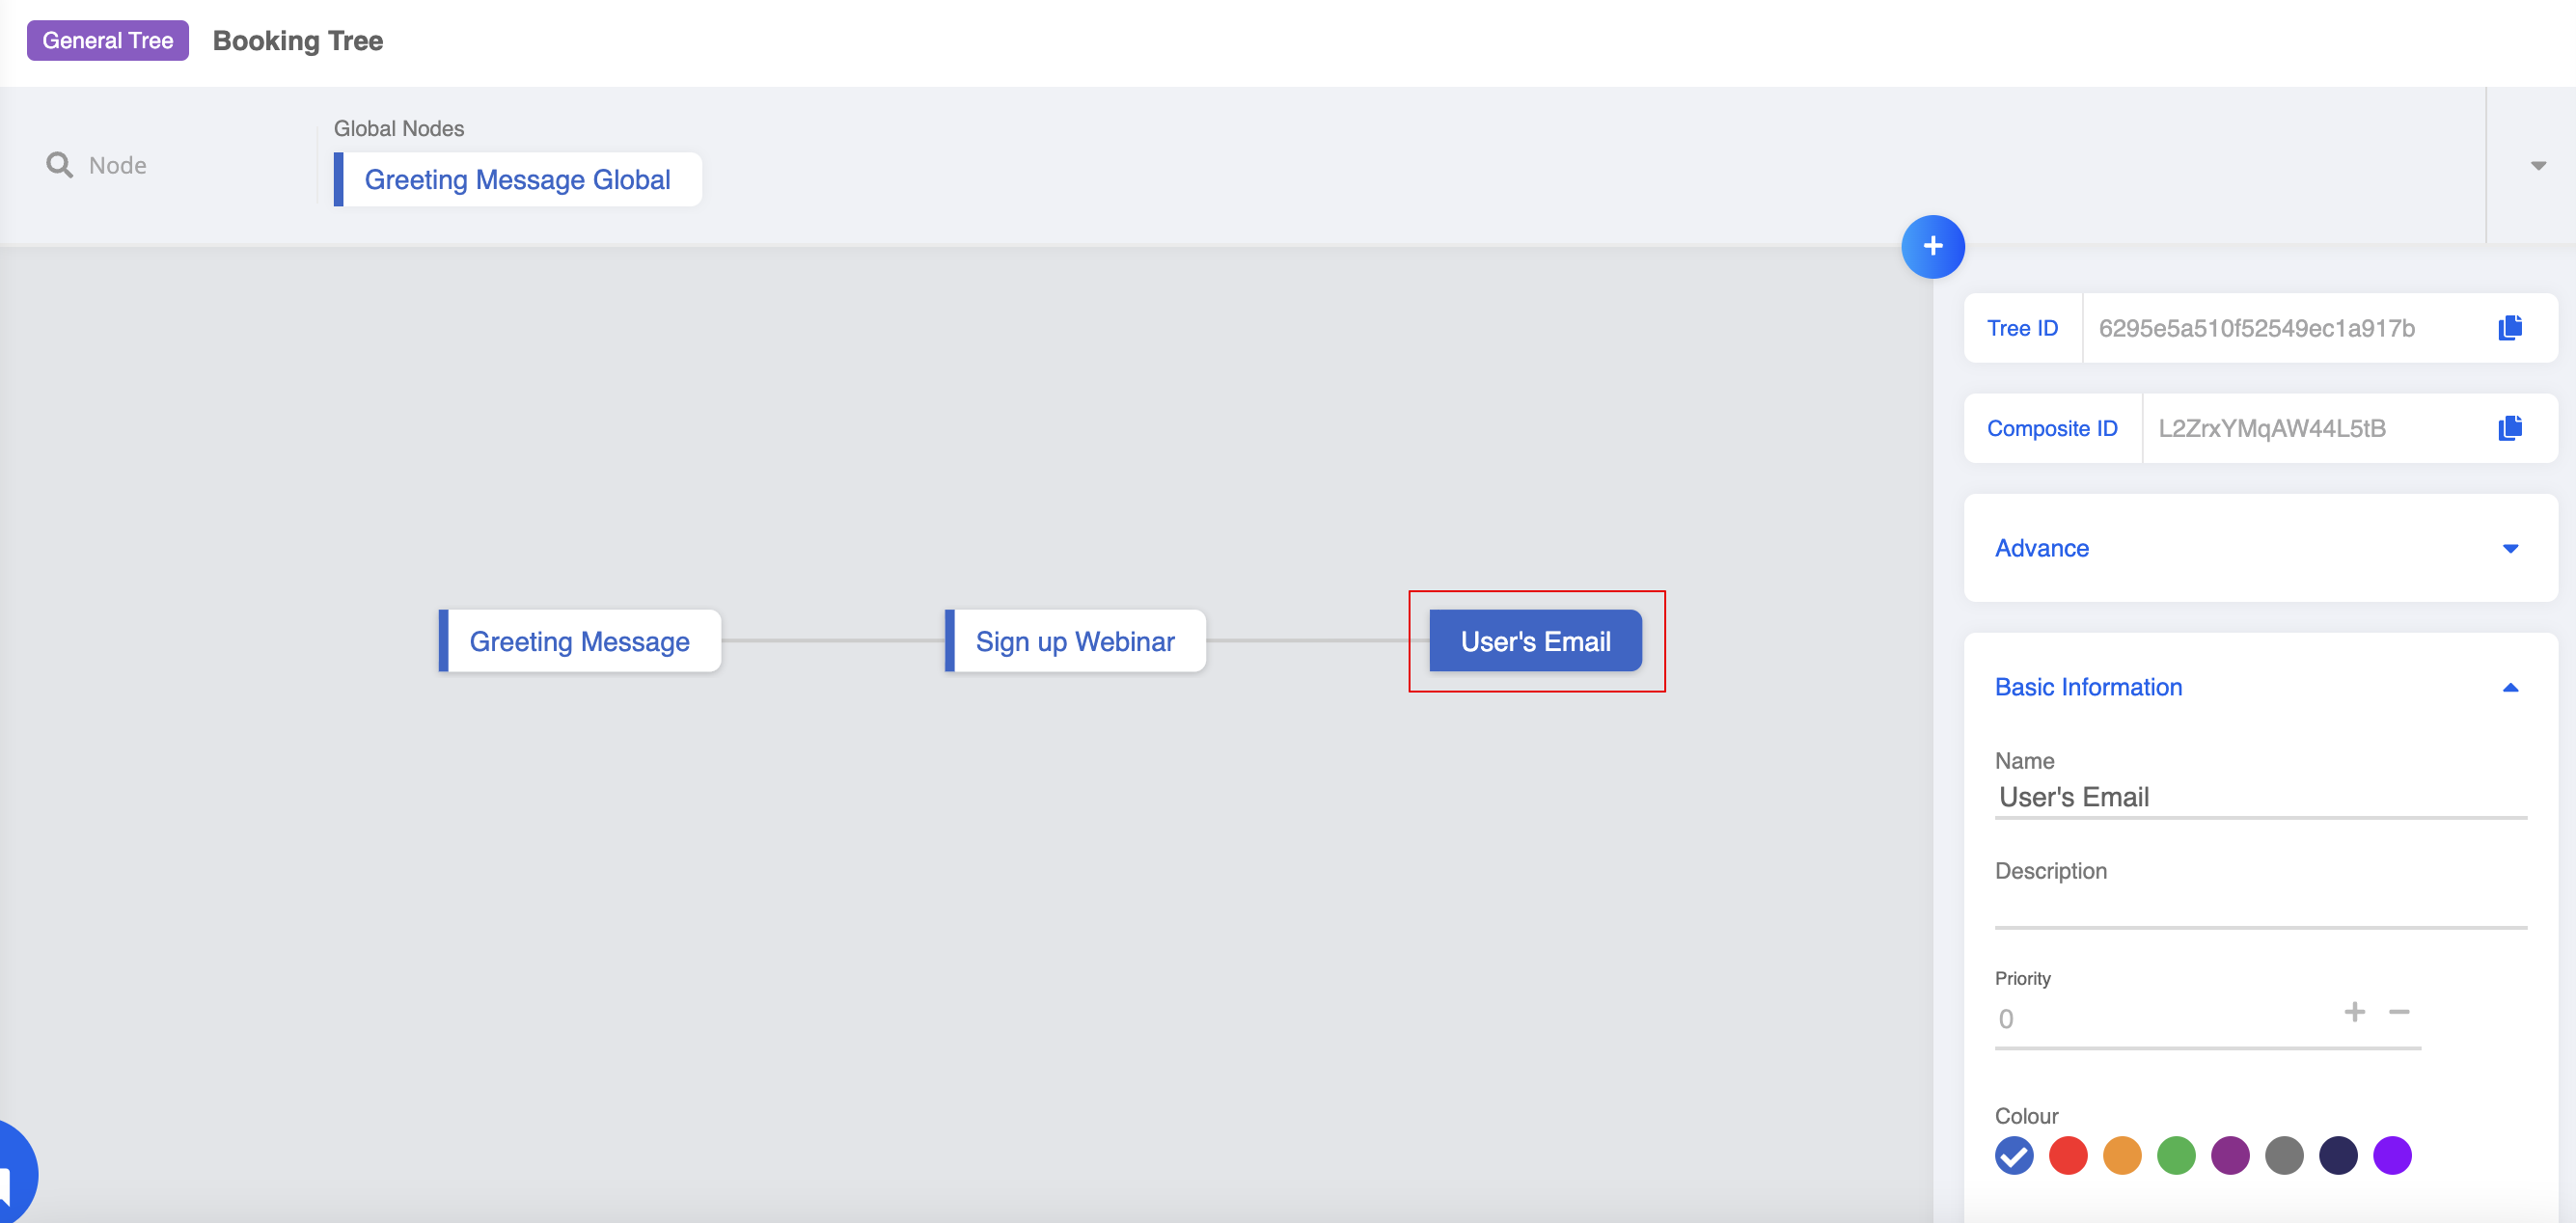
- Create a new node after customer has provided the email.
Create Any Email Trigger
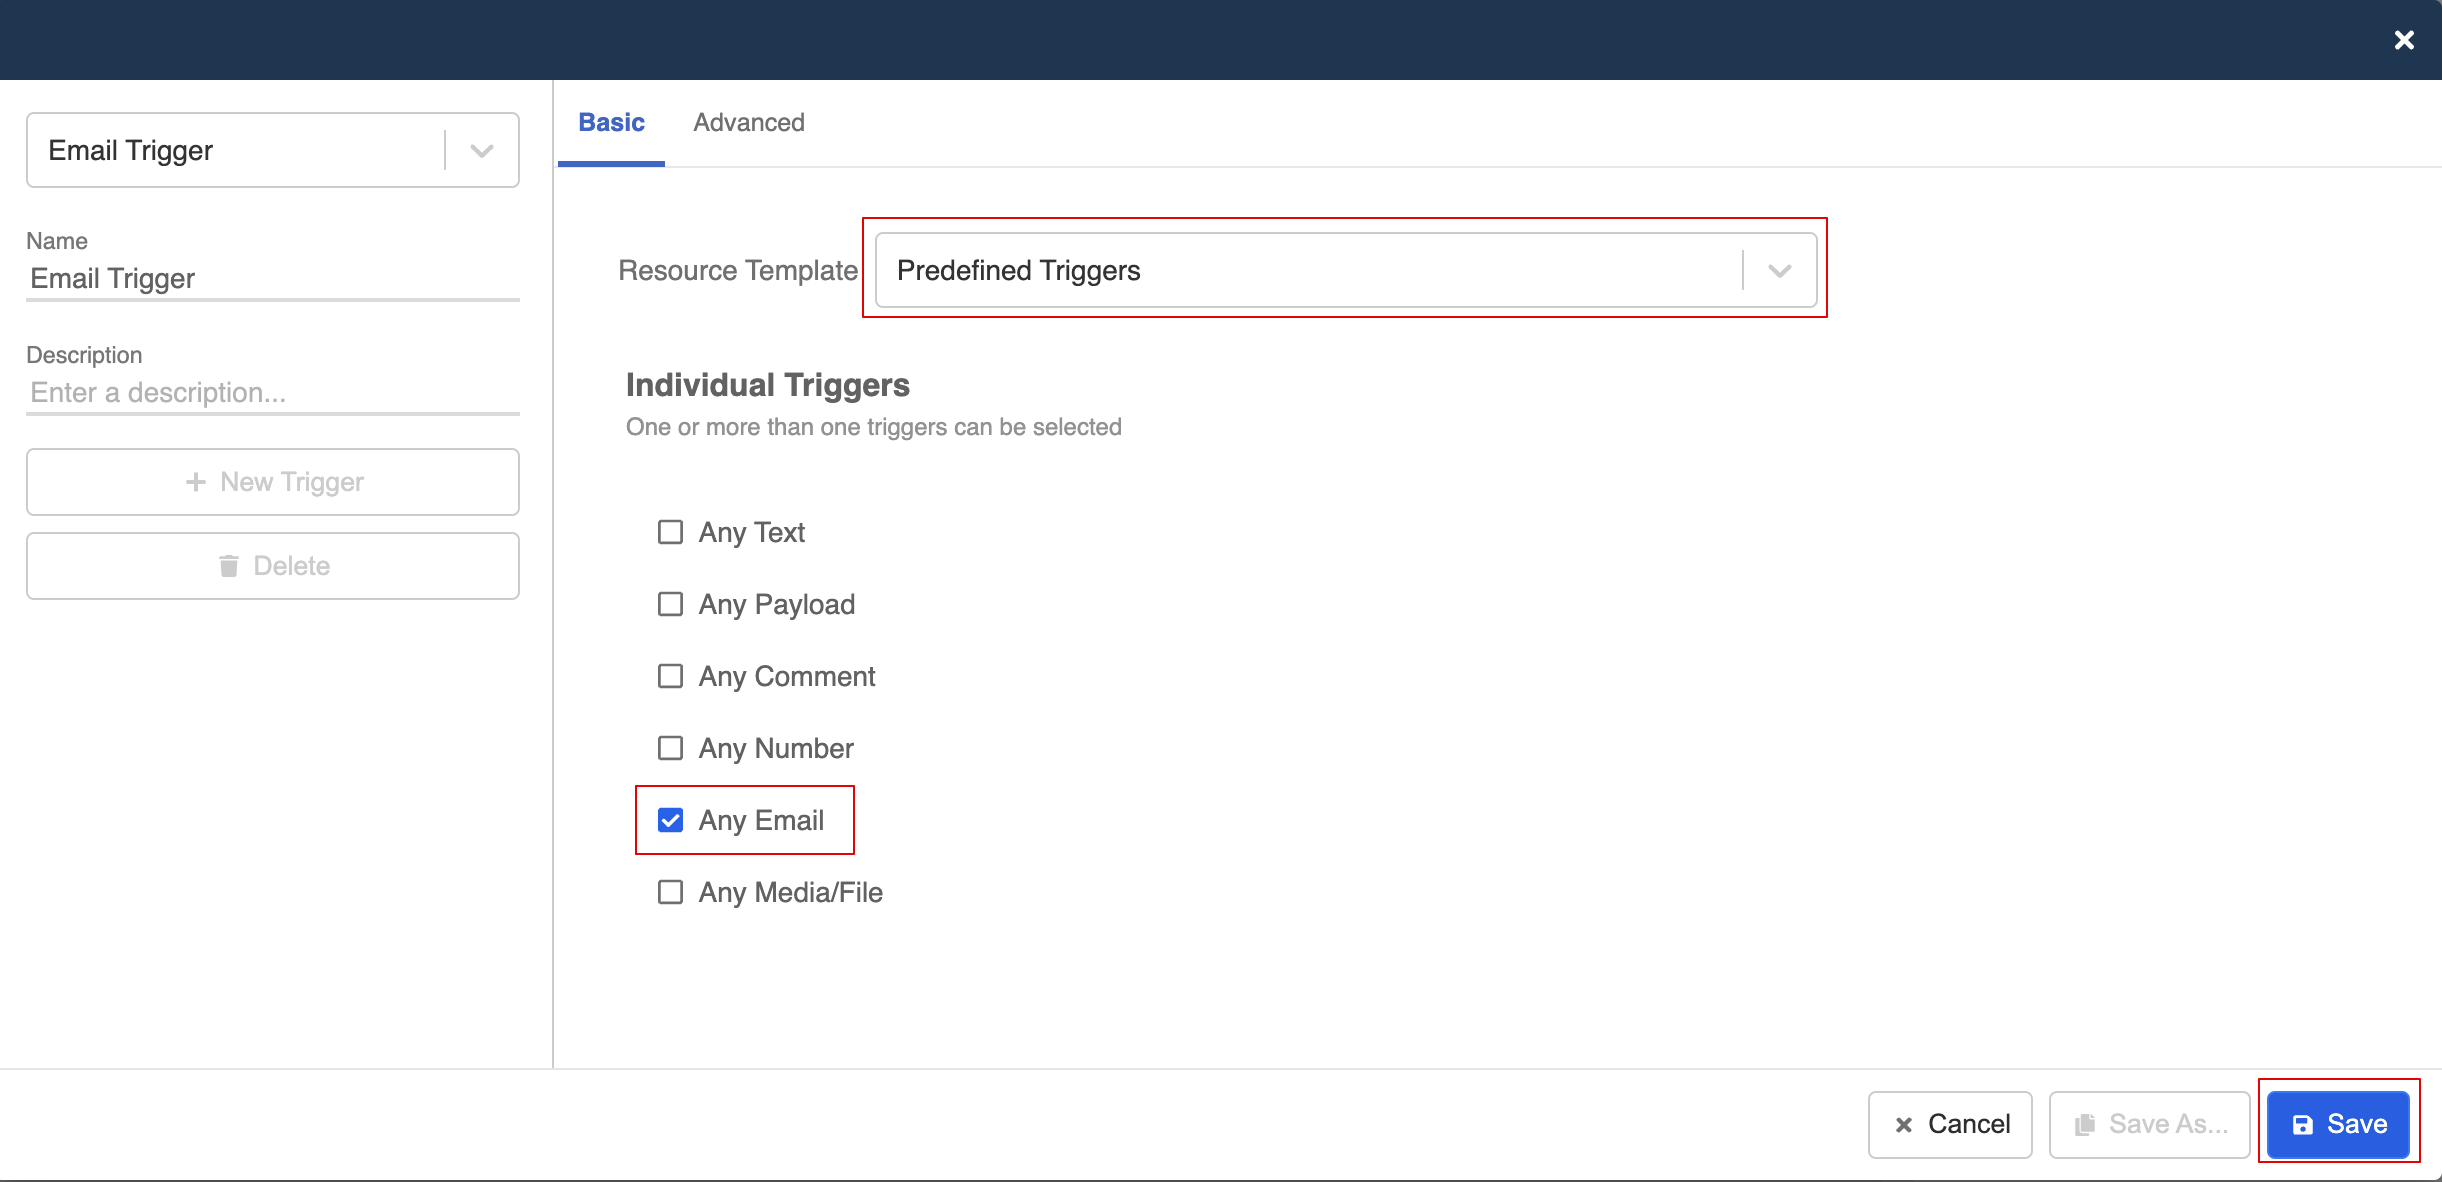
- Create a new trigger. Select Predefined Trigger and then "Any Email".
Create Response
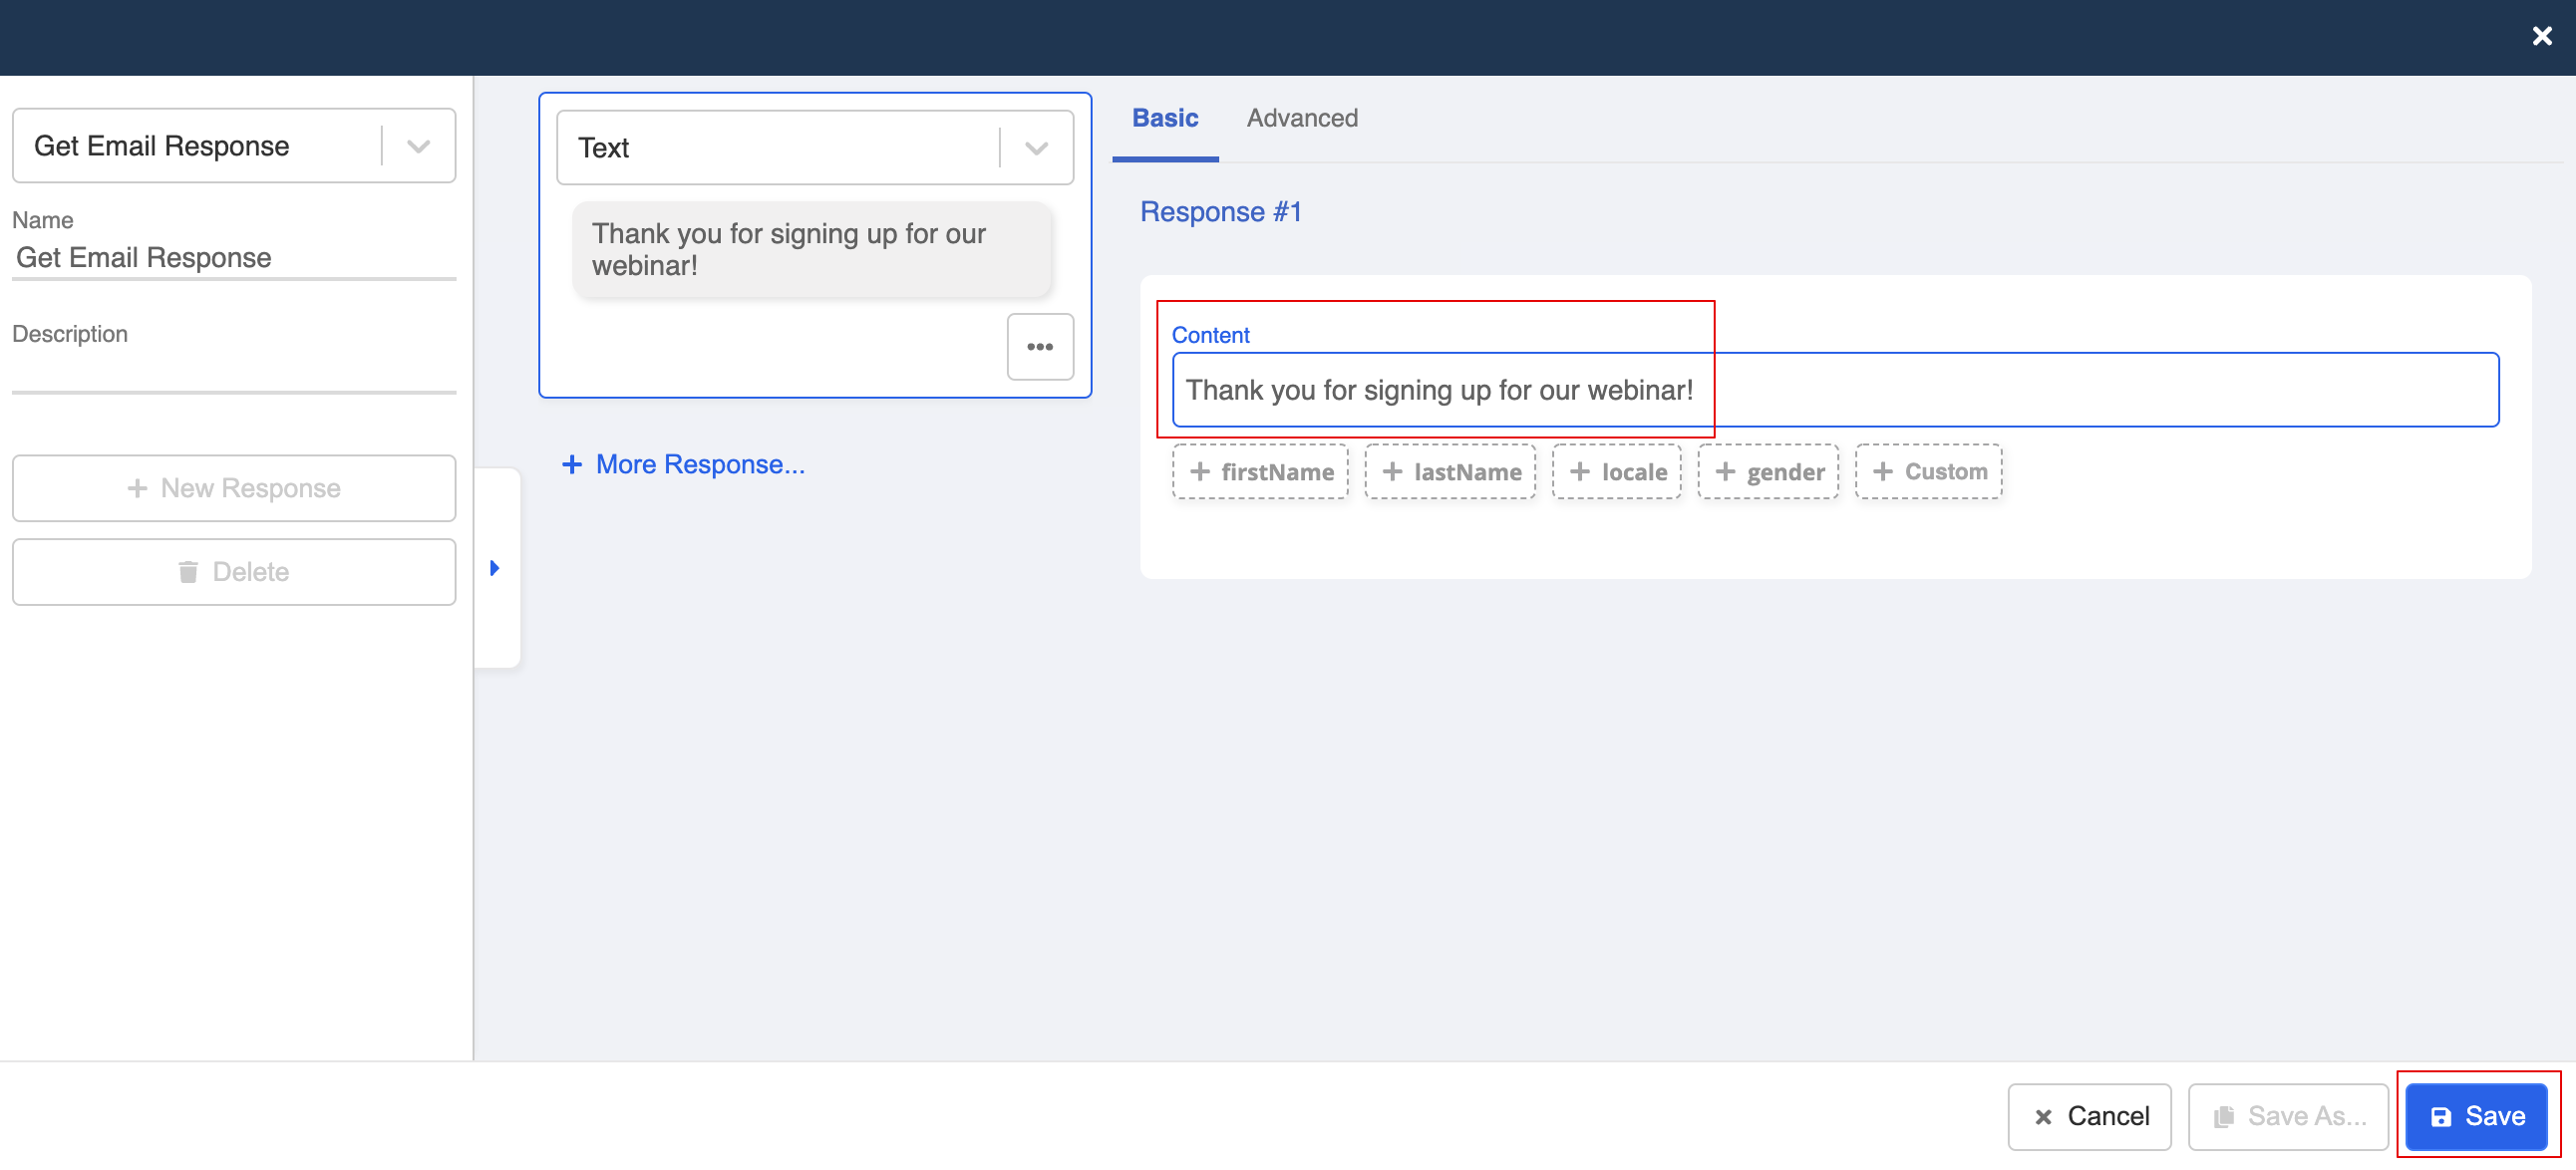
- Create a new response for customers have signed up with their email.
Build 2nd-Layer Child Node - Consulting
- Create a node following the "Greeting Message". This is for the customers who want to book for consulting.
Create Any Payload Trigger
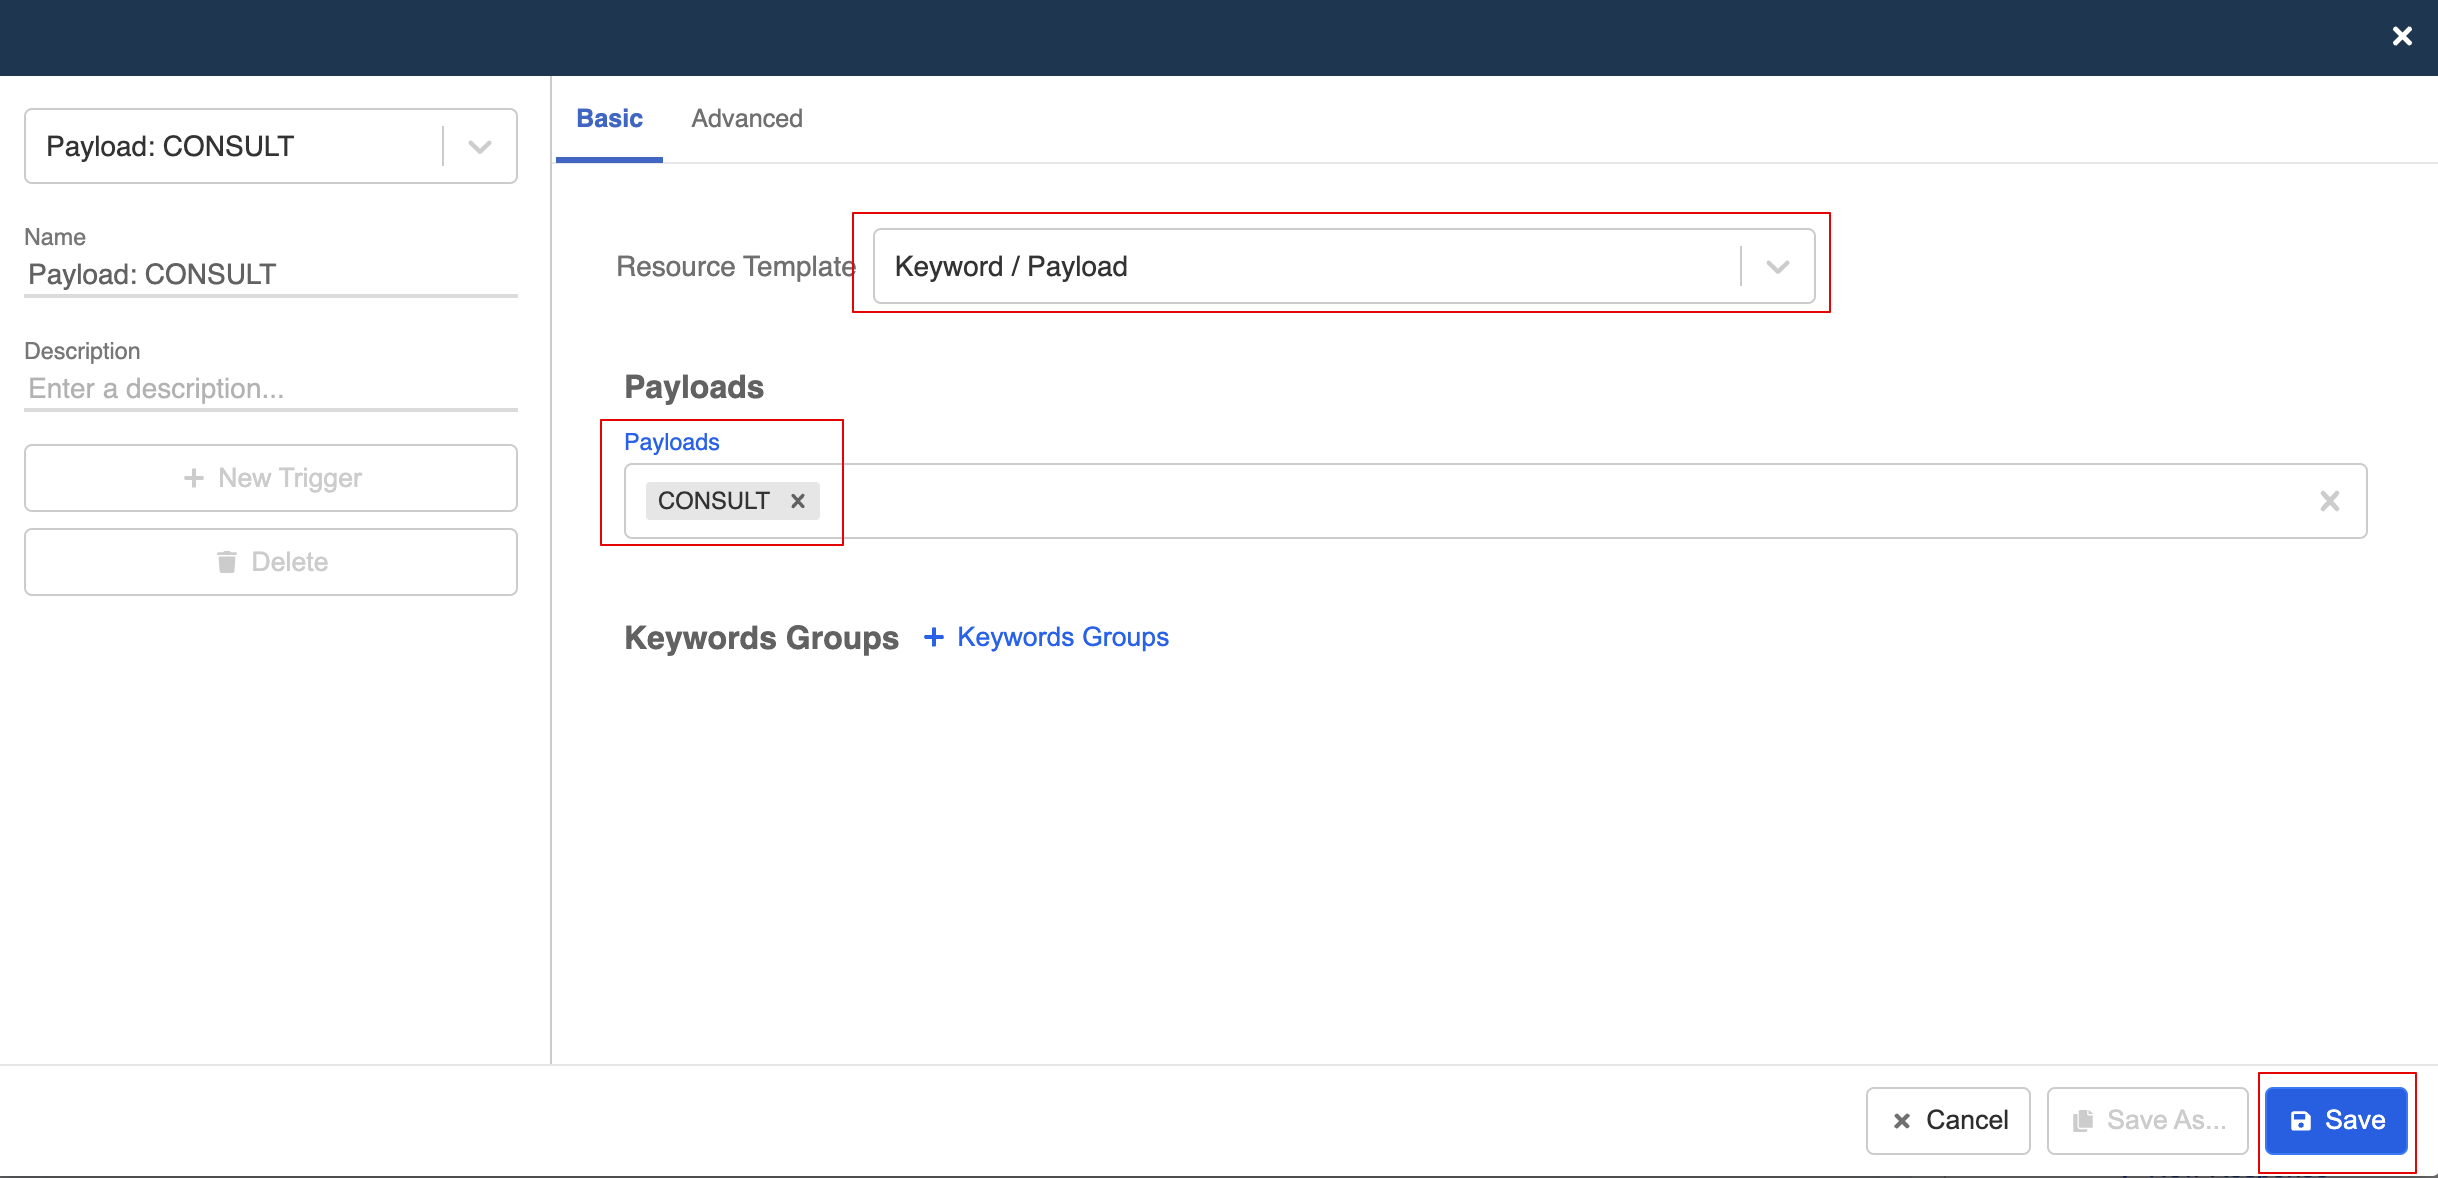
- Create a trigger. Select Keyword / Payload, match the payload to what you have created in the "Greeting Message".
Create List Message Response
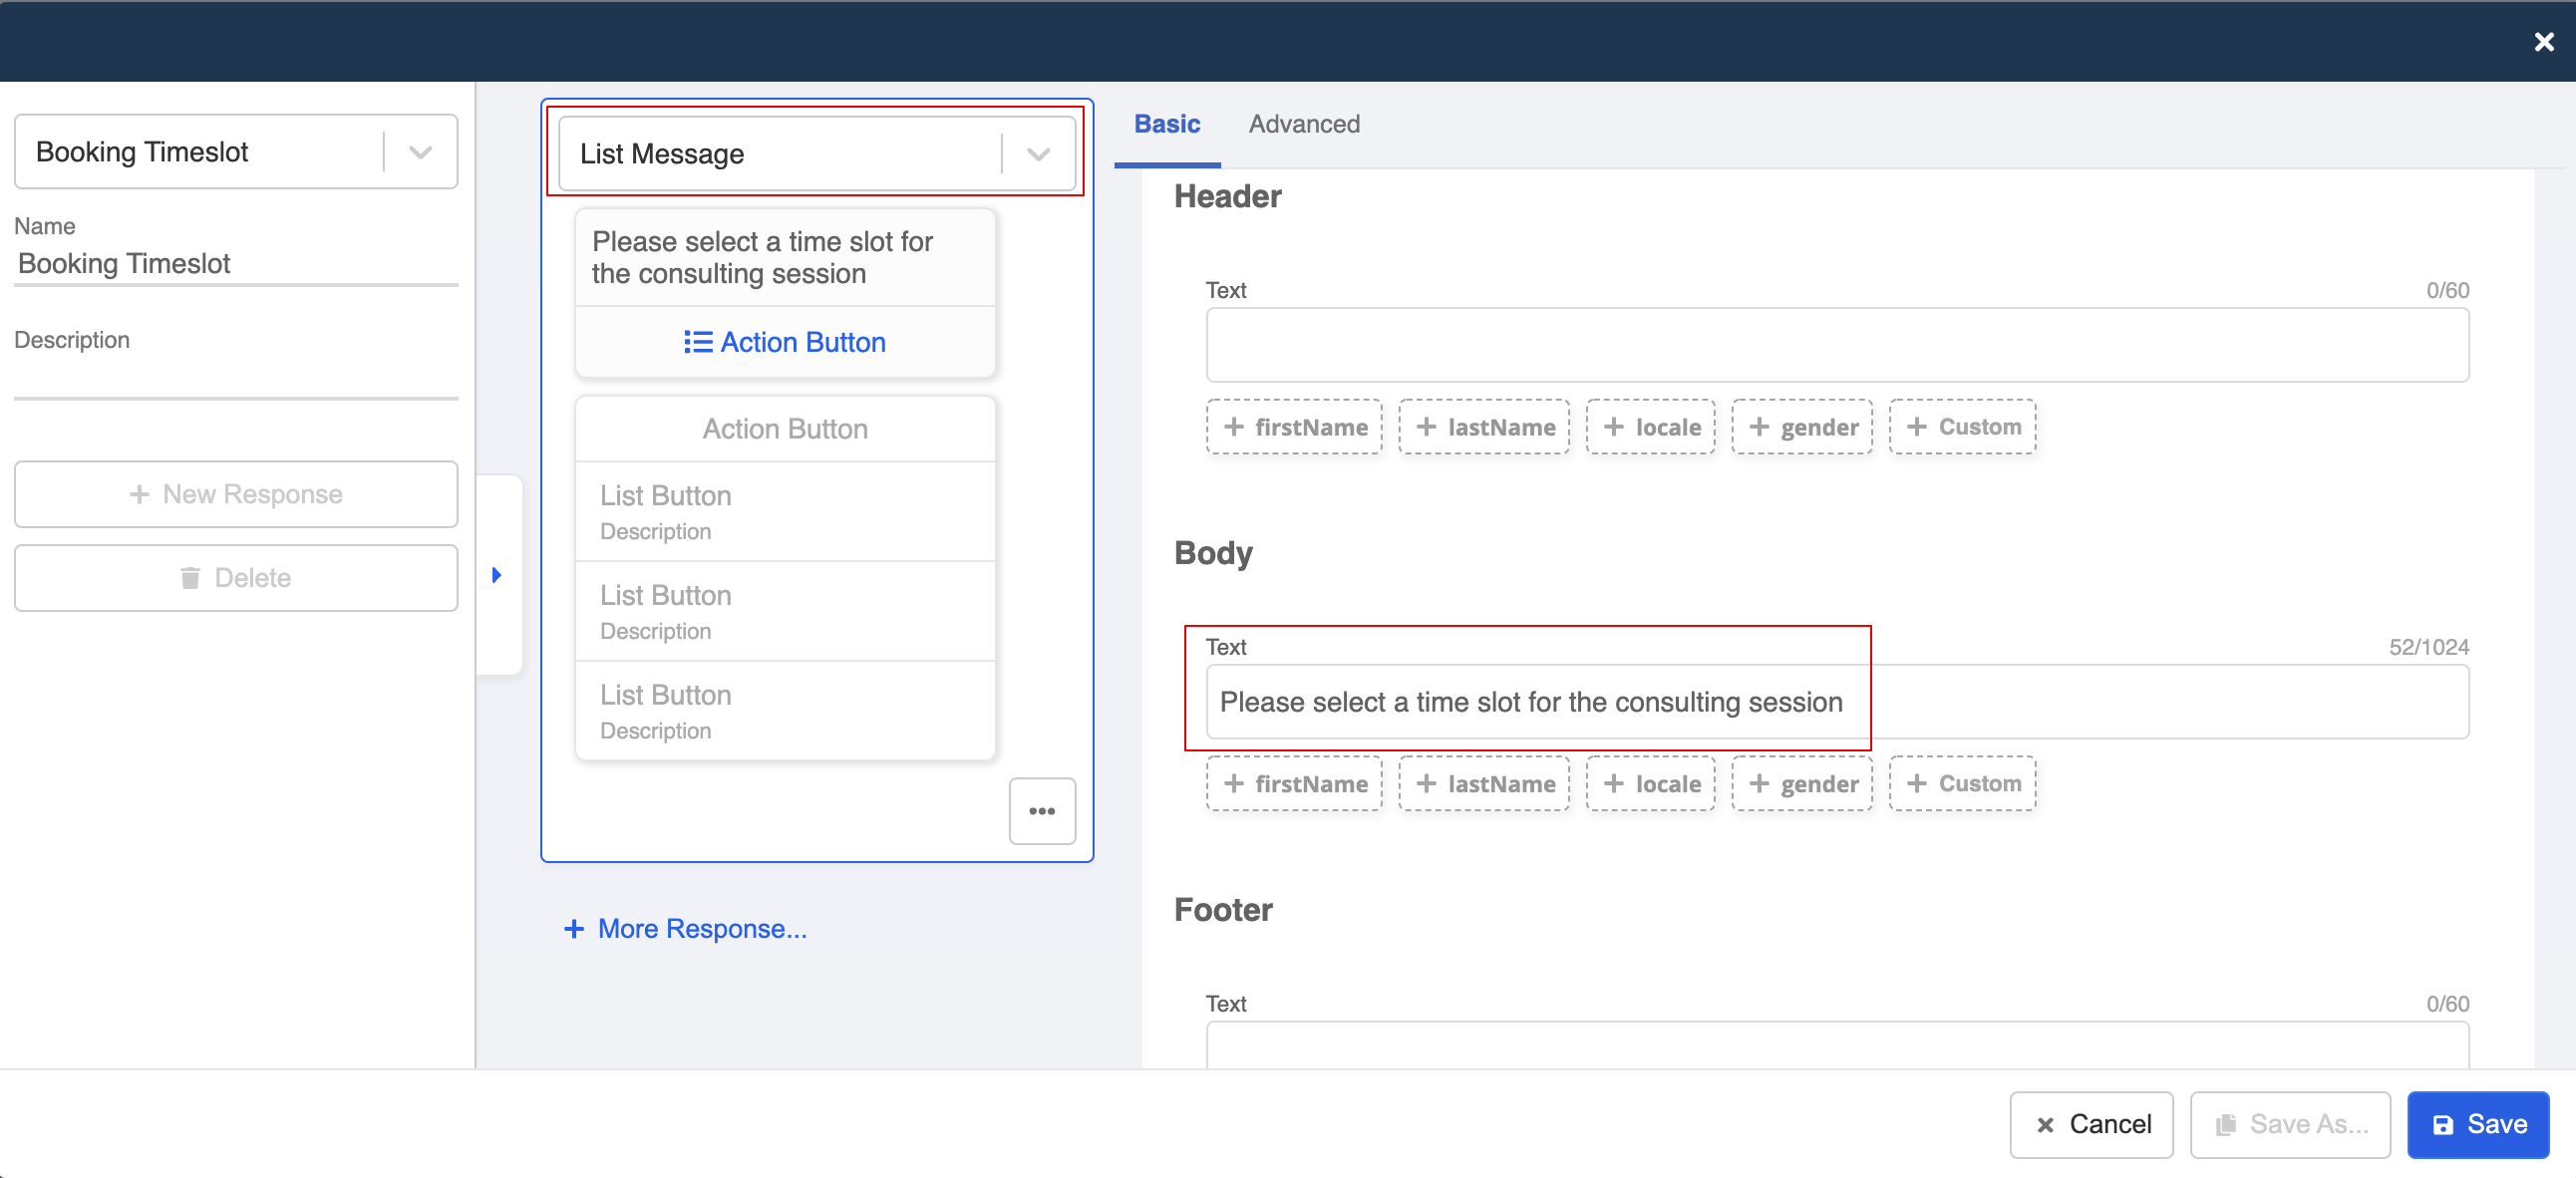
- Create a new response. Open the platform tab, select "Add Platform" and select "WhatsApp Cloud".
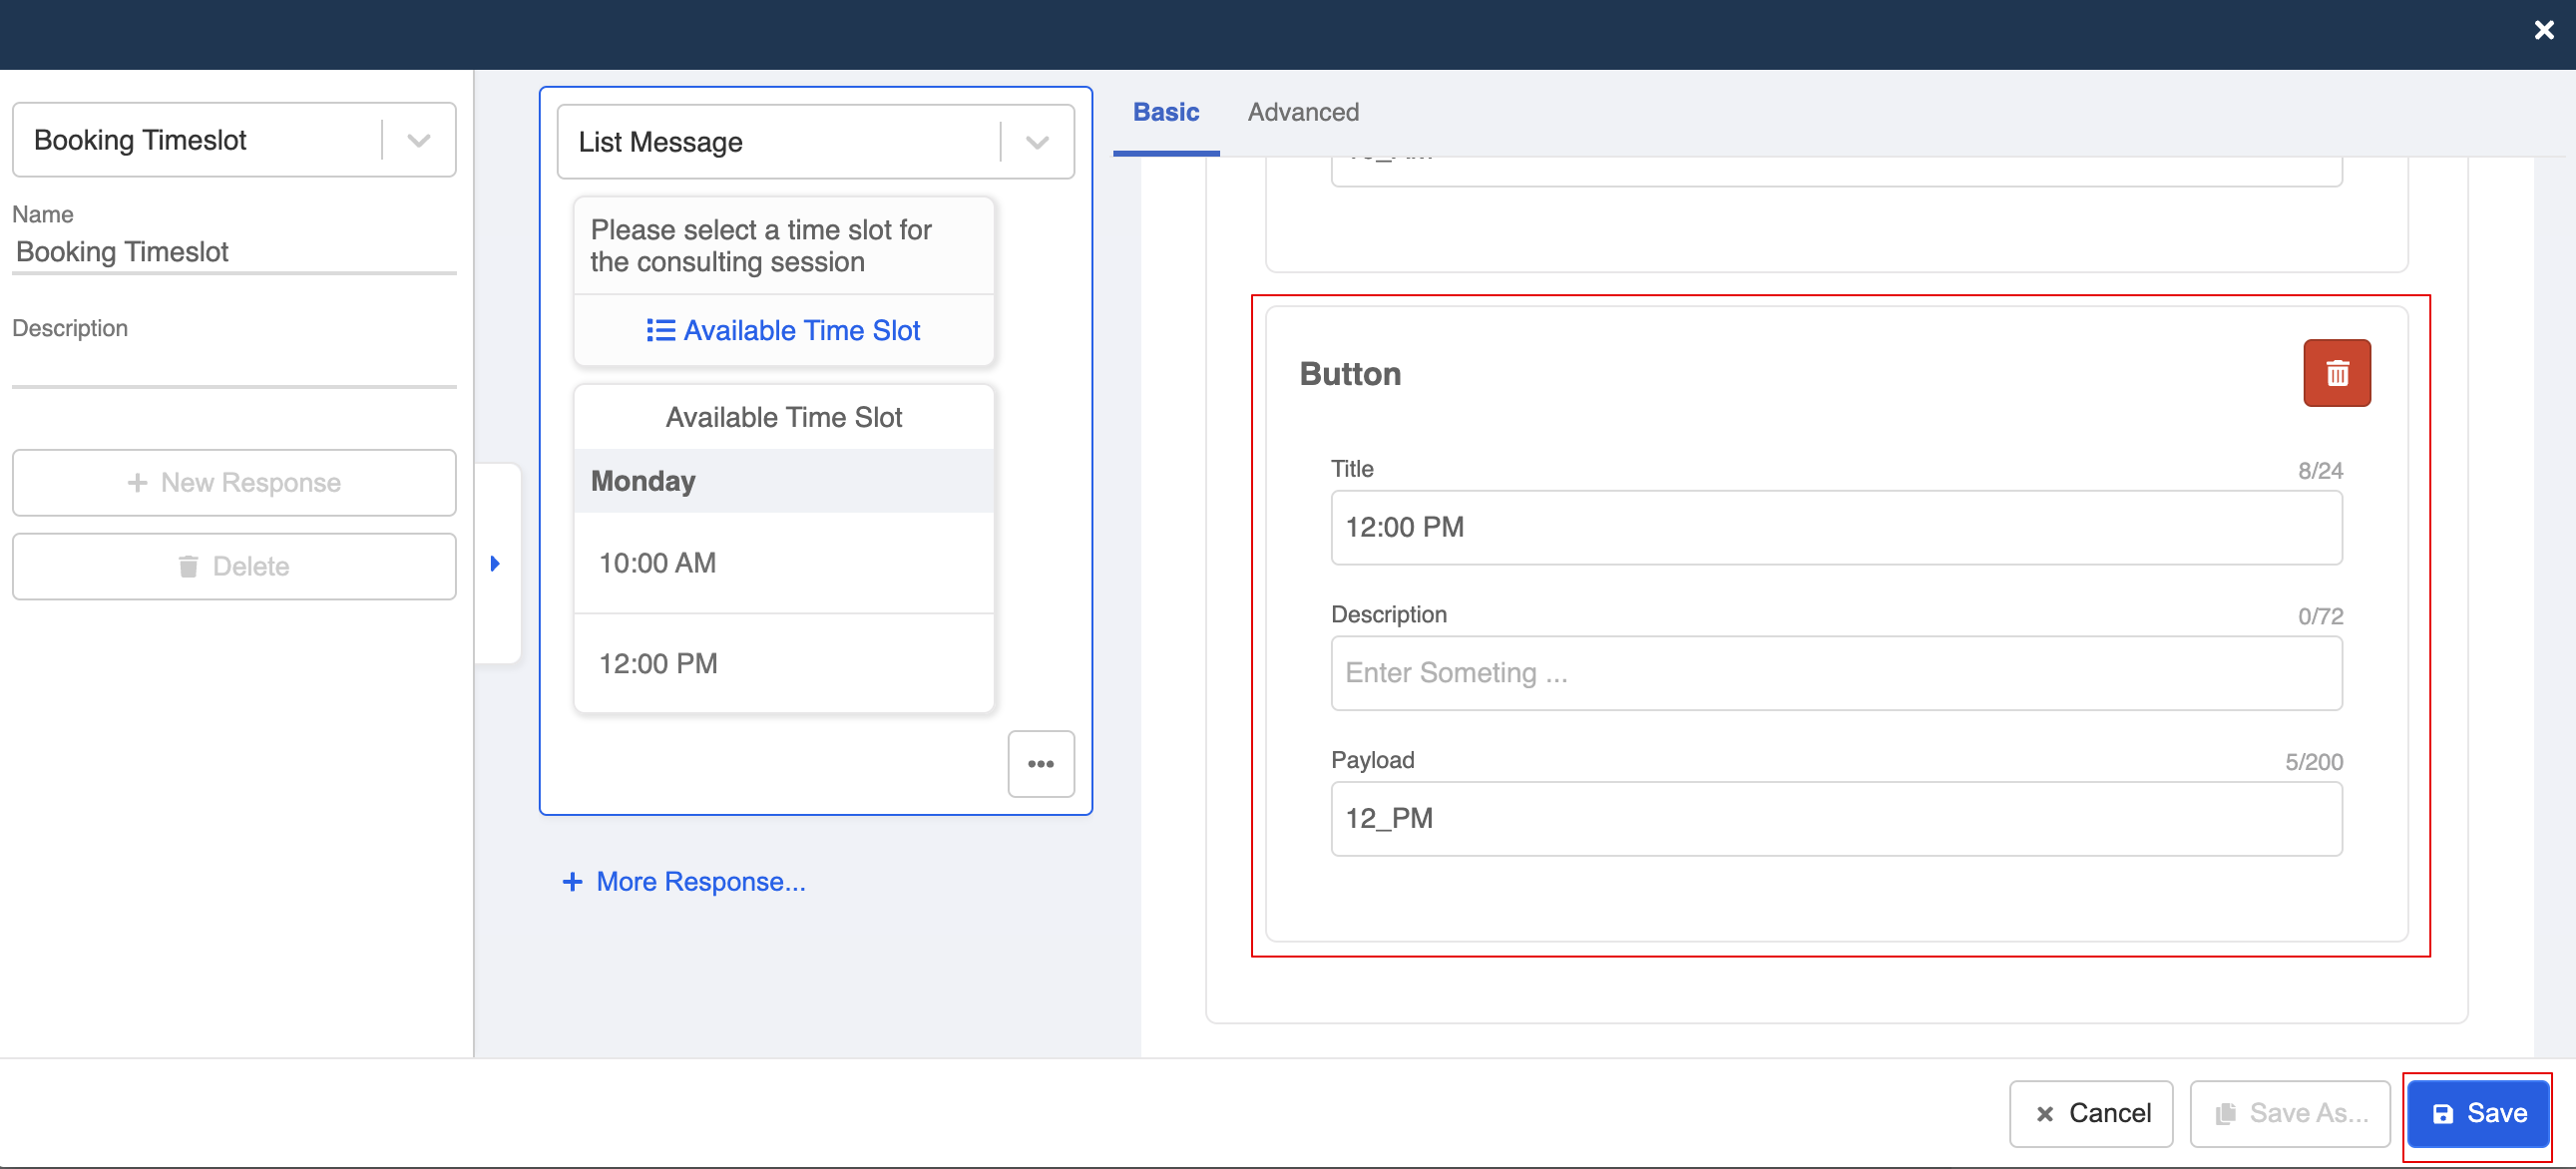
- Select "List Message" from the response type. Enter text content in Body.
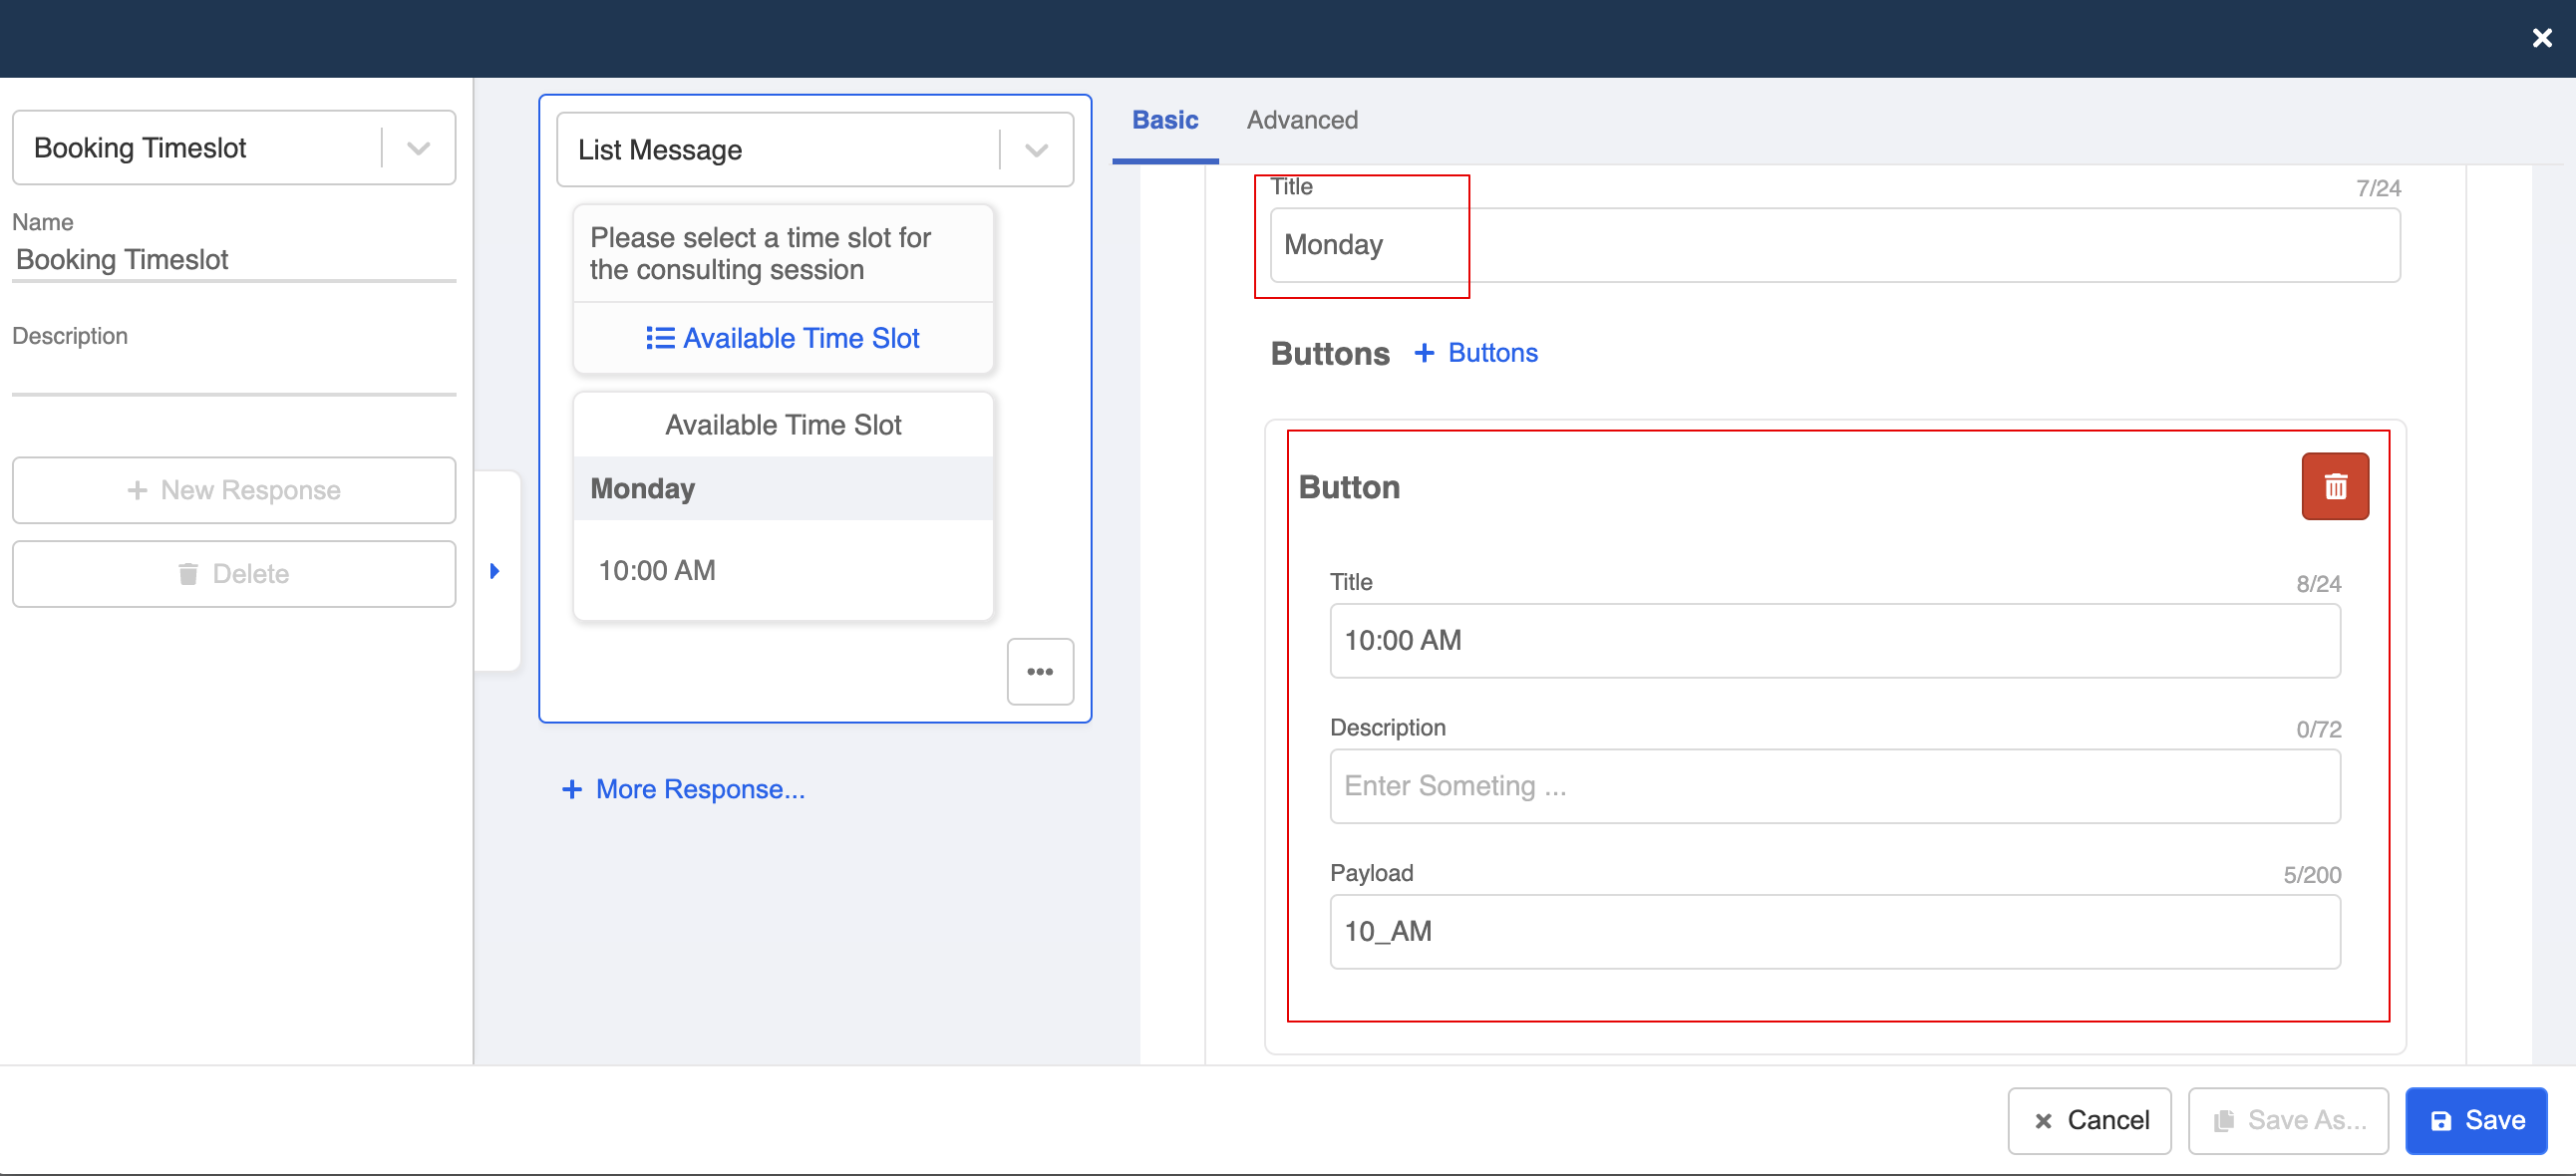
- Scroll down and create a button for the booking time slot. You will need to create a case-sensitive payload for each button.
- Create another button for another time slot.
Build 3rd-Layer Child Node - Consulting
- Create a new node following "Book for Consulting". It's for customers who choose the first time slot.
Create Any Payload Trigger
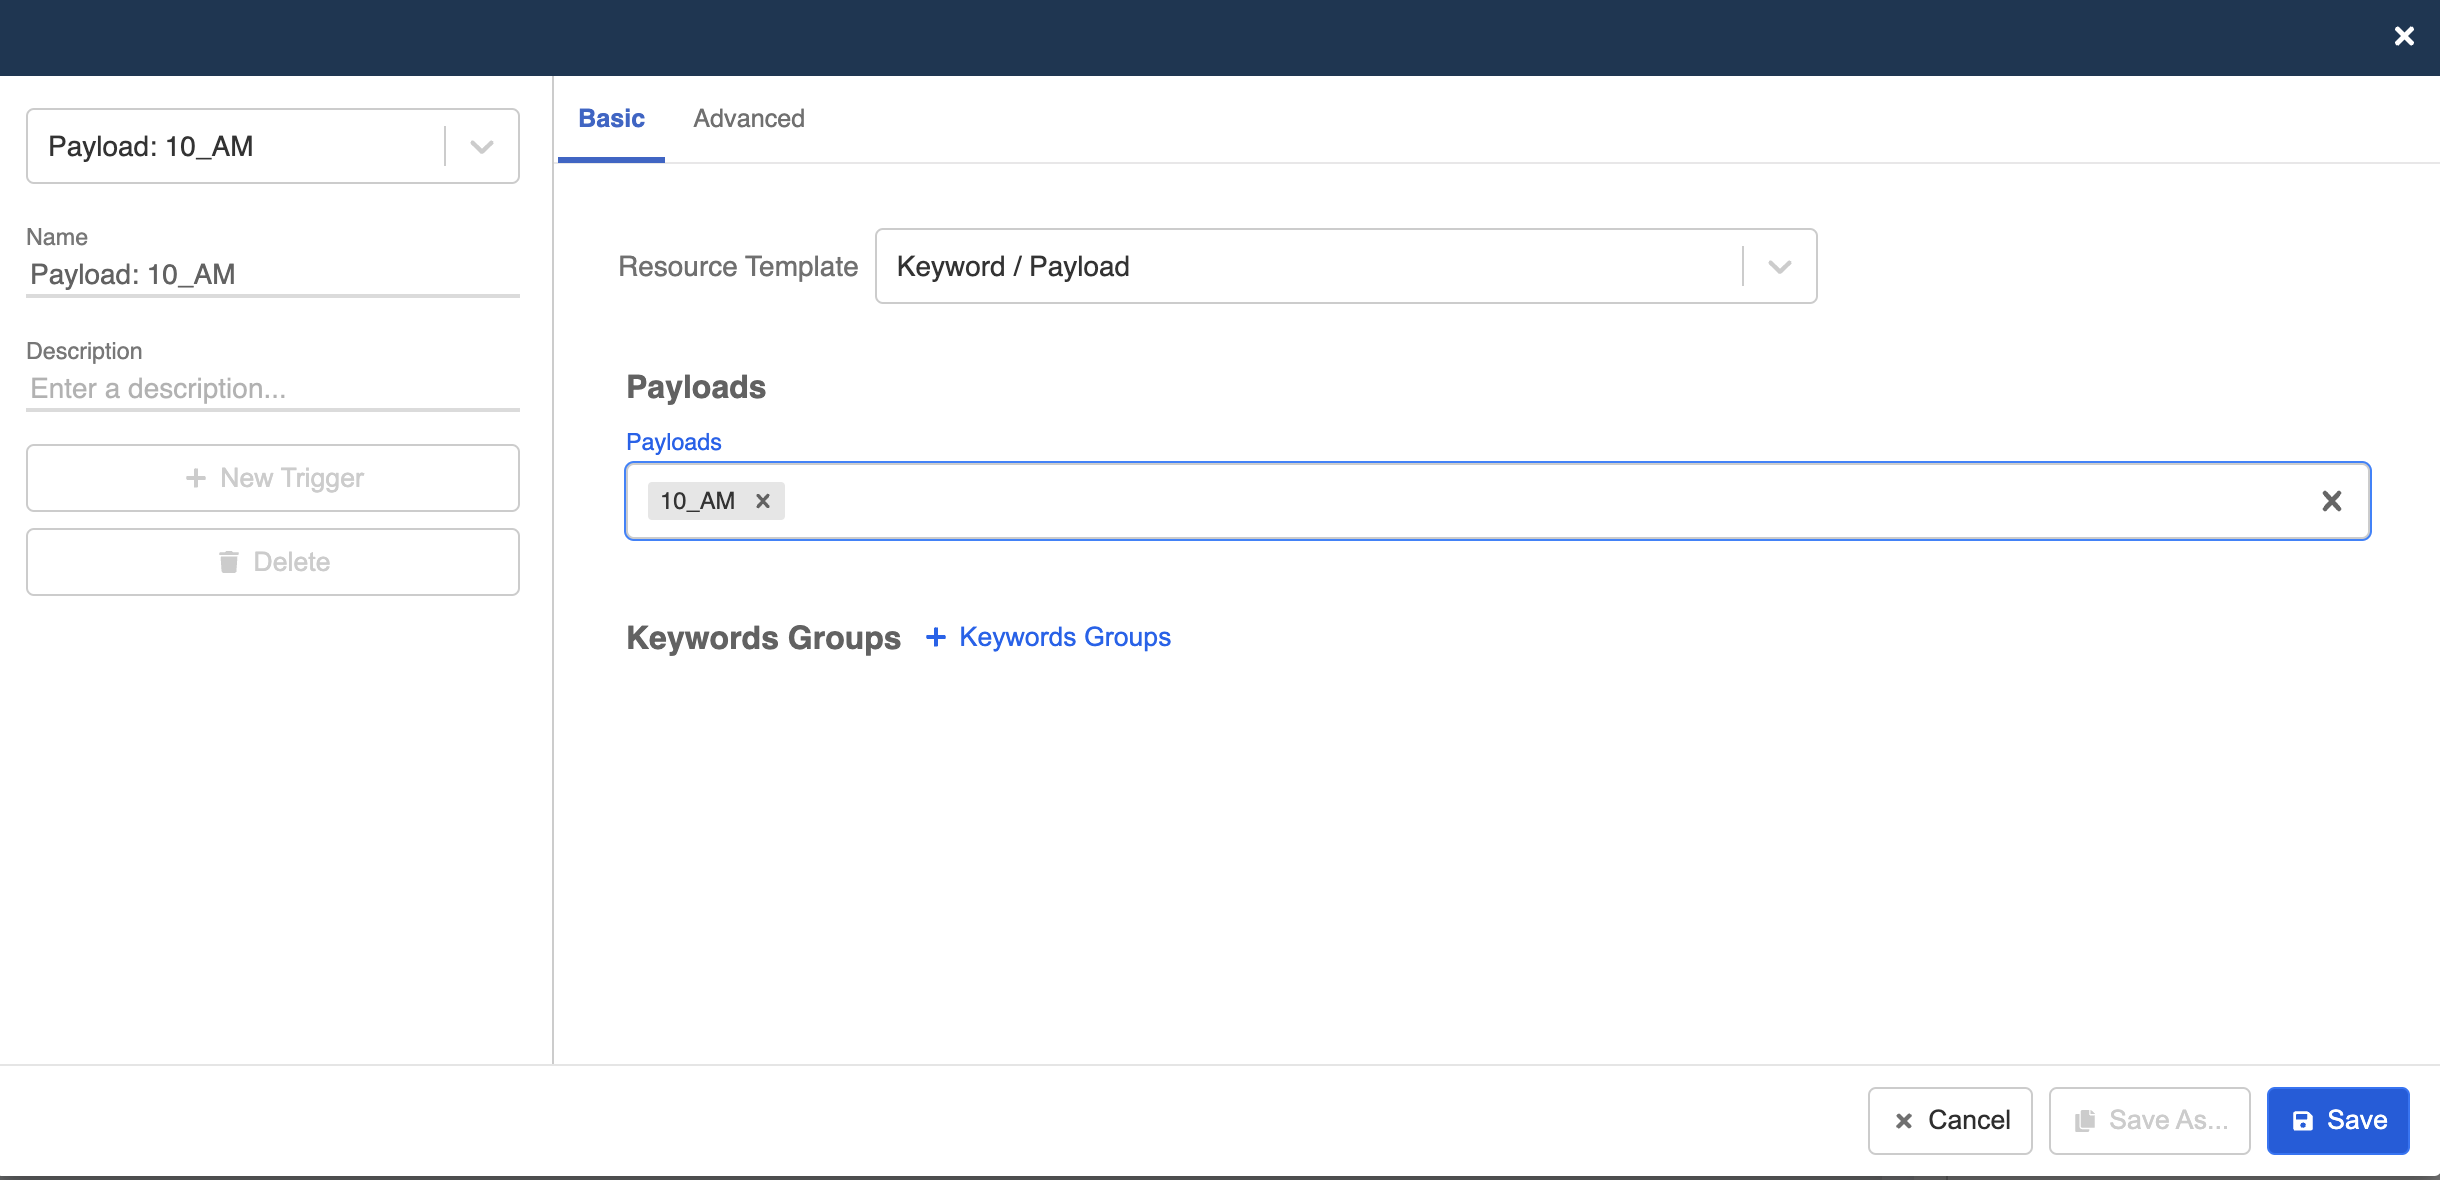
- Create a new payload. Set up a payload trigger, and match the payload to the payload created for the first timeslot.
Create Response
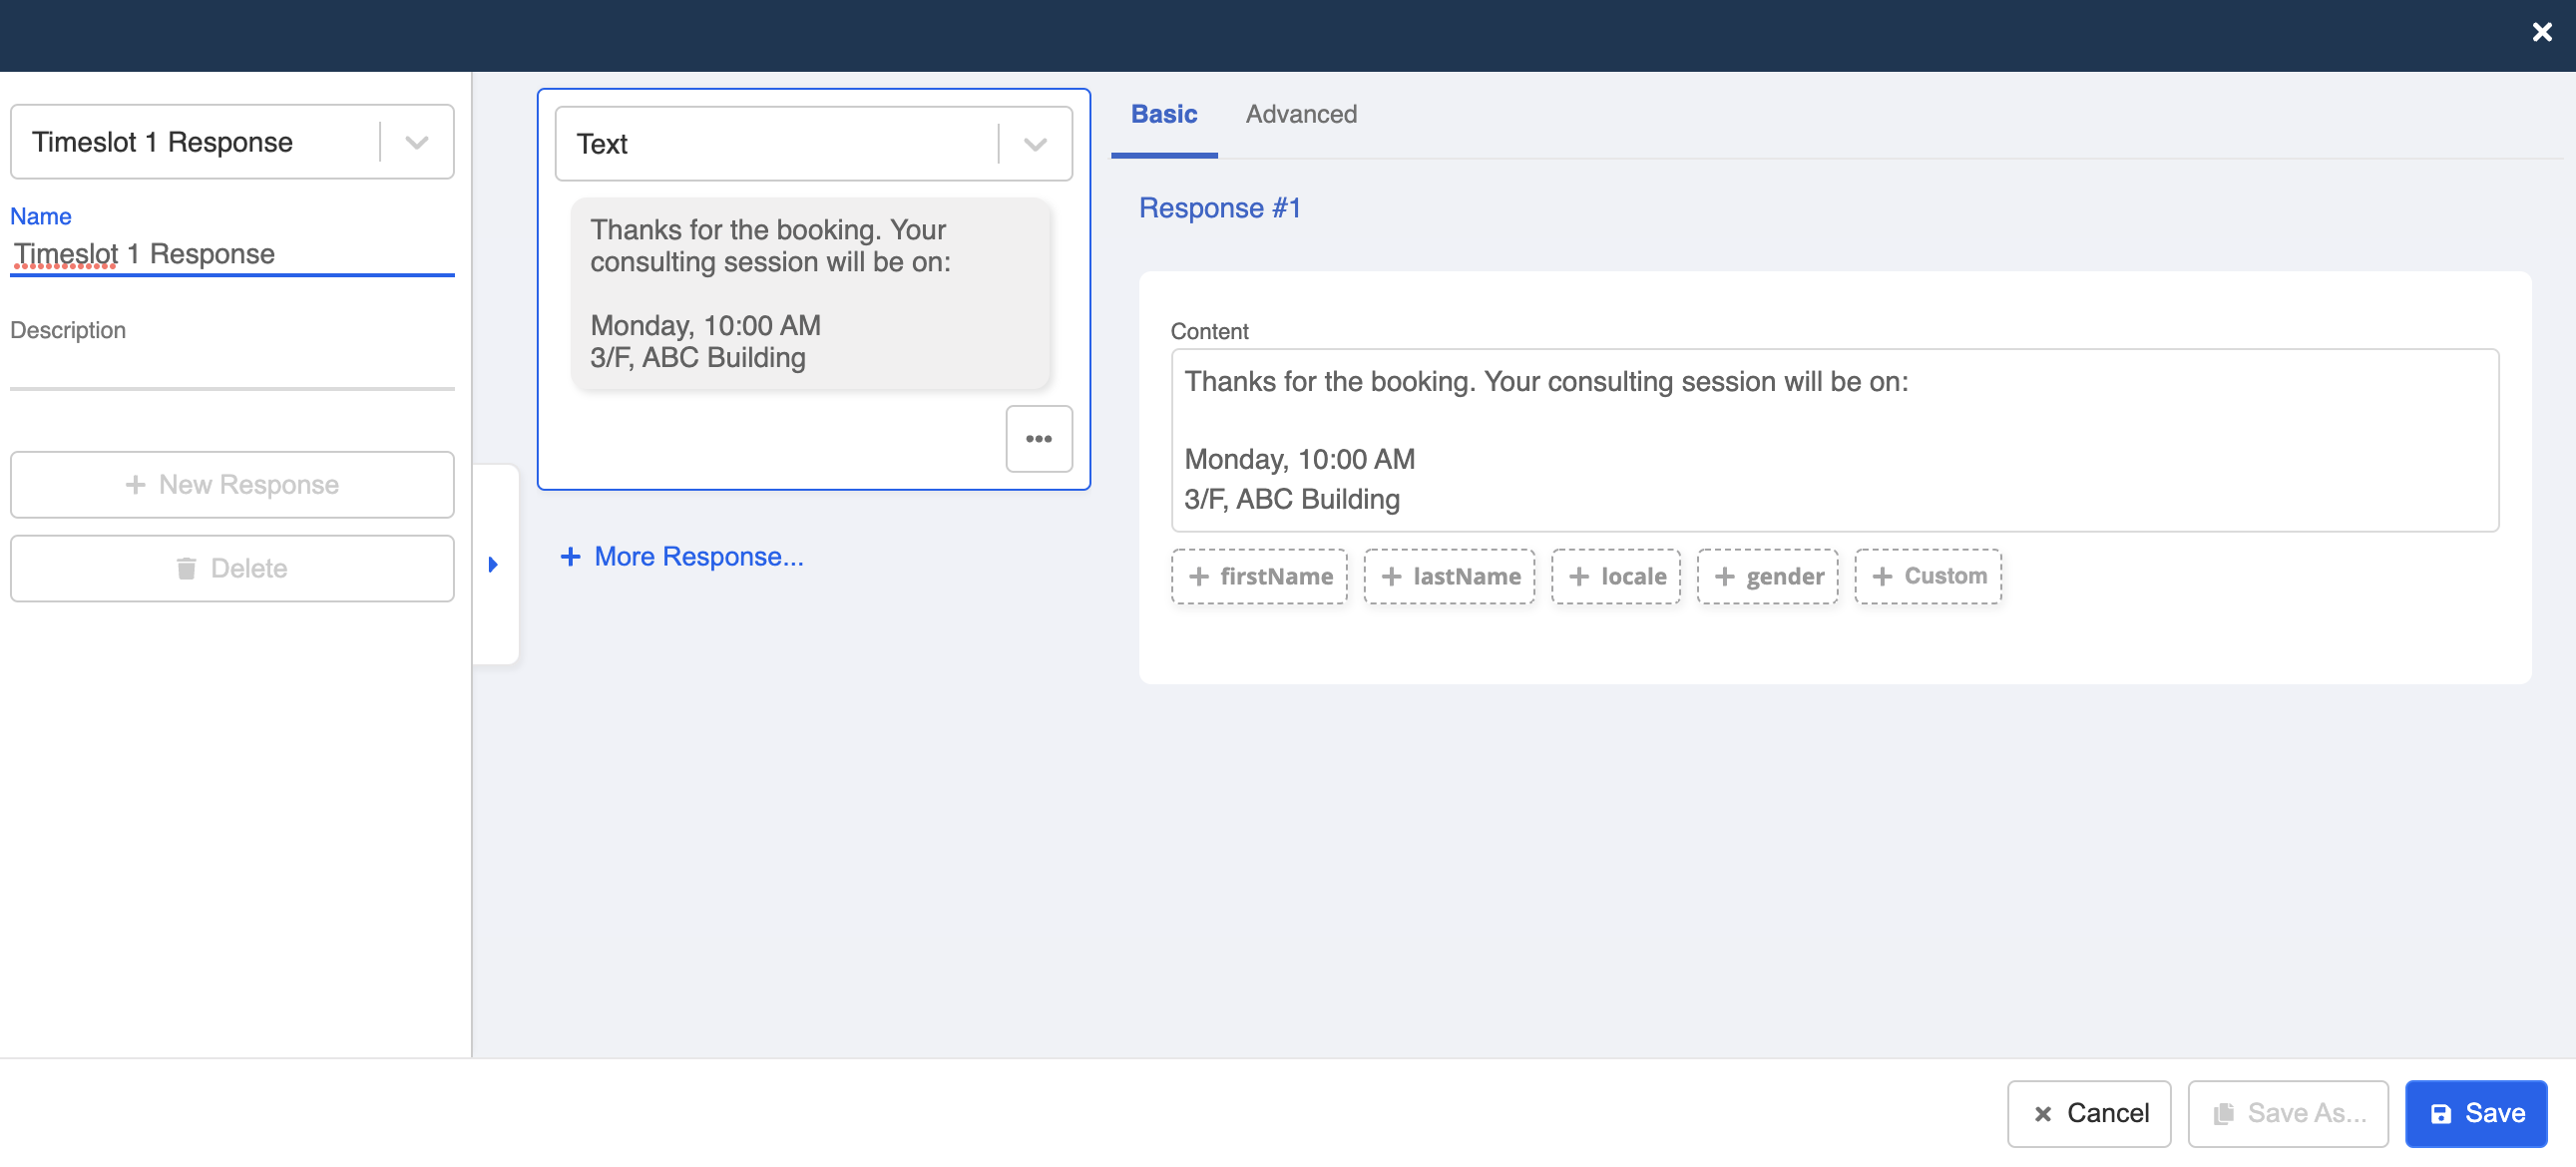
- Create a new response for the customers who booked for the first timeslot.
- Finally, repeat step 16-18 to create another chatbot node for the second timeslot.
- Now your chatbot should have a completed structure.
