Create a Global Node
Now you can see your first node in the workspace, how about on your testing chatbot? In this section, we will teach you to create another type of node: Global Node. Global Node allows you to trigger the same node at any point of your conversation flow.
Once added to Channel, Global Node is often used as a "door" to kickstart a conversation. For example, it is used extensively on the "Greetings" button or the "Persistent Menu" buttons of the Web Chat.
Without a Global Node, no one can ever kick-start your conversation tree.

What is your Result?
| Property | Description |
|---|---|
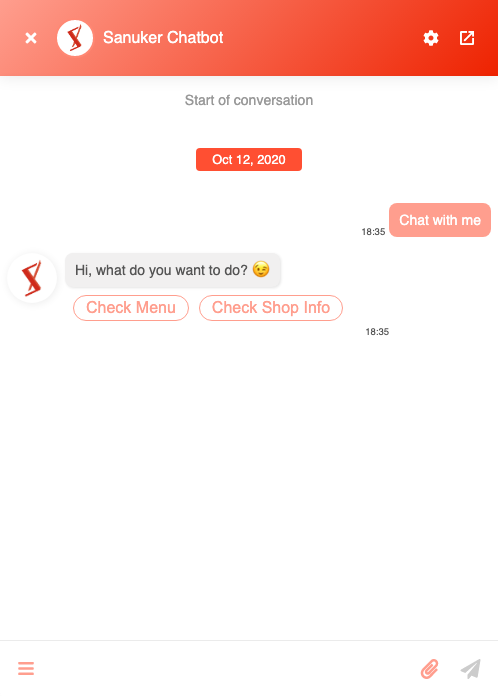
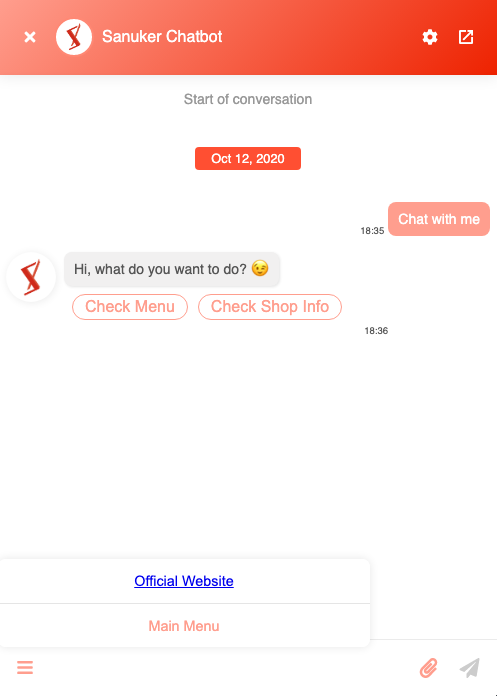
Successful Result | You should also be able to trigger the first node on your testing chatbot in two ways: by clicking the Get Started button or the Main Menu button. |
Getting Hands-on
Enter your Bot Builder and start working on your tree.
Create a Global Node: Main Menu
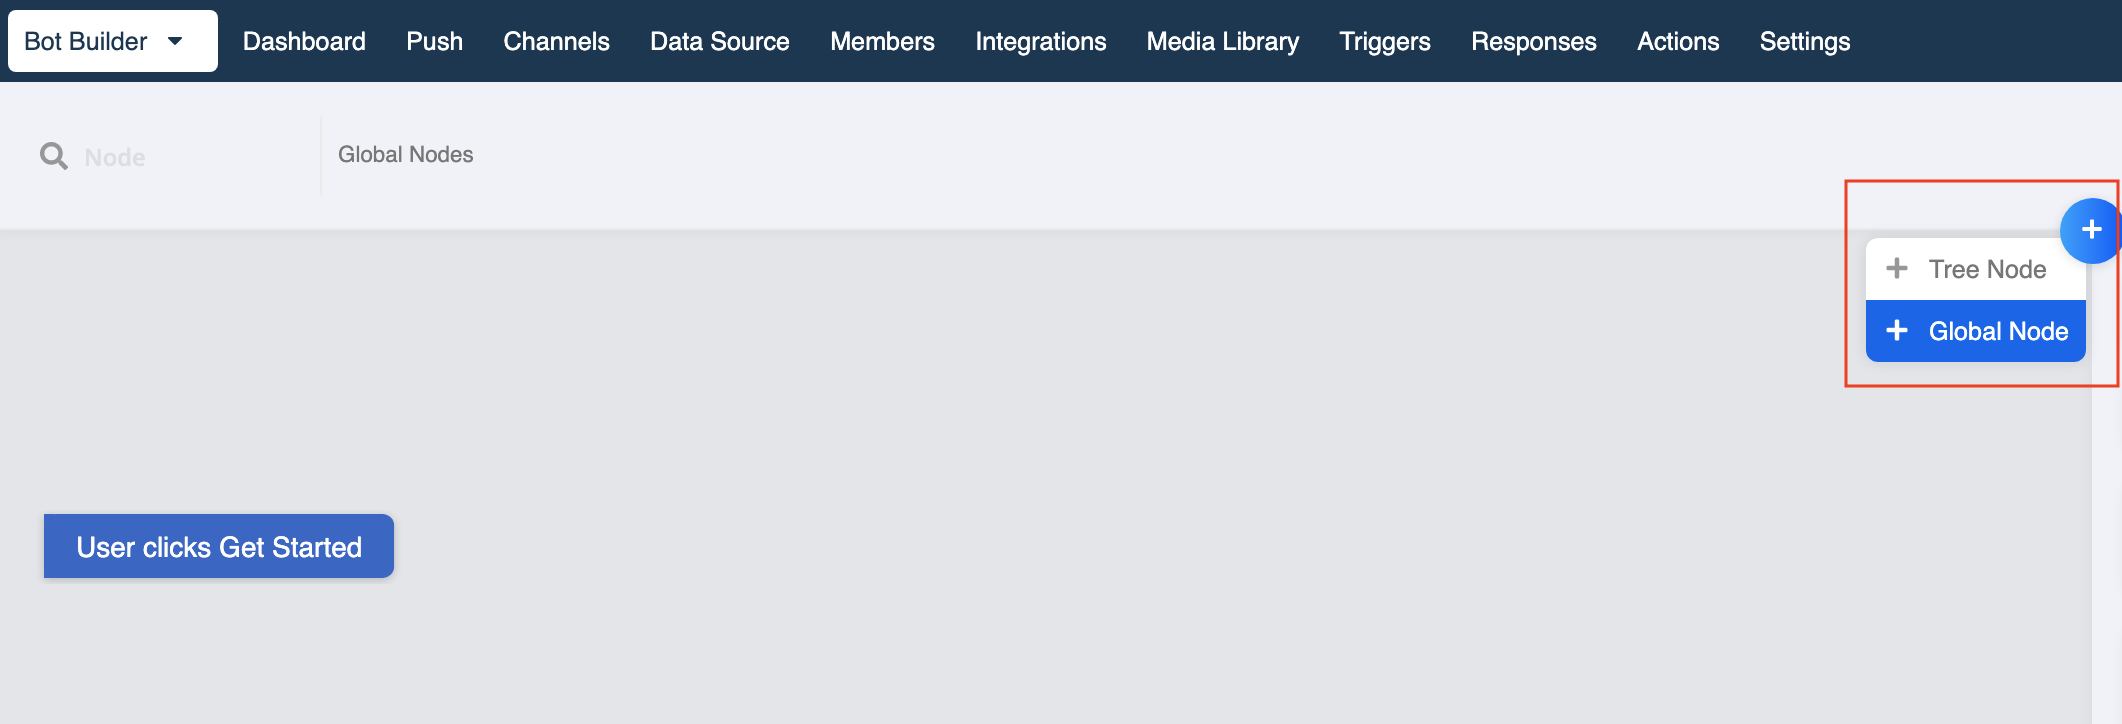
- Select "+" on right top corner of workspace.
- Select "+ Global Node".
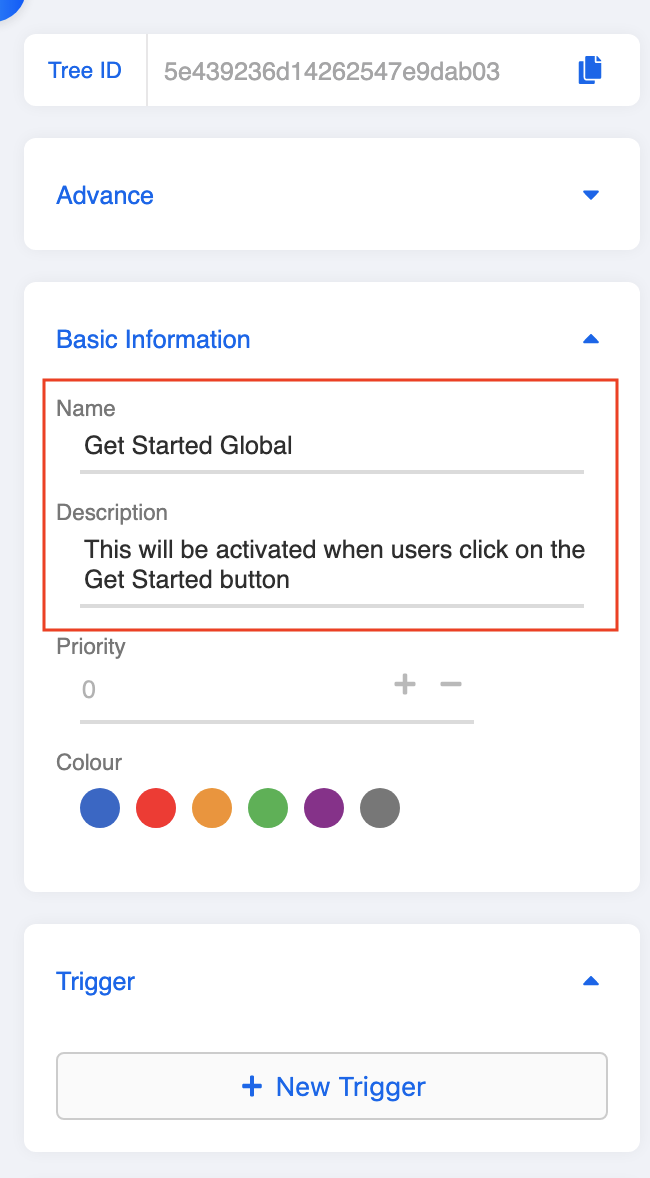
Head to the "Node Inspector" and name your global node.
Usually we would put Global at the end of the global node to identify it from the tree node with the same name. Since we are going to create a persistent menu button Main Menu to trigger our first node, name the global node "Main Menu Global".

Create a Trigger
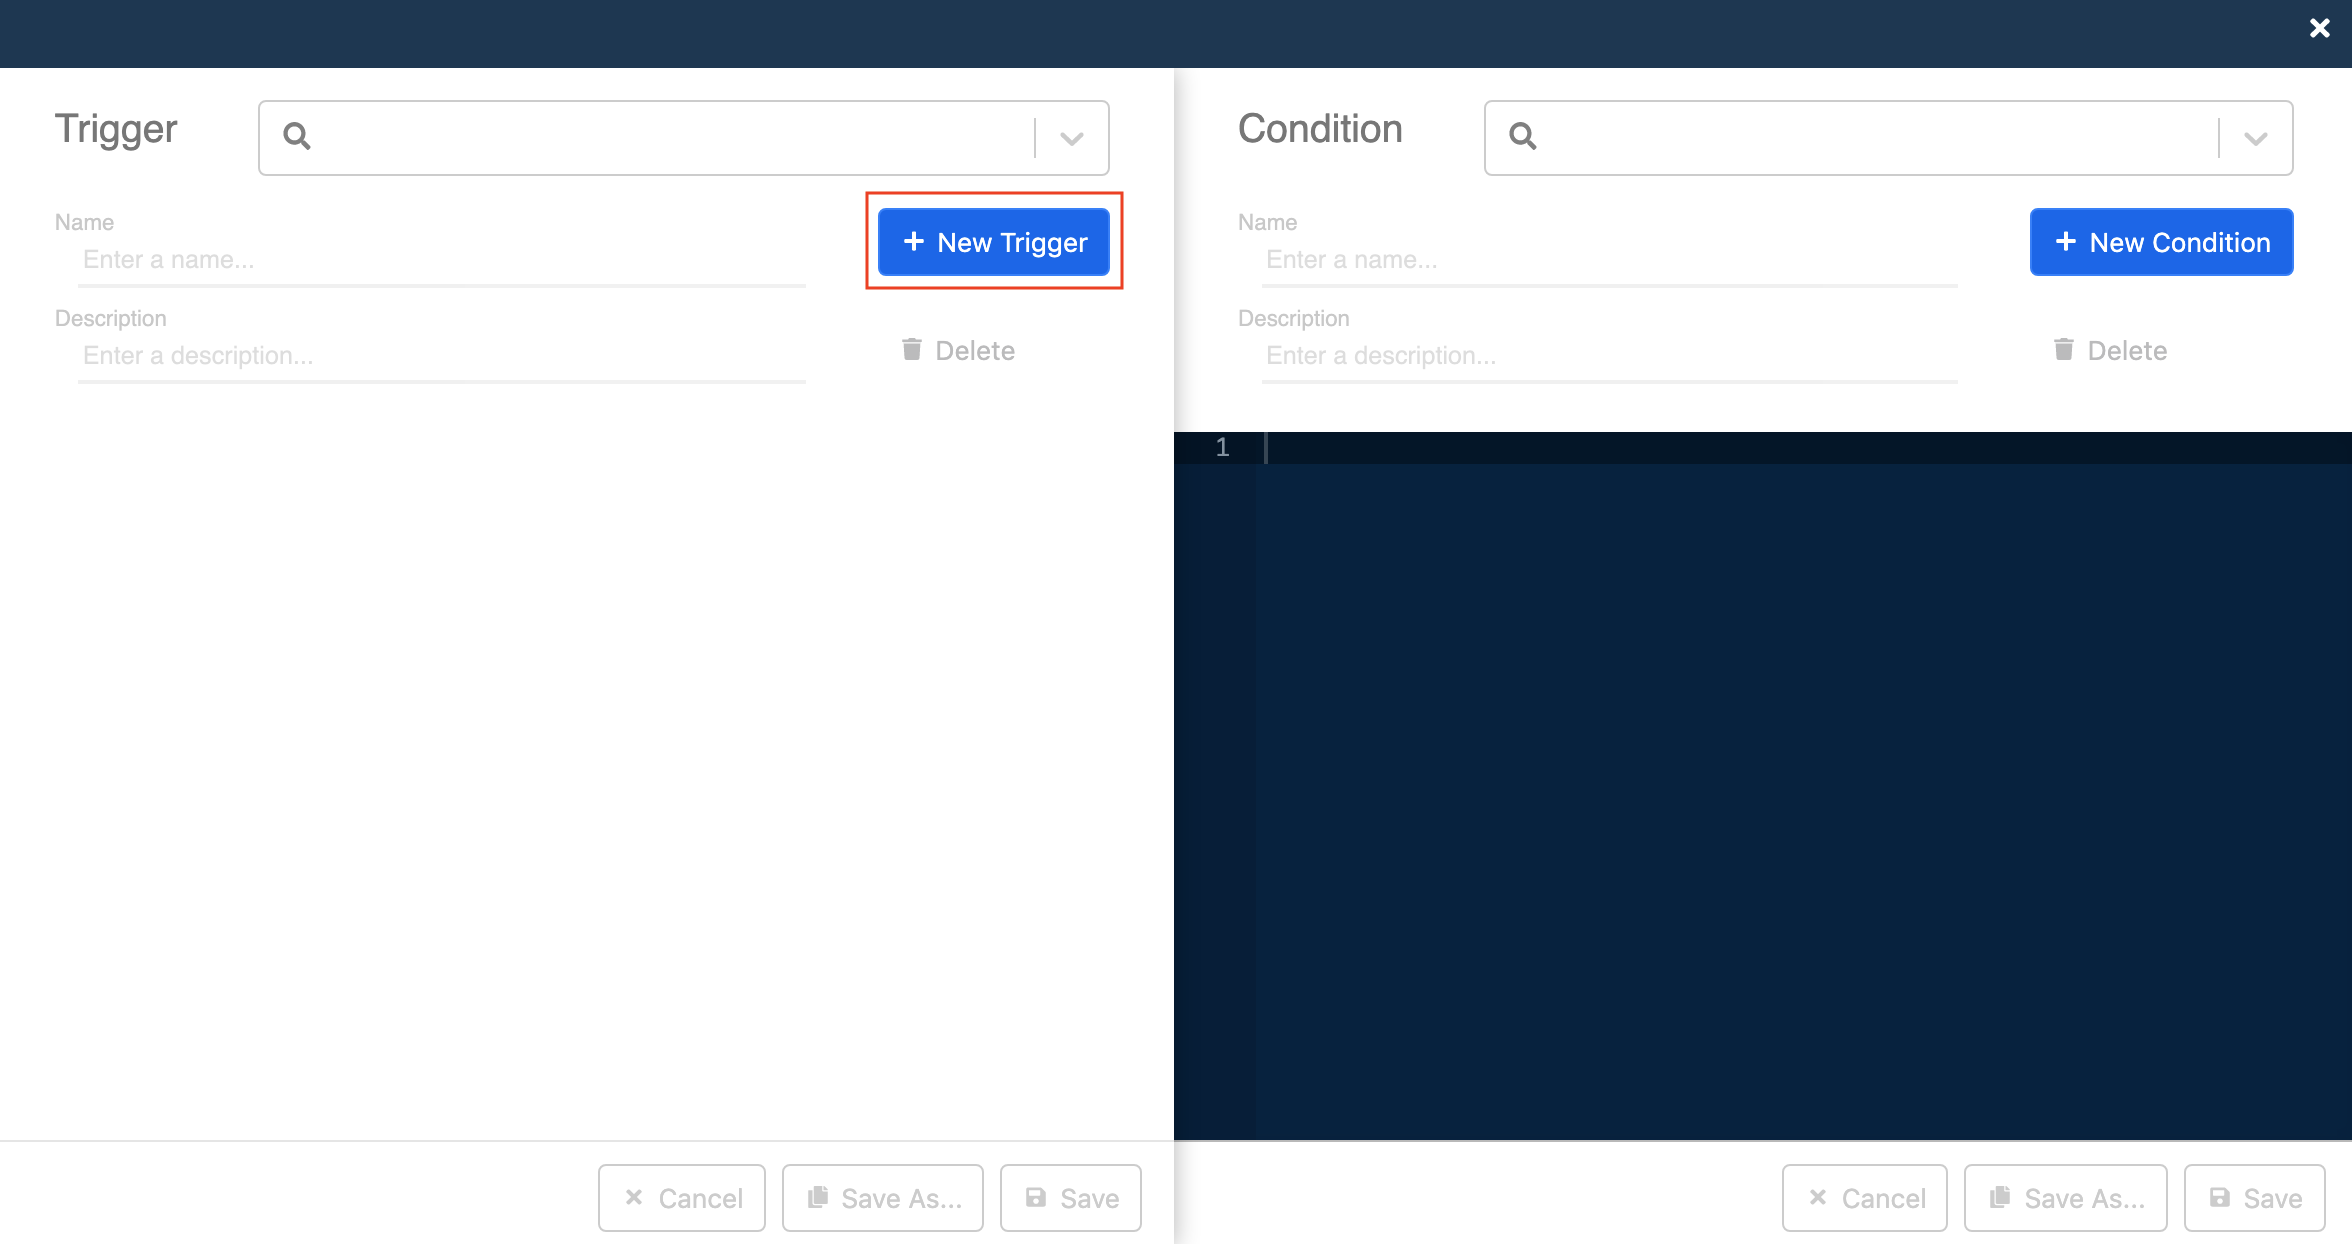
- Scroll down to "Trigger" and click "+ New Trigger".
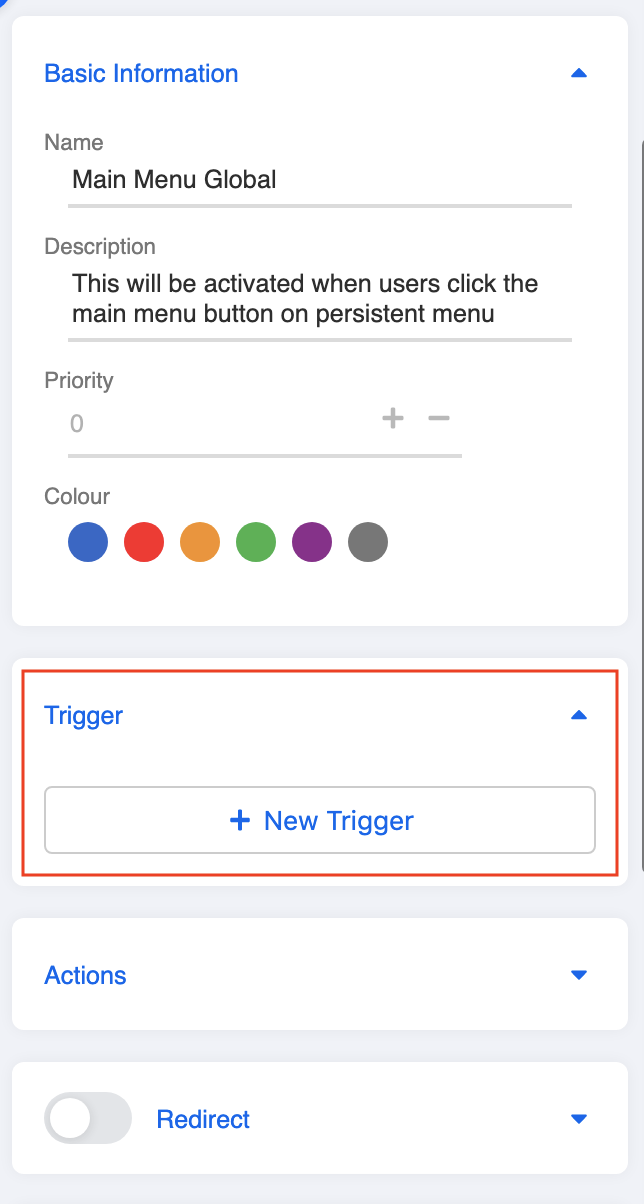
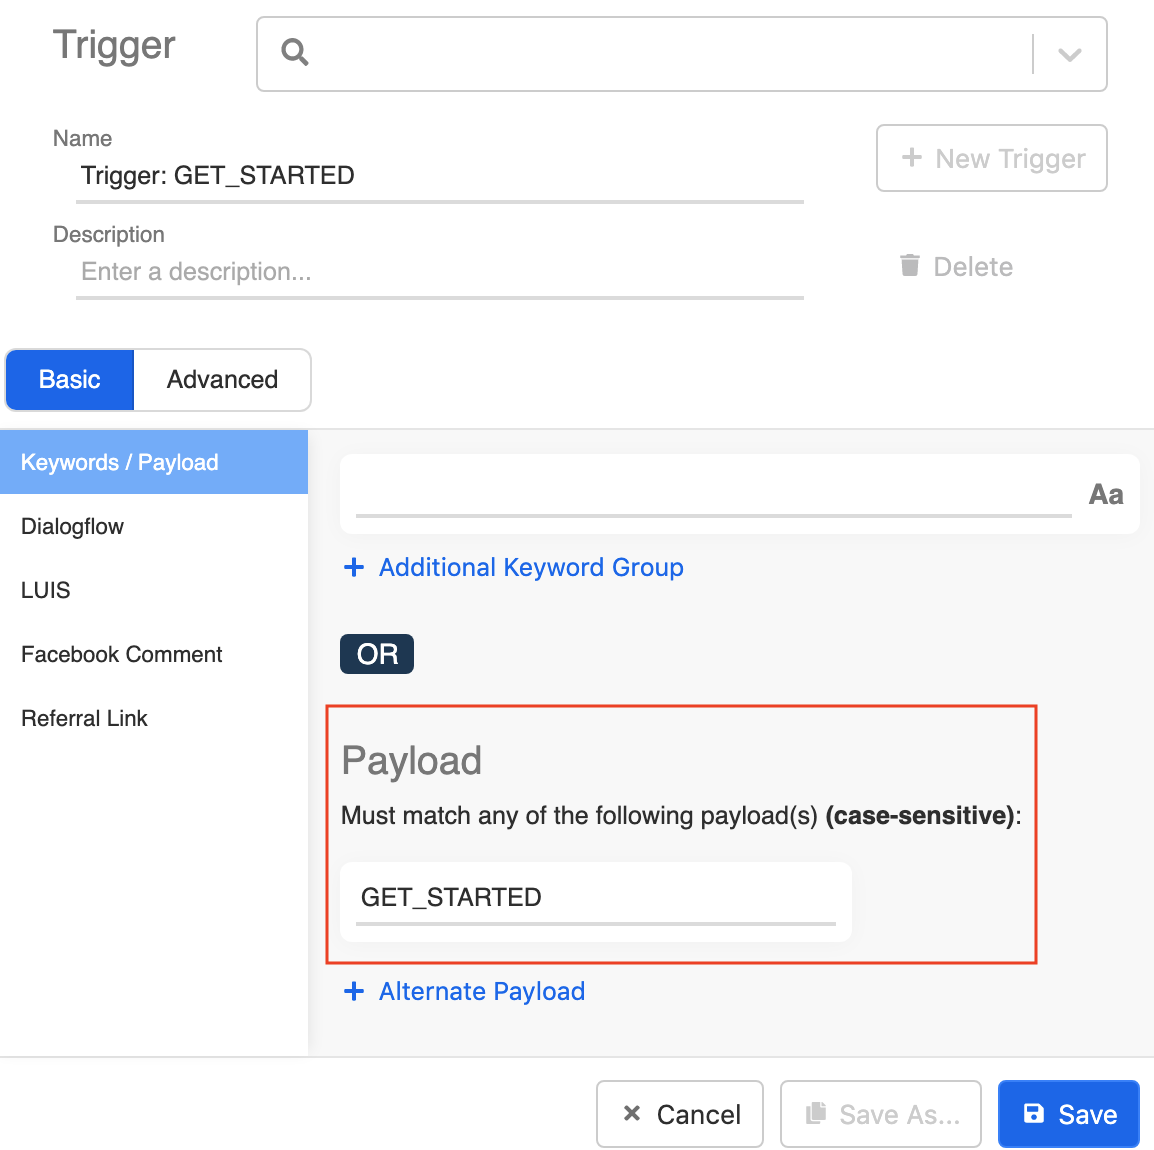
- A new window of Trigger Builder will be opened. Click "+ New Trigger" to create your global trigger.
You should now see the Basic mode. Under "Keywords / Payload", you should create a payload trigger since you want to create a button trigger.
Under Payload, type "MAIN_MENU" as the payload.
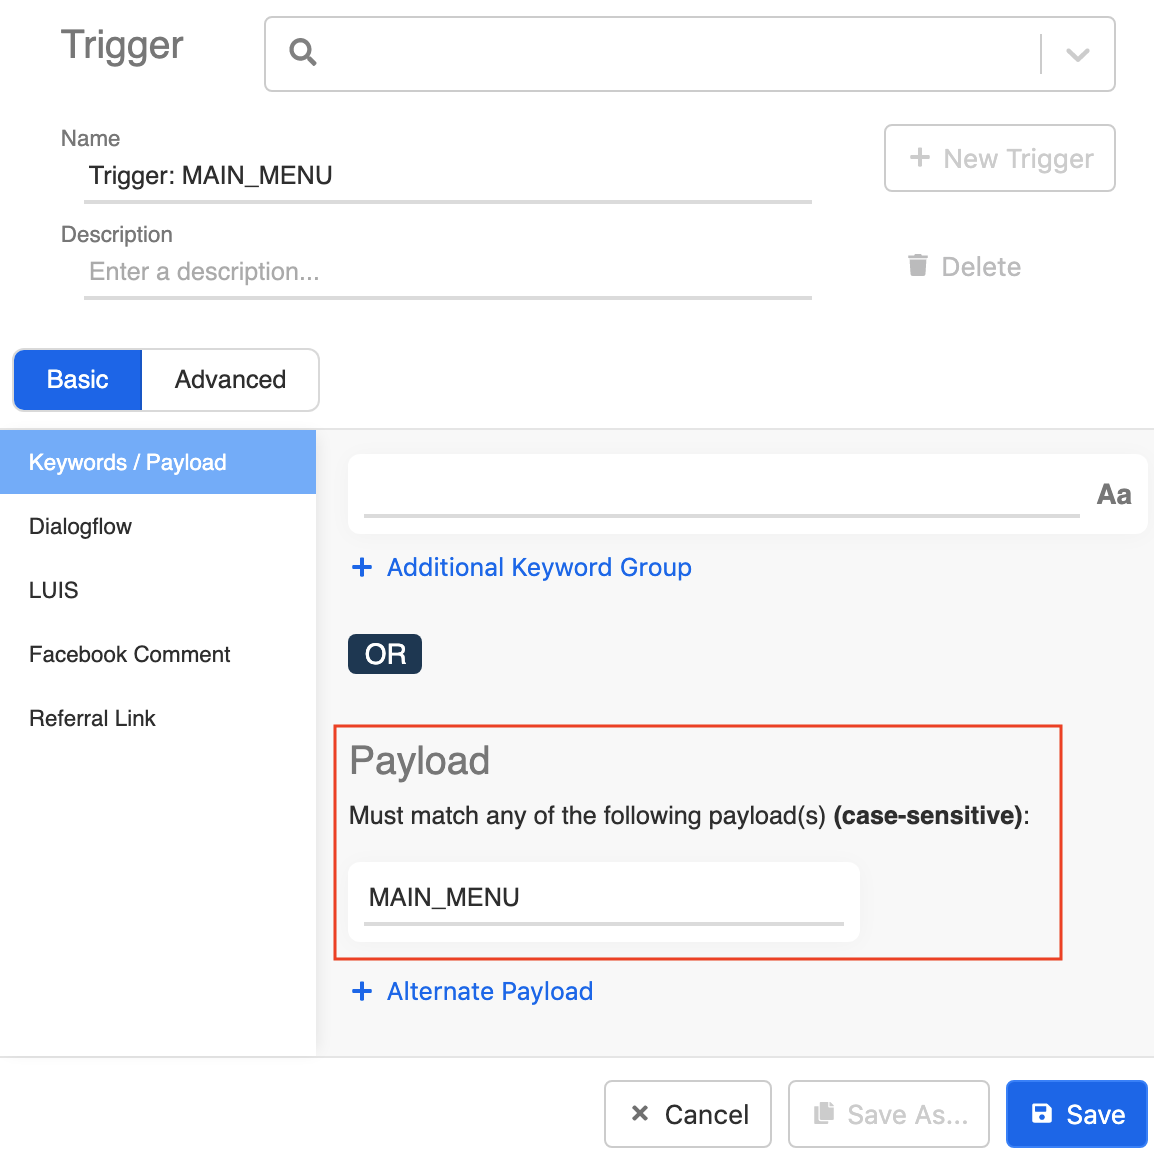
Click "Save".
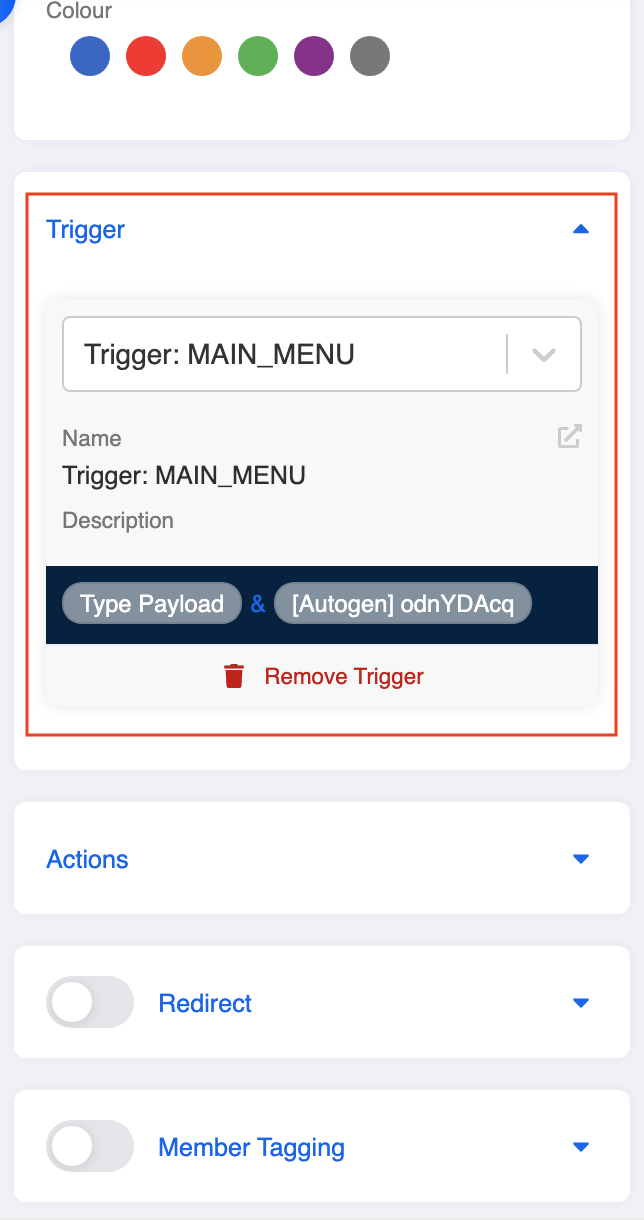
Close the pop-up. Your trigger should be set up now under Trigger.
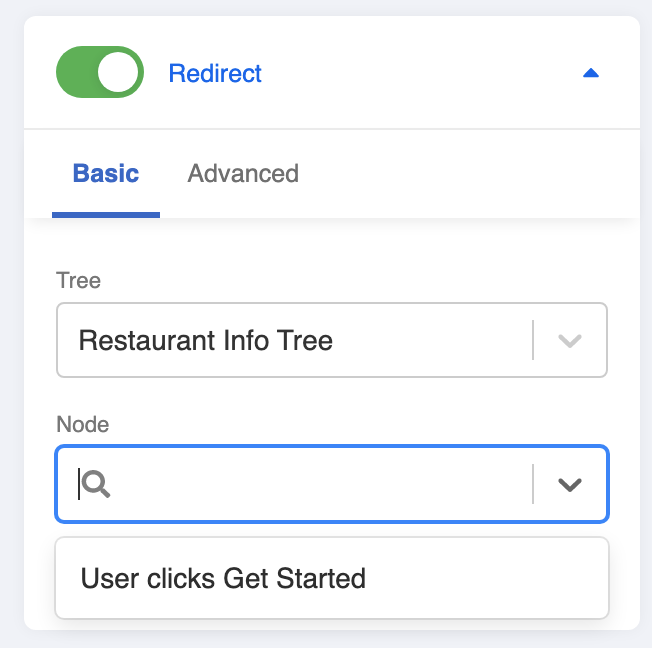
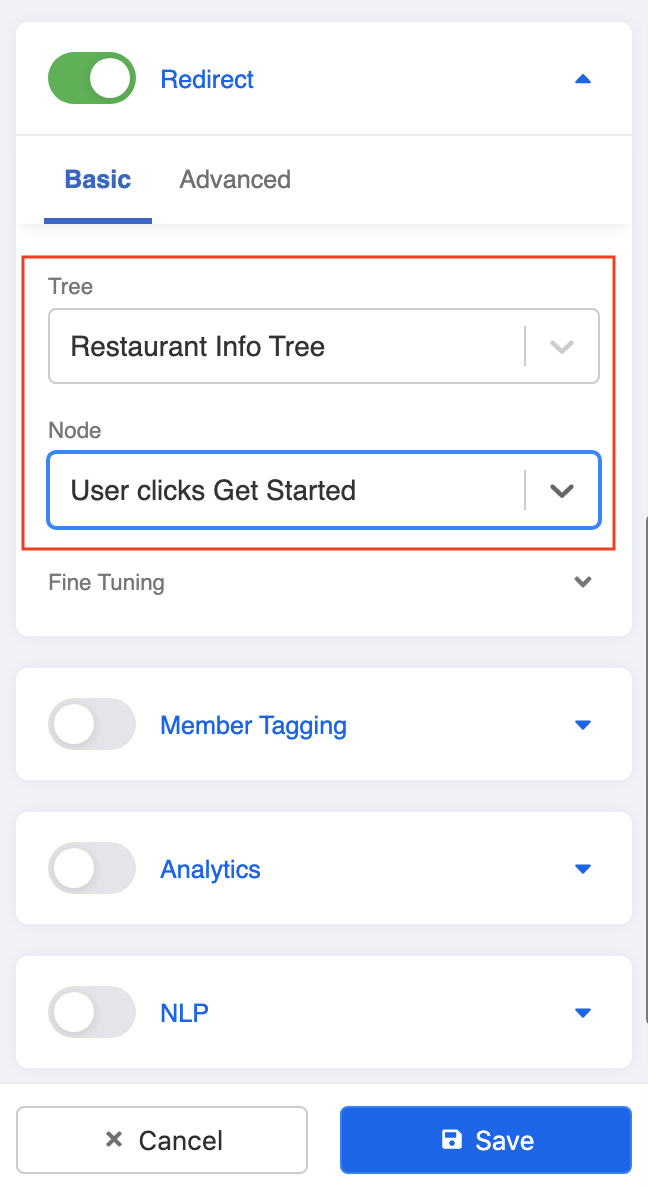
Toggle on Redirect
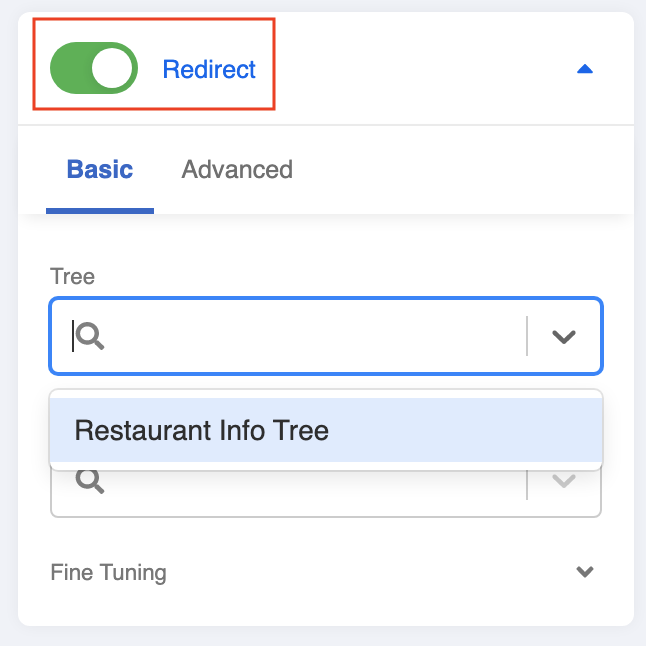
Scroll down to "Redirect" and toggle it on (it will turn green).
Select the tree and node you want to redirect your users to whenever they click on this global node and usually it's the tree and you are editing right now. So for tree, select "Restaurant Info Tree"; for node, select your first node "User clicks Get Started".
tip
Sometimes we could also redirect users from one tree to another tree. It is applicable when you have multiple trees in your channel.
- Click "Save" at the bottom to save the node.

Create another Global Node: Get Started
- Repeat the same steps from 1 to 12 to create another global node: "Get Started Global".

Add Global Node in Channel
Now, head back to your testing channel created at Step 1.1.
Click "Edit" to enter into the testing channel.
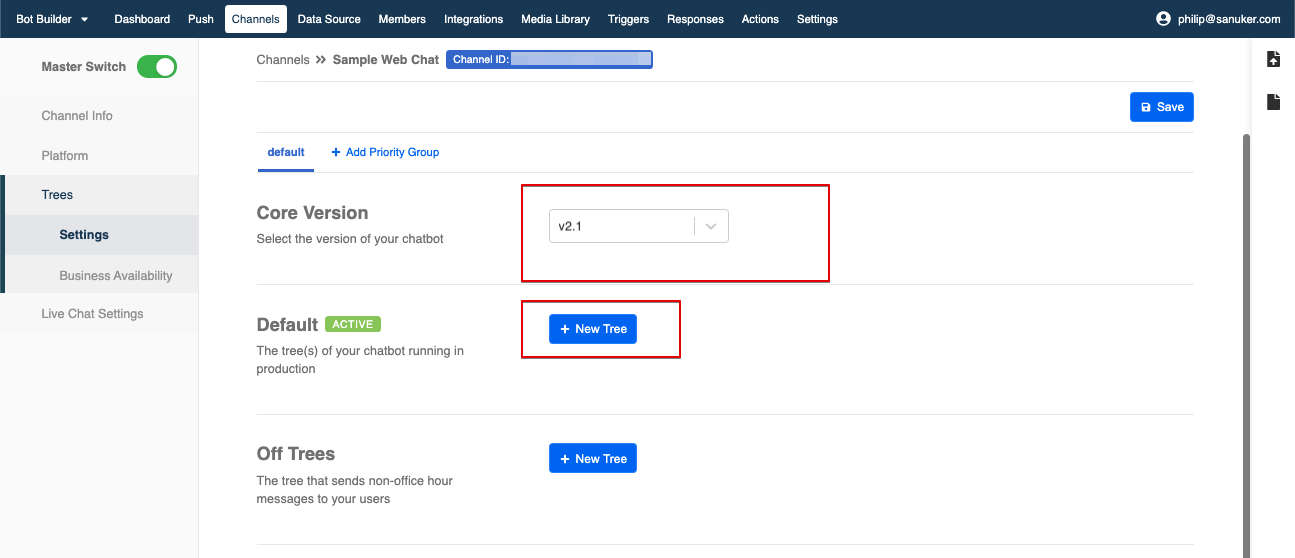
On the left tab, click "Trees".
Change the the "Core Version" to "2.1". Then, under Default, click "+ New Tree" to add your created trees in this channel.
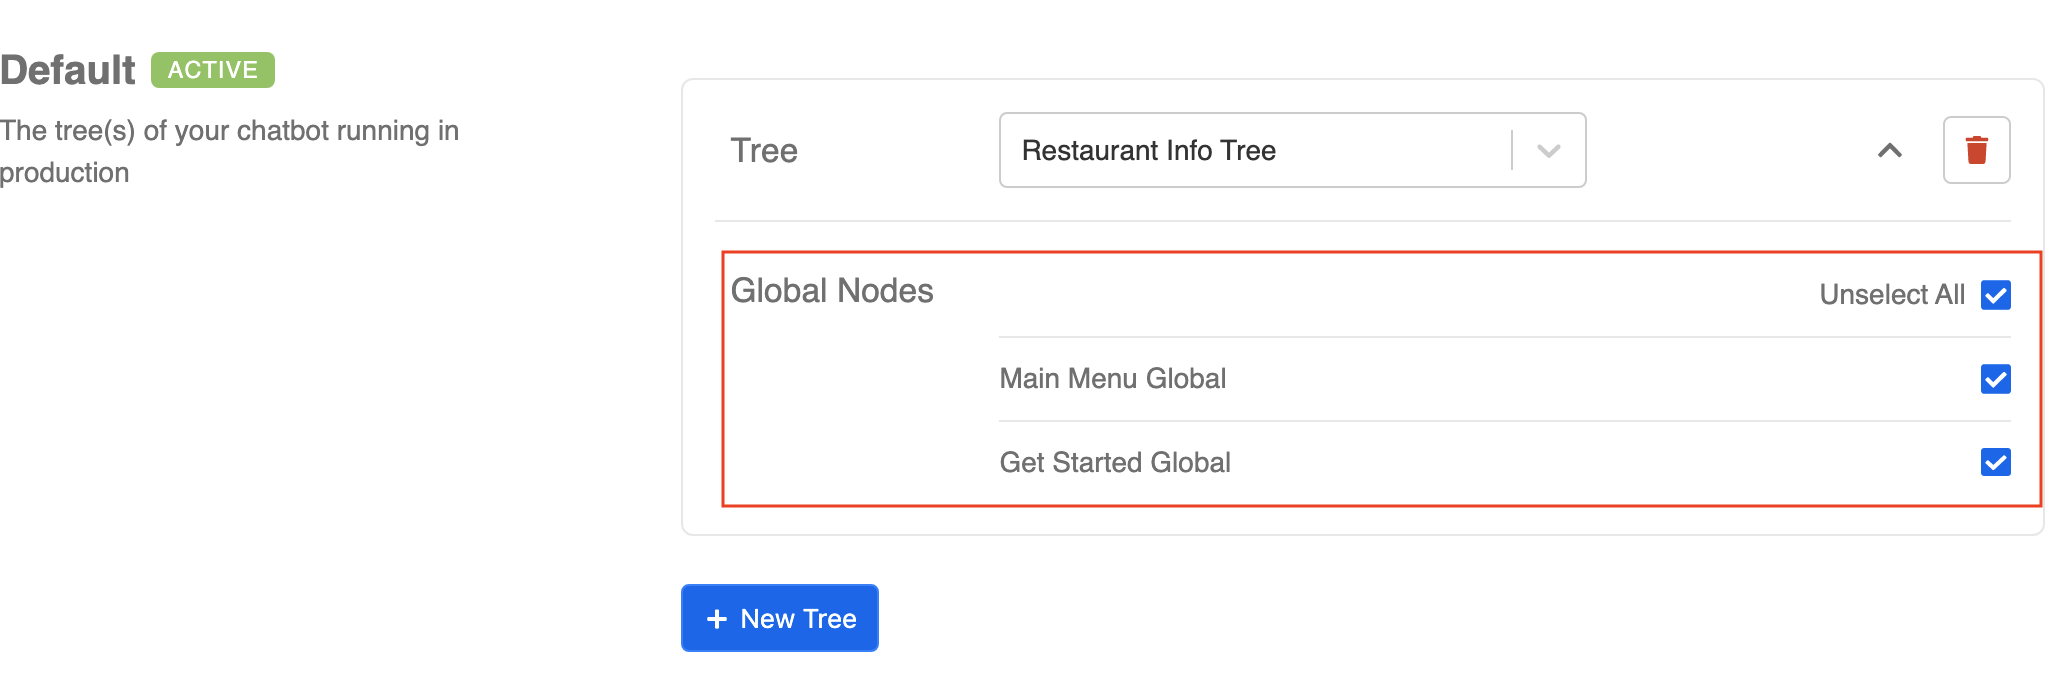
- A new dropdown of tree selector will appear. It's time to add back your first tree and global node here. Select Restaurant Info Tree".

After you have selected the tree, a list of global nodes under this tree will appear. You should tick all global nodes that you want to allow user to activate (especially across trees). So you can just click "Select All".
Click "Save" to save your settings.
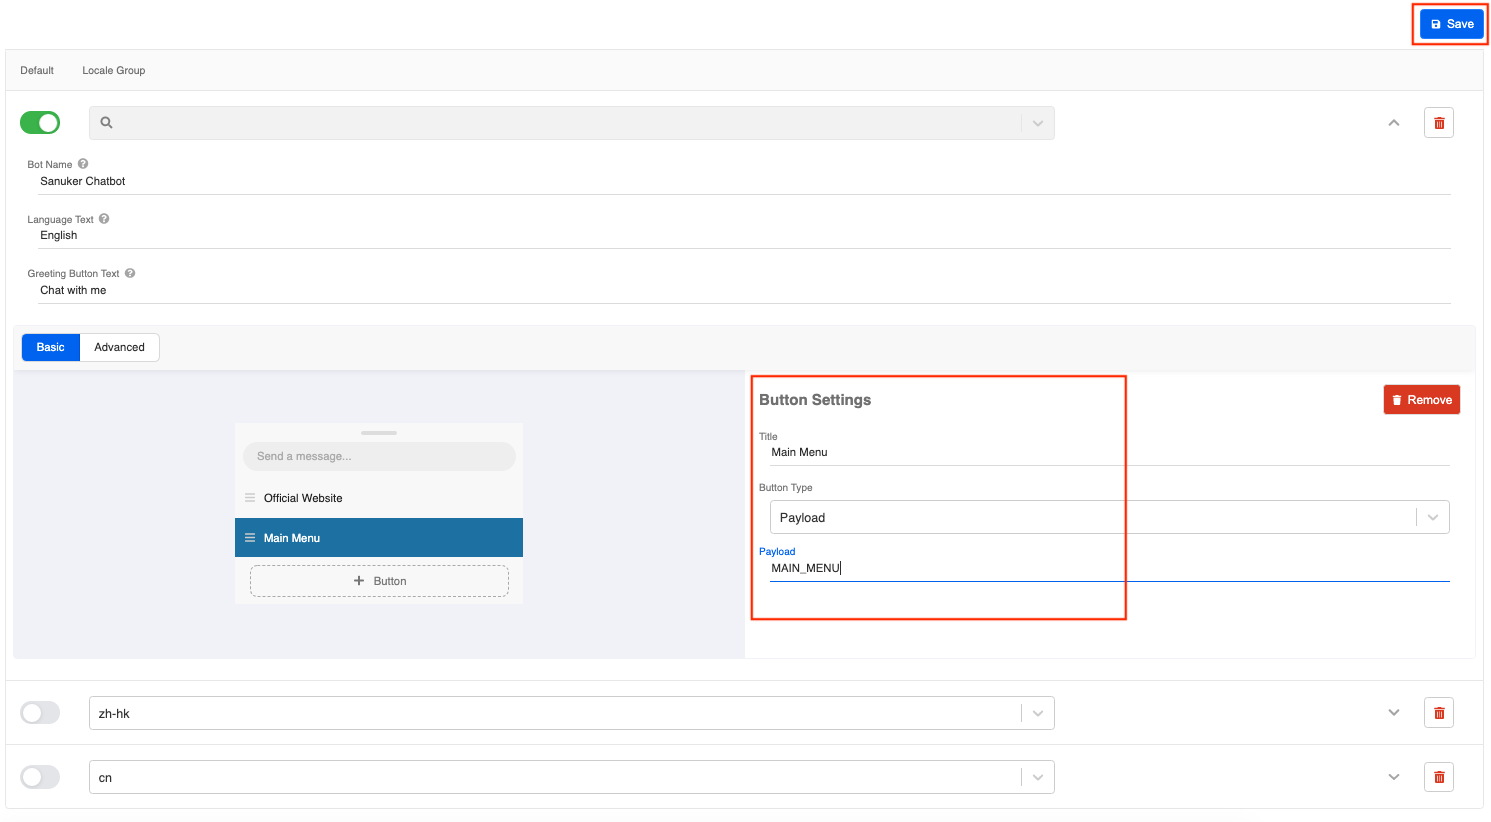
Set Persistent Menu
Now you have to add the menu button Main Menu on the persistent menu. So head back to "Platform" on the left tab.
Scroll down to Persistent Menu and click "+ Button".
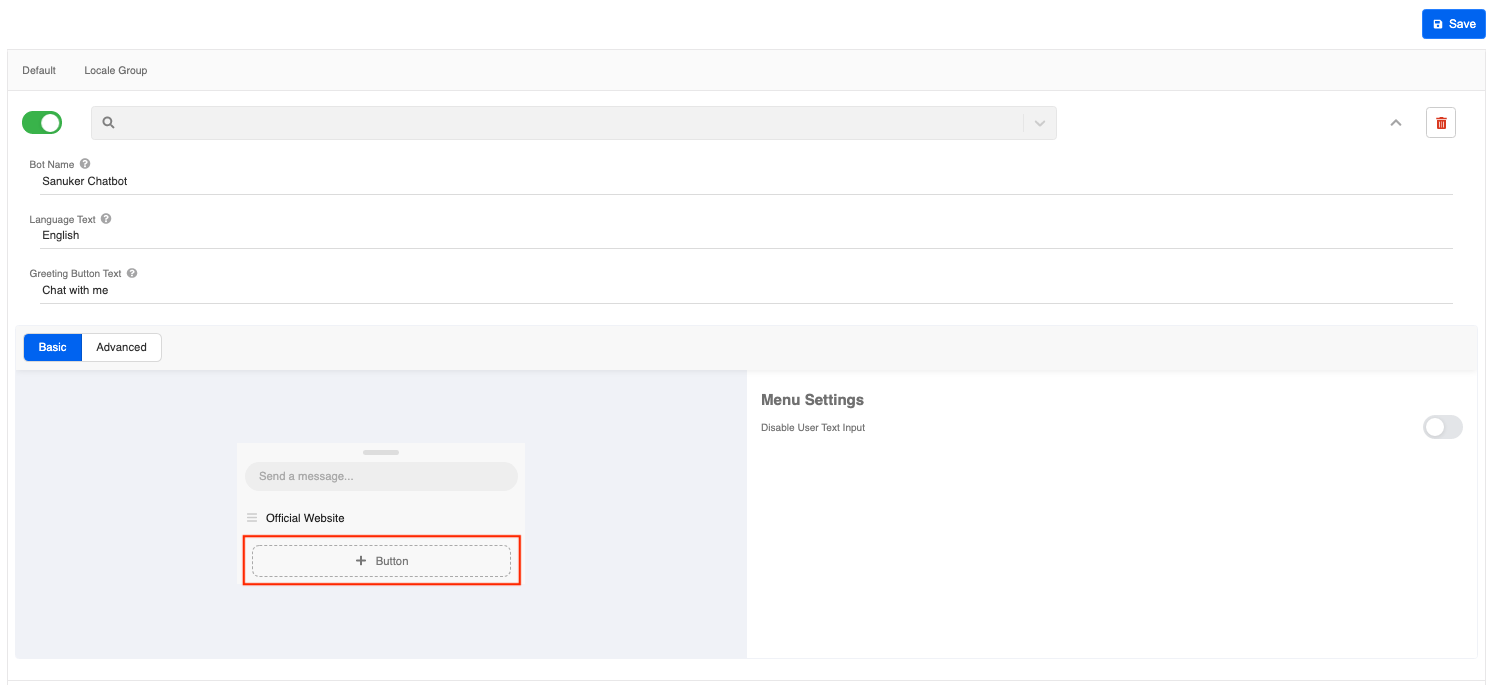
Fill in the details of the button. Under Title, fill in Main Menu. Choose "Payload" as your Button Type. Fill in "MAIN_MENU" as the Payload.
Click "Save" to save your menu settings.
- You can now check the messages on your testing chatbot. Check if you can get a successful result 🎉
tip
Sometimes the persistent menu will be cached and it needs a little time to refresh. One trick to refresh conversation is to delete the cookies on the website and you should be able to see the changes immediately.