Build your First Chatbot
In WOZTELL, building a chatbot is much easier than you think!
You don't need any prior chatbot knowledge or experience. With the Detailed Instructions and Introduction to Basic Concepts, our step-by-step guide will lead you on a journey to explore, understand and create you first chatbot in WOZTELL.
This chatbot will greet you at the start. Then, ask you a question and let you choose between two answers. Finally, your choice will be saved to the database.
How should your Chatbot start a conversation?
We say "Hi" to the people we have met, and we can do the same with our chatbot. When you say "Hi" to your chatbot, you want your chatbot to greet you too!
STEP 1 : Sign up/Log in WOZTELL
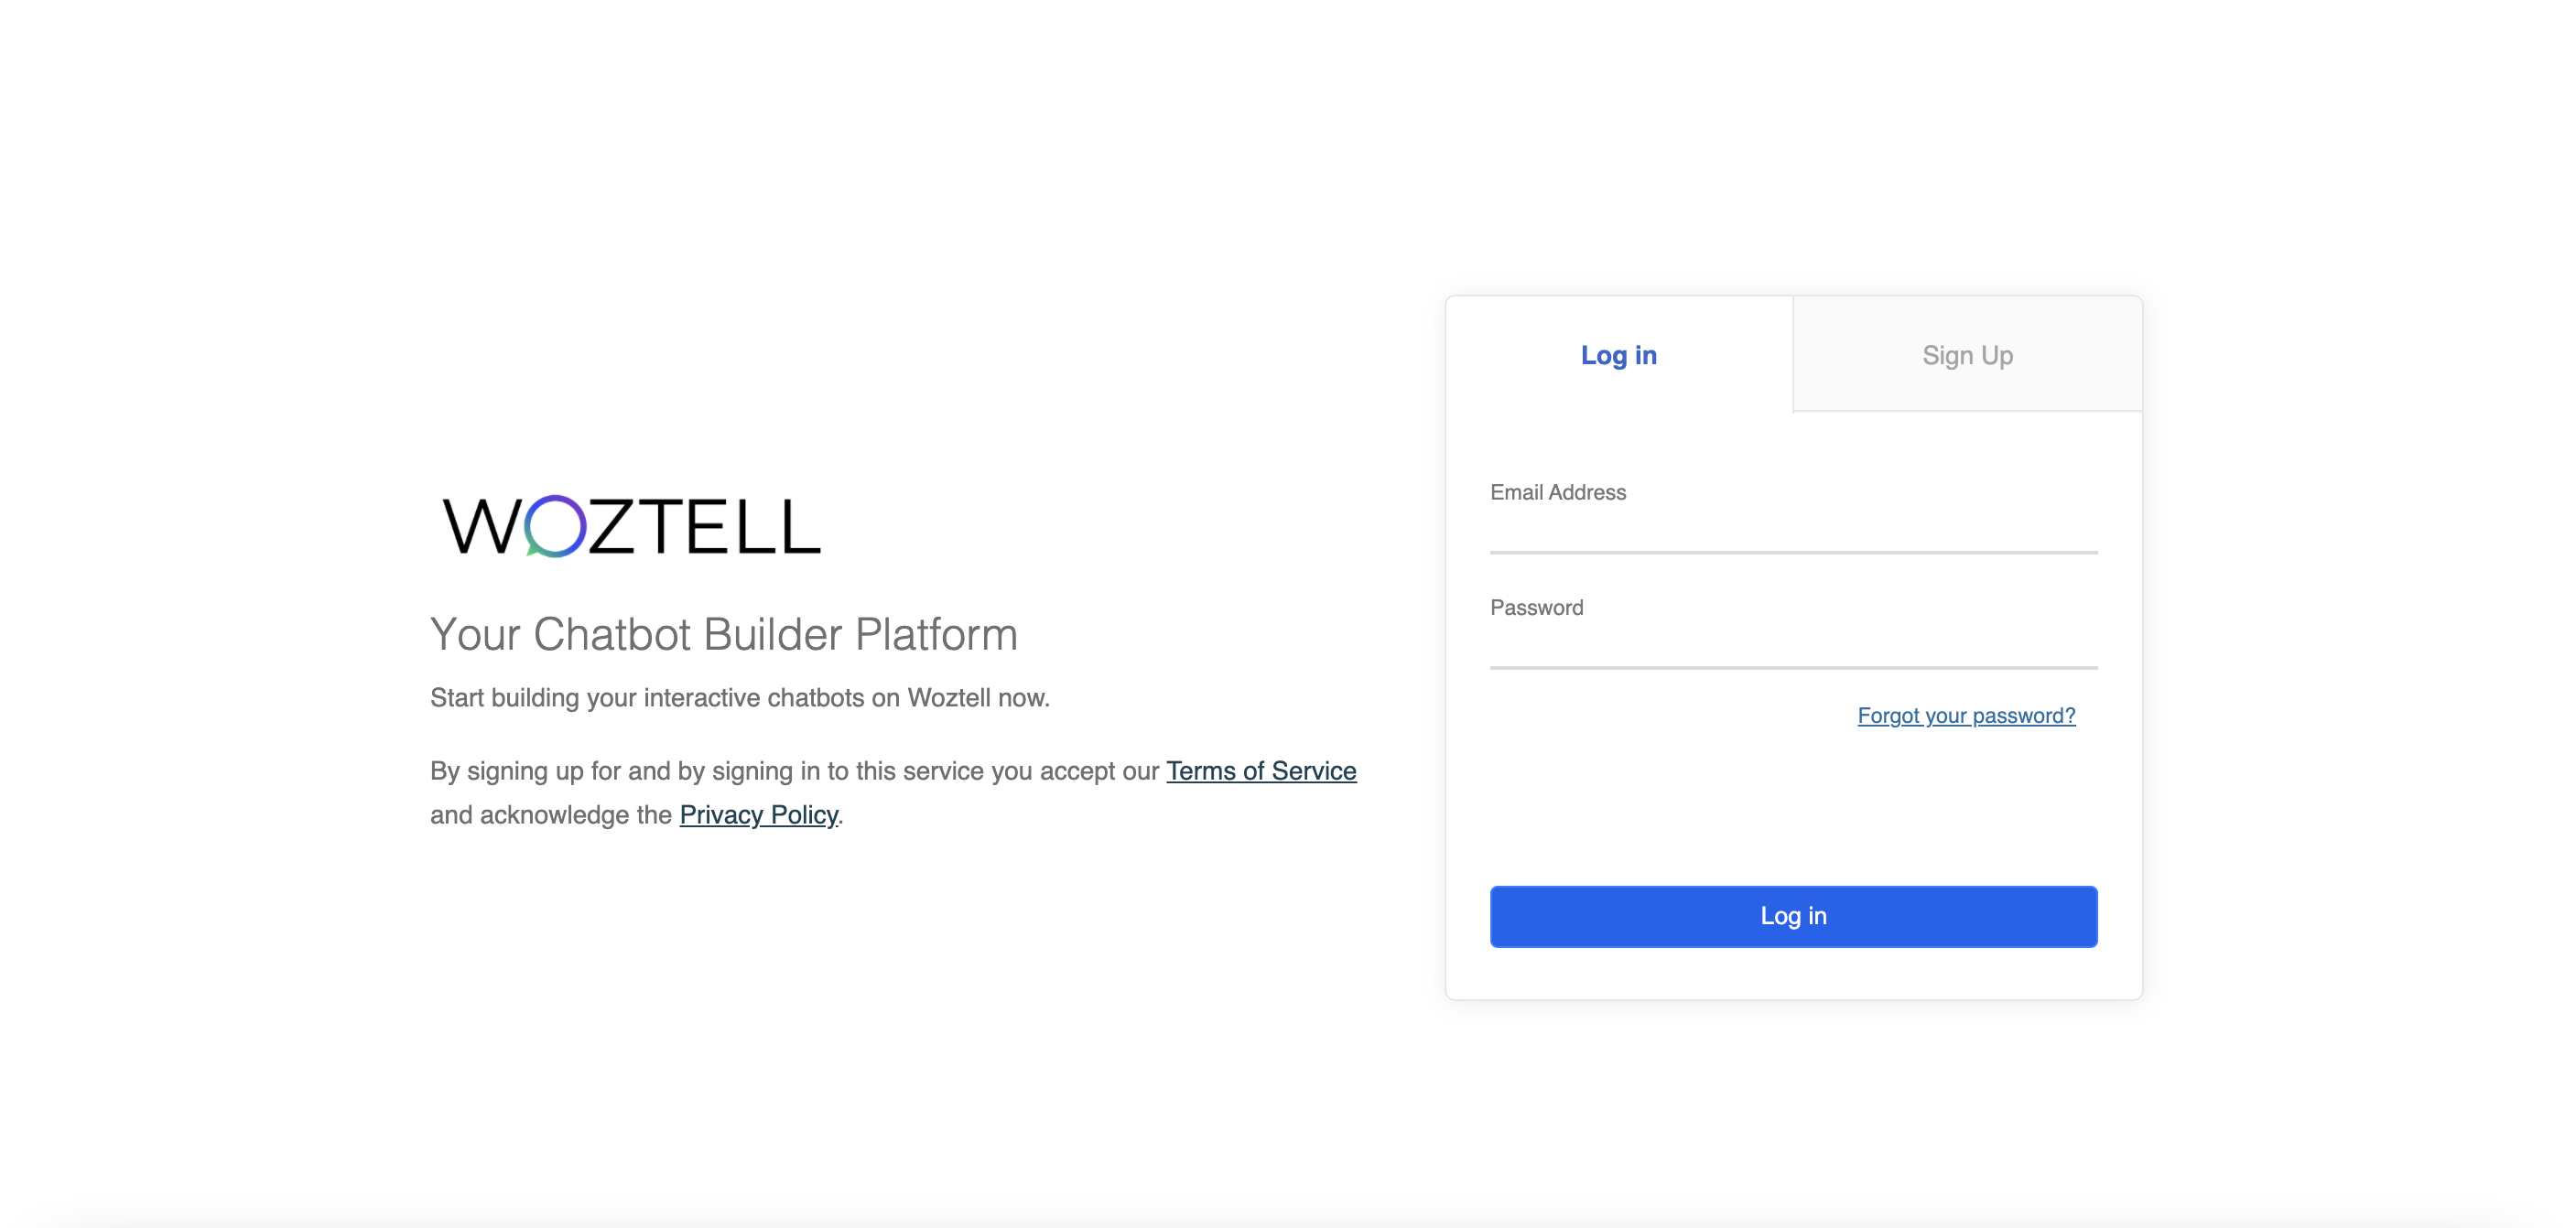
- First, go to https://platform.woztell.com/login and register for a free trial account. If you have already created a WOZTELL account, log in and we are ready to go!
STEP 2 : Build the First Node
Create the First Tree
What is a Tree?
A chatbot is based on a Conversation Tree, which simulates a hierarchical tree structure. With nodes and branches, a tree stands for a complete conversation flow. Therefore, creating a tree is always the first step to build a chatbot.
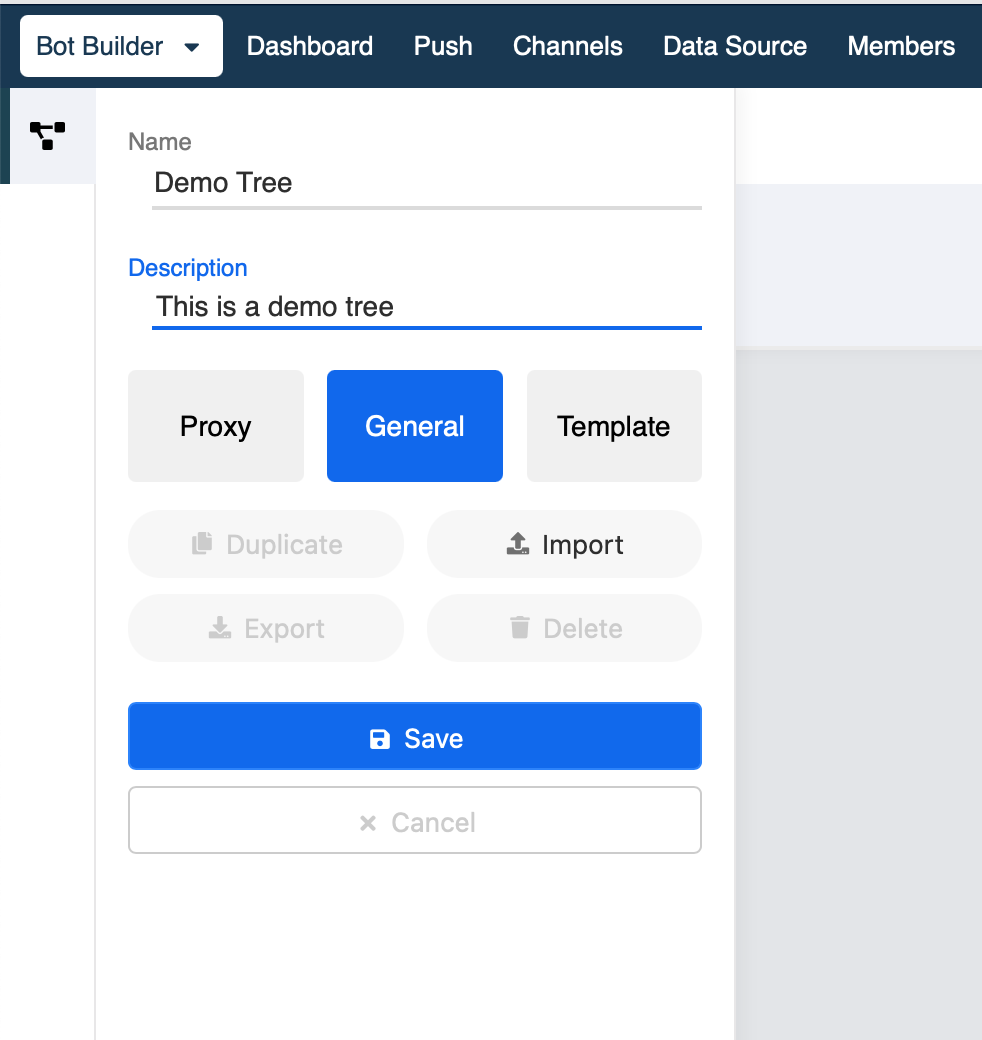
- To create your first tree. Go to "Bot Builder" and click on "+ Create Tree".

- In the Tree Manager, fill in the Name and Description for your first tree. Click "Save".
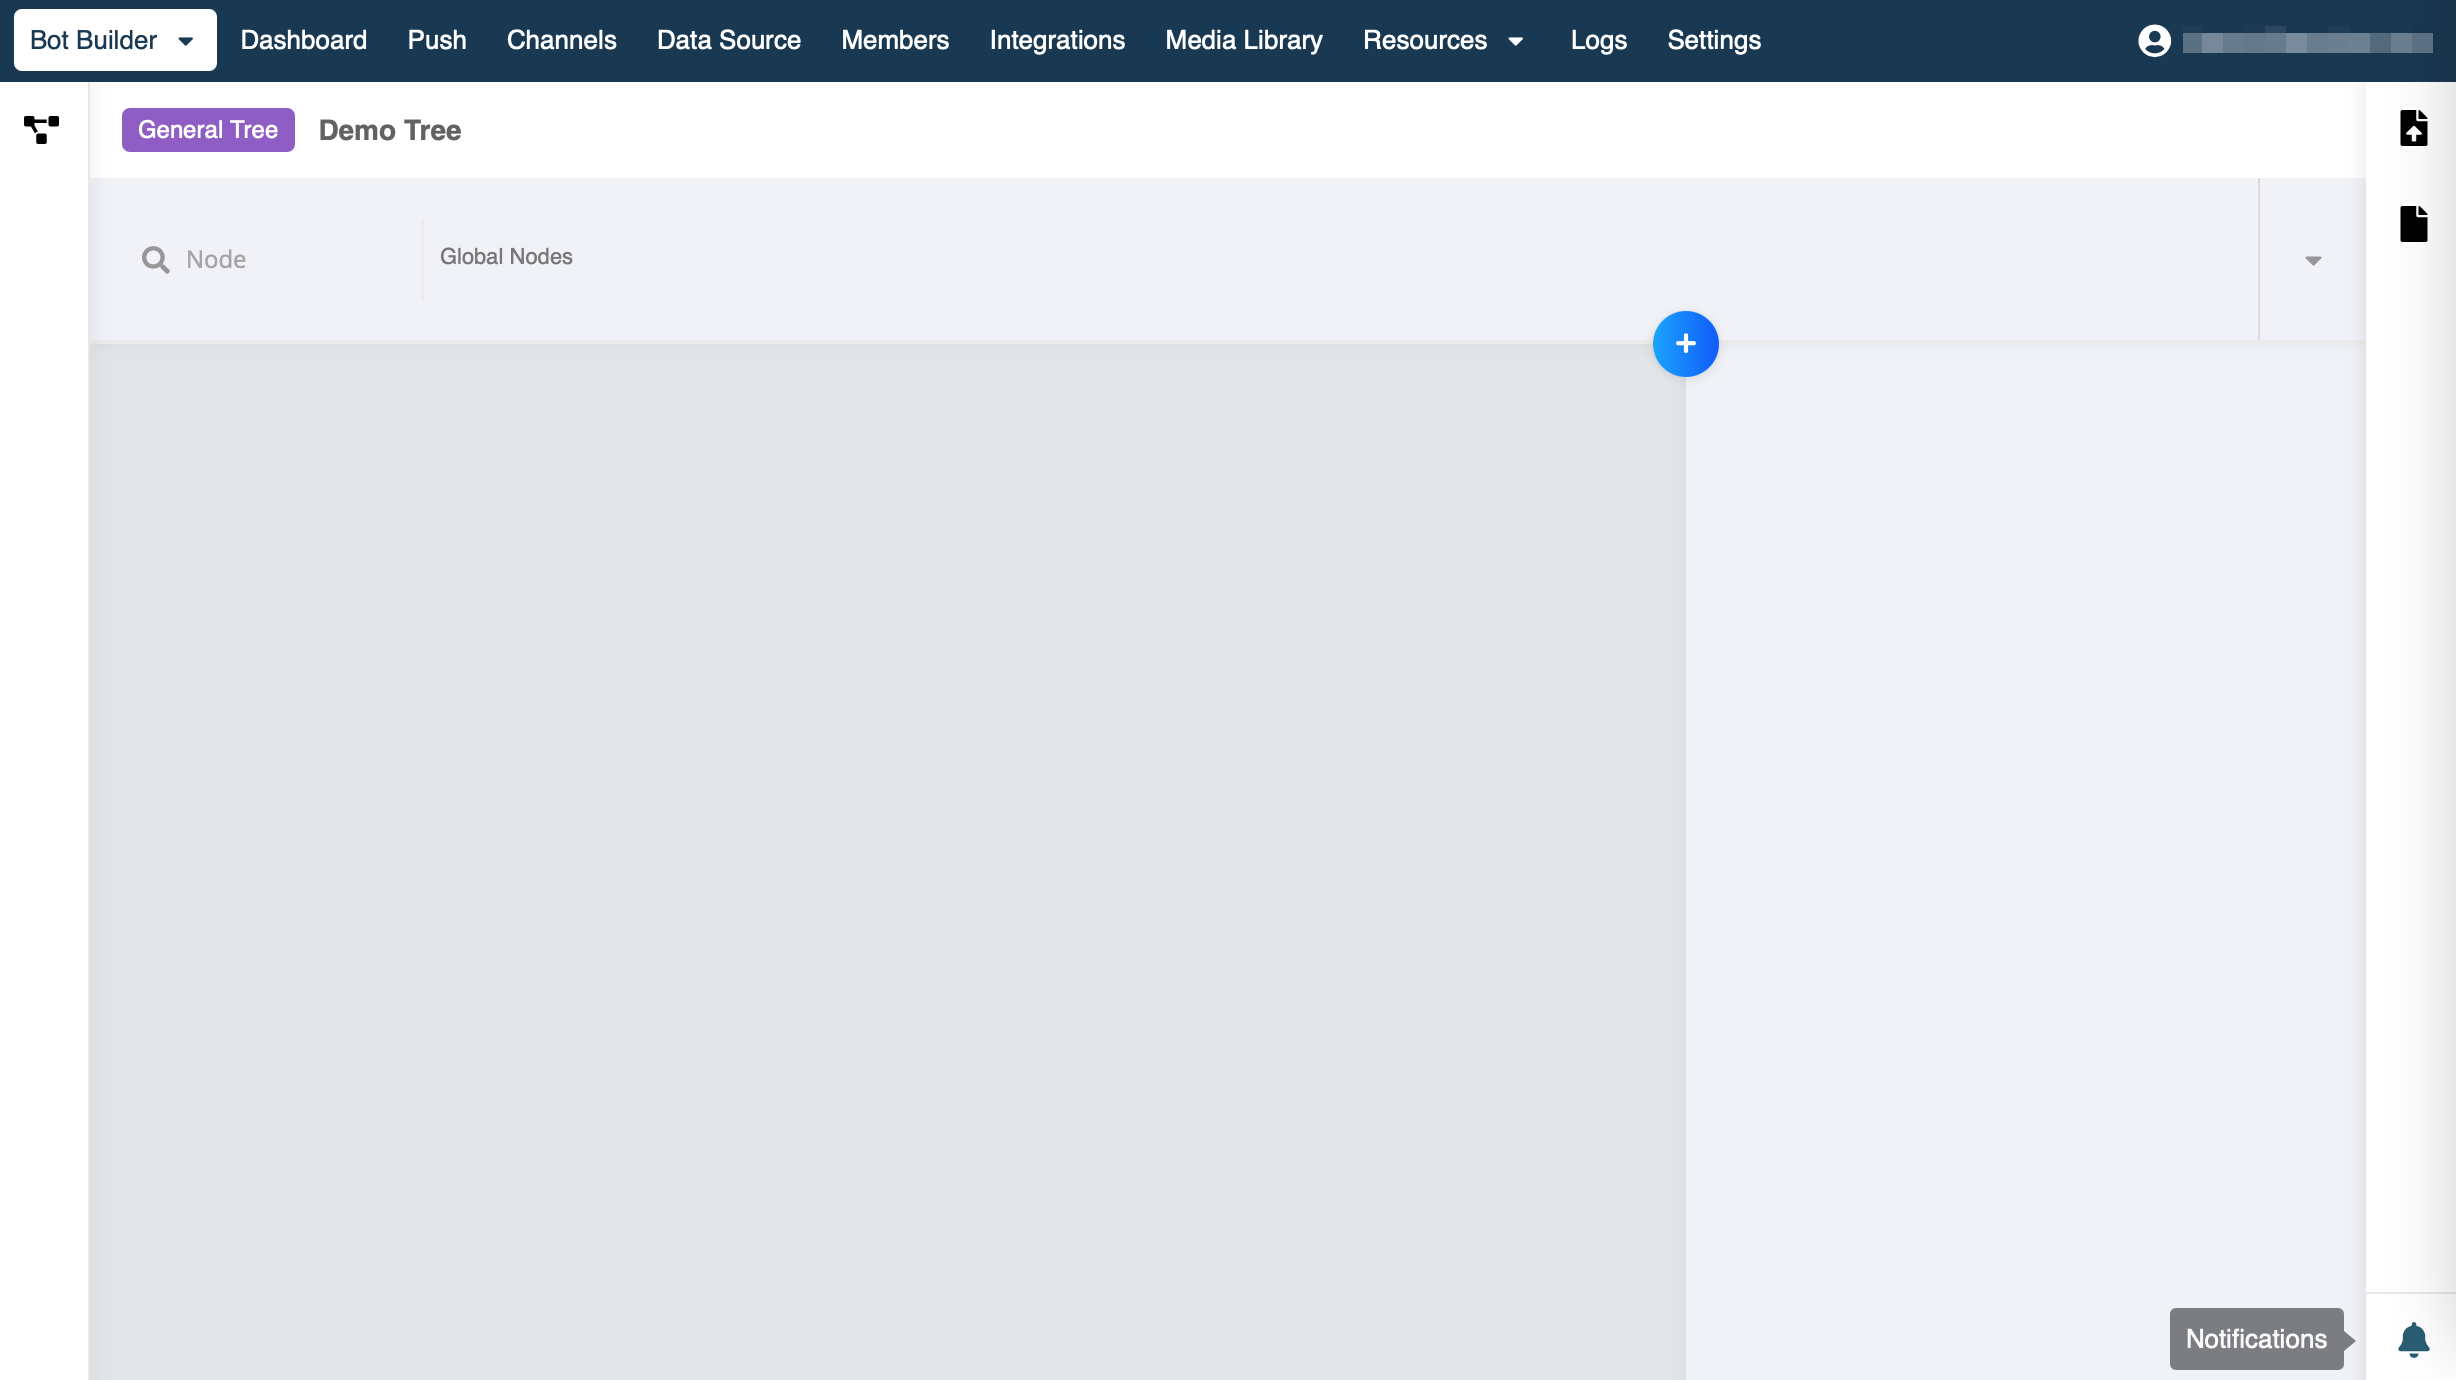
- Now we have entered the Workspace. This is where you will construct your tree and complete a conversation flow.
Build the First Node
What is a Node?
A chatbot is based on a tree, while a tree is basically formed by a set of nodes. A Node is a message response that can be triggered by a designated path and trigger.
Click here to learn more about node.
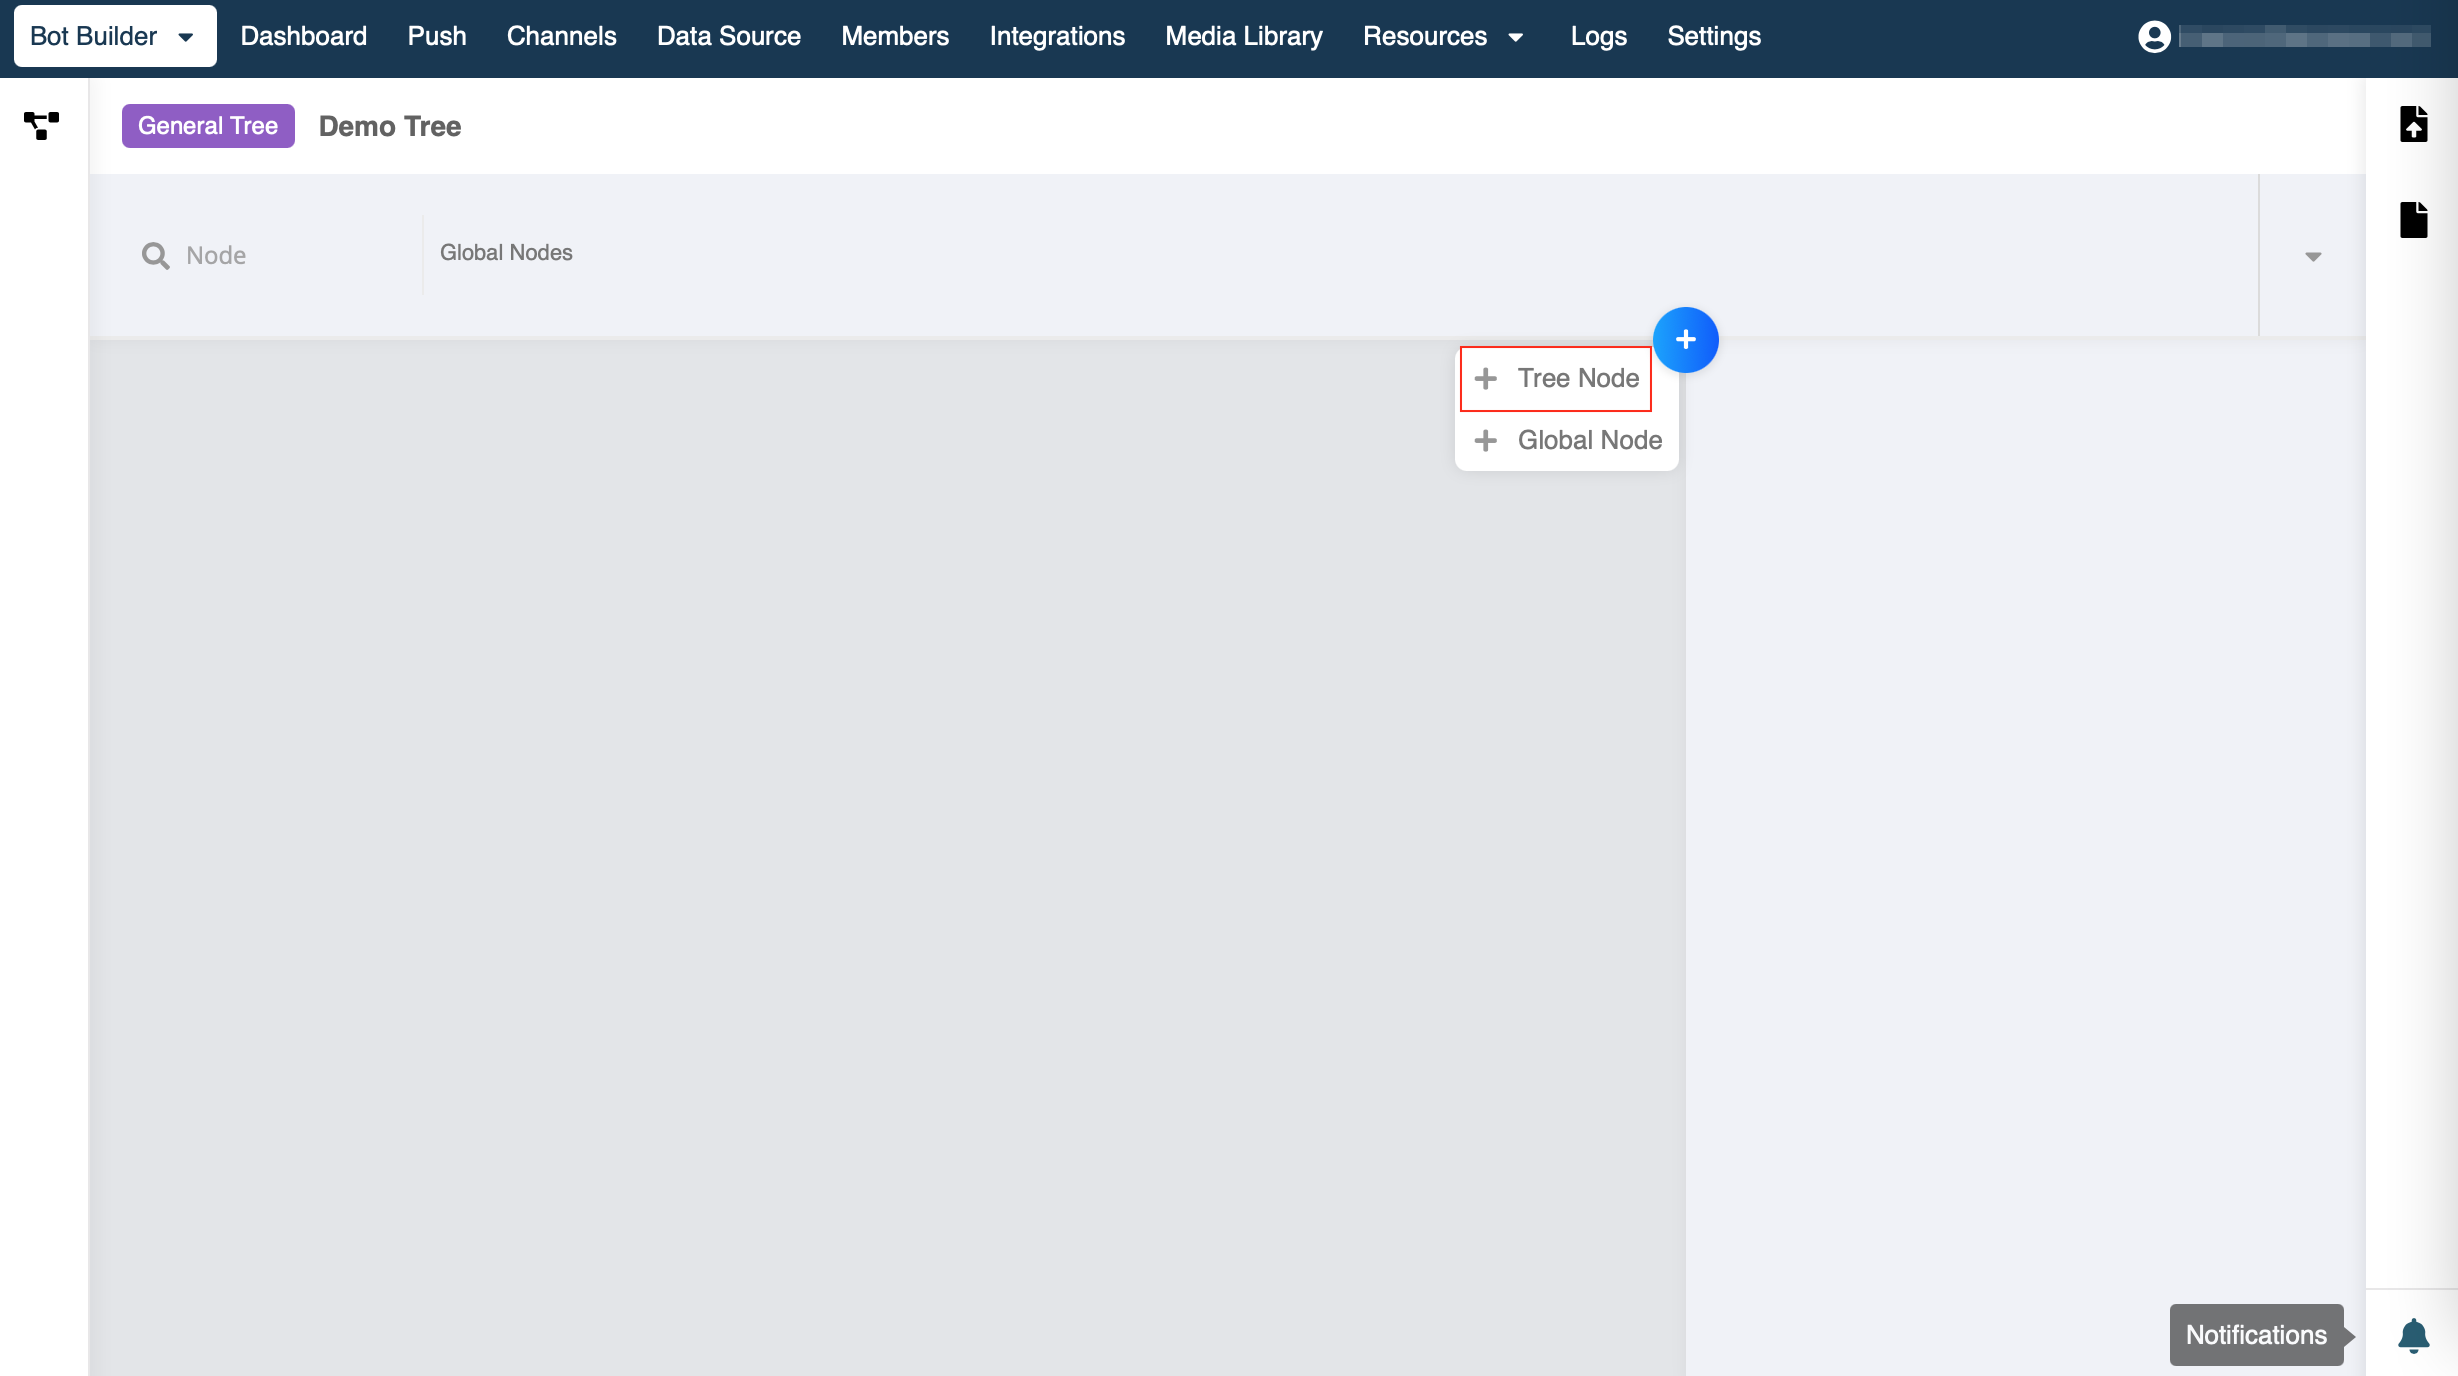
- To create a Node, click on "+", then select "+ Tree Node".
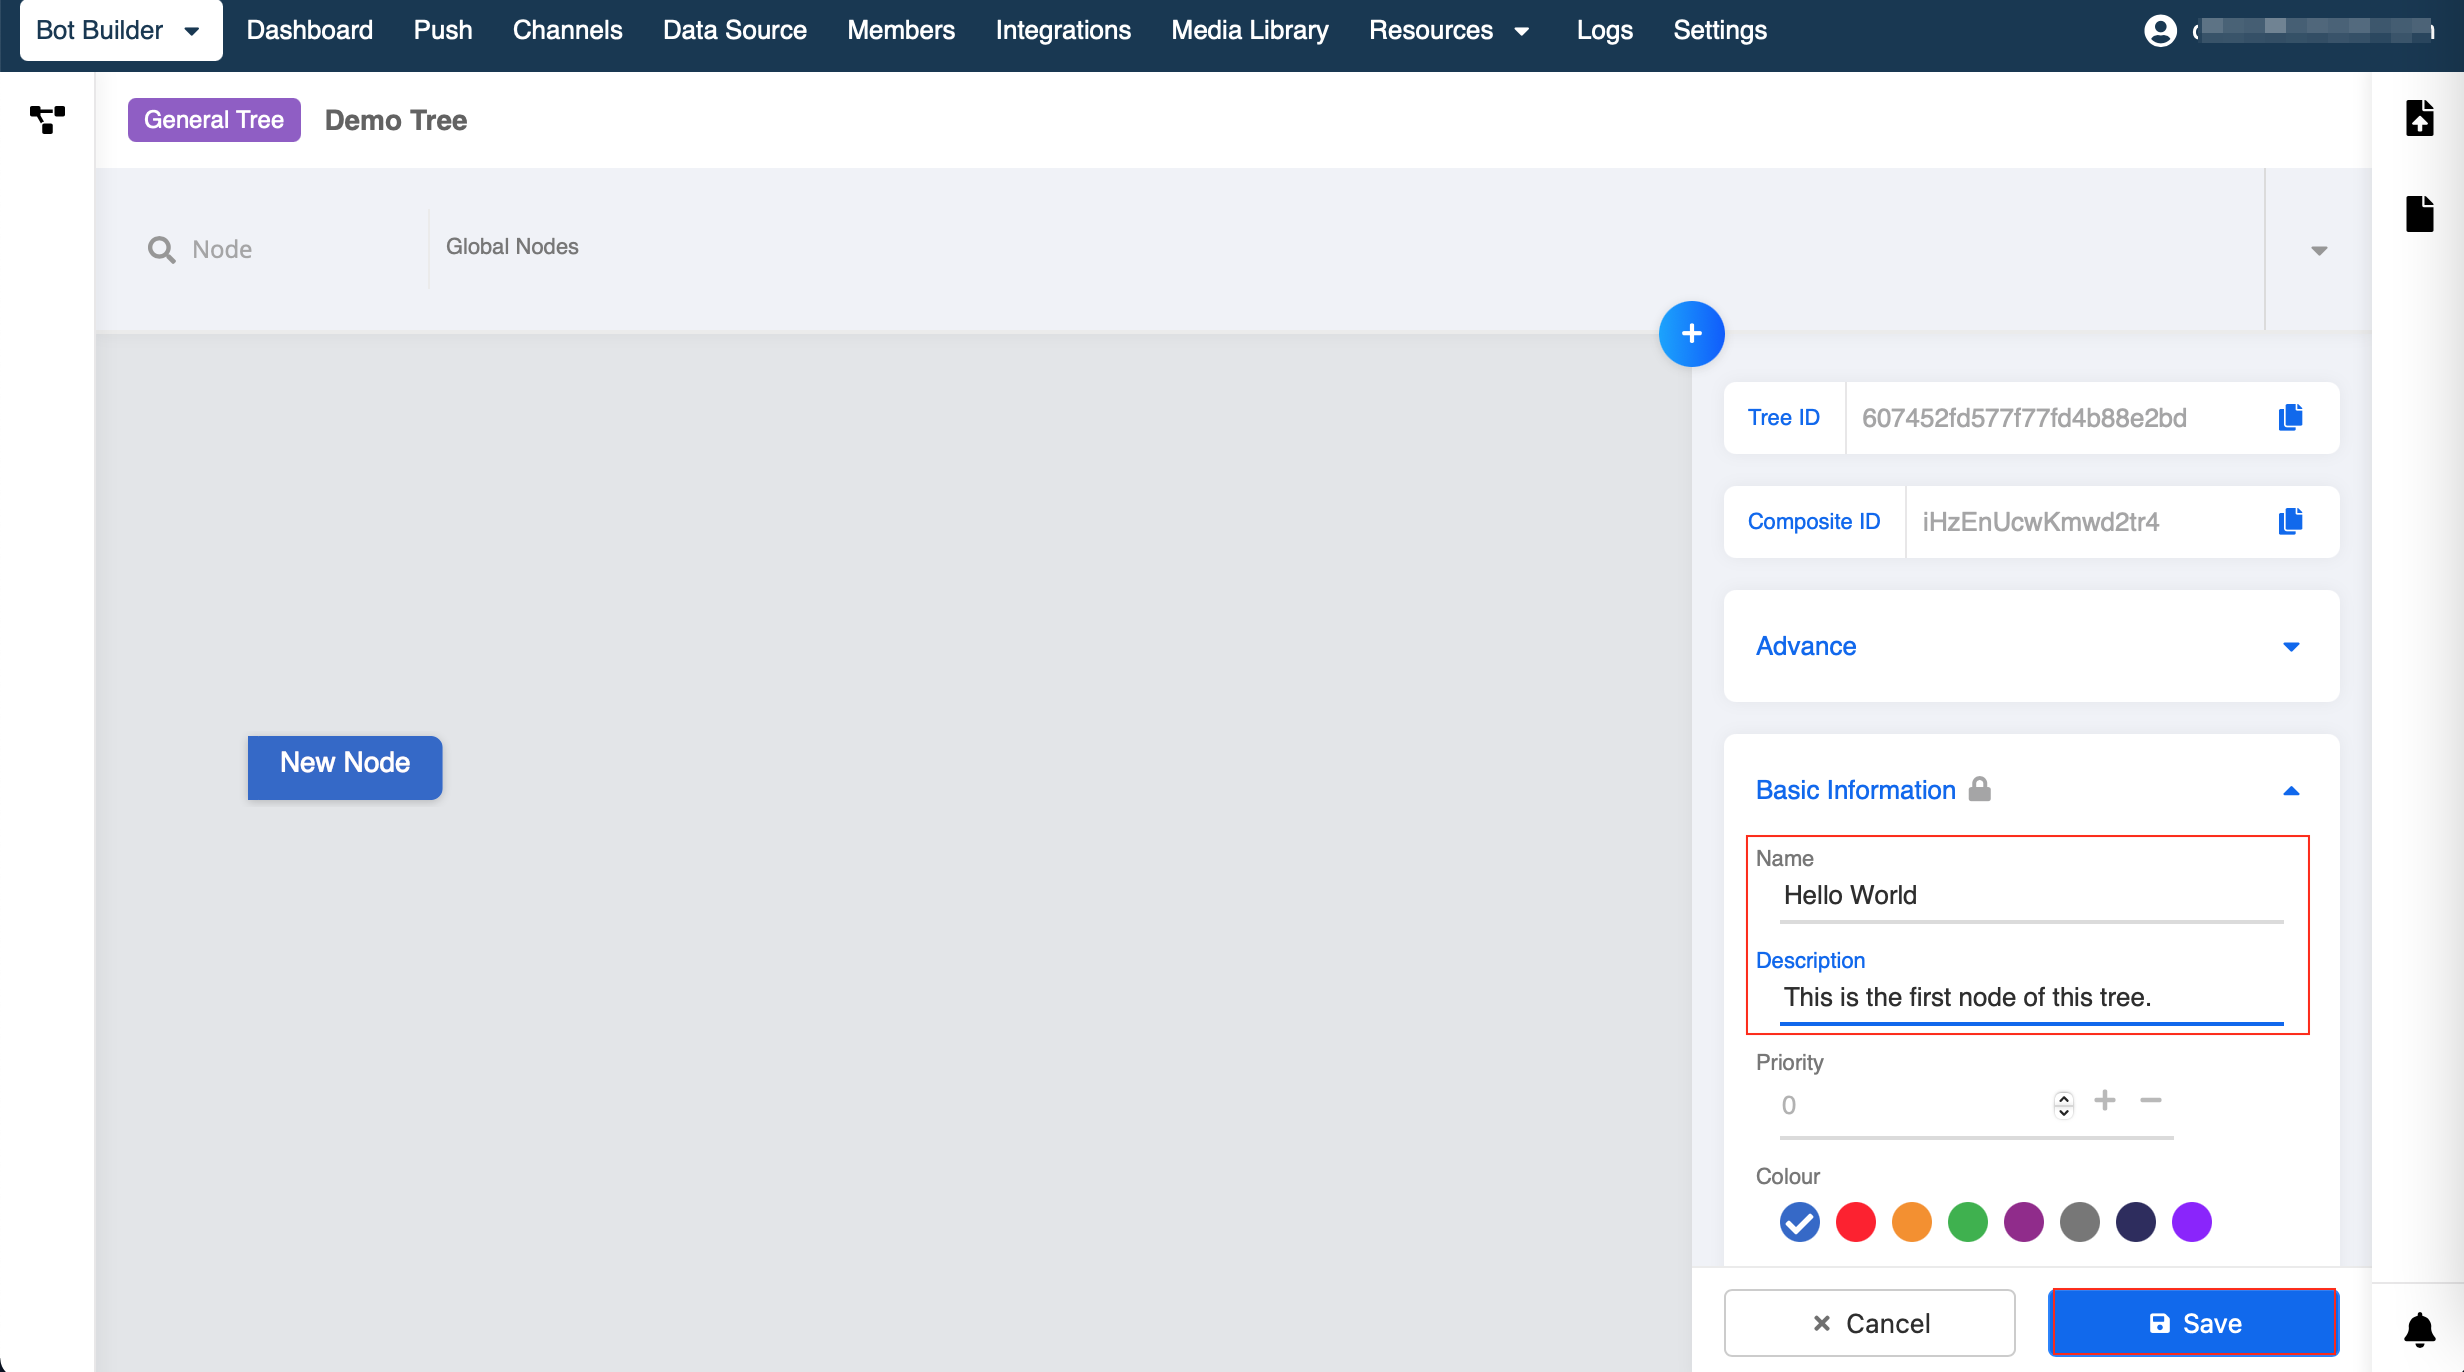
- In the Node Inspector, fill in the Name and Description for your node. Click "Save".
Create Response
What is a Response?
A Response is the message that your chatbot will send to a user when a node is triggered. You can set more than a set of responses in a node, and you can also choose from a list of message types for different platforms.
Click here to learn more about response.
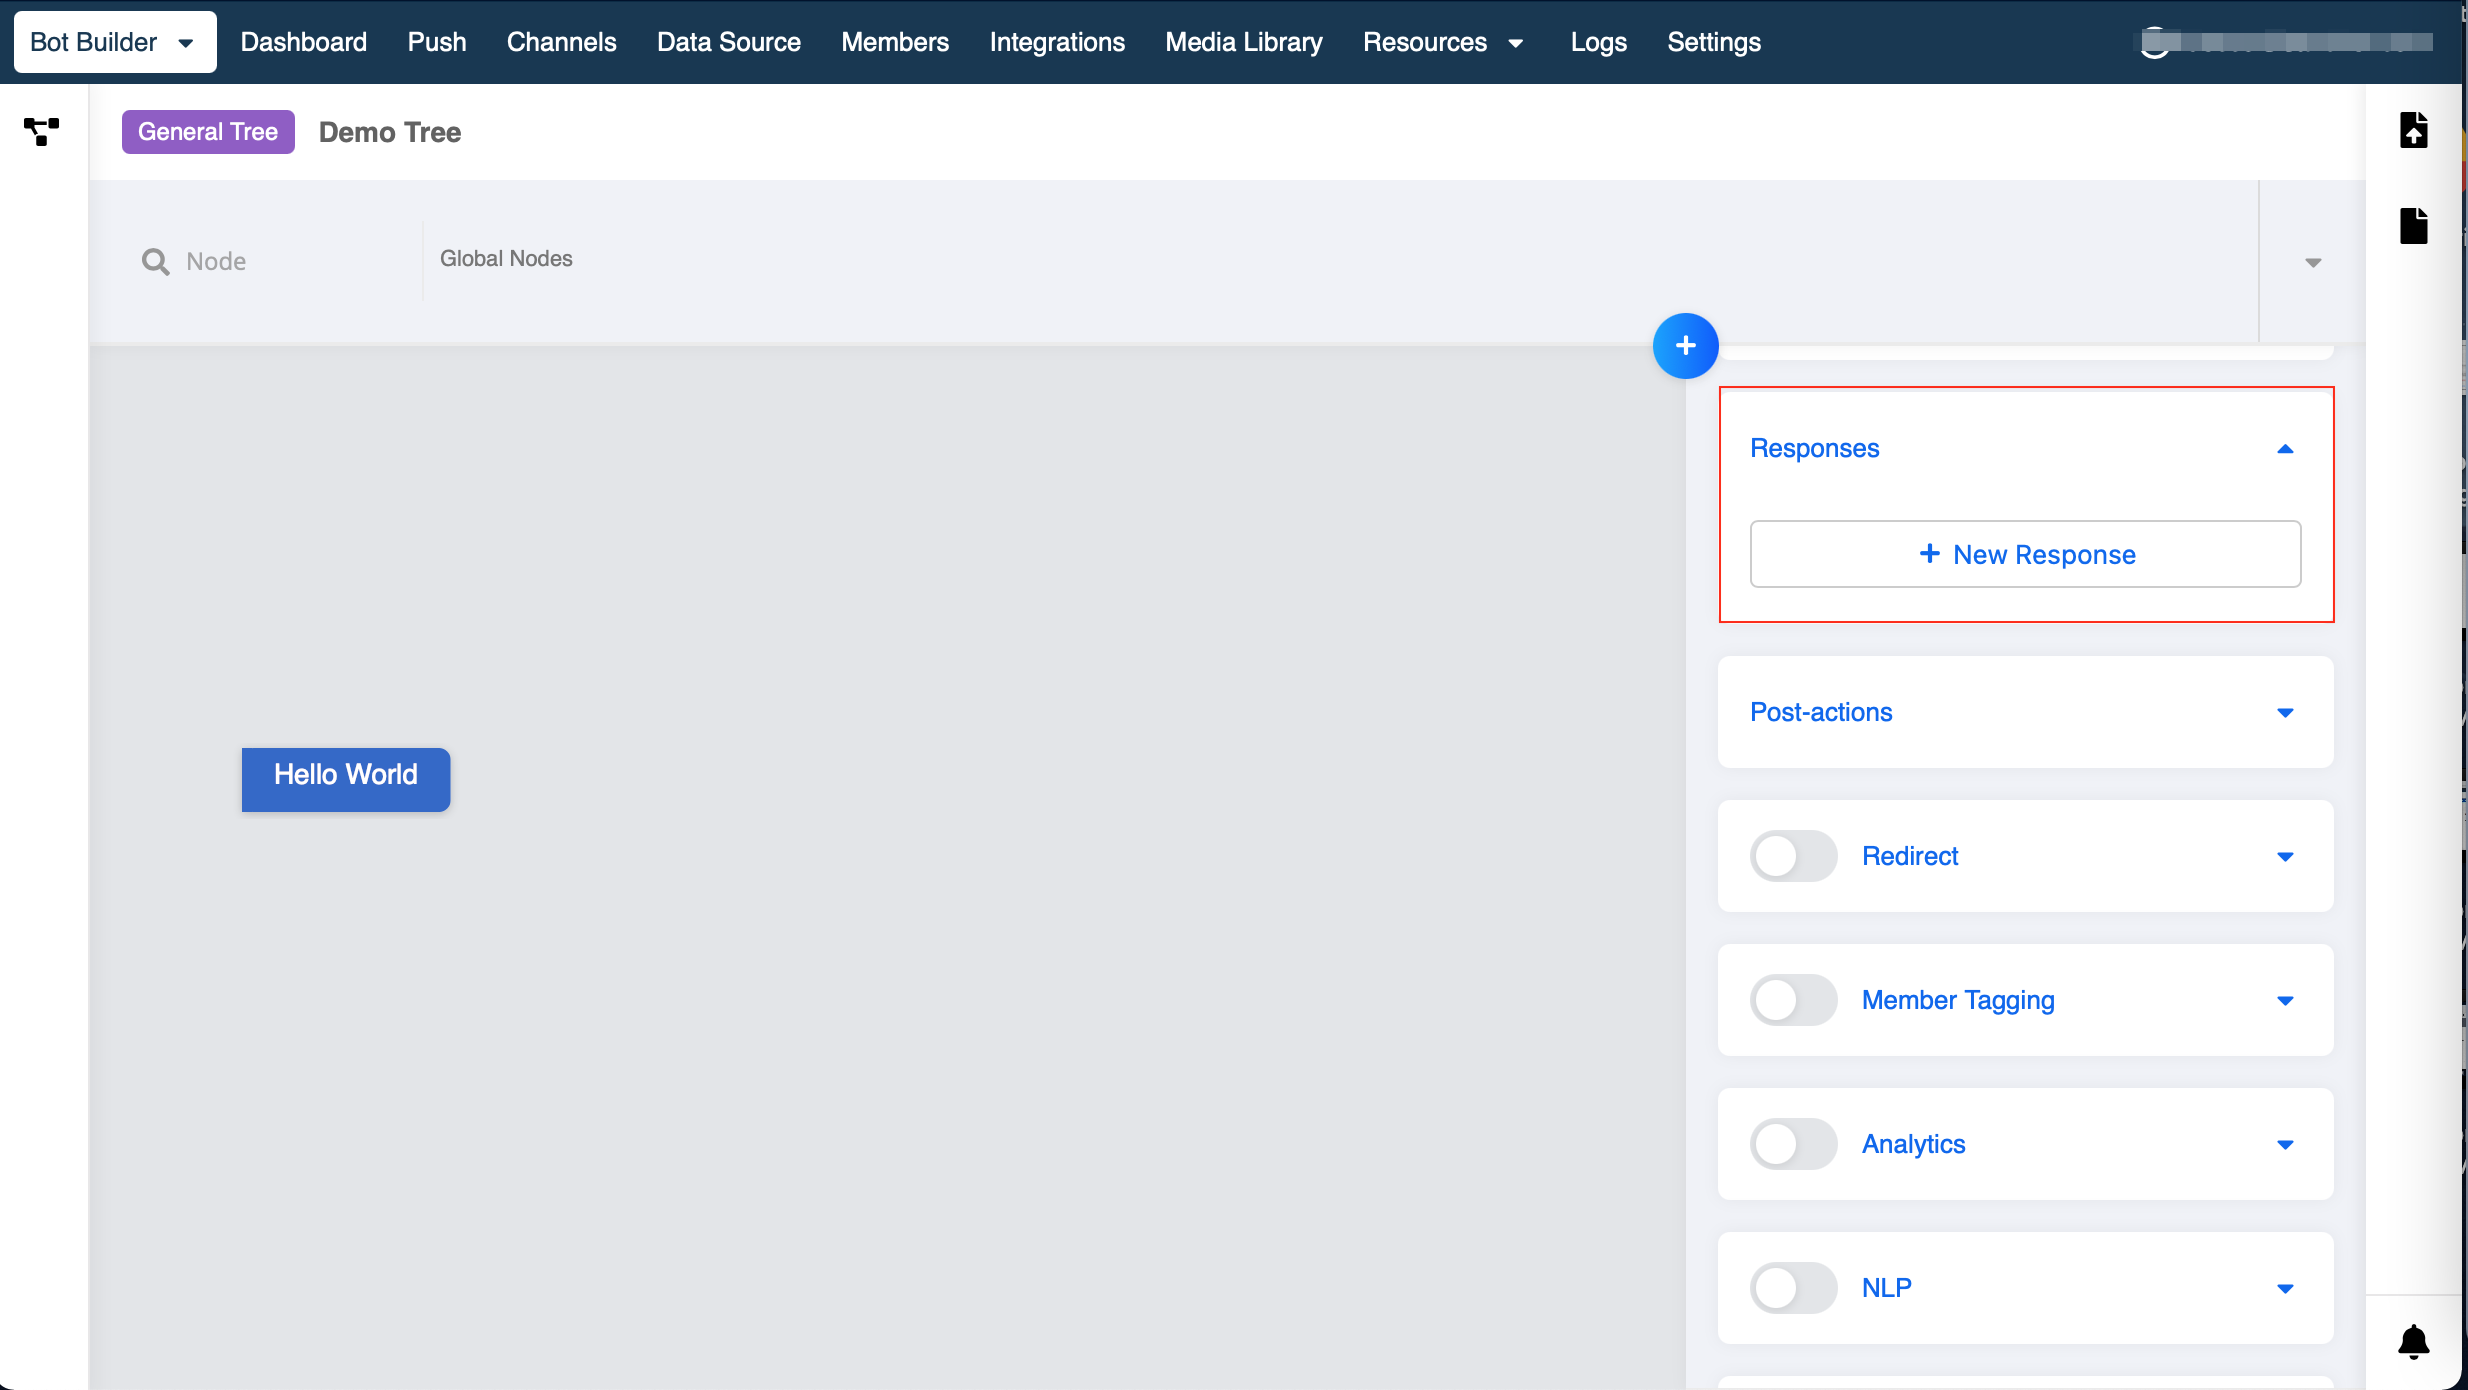
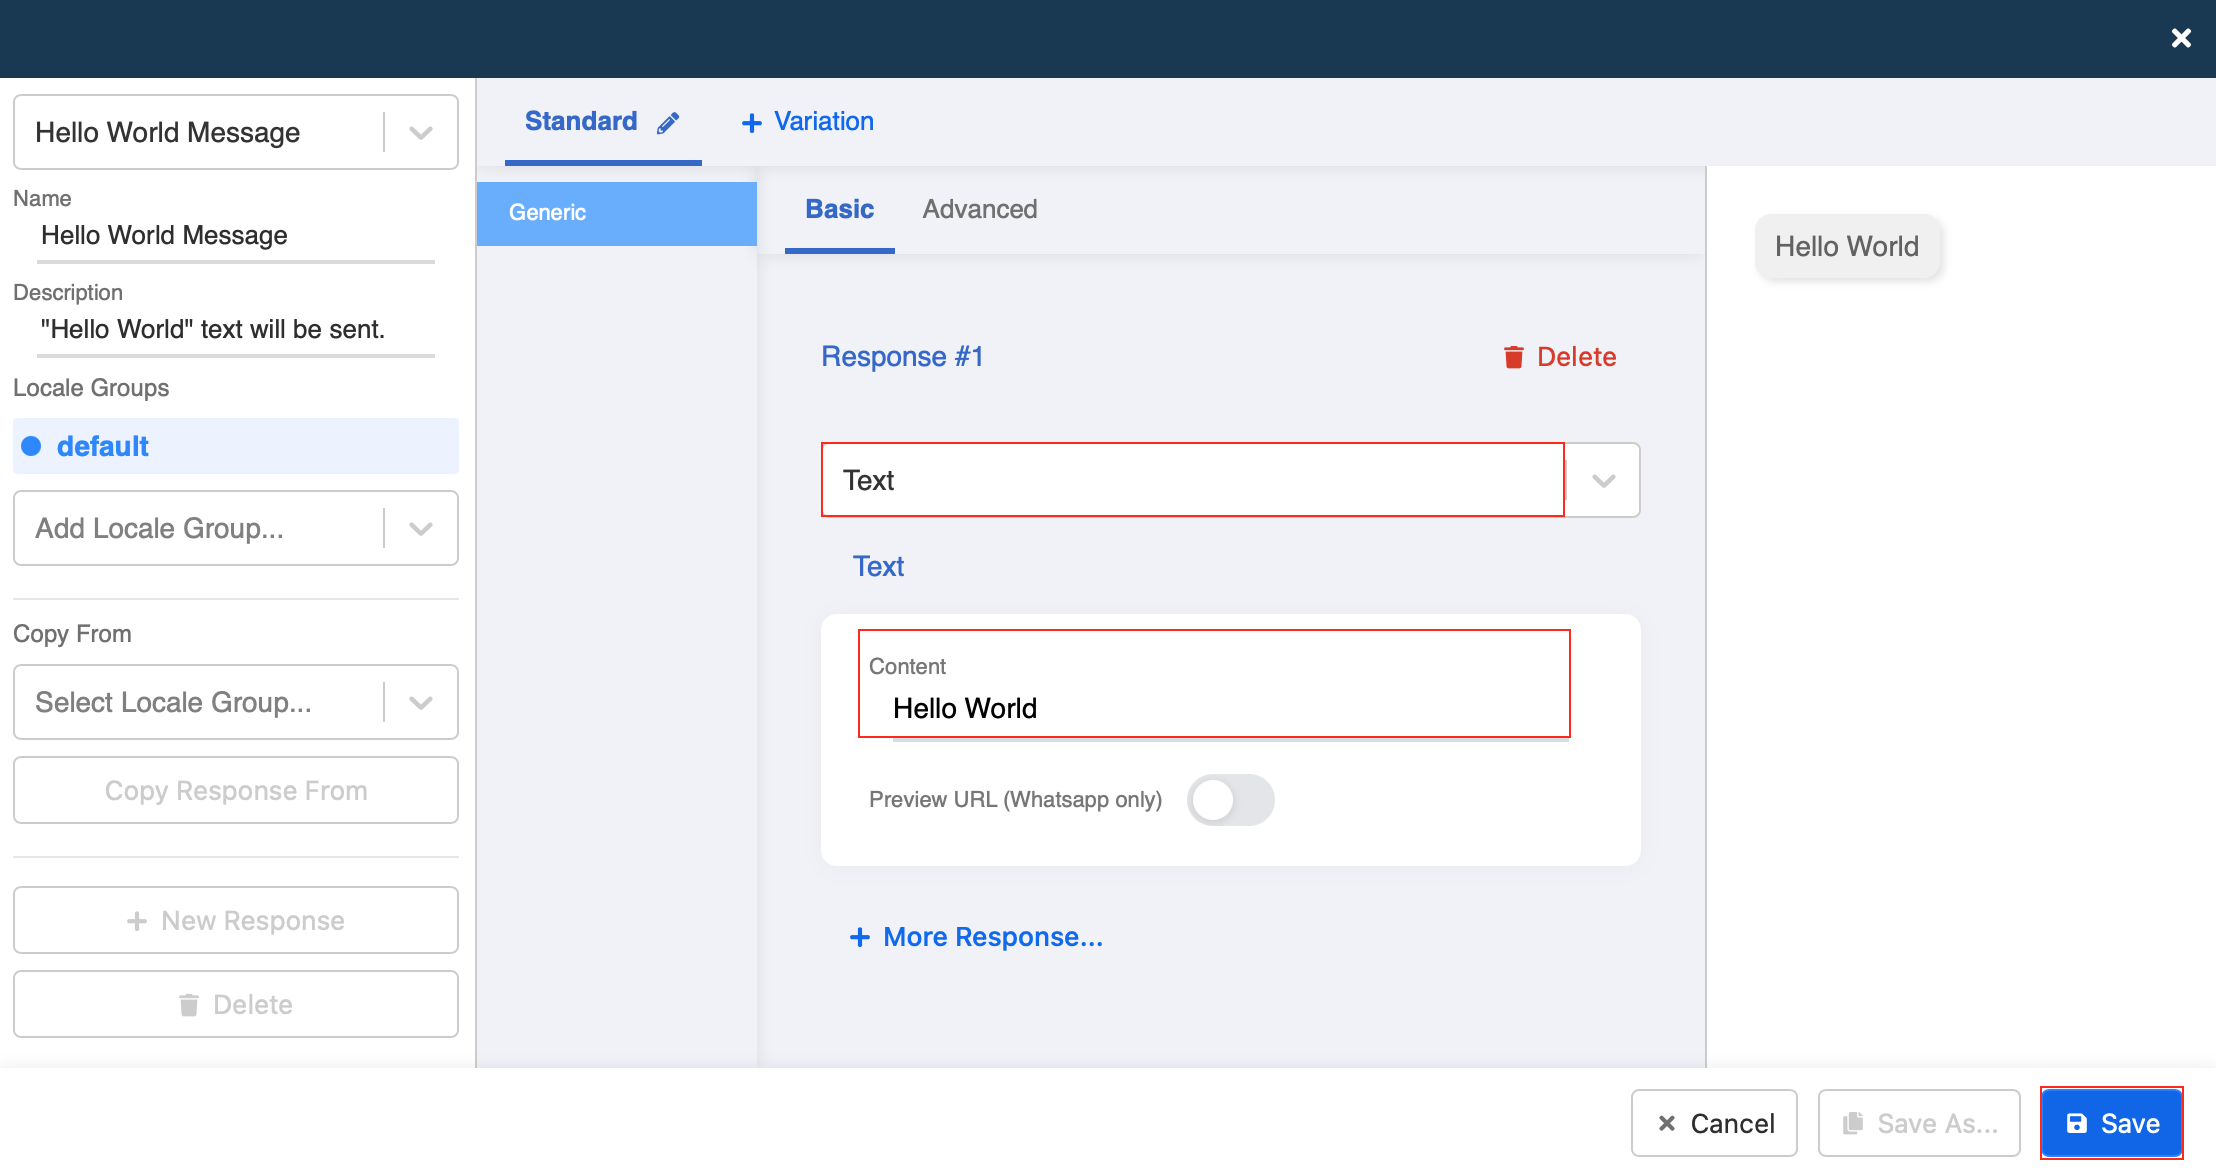
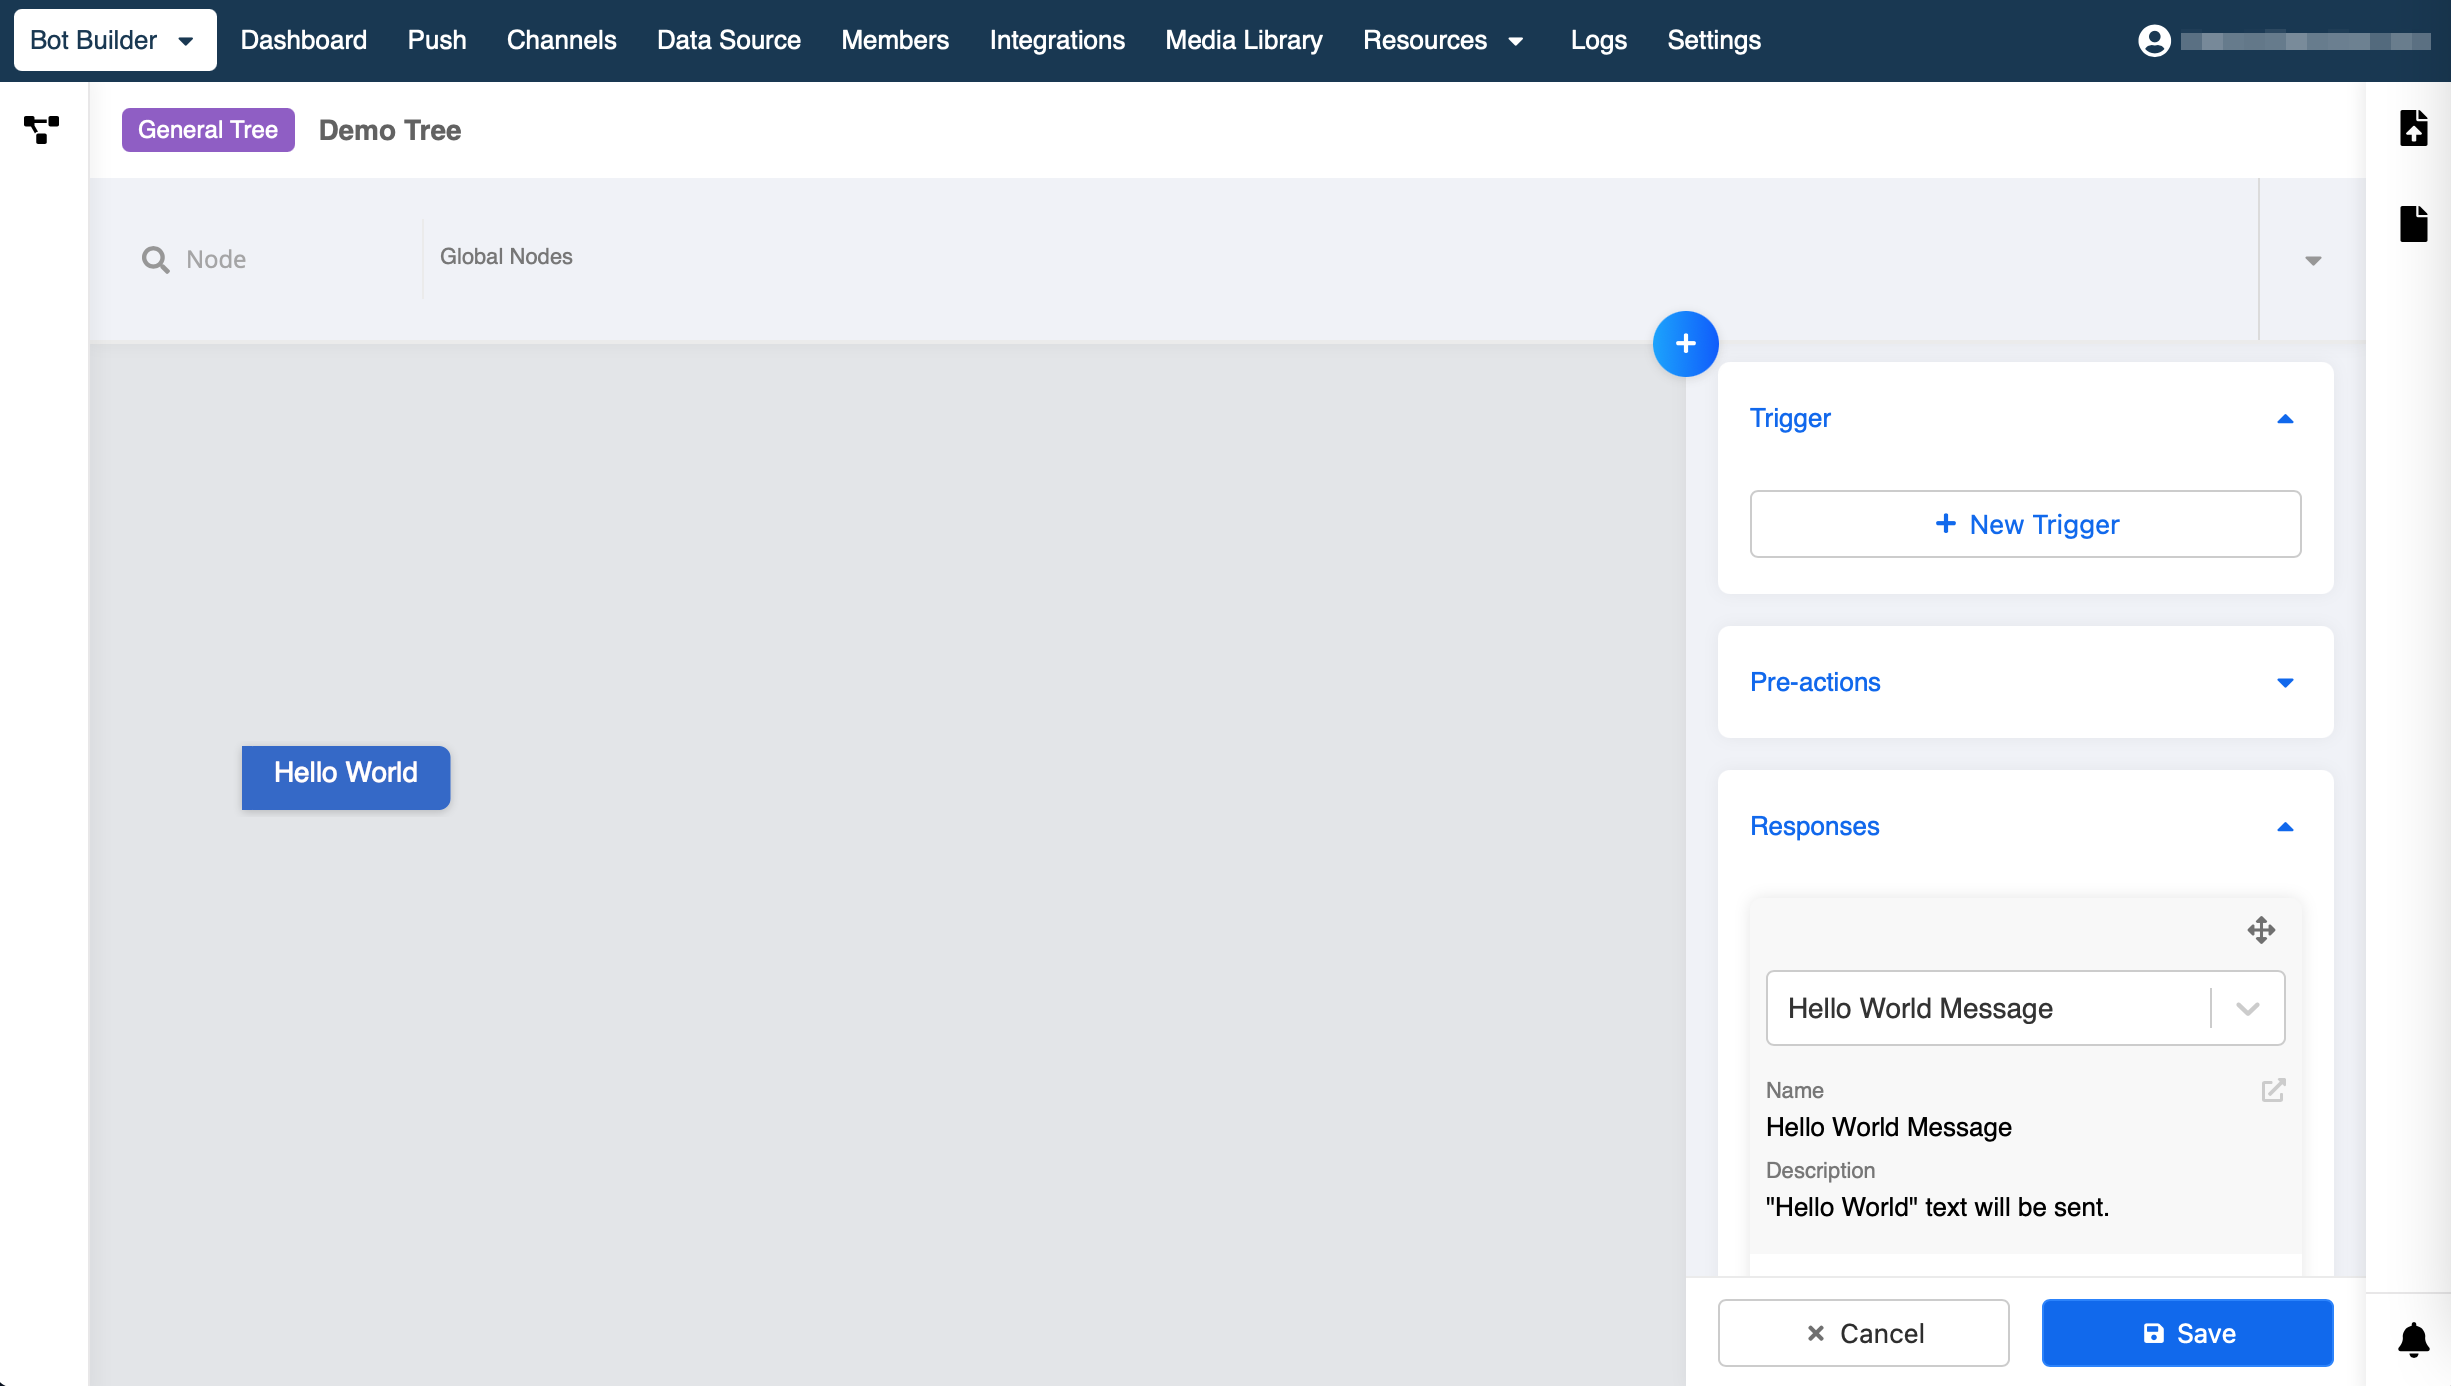
- In the Node Inspector, under Response, click on "+ New Response".
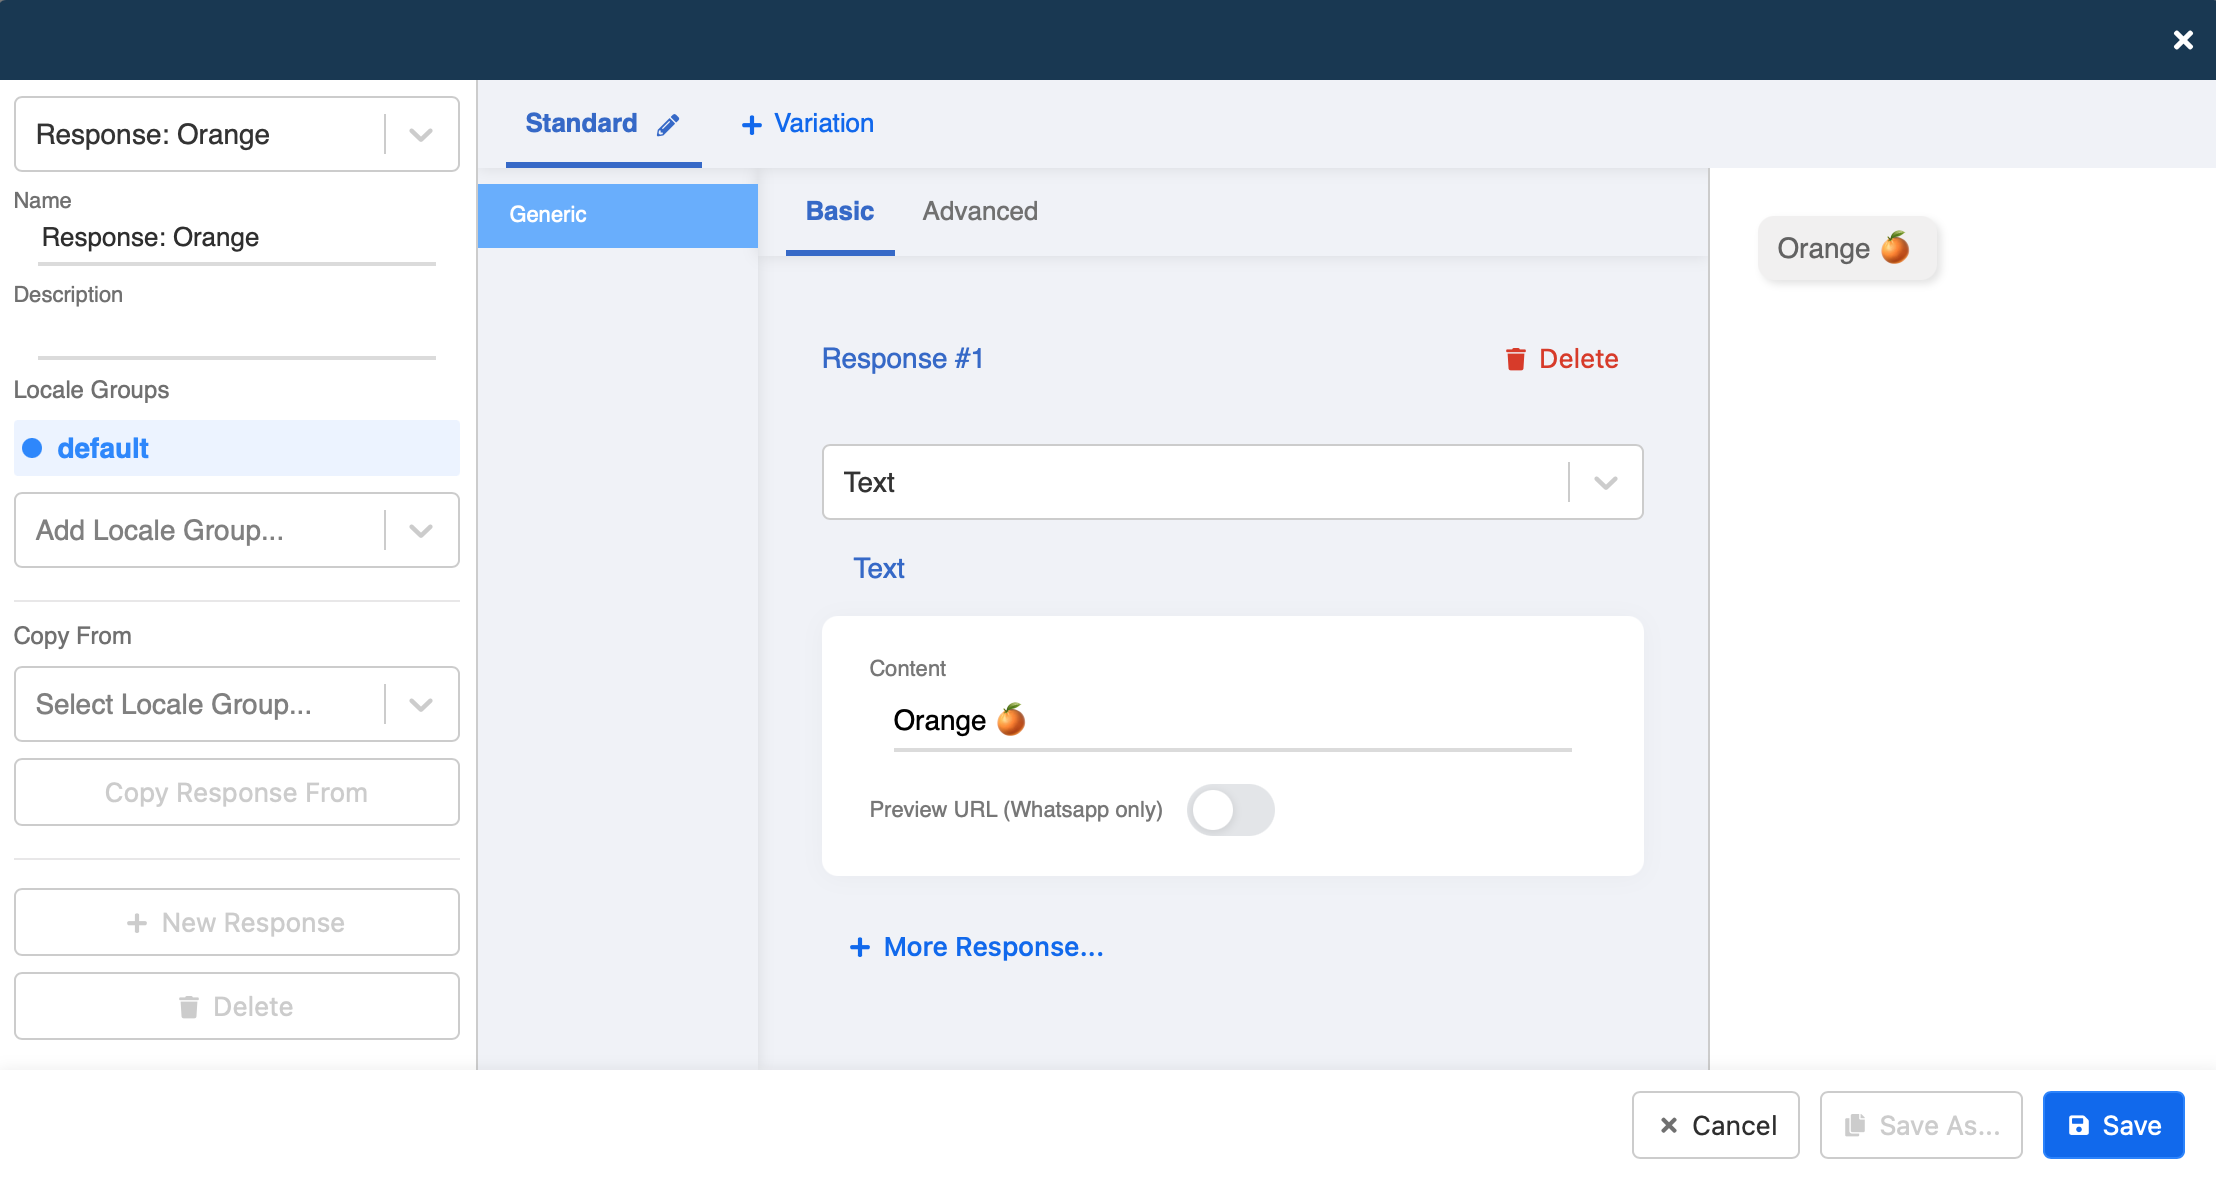
- Click on "+ New Response". Fill in the Name and Description for the response.
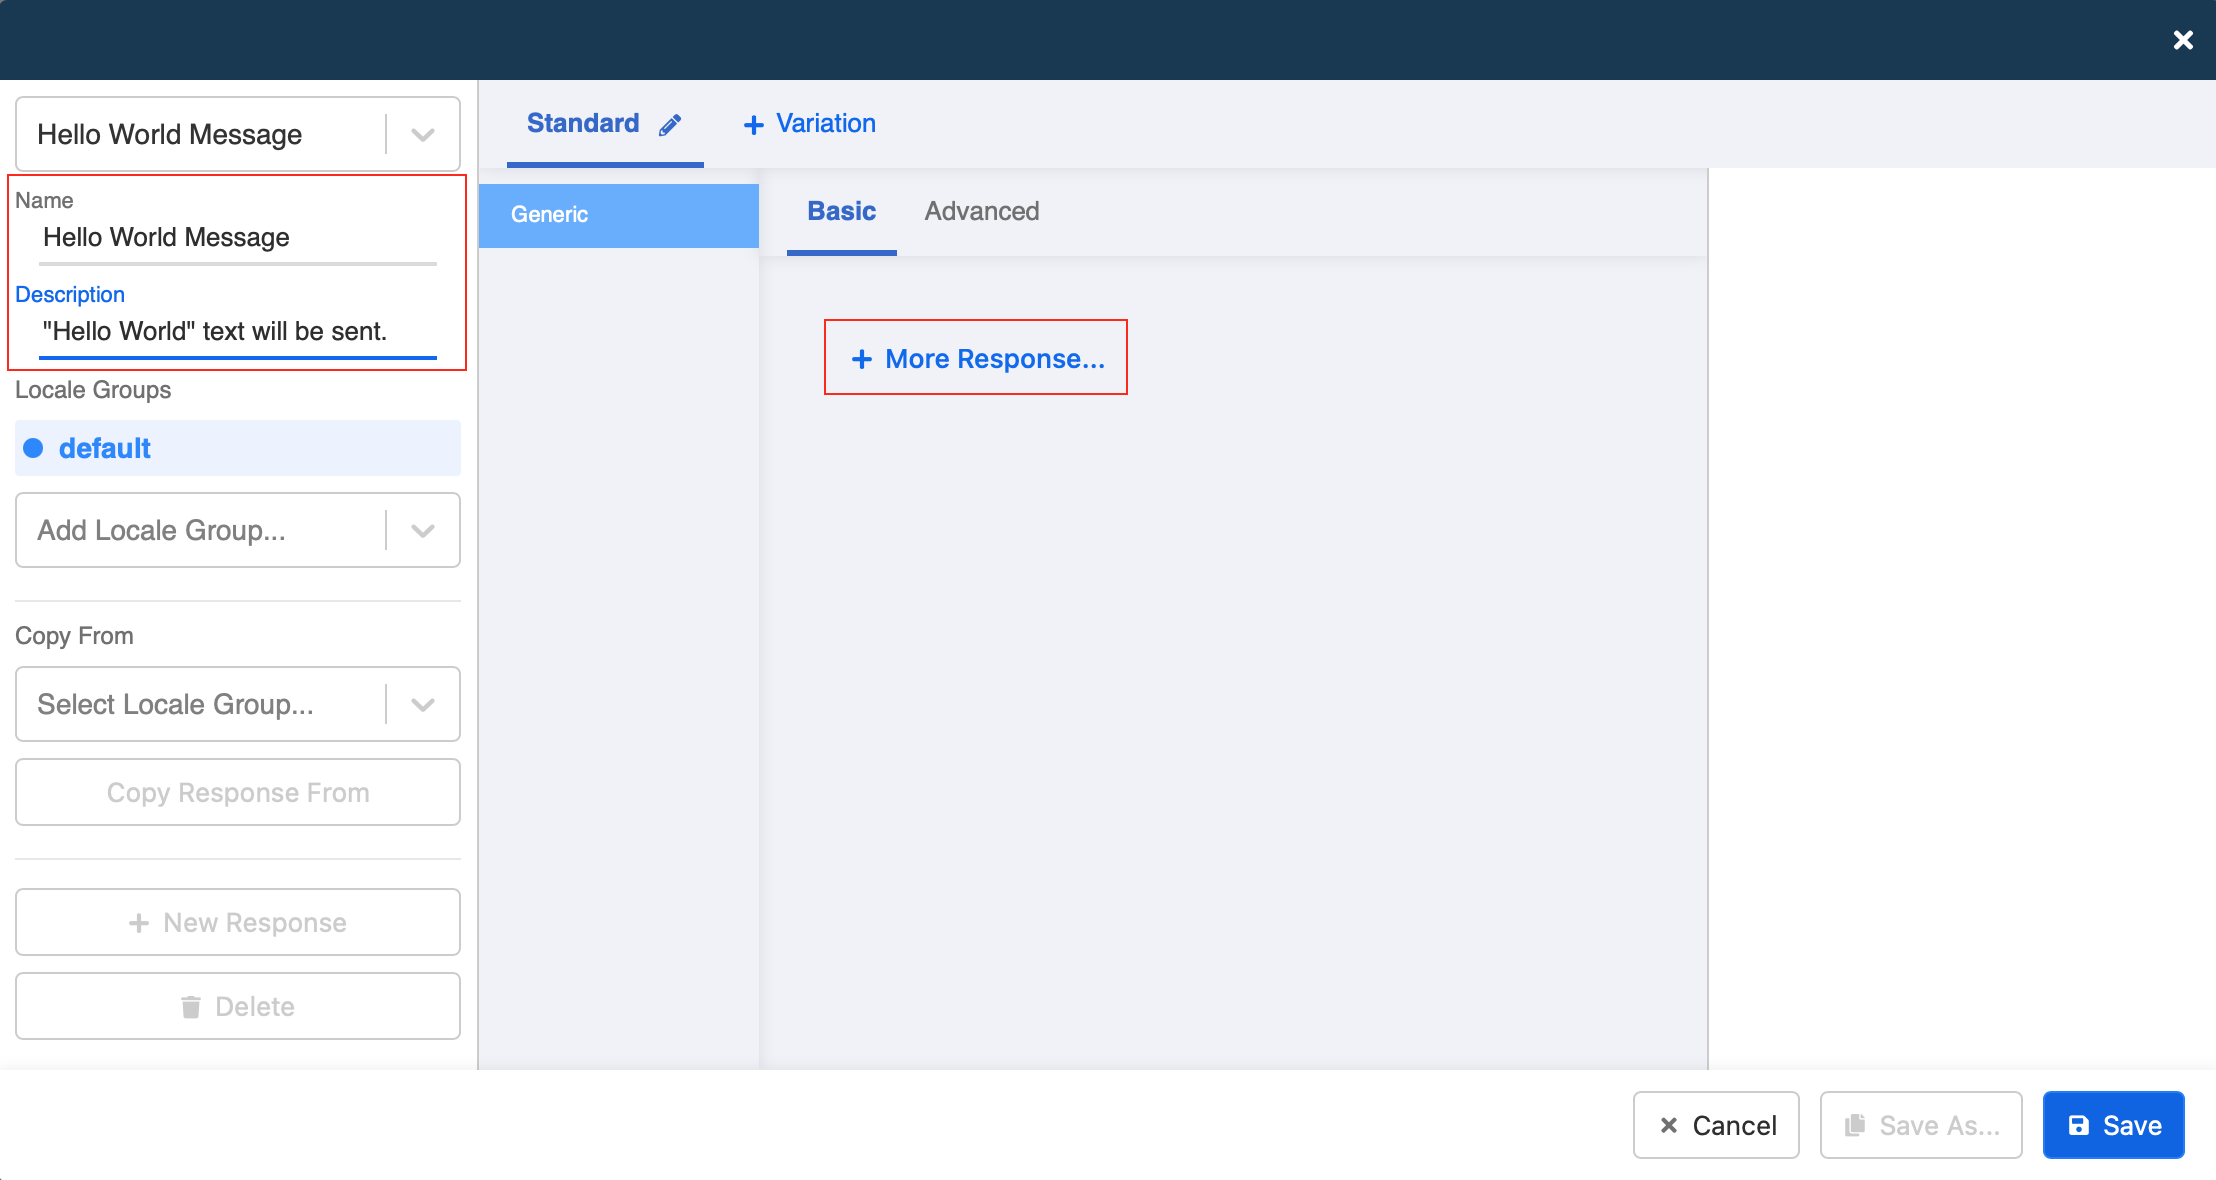
- Select "Text" from the dropdown. Input the content for your response. You can see the preview on the right side. Click "Save". Now you have created the message response for your first node!
Create Trigger
What is a Trigger?
A Trigger is a way to notify a node to send its response message. With the right trigger, the end user can enter the right node in a conversation flow.
Click here to learn more about trigger.
- In the Node Inspector, under Trigger, click on "+ New Trigger".
- Fill in the Name and Description for your new trigger. Then, in Keywords, input "Hi". Therefore, this node will be triggered when the user types "Hi".
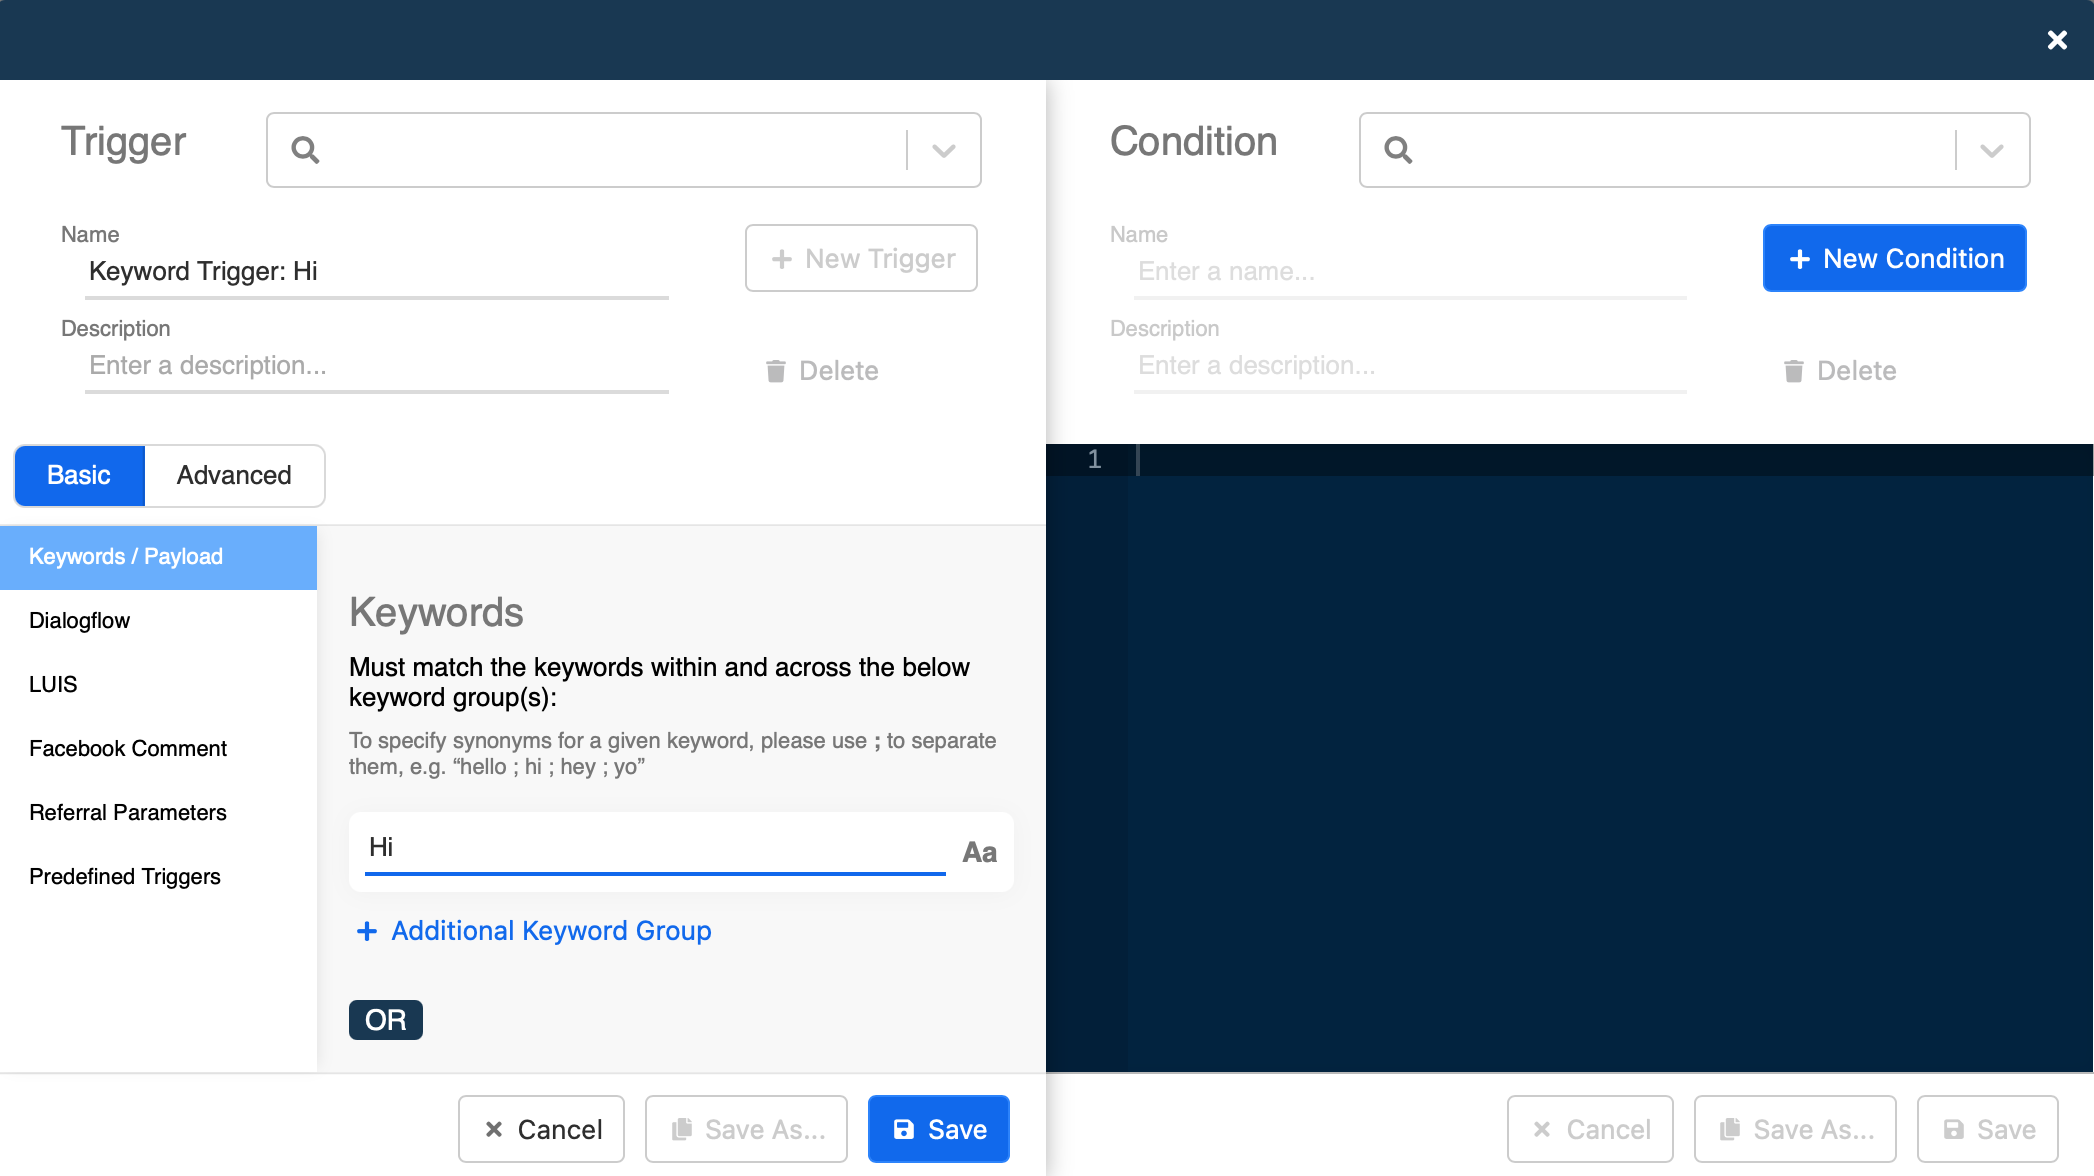
- Now we have created a Keyword Trigger! Remember to click "Save" to save the changes made to this node.

STEP 3 : Connect to Channels
What is a Channel?
A Channel is where you decide which messaging platform you want to deploy your chatbot onto. Each channel is created for one platform to hold your chatbot.
Click here to learn more about channels.
- To create a new channel, go to "Channels", select "+ New Channel".
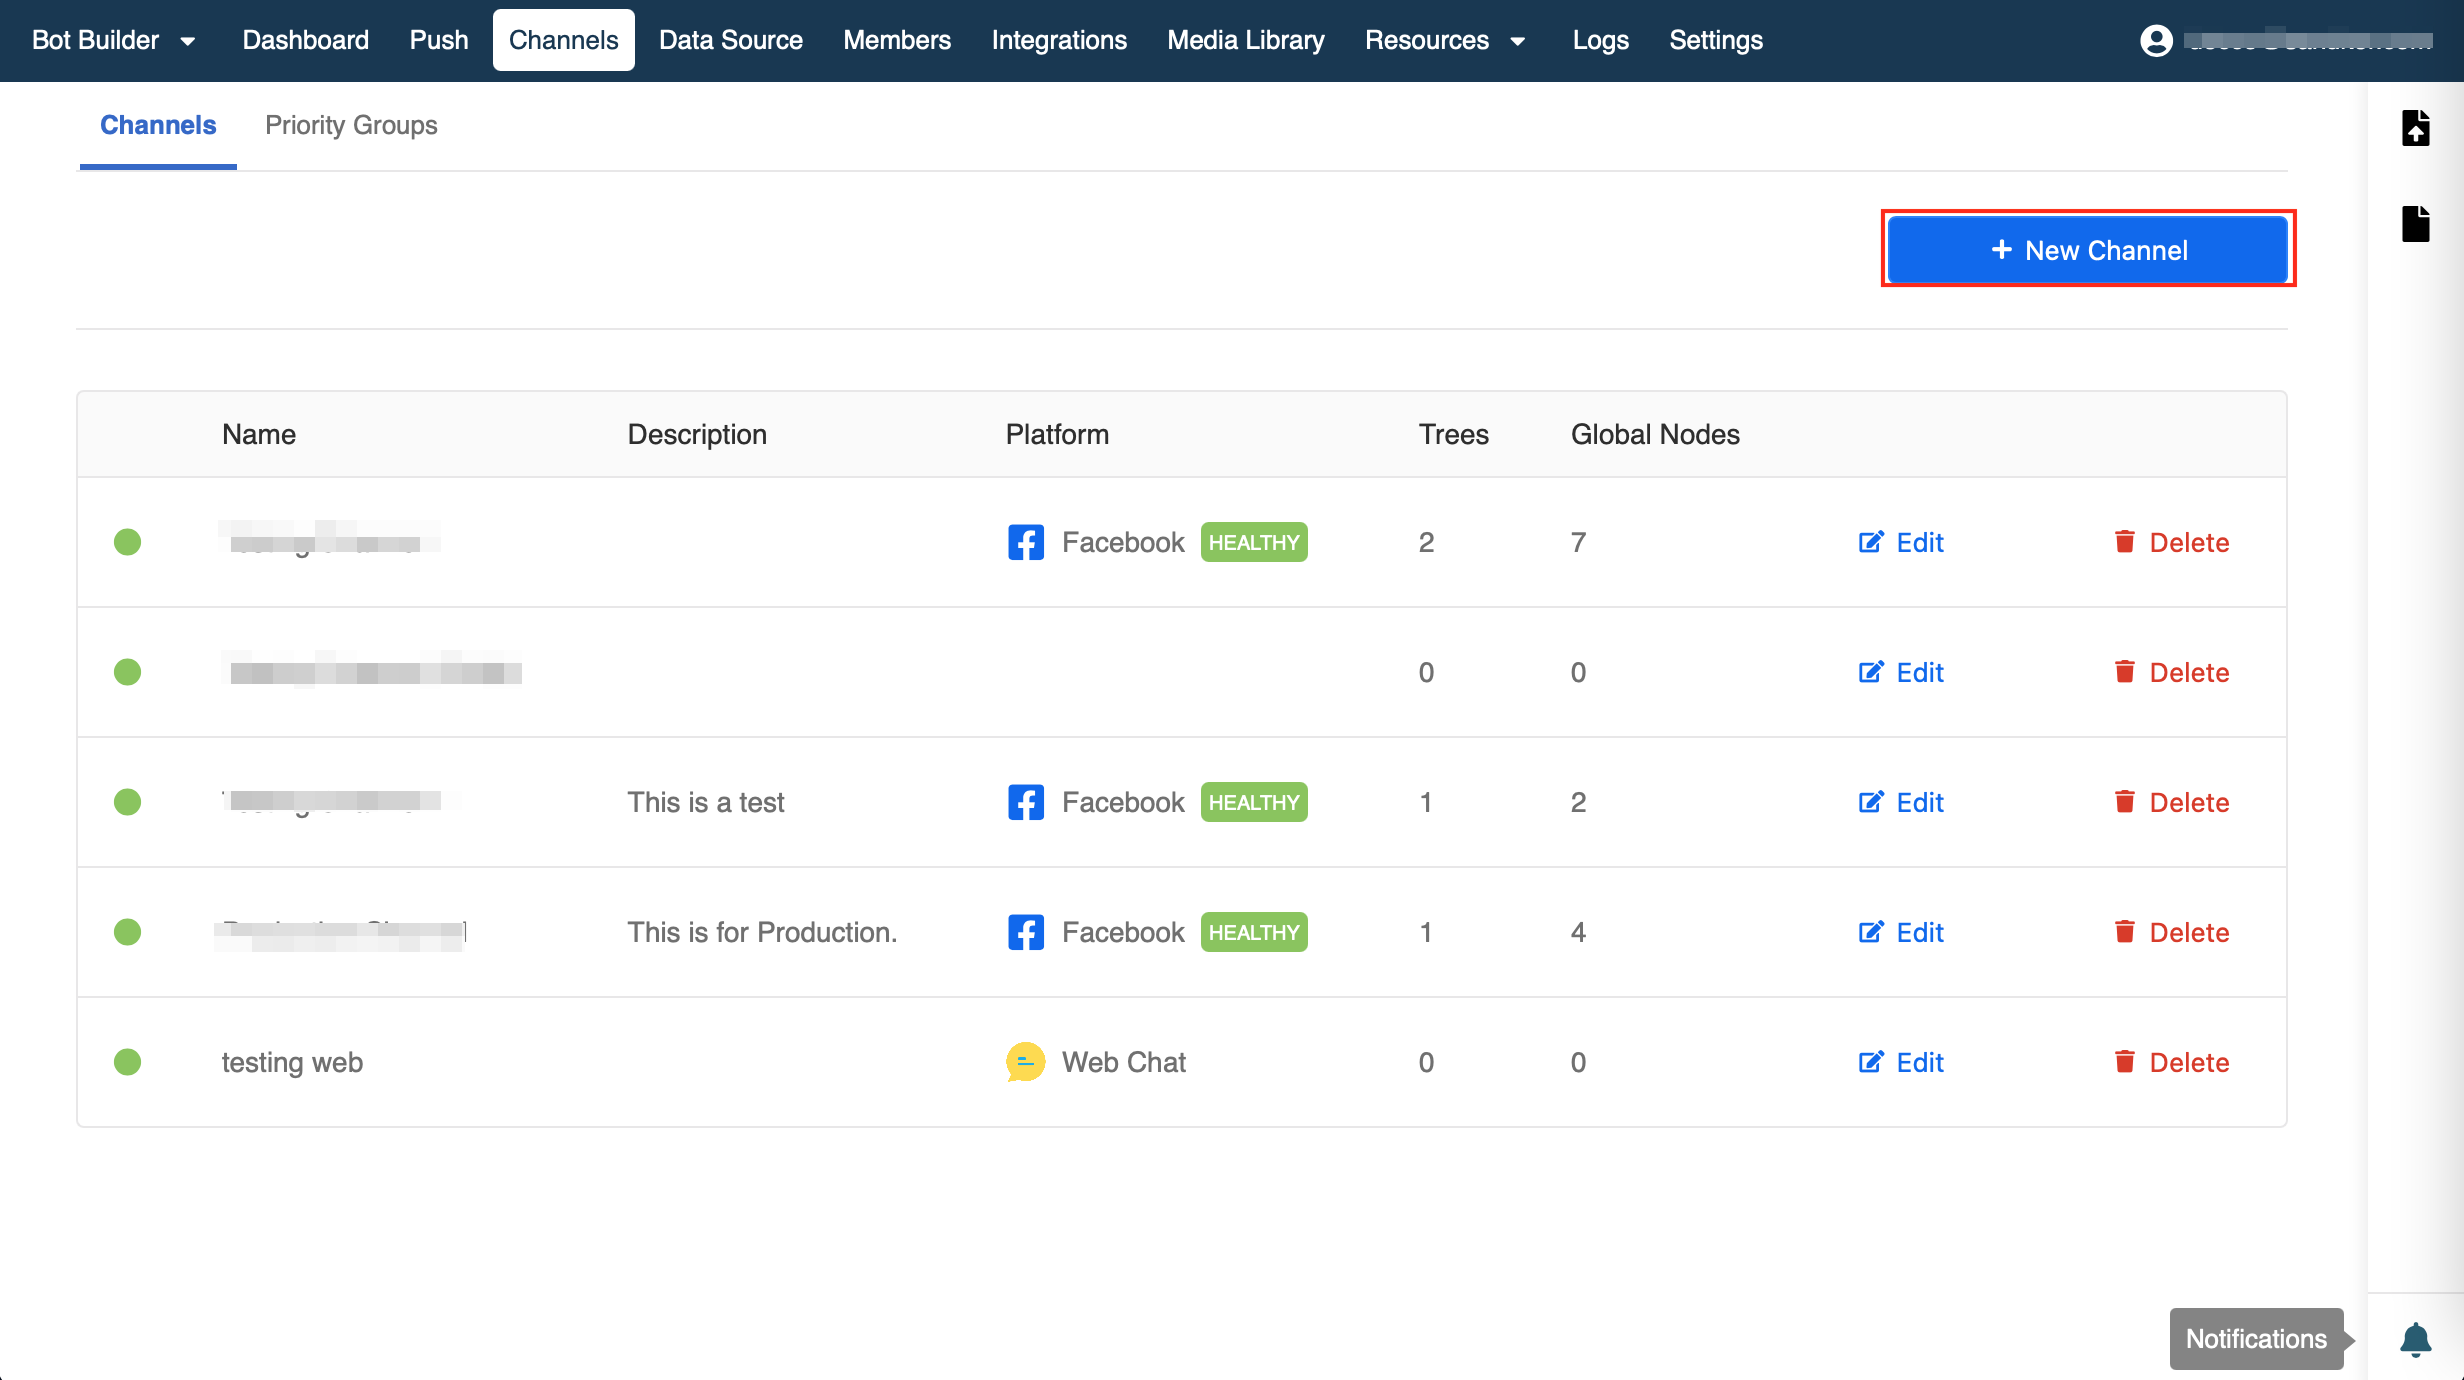
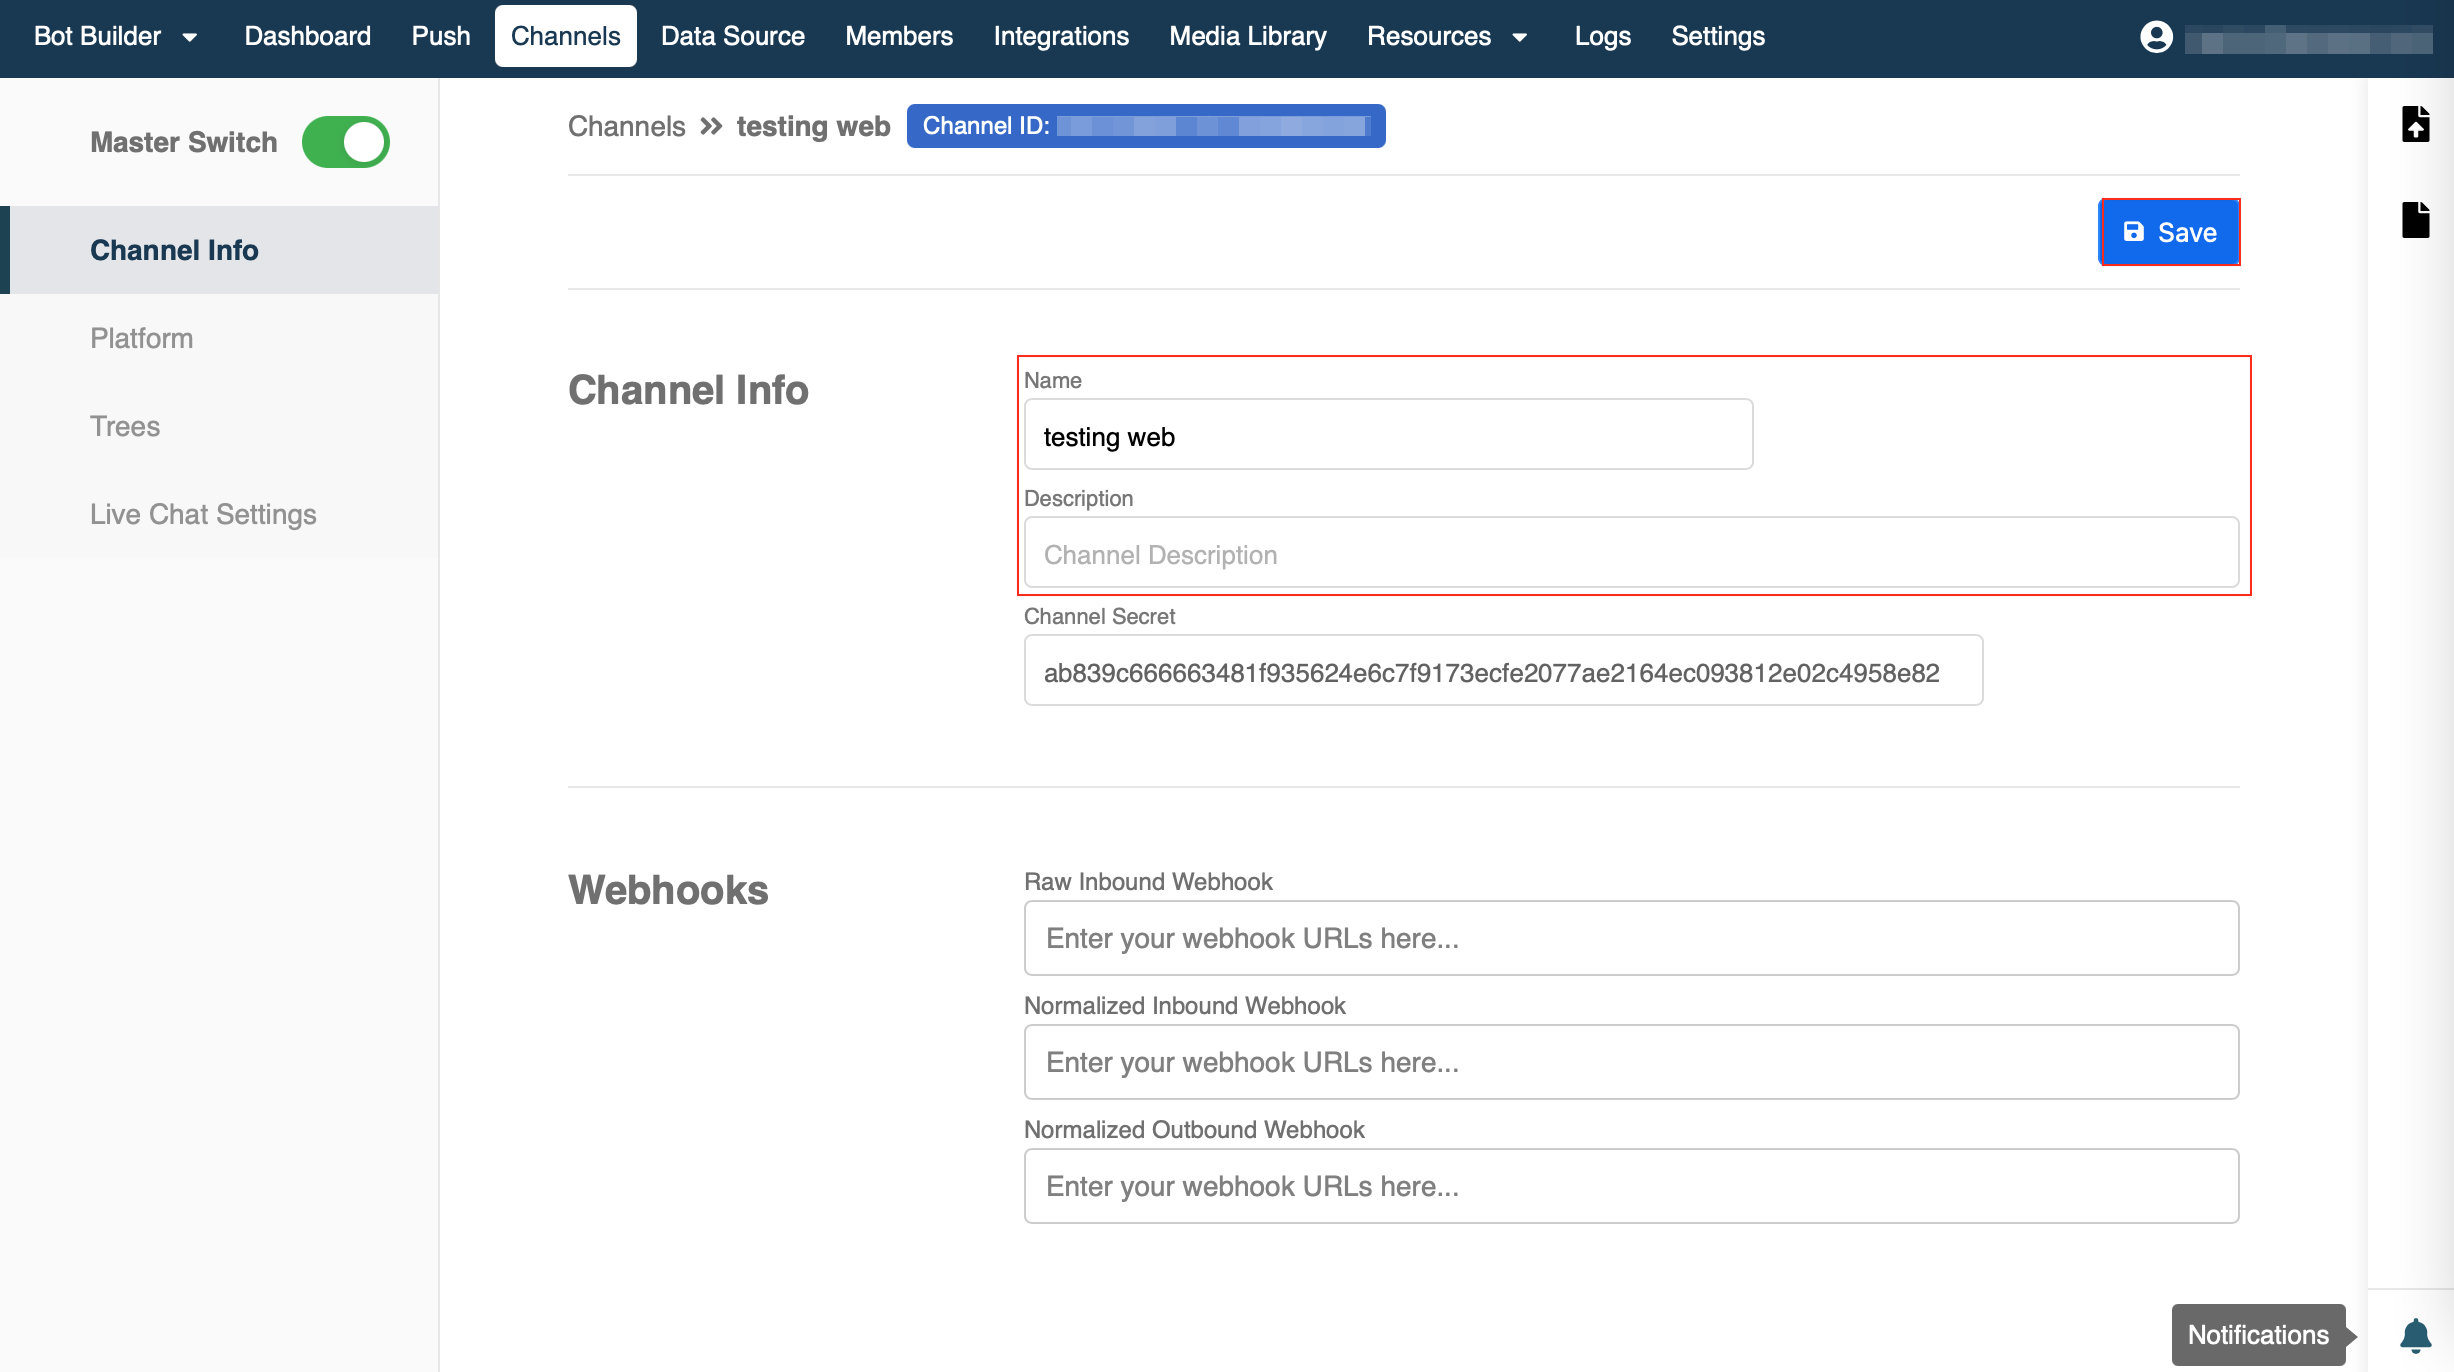
- Now, fill in the Name and Description for your new channel. Click "Save".
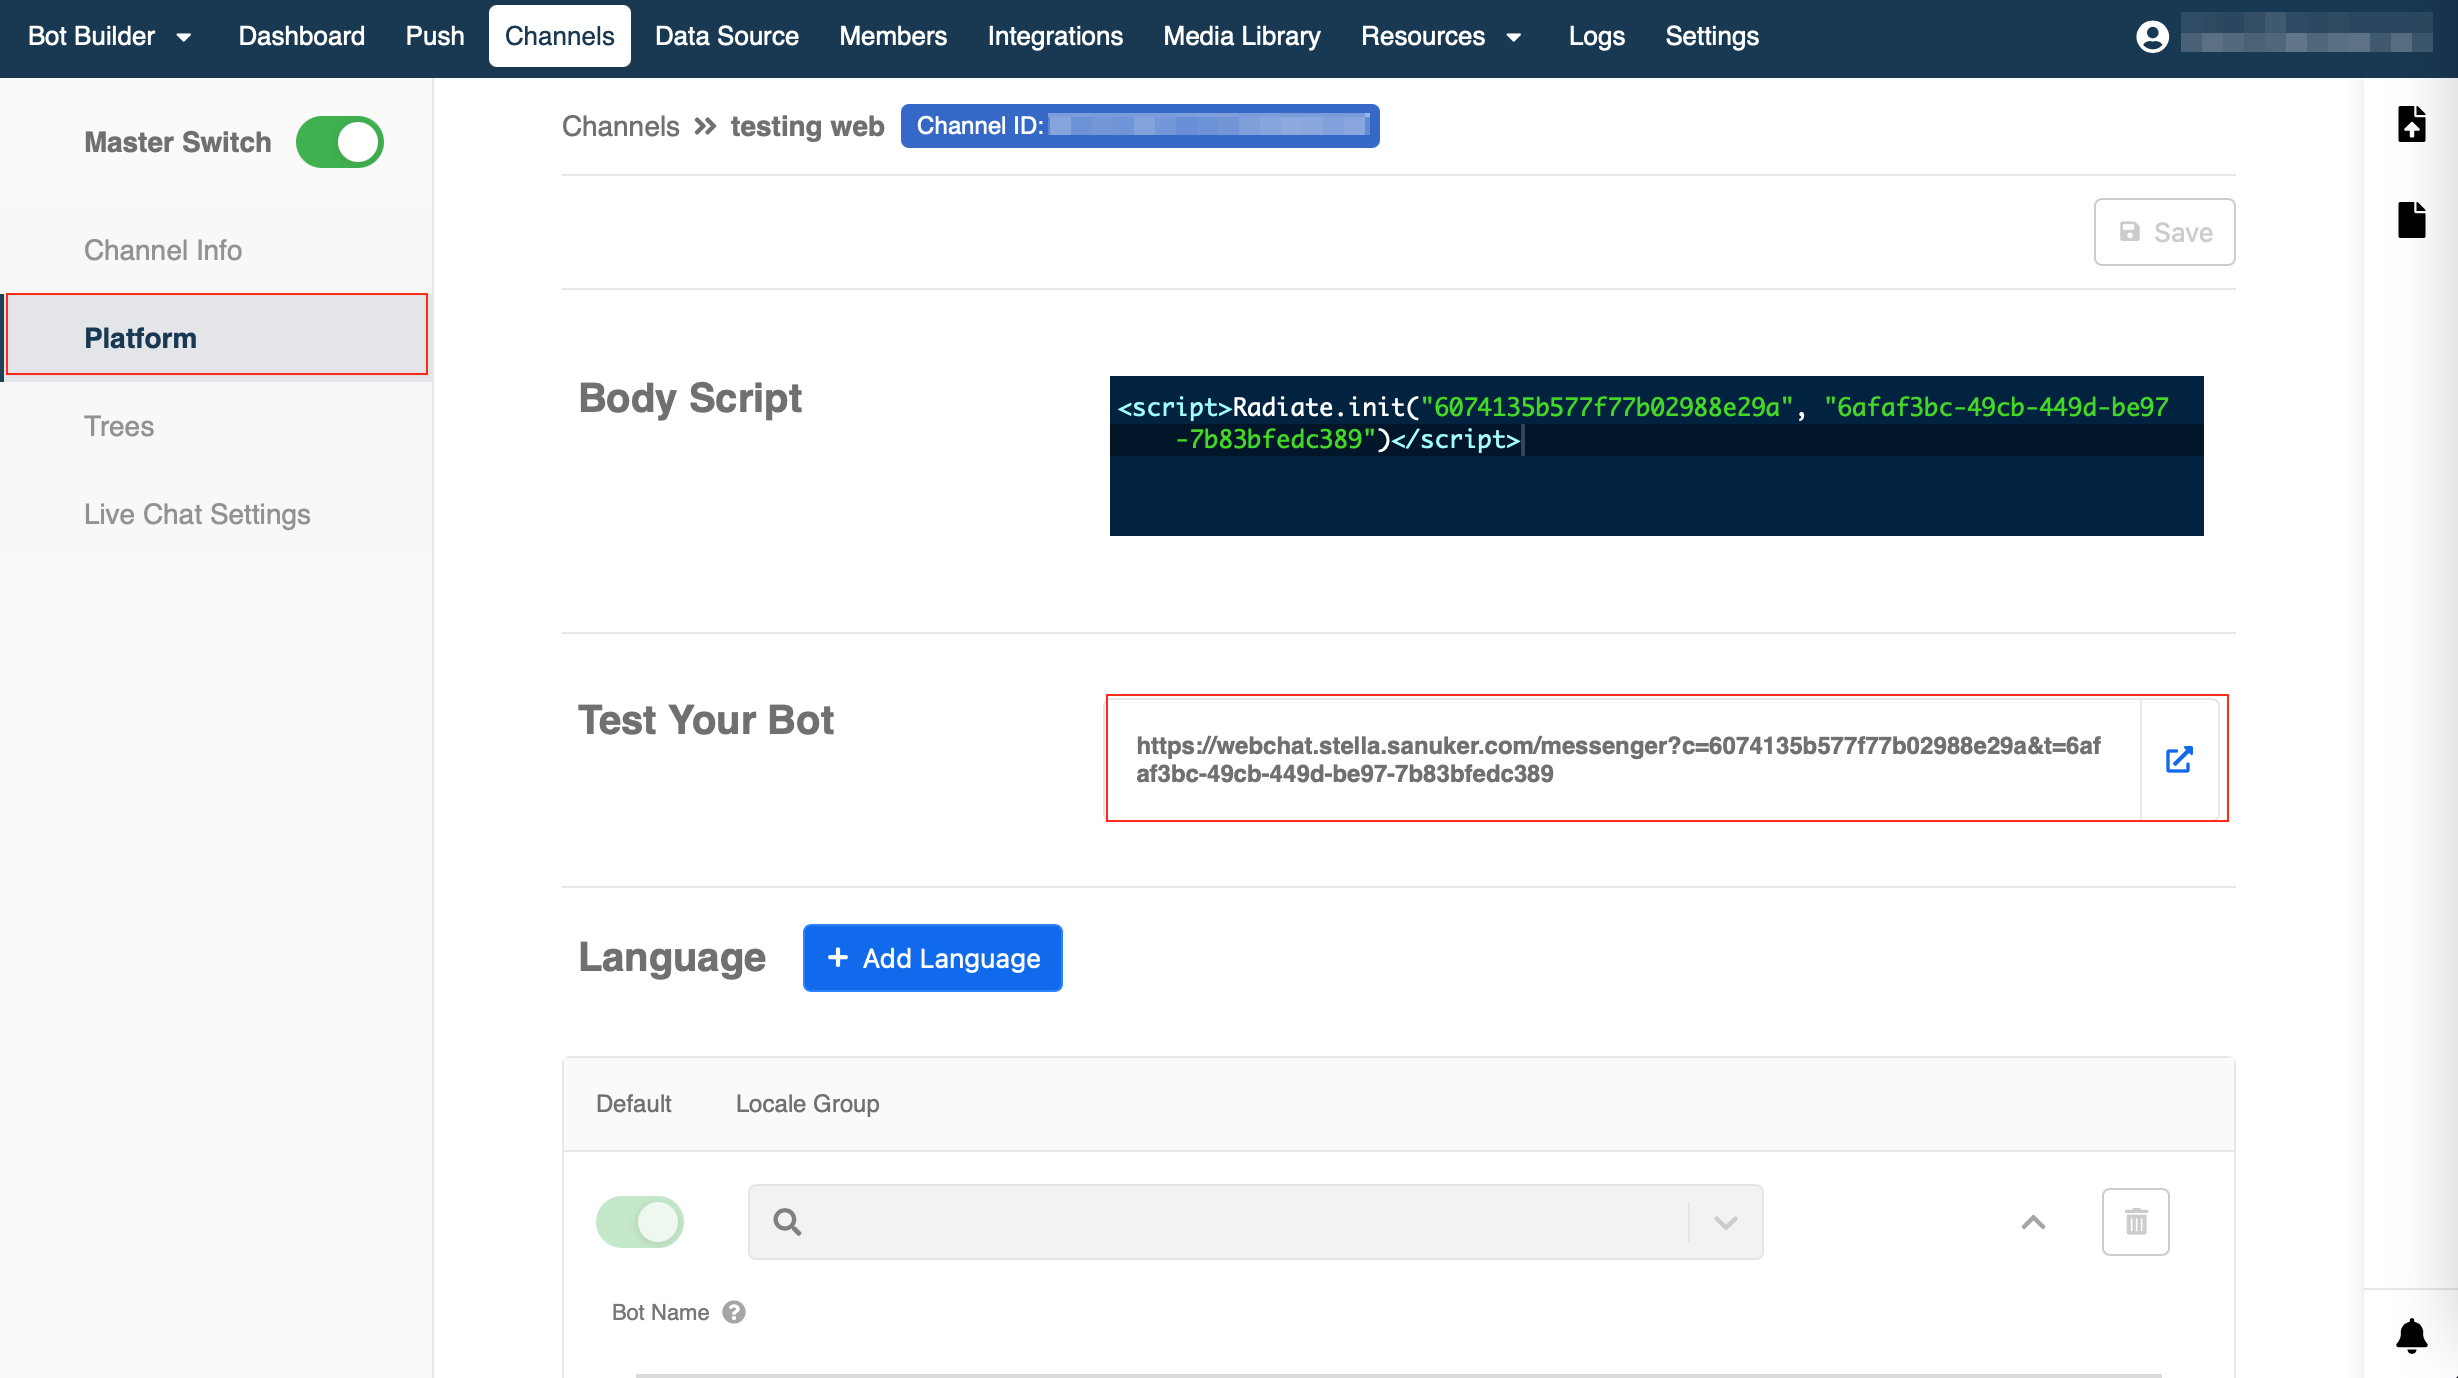
- Go to "Platform" on the left menu. Select "Web Chat". Click "Save".

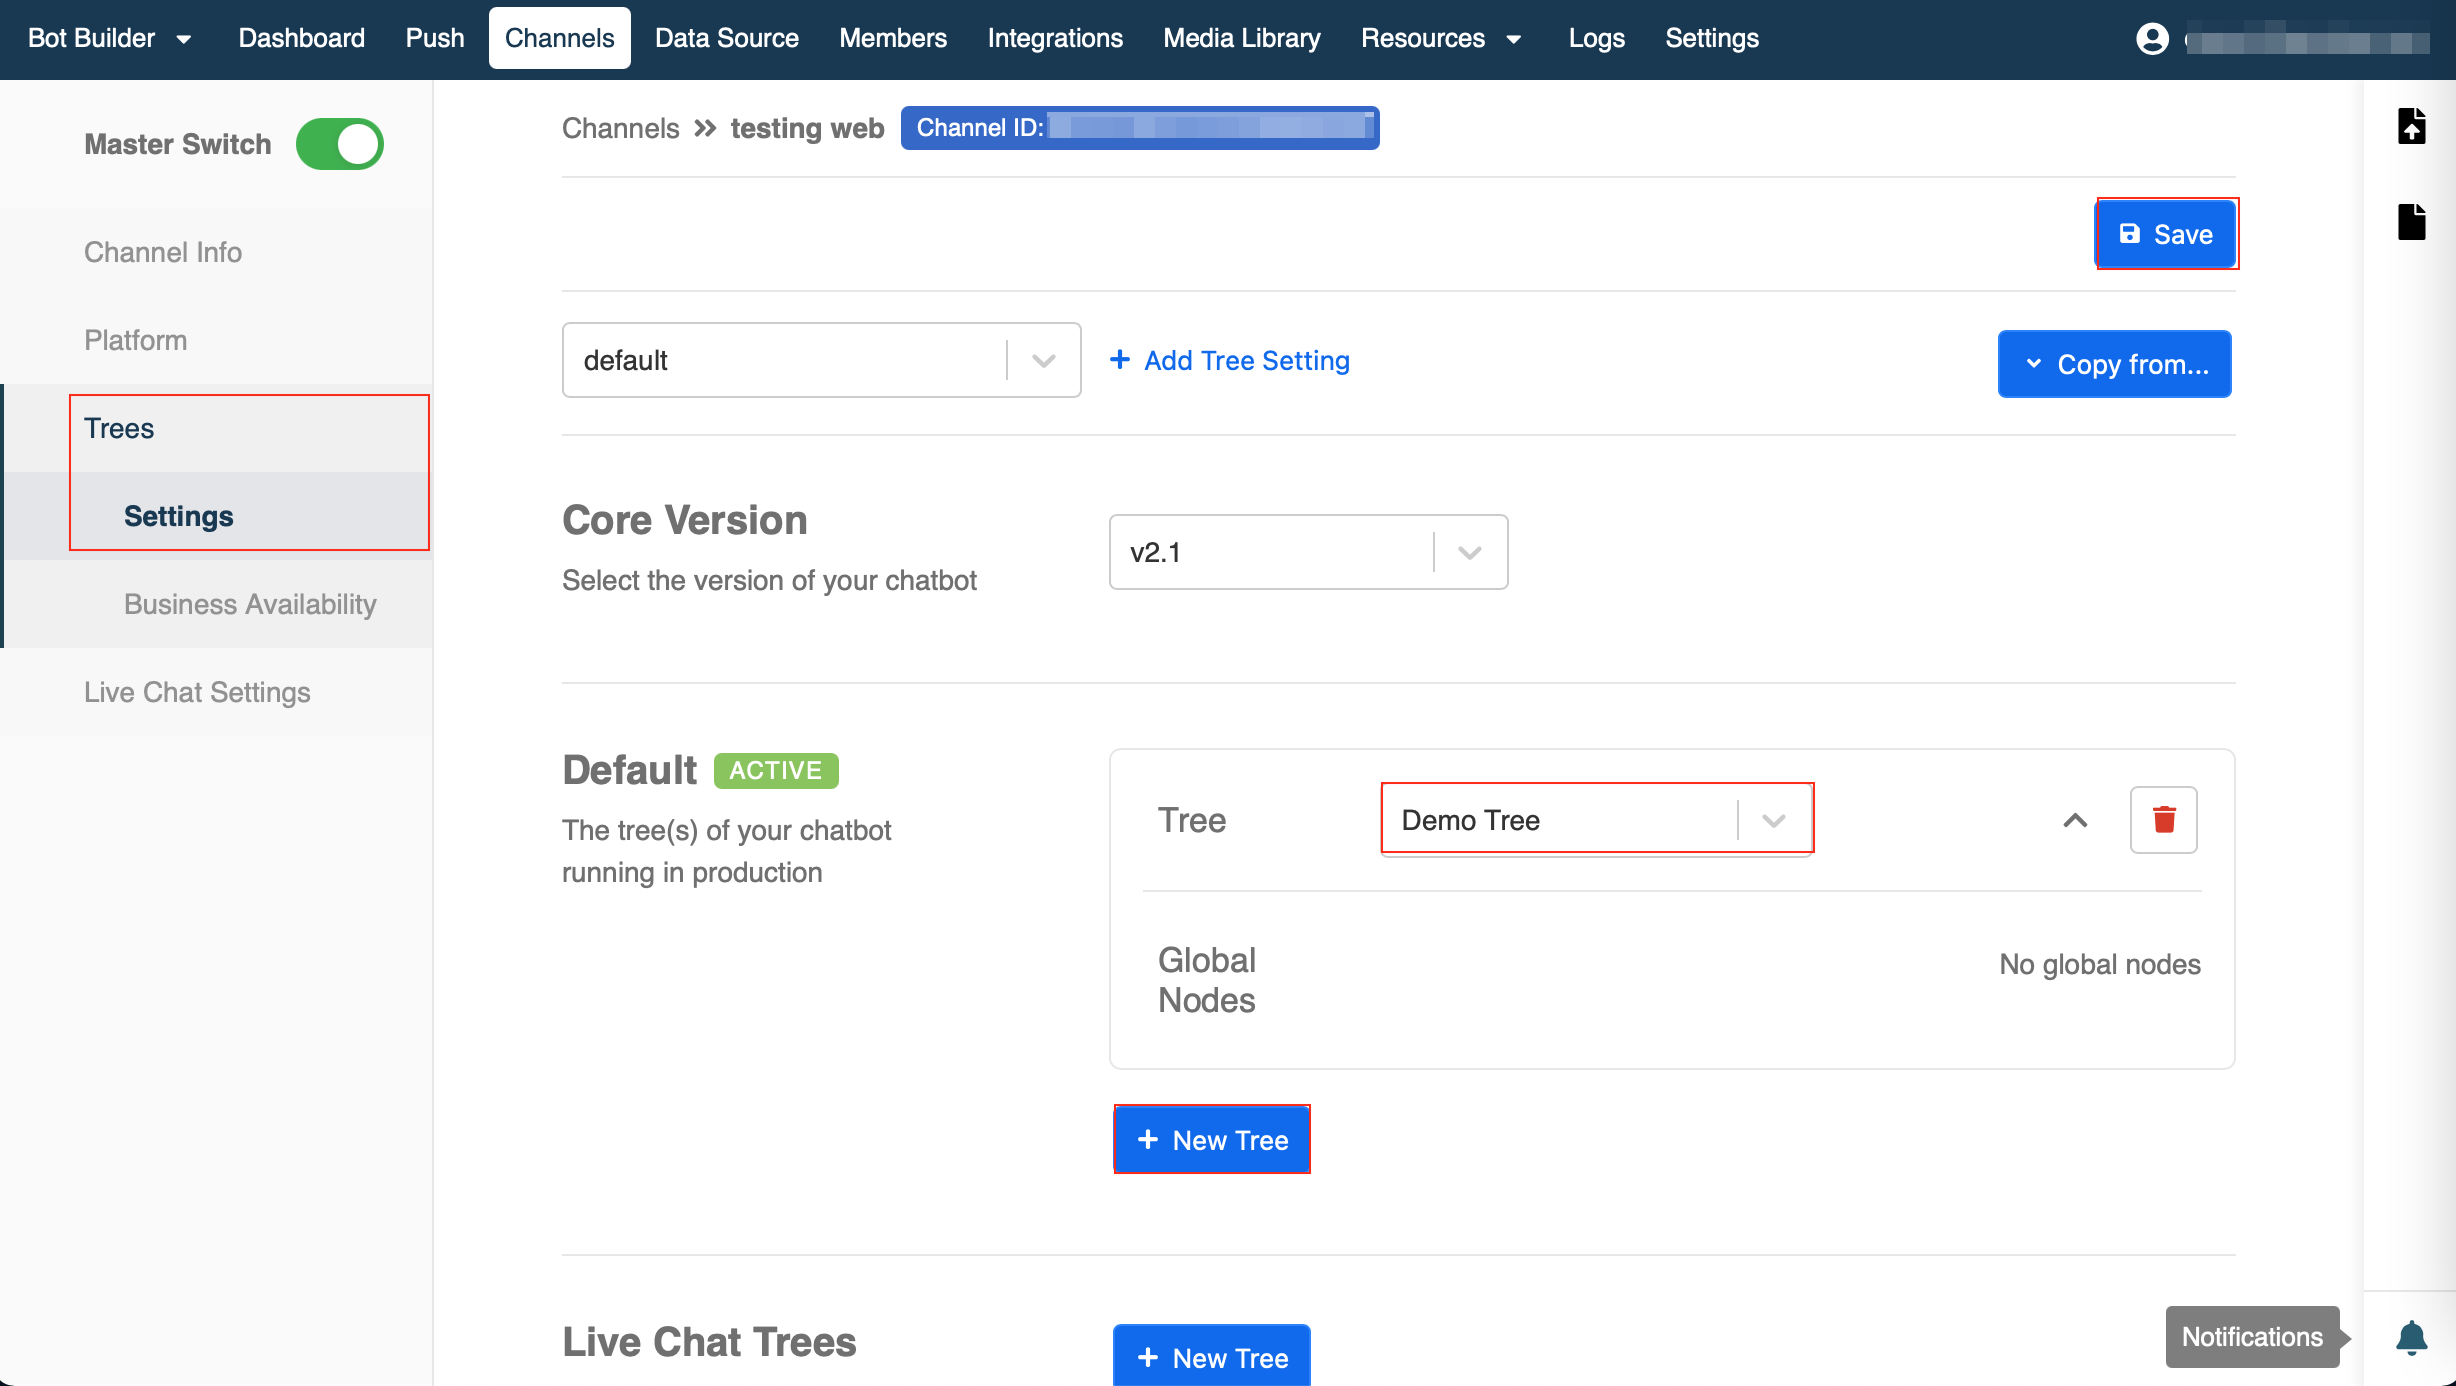
- Go to "Trees" on the left menu, select "Settings". Then, click on "+ New Tree" and select your first tree. Click "Save"
Test Your Greetings Message
Now you have created your first tree and a node that contains a trigger and response. Once you have connected your tree to the channel, you can test your result with Web Chat.
- Go to "Platform" on the left menu. Scroll down to locate "Test Your Bot". Copy the link and open it in your browser.
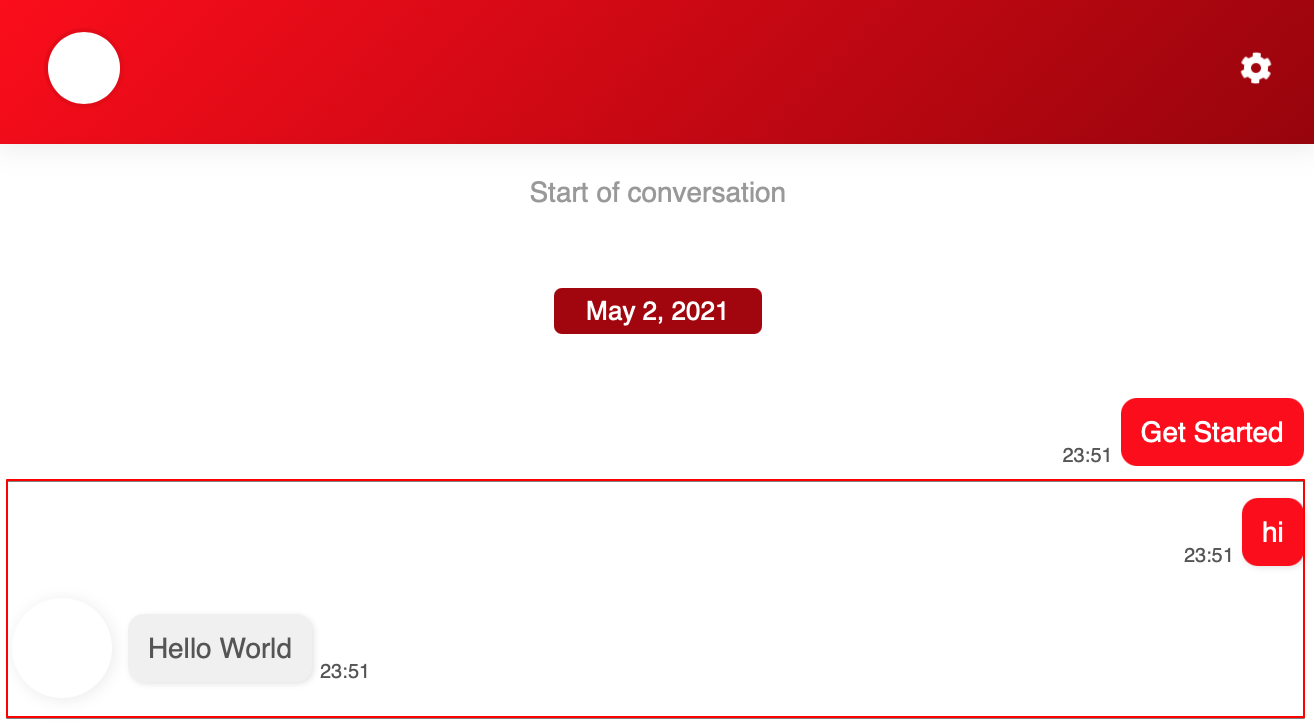
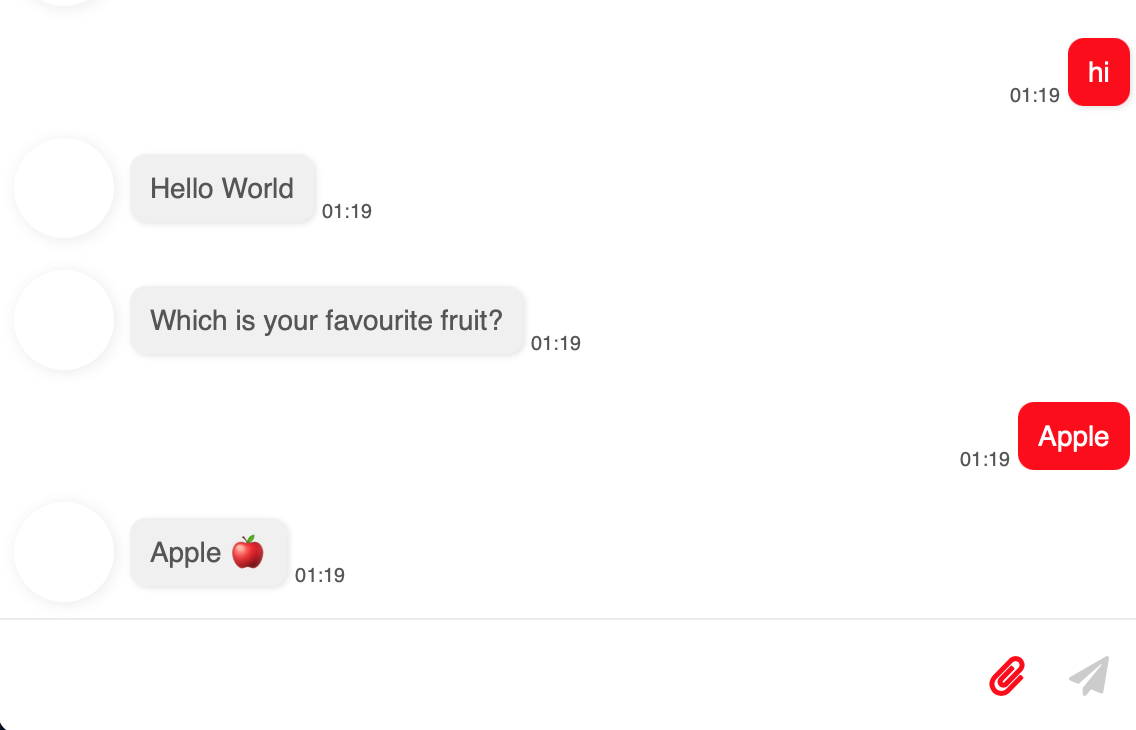
- Now you can type the Keyword you have created to test you first chatbot! See the expected outcome.
STEP 4 : Build Child Nodes
We've created the first node, what's next?
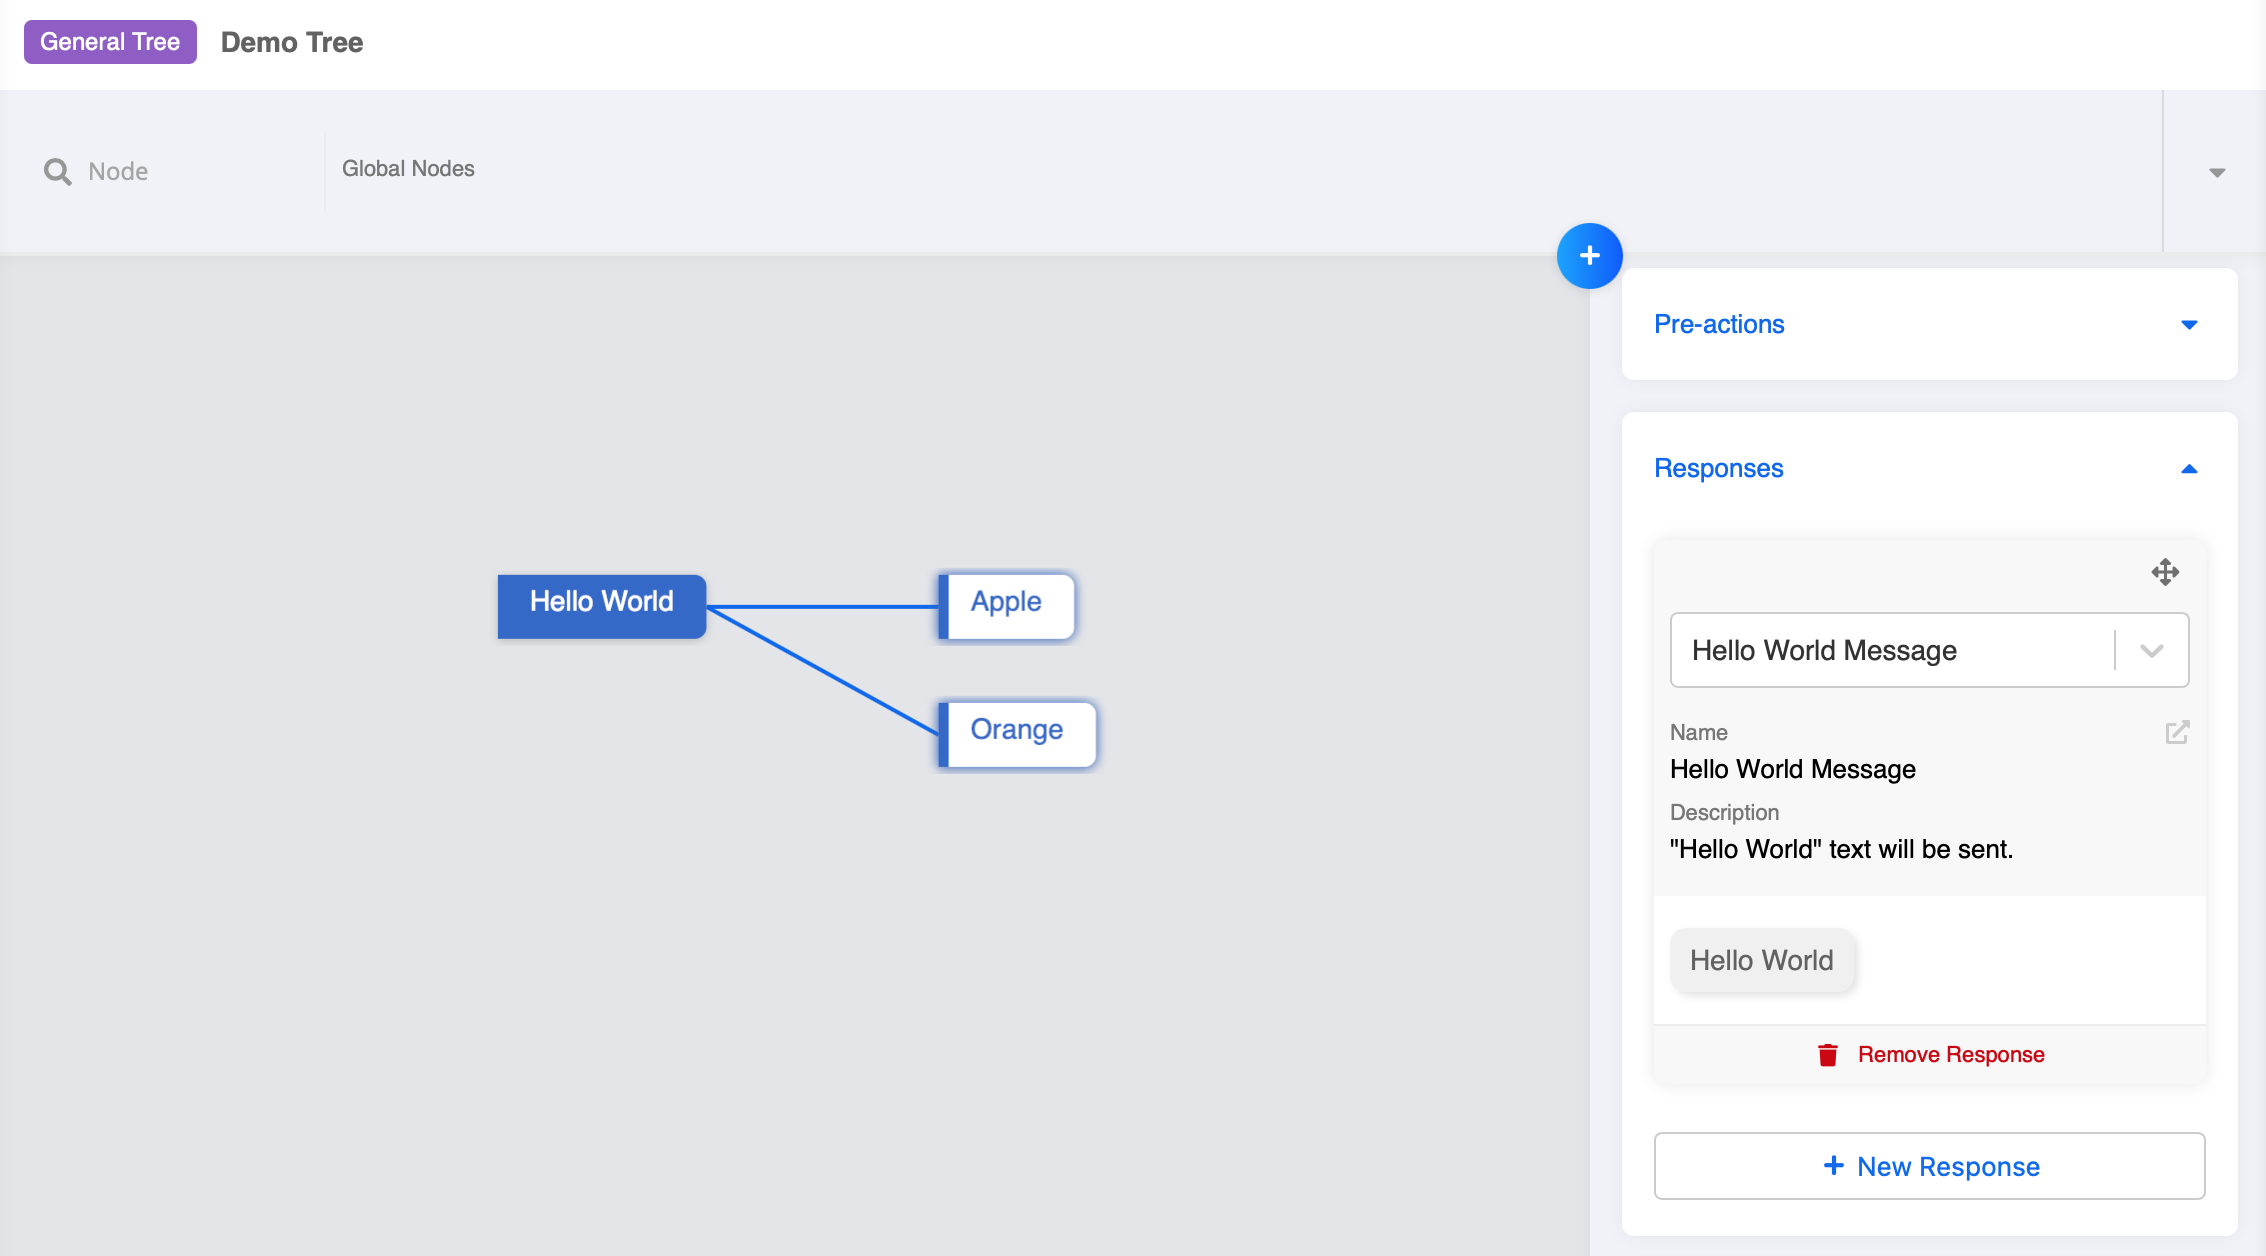
We will build two more nodes following the first node, and continue to expand our tree structure.
- Create two new tree nodes following the first node. Fill in the Name for both nodes.
- In the new nodes, create distinct text response in the two new nodes respectively.

Create Quick Reply
What is Quick Reply?
In response, Quick Reply is a kind of messsage type that presents a button. It will only be displayed once and will be dismissed once it is clicked.
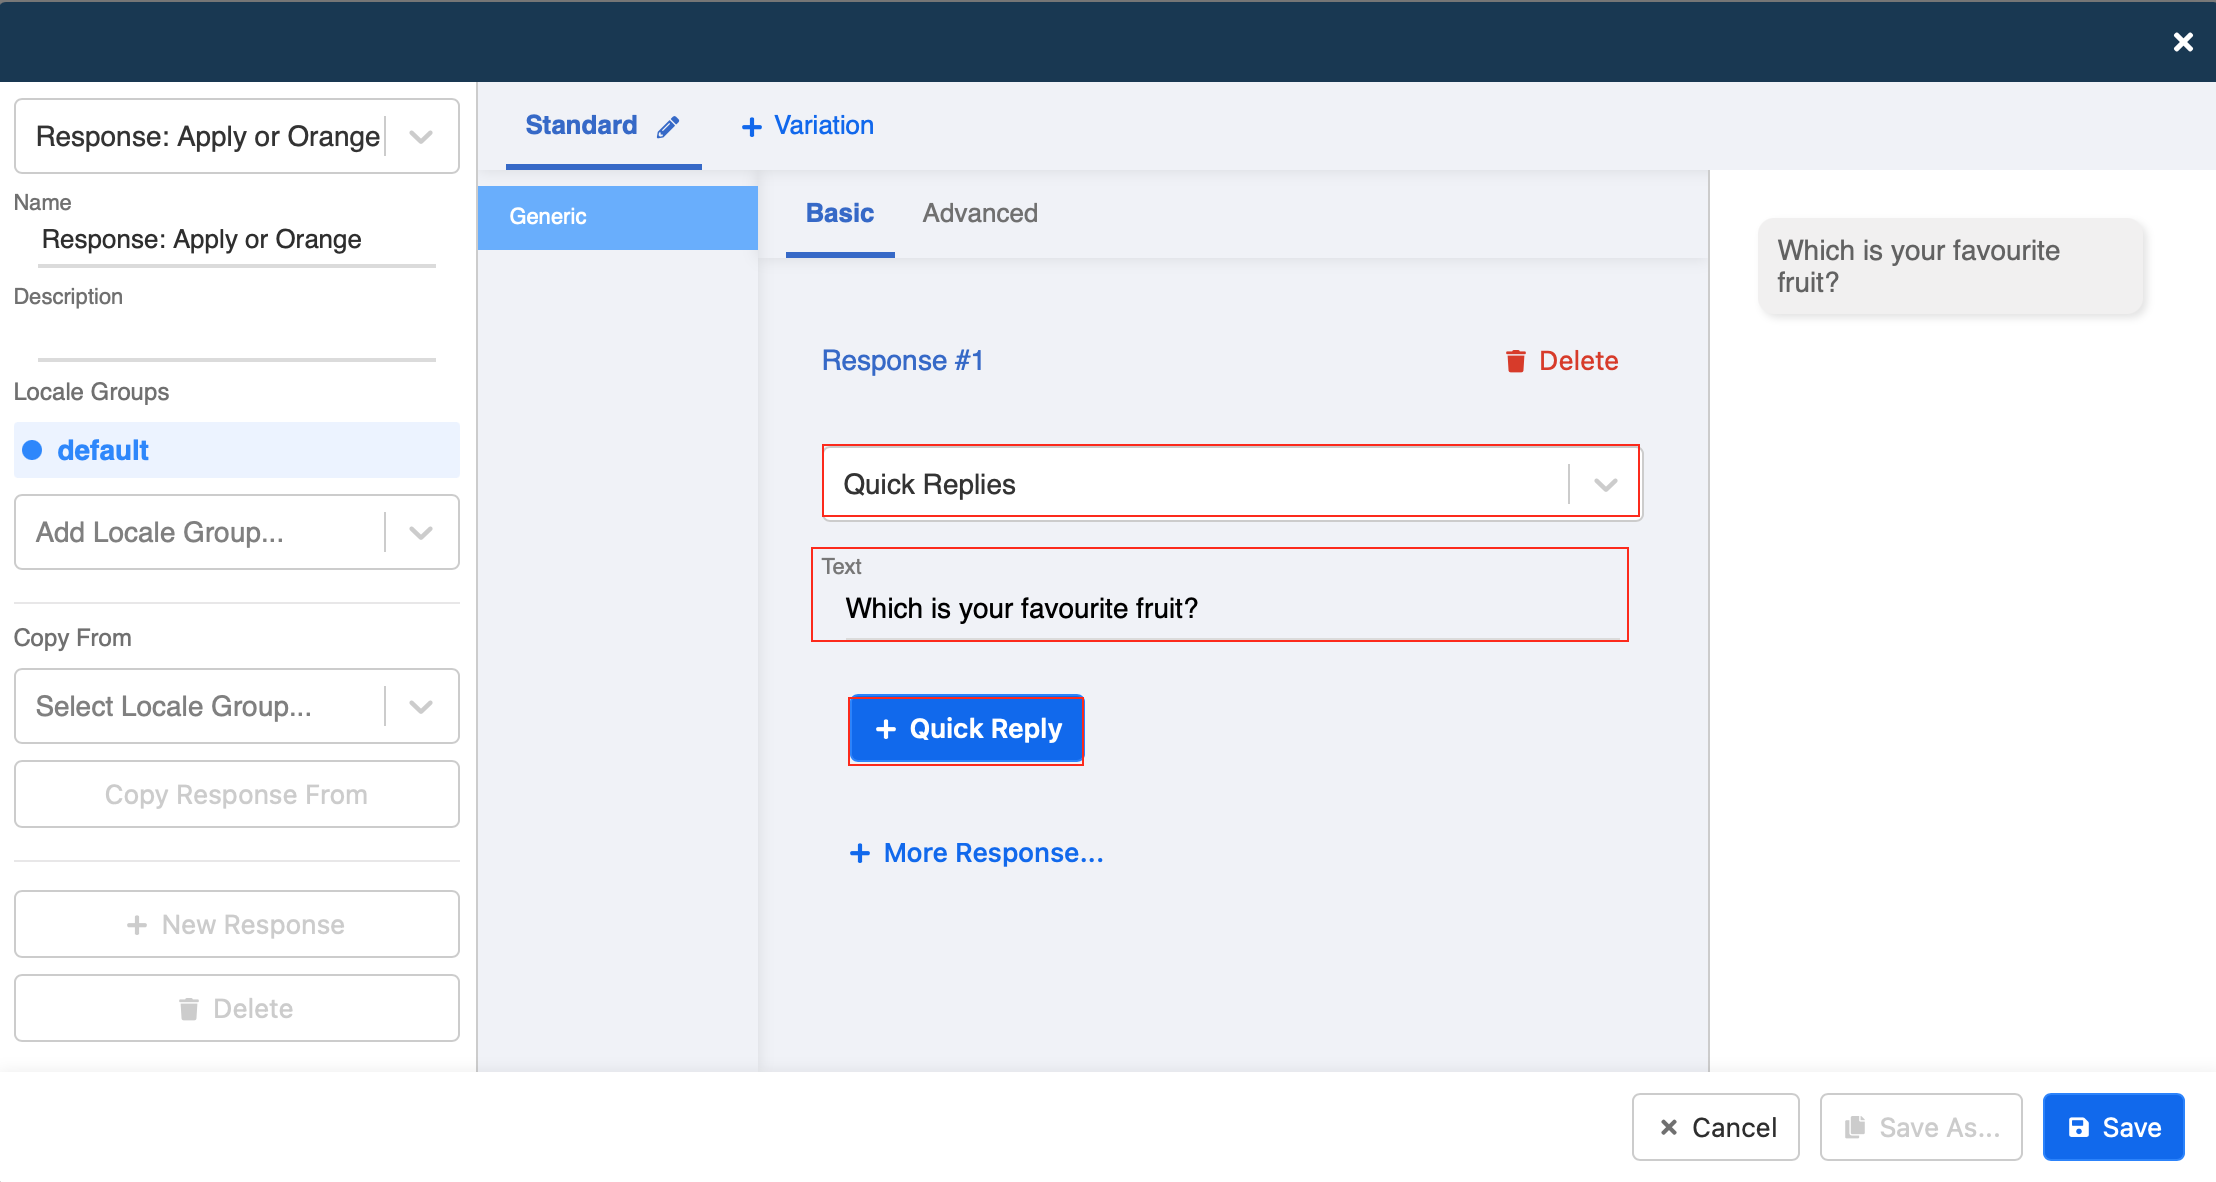
- Go back to the first node, create a new Response.
- Select "Quick Reply" as the message type. Fill in the content and input a Payload in block letters.
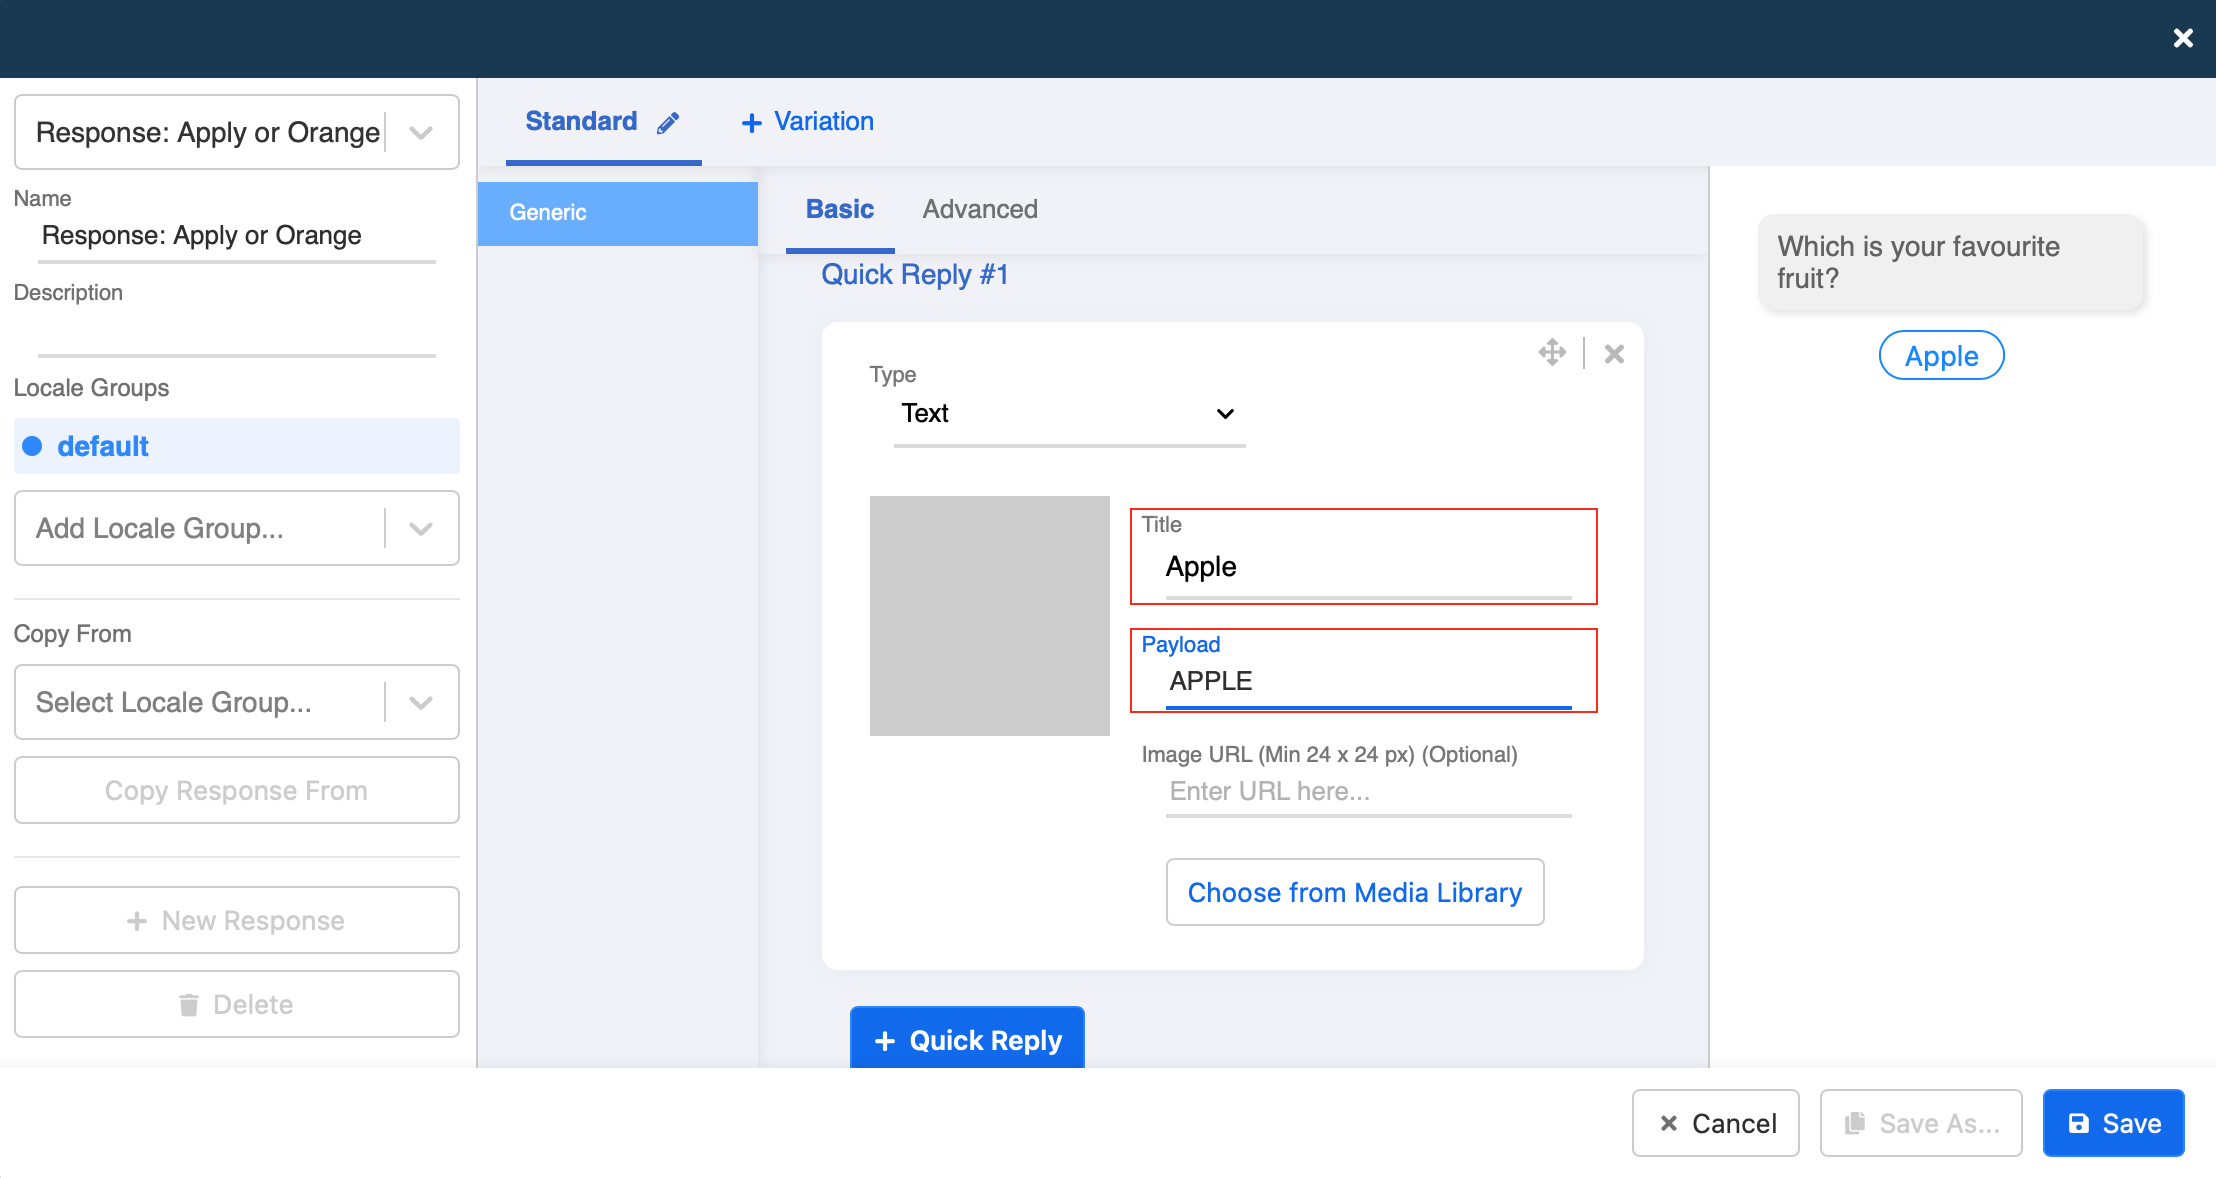
- Repeat Step 22 to create another "Quick Reply".

Create Payload Trigger
What is Payload?
Payload is a case-sensitive and self-defined value used for buttons. The payload value of a button response must match with the corresponding trigger of another node.
Click here to learn more about payload.
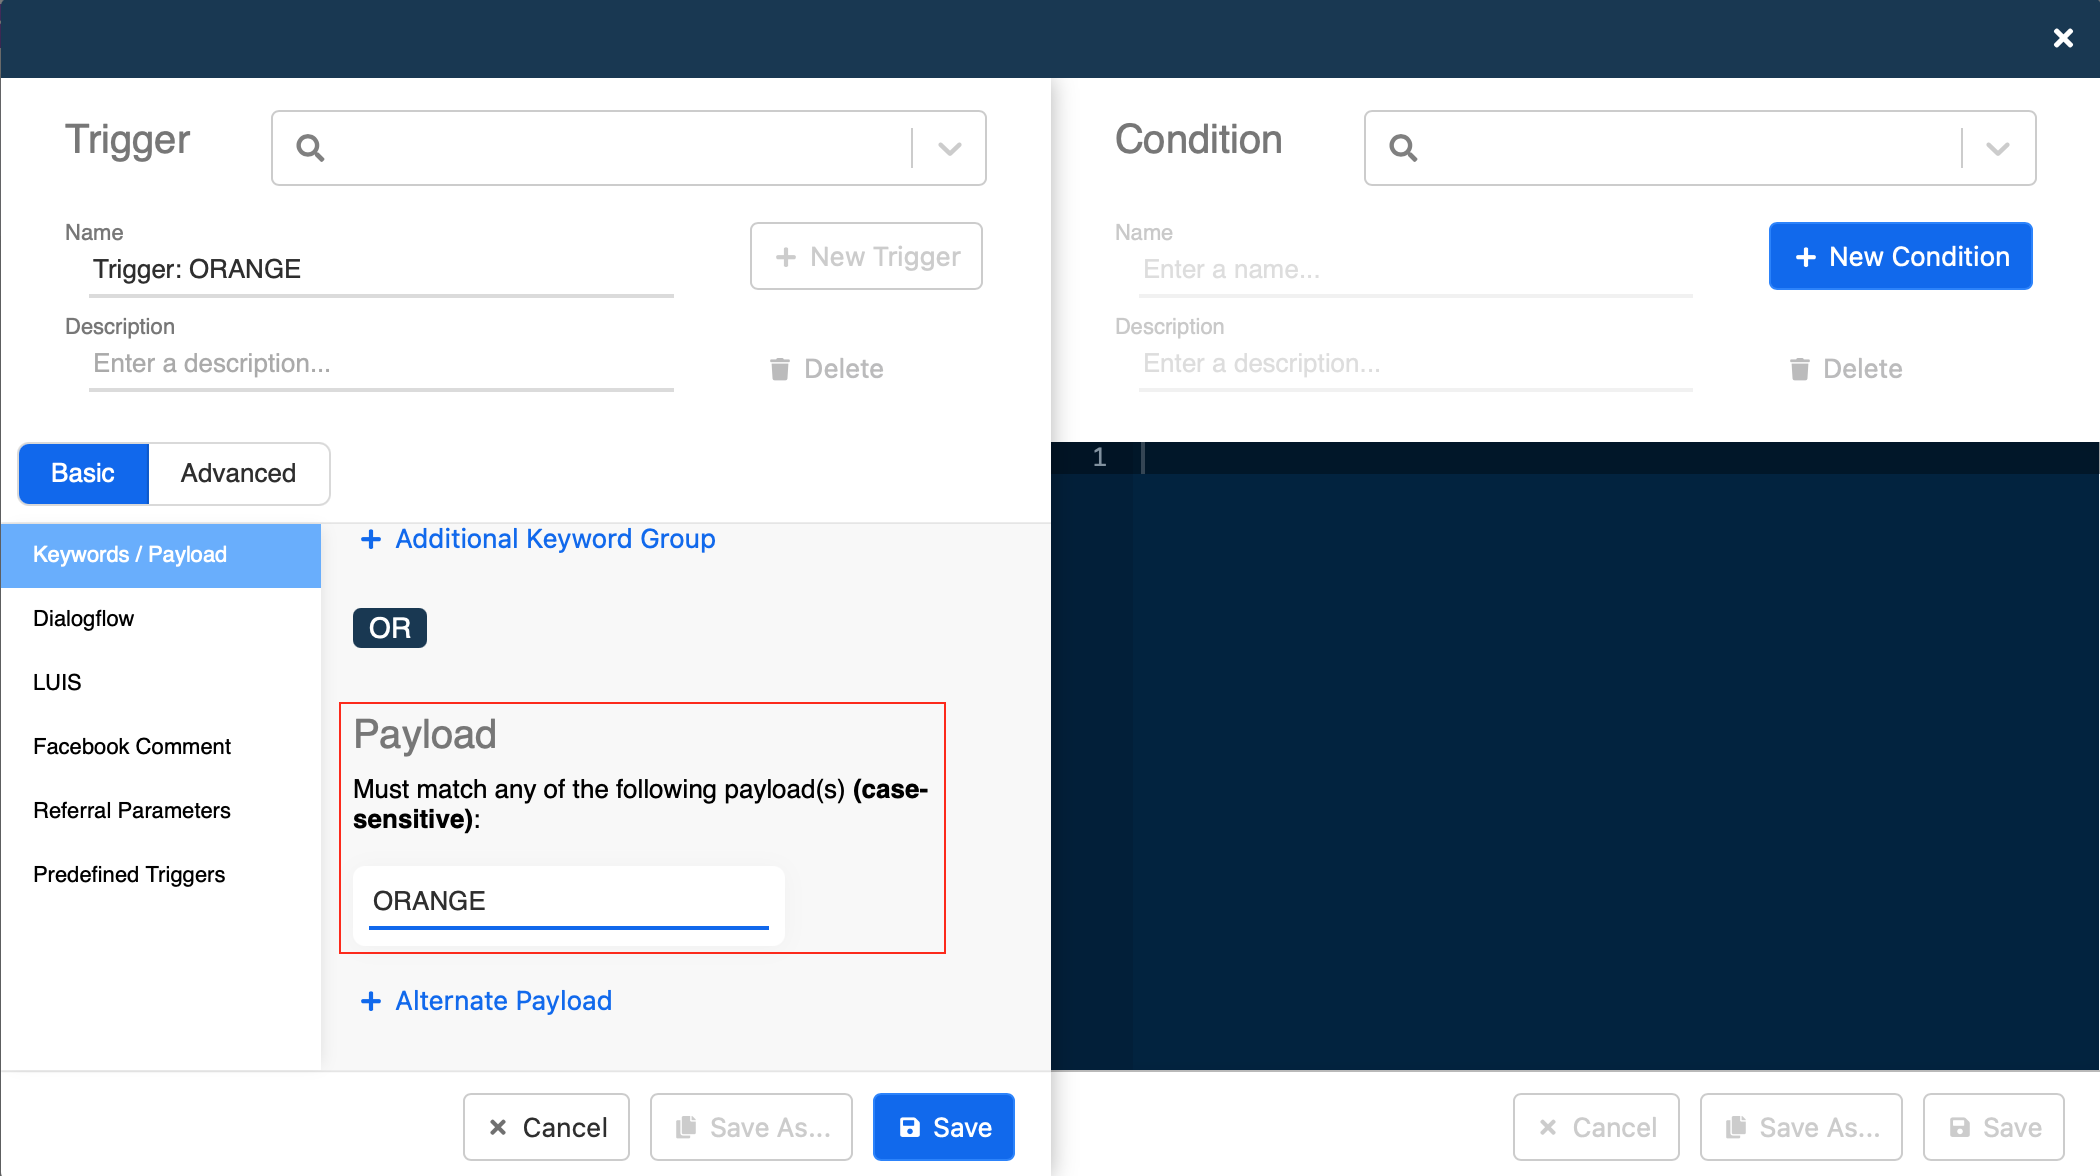
- Go to the node "Apple", create a trigger. Input the Payload that you have set for the quick reply.
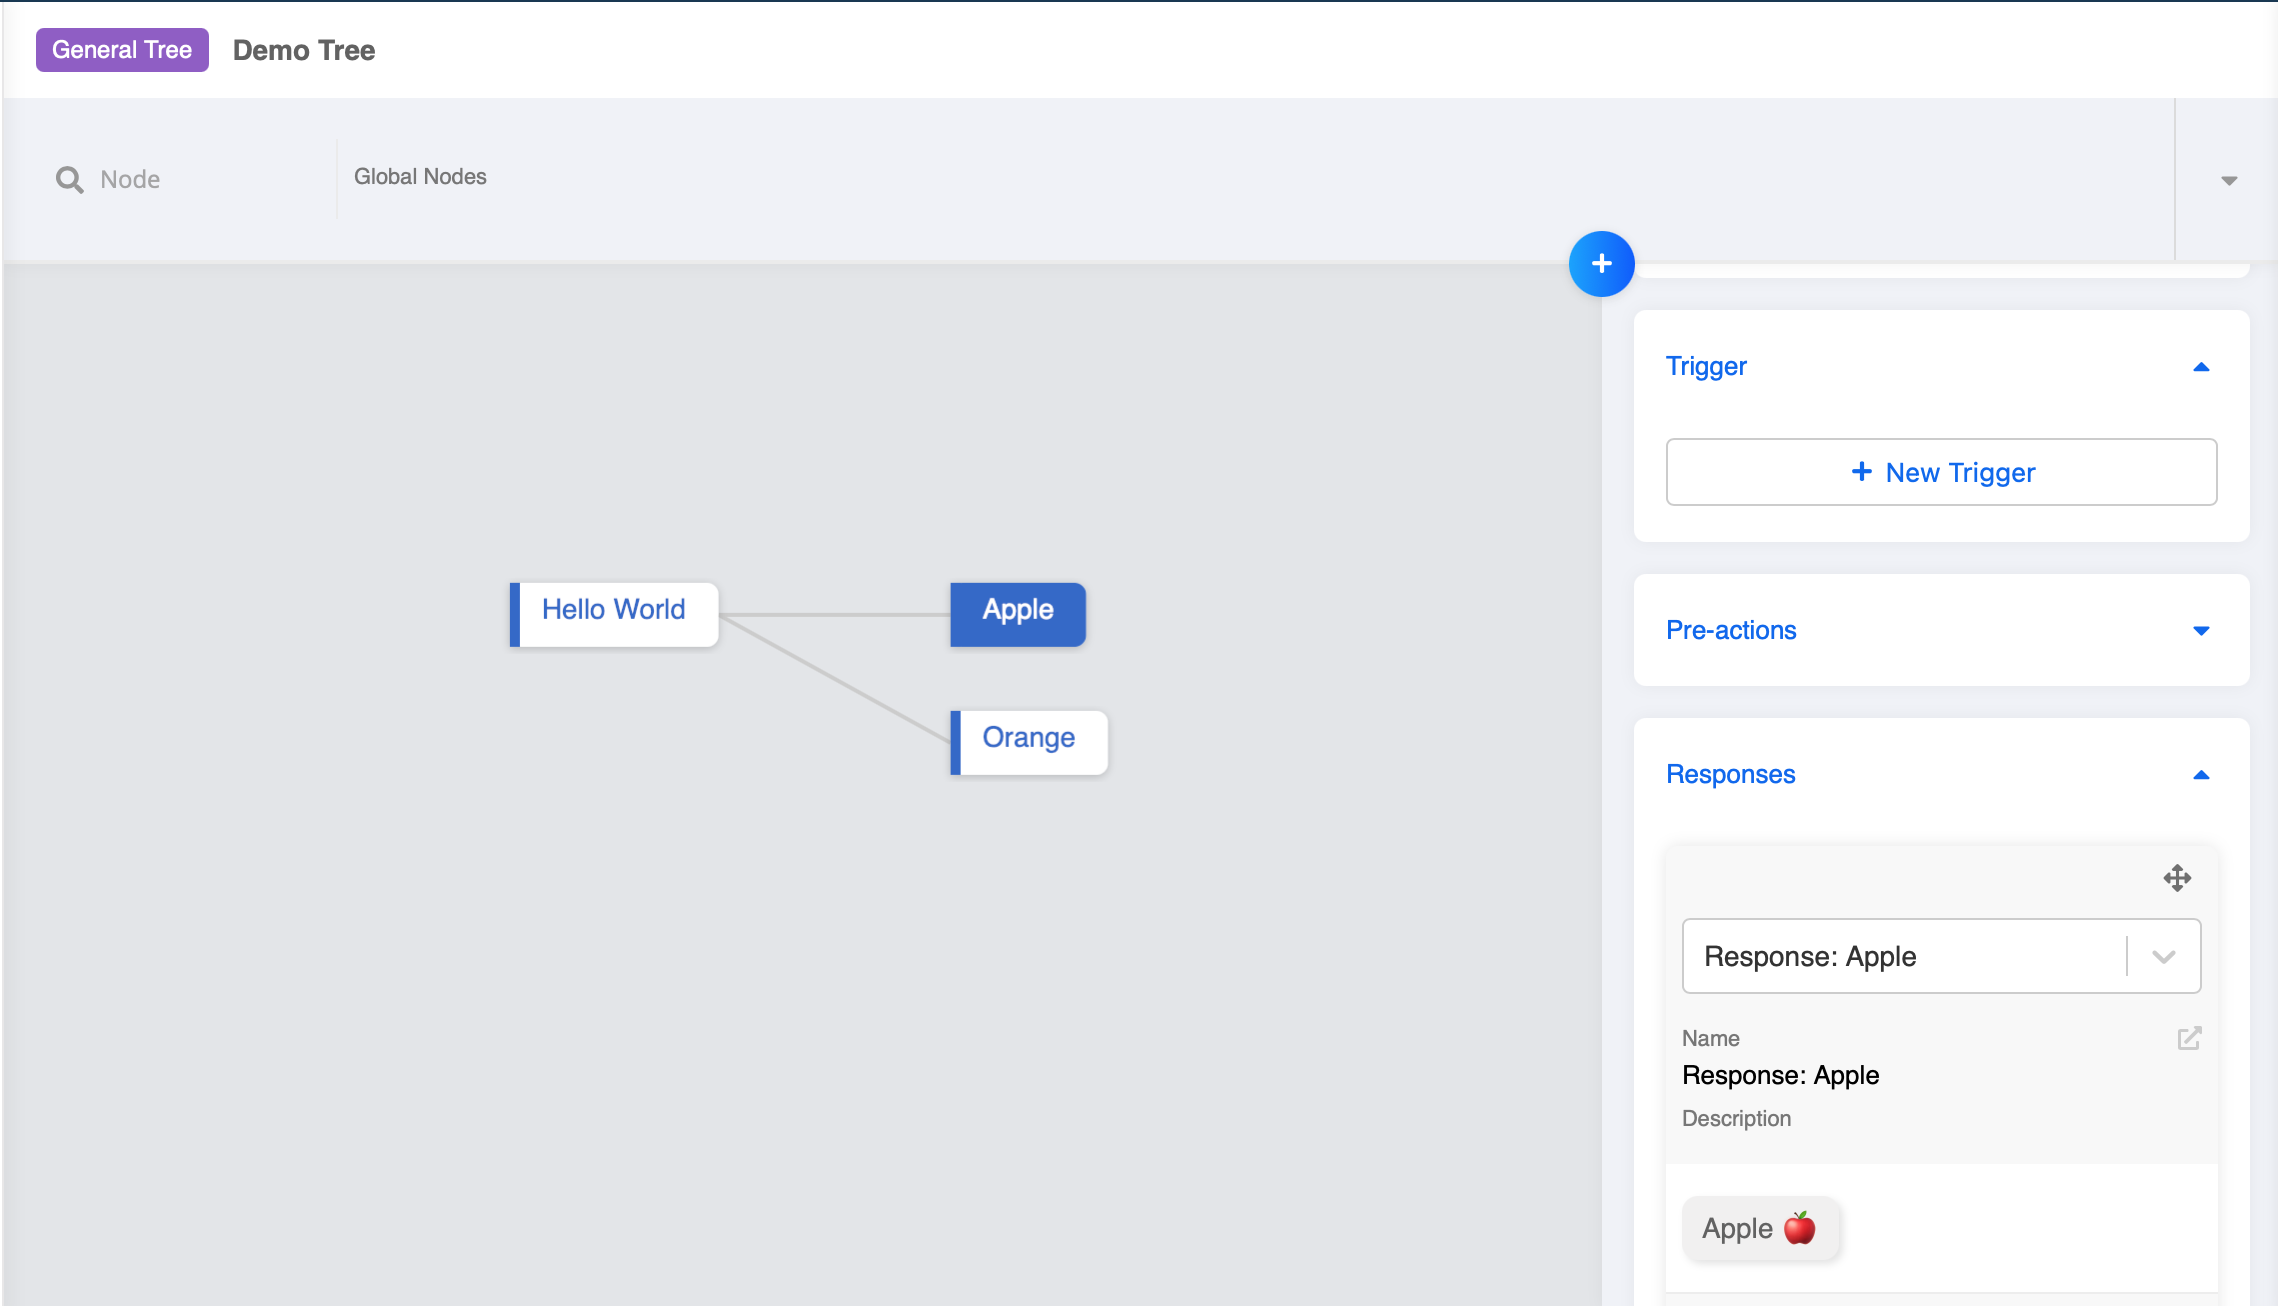

- Repeat step 24 in the node "Orange".
Test your Child Nodes
Now you have created two quicky replies and two child nodes at the second layer of your tree.
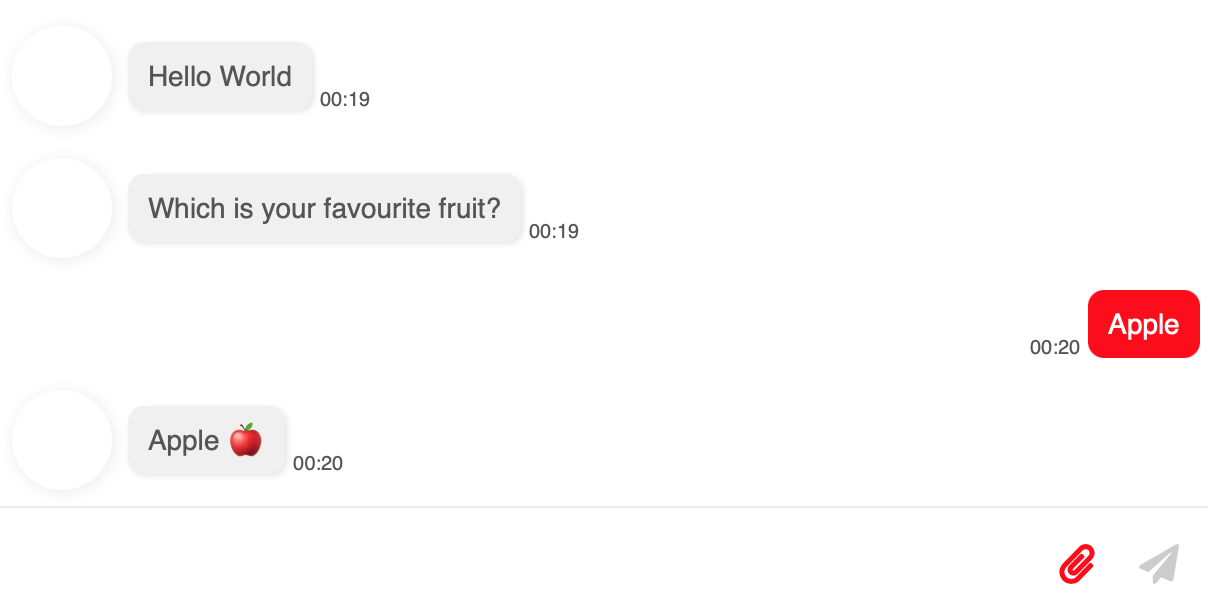
- In web chat, click on any one of the quick reply buttons. The correpsonding response should be displayed.
- Now, if you type "Hi" again, will the chatbot greet you again? The answer is NO. What should we do if we want to go back to the first node?
Node to Match
To better understand what's going on, you can first learn about the Node To Match.
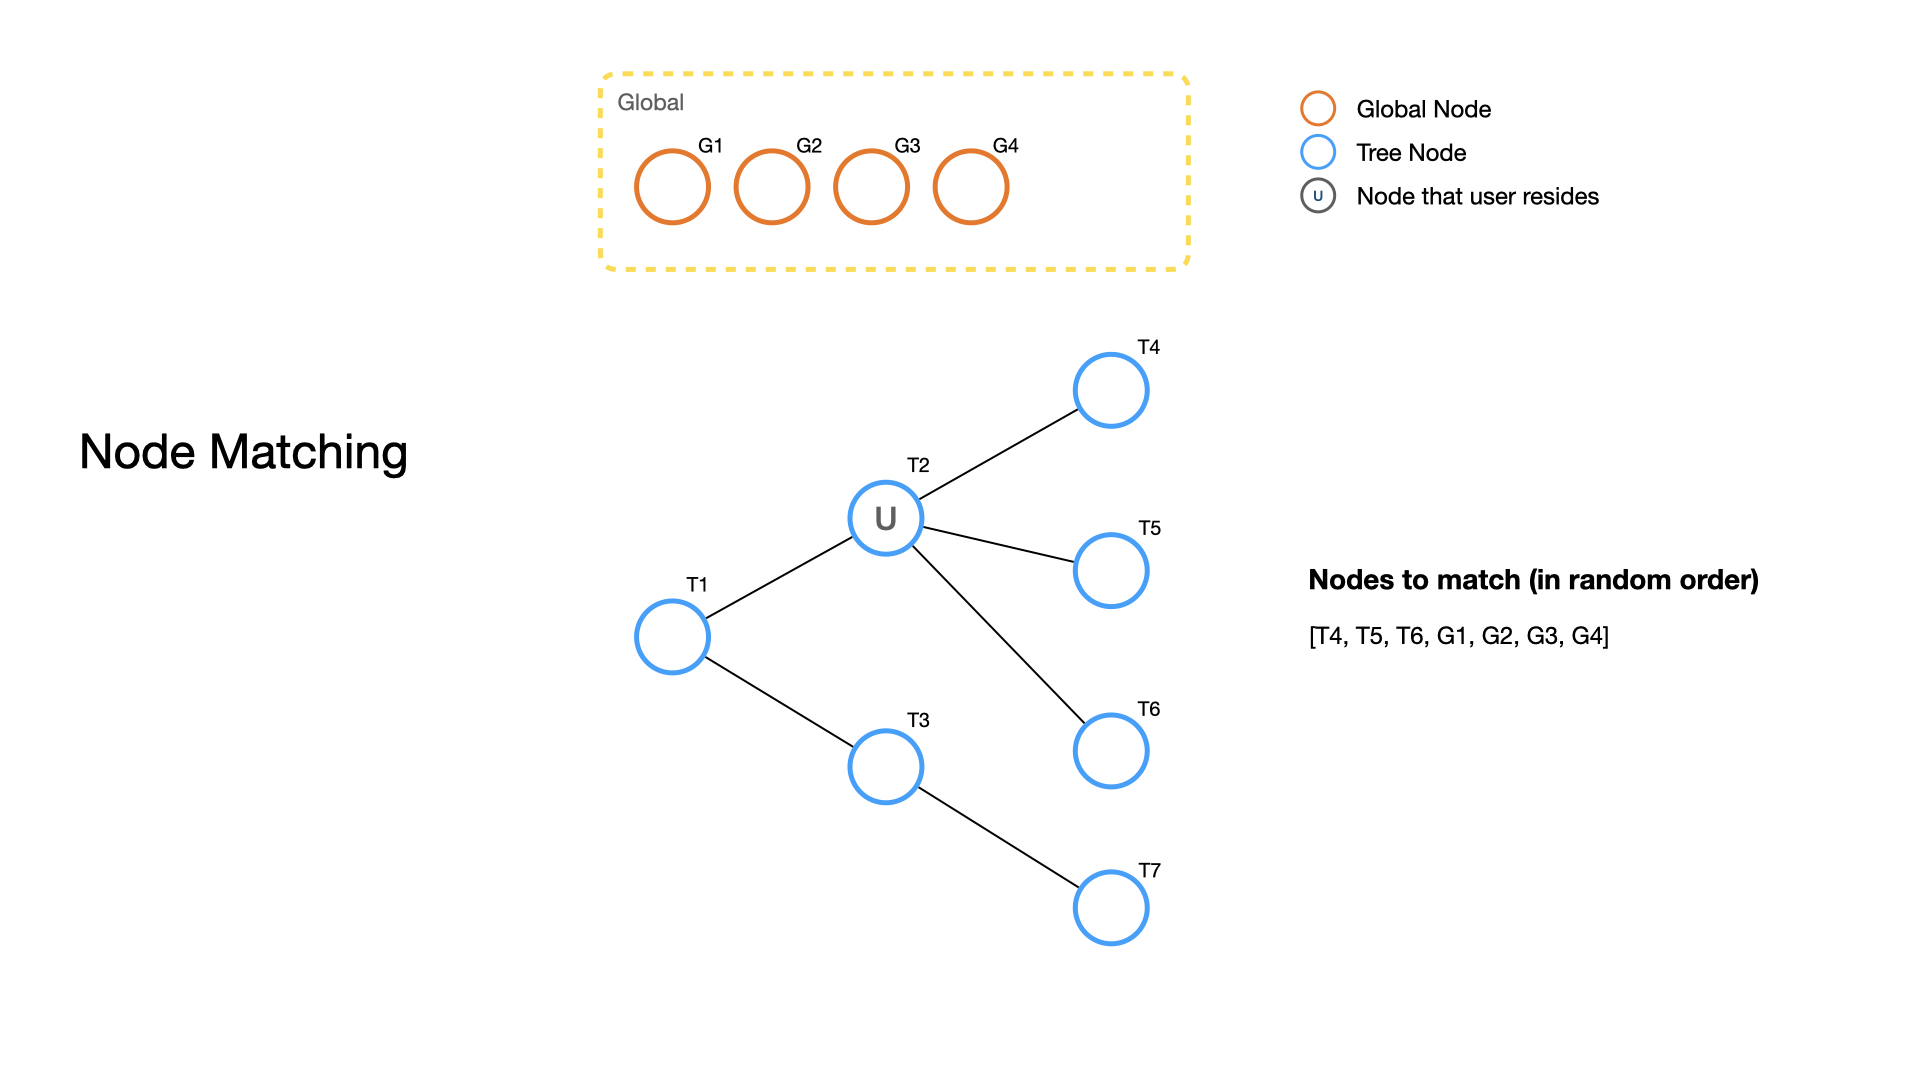
WOZTELL will save the node a member is last in. Then, it will decide where to go next. The next node to be matched can be the child nodes, global nodes or global nodes on channel level.
At this moment, since we have no global nodes and no child nodes directly connected to the current node, no next node can be matched and we are stuck at this node.
Reference:
- Child Node: Node directly connected to the current node
- Global Node: Node that can be triggered anywhere in a tree
- Channel Global Node: Same as global node, but can also be triggered even it is in another tree in the same channel
Click here to learn more about node to match.
STEP 5 : Build a Global Node
What is a Global Node?
A Global Node is a node that can be triggered at any point of the conversation, while a Tree Node can only be triggered following a designated path in a tree.
Click here to learn more about global node.
Create a Global Node
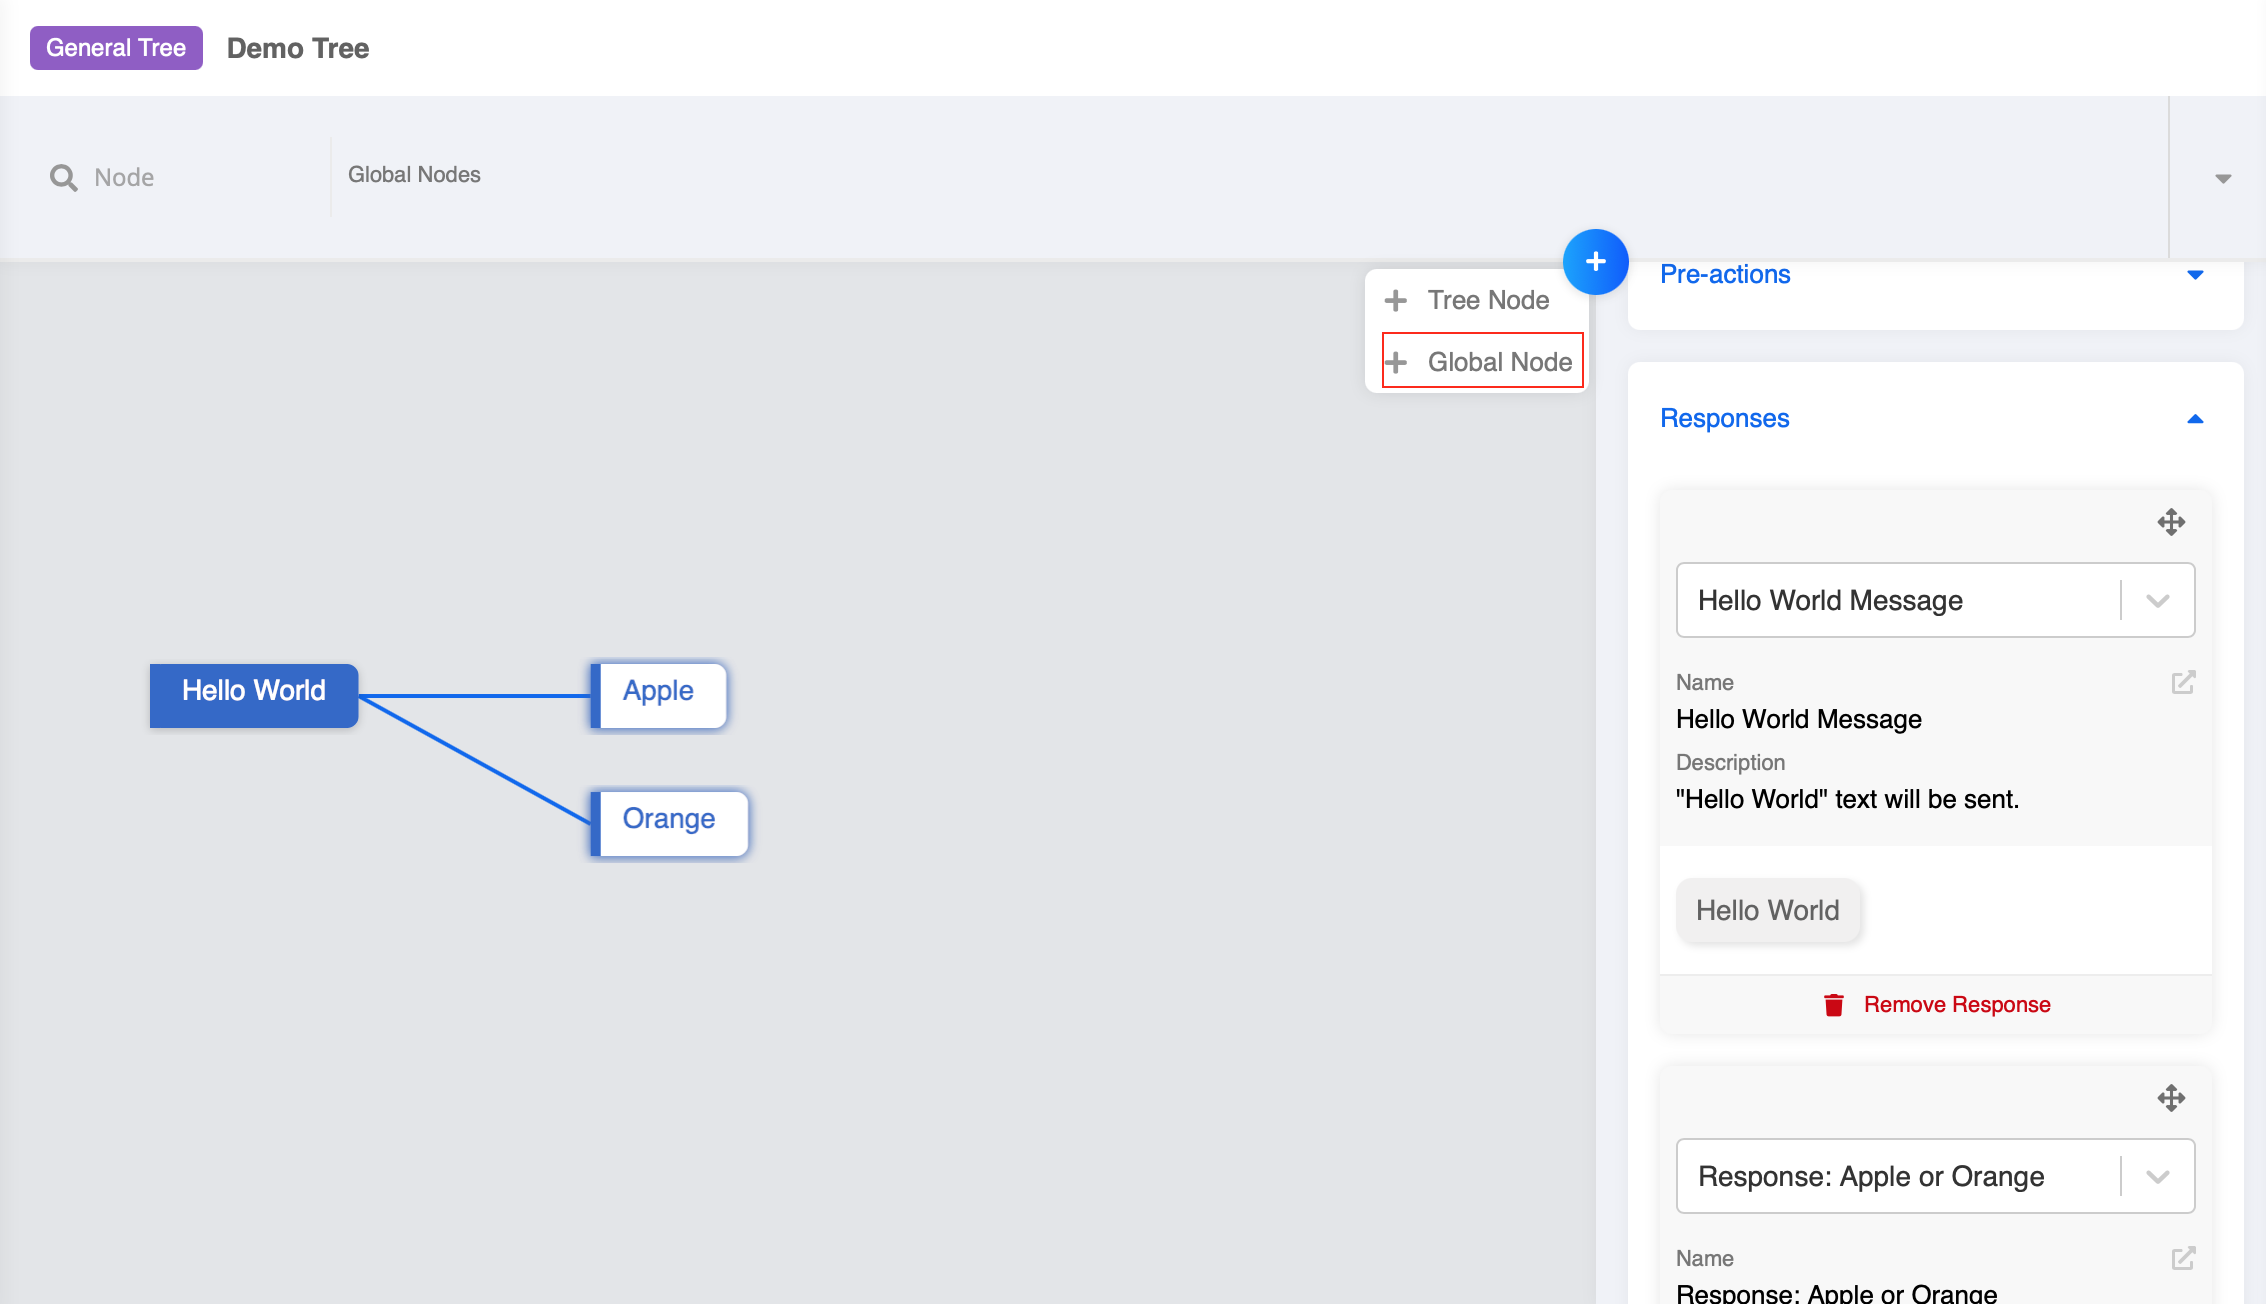
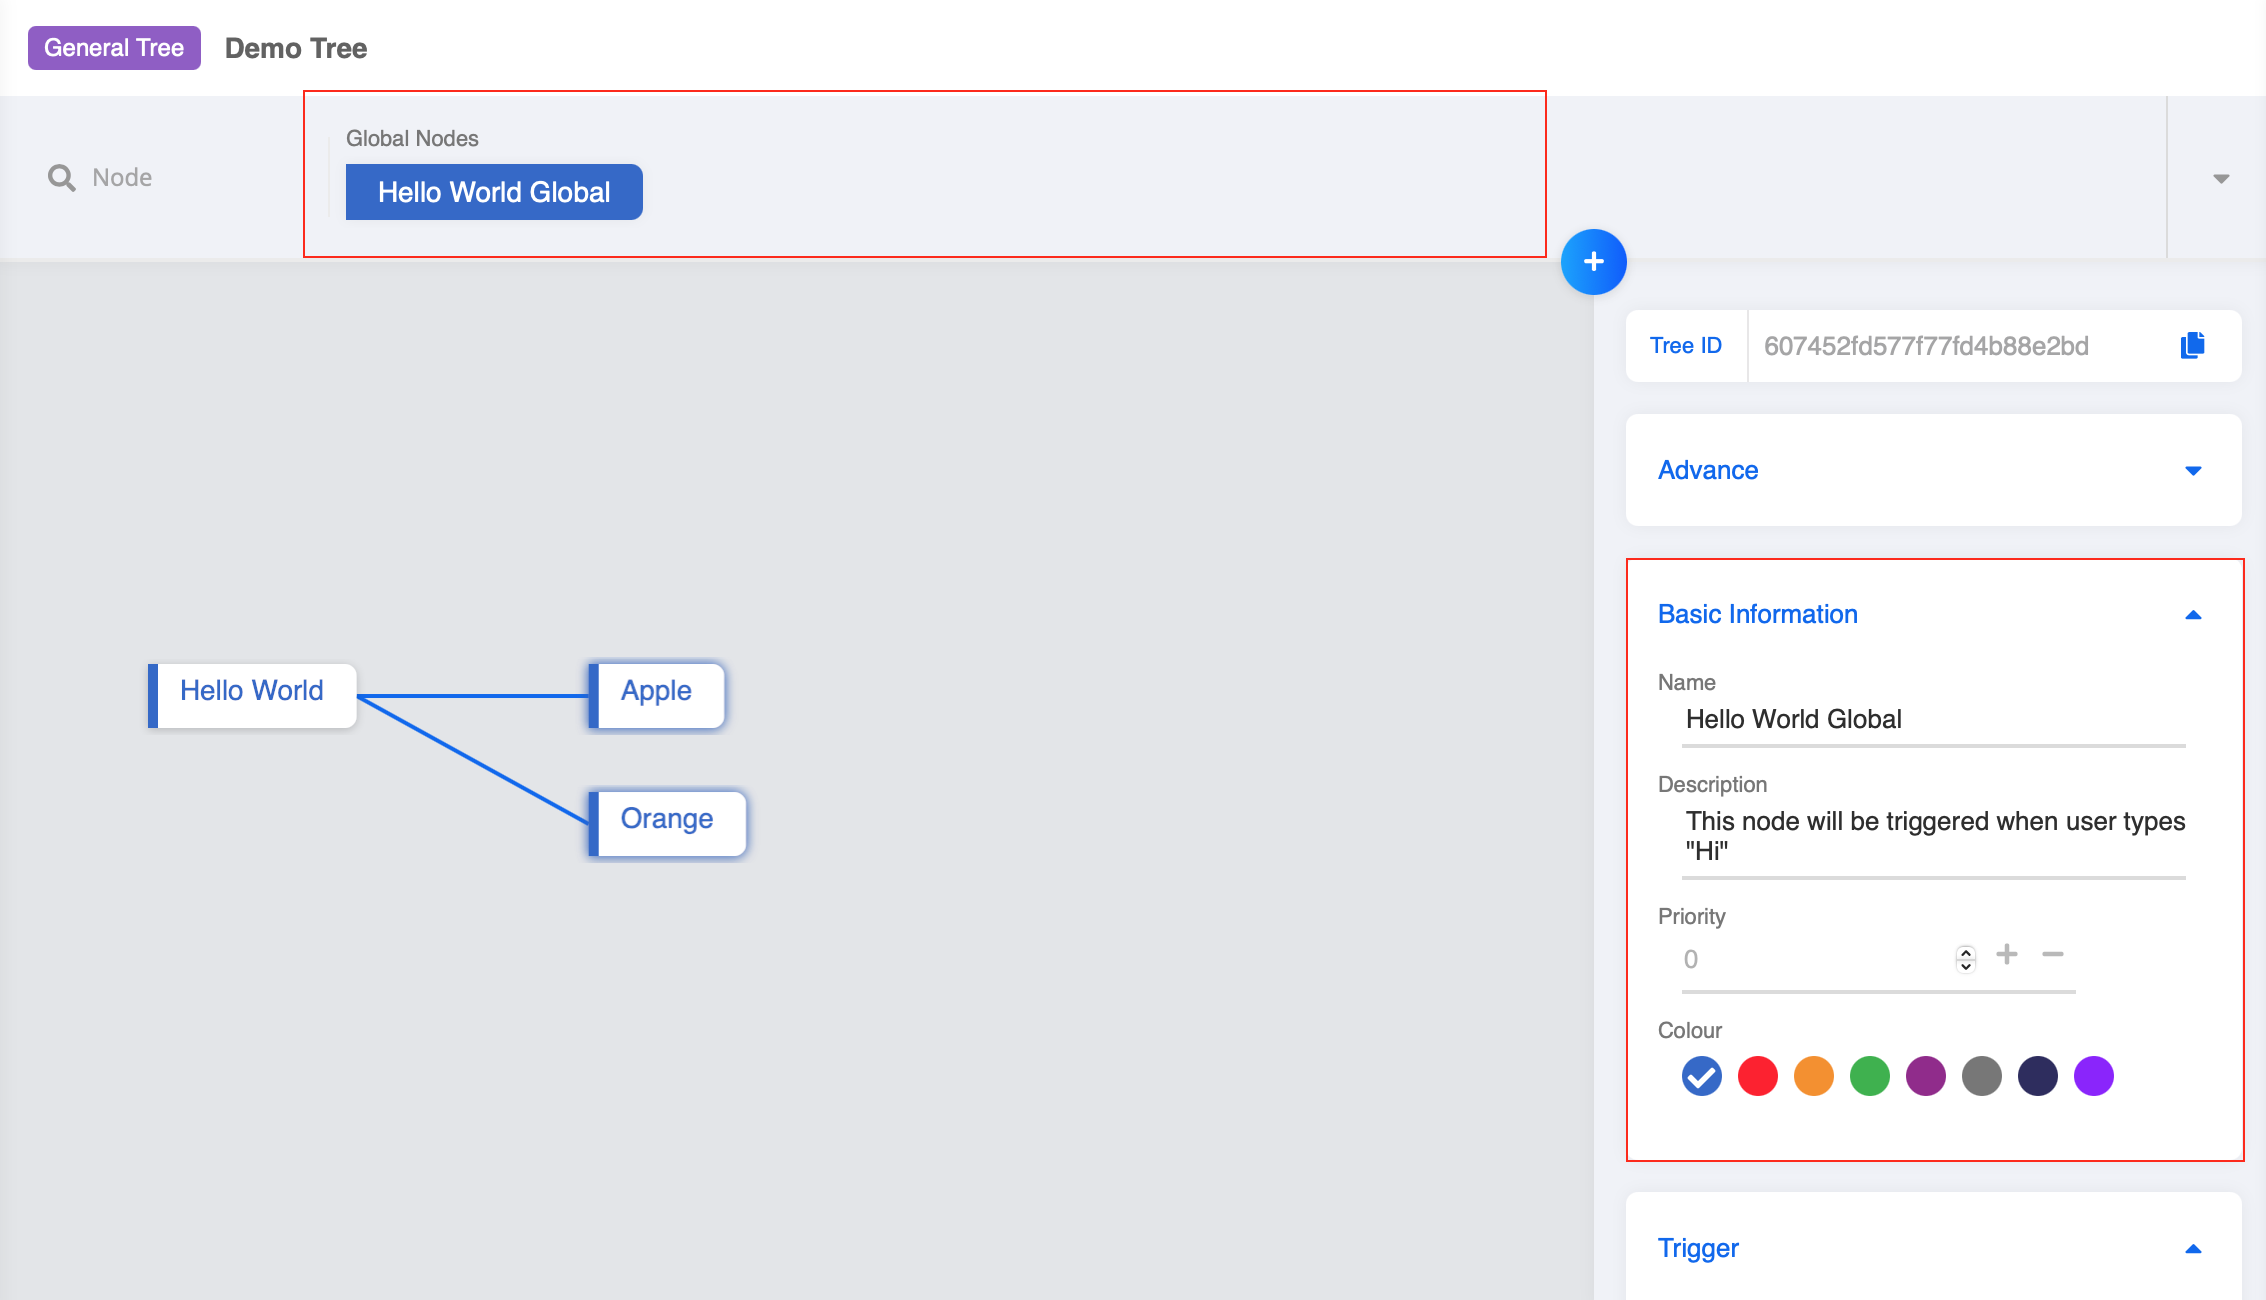
- In your workspace, click on "+" and create a new global node. Global nodes are stored in the Node Drawer.
Create a Trigger
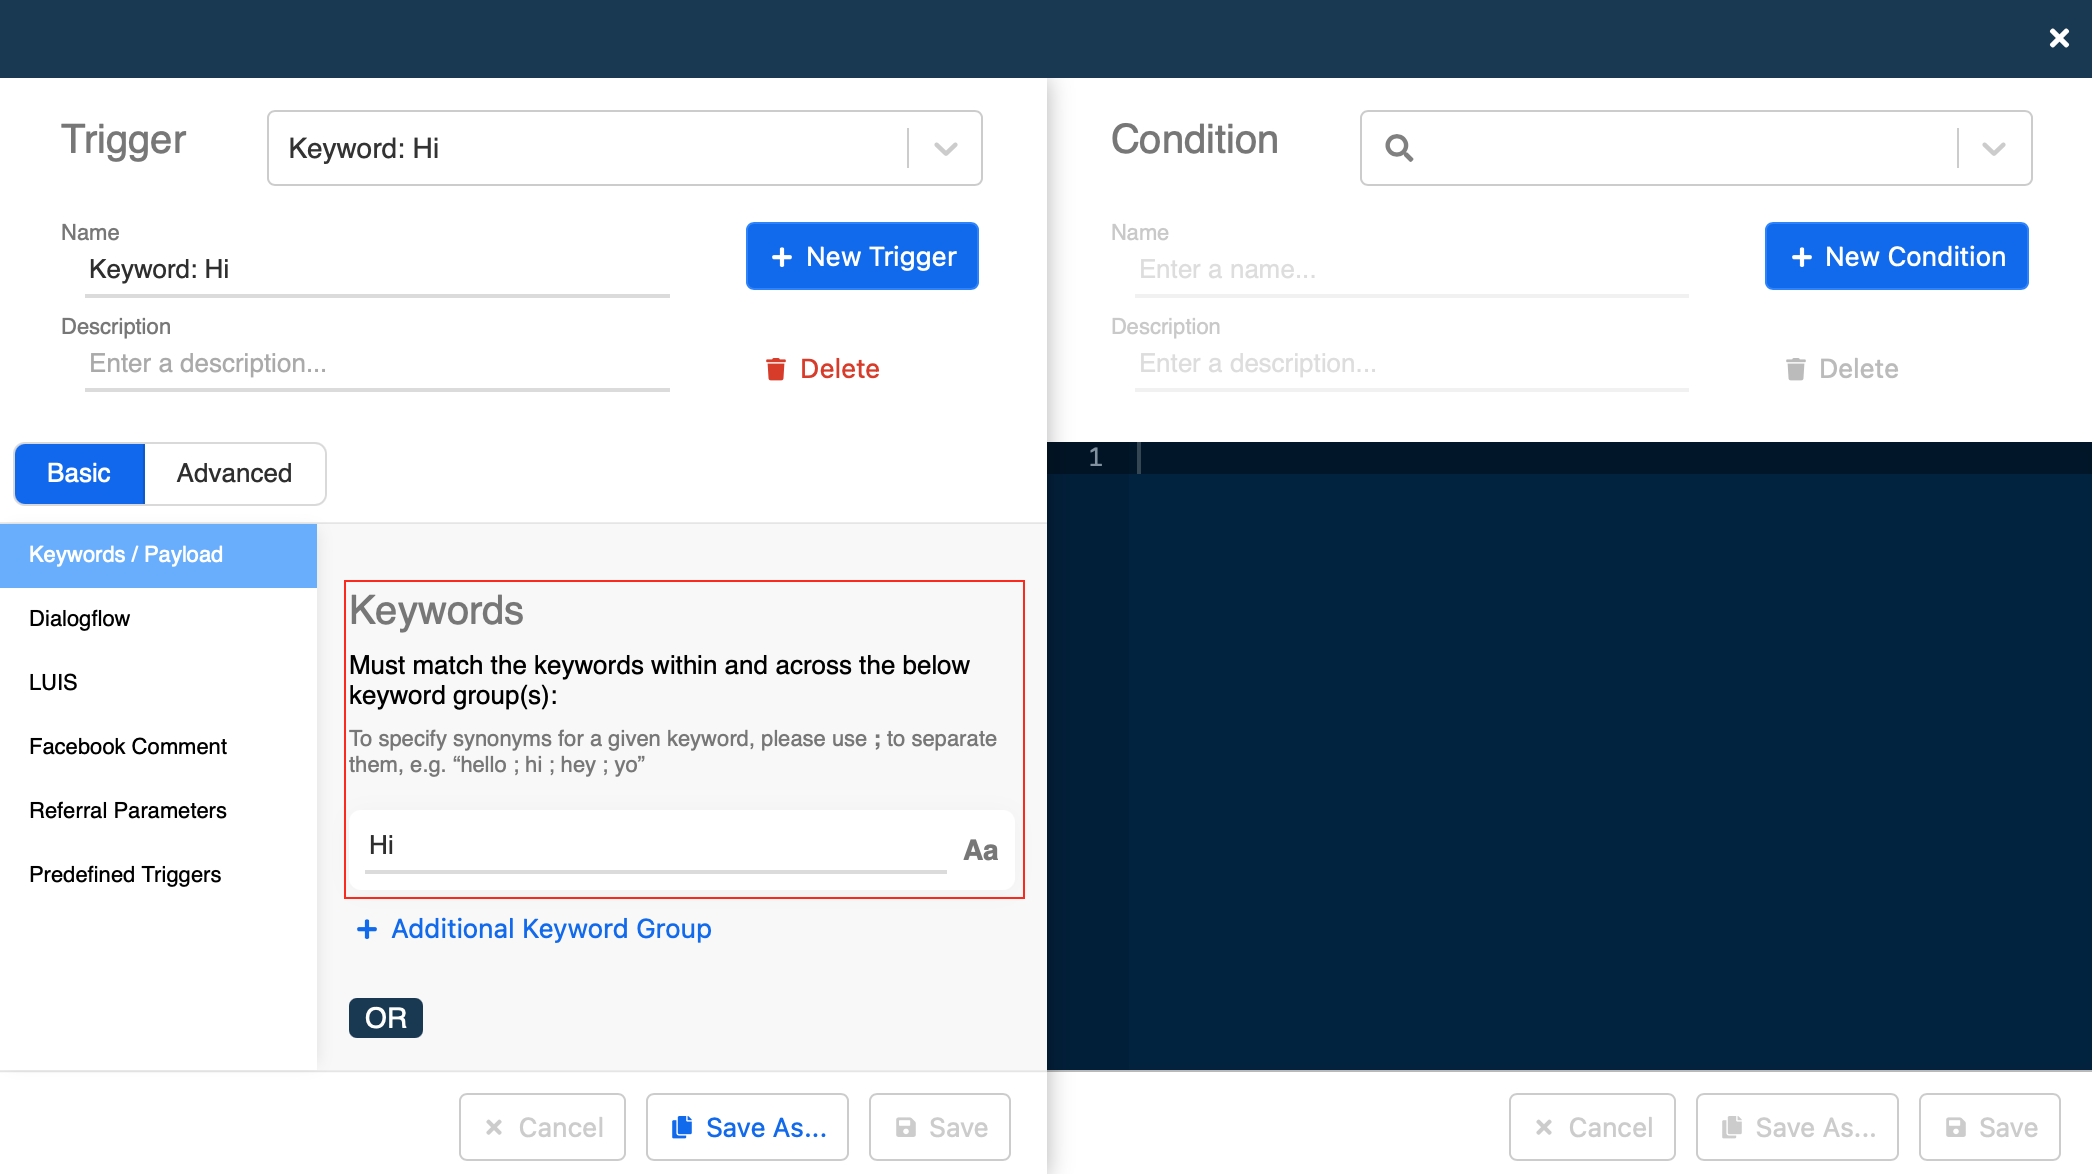
- Click "+ New Trigger" to create a new trigger. Set "Hi" as the keyword trigger. Click "Save".
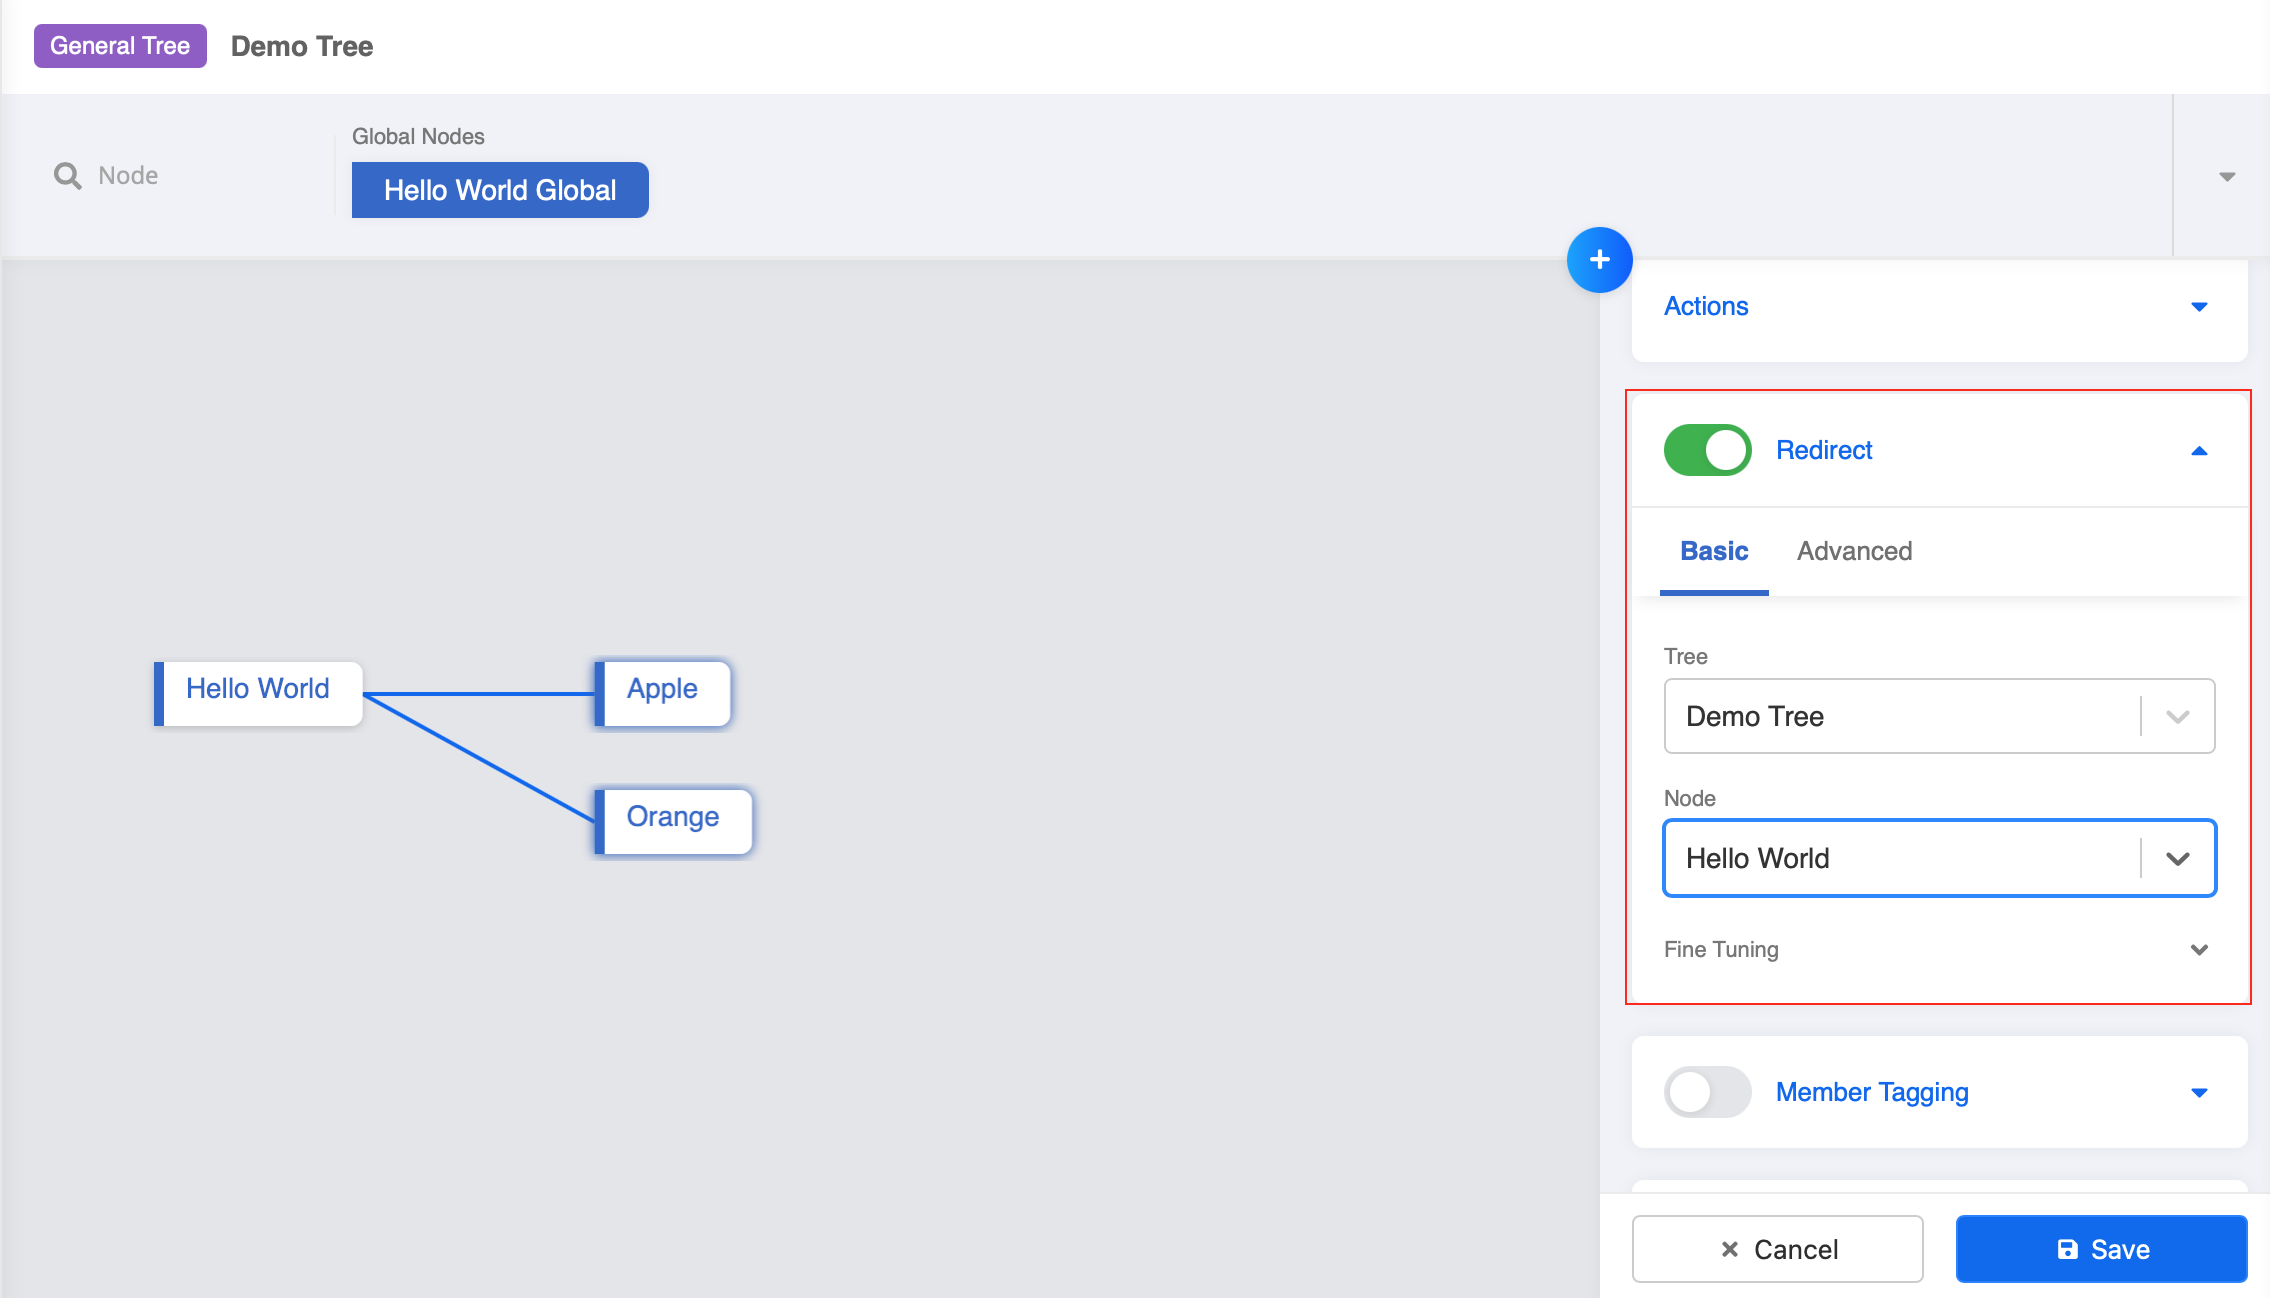
Toggle on Redirect
What is Redirect?
Redirect is function applicable to a node that can lead the user to a specific node of the same tree or another tree.
Click here to learn more about redirect.
- Toggle on Redirect. Select this tree, and select the "Hello World" node as the destination.
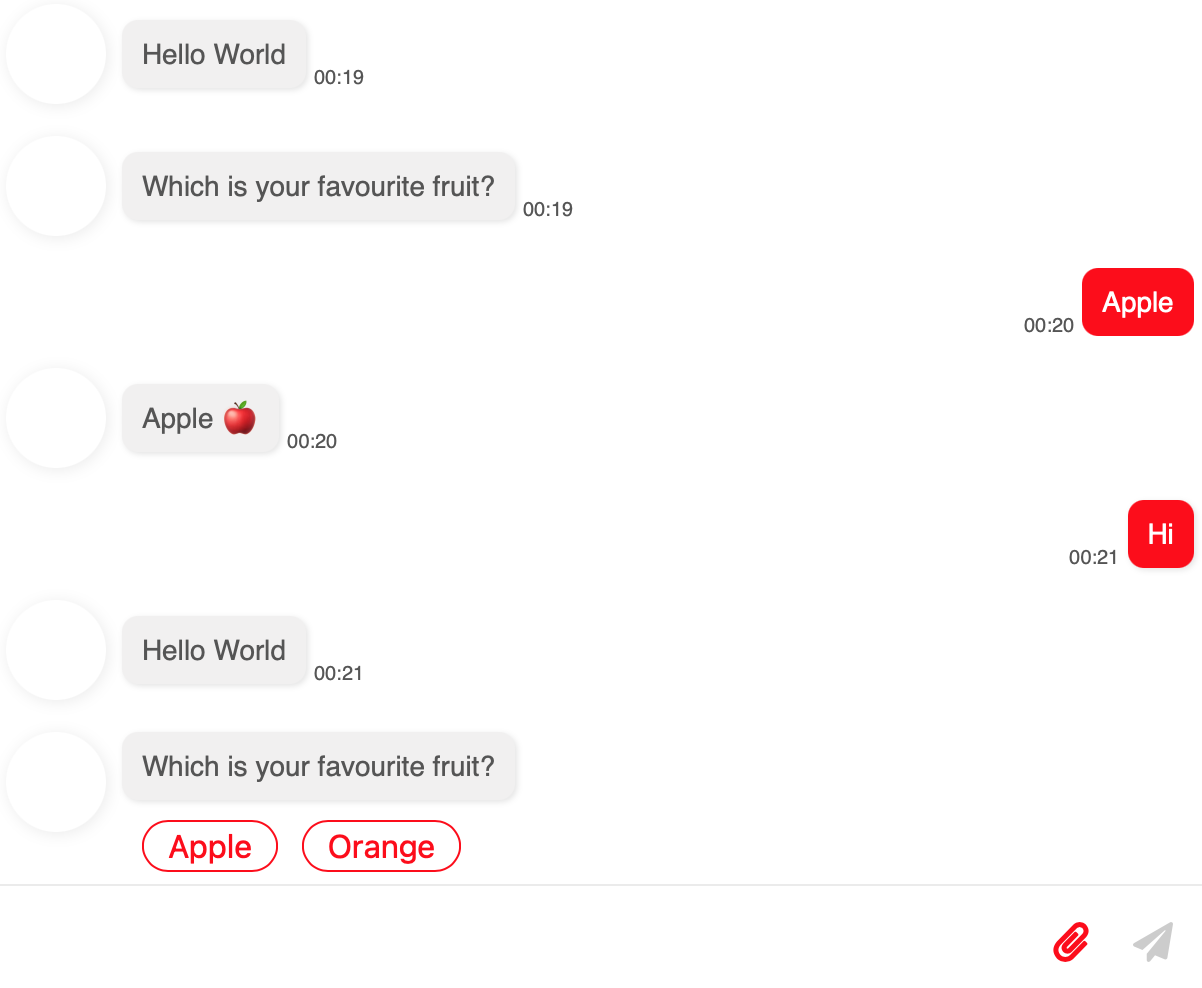
Test your Global Node
- Go to "Channels", select "Trees". In "Settings", select and add the global node. Click "Save".
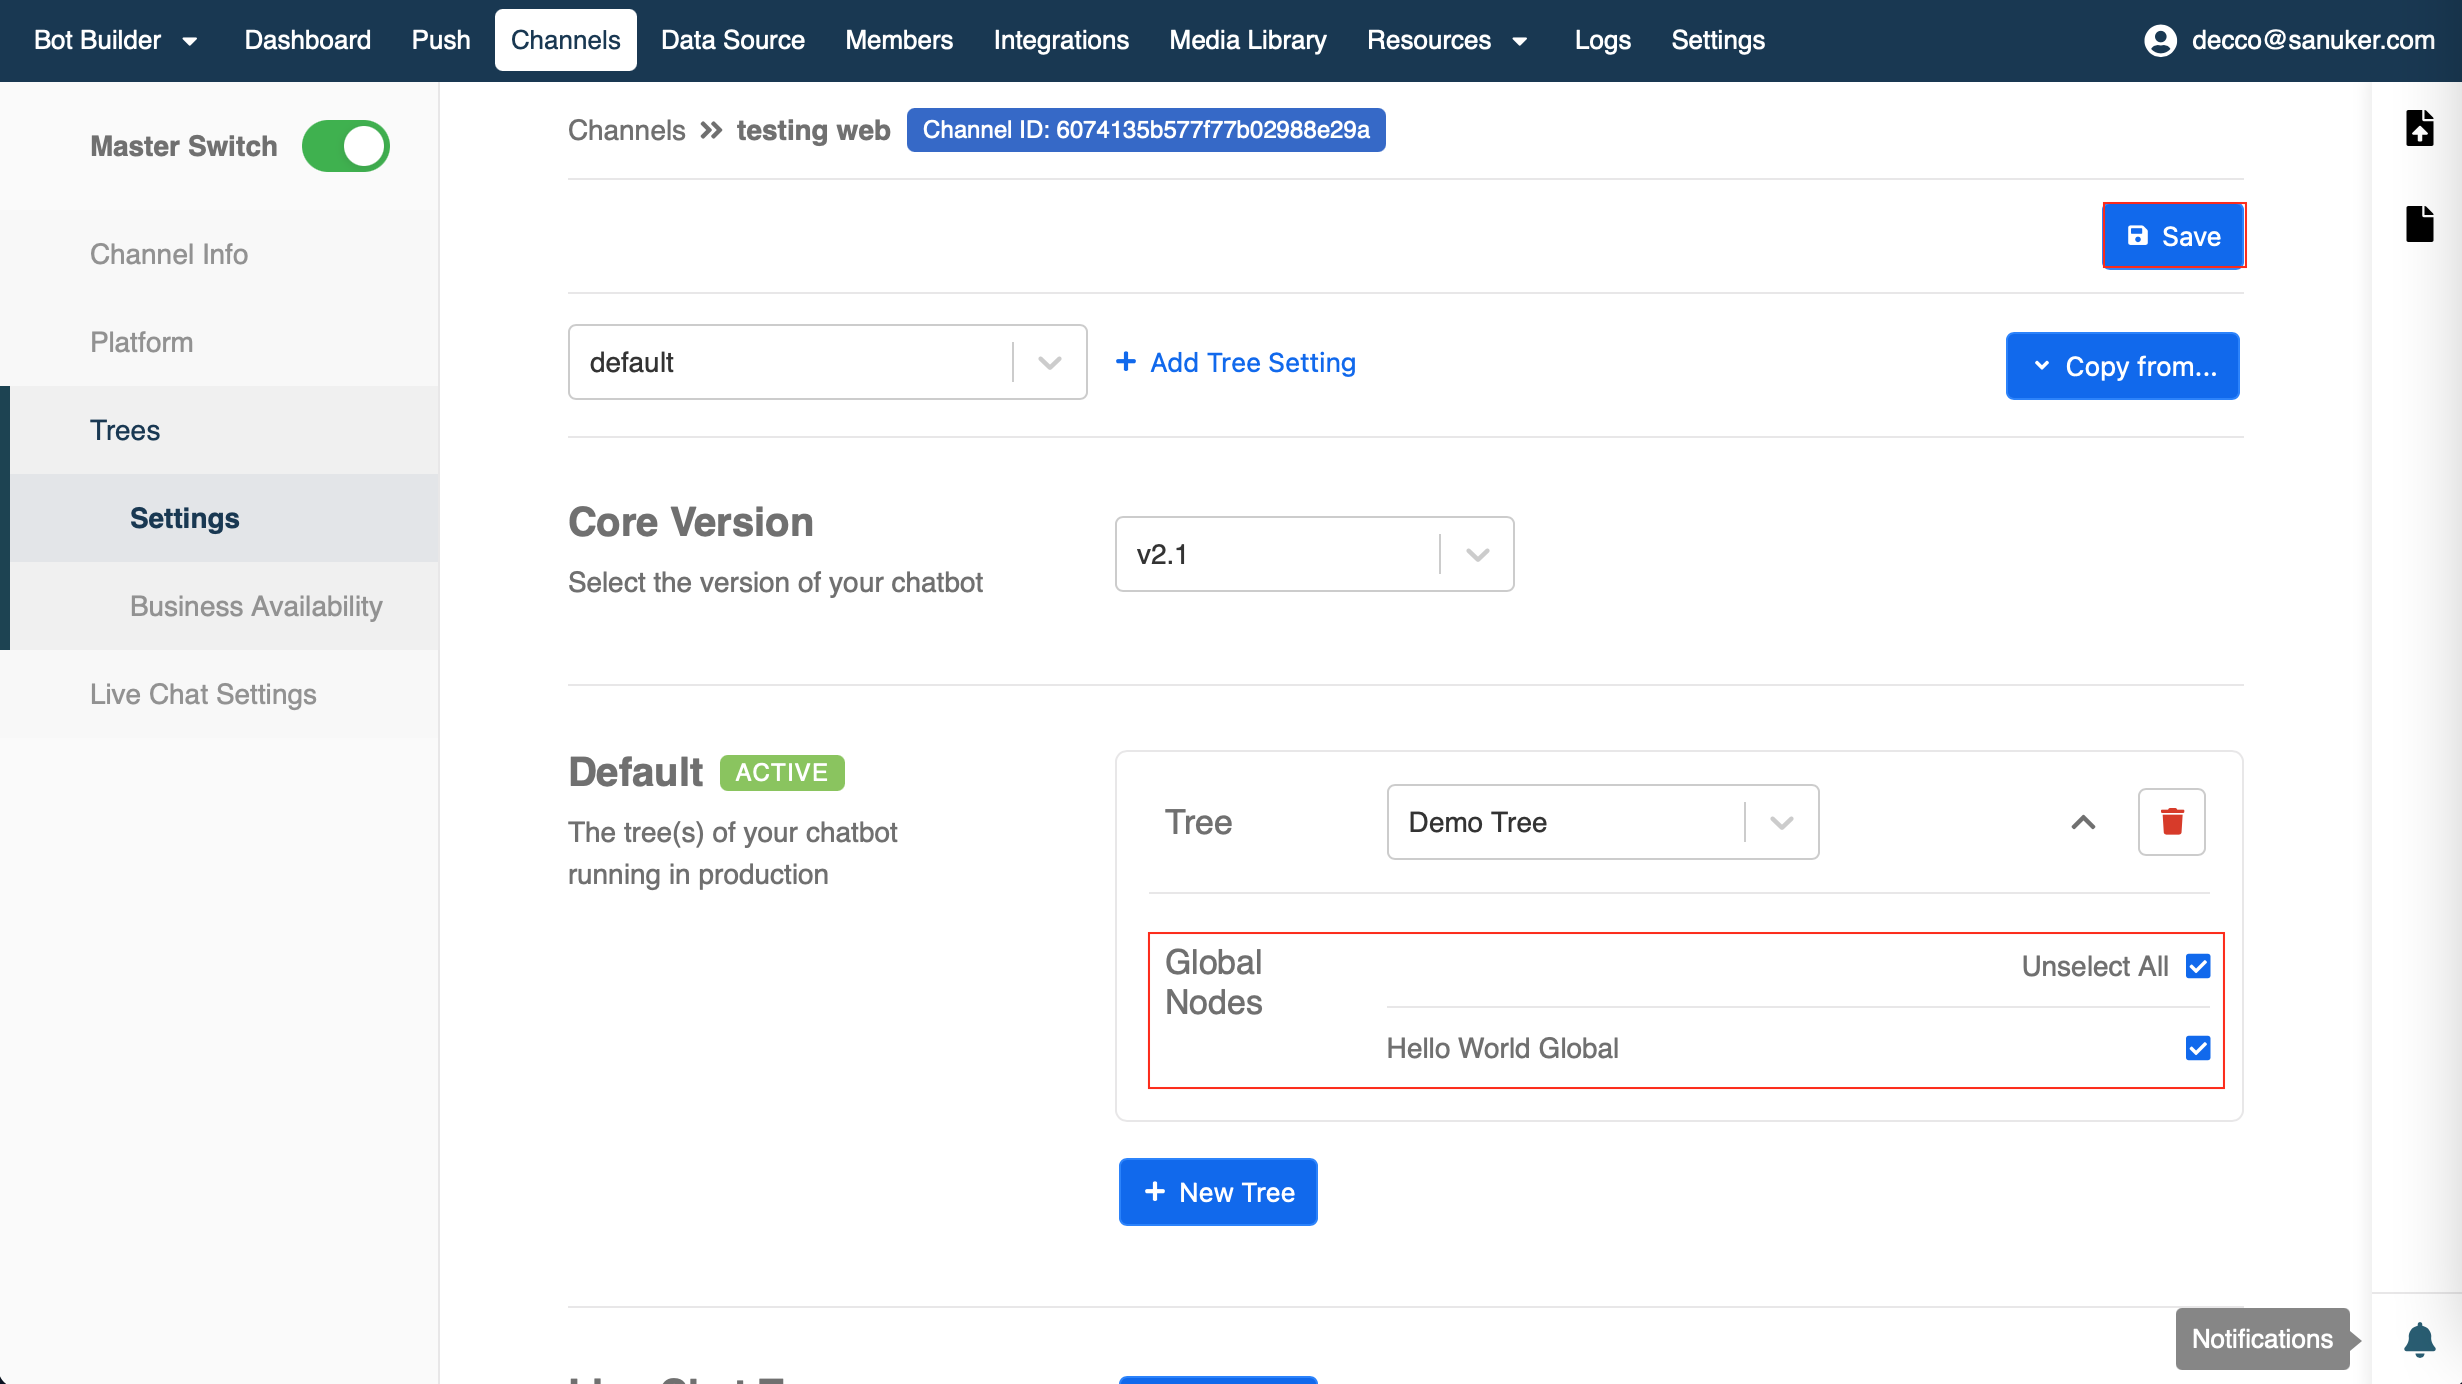
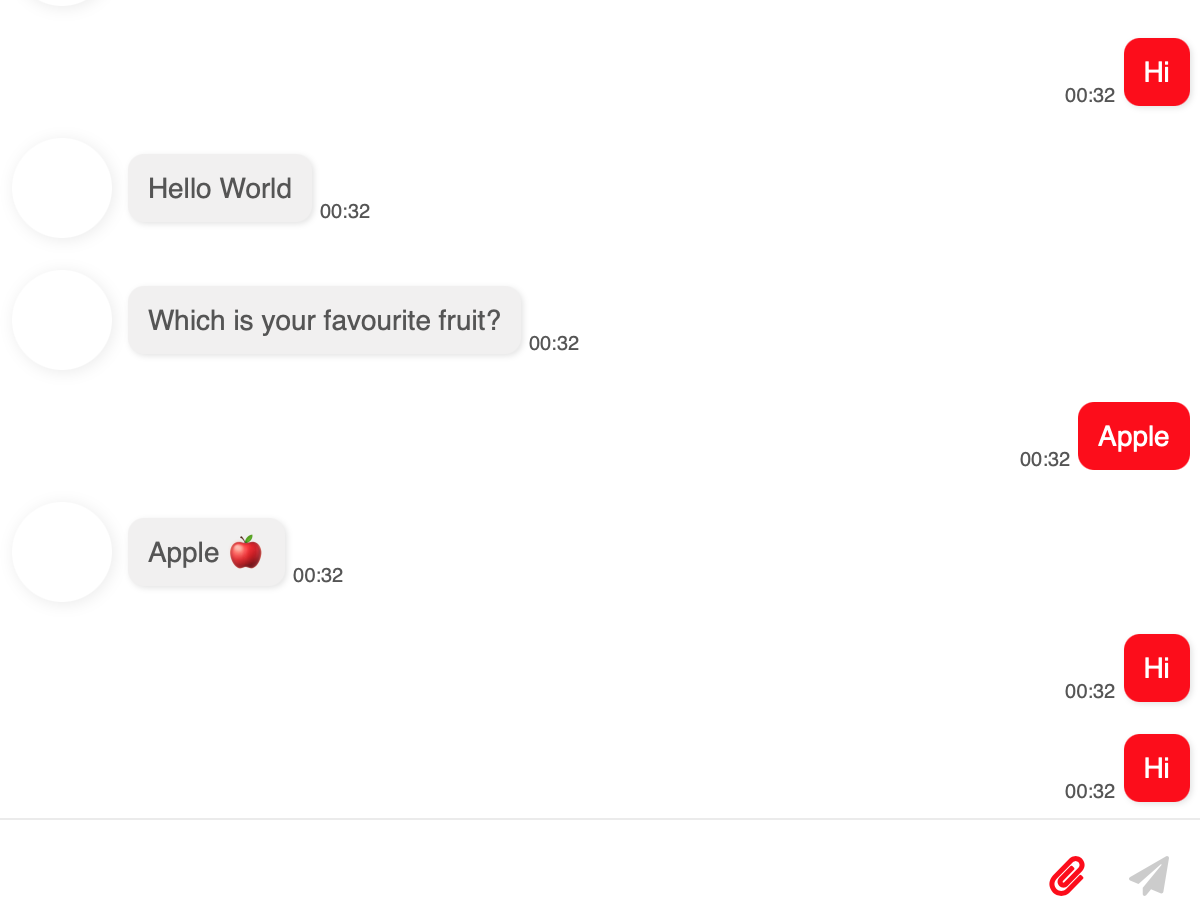
- Now you can type "Hi" again, and the chatbot will greet you again, which means the global node has redirected you to the first node.
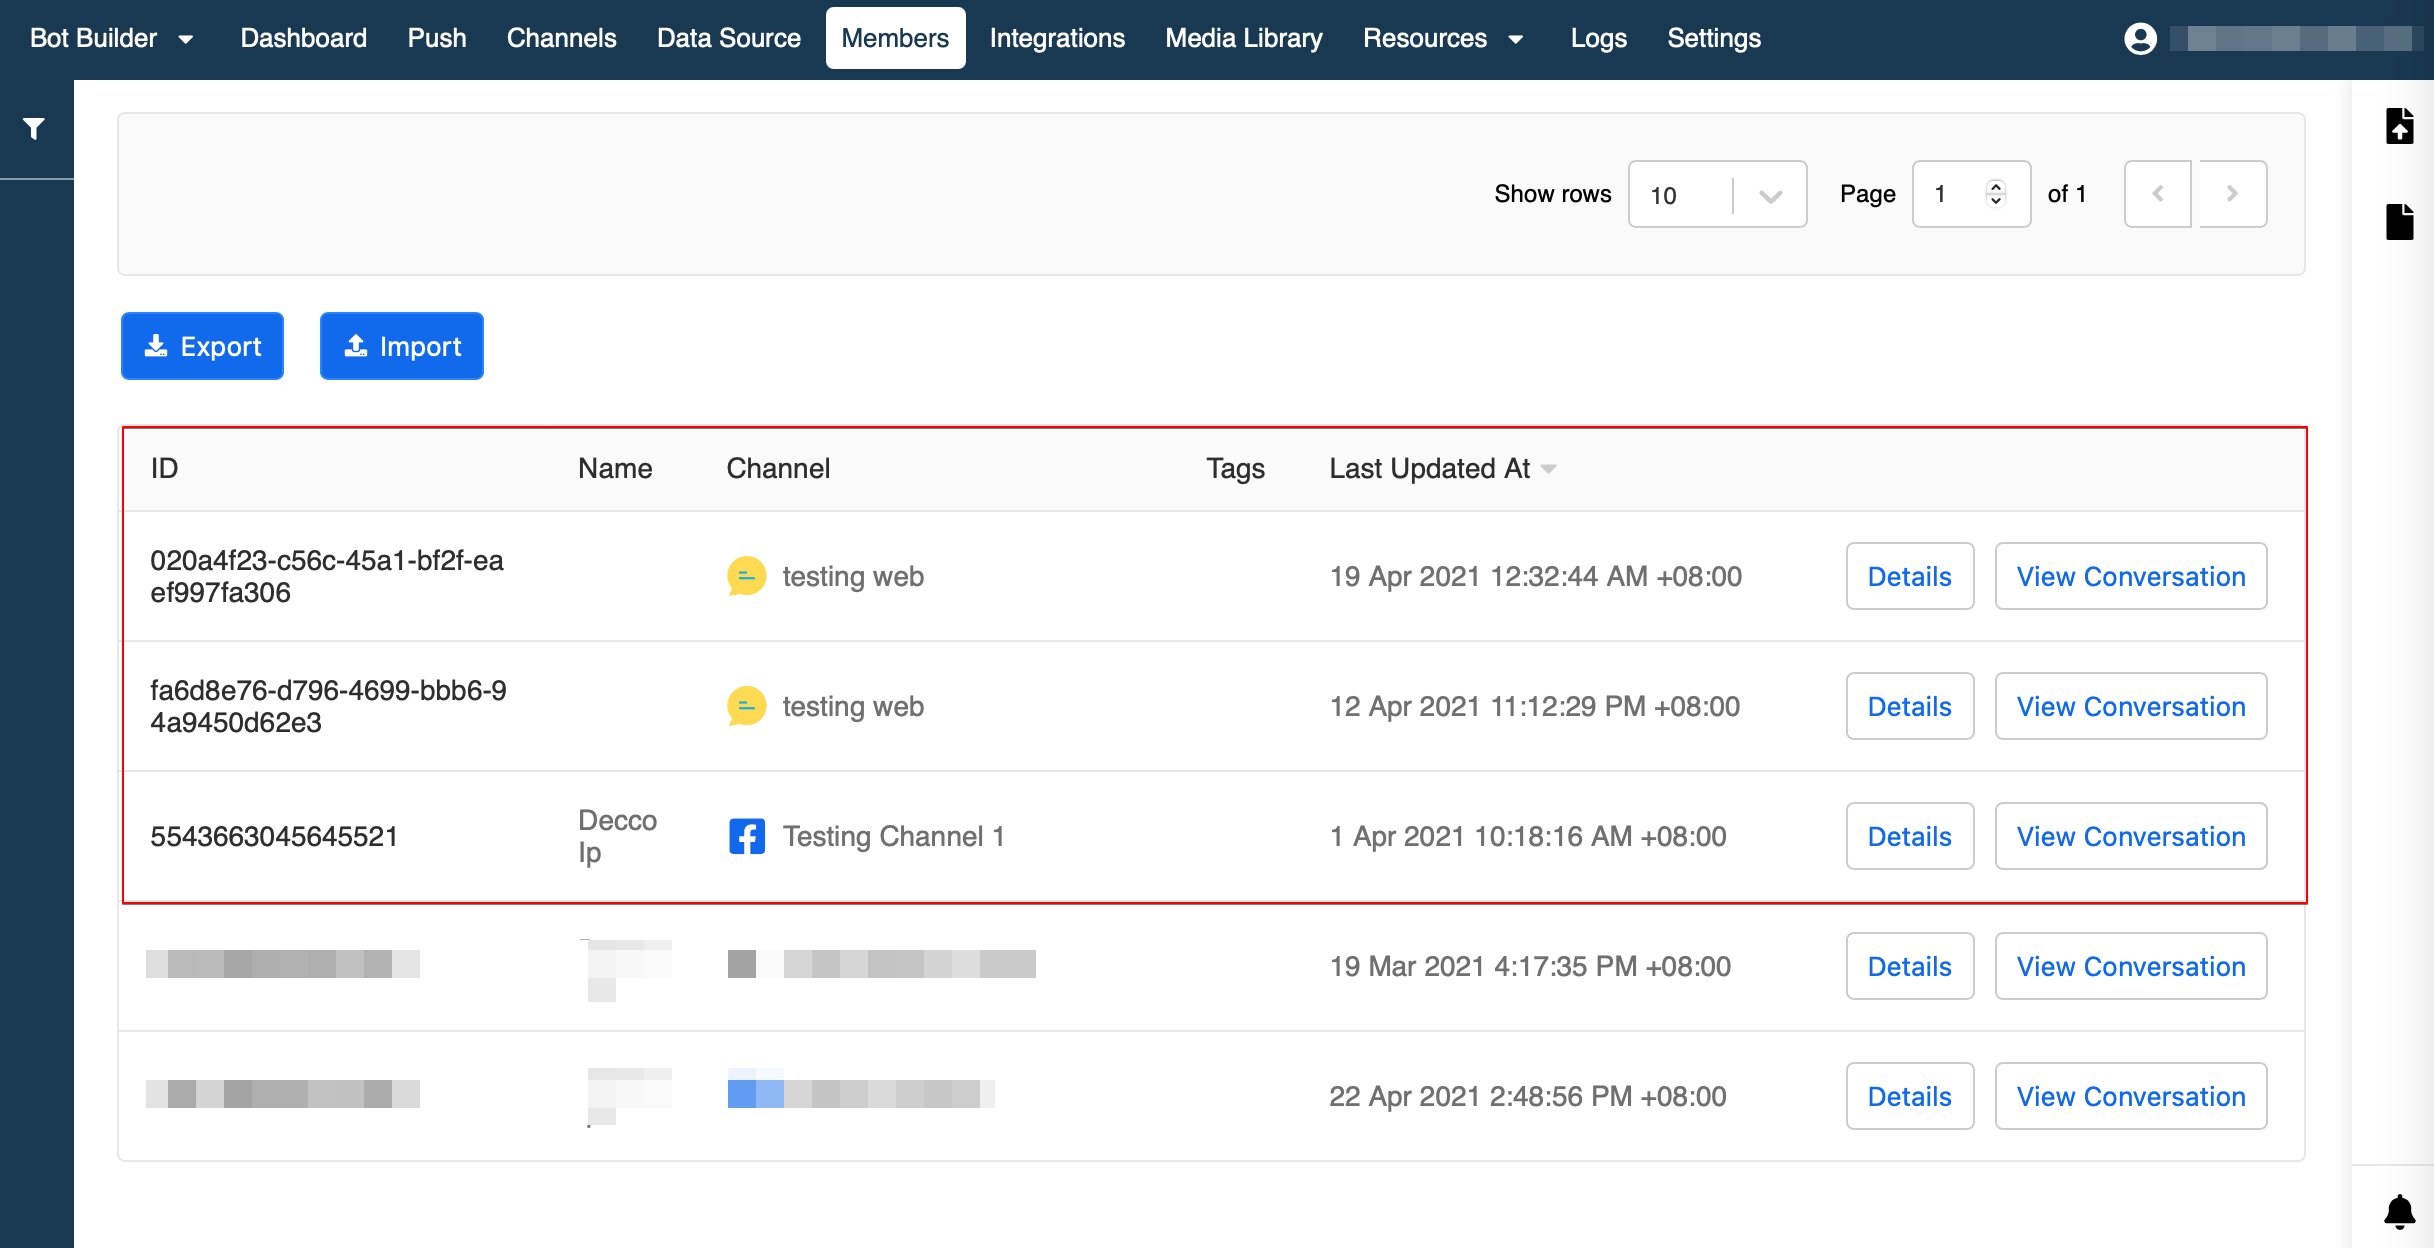
STEP 6 : Members
What are Members?
A chatbot can talk to many people every day, how can we know who have interacted with your chatbot? Members are the subscribers of your chatbot. Anyone who has talked to your chatbot is recorded and can be checked in the Members Page in WOZTELL.
Click here to learn more about members.
Member Info & Conversation
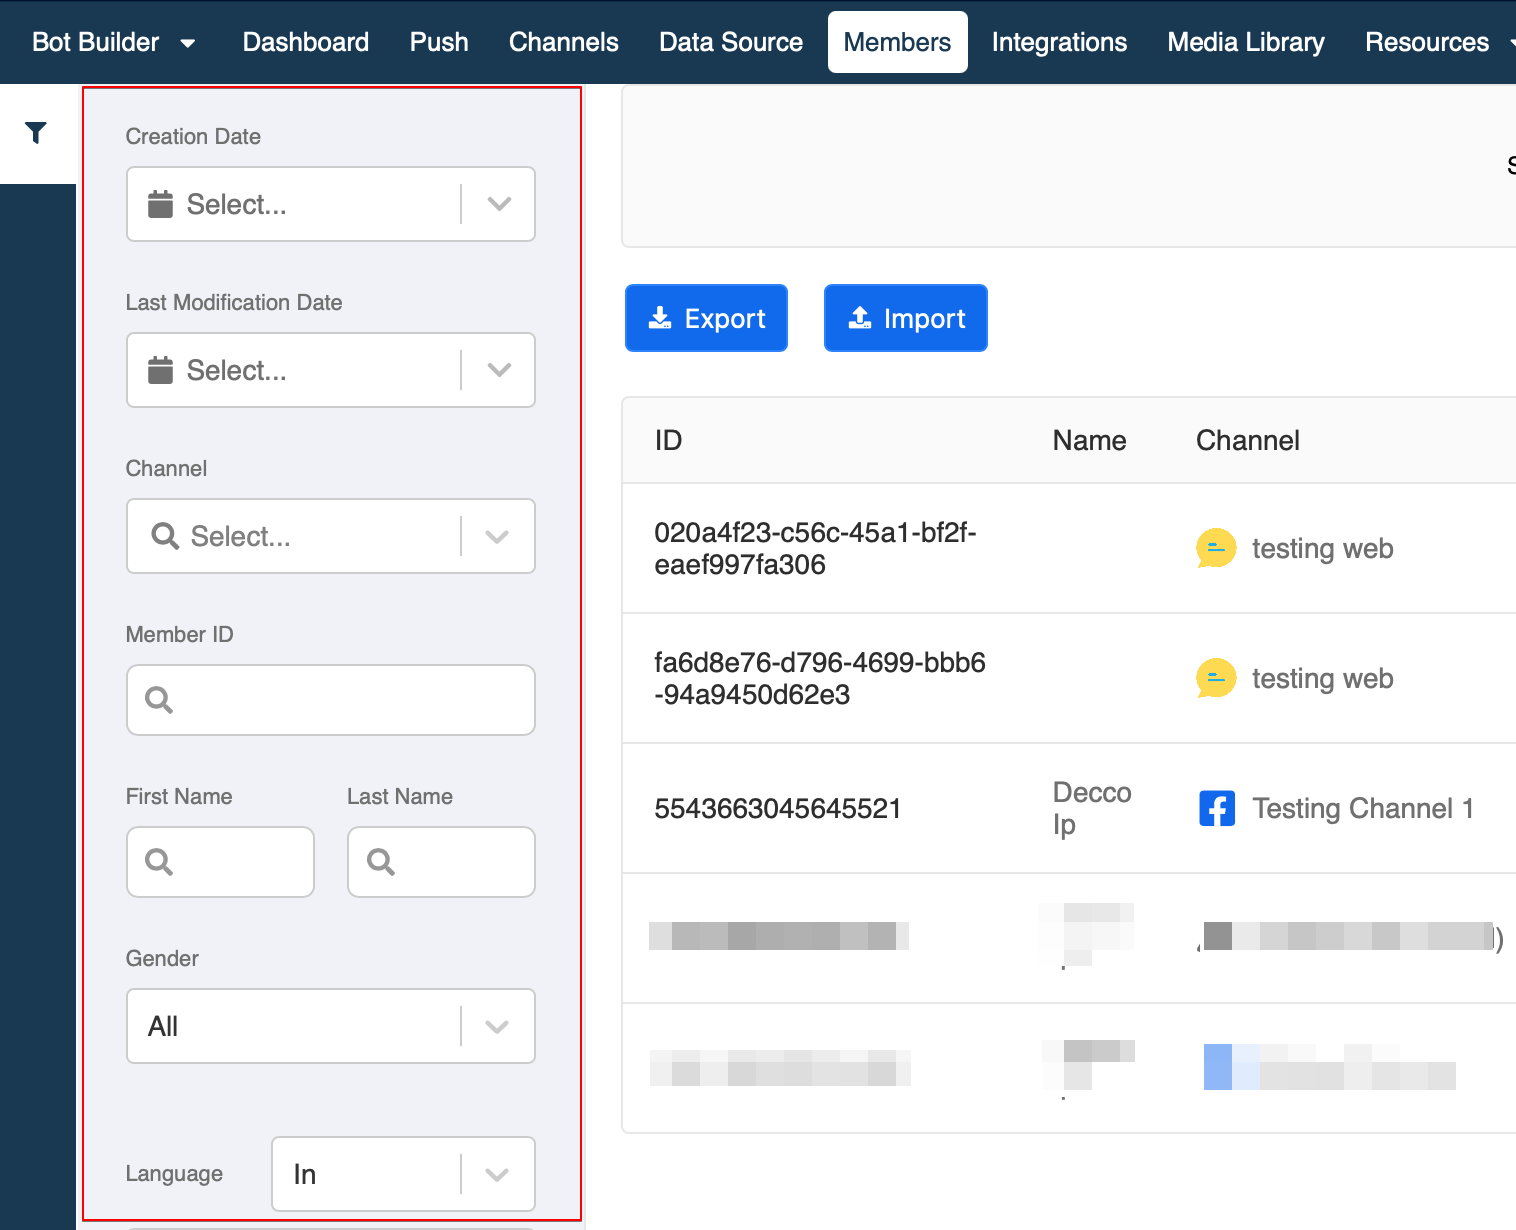
- Go to "Channels", you can see the list of members who talked to your chatbot. You are able to see the basic information including: External ID, Name, Channel, Tag and Last Updated Time.
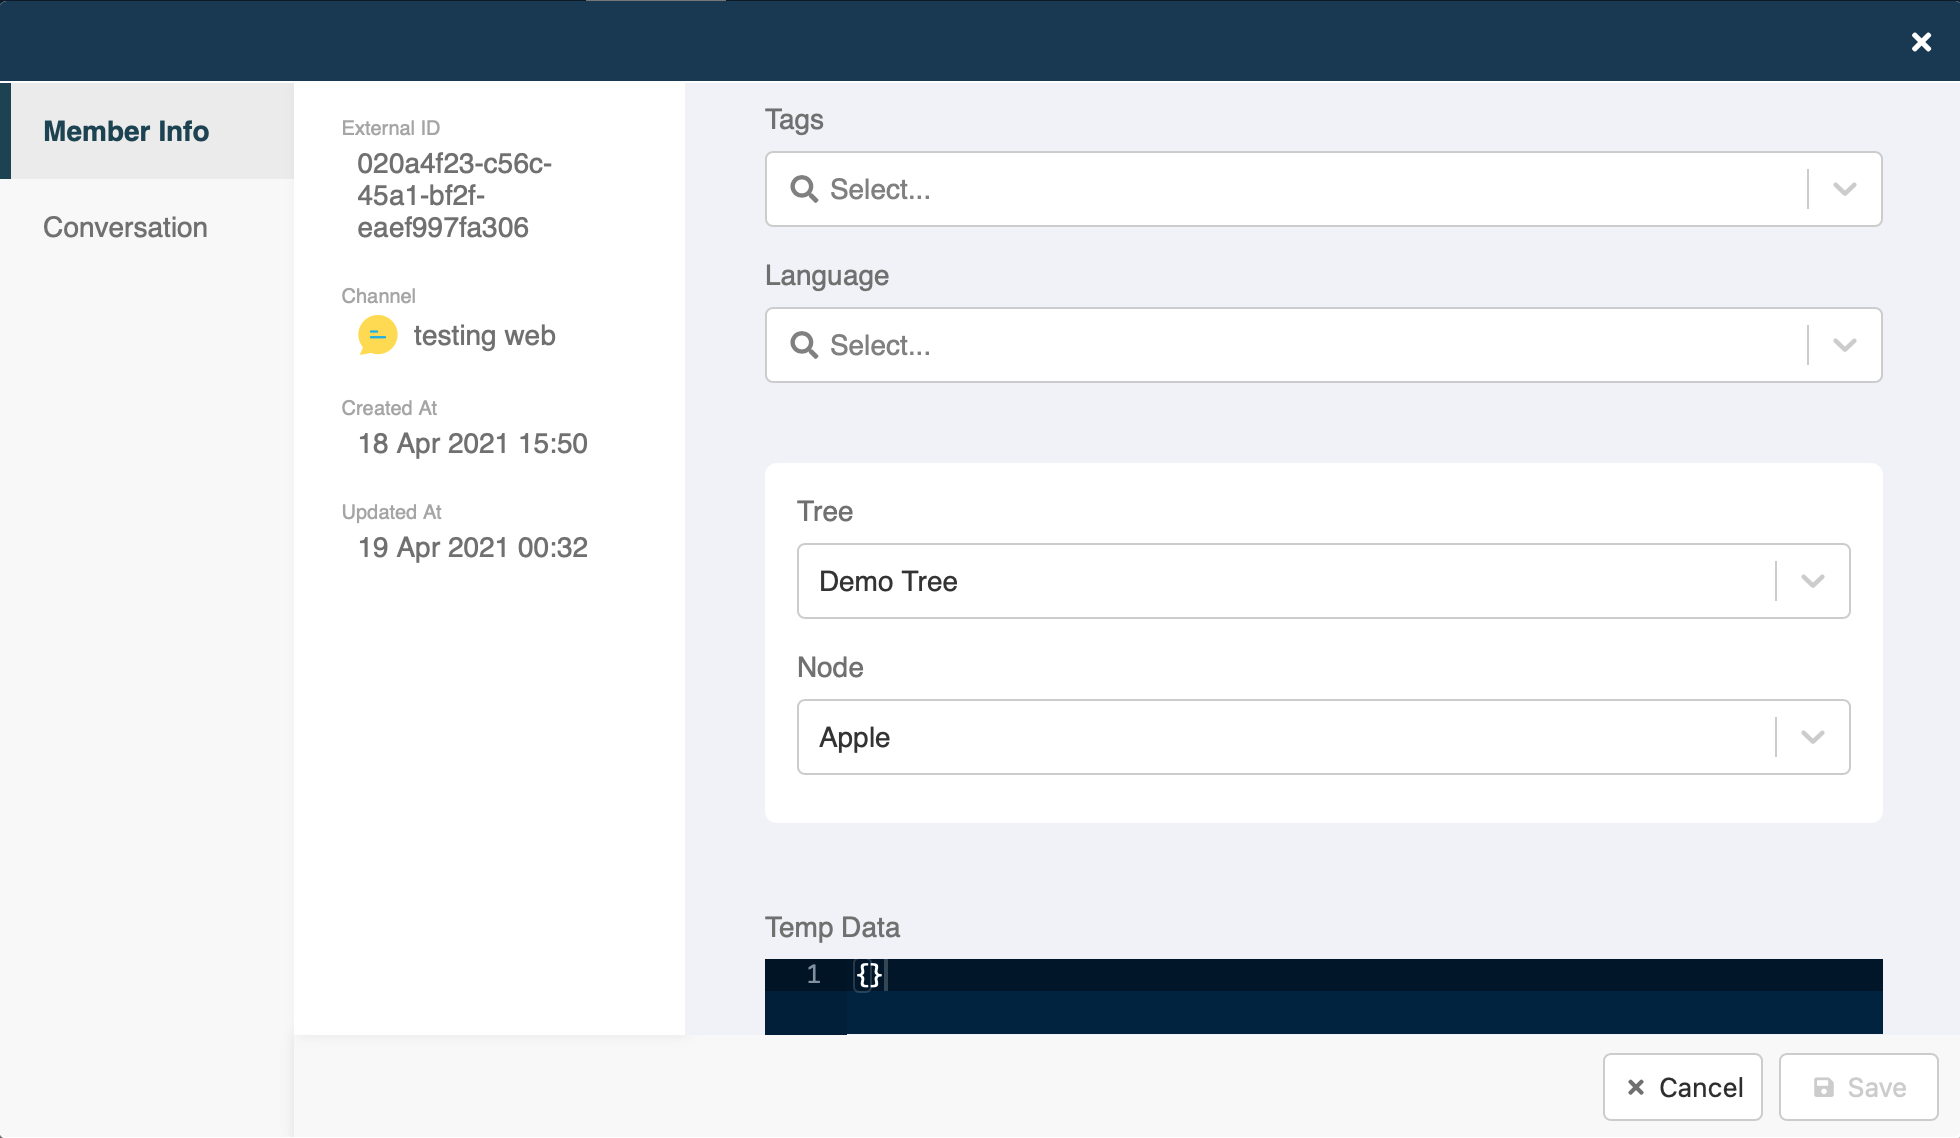
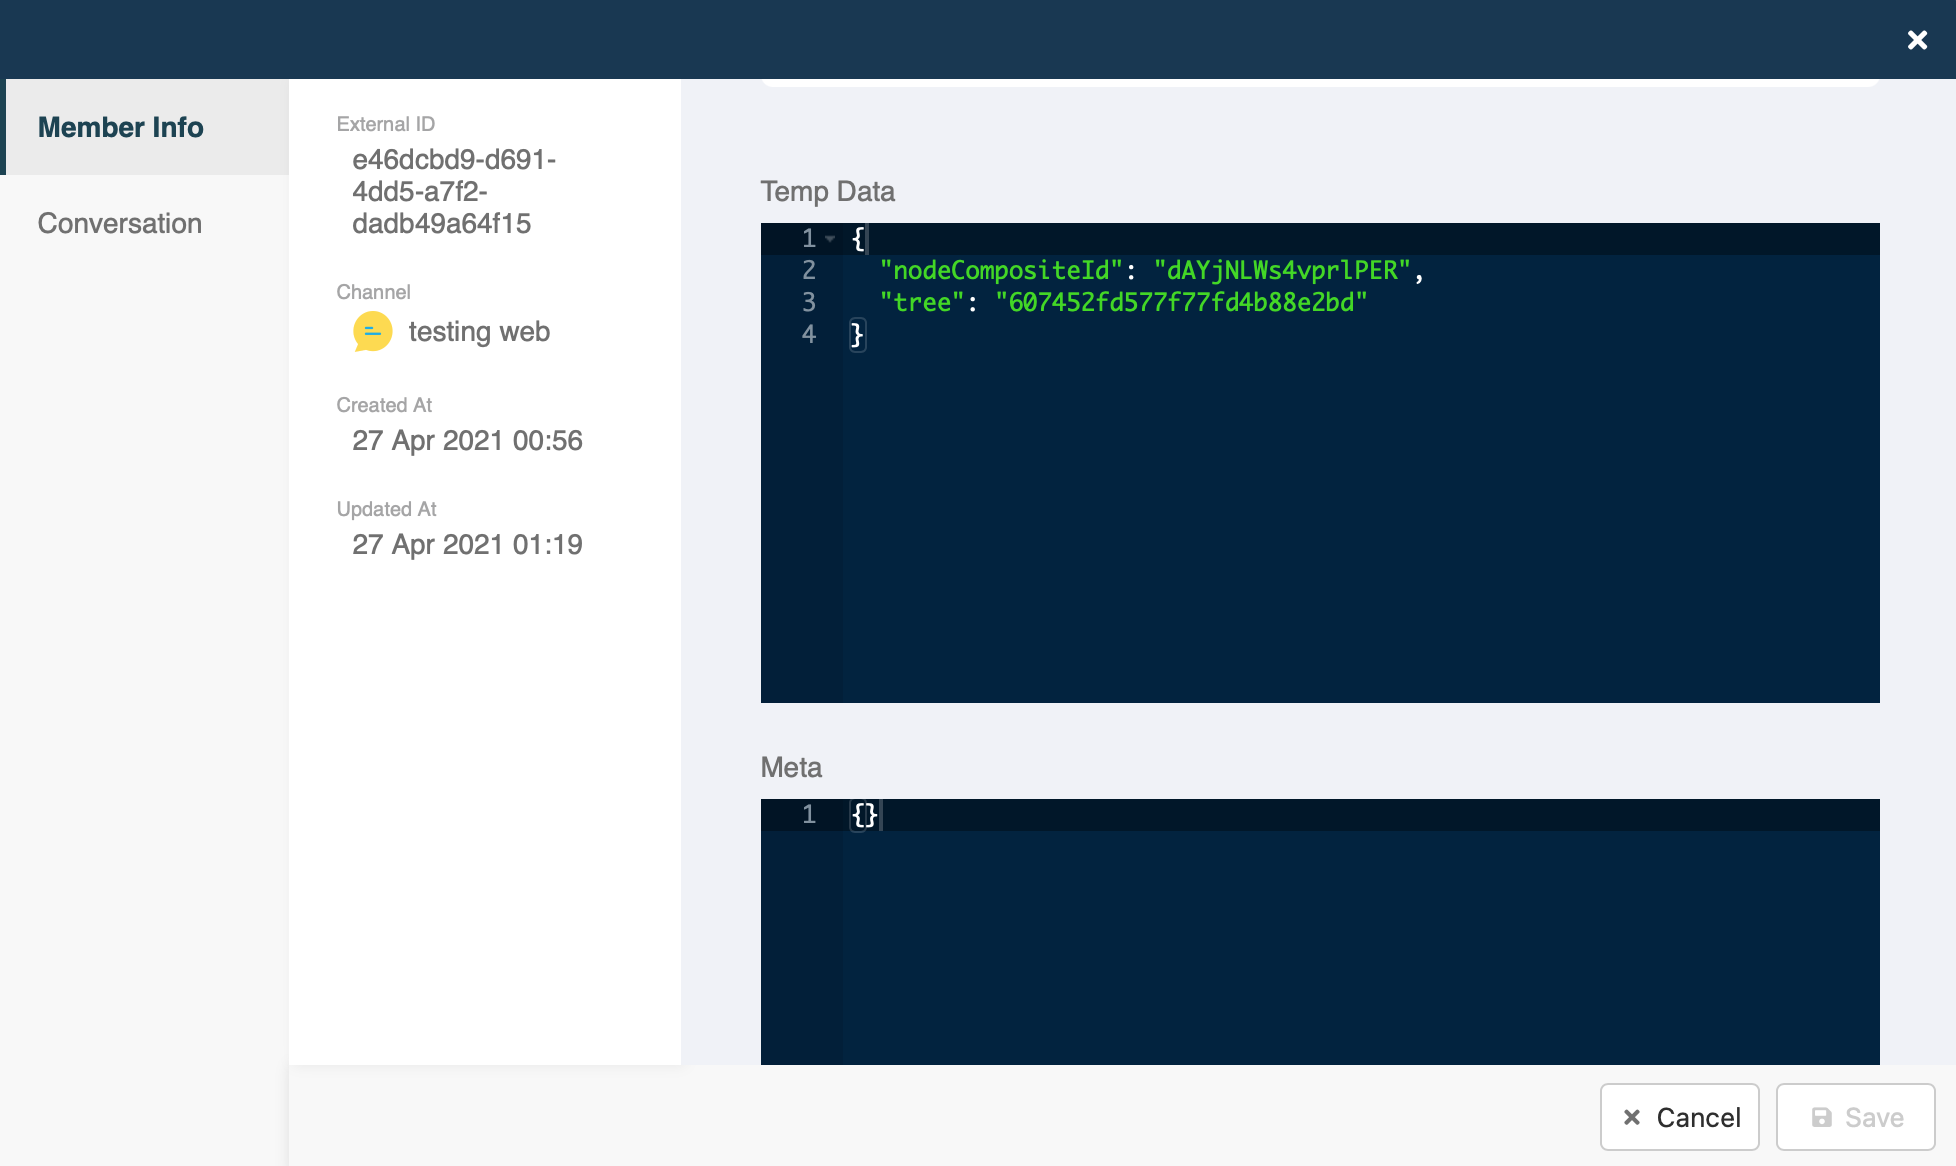
- After clicking on "Details", you can view the detailed information about a member, including: Basic Information, Language, Last Position in the Tree, and the Temp Data.
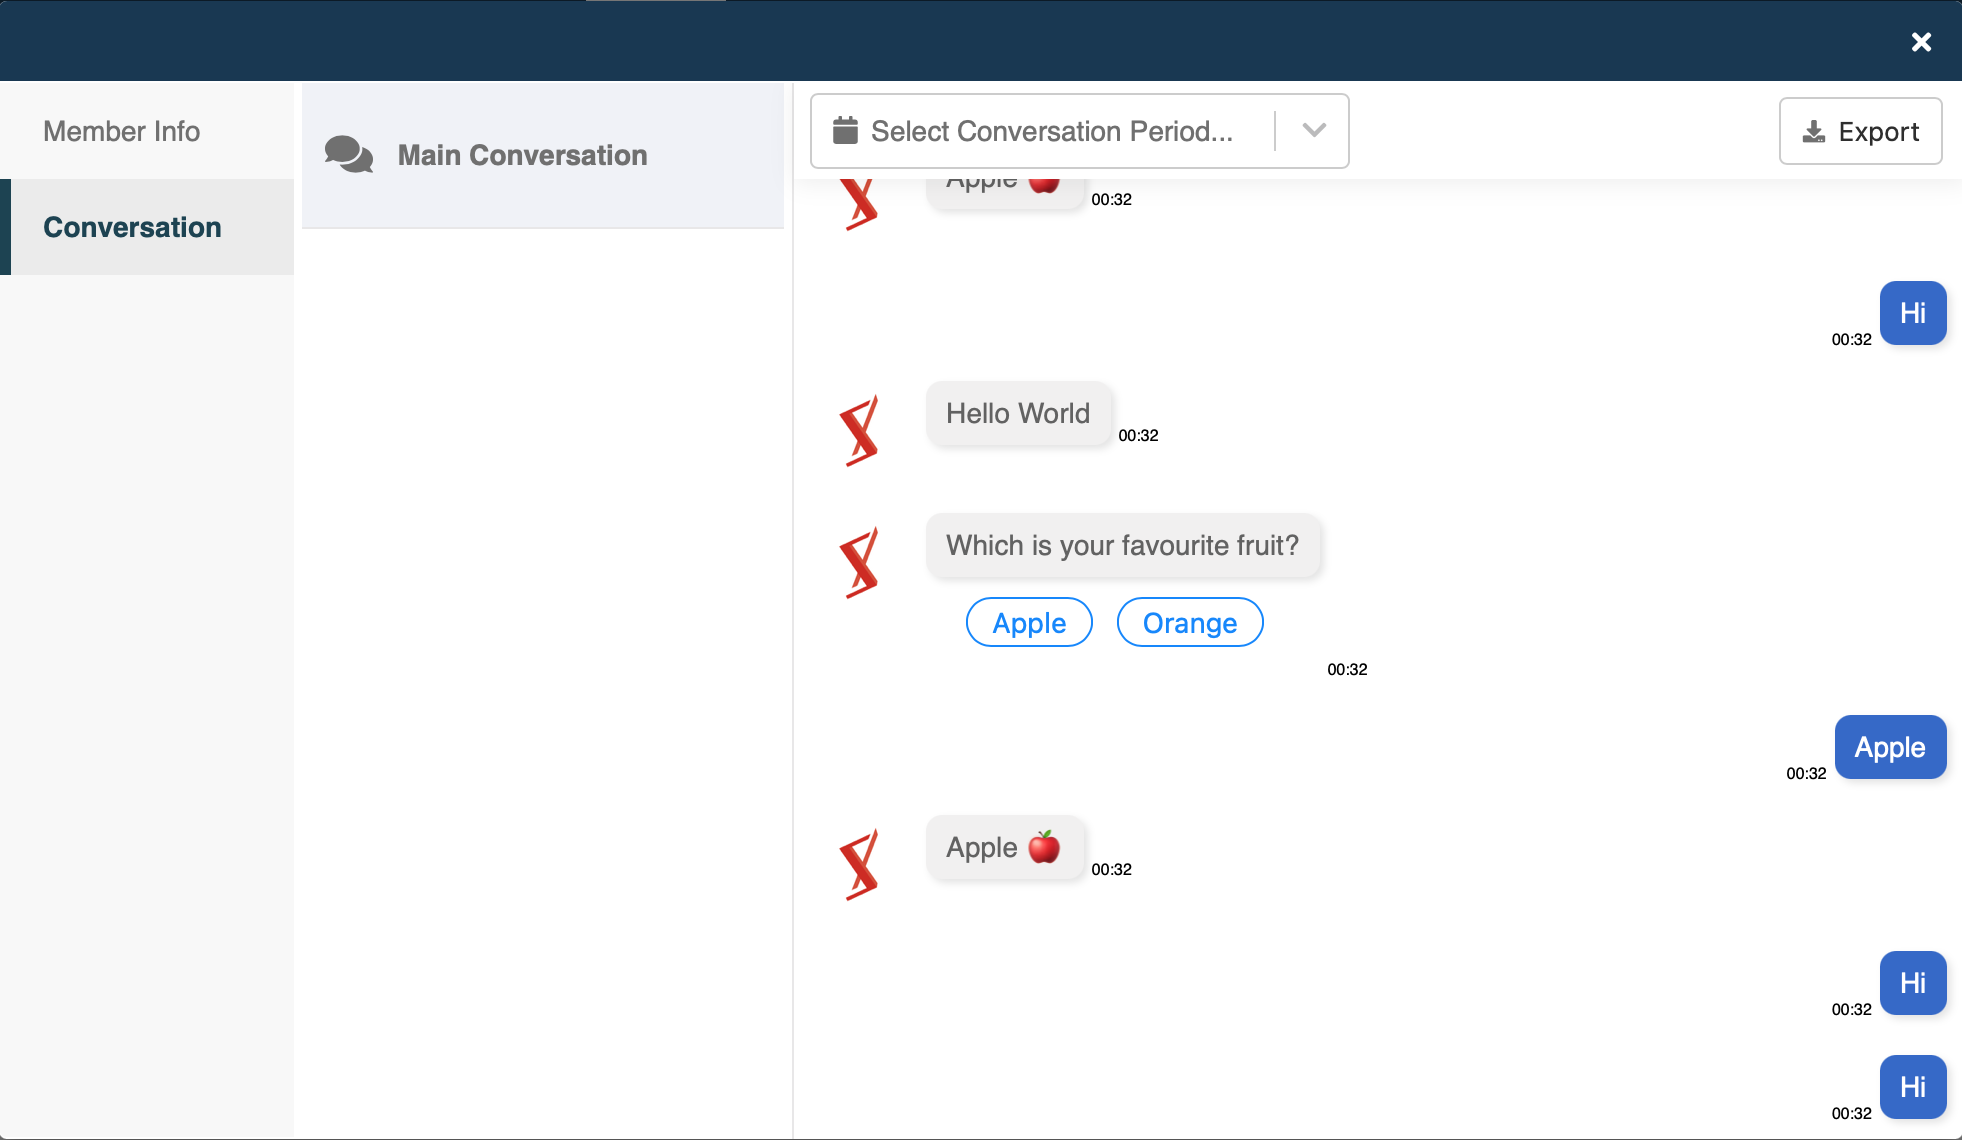
- In "Conversation", you can view the chat history between your chatbot and this member.
- You can also sort out particular group of members by using "Filter".
- Remember Temp Data? We can use it for storing data in the member's profile, but how?
STEP 7: Actions
What are Actions?
Action is a Promise function that can be used for logics, internal database manipulation and external API calling. In a tree node, a Pre-action is executed before sending the response, while a Post-action is executed after the response.
Click here to learn more about actions.
Save Composite ID
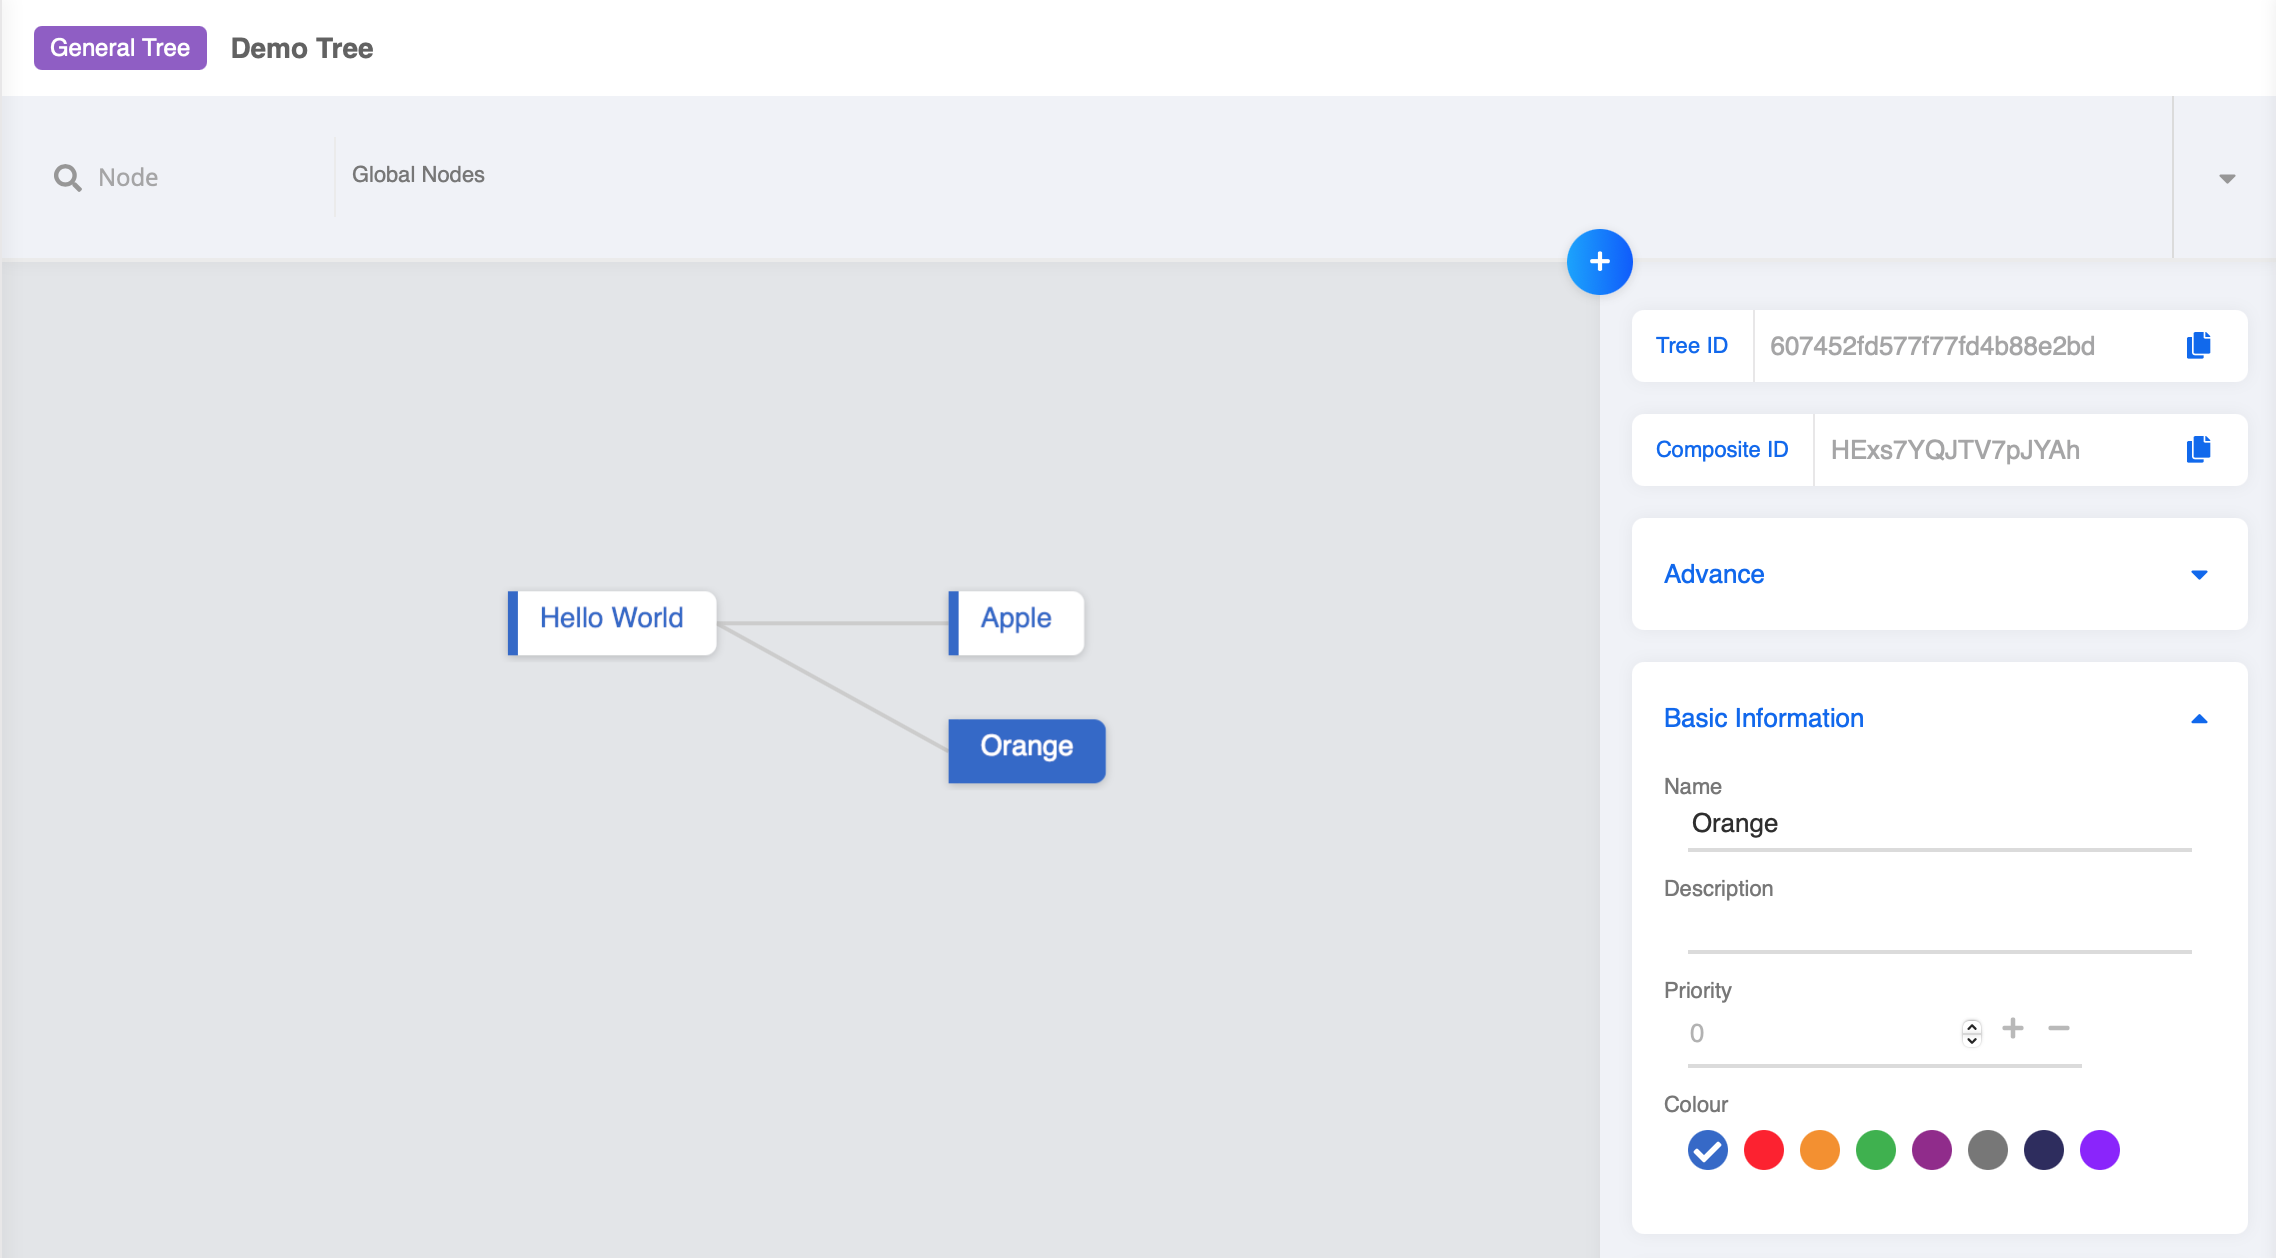
What is Composite ID
Composite ID is the unique ID for each tree node.
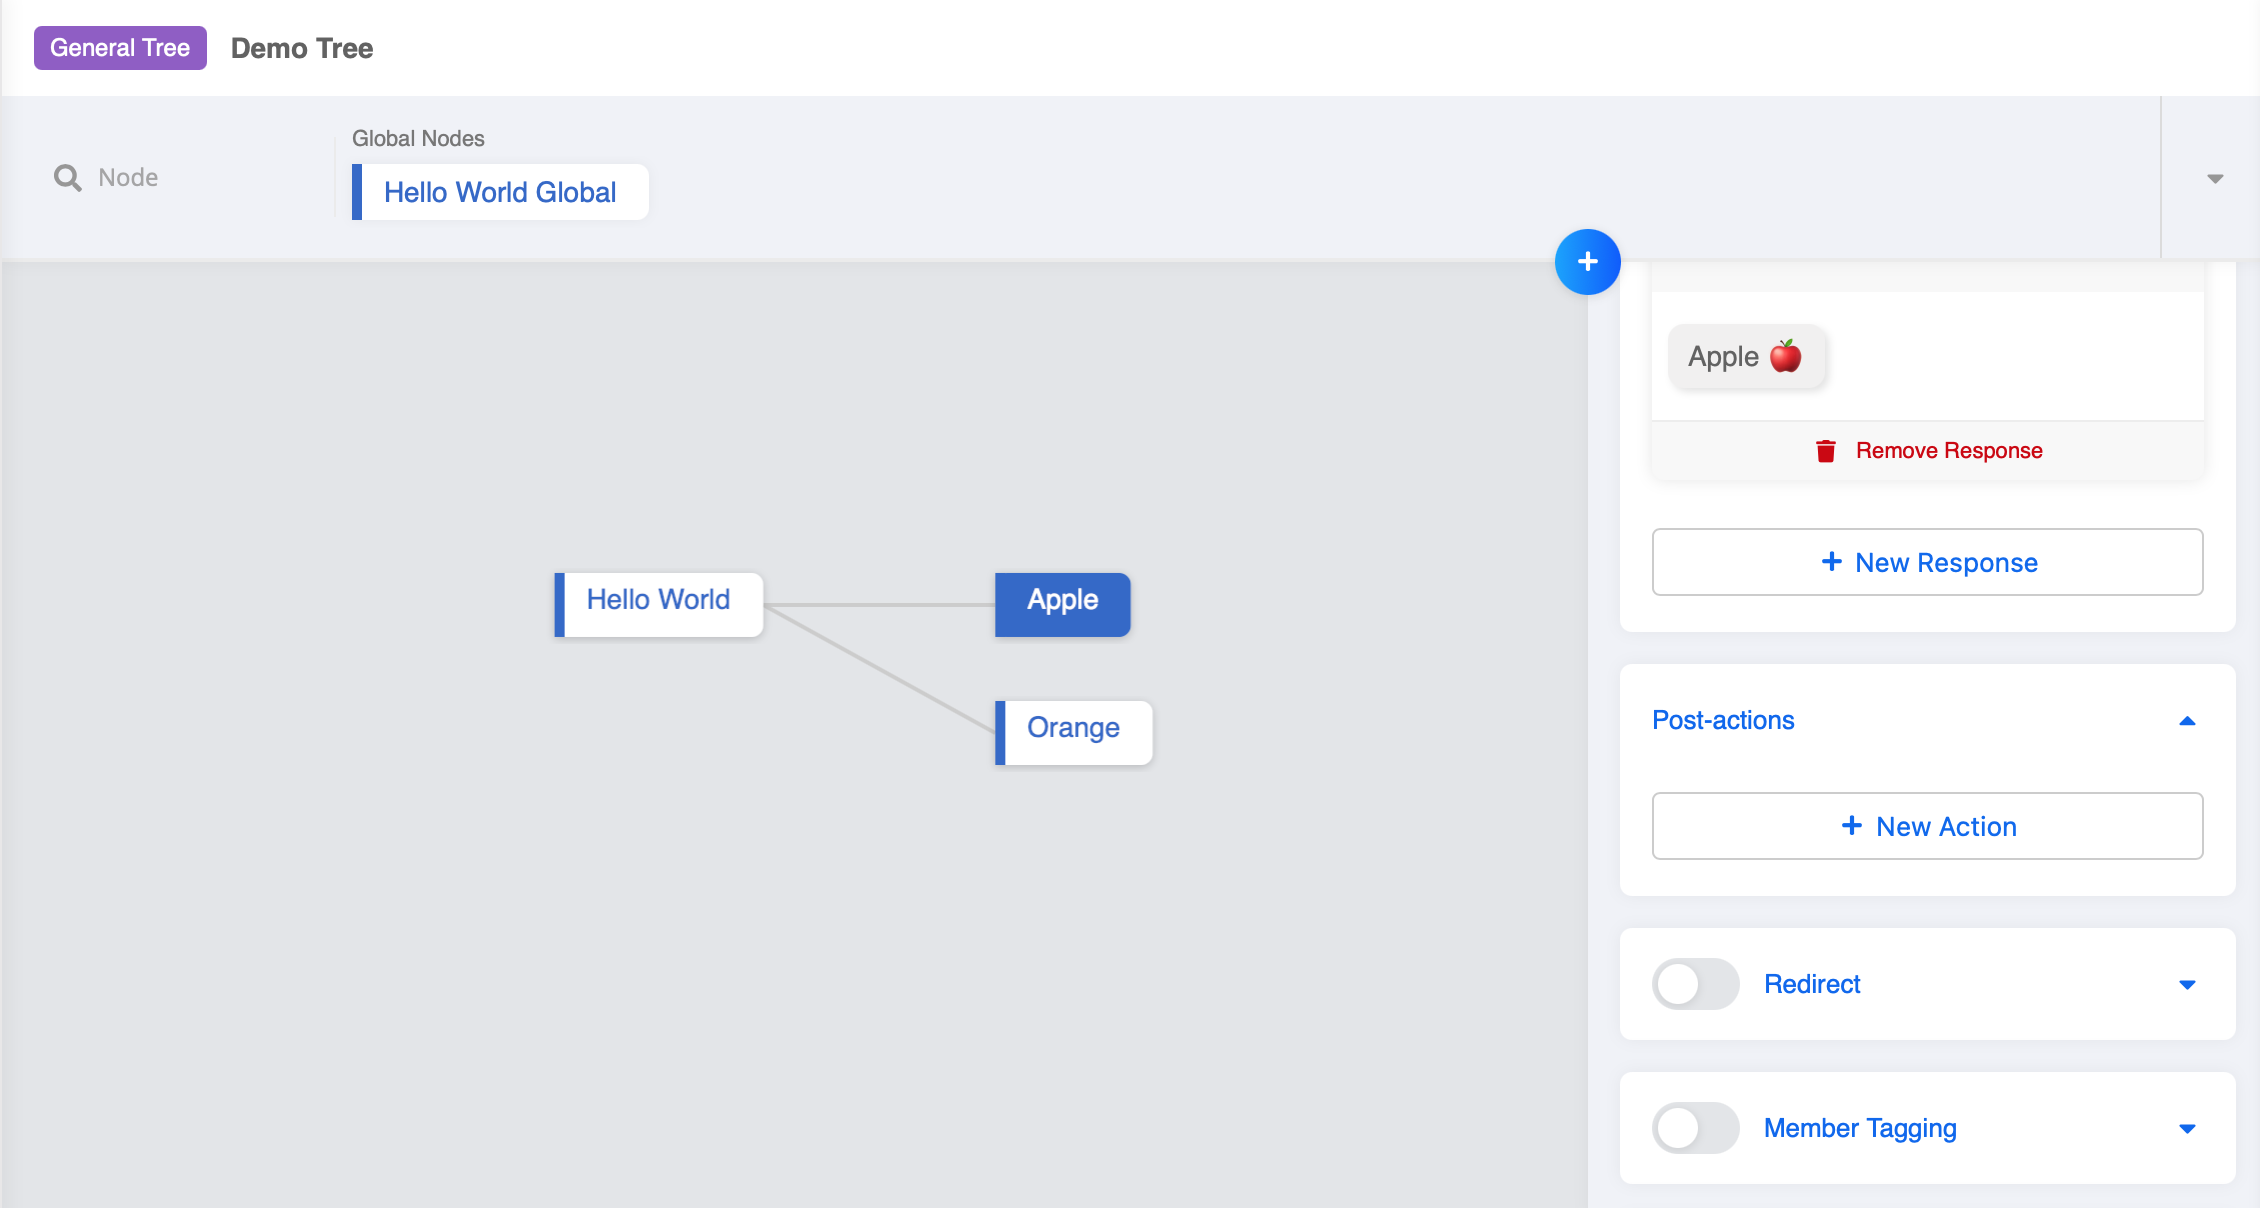
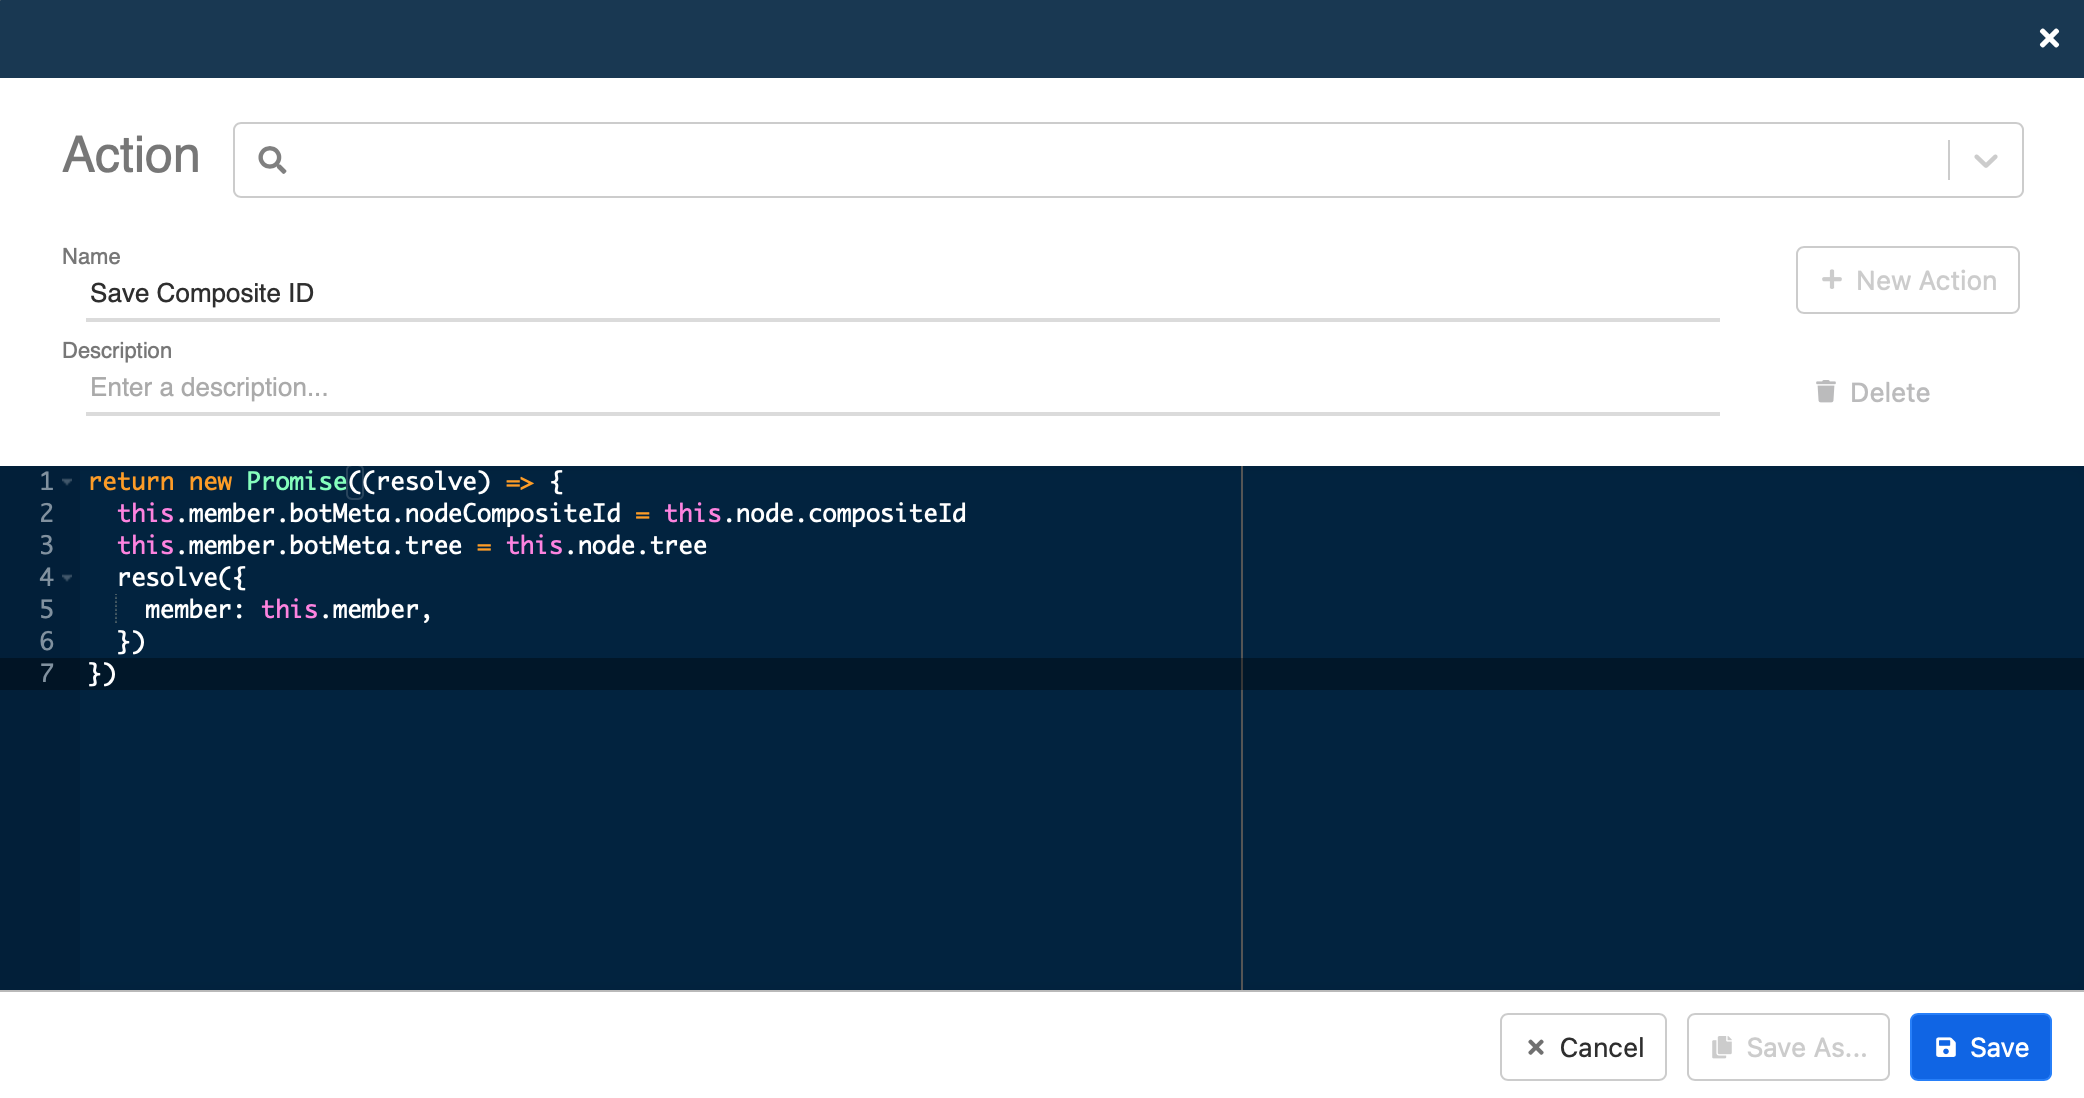
- We want to save the user's choice between apple and orange into the Temp Data. To do this, go to the Apple Node and the Orange Node, and click on "+ New Post-actions".
- Copy and paste the following code into the "Post-actions" of both node. This action helps you save the Composite ID of thie node to the Temp Data.
return new Promise((resolve) => {
  this.member.botMeta.tempData.nodeCompositeId = this.node.compositeId
  this.member.botMeta.tempData.tree = this.node.tree
  resolve({
    member: this.member,
  })
})
Check Temp Data
- Say "Hi" to your chatbot again to activate the global node. Go through the same flow again and choose between Apple and Orange.
- Repeat Step 33-34 and check the Temp Data now.
- However, how can we view all the members' choices? We can make use of Data Source.
STEP 8: Data Source
What is Data Source?
Data Source is the mini-databse that you can create in WOZTELL. It stores and displays information collected by your chatbot, or for your chatbot to retrieve.
Click here to learn more about data source.
Create Data Source
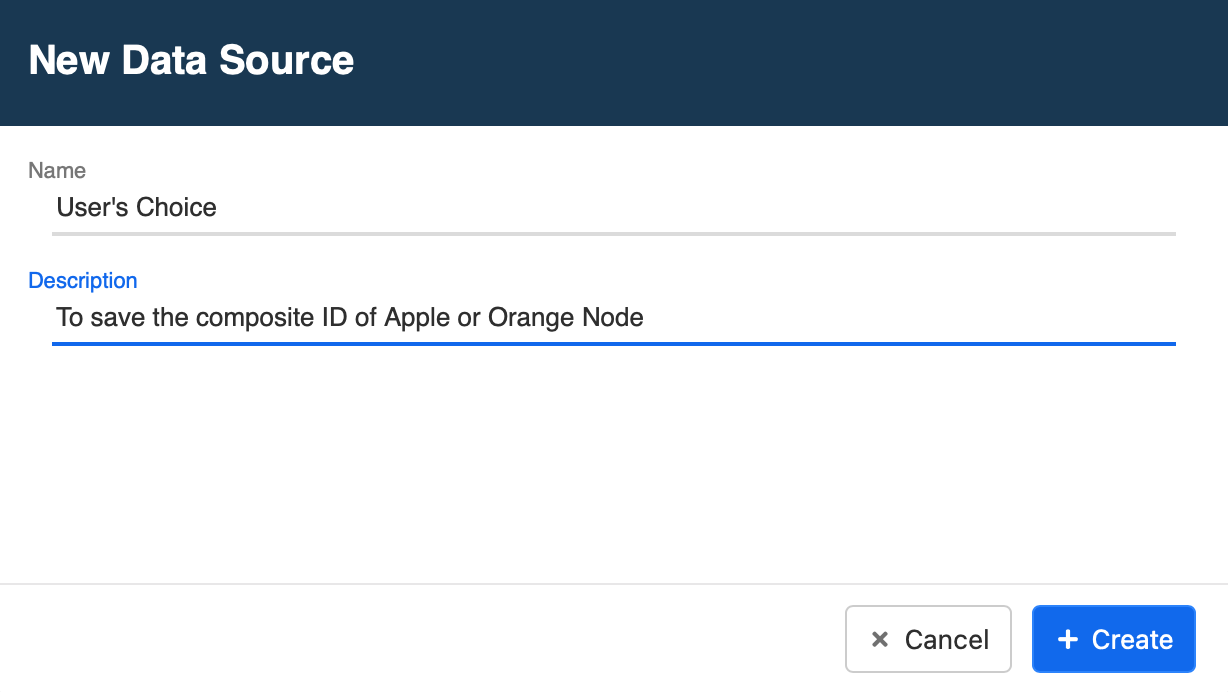
- Head to "Data Source", select "+ New Data Source".
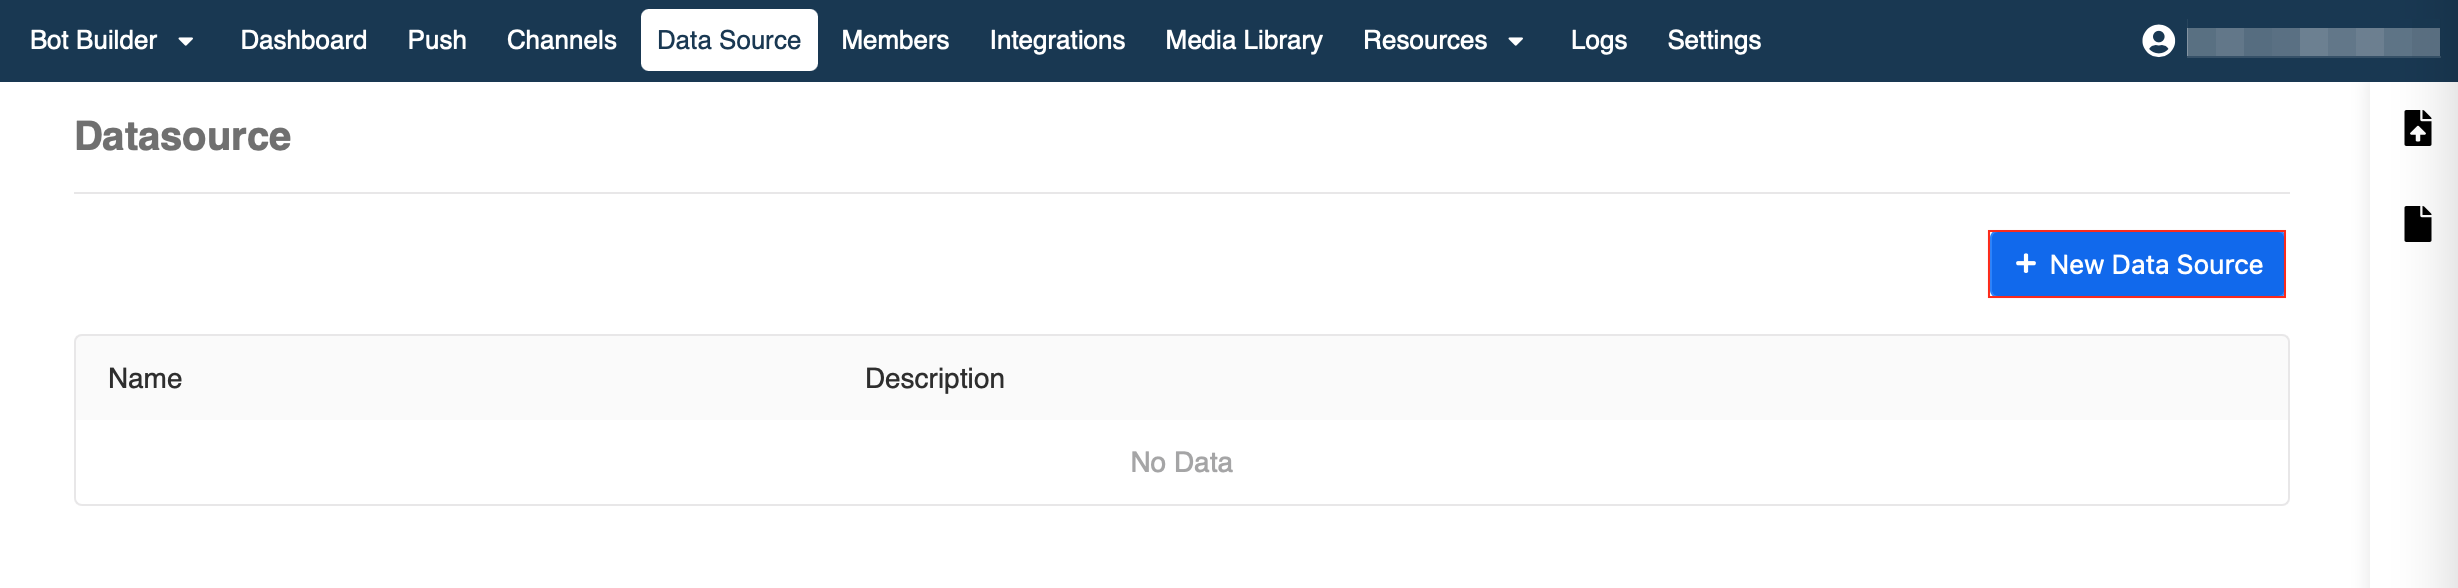
- Fill in the name and description for your data source.
- A new data source created.
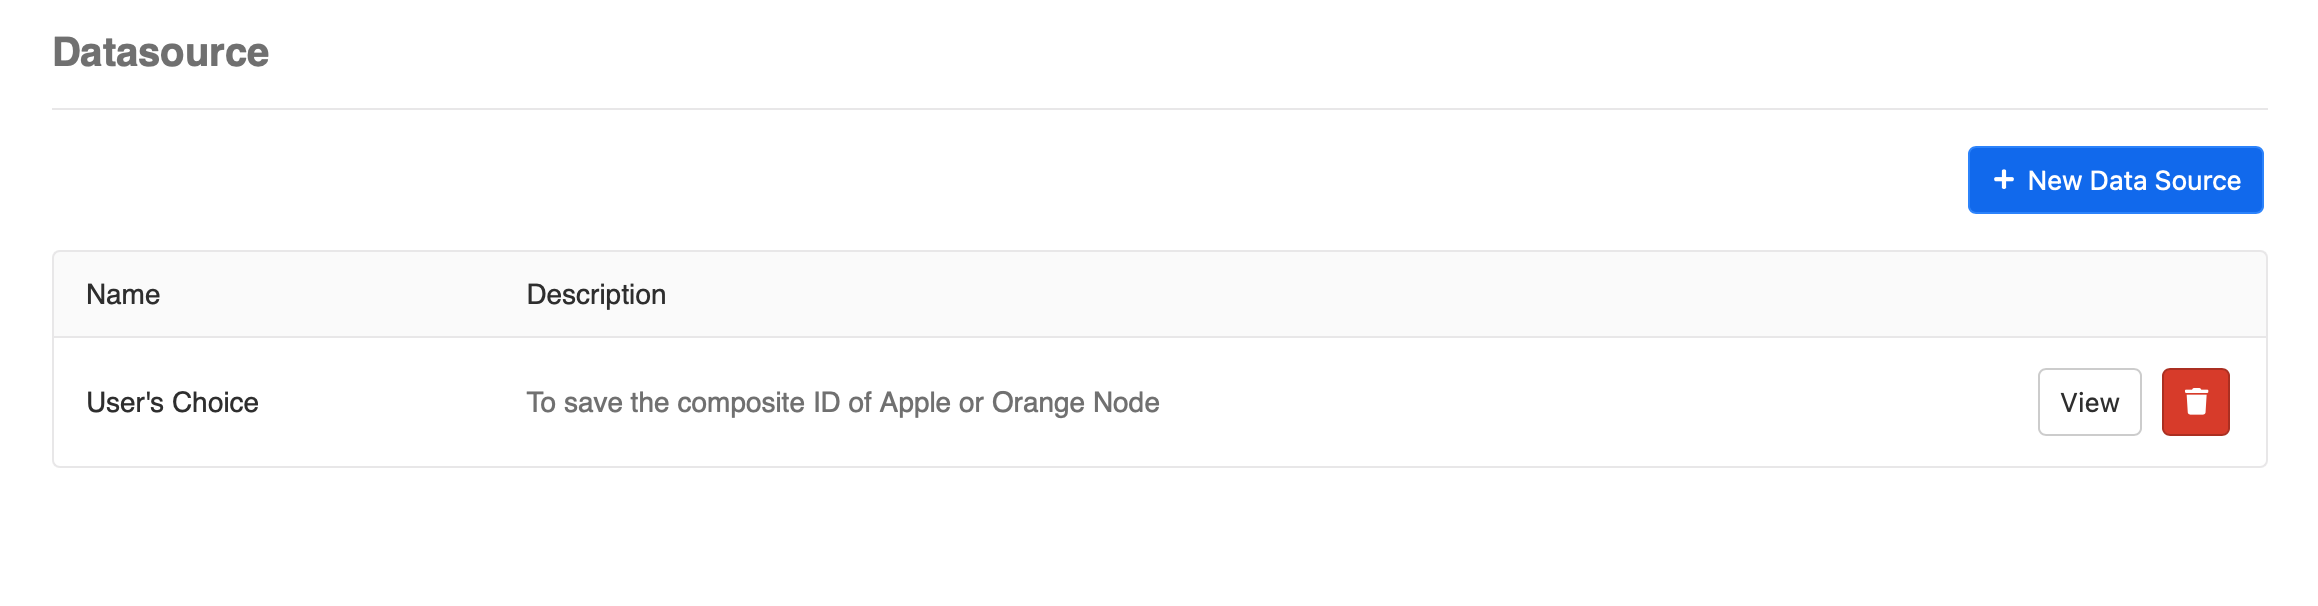
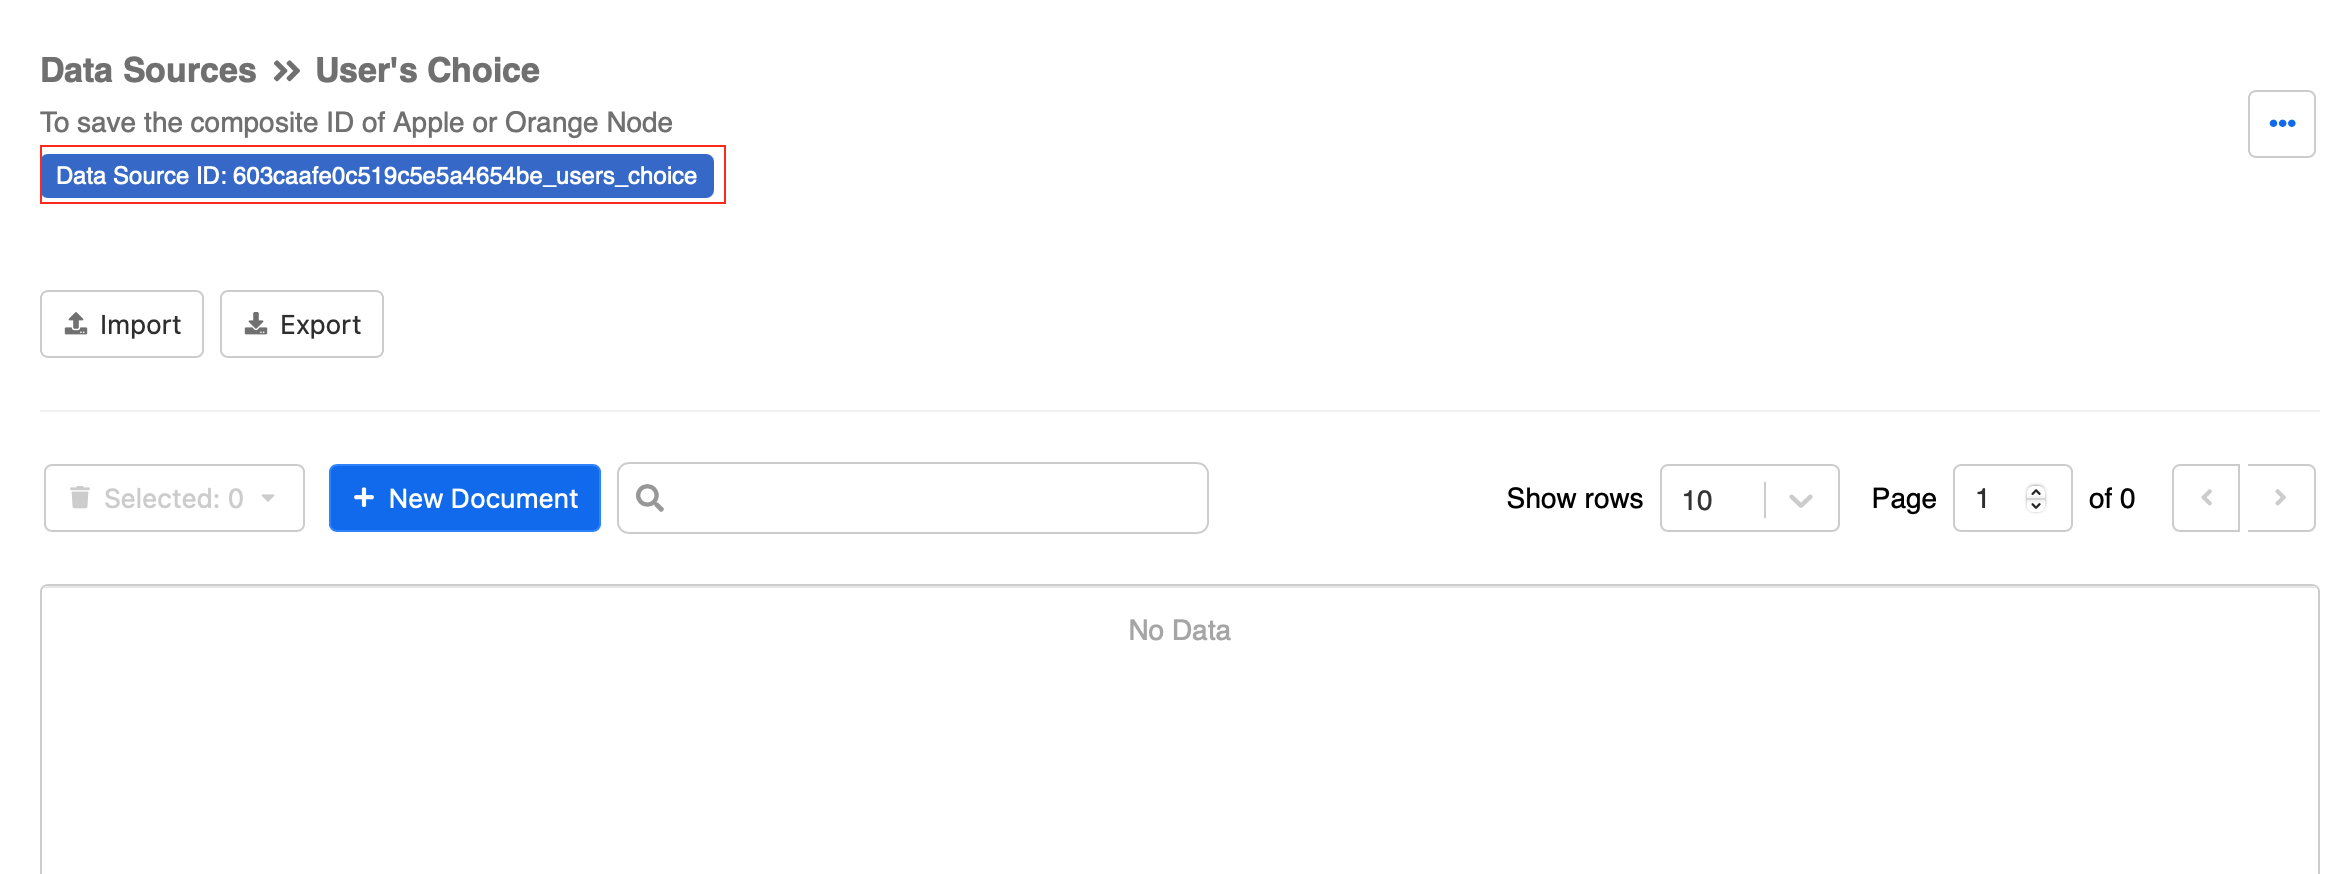
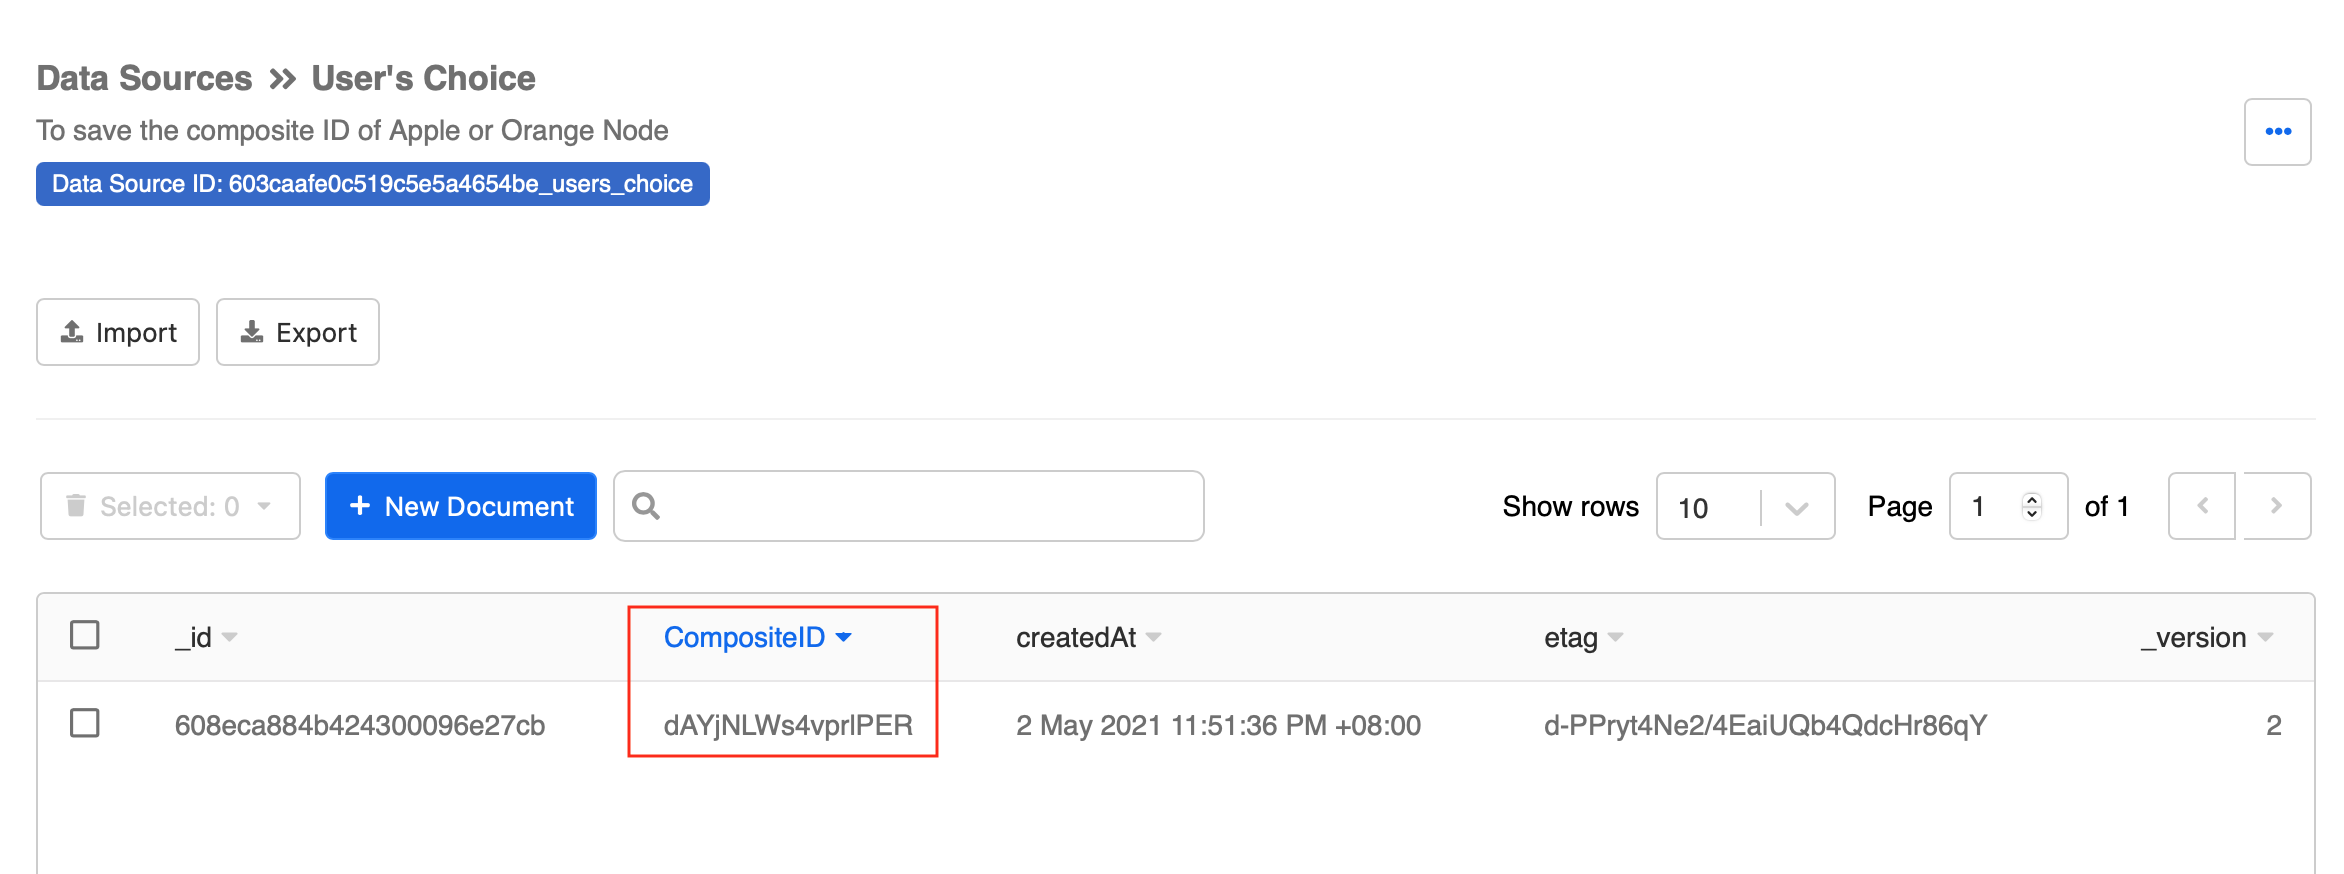
- Click on "View" to view the data. You can also find and copy the Data Source ID.
Save Data to Data Source
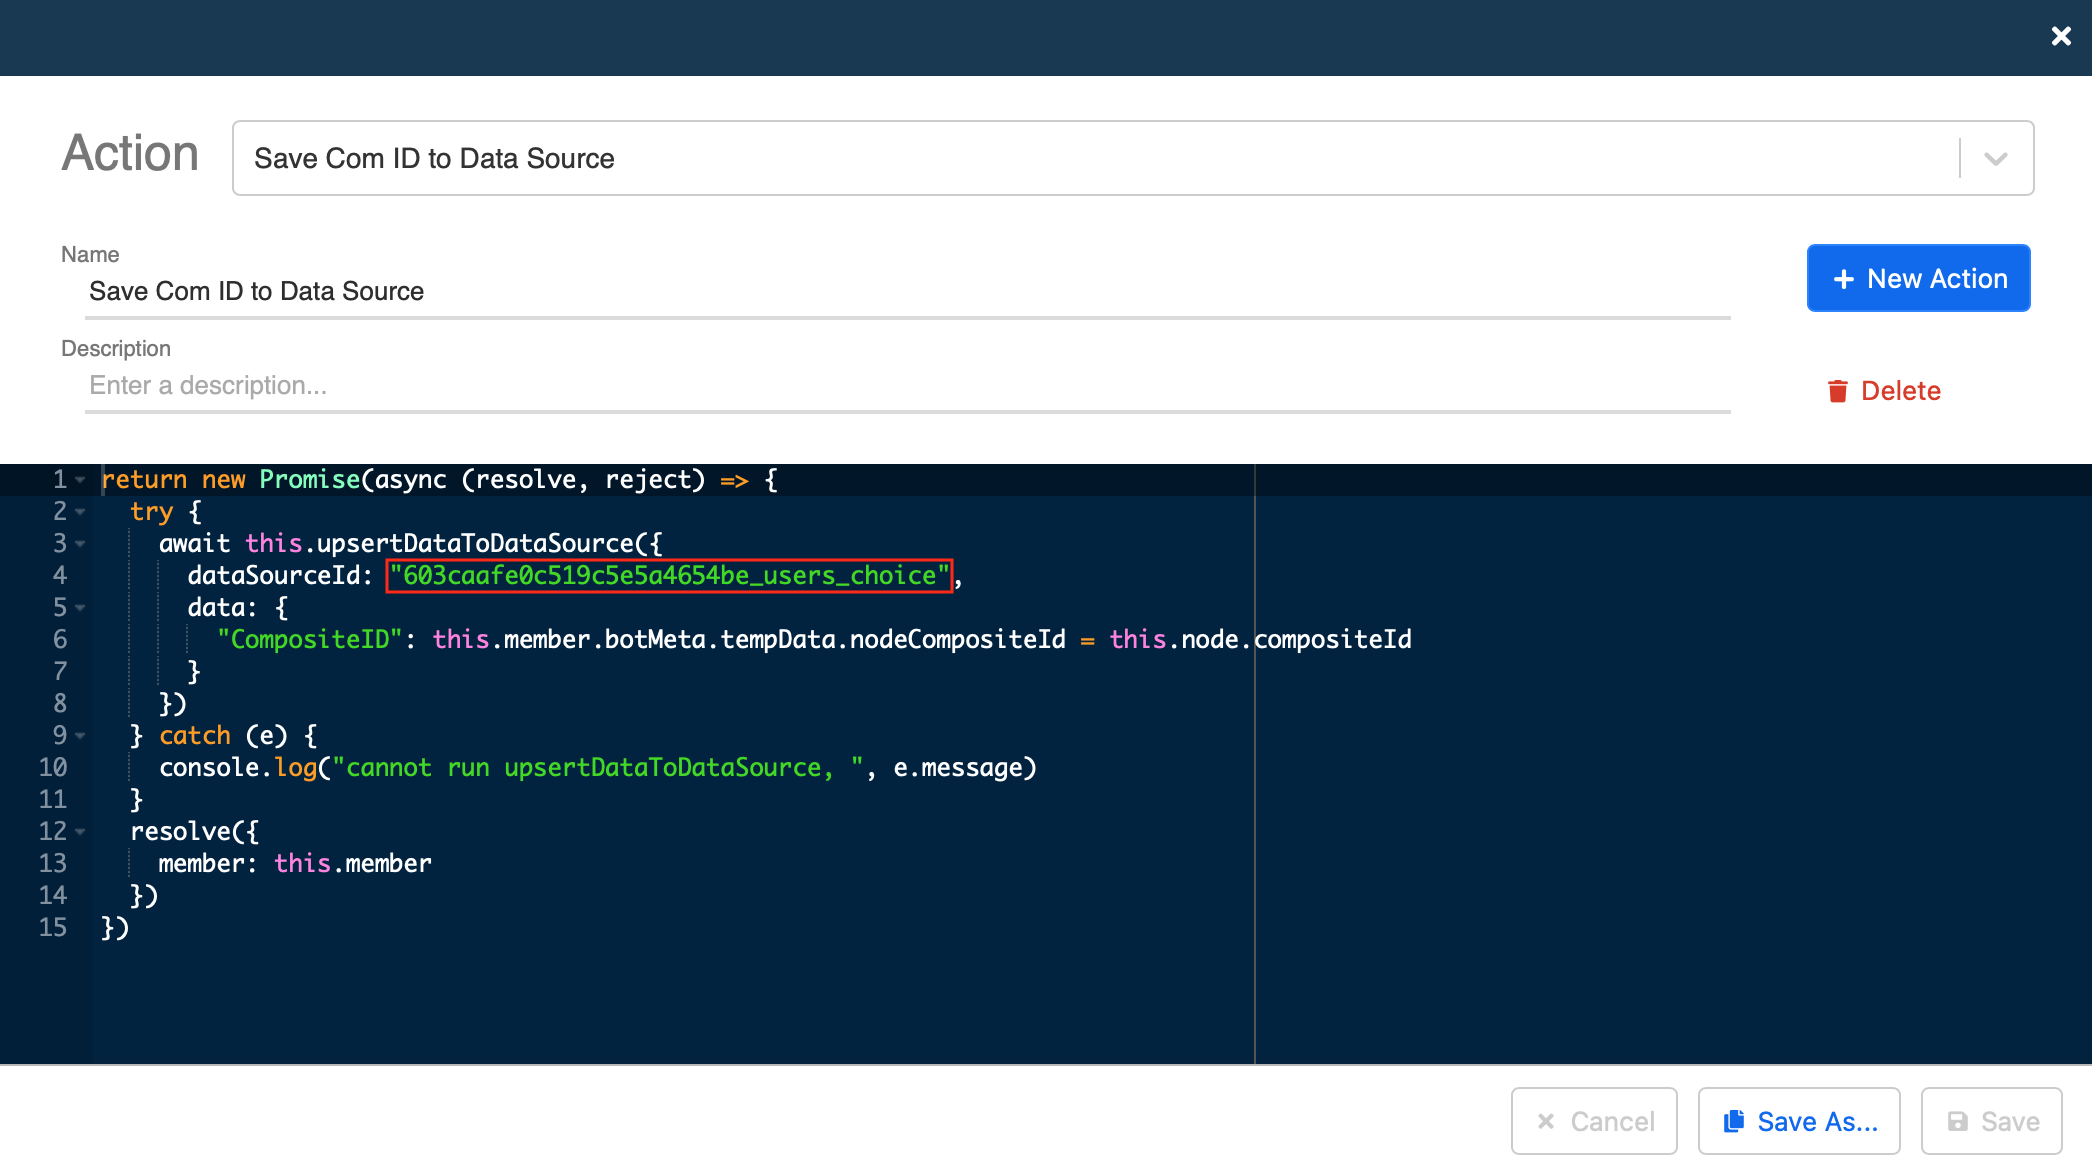
- In both the Apple and Orange Node, create a post-action respectively.

- Input the following code in the post-action of both nodes. It can retrieve the Composite ID from the member's TempData and save it to your Data Source. Remember to fill in the Data Source ID into the script.
return new Promise(async (resolve, reject) => {
  try {
    await this.upsertDataToDataSource({
      dataSourceId: "YOUR_DATASOURCE_ID",
      data: {
        "CompositeID": this.member.botMeta.tempData.nodeCompositeId = this.node.compositeId
      }
    })
  } catch (e) {
    console.log("cannot run upsertDataToDataSource, ", e.message)
  }
  resolve({
    member: this.member
  })
})
Check Data Source
Now, run your chatbot again.
Head back to "Data Source" and see if you can find the Composite ID!
Ready to Step up?
Congratulations! You have completed a basic flow for your first chatbot in WOZTELL!
Next, you can try to connect and build your chatbot on other messaging platforms:
To explore more about WOZTELL, you also can refer to our Documentatioin Guide.