Instagram Platform Management
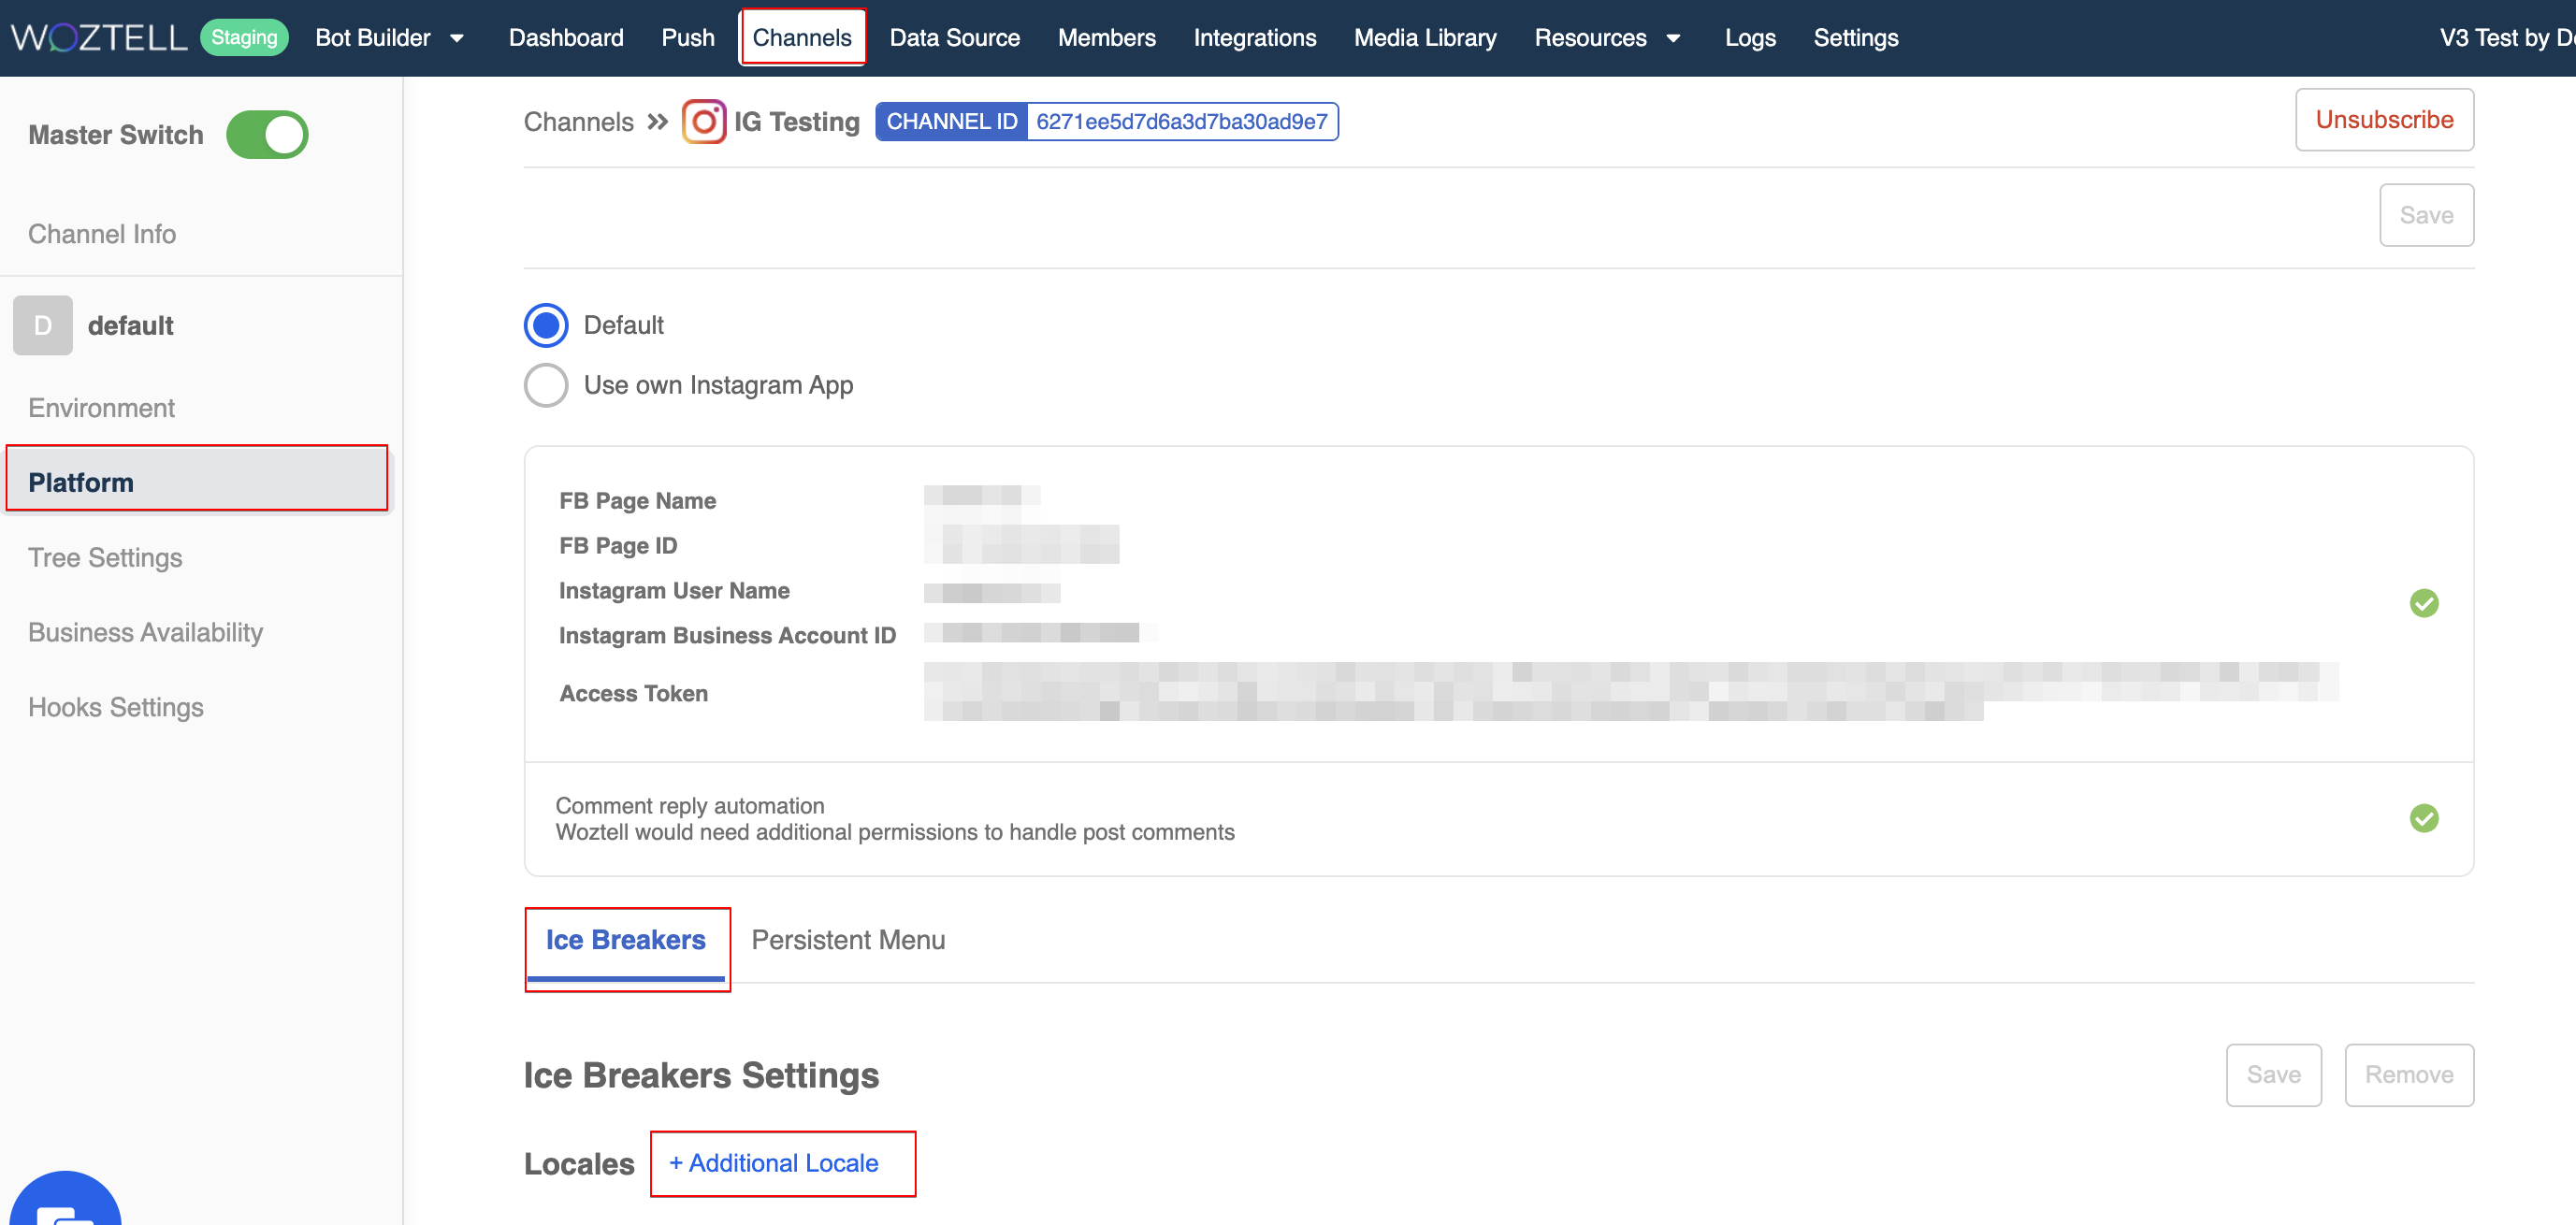
Inside the channel, the "Platform" is where you can manage settings specific to the Instagram Messenger Integration.
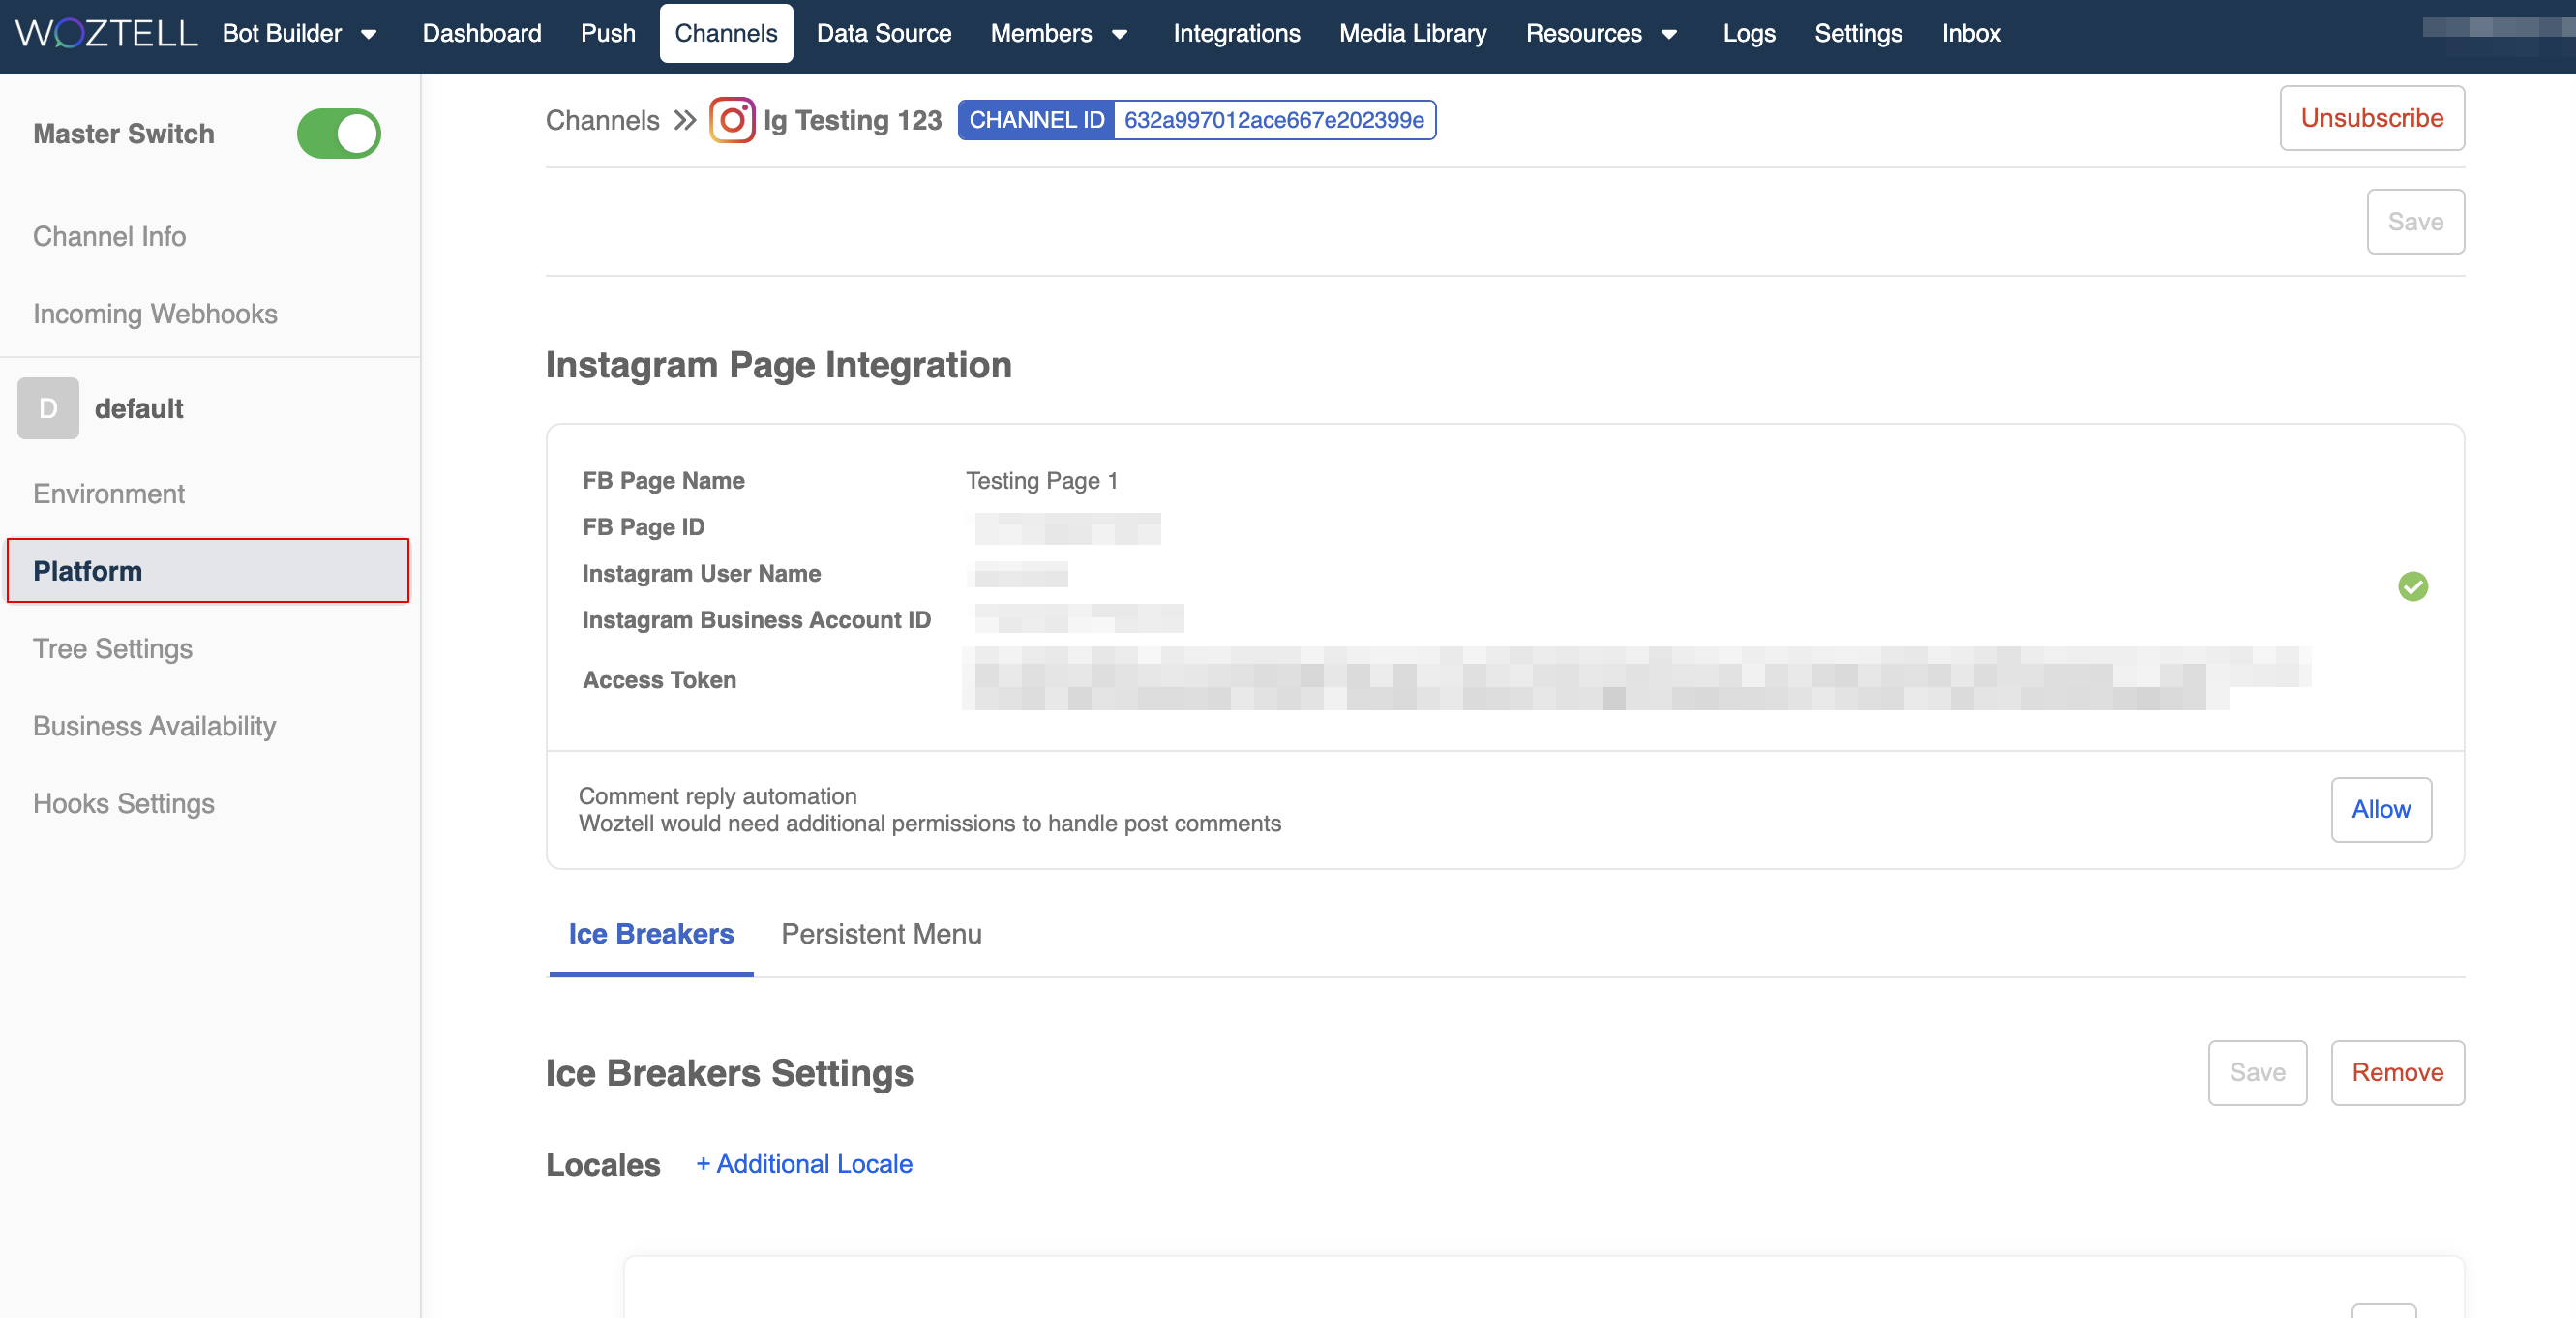
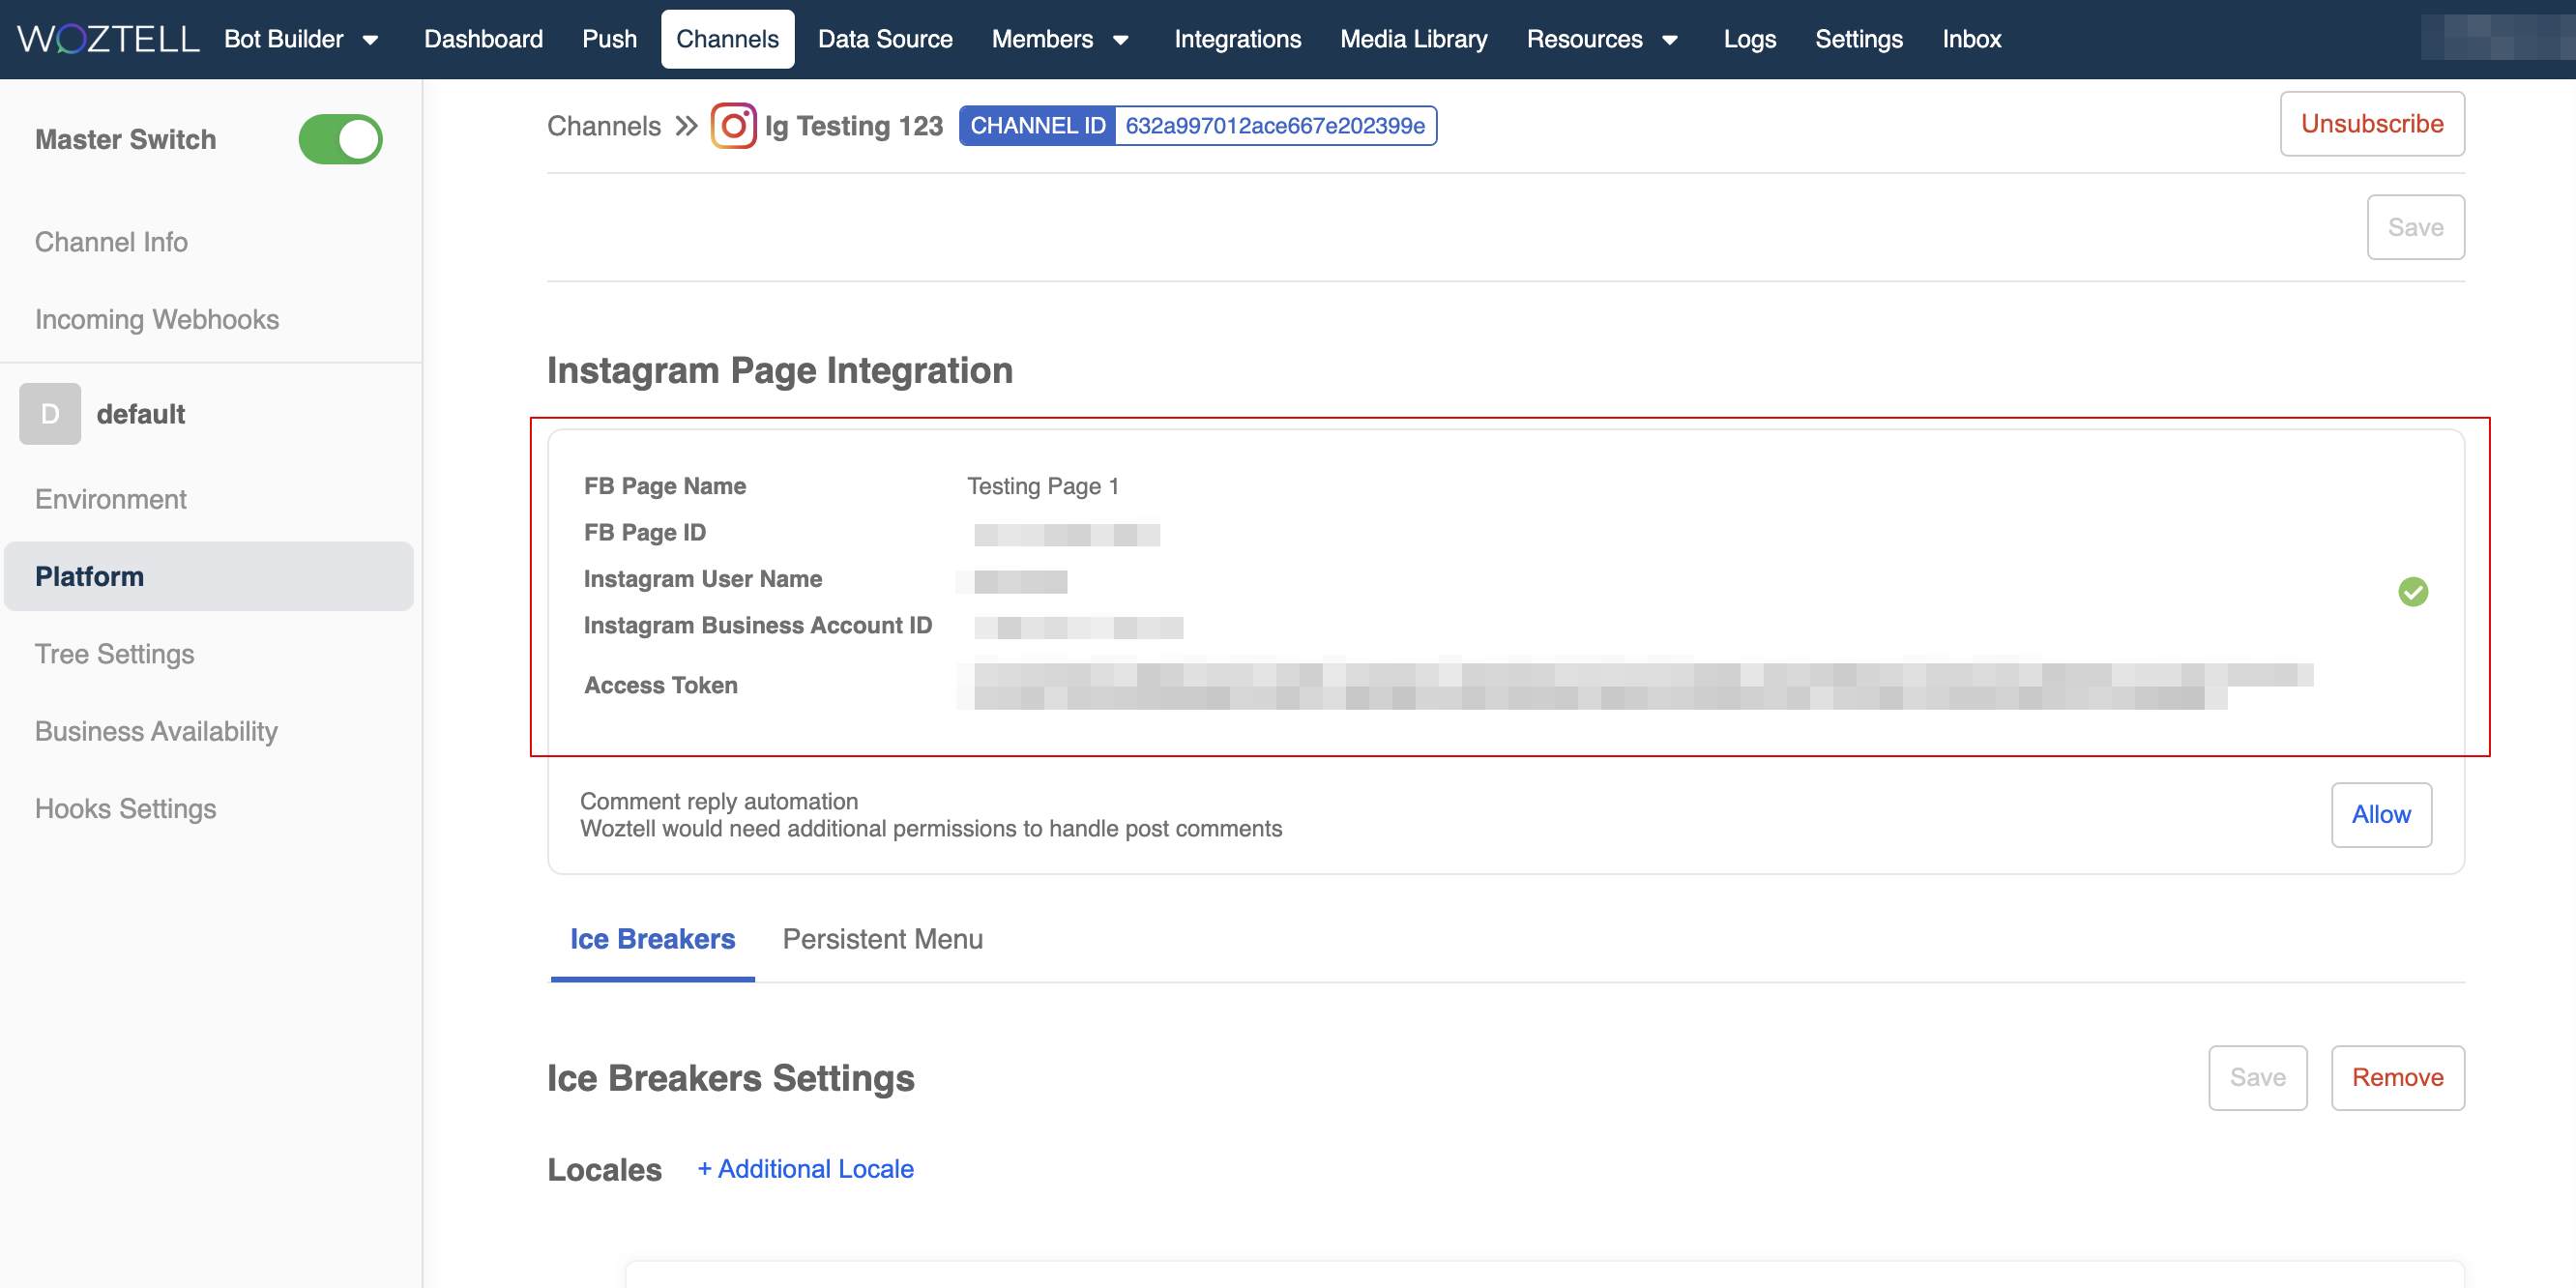
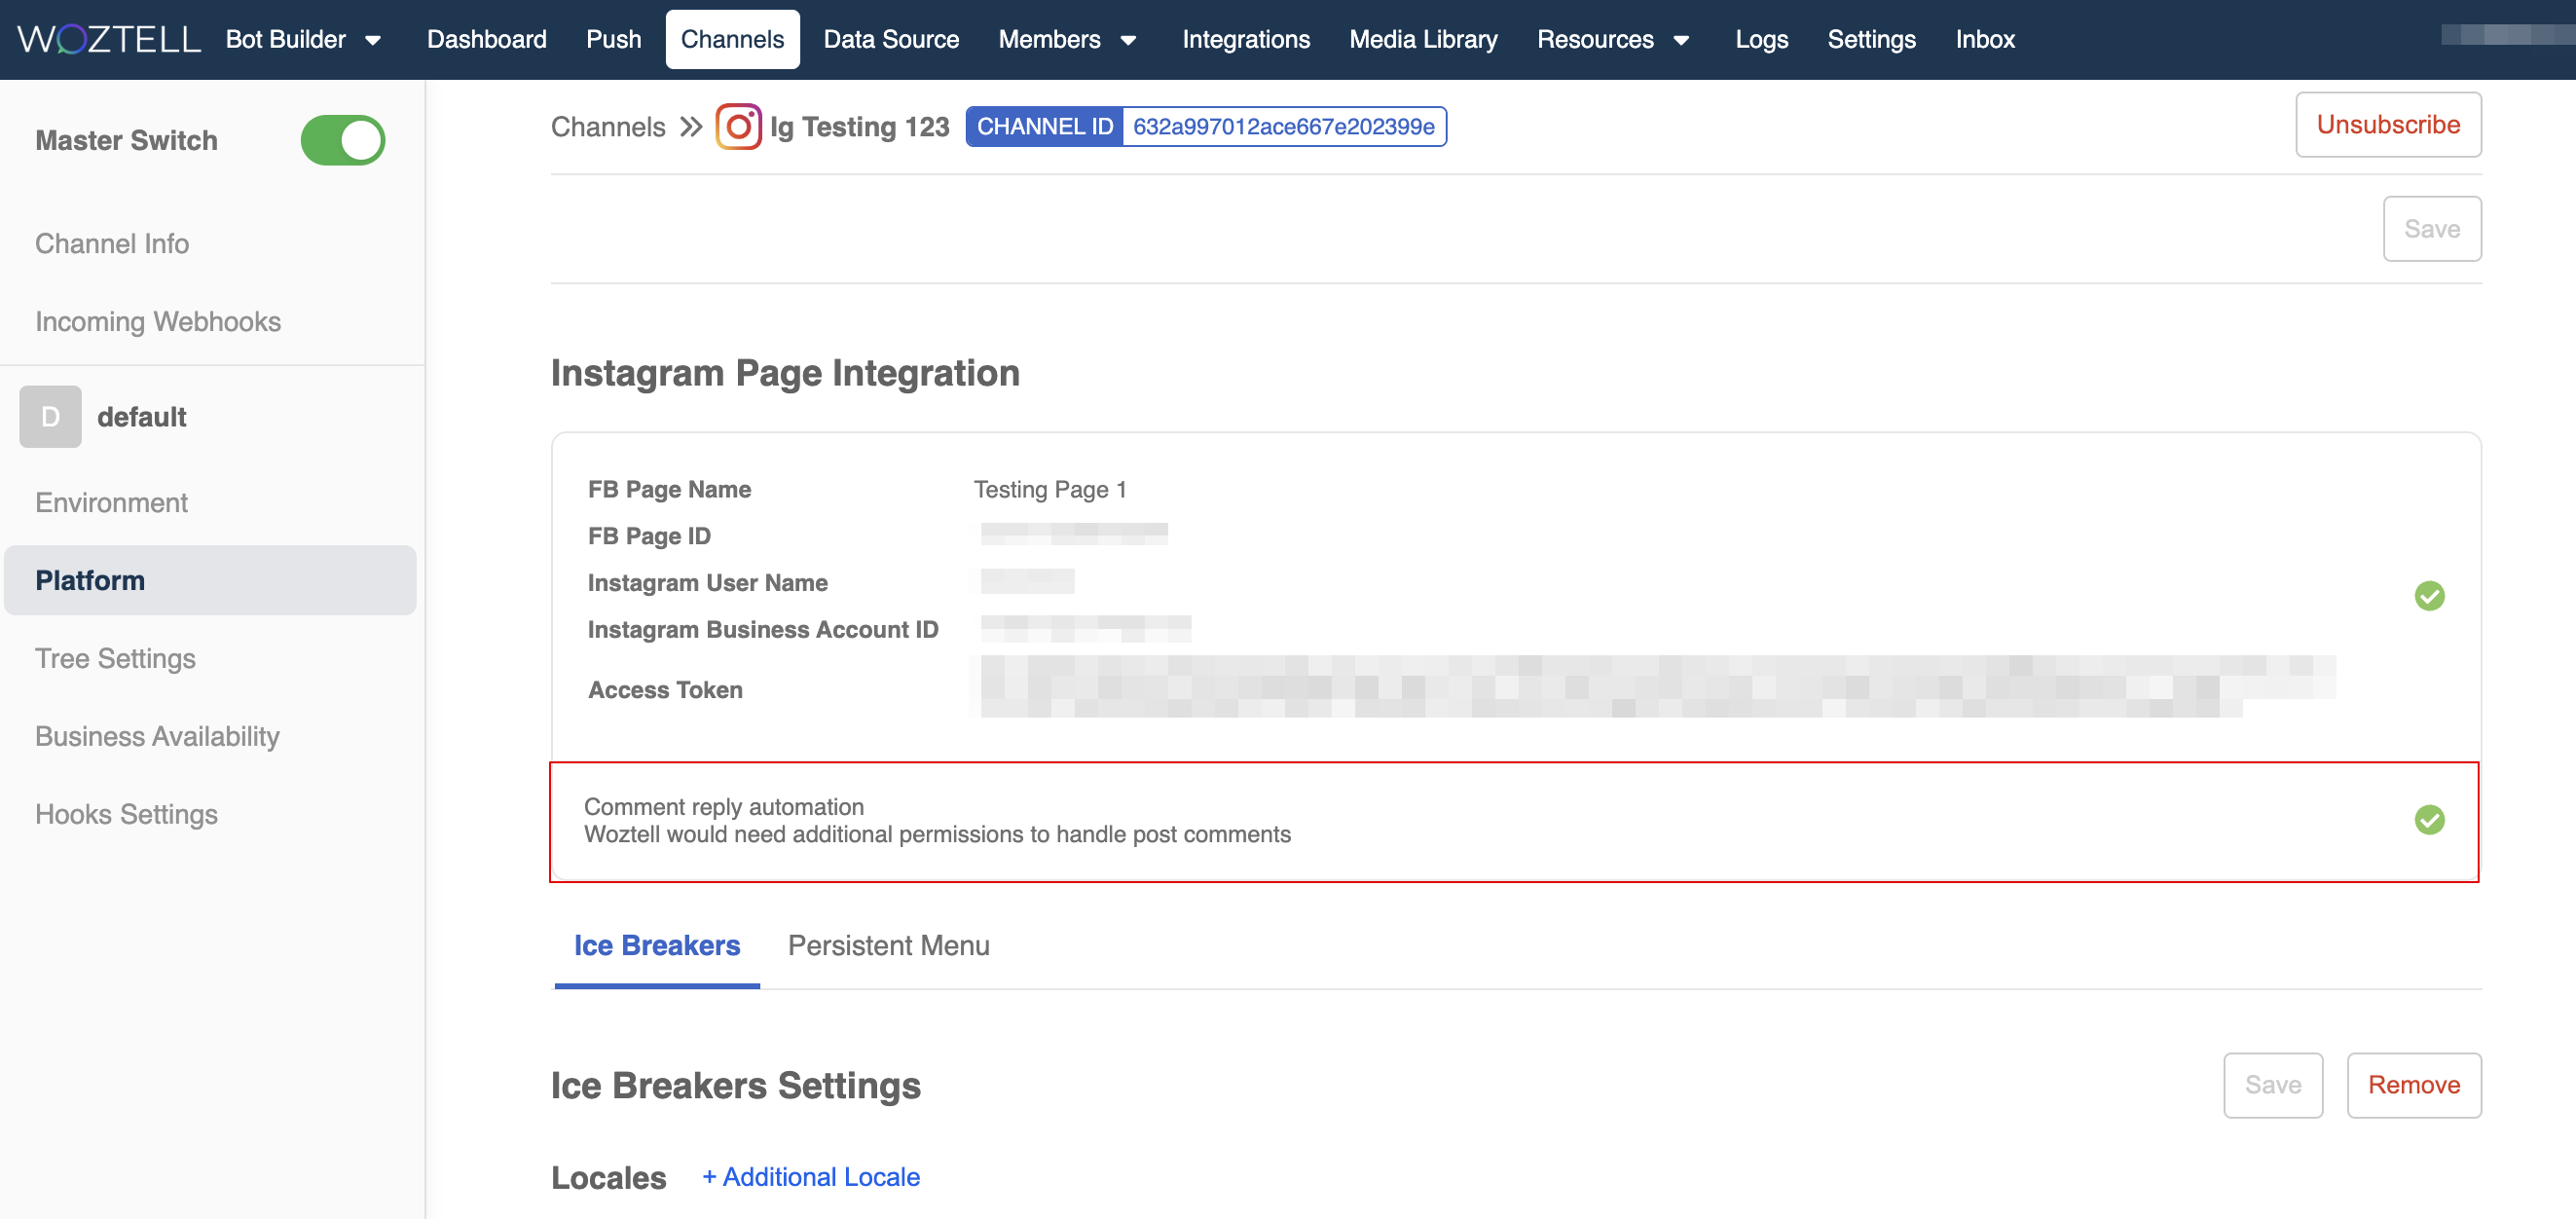
Page Info
Once you have successfully connected you Facebook page to a channel, the "Page Info" can be displayed, which includes the "FB Page Name", "FB Page ID"m "Instagram User Name", "Instagram Business Account ID" and "Access Token".
Reminder
You can create a ig.me link by using with the Instagram User Name, which can redirect a user to a conversation with your Instagram account:
ig.me/INSTAGRAM_USER_NAME
Permission for Comment Reply
Reminder
Please refer to here for the steps to build the comment reply flow.
- To enable the Comment Reply feature, you need to allow the relevant permissions in this section.
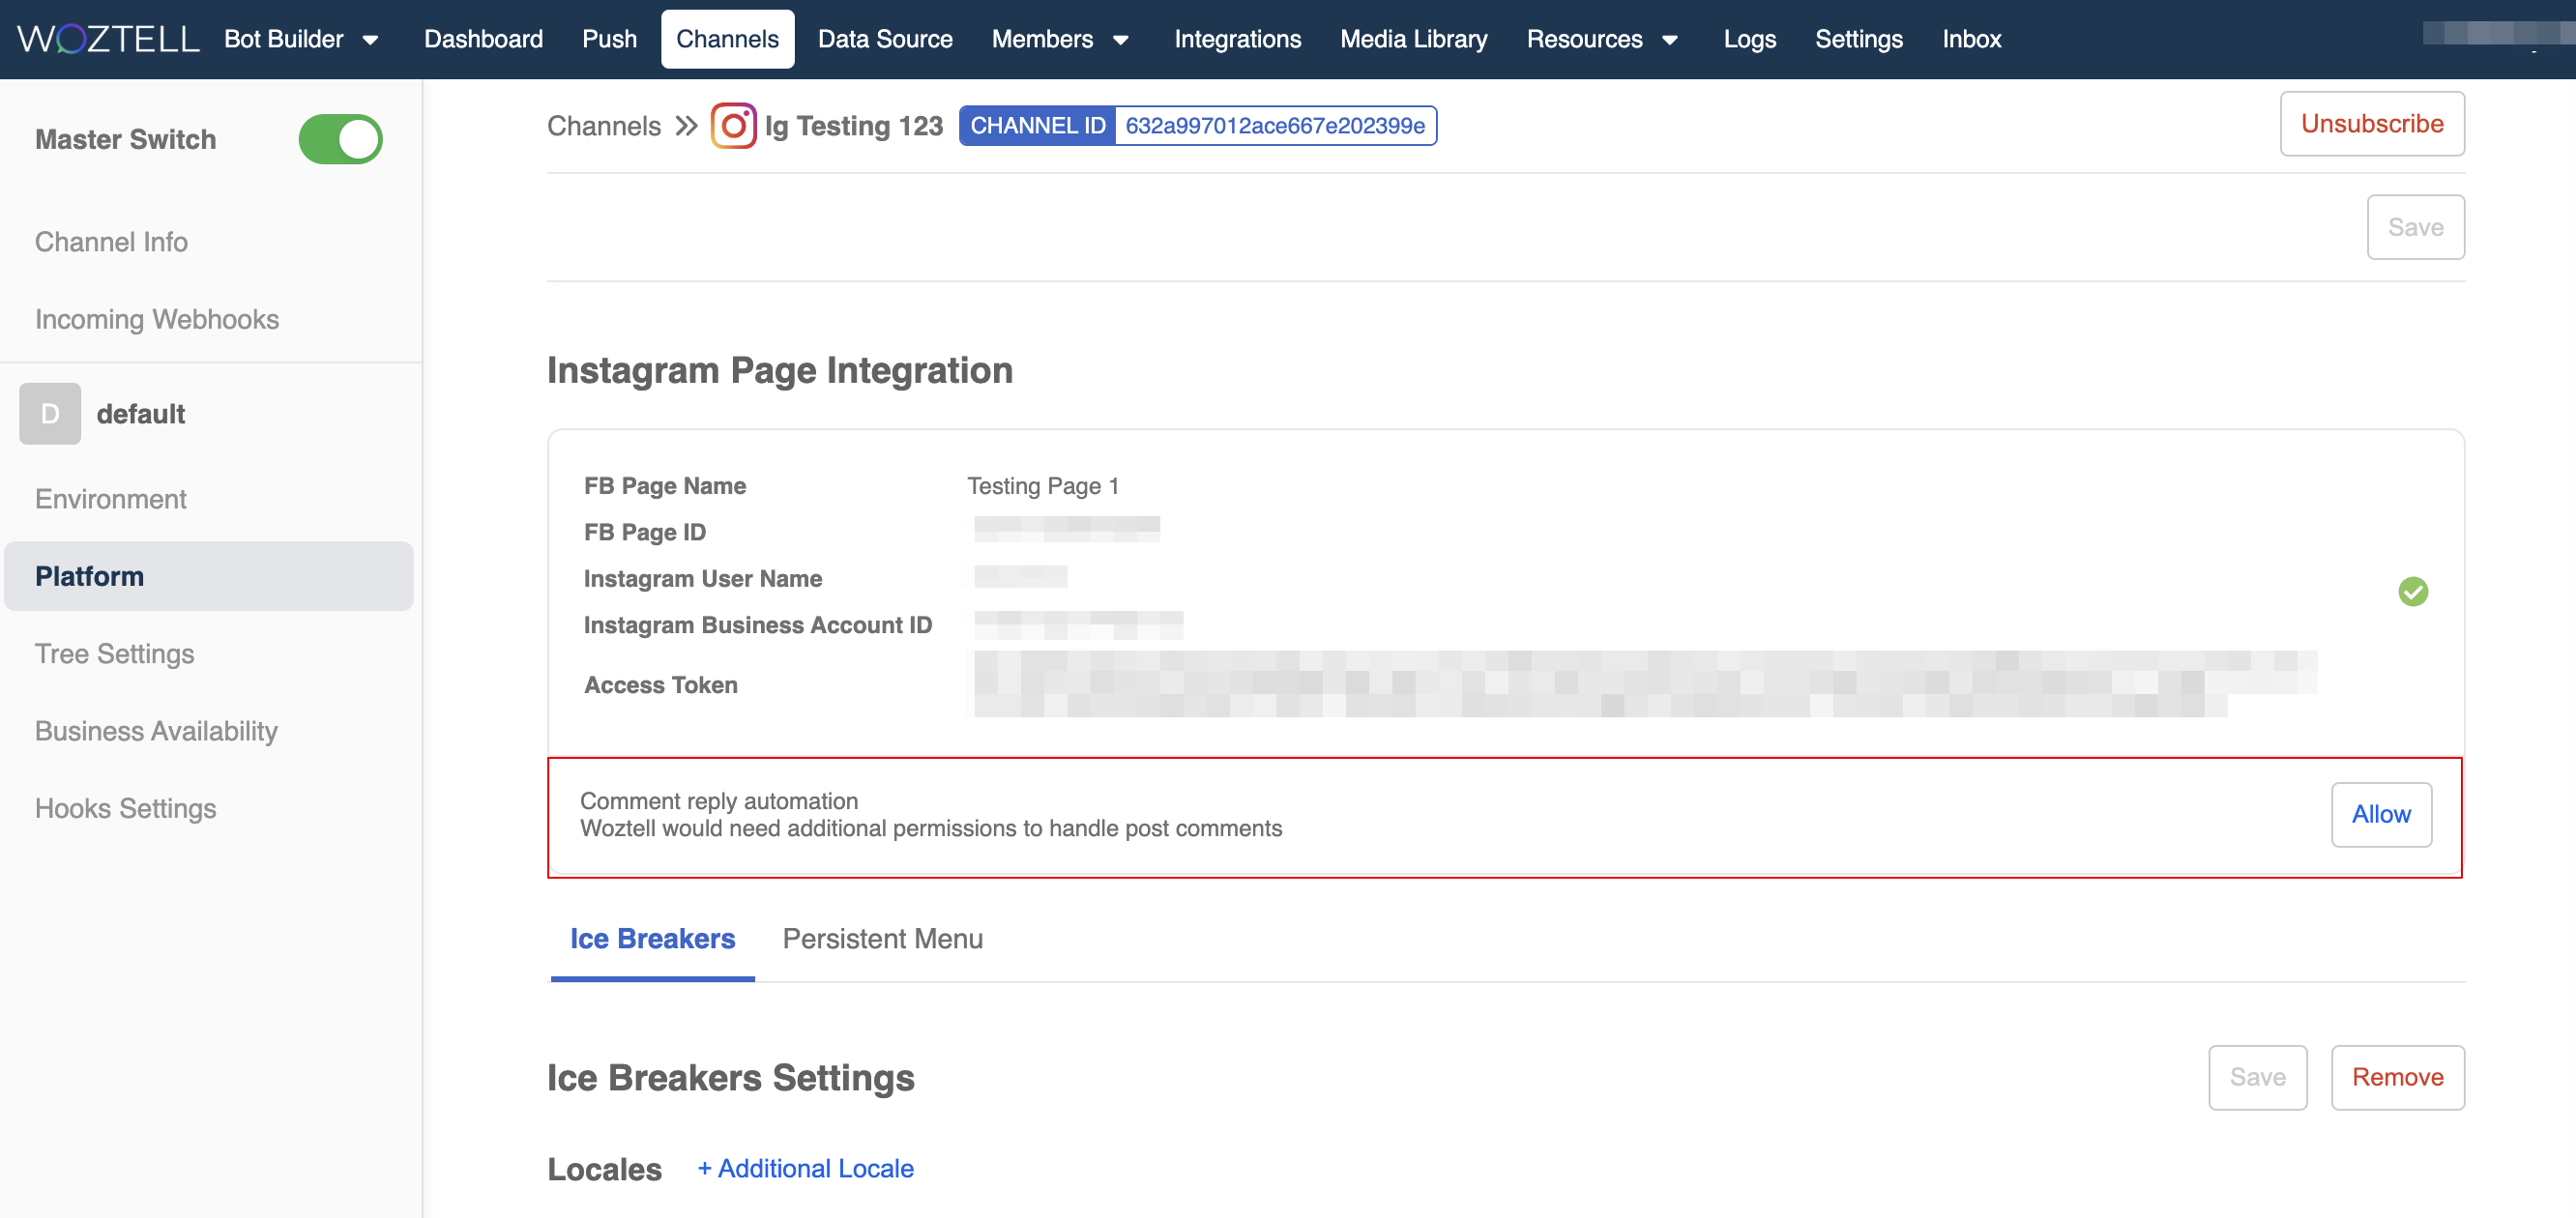
- After clicking "Allow", you will be asked to log into your Facebook account and grant the permissions for selected pages.
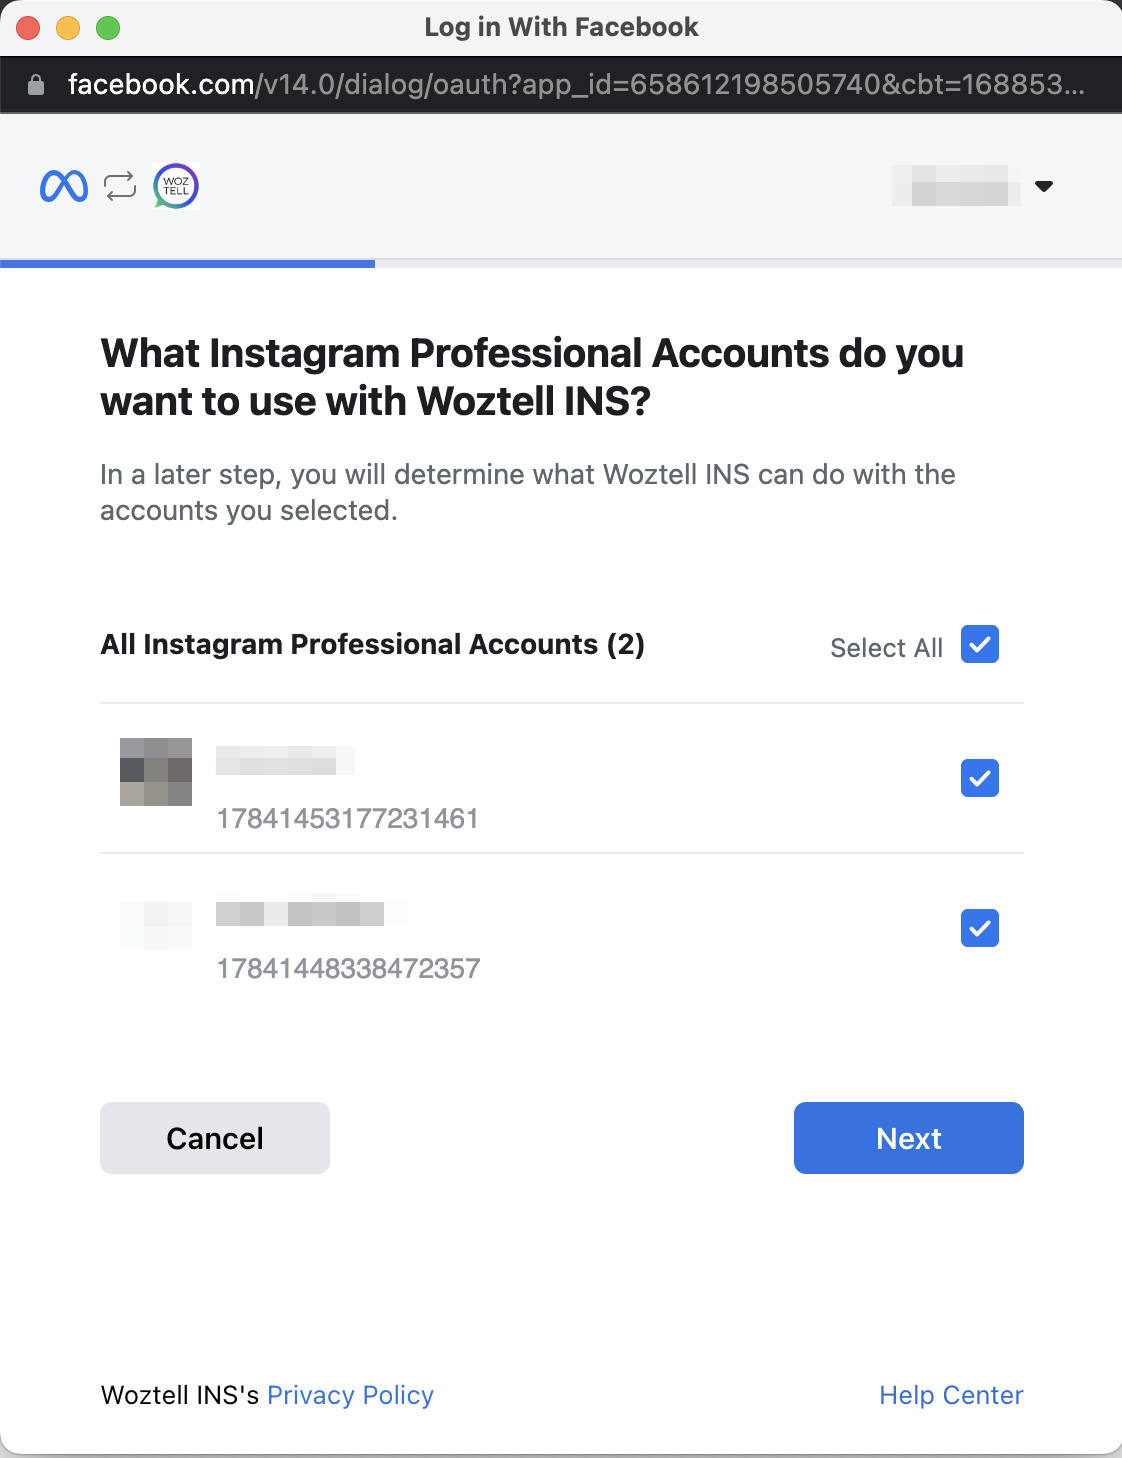
- The button will turn into a green tick once the permission is granted.
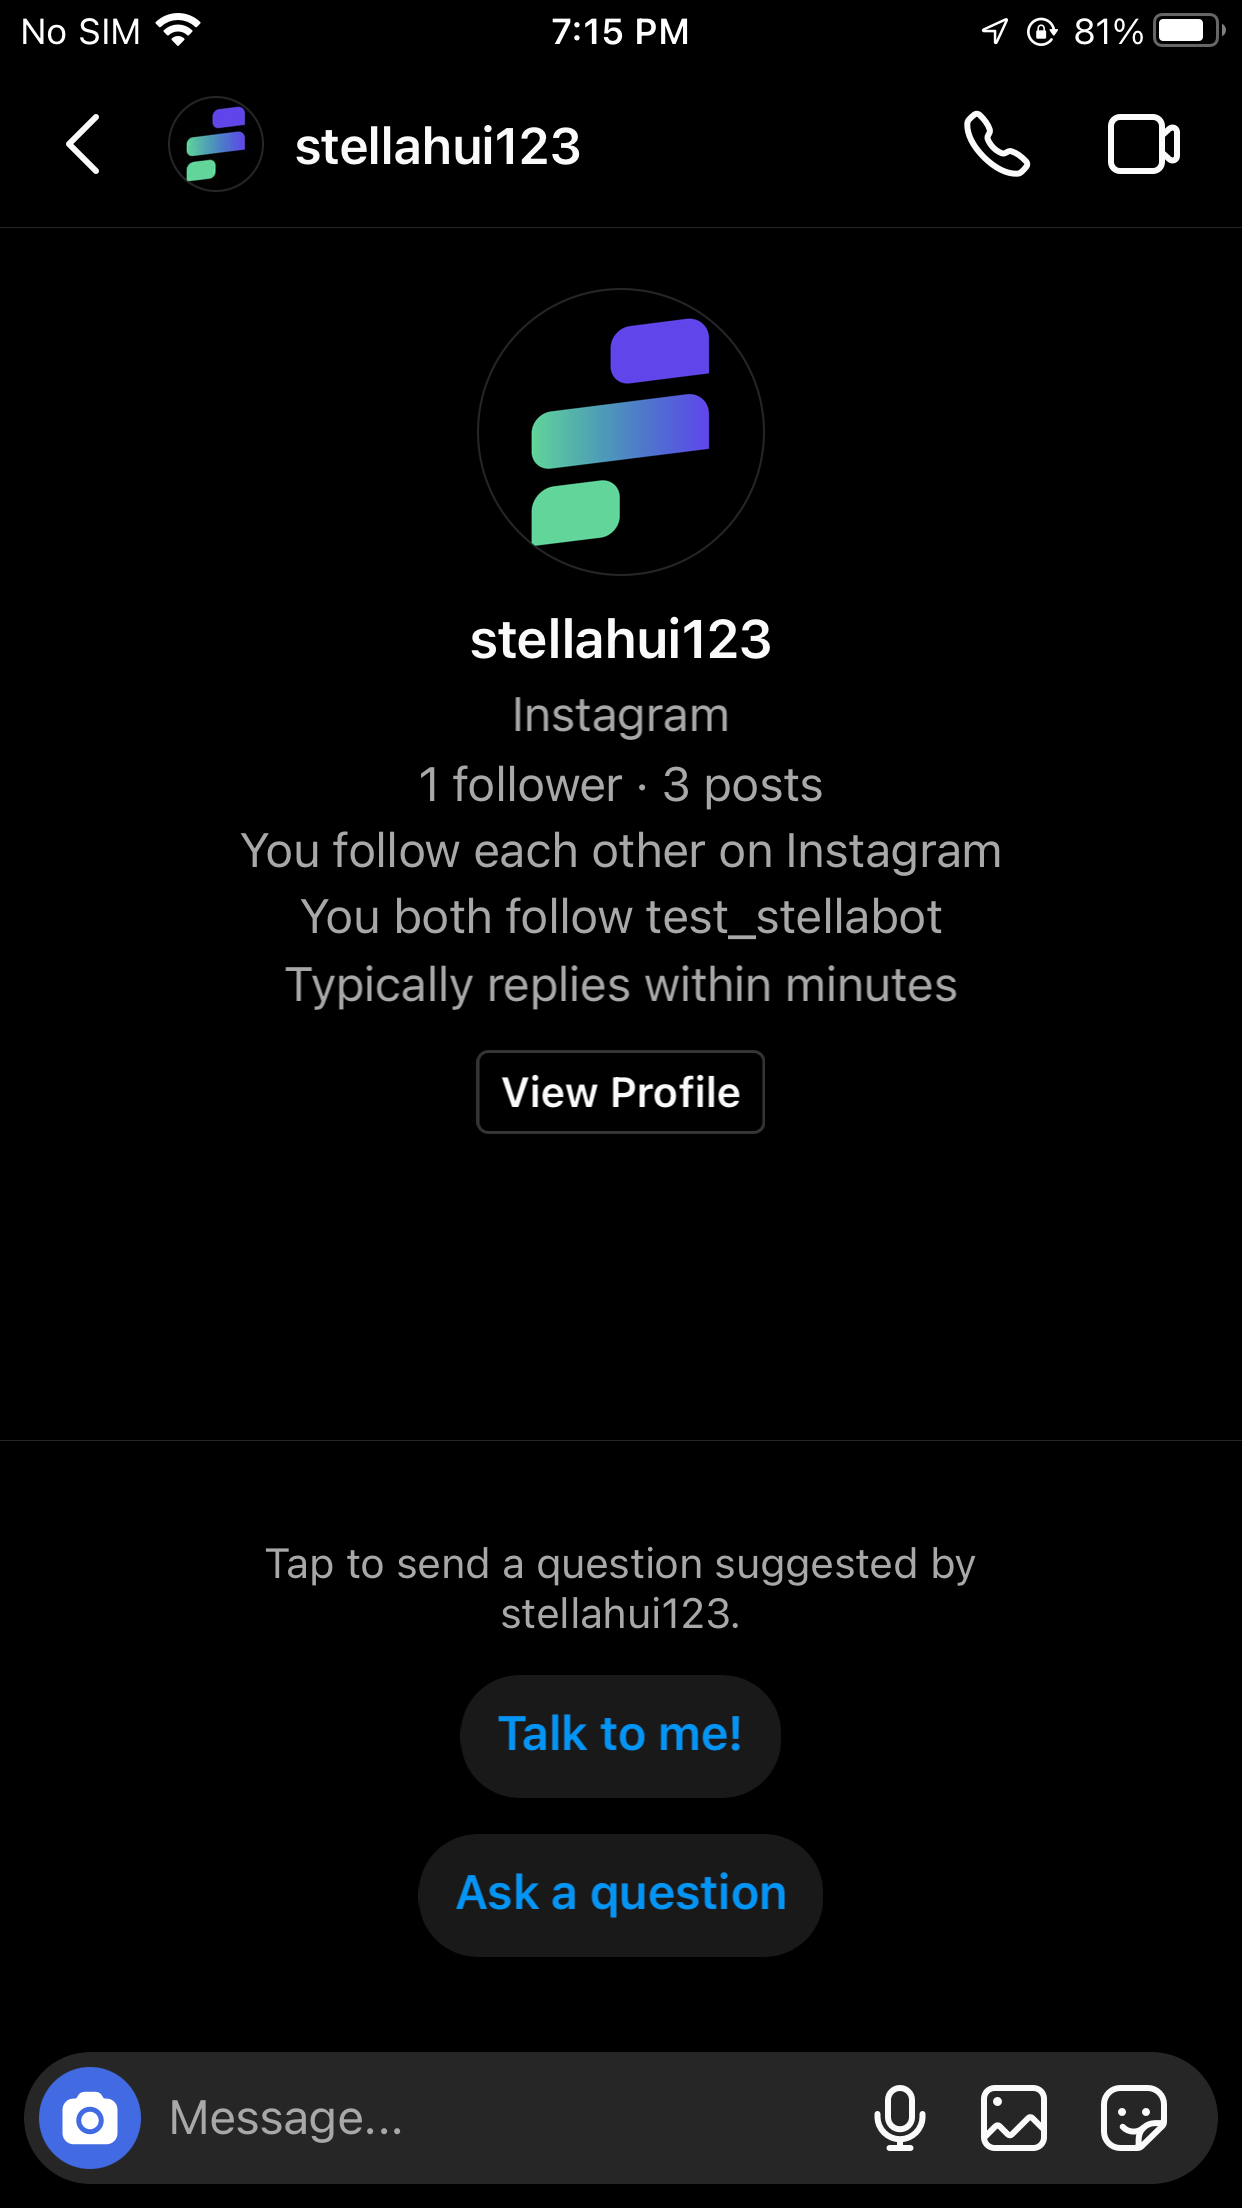
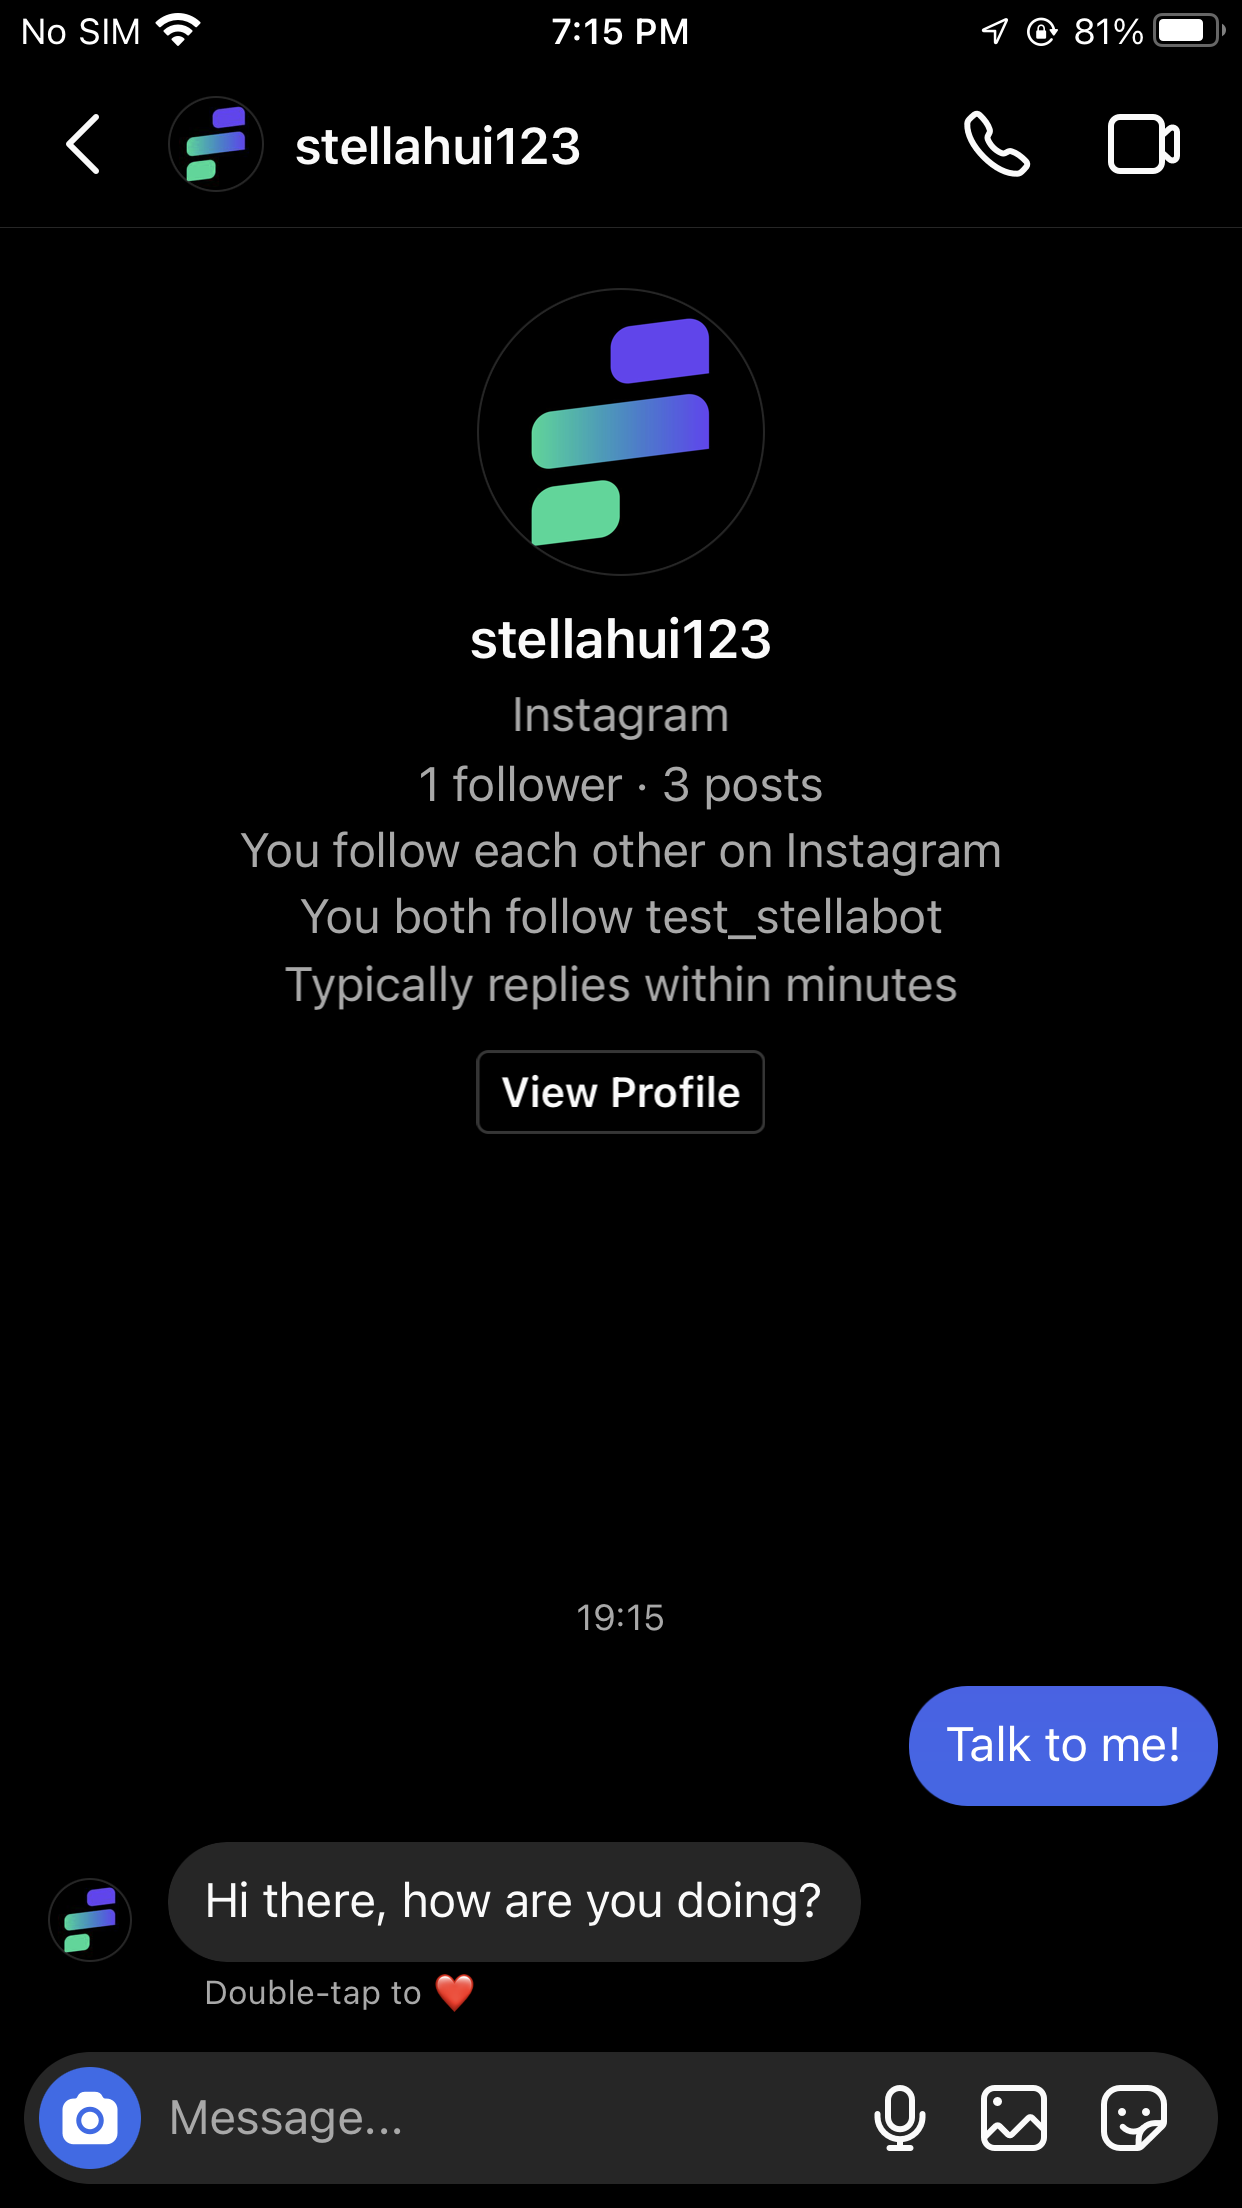
Ice Breakers
Ice Breakers are the text bubbles displayed to new users who have never chatted with your page. They act as the entry points to an Instagram chatbot. Every page is allowed to create a maximum of 4 questions via Ice Breakers.
In "Channels", head to your Instagram channel.
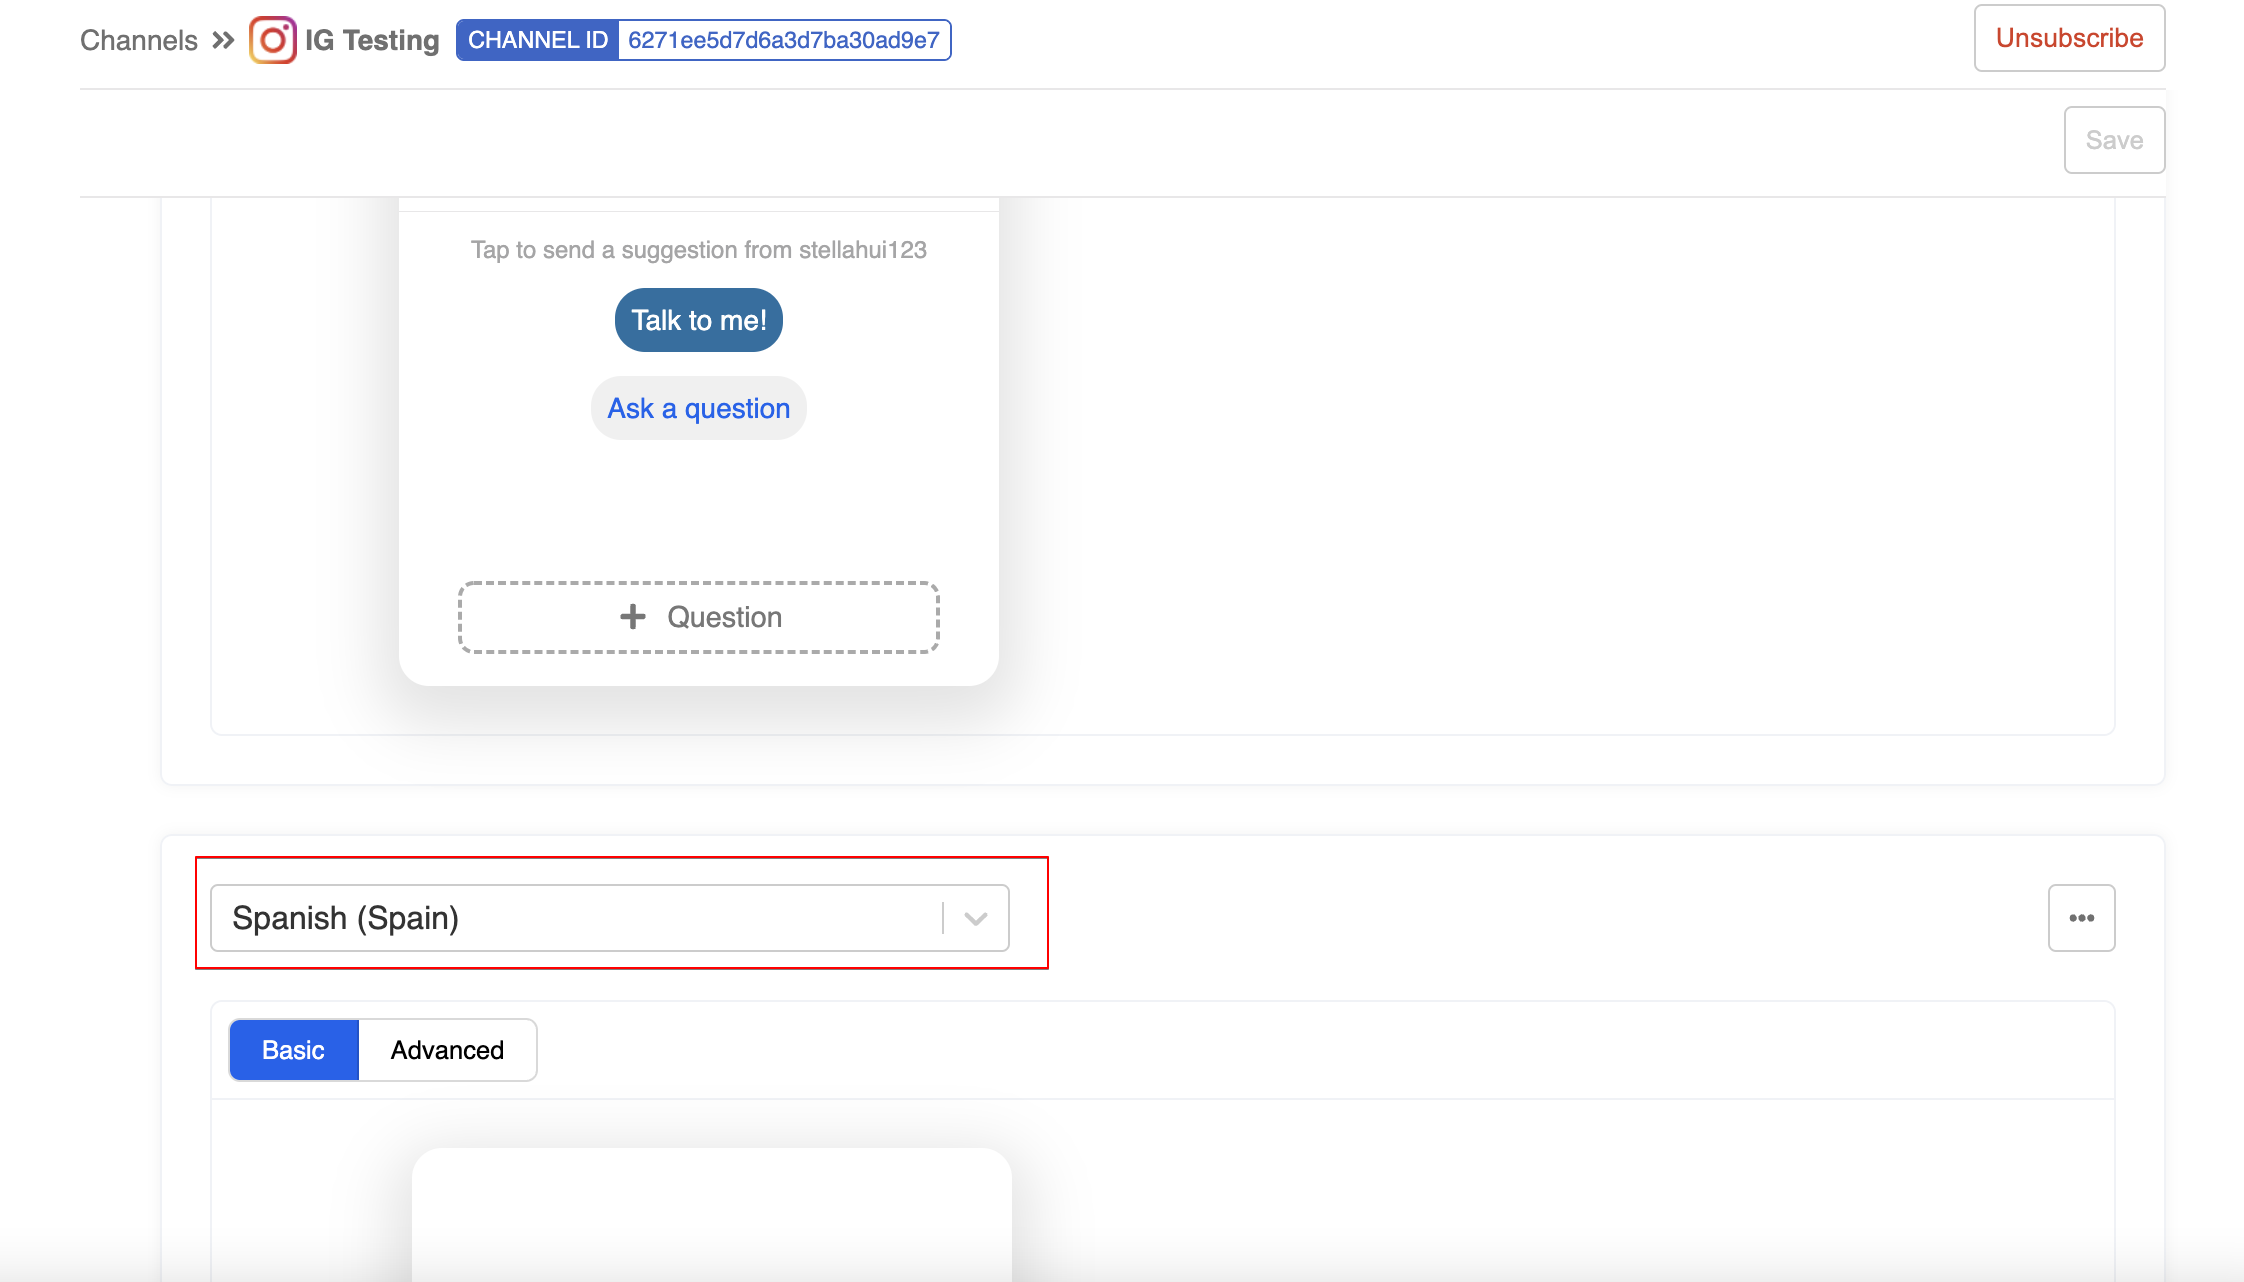
Head to "Platform". Scroll down to the "Ice Breakers" section and select "+ Additional Locale".
- Select "+ Questions" to add a new ice breaker question.

- Fill in the text content and payload.
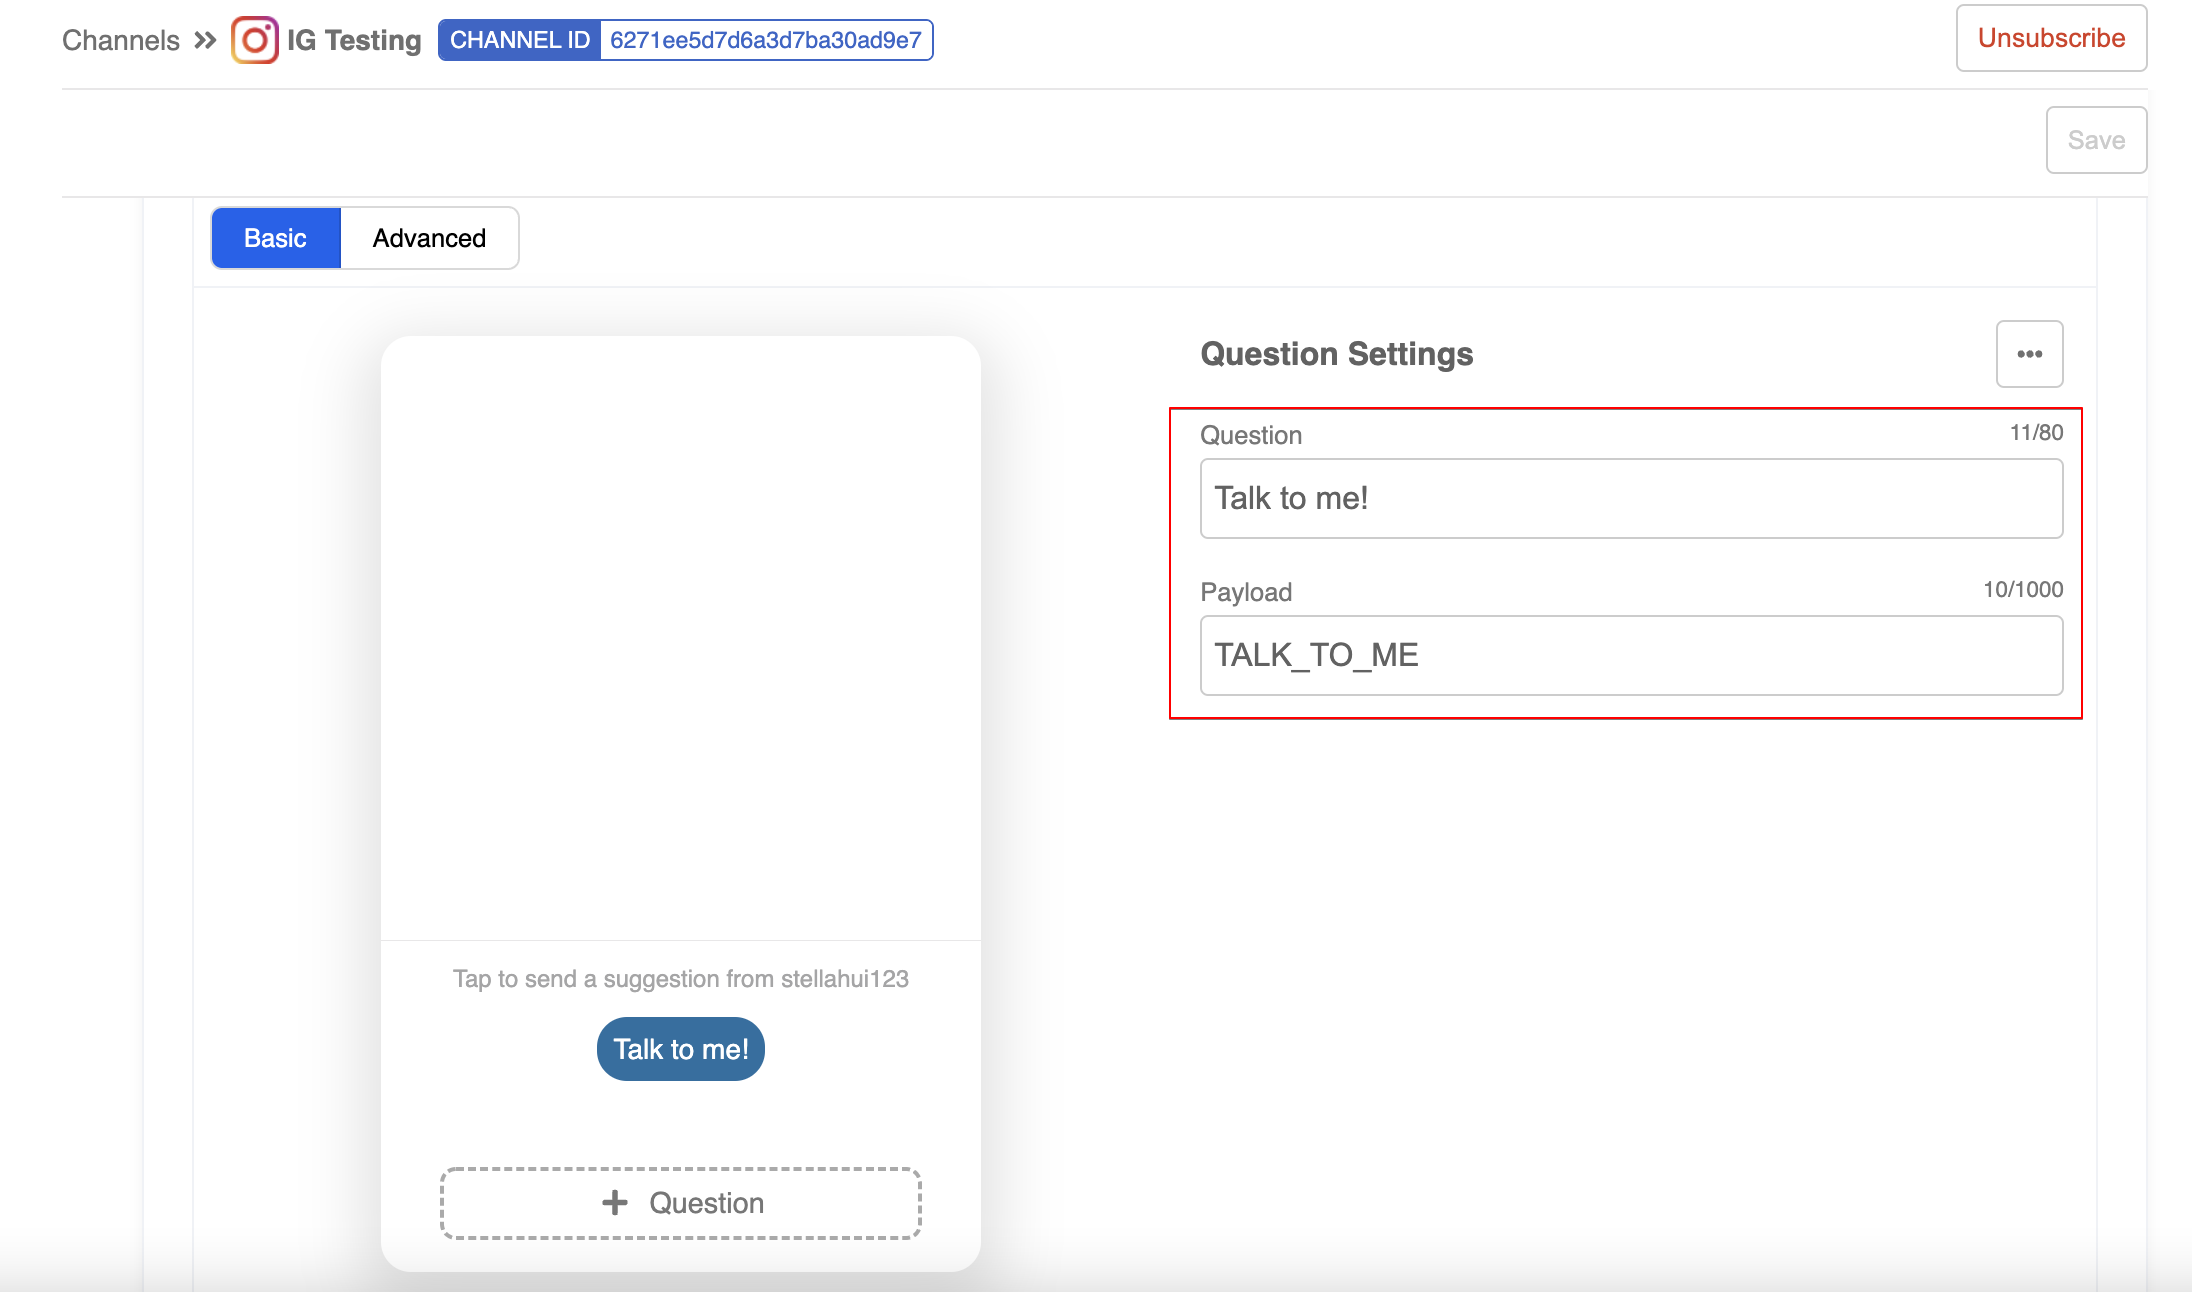
- Save the ice breaker questions.

- If you select "+ Additional Locale" again, a new modal will be created. You can choose a different locale setting from the dropdown to cater for the needs of customers.
- In Bot Builder, create a chatbot and a chatbot node for sending the response.

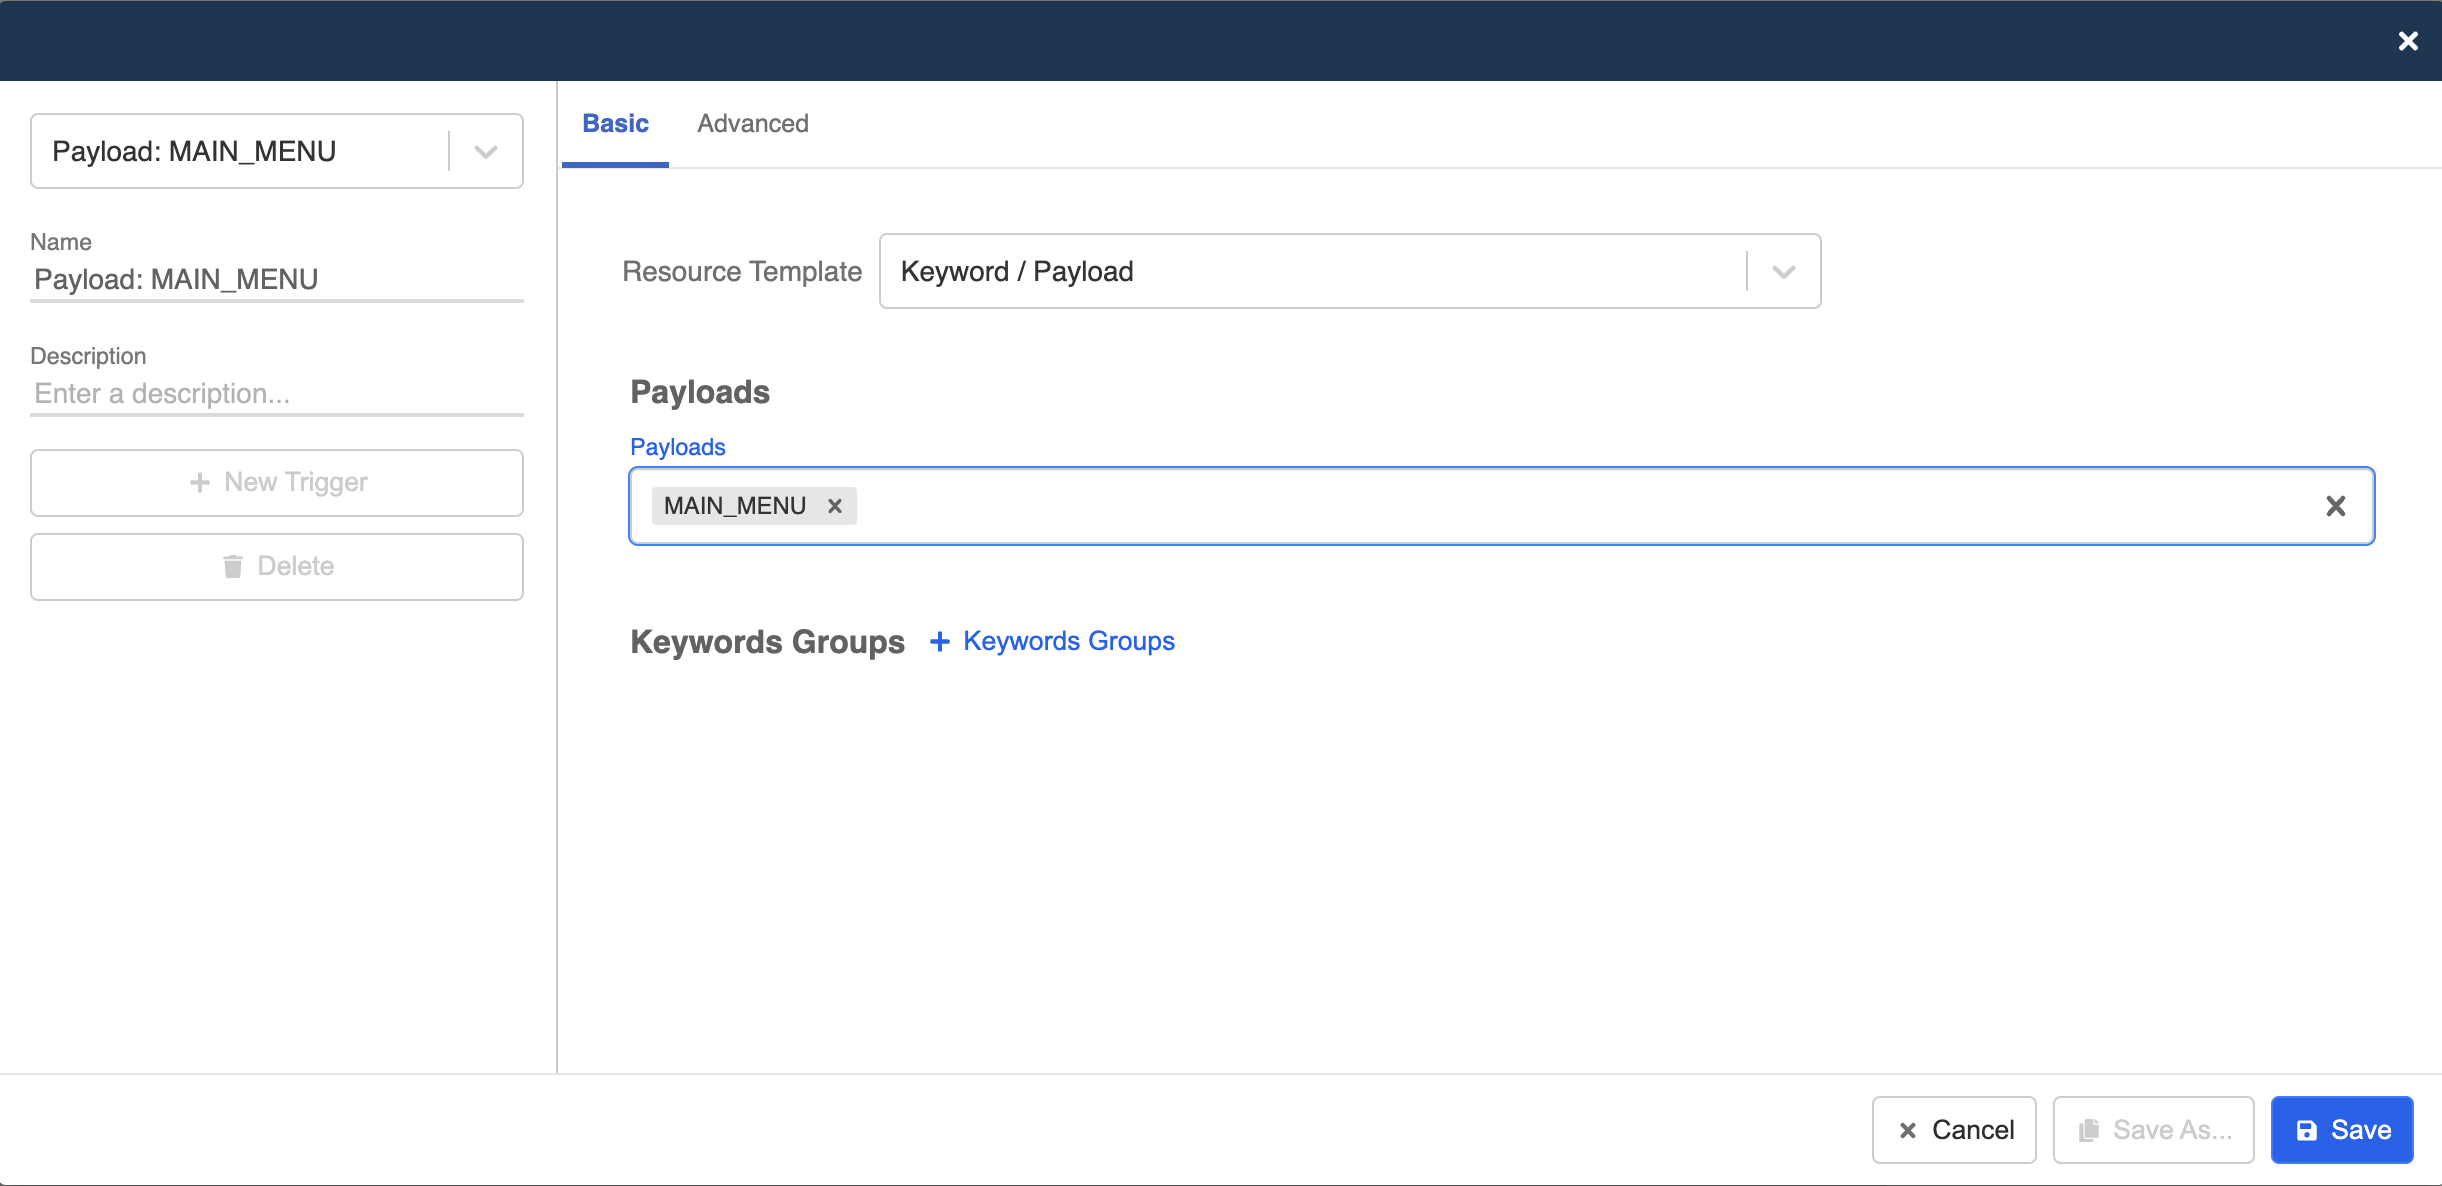
- Create a global node, then create a payload trigger. The payload should match with the one you have assigned to the ice breaker question.
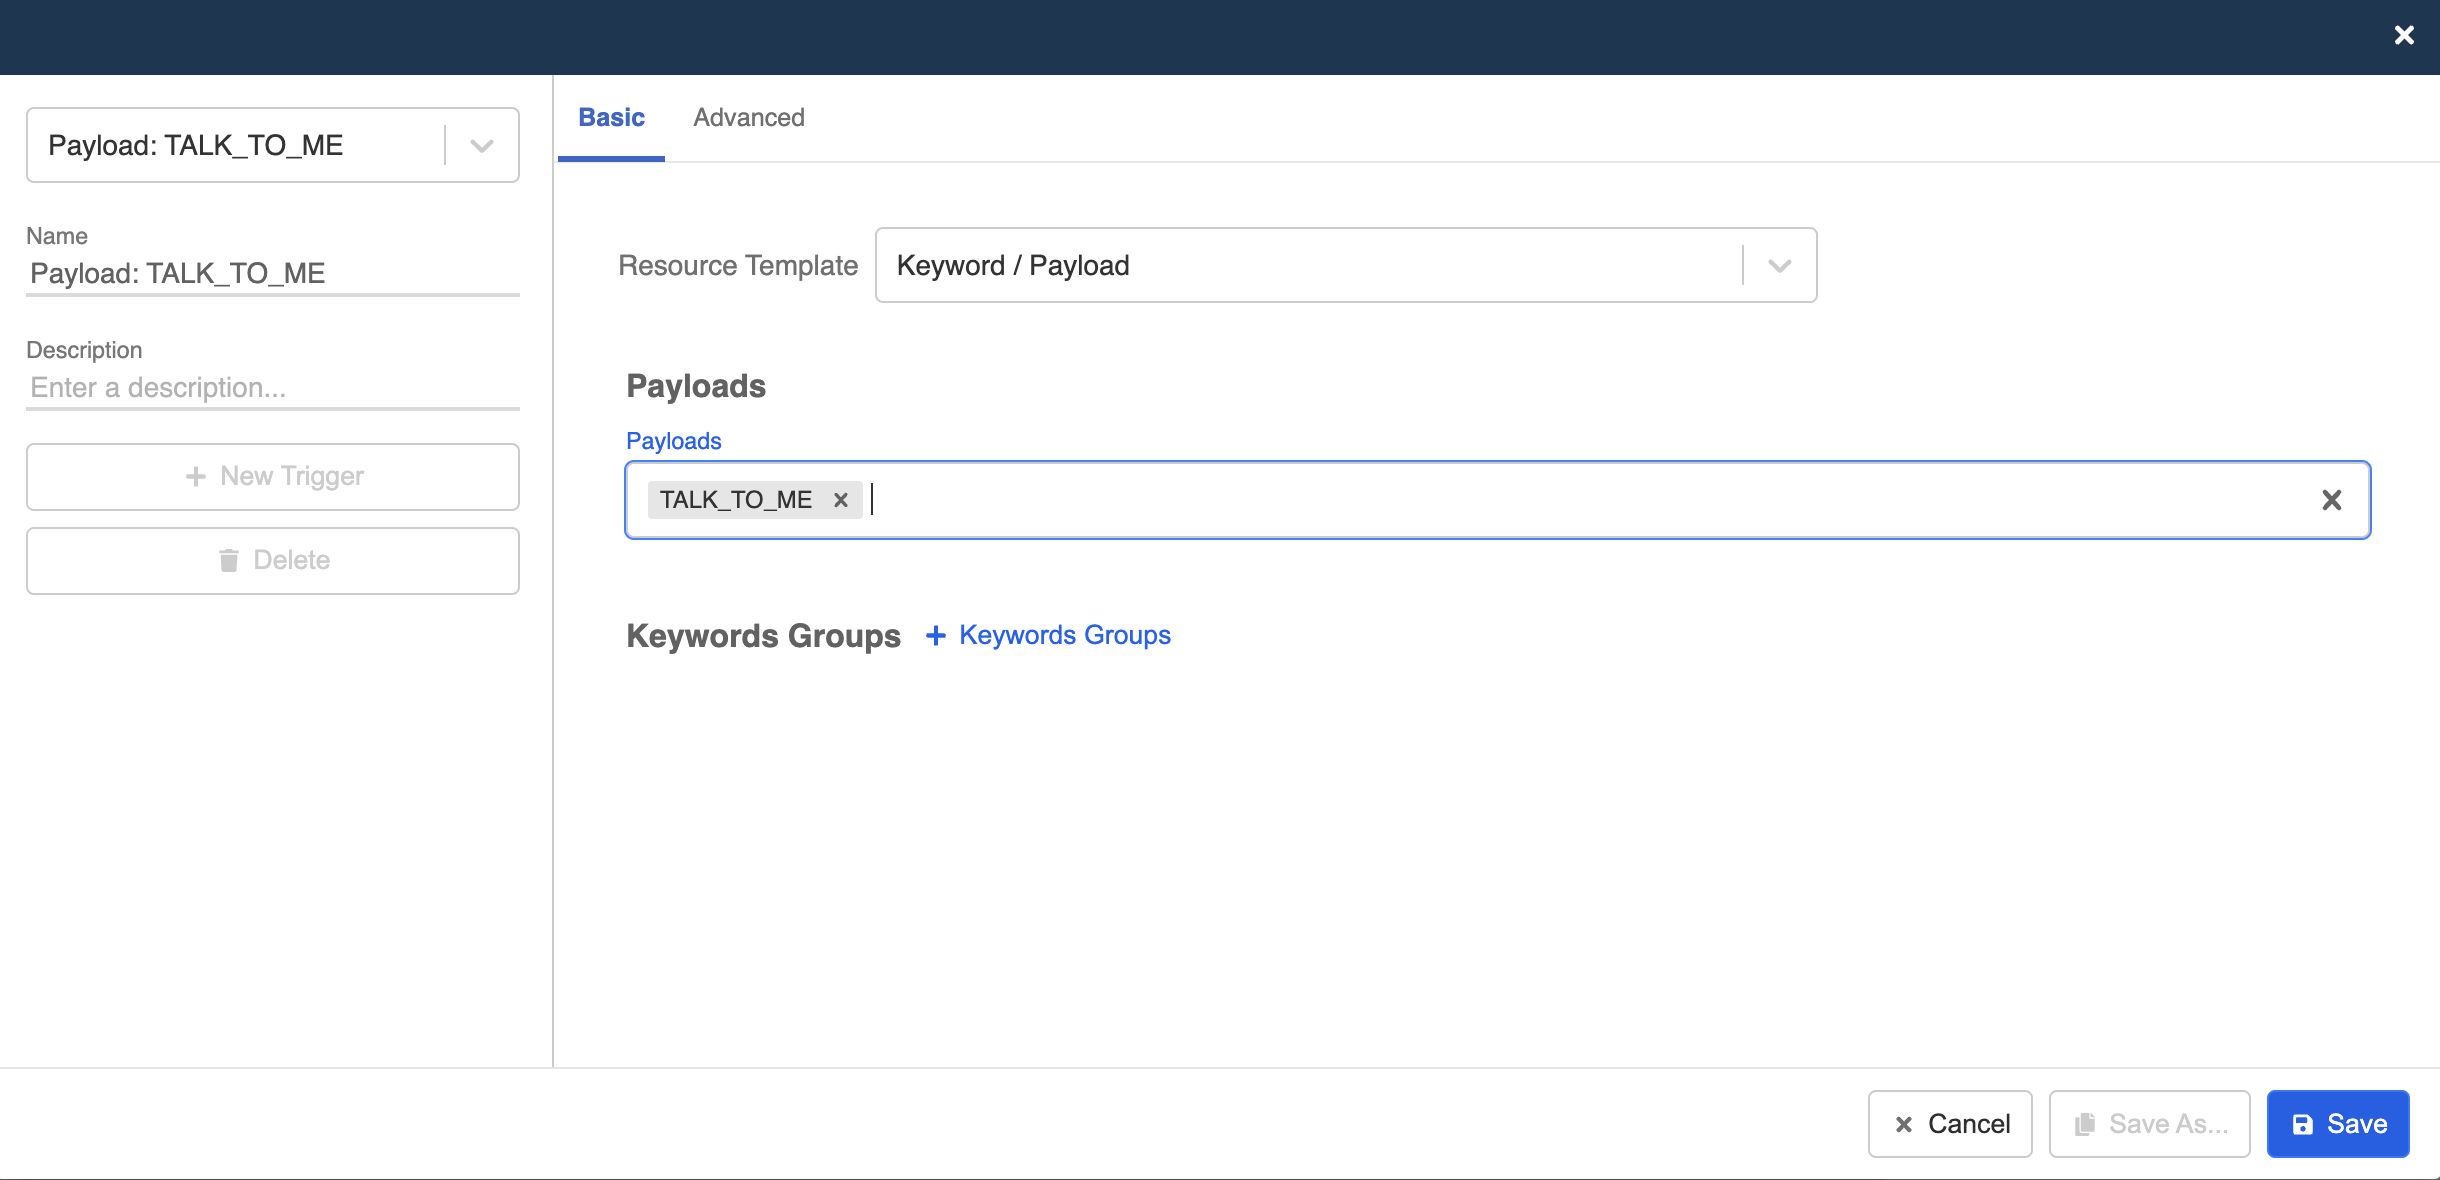
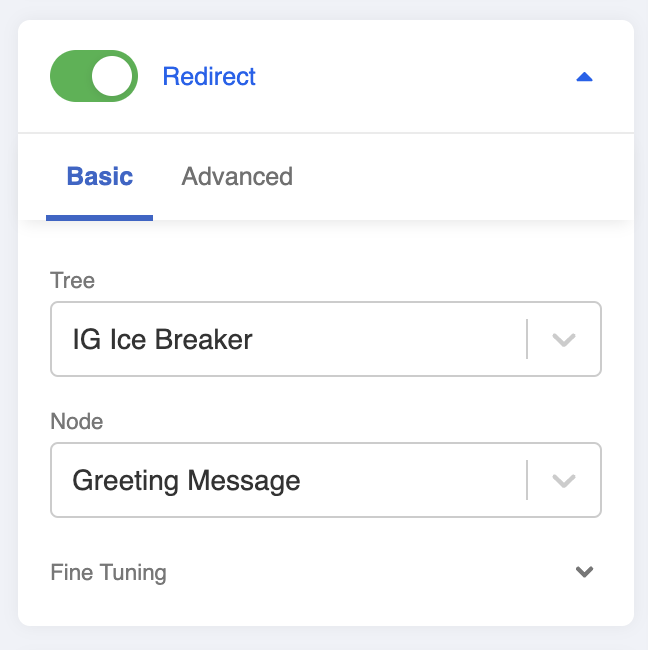
- Redirect the global node to the chatbot node in order to display the response.
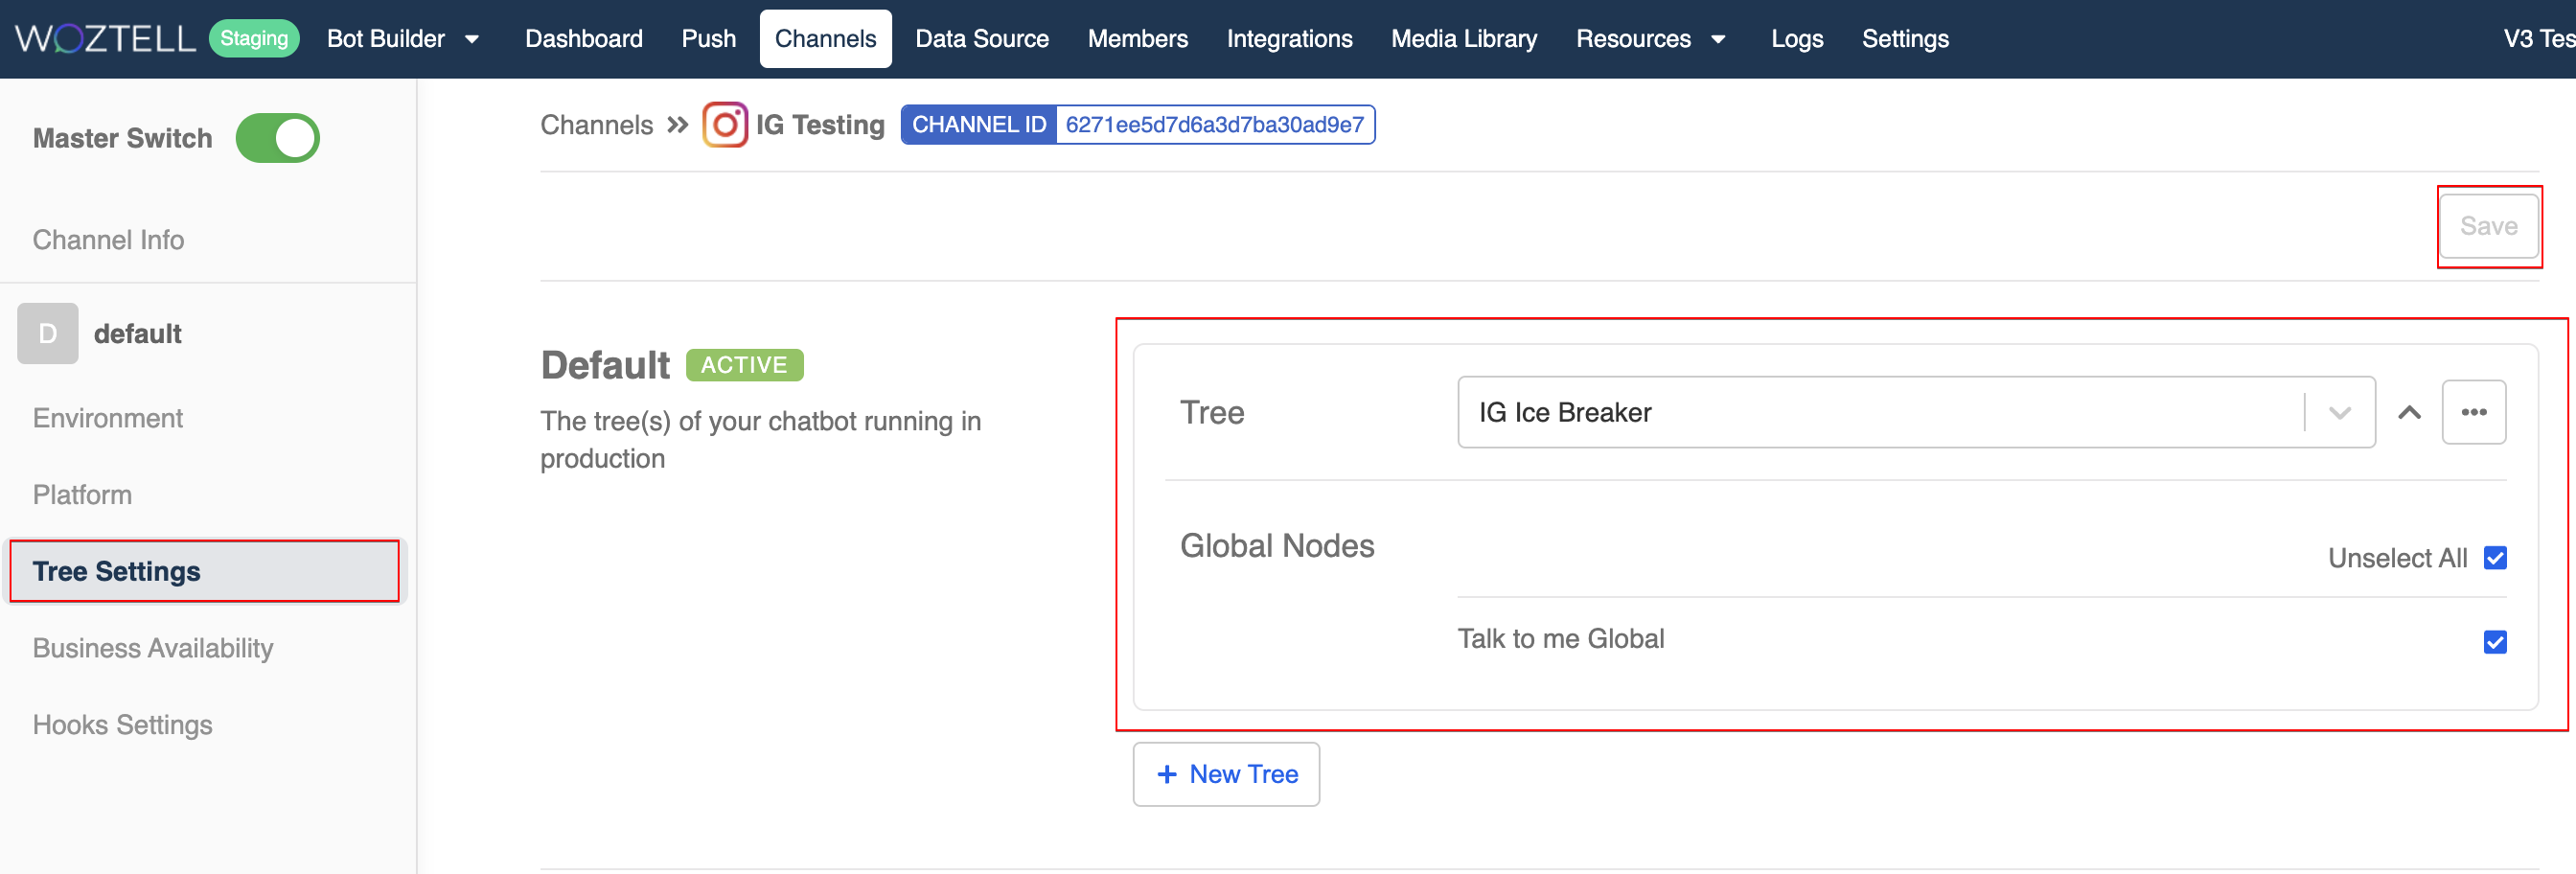
- Finally, remember to add the chatbot to the channel in Chatbot Settings.
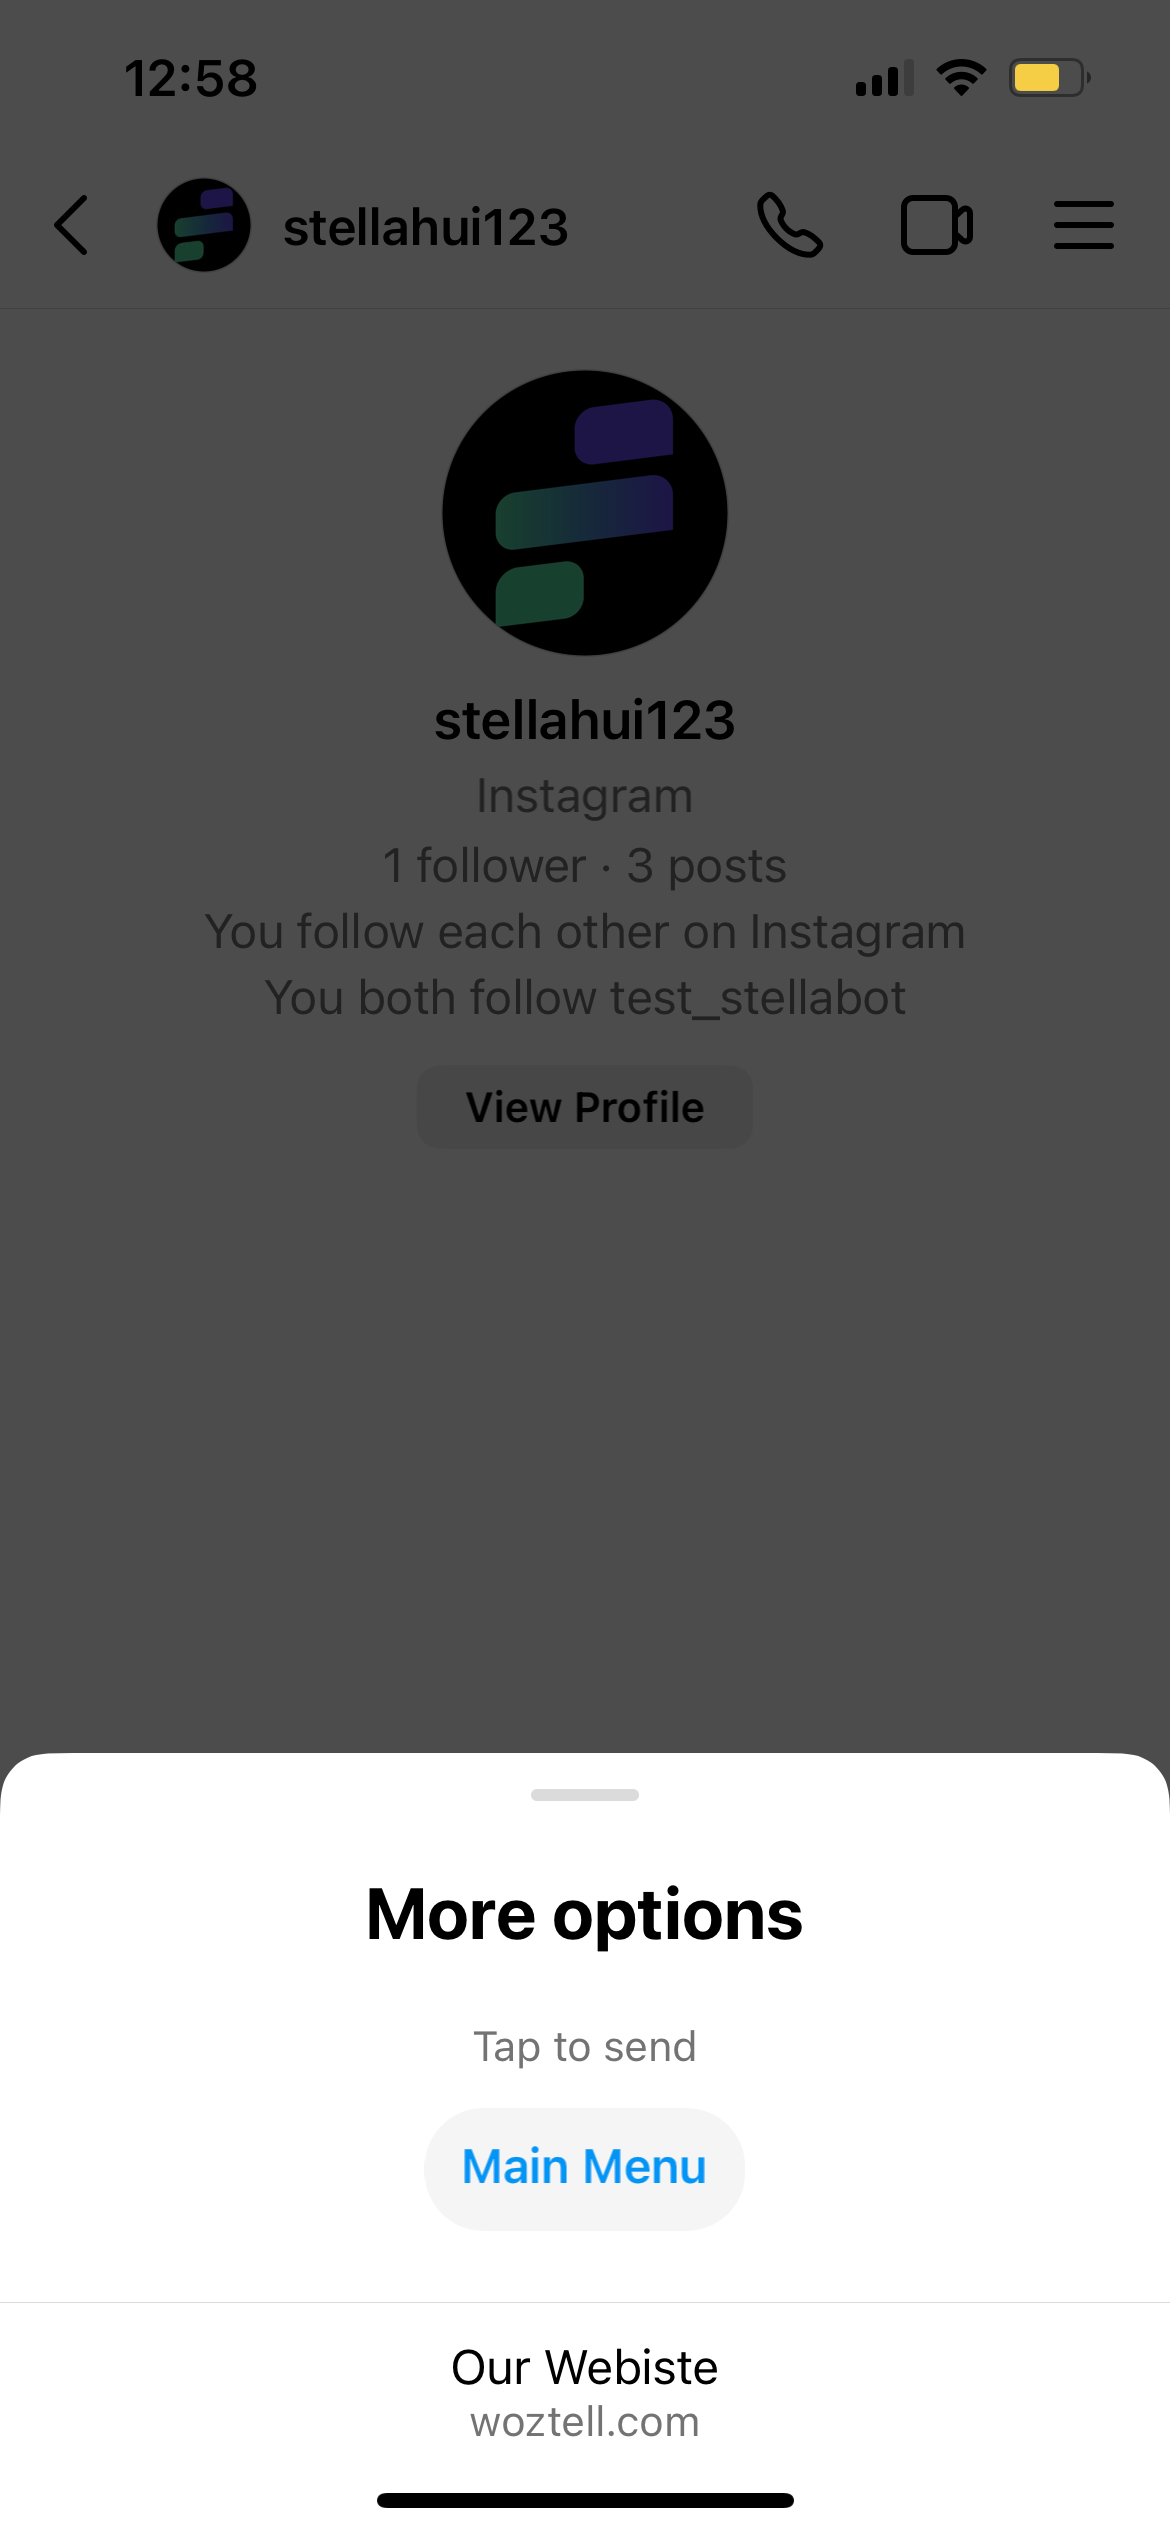
New users visiting your Instagram page can start a conversation with your chatbot by clicking the ice breaker button.
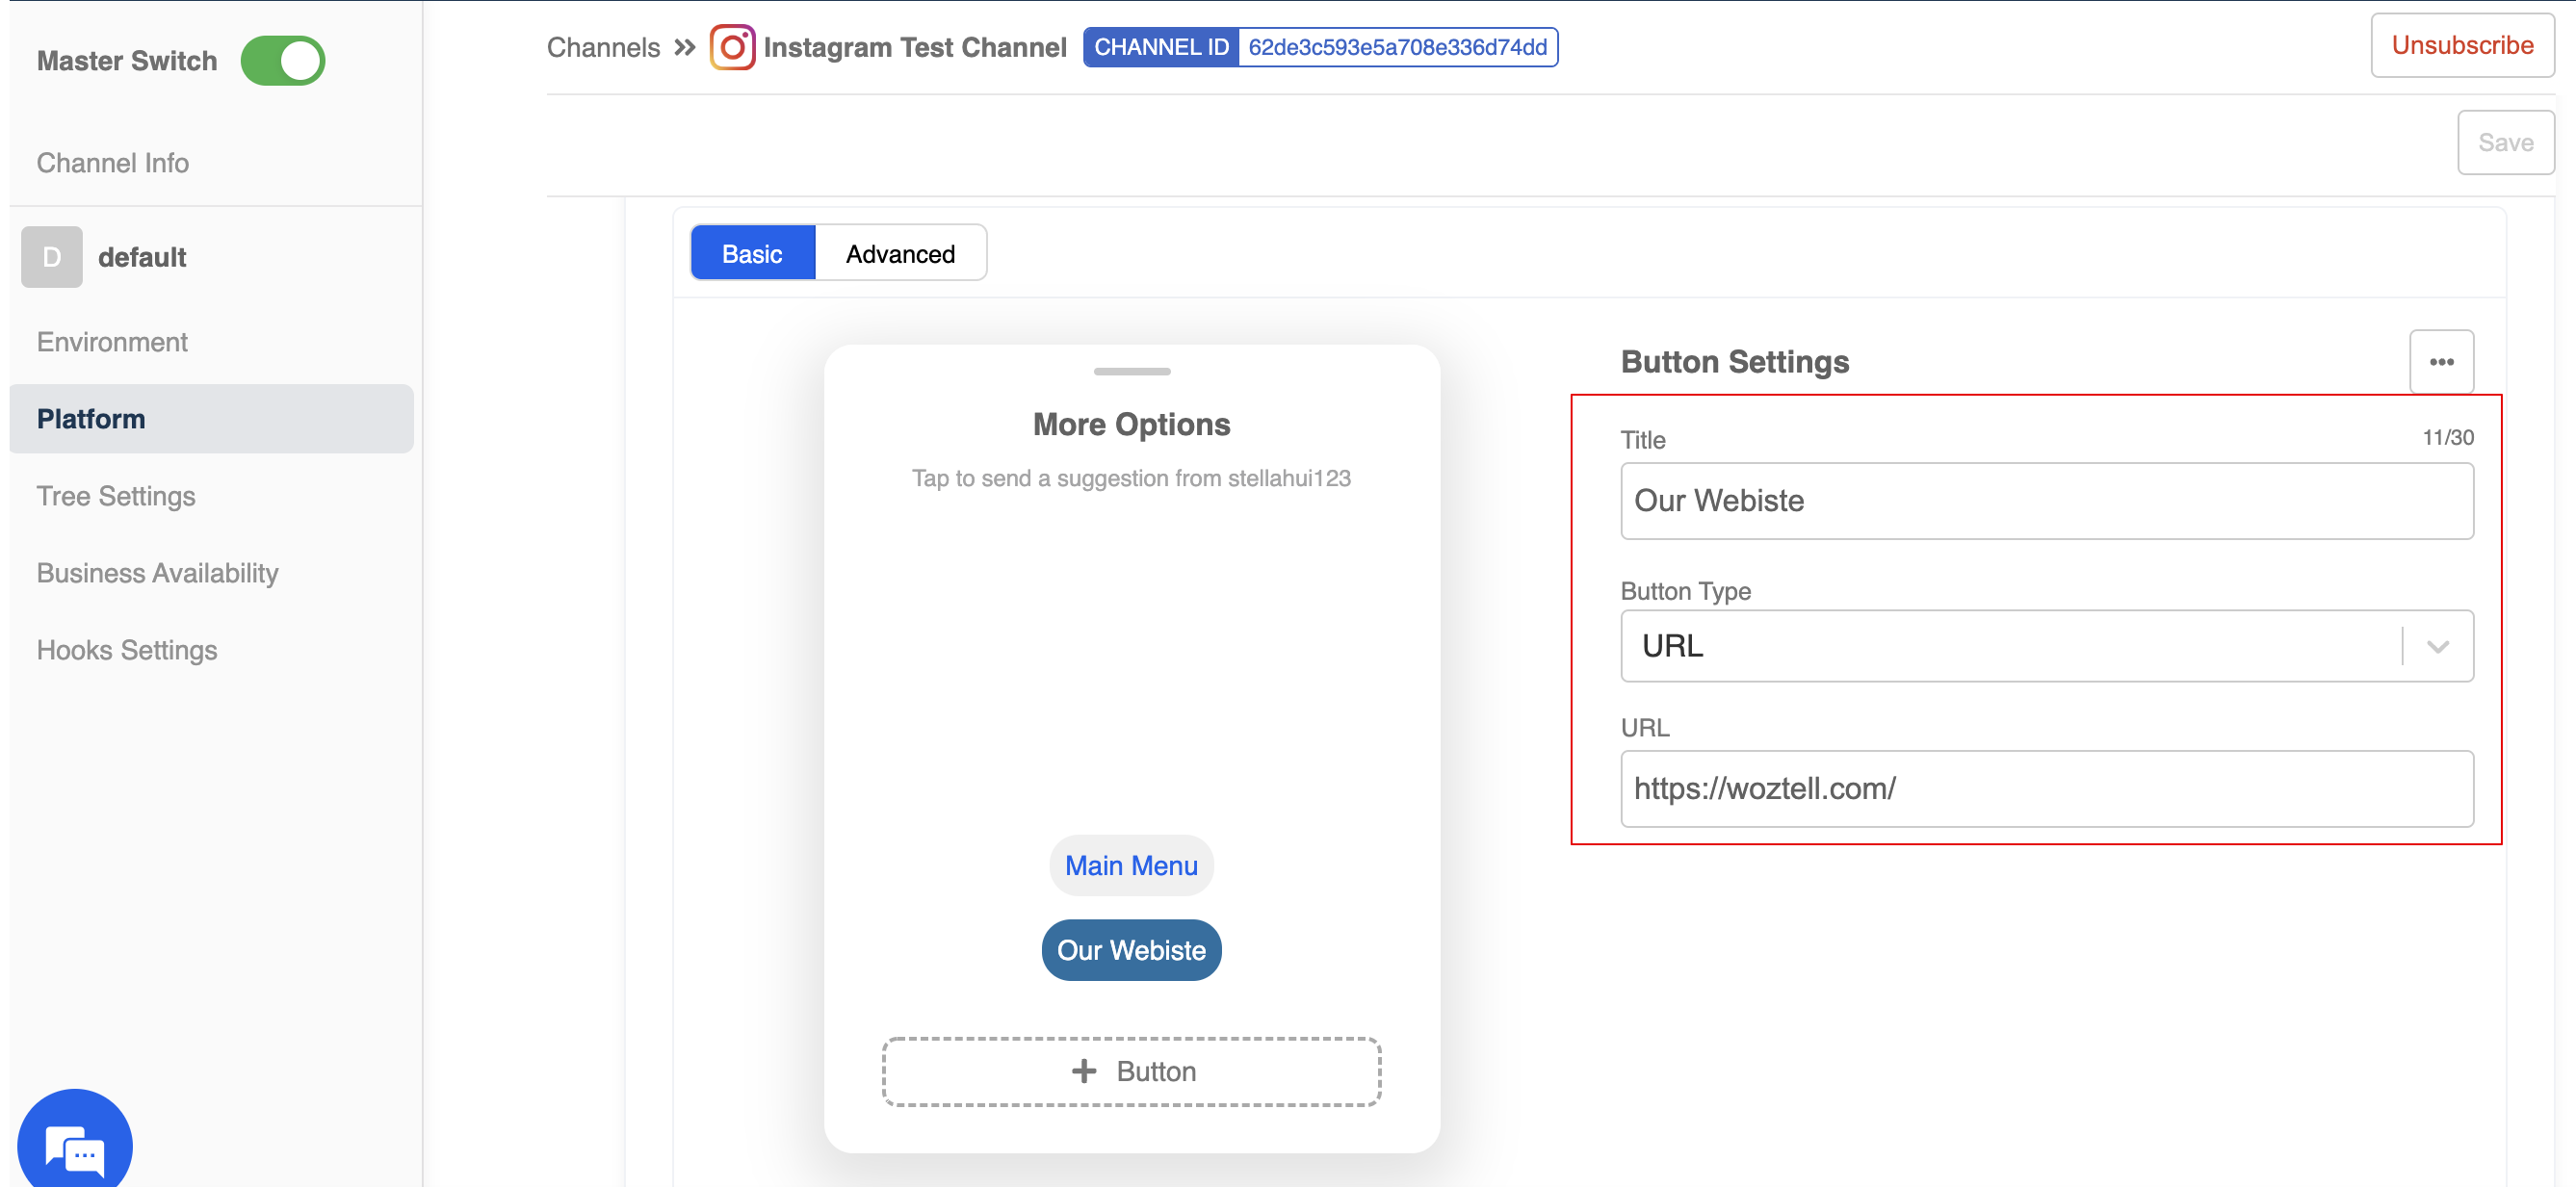
Persistent Menu
Persistent Menu is a navigation menu located right next to the typing area to help users gain access your chatbot’s functionality. For example, a button that can always lead the users back to the main menu of your conversation flow.
In "Channels", head to your Instagram channel.
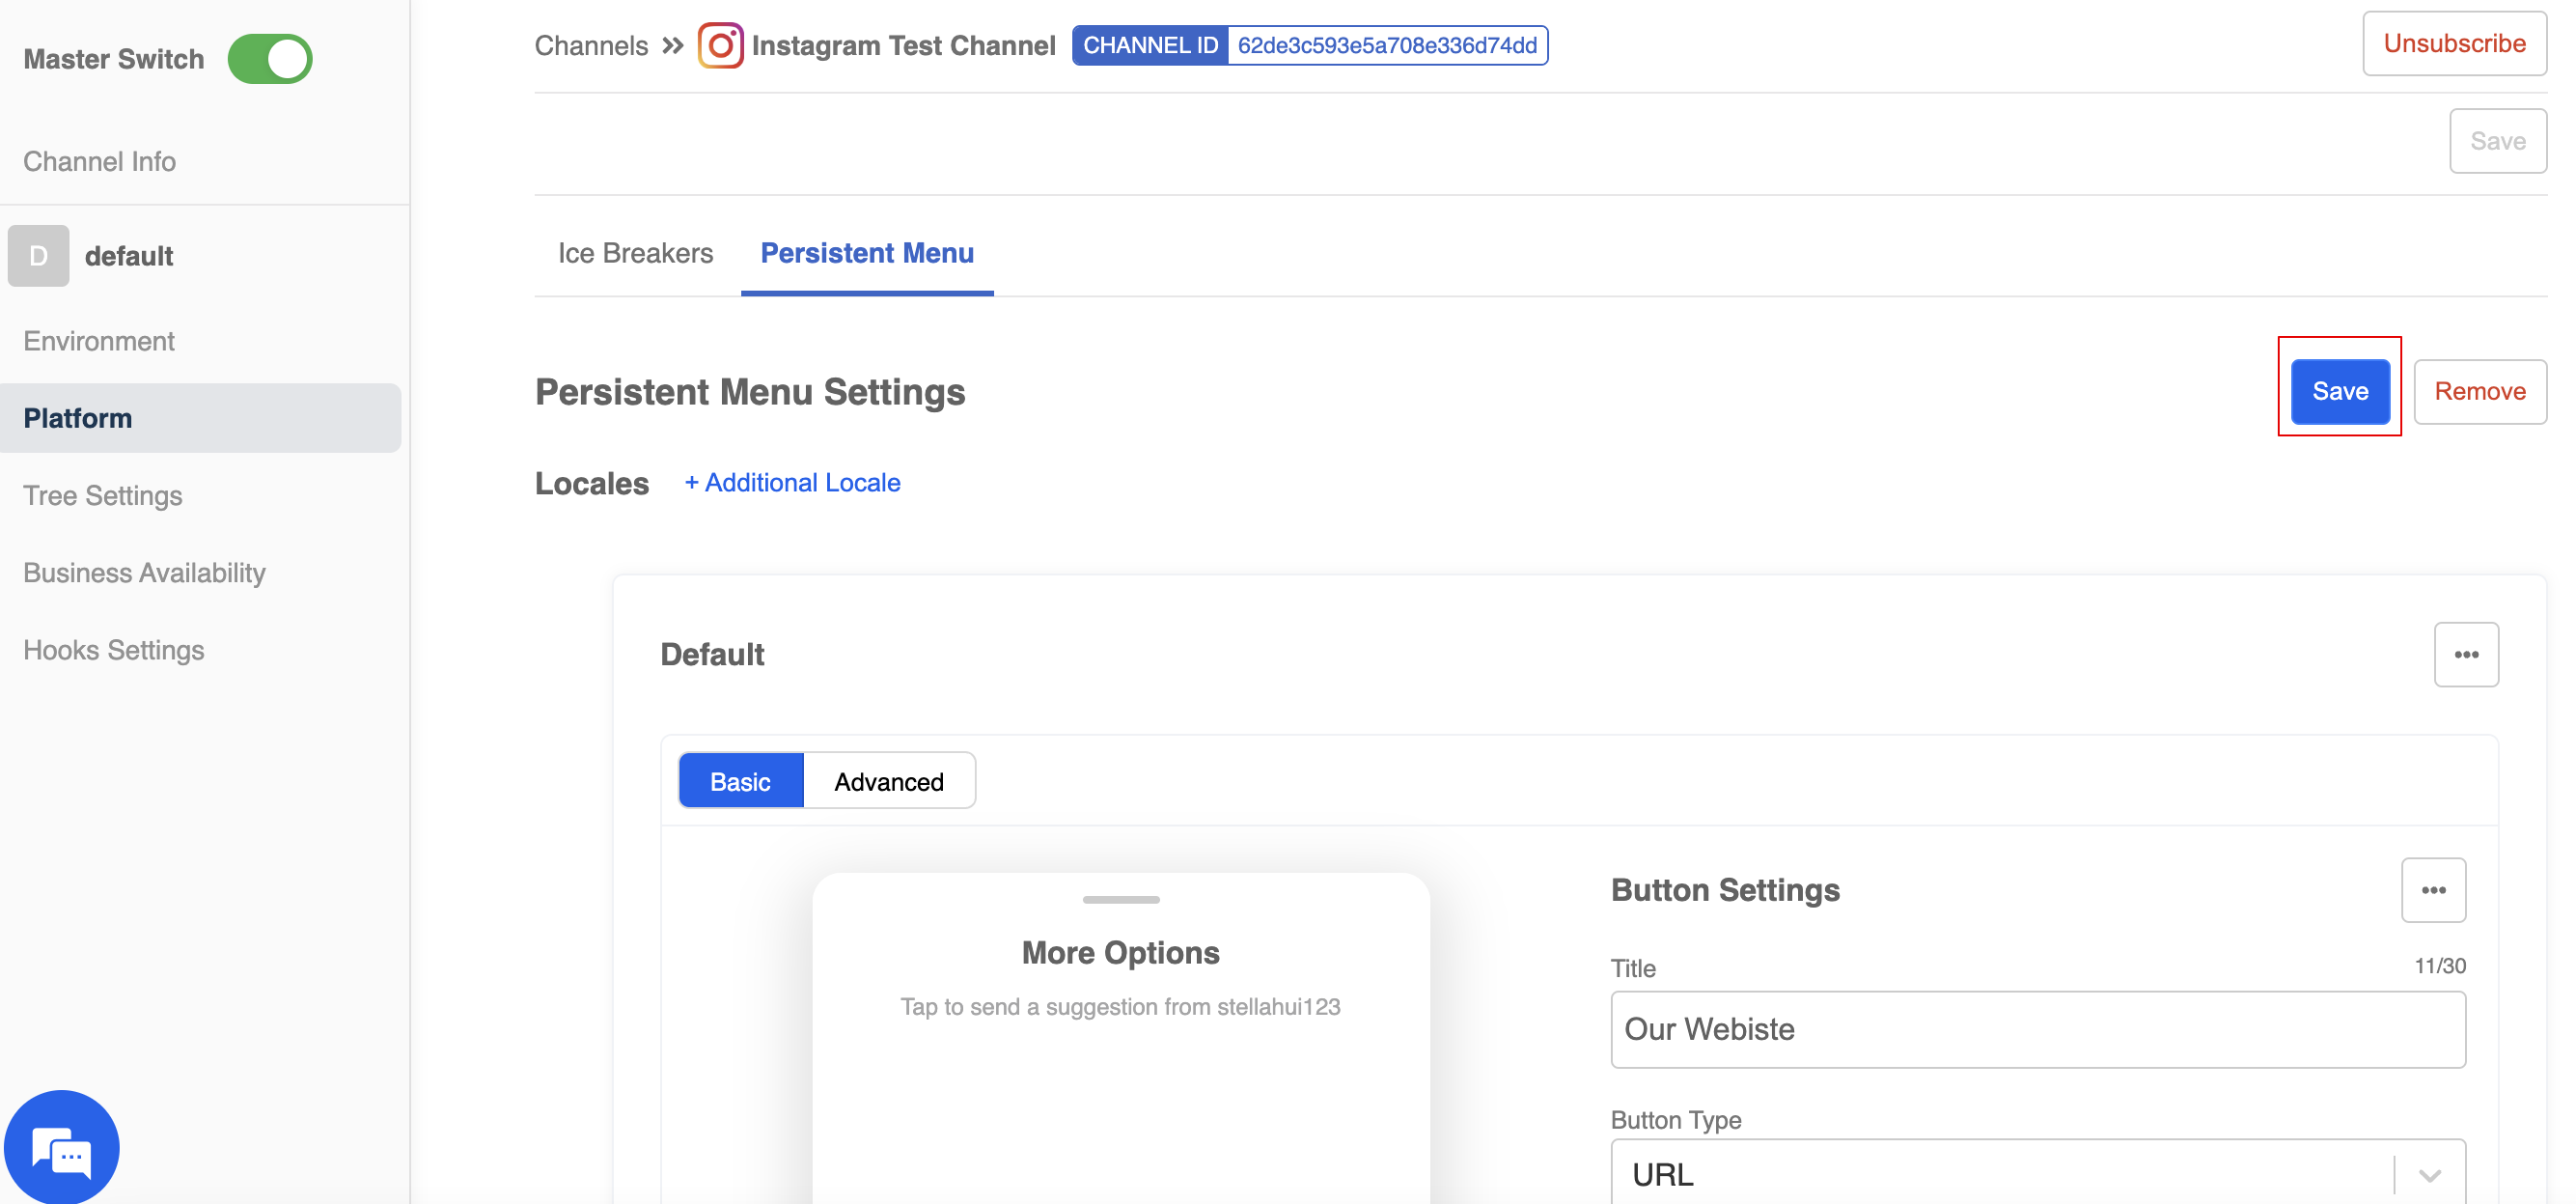
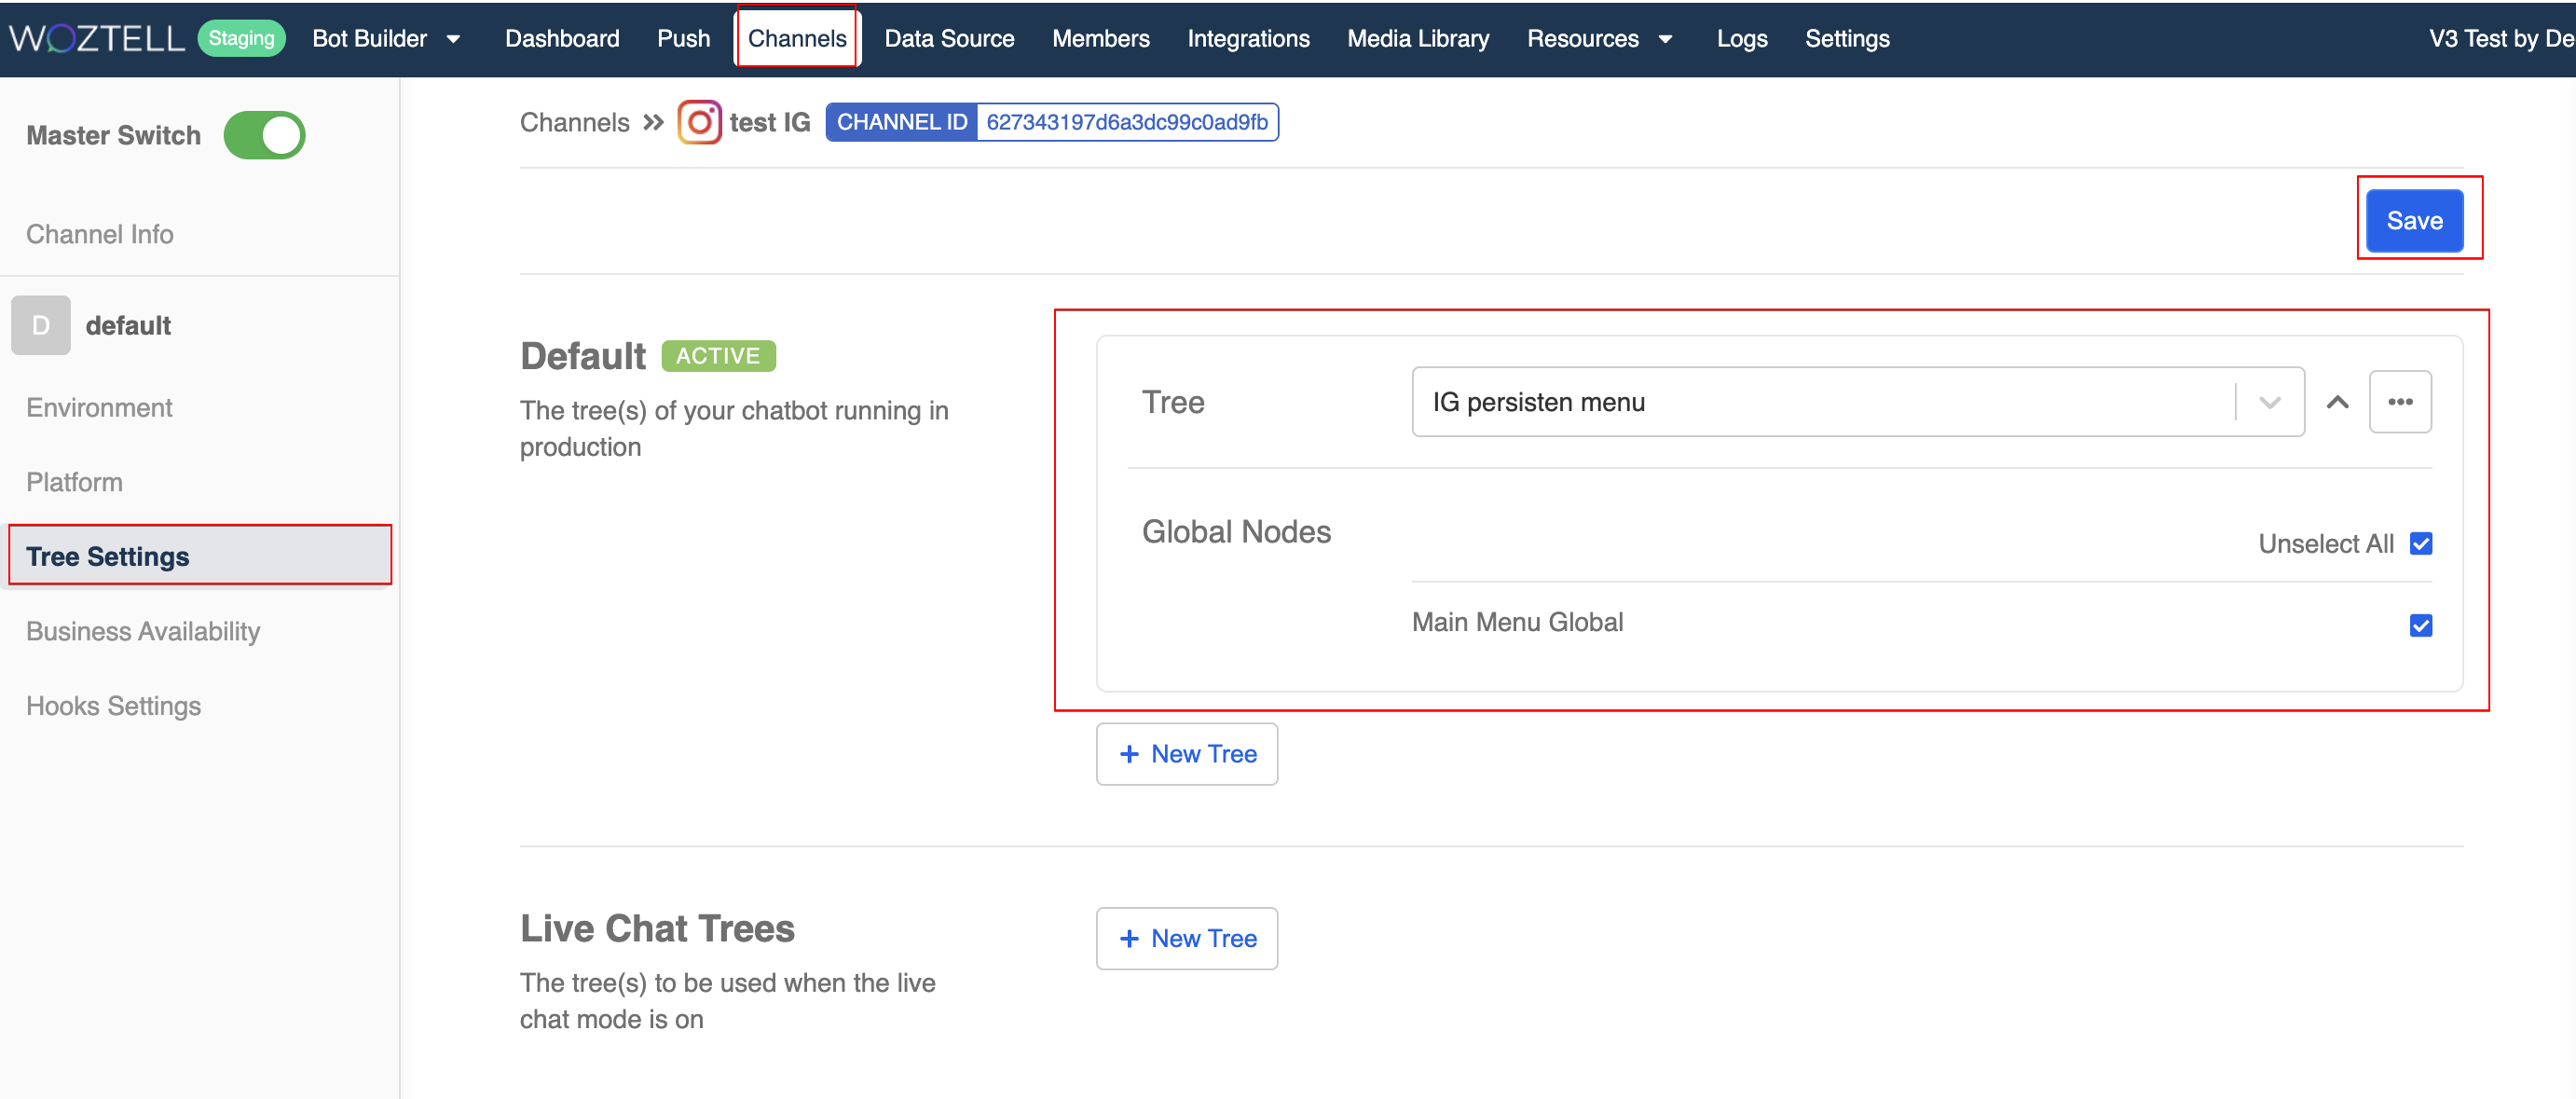
Head to "Platform". Scroll down to the "Persistent Menu" section.
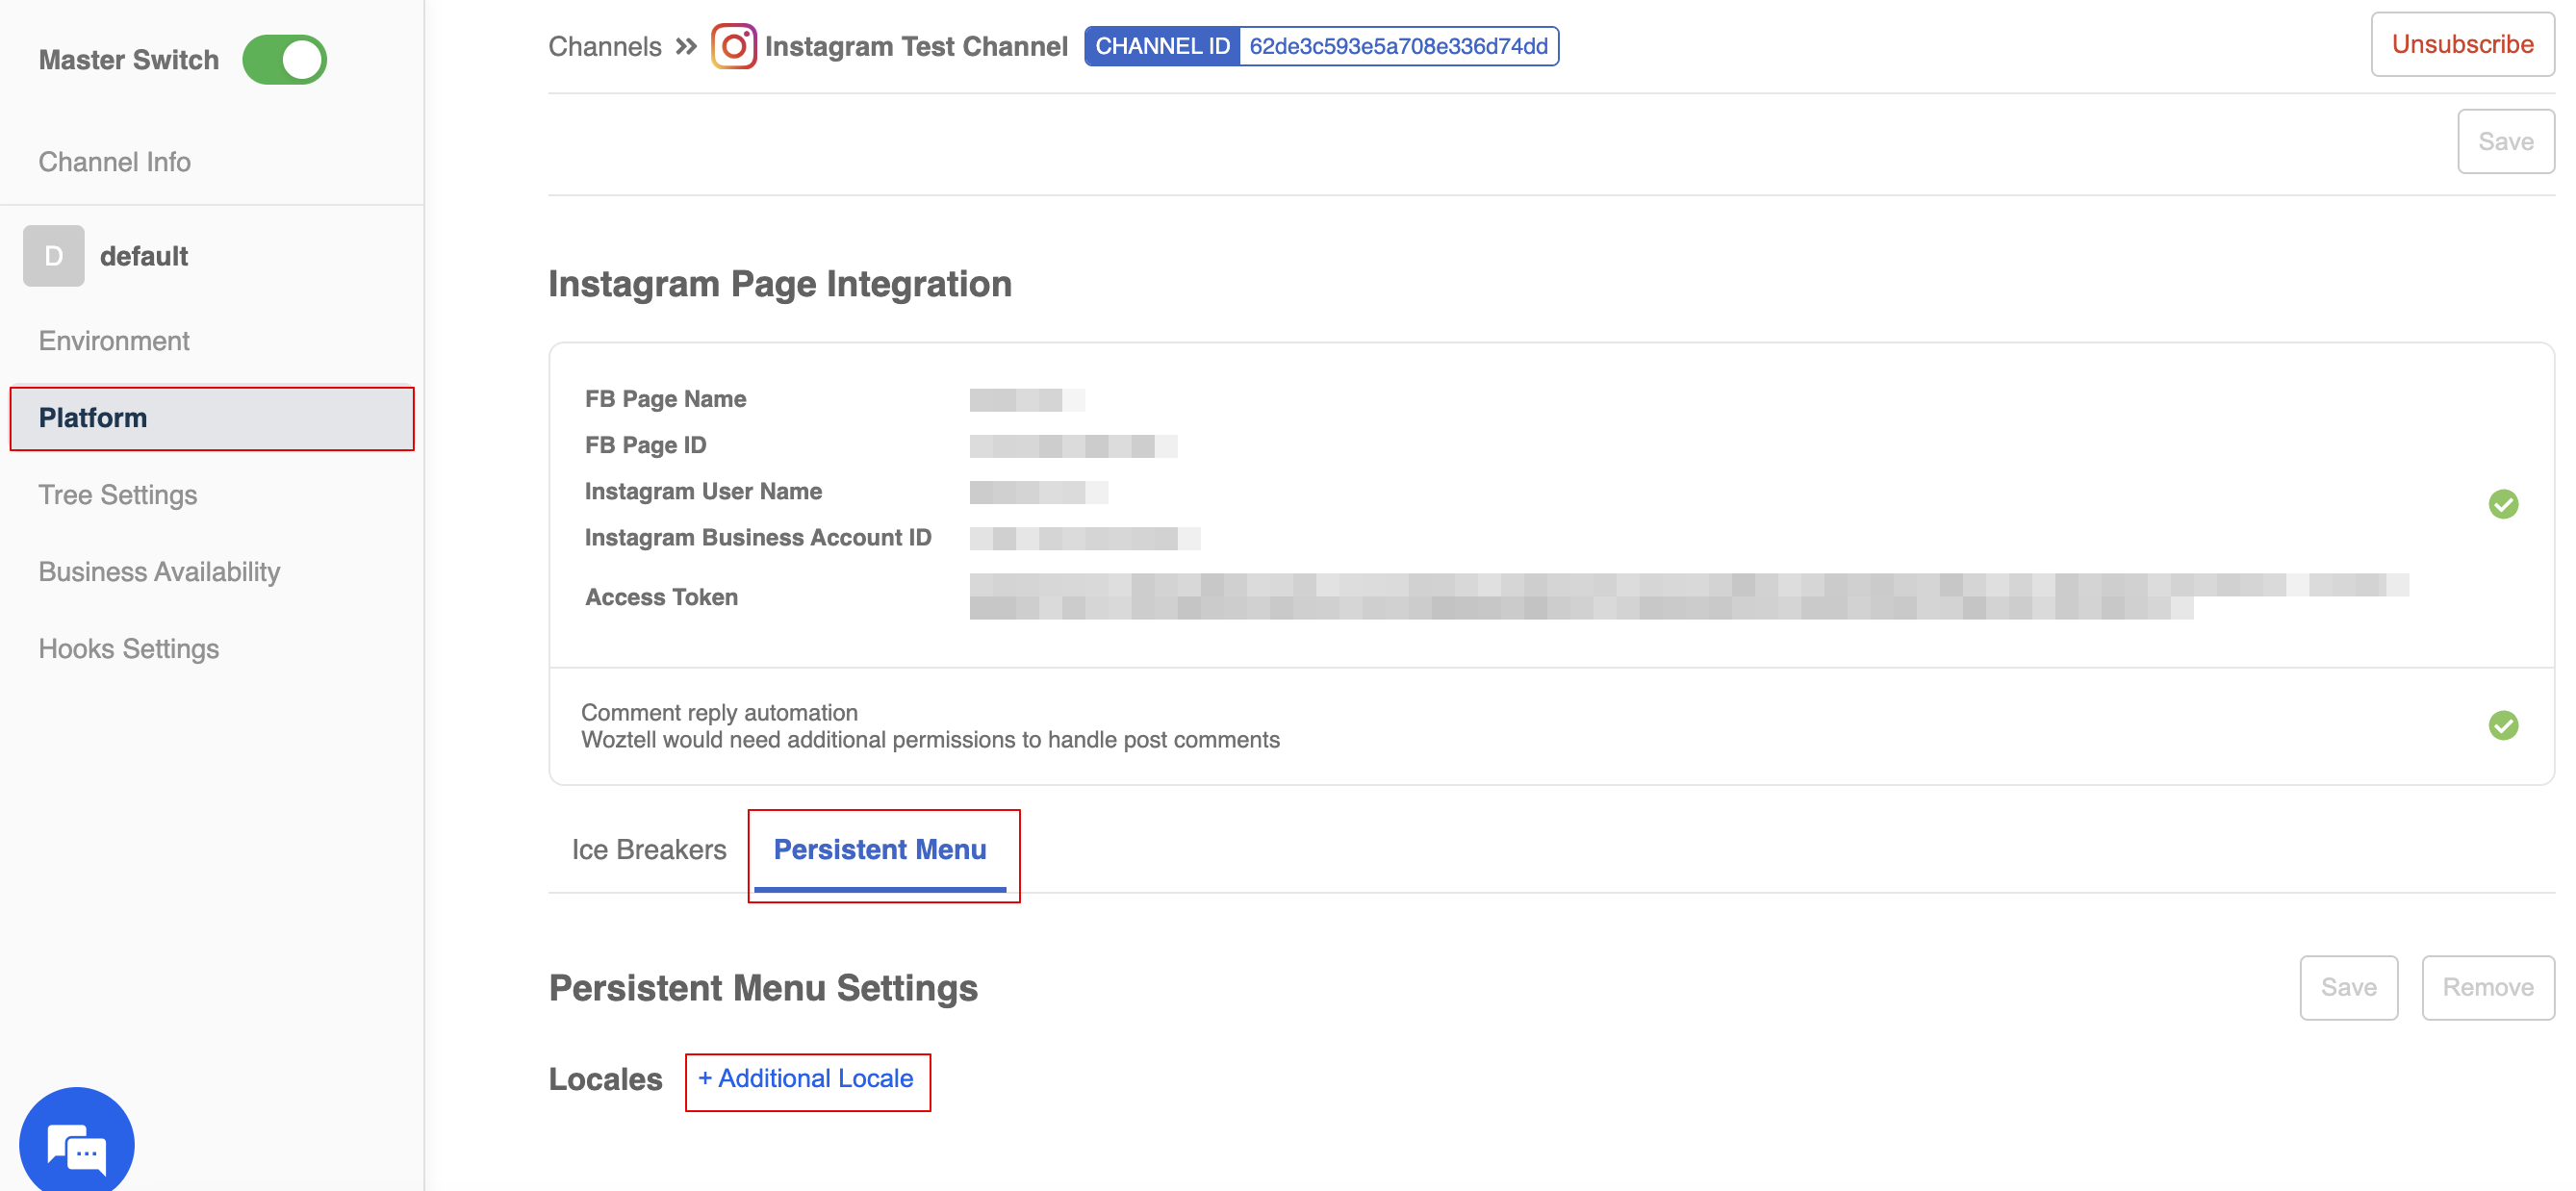
- Select "+ Additional Locale".
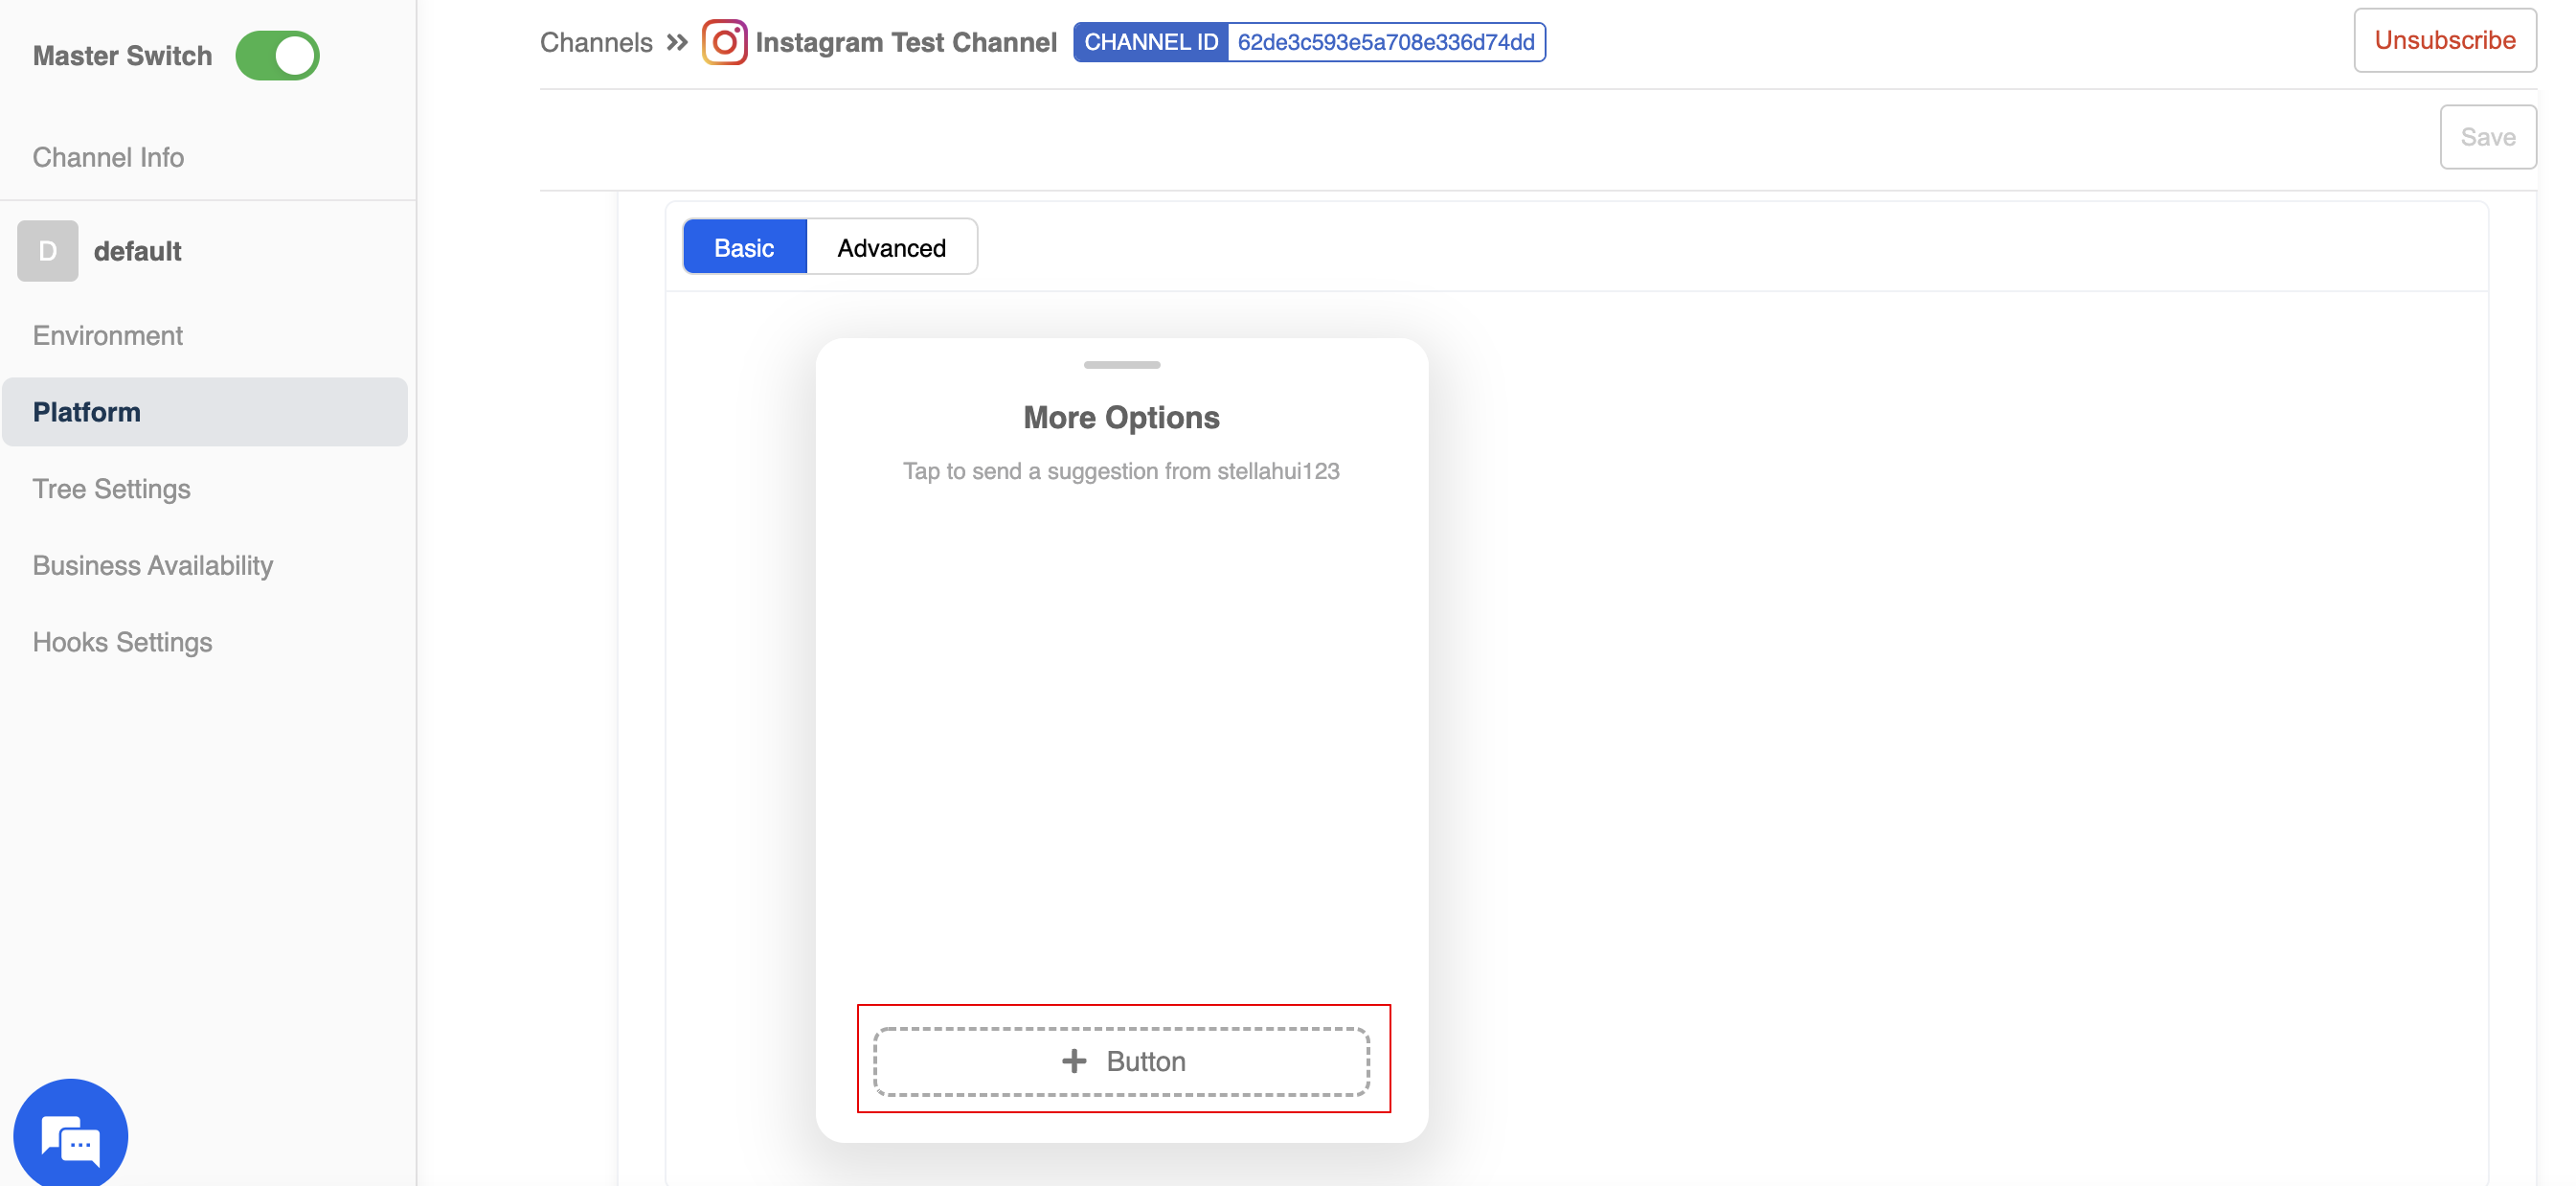
- Create a button by filling in the text content, button type and payload.

Another button type is "URL", which allows you to direct users to a website.
- "Save" the persistent menu settings.
- In Bot Builder, create a chatbot and a chatbot node for sending the response.
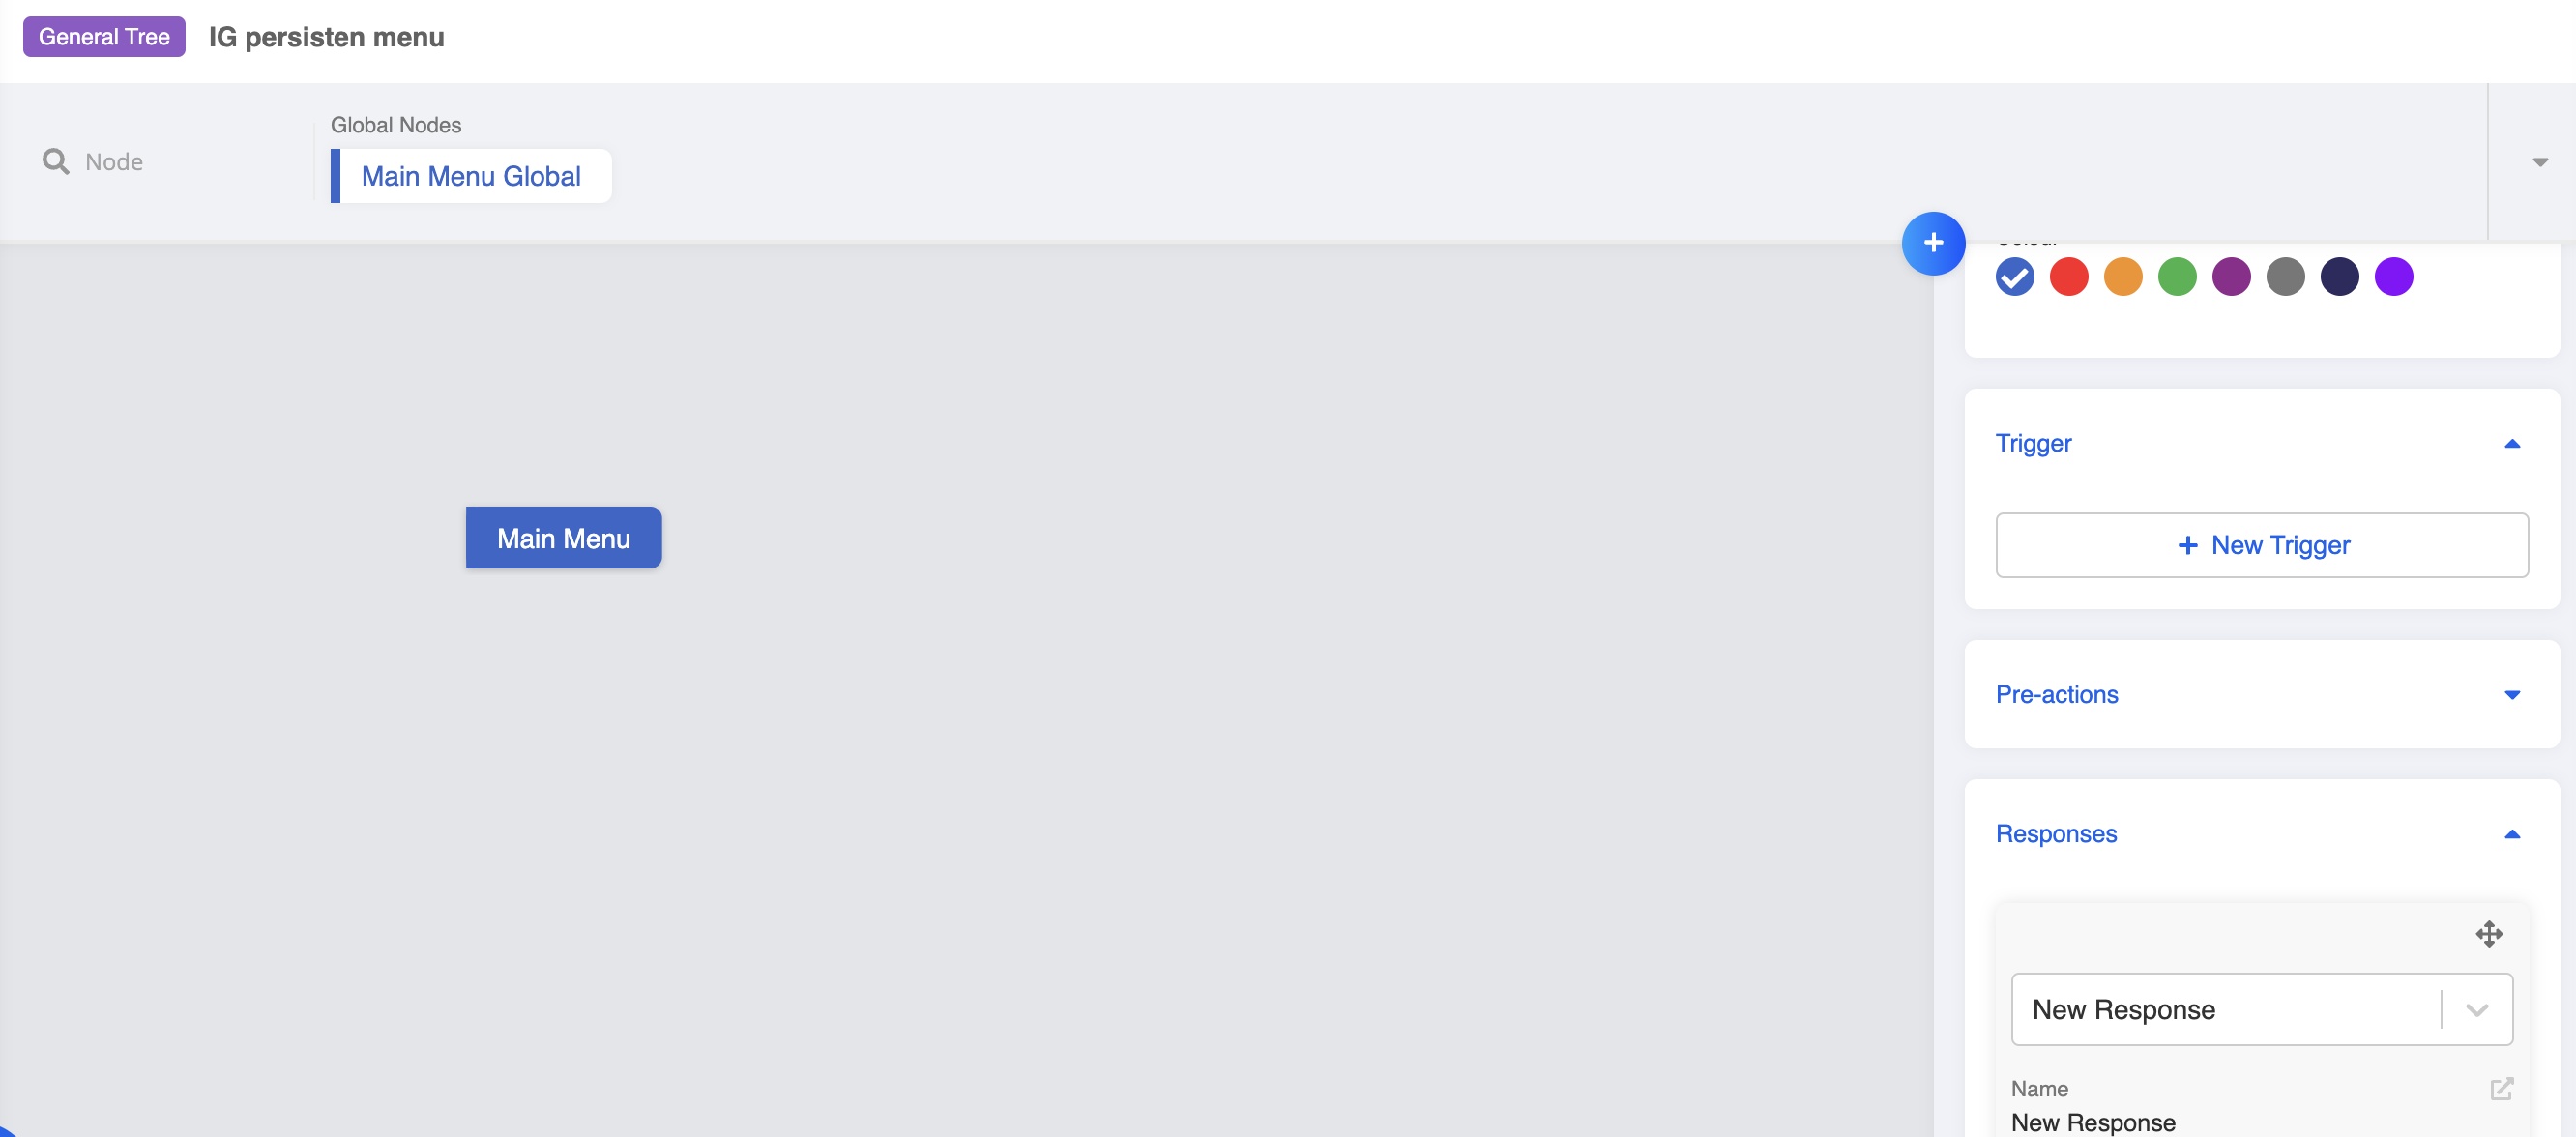
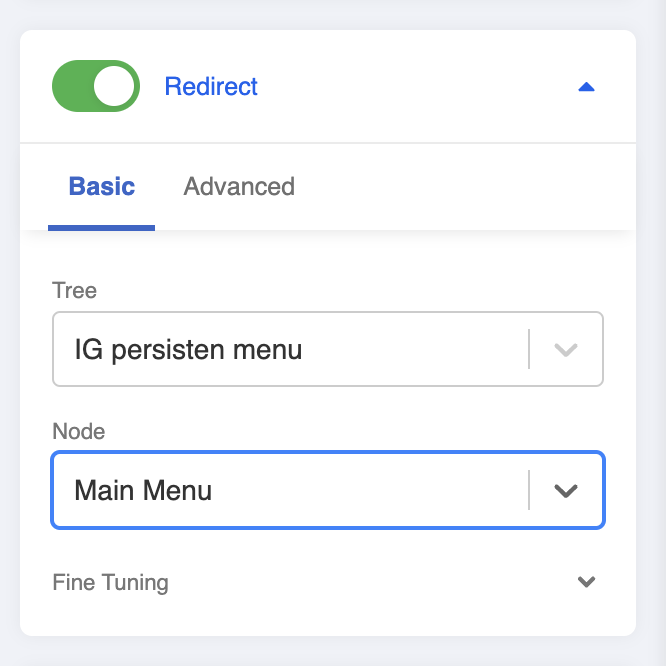
- Create a global node, then create a payload trigger. The payload should match with the one you have assigned to the persistent menu button.
- Redirect the global node to the chatbot node in order to display the response.
- Finally, remember to add the chatbot to the channel in Chatbot Settings.
In Instagram Messenger, you can always open the persistent menu and see the options you have created.