Recurring Notification
Recurring Notification (RN) provides developer the flexibility to push any contents to the users as long as it is complied with the community standards and the users have opted-in to receive the push message.
Different from One-Time Notification, Recurring Notification is requesting user's consent to send one message at a fixed time interval, and the notification token will last for a fixed period of time until expiry.
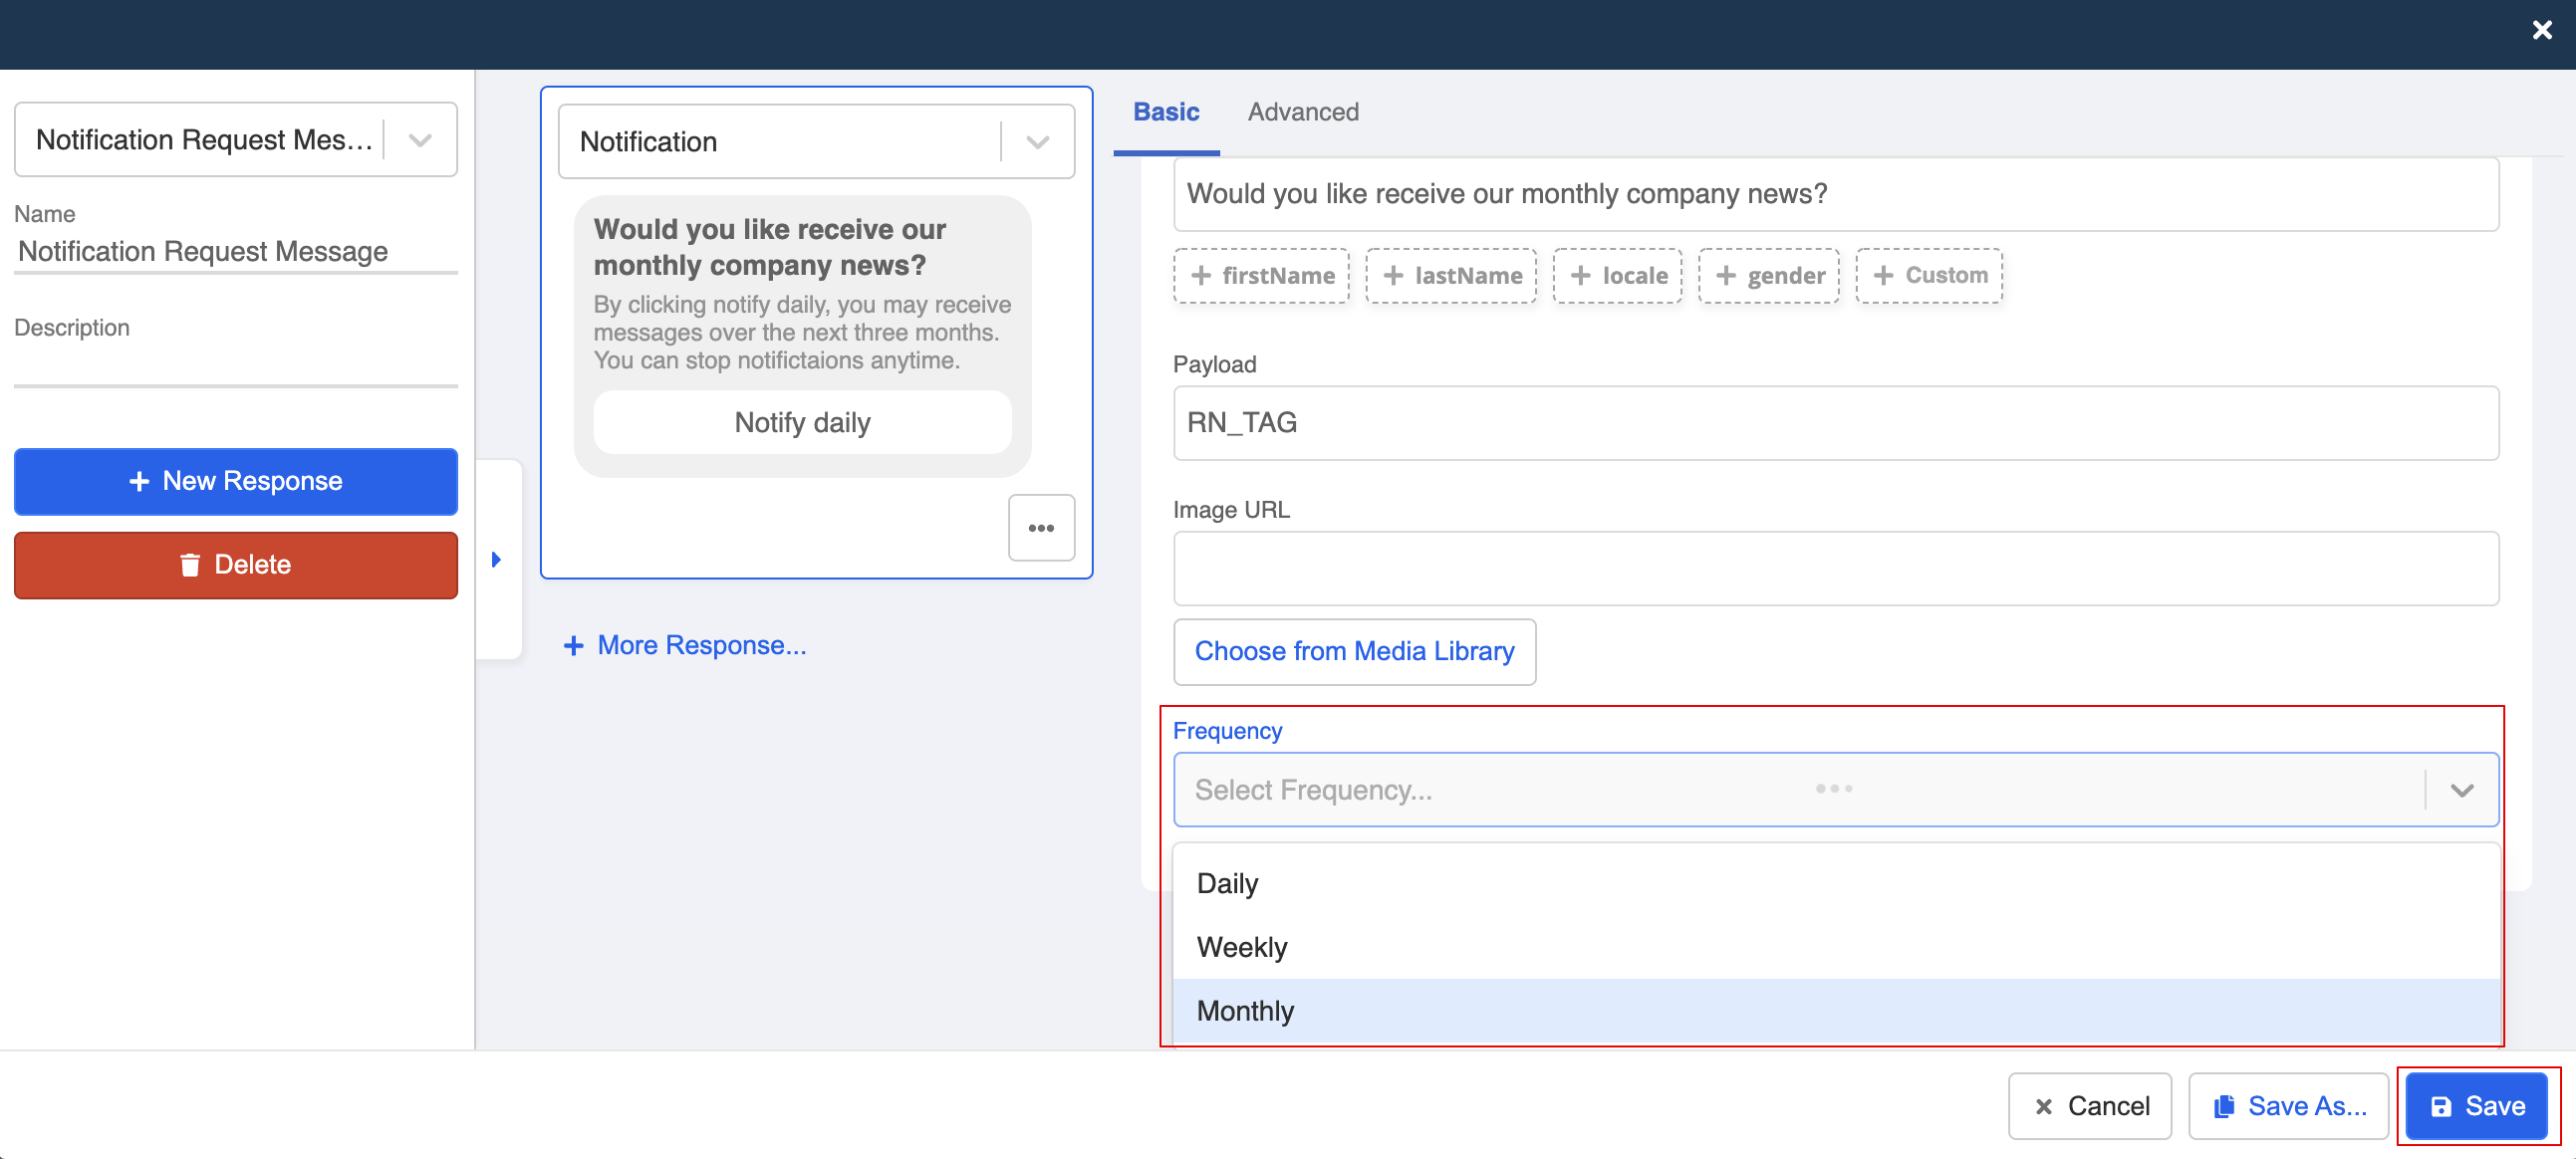
Business can manage the Notification Frequency and let user agree to receive a push message on a regular basis:
| Frequency | Description |
|---|---|
| DAILY | allow business to send 1 notification message on a daily basis for a span of 6 months |
| WEEKLY | allow business to send 1 notification message on a weekly basis for a span of 9 months |
| MONTHLY | allow business to send 1 notification message on a monthly basis for a span of 12 months |
Expected Outcome
- The user enters the chatbot and triggers the Recurring Notification.

- The user clicks on the button to agree, a opt-in message is displayed.
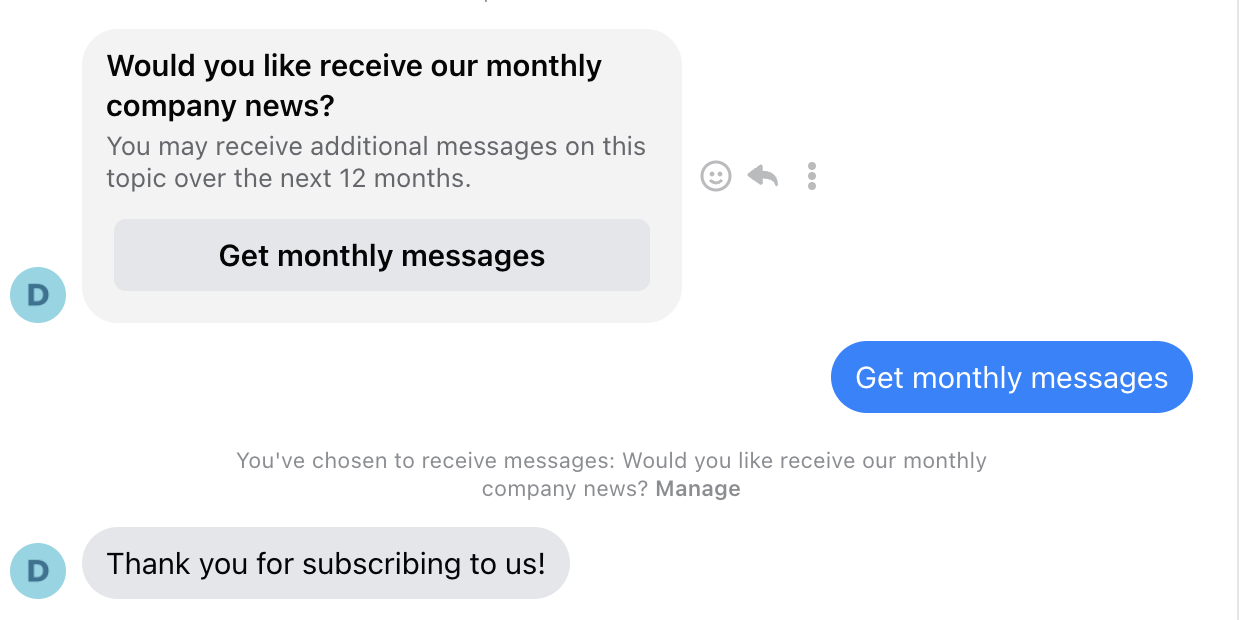
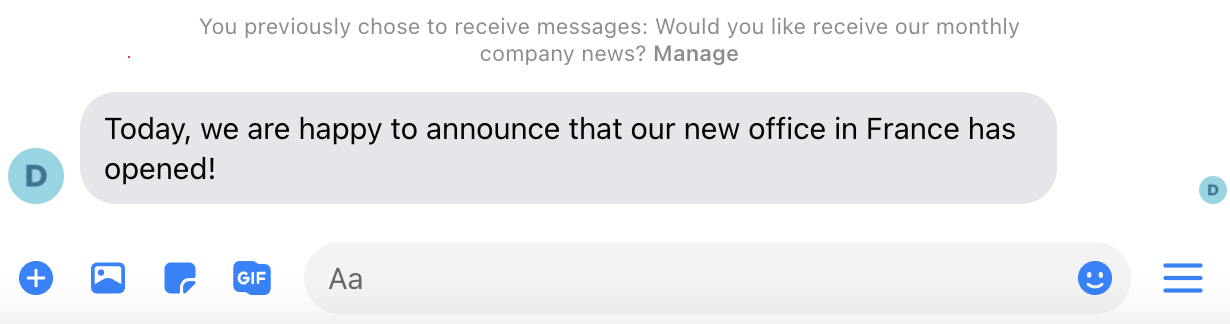
- After getting opt-in, the business can now send push message to this user.
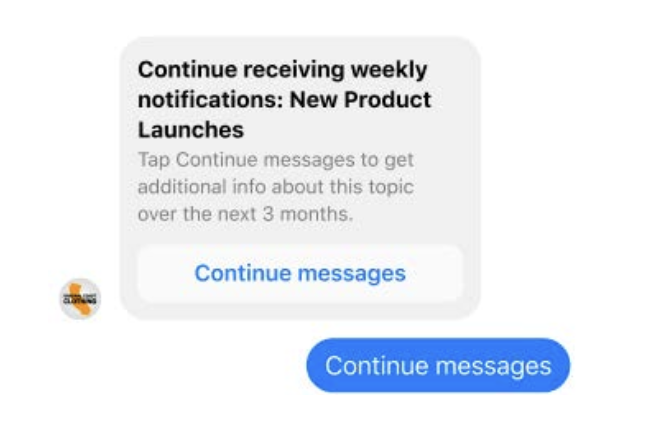
- When the notification token is about to expire, an automatic re-opt-in request will be sent to user. This is a default setting of recurring notification, which cannot be customized by businesses.
Sample Tree Structure
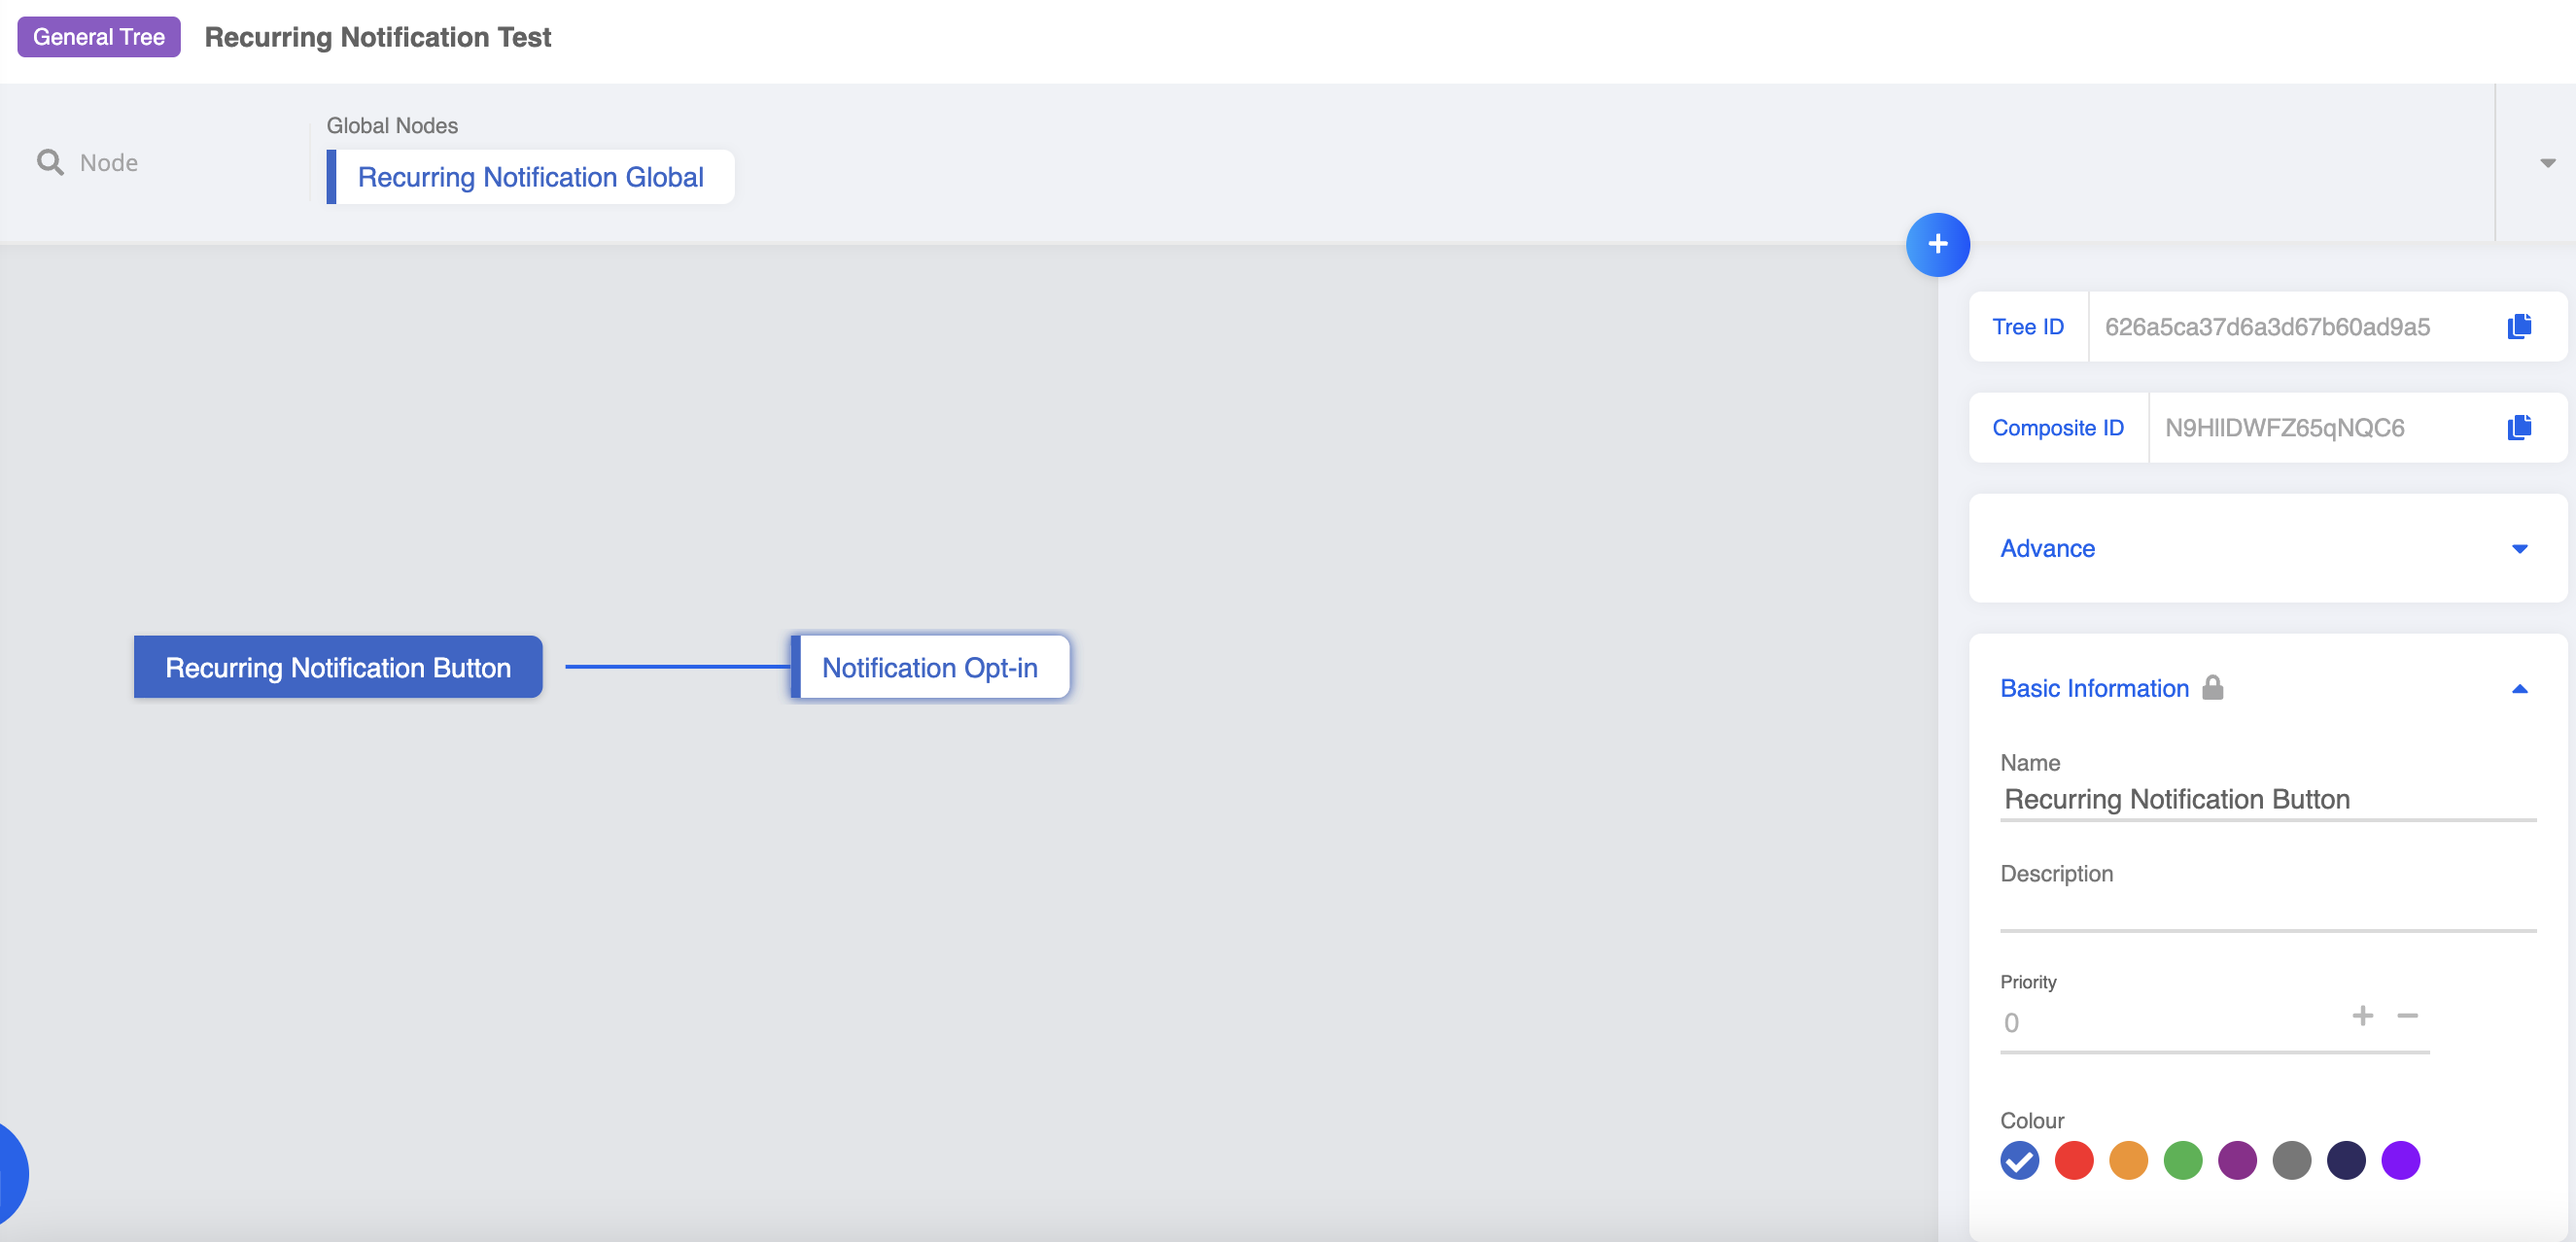
RN Button
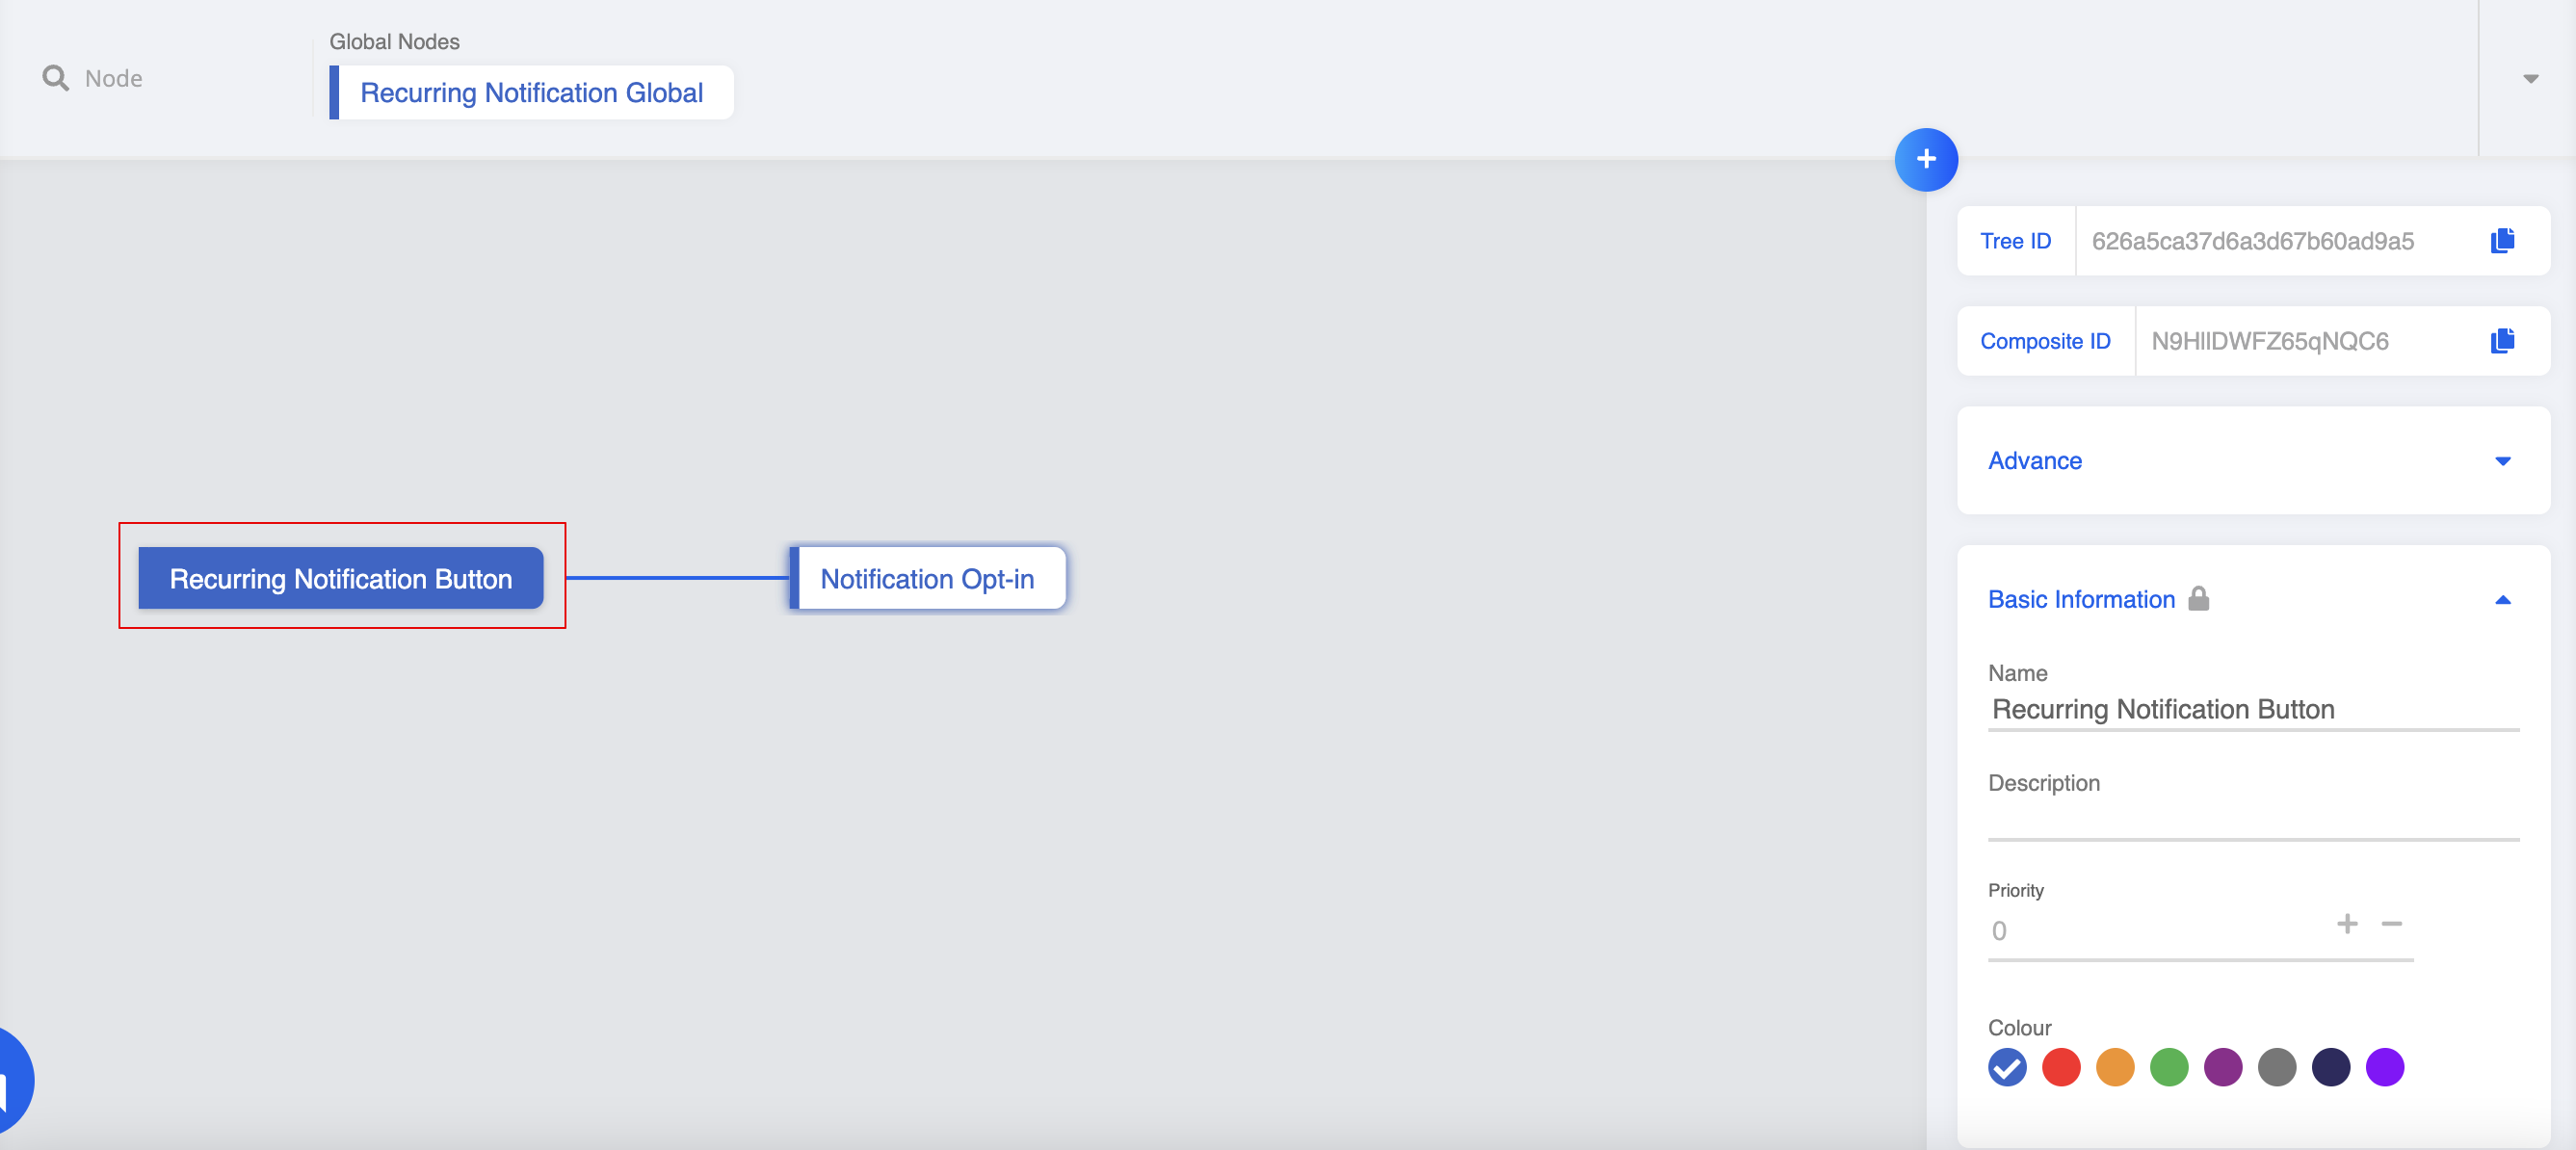
- Create a Tree Node and name it as "Recurring Notification Button". This is the message that asks for user's consent, it comes with the content and a button.
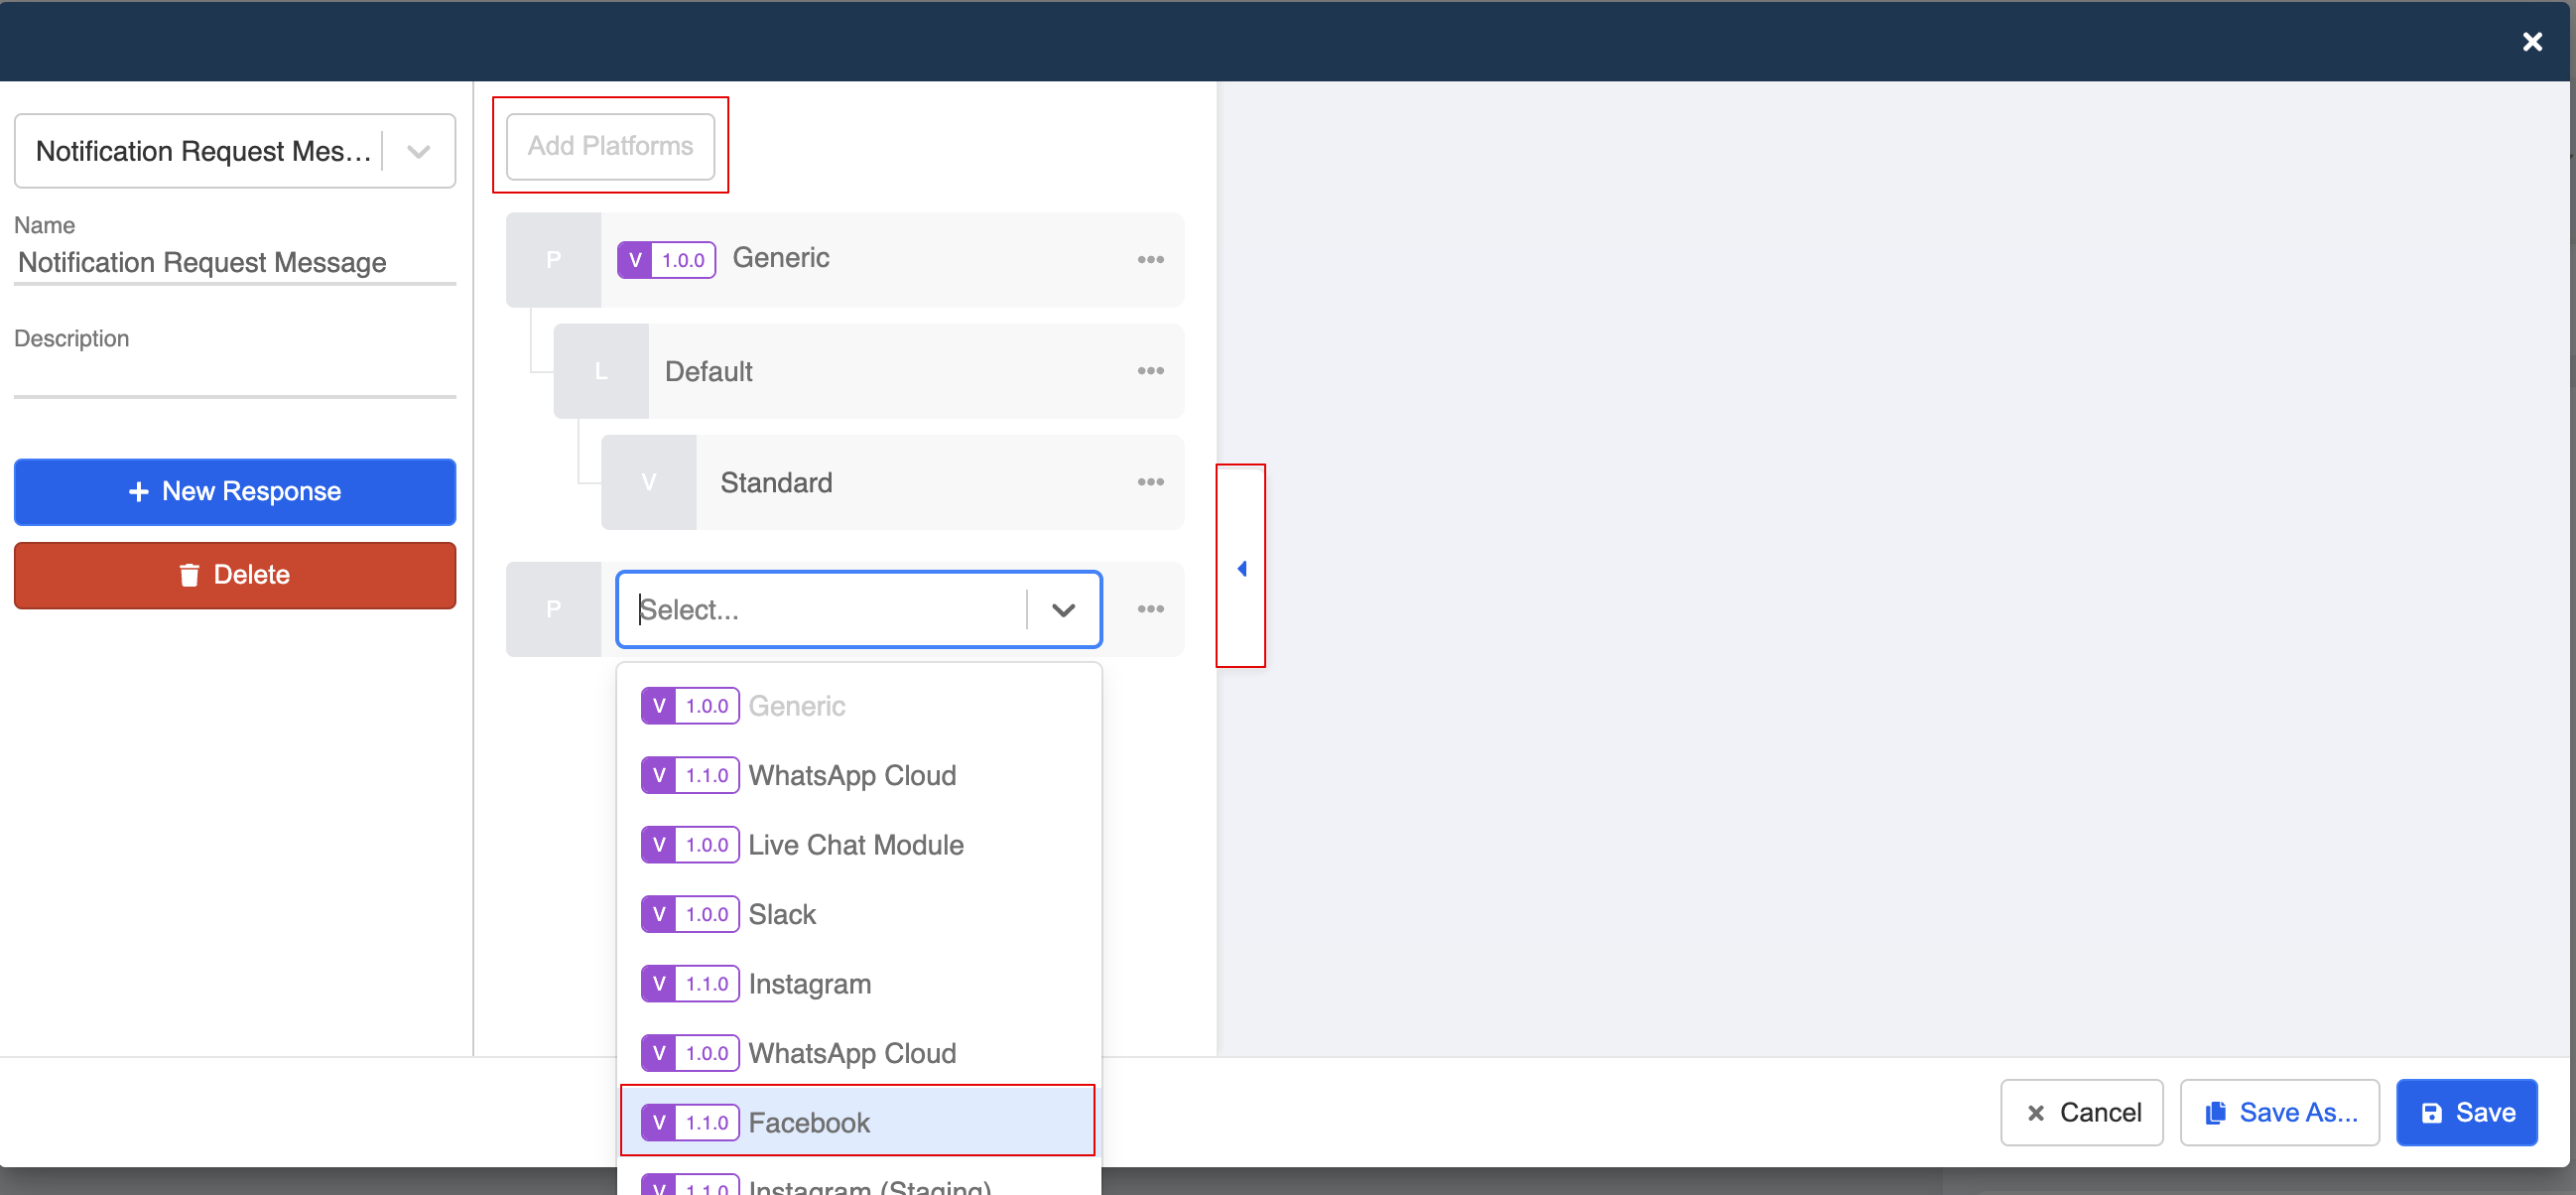
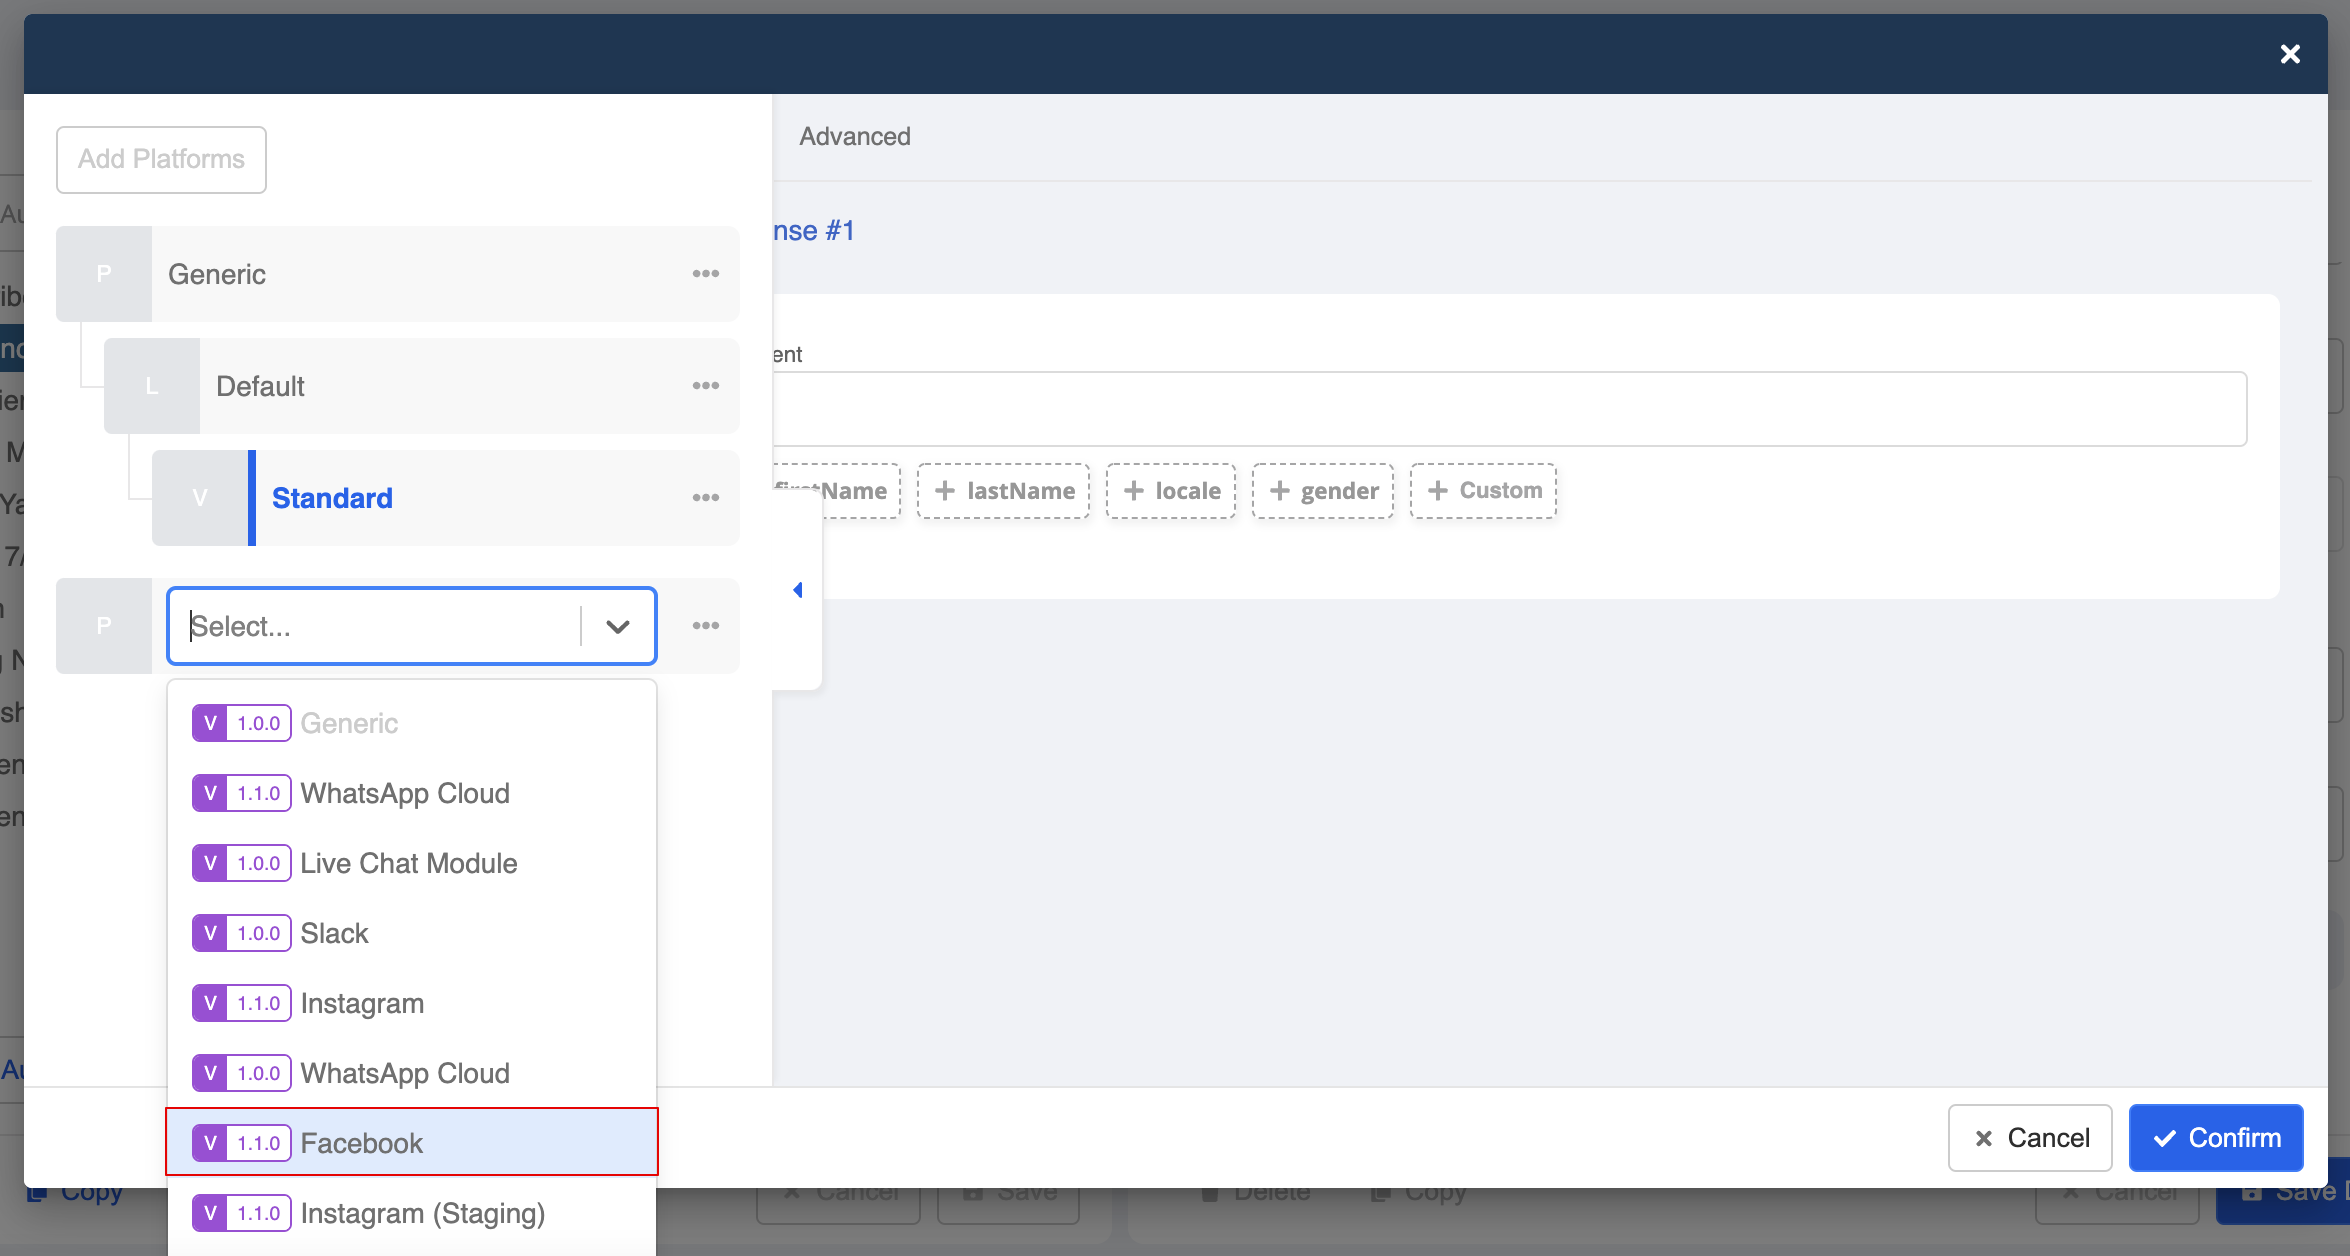
- Create a new response. Then, create a platform specific response and select "Facebook".
tip
RN is supported in Integration Version v1.1.0
- Select "Notification" as the response type.
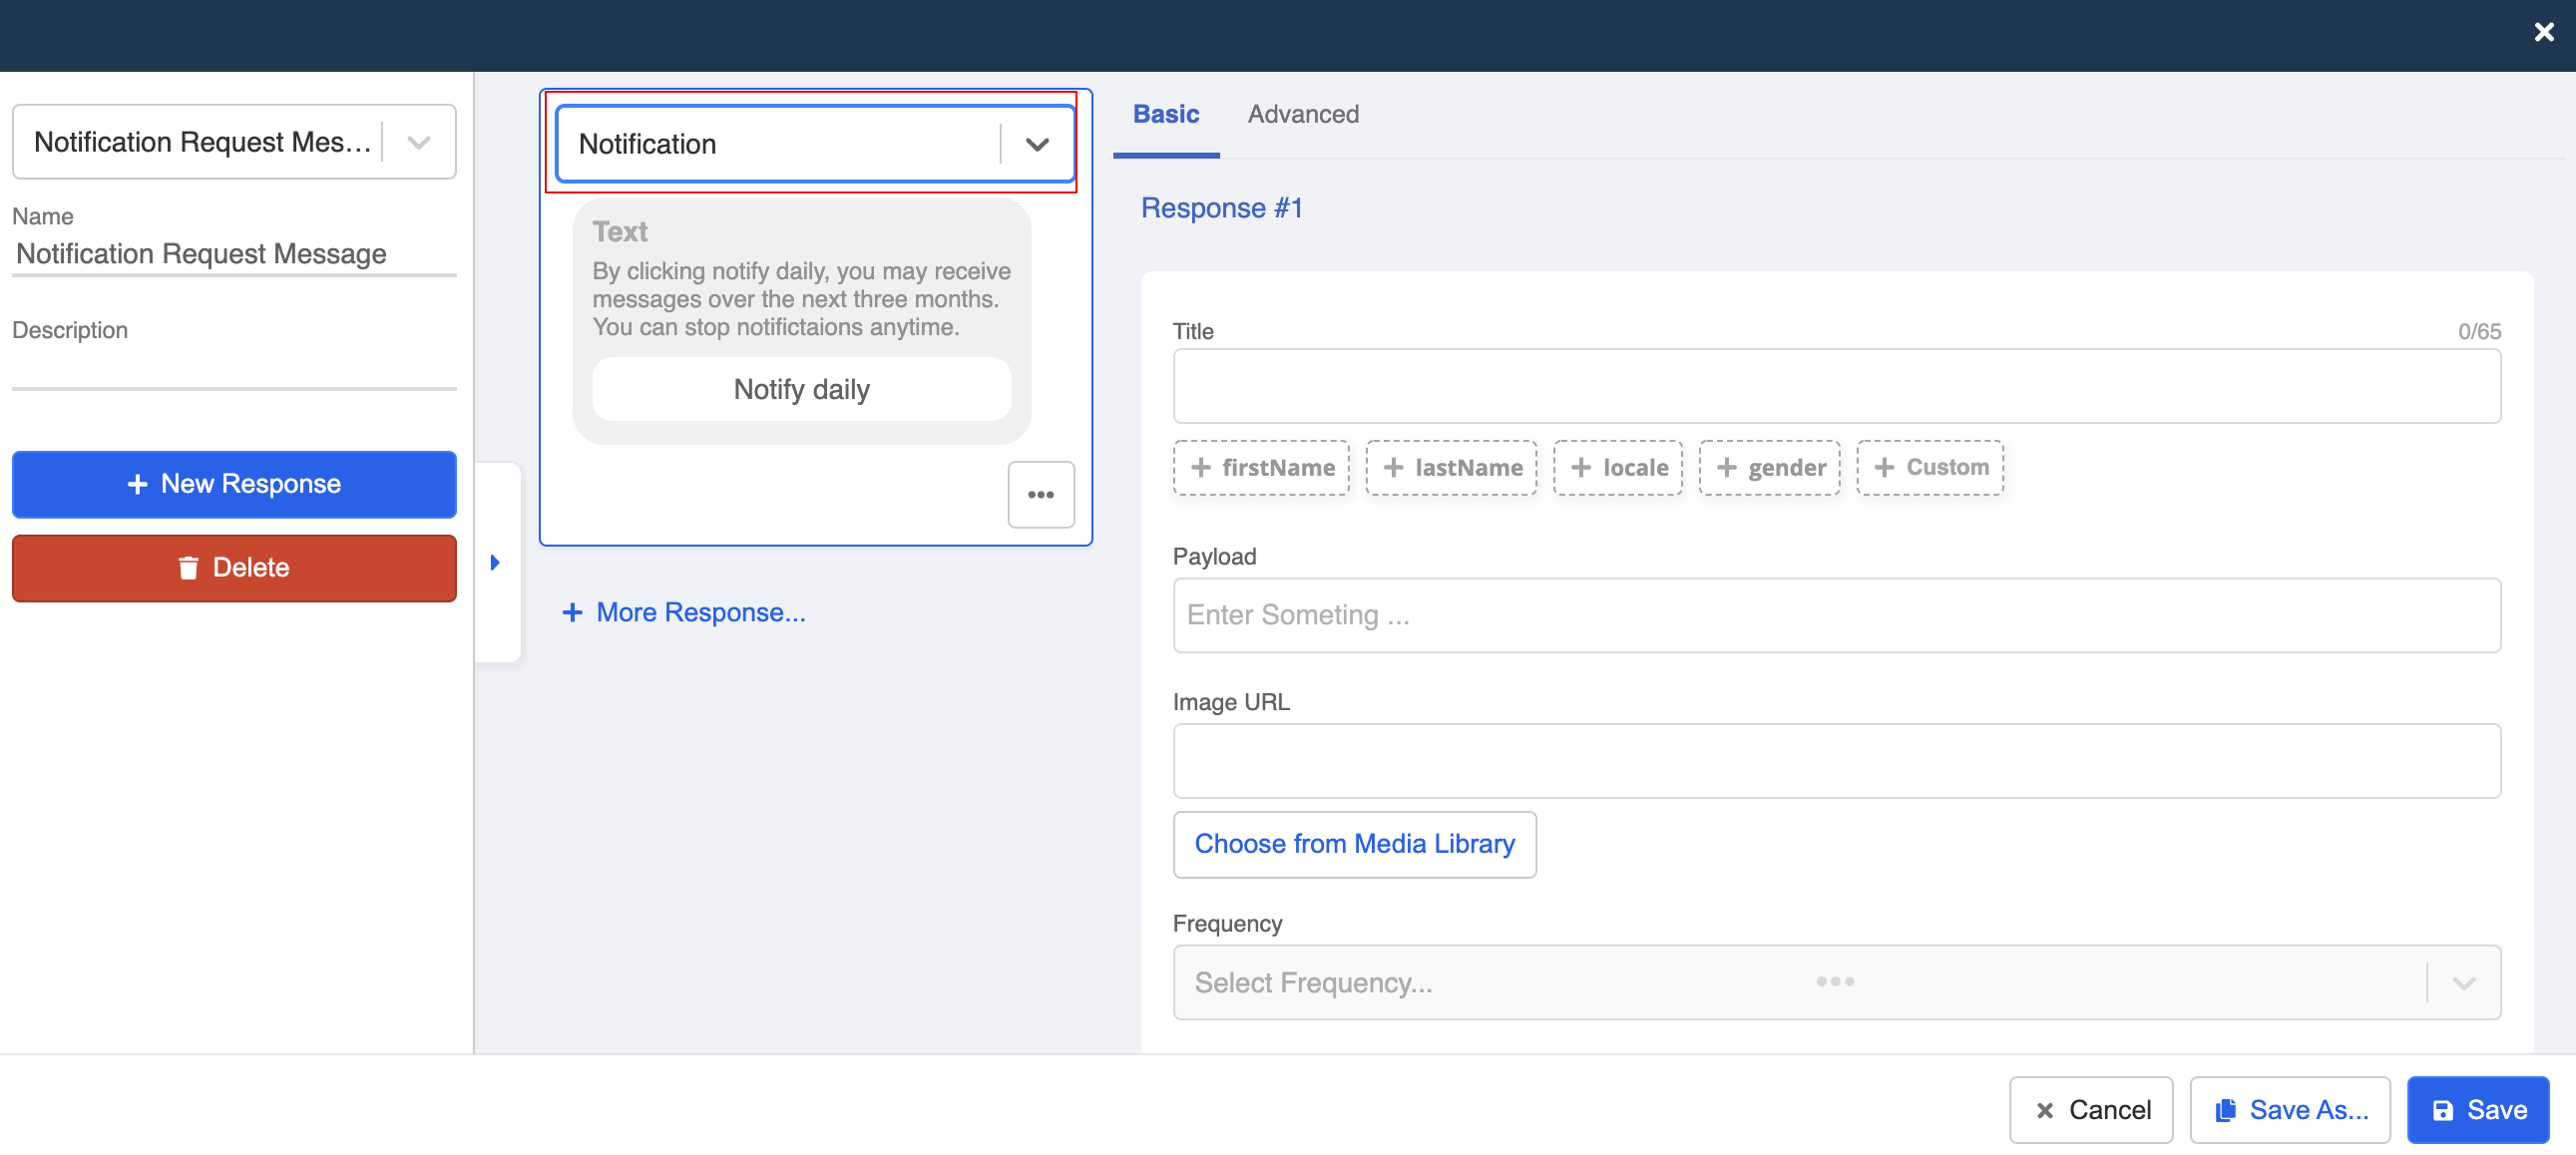
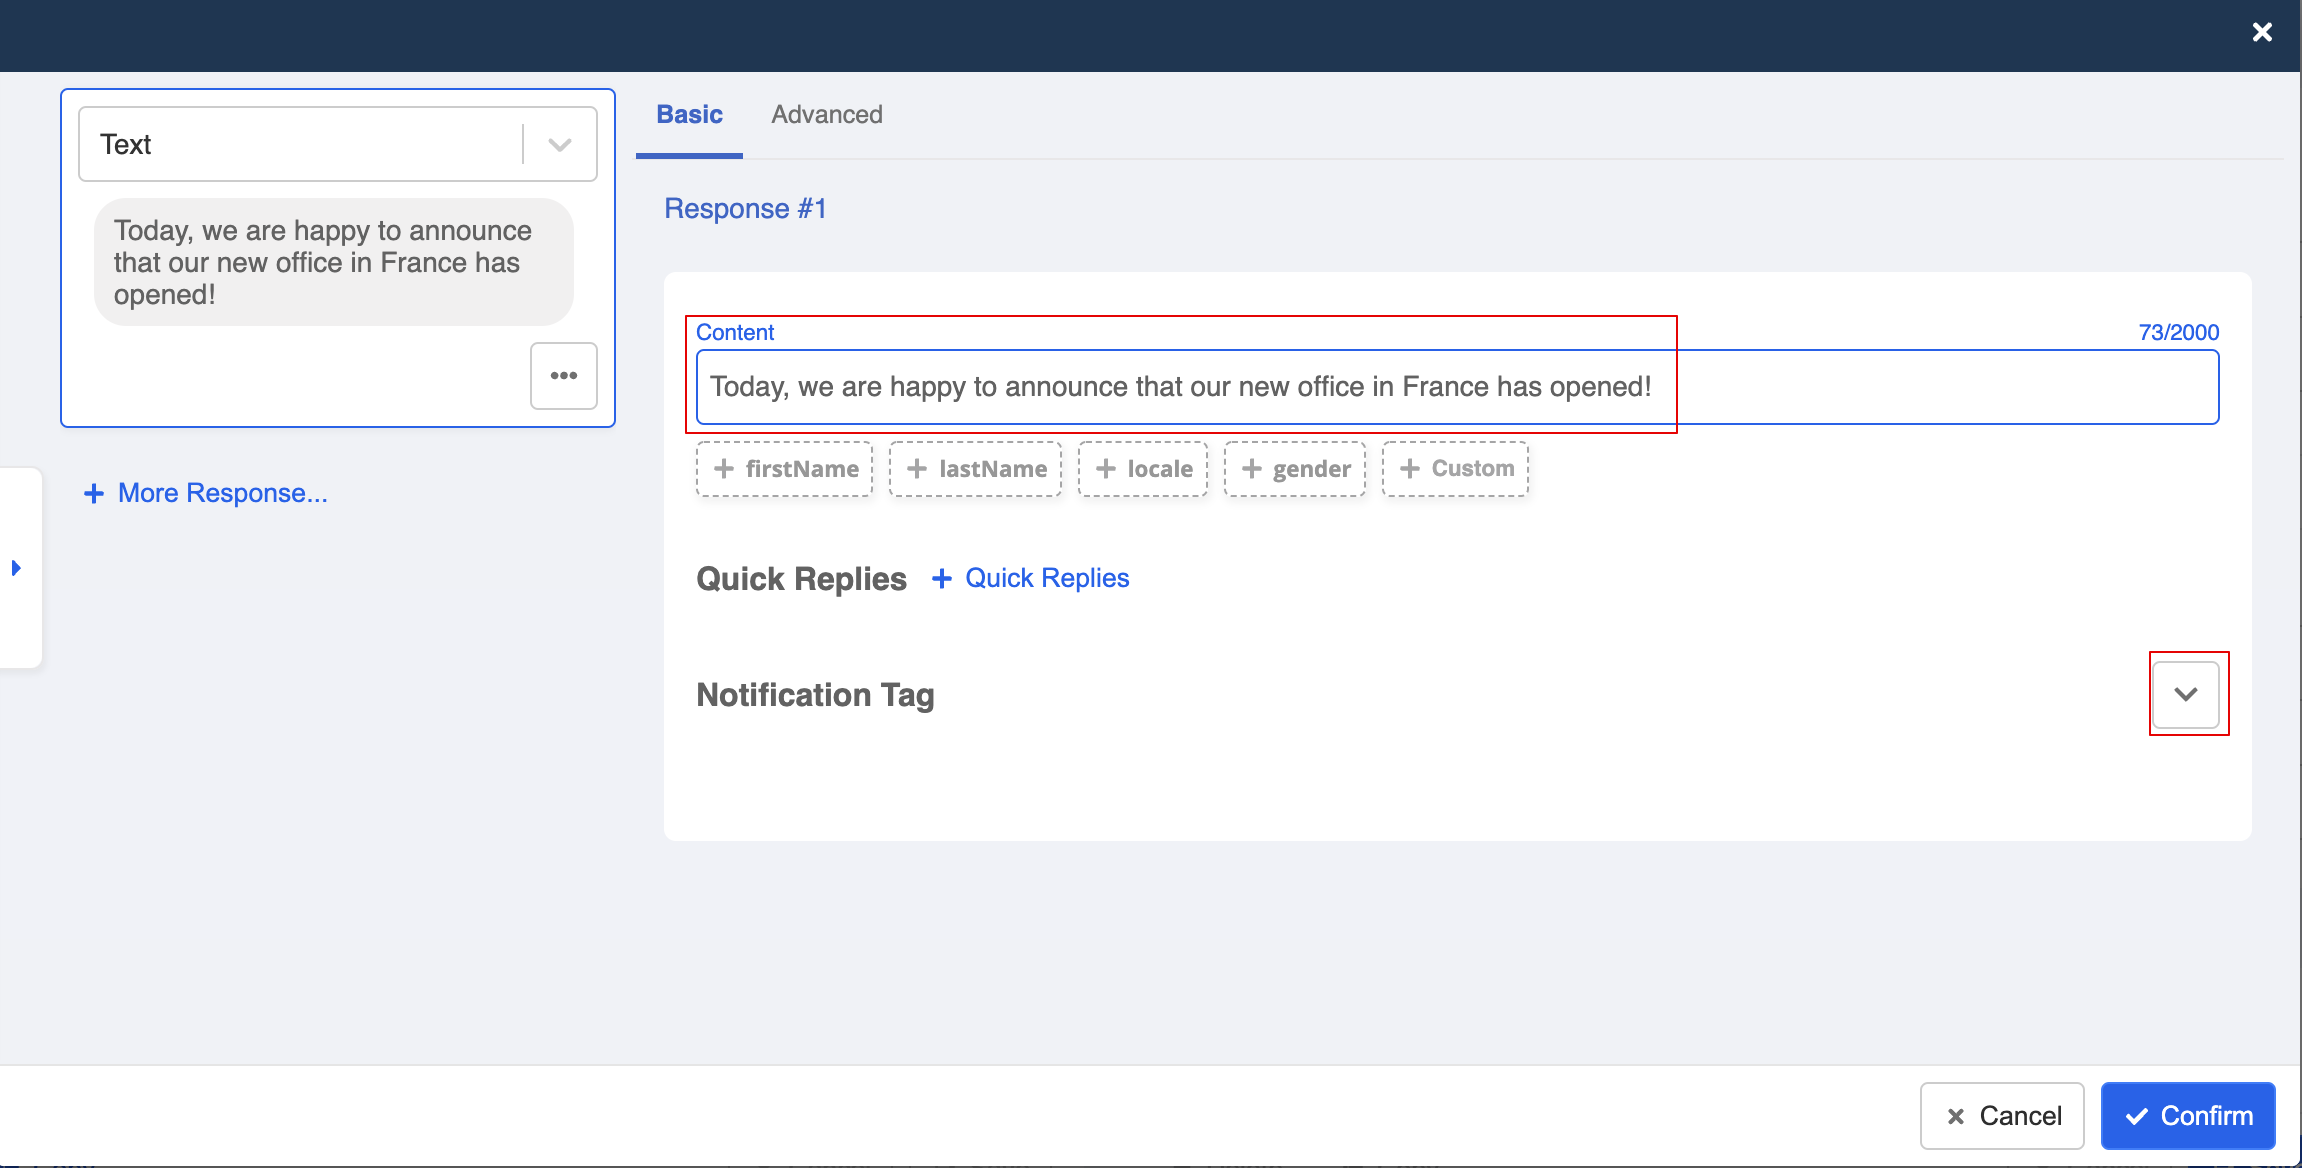
- Enter the text content, and a case-sensitive payload. Optionally, you can also attach an image to the message.

- Finally, select the "Frequency" from the dropdown and save the response.
RN Opt-in
- Create a Tree Node following the and name it as "Notification Opt-in". This is the message displayed users agree to receive the notifications.
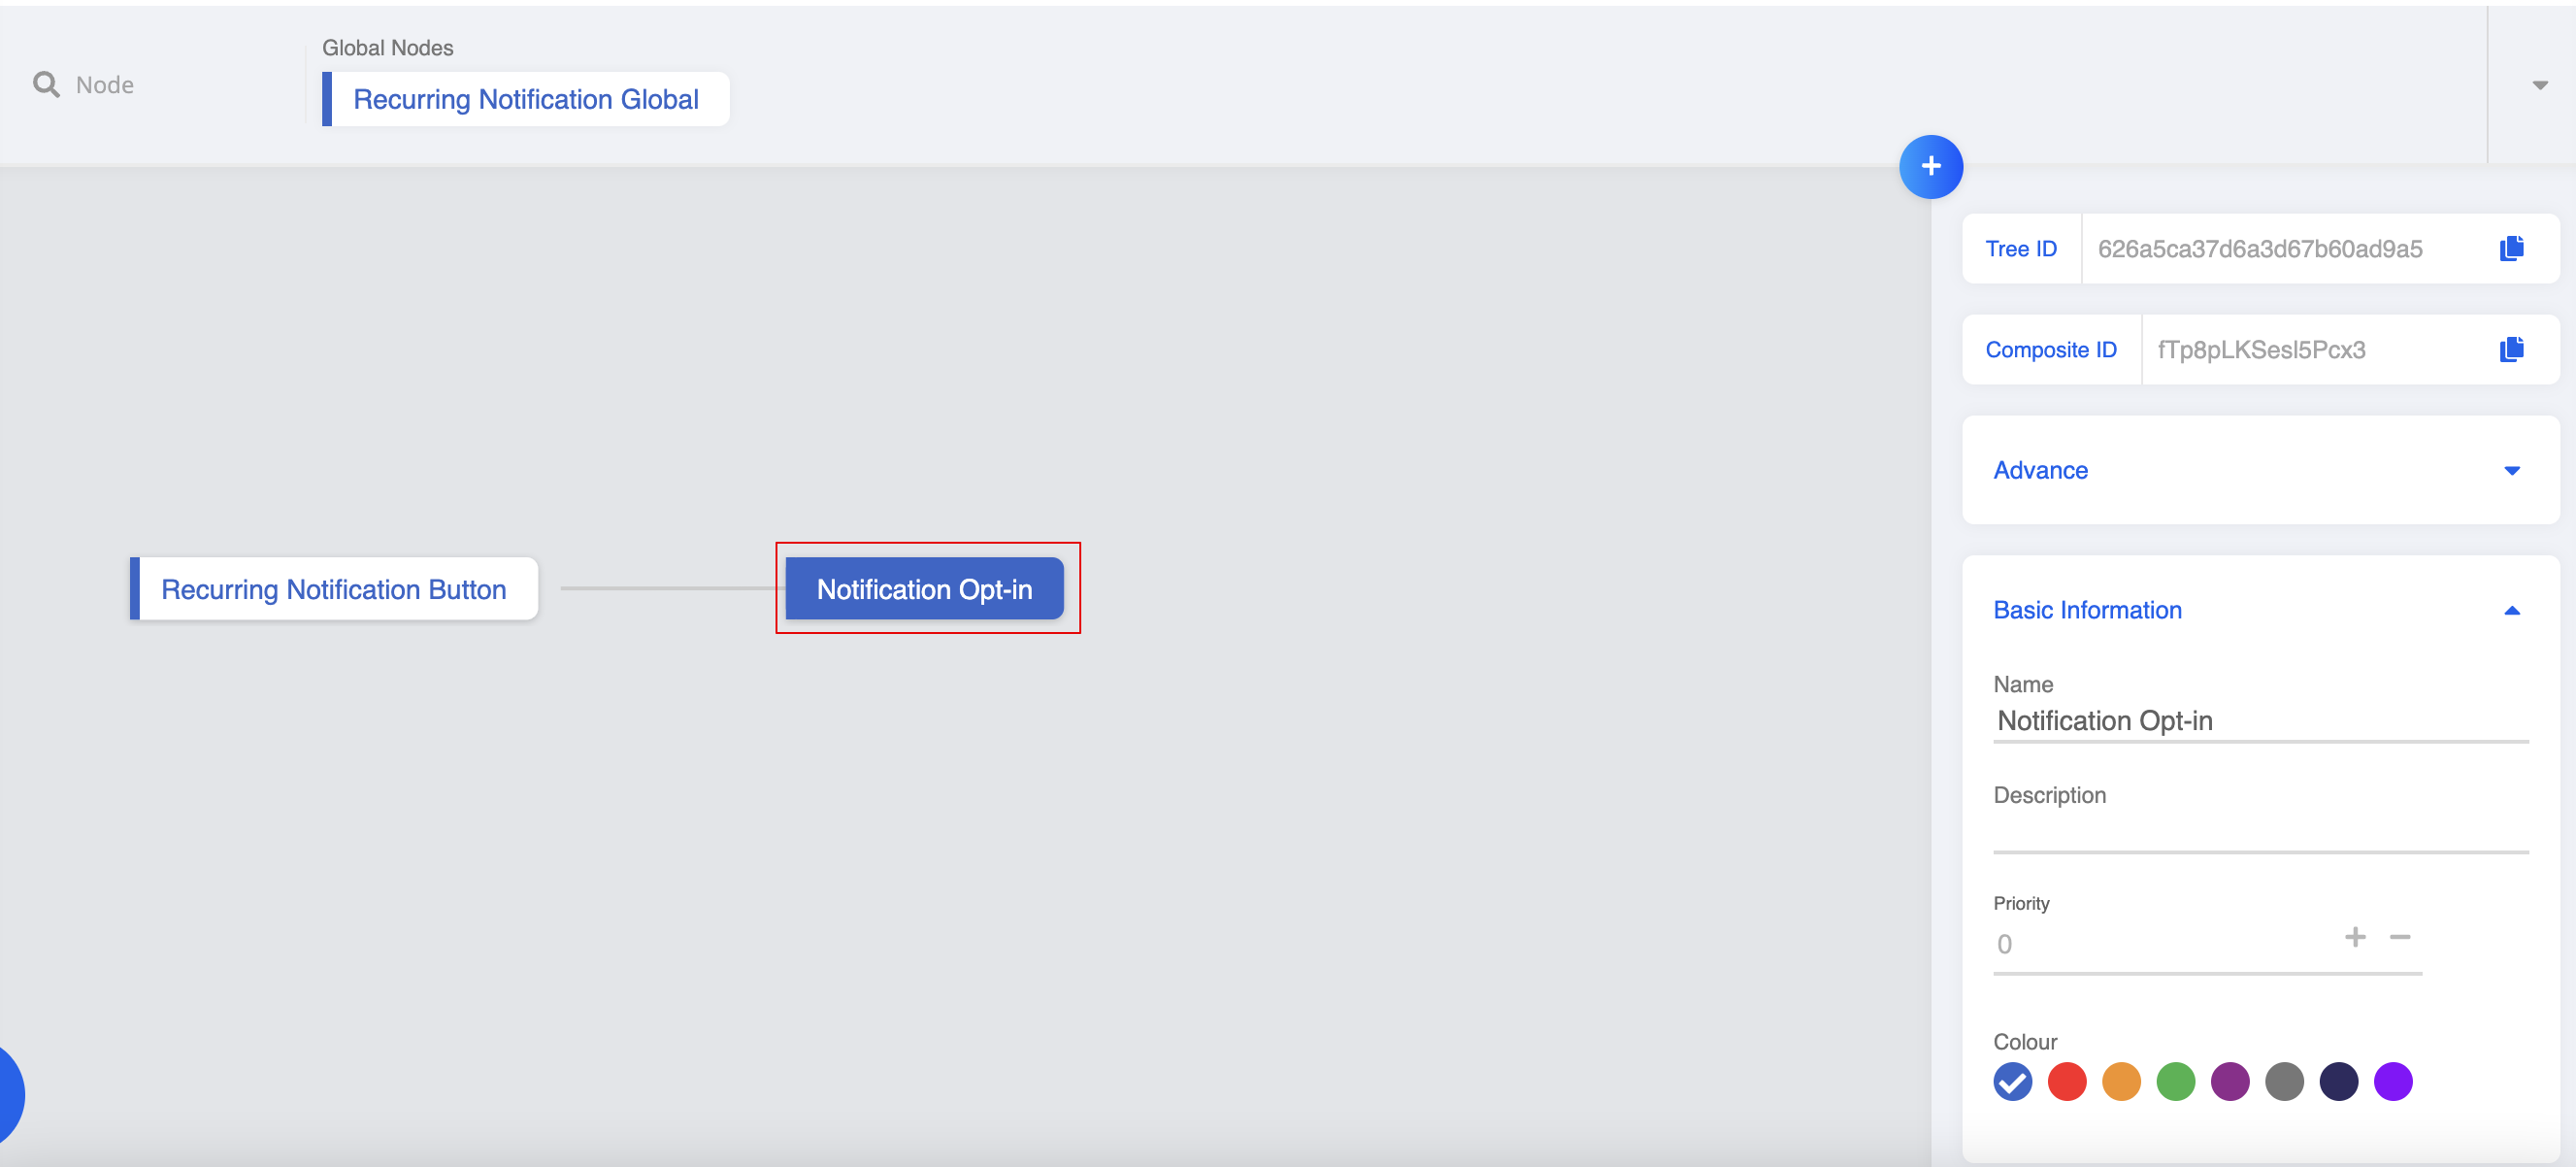
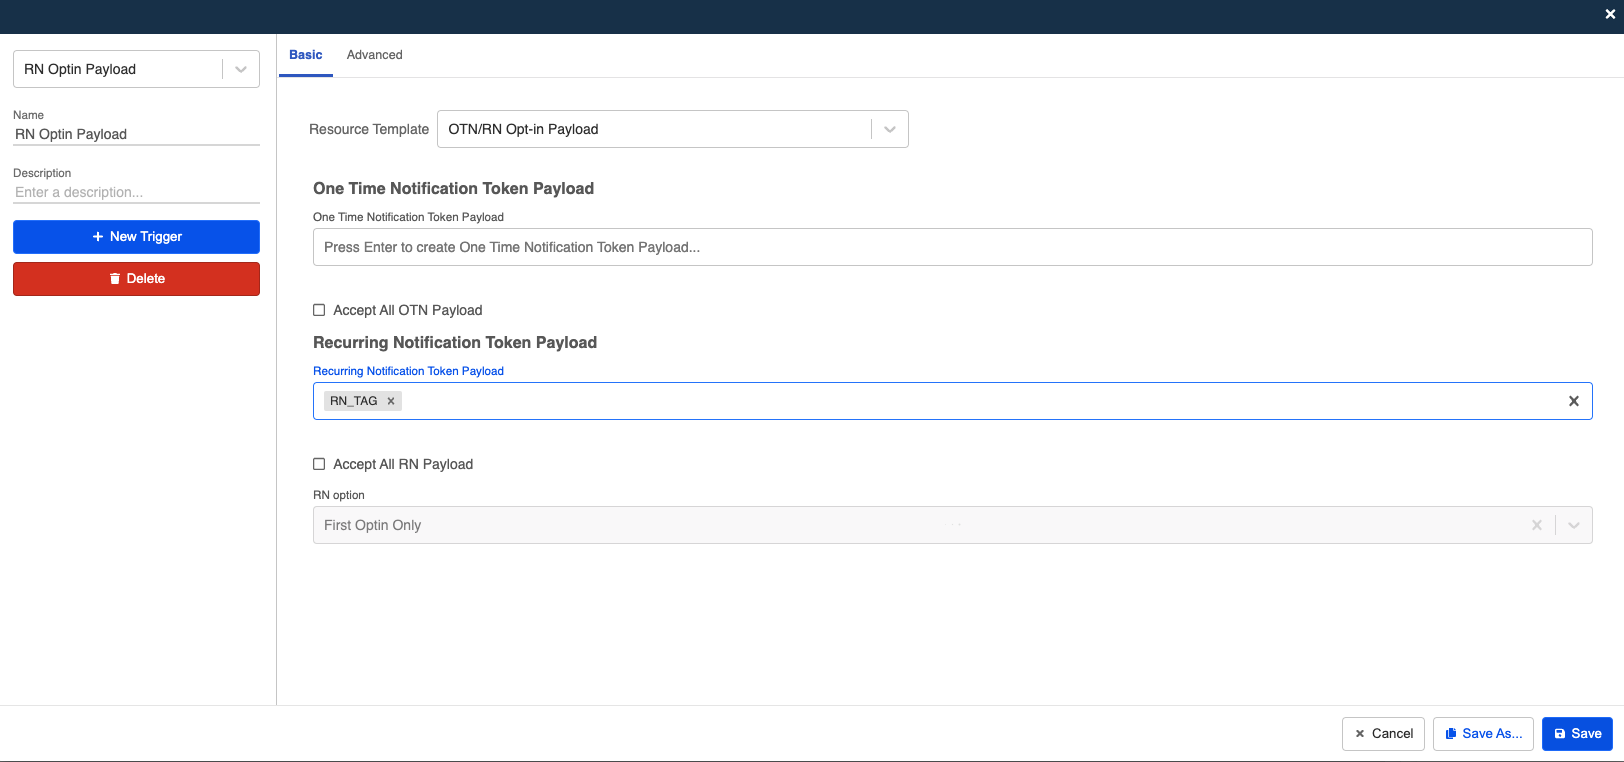
- Create a new trigger with the following sample code. Please note the payload should match with the payload created in the RN Button.
return this.messageEvent.type === "OPTIN" && this.messageEvent.data.payload === "RN_TAG"
- Create a platform specific response for "Facebook". Enter the text content for the message.

- Remember to save the response and node!
Create a Global Node
Finally, you will need an entry point for users to enter this flow.
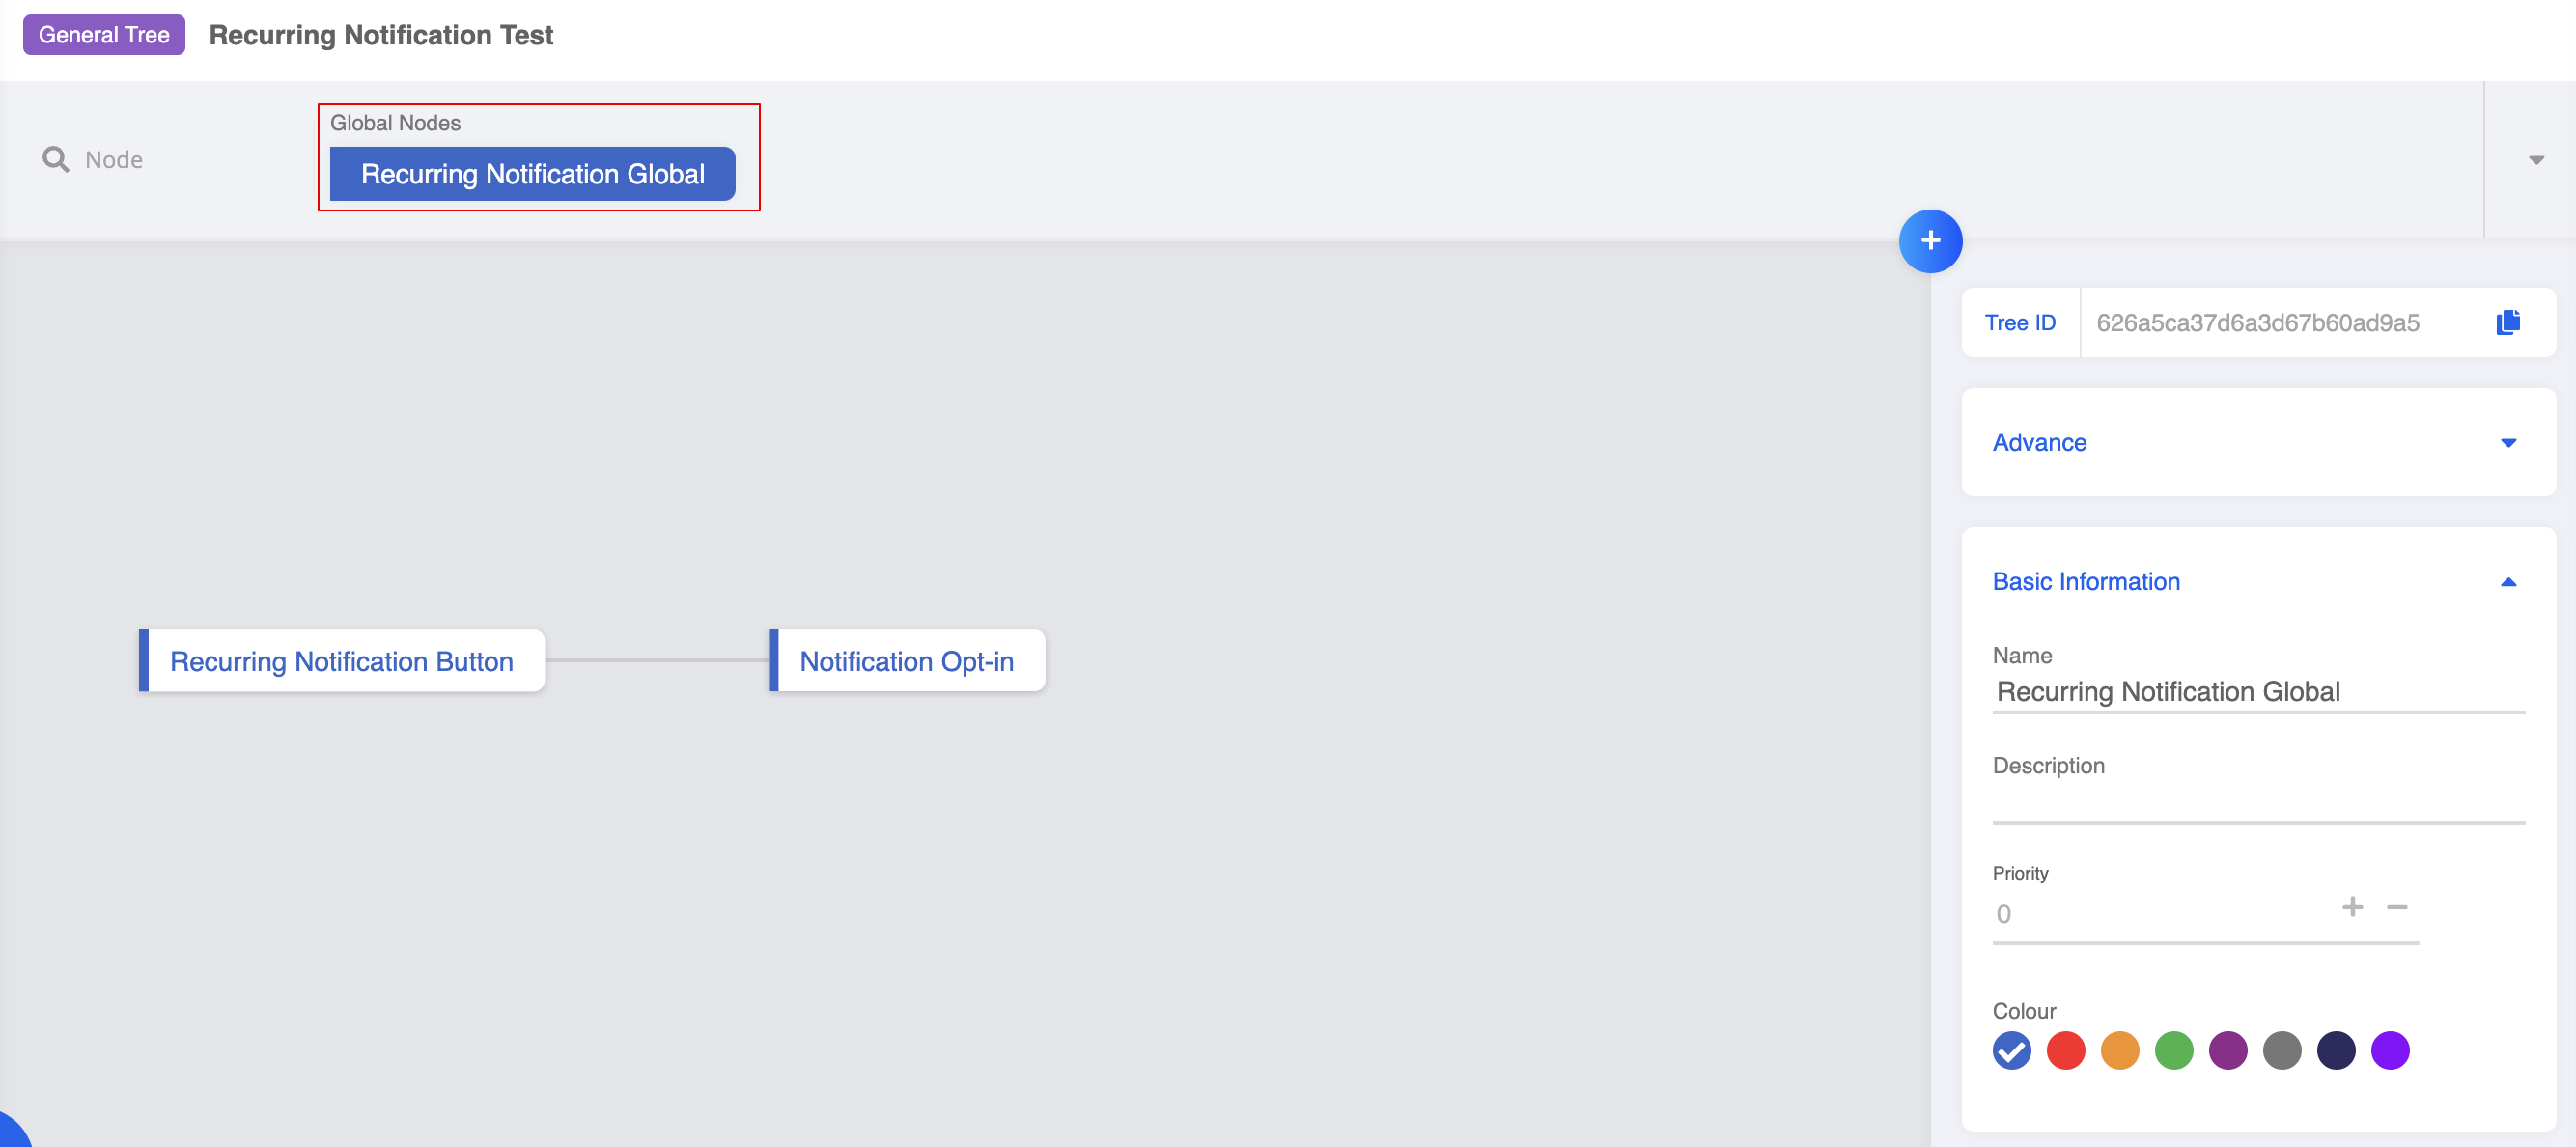
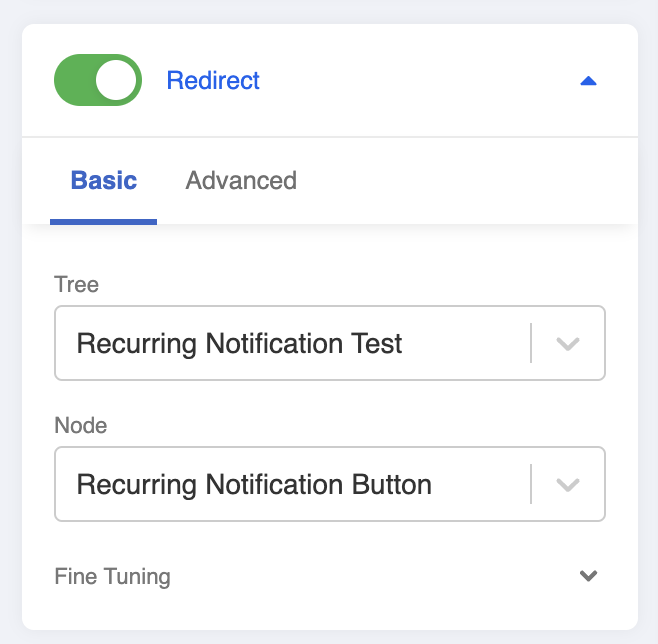
- Create a Global Node, and name it as "*Recurring Notification Global".
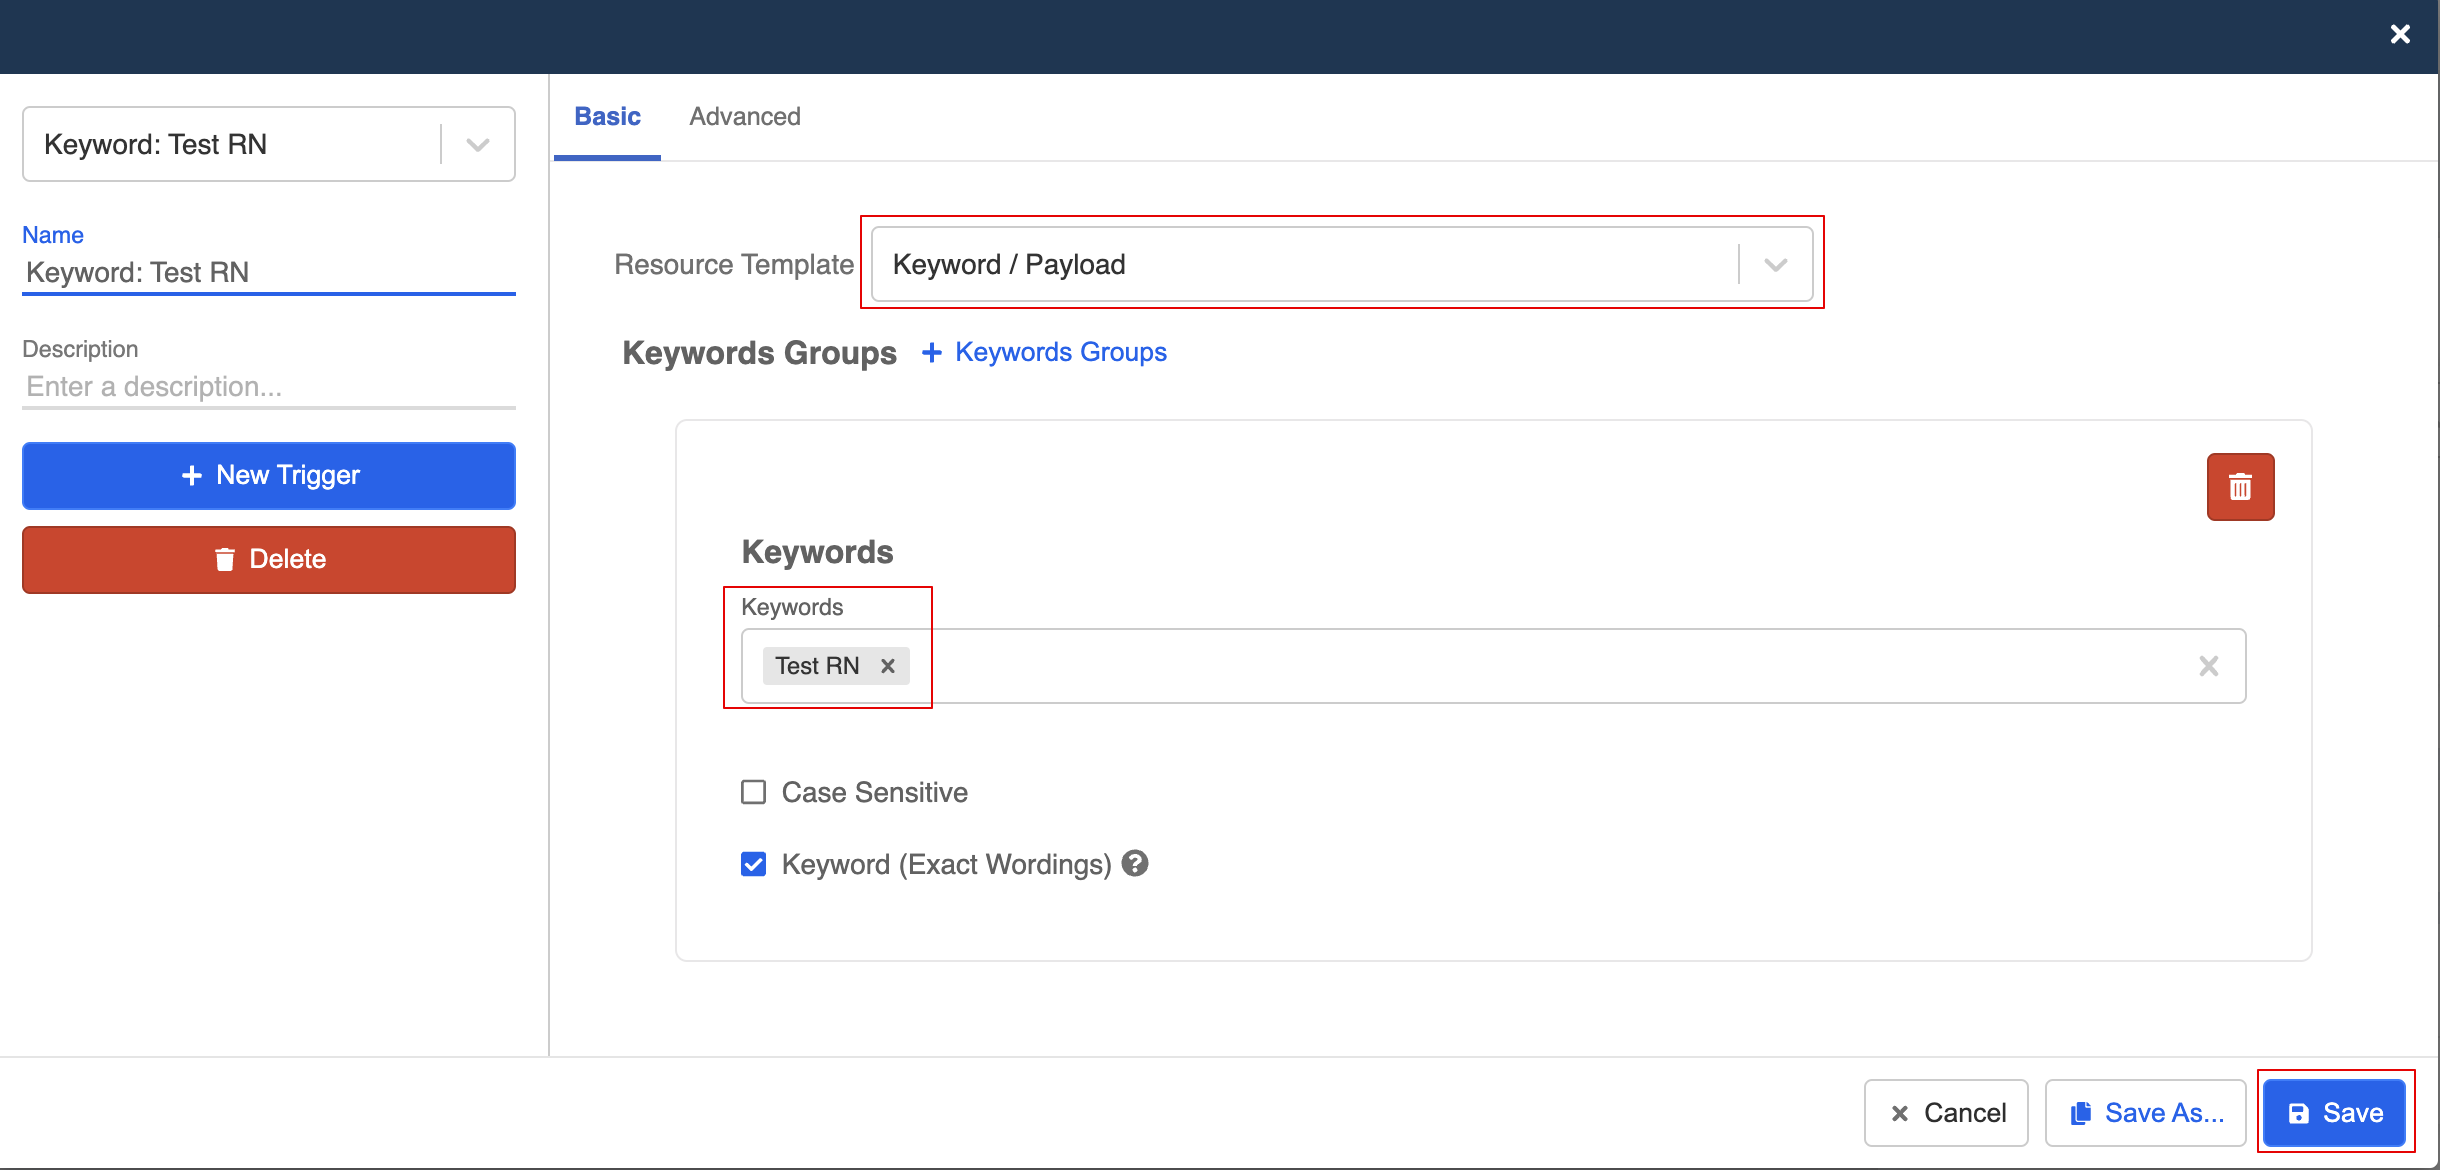
- Create a new trigger. Under "Keyword / Payload", create a keyword and save it. In this example, let's take "Test RN" as the keyword.
- Toggle on Redirect and redirect to the node of RN Button.
RN Push
Once the users clicked the button to receive RN message, businesses can now send push message to these users based on the frequency they agreed to.
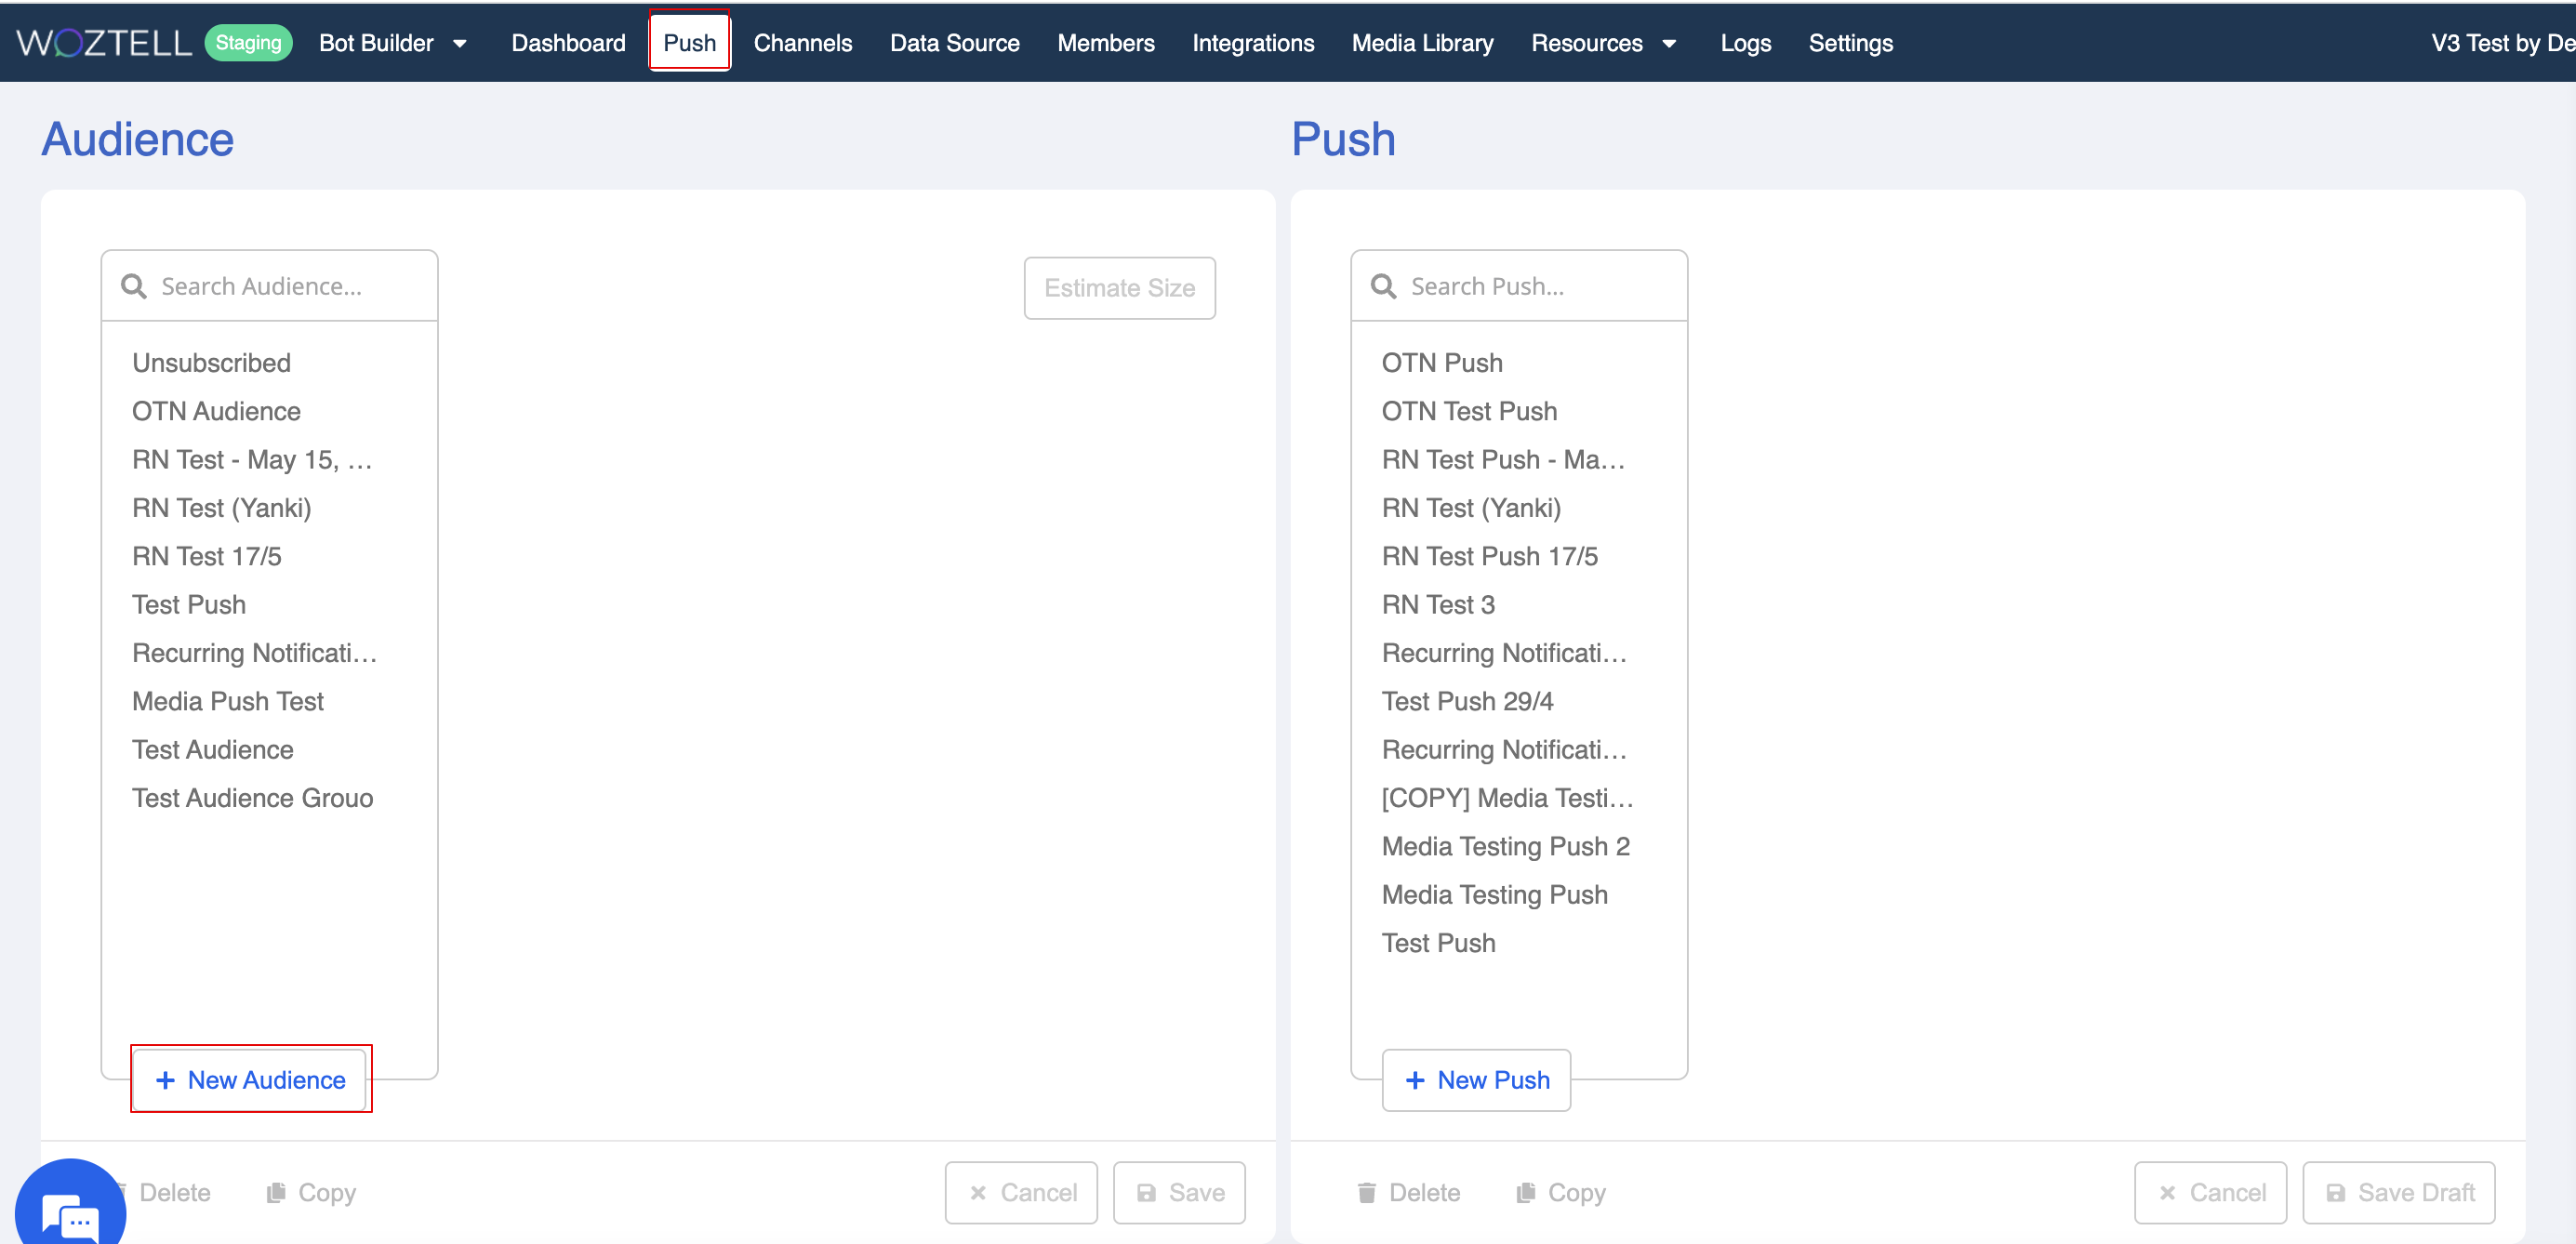
Create RN Audience Group
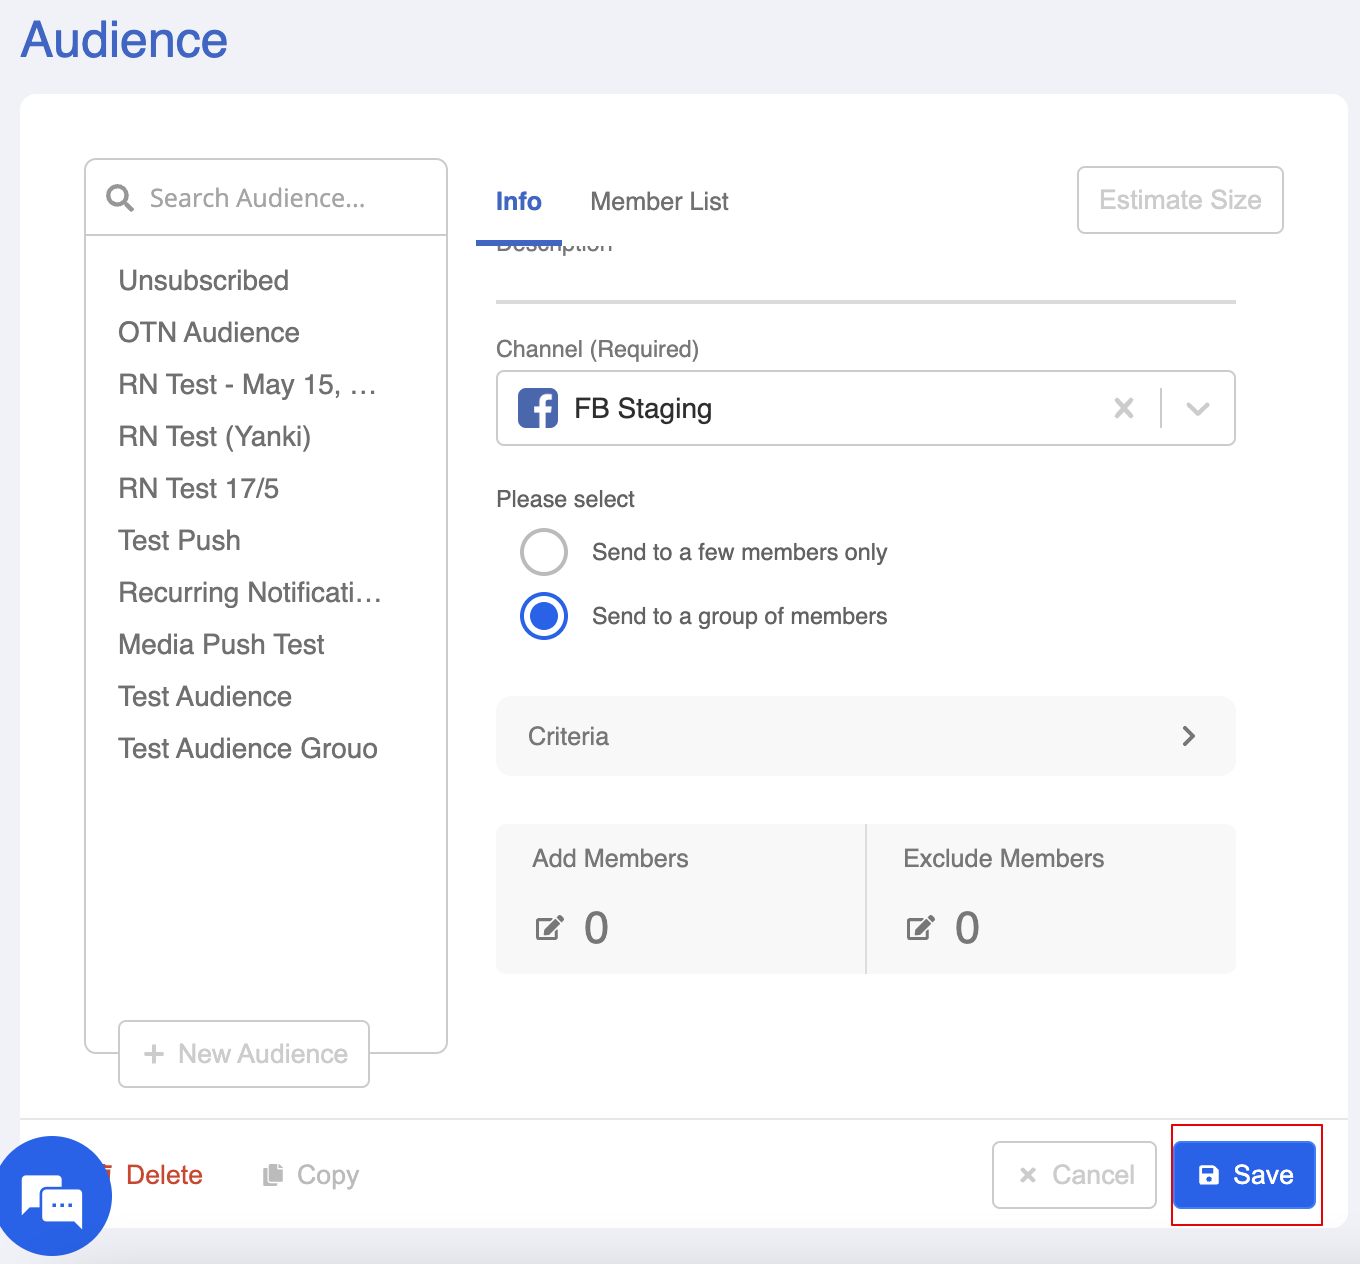
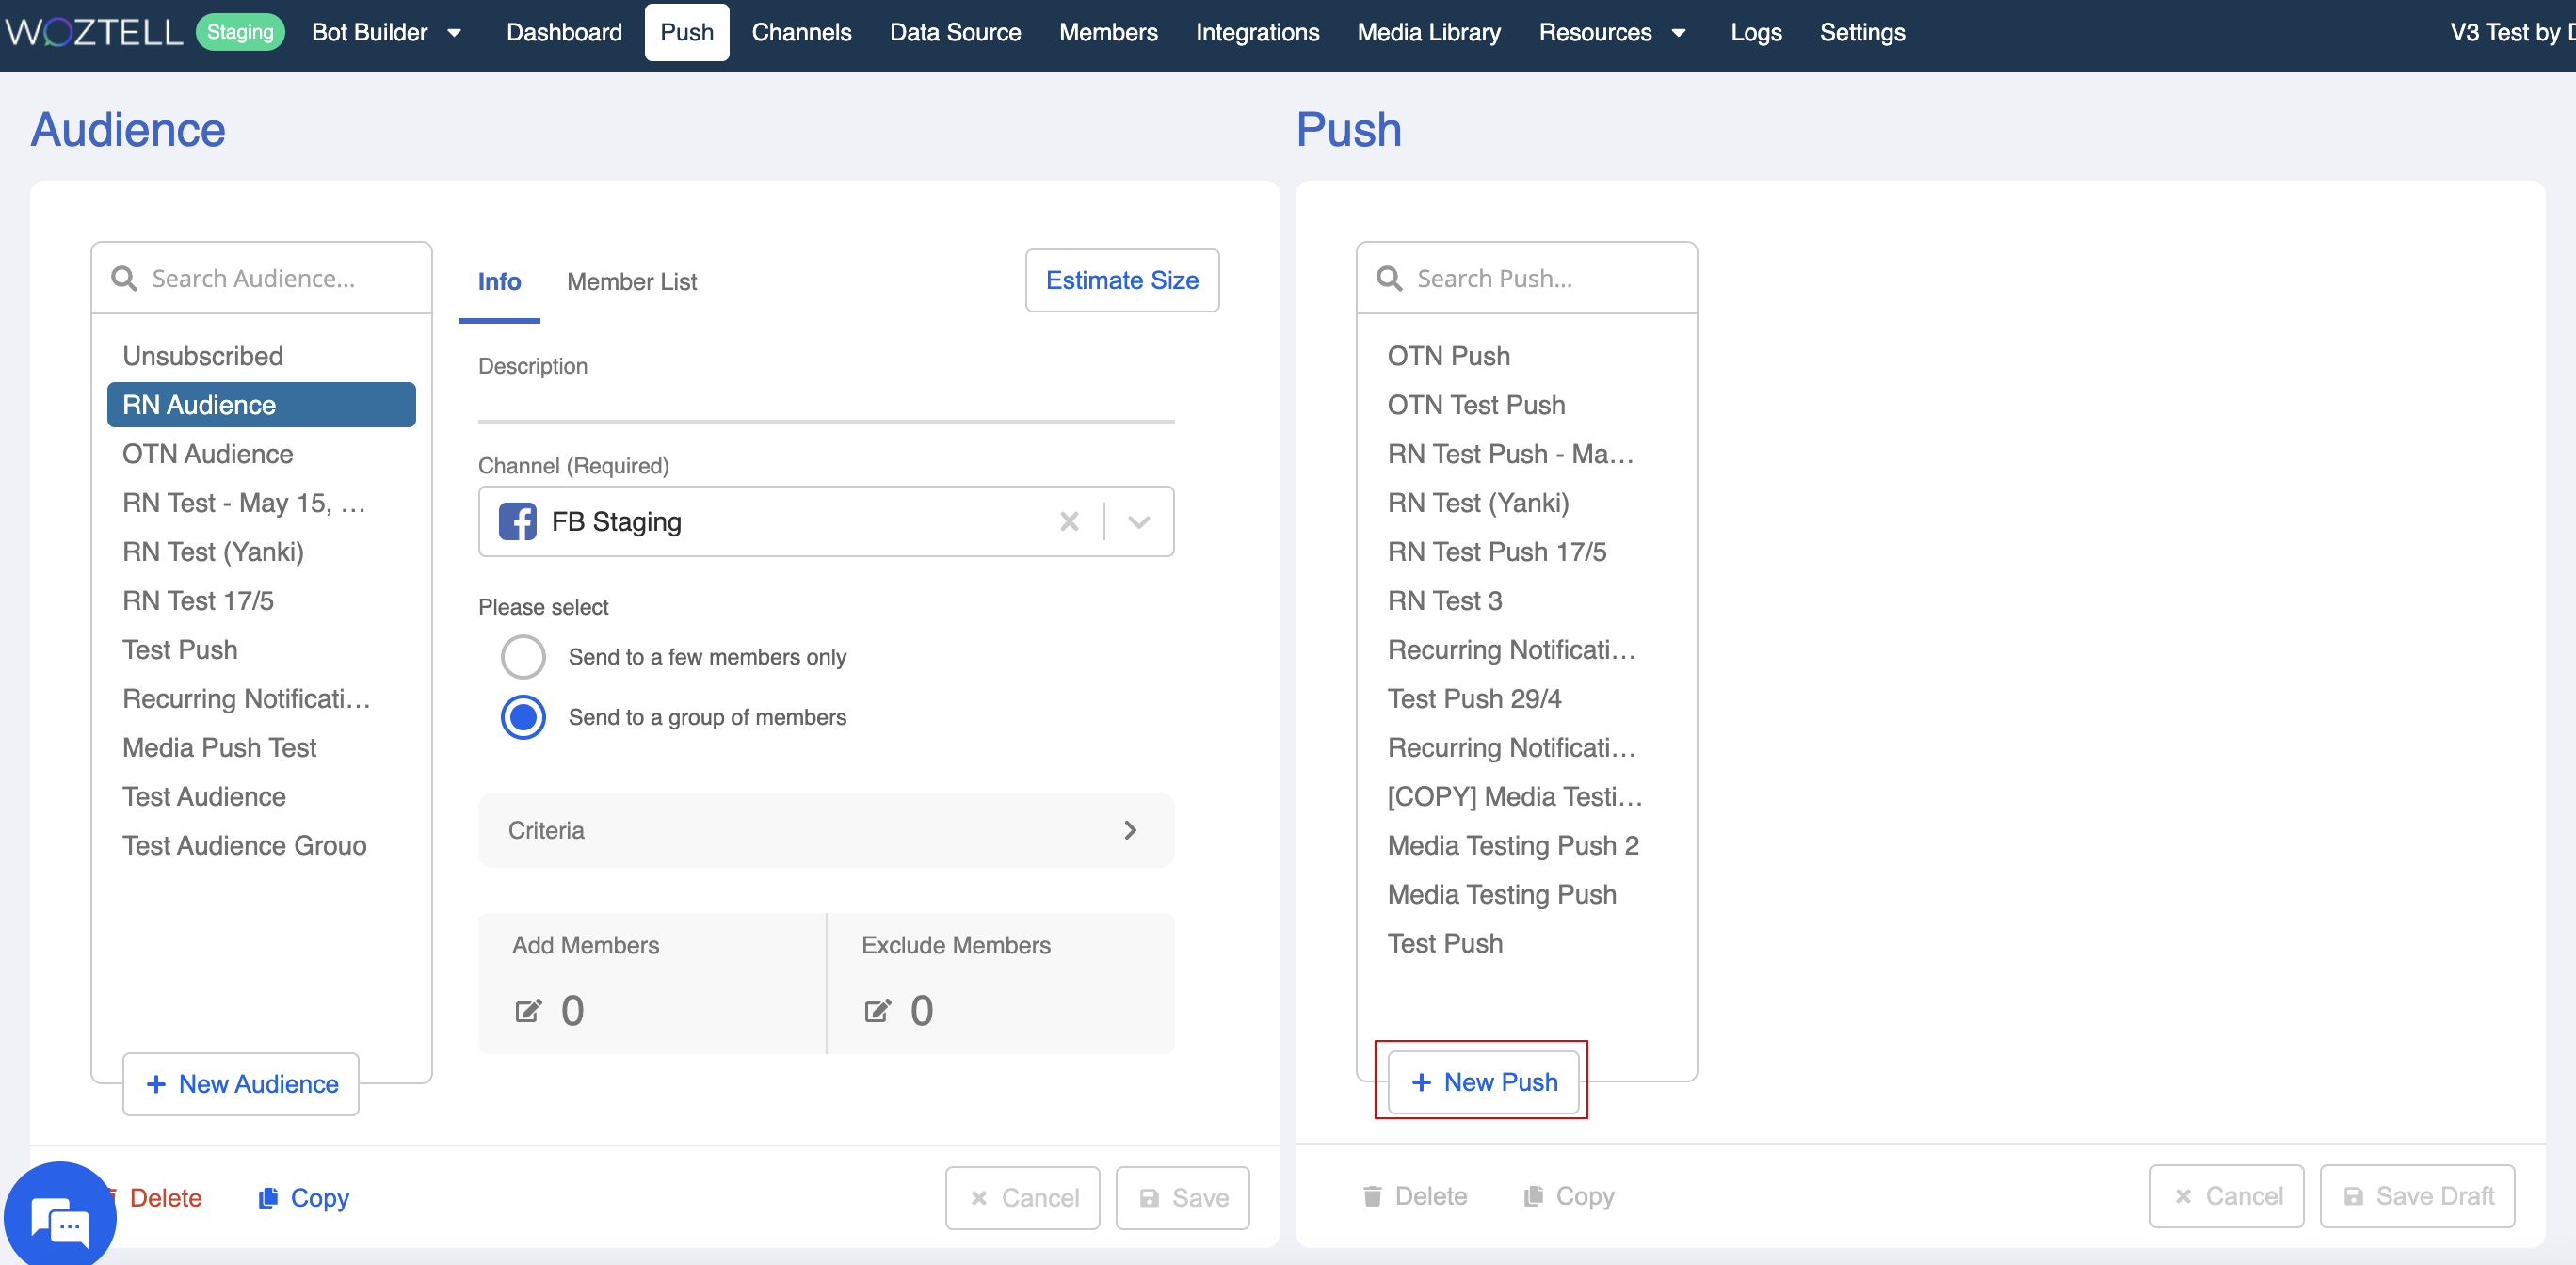
- Head to Push. Select "+ New Audience" to create a new audience group.
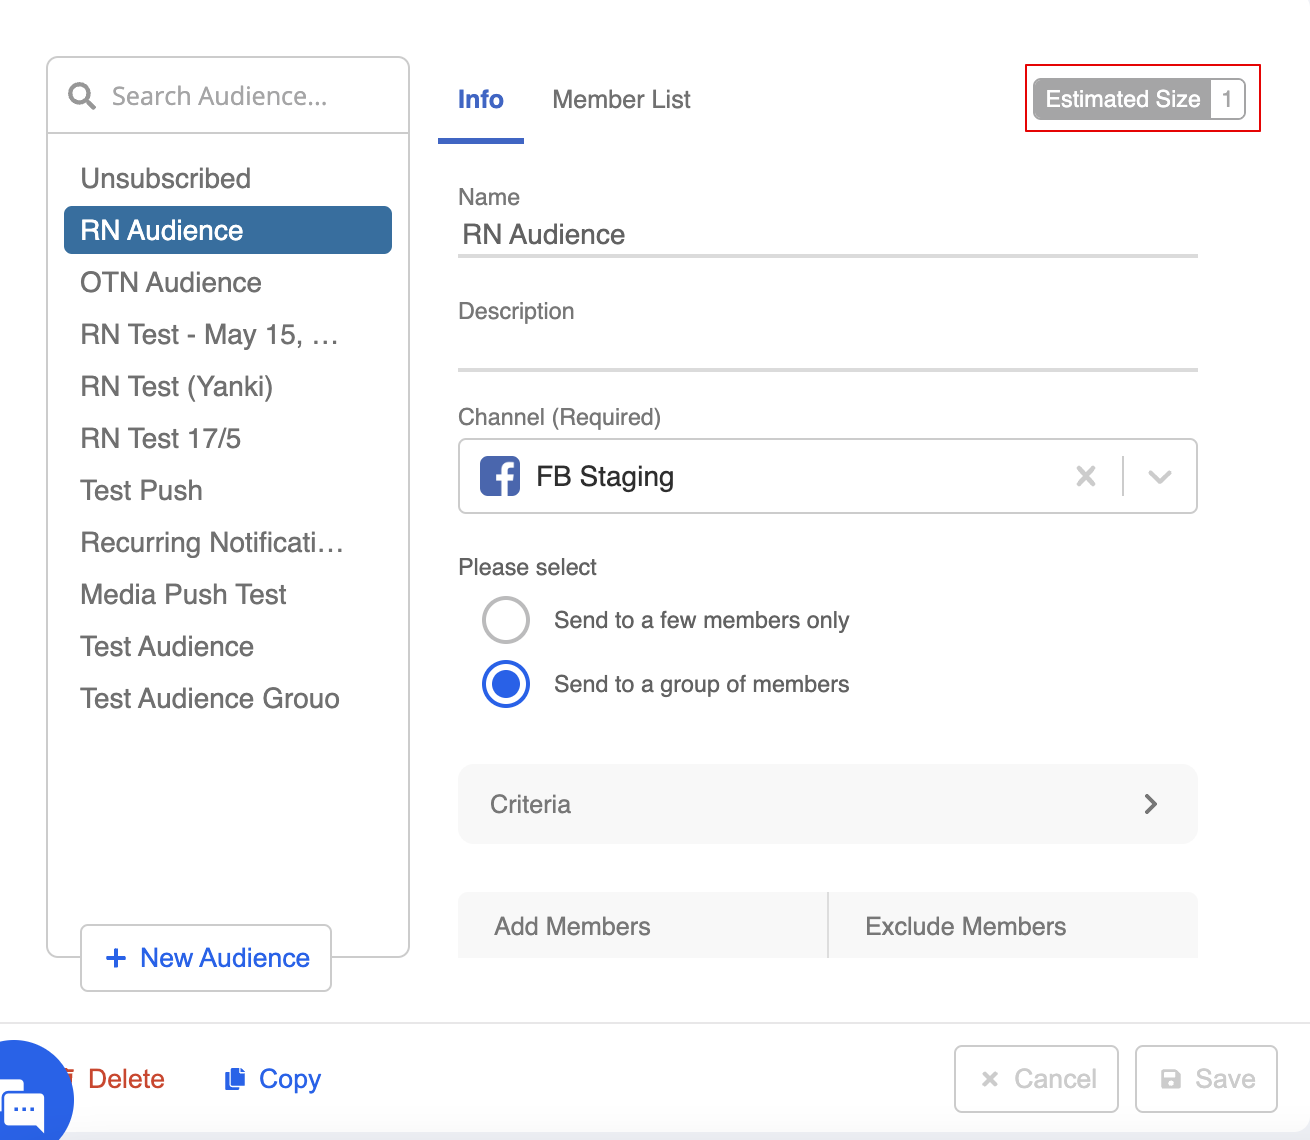
- Select the relevant Facebook channel, then select "Send to a group of members".
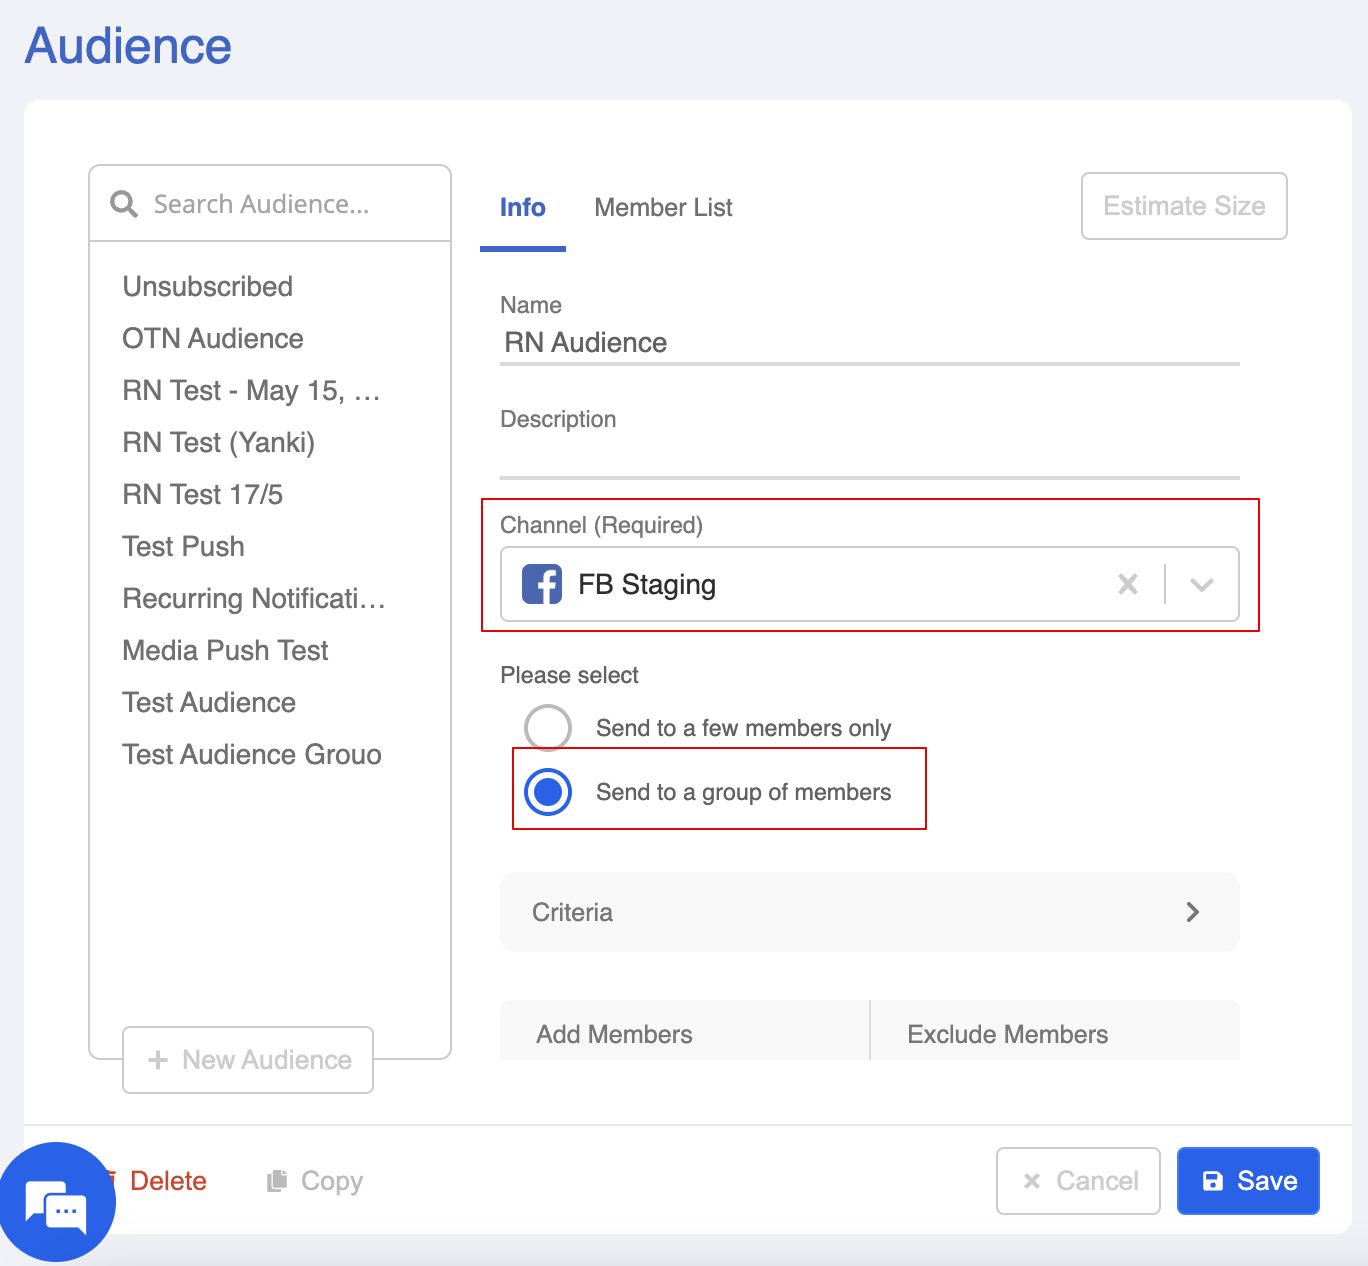
- Select "Criteria", you can filter out the RN members here.
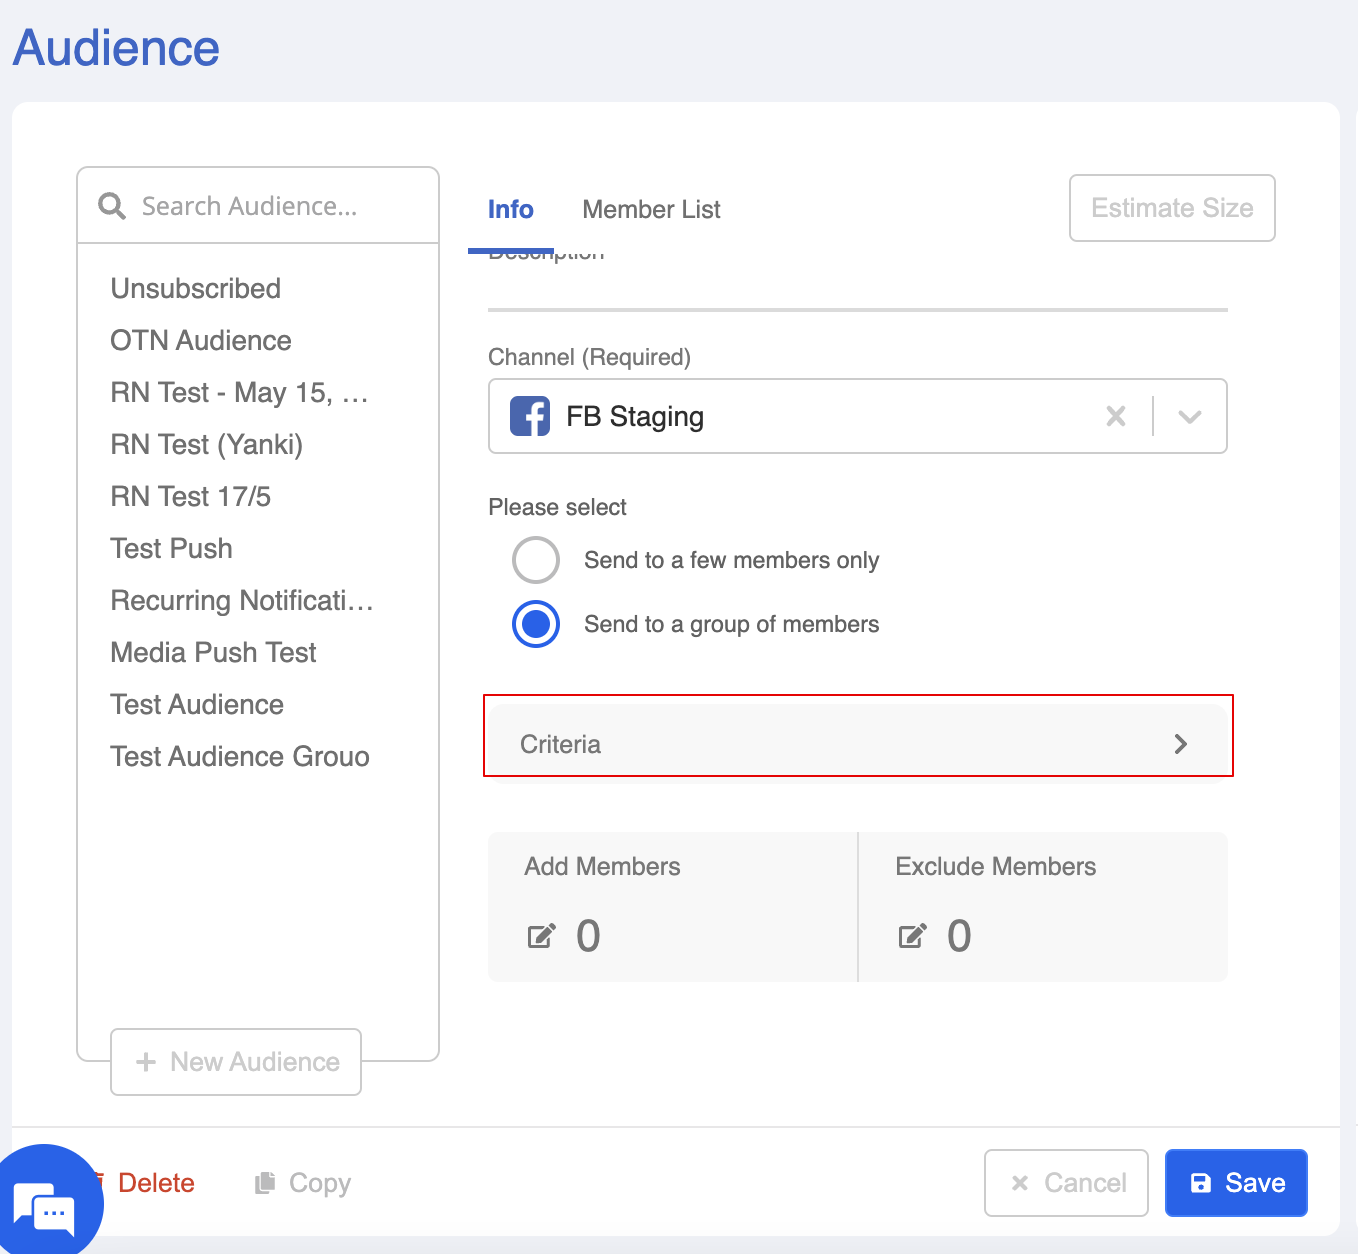
- Under Tag, select "In", and enter the "active" RN tag.
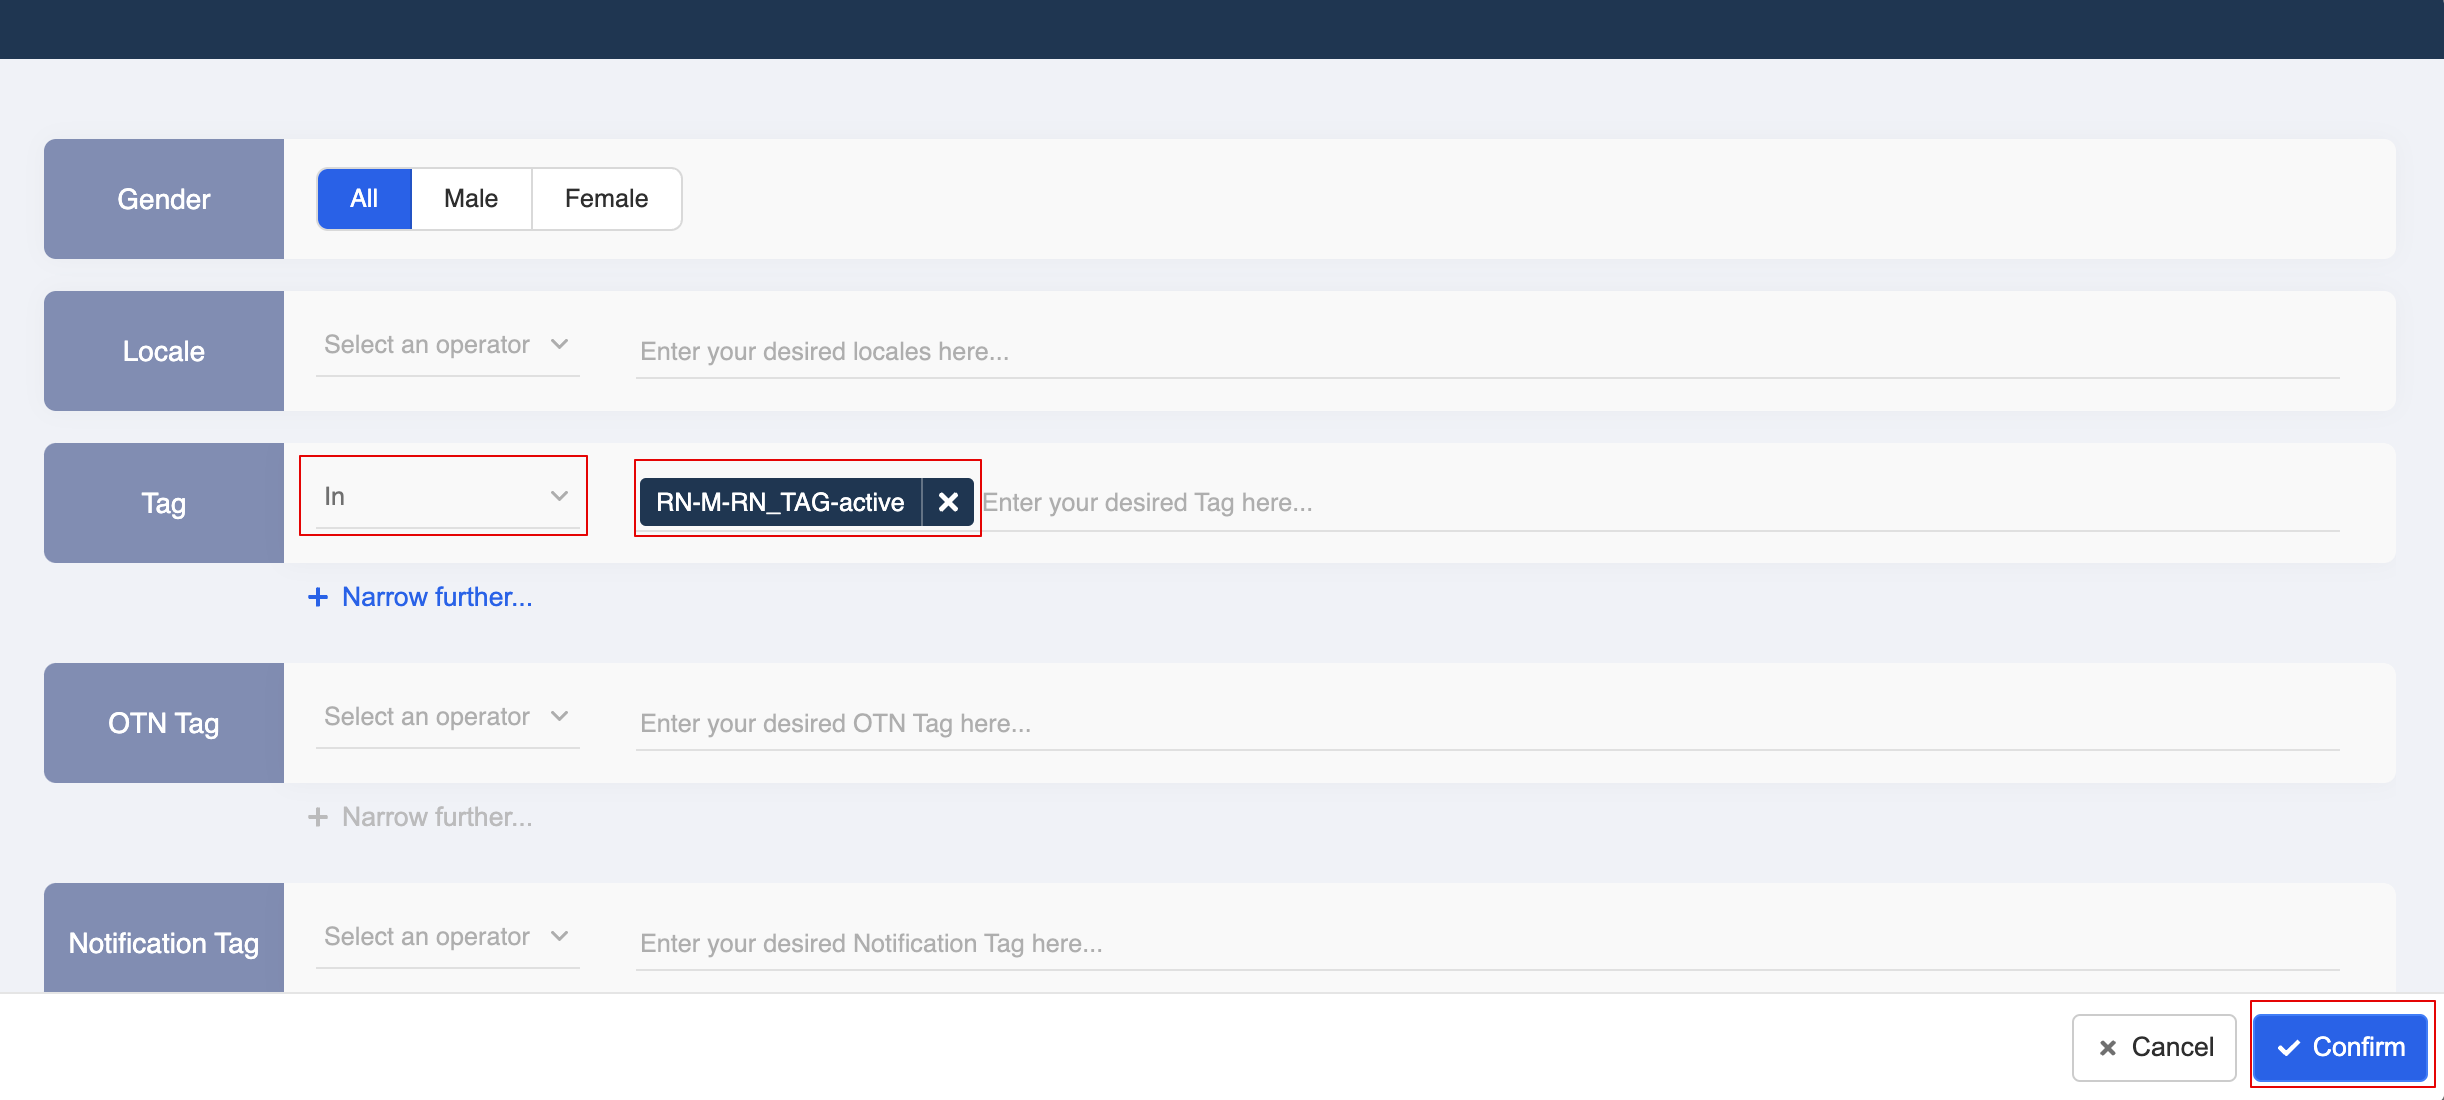
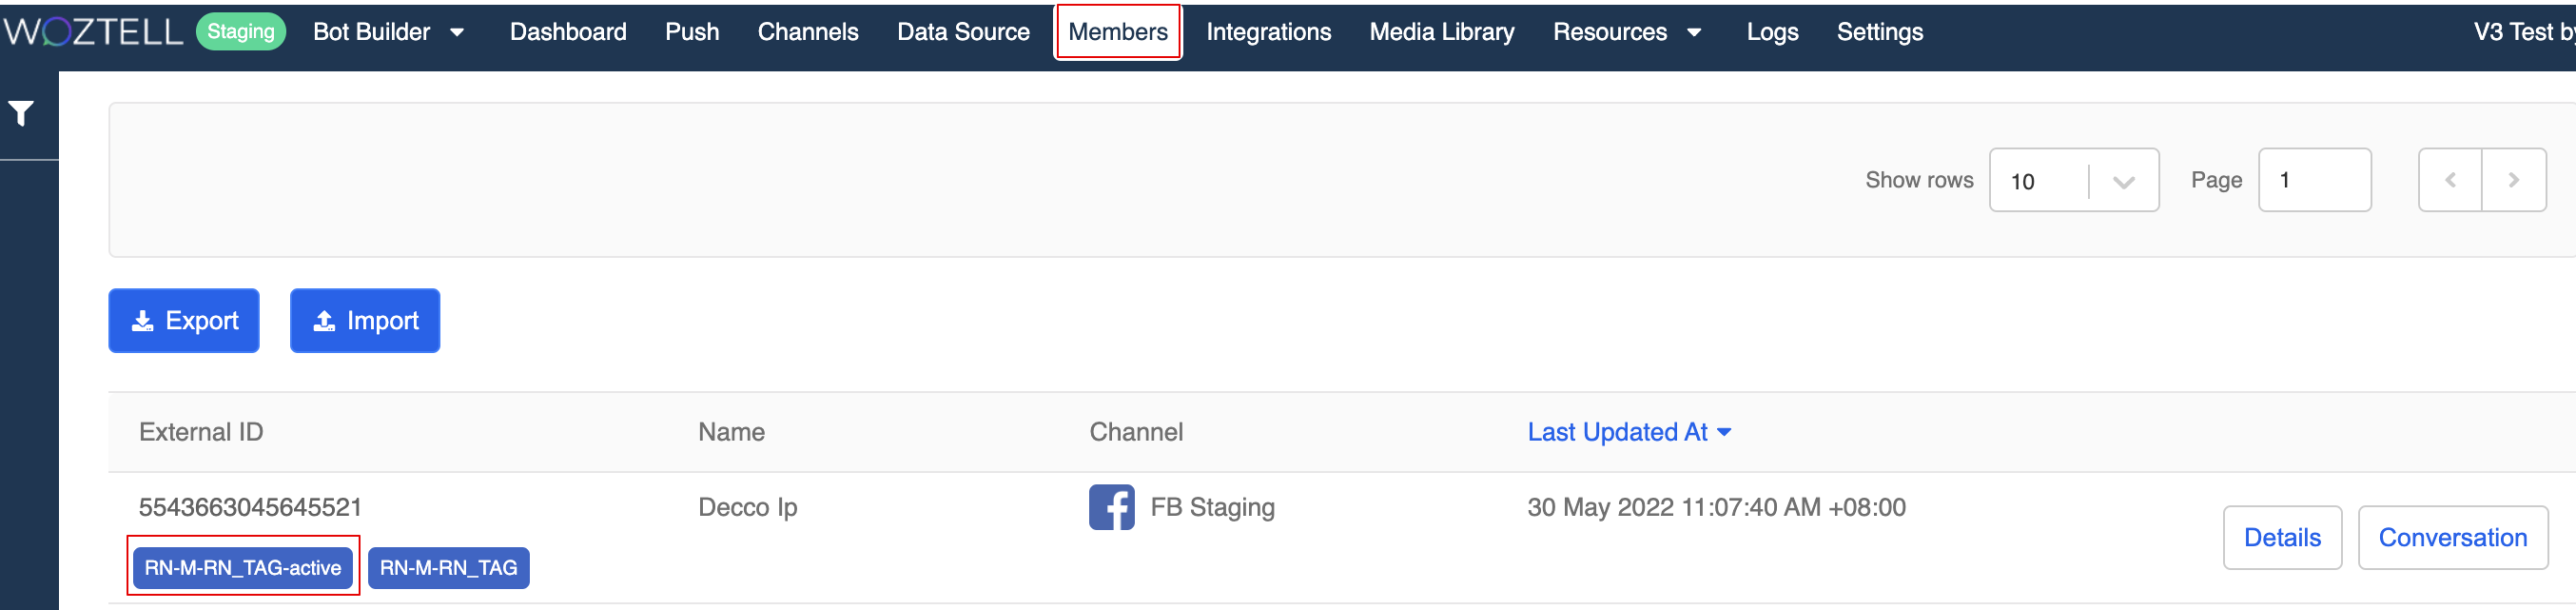
You can find the tags in members page as well. Users who have agreed to receive RN message will be labelled with 2 tags: RN-${frequency}-${rnToken.tag} and RN-${frequency}-${rnToken.tag}-active.
- Then, save the audience group.
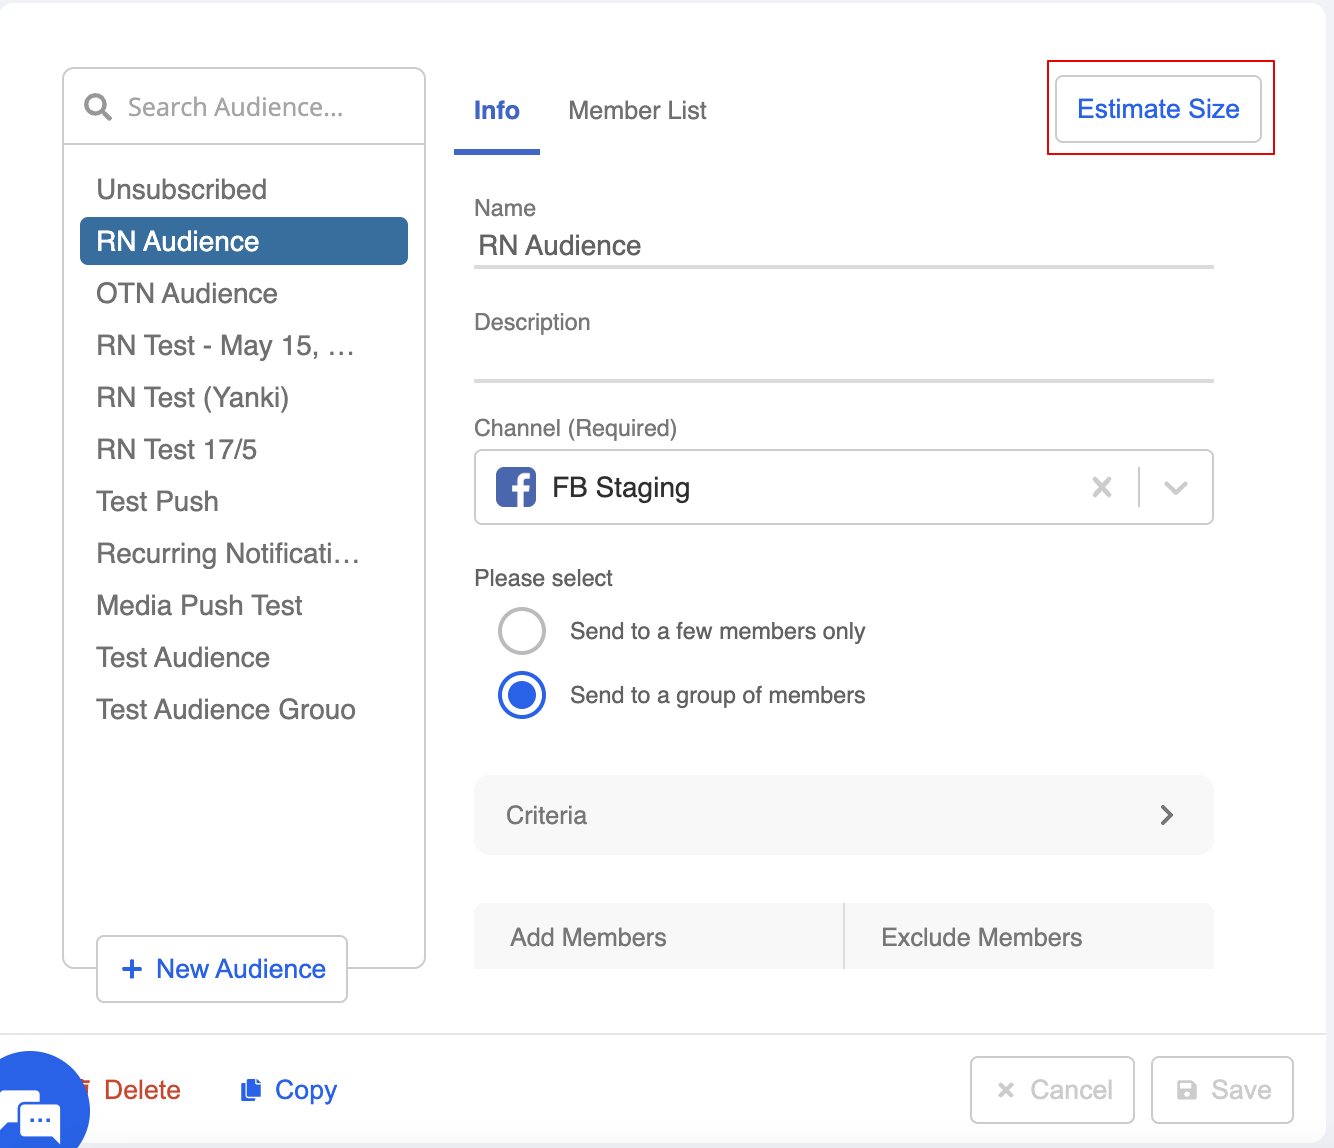
- You can click "Estimate Size" to view the audience count of this group. When the RN Tag is applied to the criteria, this audience count will grow when more members are added with this tag.
Send the RN Push
tip
Rate limit is applied to the RN request message. Businesses are allowed to send up to 10 opt-in requests per user in 7 days; and up to 5 opt-in requests per user in a single day.
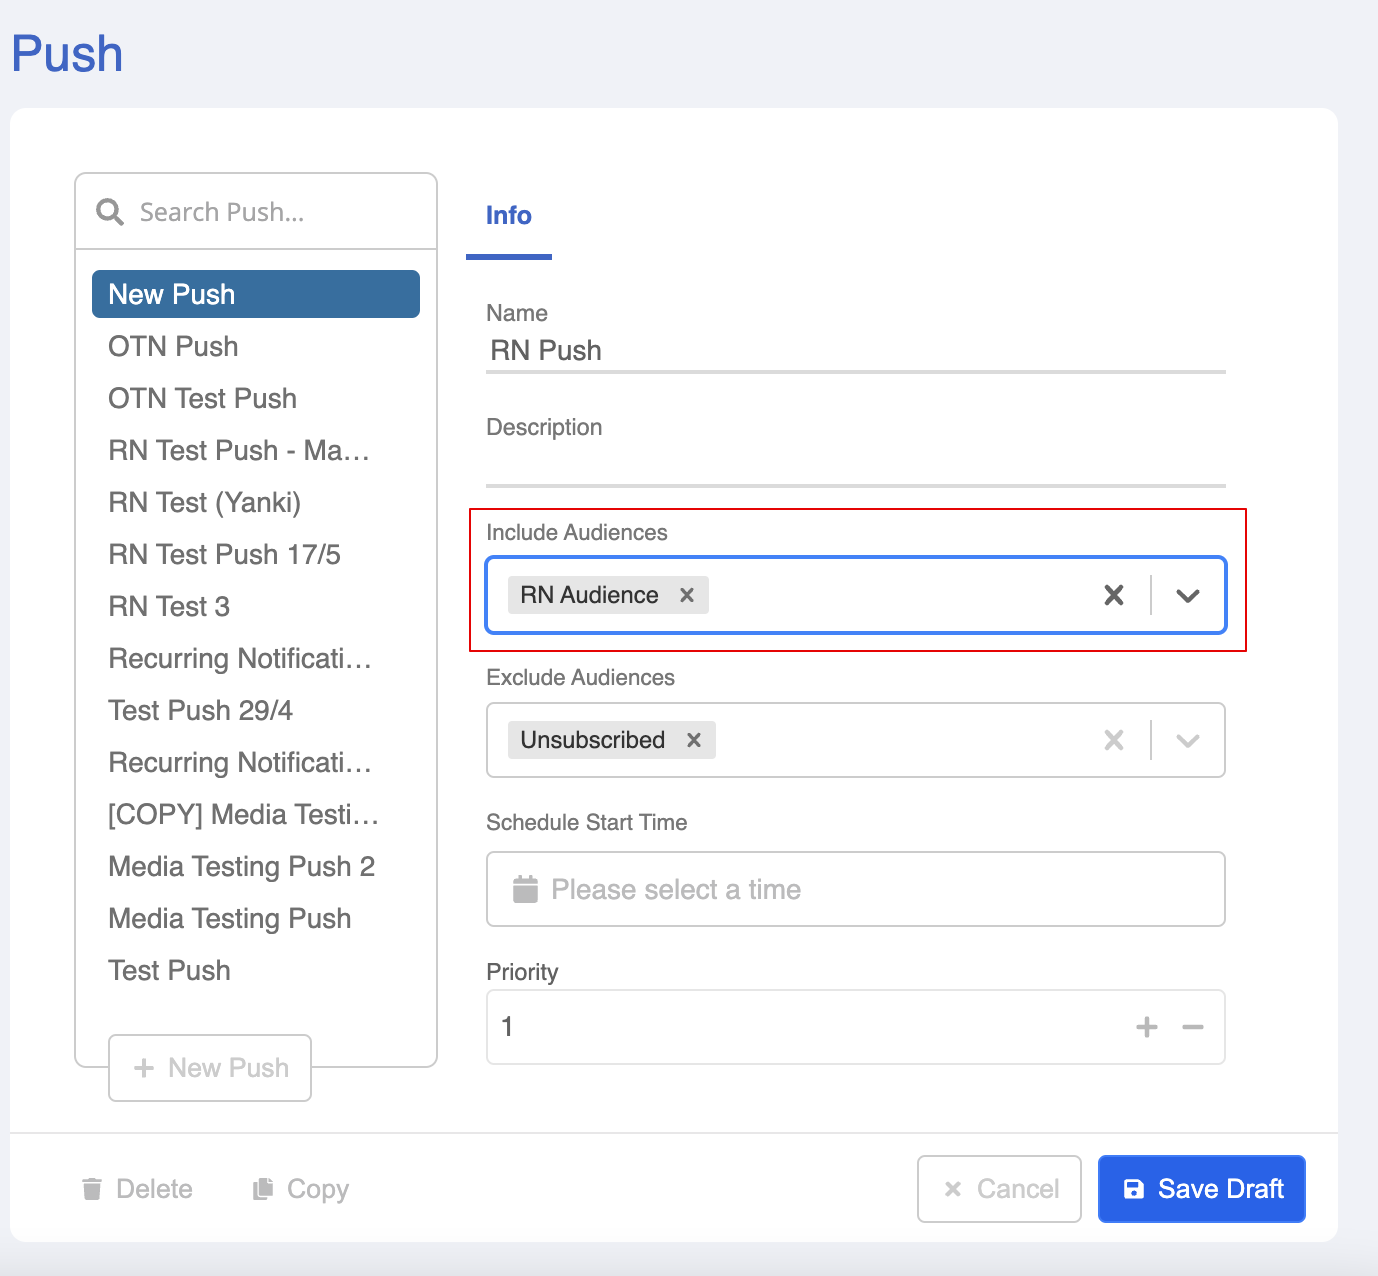
- At the right side of Push Panel, select "+ New Push" to create a new push.
- Select the audience group which you have just created.
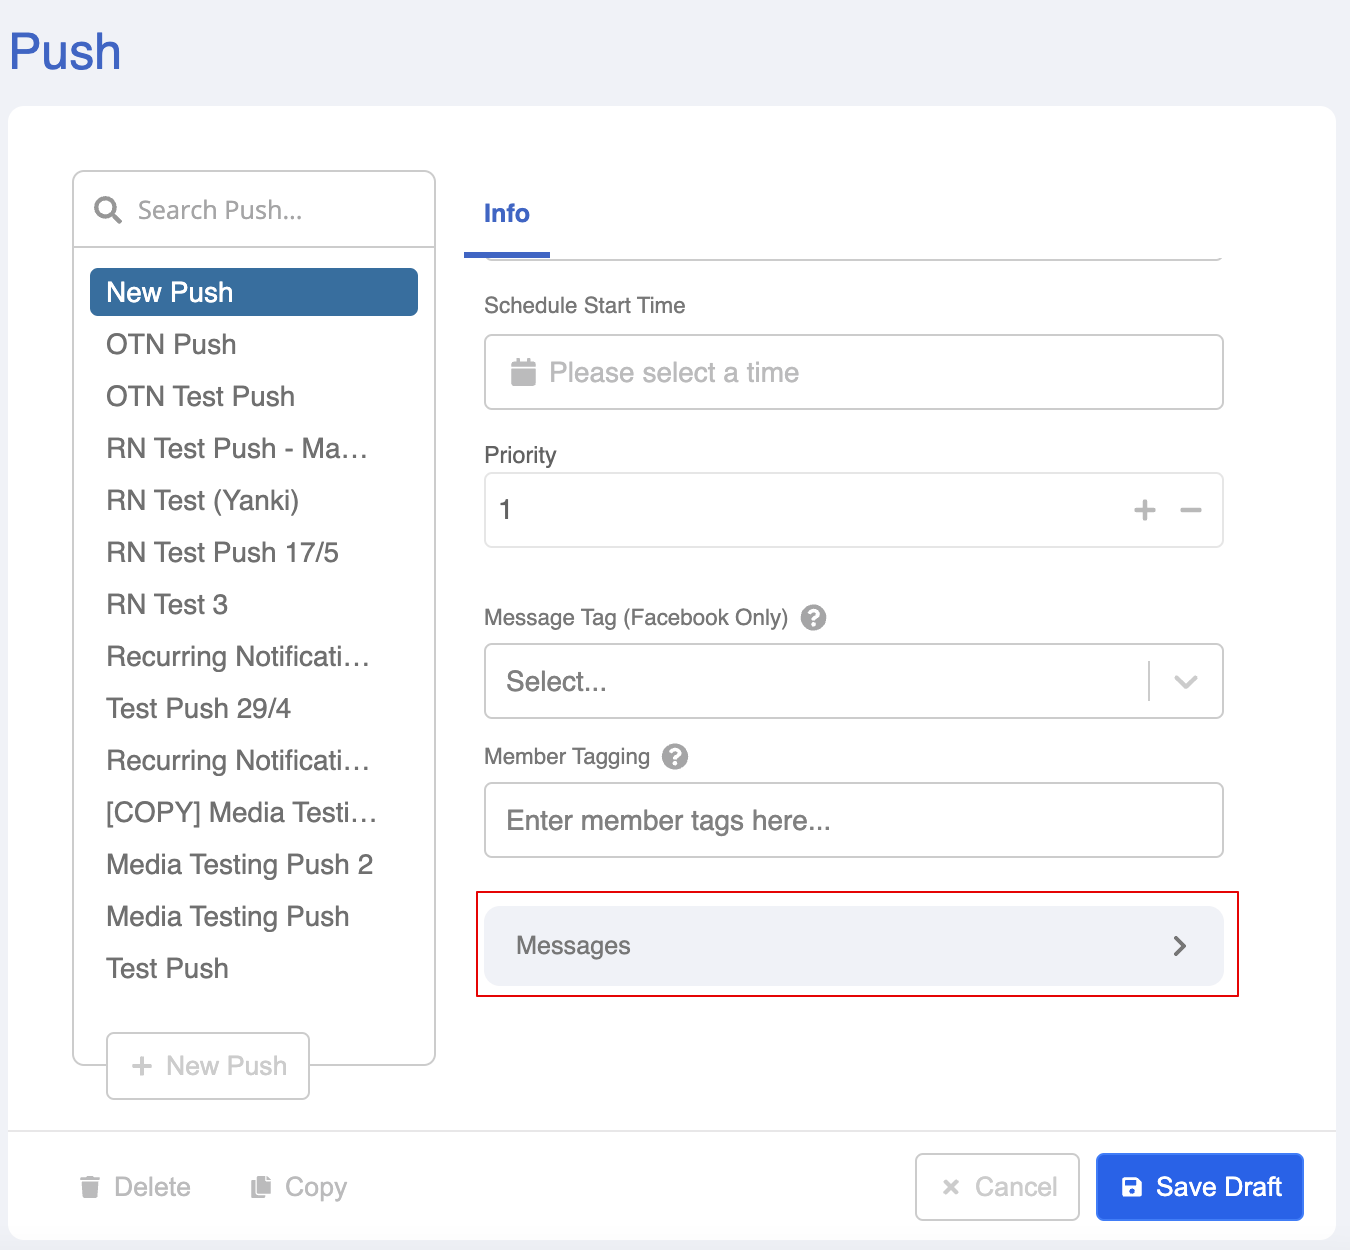
- Select "Messages" for creating the push message.
- In the response modal, open the platform tab and select "Facebook".
- Enter the text content for the push message. Then, expand the "Notification Tag" section.
- Select the corresponding Page ID and Recurring Notification Tag from the dropdown lists. For the RN Tag, please select the "active" tag.
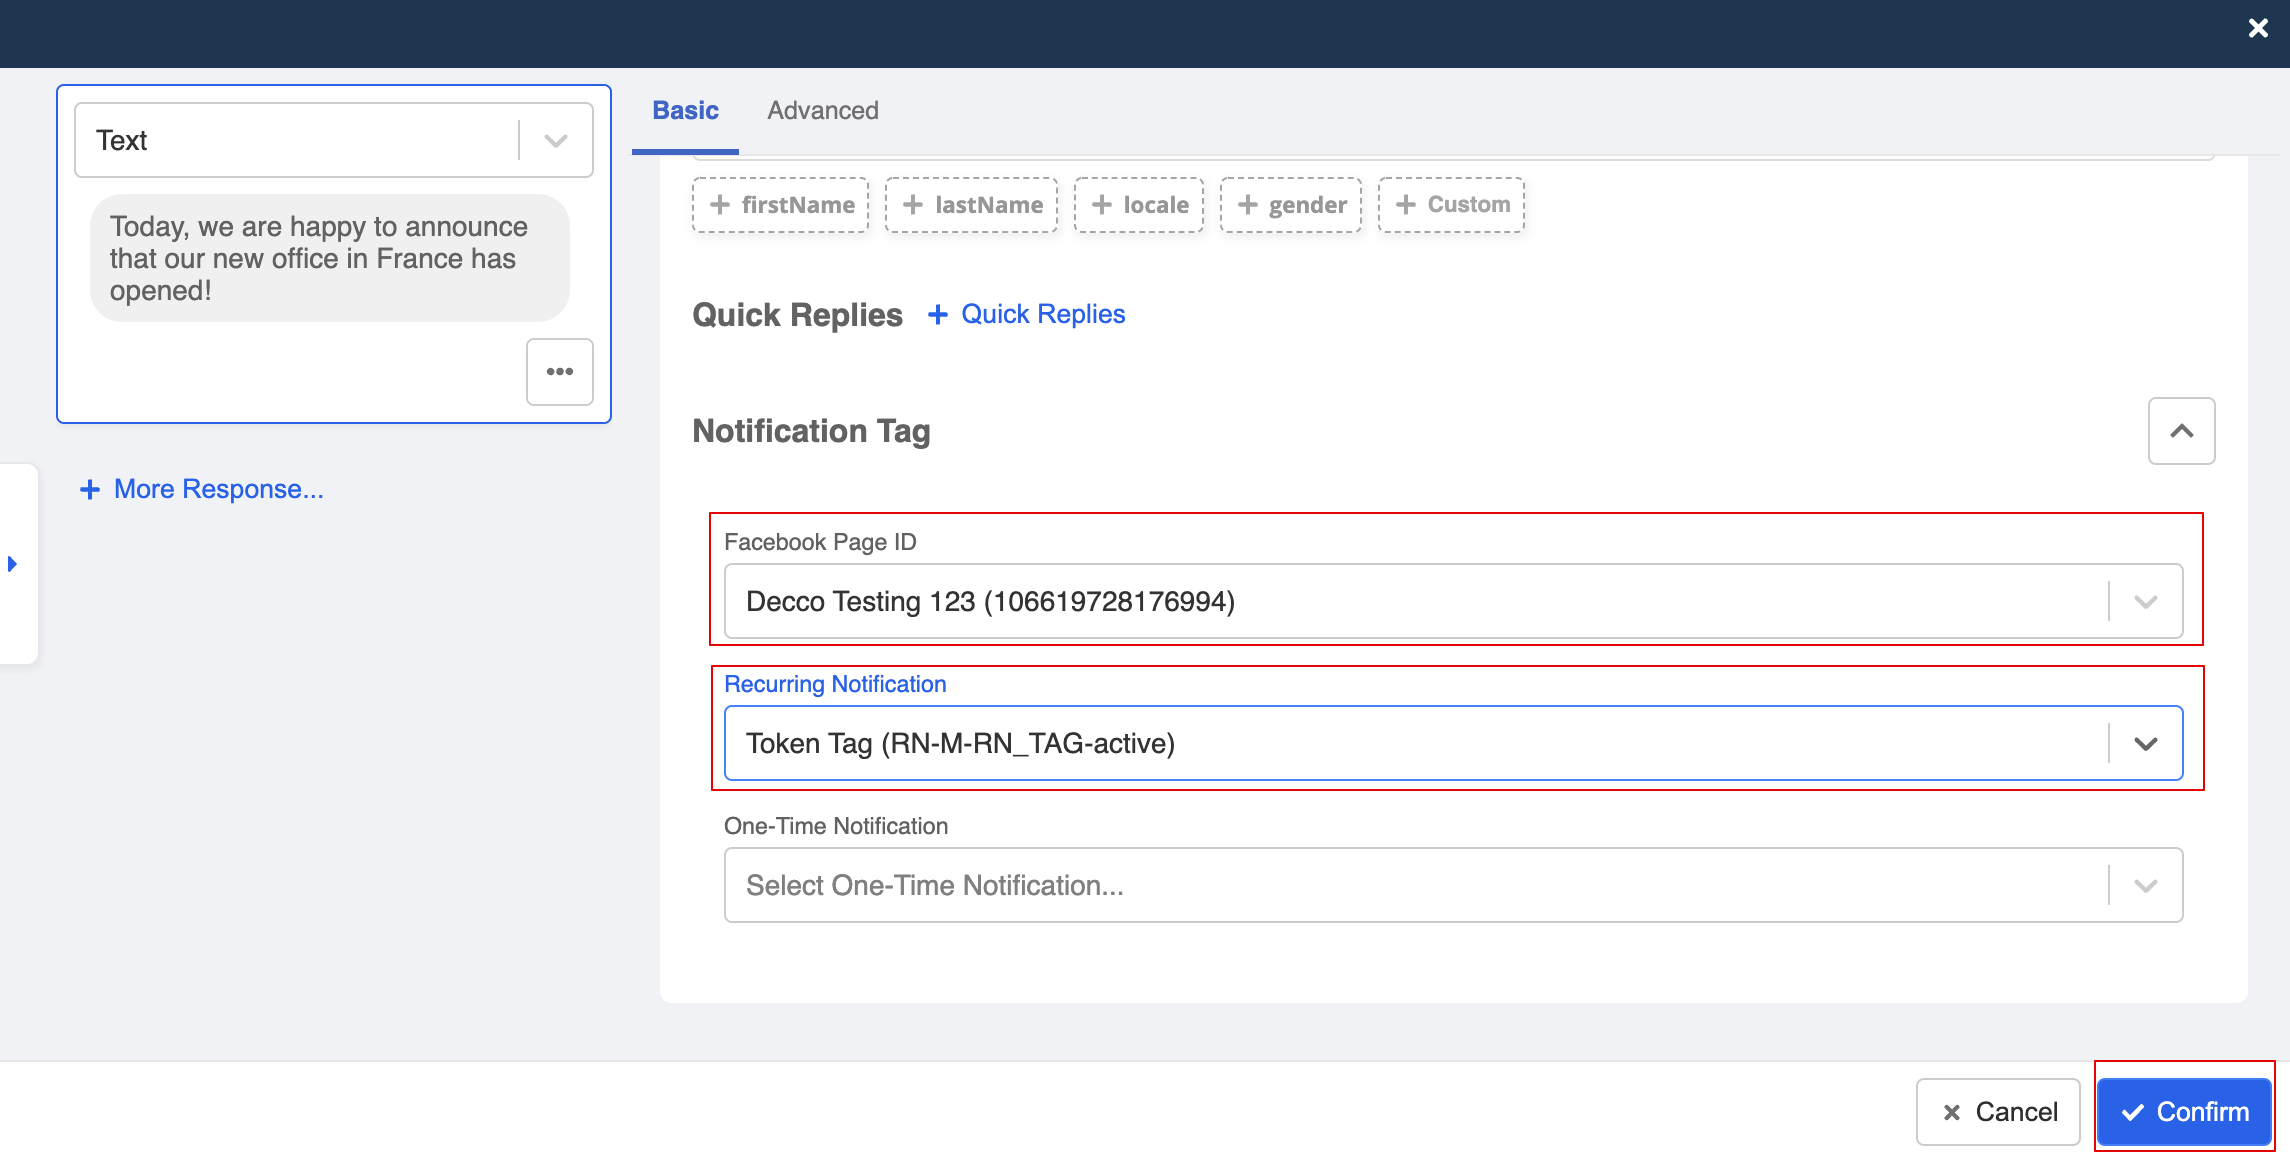
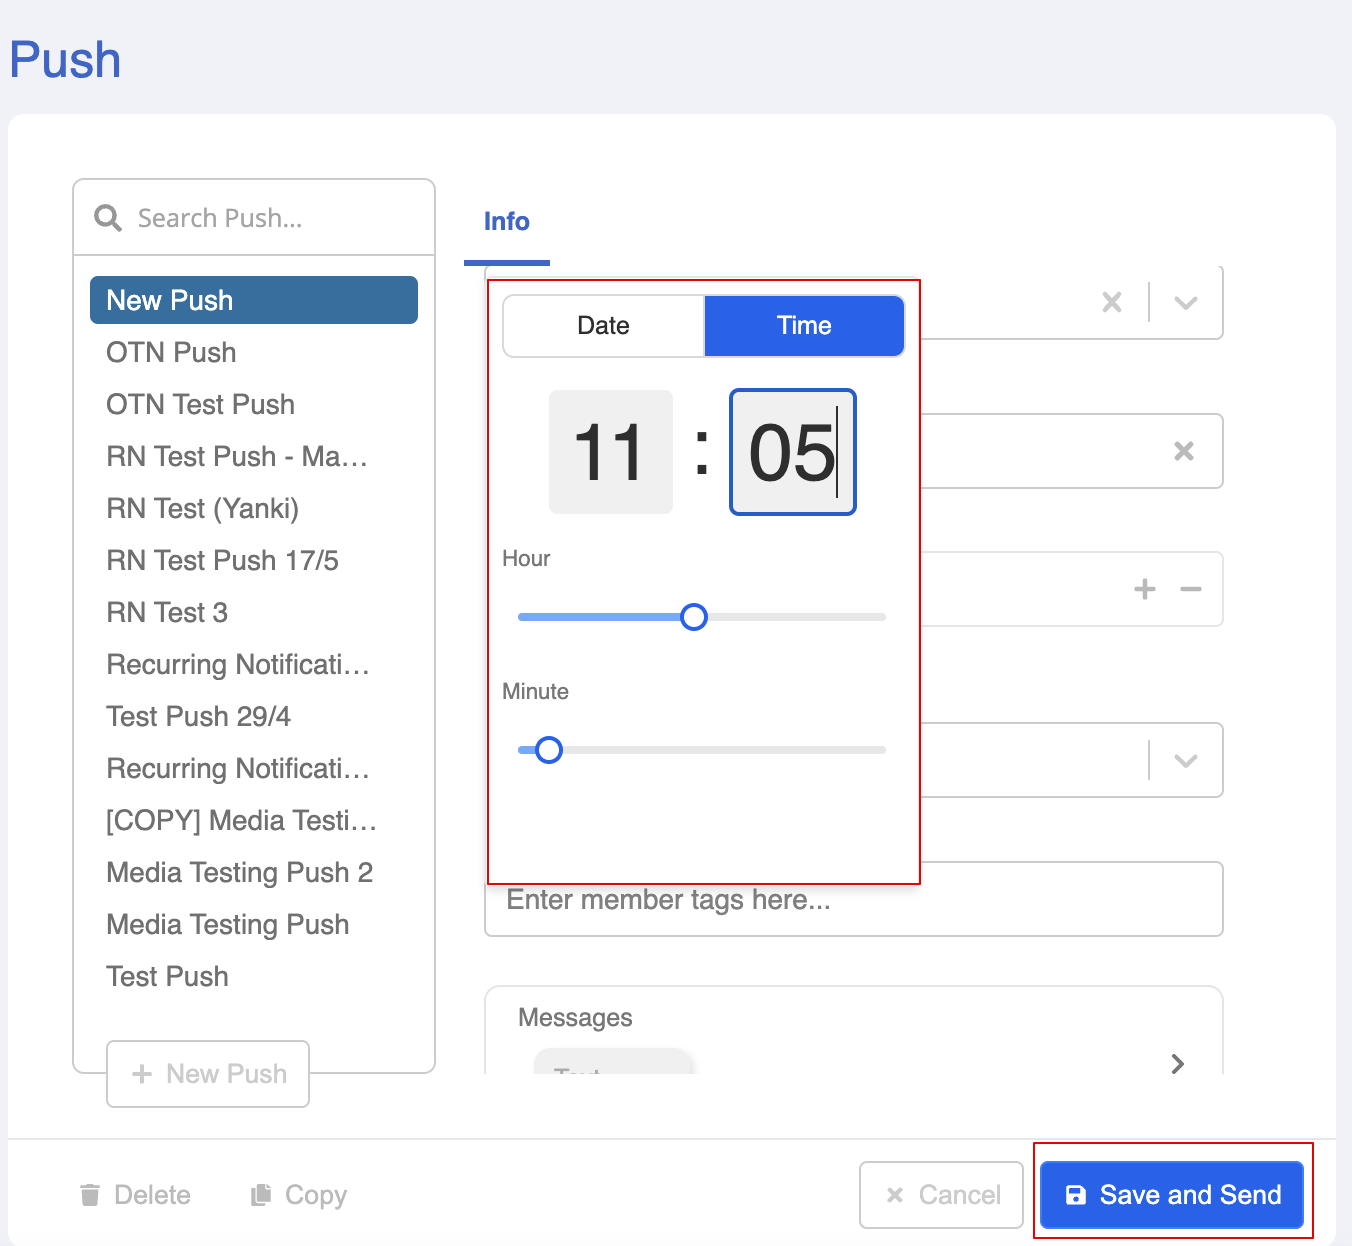
- Schedule a date and time for sending the push message. Finally, click "Save and Send" to send the push.
Limitations
To ensure the quality of user experience, businesses are advised not to send duplicate opt-in request messages to users.
In addition, rate limit is applied to the RN opt-in request. Businesses are allowed to send up to 10 opt-in requests per user in 7 a day period; and up to 5 opt-in requests per user in a single day. The rate limit might be lowered if the business has violated Community Standards within the last 90 days.
For more details about the limitations of RN, please refer to here.