Member Unsubscribe Flow
Introduction
Users who have interacted with your chatbot are considered as members/subscribers. Their information and conversation history will be stored in the "Members" page in WOZTELL. However, not all the users are happy with receiving updates and notifications from your chatbot.
In this section, you will learn how to apply a Member Unsubscribe Flow to your chatbot and allow users to unsubscribe by themselves. As a result, the unsubscribed members will be automatically excluded from the audience while sending push messages in Push Panel.
Reminder
Unsubscribed members can no longer receive push and agenda messages. Although they can still interact with the chatbot, some of the WOZTELL Inbox functions might be affected.
Expected Outcome
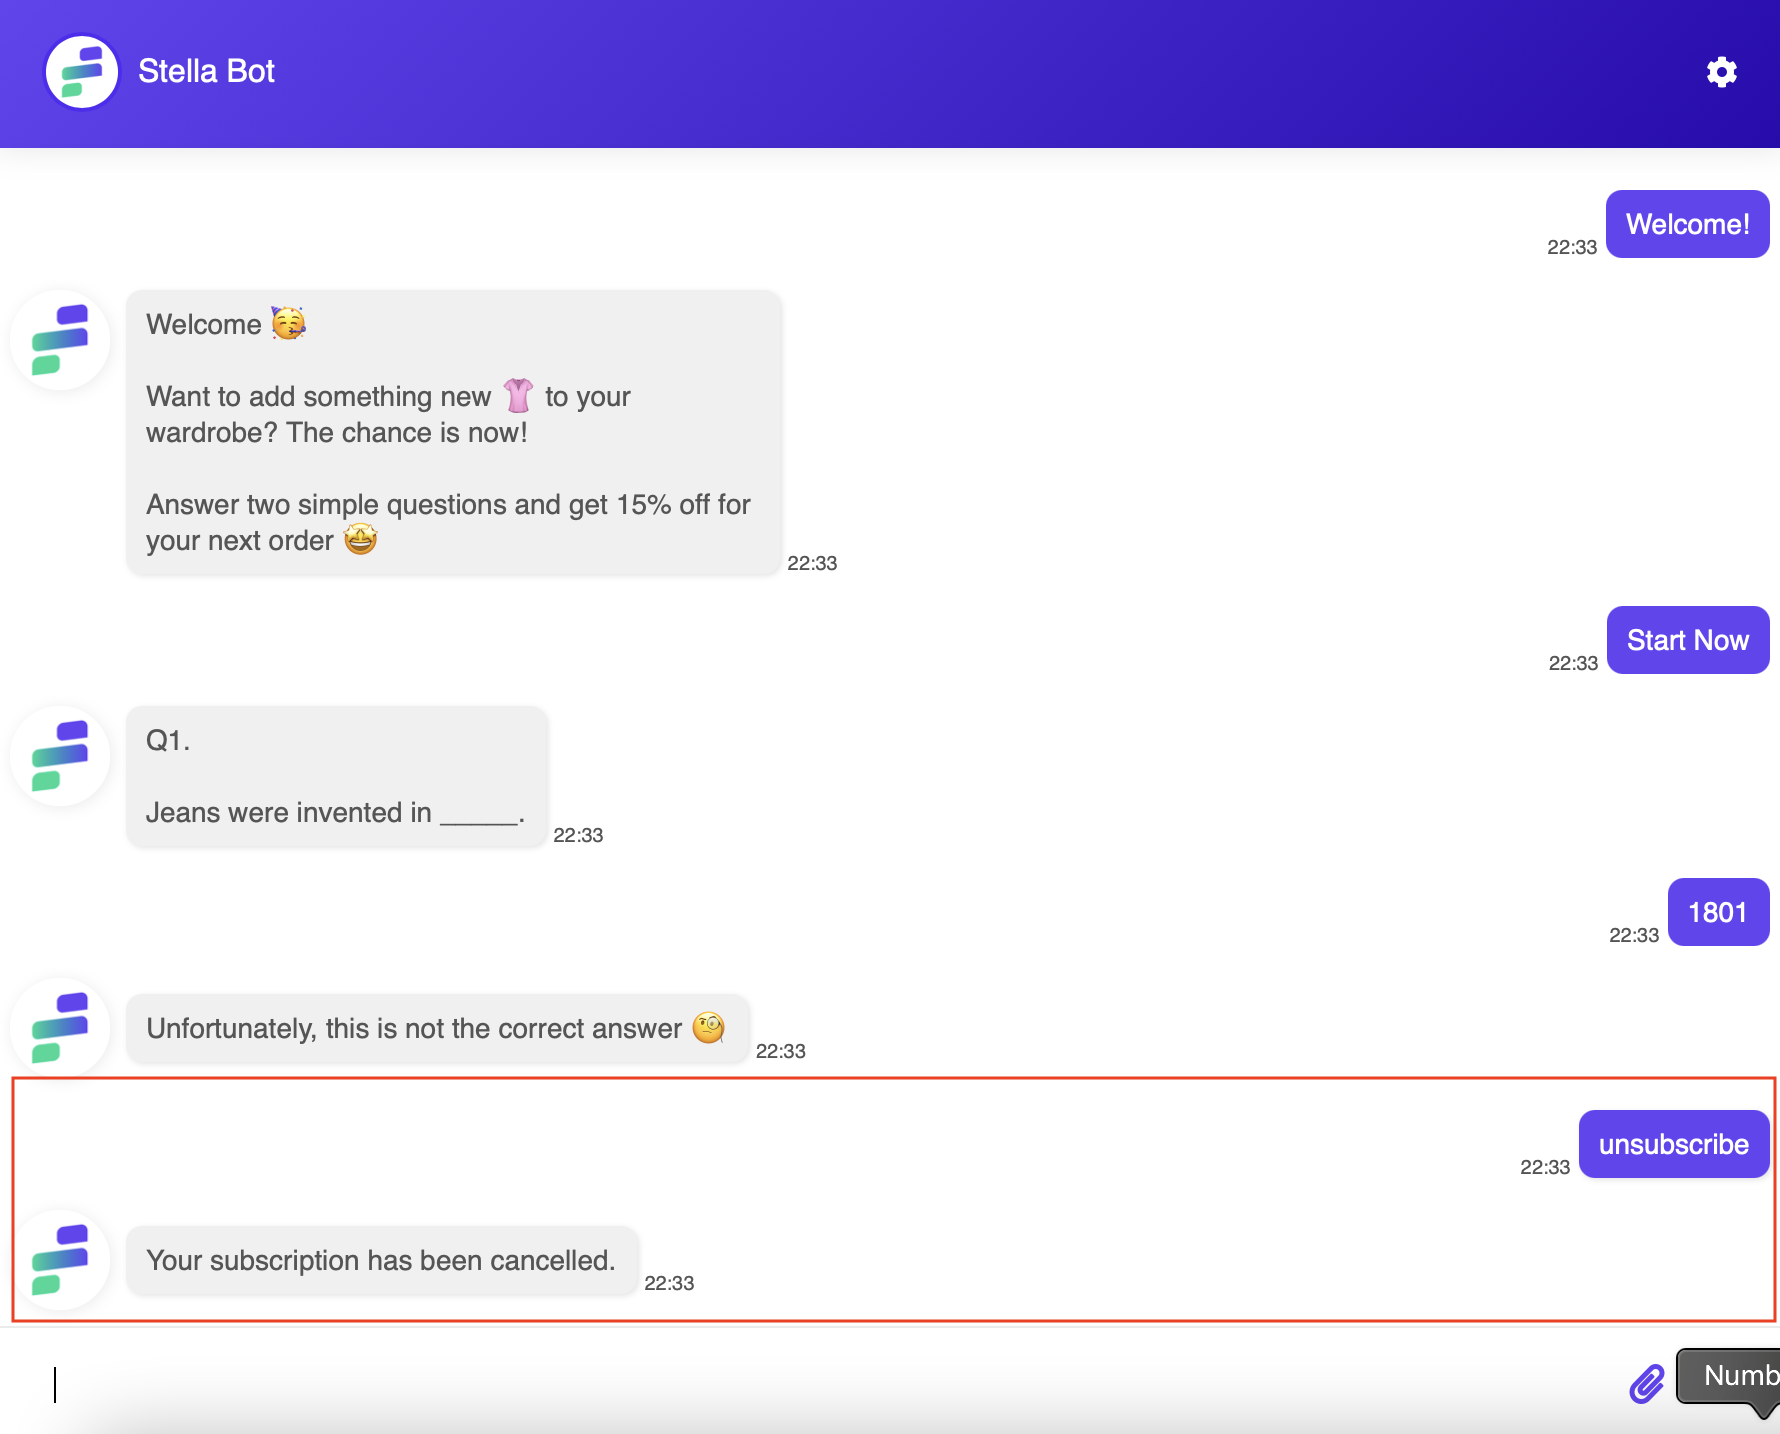
Sample Chatbot Structure
Create a Chatbot & Node
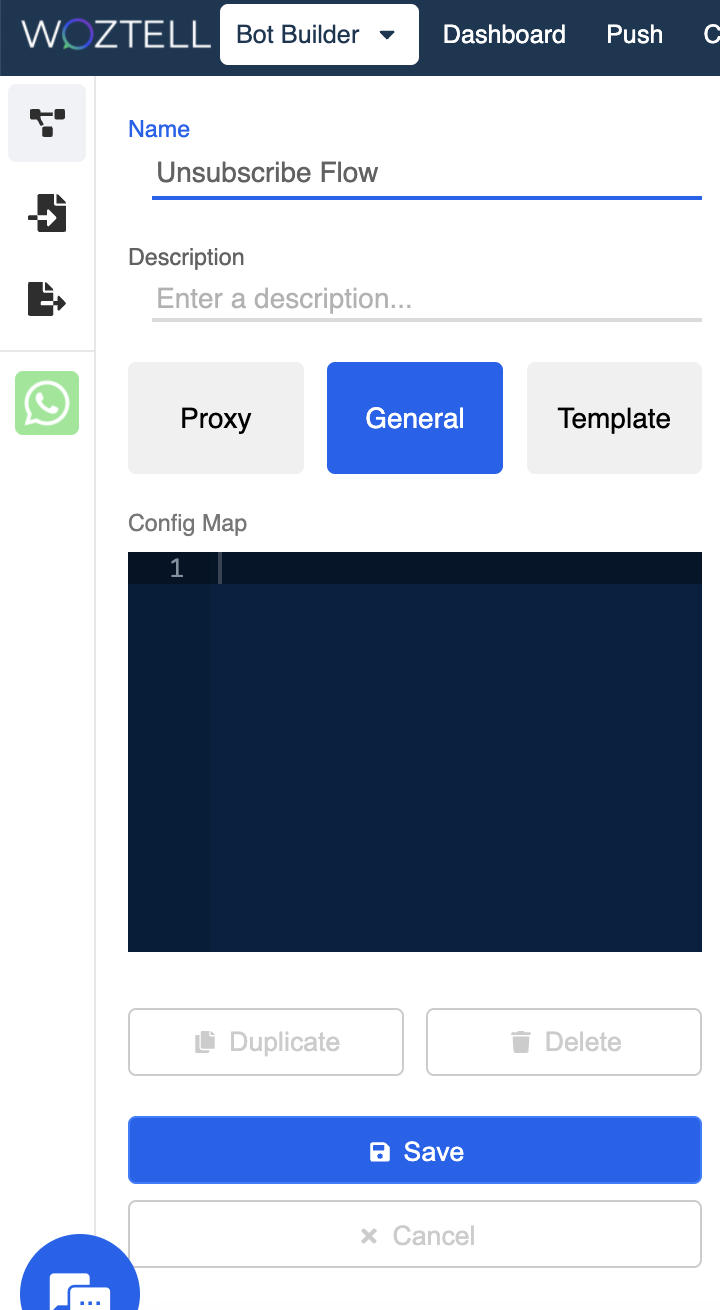
Head to "Bot Builder" in WOZTELL
Create a chatbot and name it as "Unsubscribe Flow".
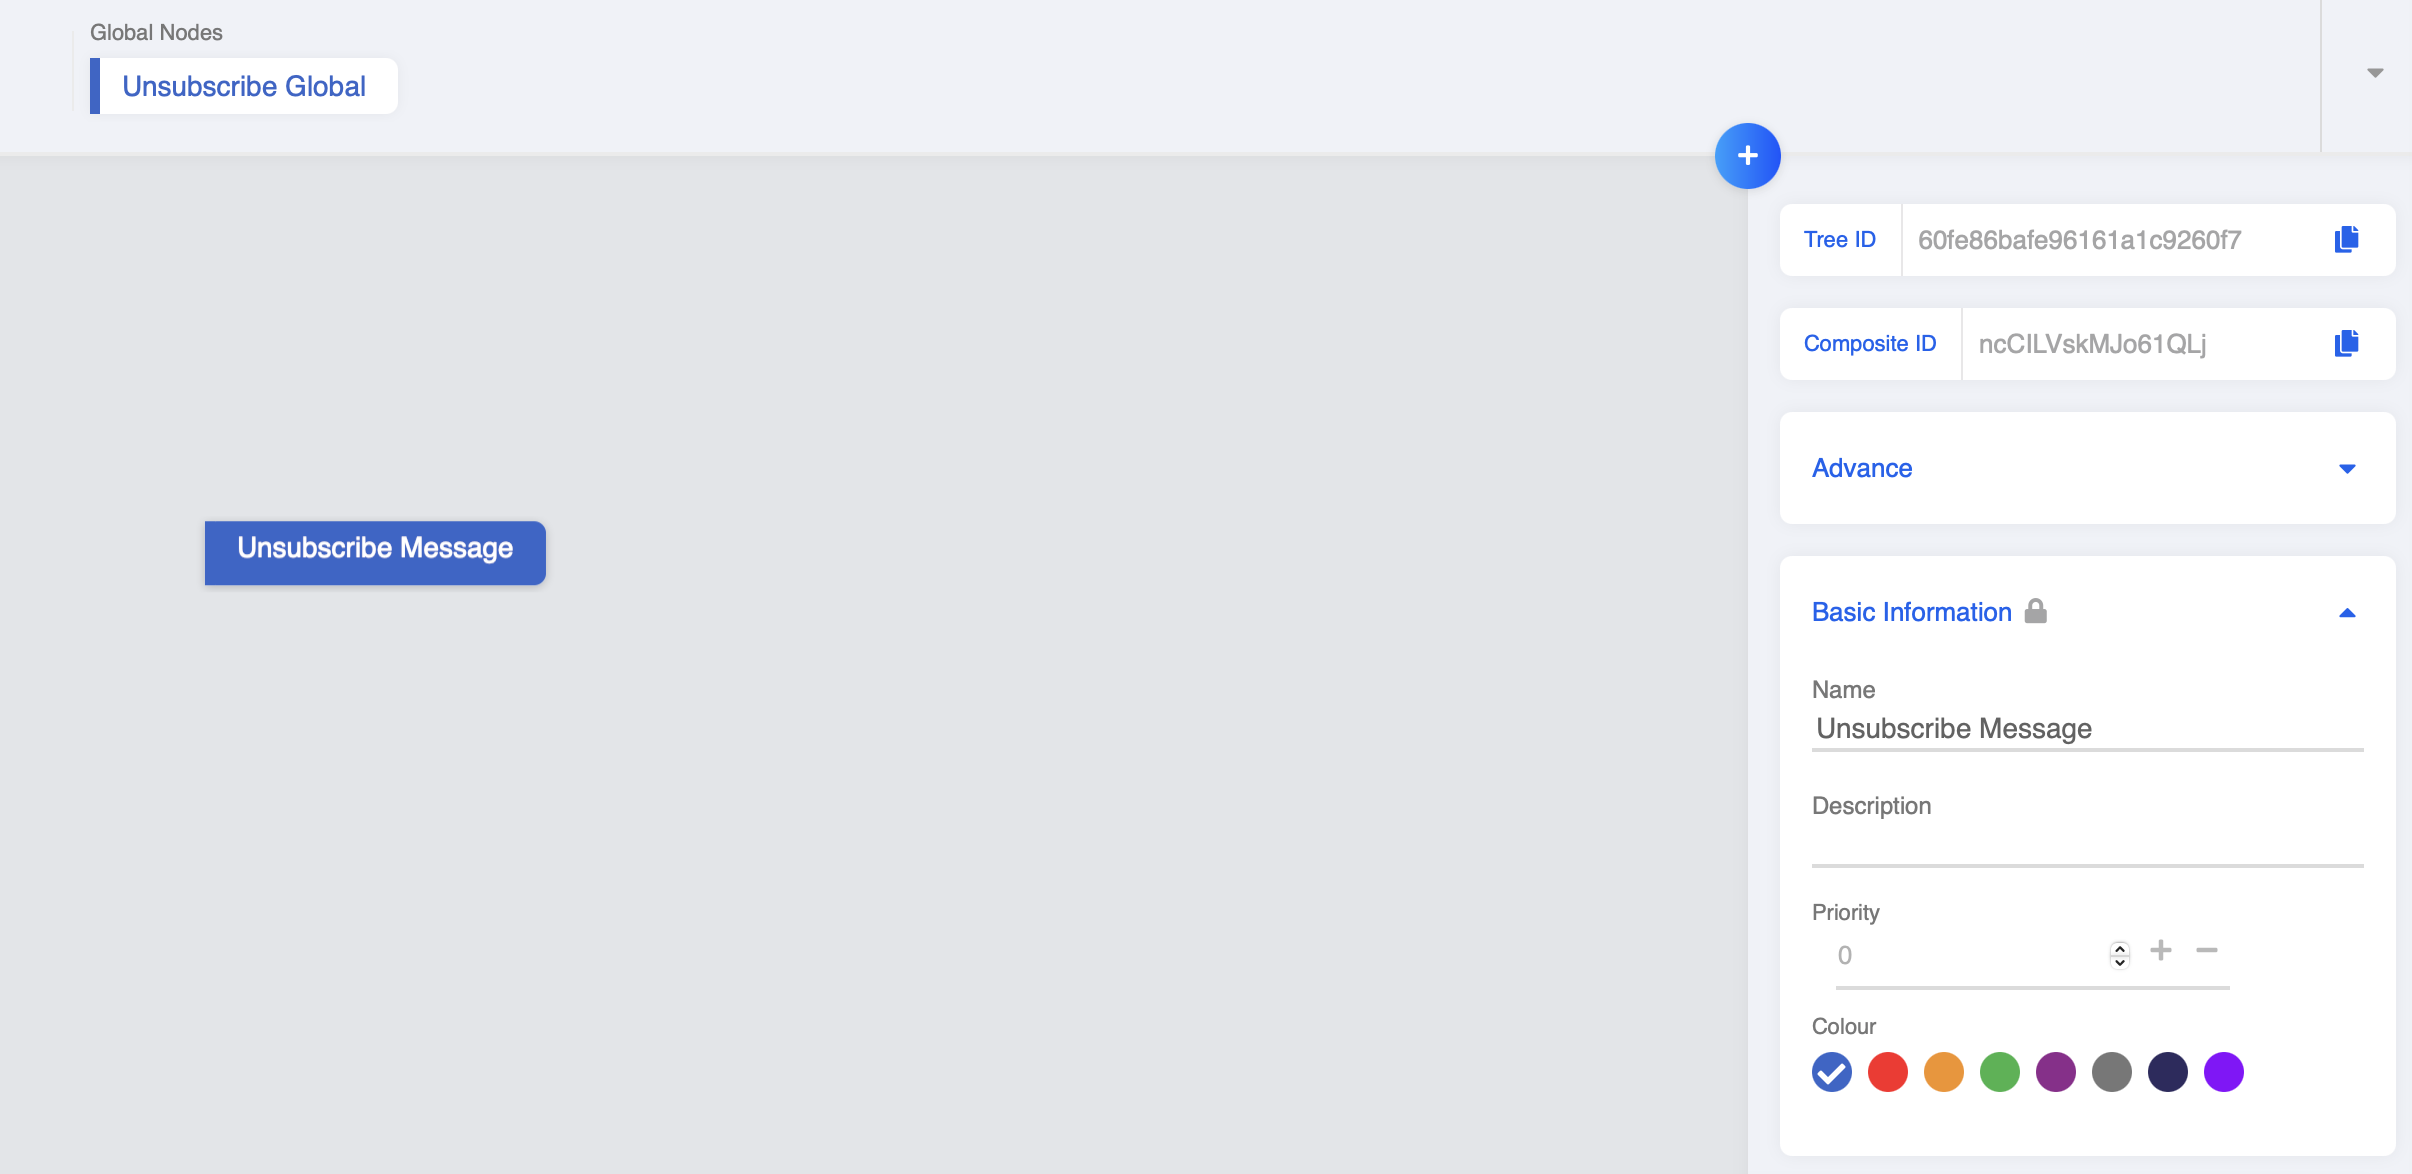
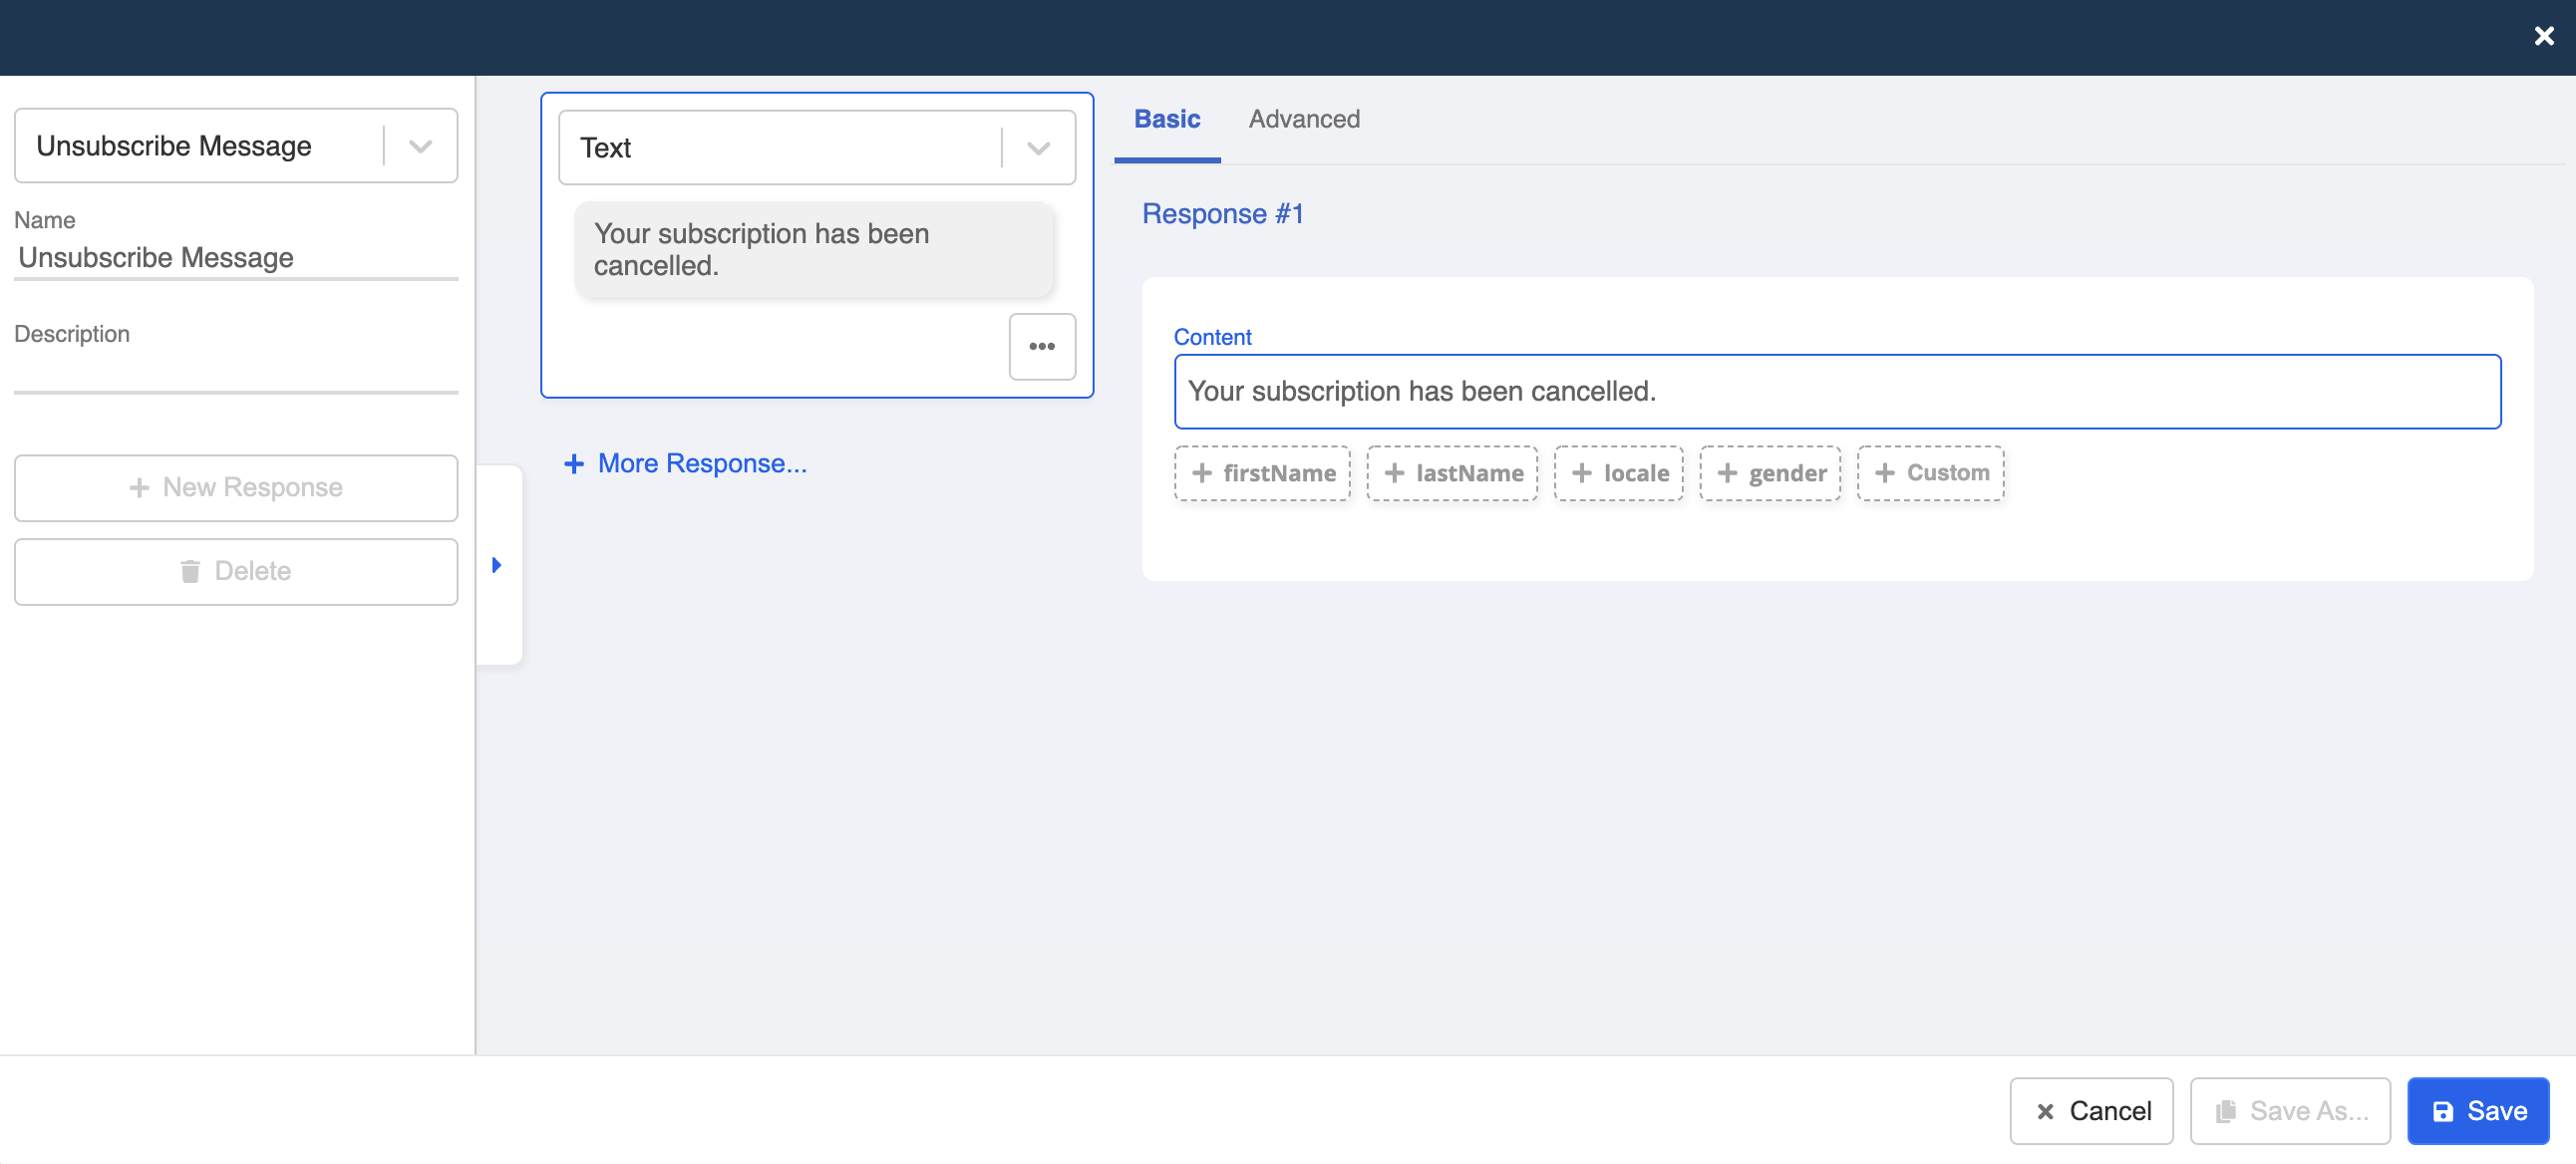
- Create a chatbot node and name it as "Unsubscribe Message".
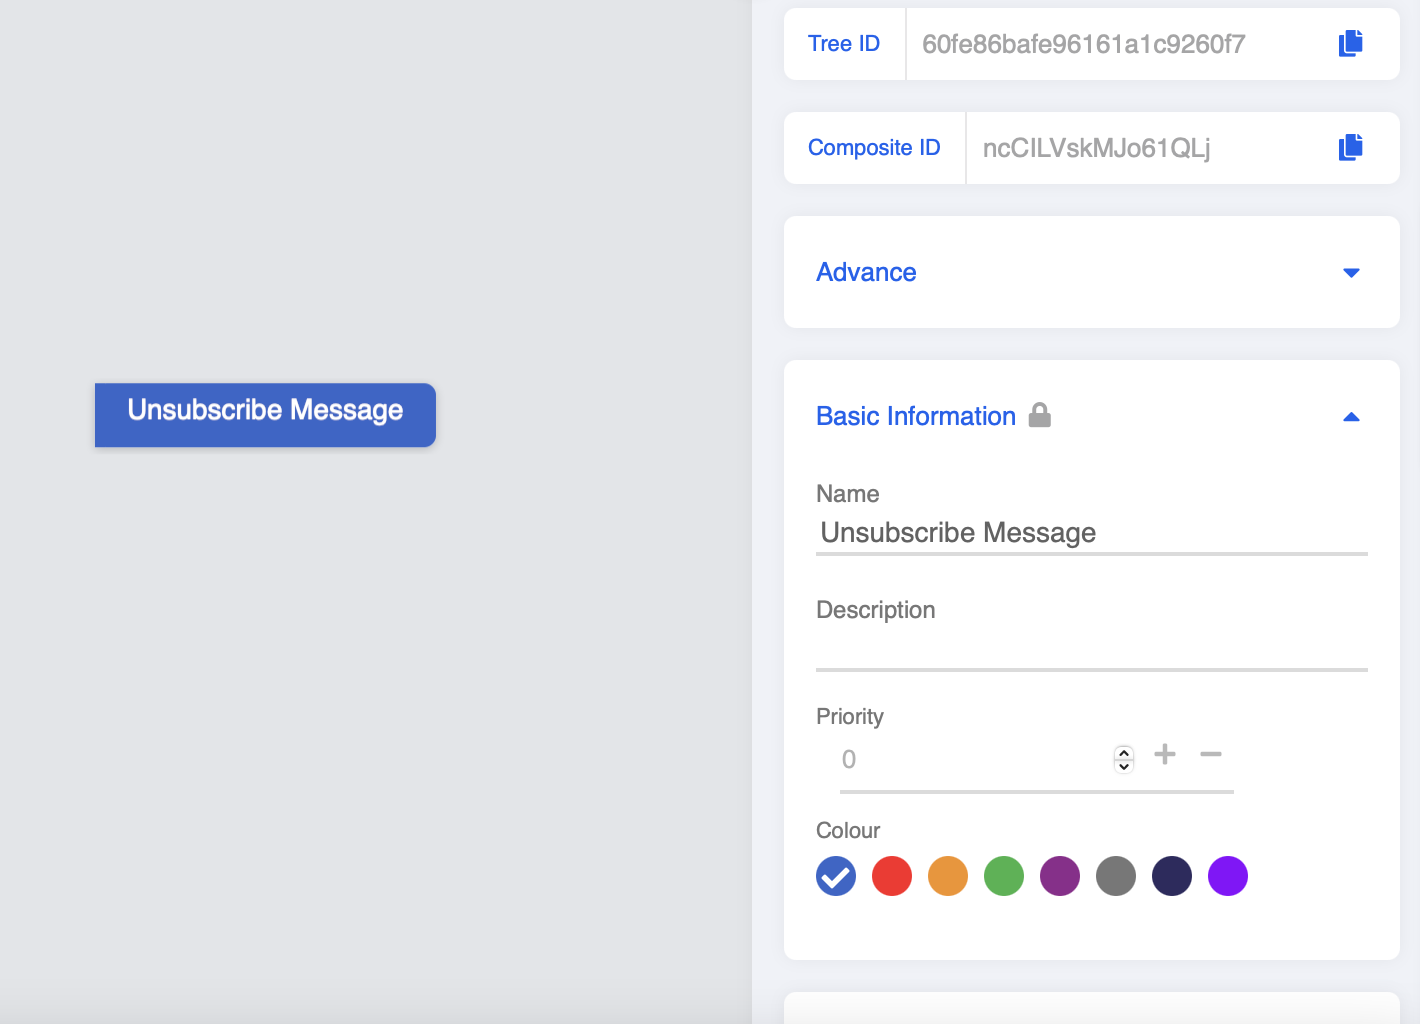
- Create a Response. Add a text response to indicate users about the unsubscription, for example, "Your subscription has been cancelled."
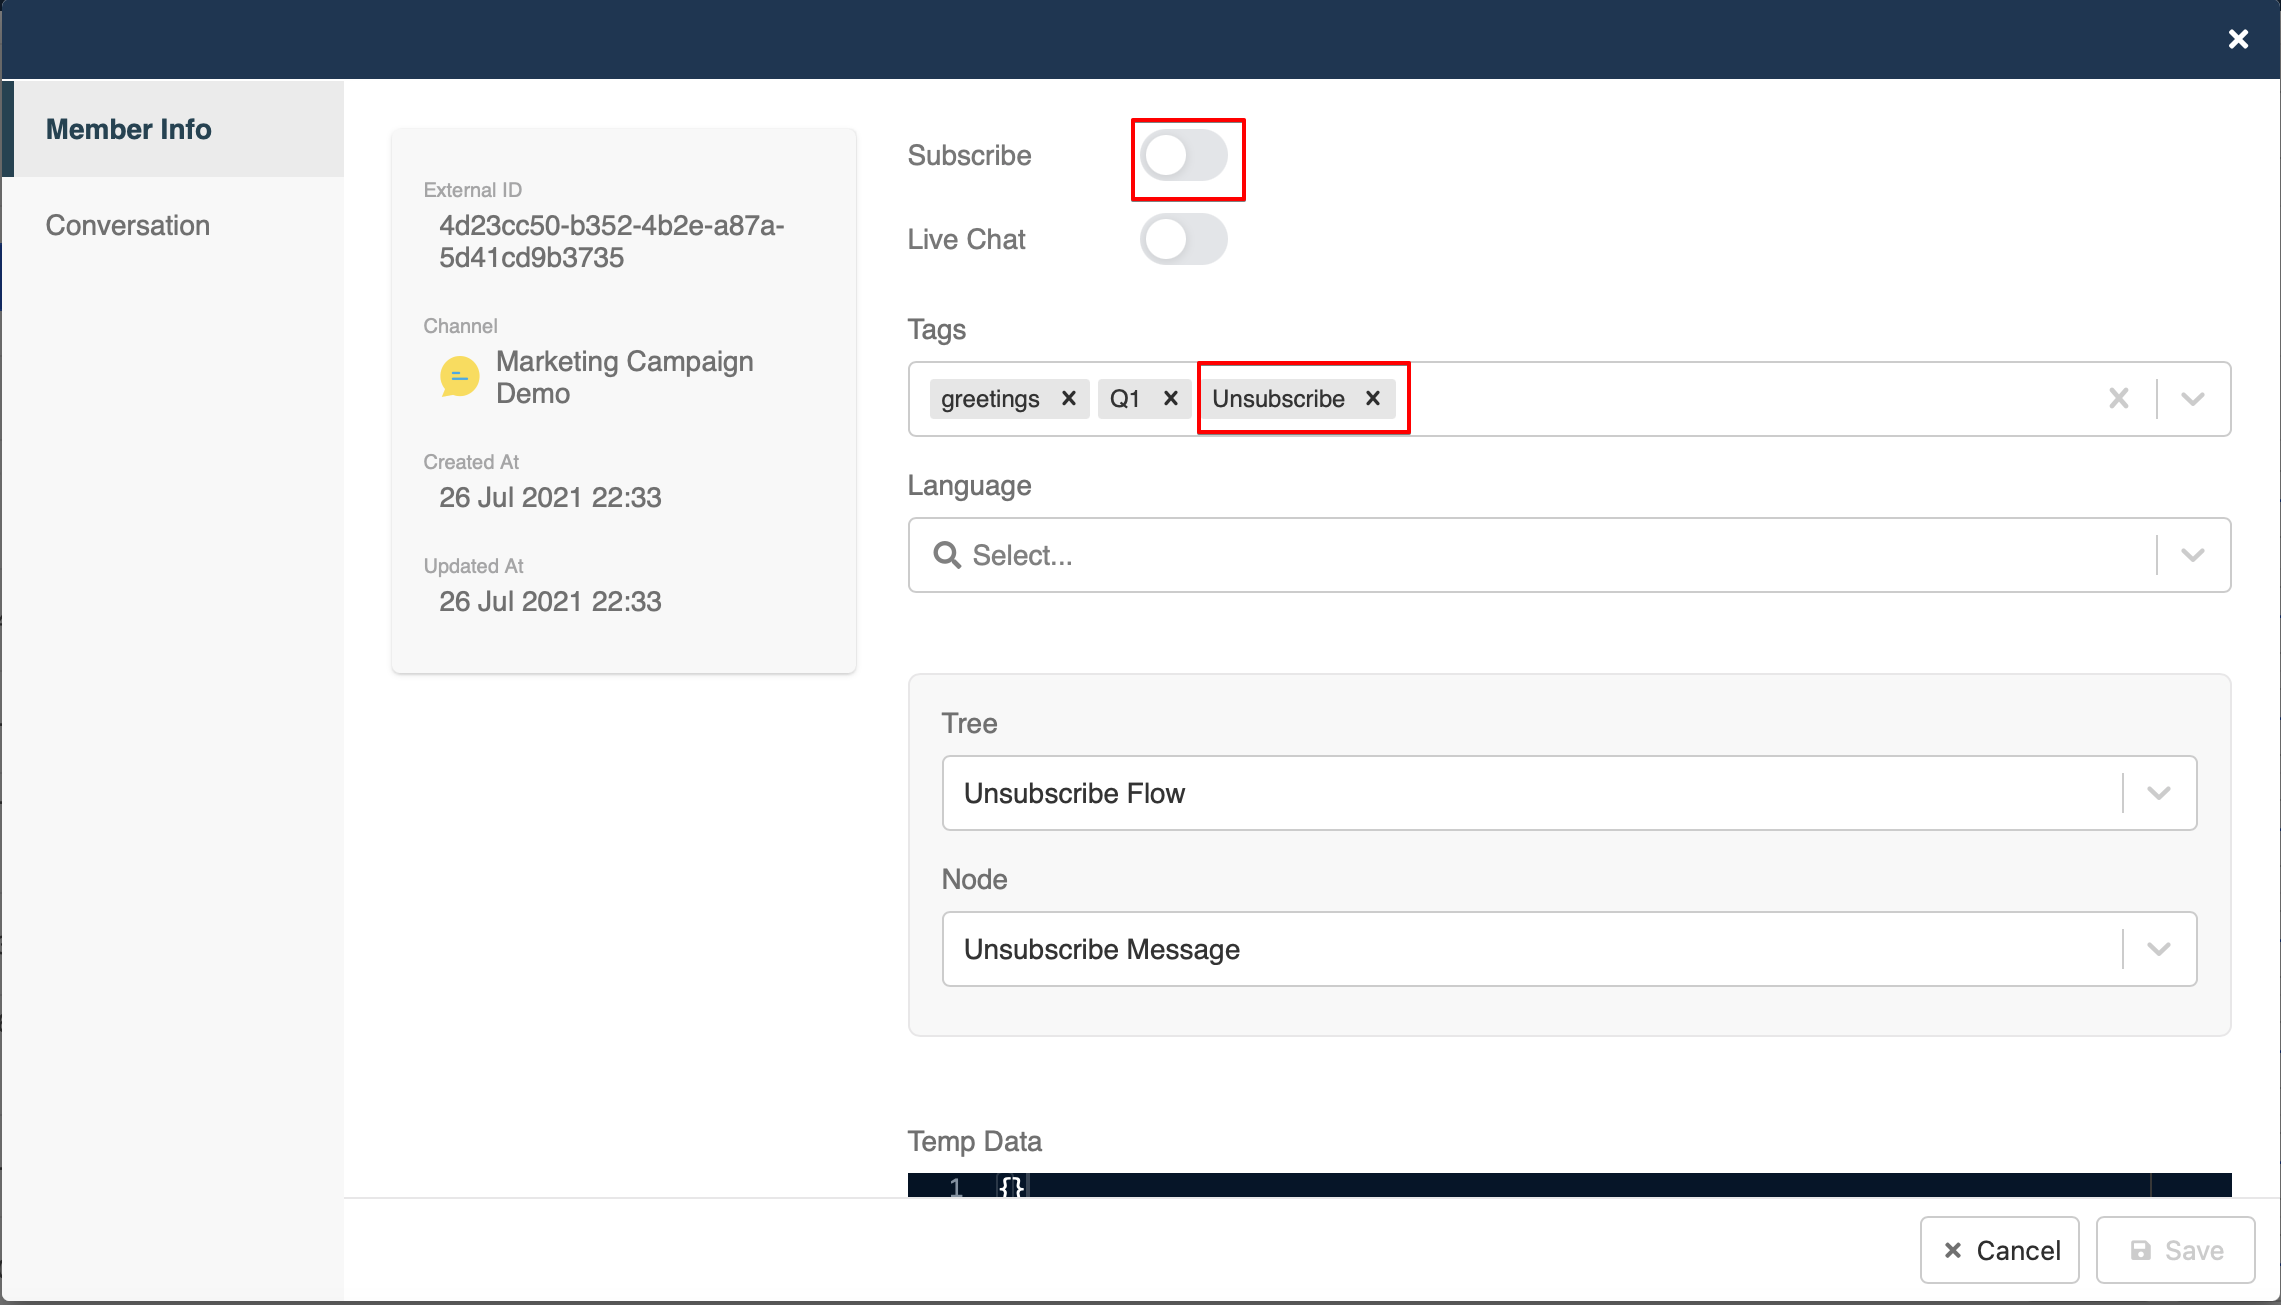
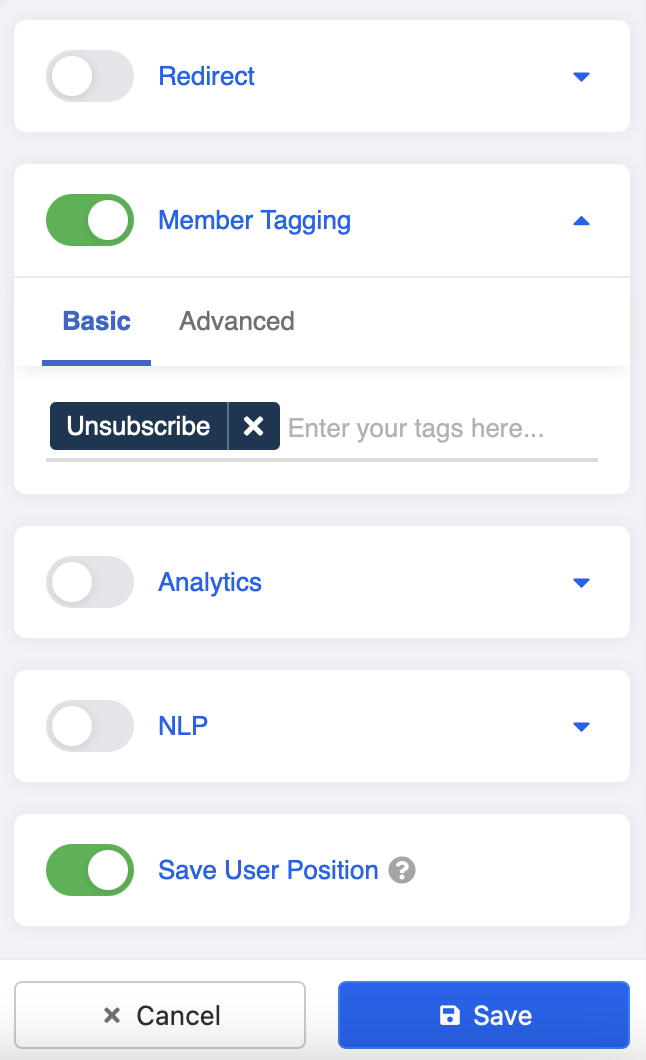
- Scroll down and toggle on Member Tagging, type "Unsubscribe" and click enter to create the tag. After that, remember to save the node.
Create a Pre-action
Head to Pre-actions. Create a new pre-action.
Enter the following code. It will unsubscribe the corresponding user from your member list.
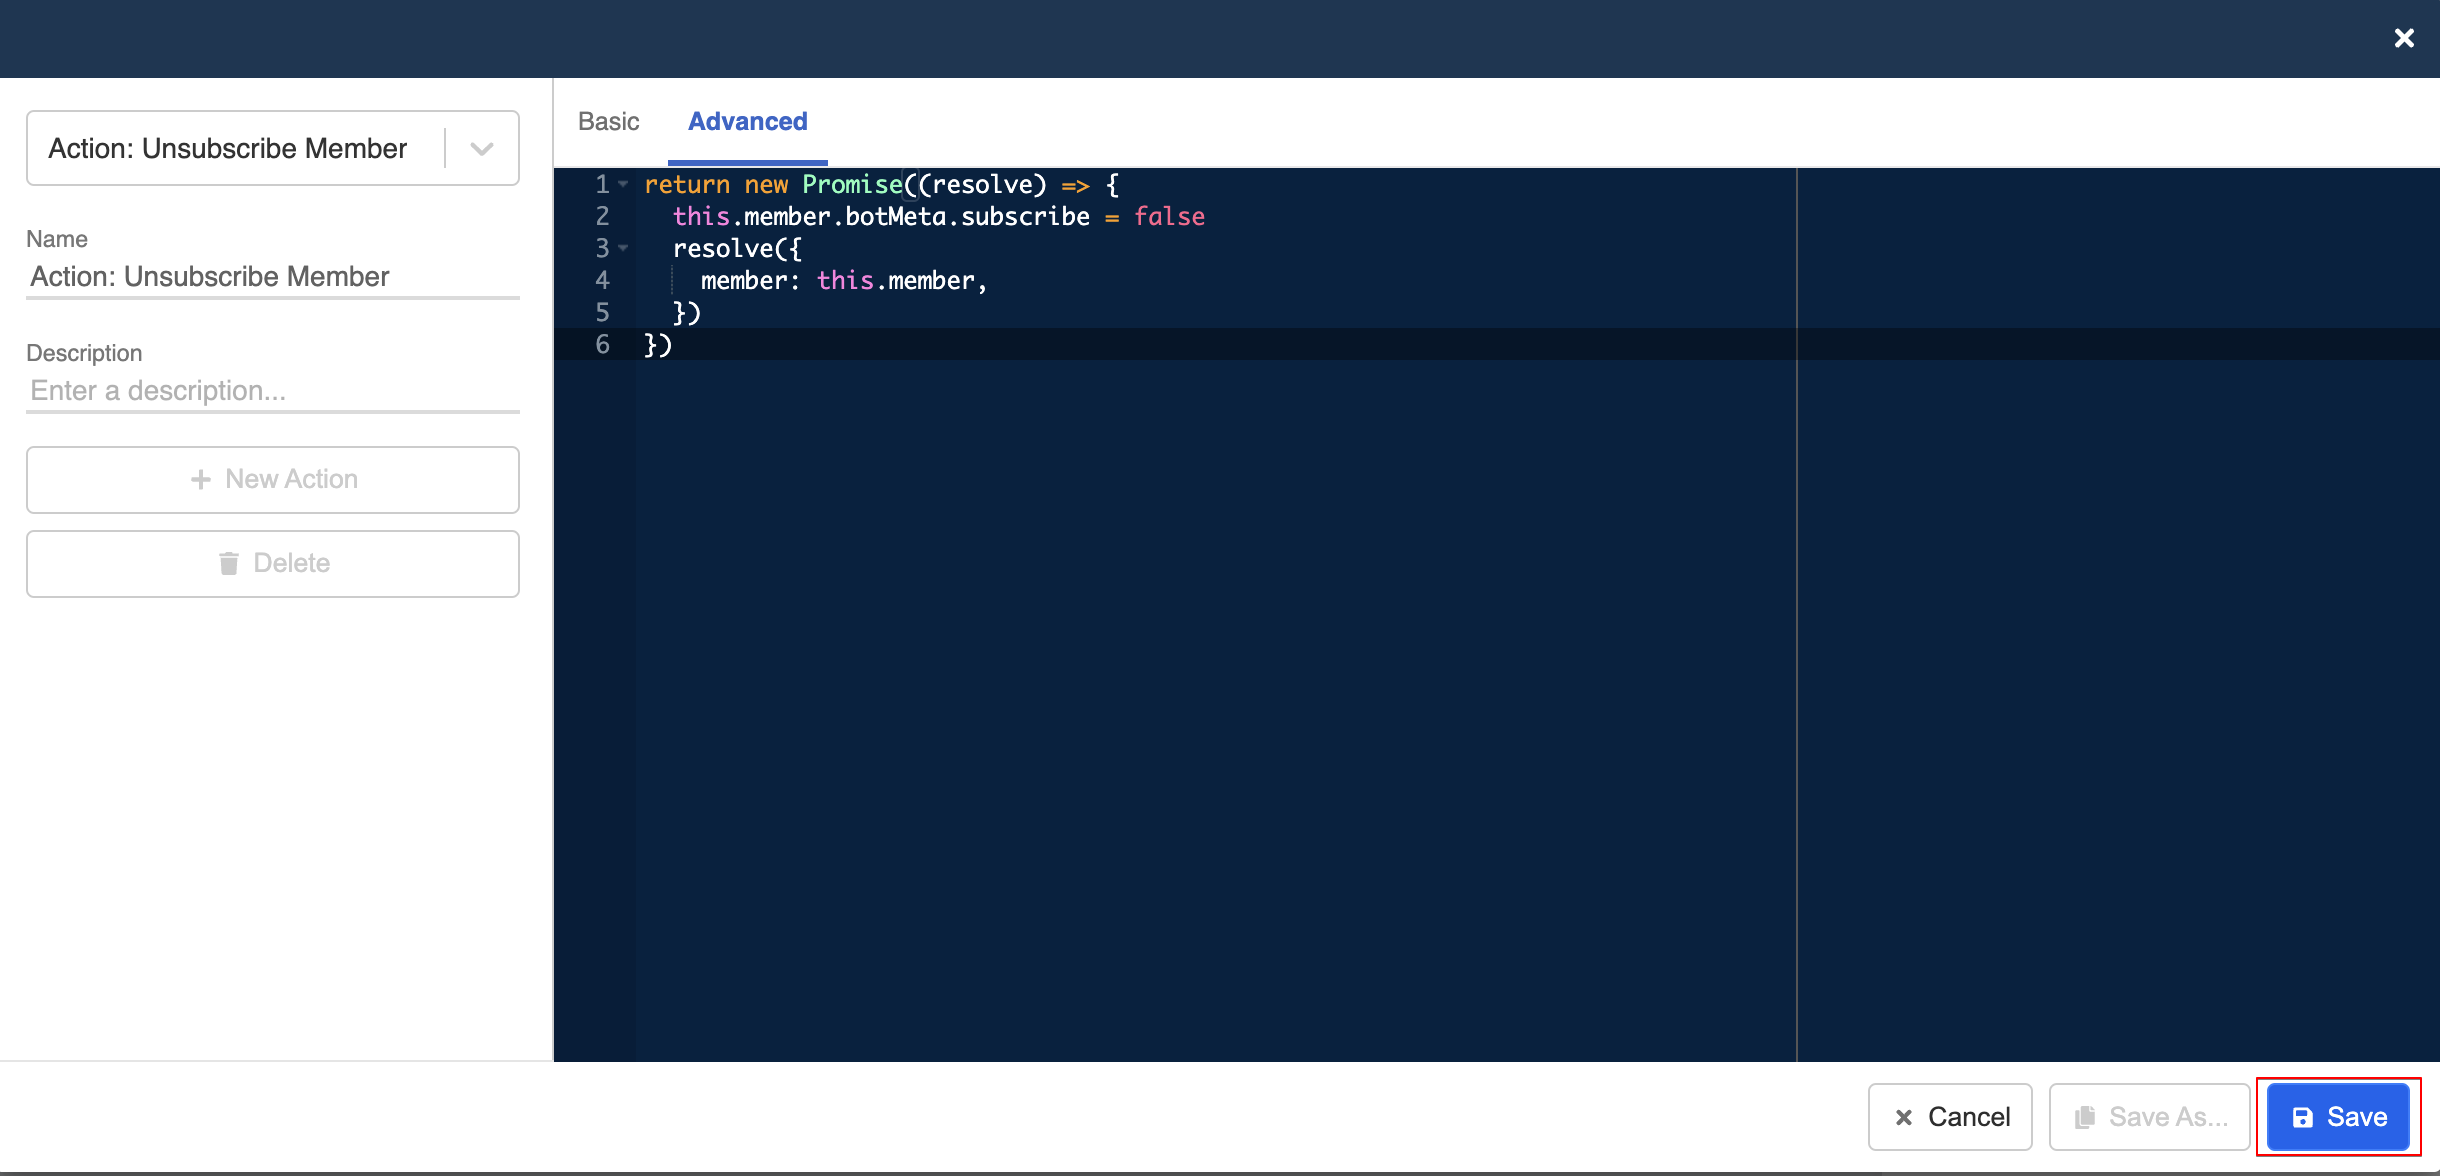
return new Promise((resolve) => {
  this.member.botMeta.subscribe = false
  resolve({
    member: this.member,
  })
})
Create a Global Node & Trigger
- Create a Global Node, name it as "Unsubscribe Global".

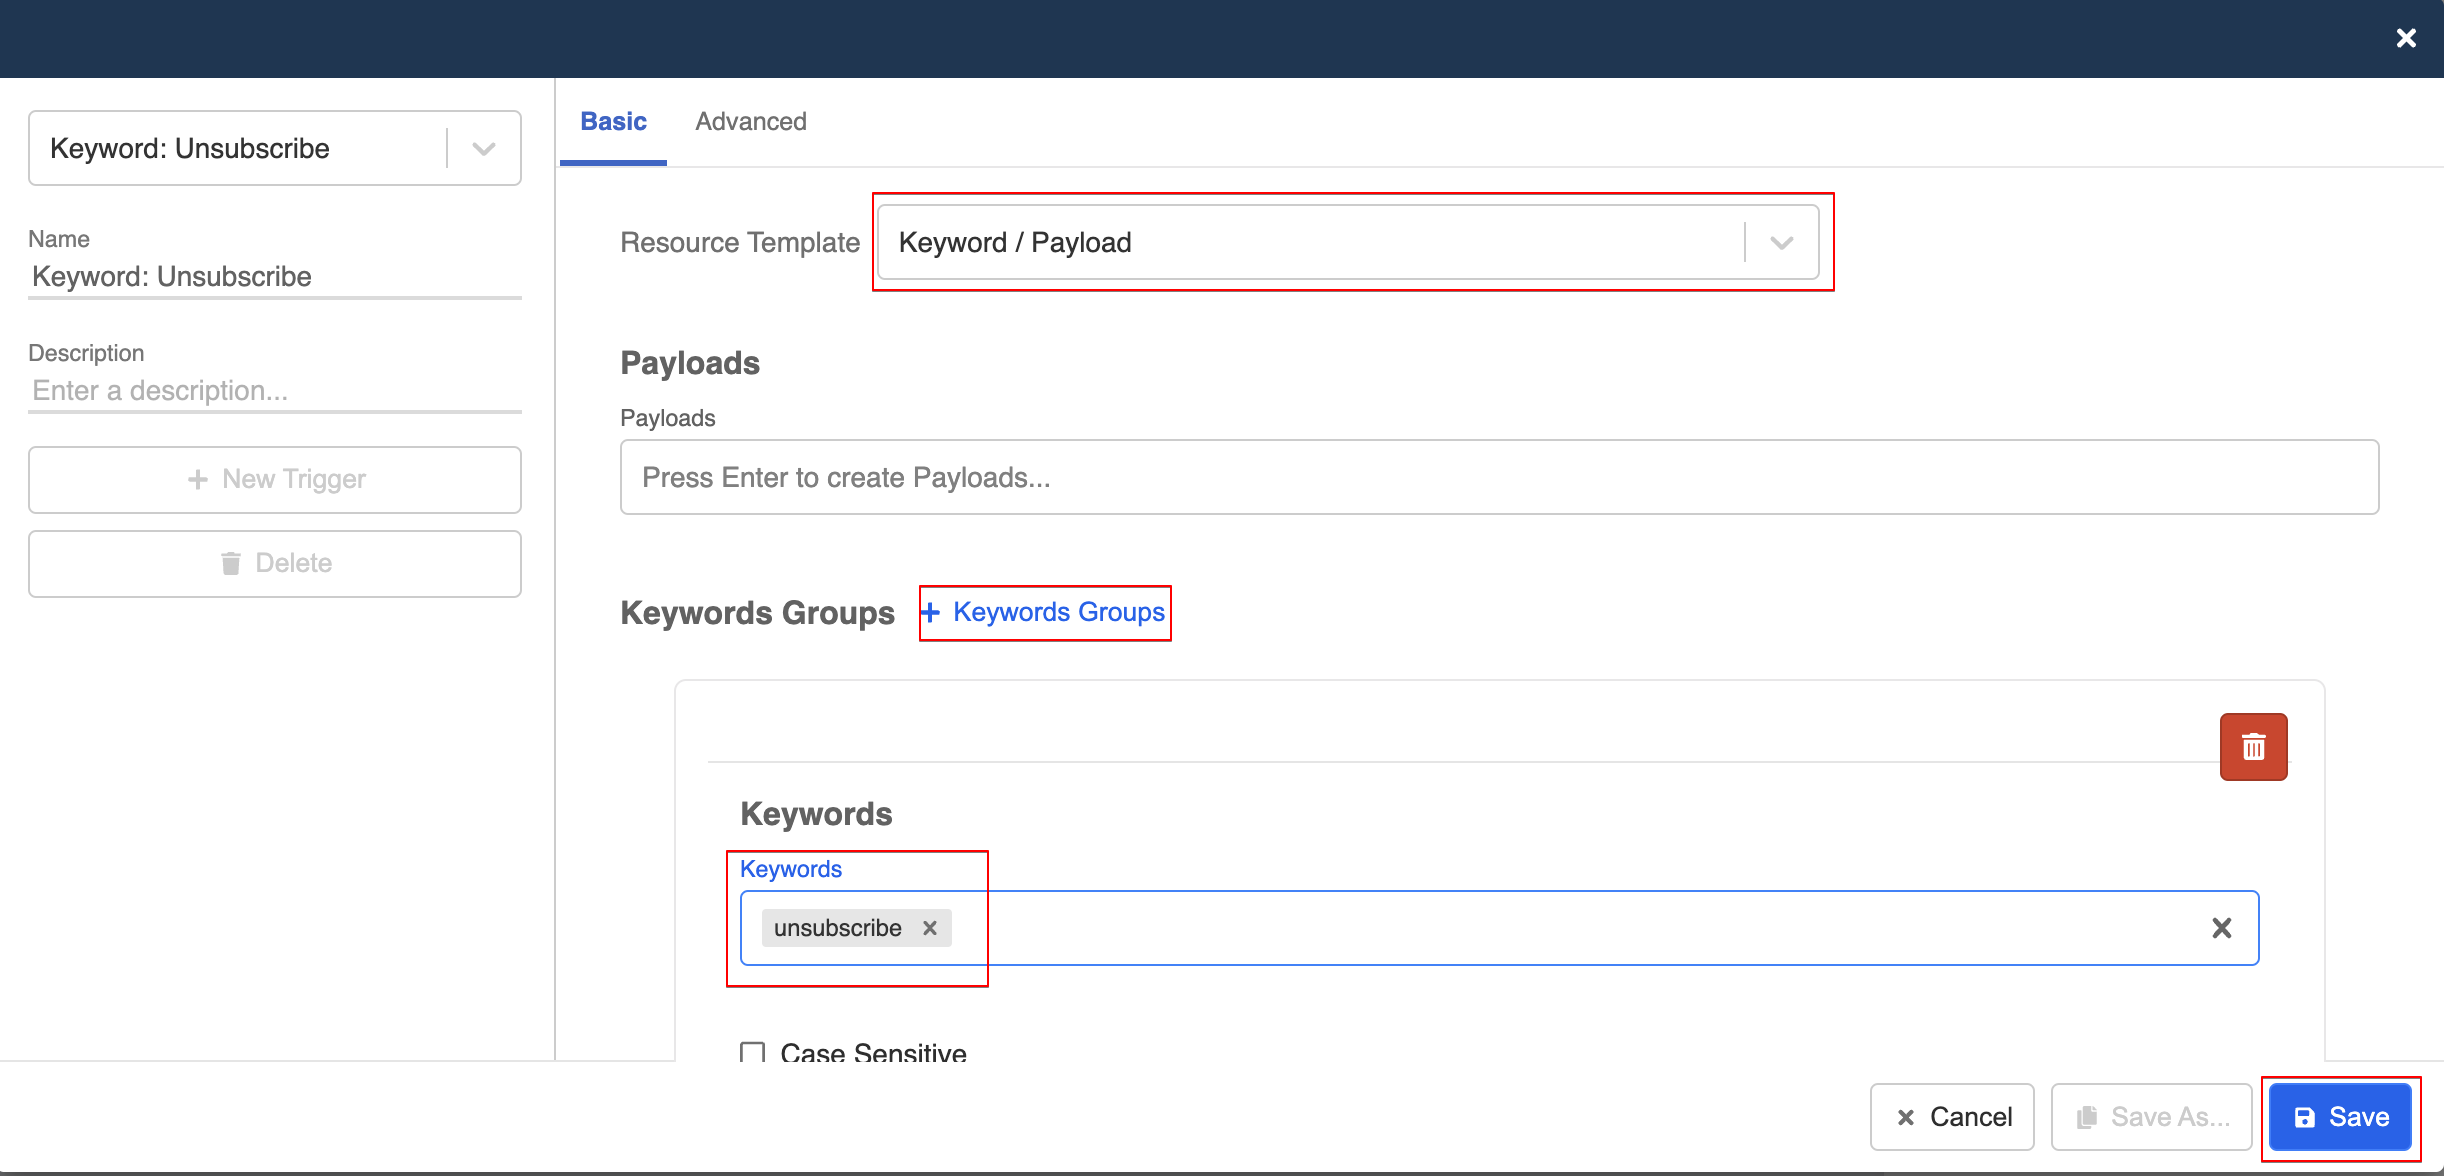
Create a trigger.
Select "Keyword / Payload" and "+Keyword Groups". Type the keyword and confirm it by clicking "Enter".
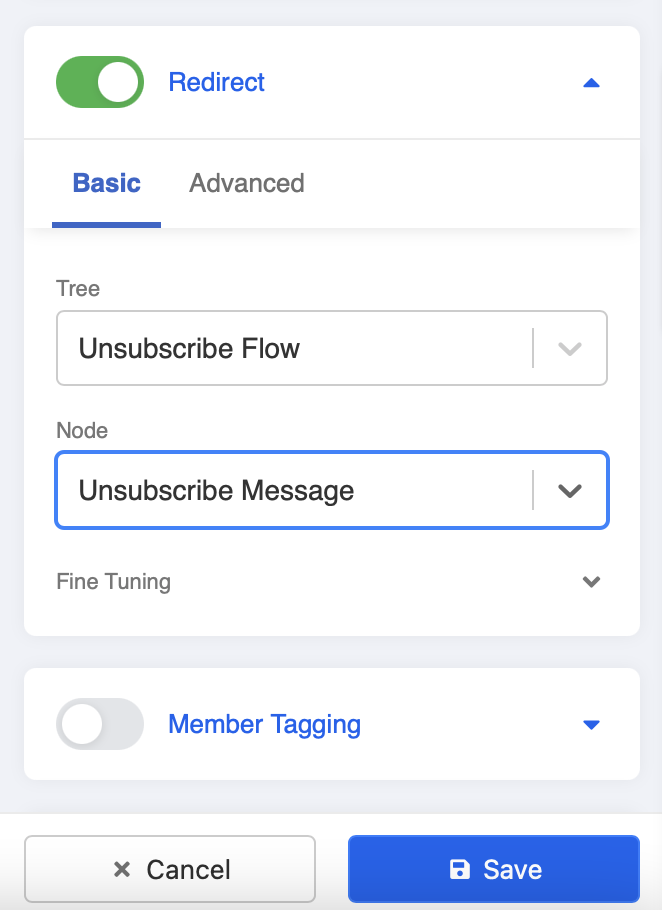
- Toggle on Redirect, and select the "Unsubscribe Message" general node.
Add Unsubscribe Chatbot to Channel
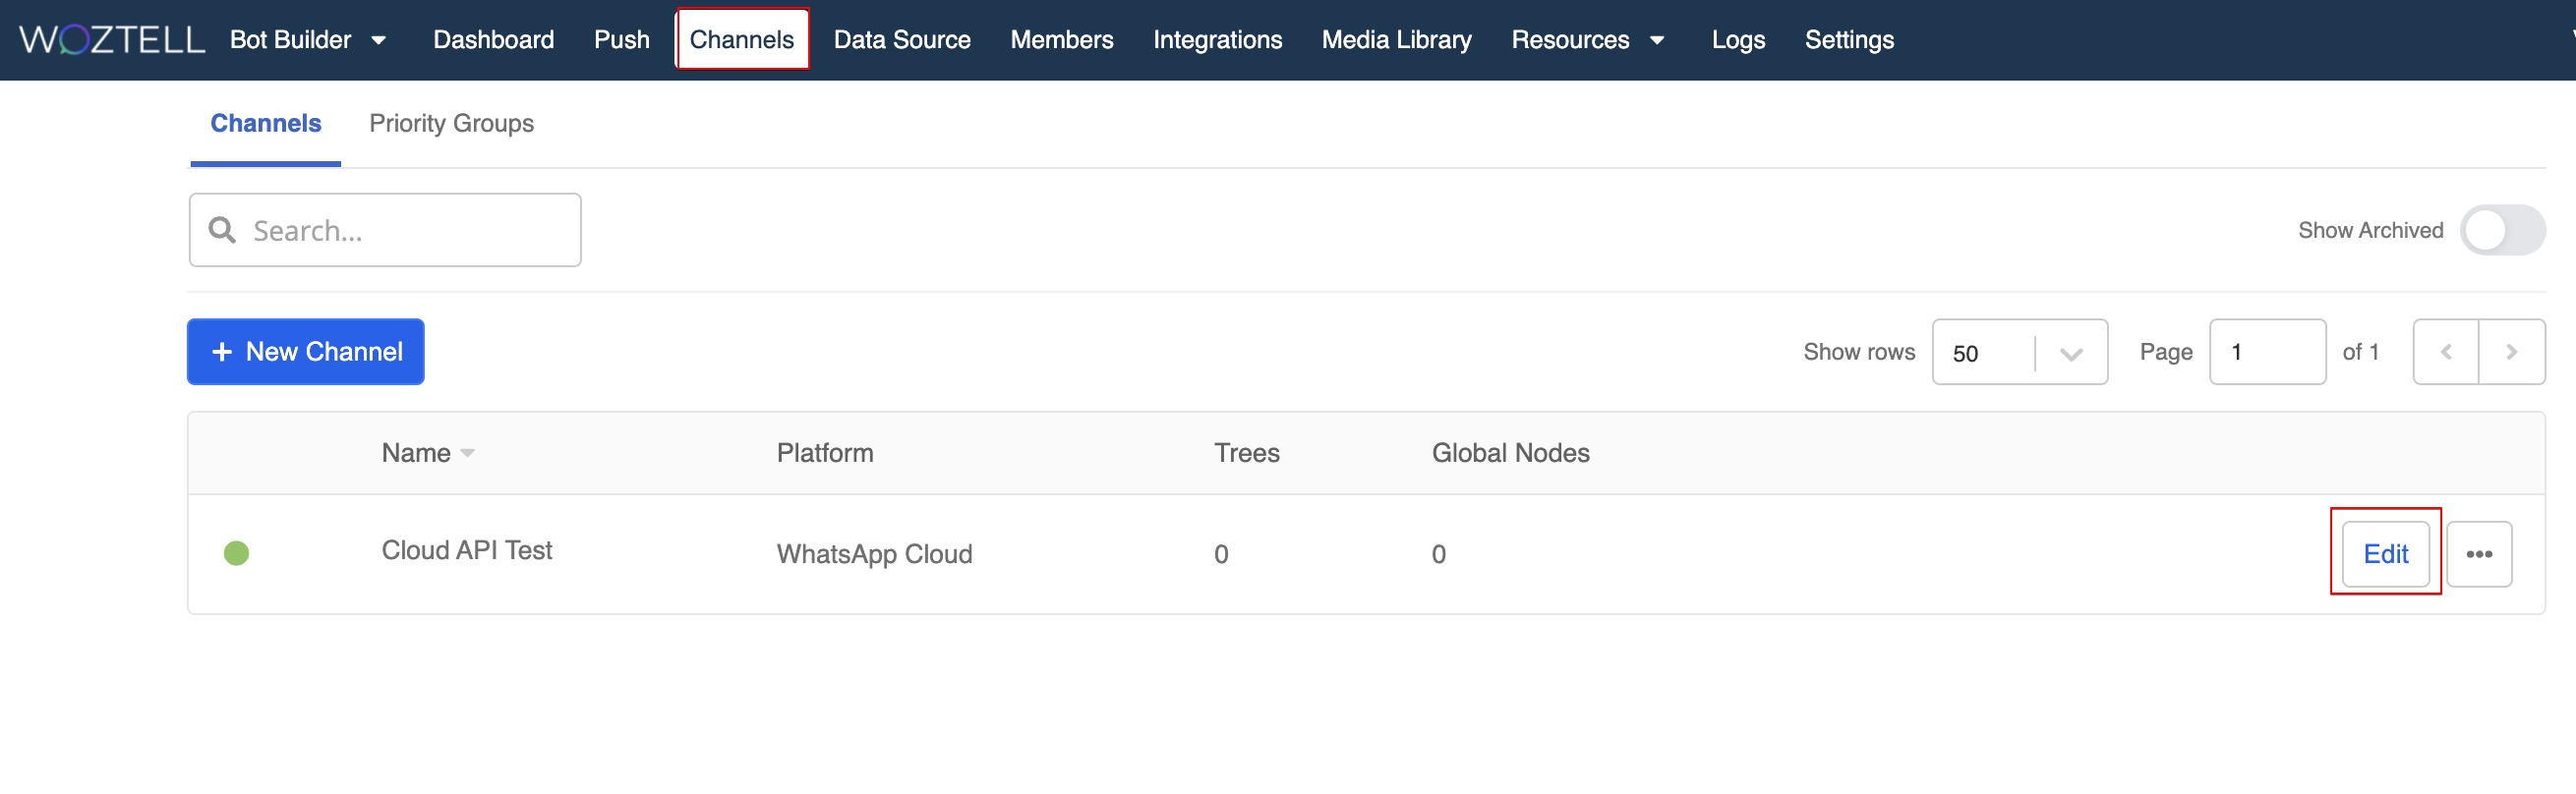
- Head to "Channels", click "Edit" to enter the channel.
- Head to "Chatbot Settings", select "+ New Chatbot" in default.
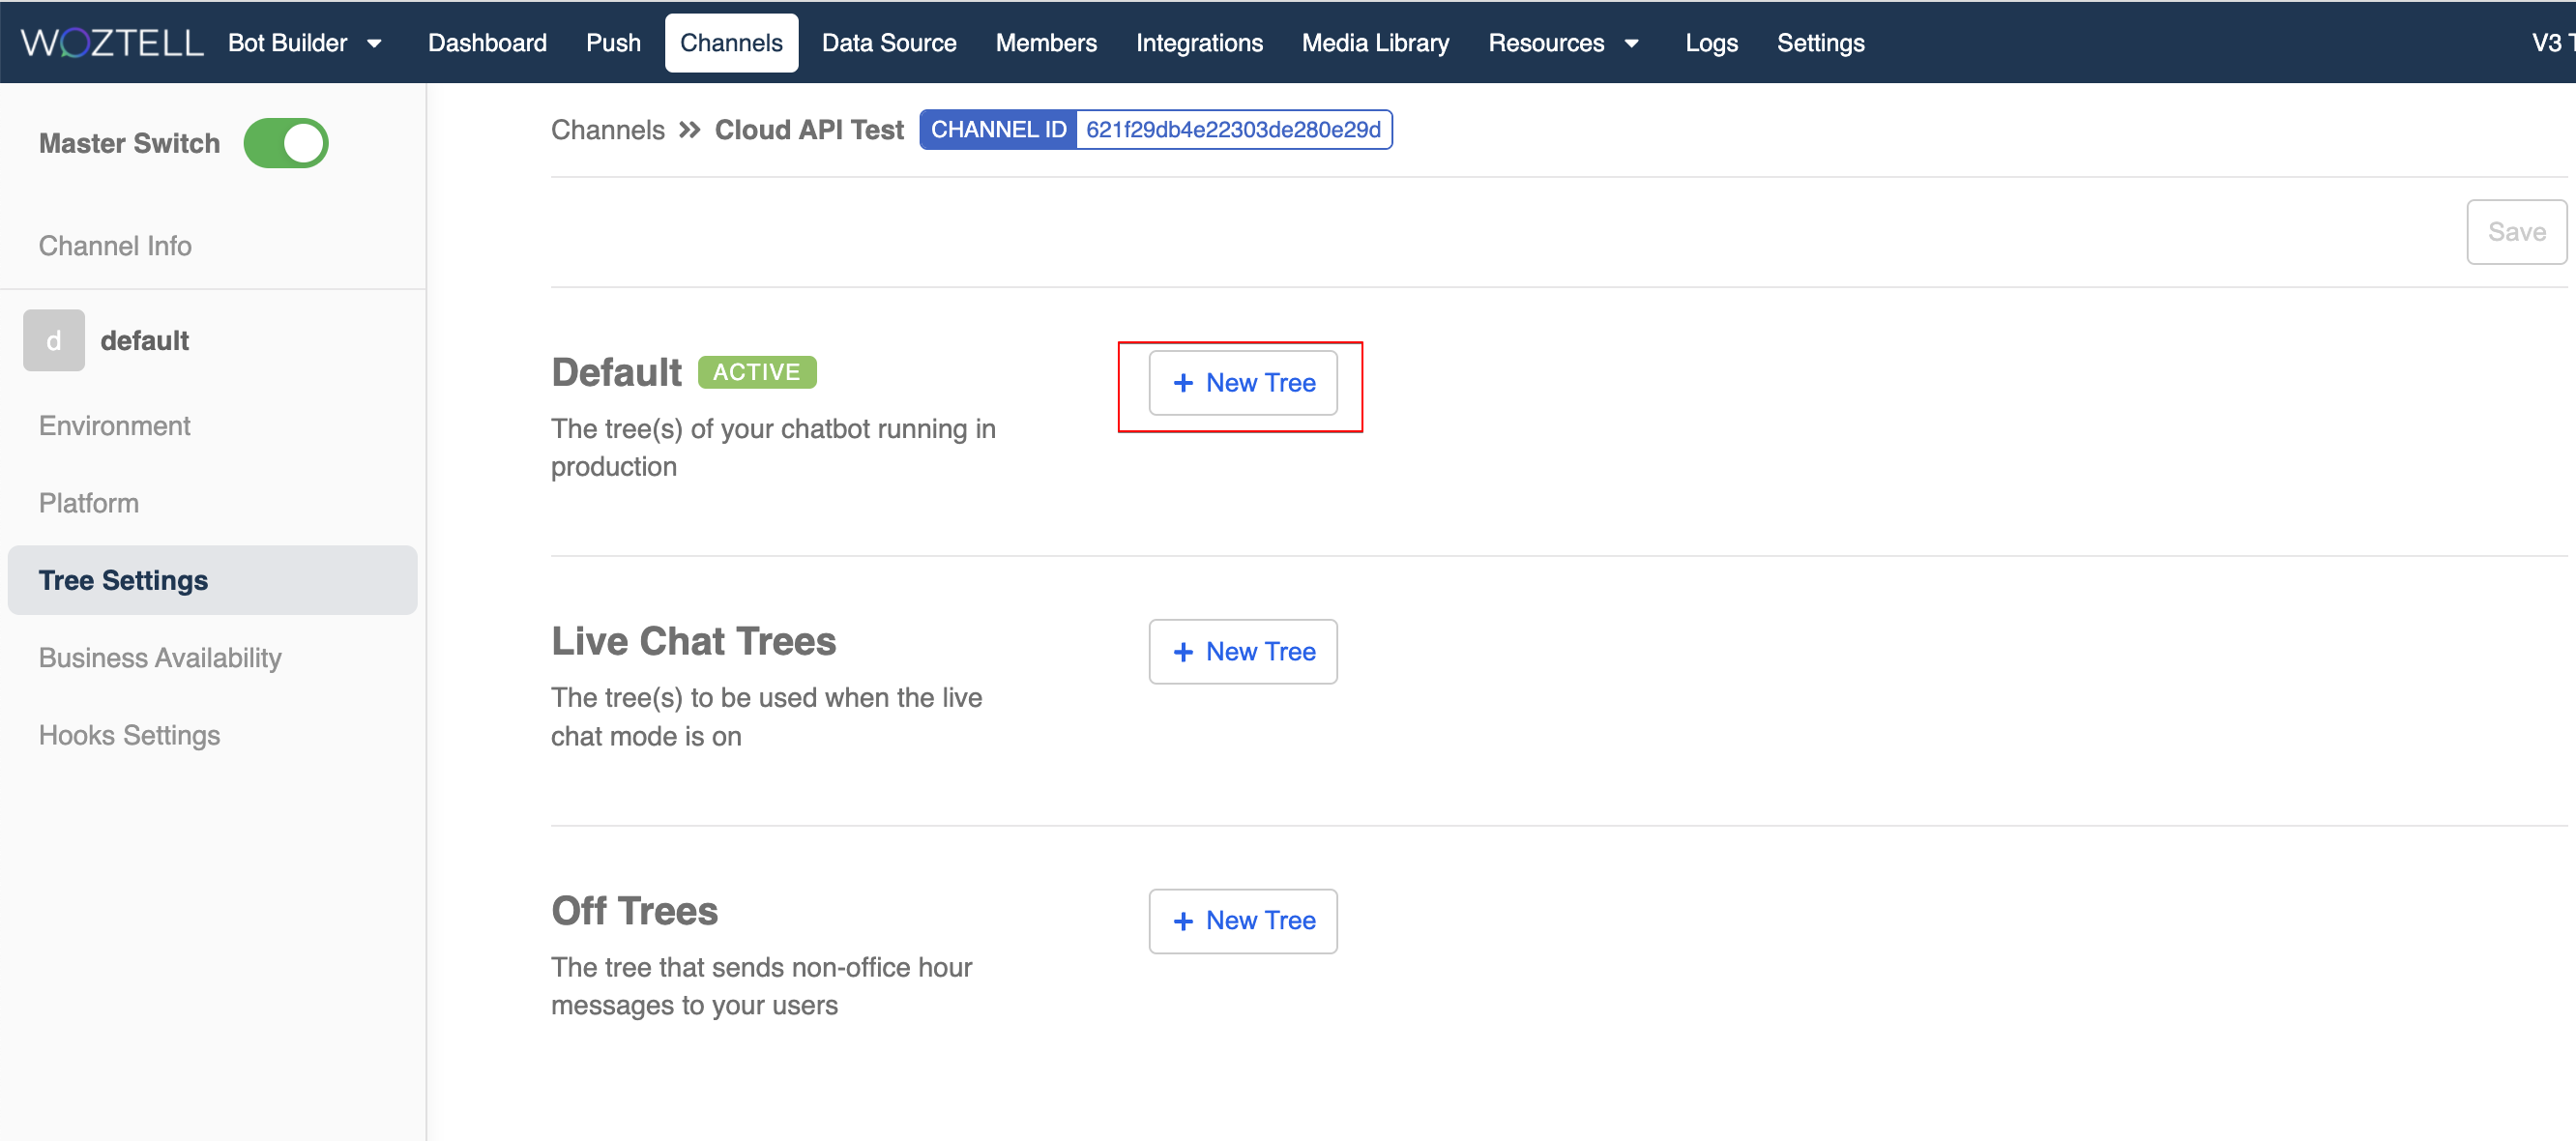
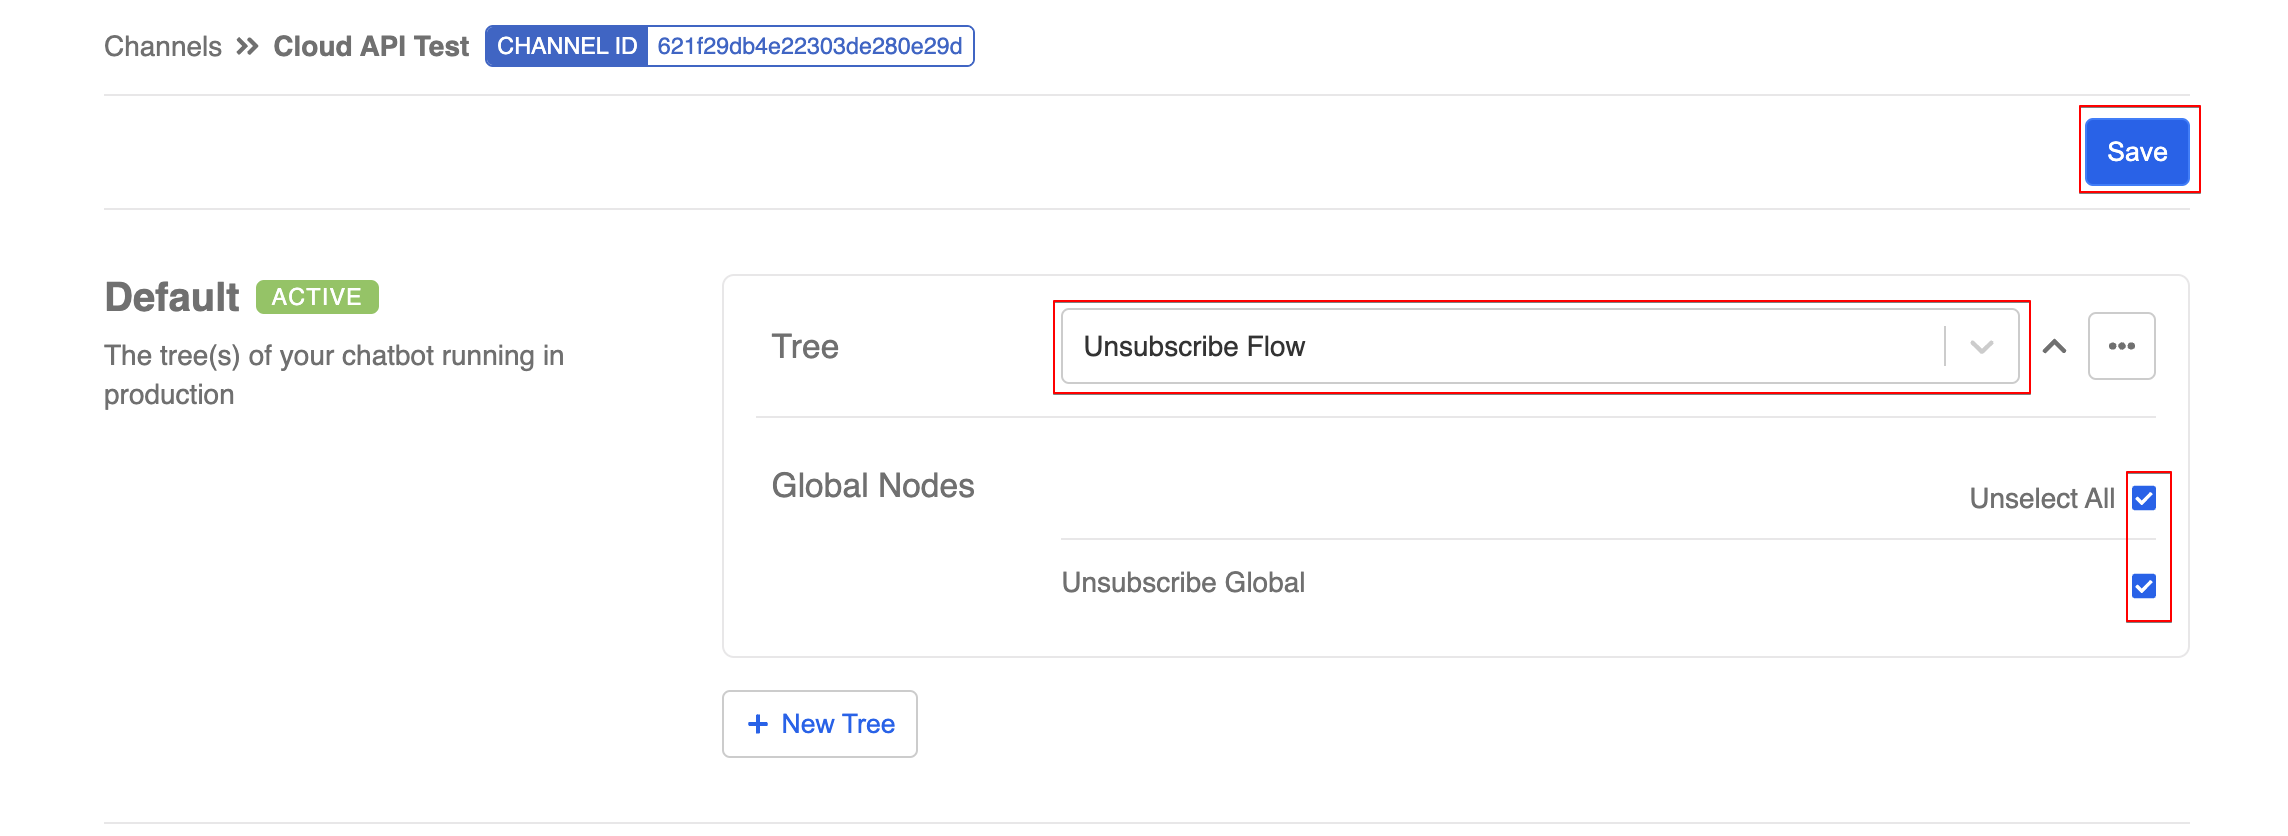
- Add the "Unsubscribe Flow" to this channel, and tick the global node "Unsubscribe Global". It means this global node will apply to all chatbots in this channel. Remember to save the settings afterwards.
- Now, you can start testing the unsubscribe flow!