Thread Operations in Inbox Integration
The inbox system comprises two primary components, namely Folder and Thread.
Thread: the conversation between a support agent and an end user in a specific channel. A thread allows an agent to engage in a conversation with the user and control various aspects of live chat support.
Folder: enables support agents to store and group threads according to their preference. It is a versatile component that can store threads from multiple channels, making it effortless for agents to access and manage conversations with end-users.
Start a Conversation
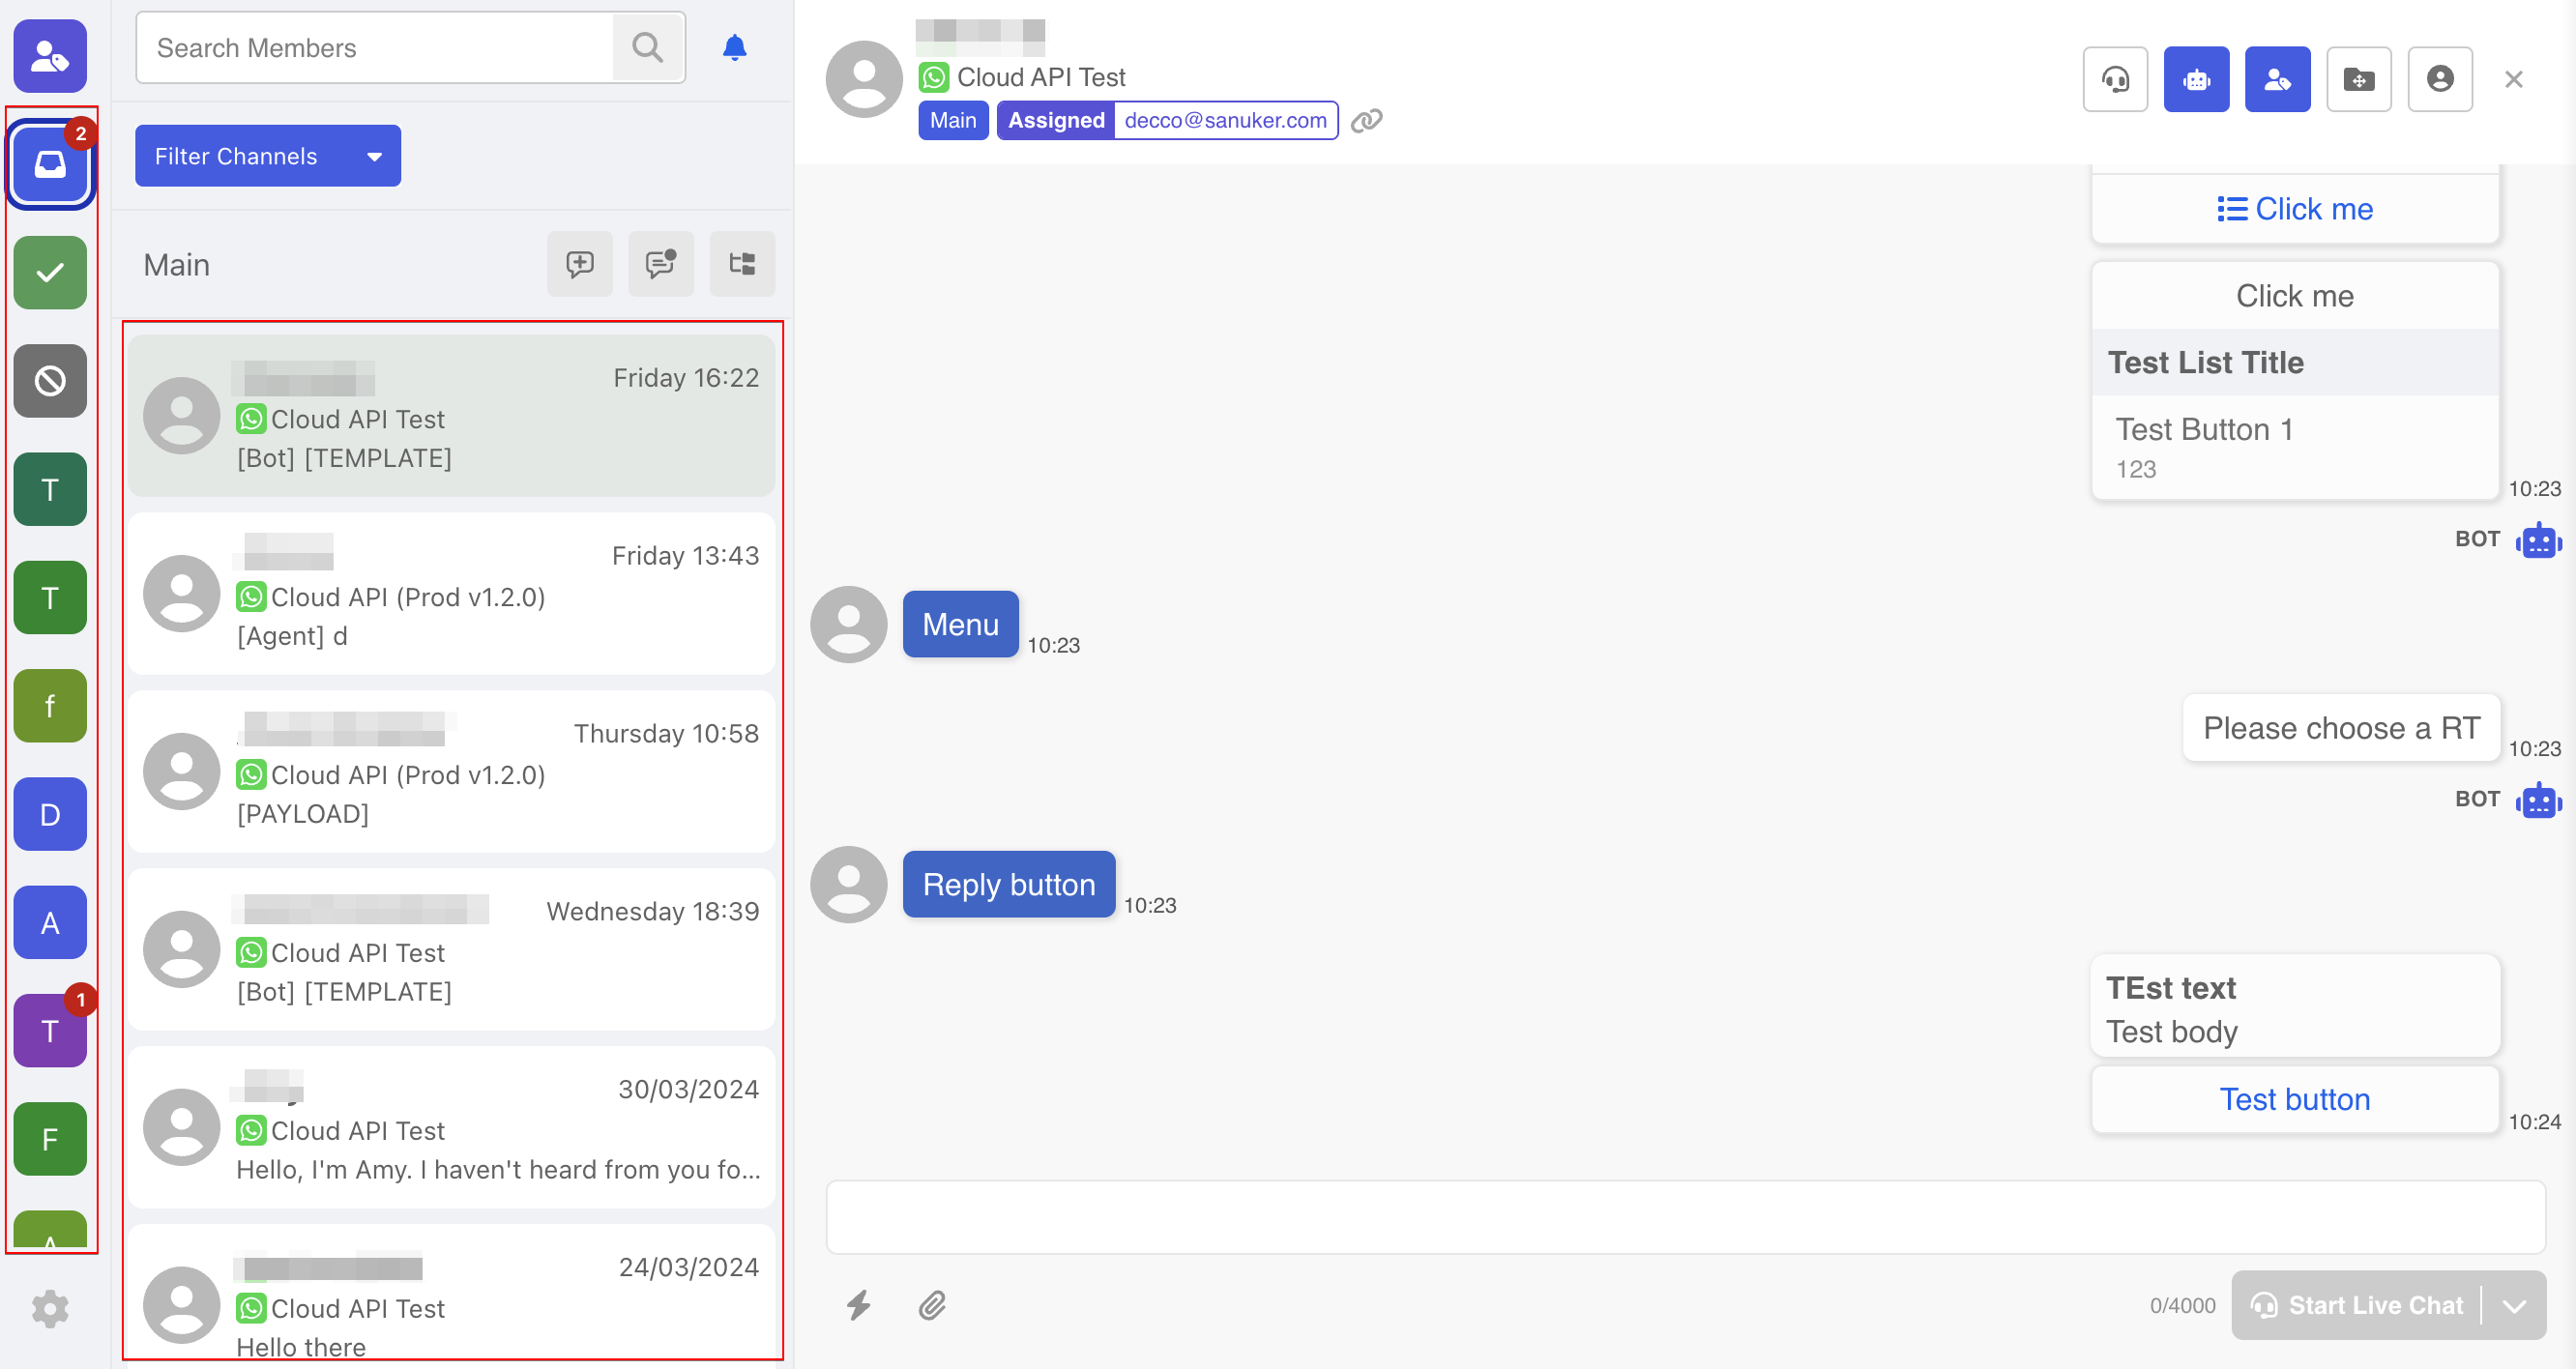
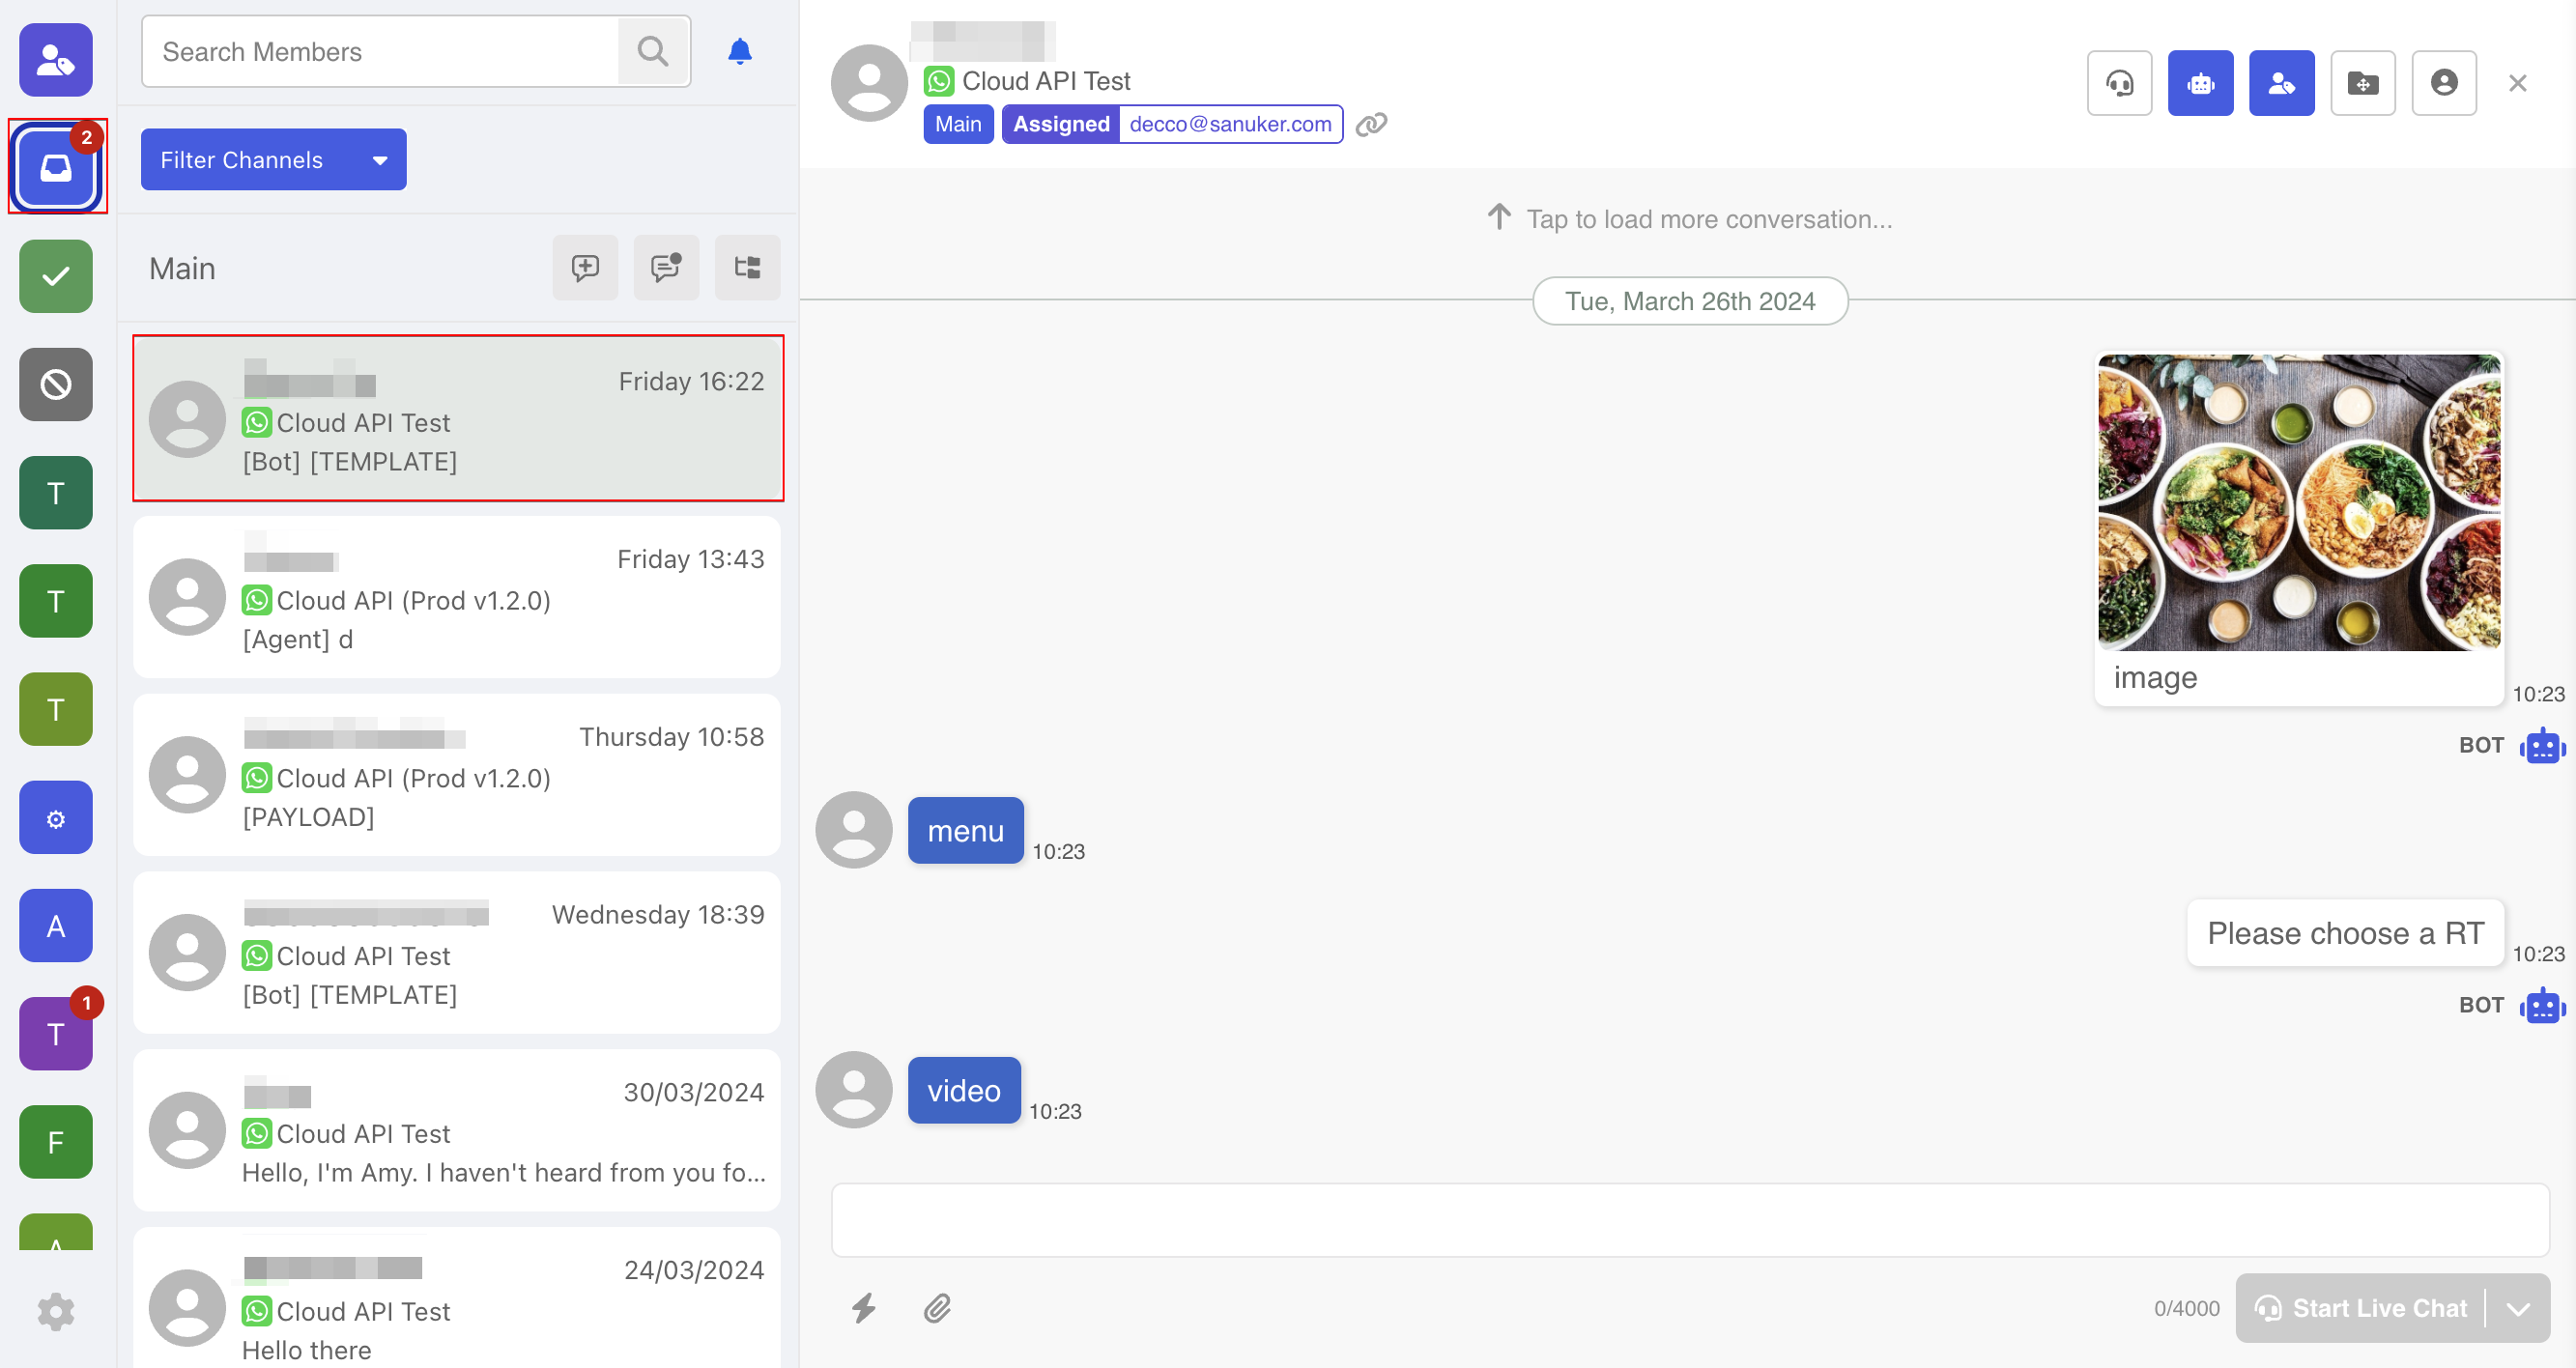
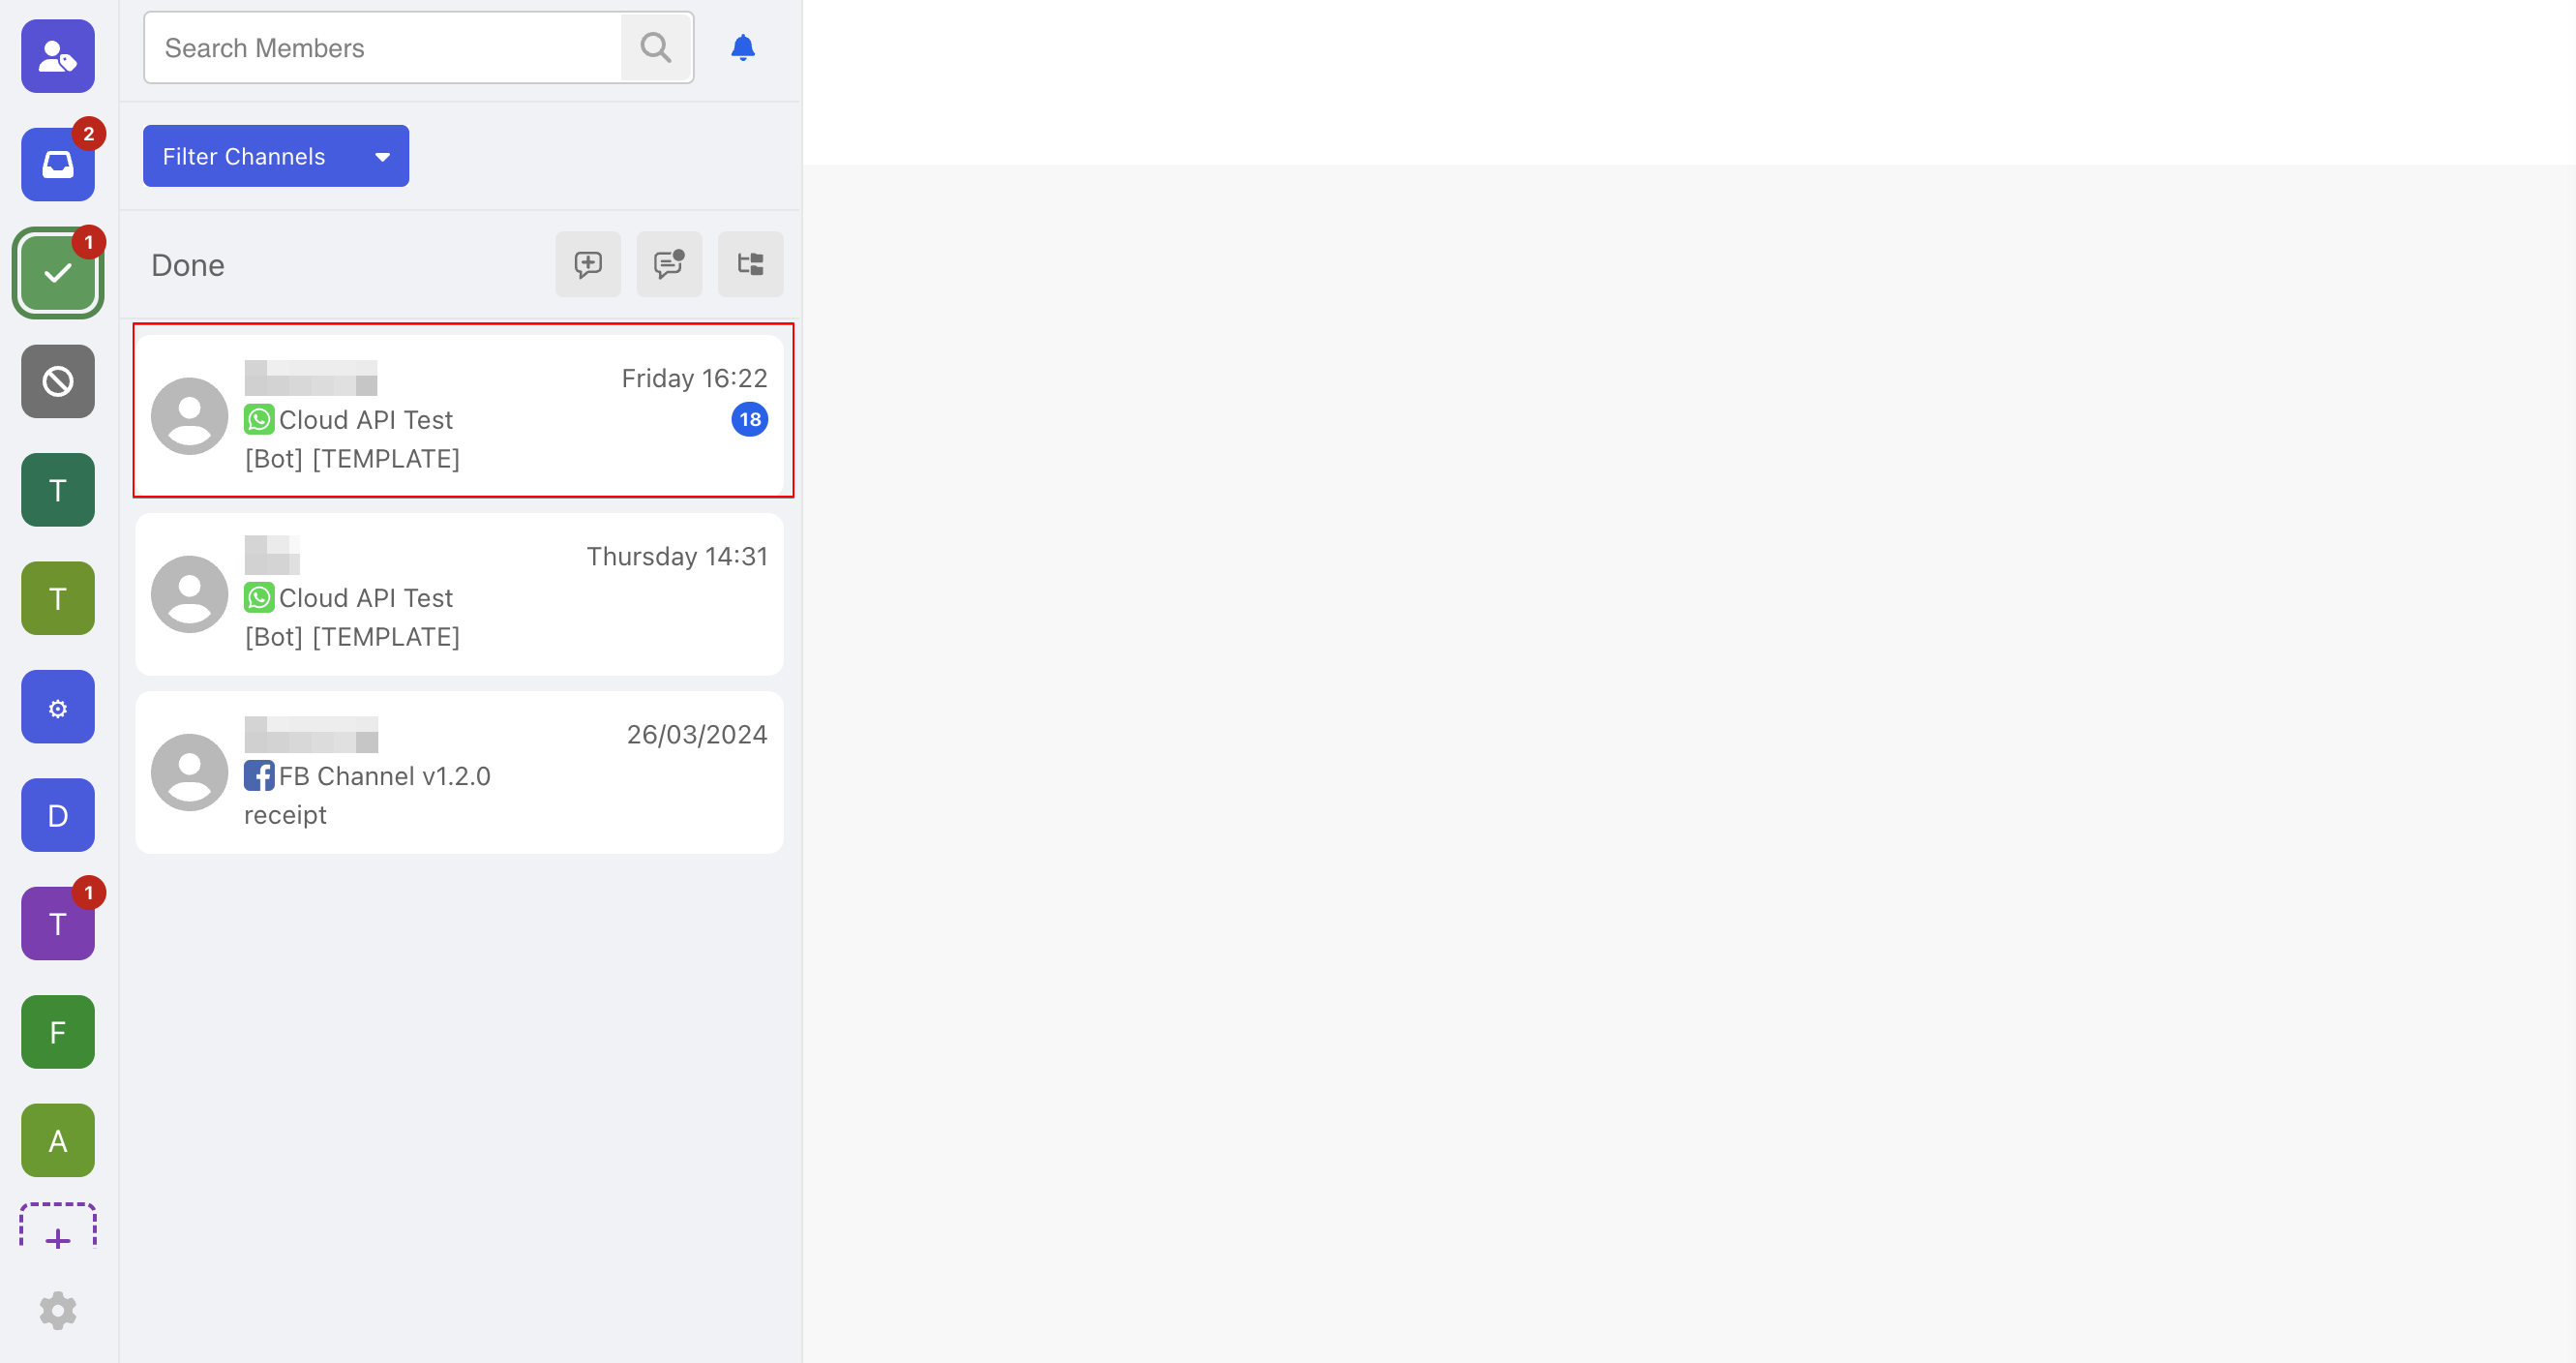
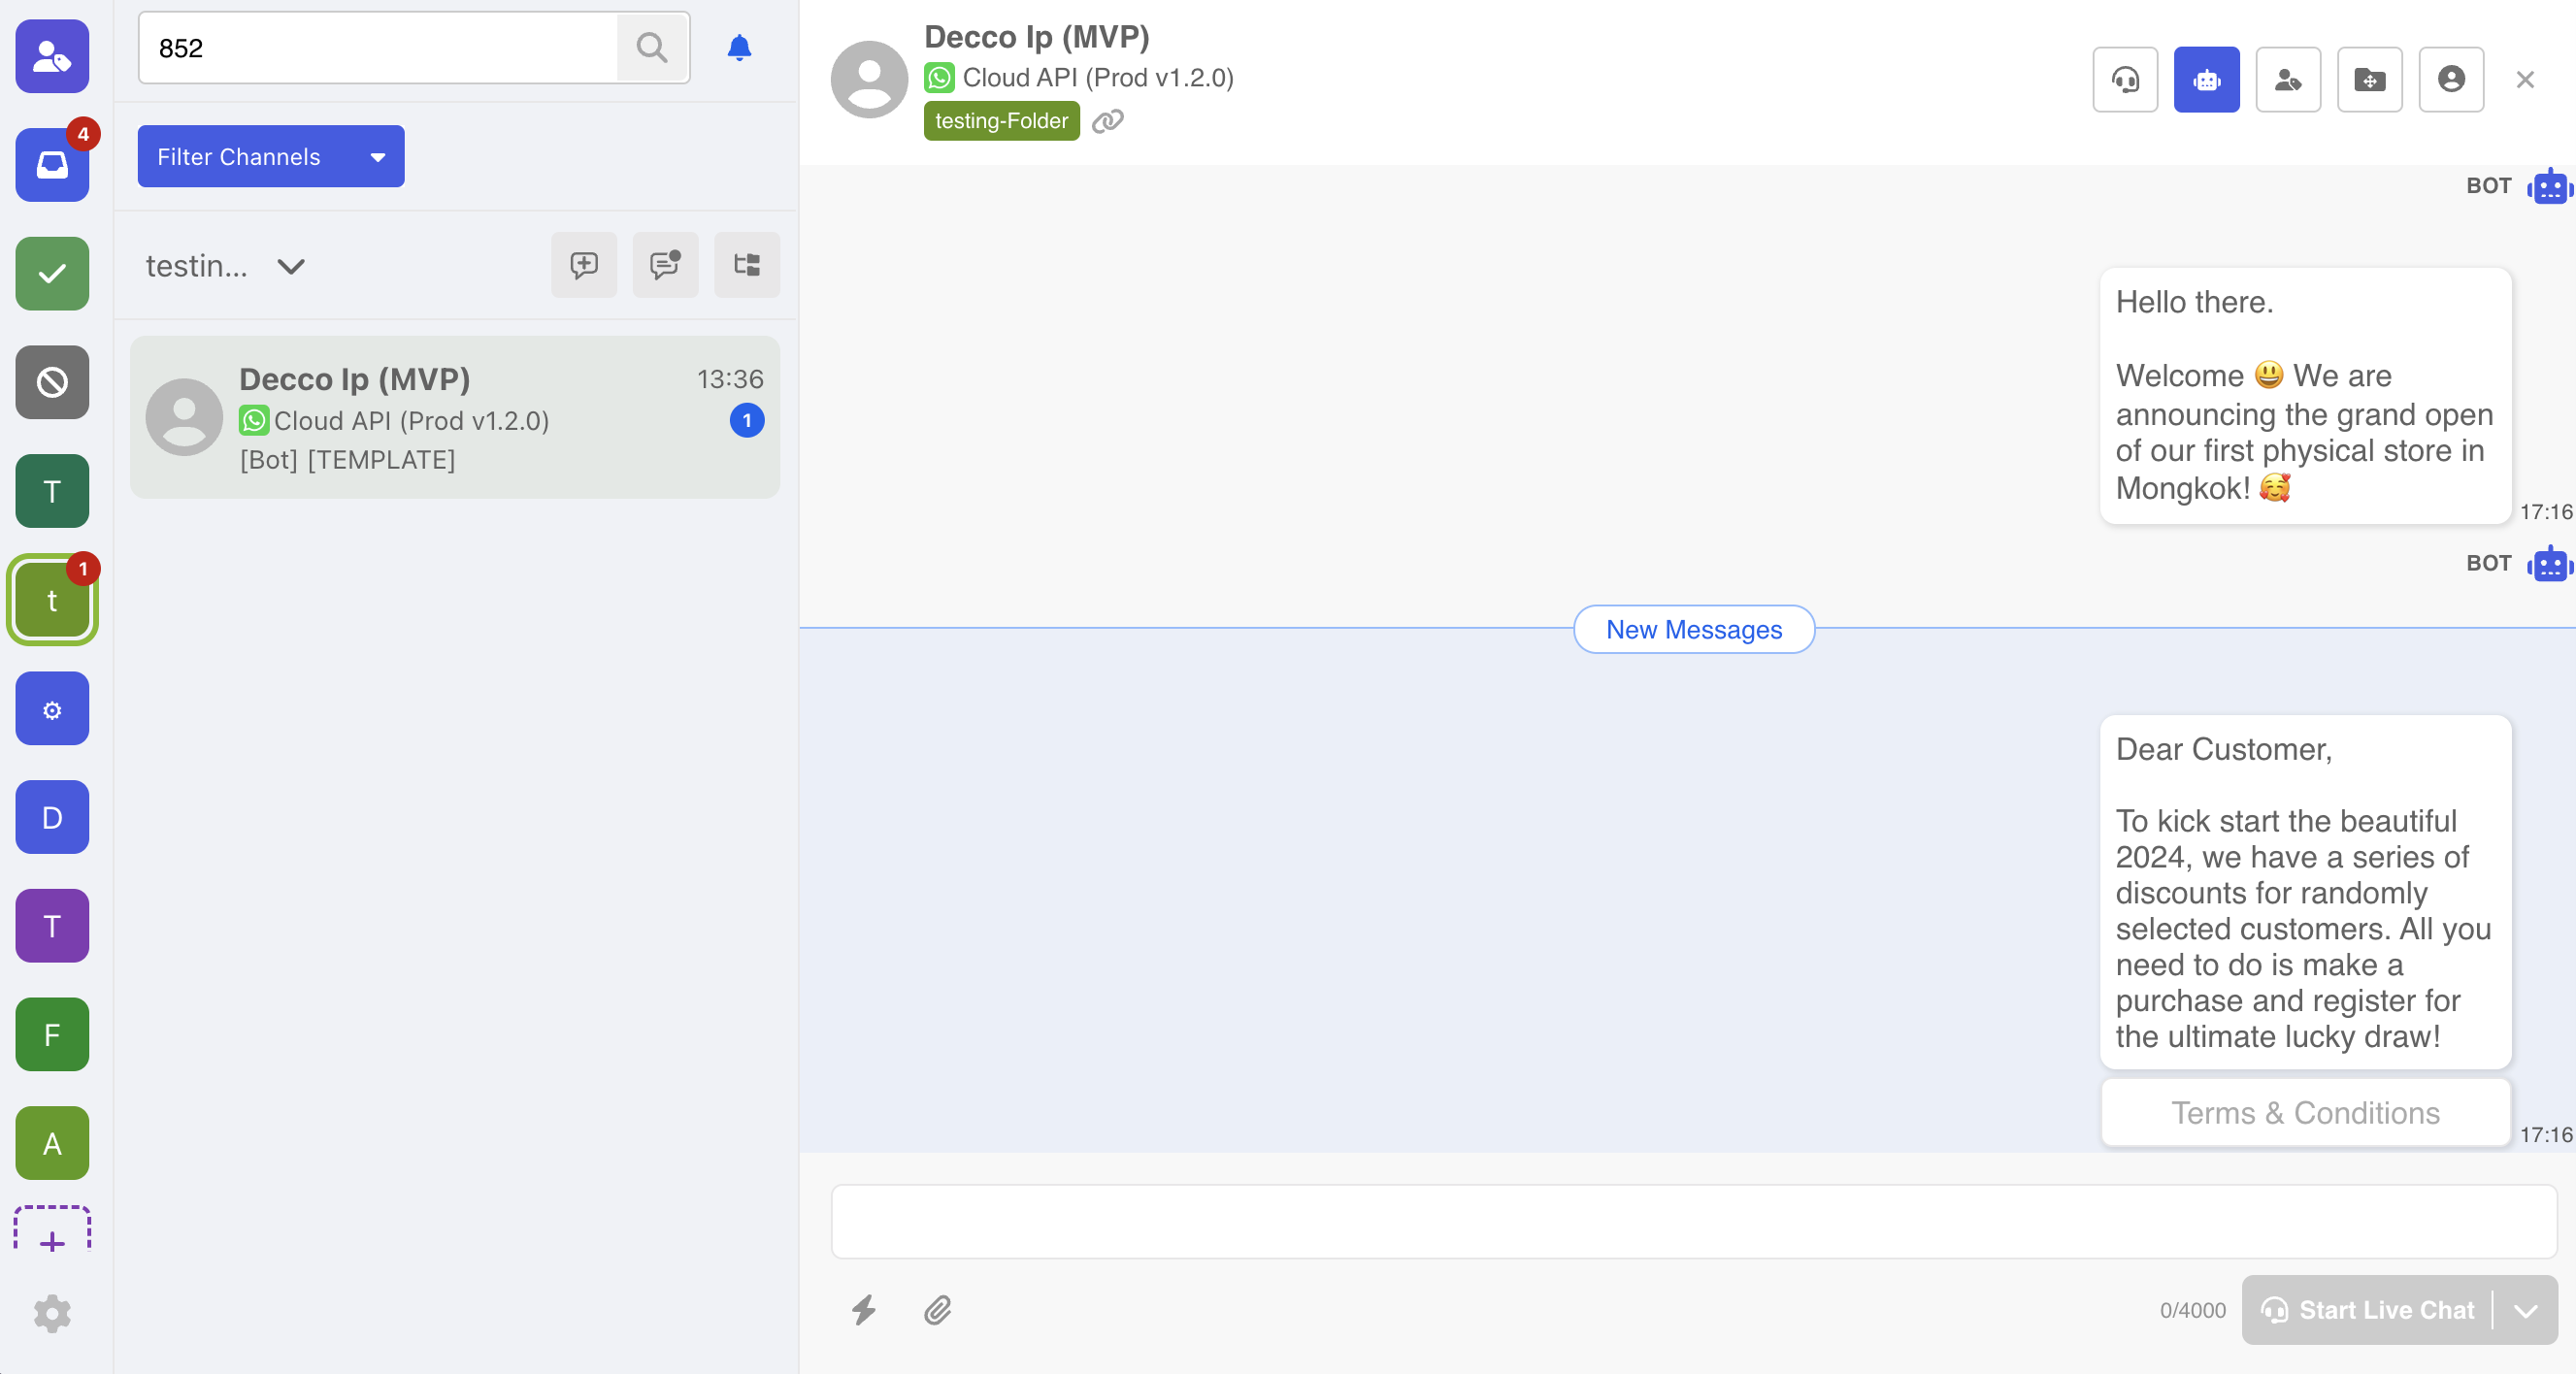
Once a channel is connected, the new messages from the channel will be reflected in the inbox as threads. Threads with unread messages will be listed in the Main Folder.
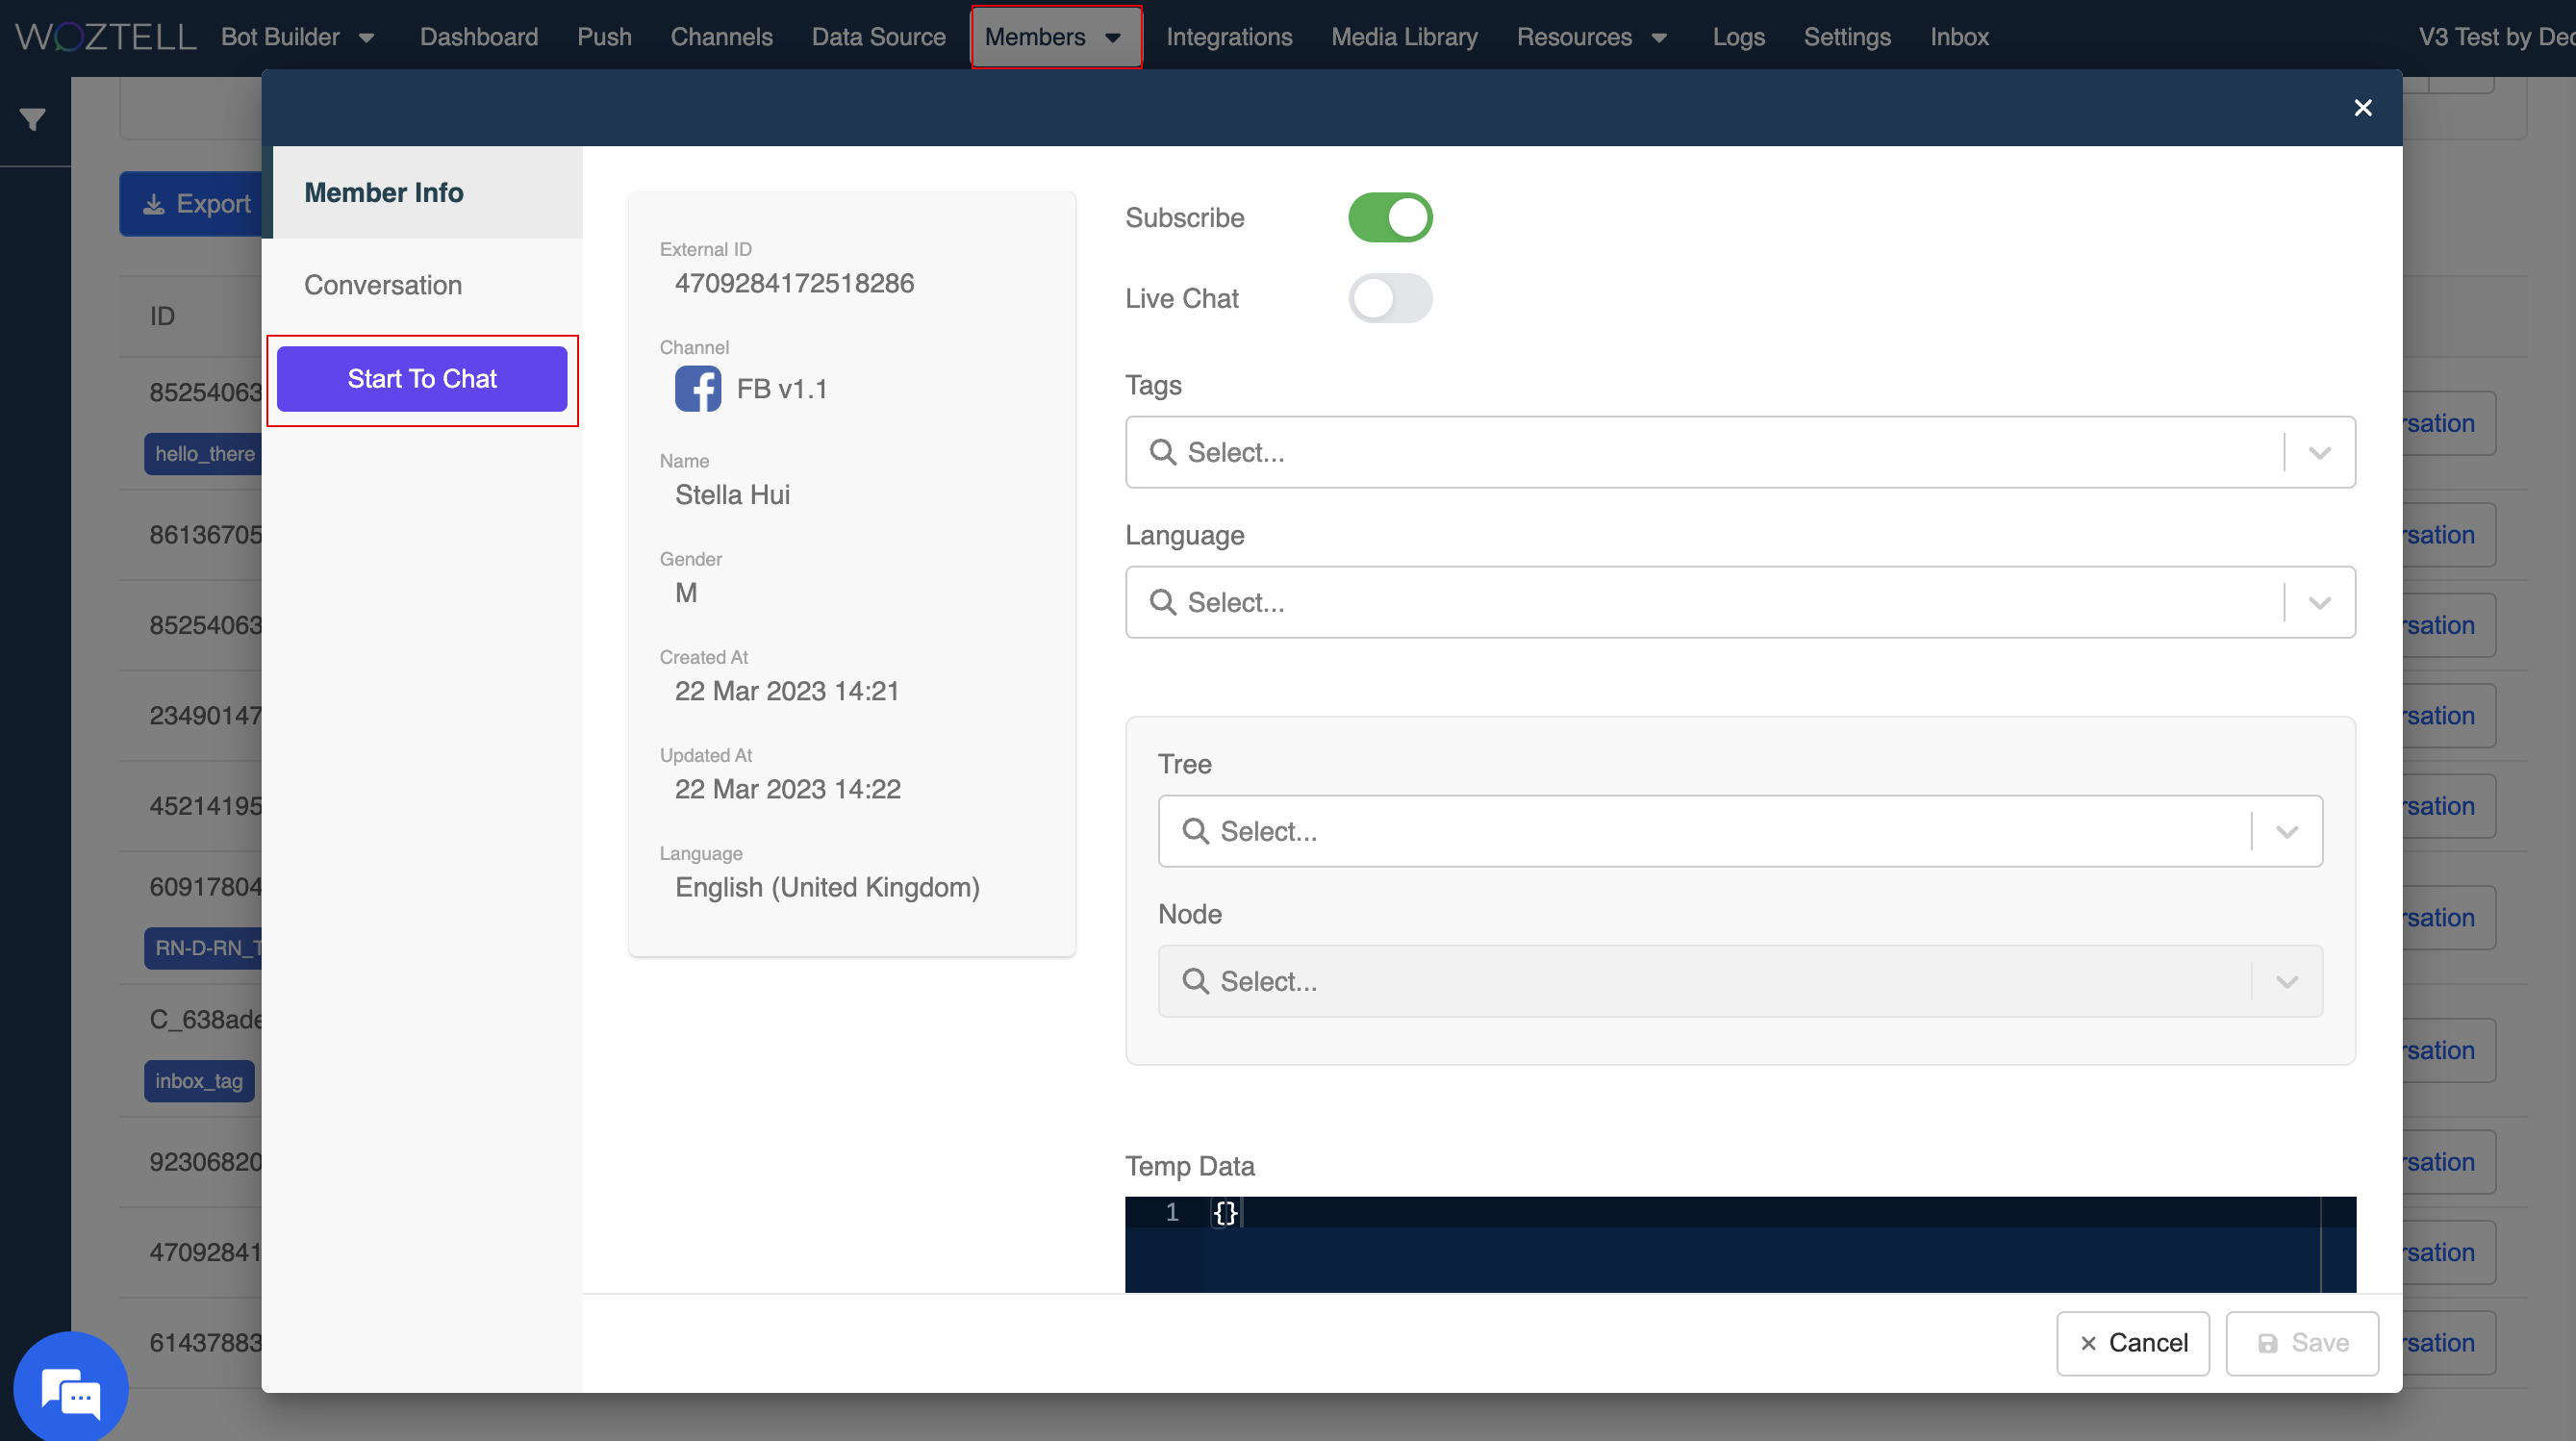
On the other hand, agents can actively start a thread by heading to the Member's details under the "Members" page, and clicking "Start to Chat".
Send Message
To send a message, you can simply open a thread and start typing. Normally, you can send the message by clicking the "Send" button or using the "Enter" key, and the behavior of the "Send" button will change based on the status of the thread.
- If the agent wants to send a message in chatbot mode, you can choose to send the message and enable the Live Chat mode as well.
NOTE
For conversations on Facebook/Instagram messenger, WOZTELL supports agents to reply outside the 24 hours window by intuitively applying the human agent tag to the message.
Please note that Meta only allows this for the use cases within 7 days since the last user's message,
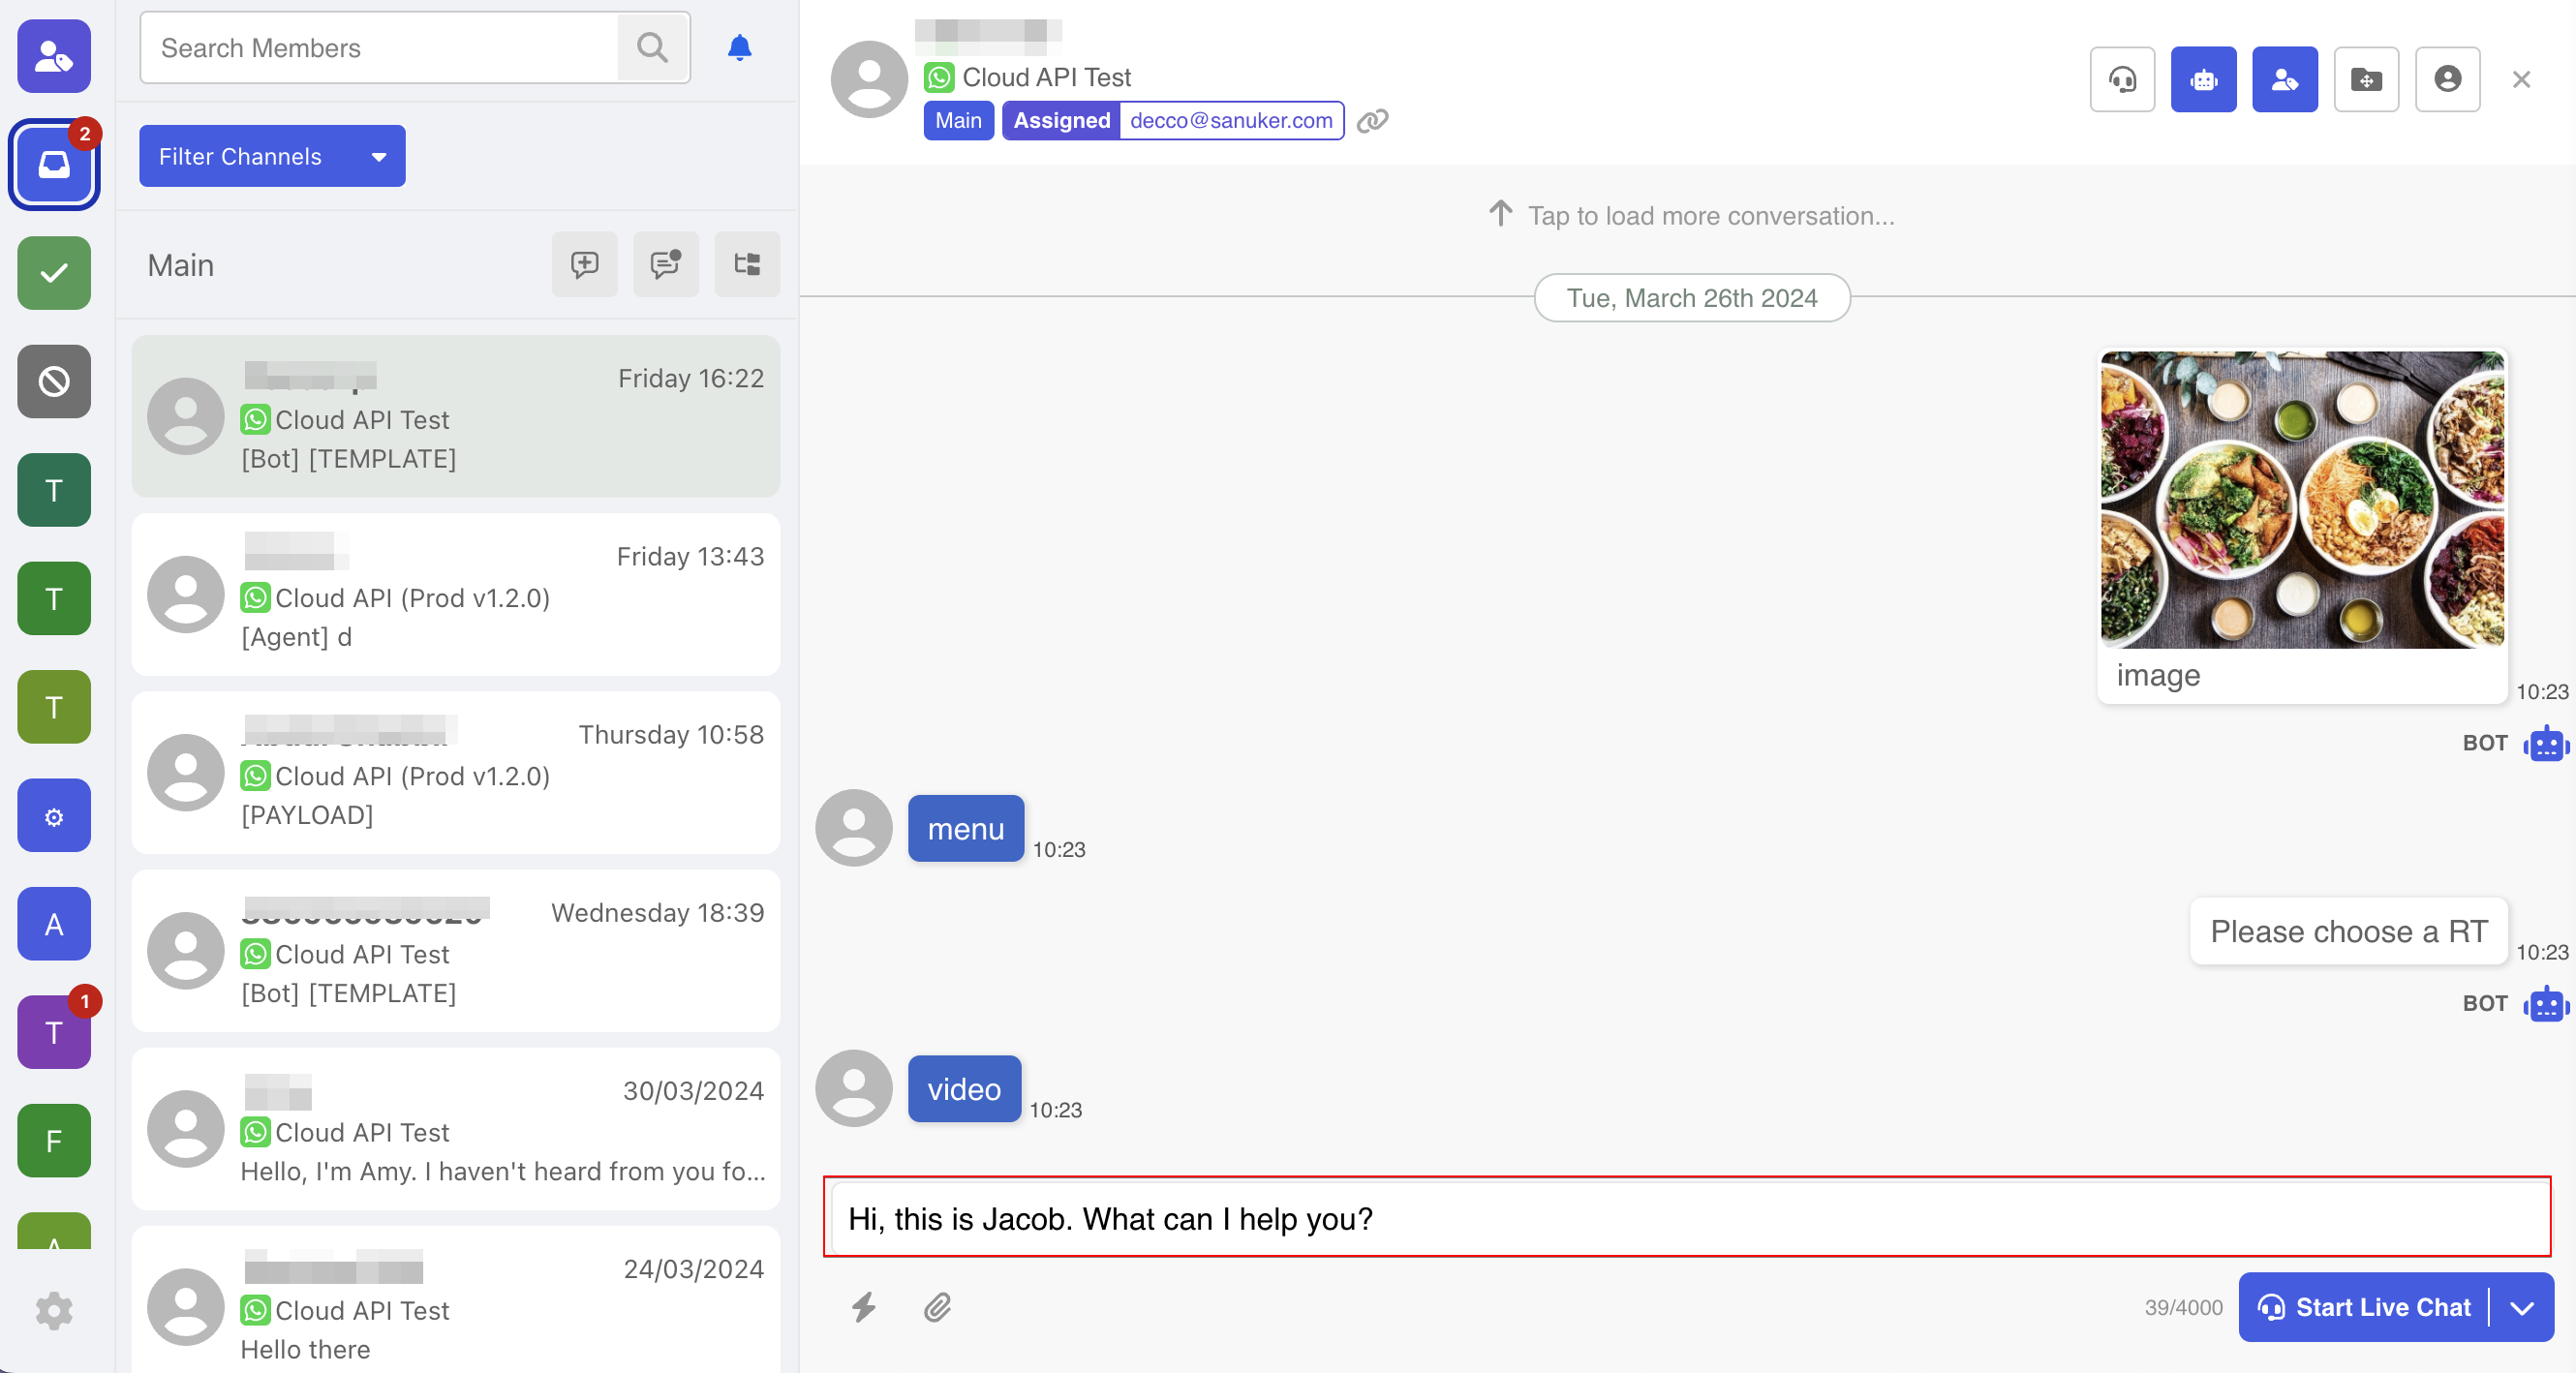
- In the chatbot mode, agent can also choose to send the message directly and keep the thread in chatbot mode.
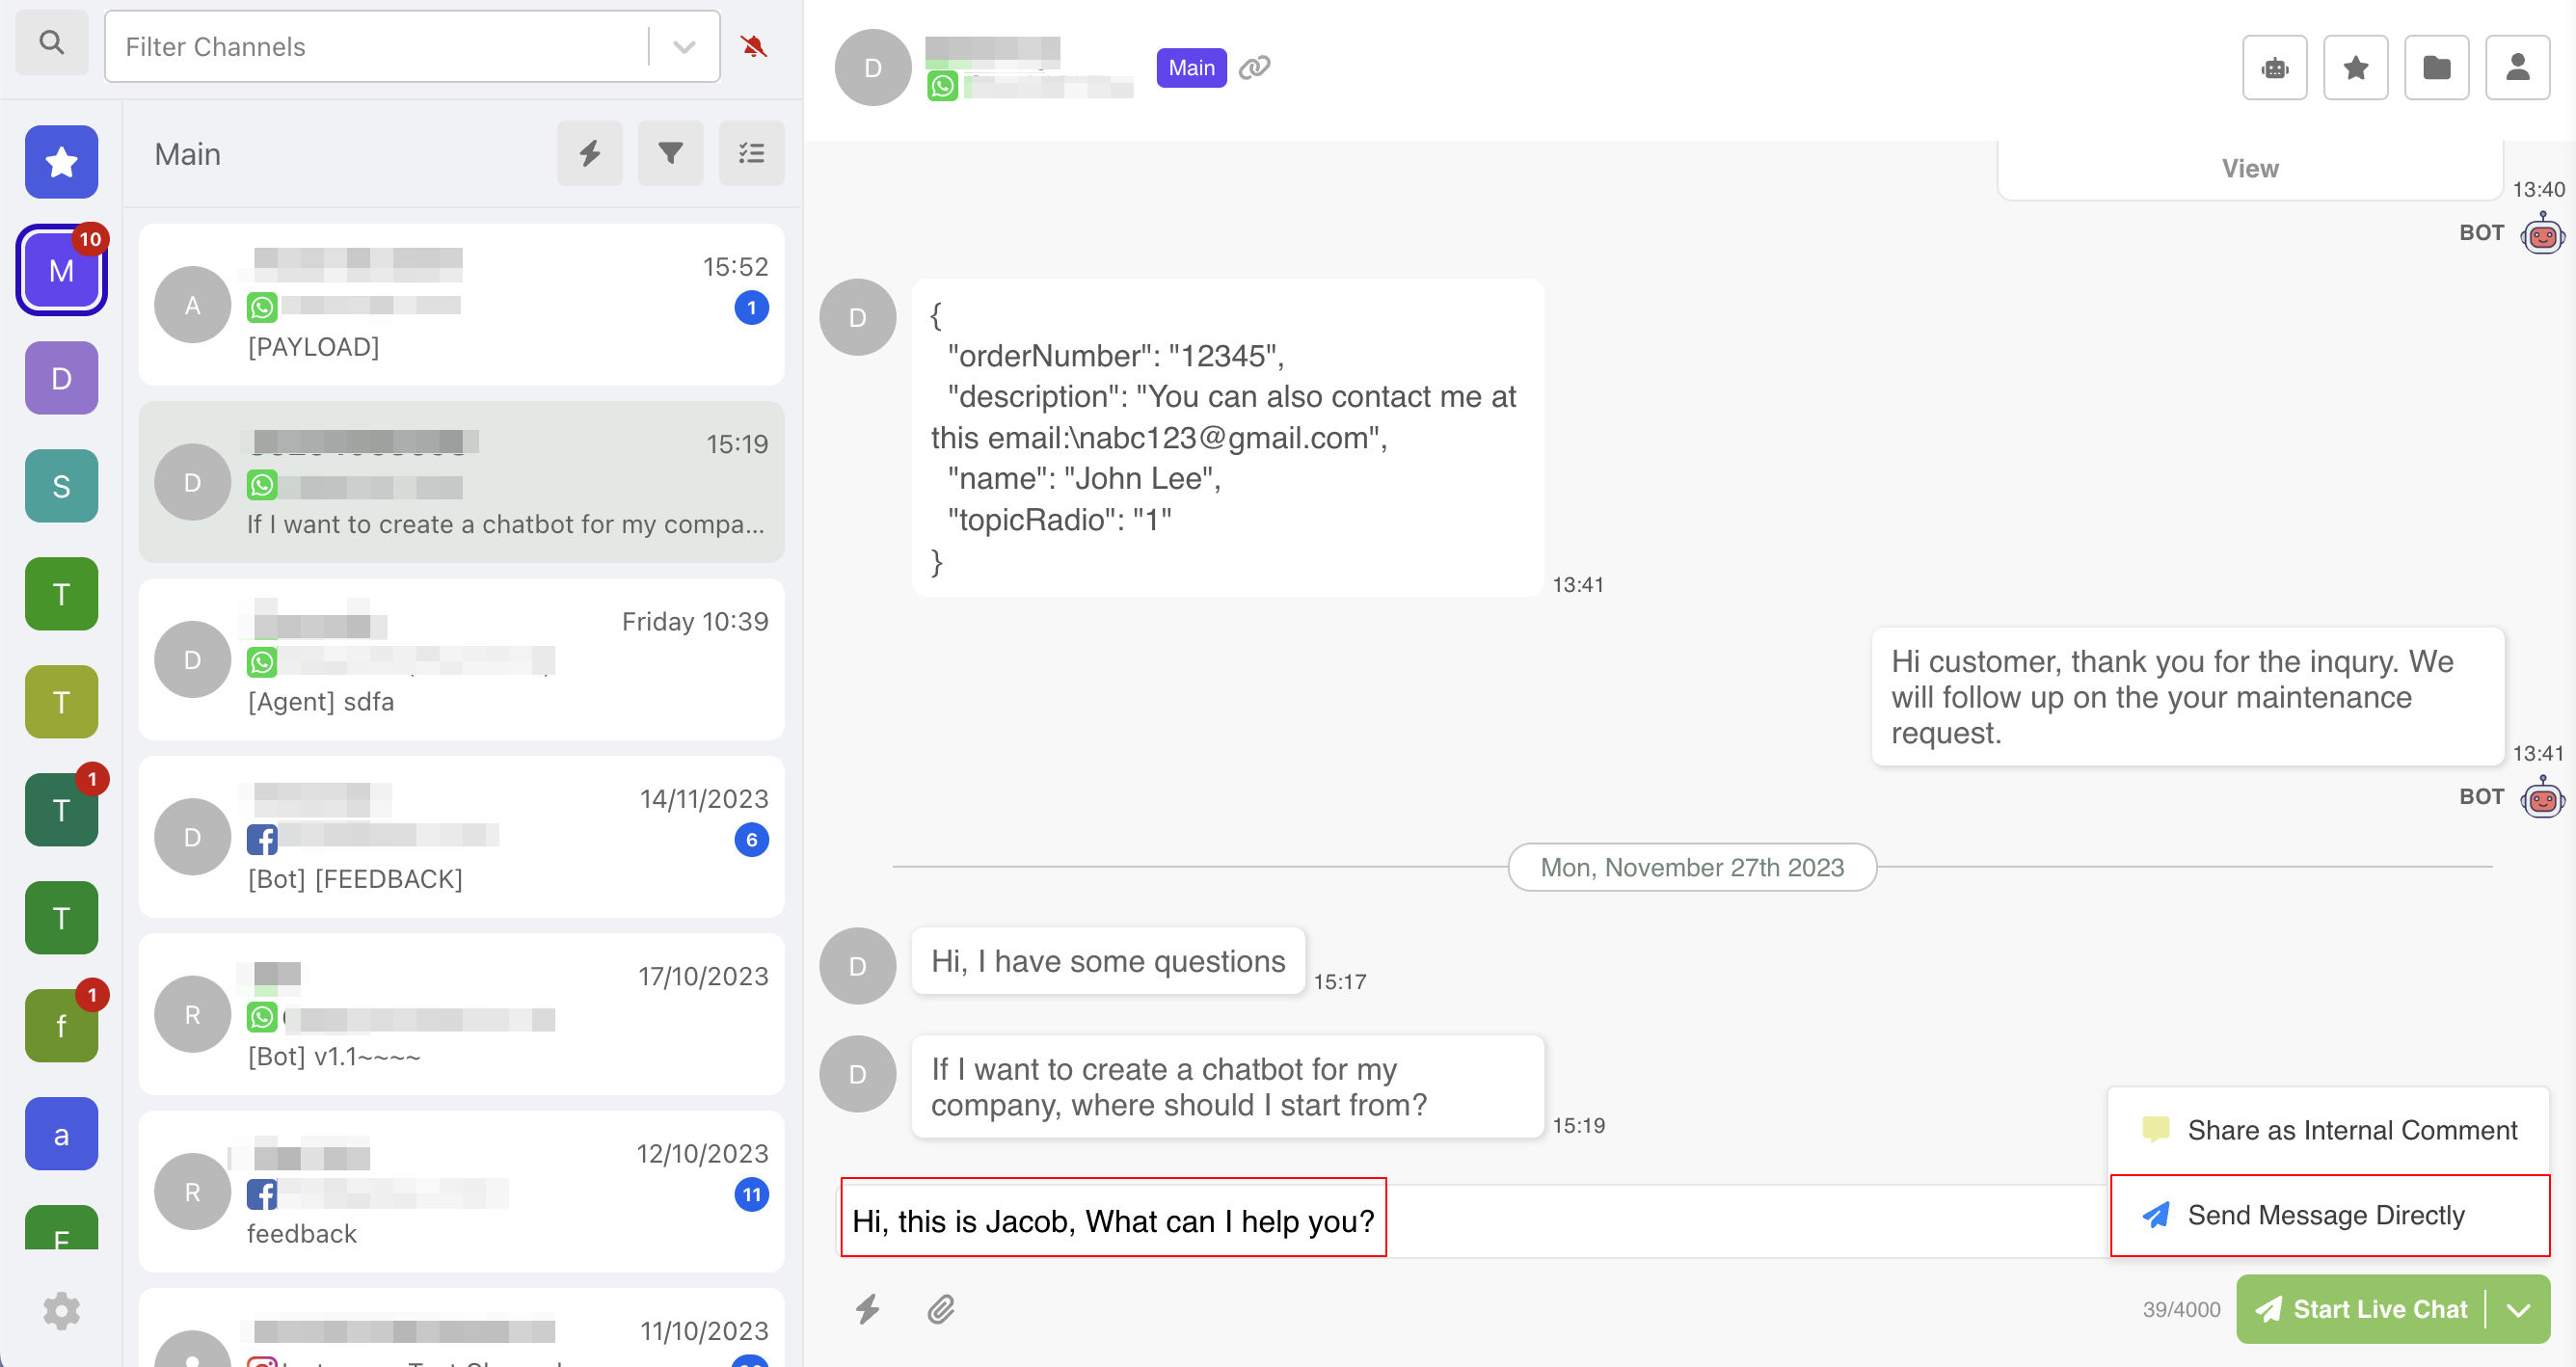
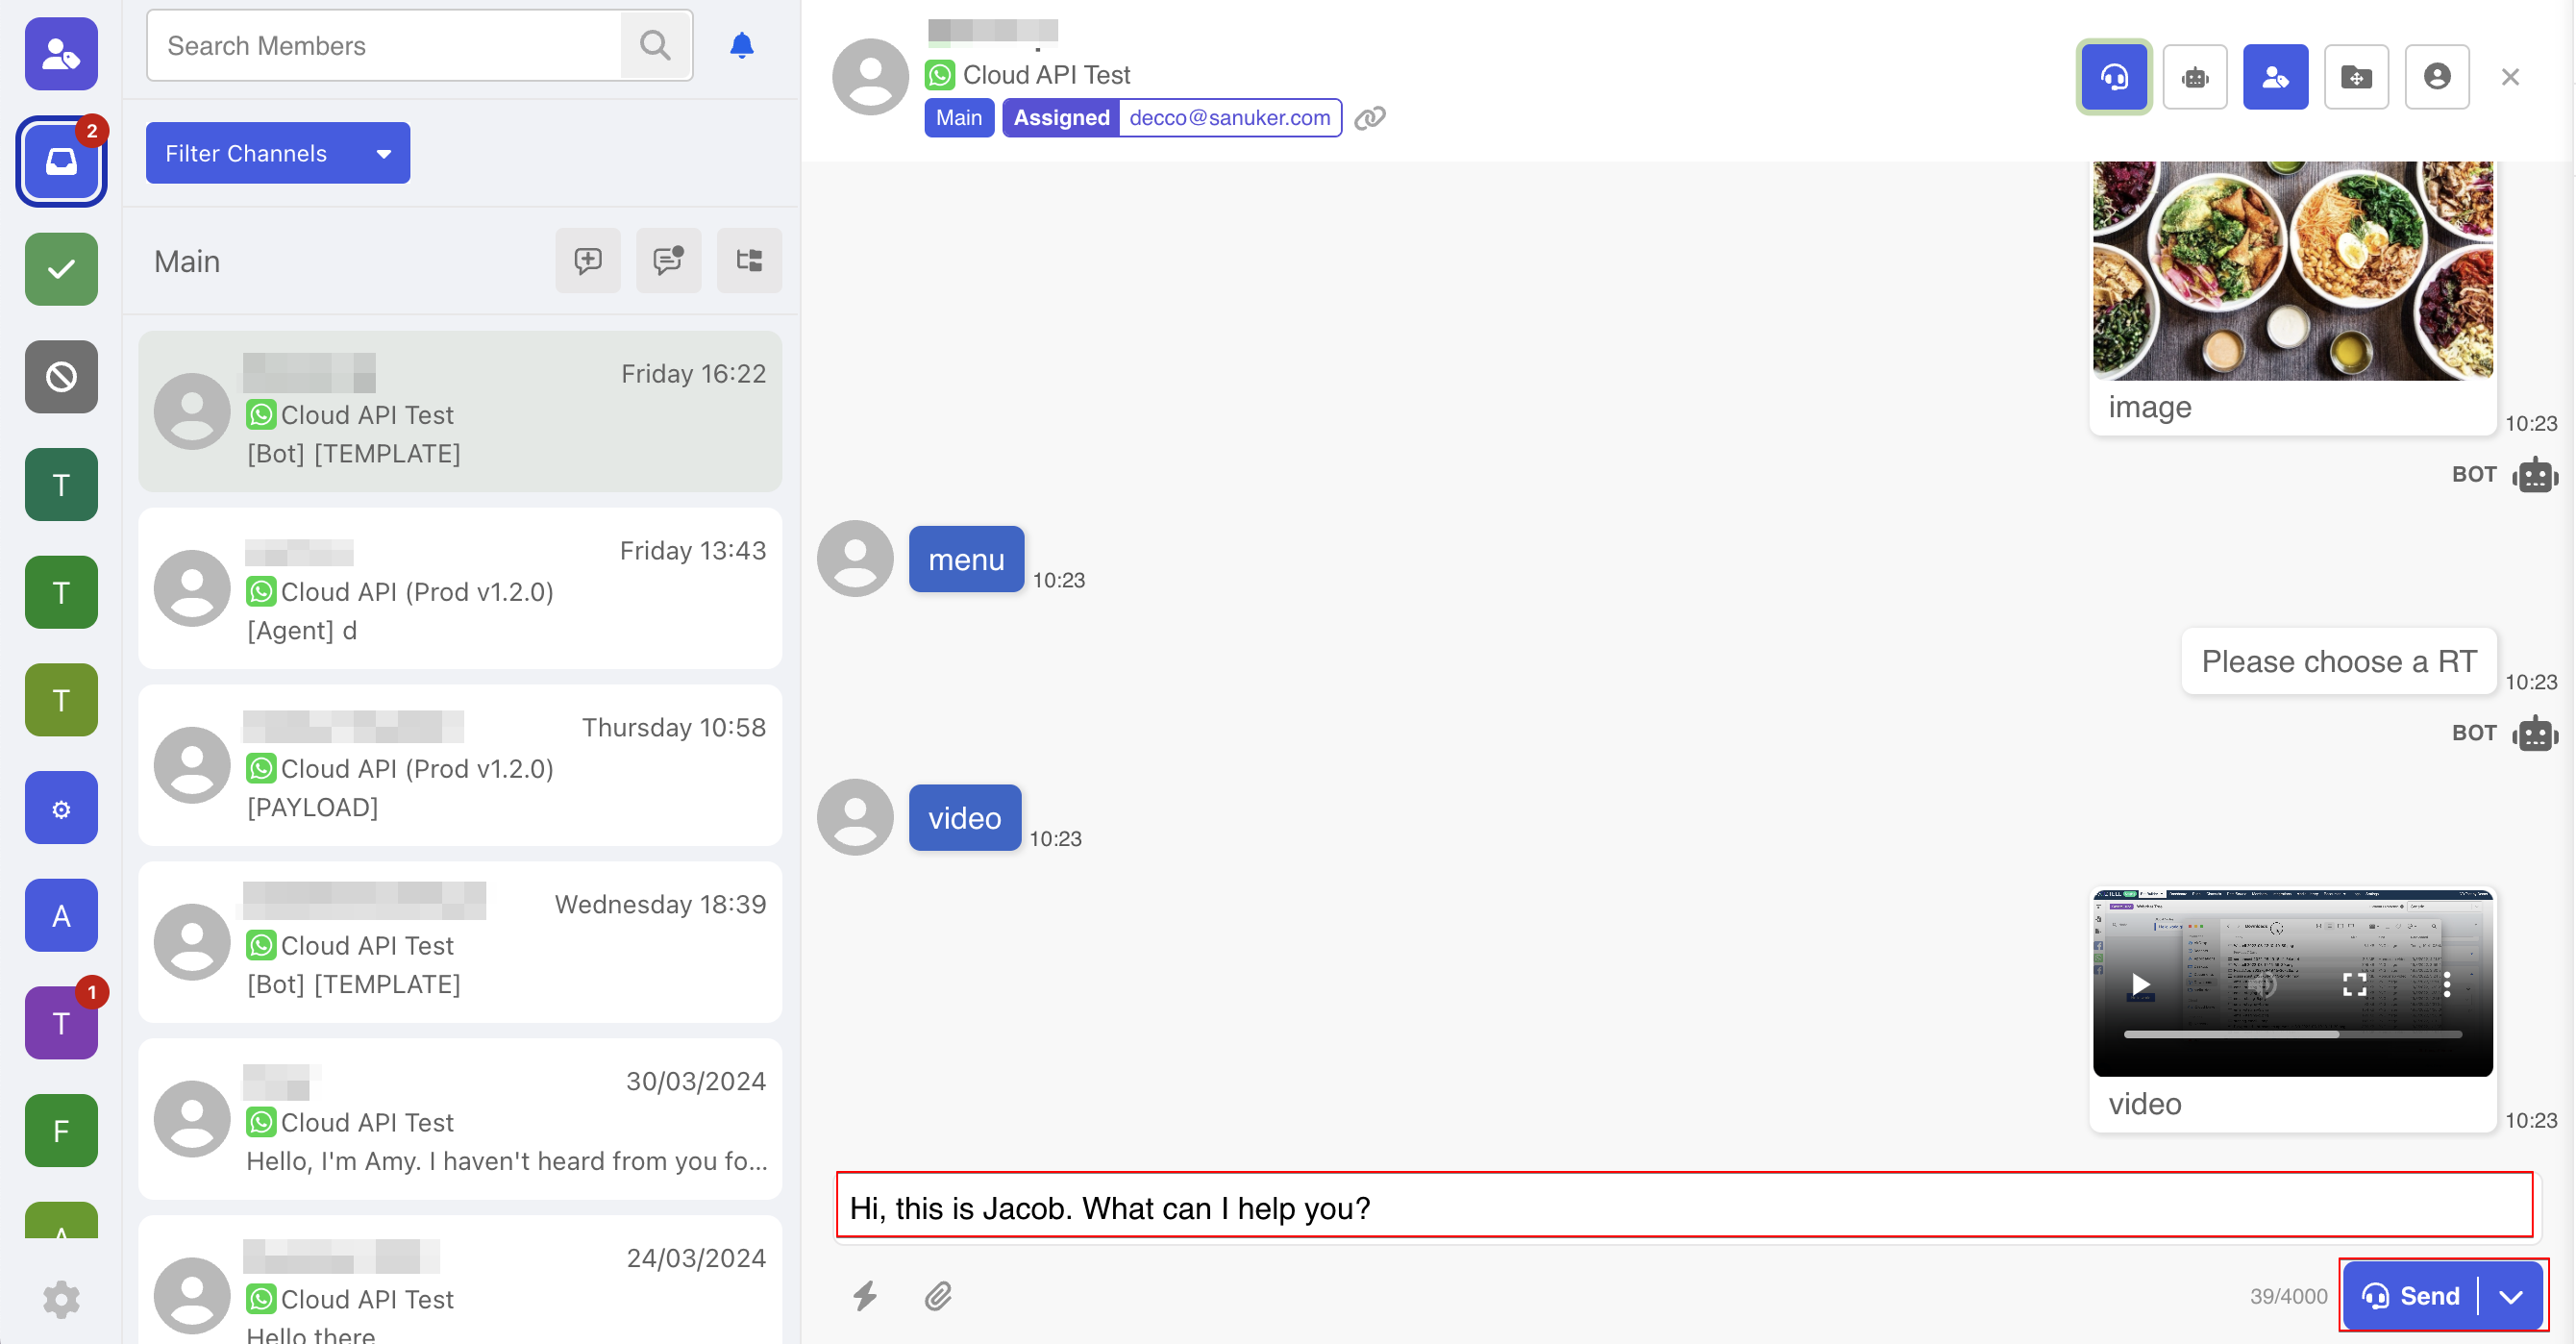
- In the live chat mode, agent can always send the message directly.
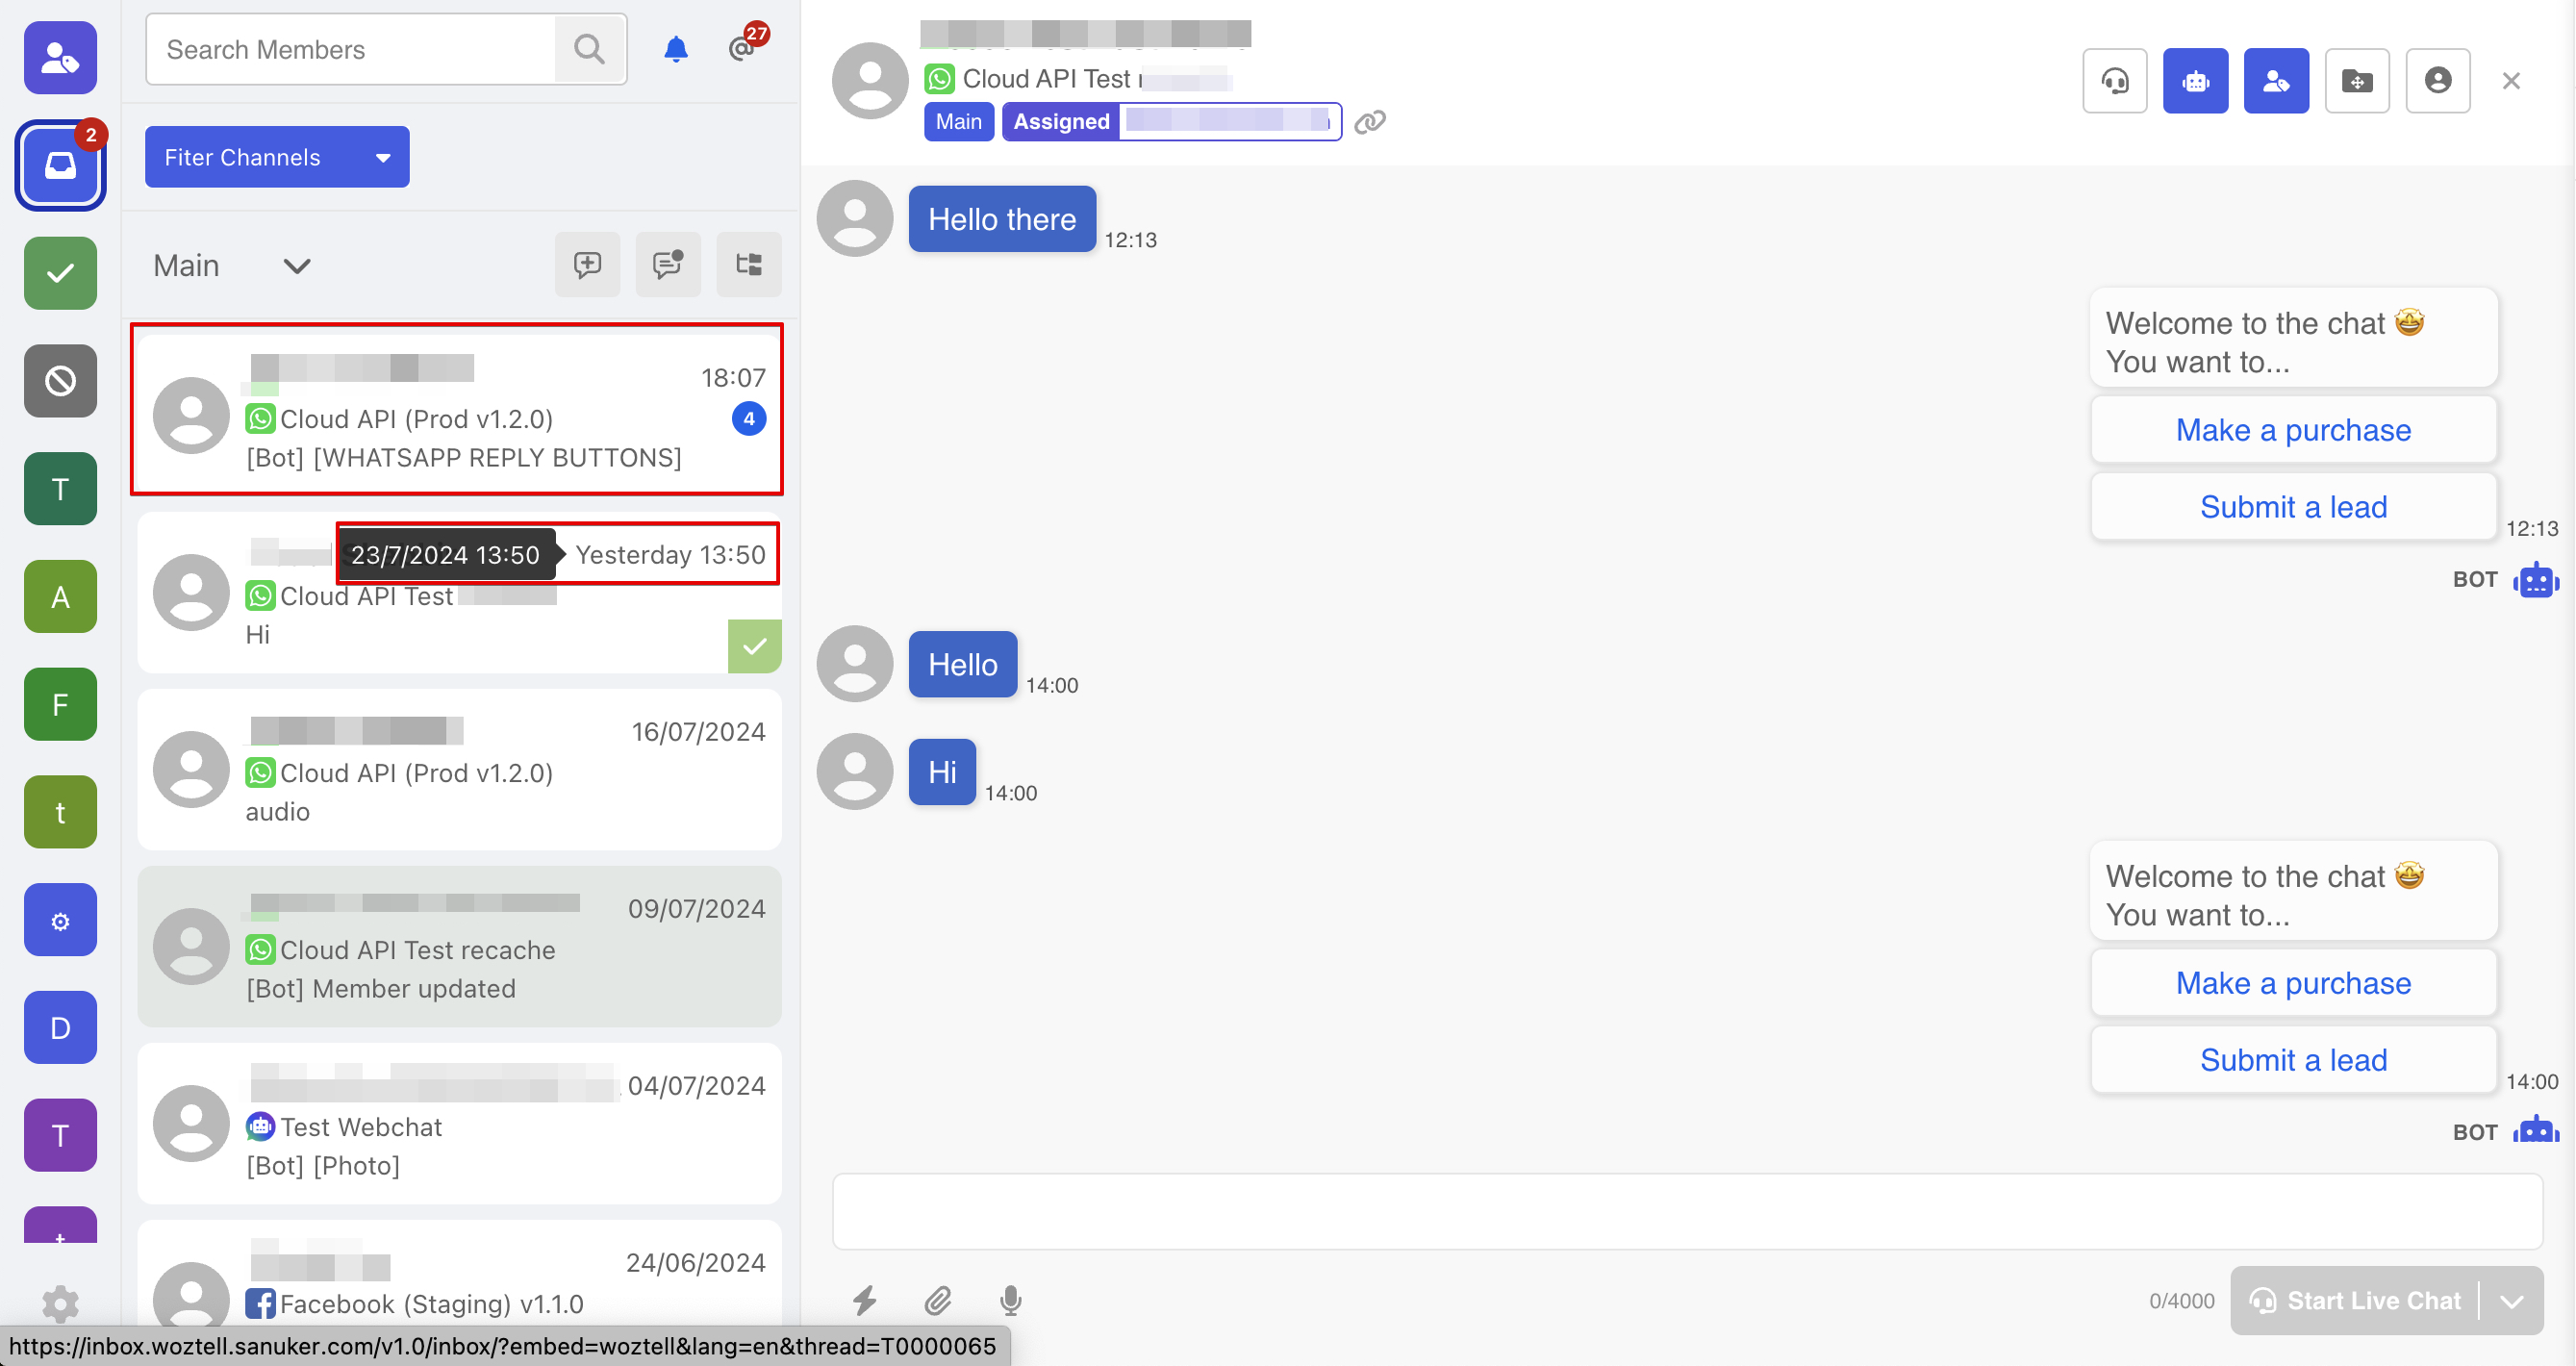
- When a thread has new received/sent messages, it will be pinned to the top of the thread menu. Agent can also view the full date and time of the latest received/sent message by hovering over the time or date.
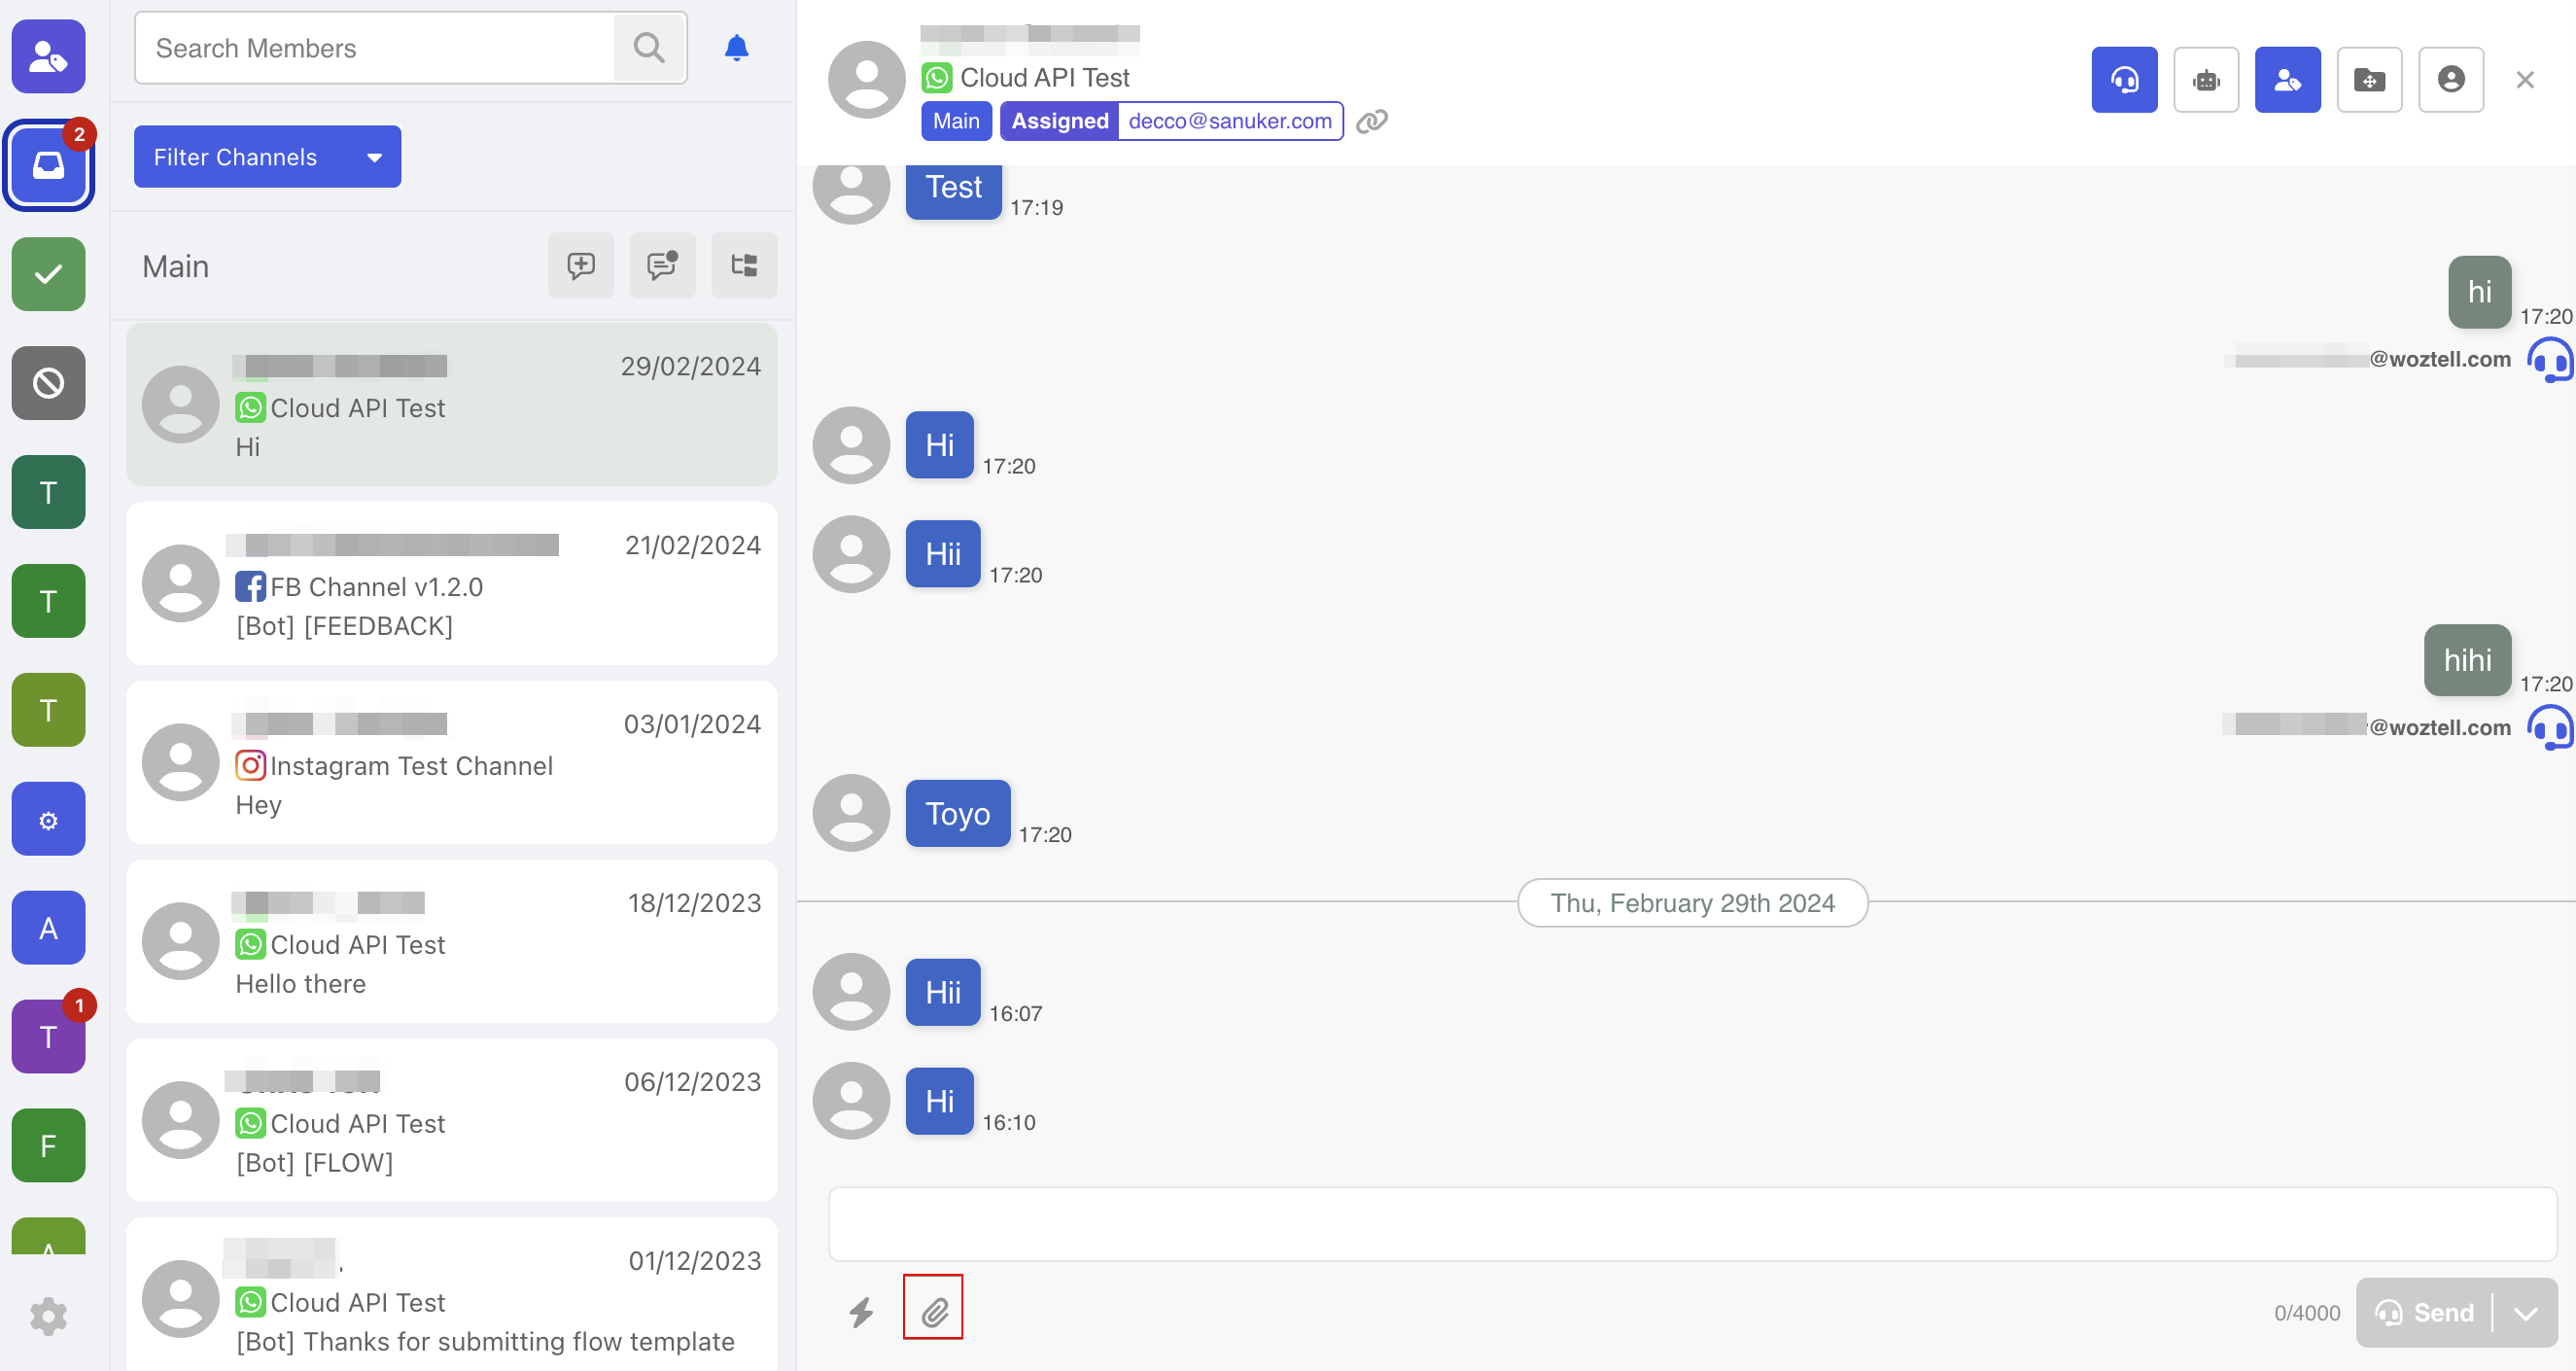
Send Attachment File
The inbox supports sending media and files by adding attachment.
NOTE
Alternatively, you can Drag & Drop or Copy & Paste media into the text field to attach the files.
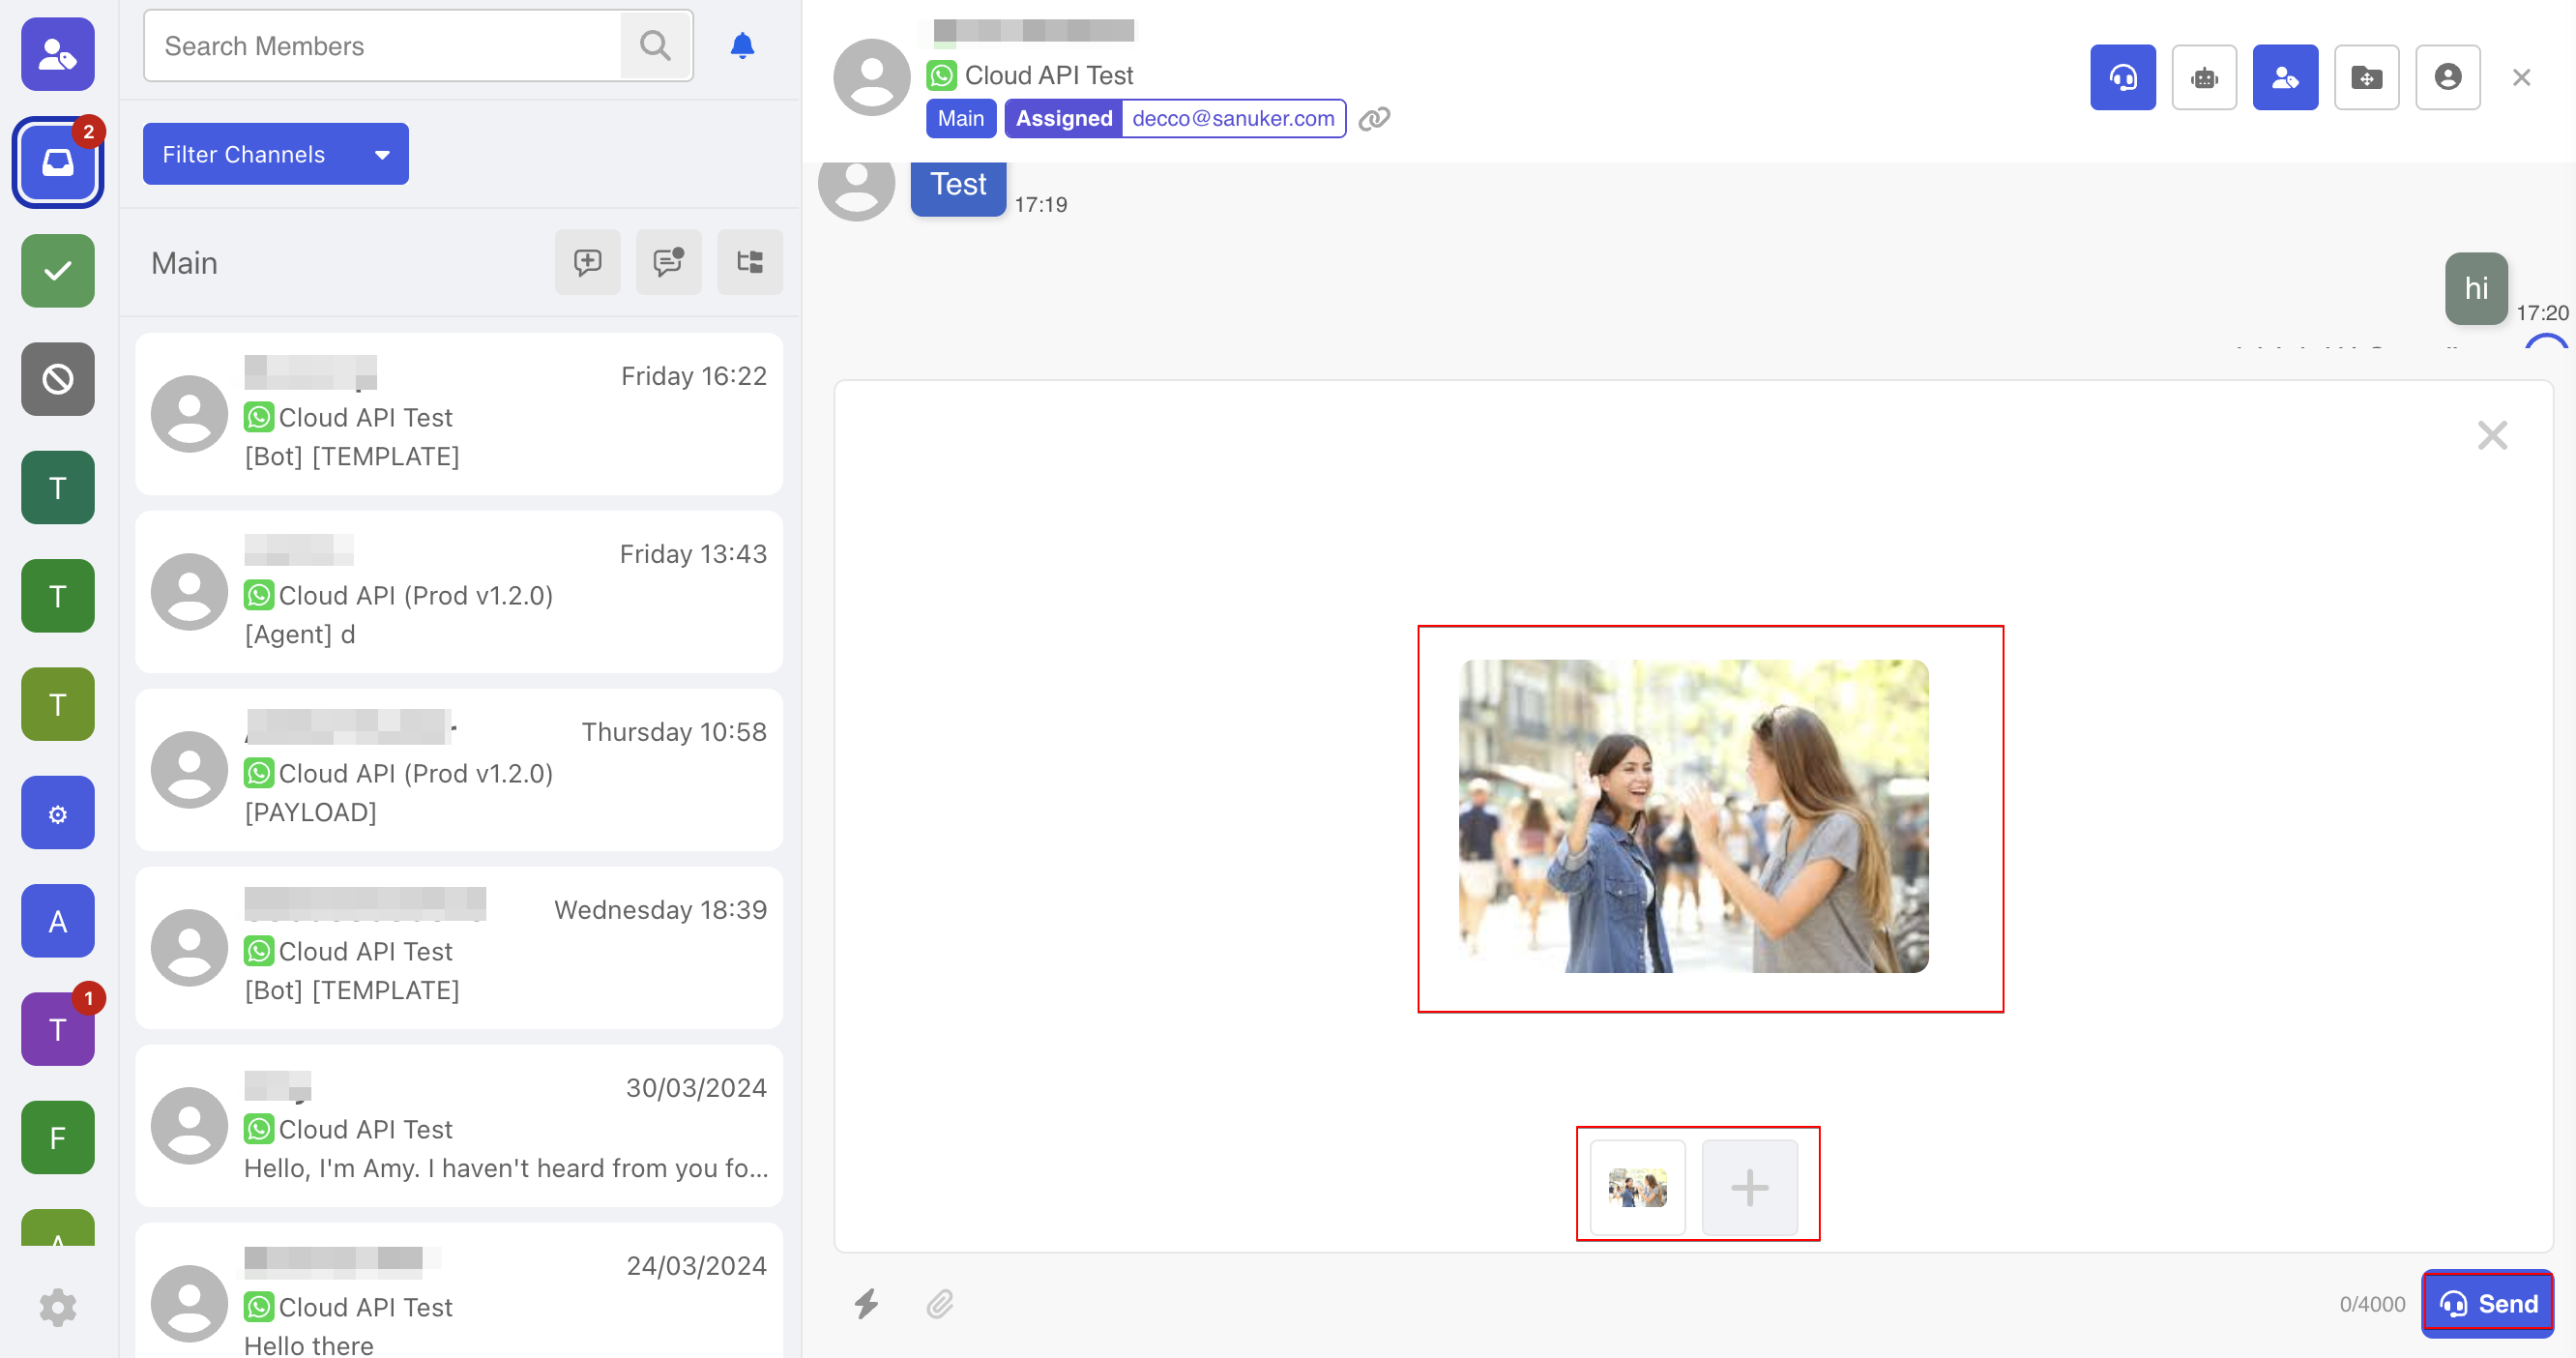
After uploading the files, you can check out the preview and decide to add or remove attachment. After that, just click "Send" to send the attachment.
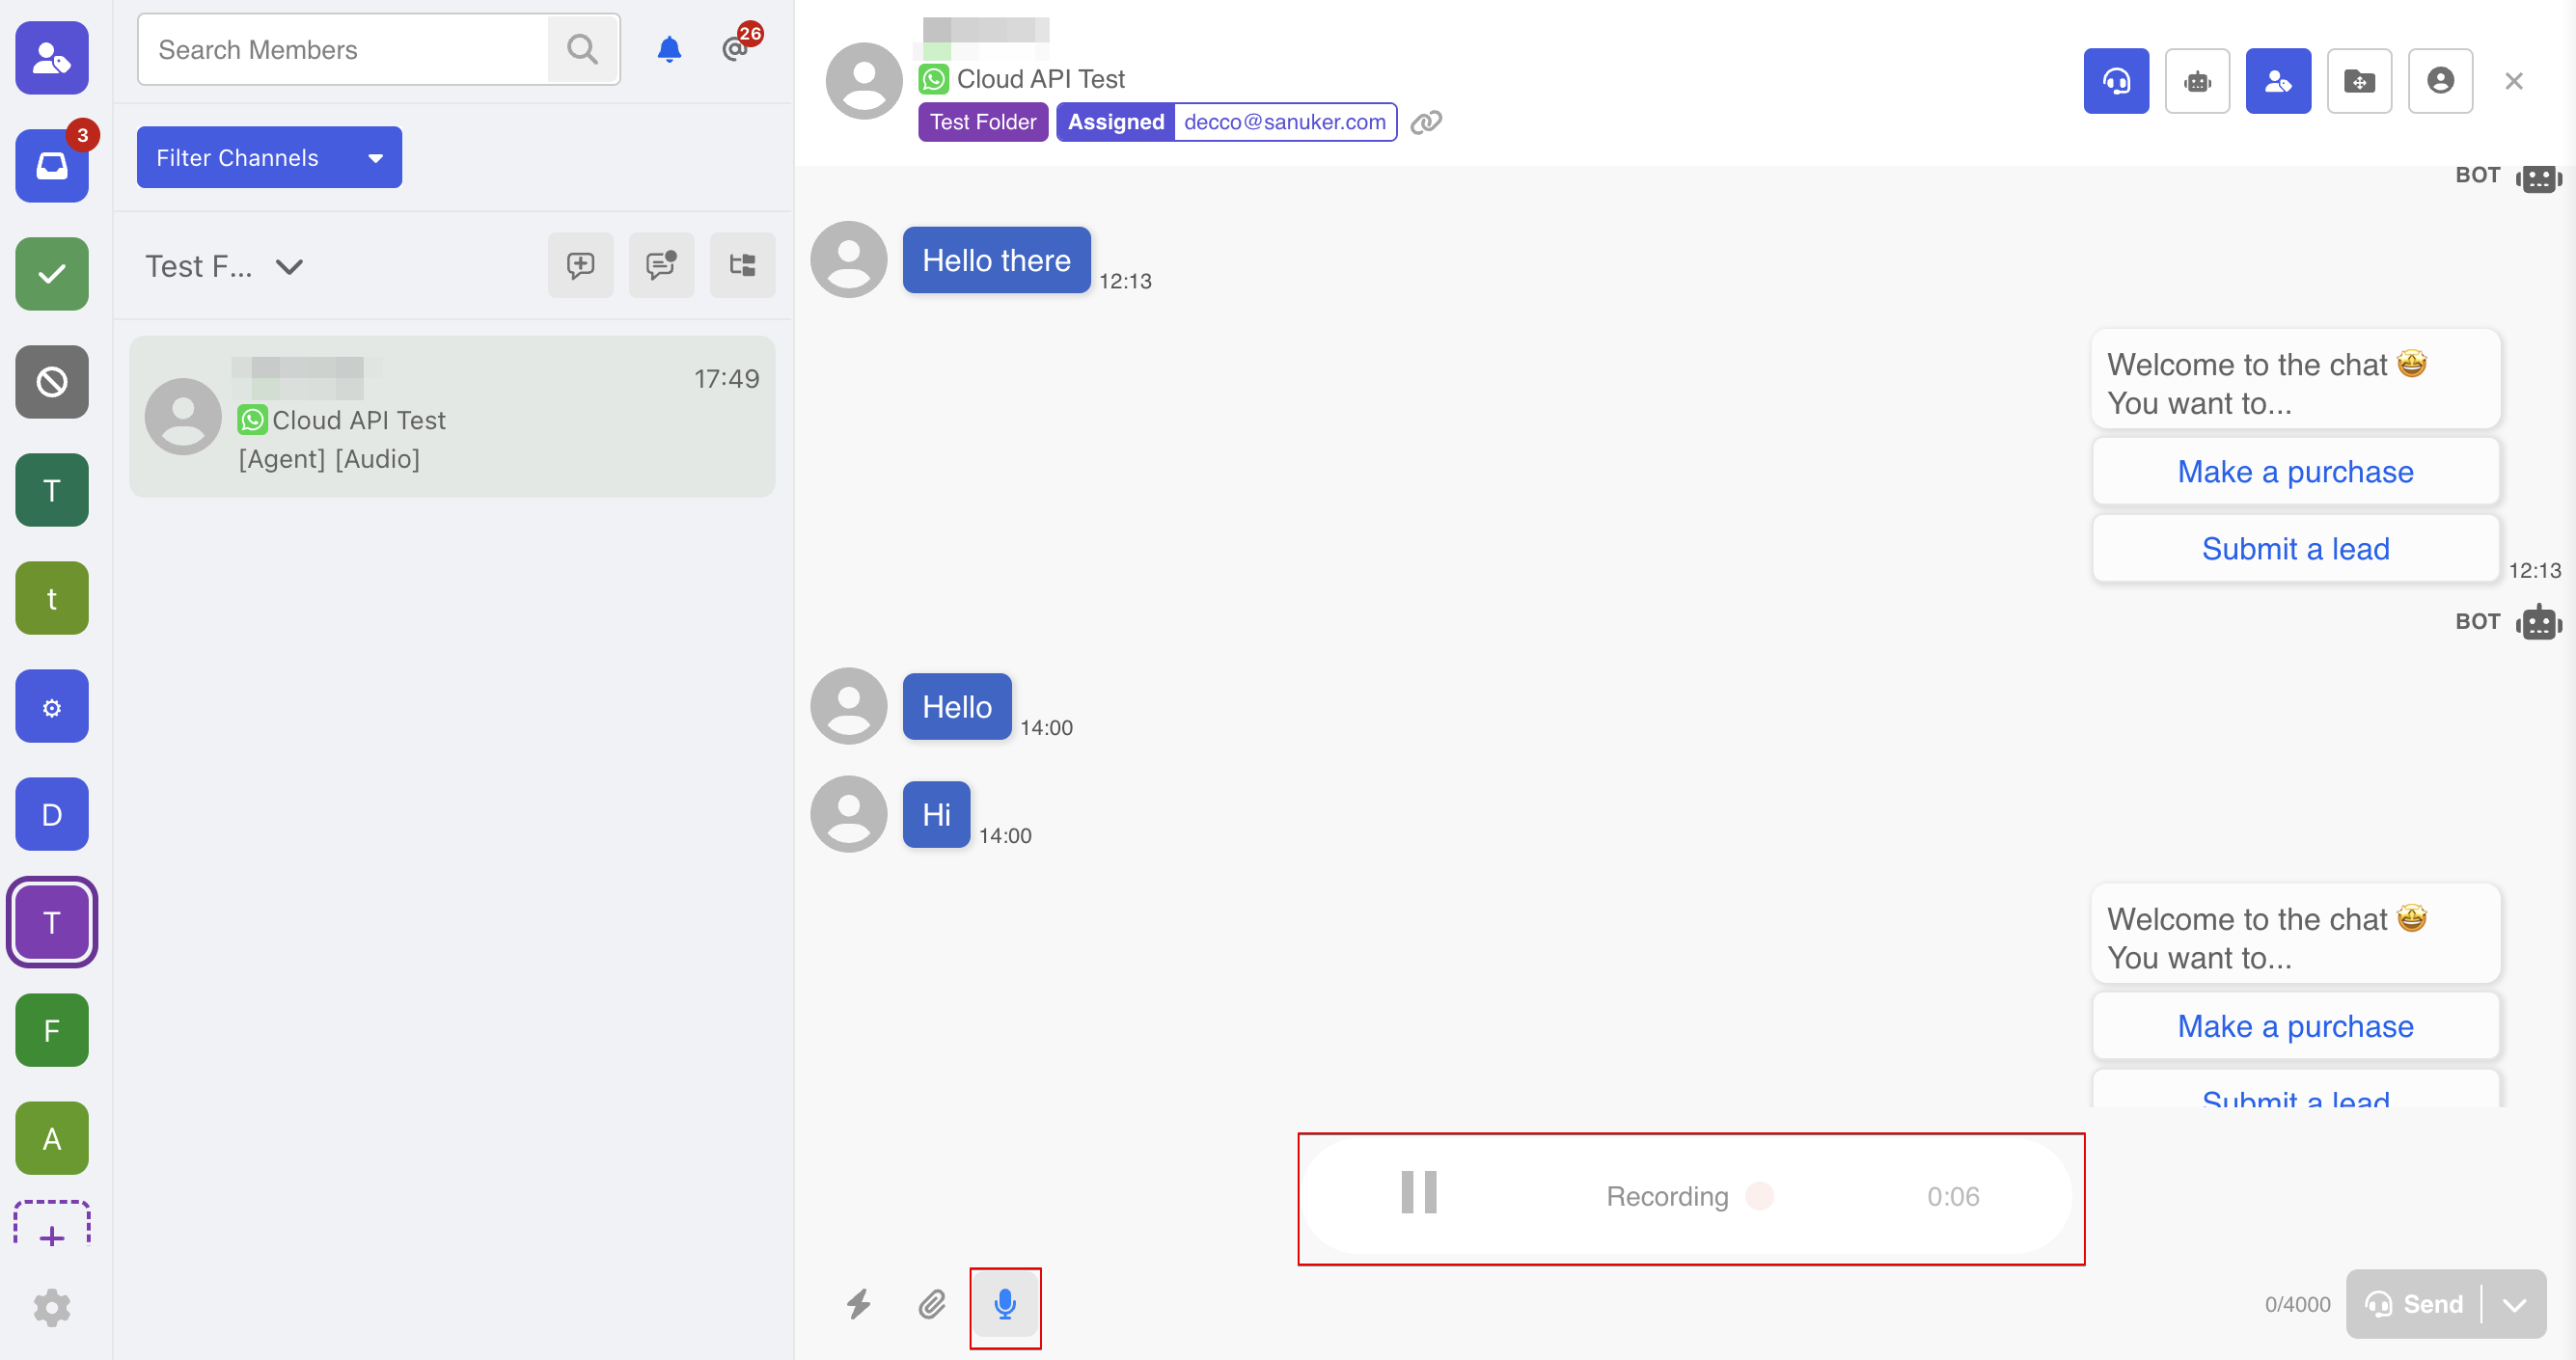
Send Audio Recording
The inbox also supports a native audio recorder for recording and sending audio message.
First, click on the "Audio" icon to start recording.
Once the recording is paused, you can either Resume recording or click the green tick to Complete recording.
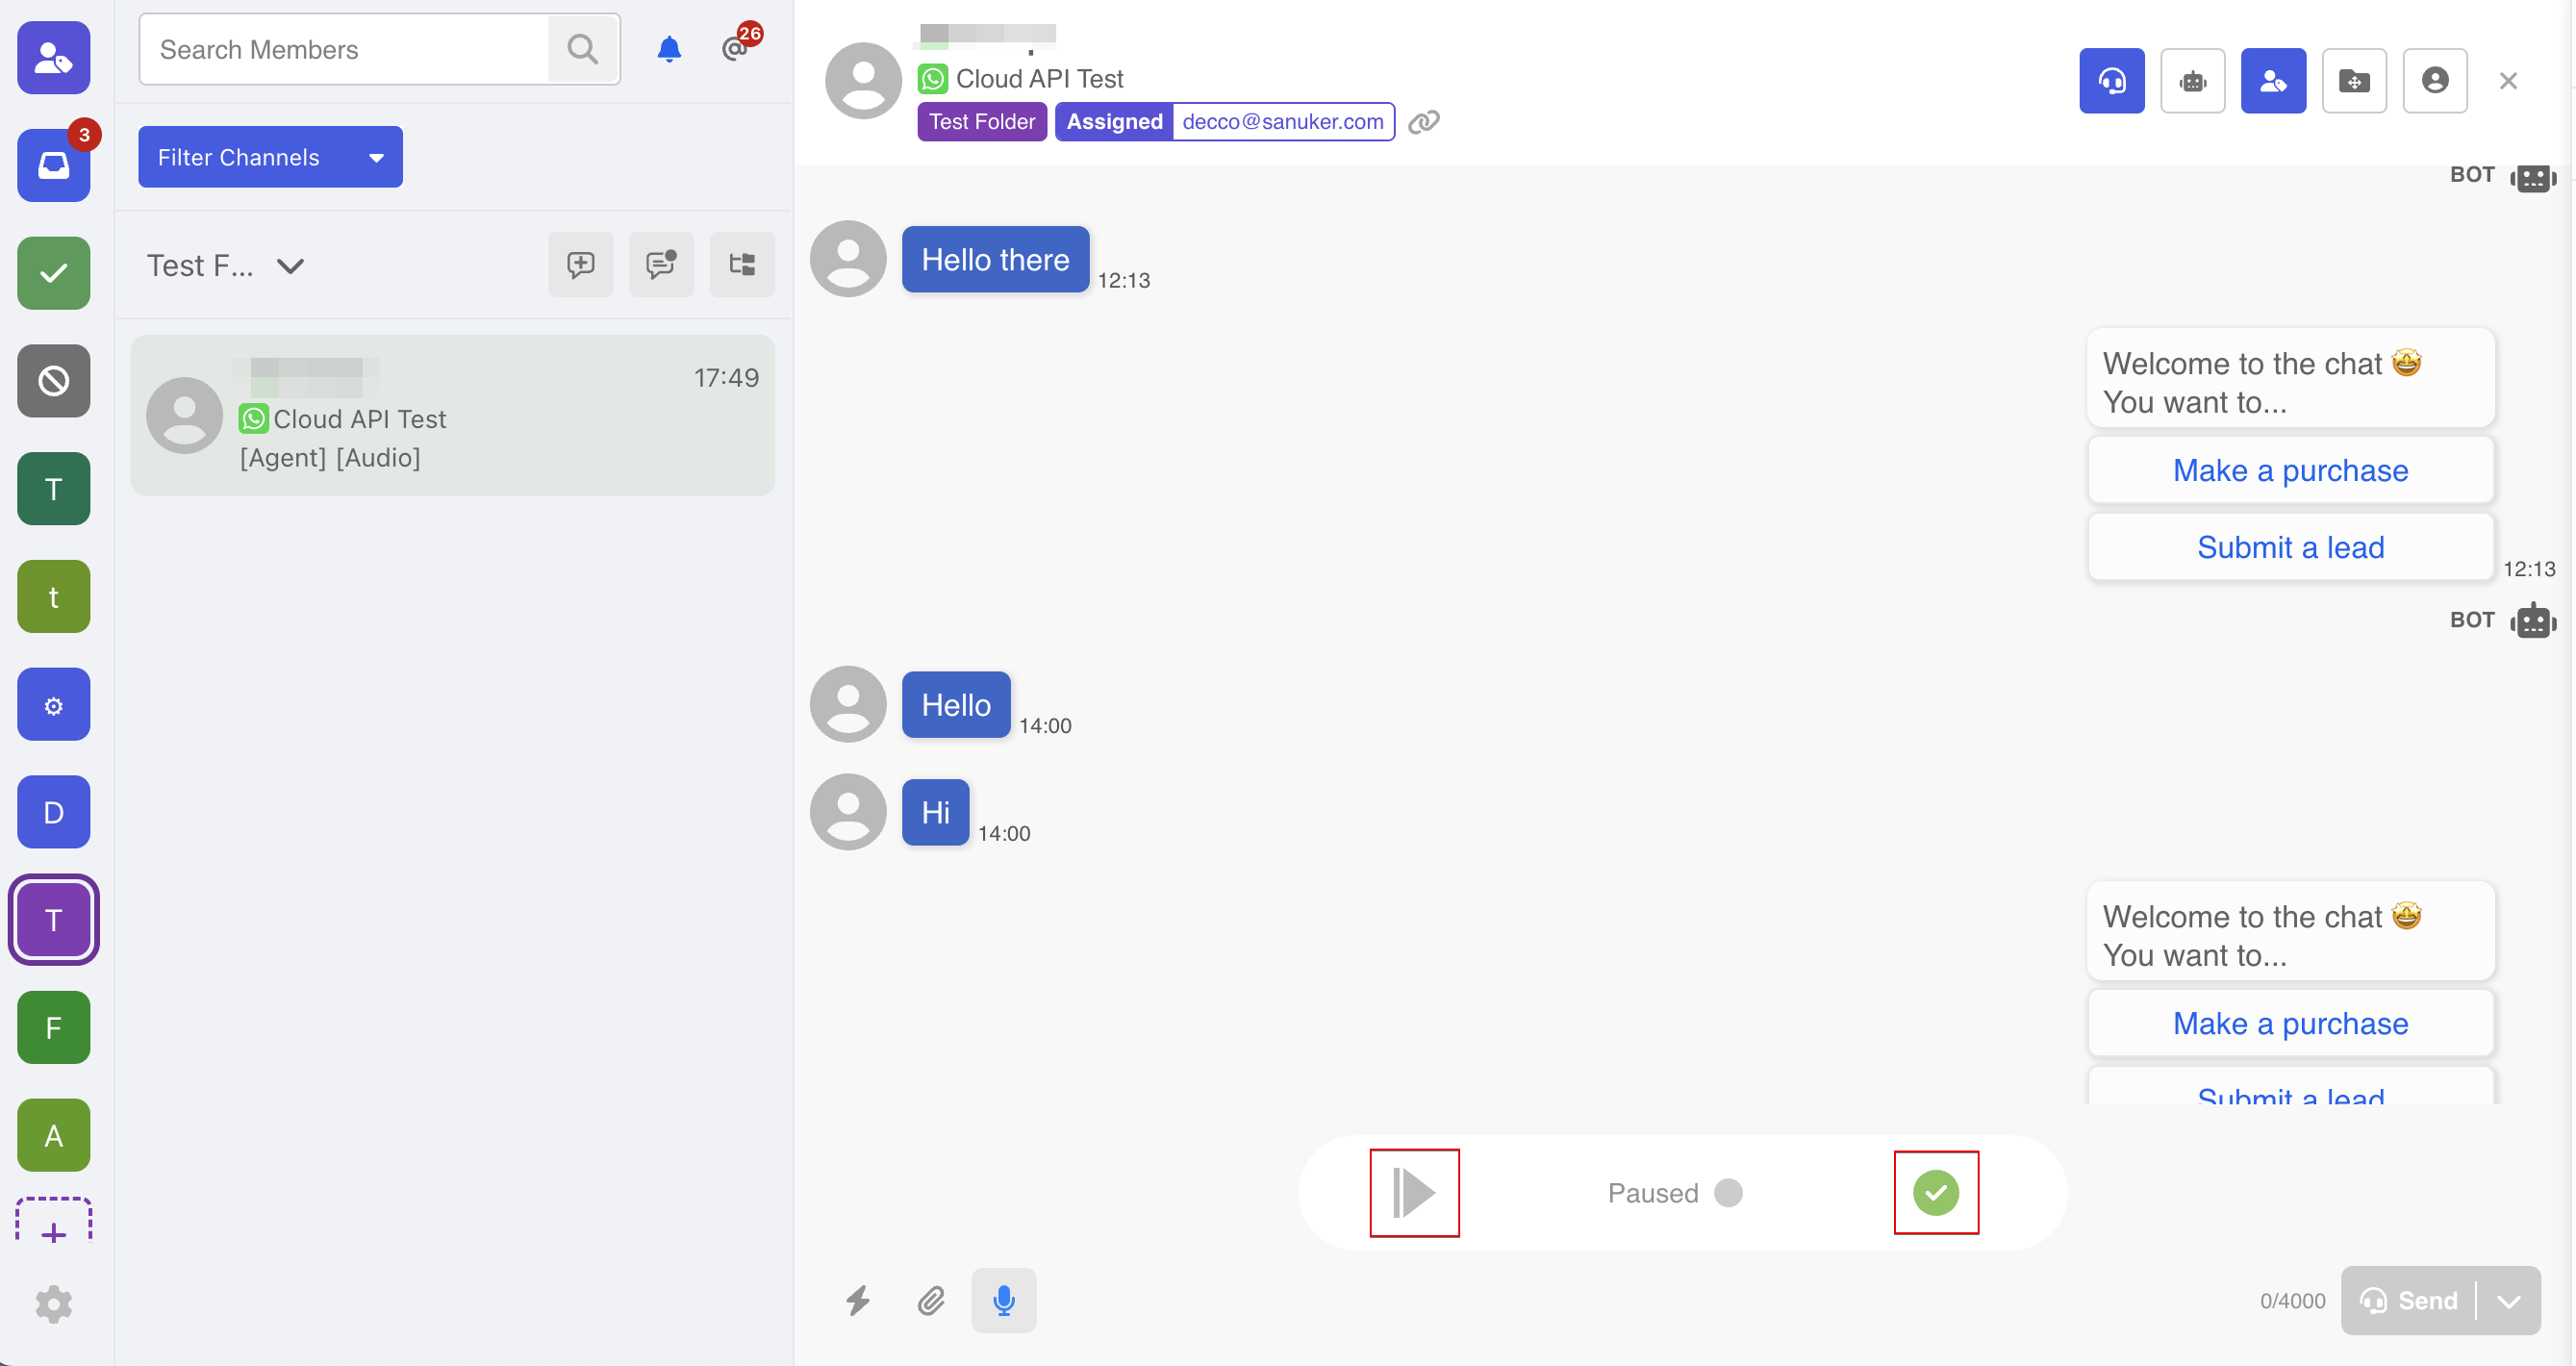
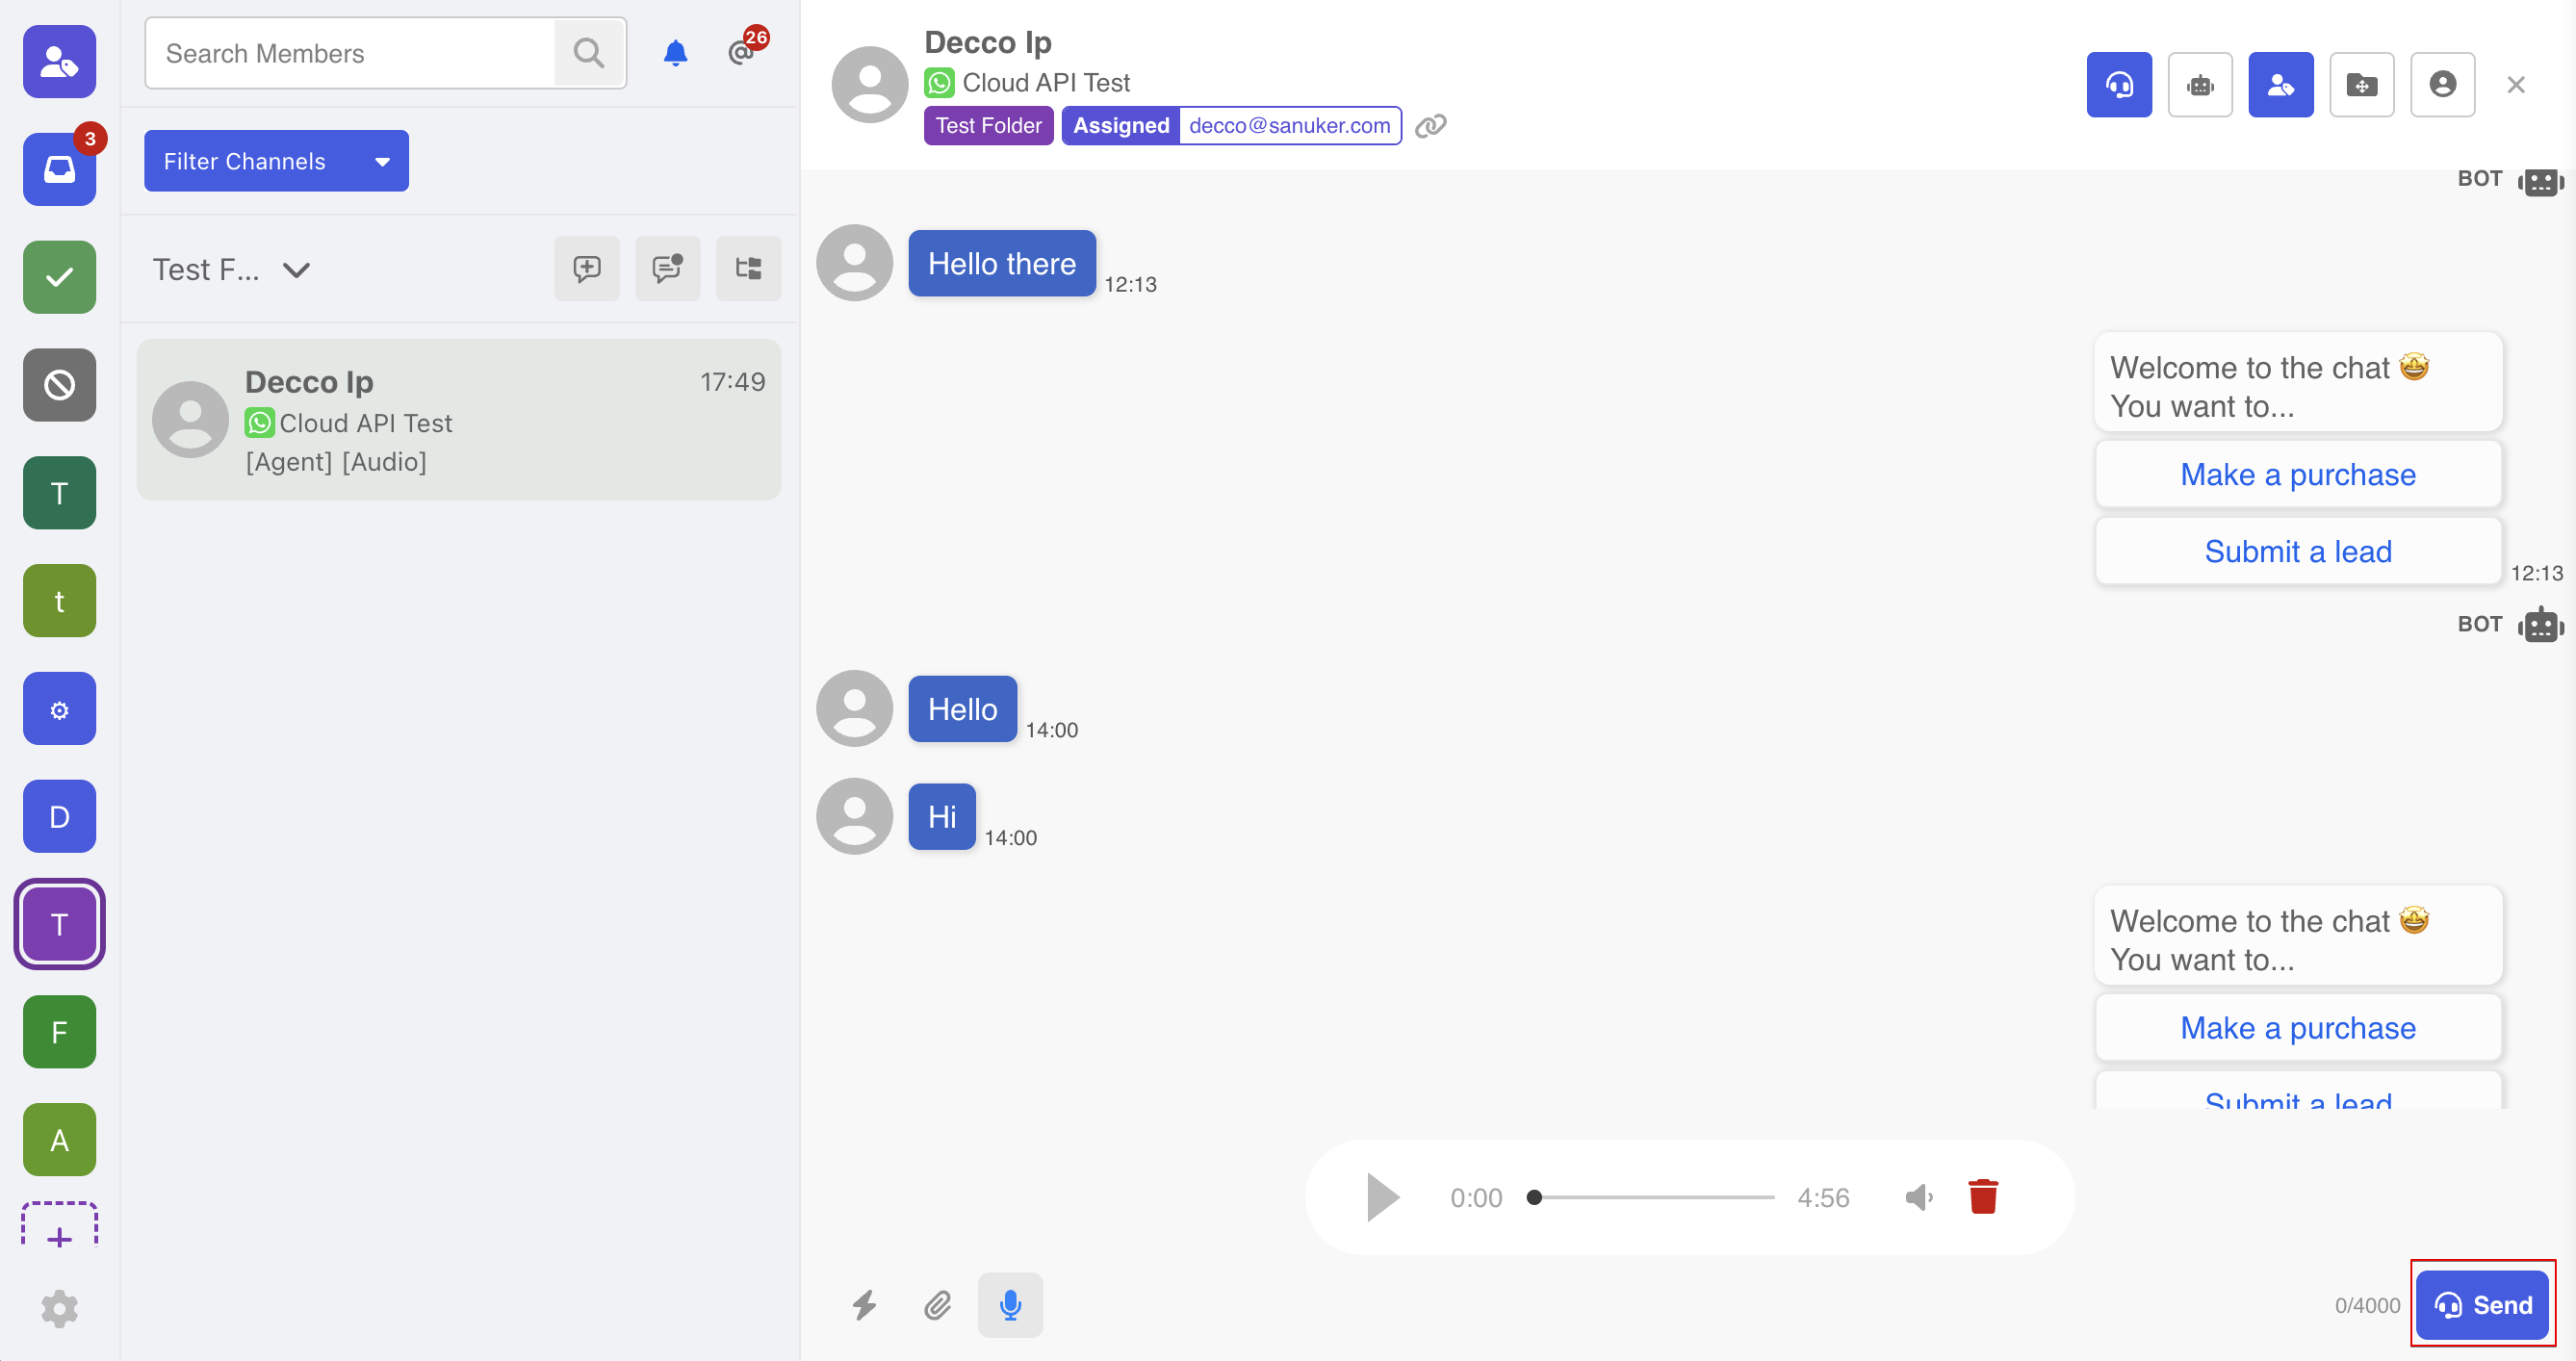
Once the recording is completed, you can replay the audio. If you want to make another take, you can also discard this recording.
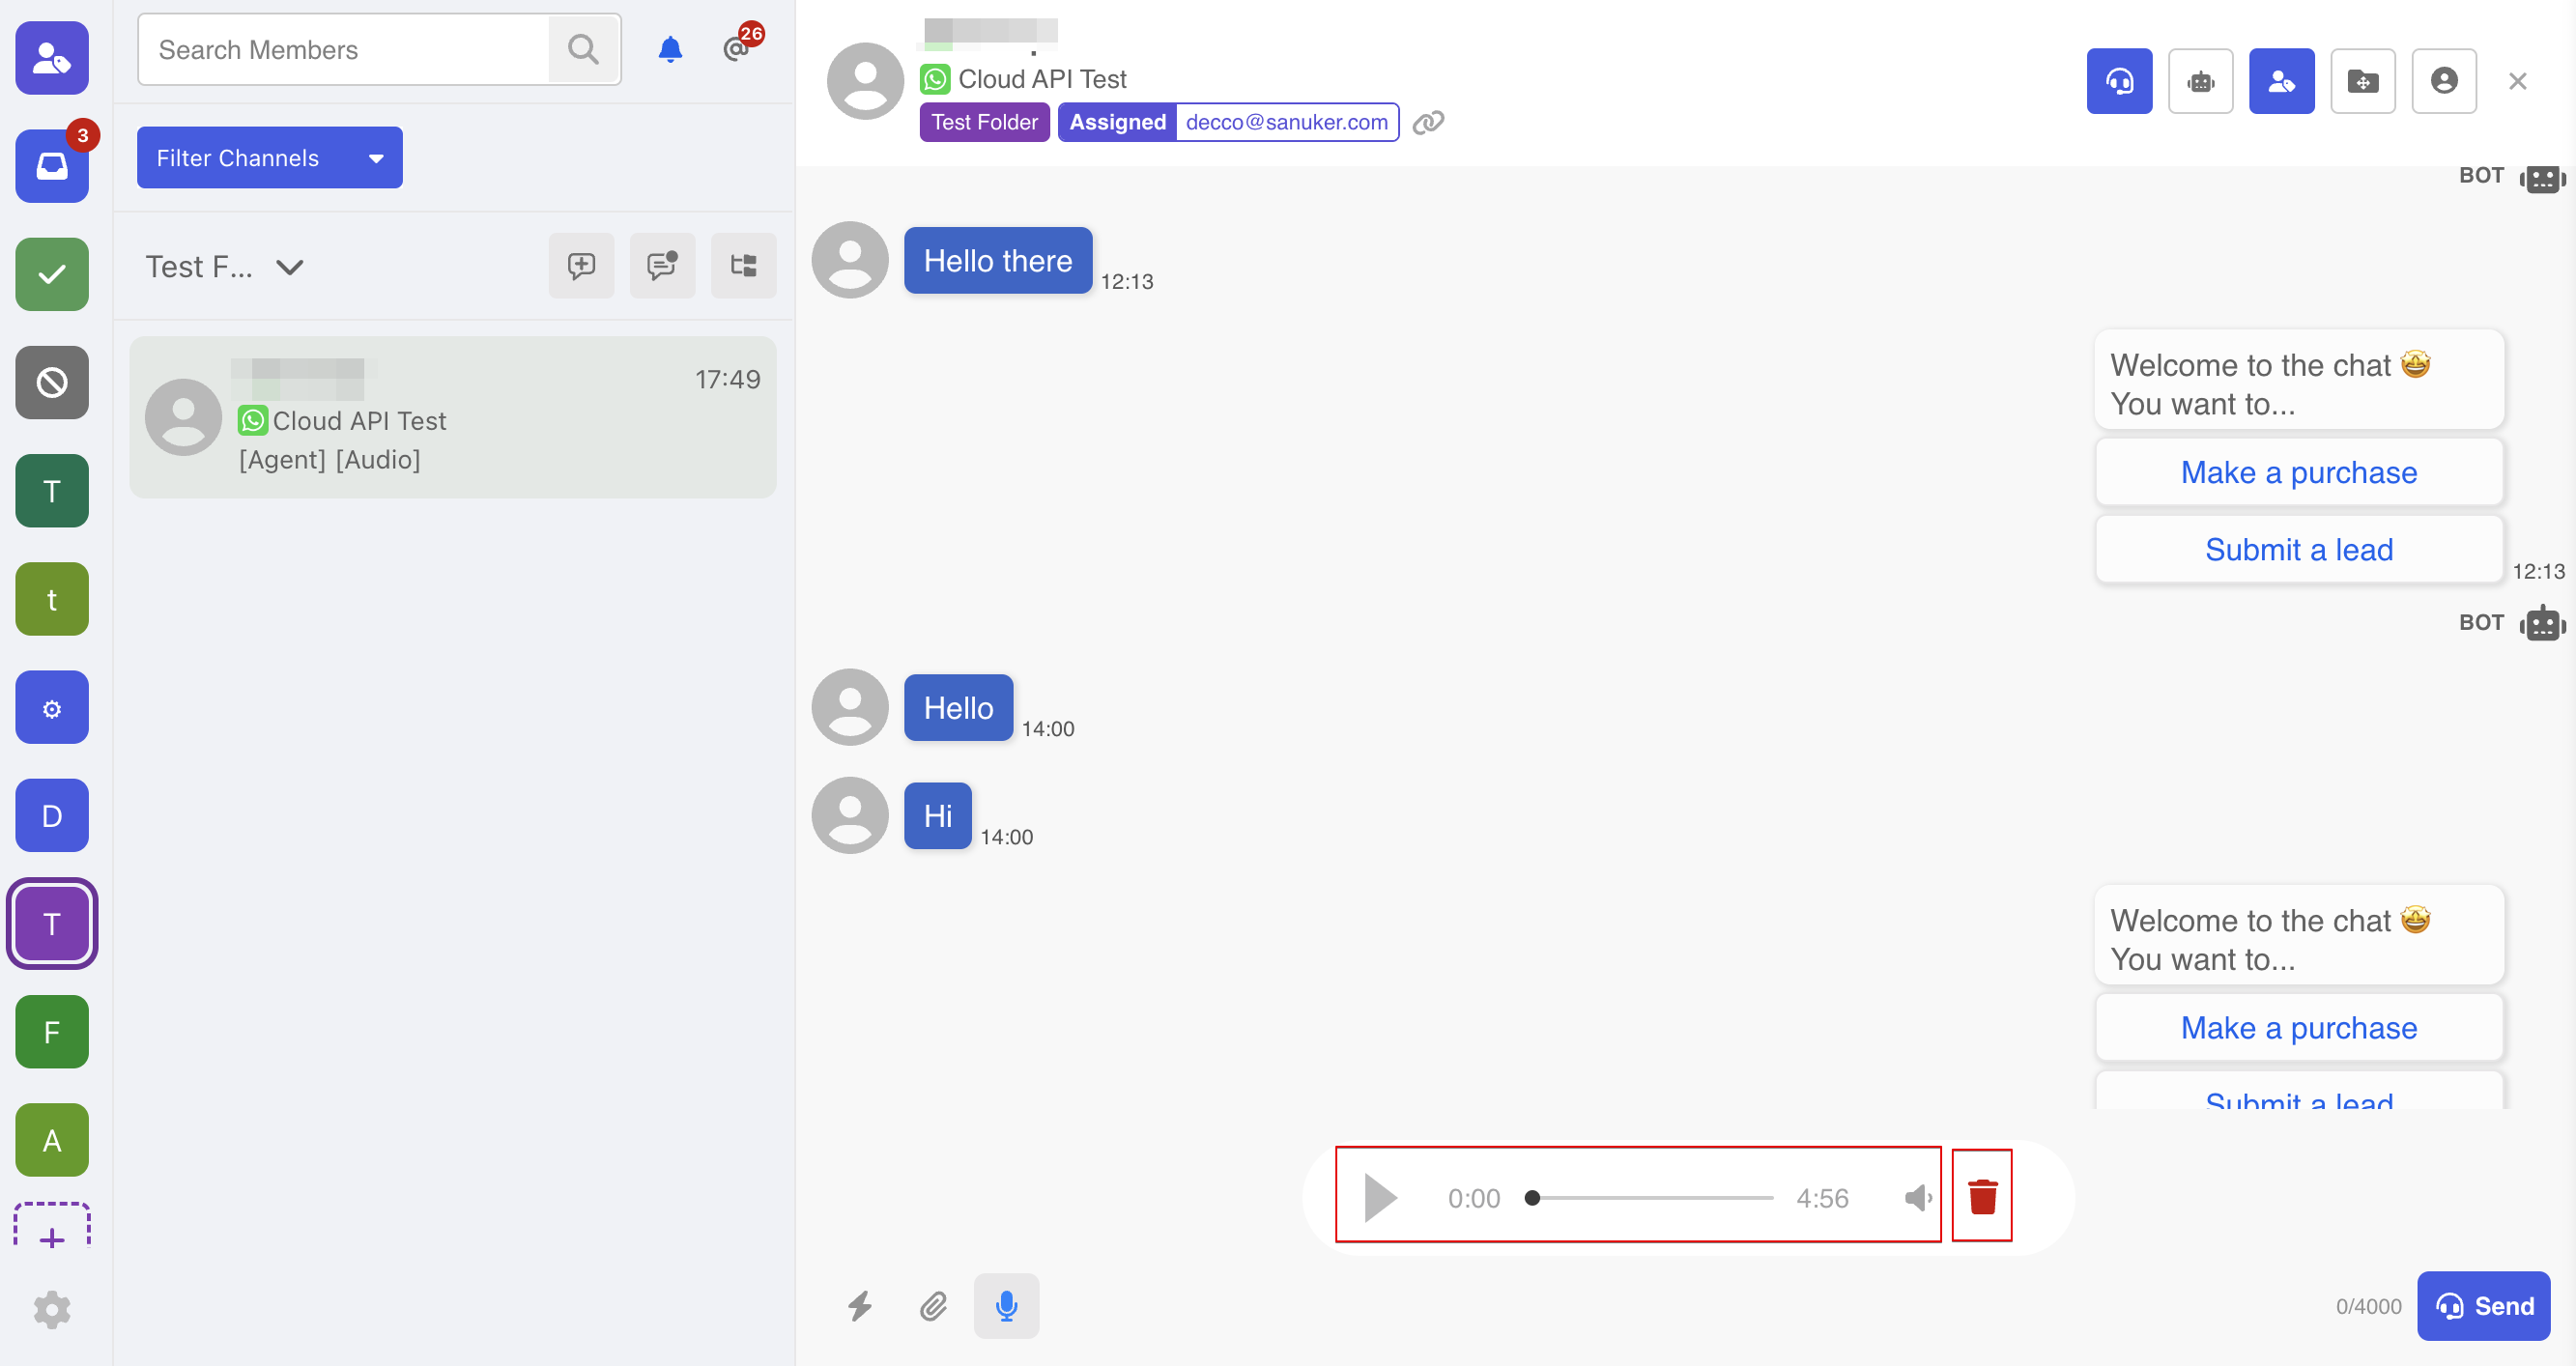
Finally, click "Send" to send it out
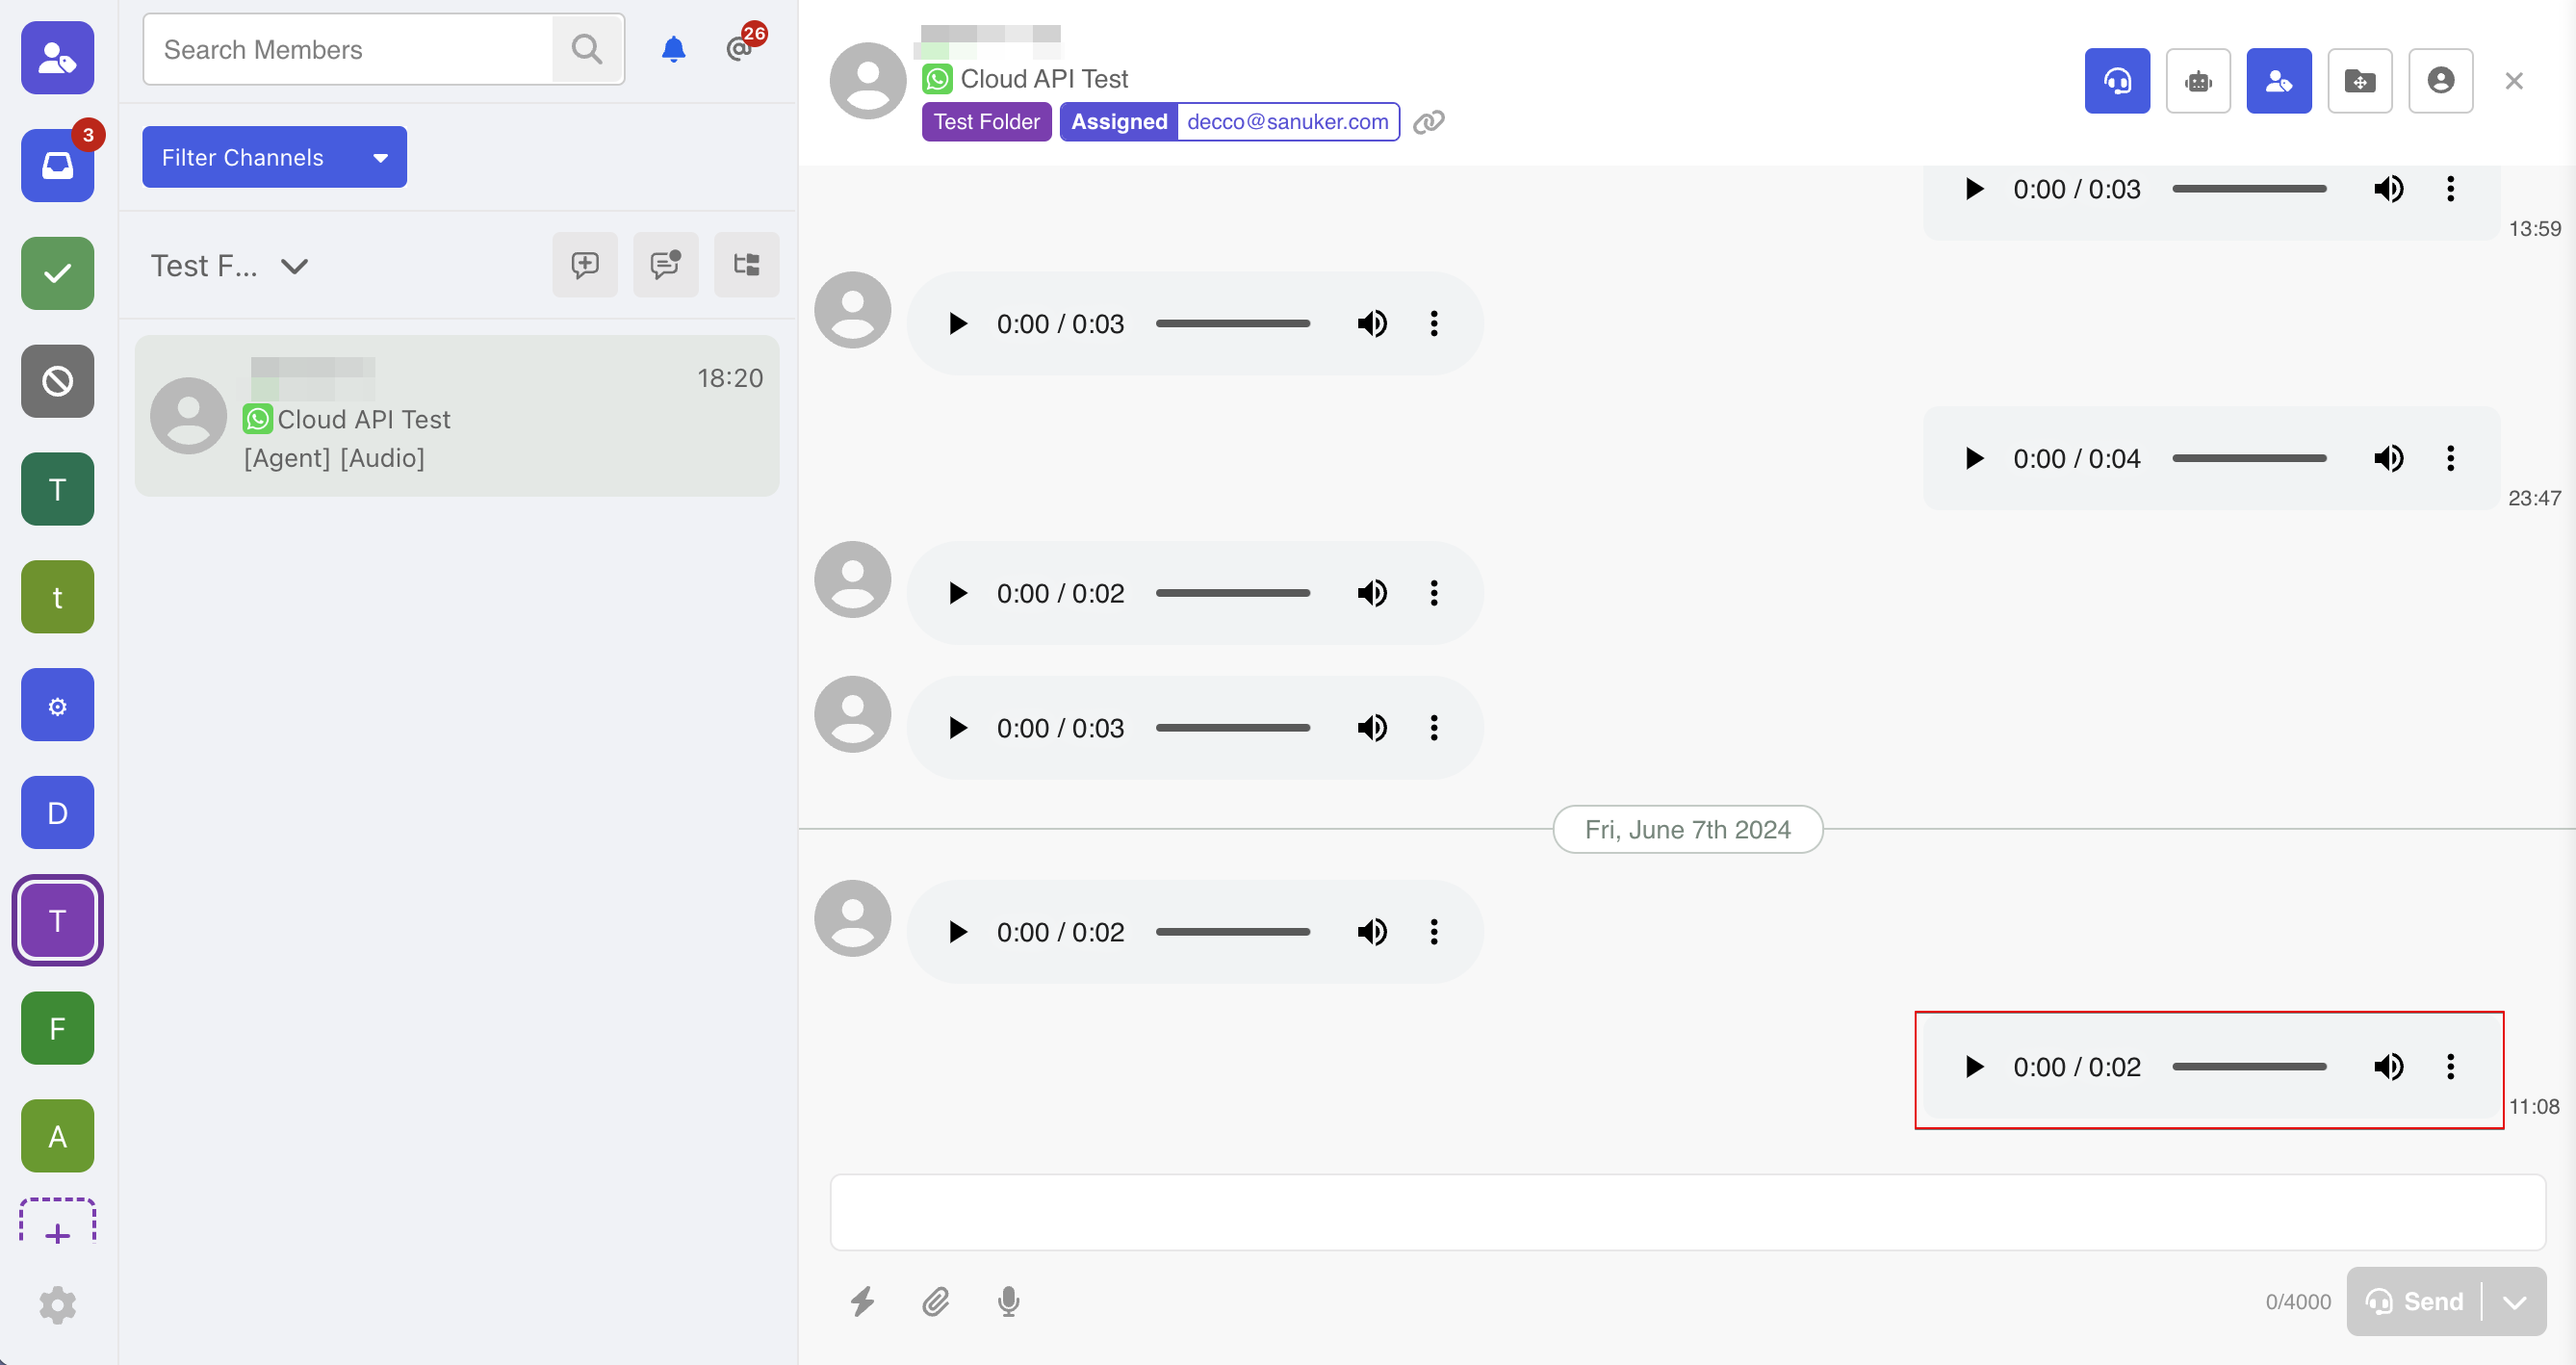
Now the audio recording has been sent!
Thread Control
A thread refers to a communication channel that allows support agents to interact with end users. Aside from the ability to send messages, thread management can be leveraged to optimize the quality of live chat support.
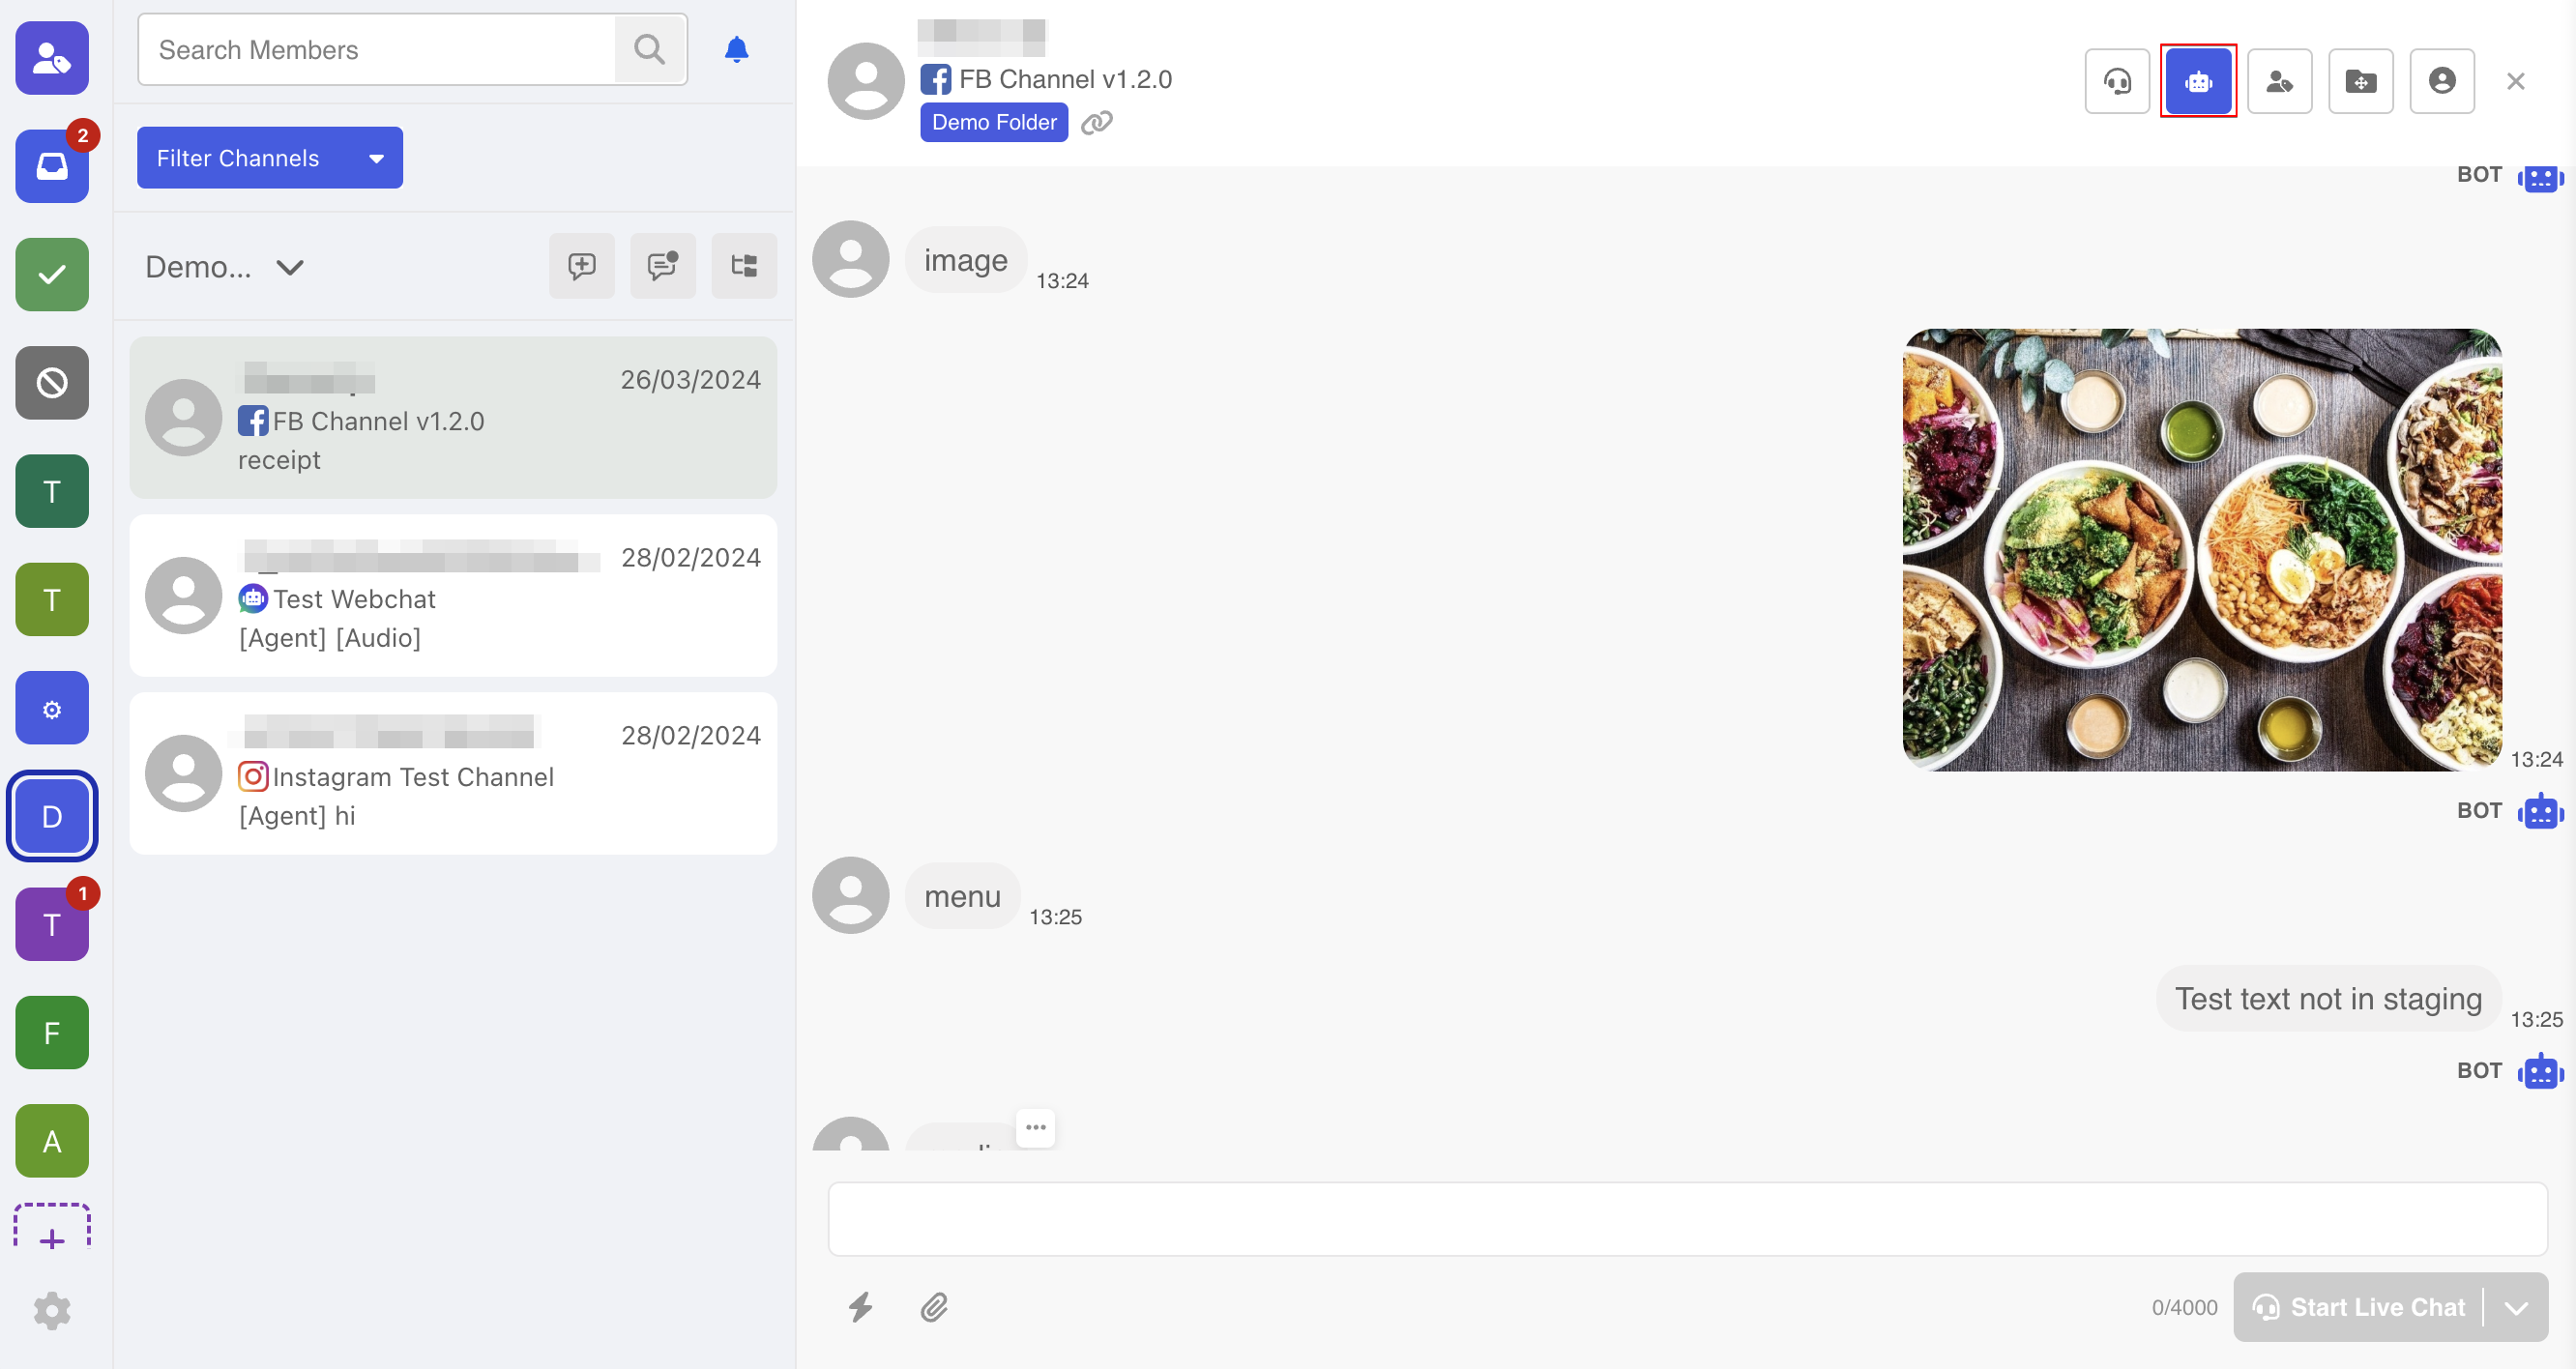
Chatbot & Live Chat Mode
This label represents what "mode" this conversation is currently in. Agents can switch between two modes with just one click.
NOTE
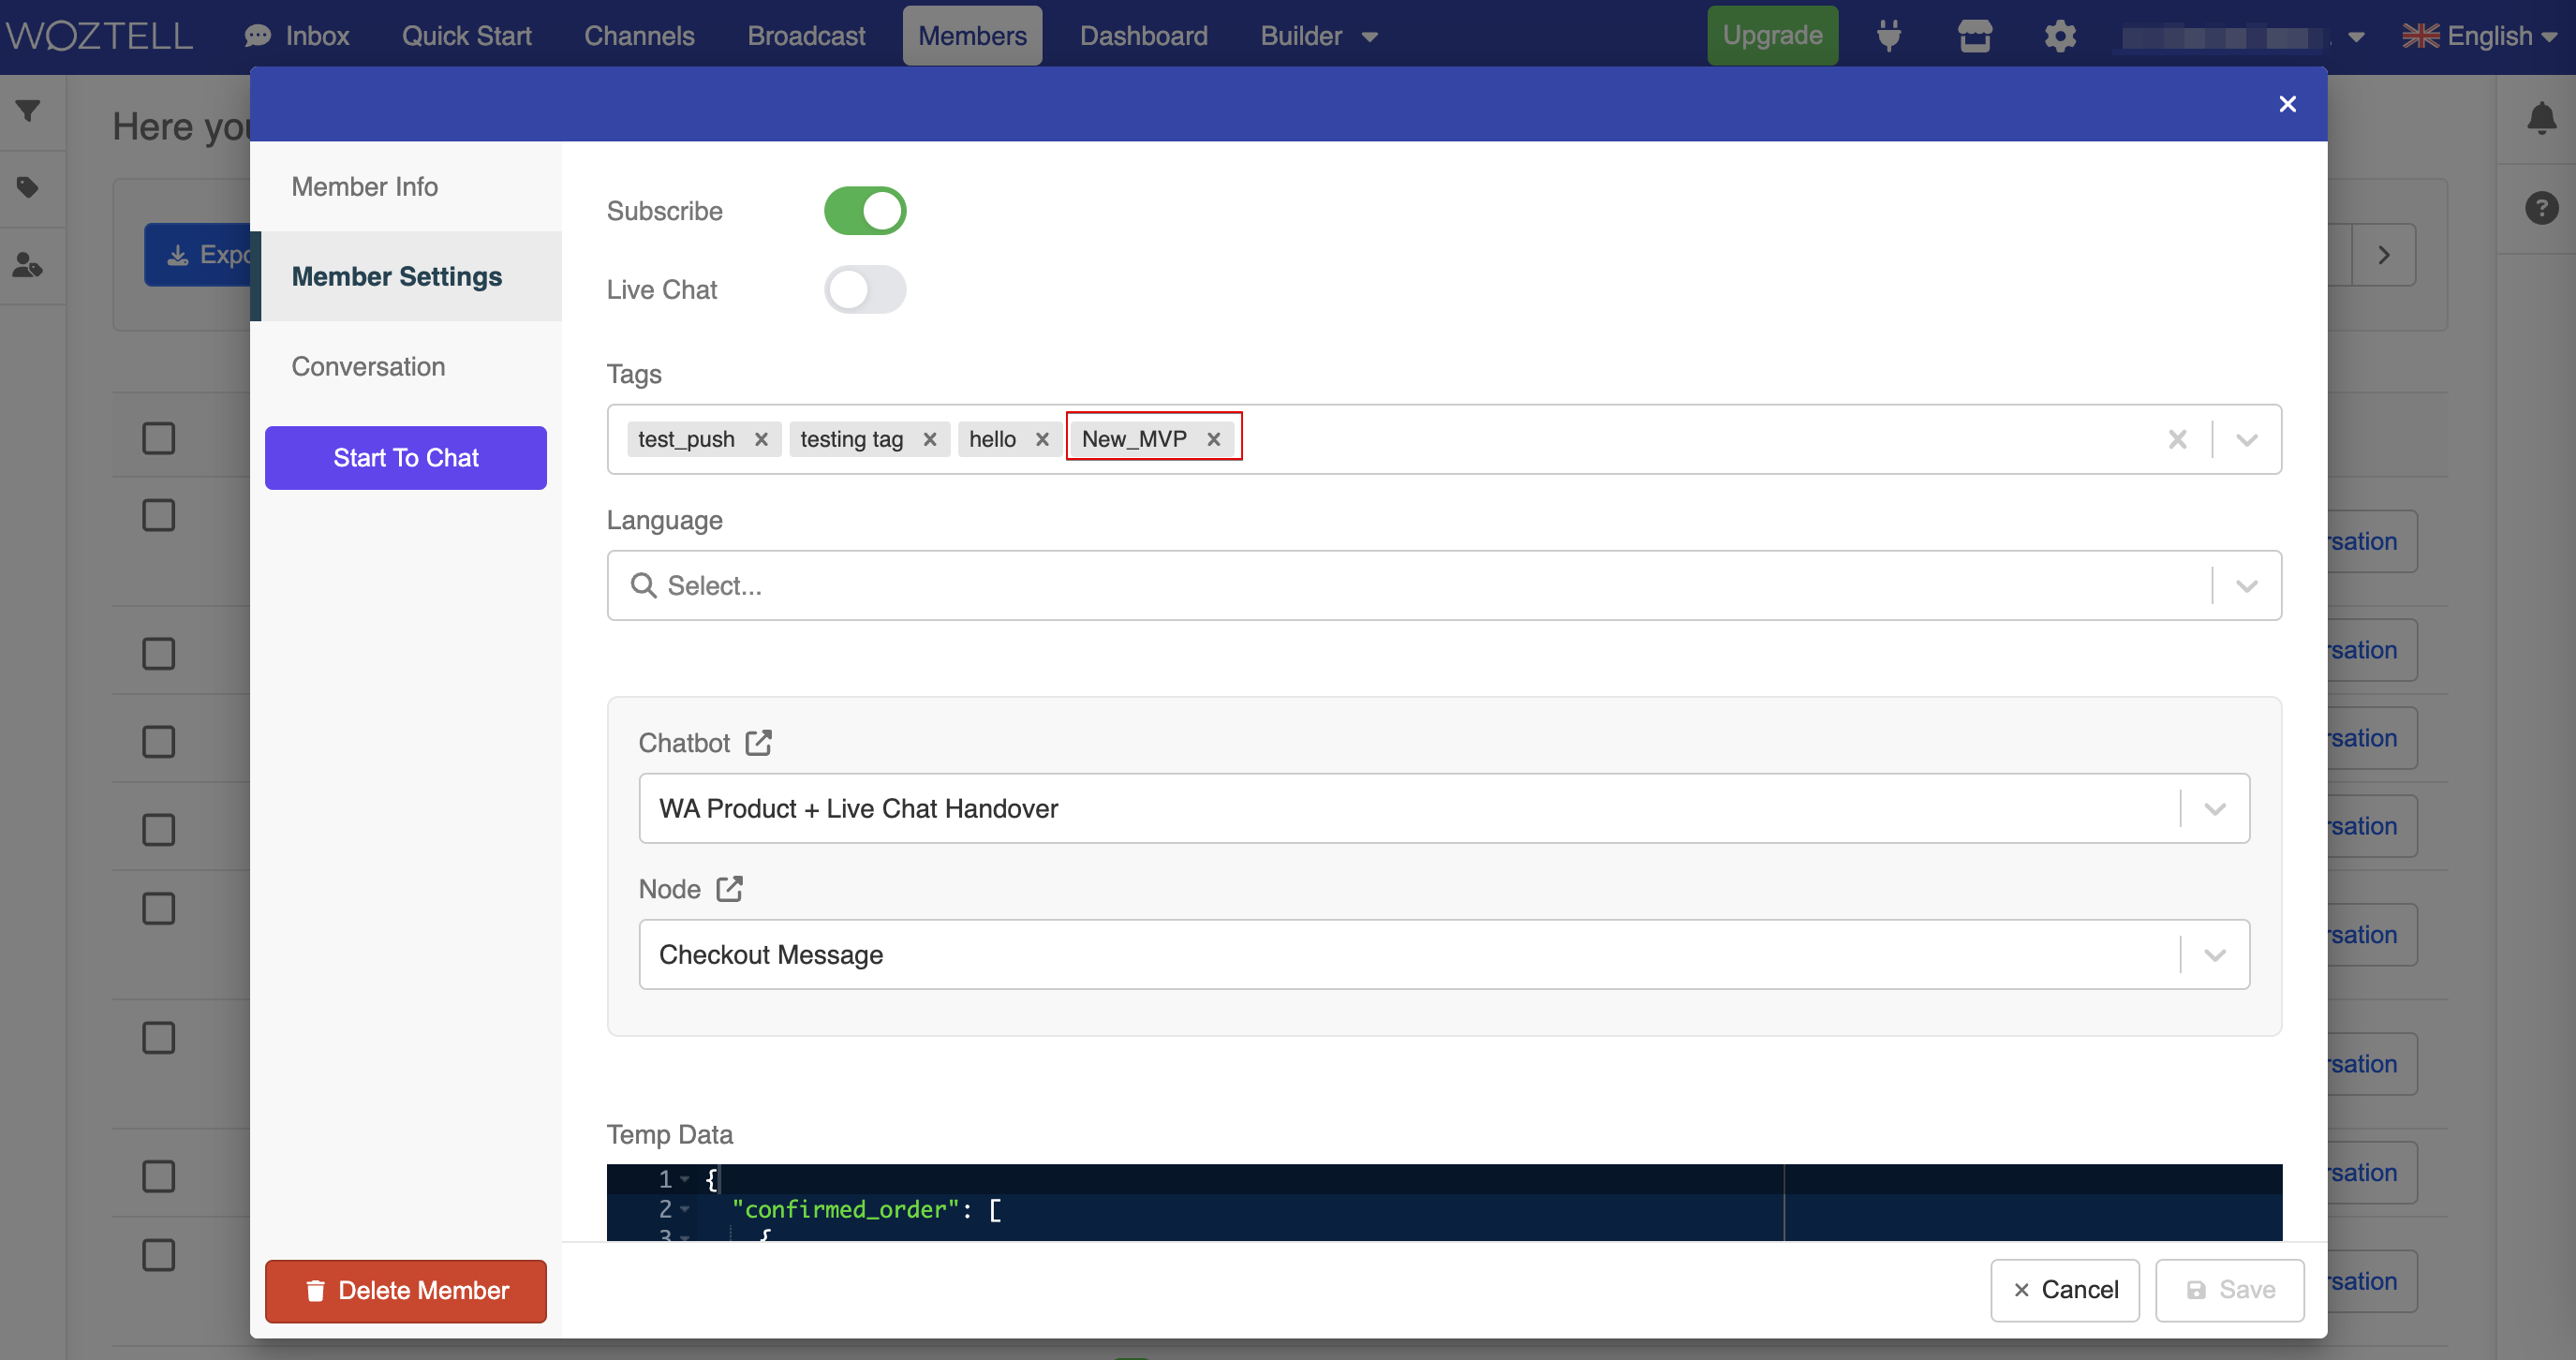
You can also switch between the Chatbot Mode and Live Chat Mode in the Member's Details under the Members page.
Chatbot Mode:
The chatbot is enabled and able to respond to the user automatically.
Live Chat Mode:
The chatbot is disabled and the user's input does not trigger any chatbot response.

Assign to Agent
Sometimes, you might need the right person to give the right answer. The Inbox Integration allows assigning a thread to another agent to follow up.
- To do so, select "Assign to".

- Select an agent and click "Confirm".
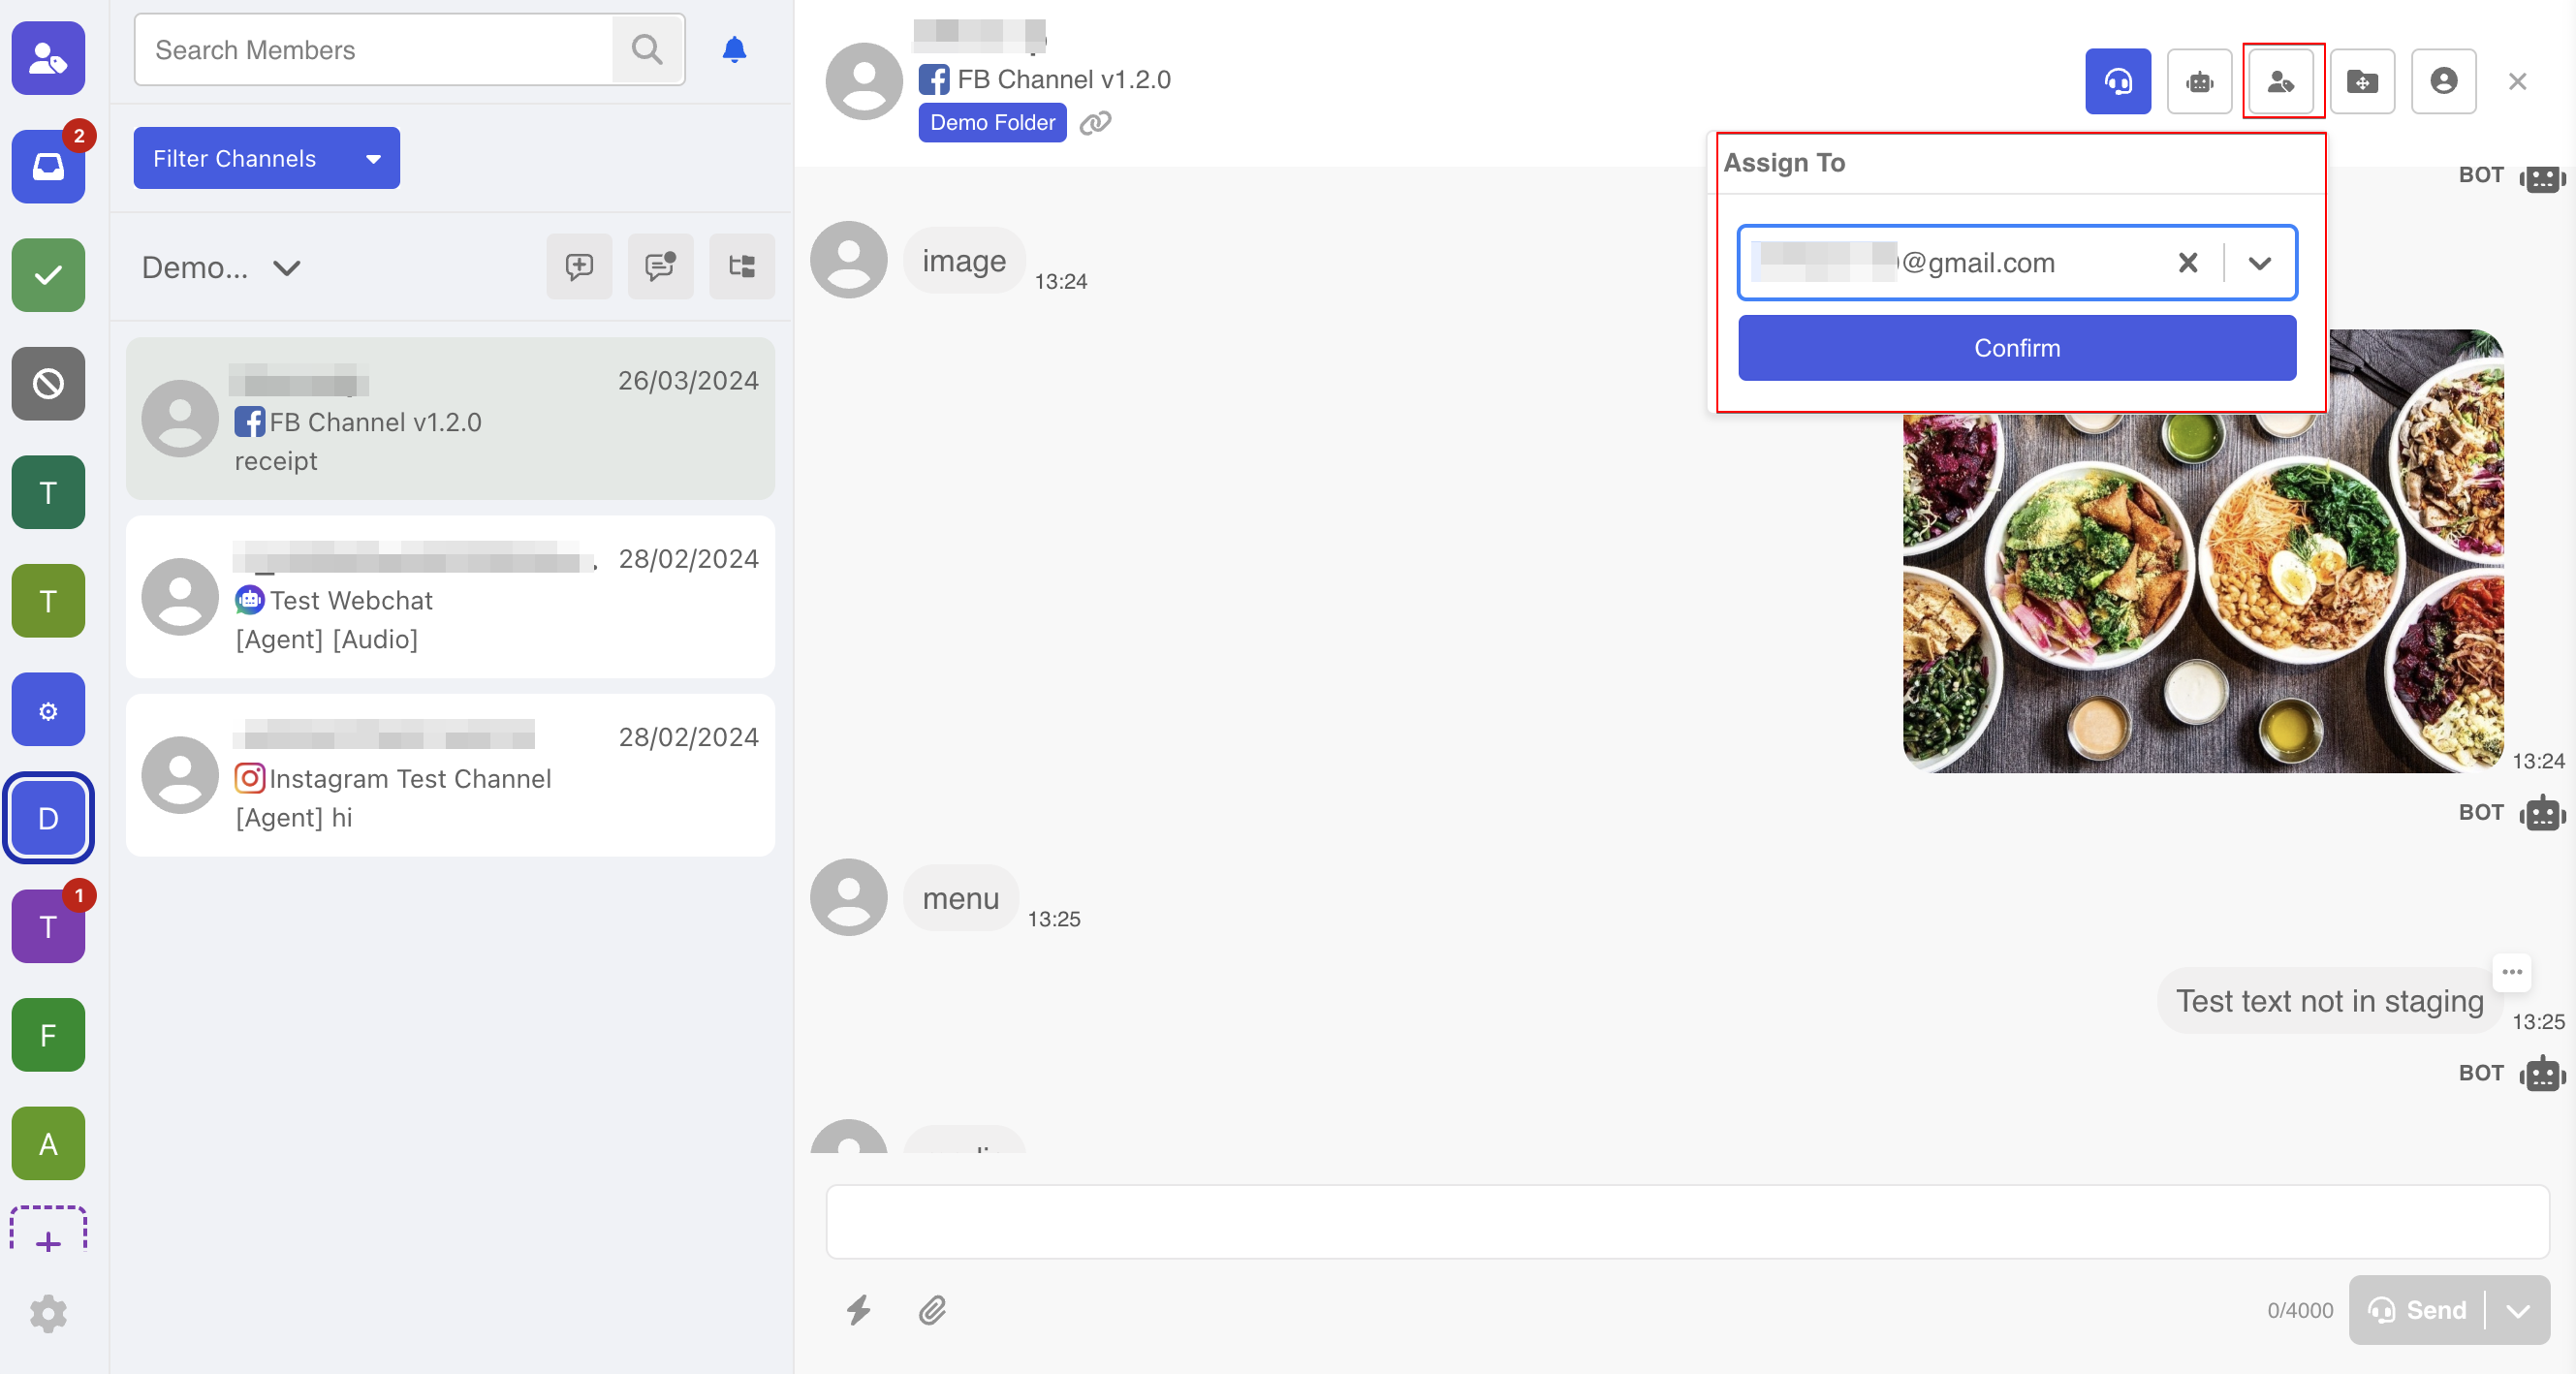
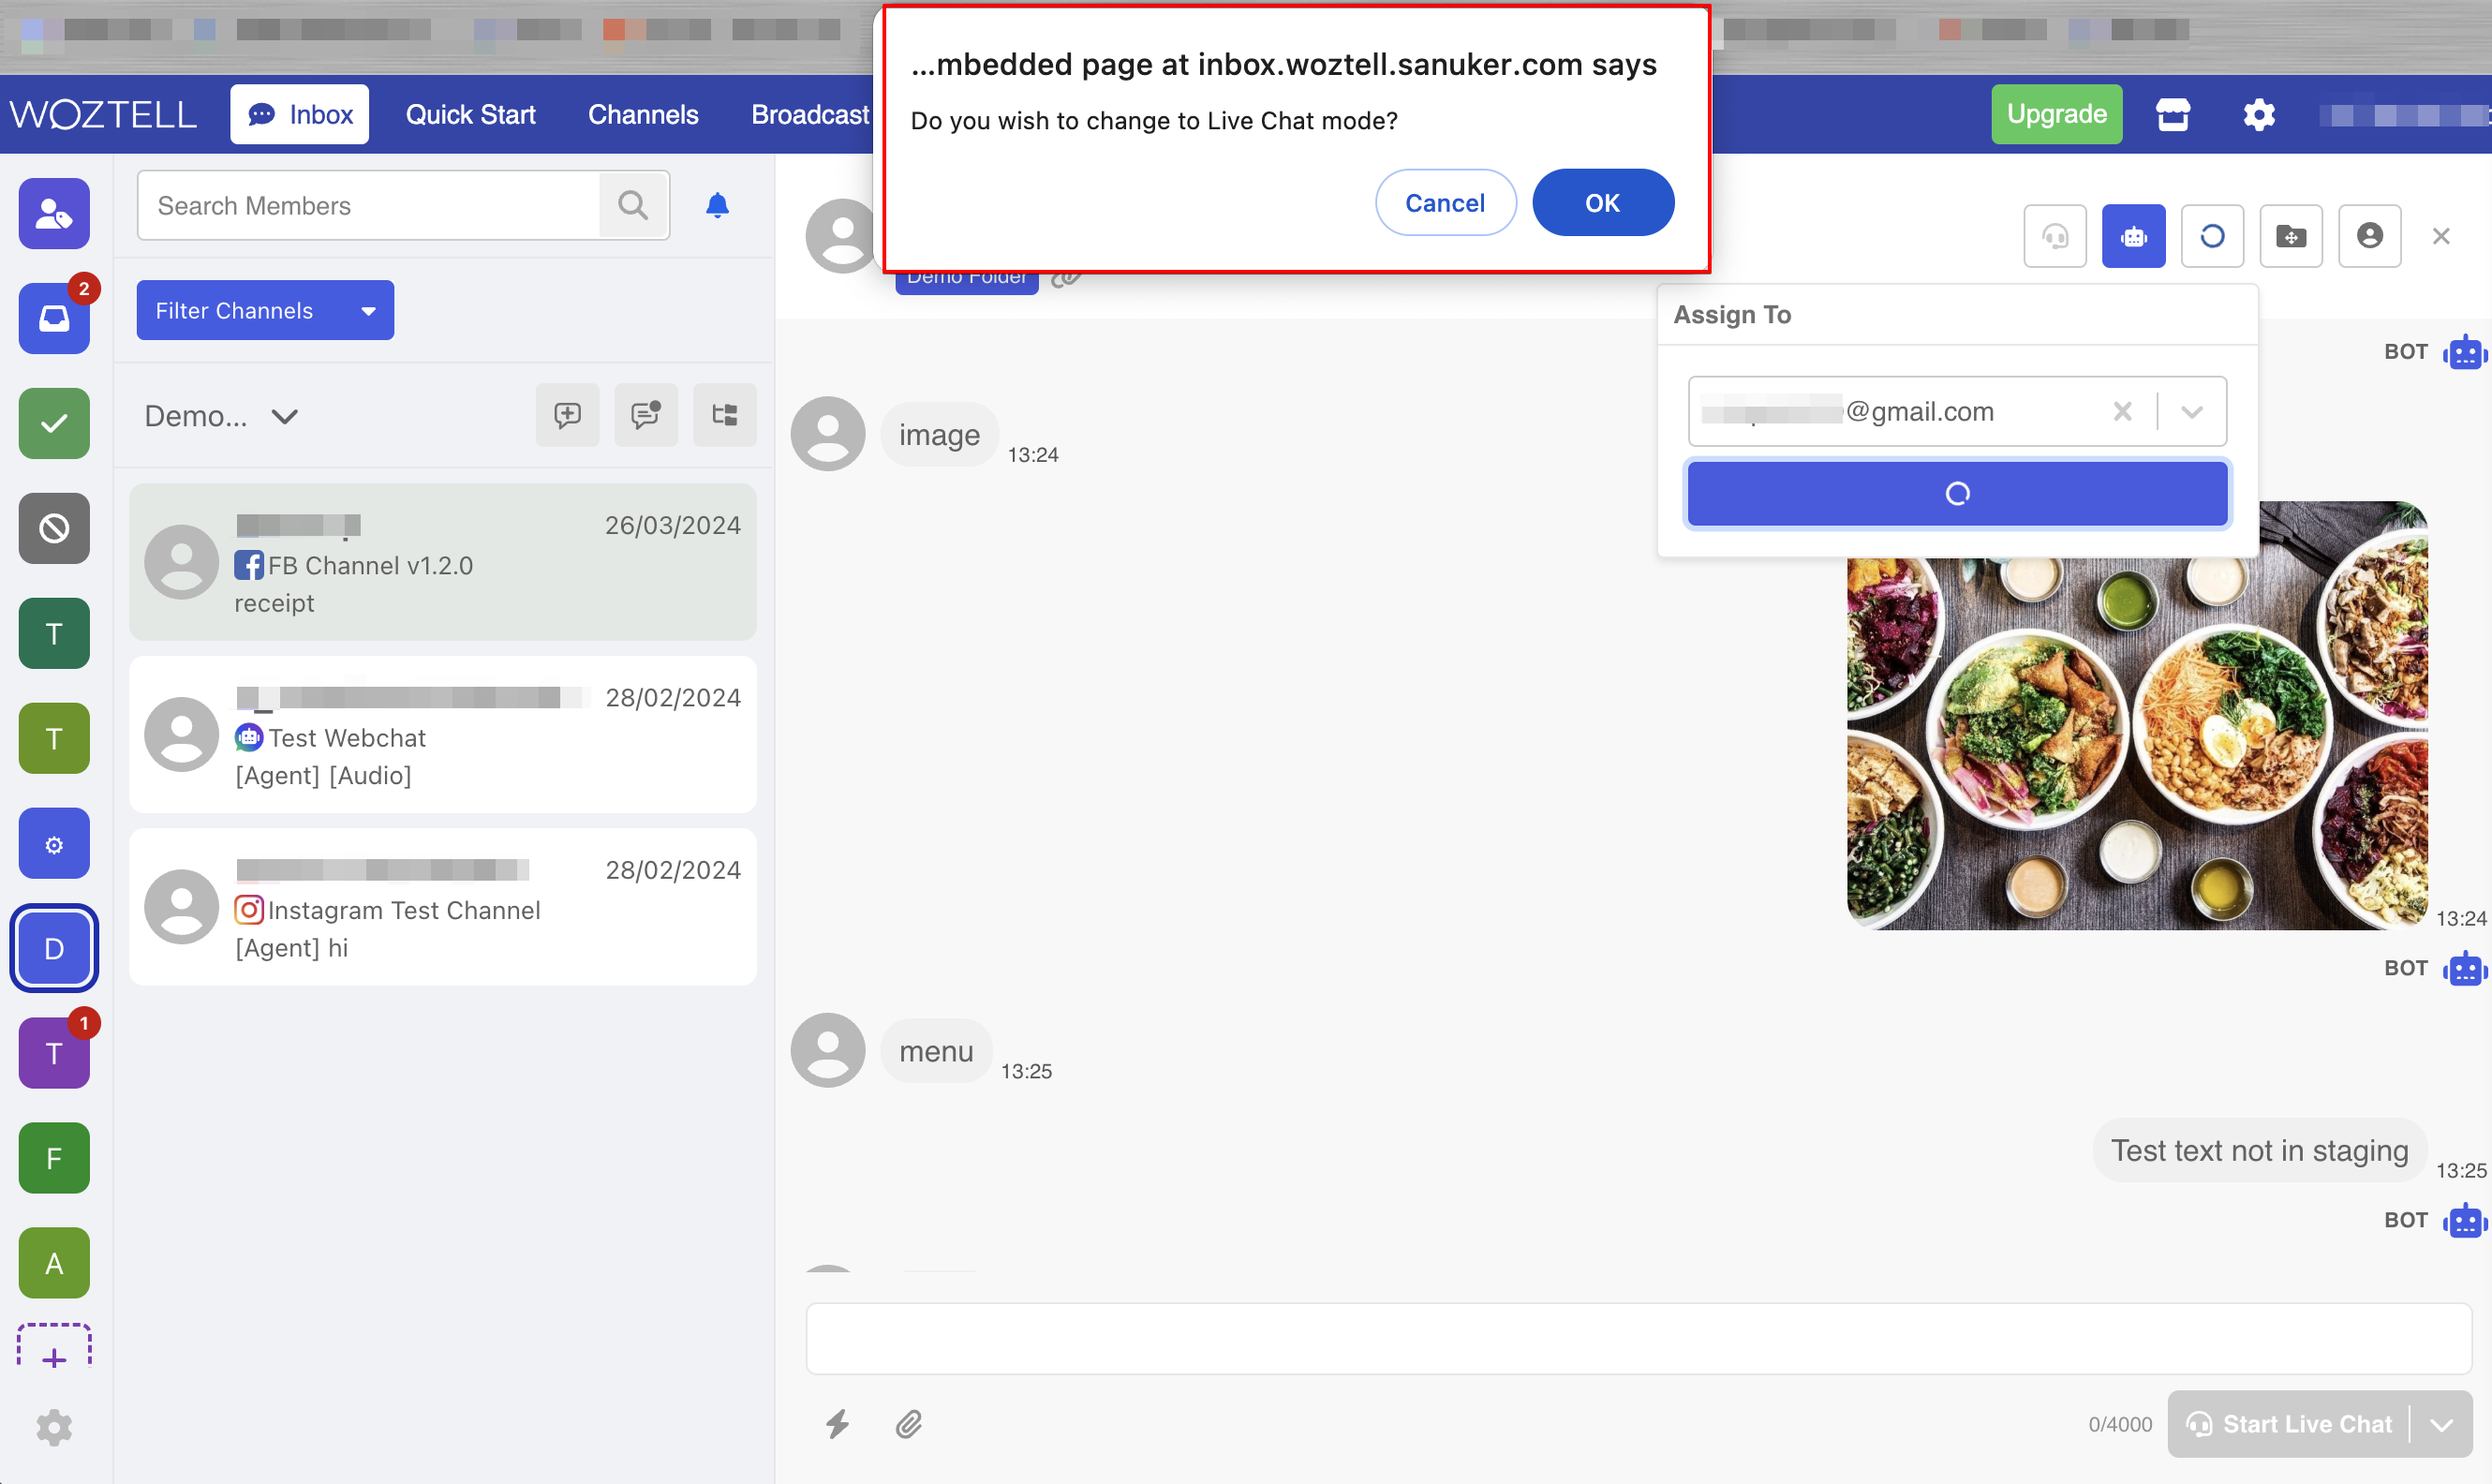
- If you assign an agent while the chatbot mode is on, a pop-up will be displayed ask if you would like to switch on the live chat mode as well.
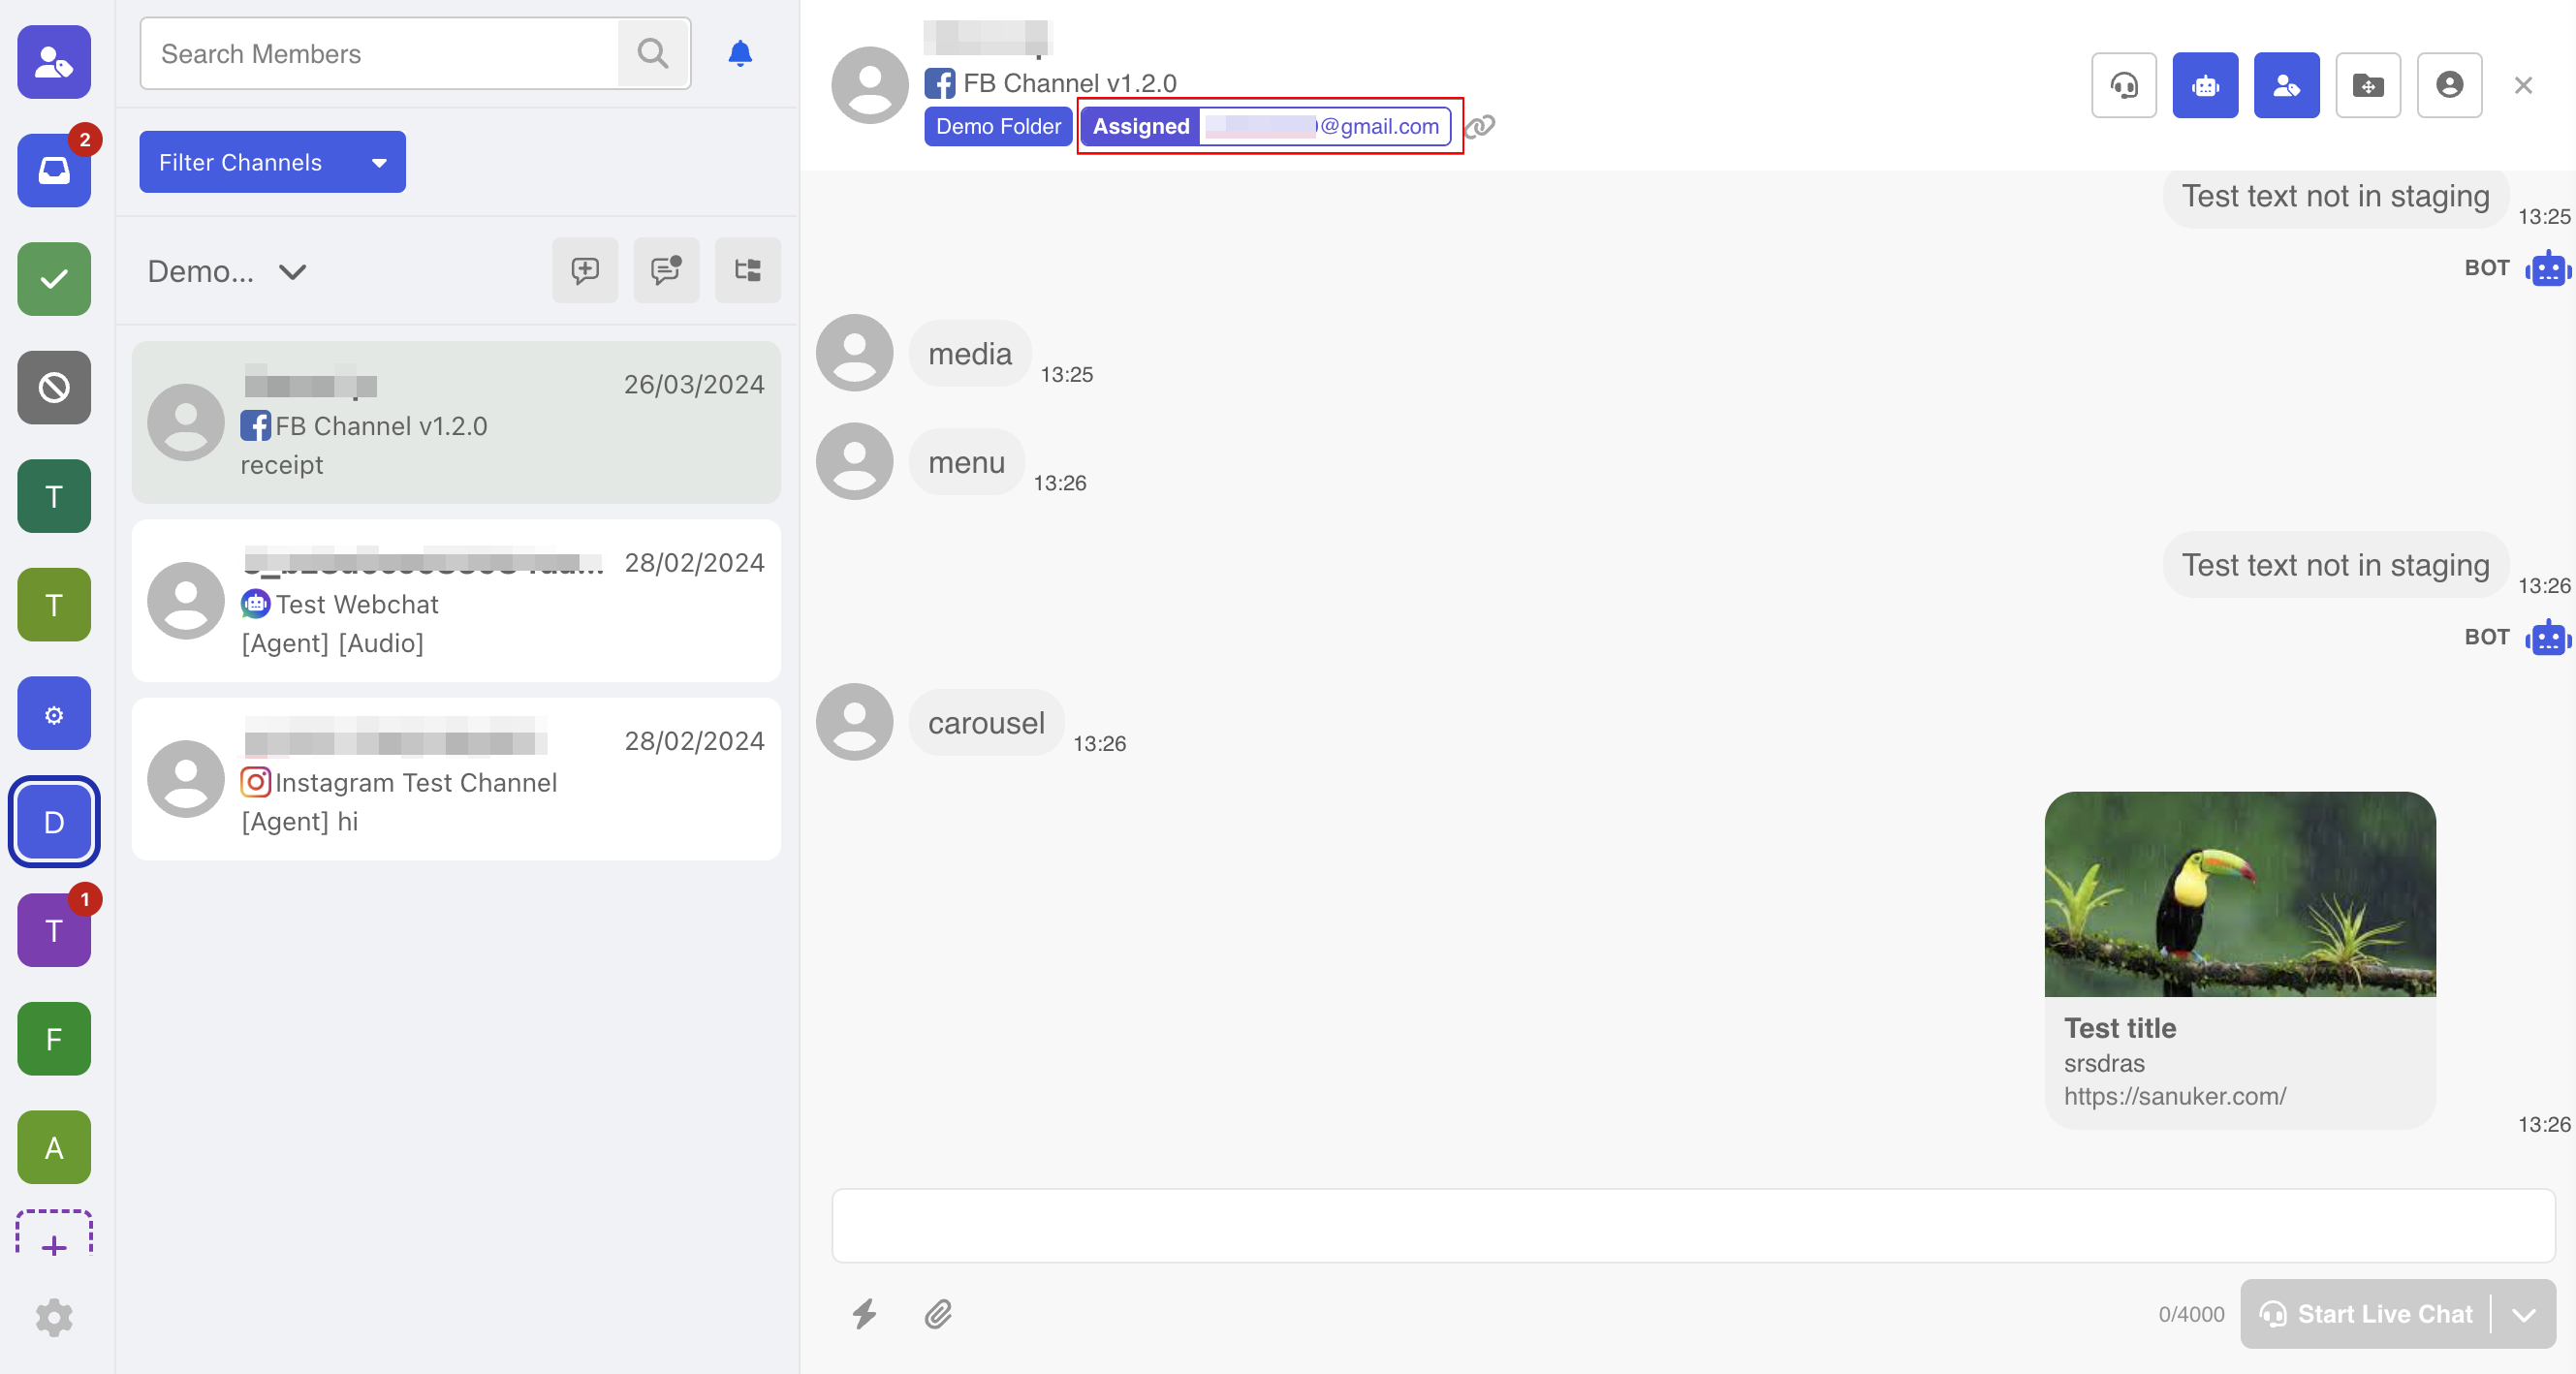
- After that, the thread will be moved to "Follow-up", which is exclusive to each agent. The live chat mode will be on if you agree to switch it on. The thread with assigned agent will have an Assignee Label as well.
Reminder
Please note that "Follow-up" is NOT an actual folder. The assigned thread is still stored in a folder, which can be viewed by other agents as well.
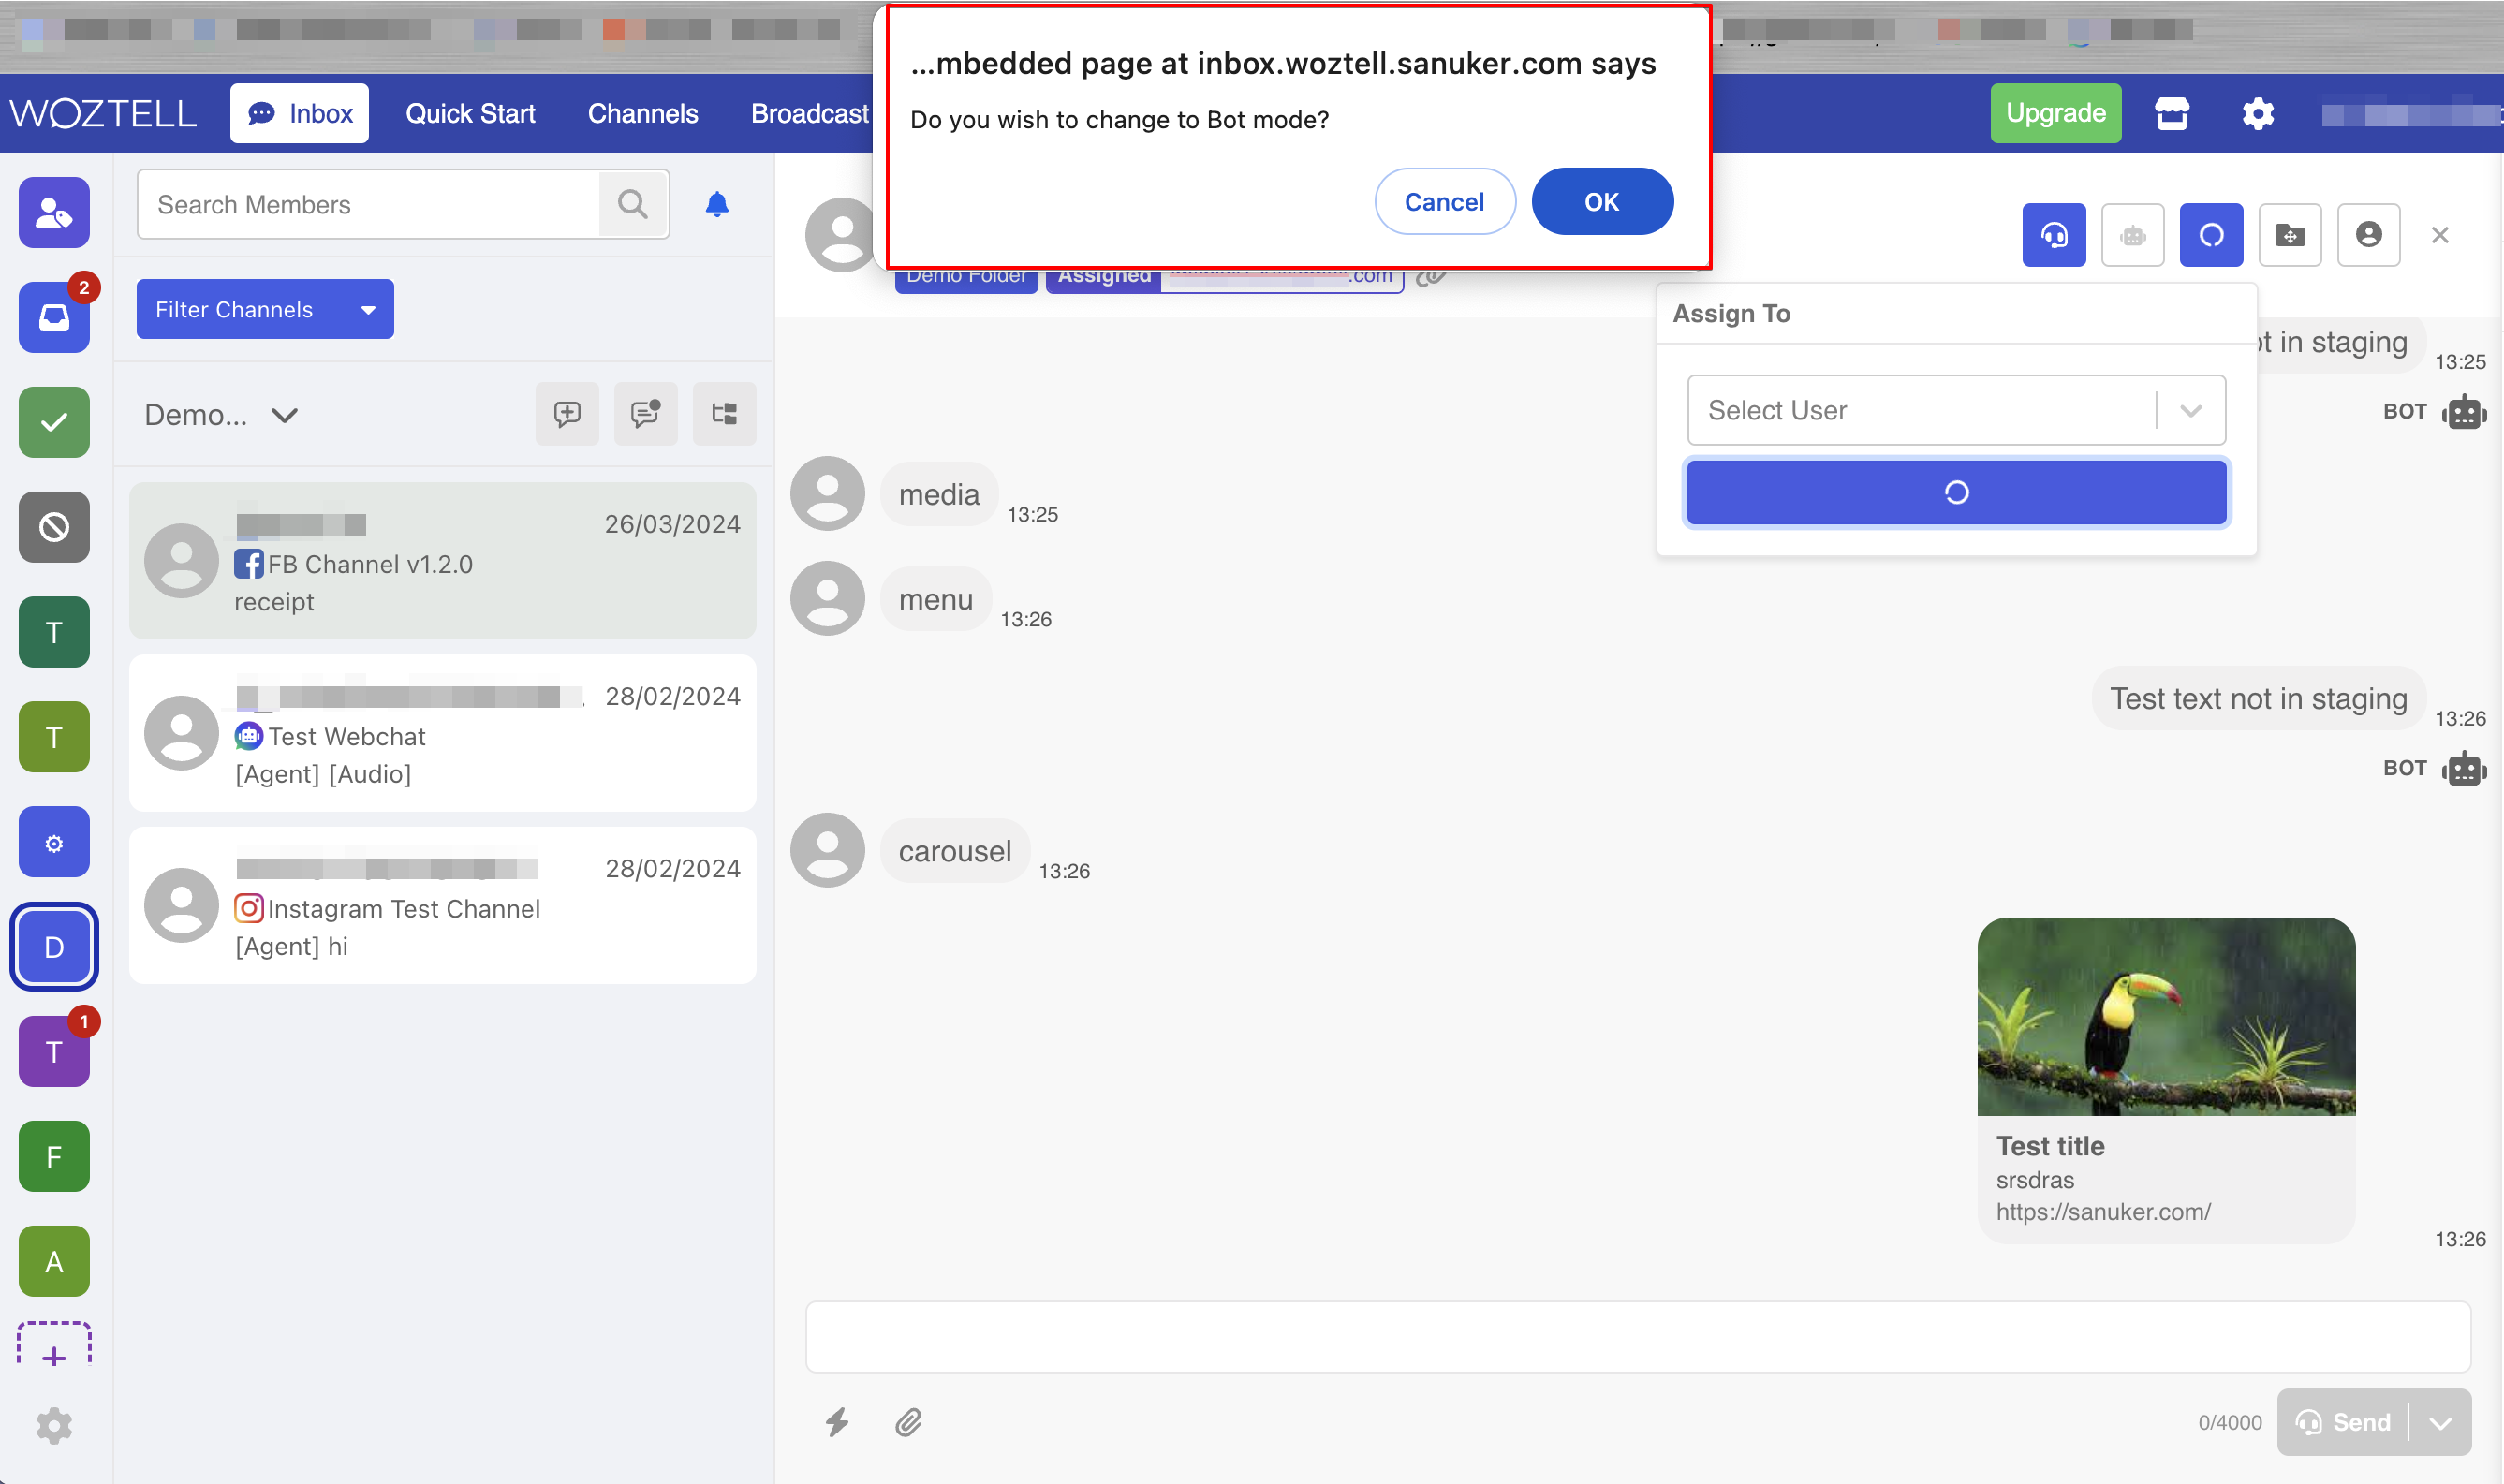
- The assigned agents can be unassigned by removing the assignee from the picker and click "Confirm".

- If you unassign an agent while the live chat mode is on, a pop-up will be displayed ask if you would like to switch on the chatbot chat mode as well.
- Alternatively, you can assign a thread to an agent using the "Change Thread Agent" action to perform the same task in the chatbot, with the option to switch on the live chat mode as well.

Agent Auto Assignment
For more complex use cases, you might need an auto assignment logic so that the new threads can be assigned to different agents within a folder. This can be achieved by building an advanced action in the chatbot.
Given you have several agents in a folder, by executing the following advanced action in a node, the conversation will be auto-allocated to an agent when it is in the folder.
return new Promise(async (resolve, reject) => {
  try {
    const _ = require("lodash")
    const { getChannelFolders, getUsers, updateThreadAgent } = require("inbox/1.0.0")
    const result = await getChannelFolders({
      channelId: this.channel._id.toString()
    })
    console.log("folders", JSON.stringify(result, null, 2))
    const result2 = await getUsers({
      channelId: this.channel._id.toString(),
      folderId: result.data[0].value,
    })
    console.log("users", JSON.stringify(result, null, 2))
    const result3 = await updateThreadAgent({
      memberId: this.member._id.toString(),
      userId: result2.data[0].value,
    })
    resolve()
  } catch (e) {
    reject(e)
  }
})
Move to Another Folder
- Threads can be moved across different folders. To do so, select "Move to".
- Select a folder as the destination, then click "Confirm".

- Now the thread is transferred to another folder.
REMINDER
When a thread is transferred to another folder, a event will be sent to the channel, which will be useful for triggering relevant actions with the chatbot.
{
  "channelId": "646327315430a1f98231dfde",
  "appId": "631802d69a73fc555f1c6bc4",
  "externalId": "85254063598",
  "messageEvent": {
    "type": "MOVE_THREAD_FOLDER",
    "data": {
      "from": "main",
      "to": "done"
    }
  }
}
Move Multiple Threads
- To select and transfer multiple threads all at once, click on "Manage Threads". You can select all the threads in this folder; or manually select several threads.
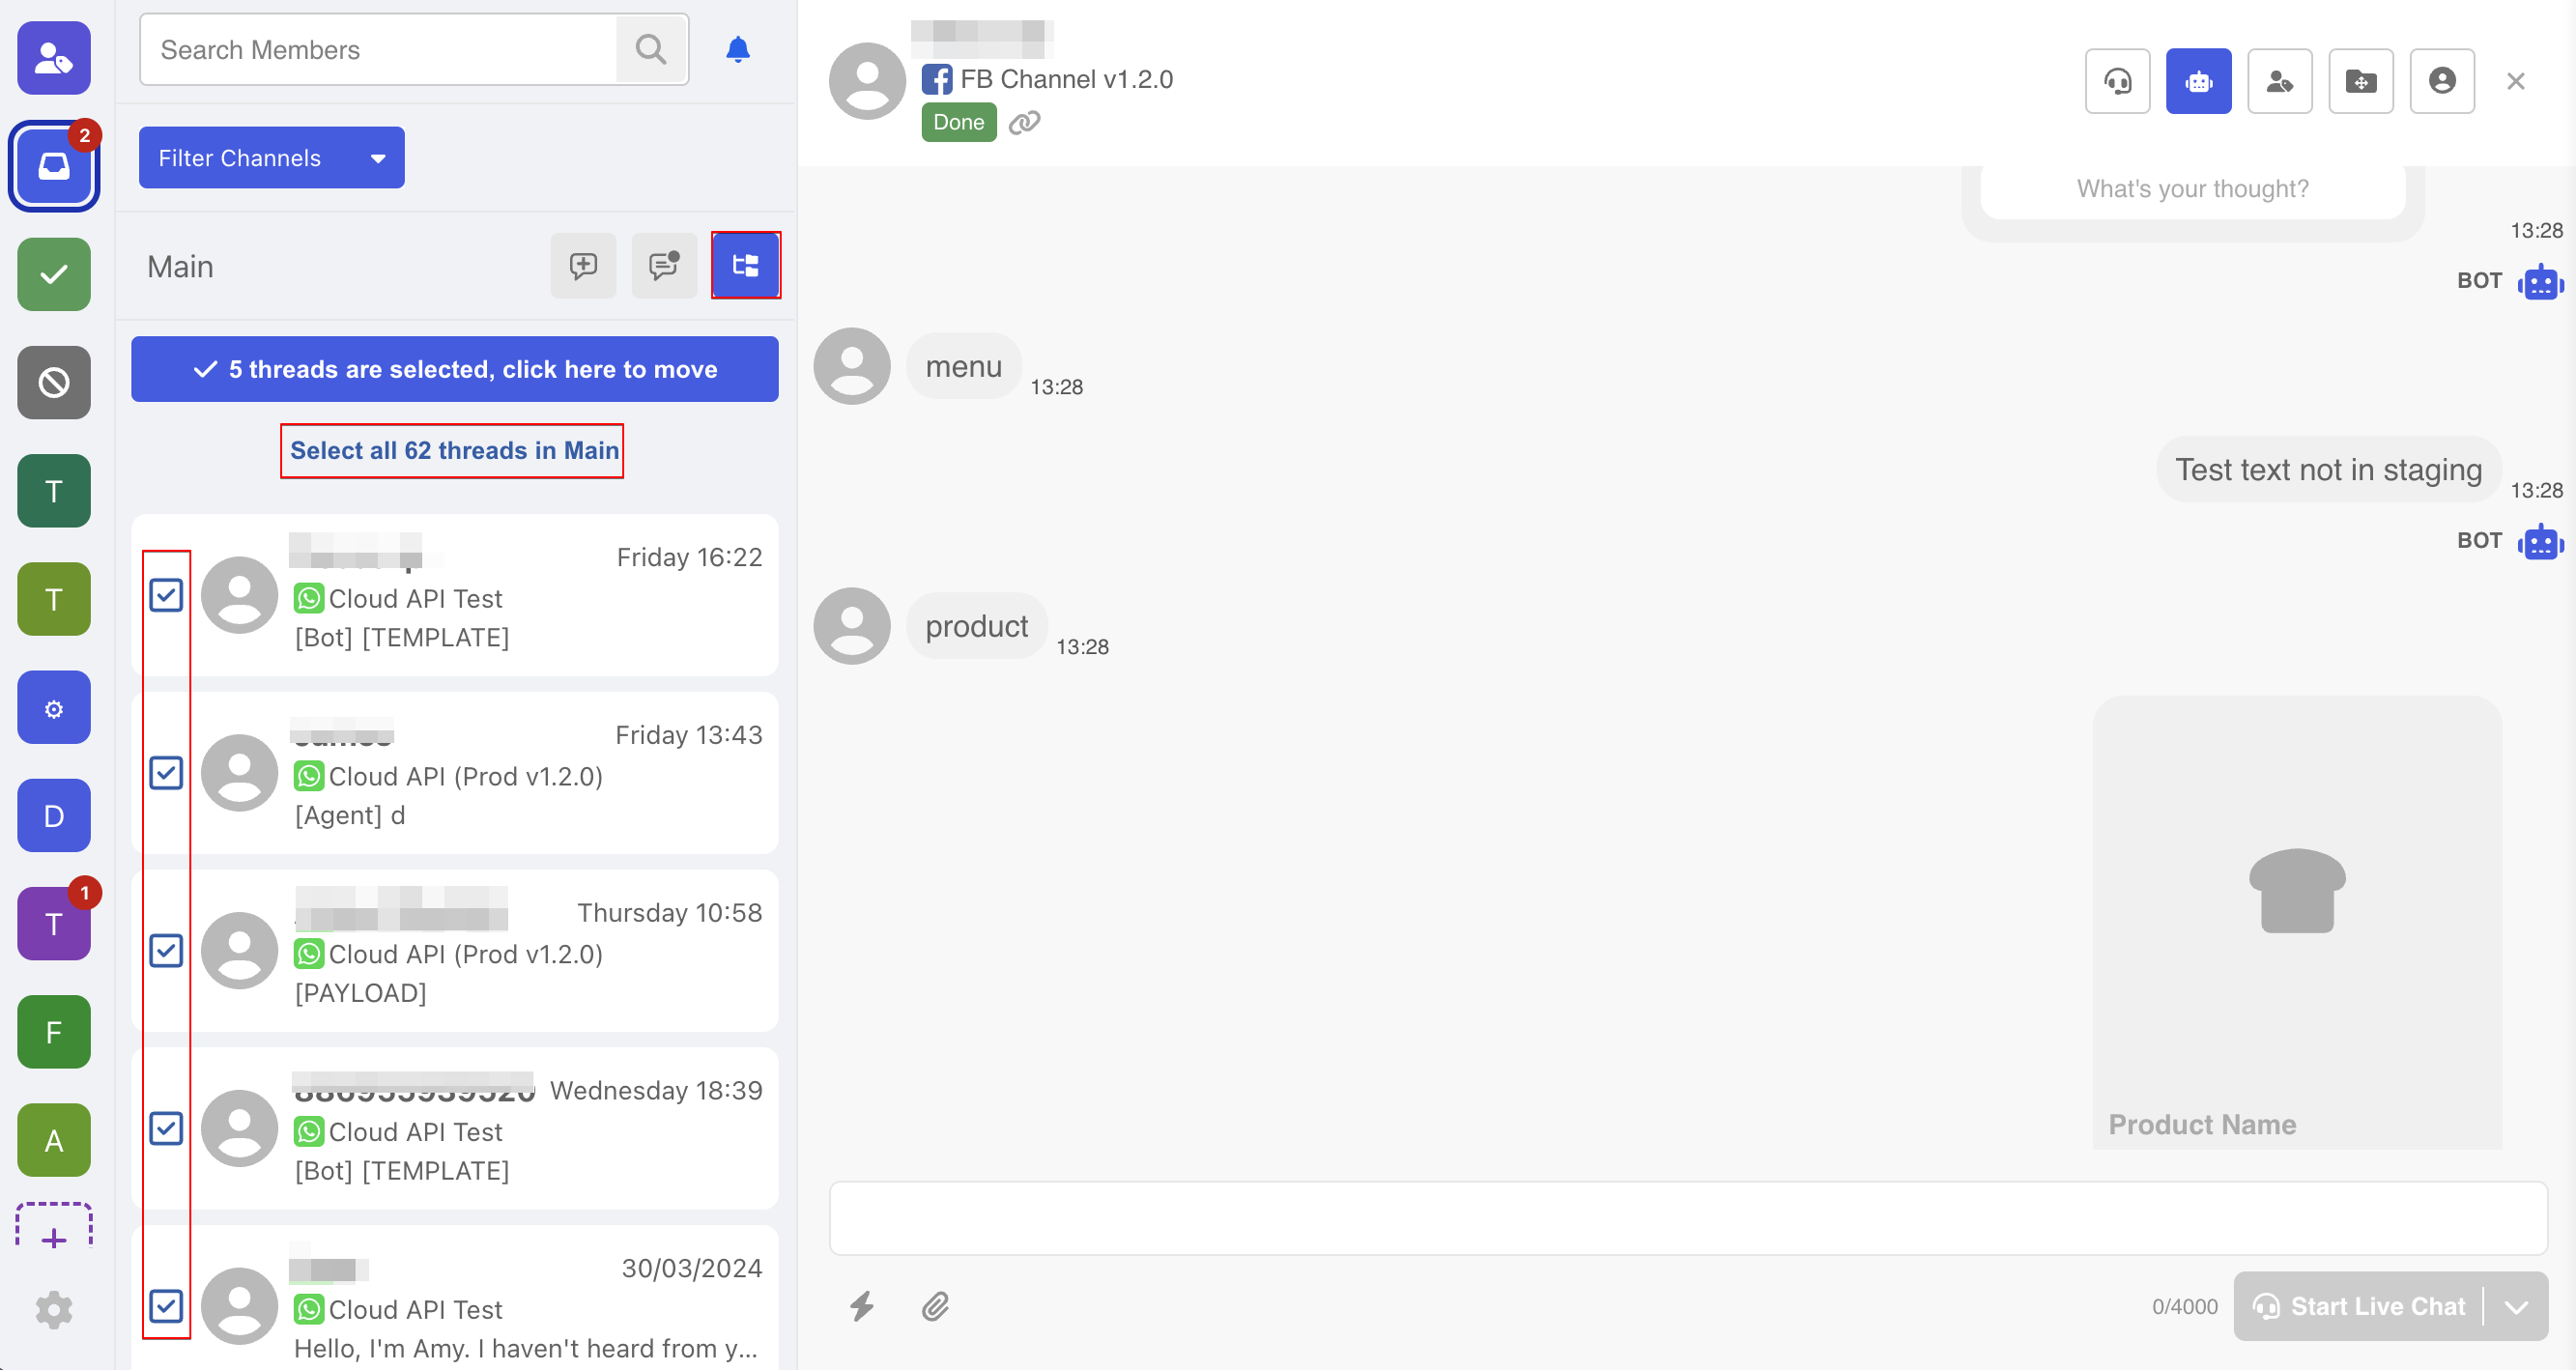
- Click to confirm the number of threads selected. Pick a folder and "Confirm" the transfer.
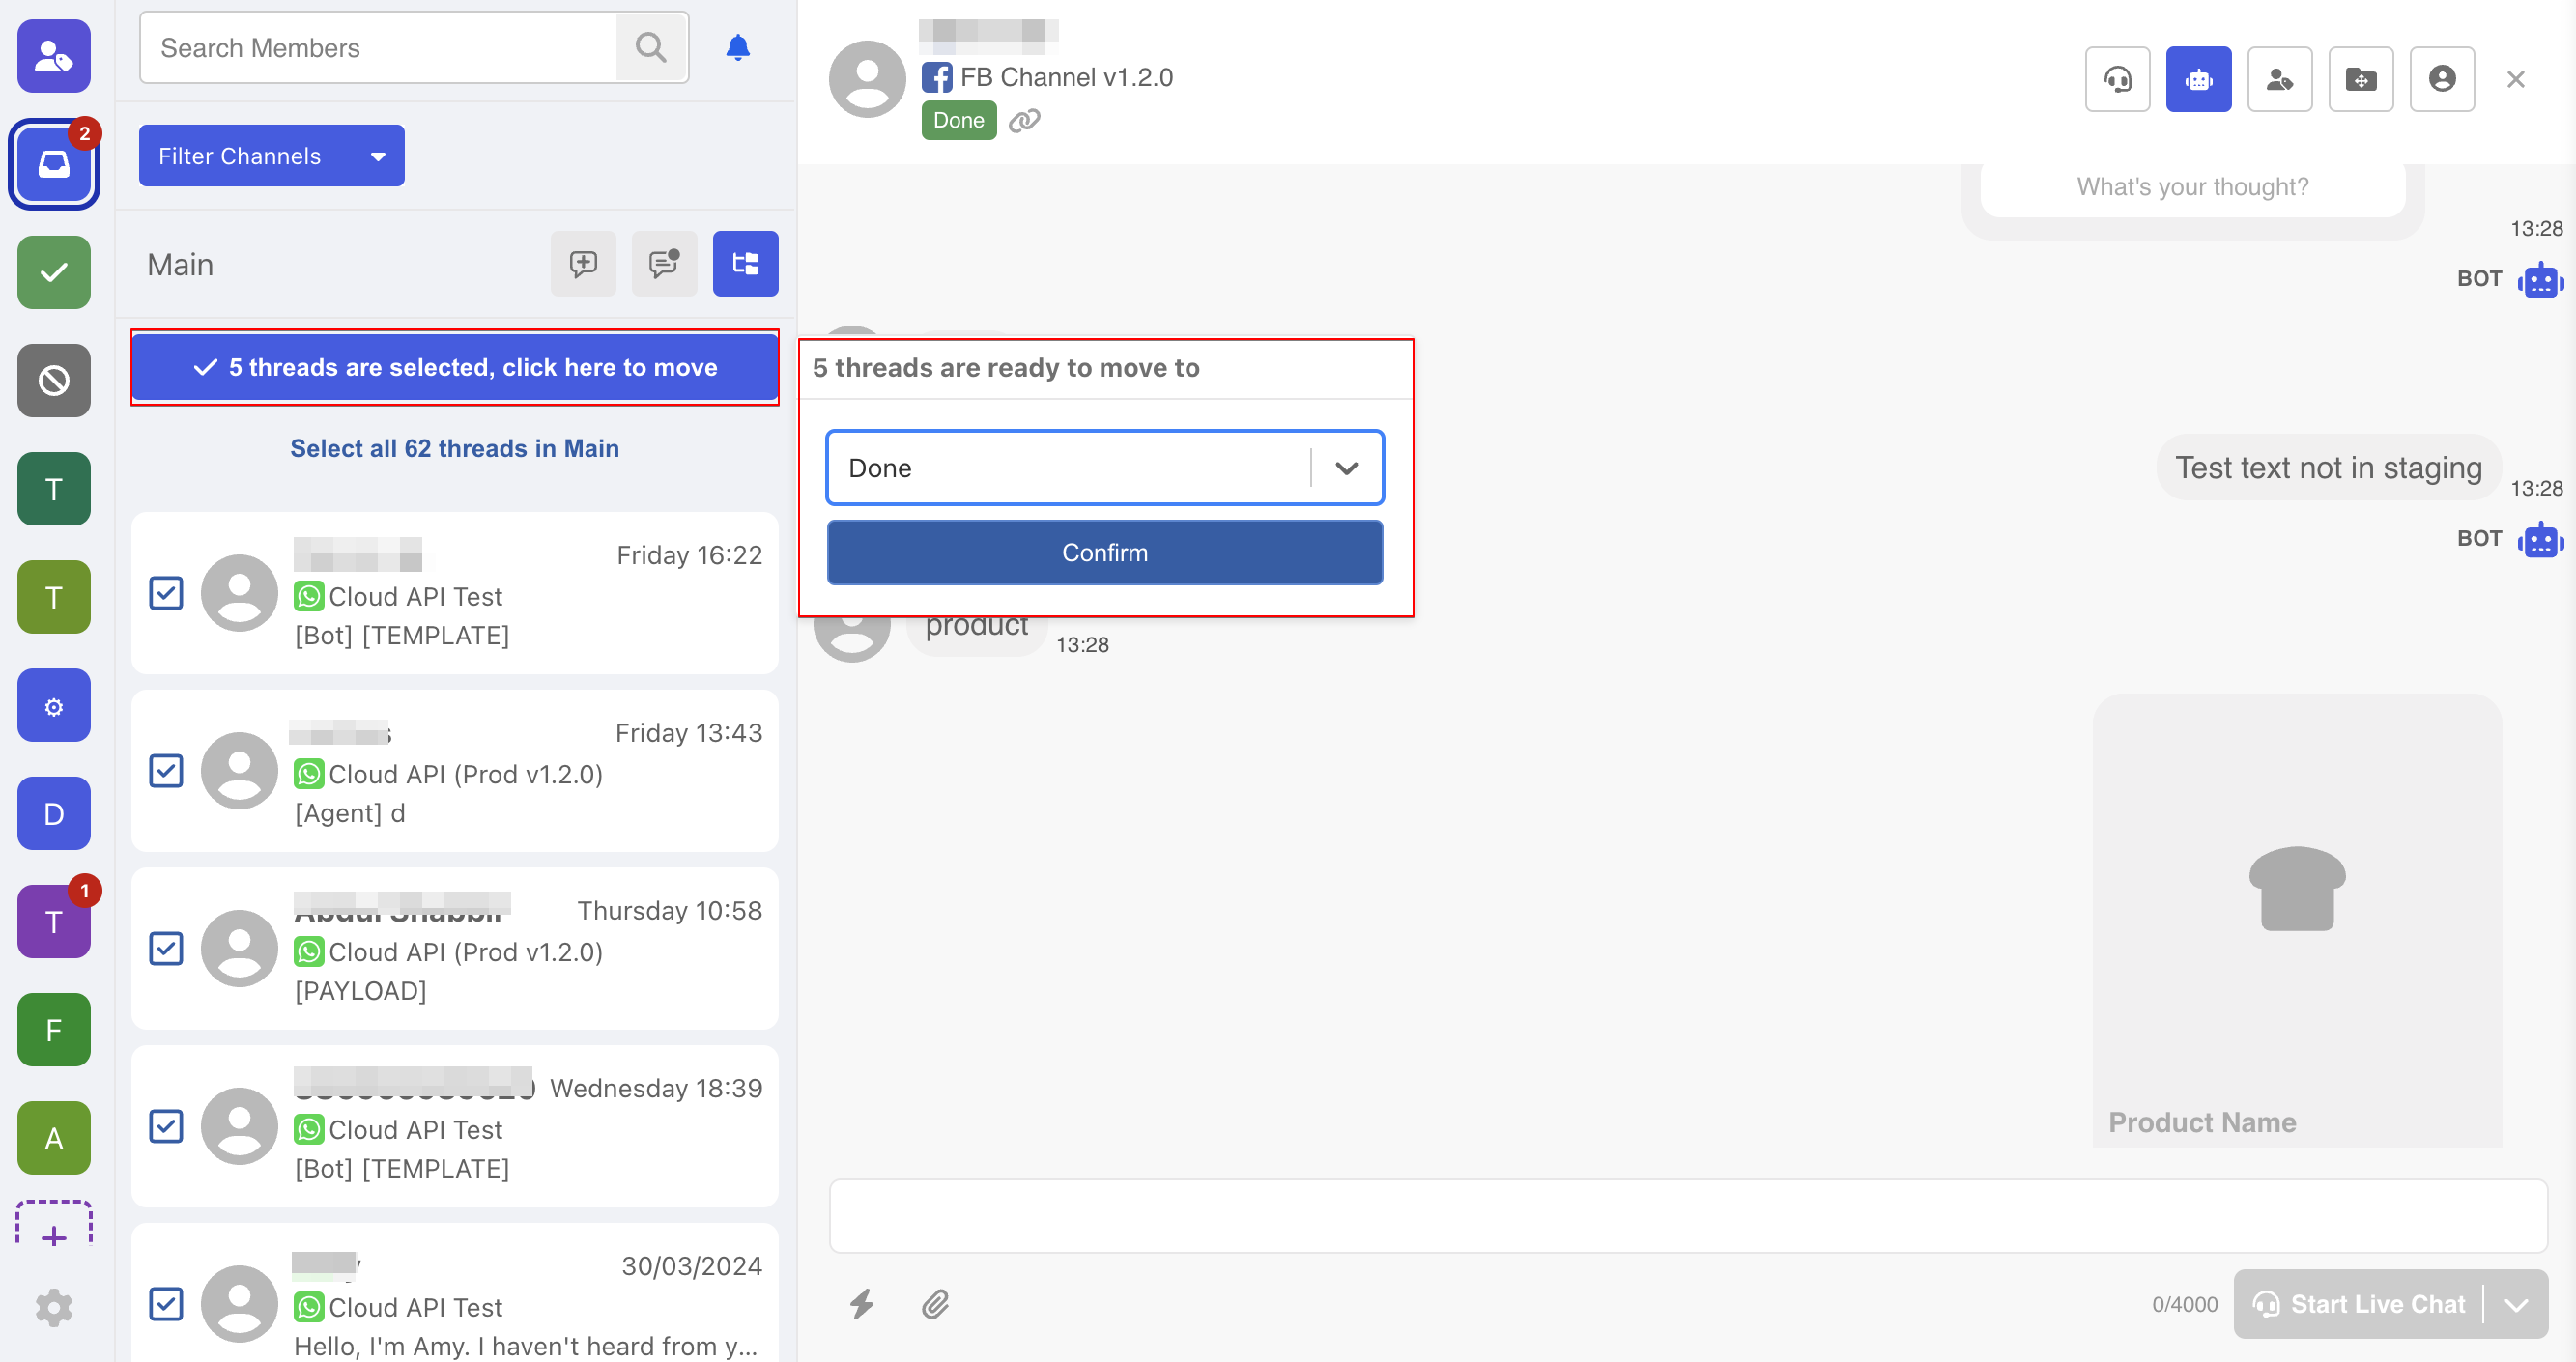
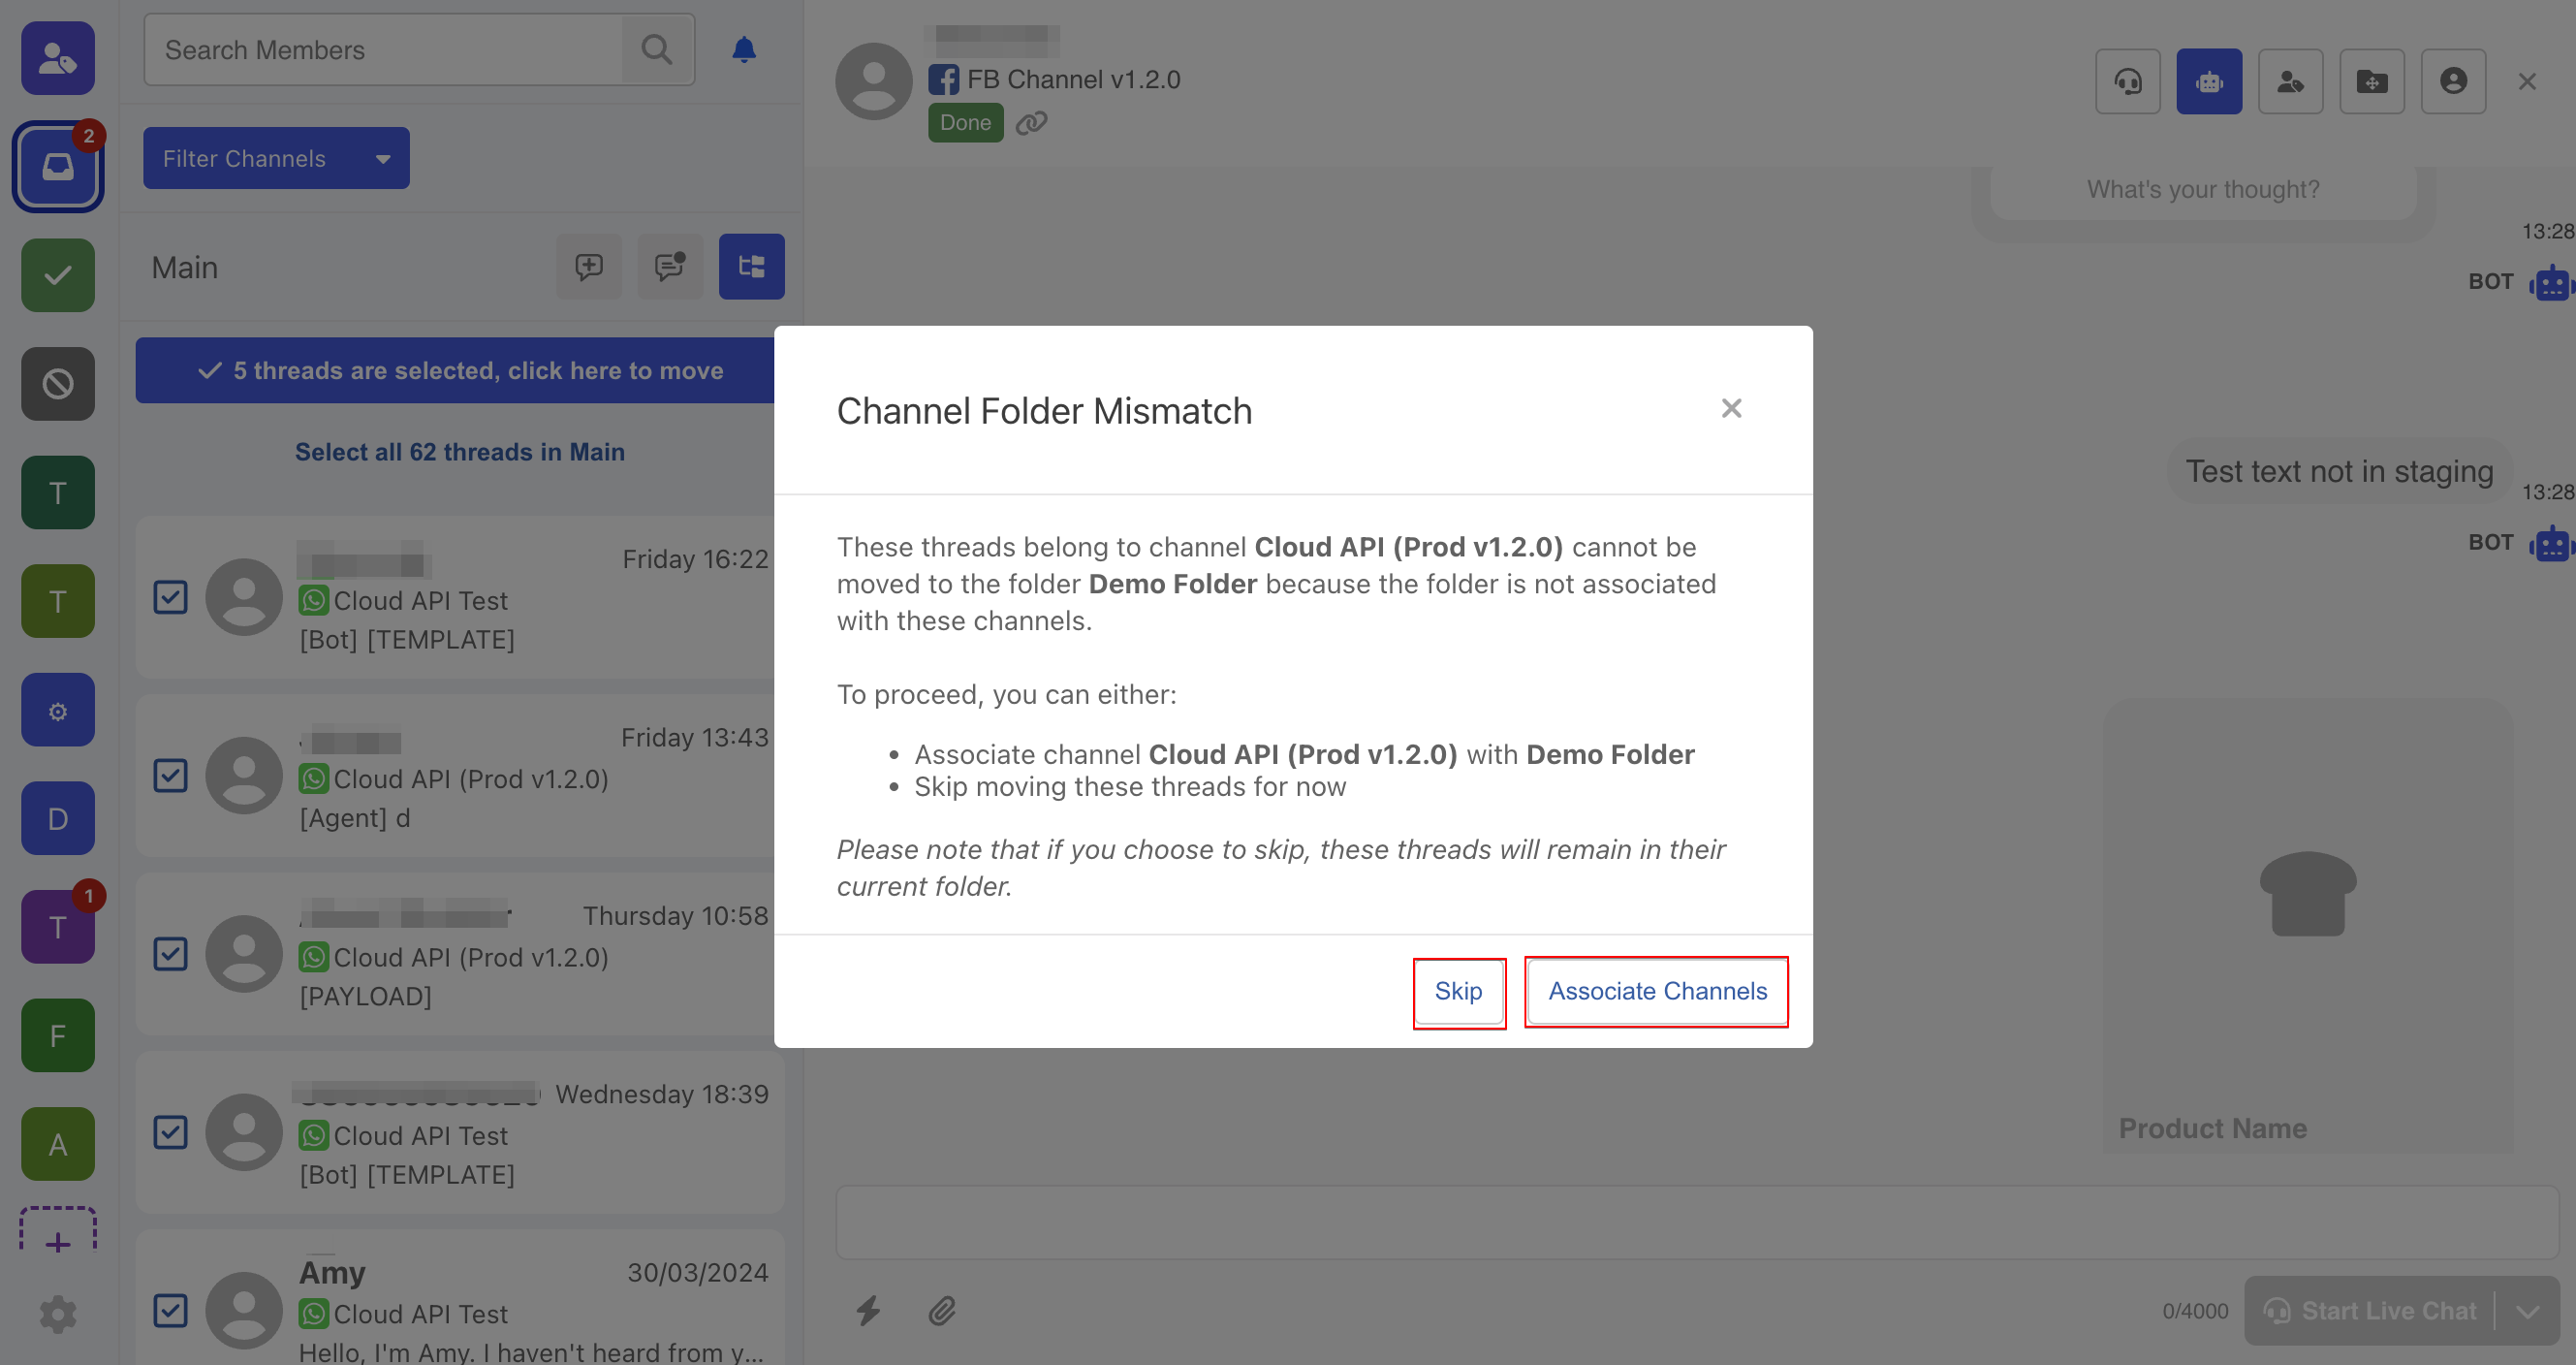
- If the selected threads come from a channel that is not supported in the destination folder, the threads cannot be transferred unless you take one of the following actions:
- Skip the threads with mismatched channels, and proceed the transfer with the rest of the threads.
- Associate the missing channel to the destination folder, so that all the selected folders can be transferred.
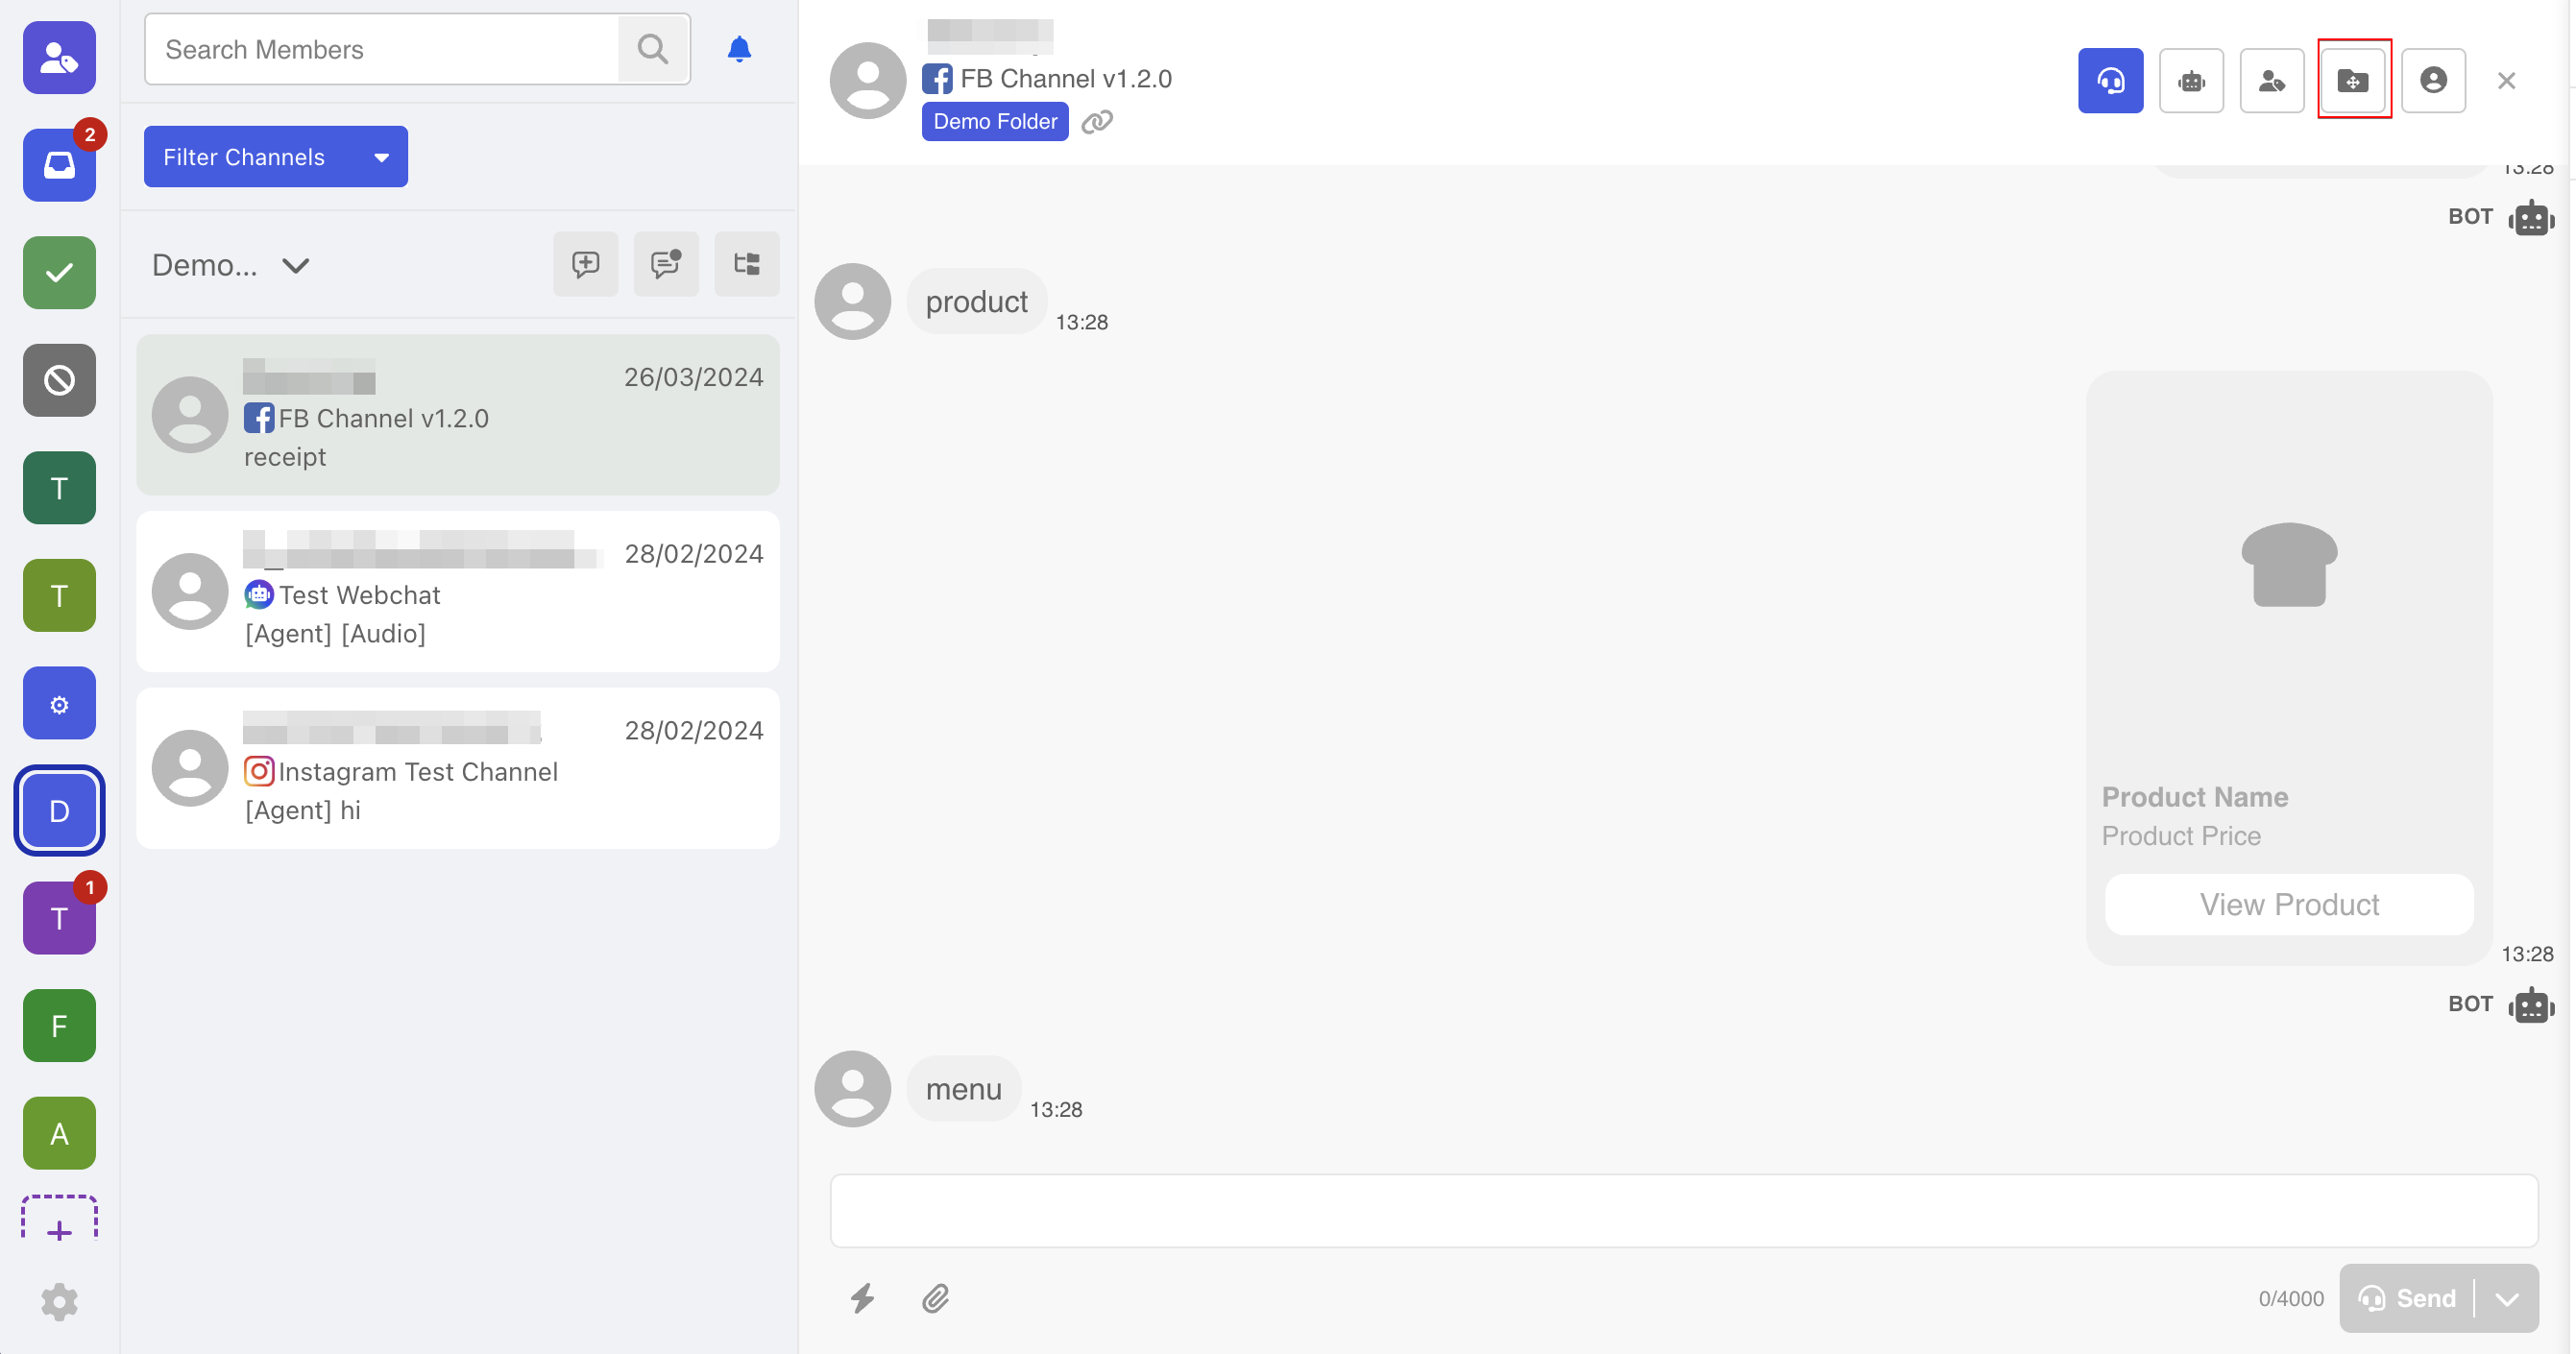
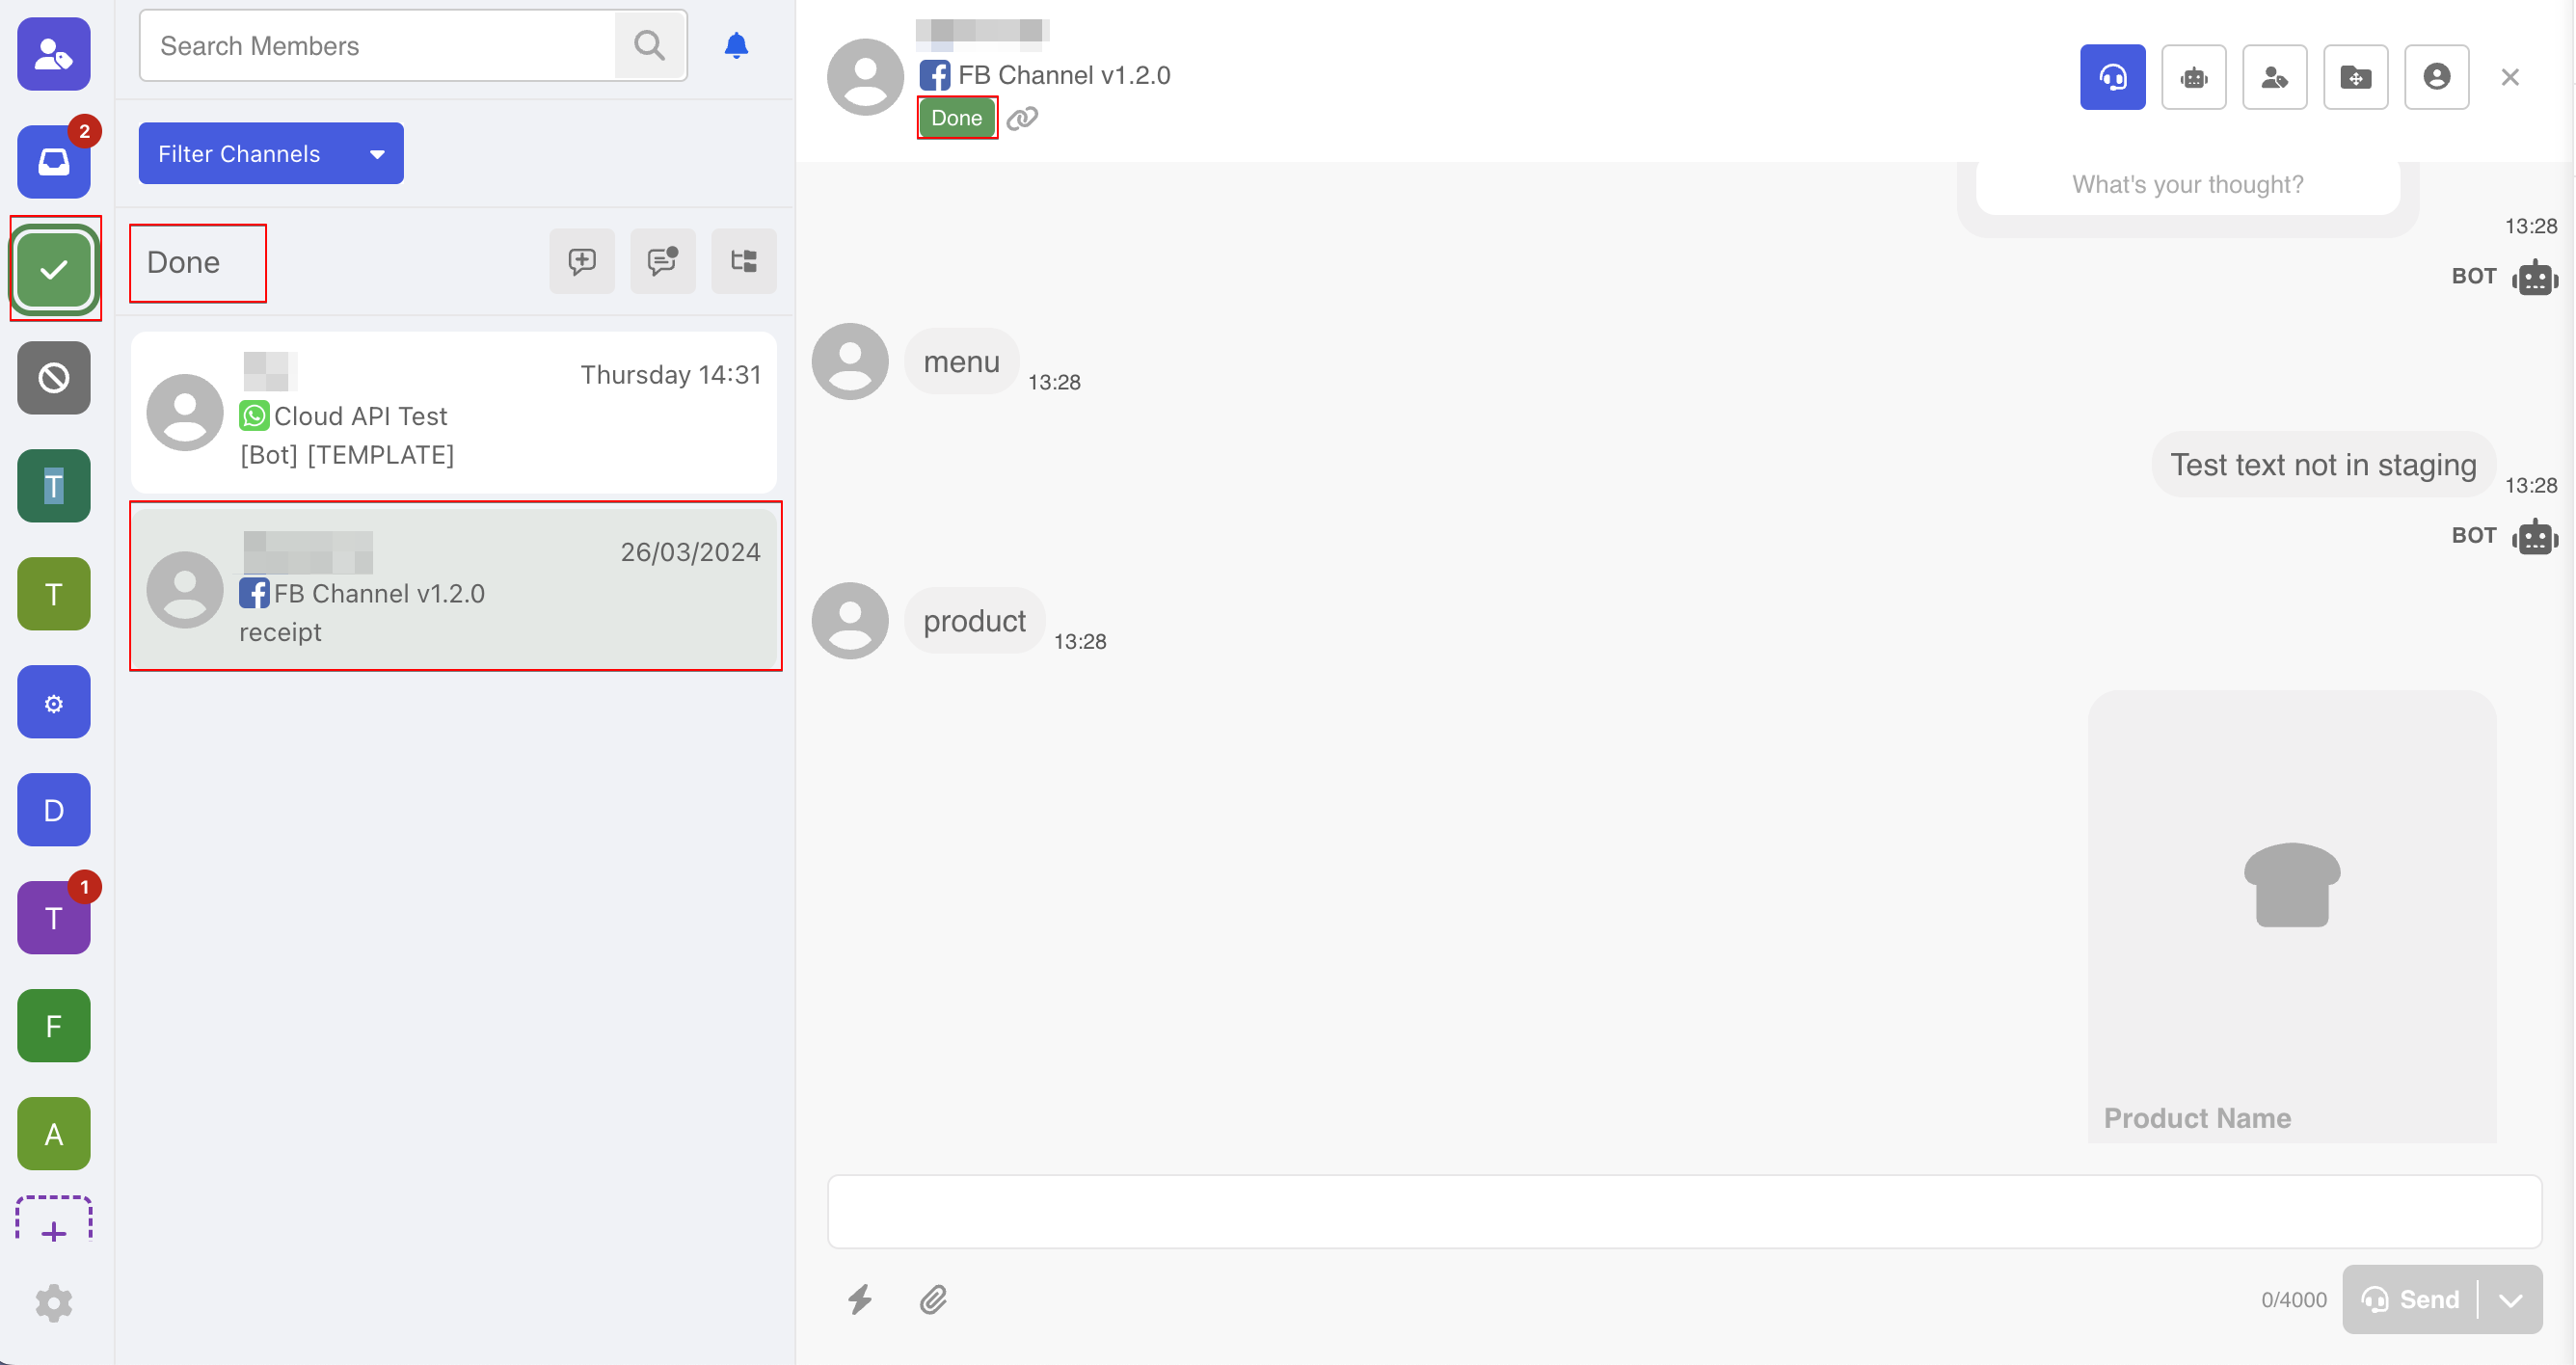
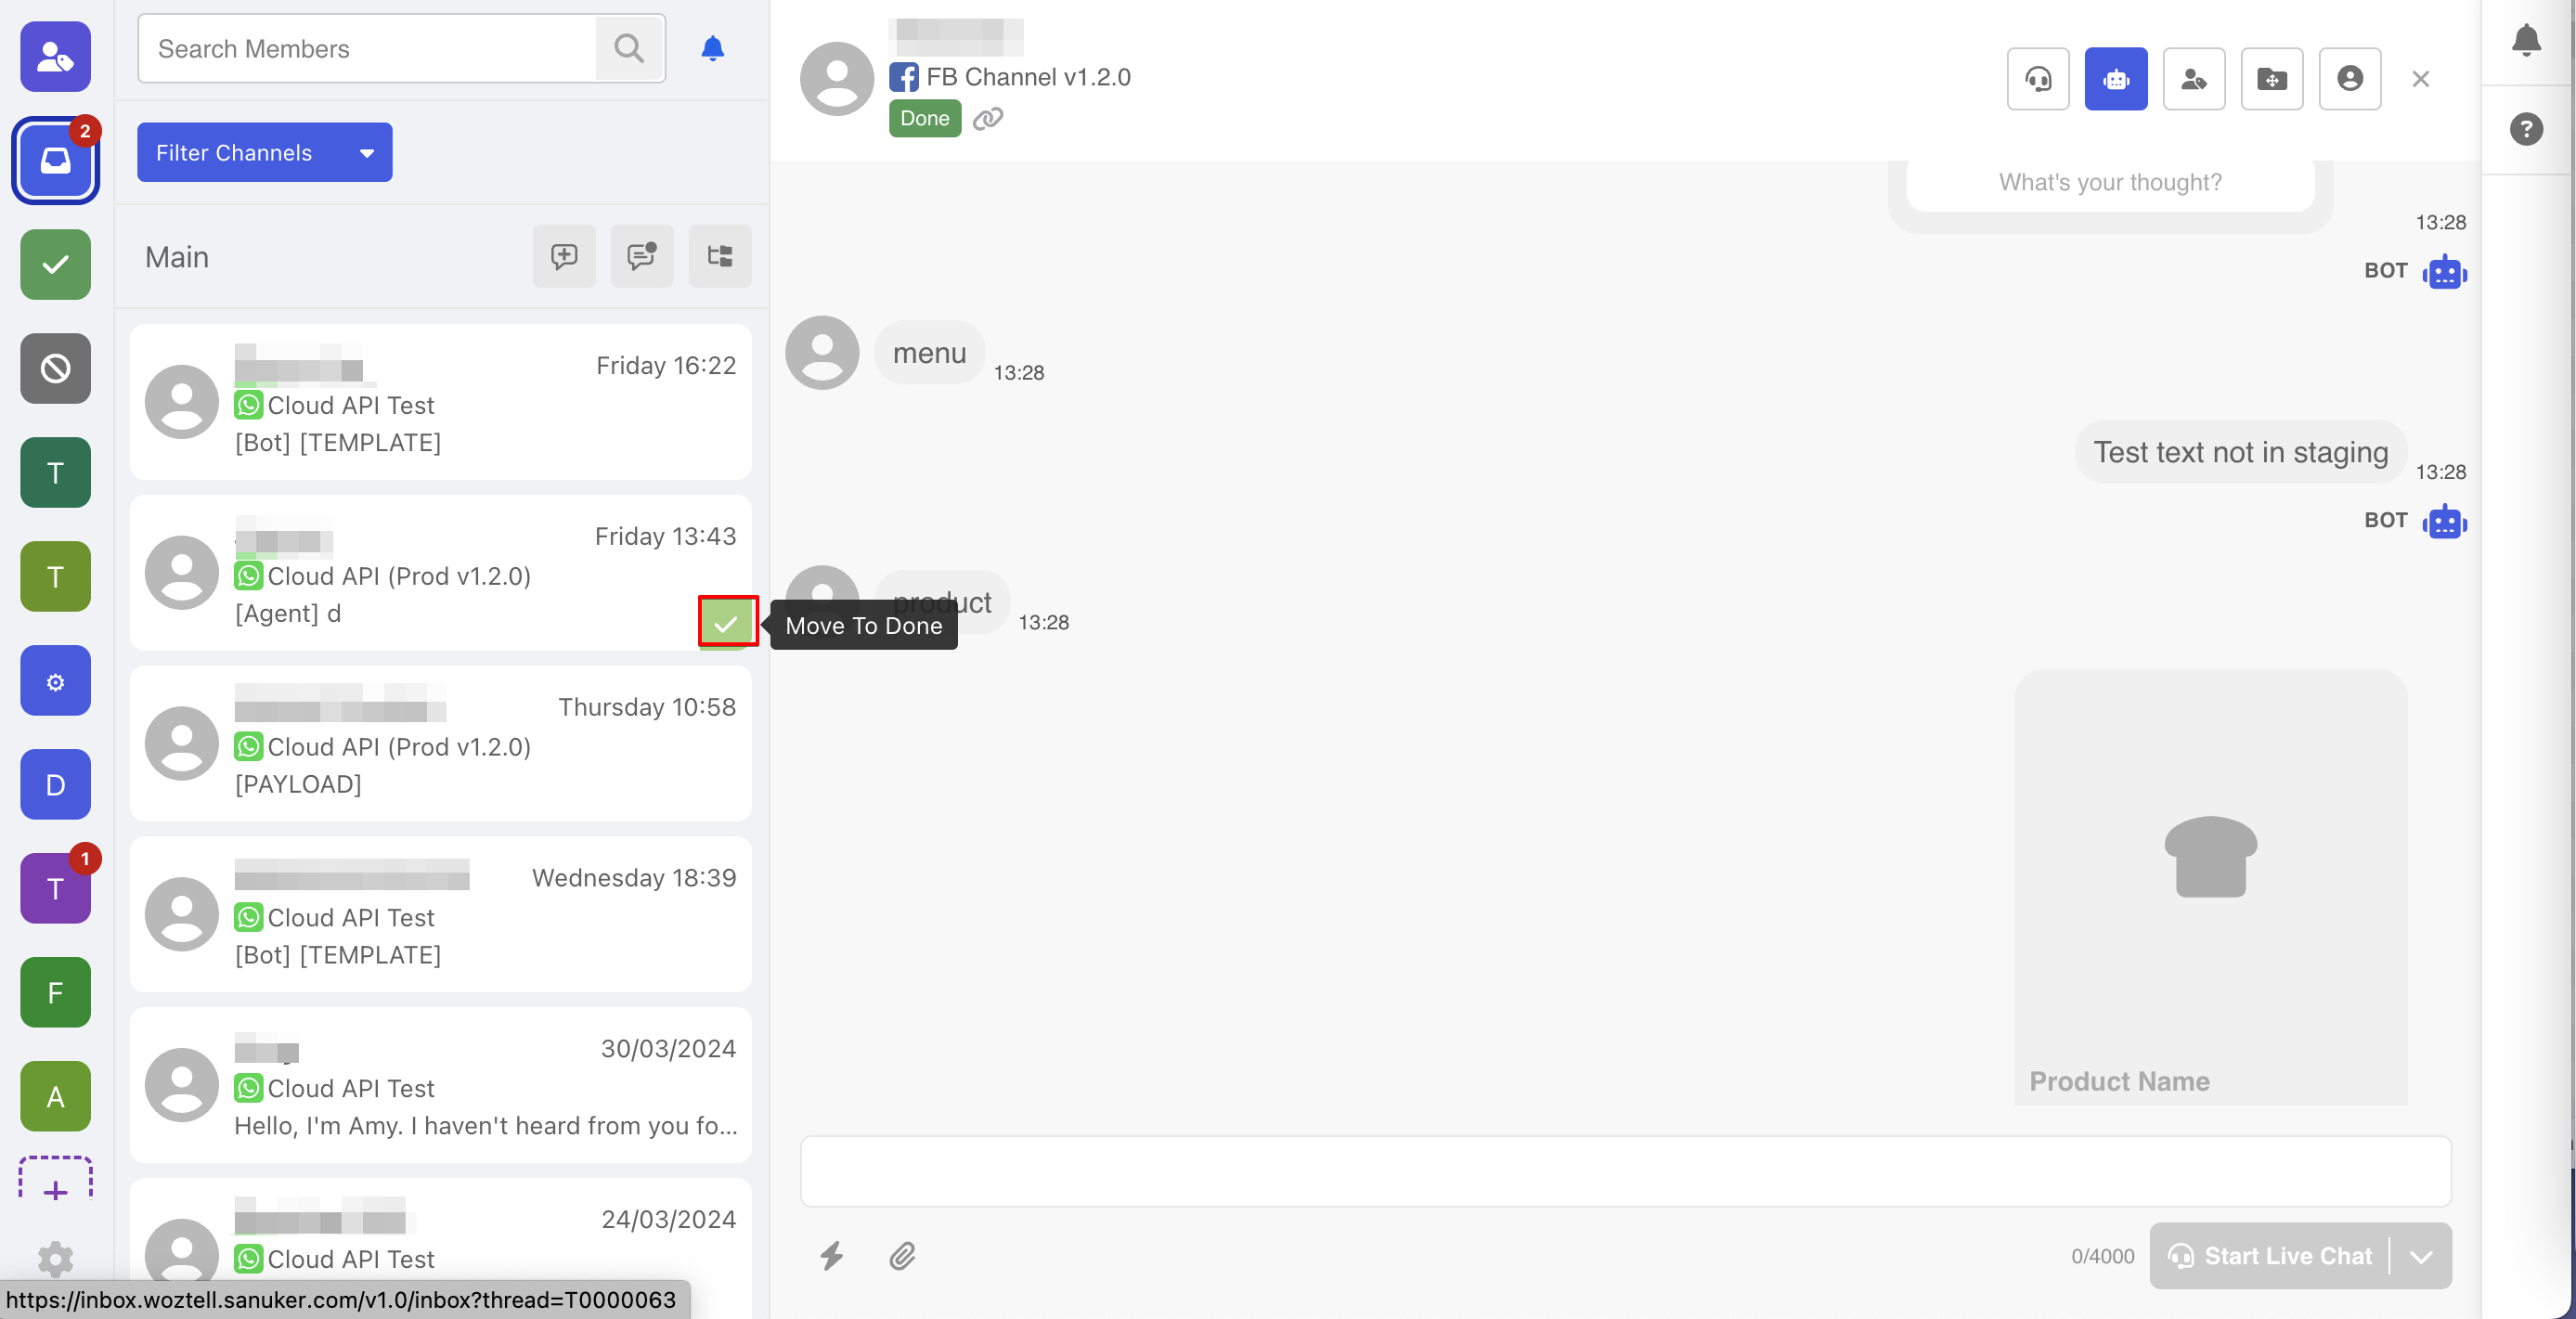
Move to "Done" Folder
The Done Folder is responsible for holding the threads that have been handled. As one of most common action for the each agent, you can make use the "Move to Done" shortcut to close a thread.
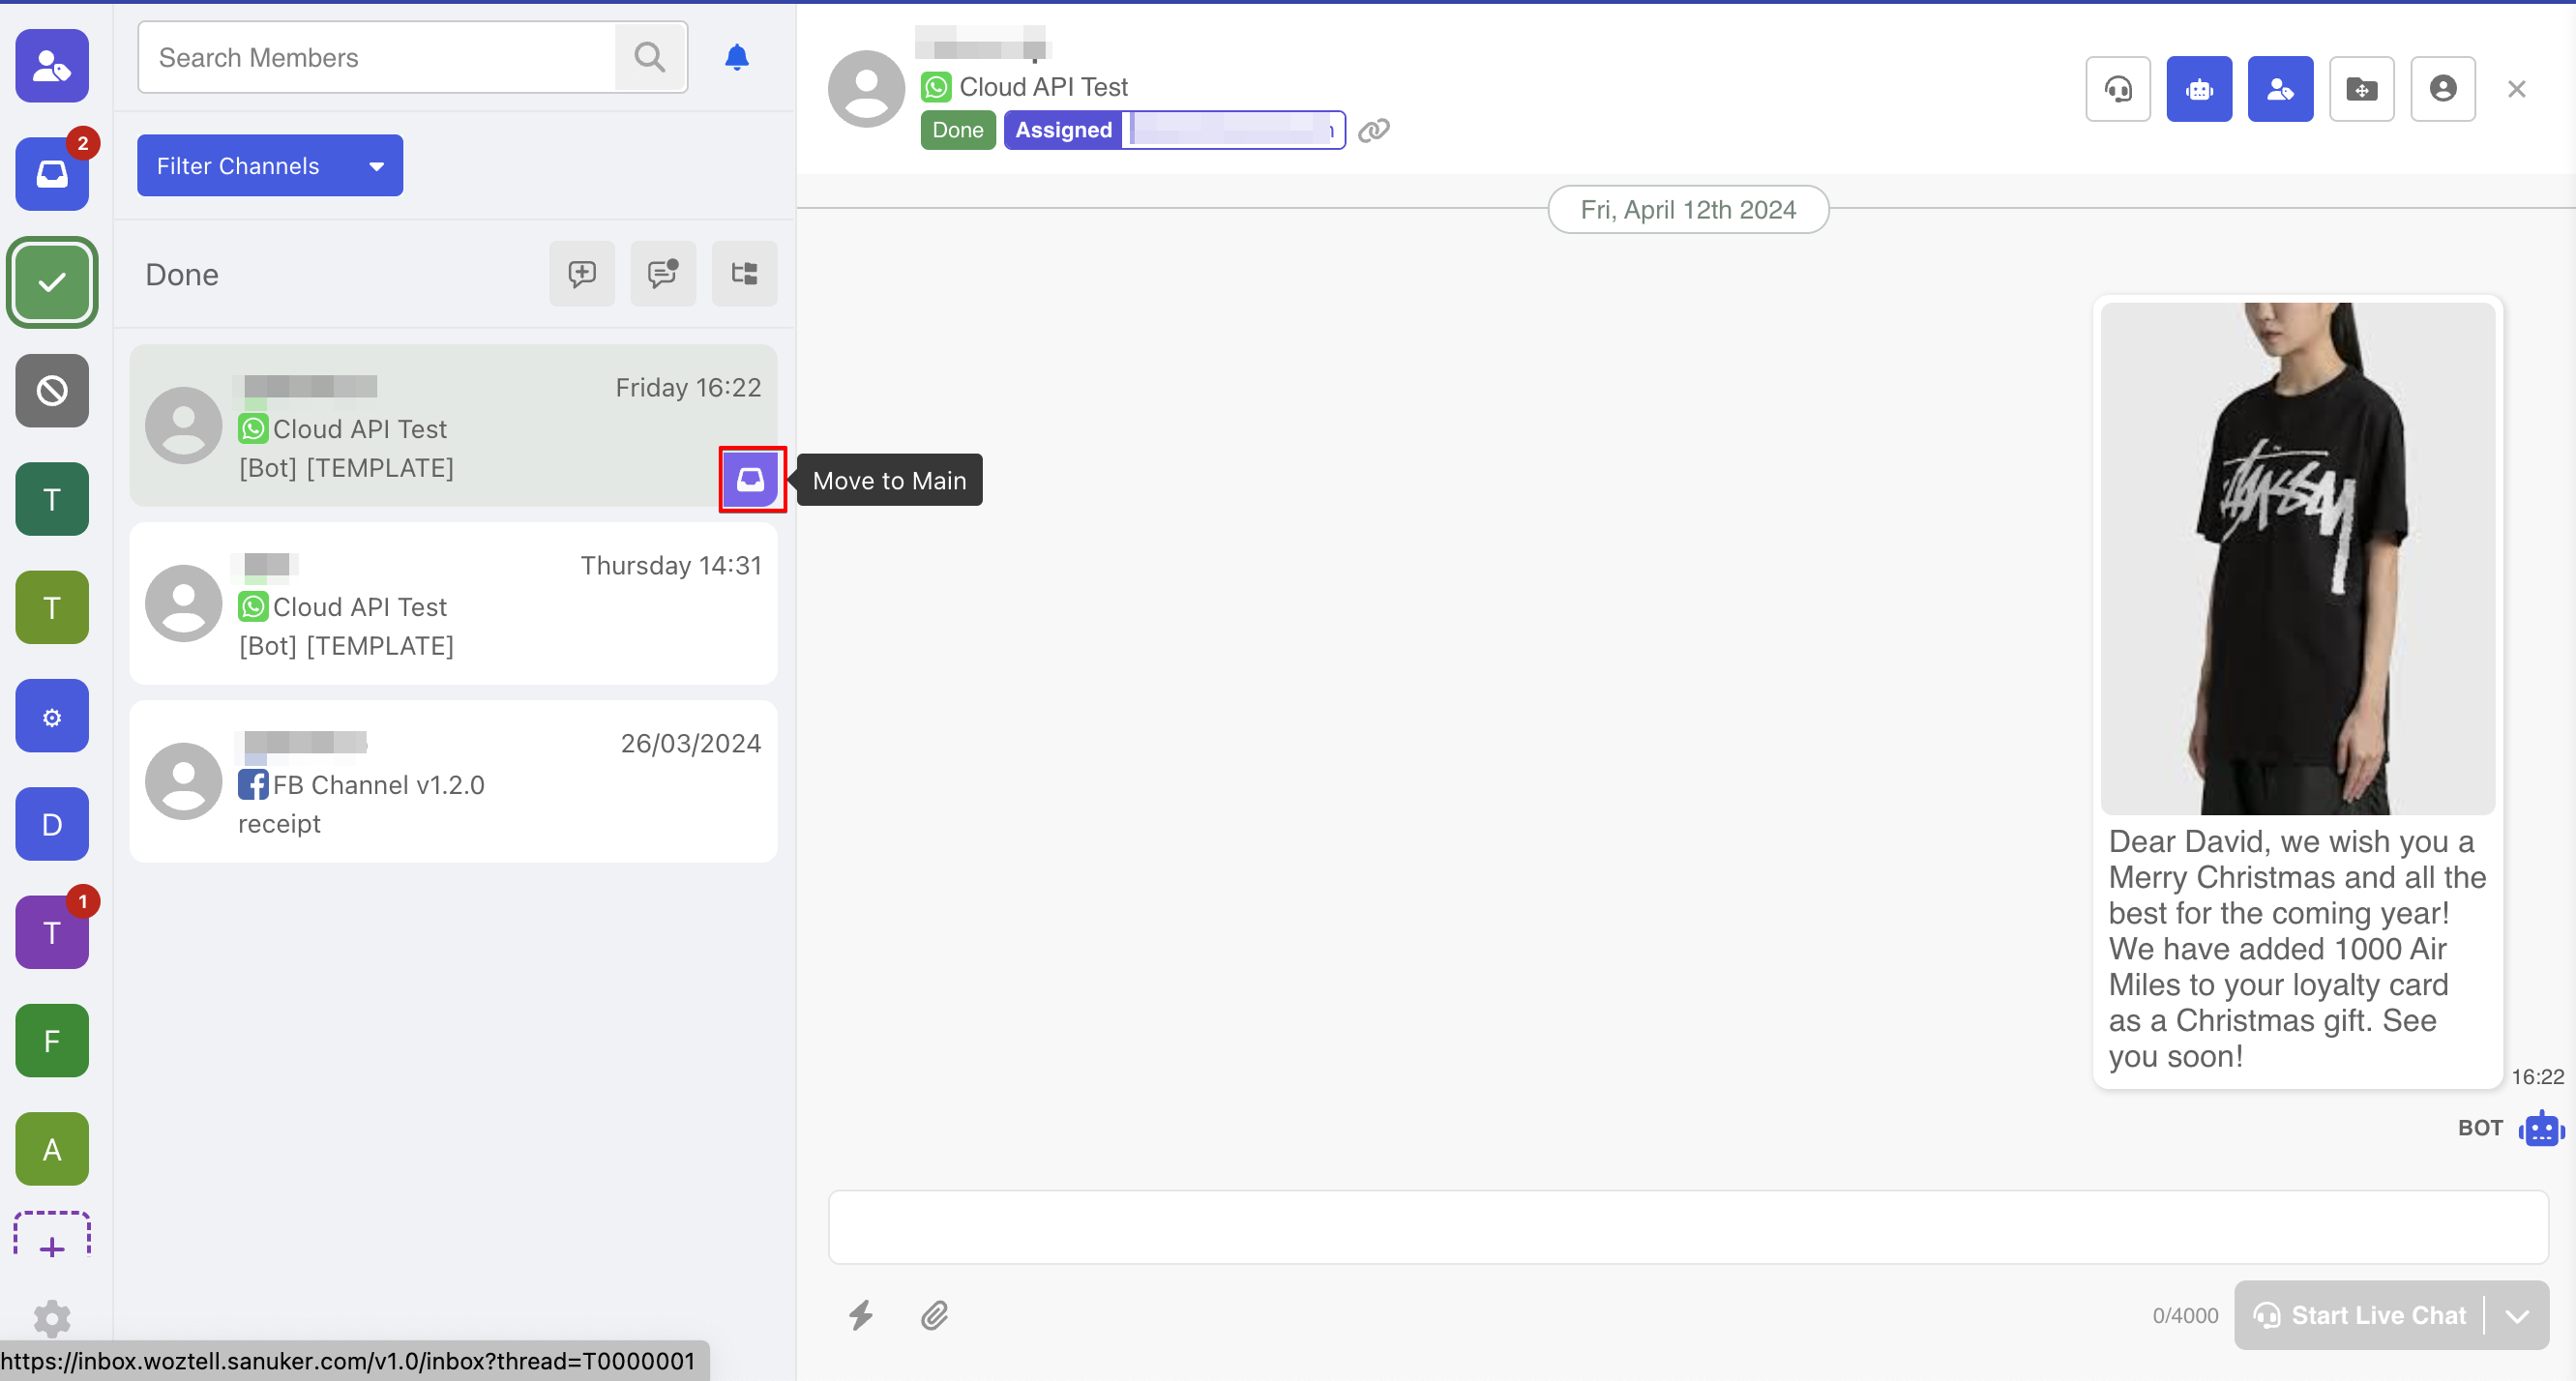
On the other hand, you can also use the "Move to Main" shortcut inside the Done Folder.
Mark Thread as Unread
In some scenarios, you would like a thread to be "unread" for other agents to follow up on. To achieve this, you can make use the feature to make thread as unread.
- Hover over the message you would like to unread and select "Mark as Unread", the messages sent and received after that will be unread as well.
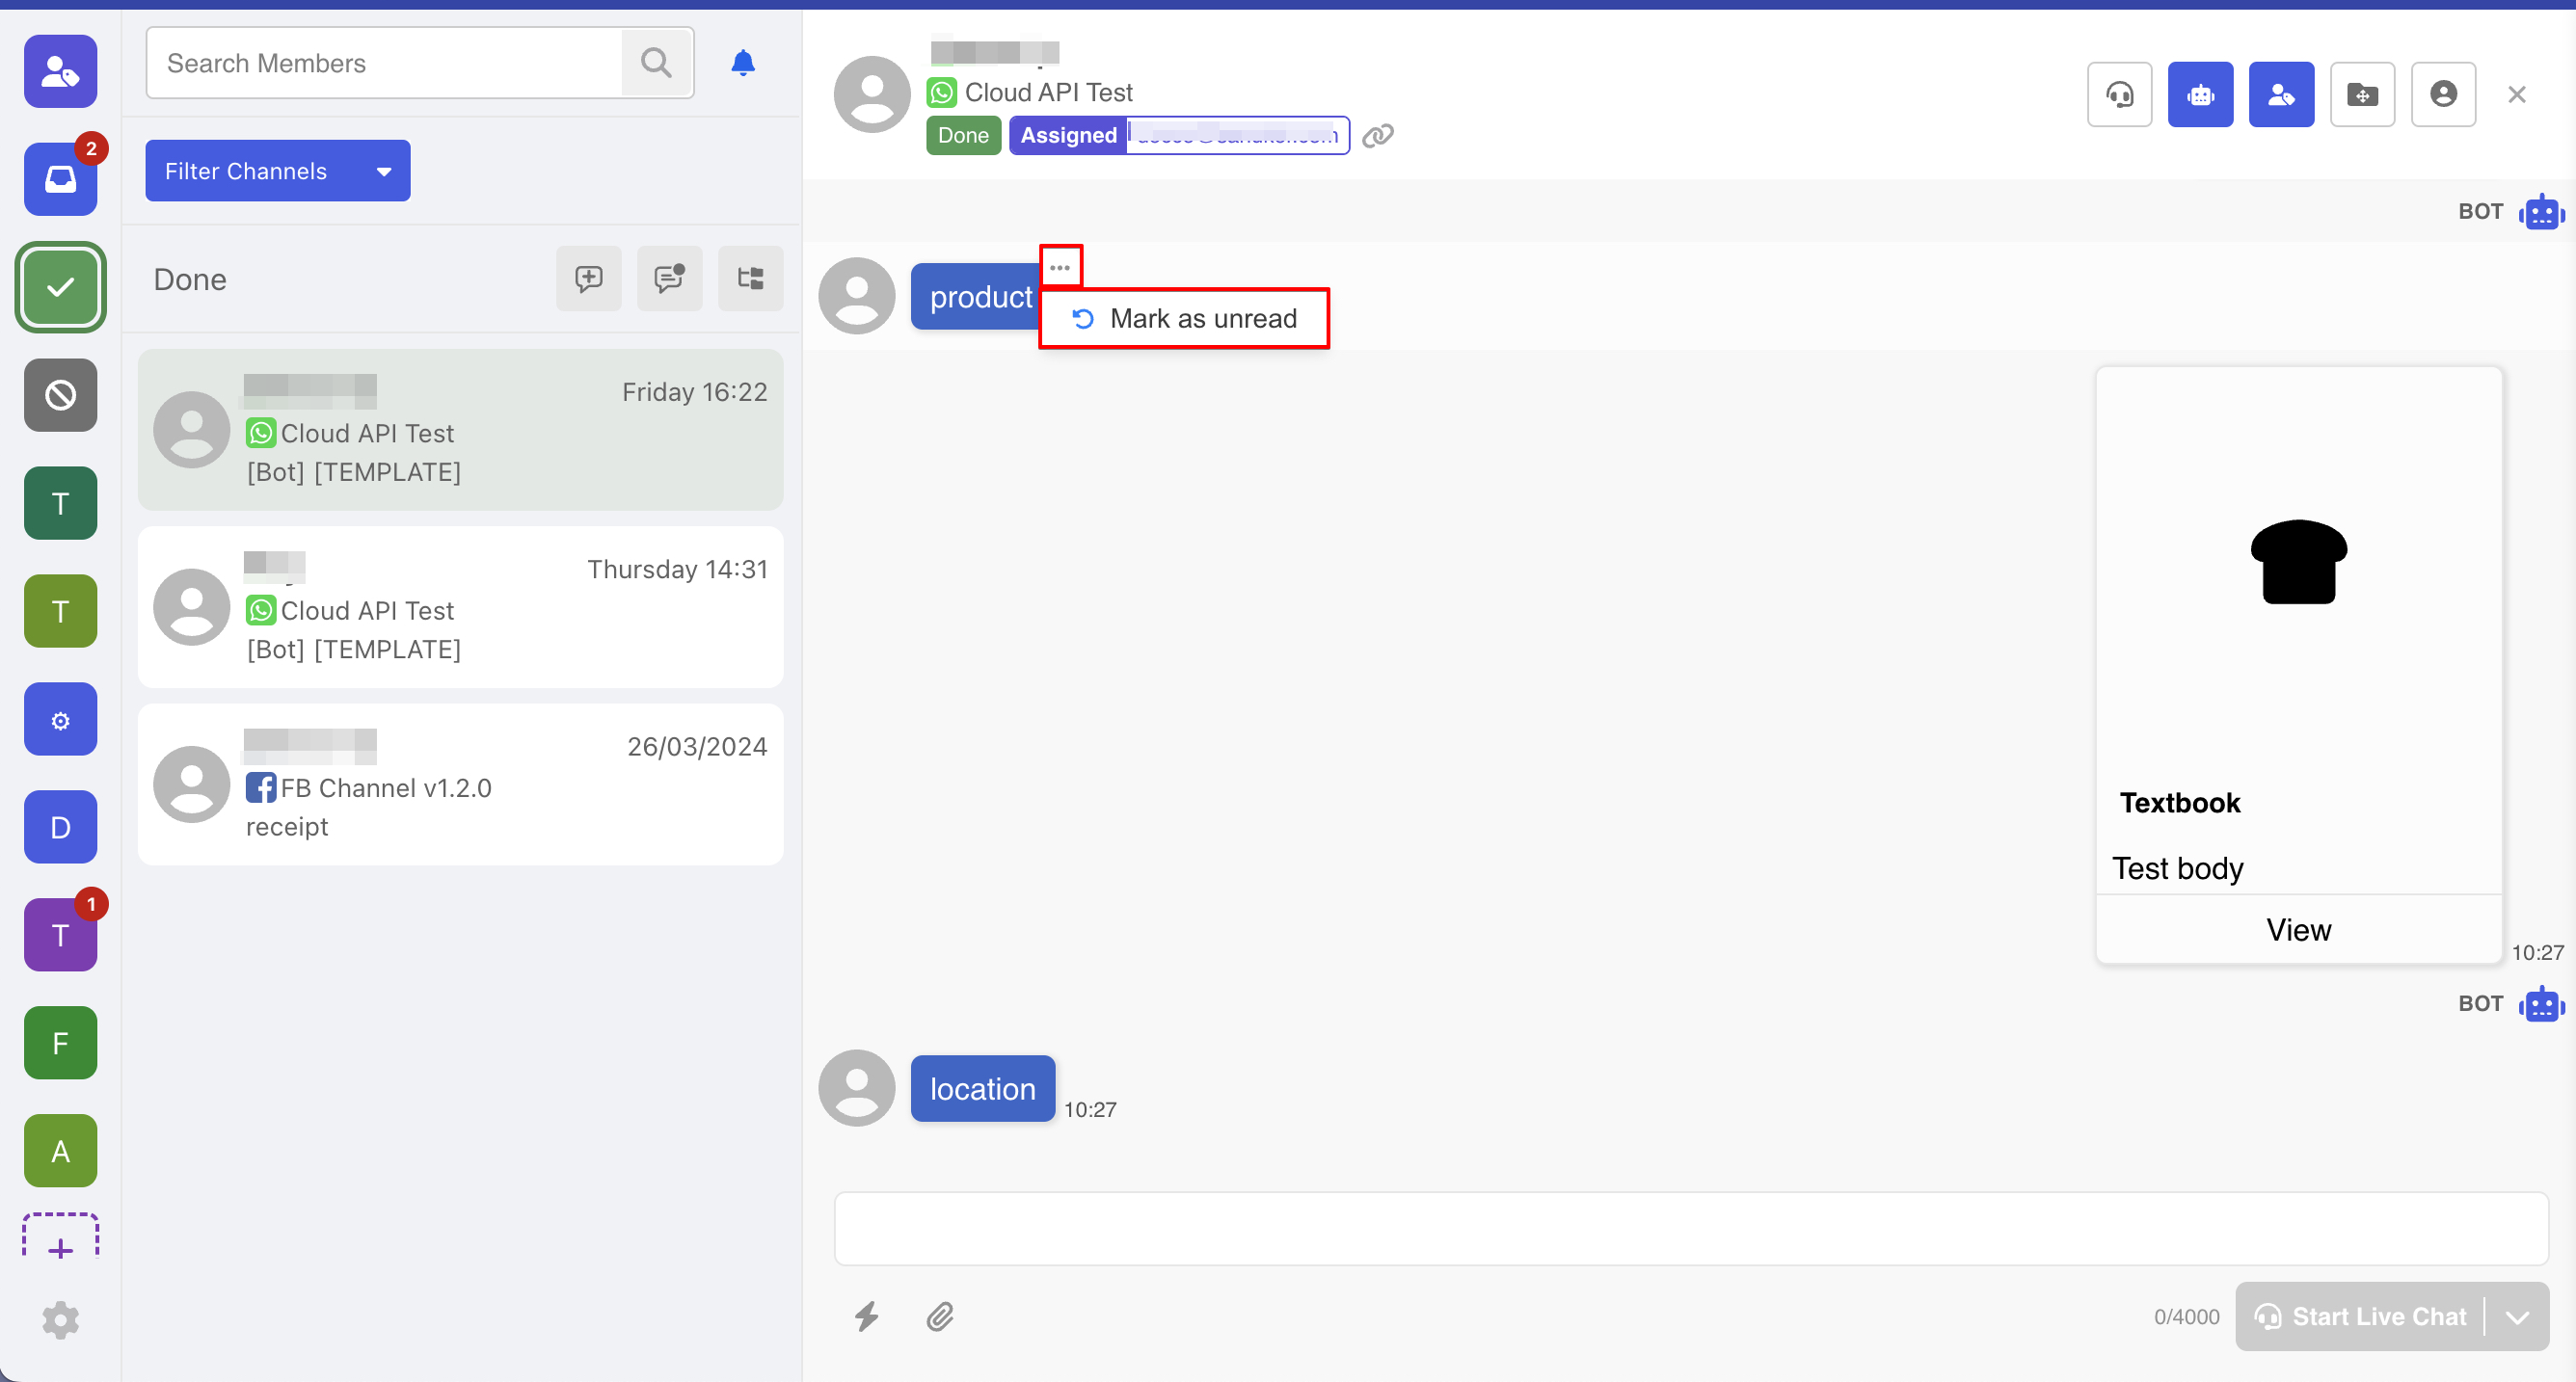
- After that, the thread will be closed, until an agent opens and reads it again.
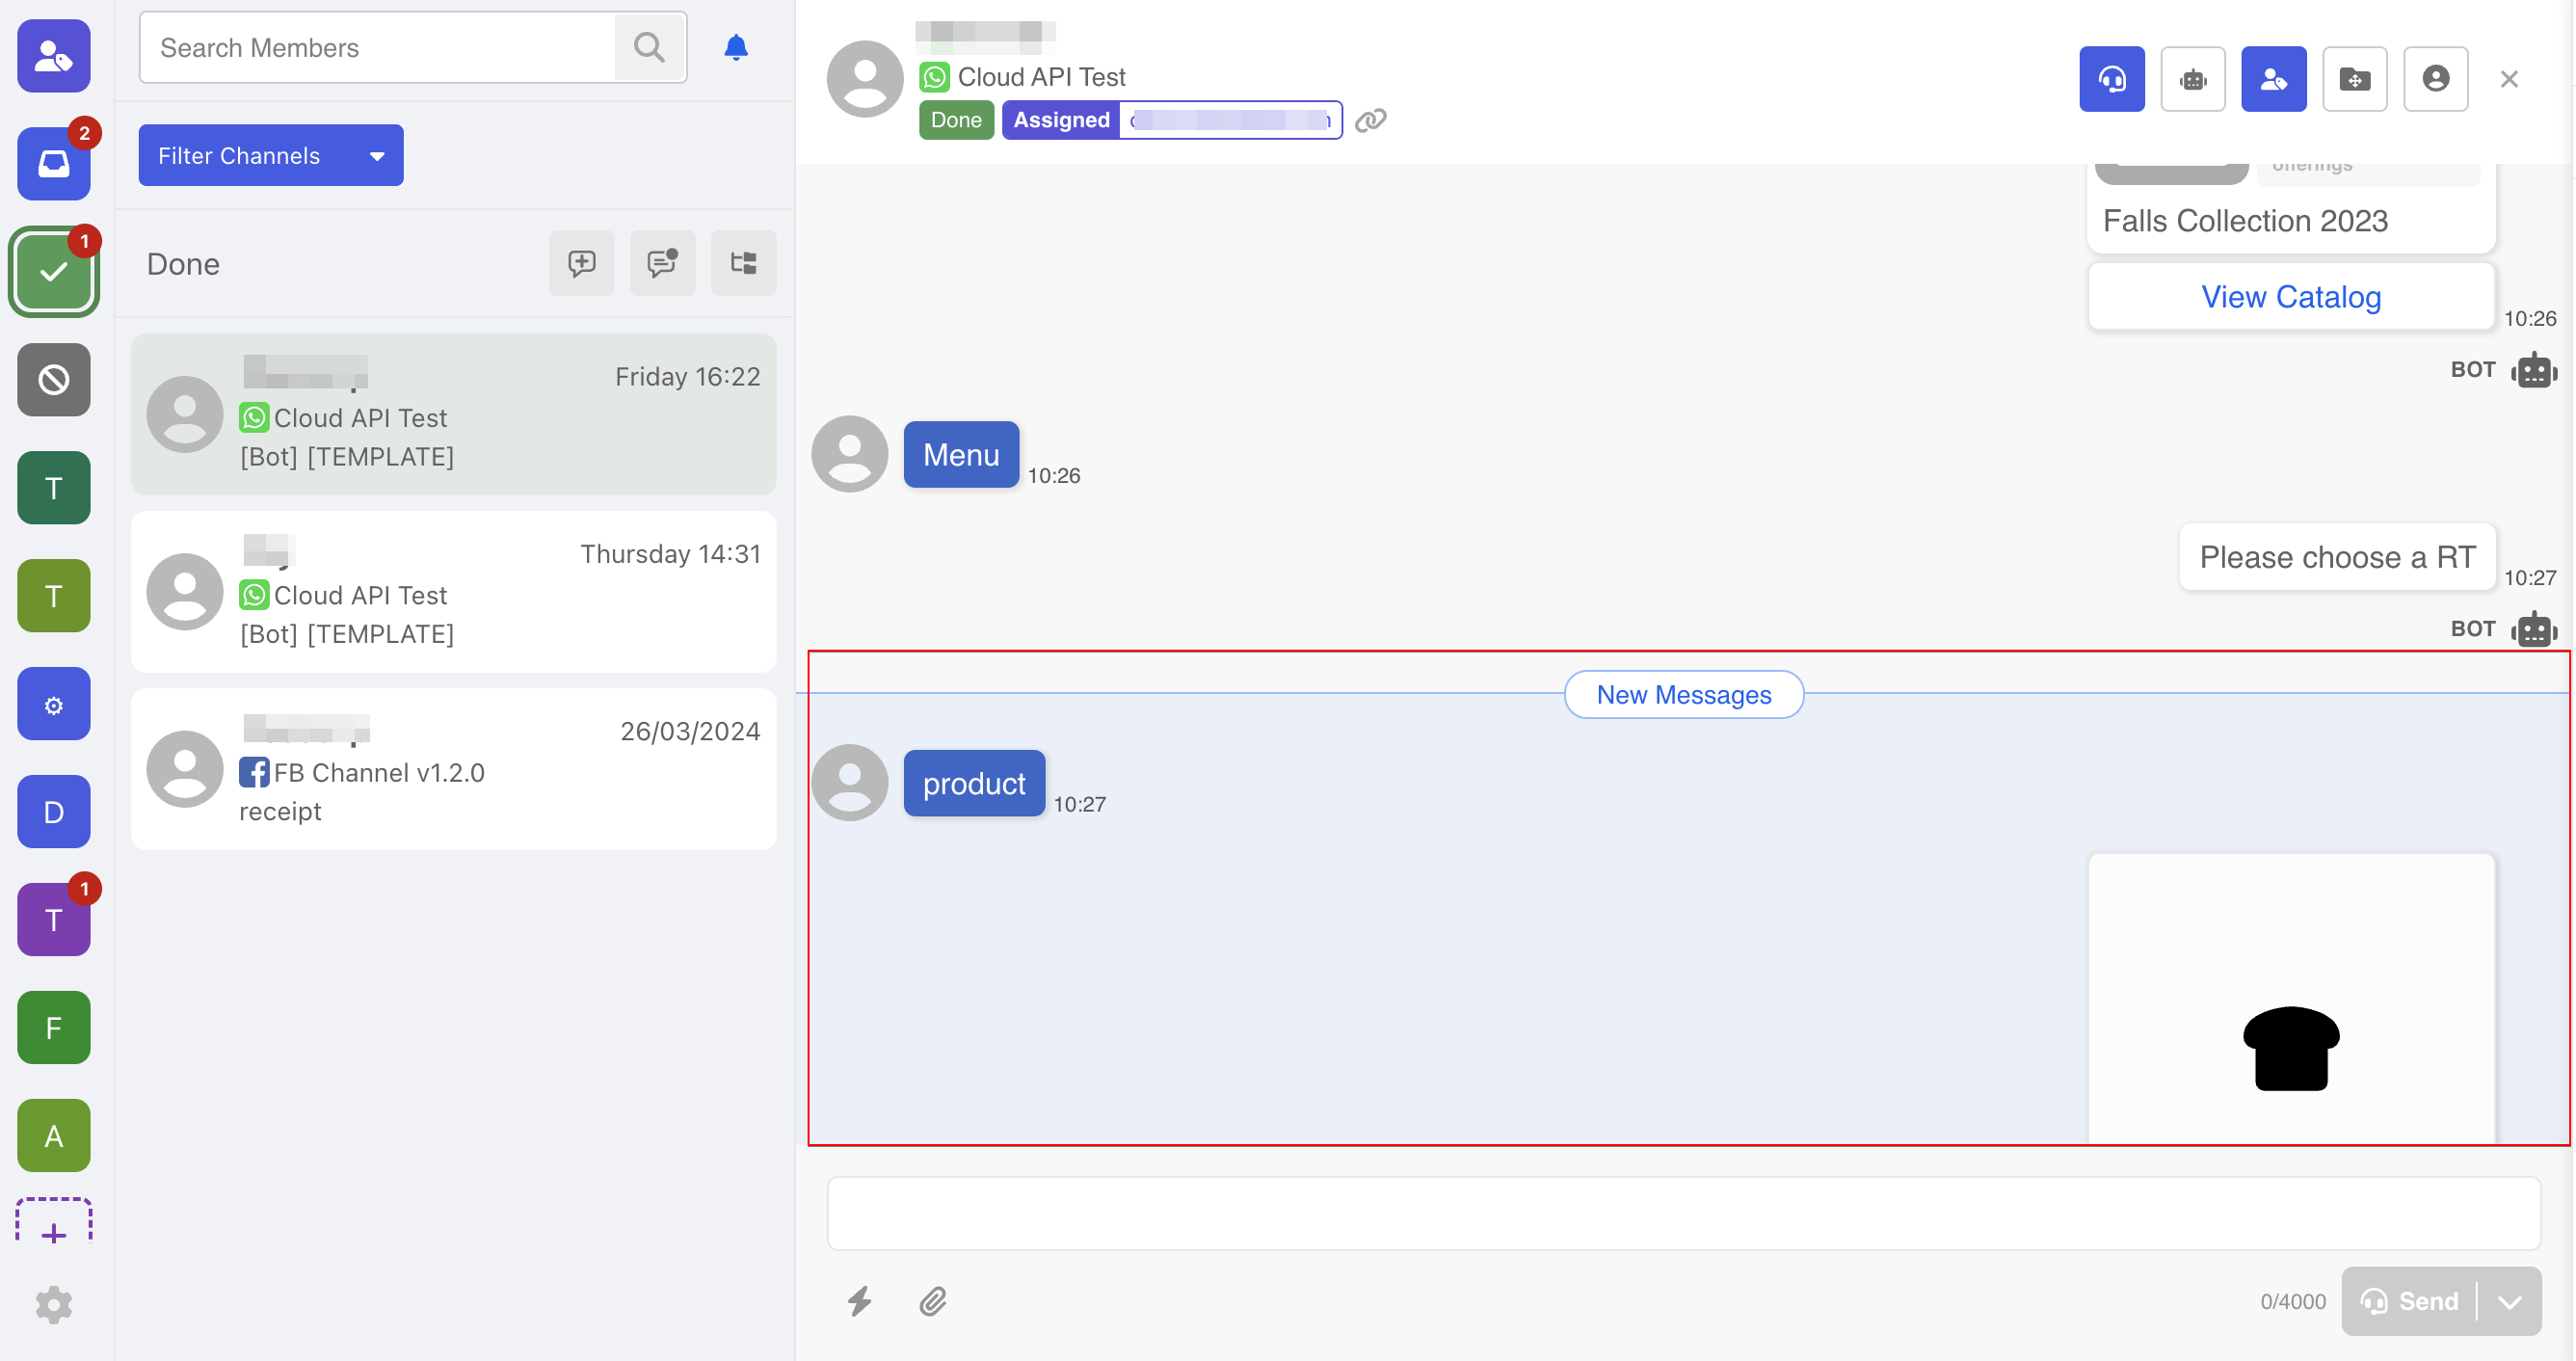
- When you open a thread with unread messages, you will be led to the earliest unread message.
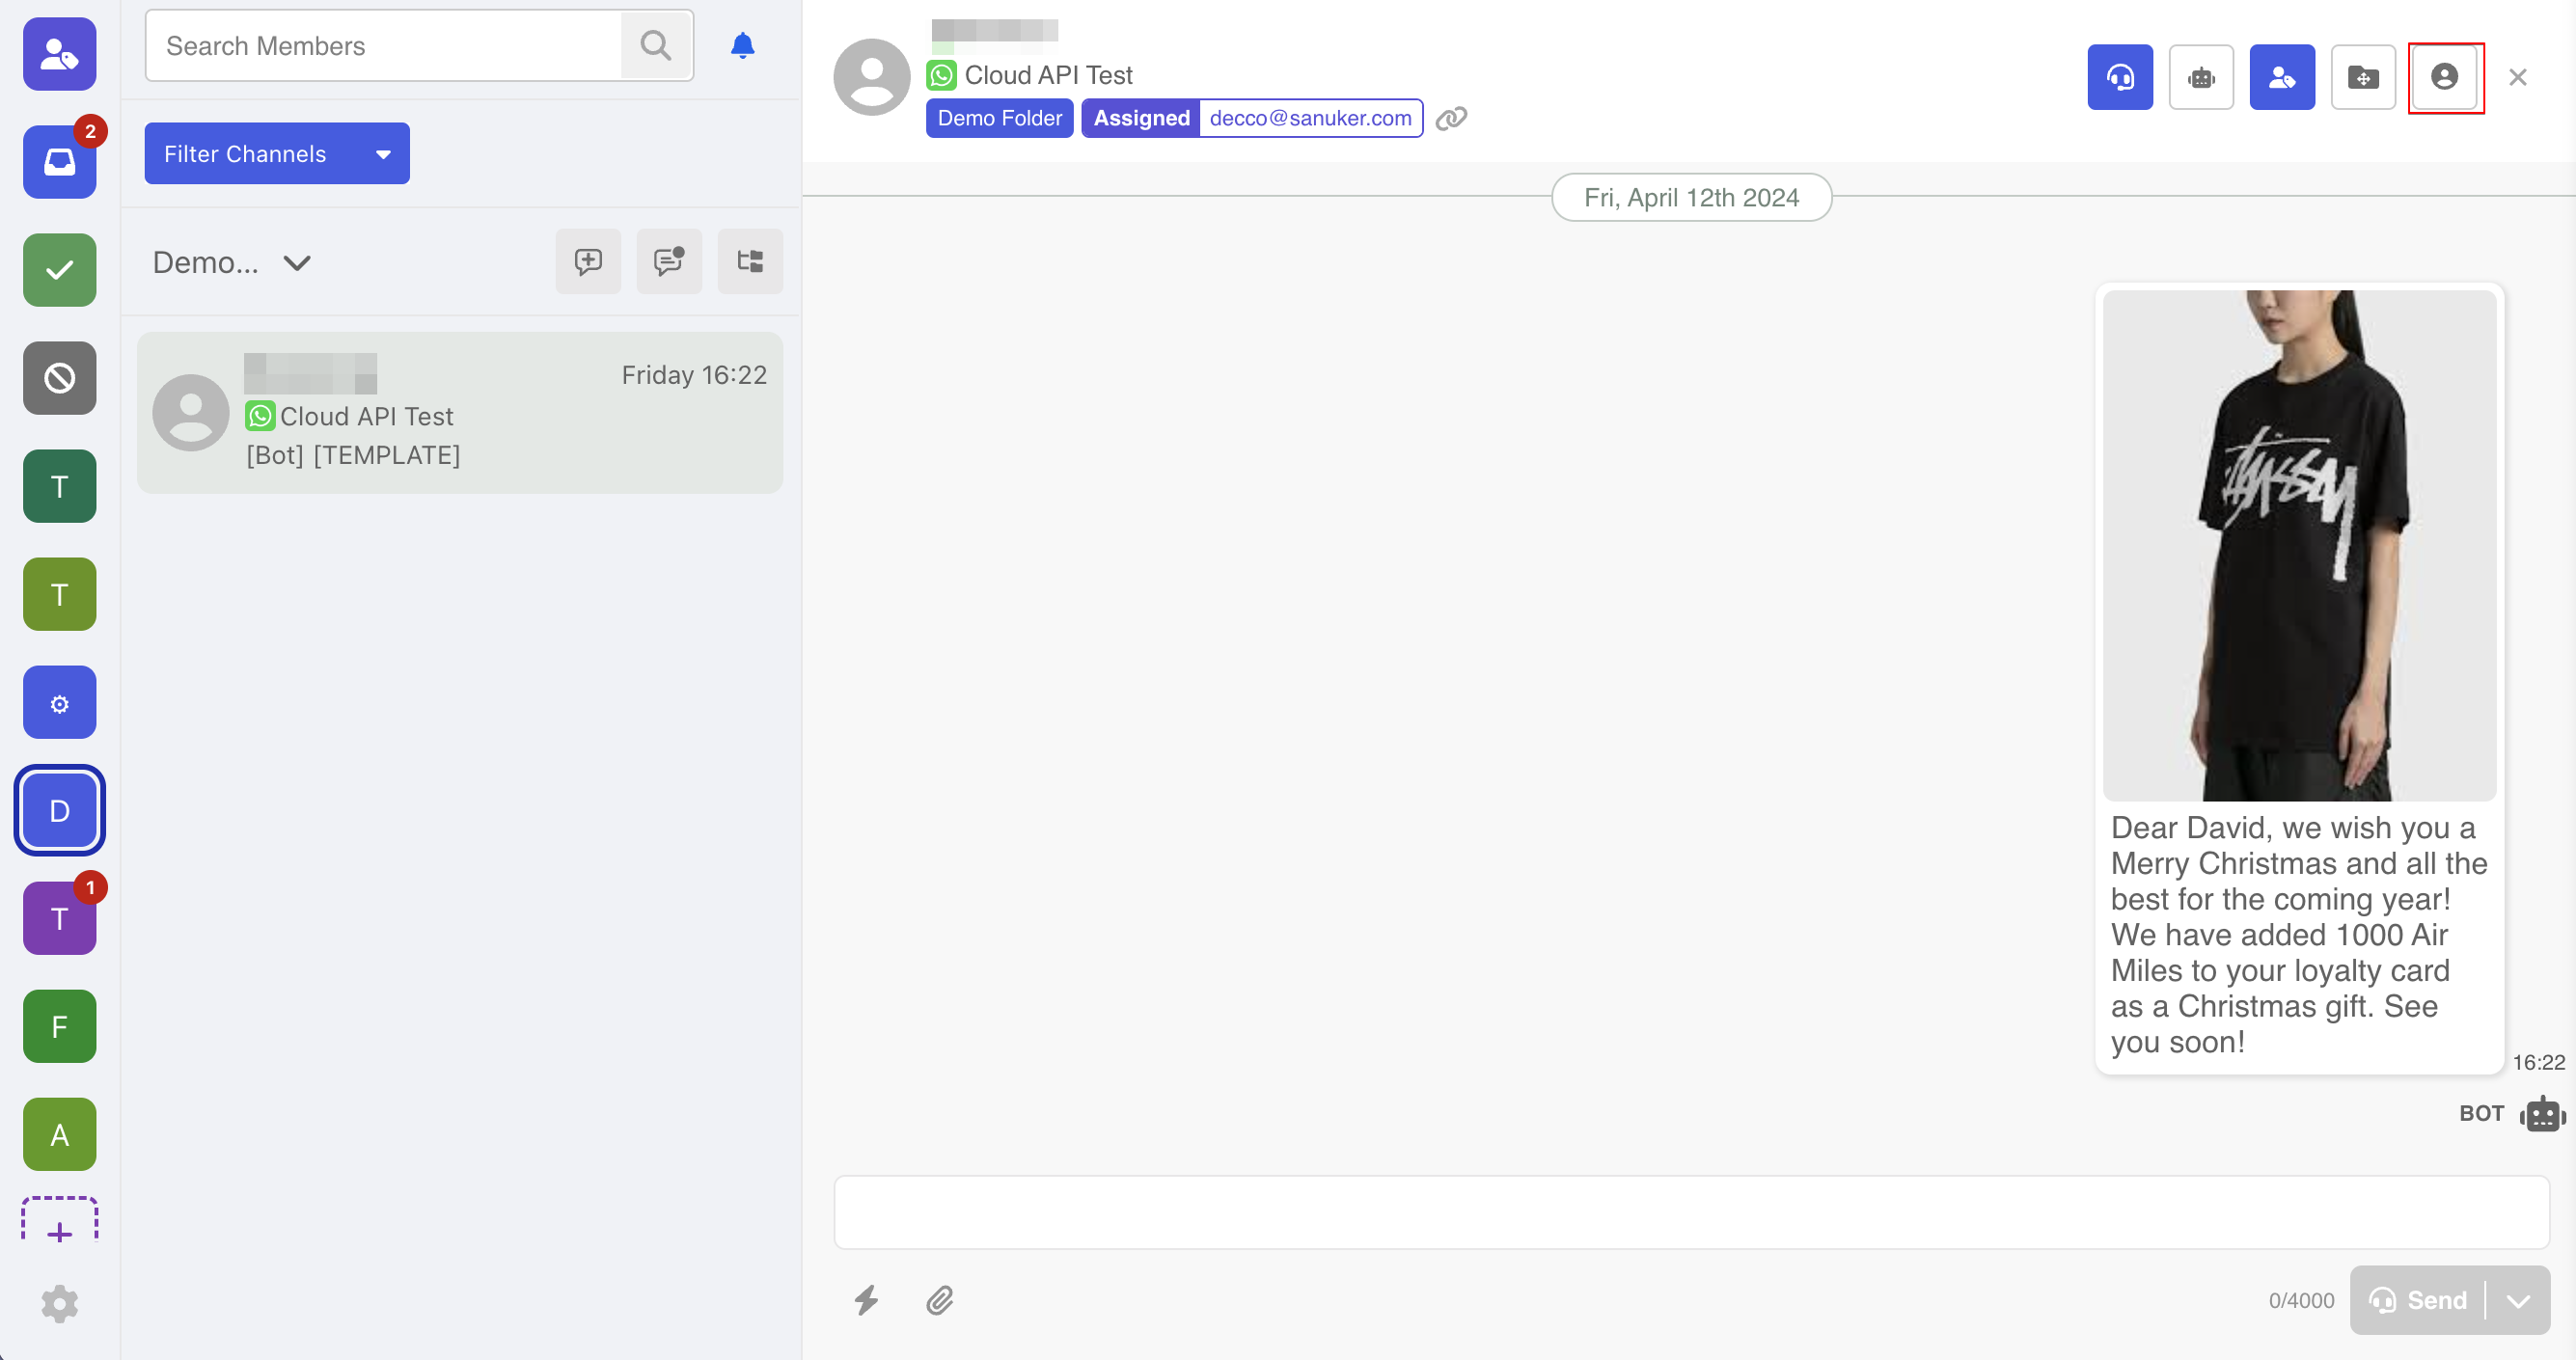
Edit Thread Member's Profile
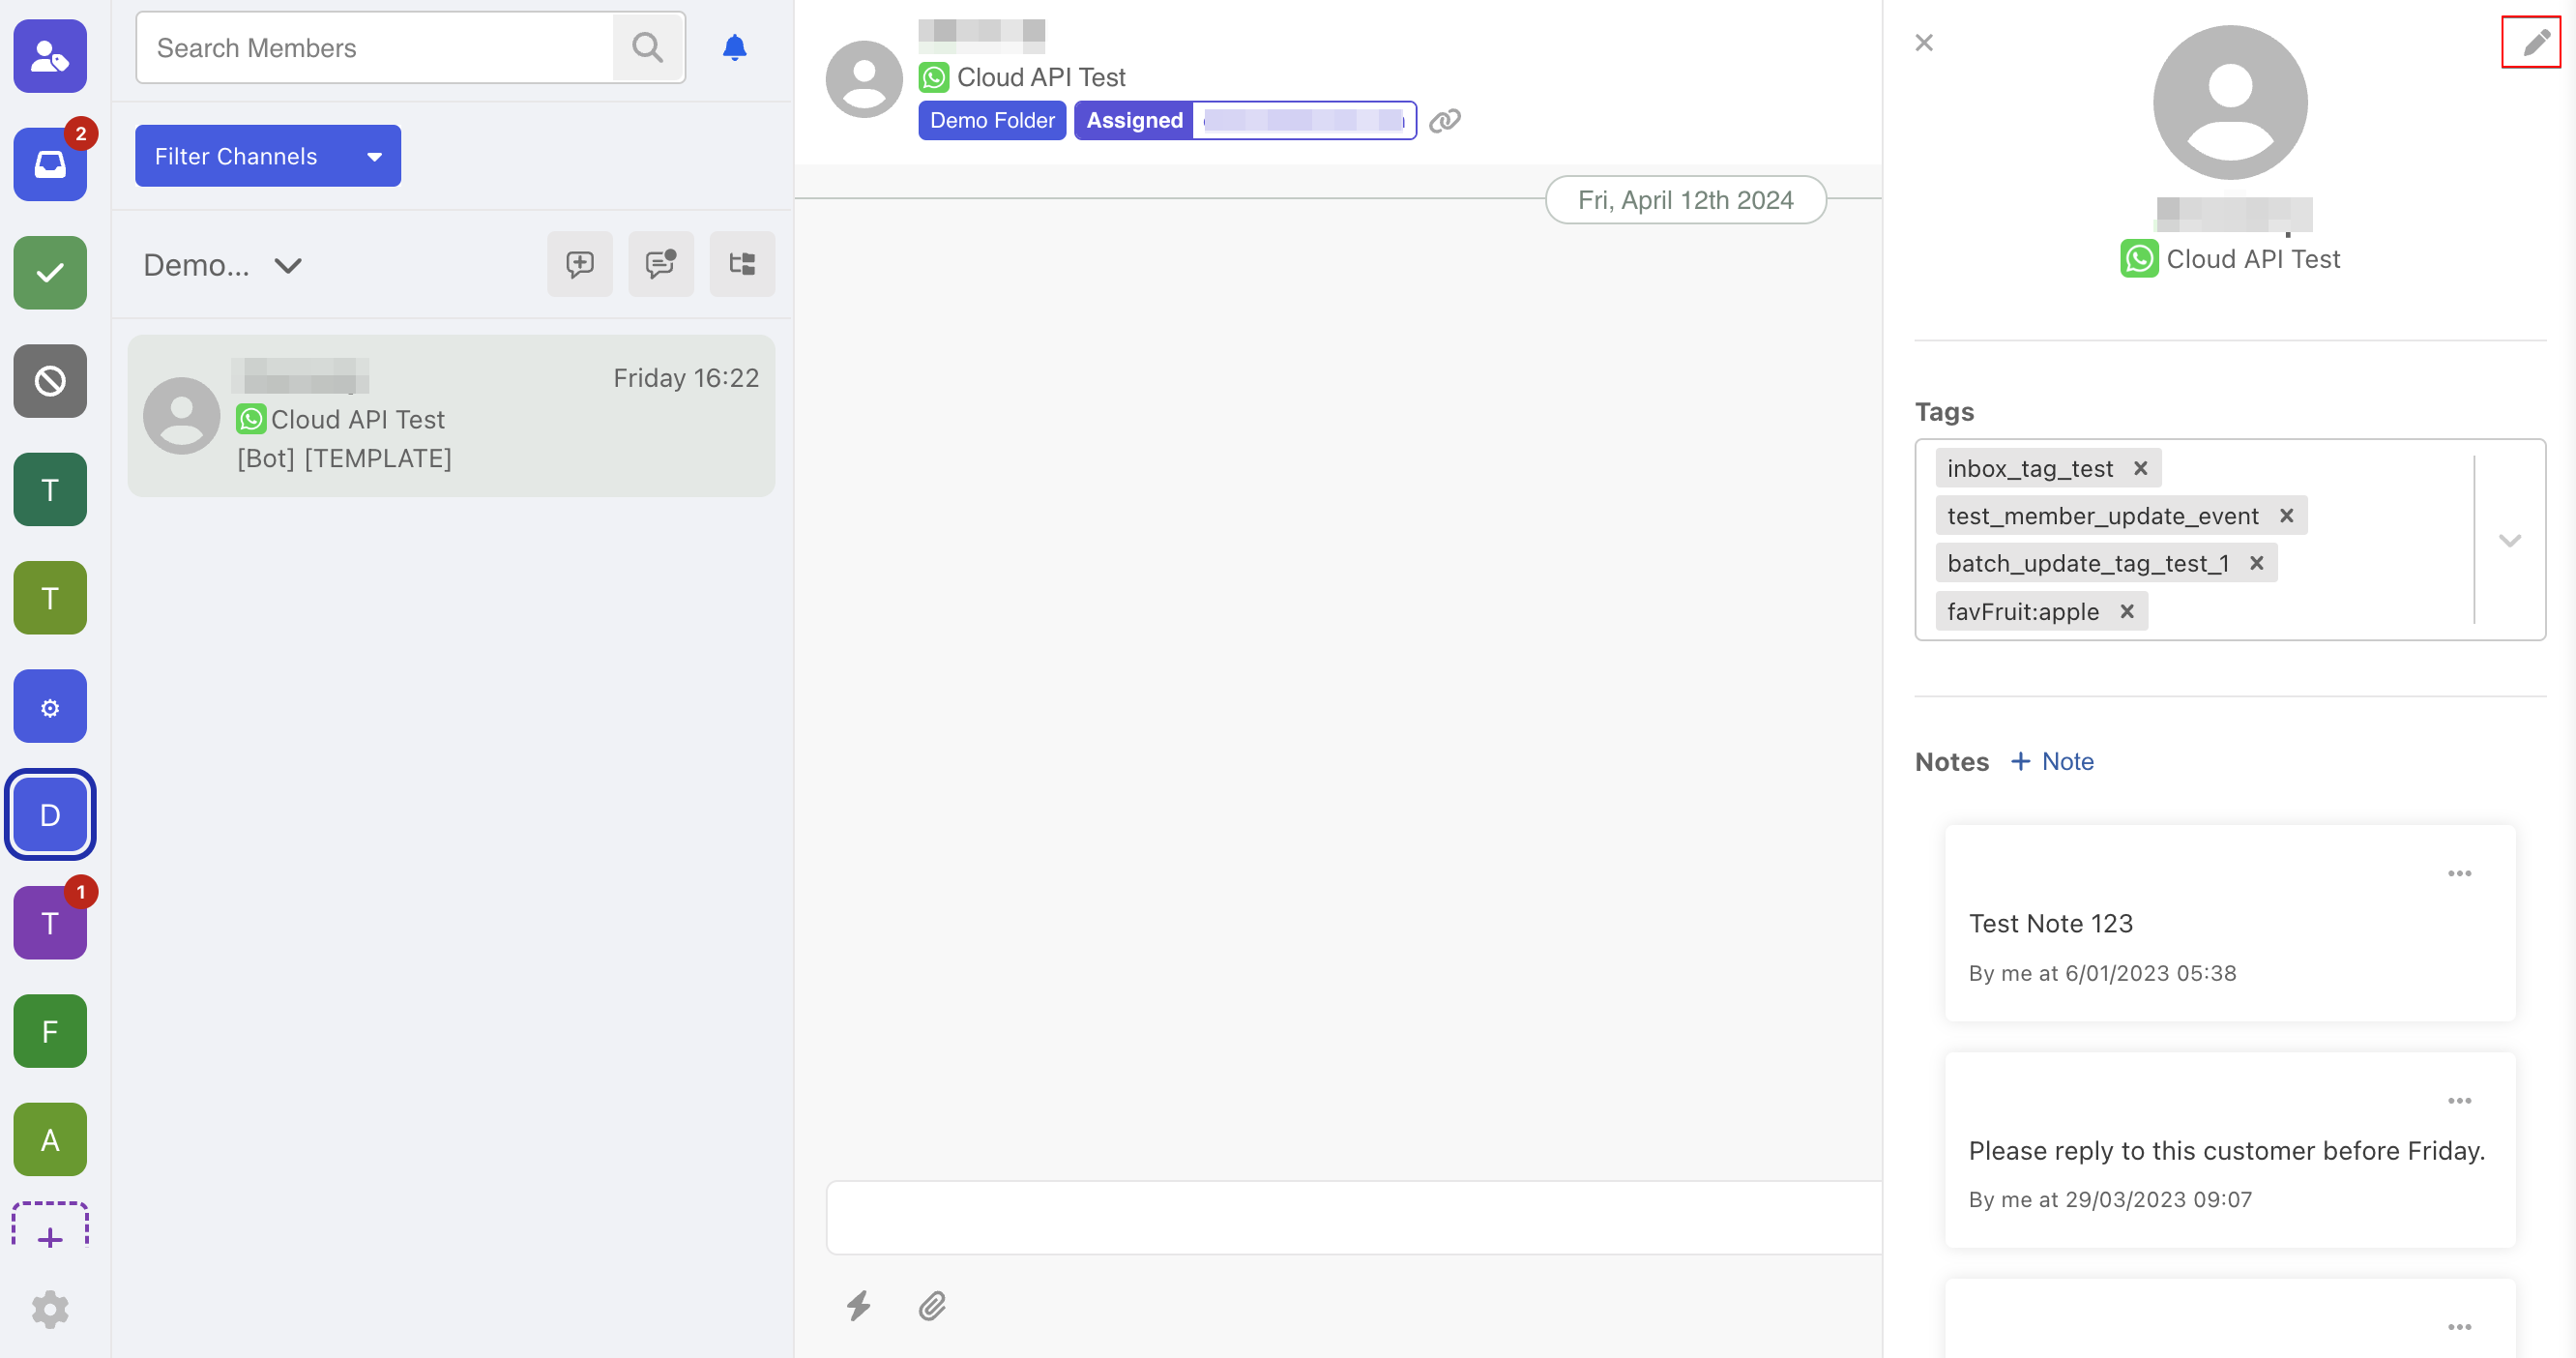
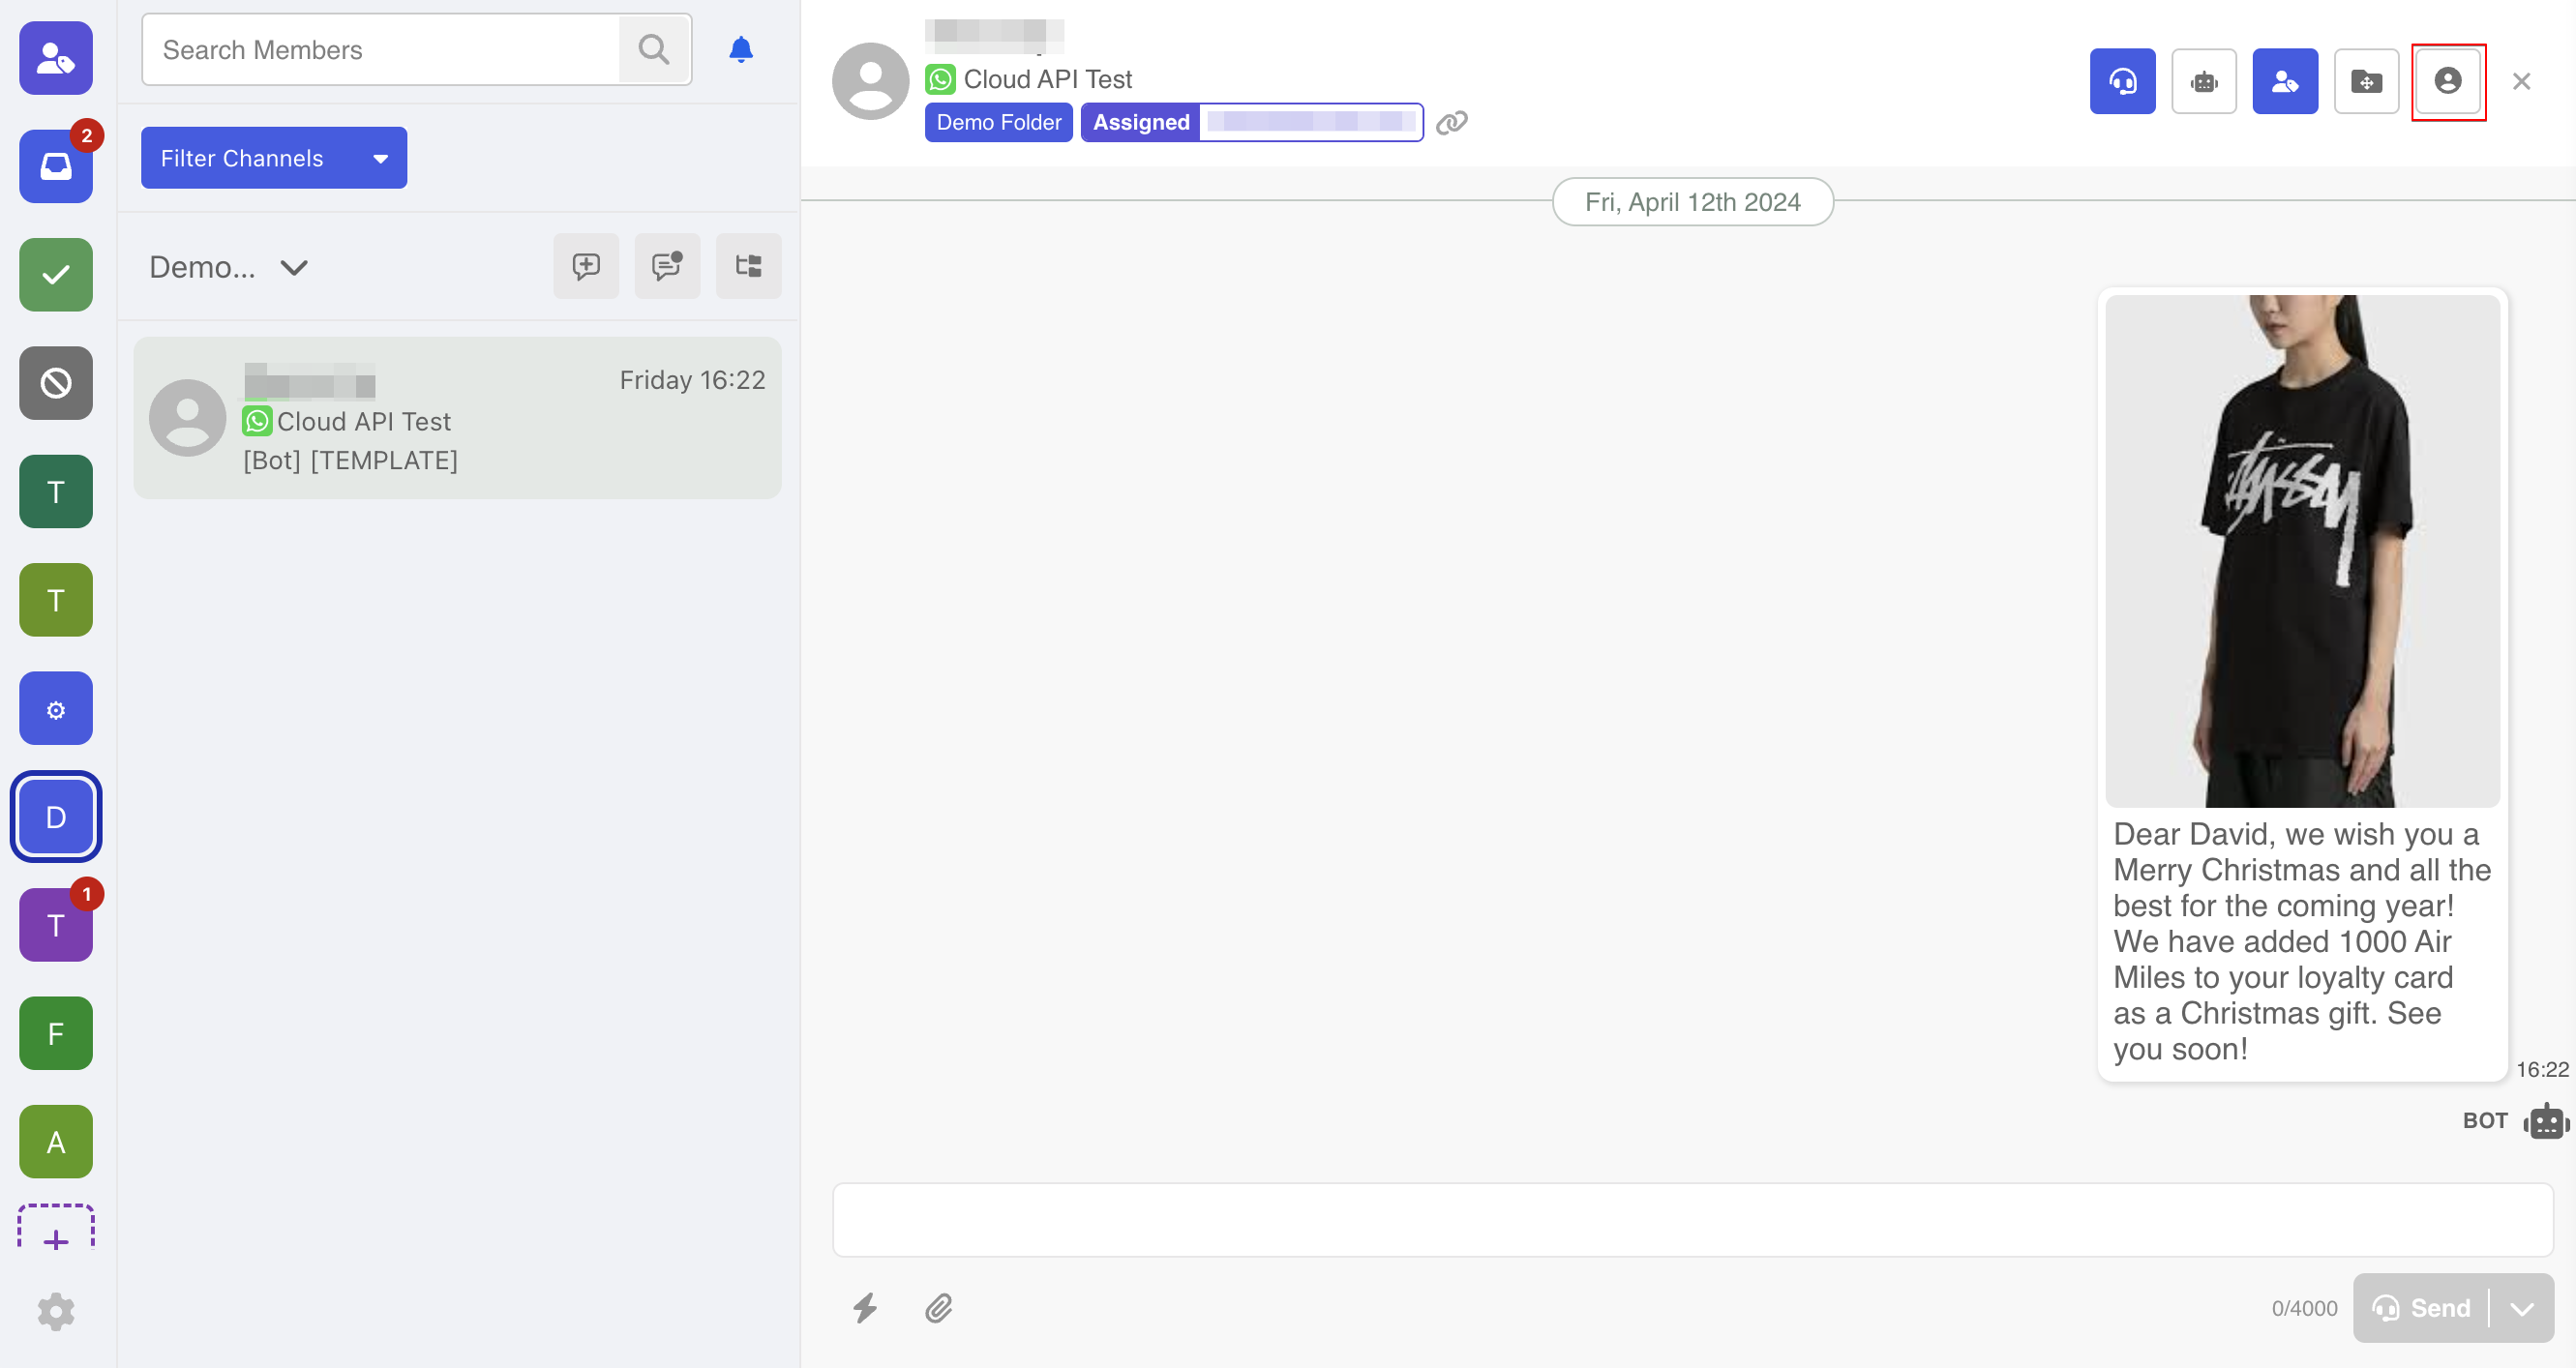
- In each thread, the agent can save the member's personal information in the profile. To do so, select the "Profile" at top right.

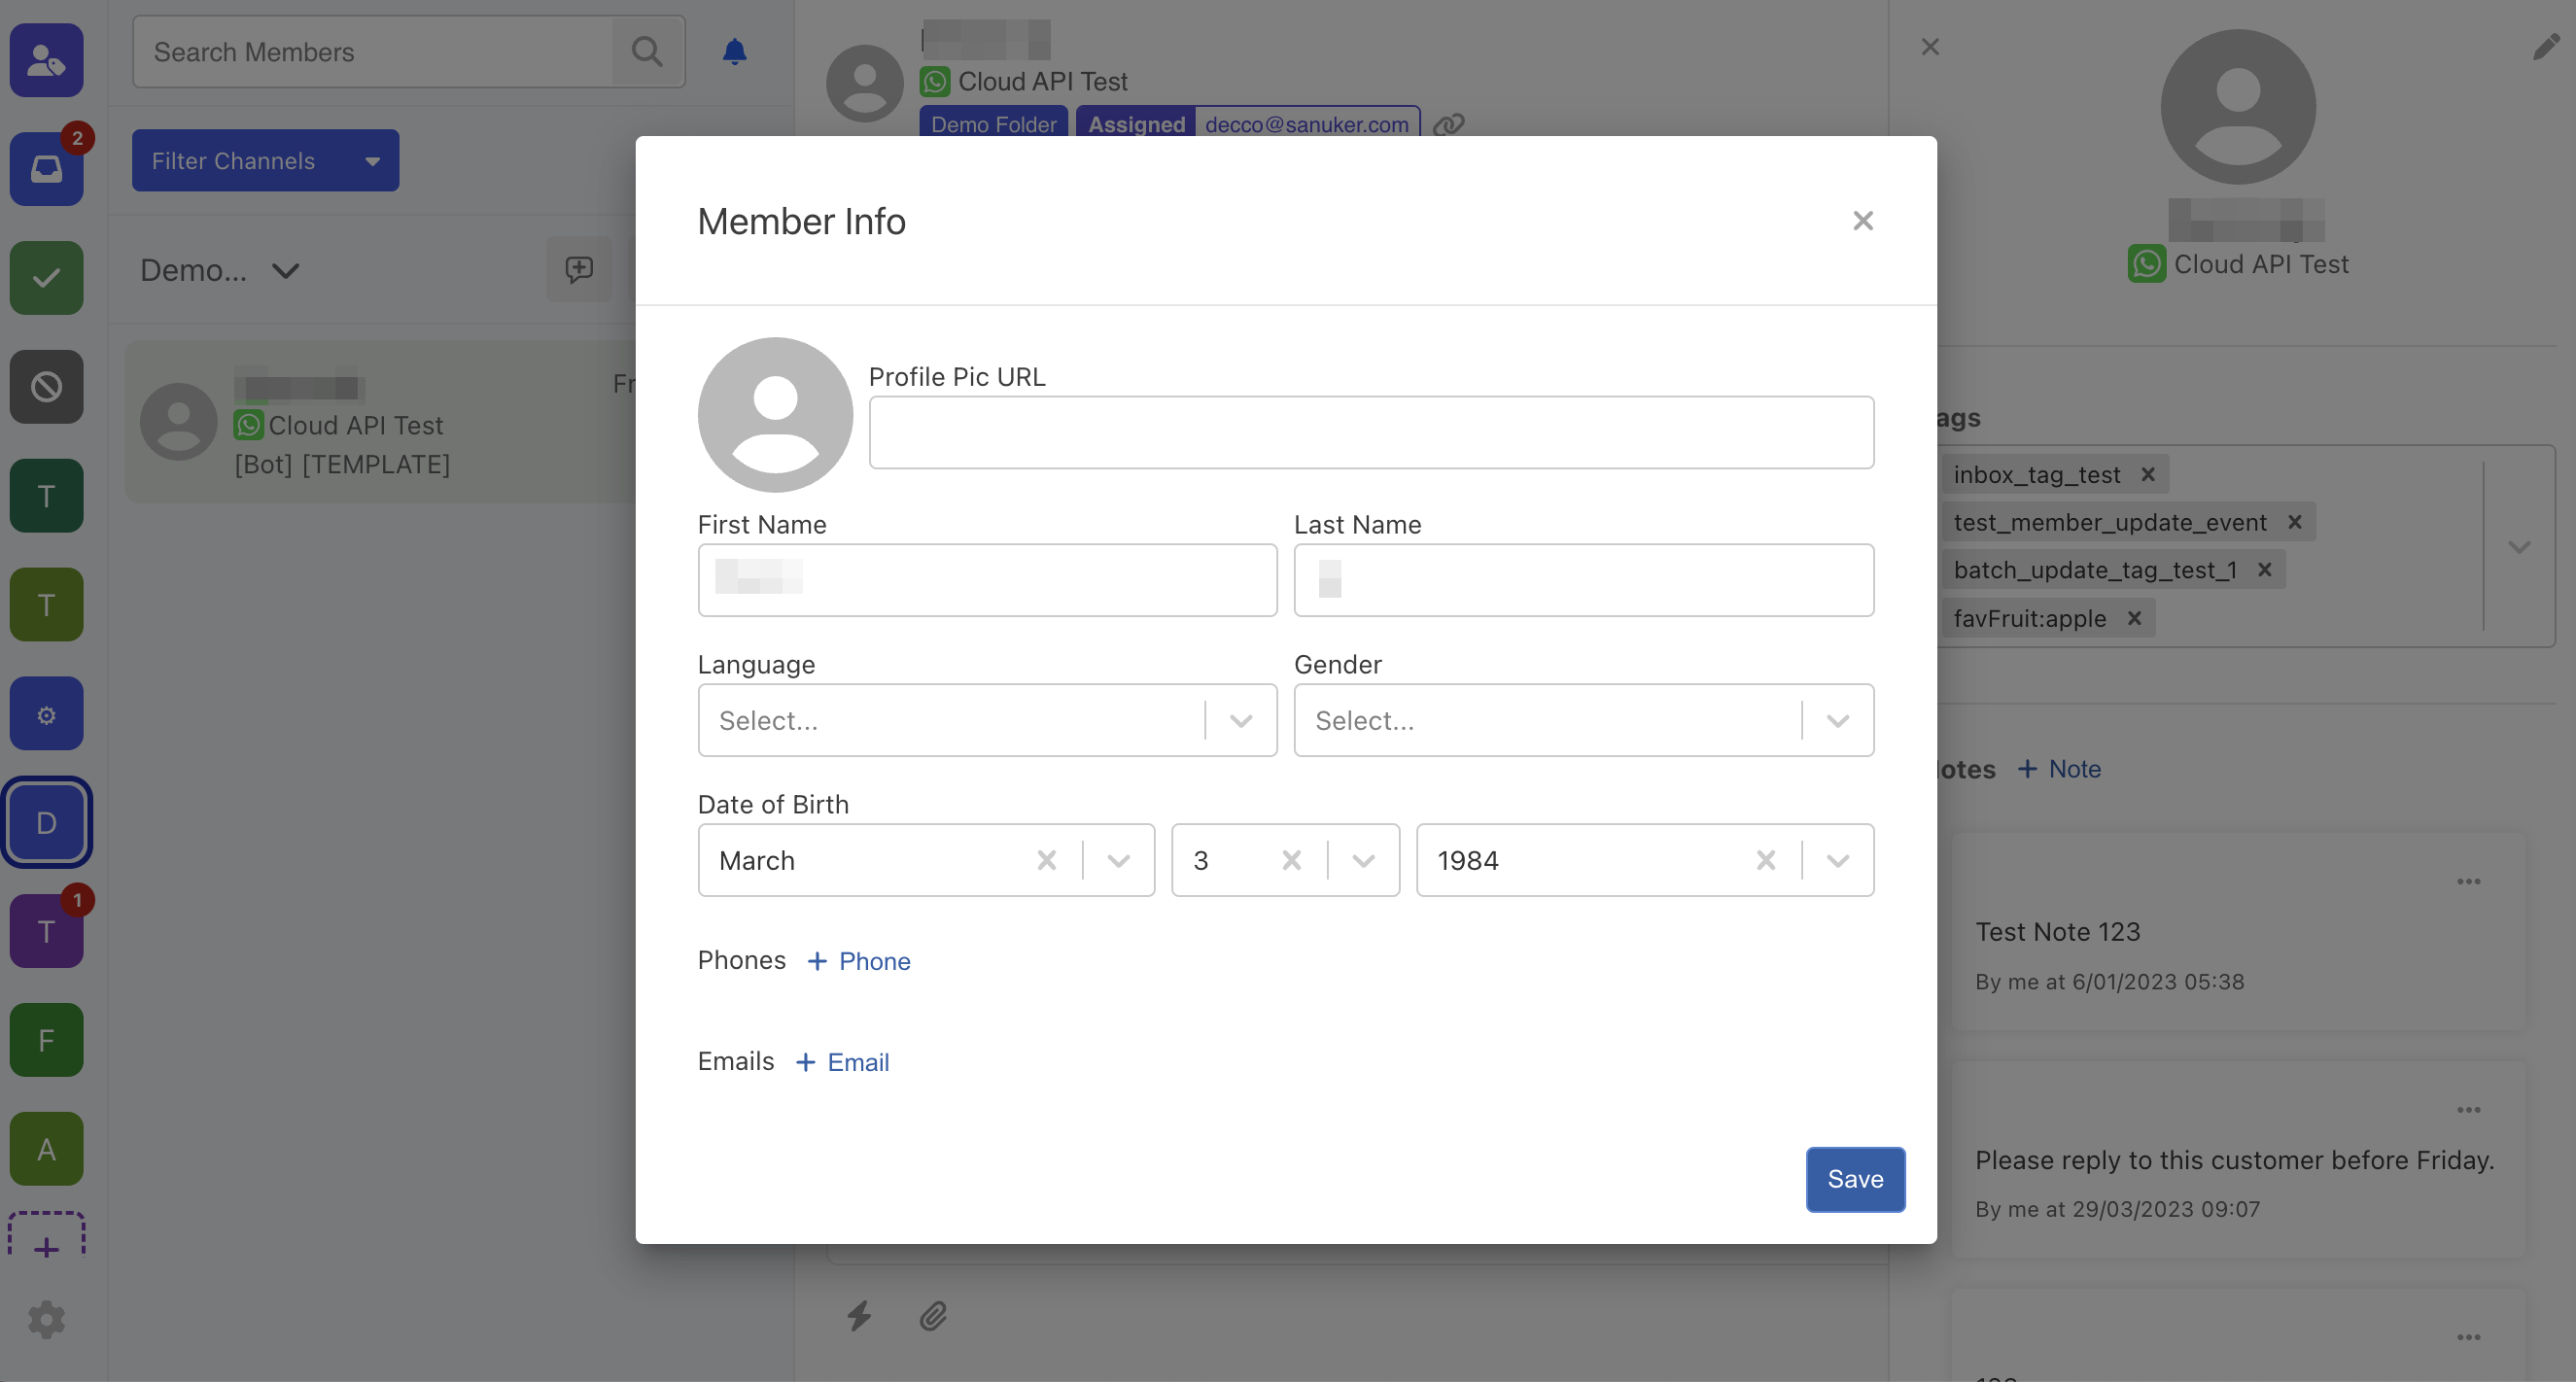
- Select "Edit".
- You can update the member profile and "Save" it.
NOTE
- Updating the inbox member profile, such as change of First Name will be reflected in the members page as well.
- The thread title will be updated if the First Name and Last Name of the member is updated by the following actions:
- Manually update inbox member profile
- Importing member to update the existing member
- Update inbox member profile by chatbot action
- Update inbox member profile by Open API
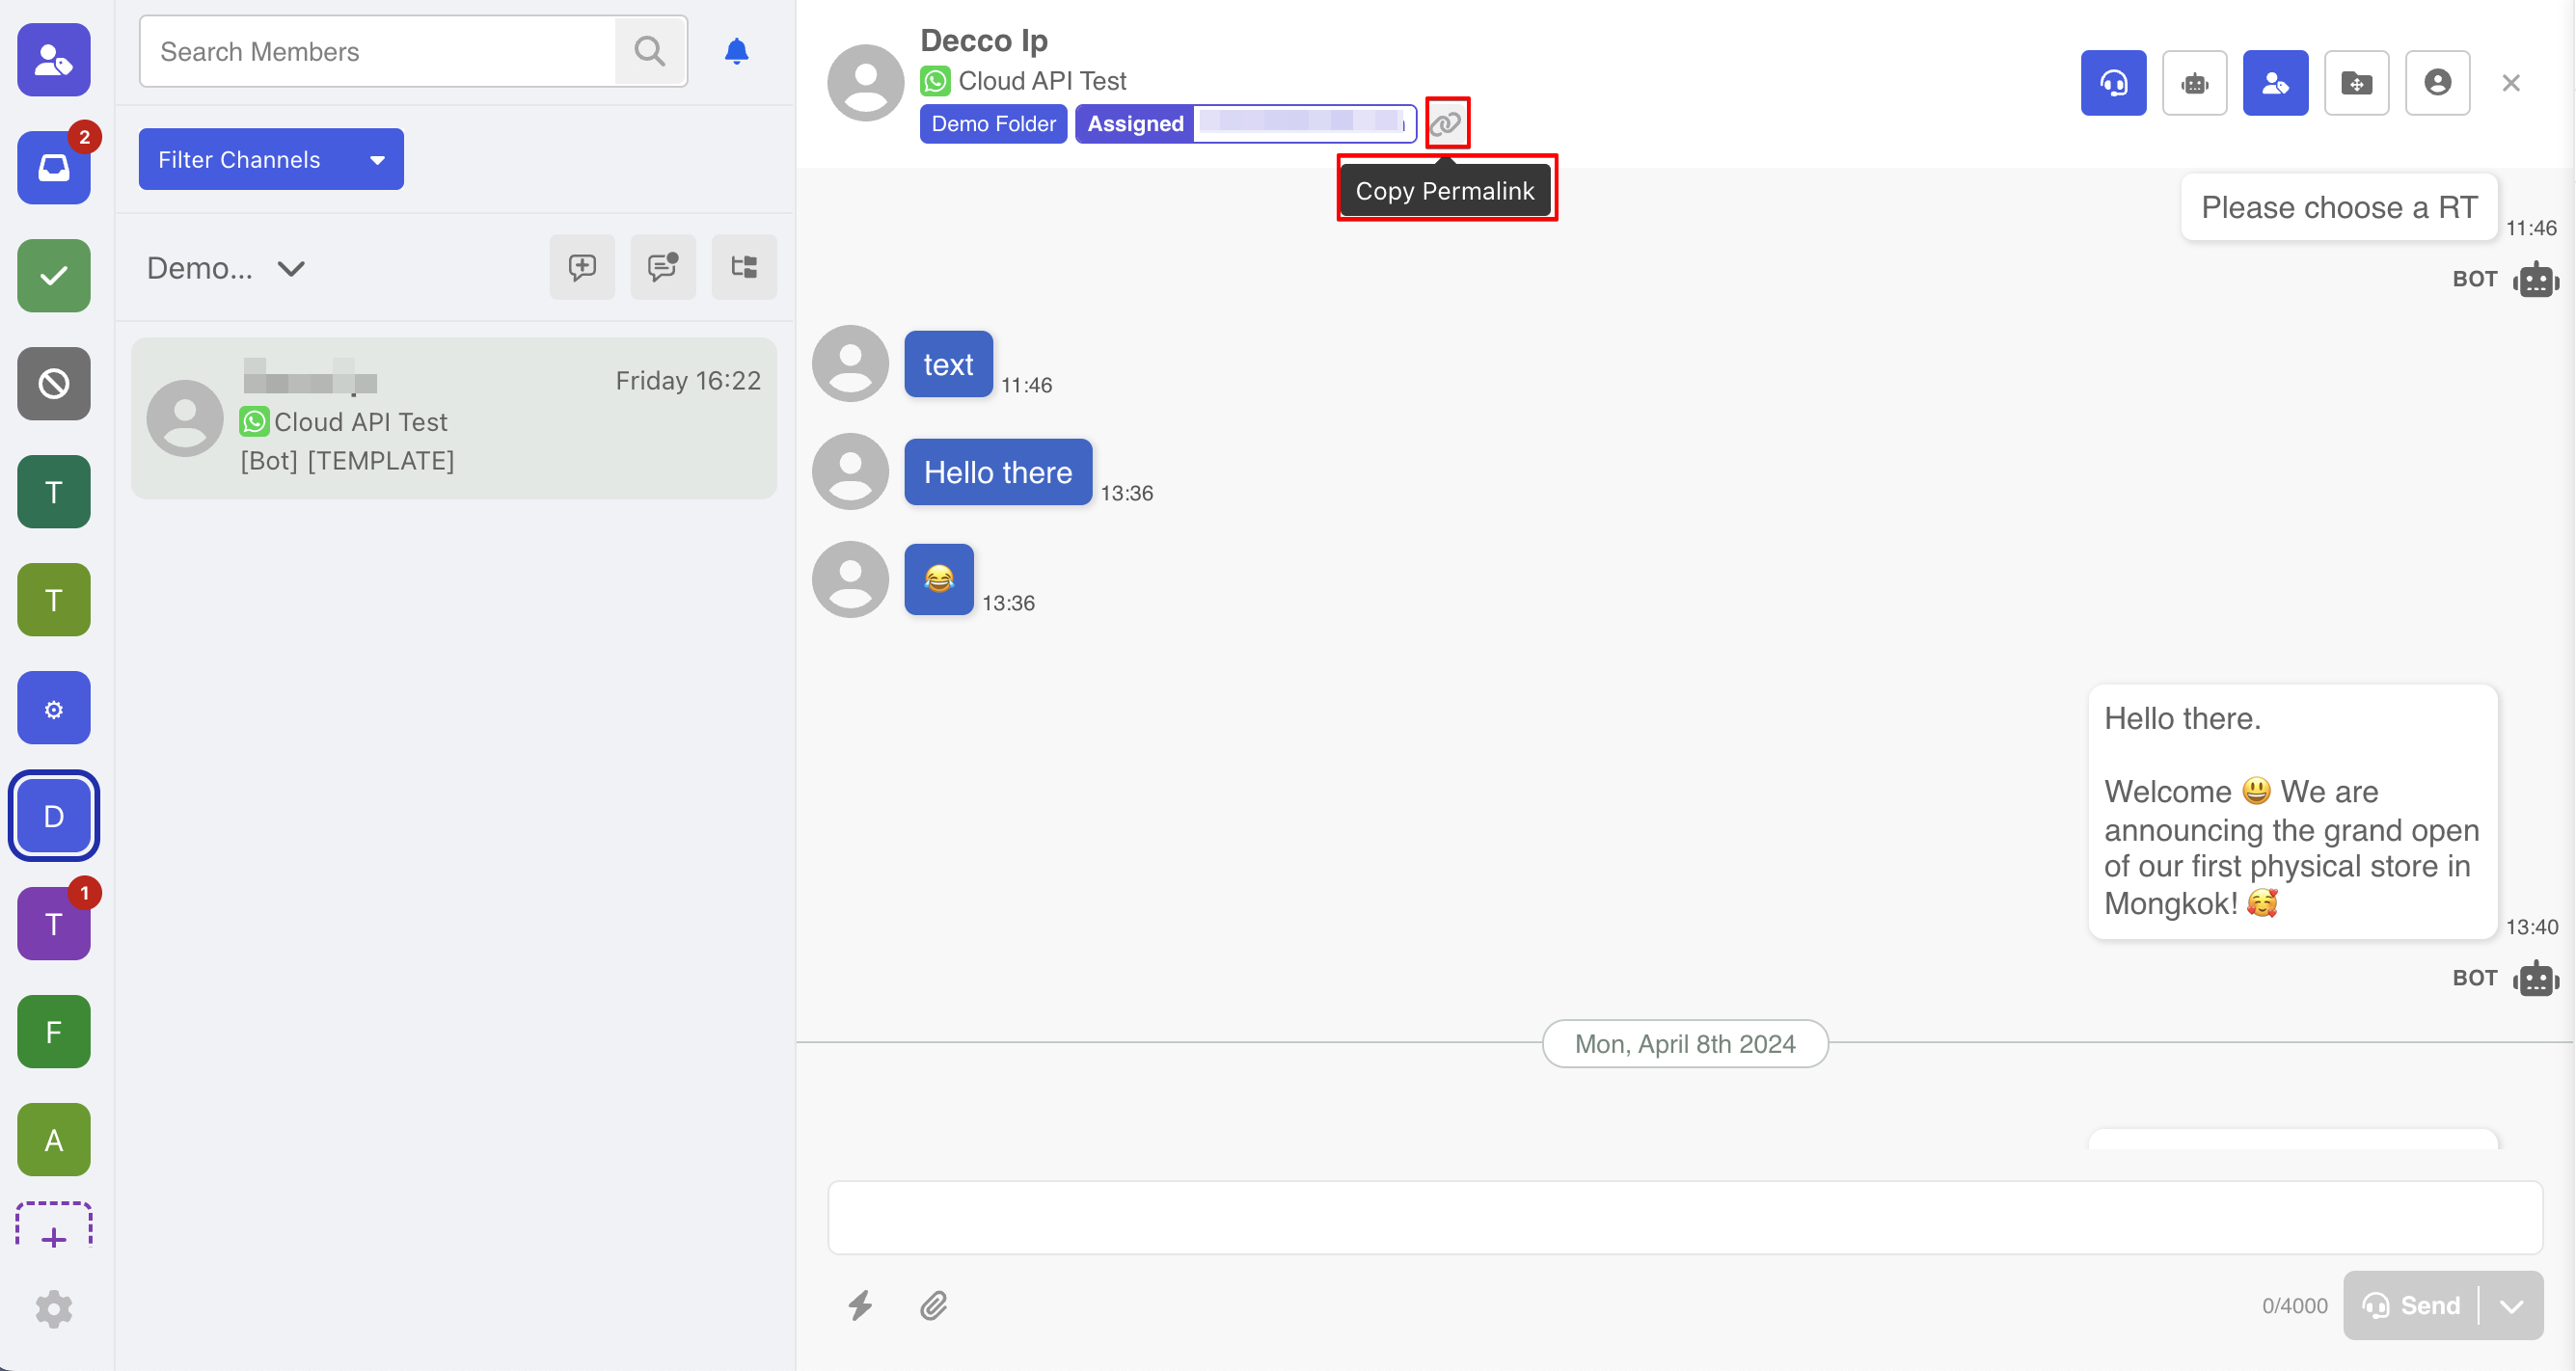
Share a Thread
For efficient collaborations, agents can share a Permalink with other agents, which will redirect to this specific thread.
tip
Alternatively, you can create a URL that redirects to a specific thread with the corresponding externalId and channelId.
Example URL:
https://platform.woztell.com/inbox?eid=EXTERNAL_ID&cid=CHANNEL_ID
Close a Thread
Agents can click the "cross" sign at the top right corner to close the current thread.
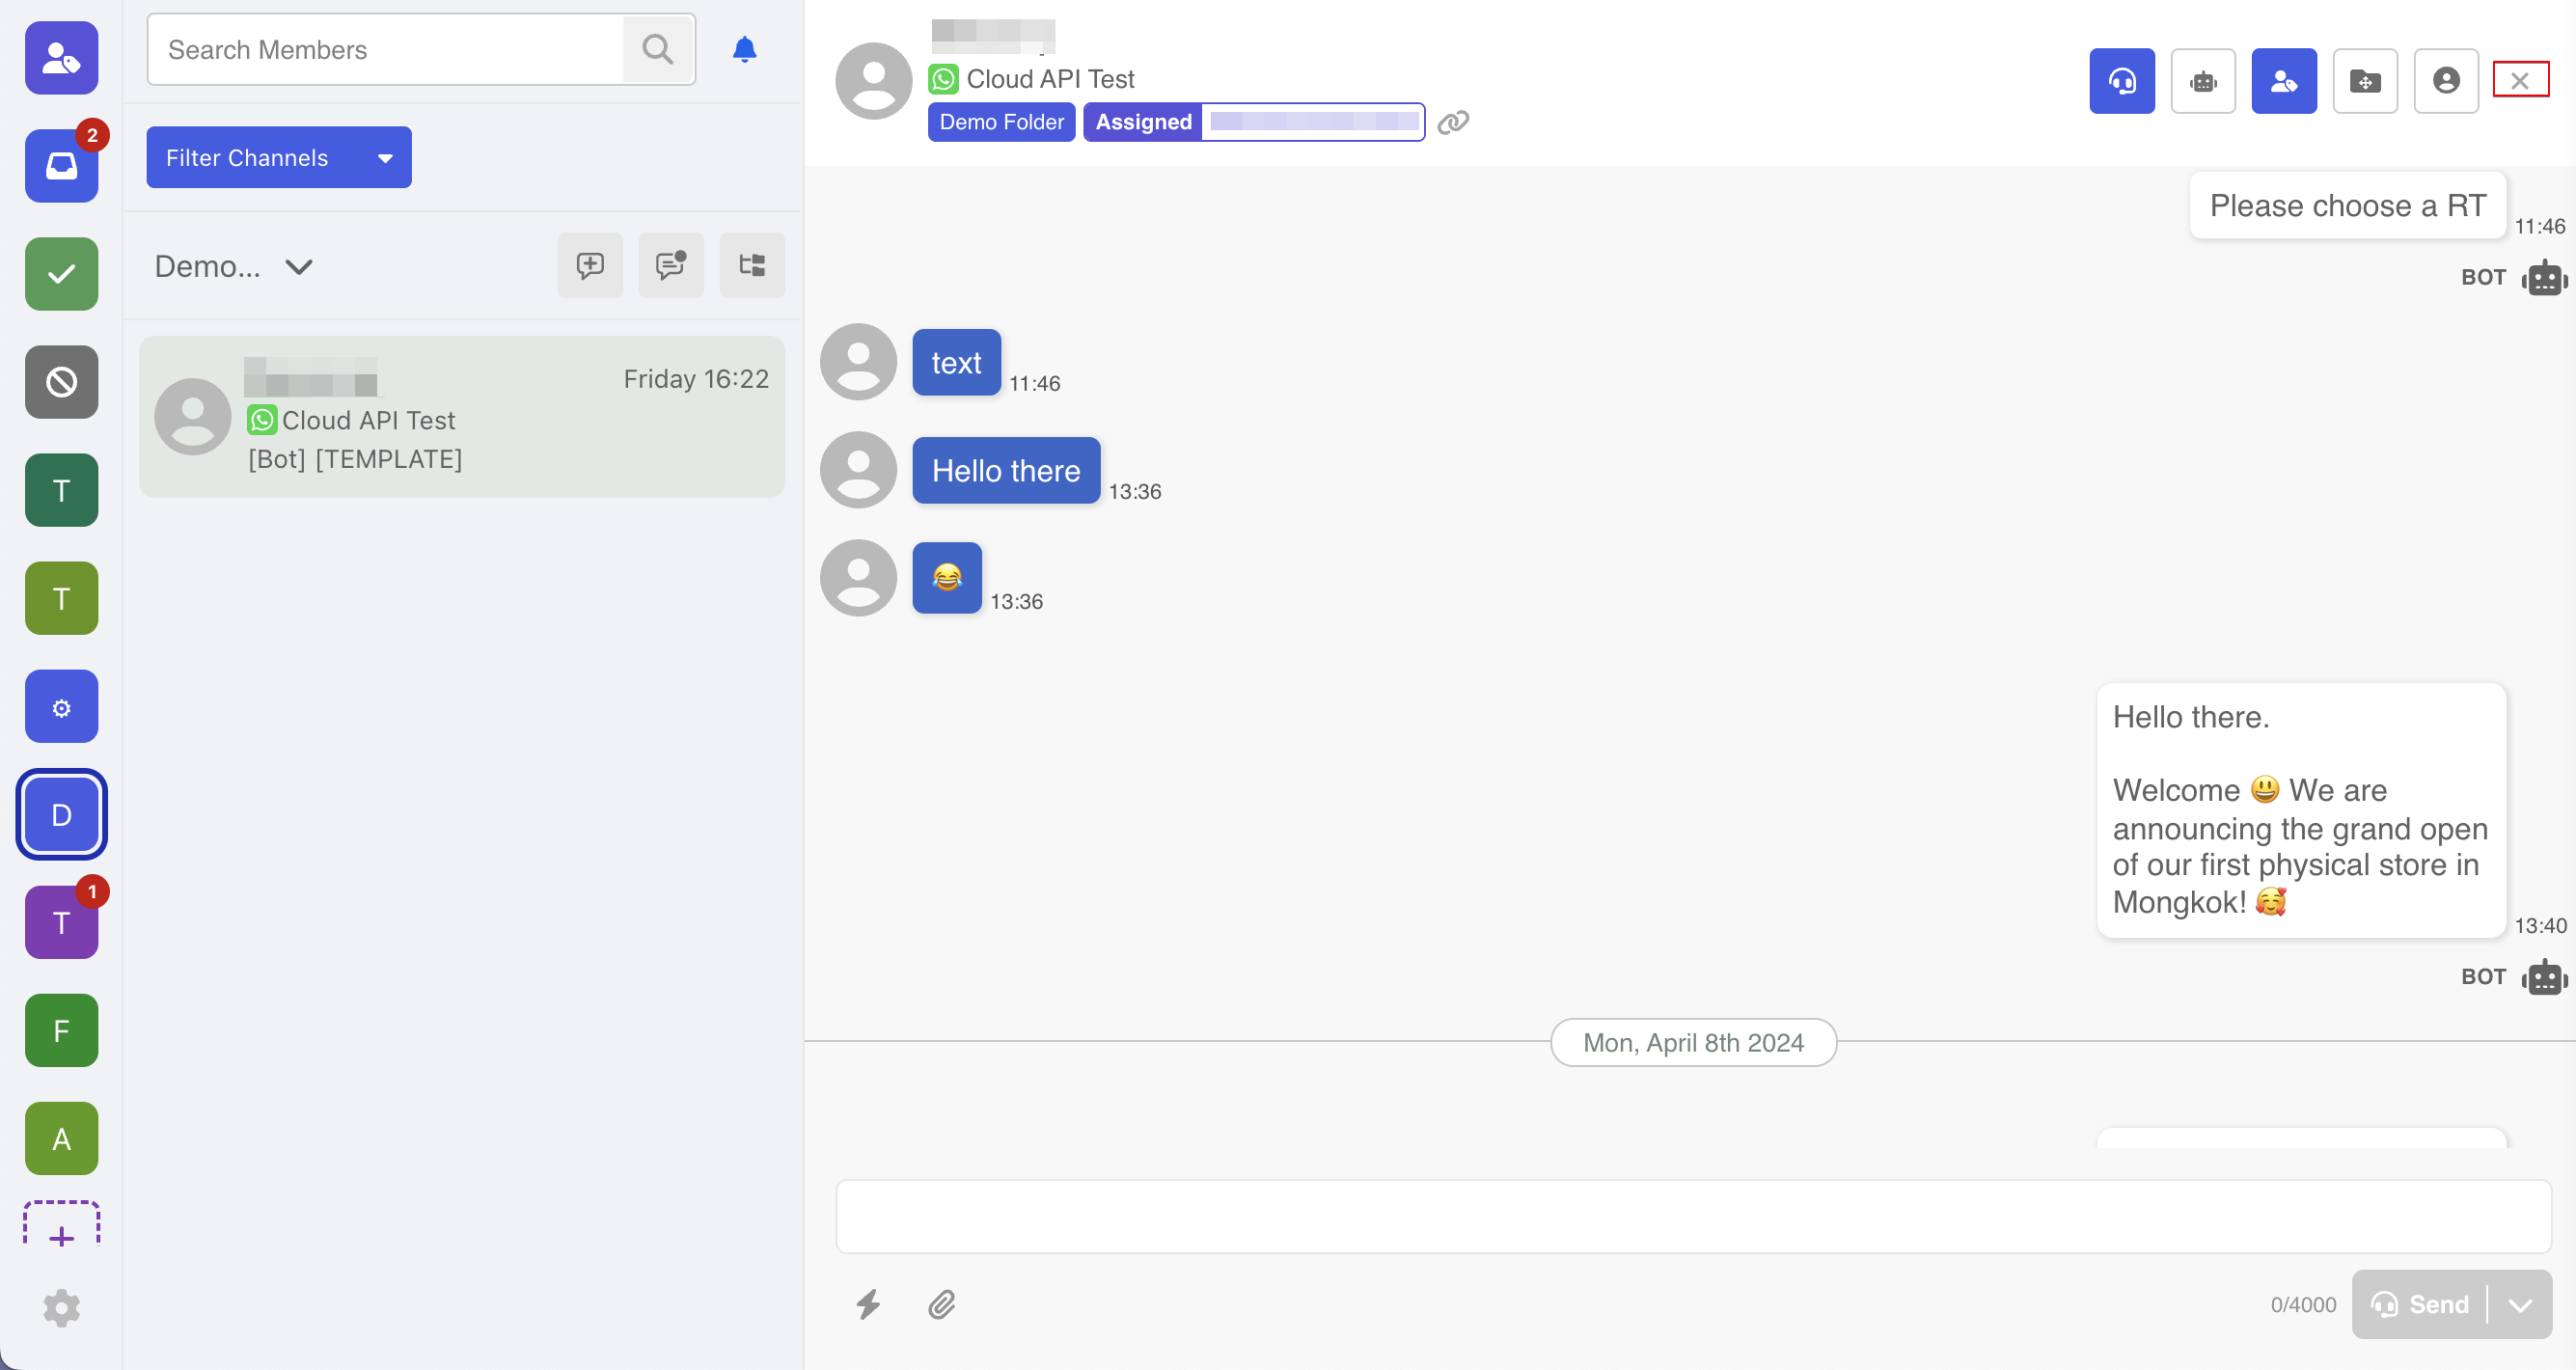
Once the current thread is closed, the right panel will be empty until you open another thread.

Add Member Tags
- Agents can add or remove member tags in a thread. To do so, select the "Profile" at top right.
- Under "Tags", you can add member tag by selecting existing tags from the suggestion dropdown.
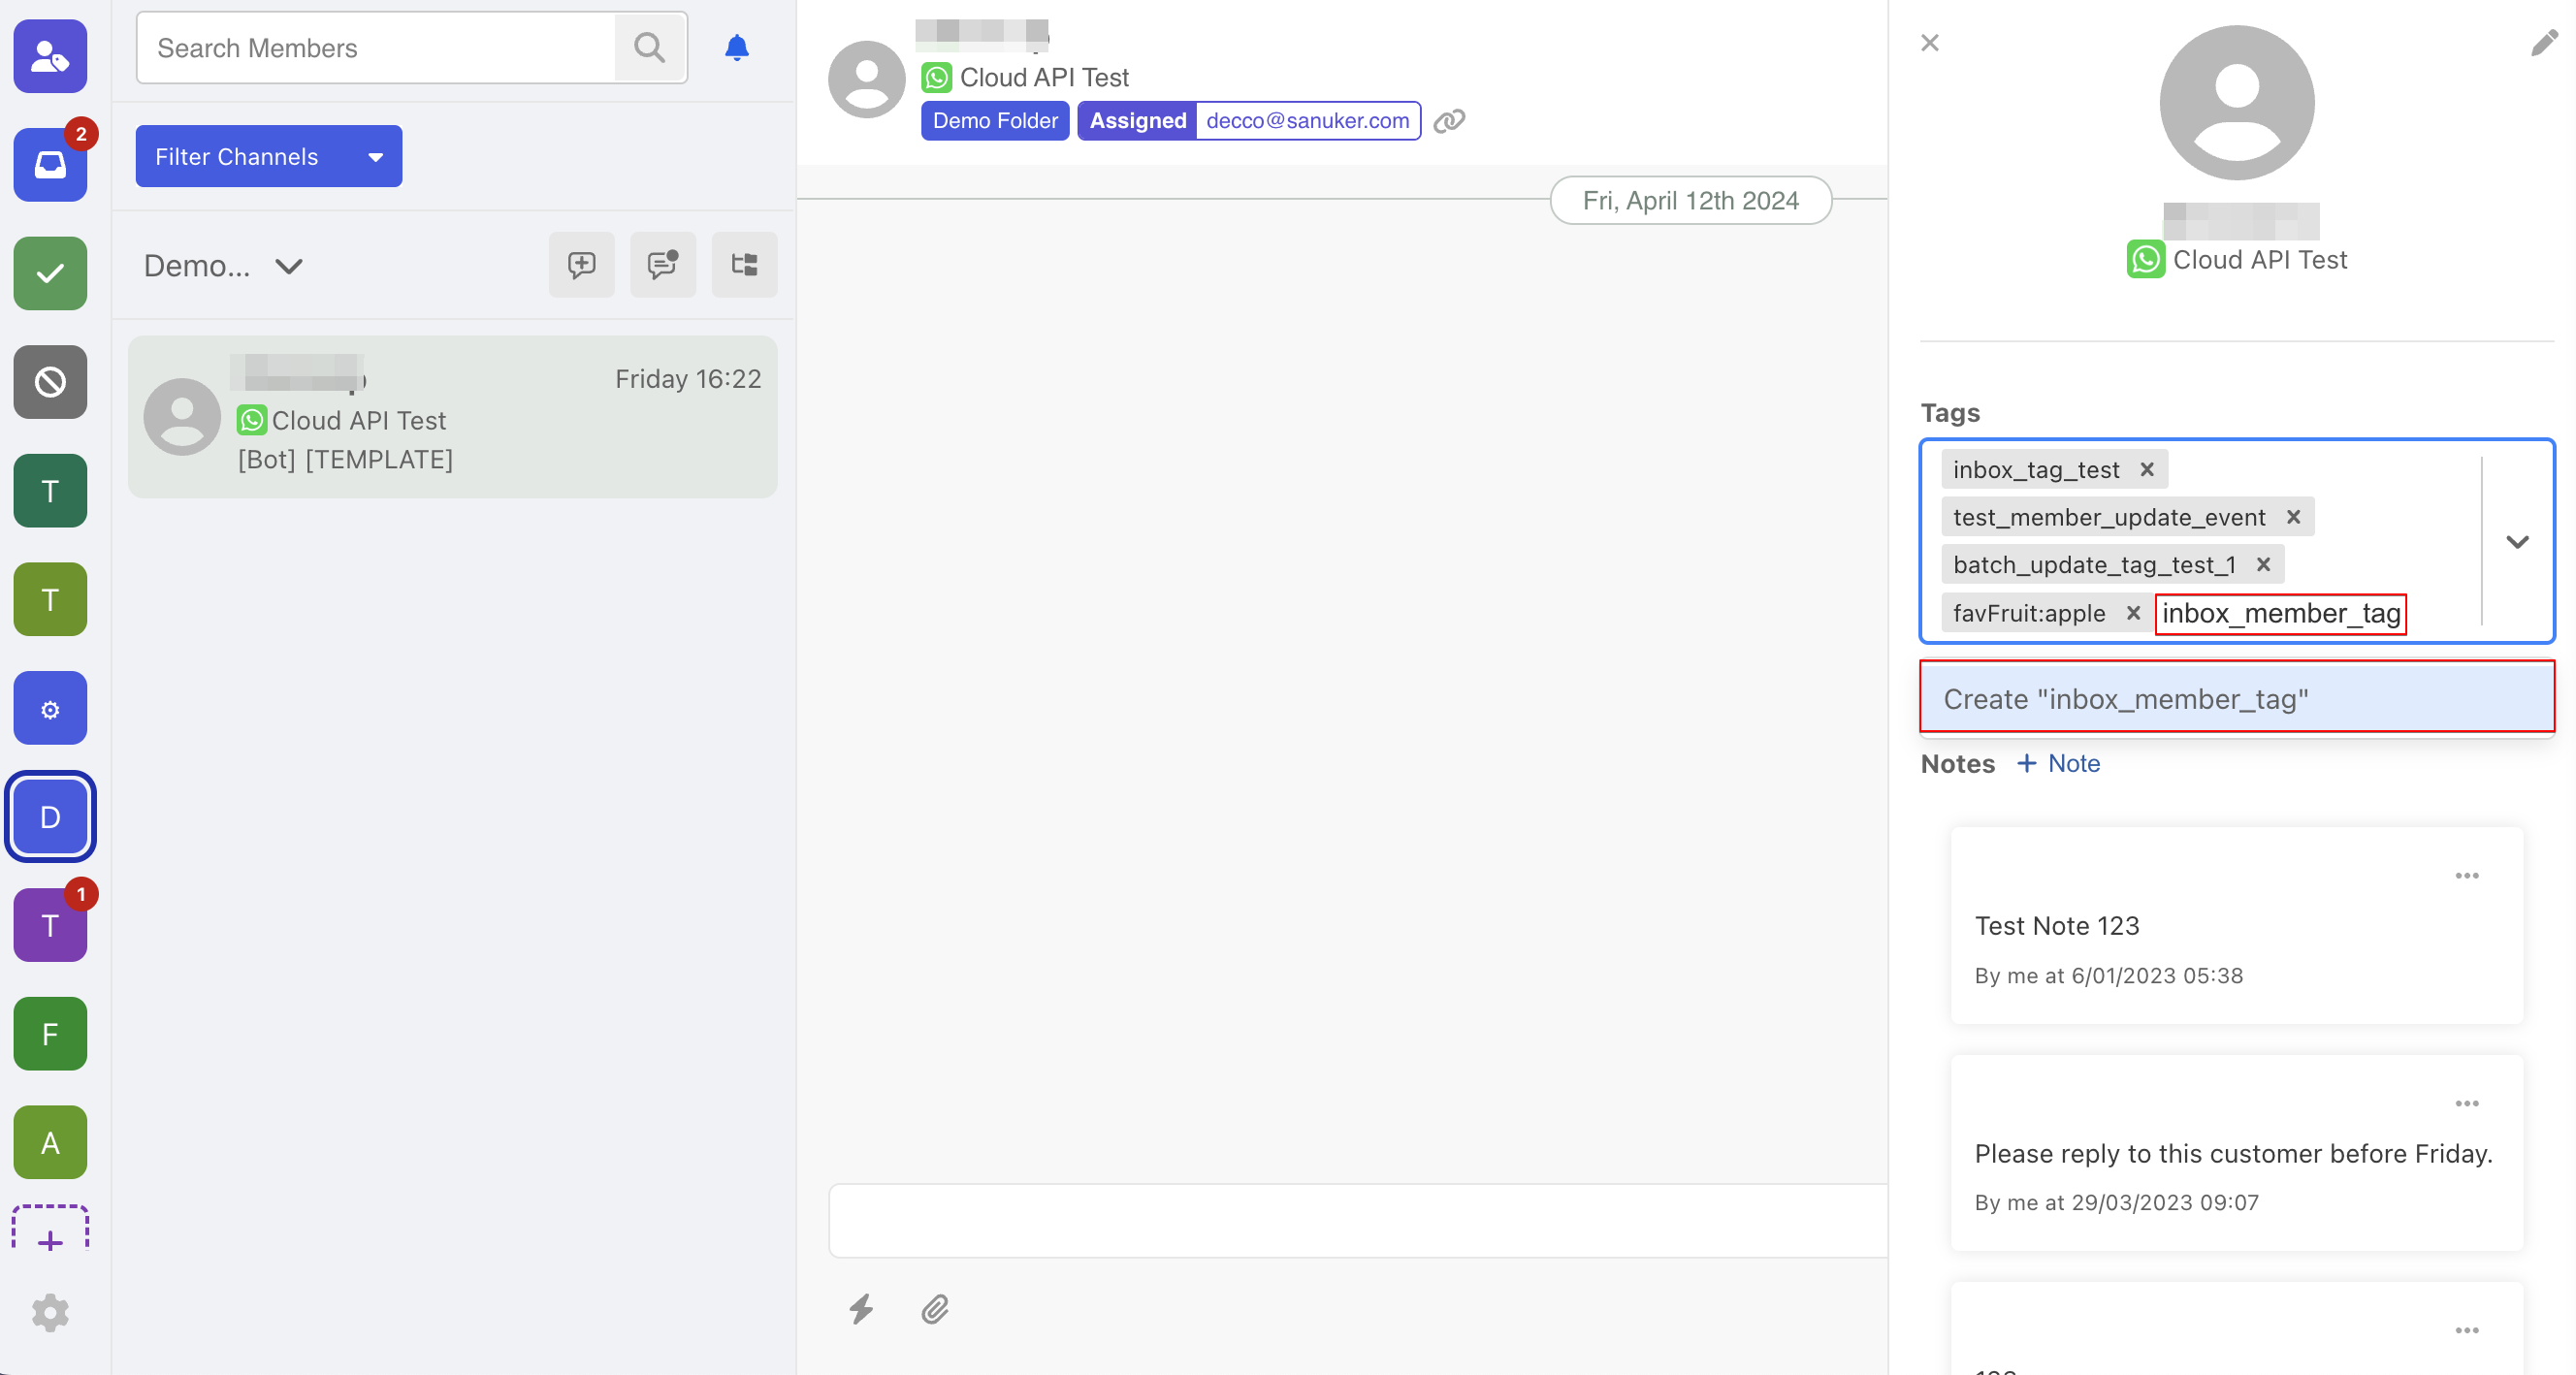
- Alternatively, you can create a new tag by typing.
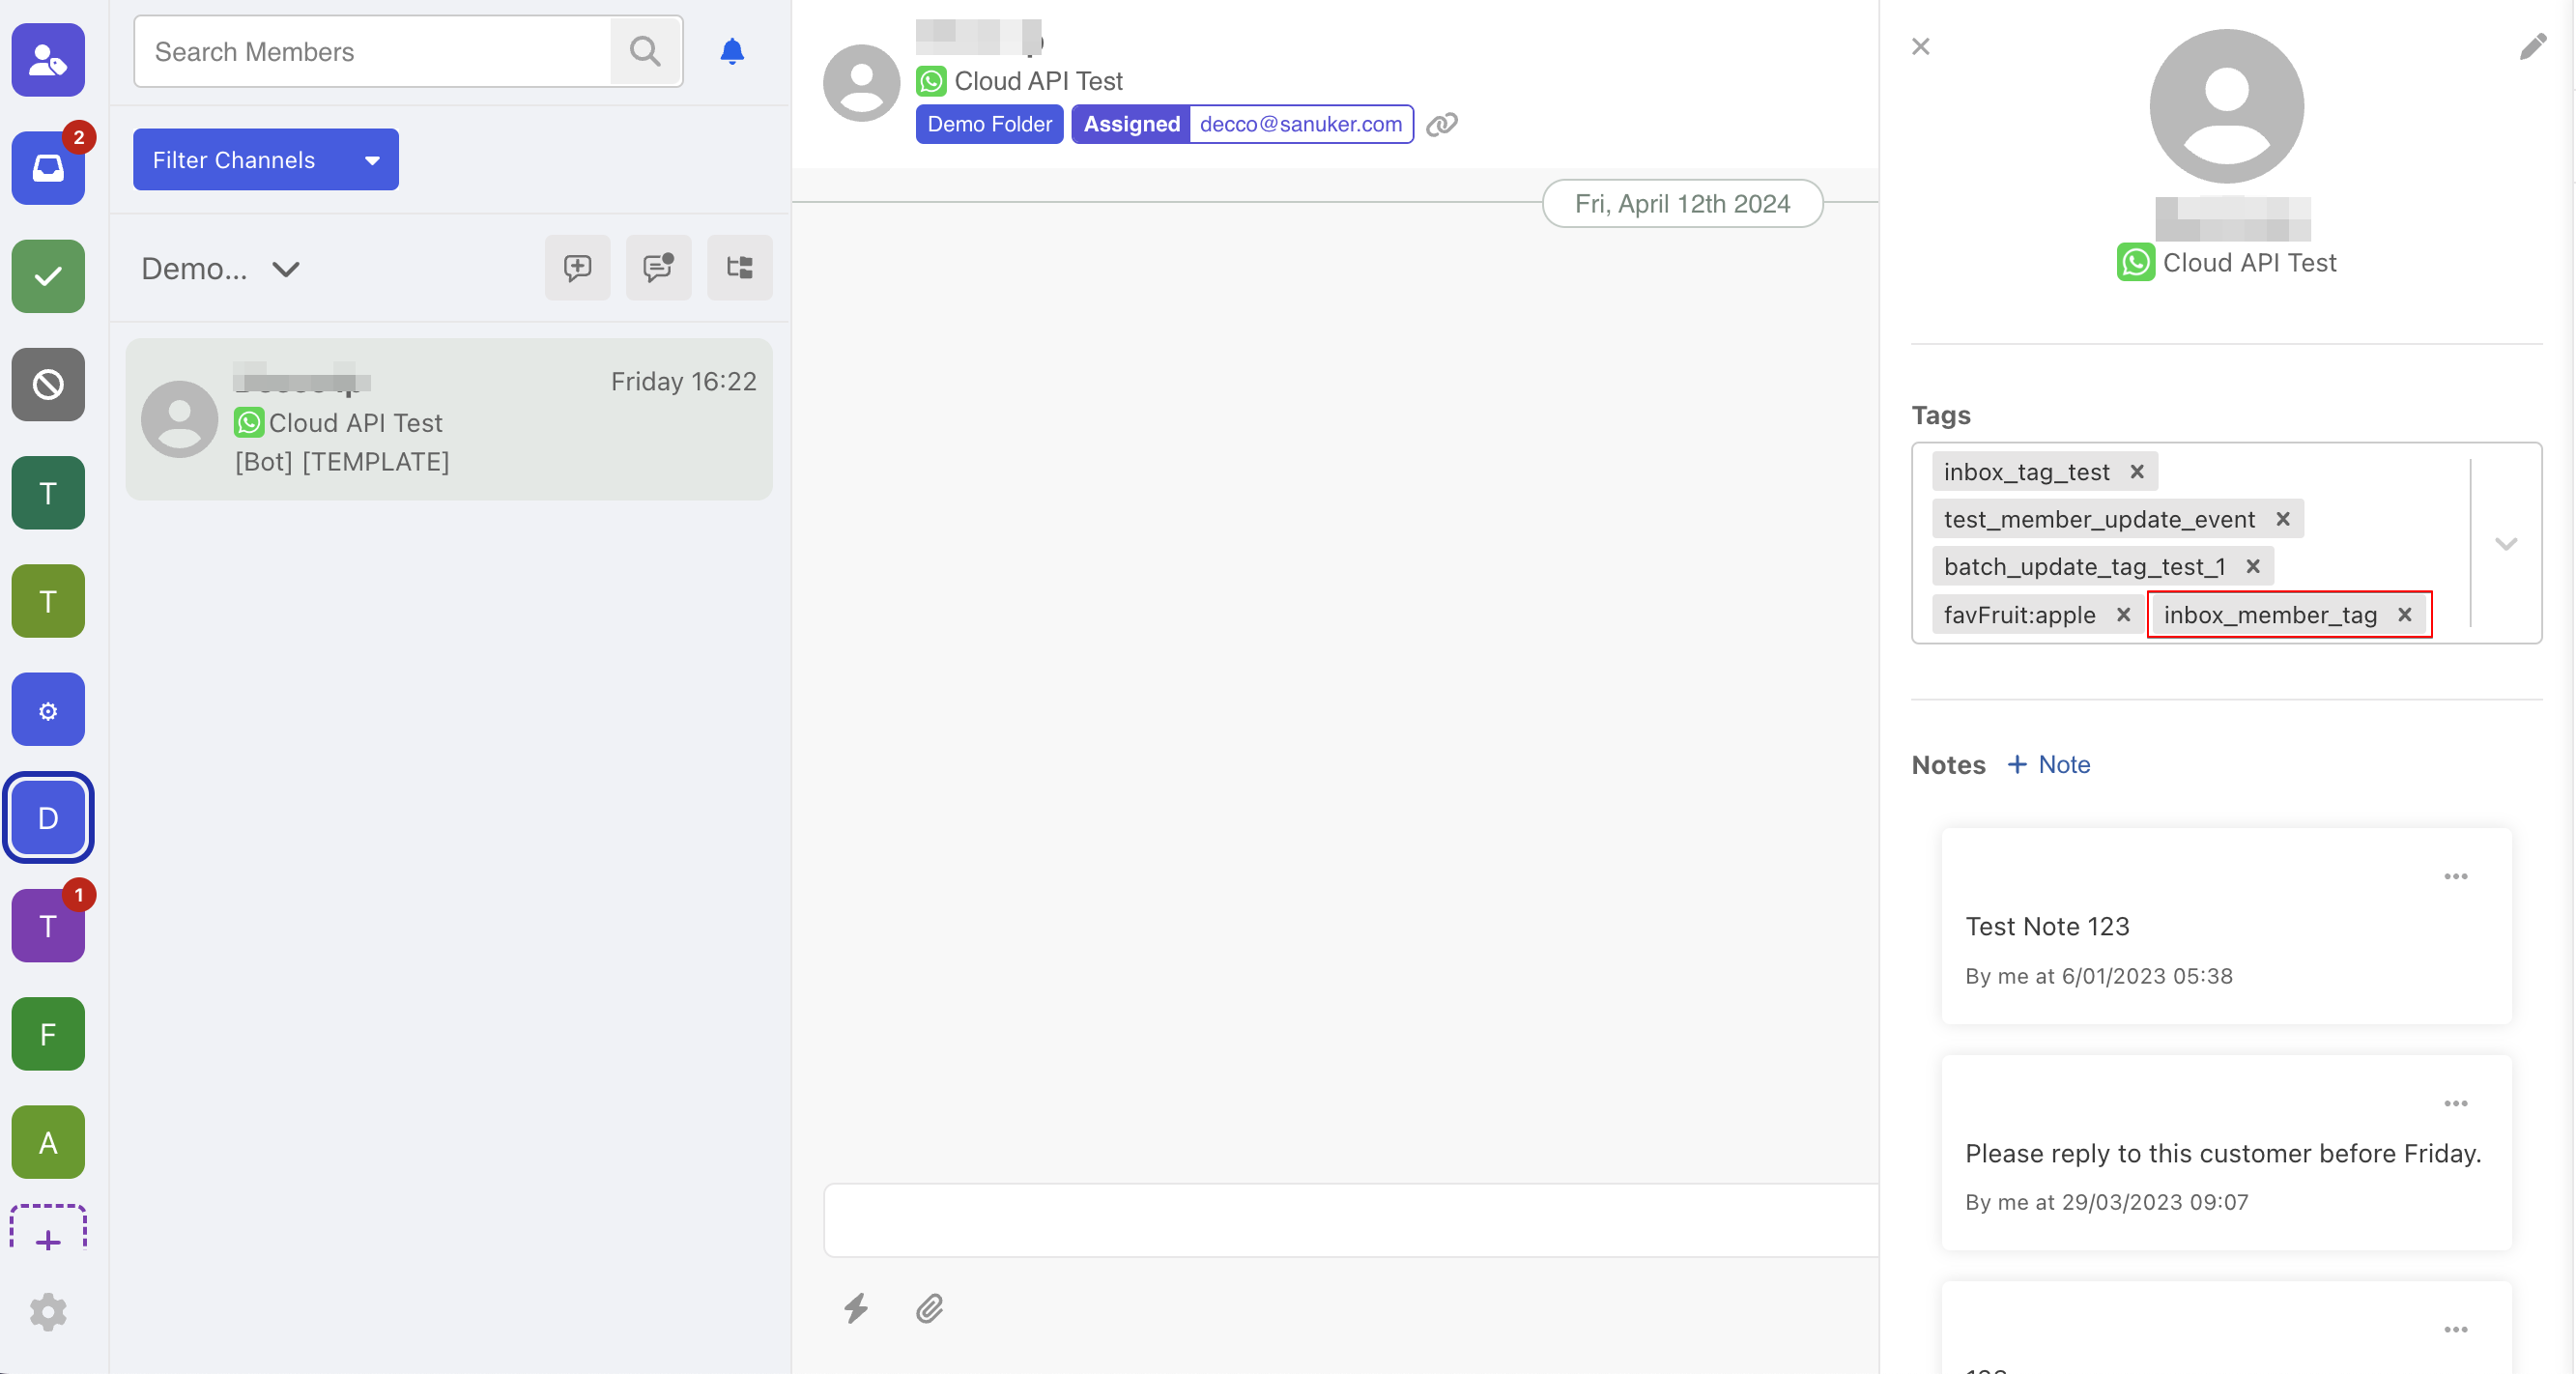
- Now the member tag is added.
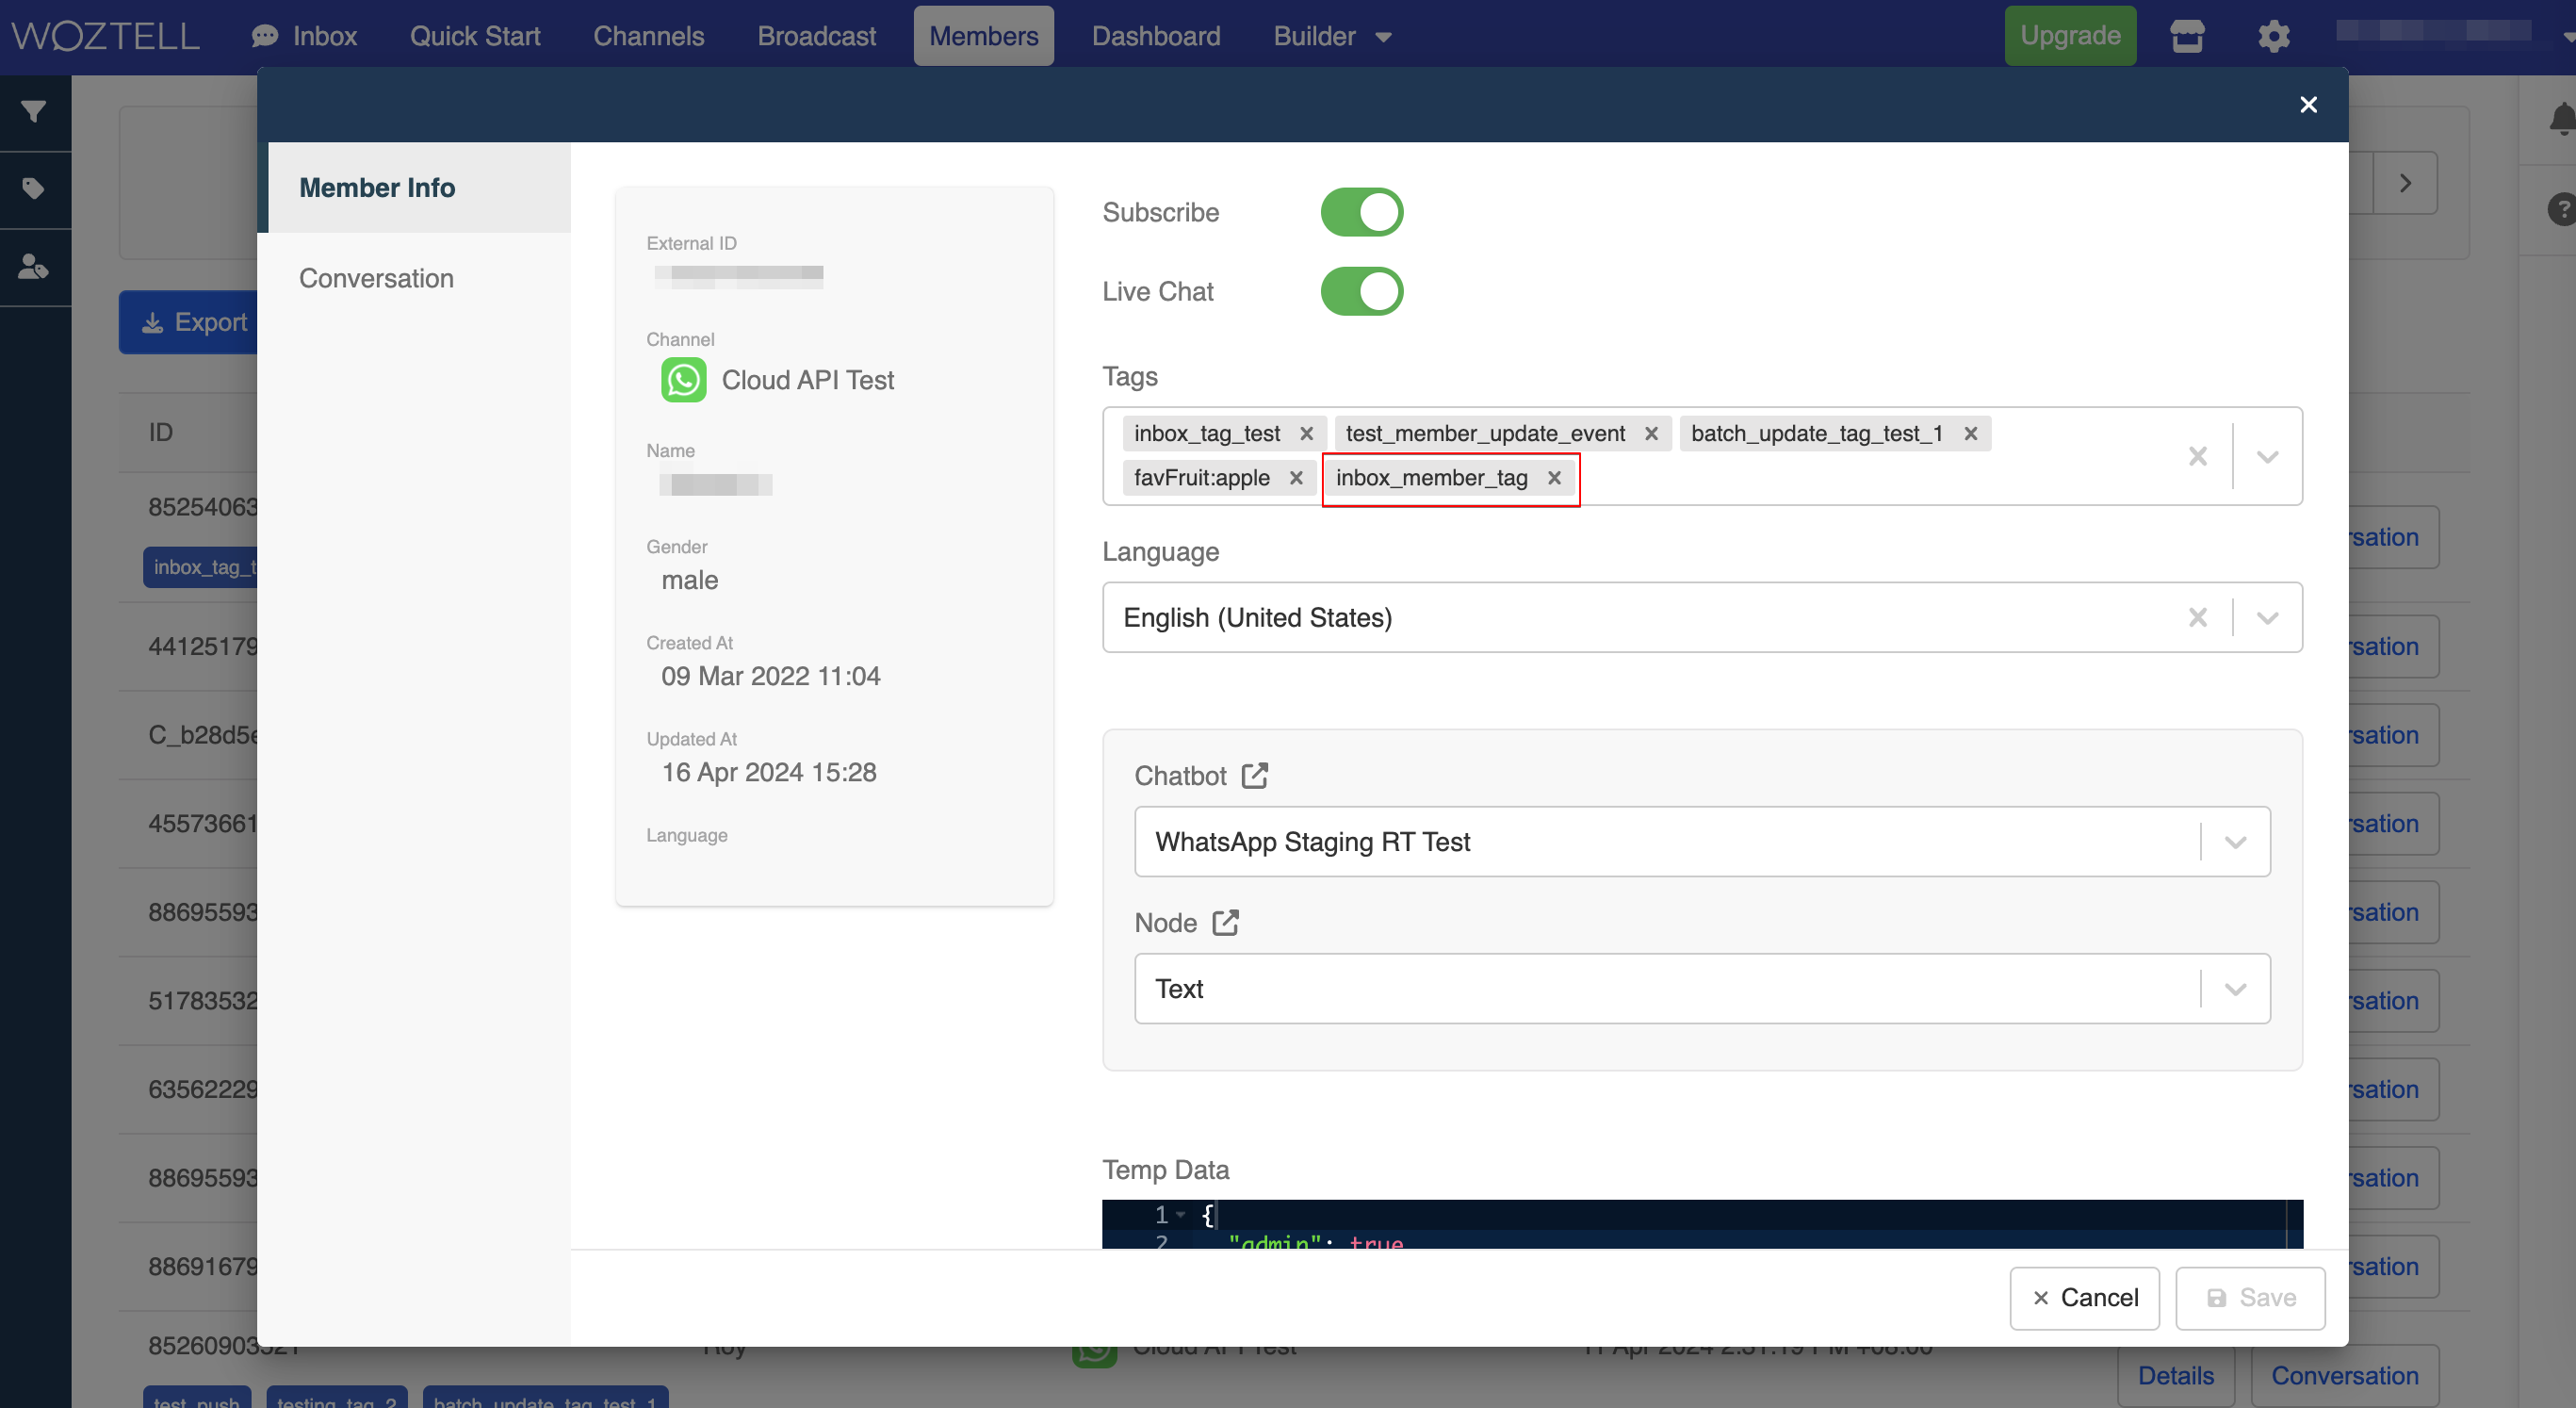
- The member tag added in the thread will also be present in the member's details.
Add Internal Notes
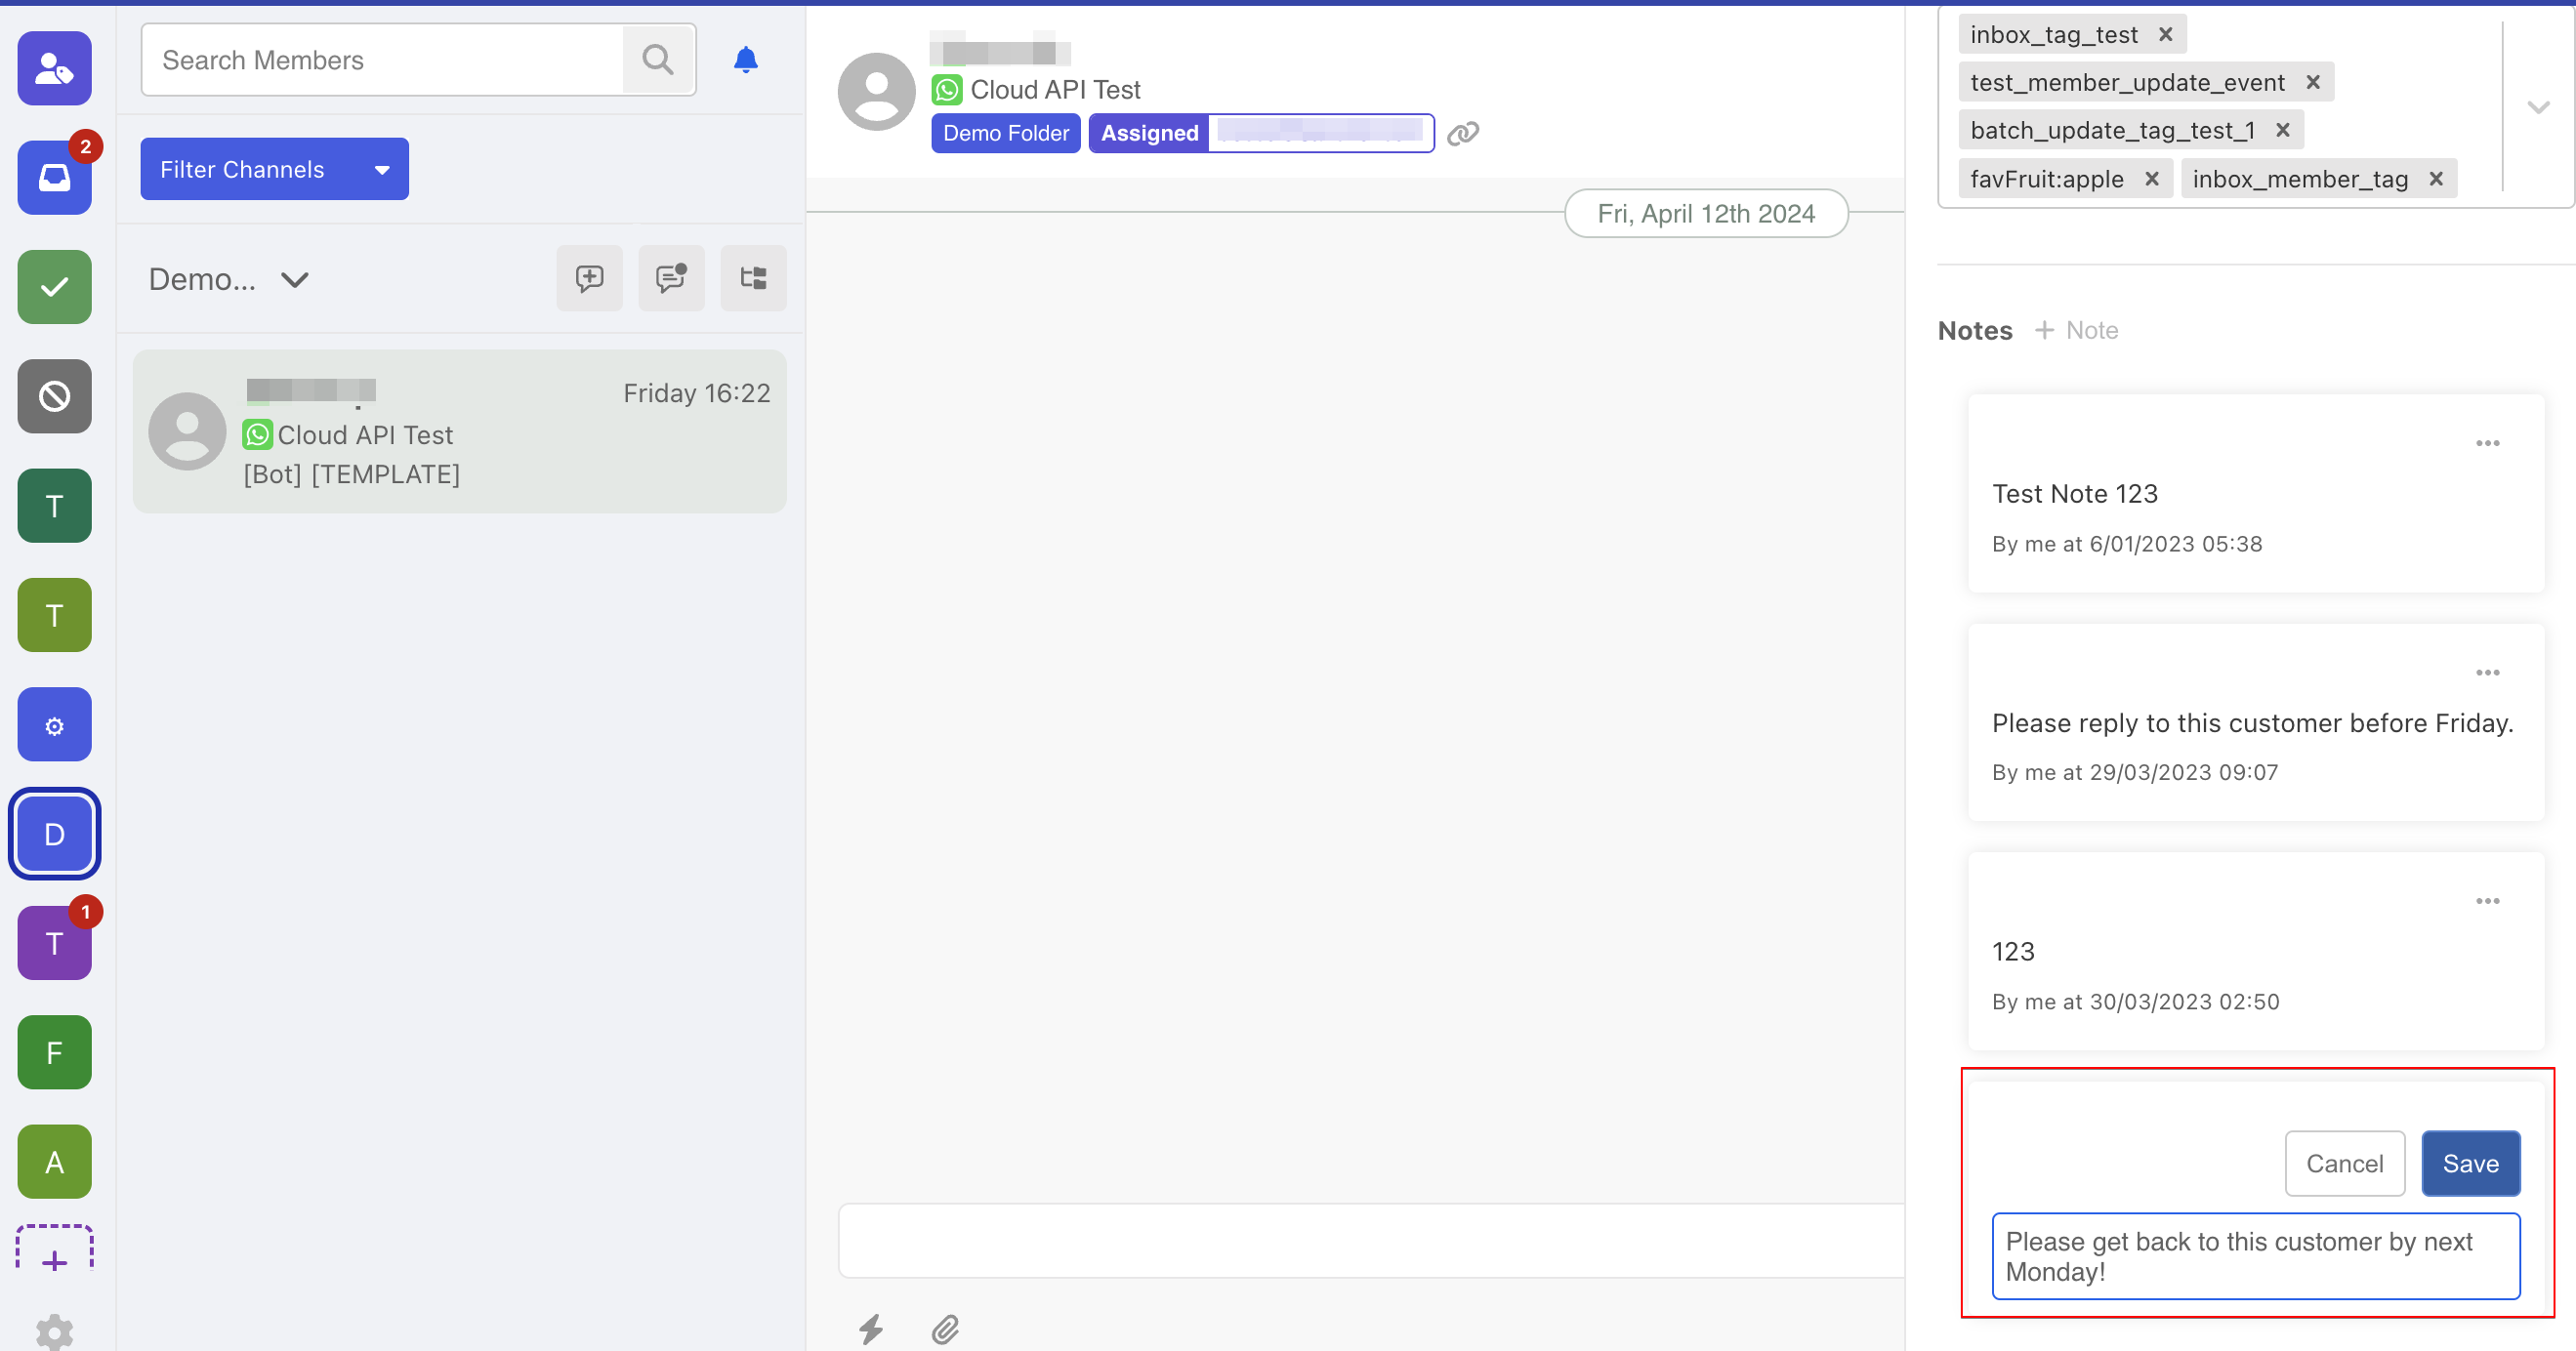
- Agents can add notes under the member's profile in the thread, these notes can only be viewed by the agents. To add the notes, select the "Profile" at top right.
- Select "+ Notes" to create new notes.

- Input the messages and "Save".
Add Internal Comment
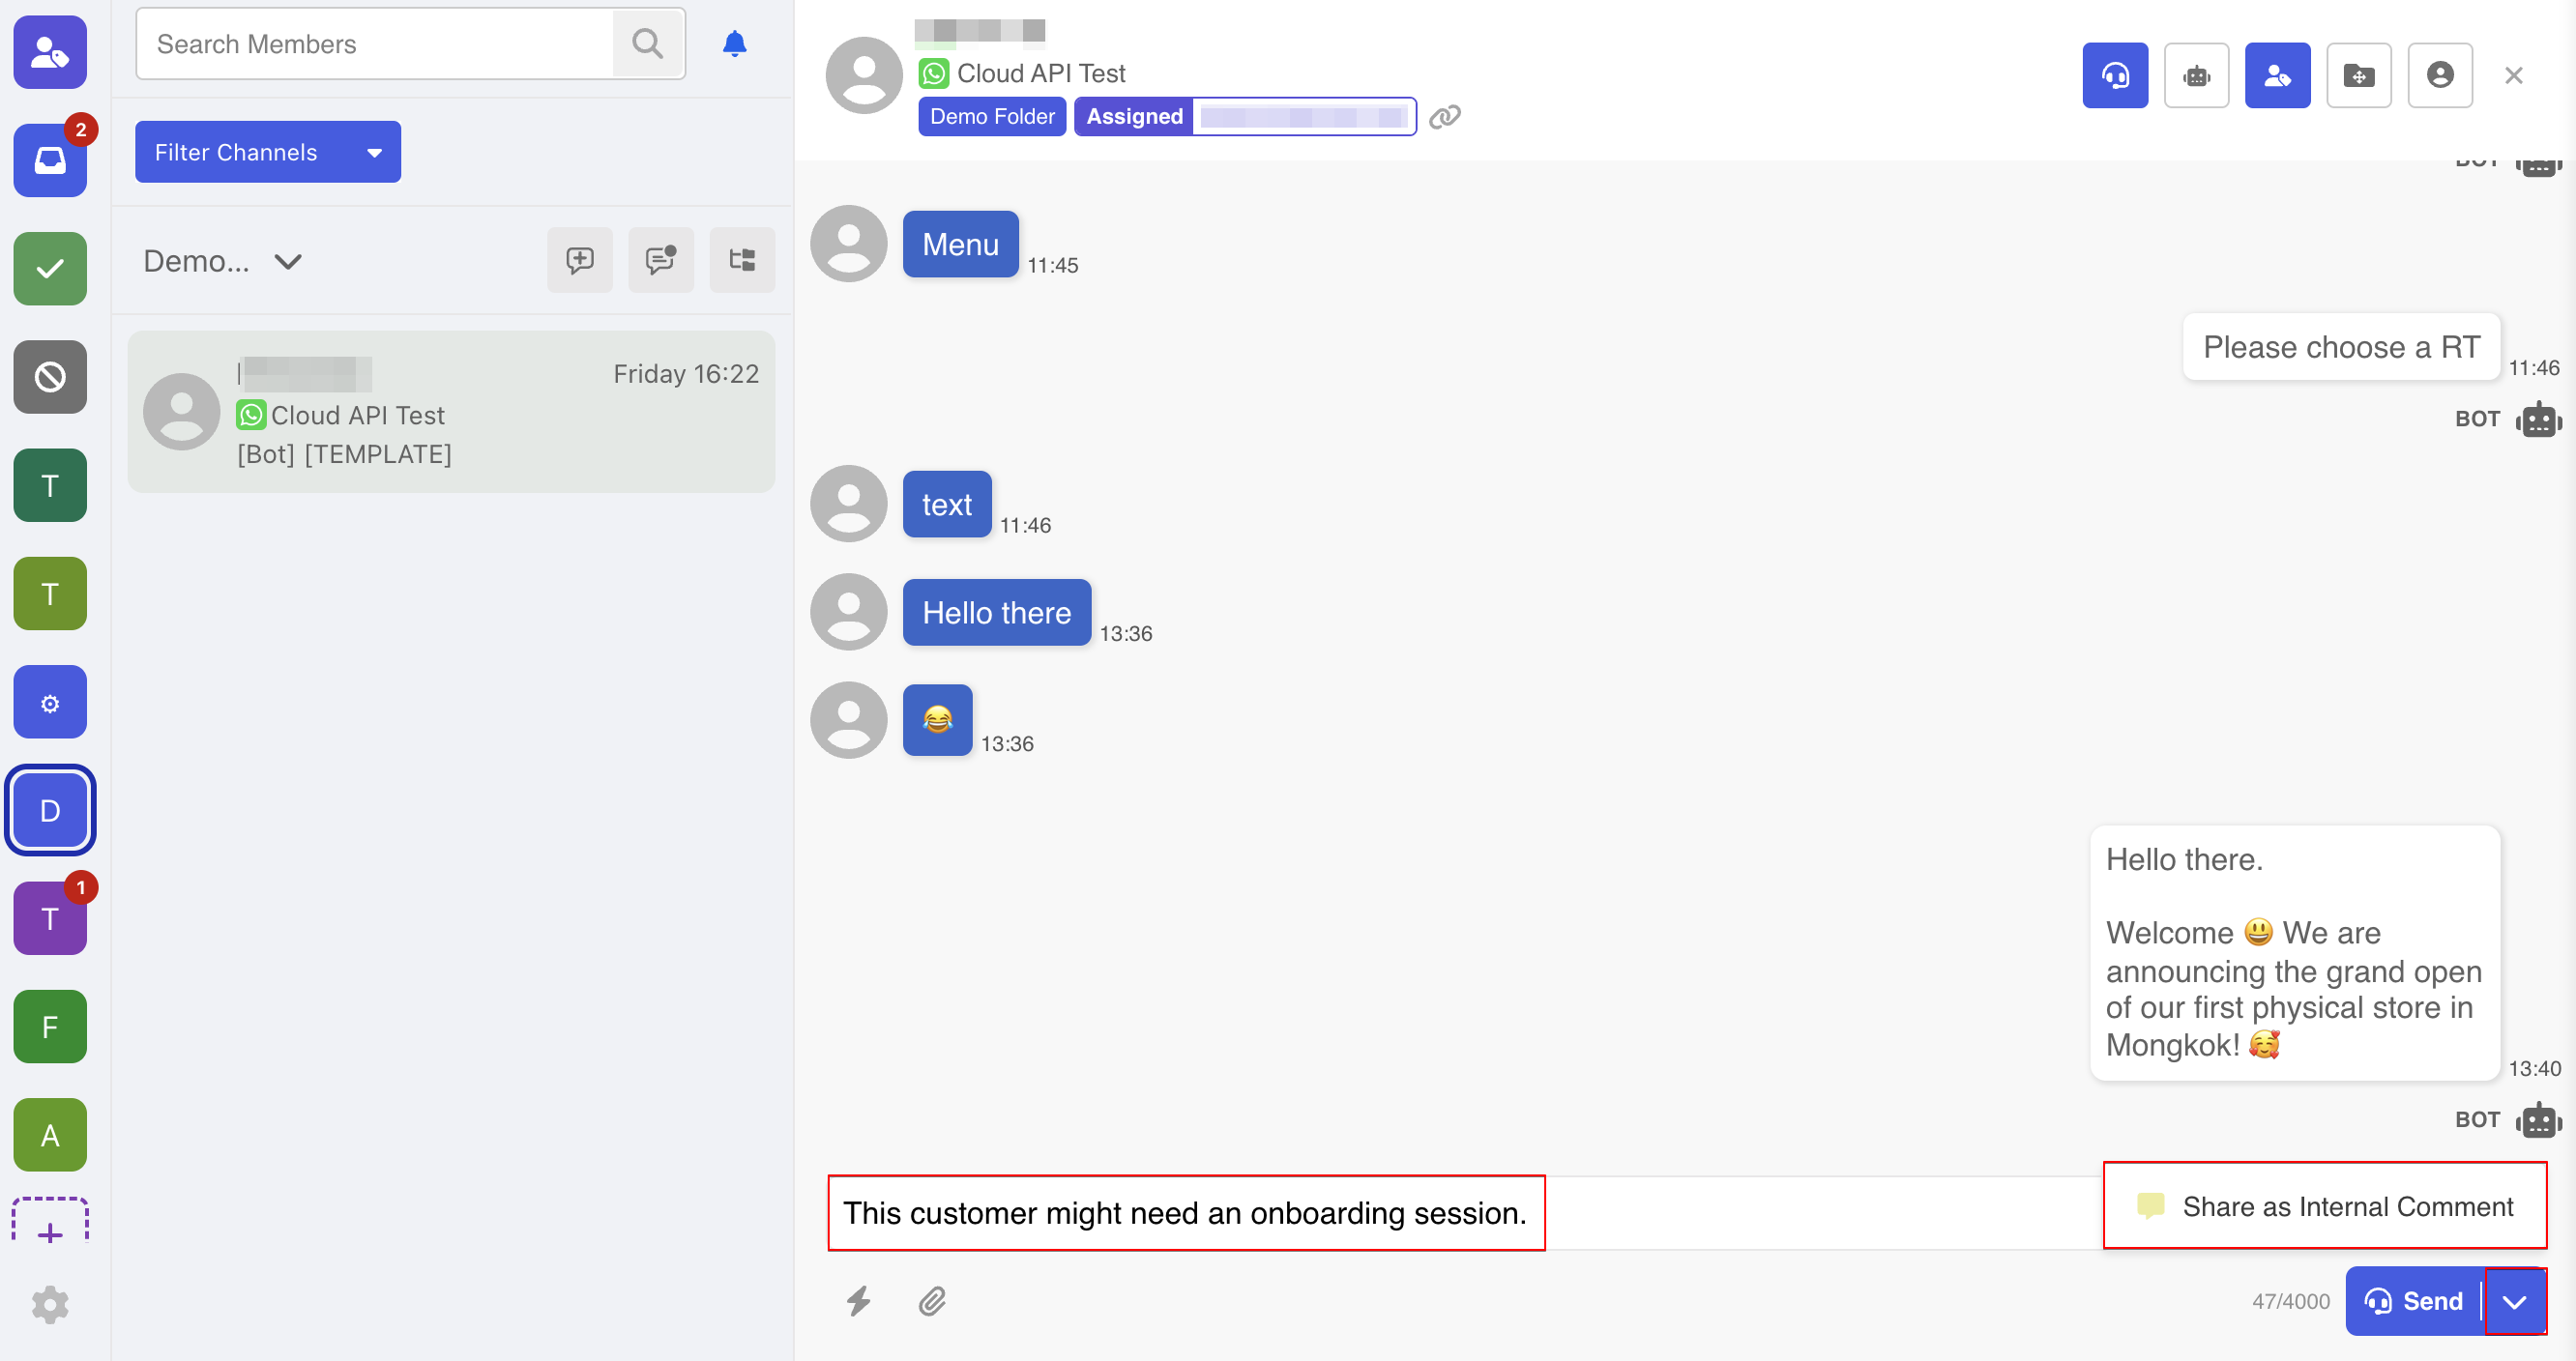
- Agents can add comments in the thread for more efficient collaboration, as the comments can act as the contextual information for other agents. To do so, agent can select "More" next the "Send" button, then select "Send as Internal Comment".
- Alternatively, agents can also add the prefix
###to the text input before sending it out.
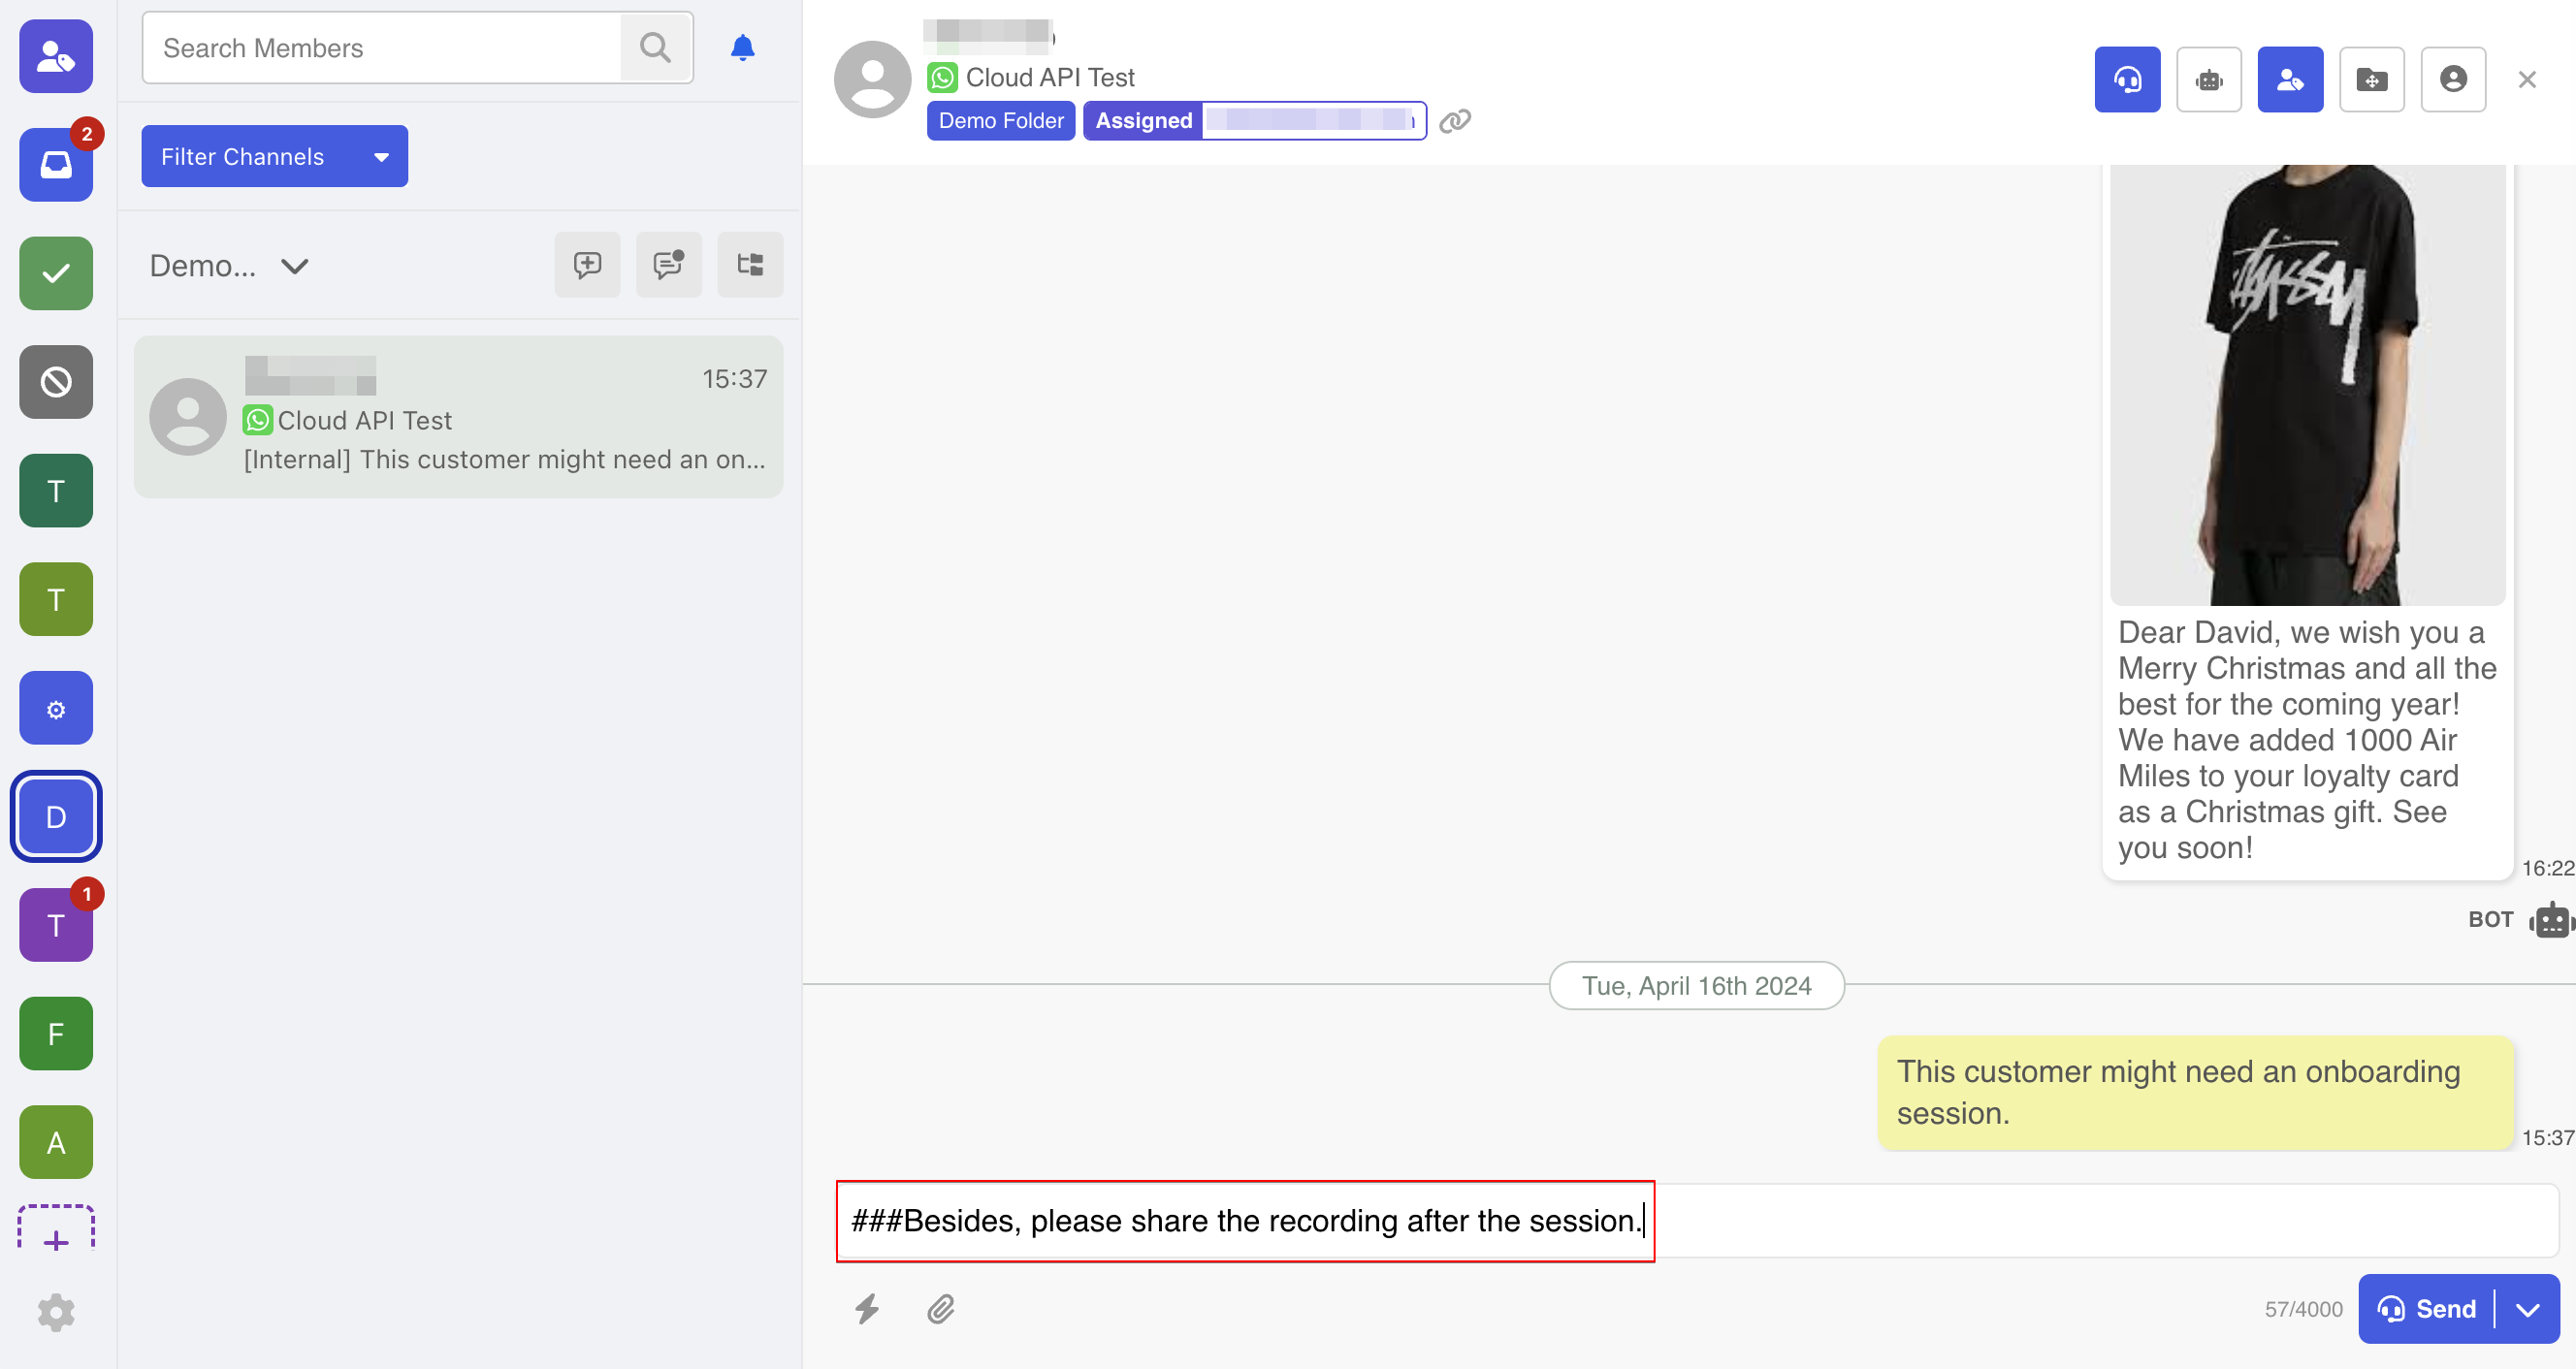
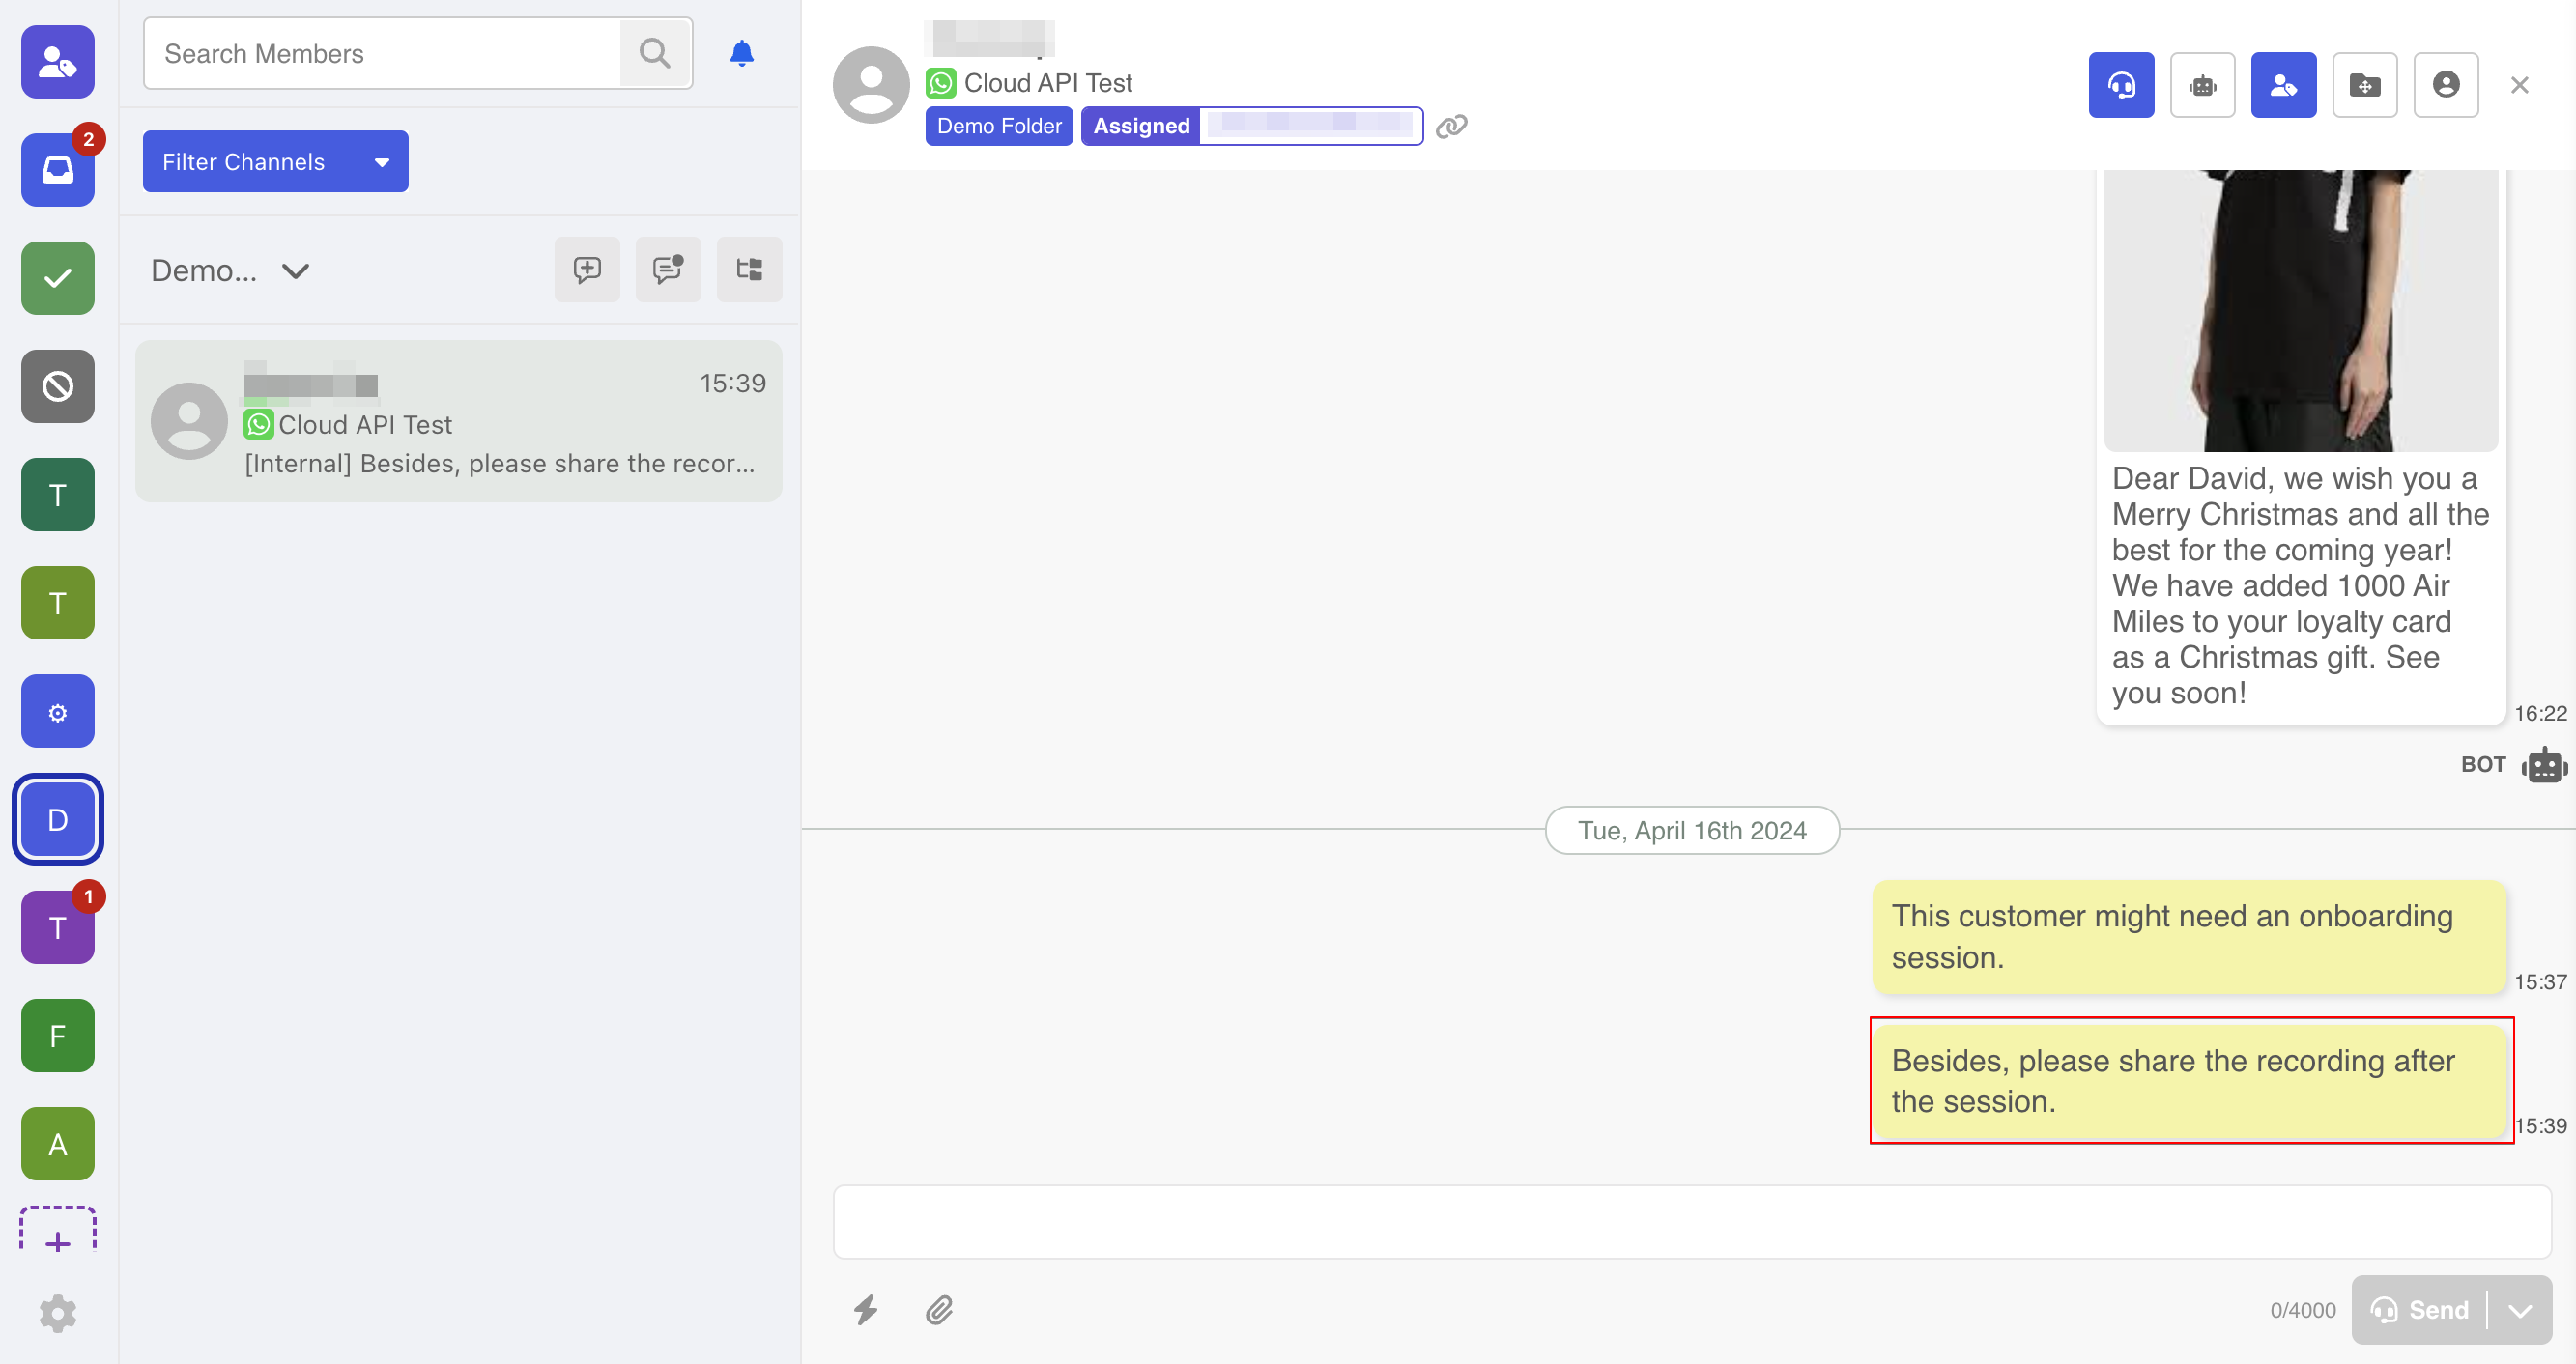
- As a result, an internal comment is sent, and it can only be viewed by the agents.
Mention other Agent
Agents can mention/tag other agent(s) in a thread by typing @email. The tagged message will be sent as an internal comment and the tagged agent will receive notification.
NOTE
The agent will be not present in the mention suggestion under the following conditions:
- The agent being tagged is not an activated user in the inbox
- The agent being tagged does not have access to the folder
- You can tag another agent by typing
@email, the teammate's email will be available in the suggestion.
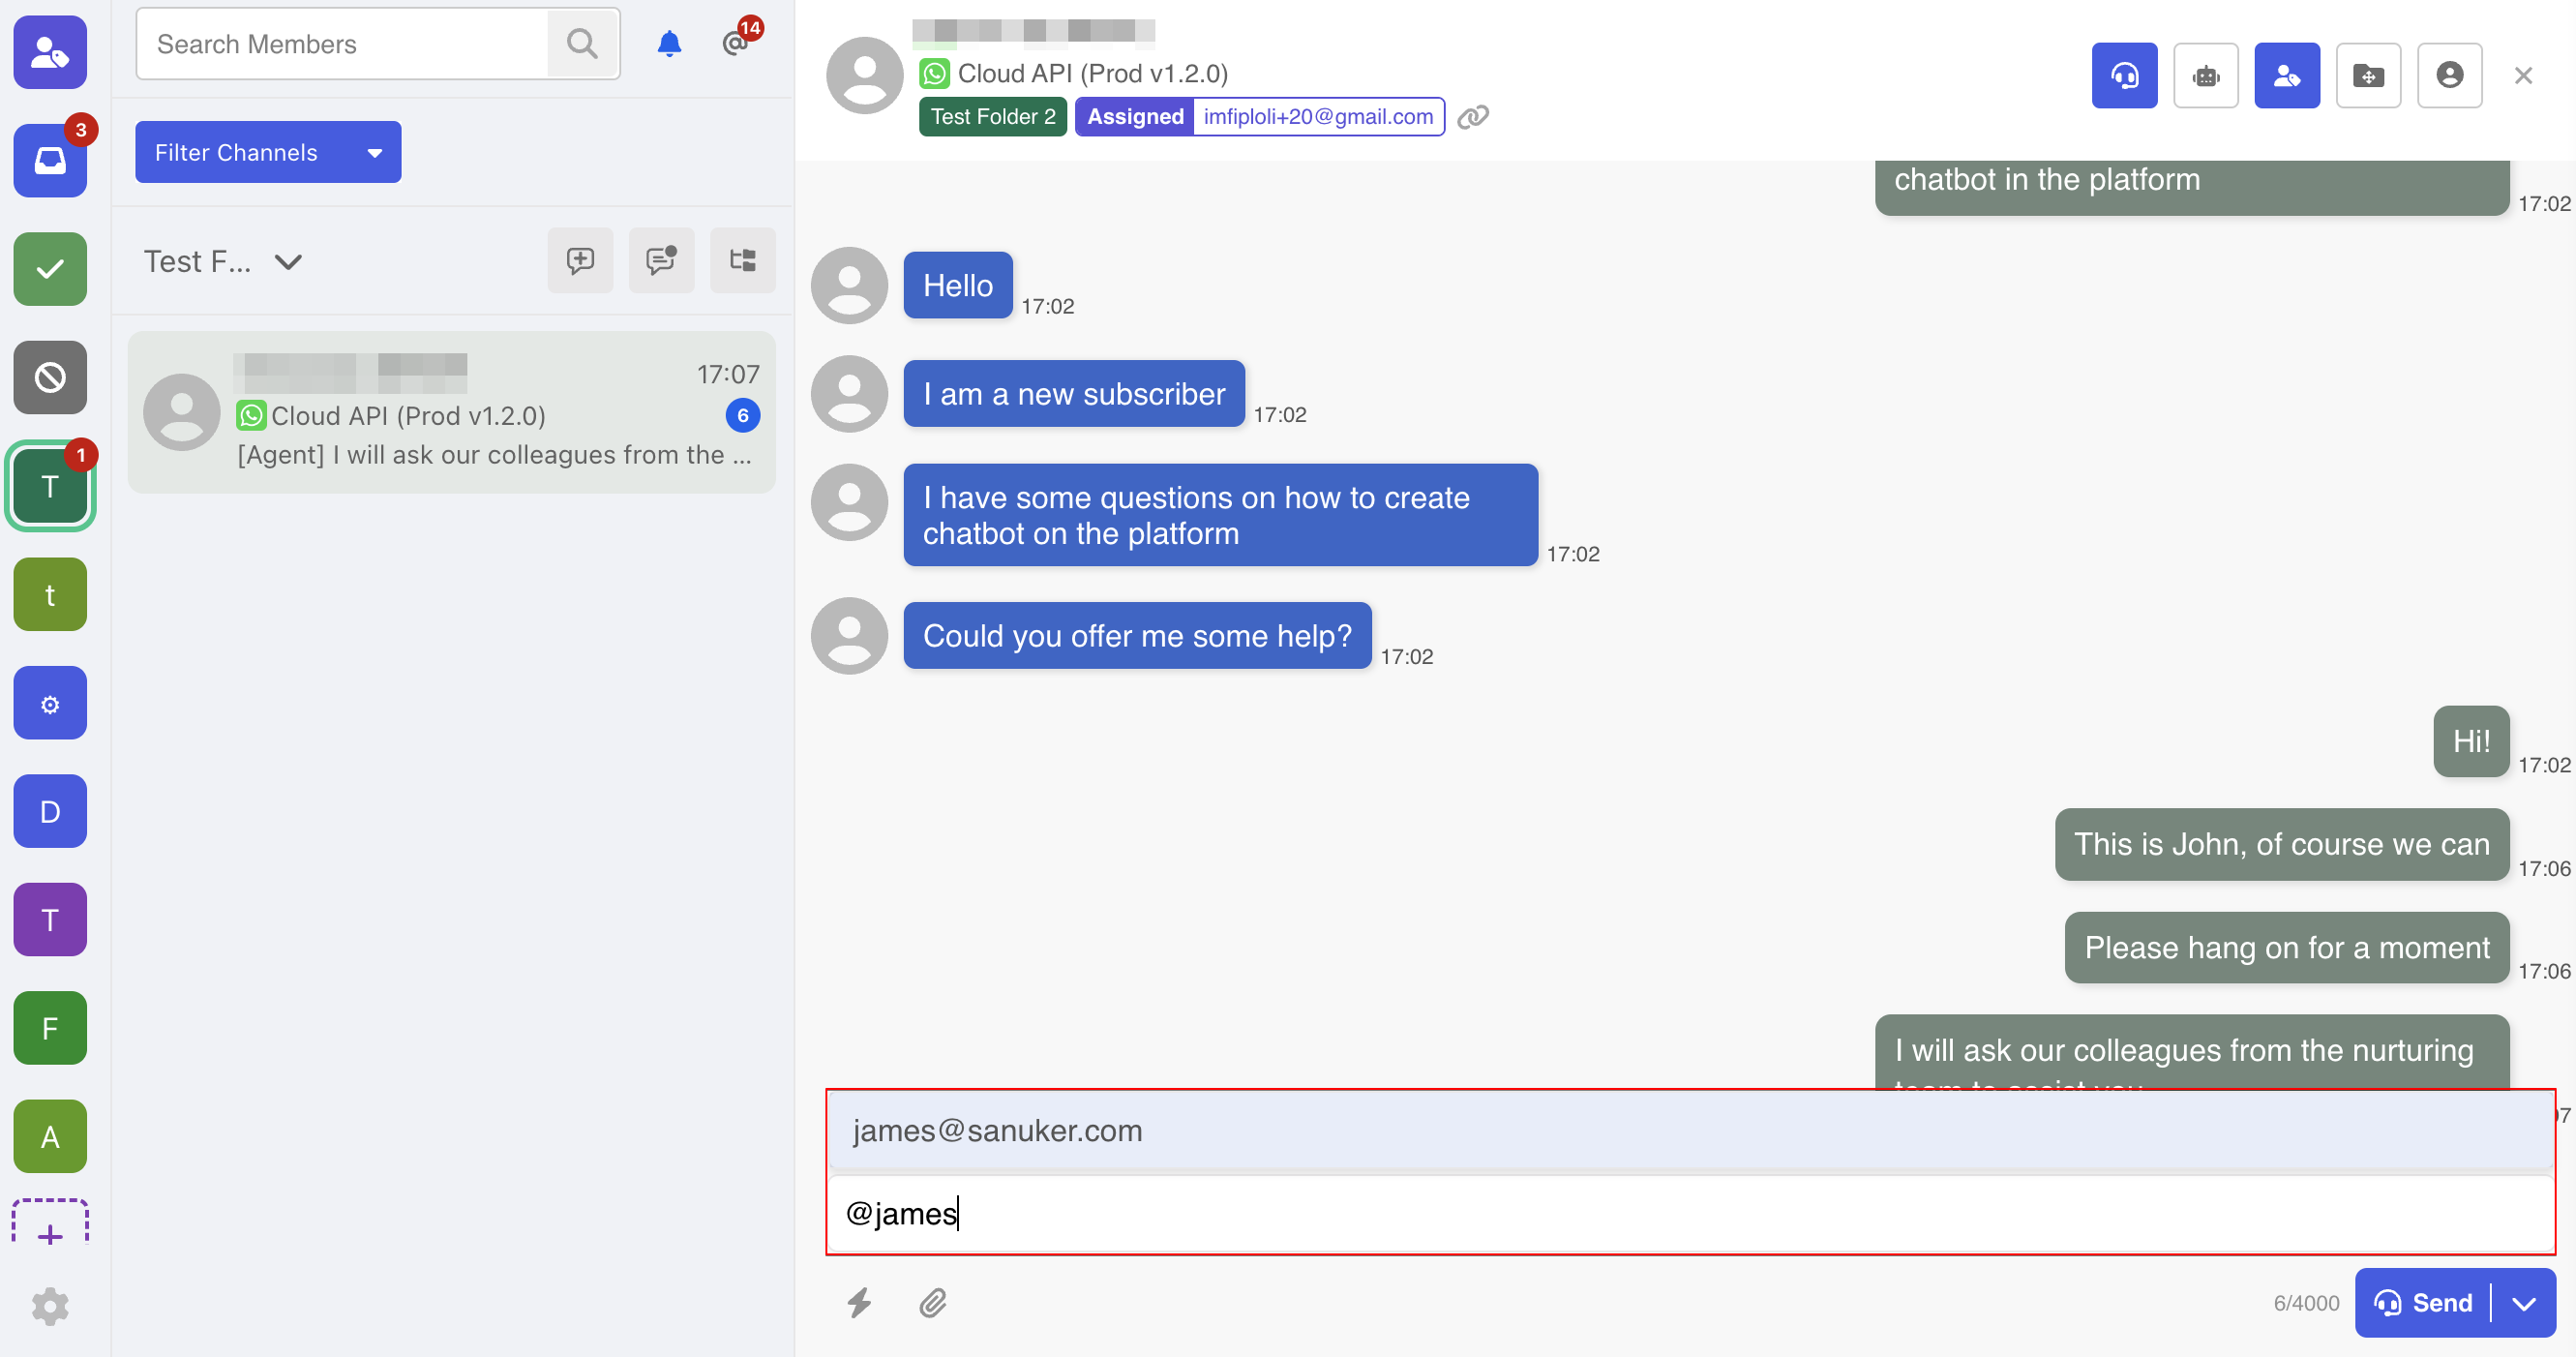
- You can tag more than one agents, and add additional text afterwards. Once we have detected a mention in the text field, you will be only allowed to "Send this as an Internal Comment".
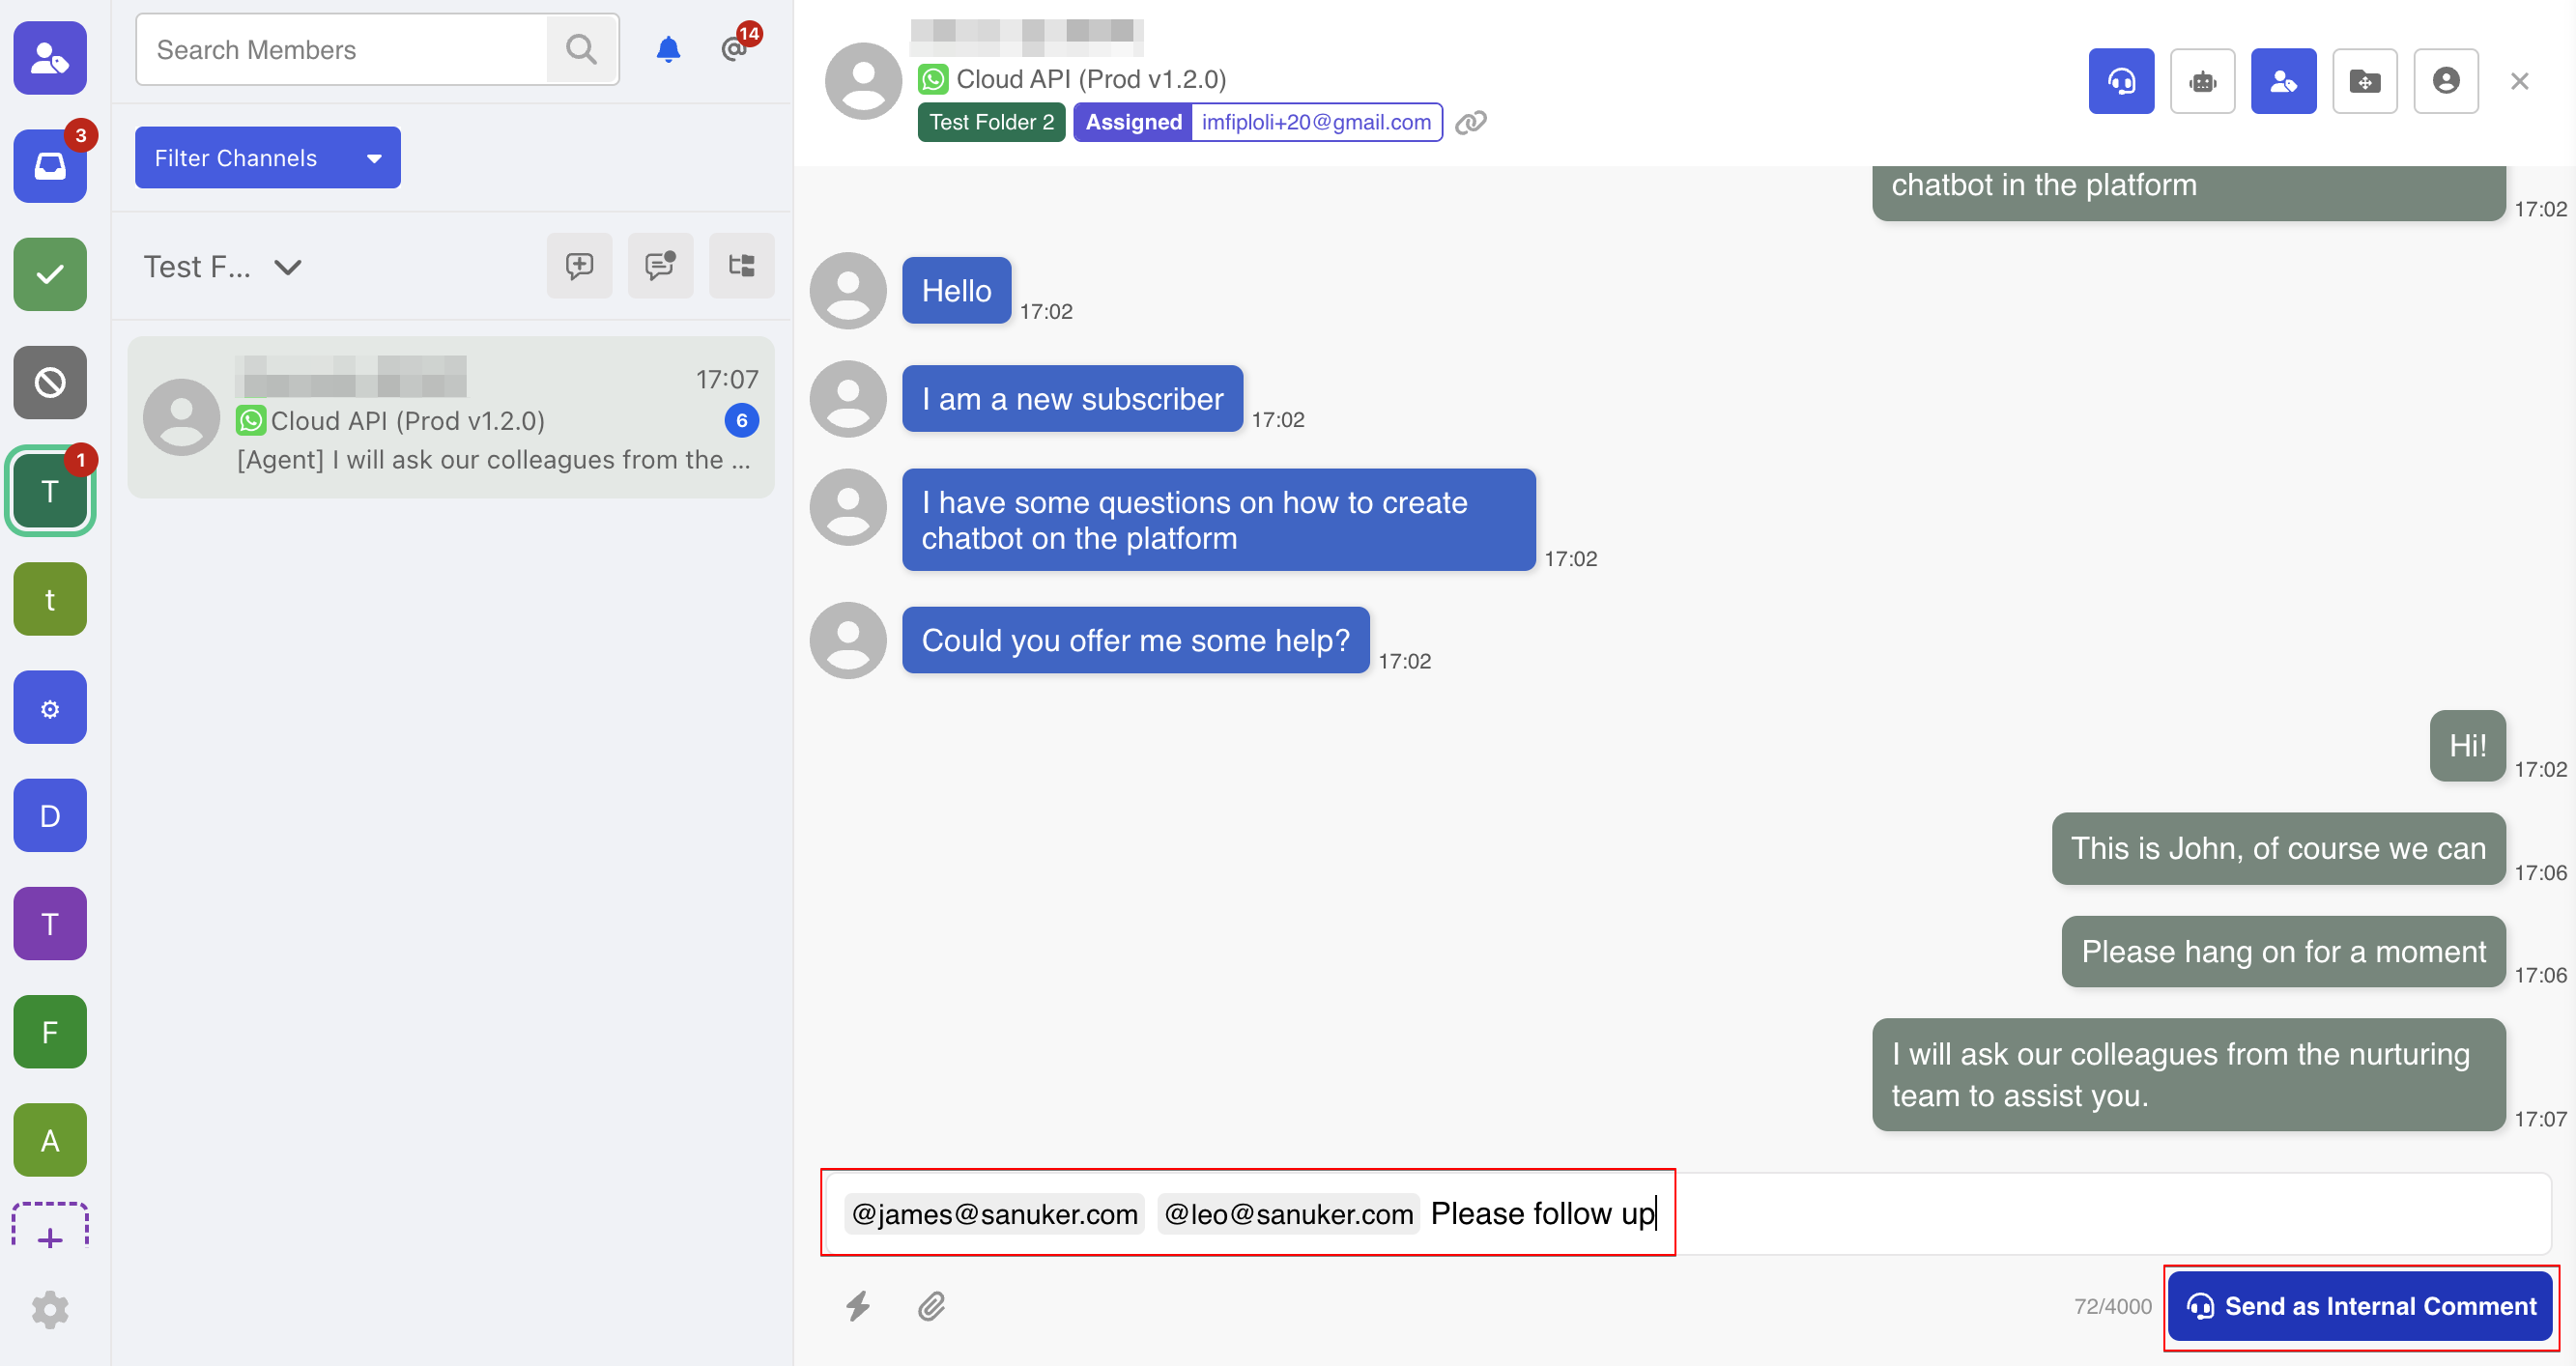
- Once it is sent, it will appear in yellow, representing an internal comment which is not visible to the end user.

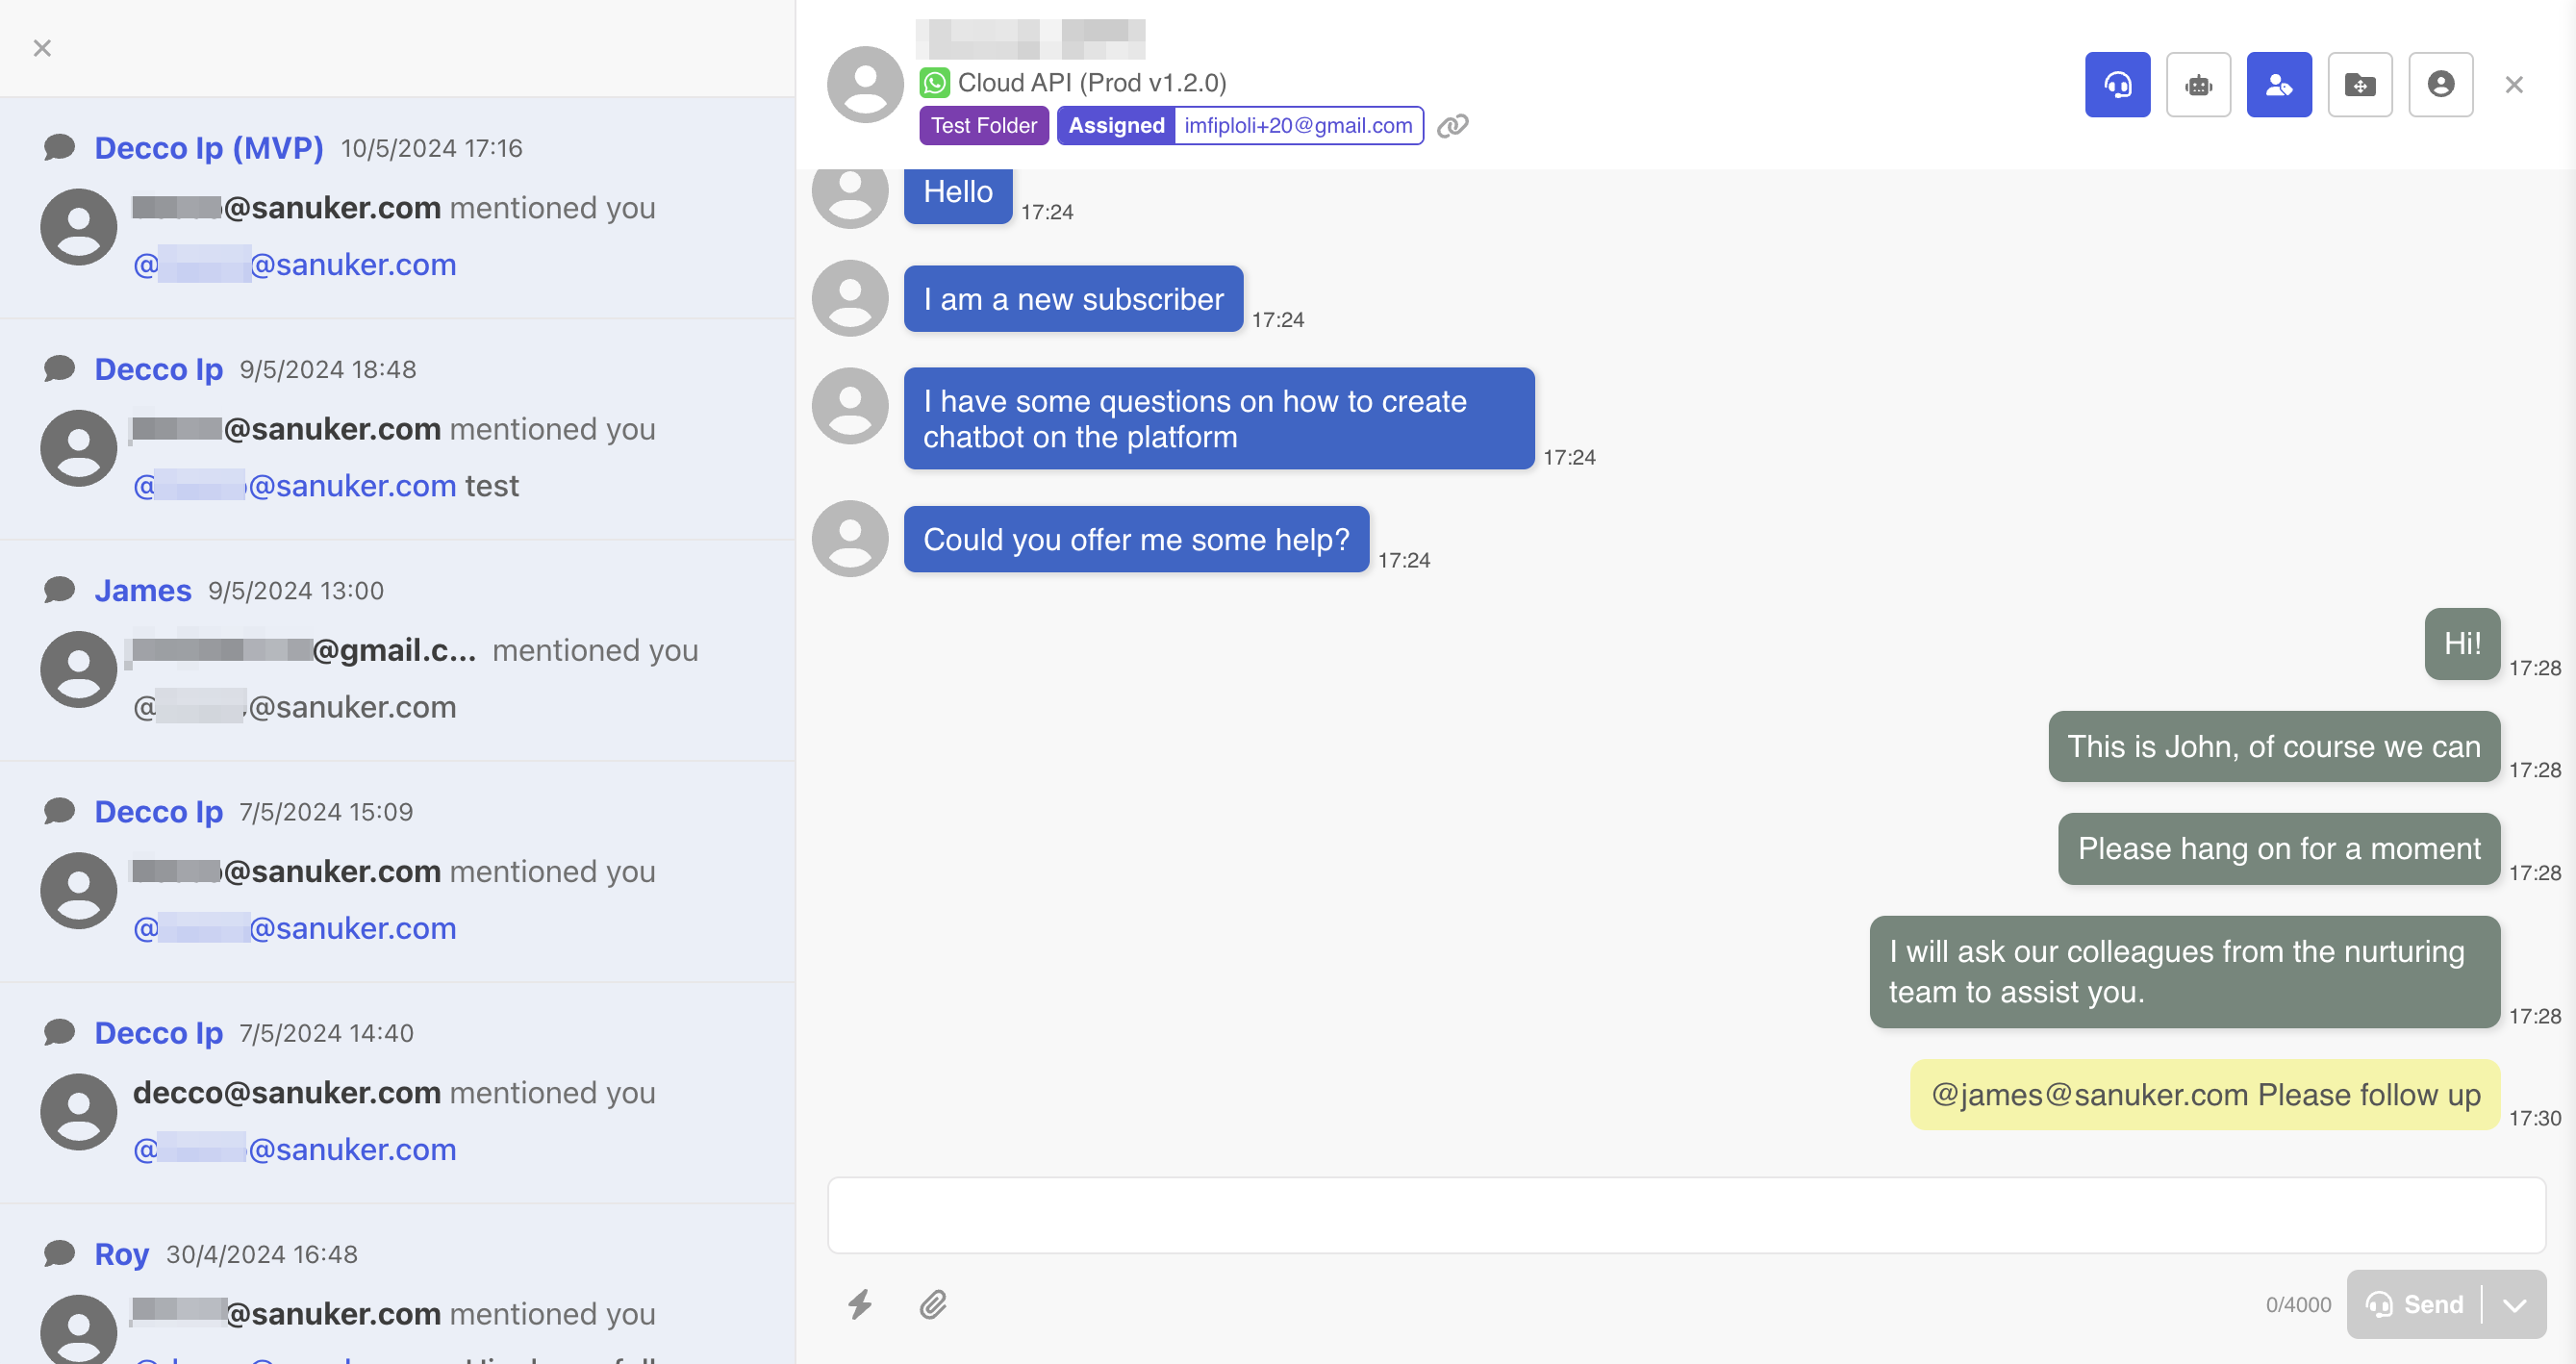
- Once you are mentioned/tagged in a thread, there will be a mention notification count.
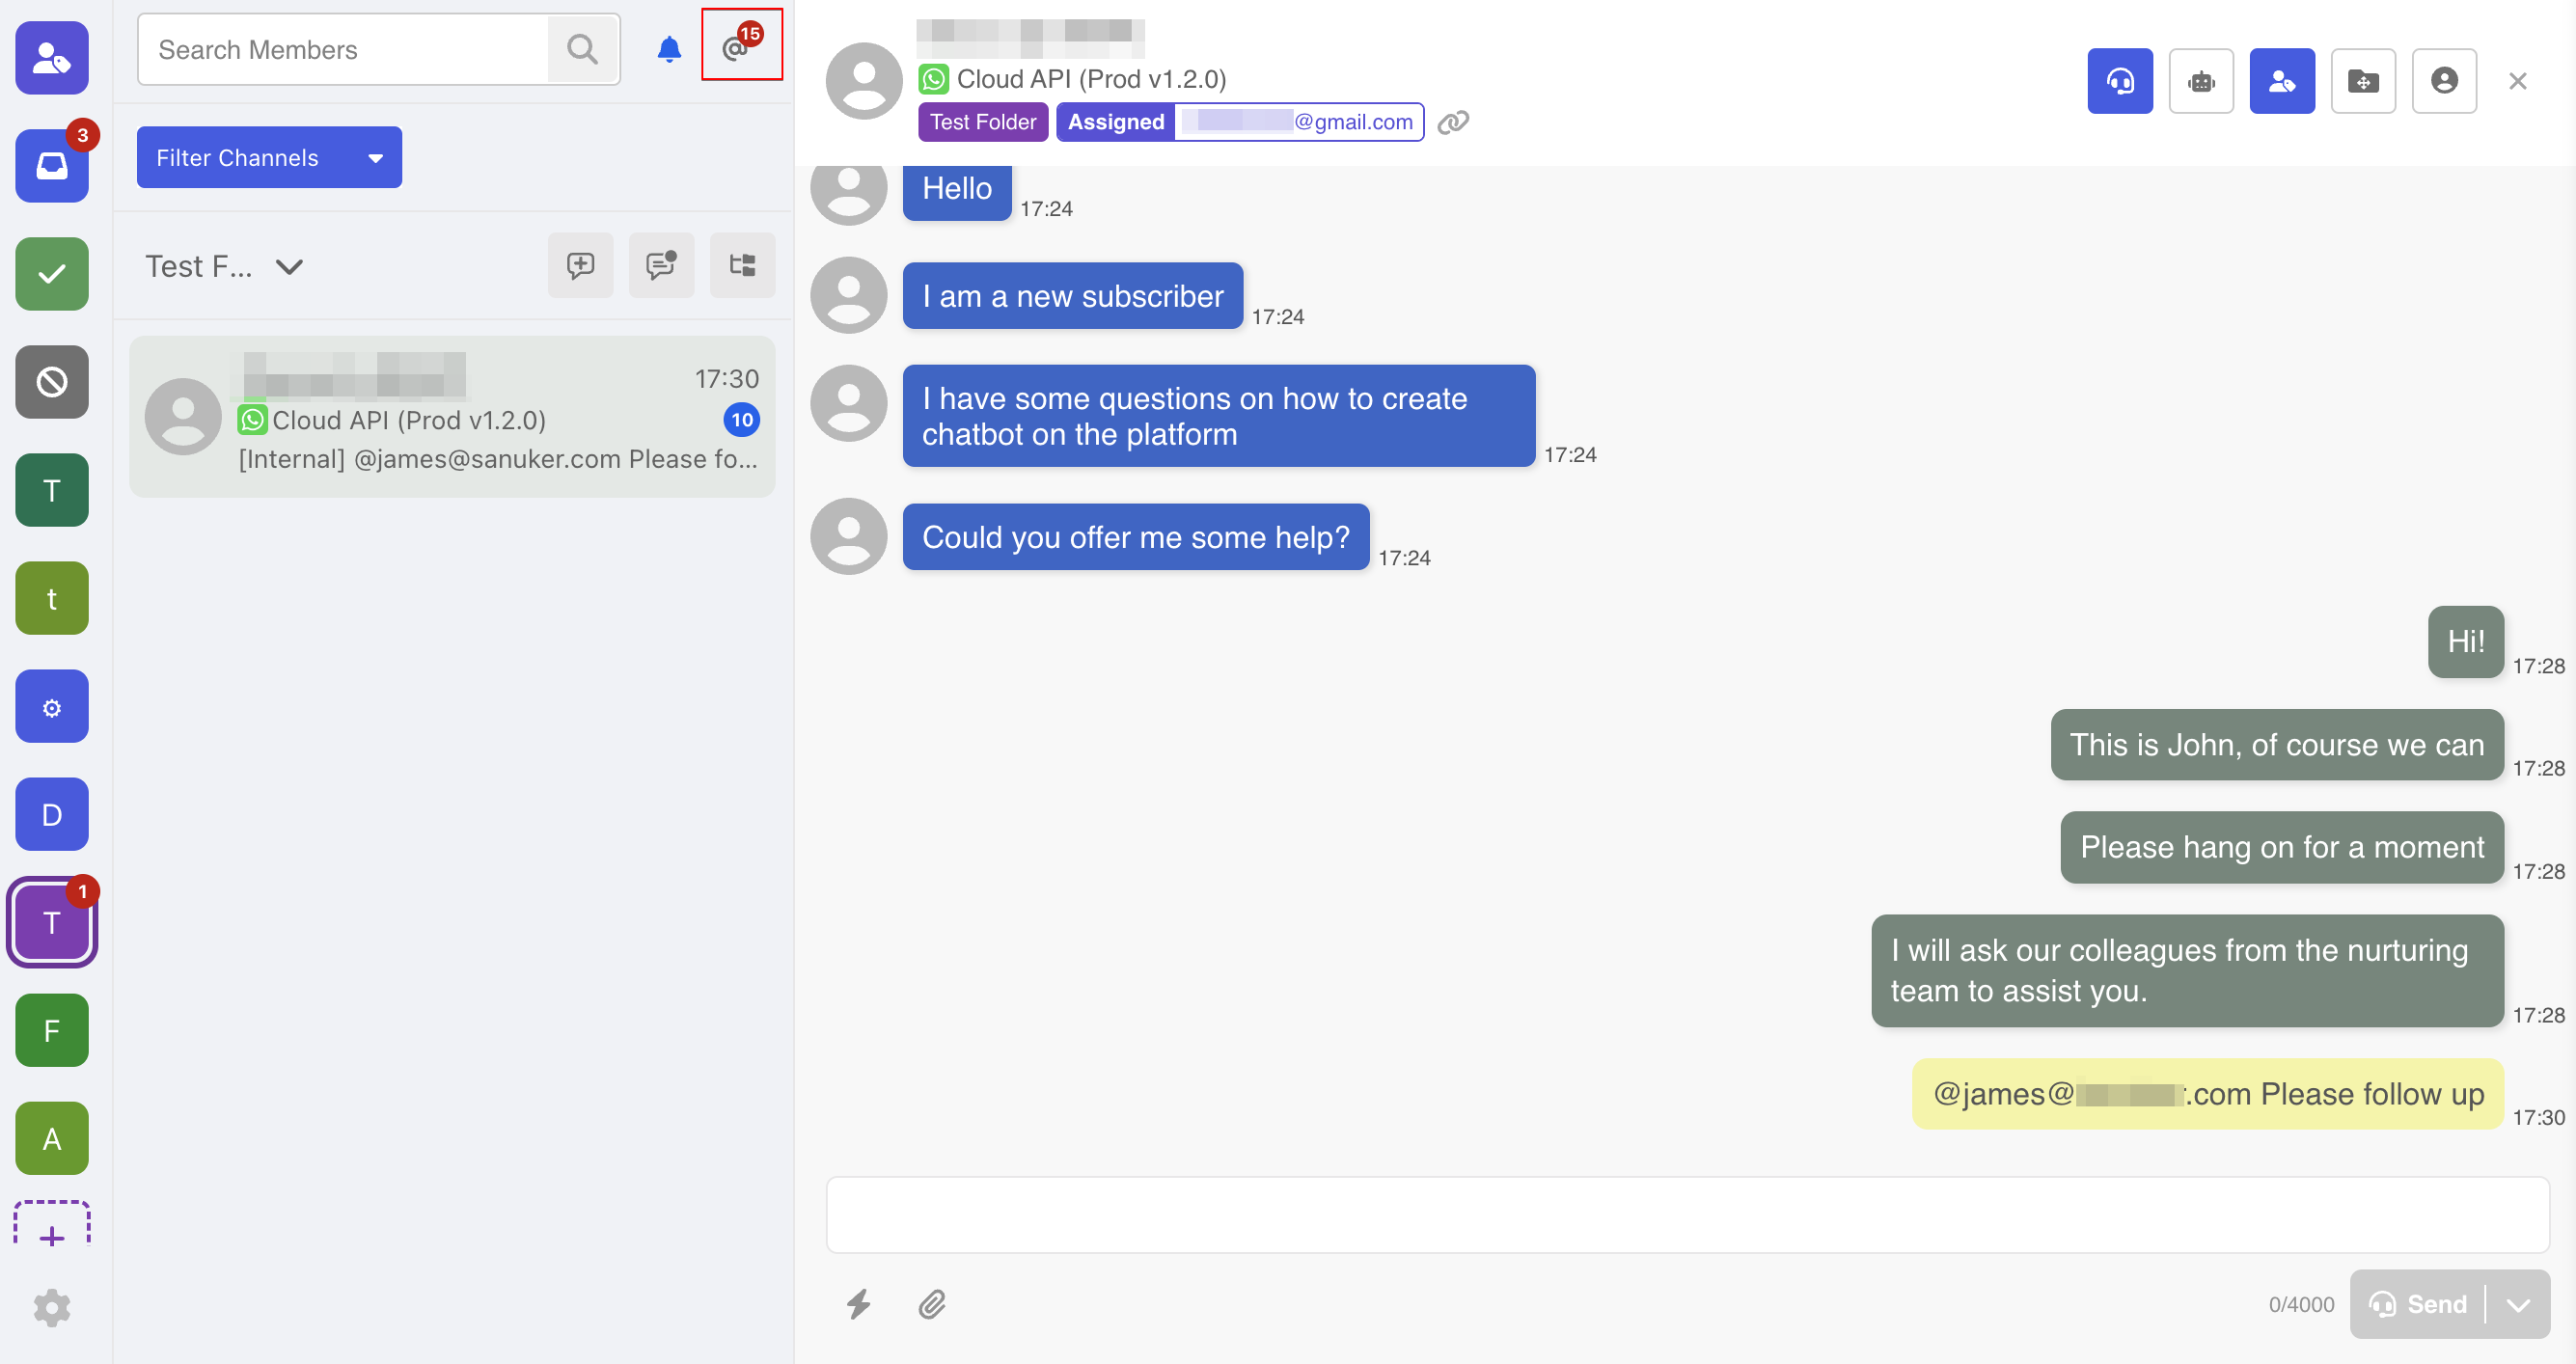
- You can click to open the mention notification panel, which contains all the record of you being tagged. And it also can redirect you to the relevant thread.
Filter Thread
Agents can filter and search threads based on their preferred criteria, which is useful for managing large amount of conversations.
Filter Threads by Channel
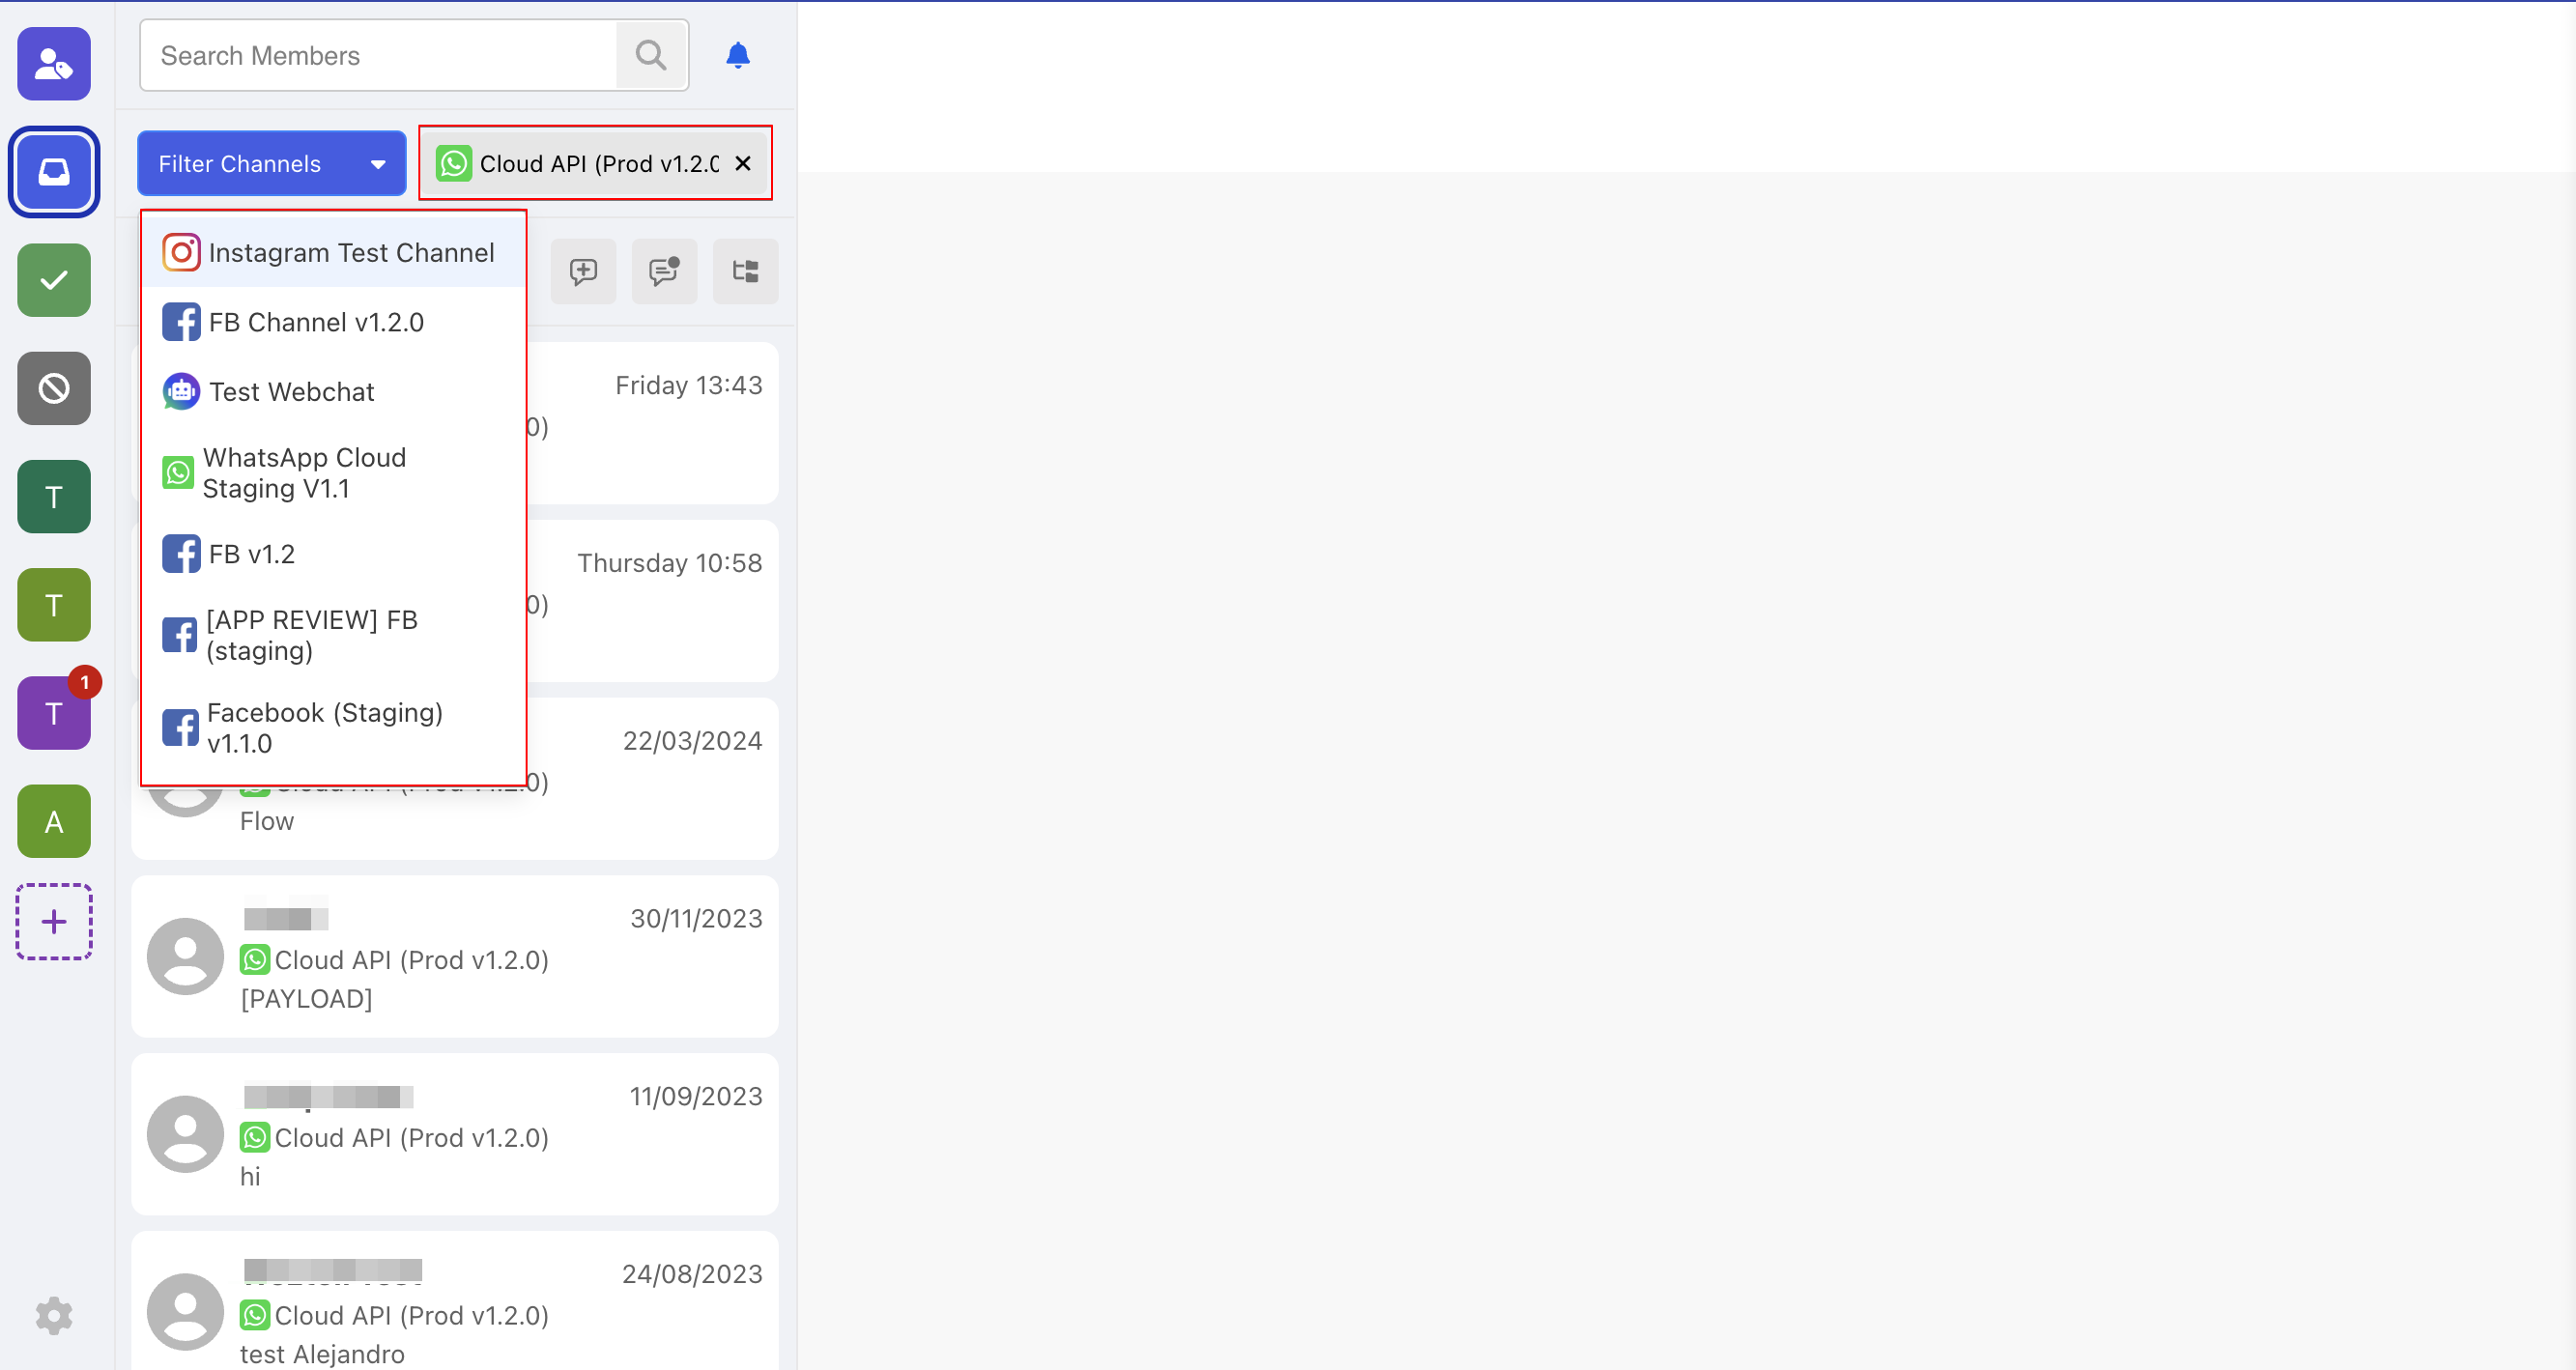
- In a folder, you can filter the threads by channel. To do this, you can select "Filter Channels".
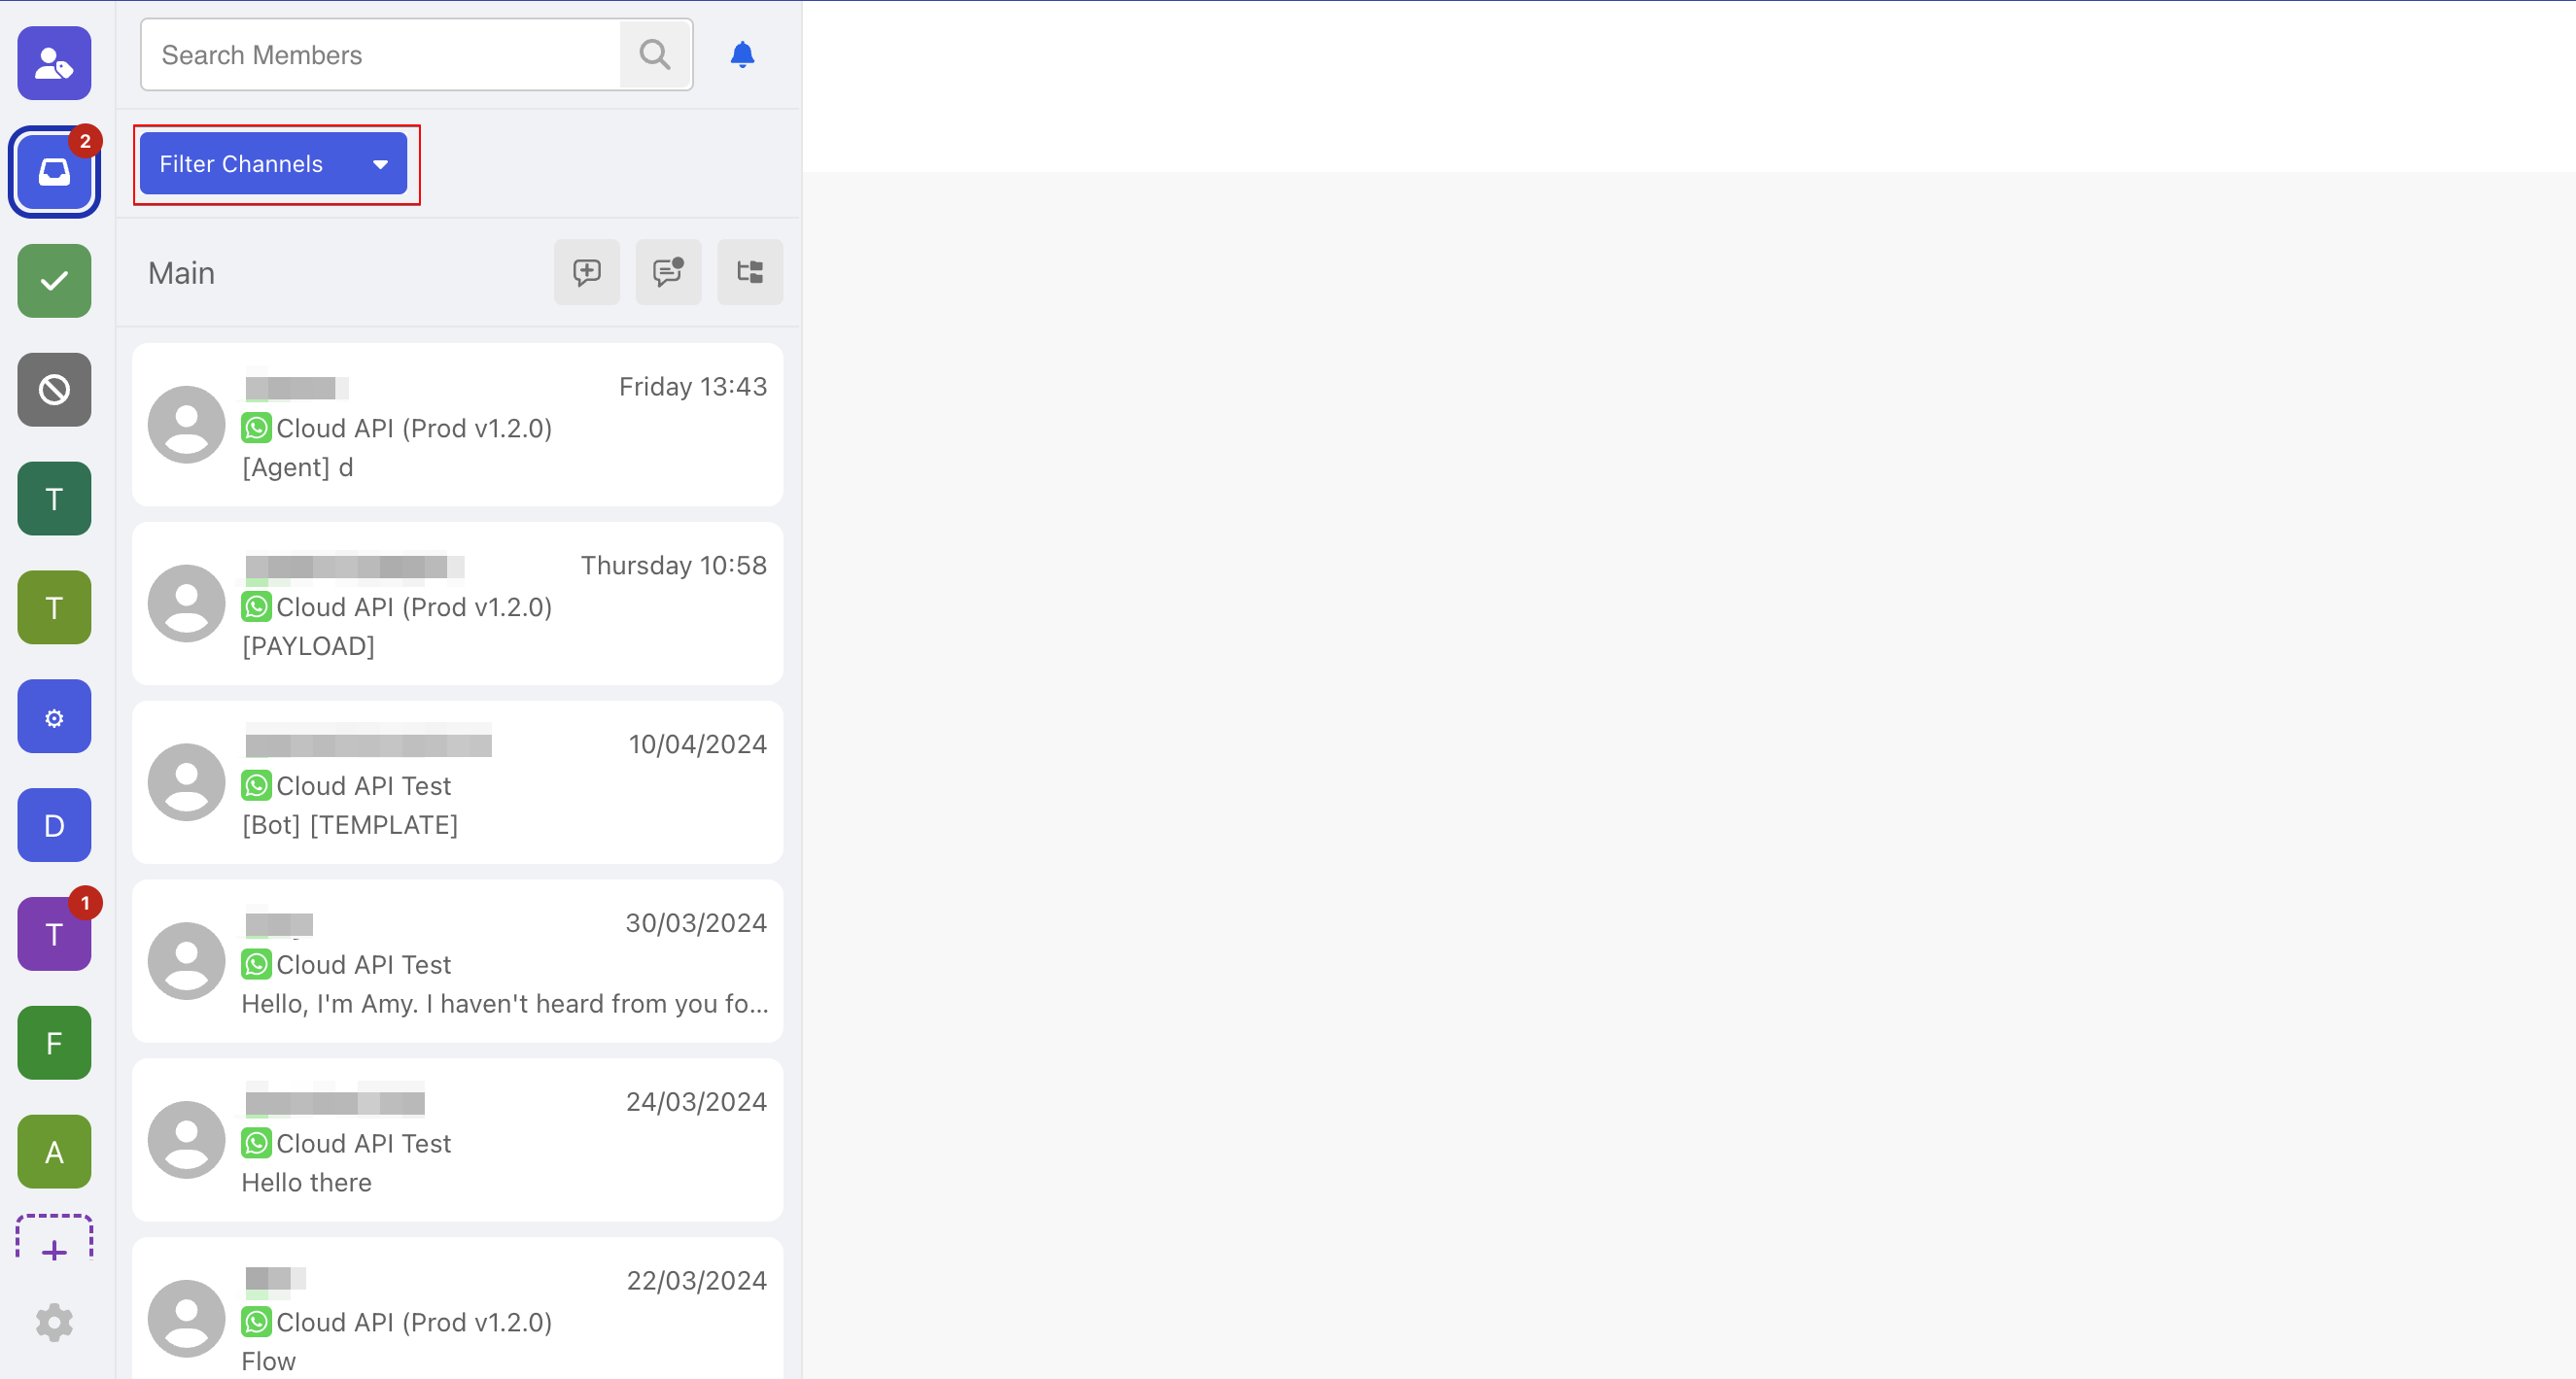
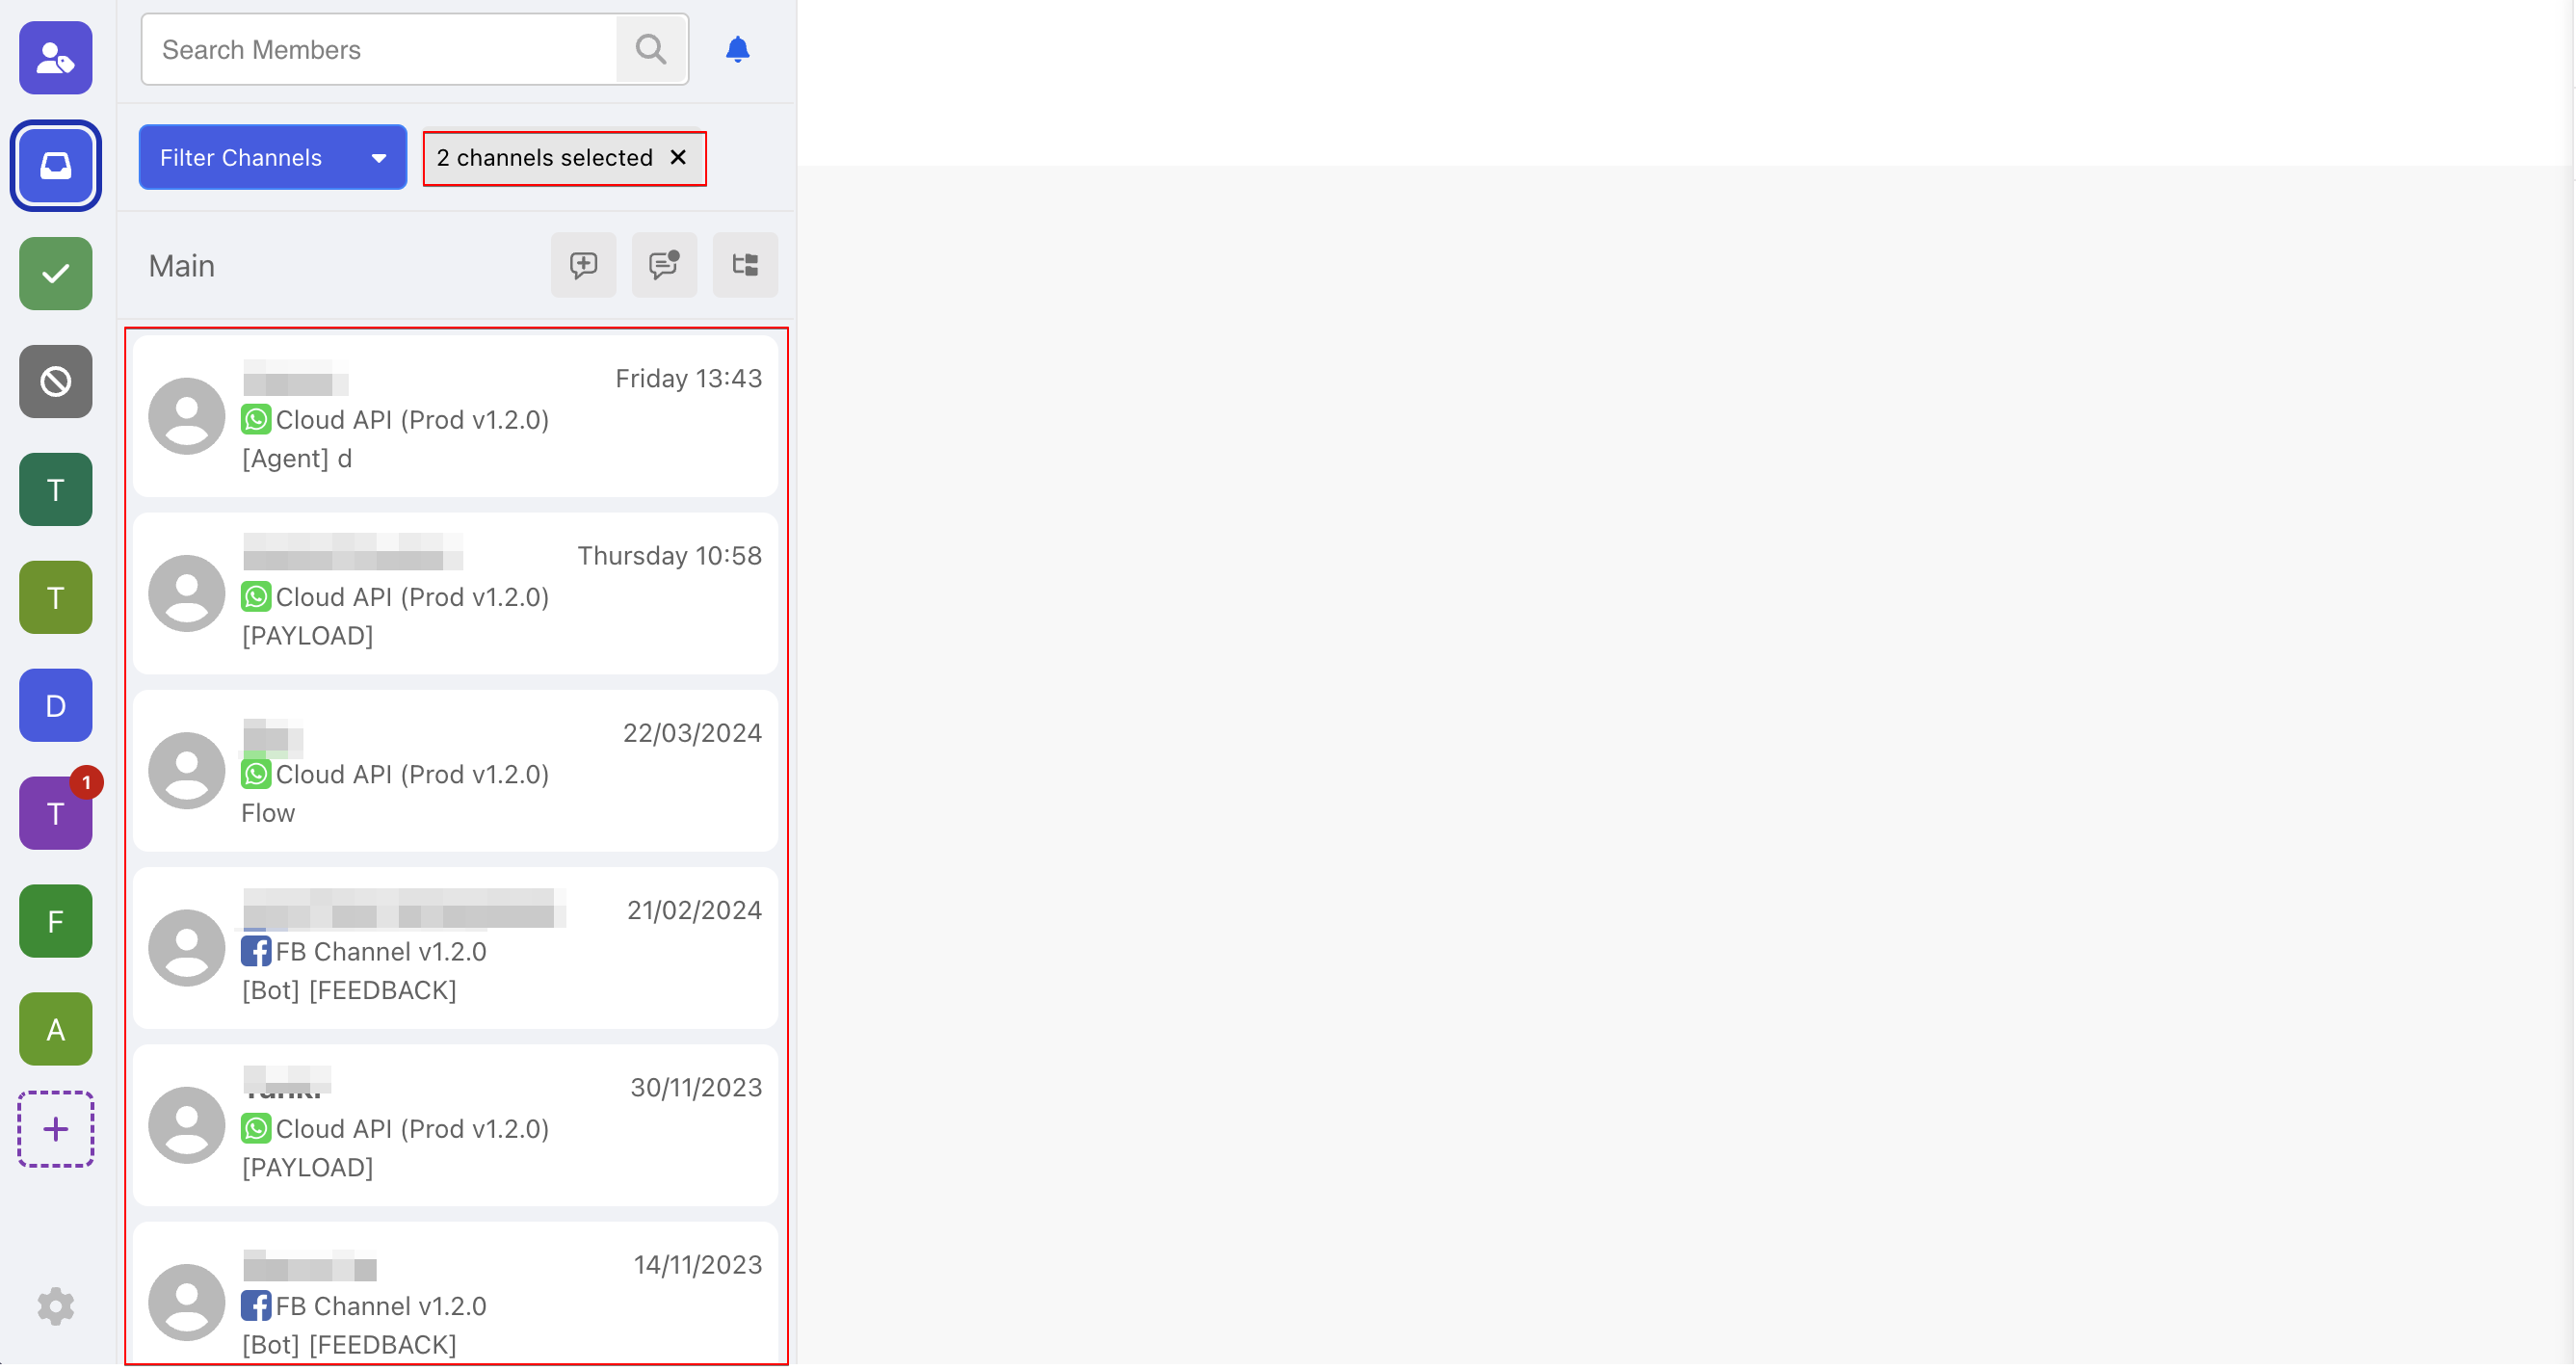
- Select one or more than one channels that you would like to filter by.
- The filtered results will be displayed in the thread list.
tip
Filter Channels is a folder-based filtering, you need to switch to another folder in order to view the filtered results of that folder.
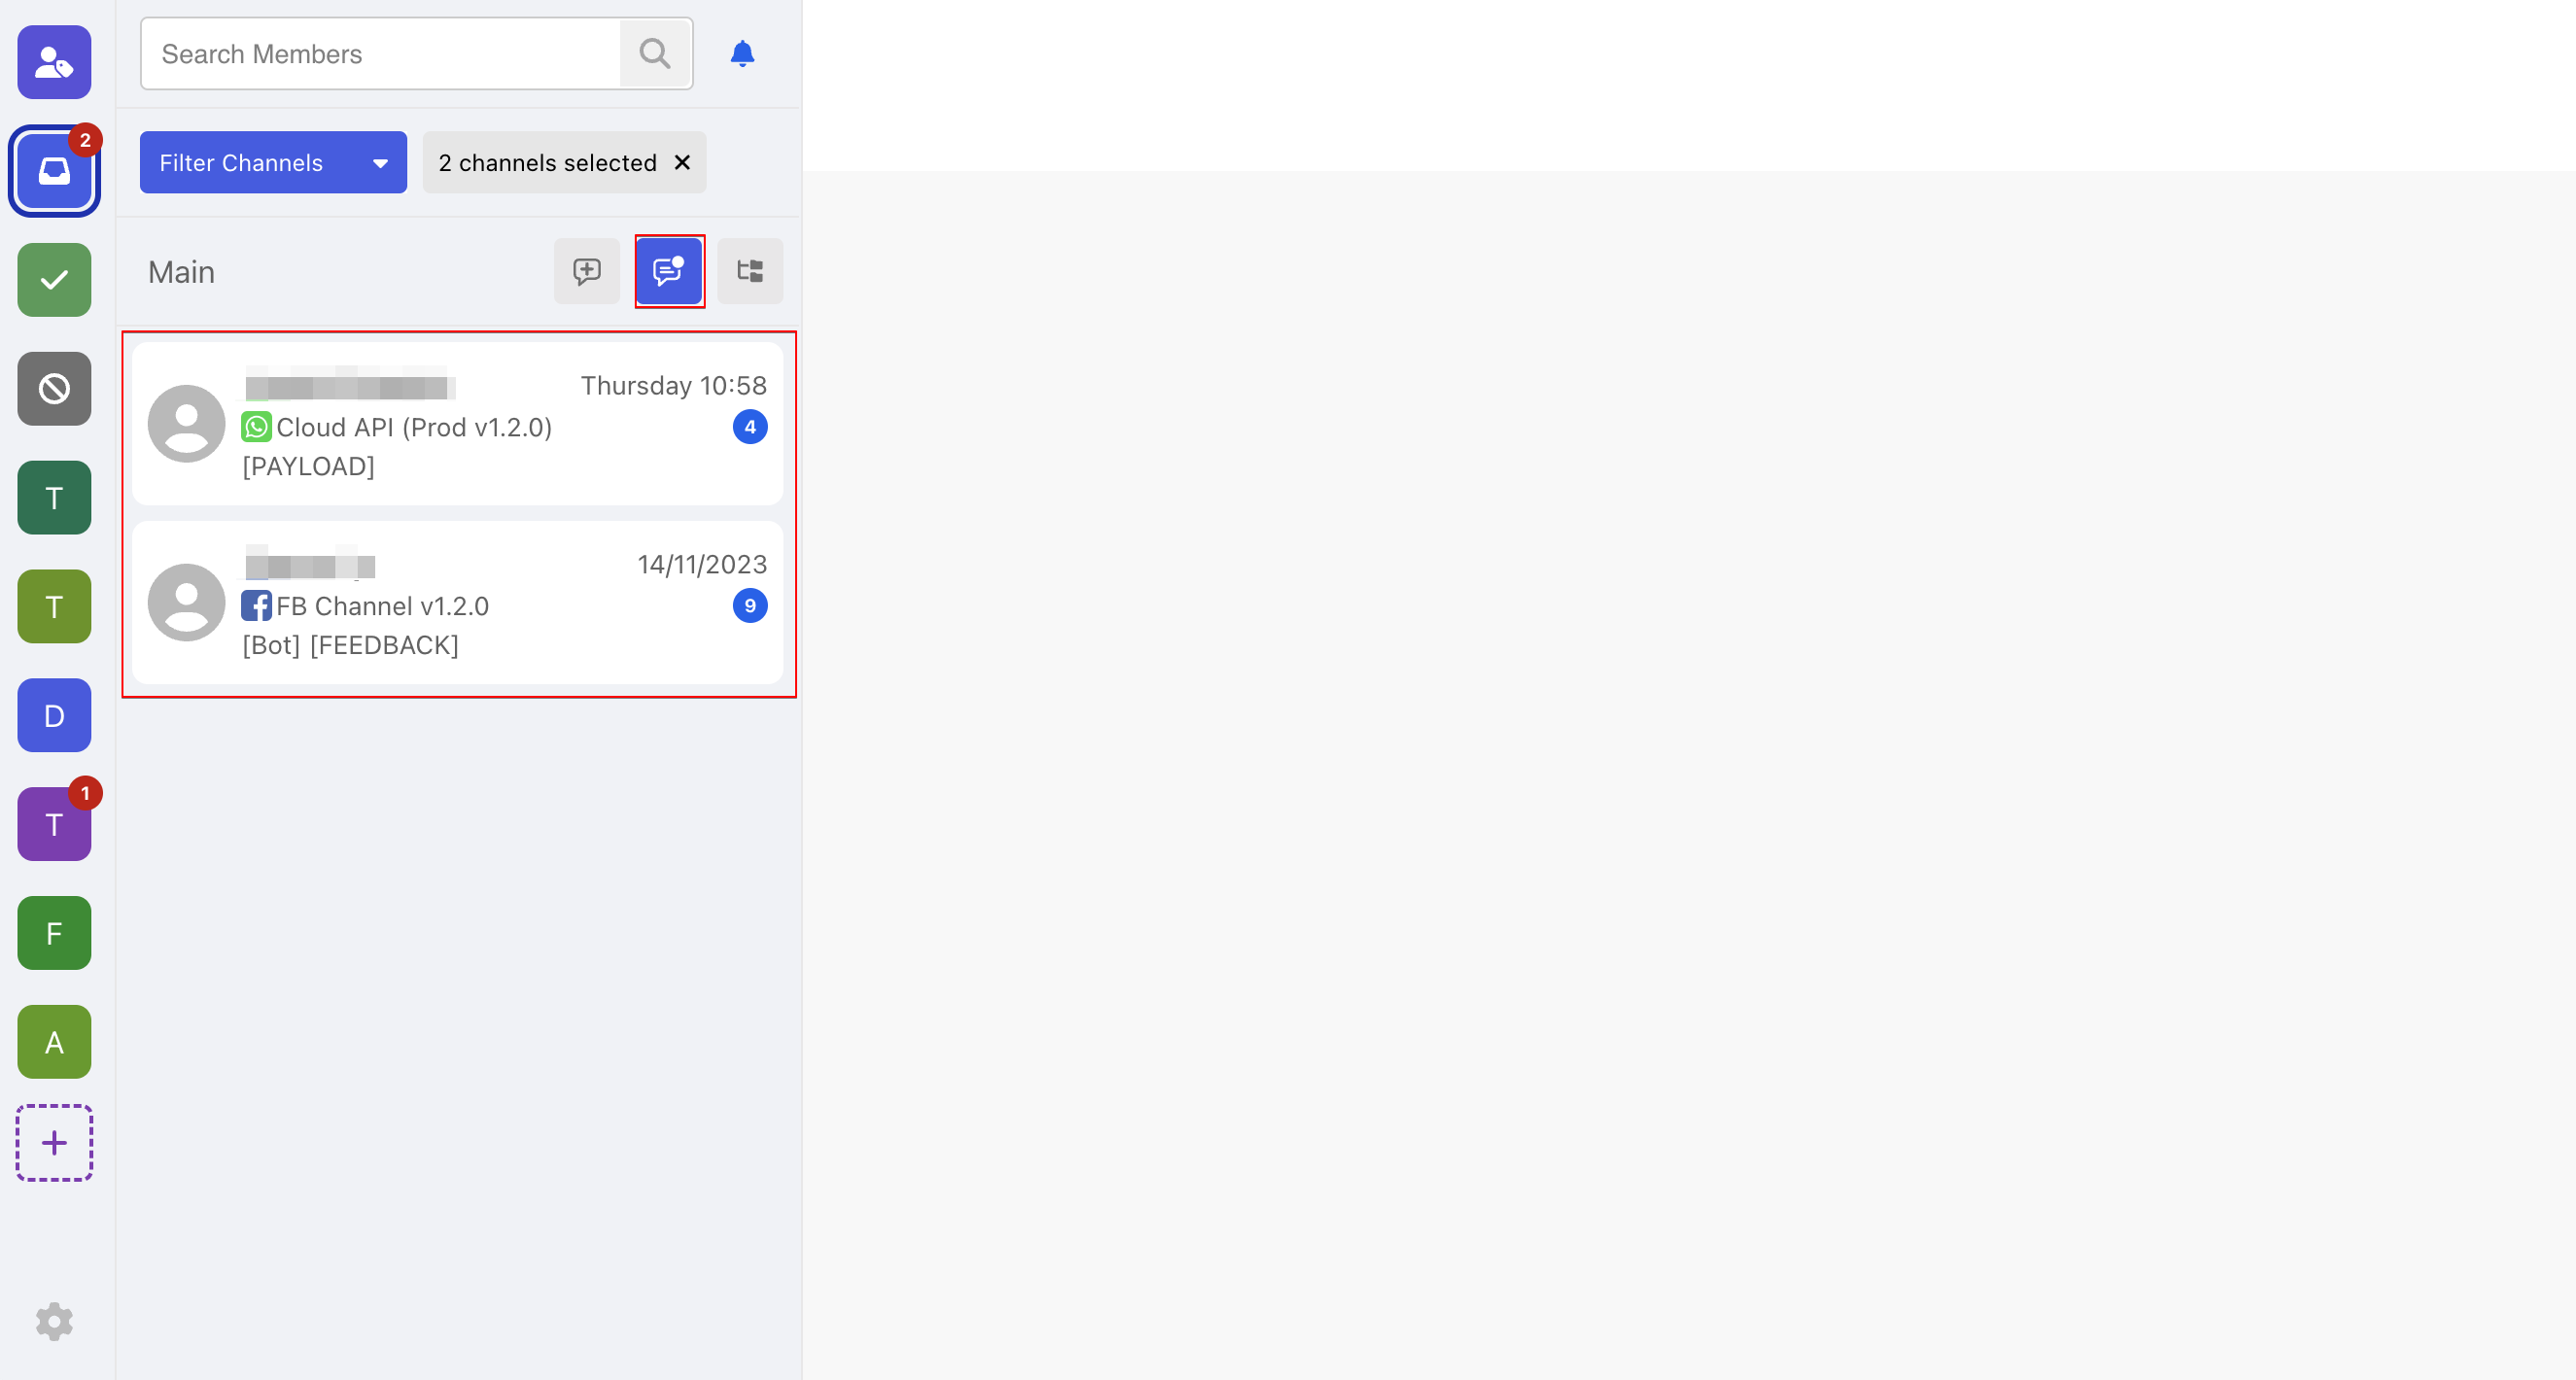
Filter Unread Threads
Click on Filter Unread Threads to only list out the threads with unread messages.
Search Threads
- To search threads, select the "Search" icon at the top left.
Reminder
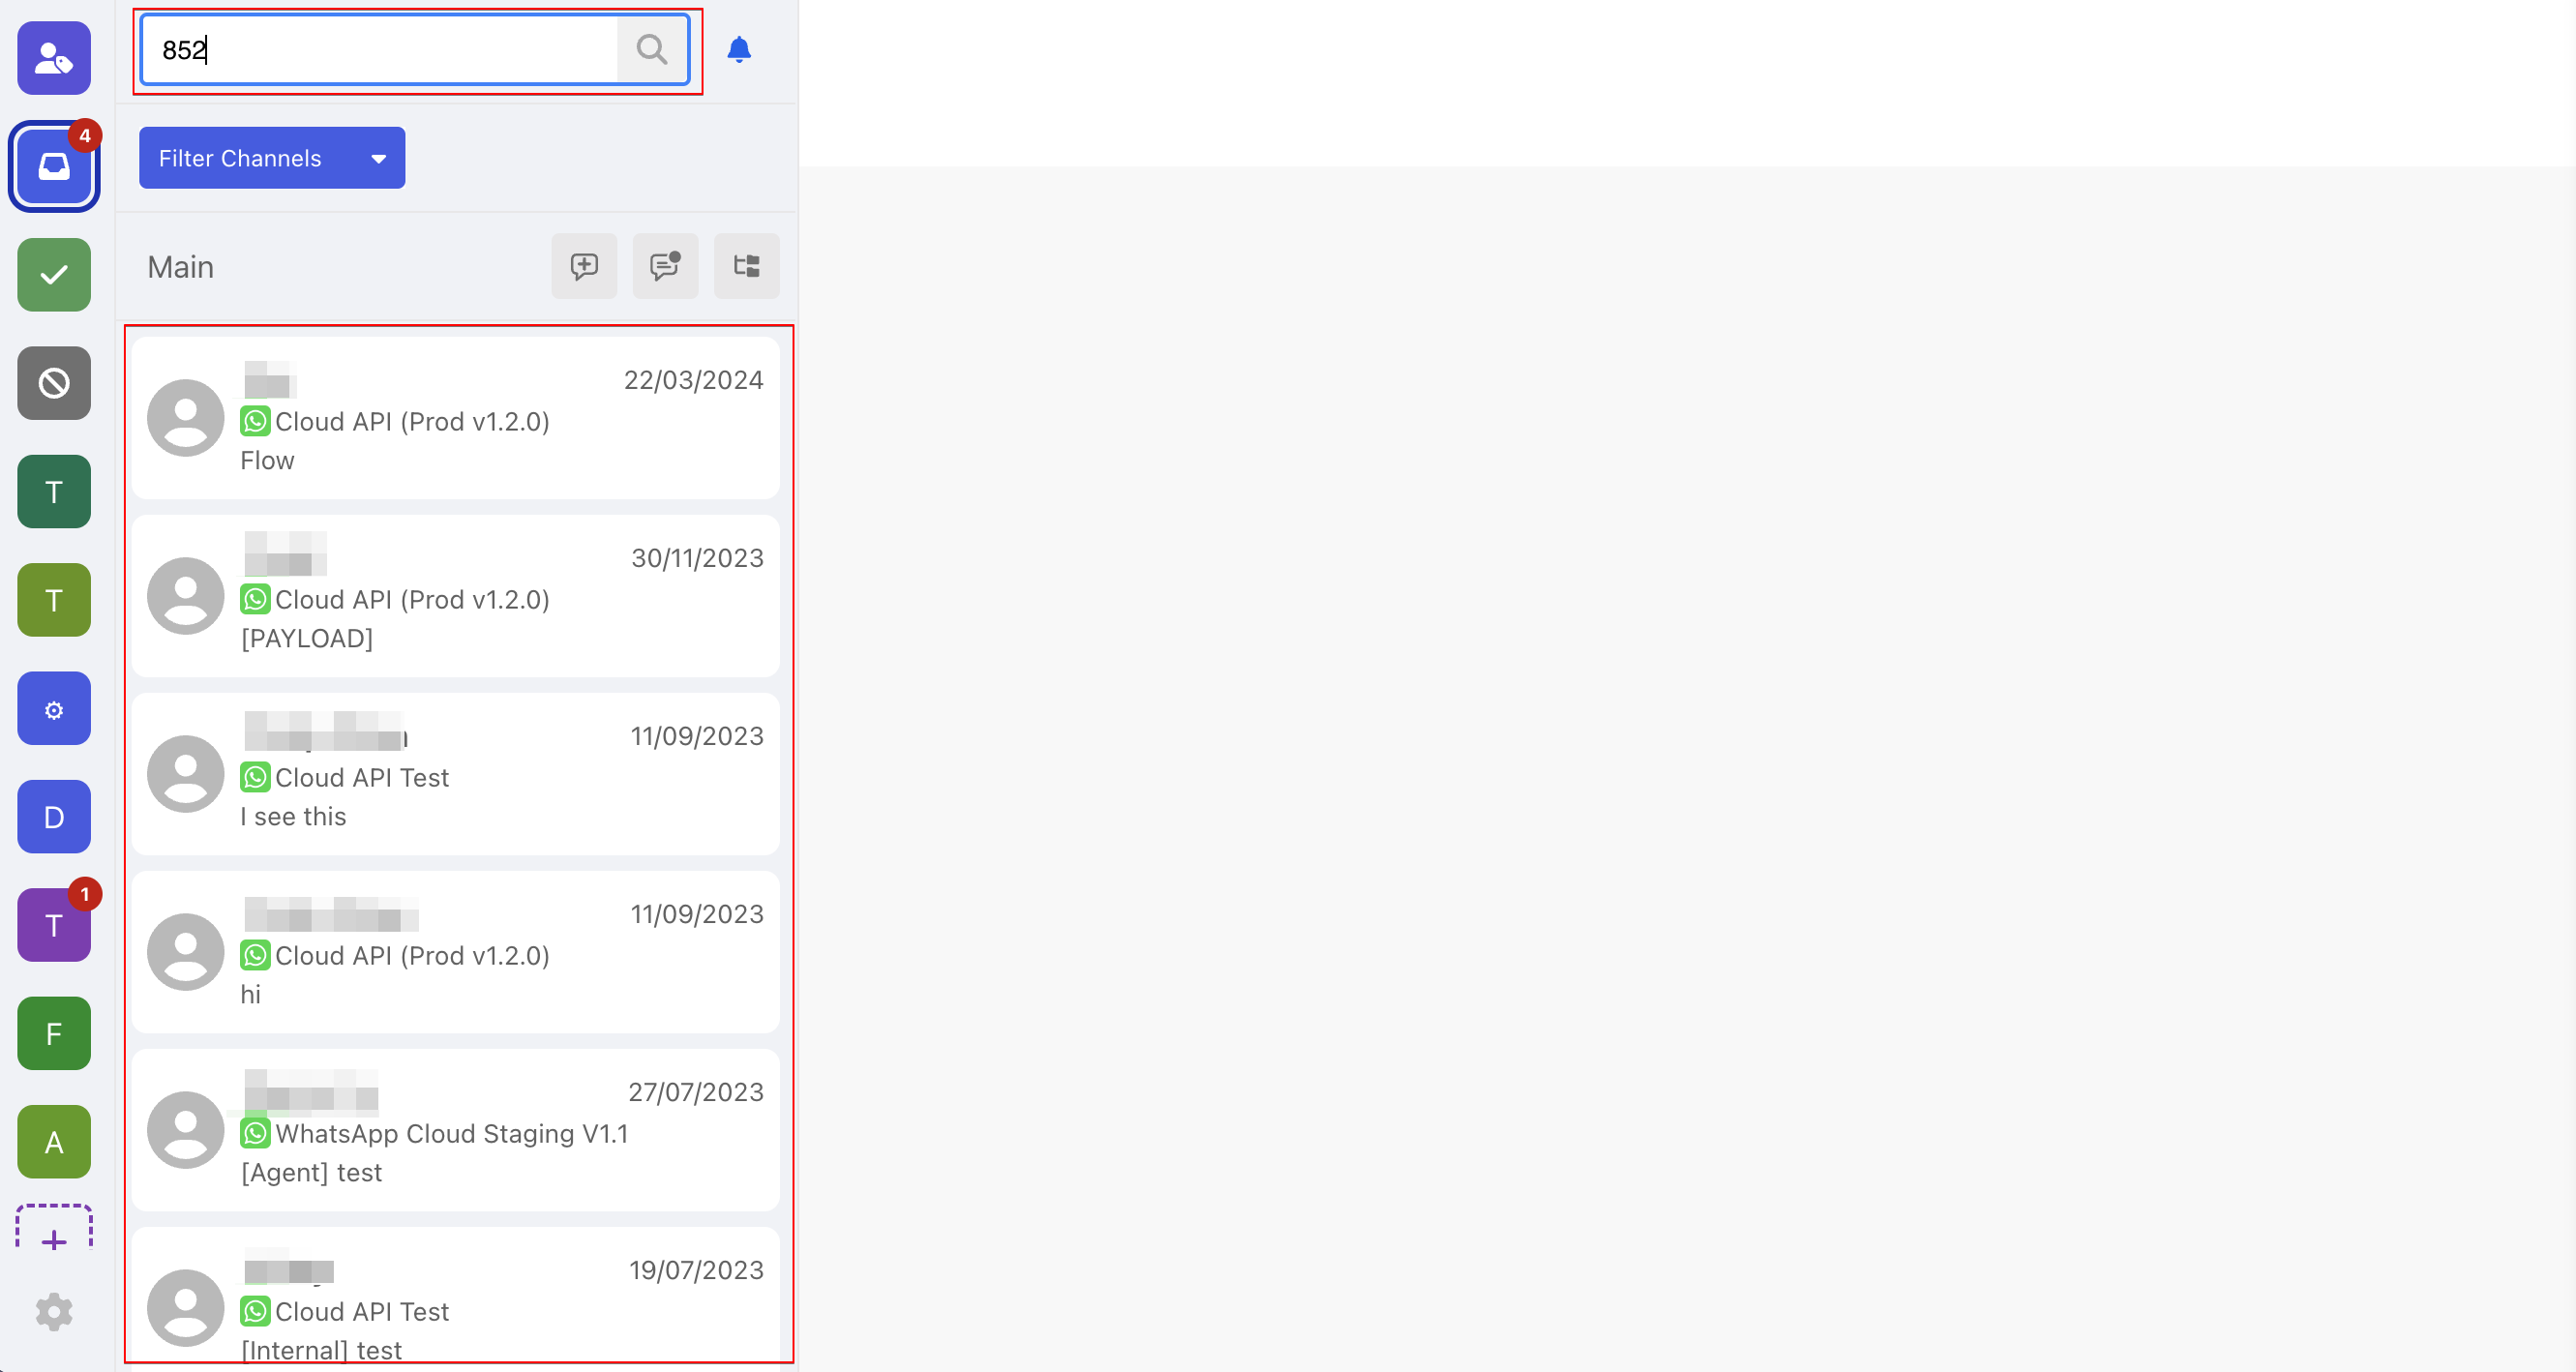
- Search Threads is not folder-based, it will present results across different folders.
- When Search Threads are applied, the result will be fixed. The new message afterwards will not be reflected until the you apply the filter again.
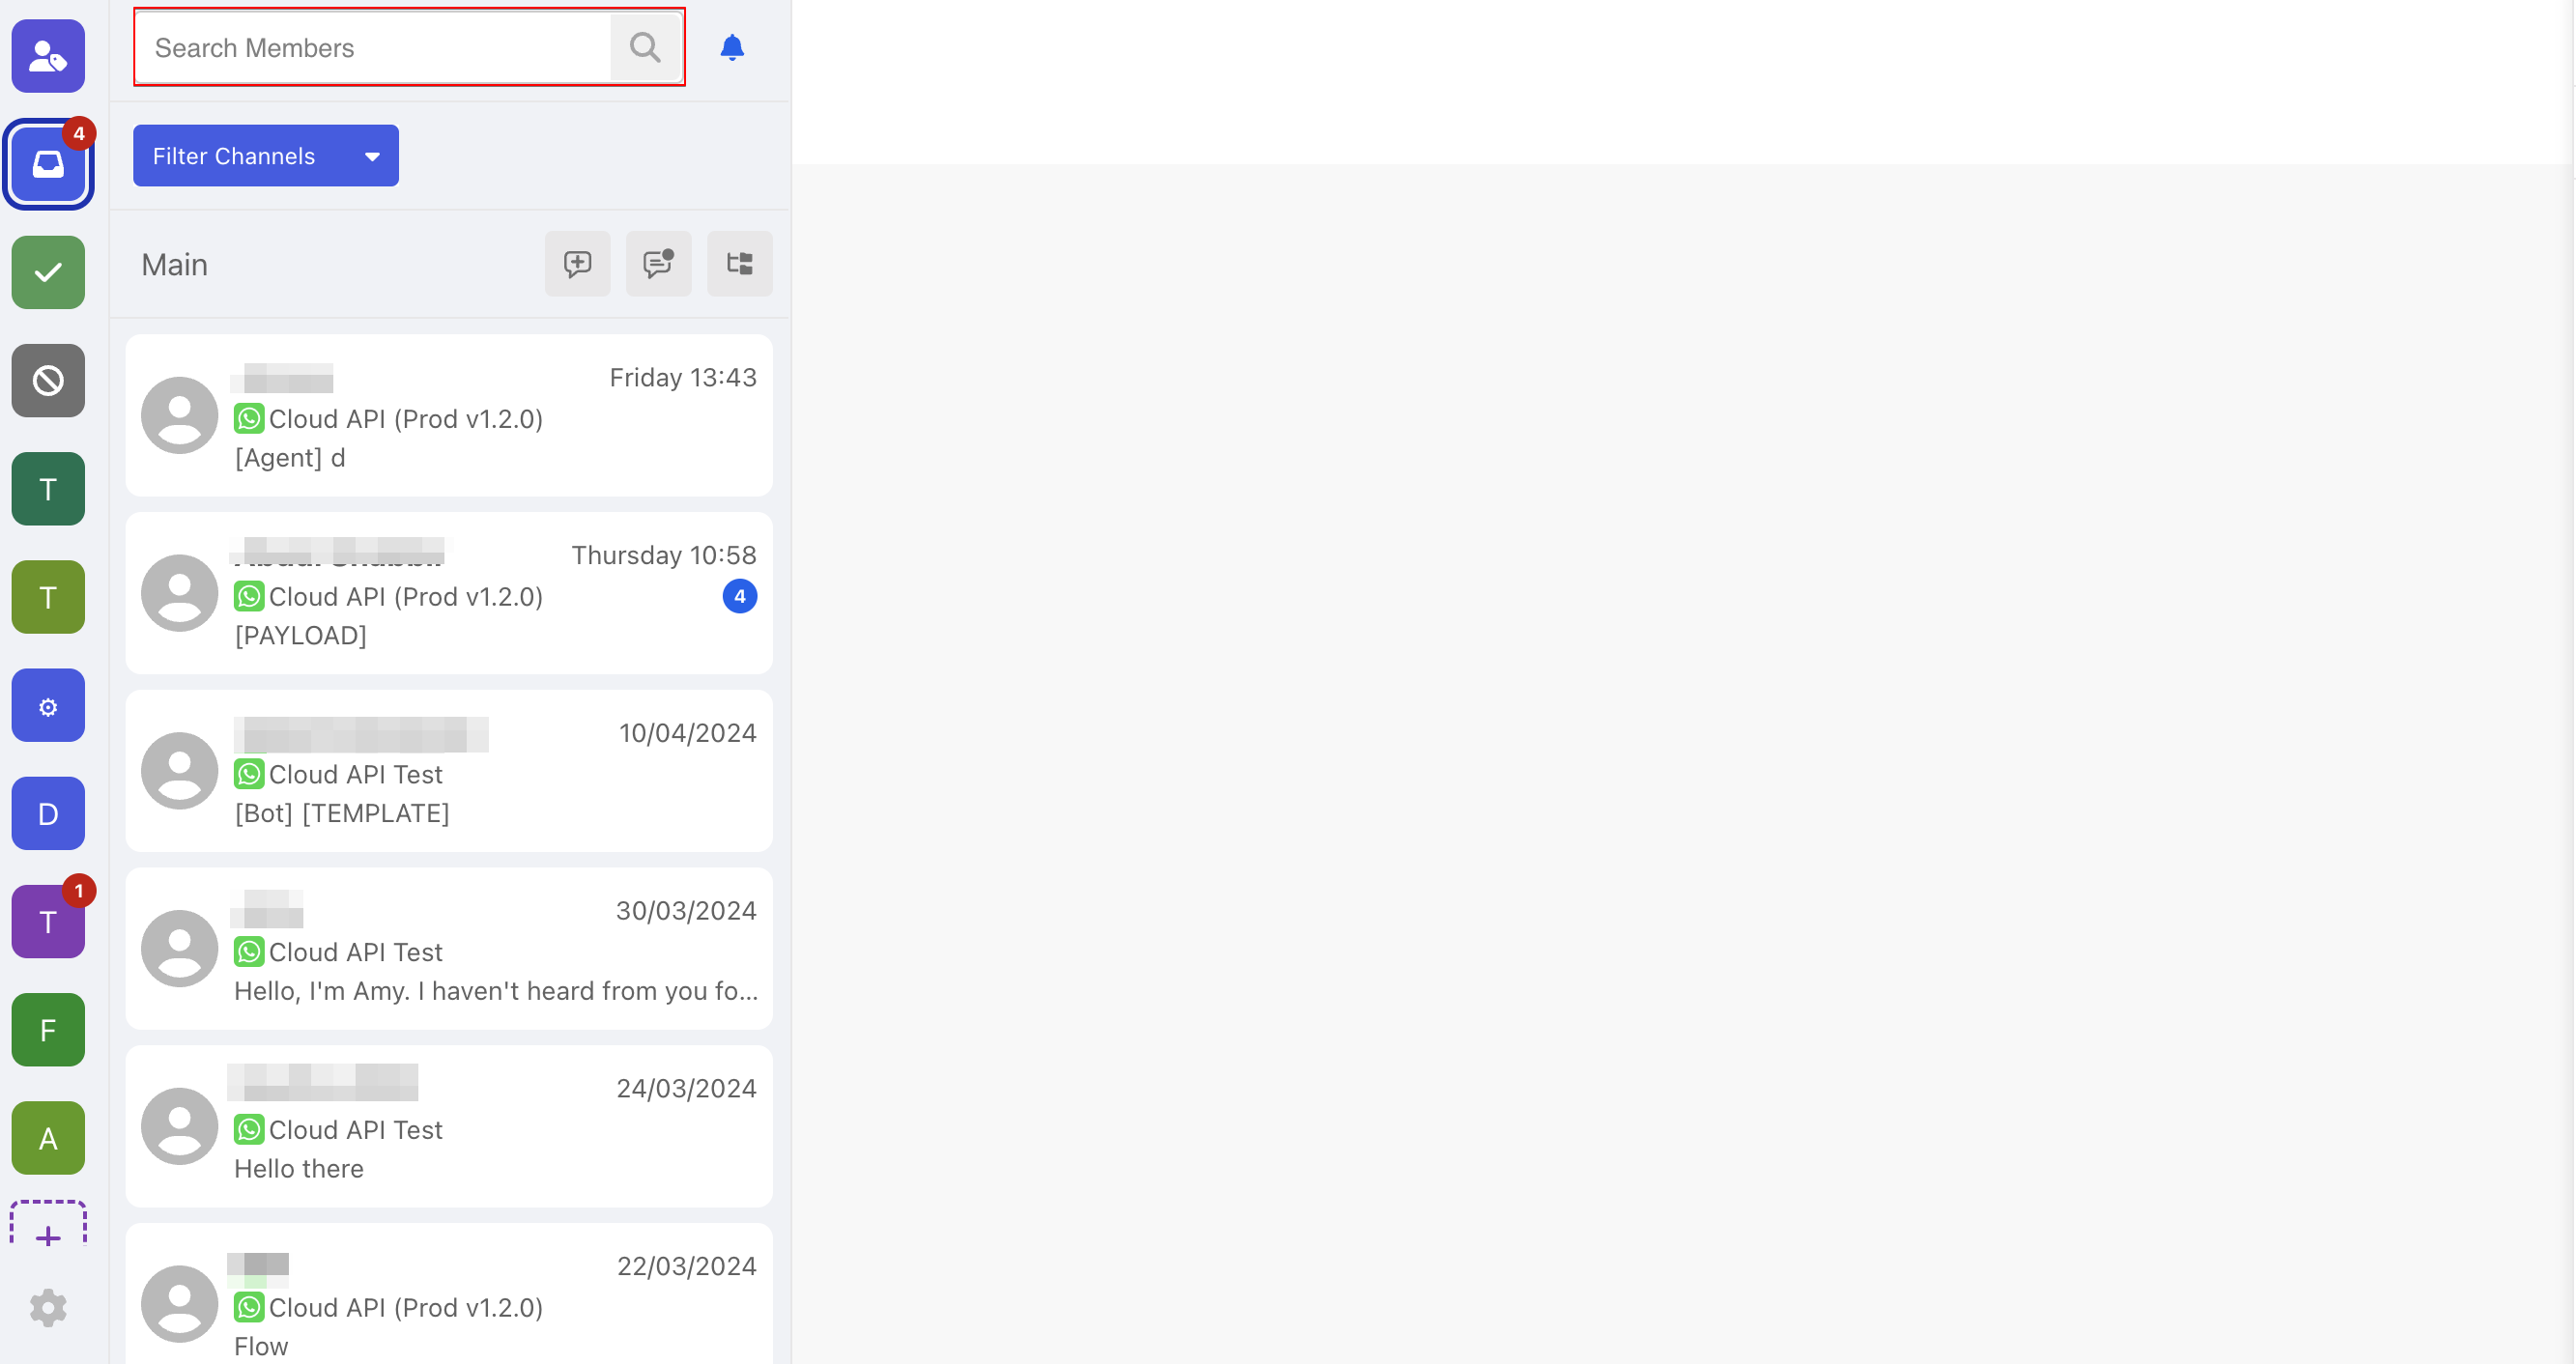
- You can search by the external ID or member's name.
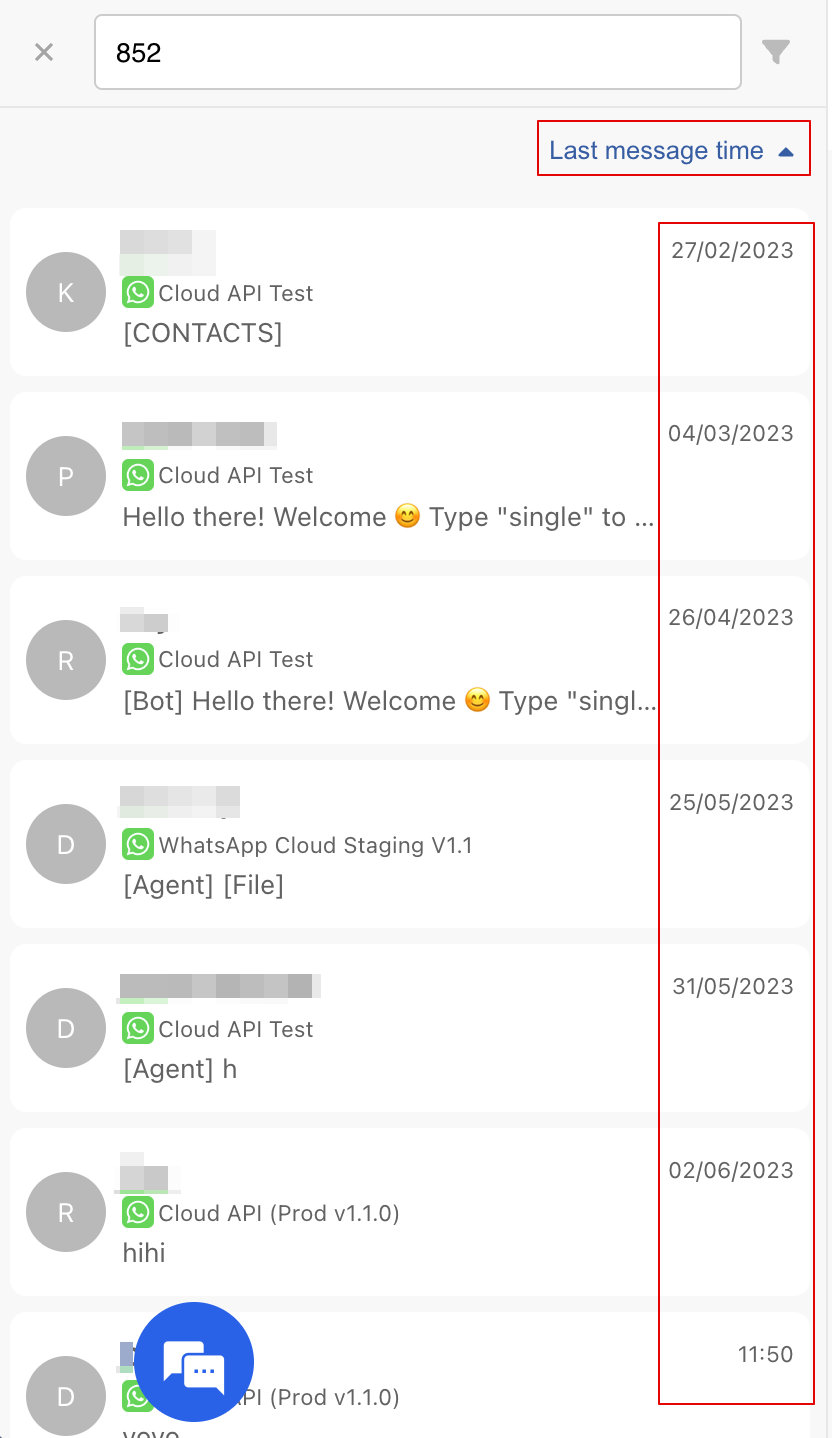
- The search result can be reordered in chronologically ascending or descending order.
- The threads can be threaded filter by selecting the "Filter" icon.
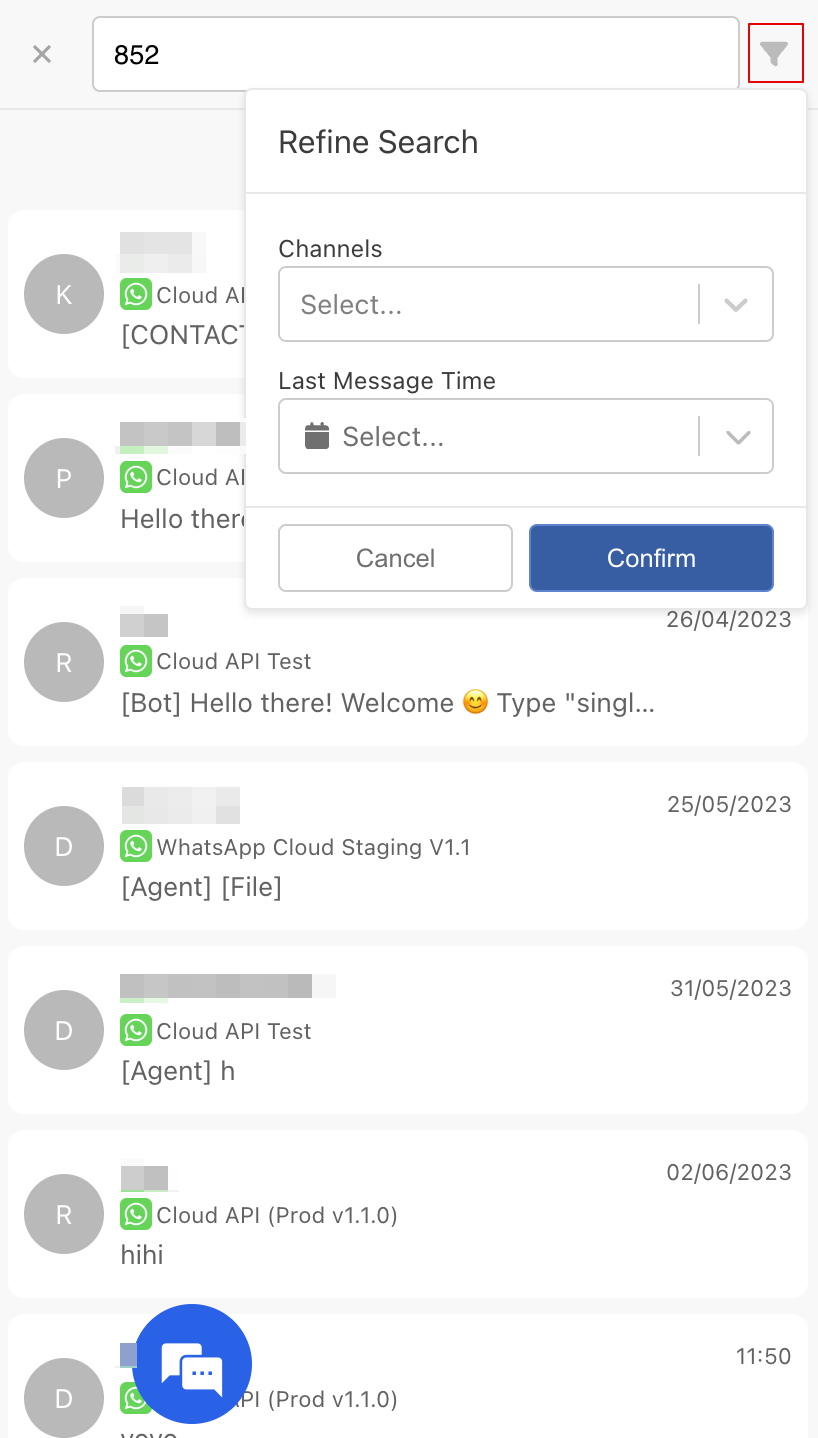
- You can filter by "Channels" and "Last Message Time".
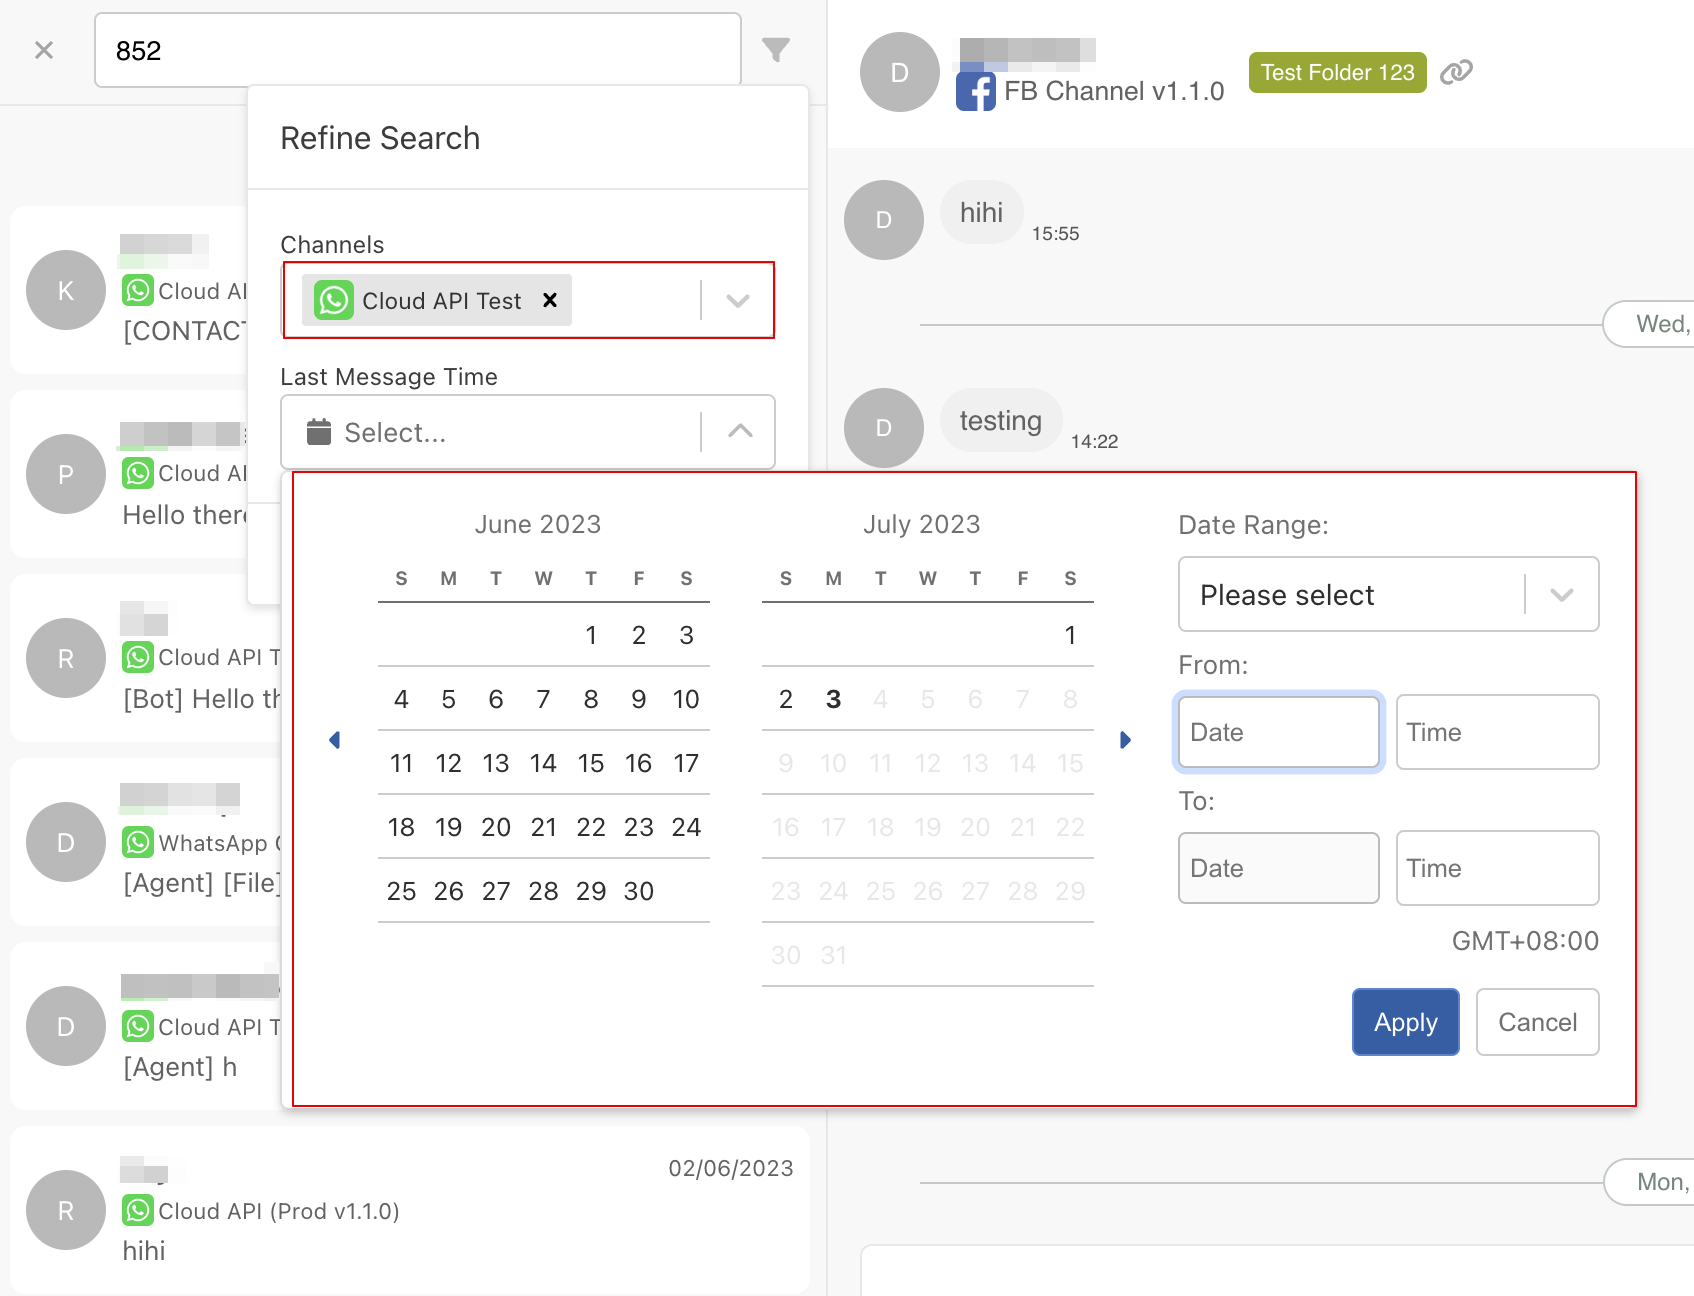
- Click "Confirm" to apply the filter.

Actions
Actions enable the agents to apply features which is specific to another integration. For example, sending a WhatsApp message template directly in the thread.
Send Message Template
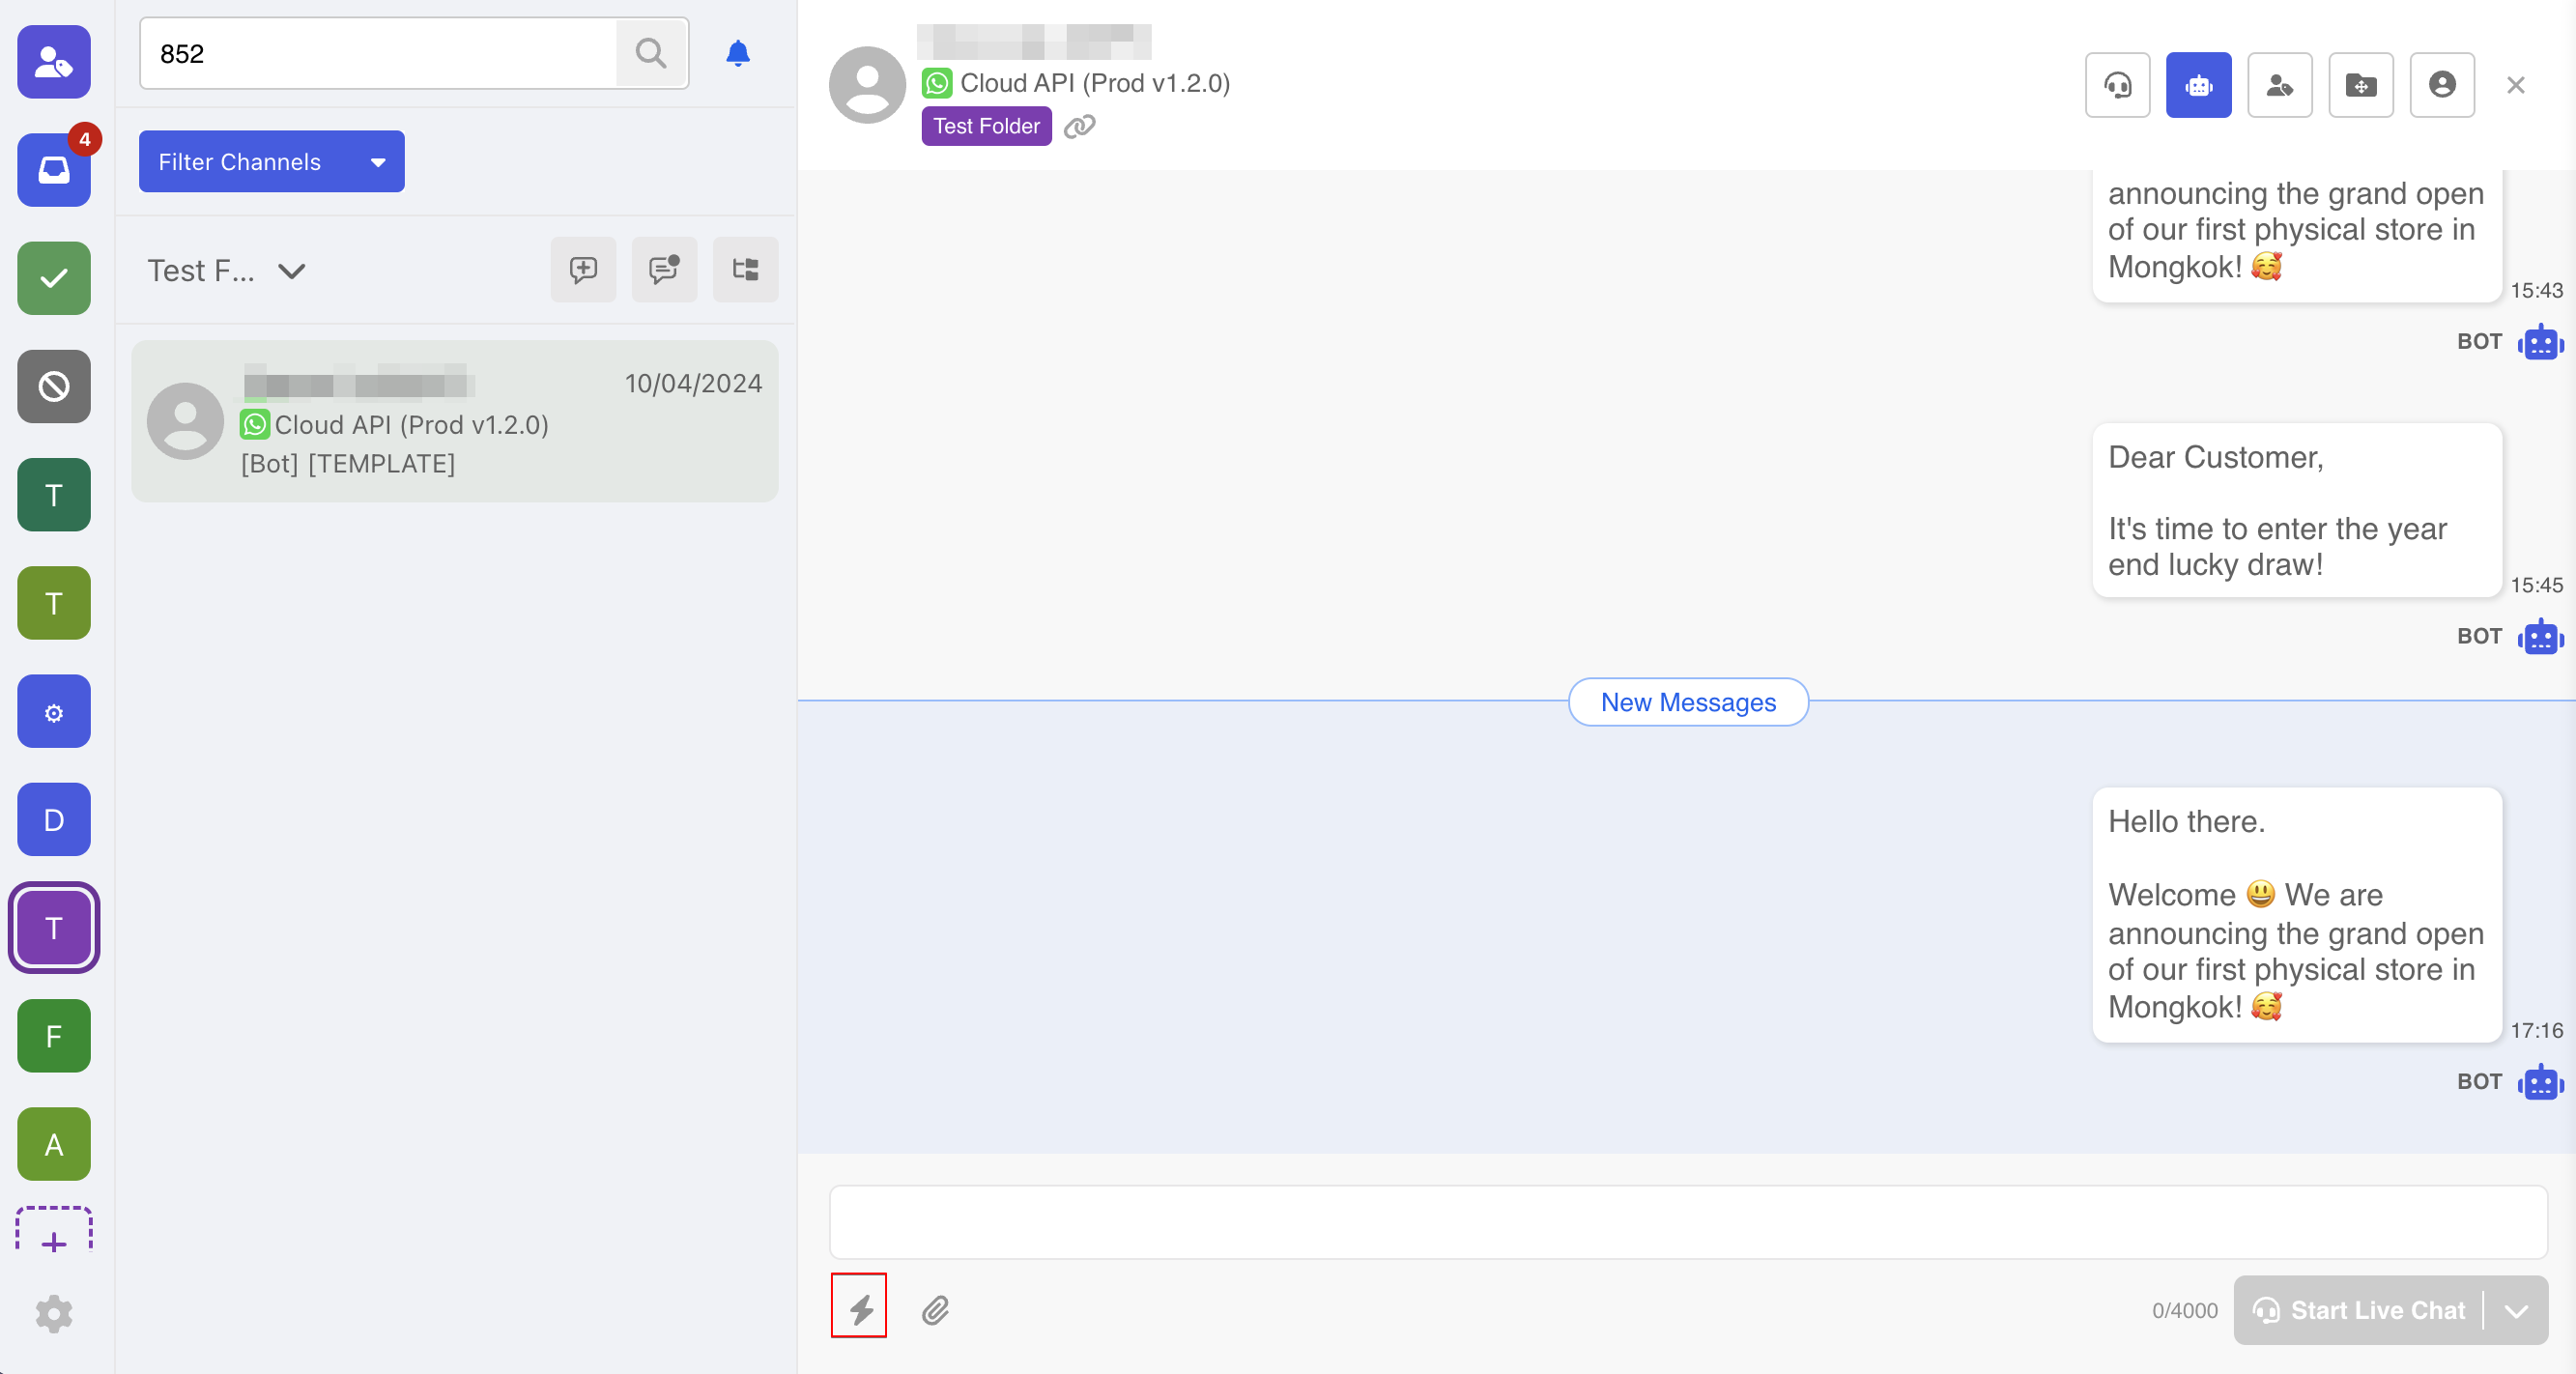
- The inbox integration provides shortcut to send WhatsApp Message Template in the thread efficiently. To do so, start by selecting "Action".
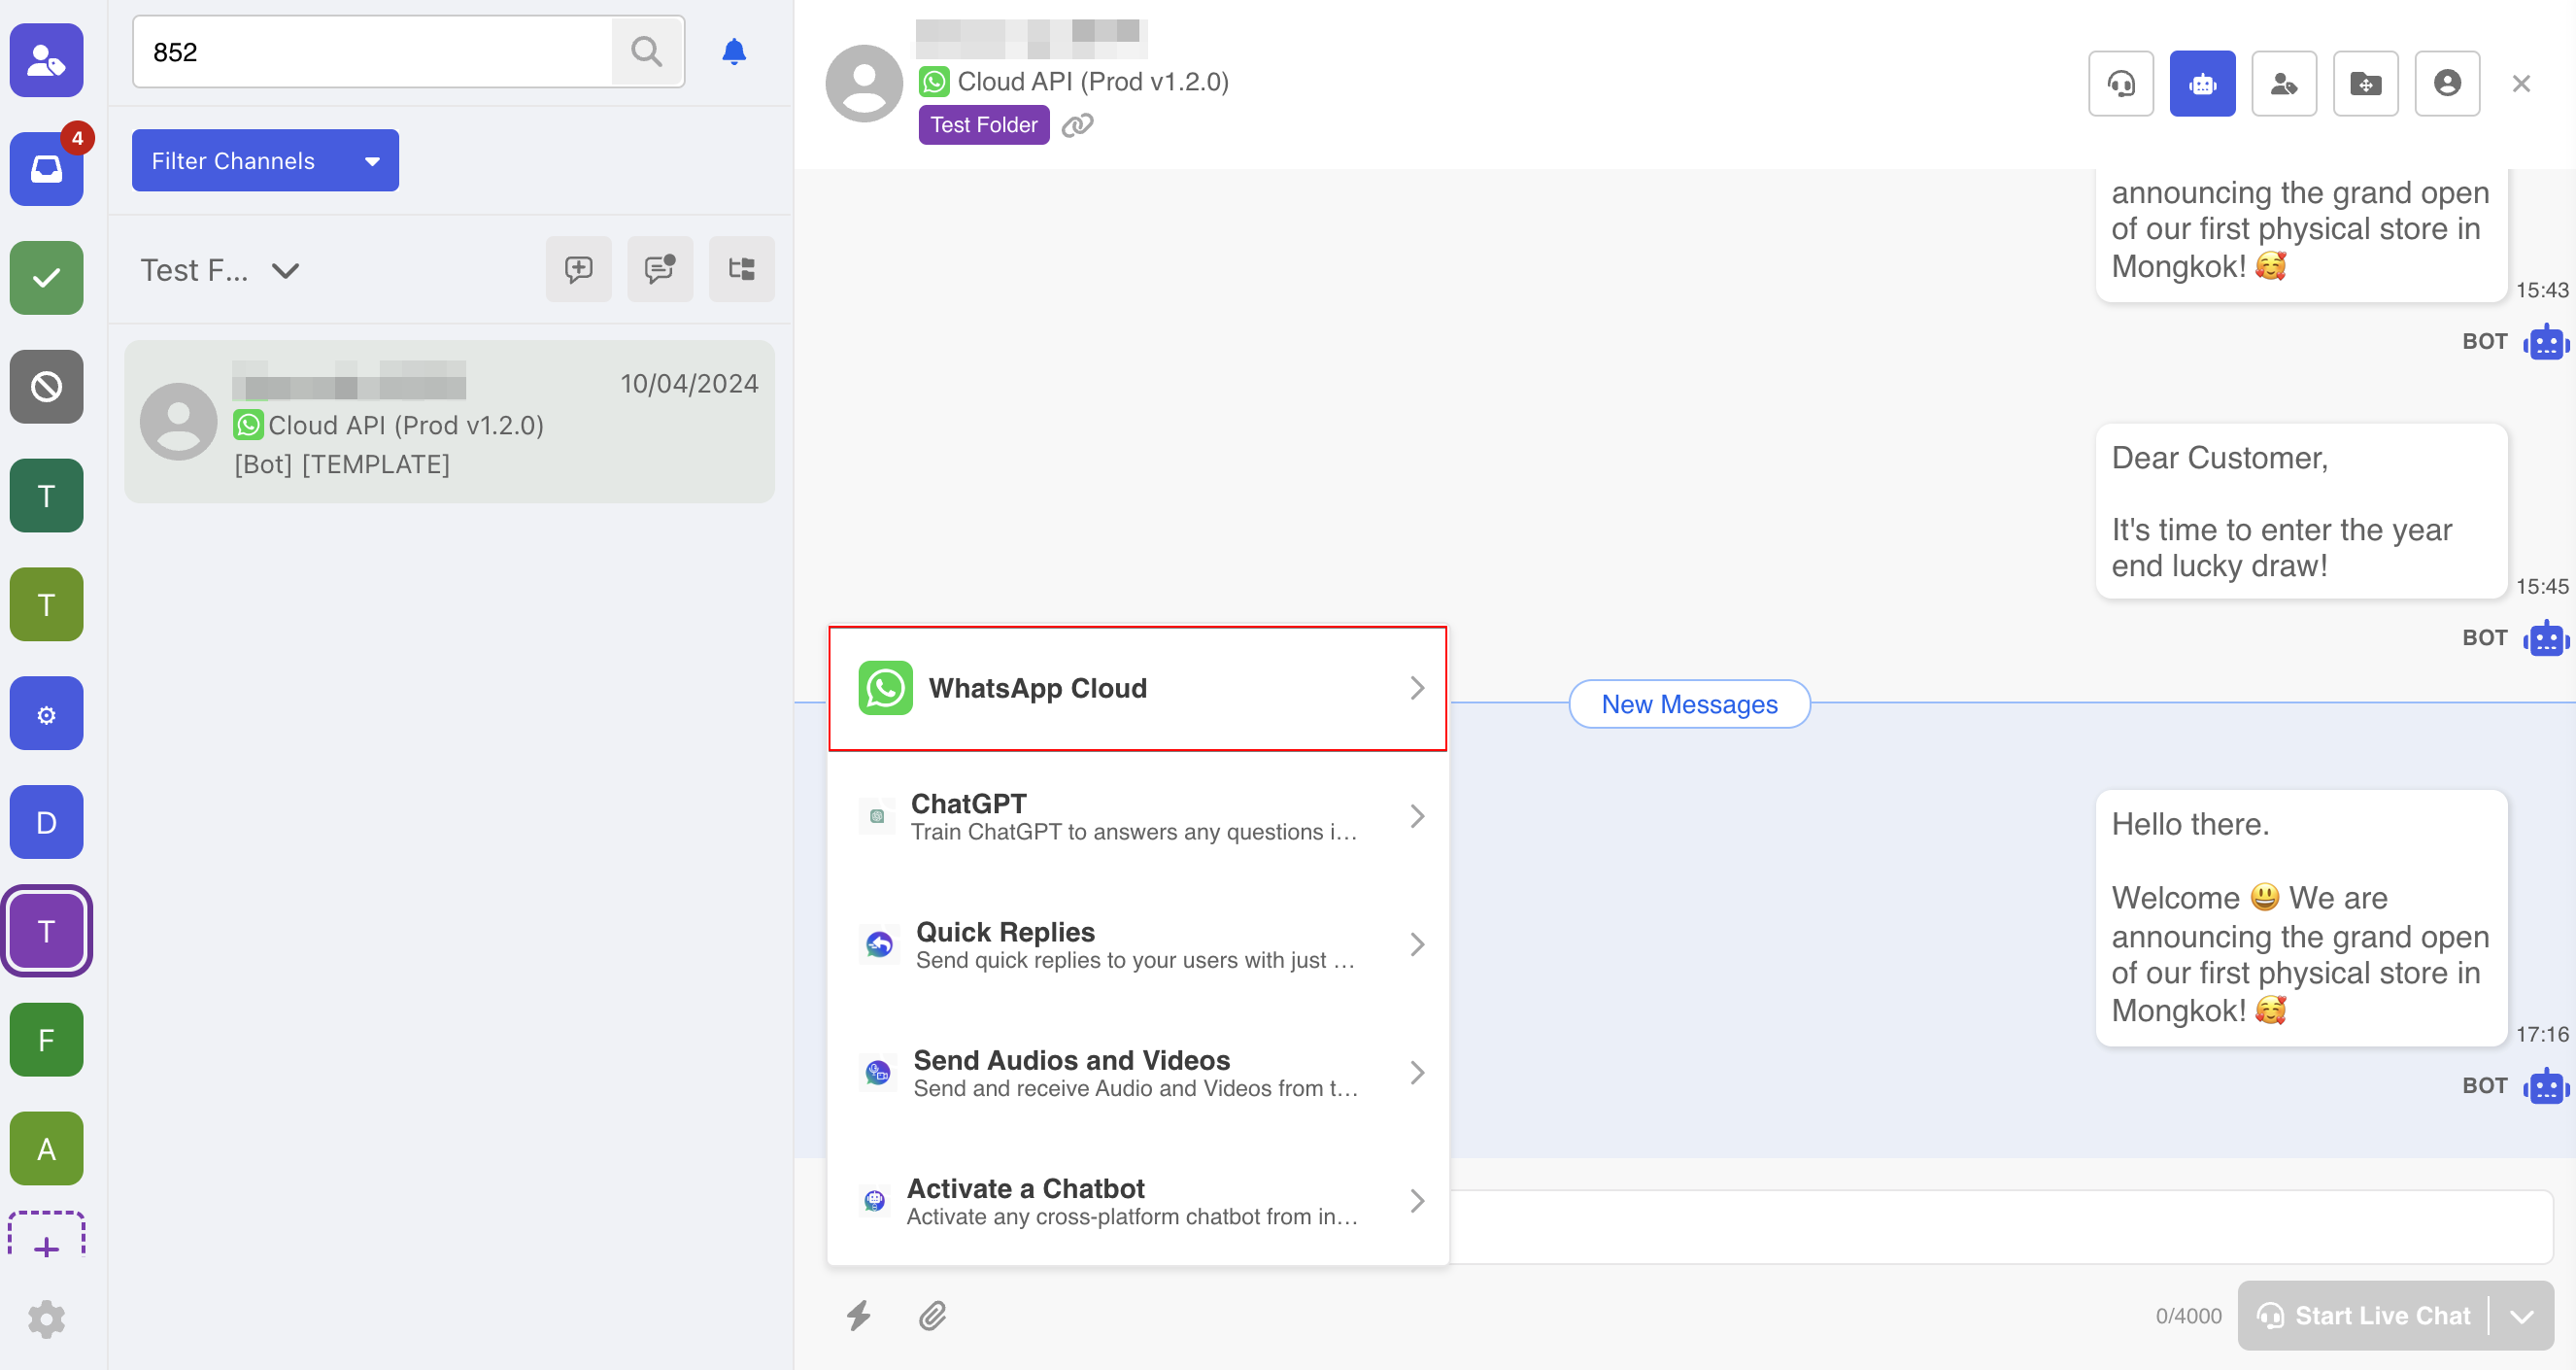
- Select "WhatsApp Cloud".
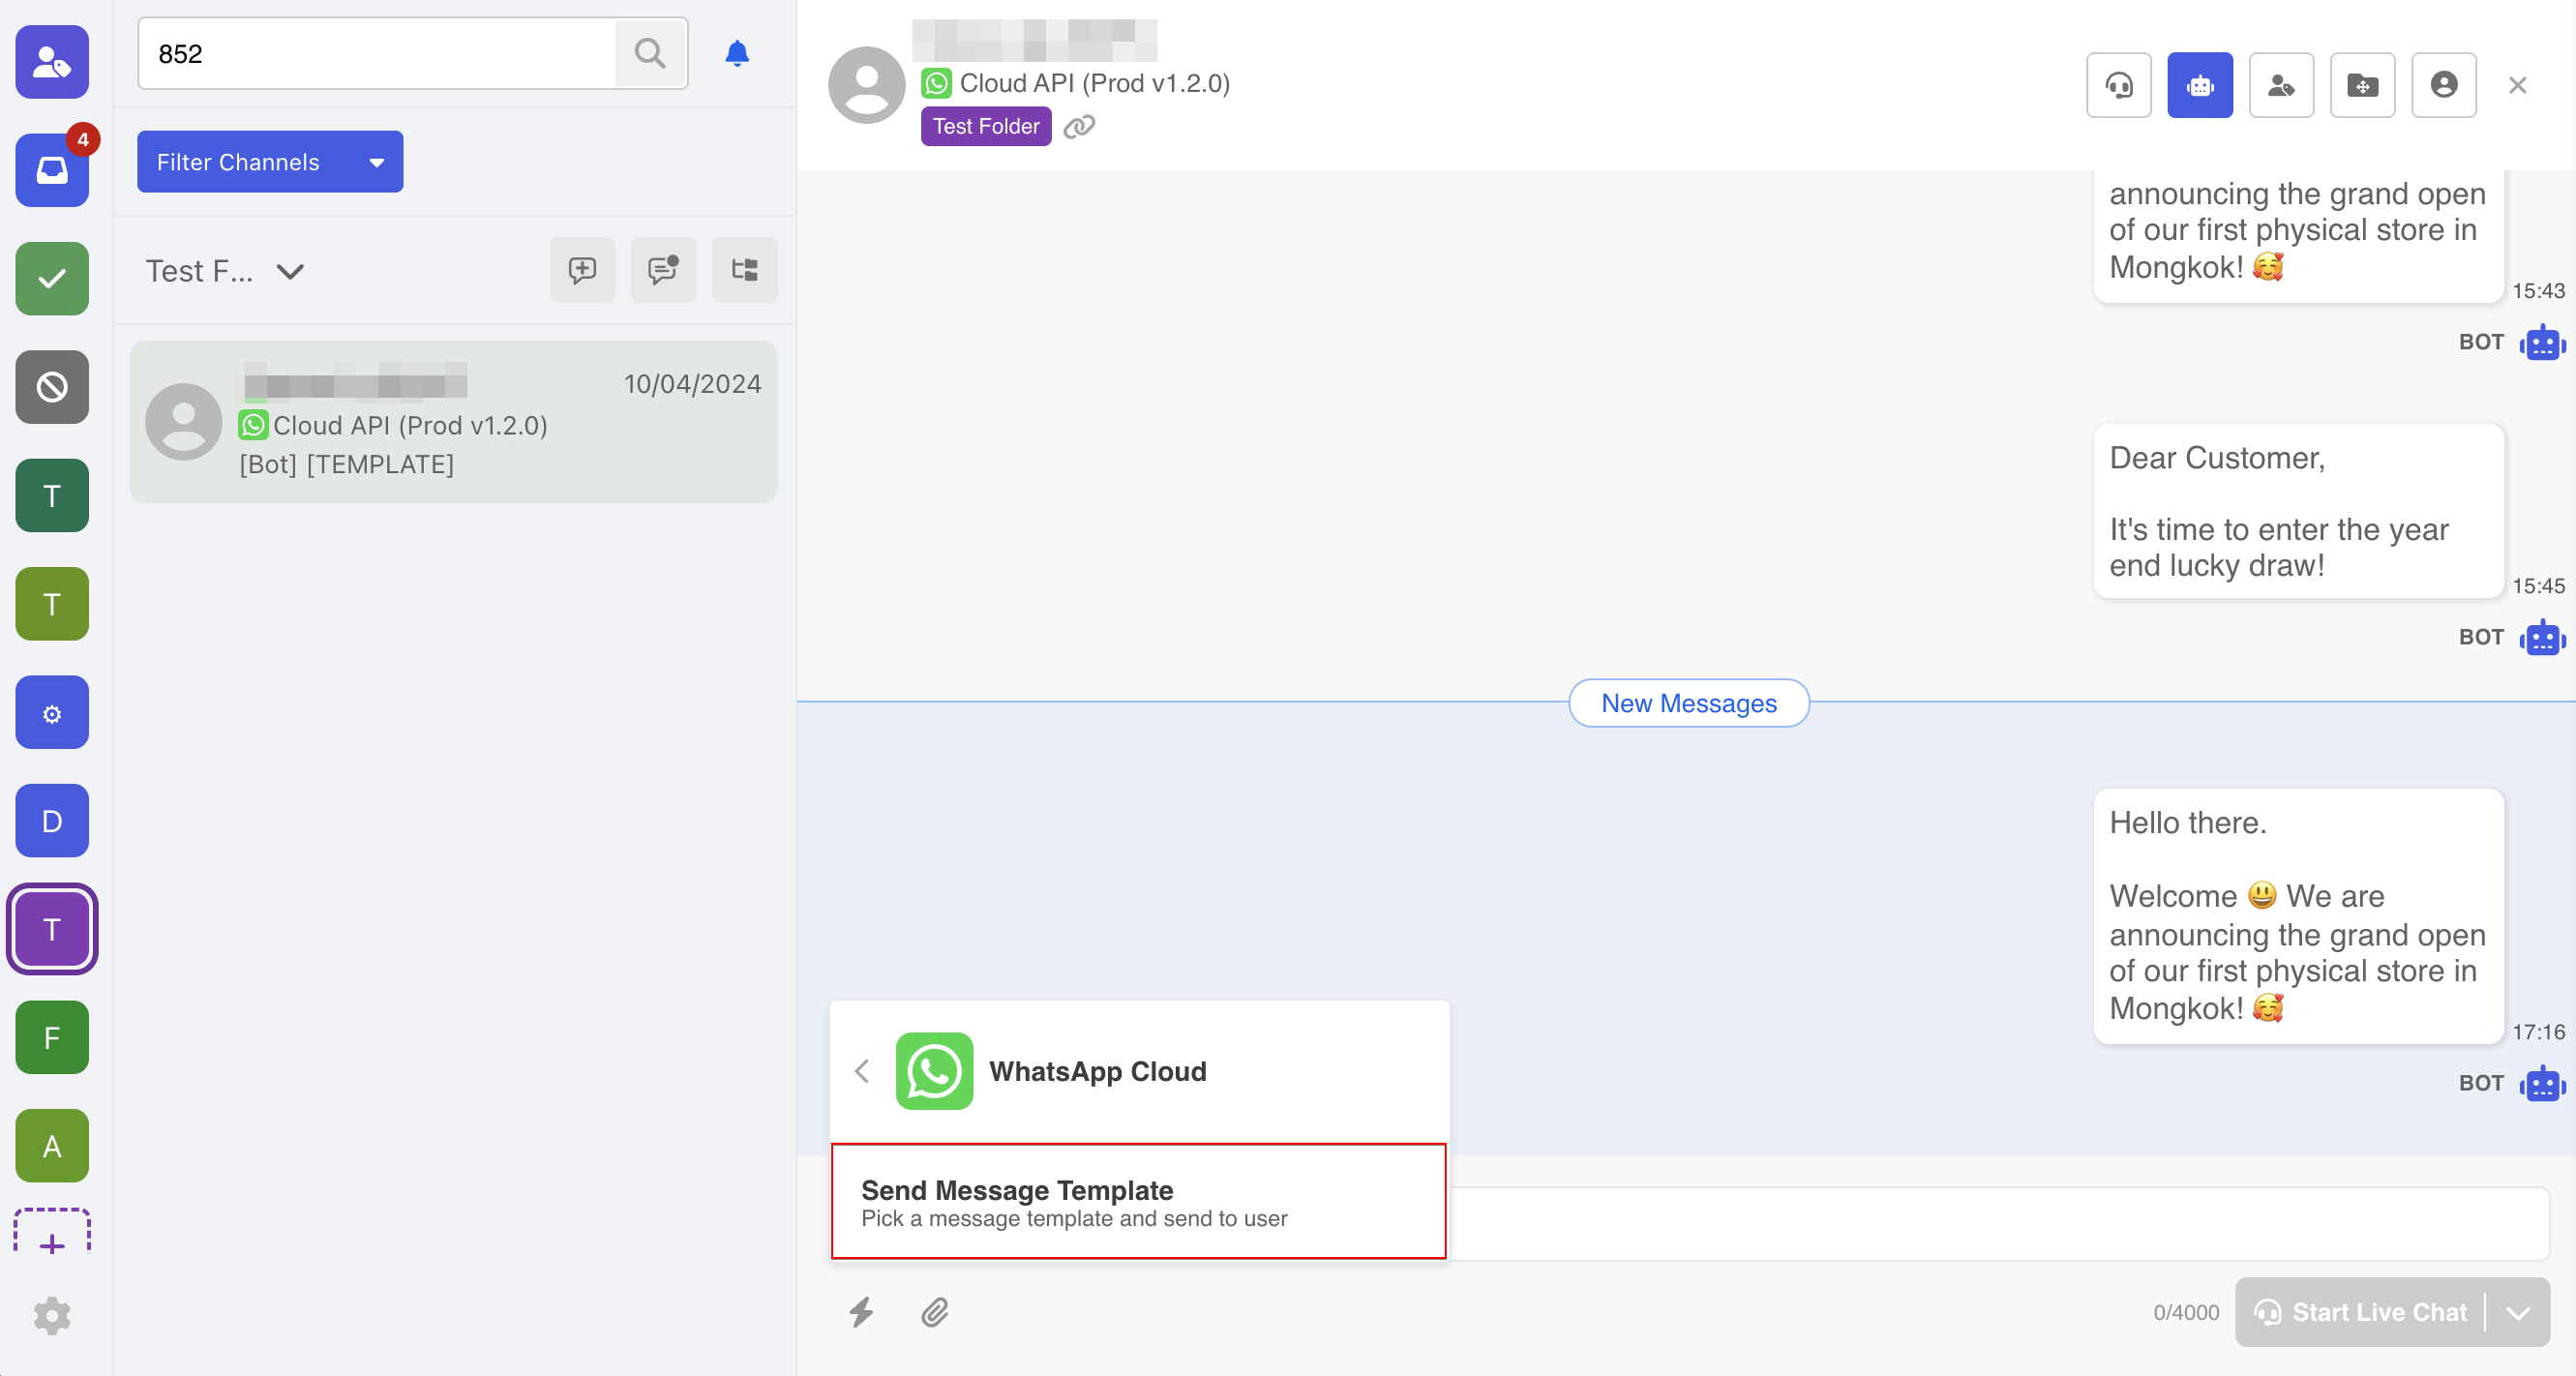
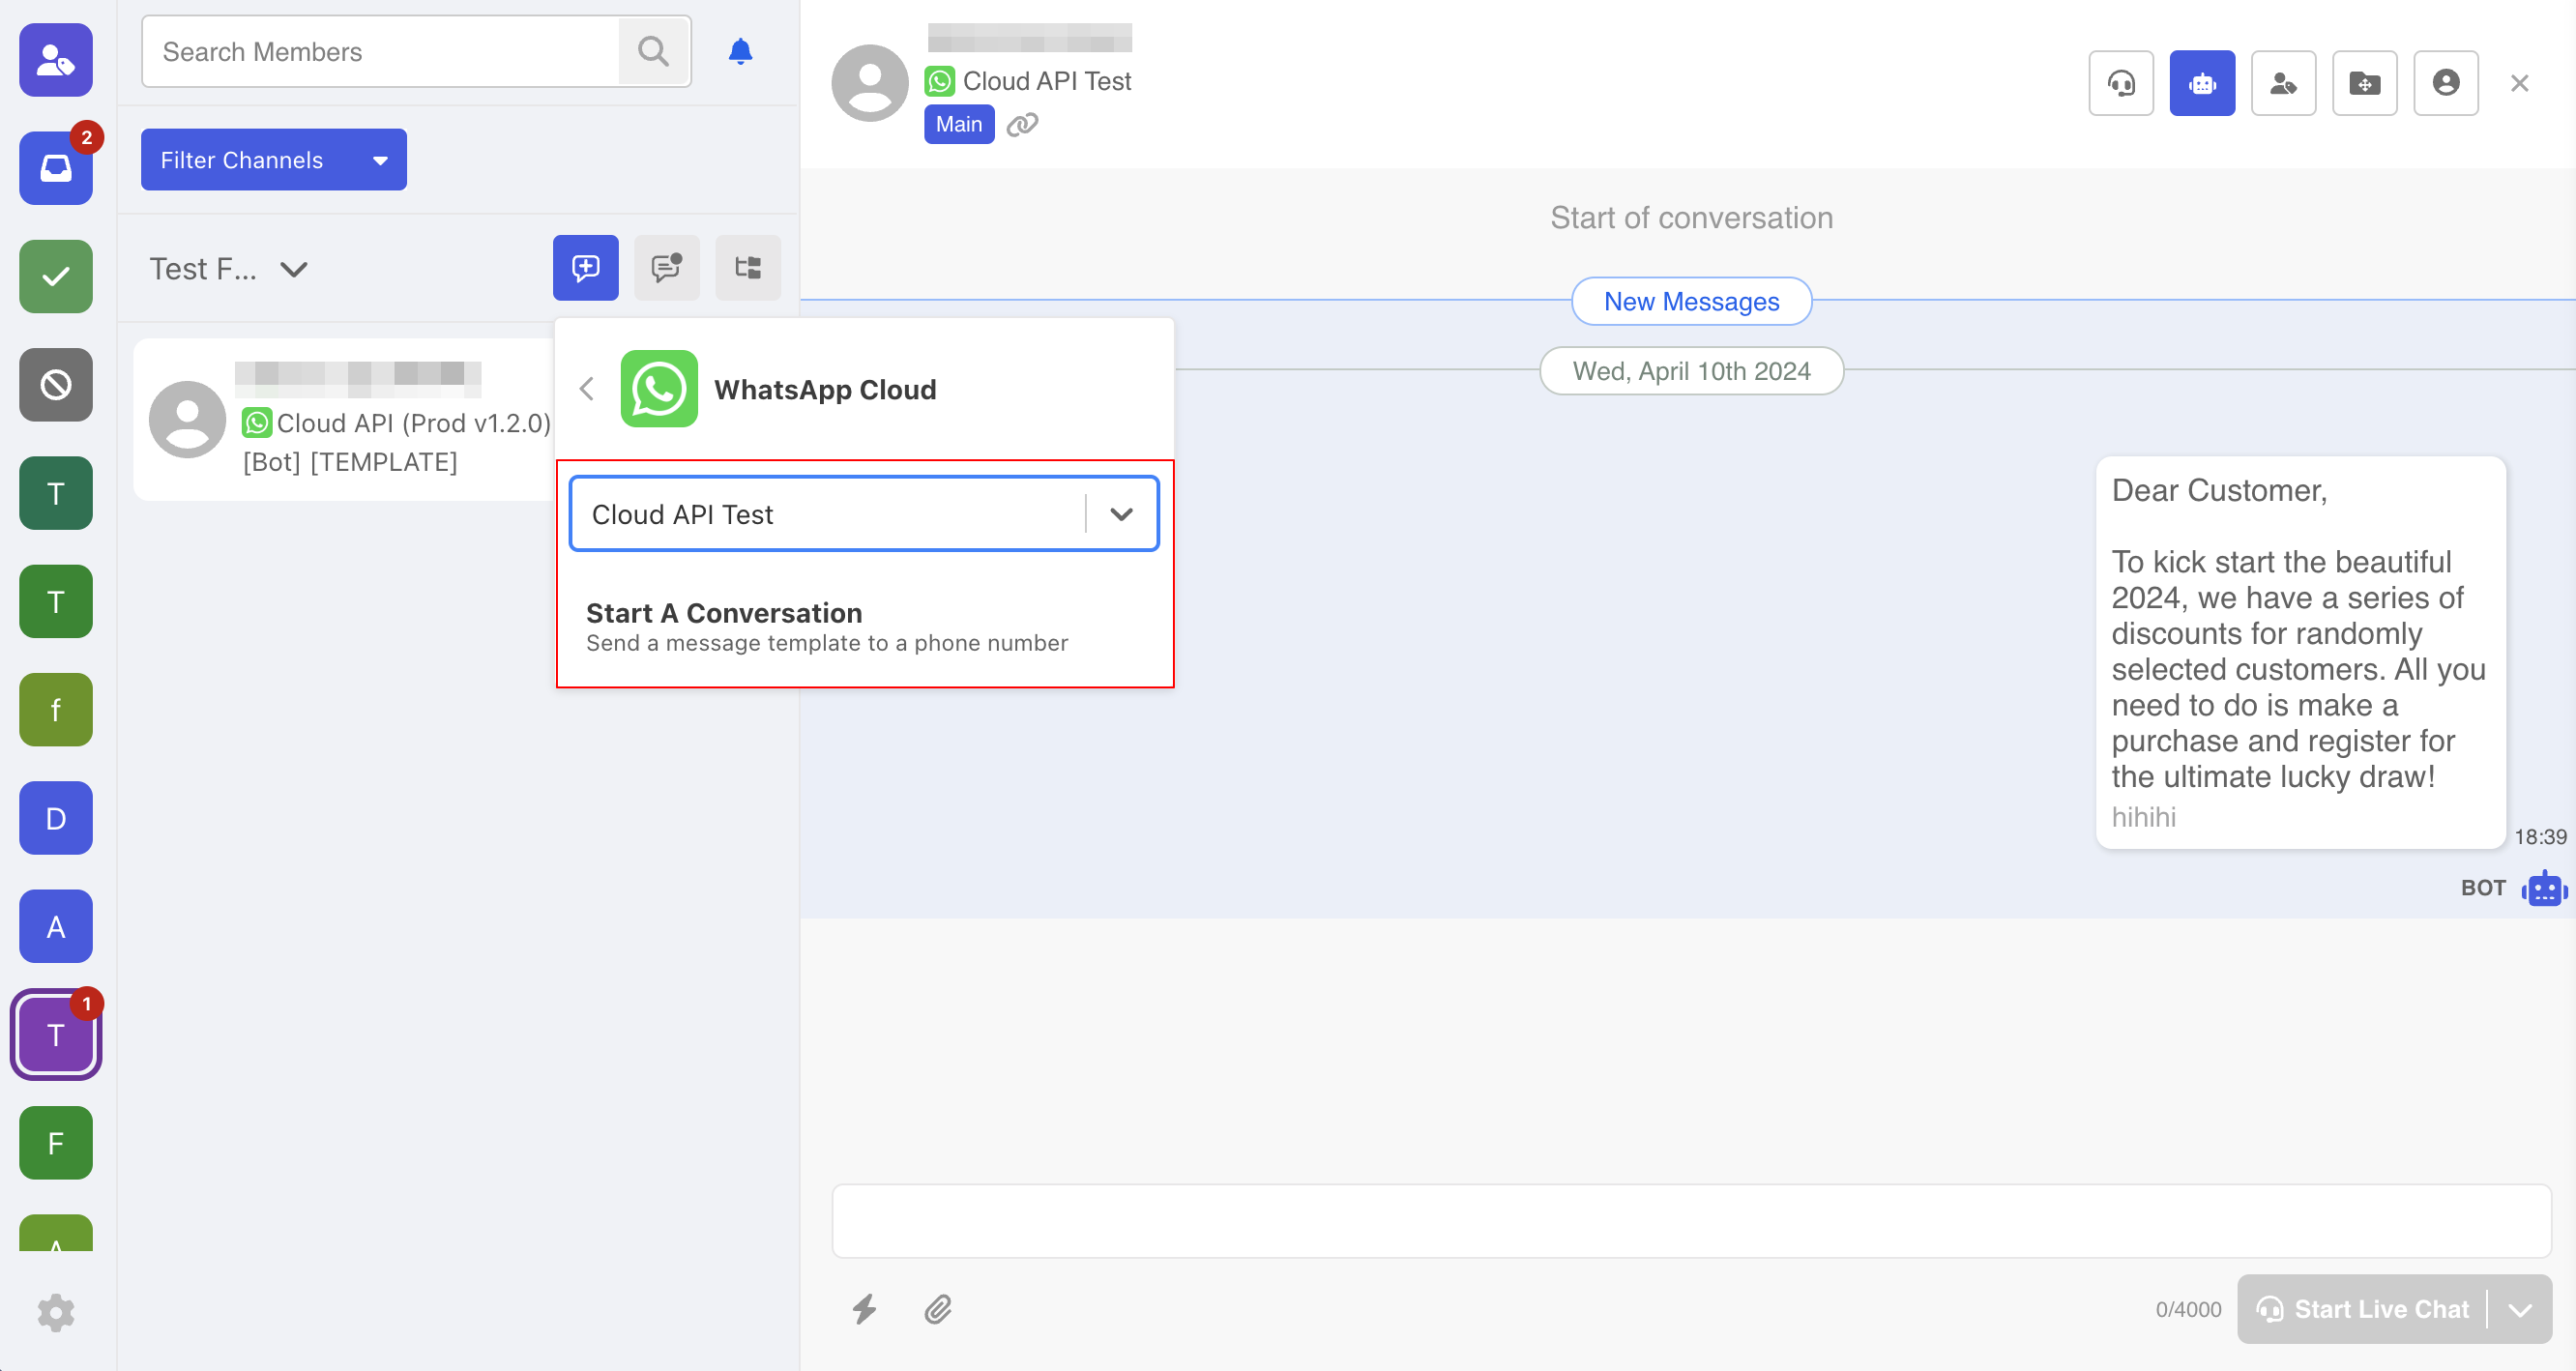
- Select "Send Message Template"
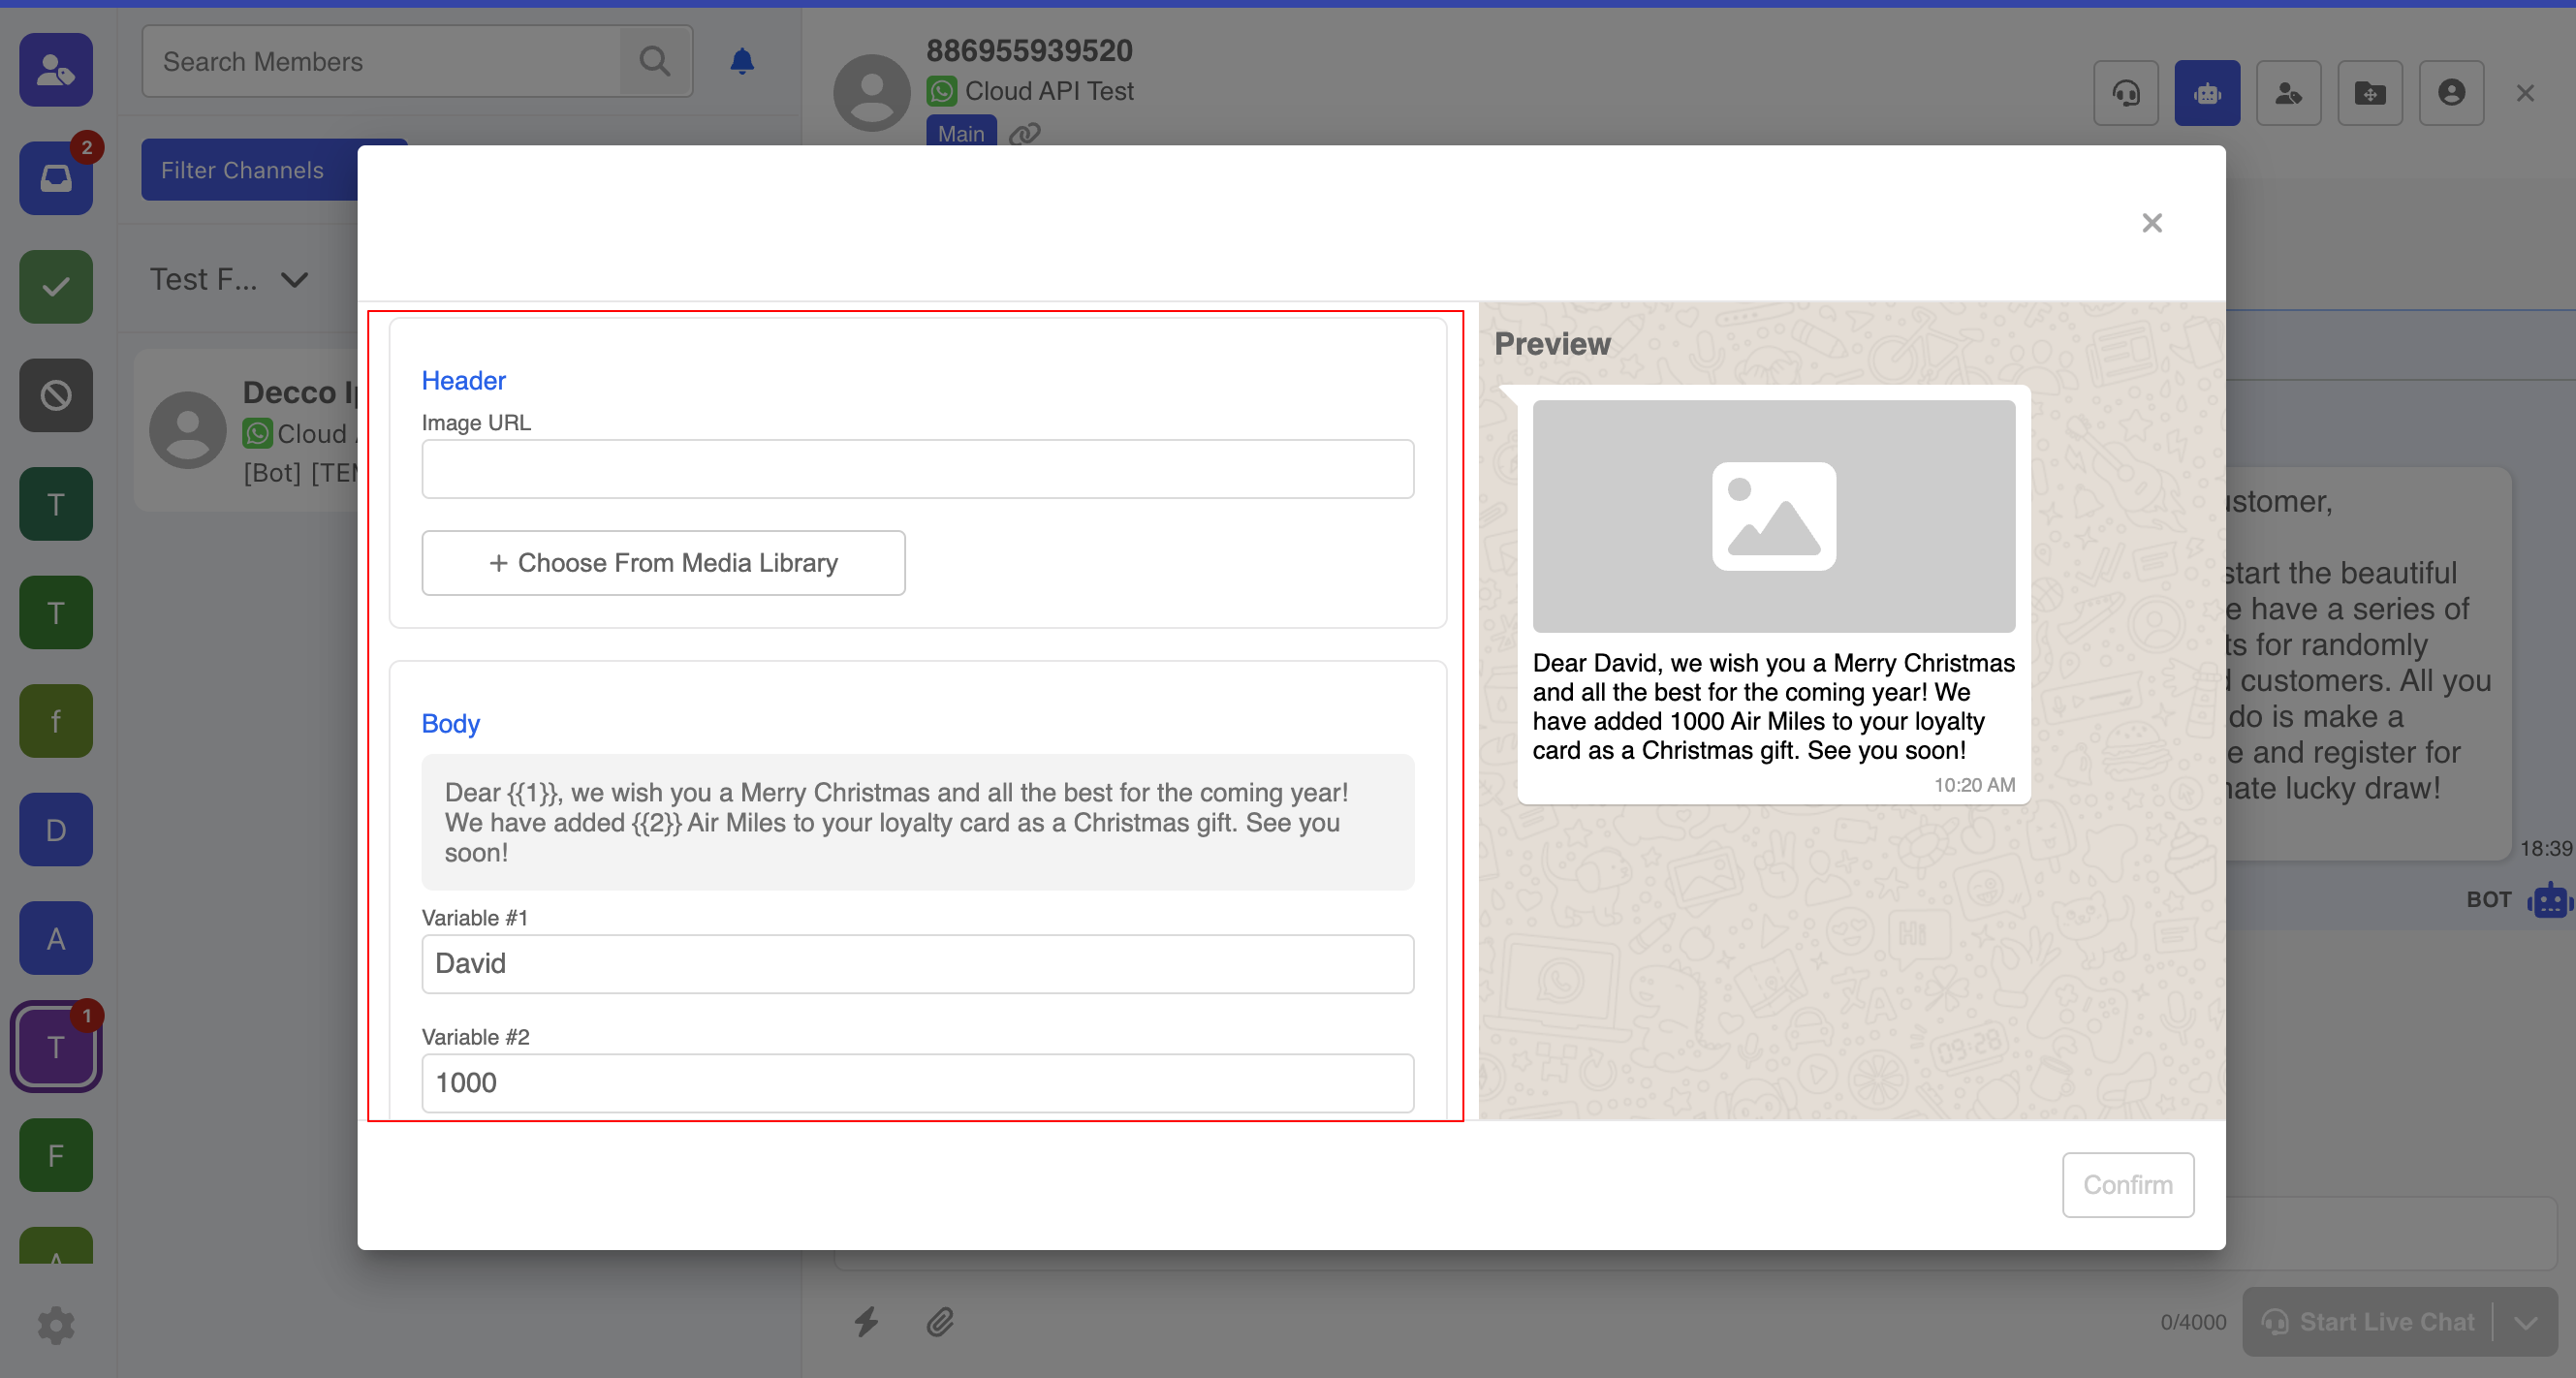
- Select the template, language and fill the variable (if any). The template will be sent when you "Confirm".
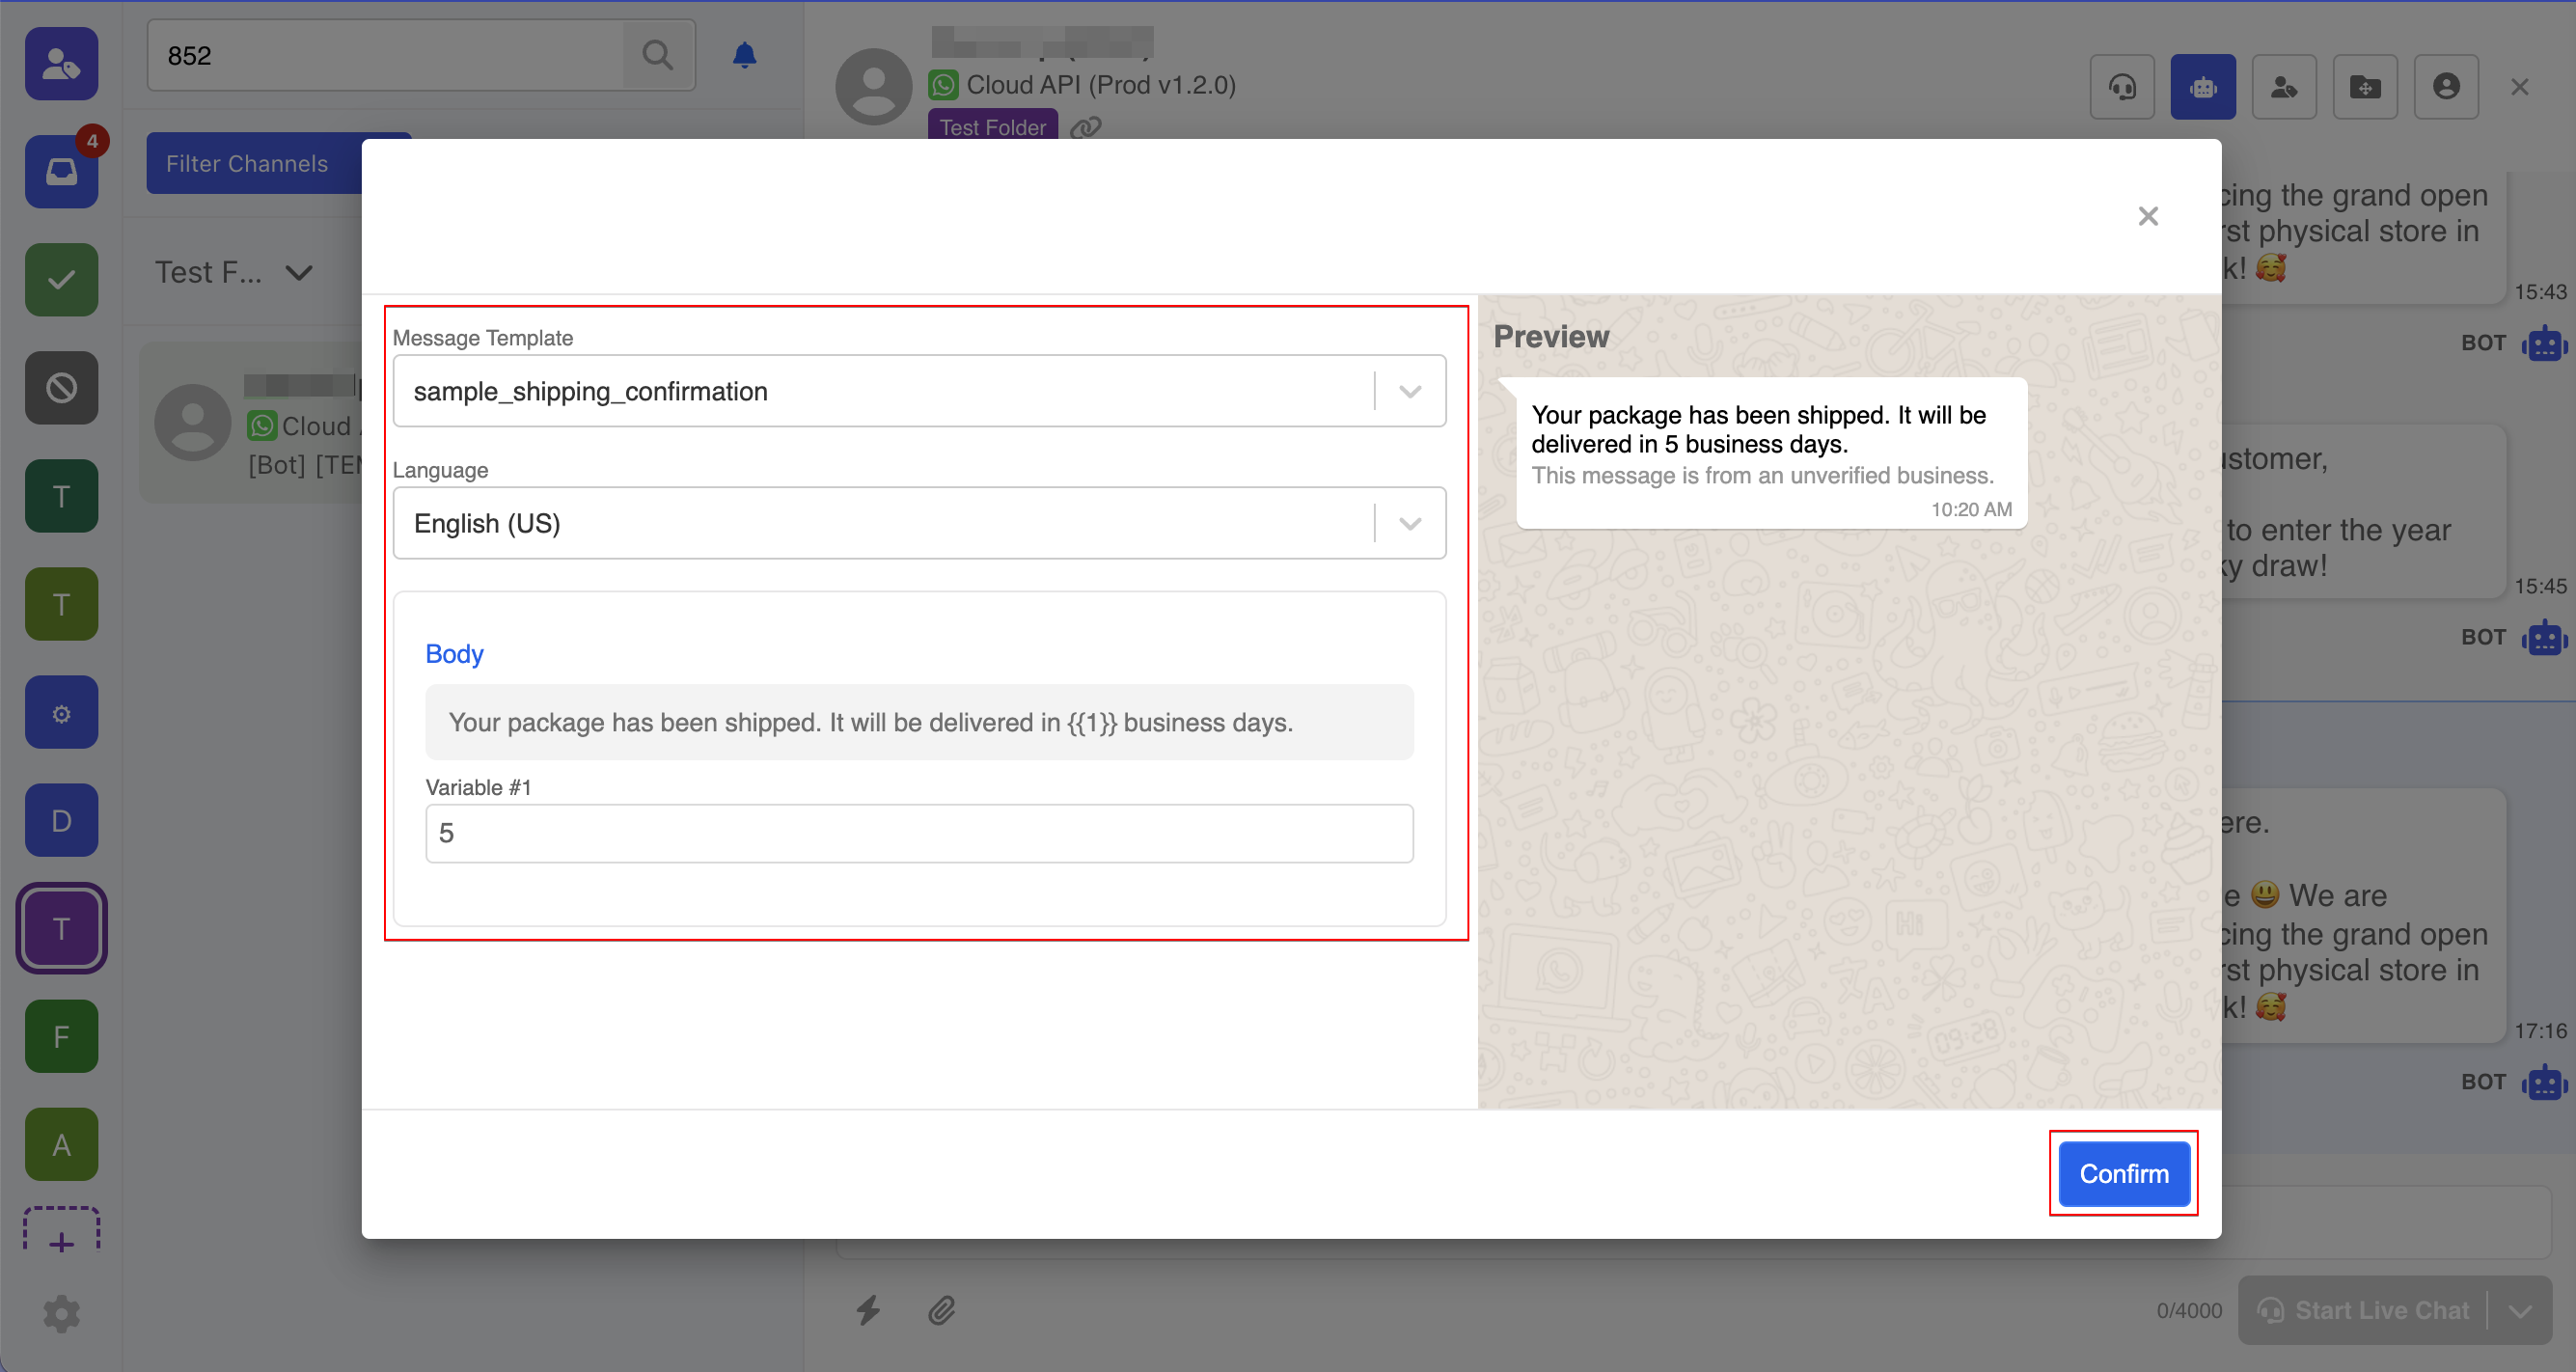
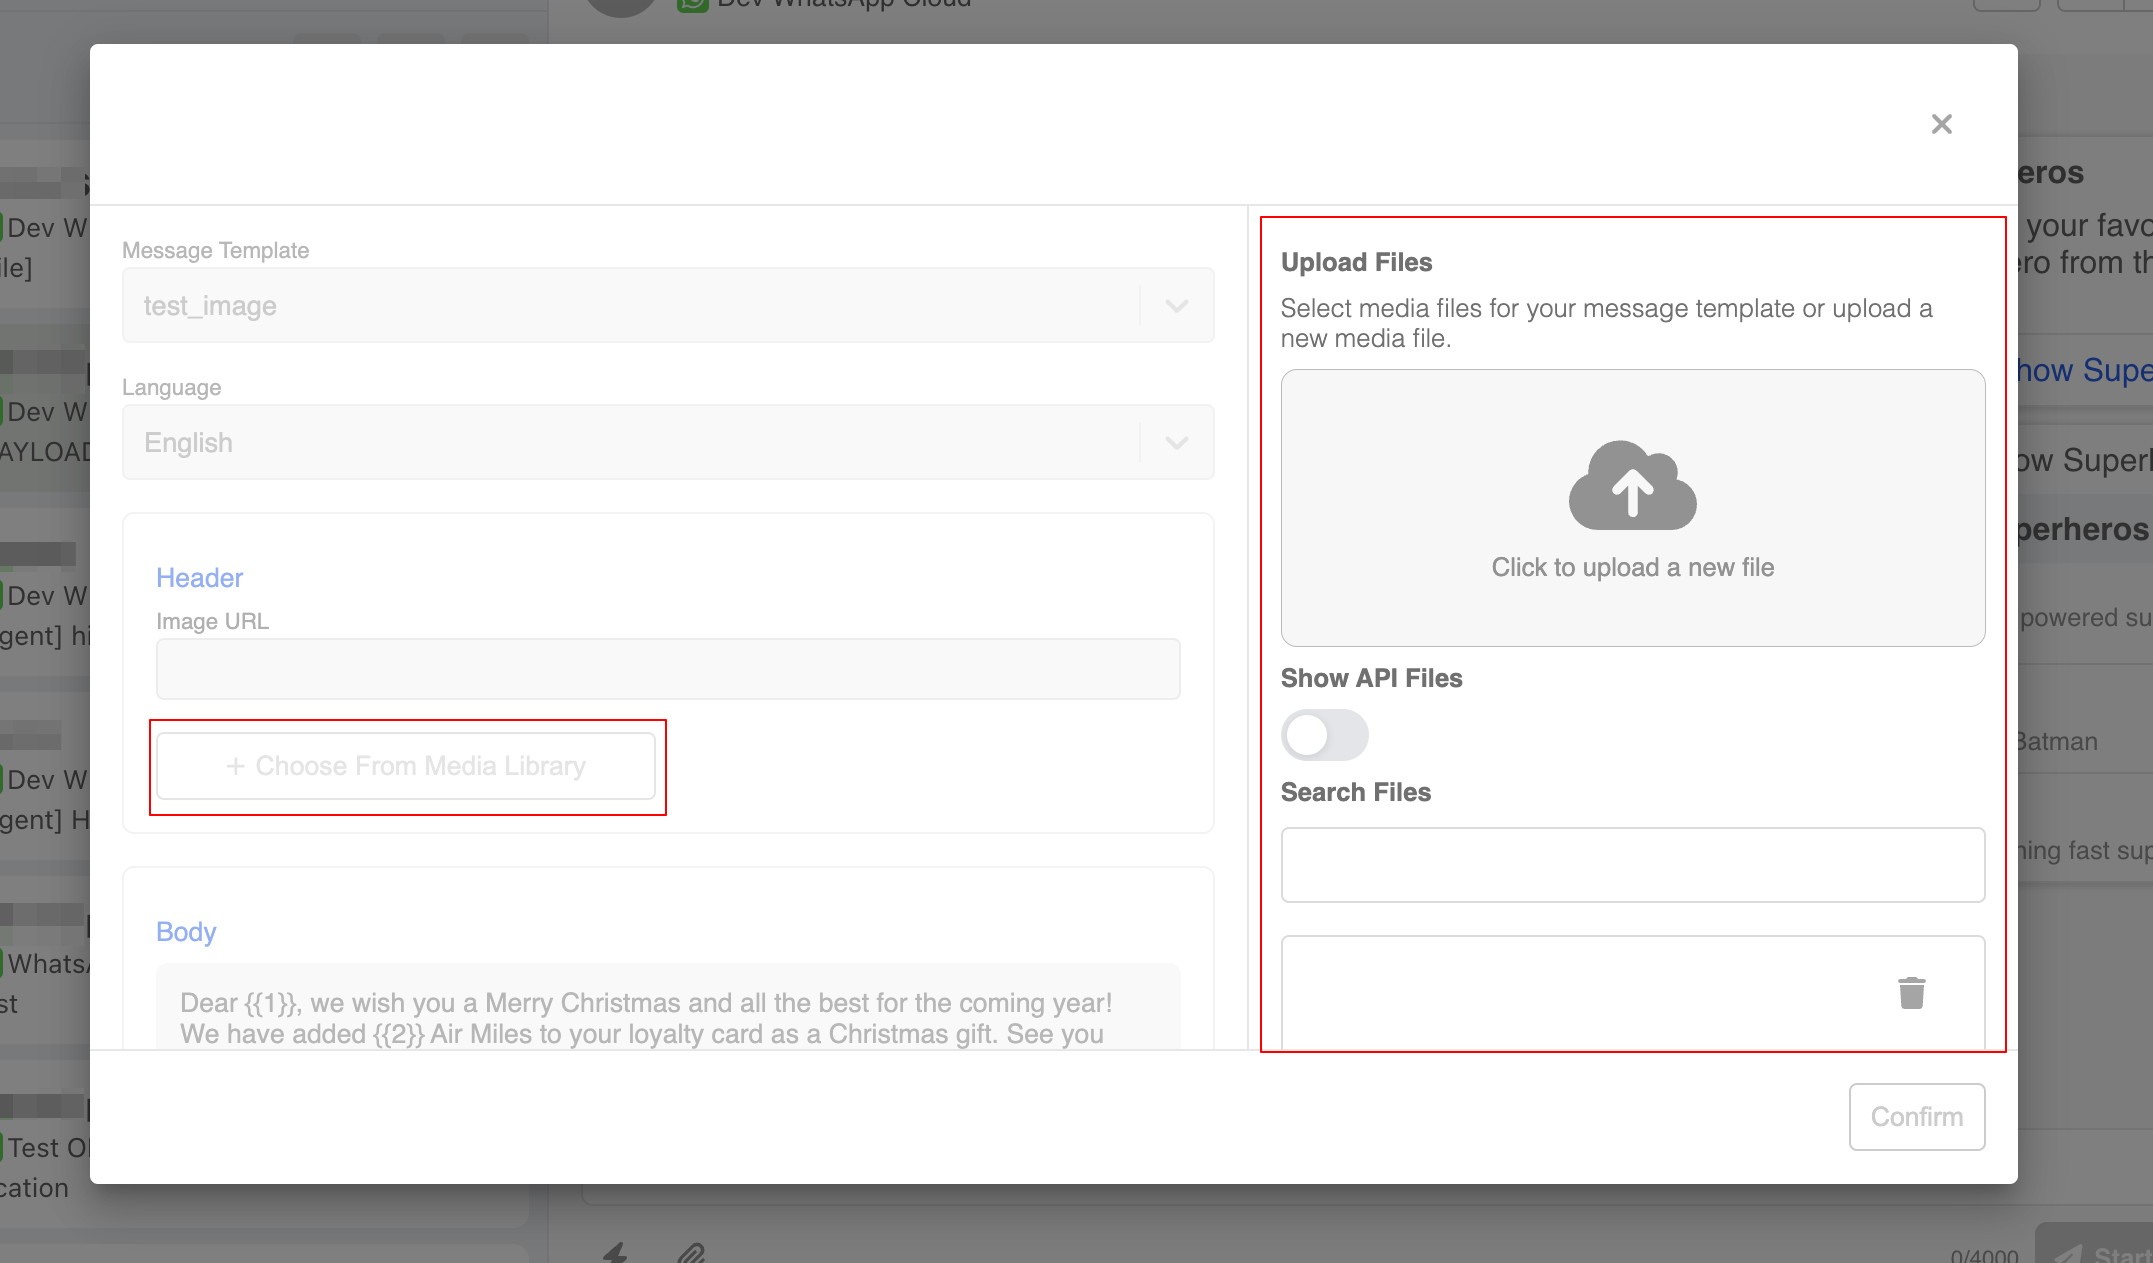
- If you need to add media to the template, you can click on "+ Choose from Media Library" to upload or select existing media in the library.
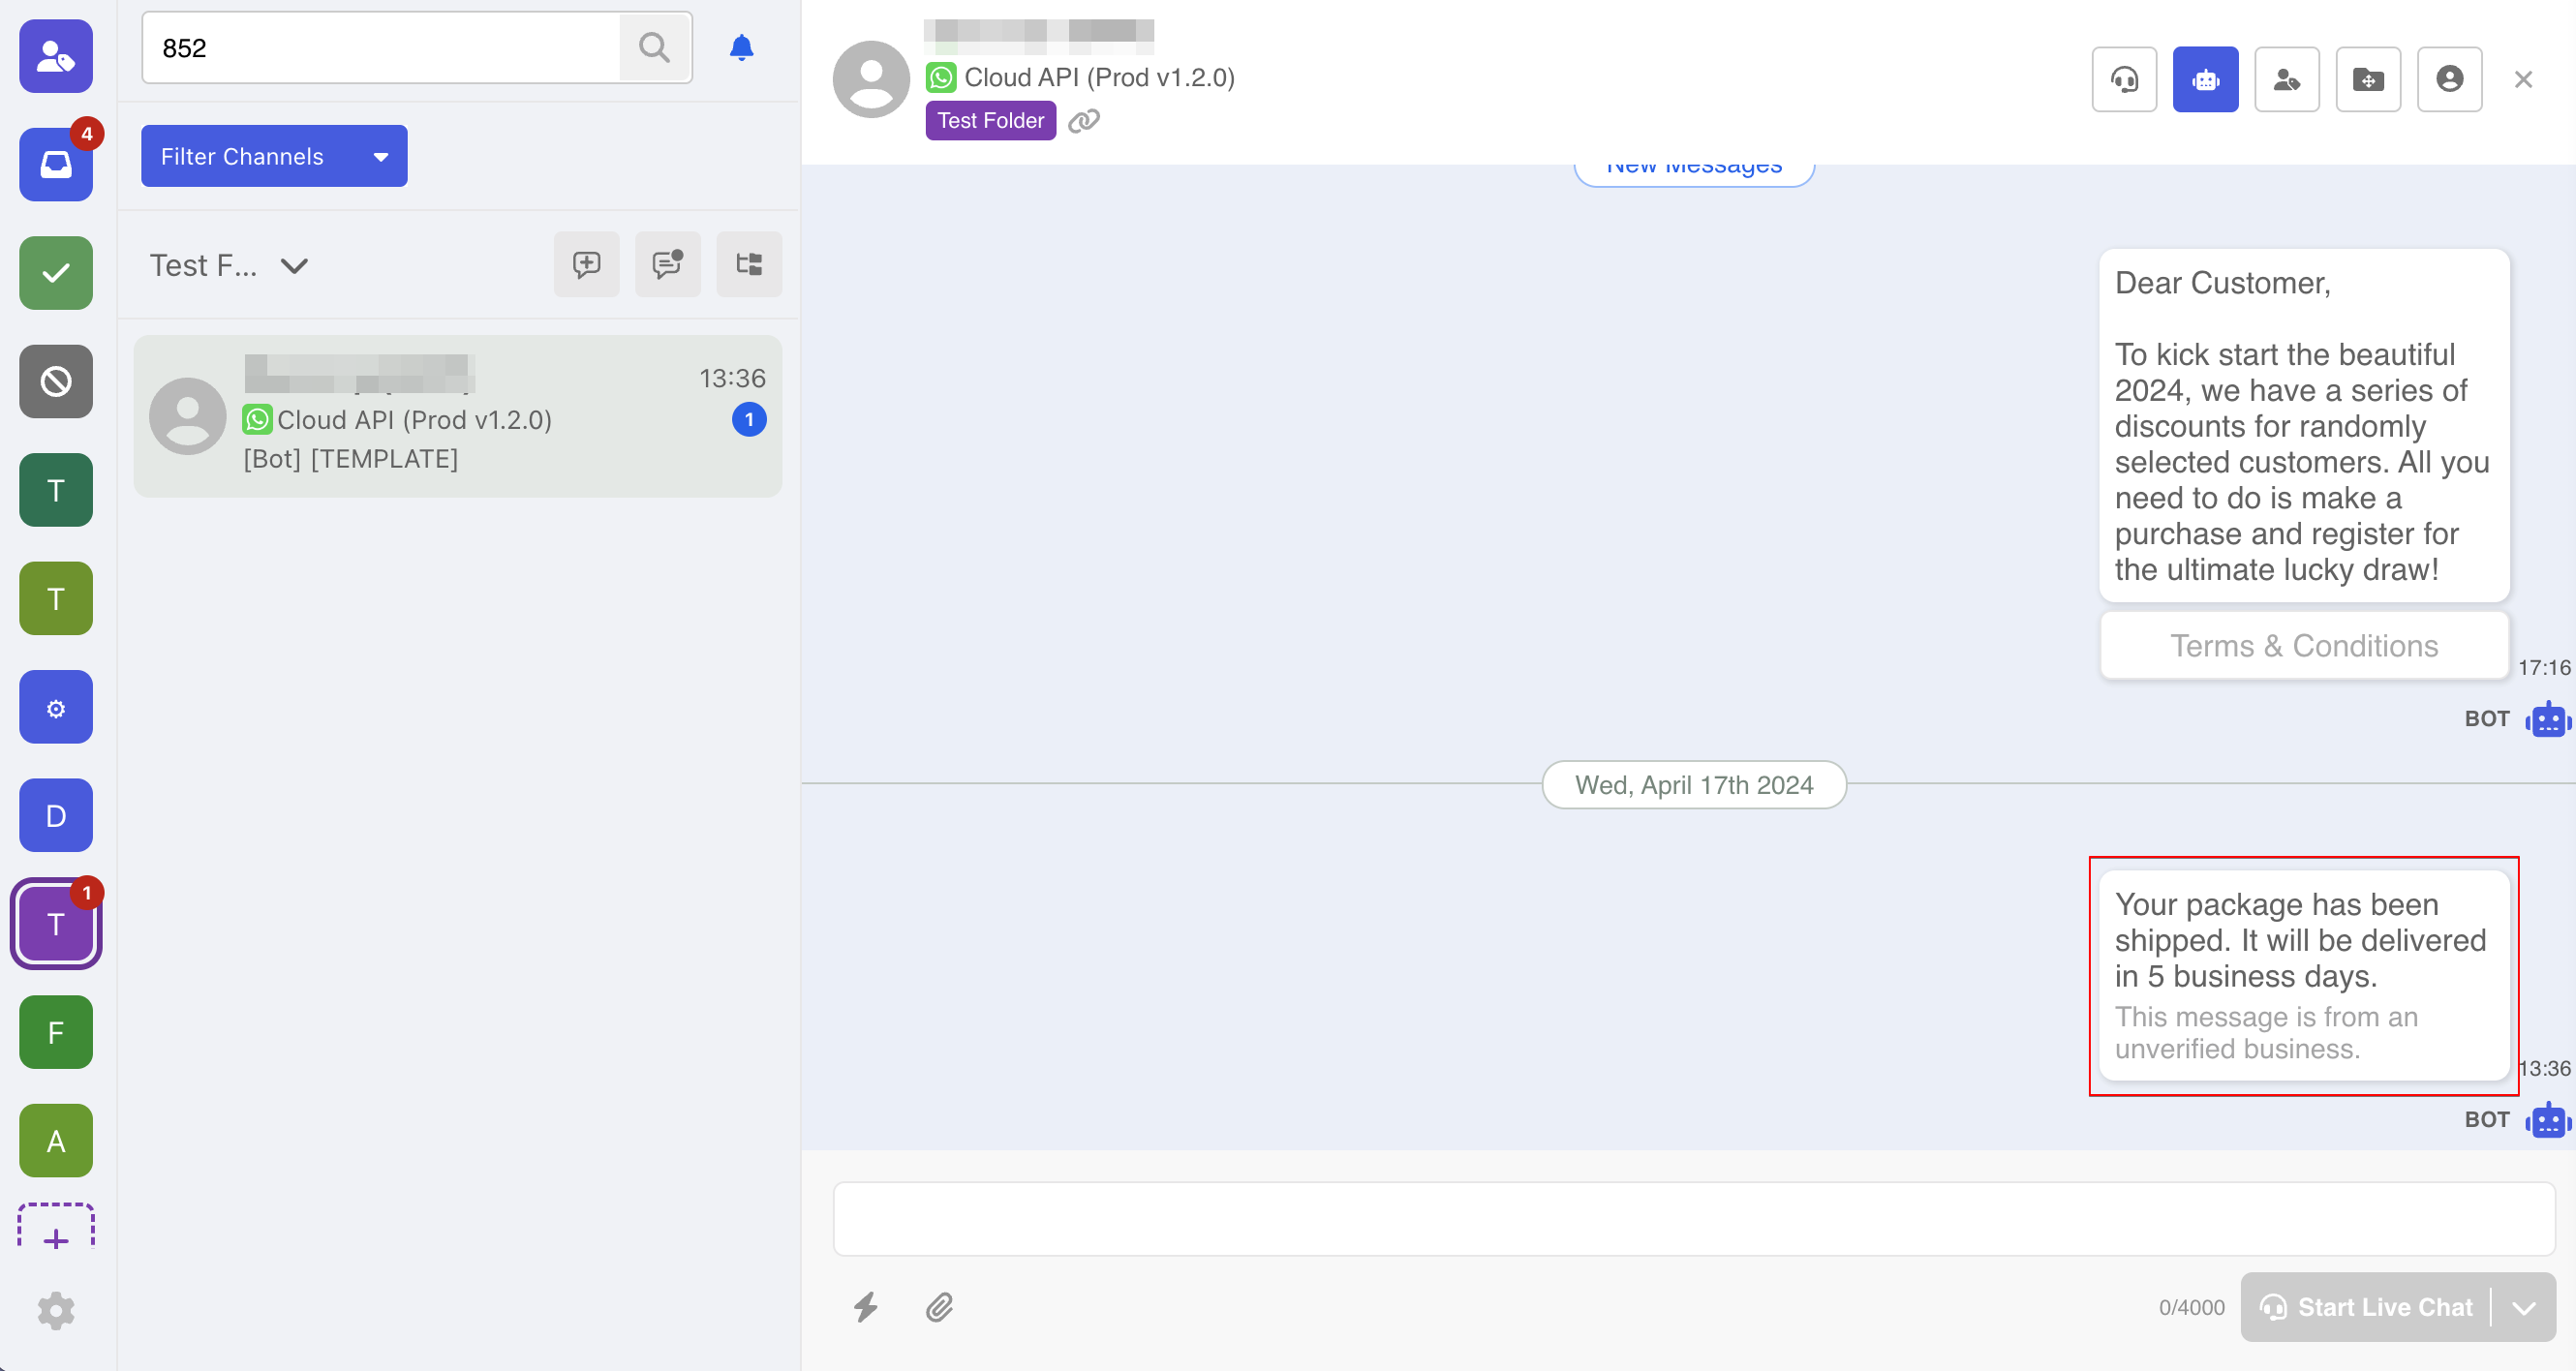
- The message template will be sent right away in the thread.
Start a thread with Message Template
In the previous guide, we have demonstrated how to send a message template inside an existing thread. However, agents can also initial a new conversation with the message template.
- Select "Action" next to the "Unread Thread Filter".
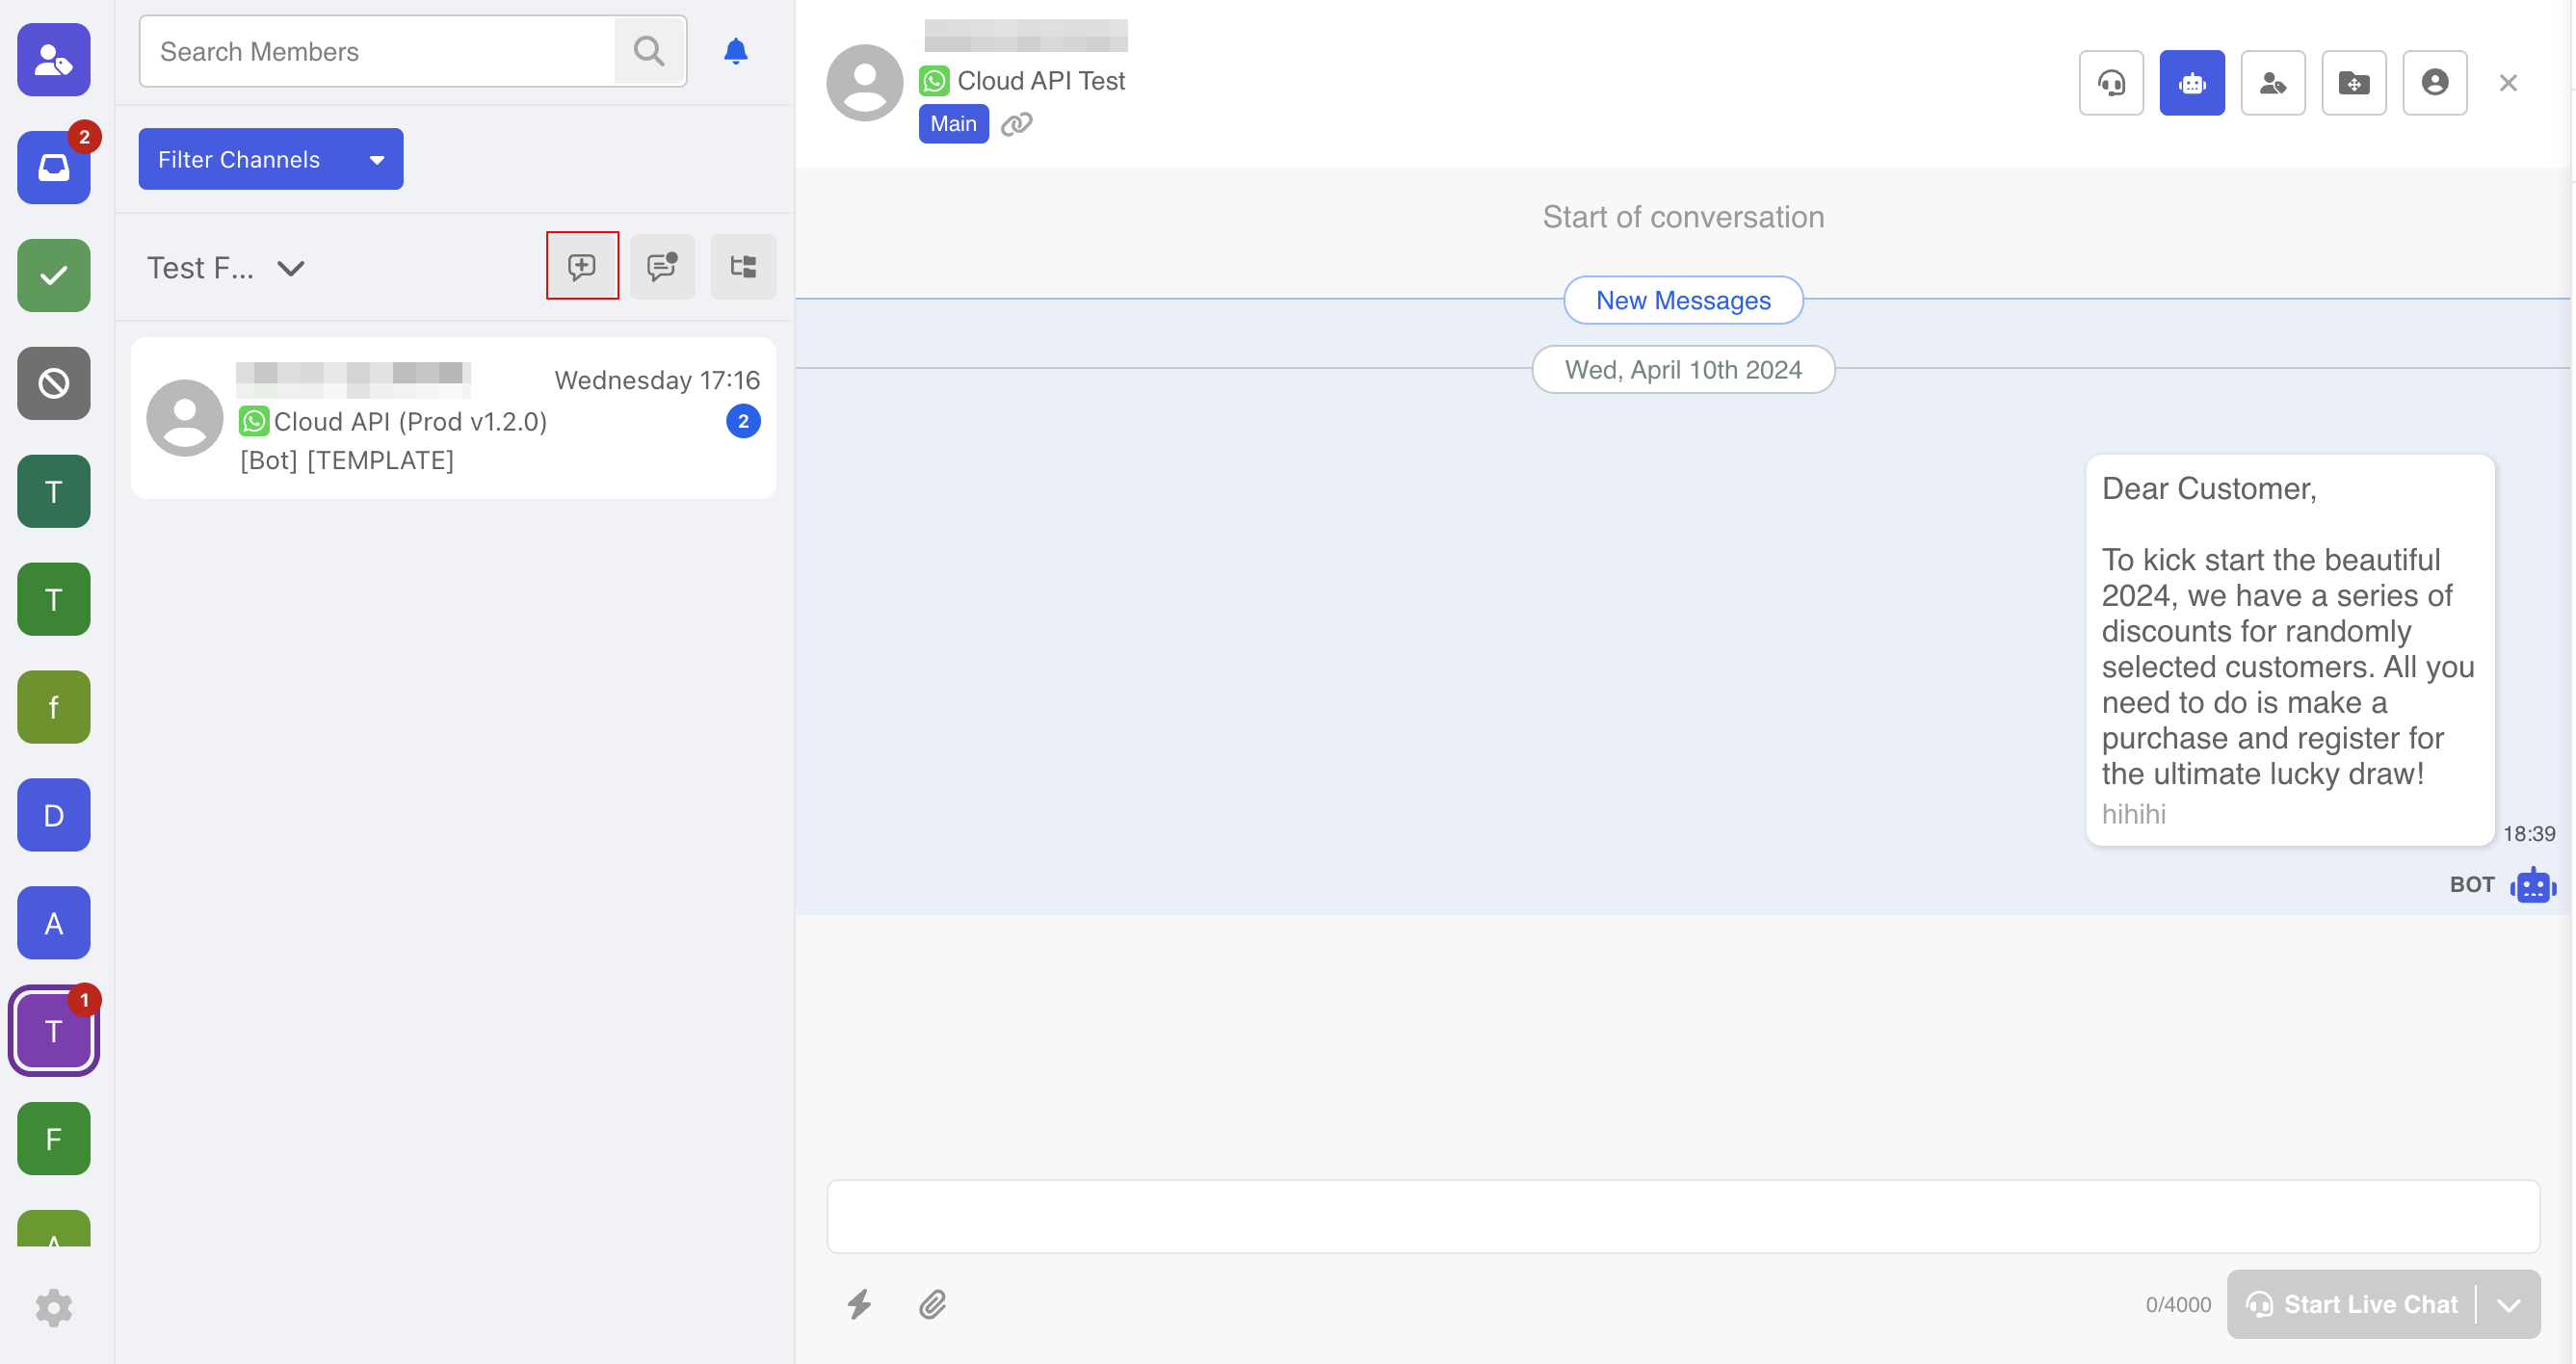
- Select the "Integration".
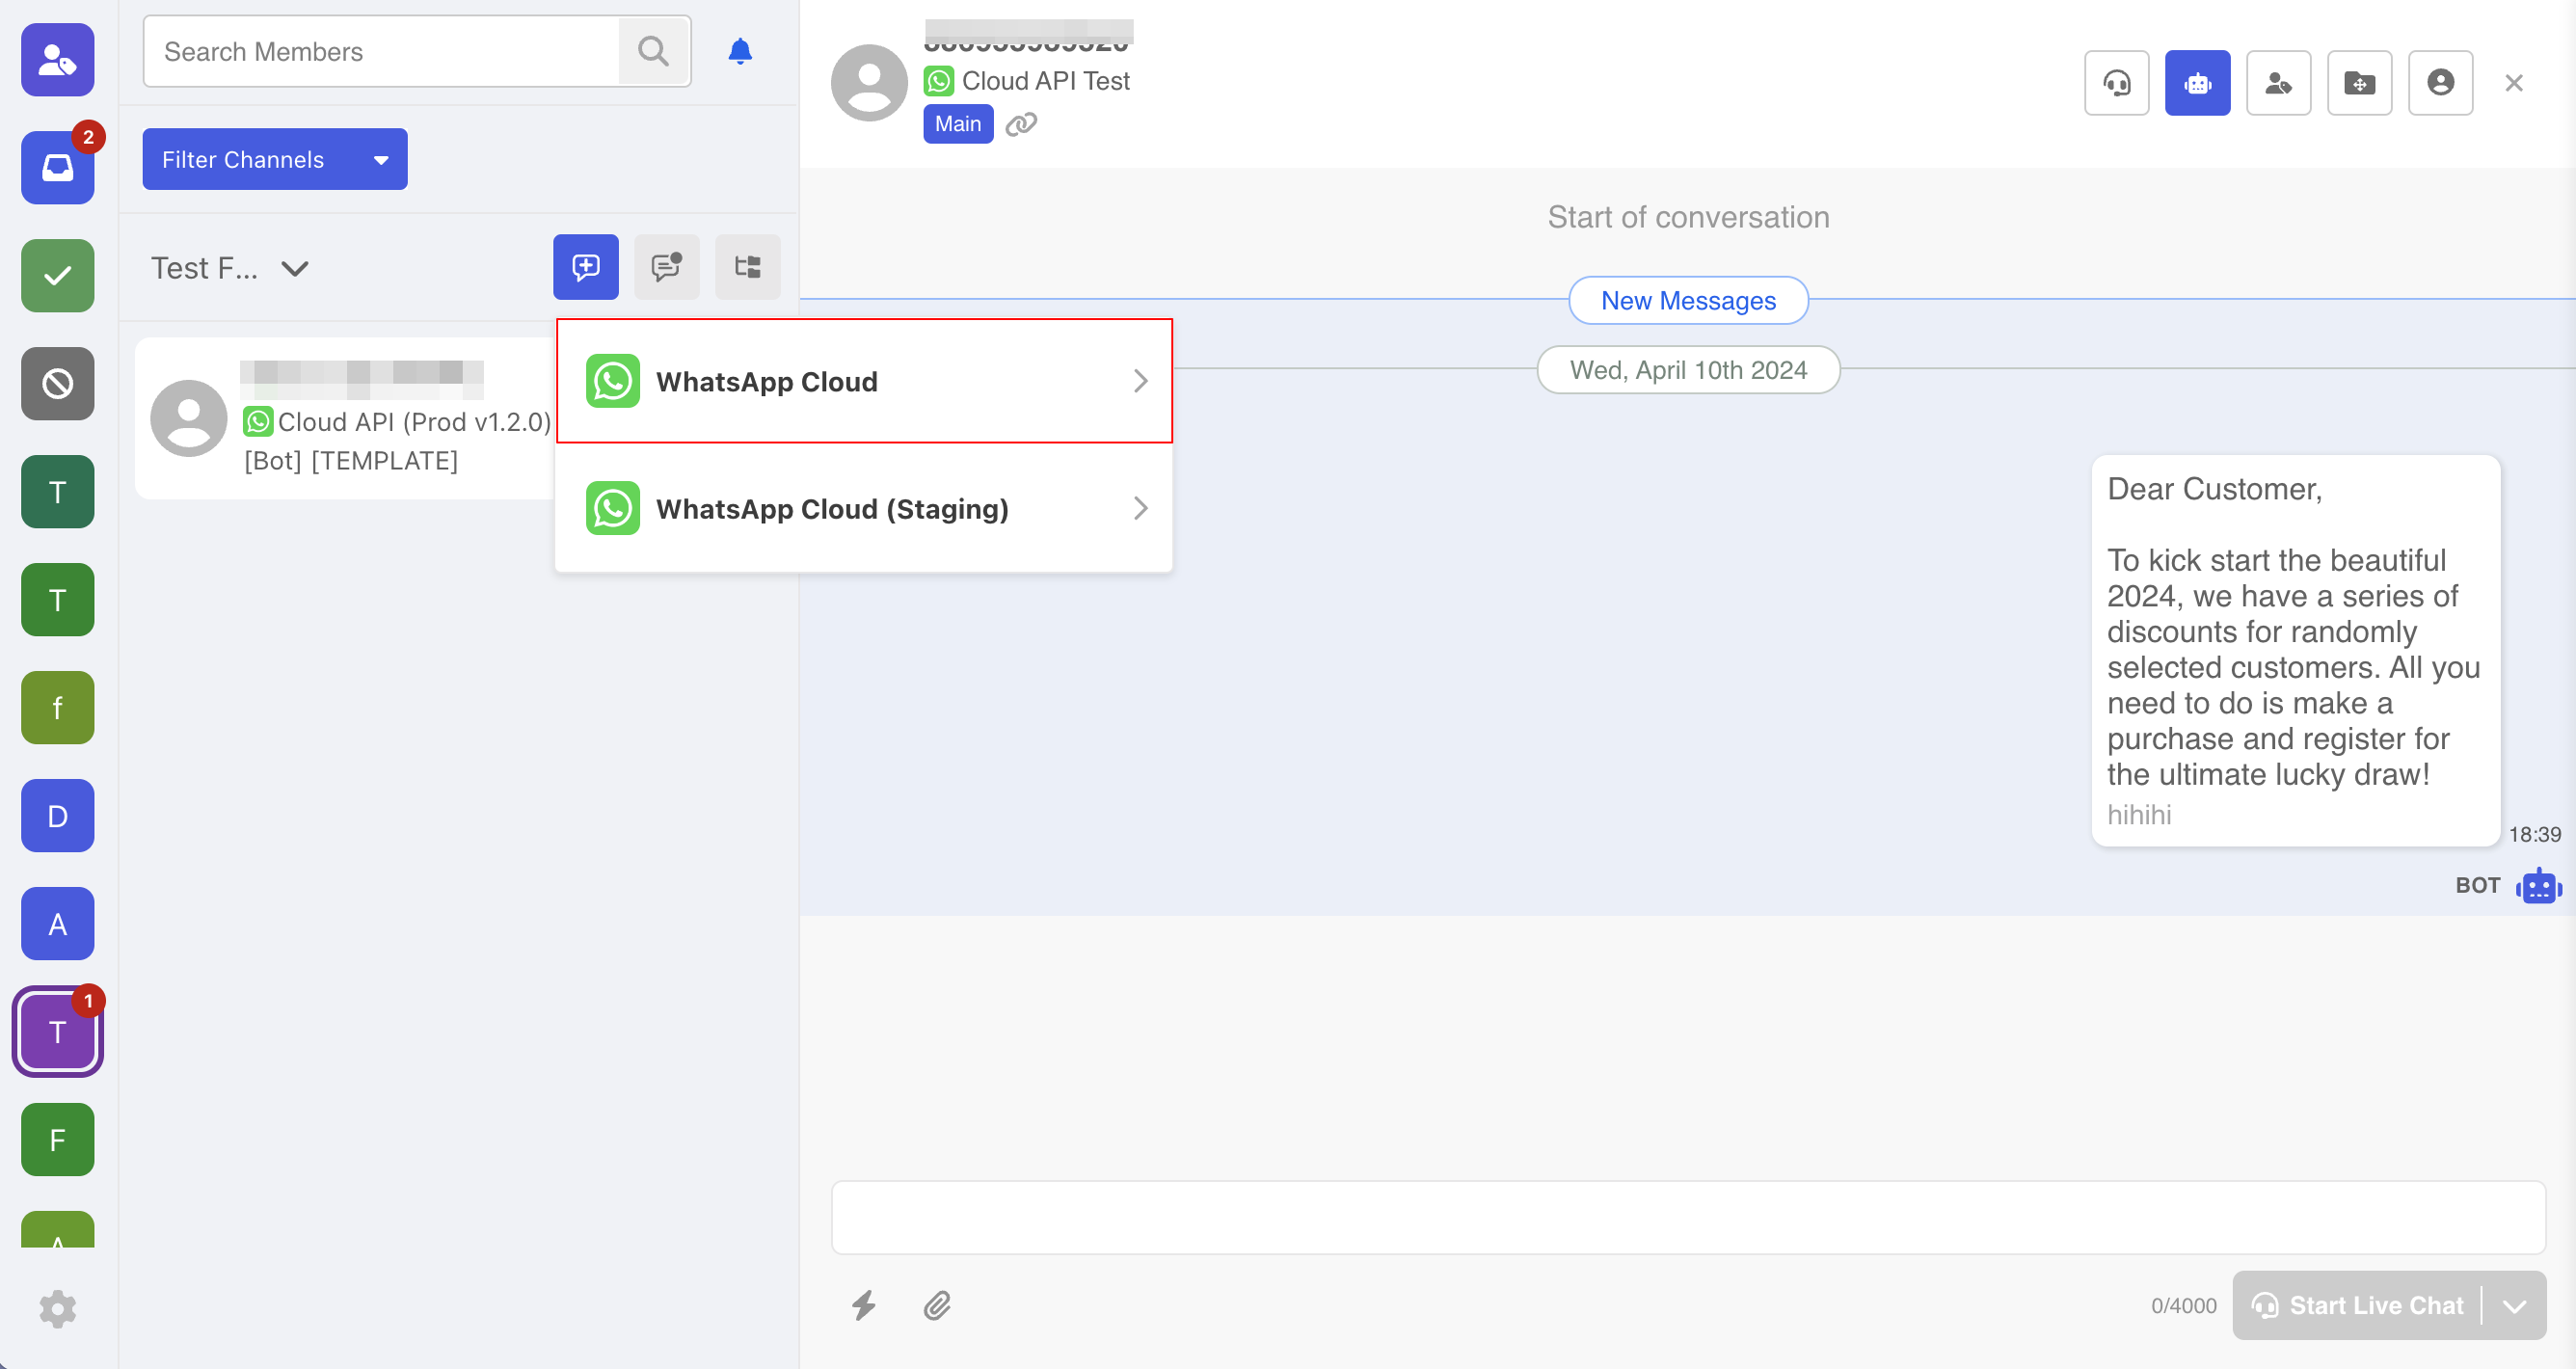
- Select the "Channel" and "Start a Conversation".
- Since you are initiating a new conversation, you need input the "Country Code" and "Phone Number" of the recipient.
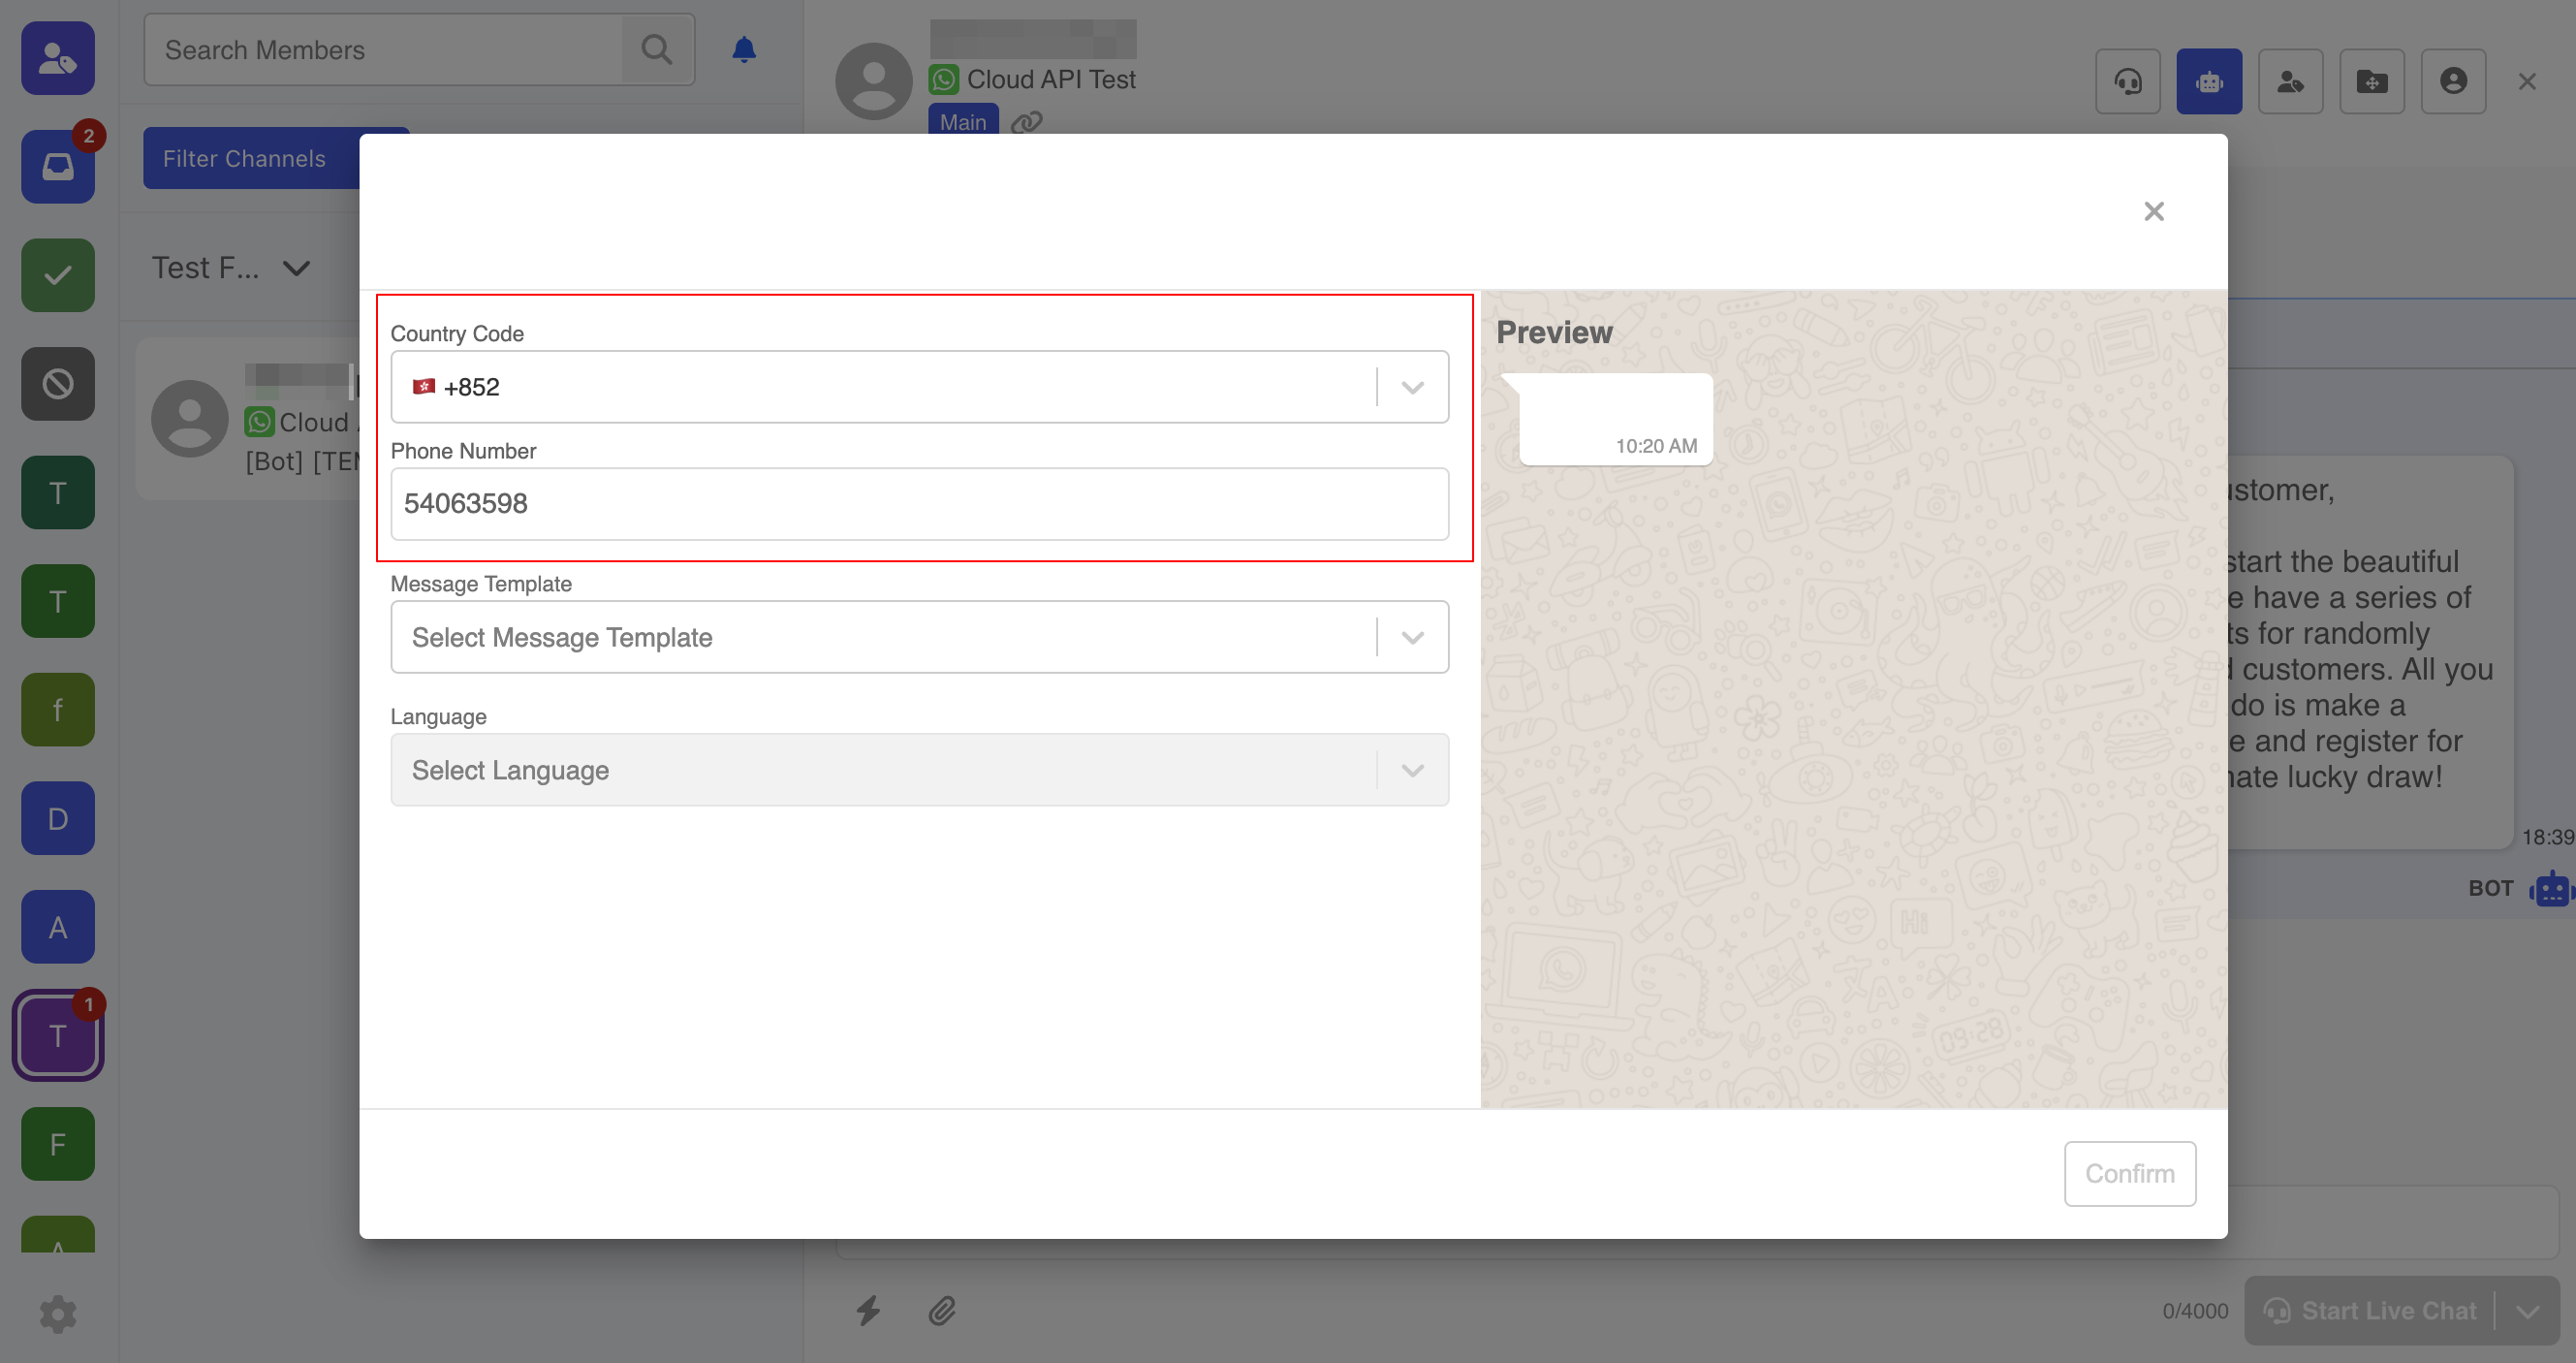
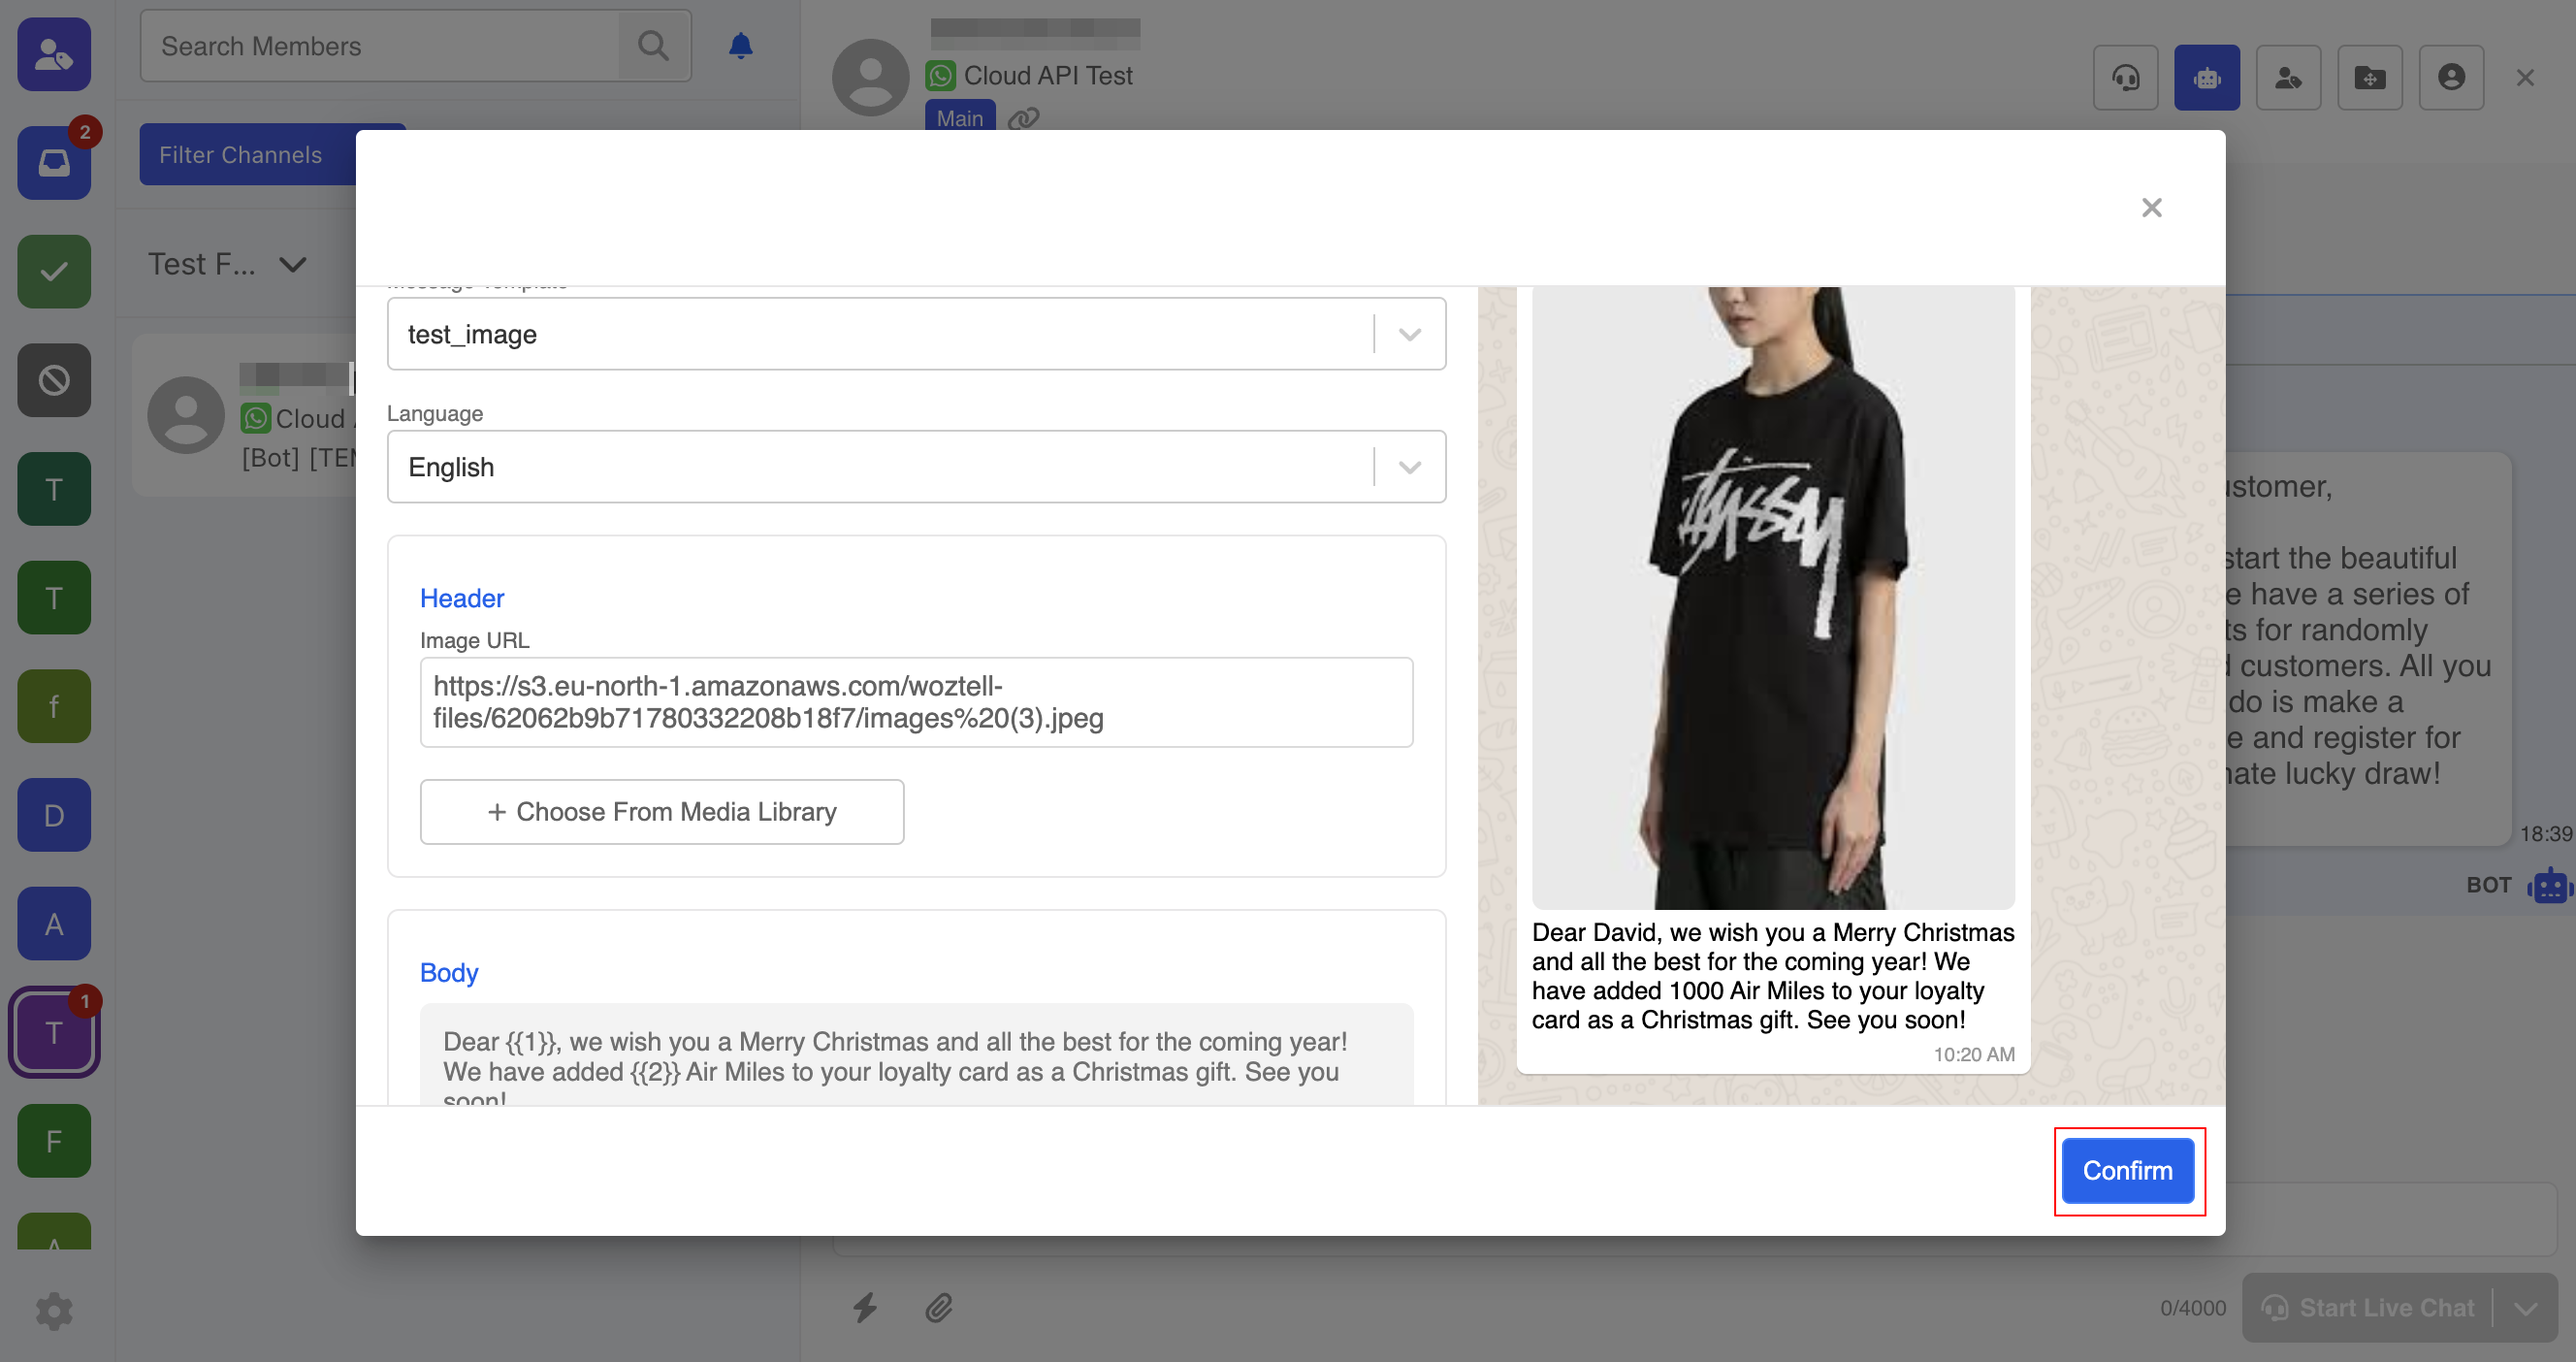
- Then, select the "Message Template" and "Language".
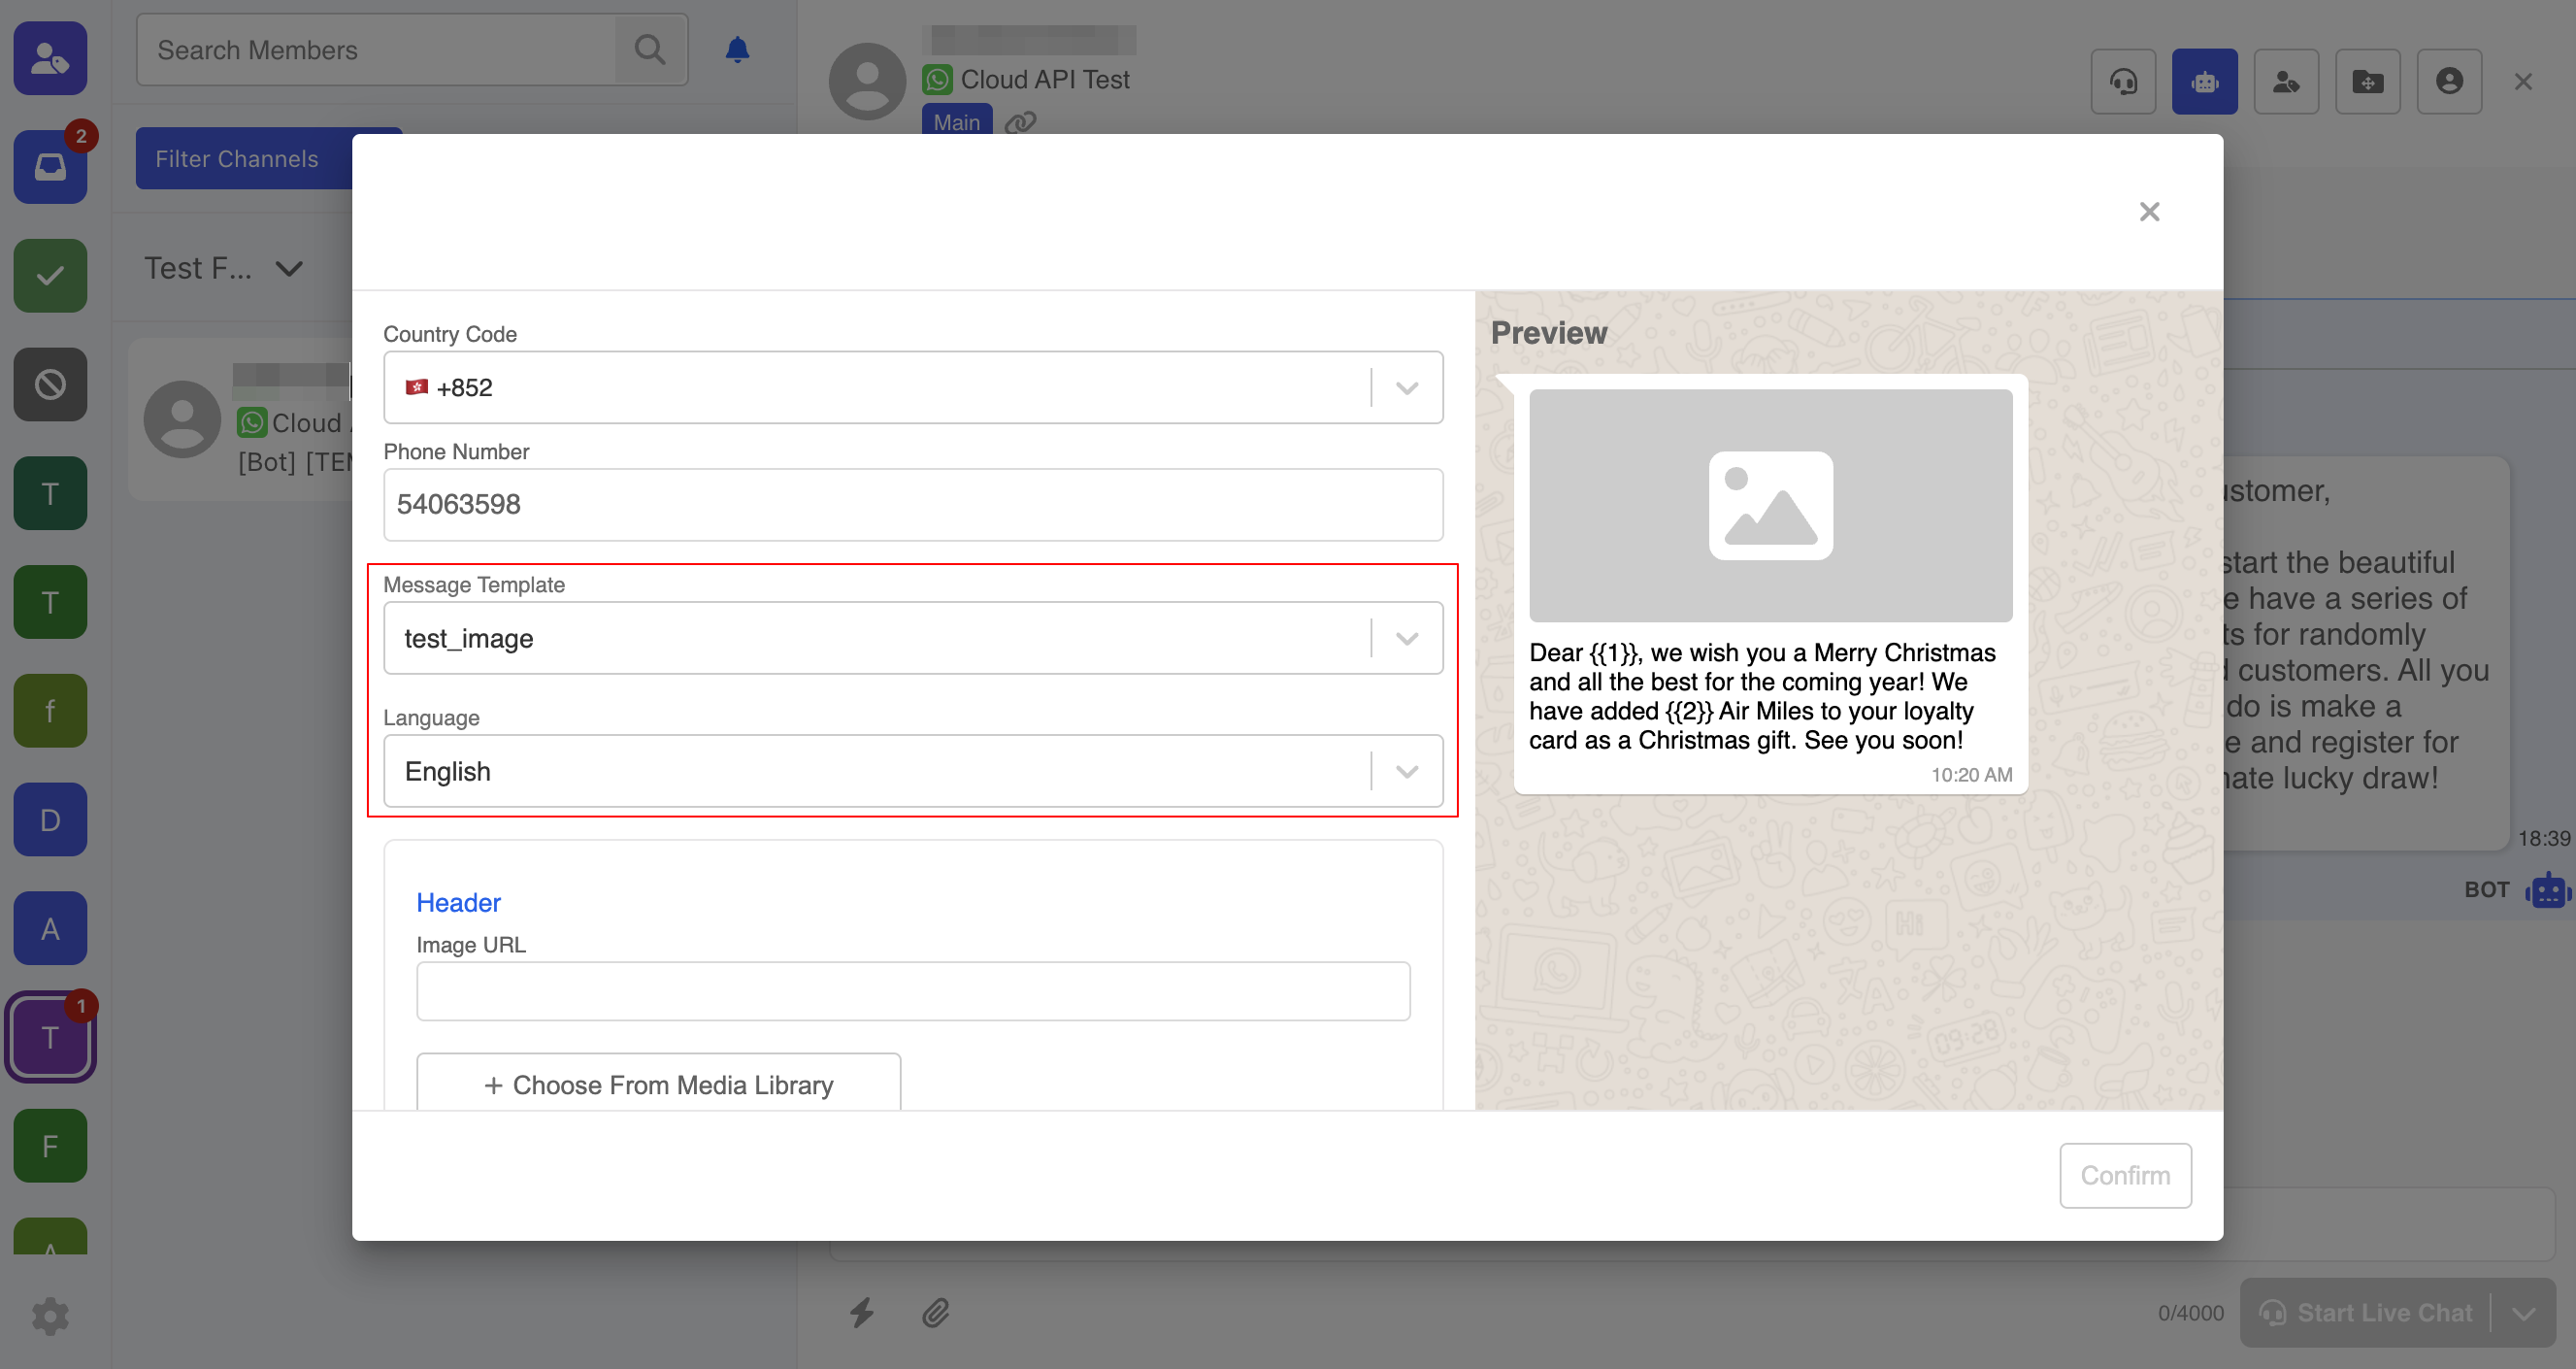
- After selecting the "Language", you can see the preview of the template. Fill in the parameters or media in the template (if any).
- If you need to add media to the template, you can click on "+ Choose from Media Library" to upload or select existing media in the library

- Once you have finished editing the template, click "Confirm" to send the template.
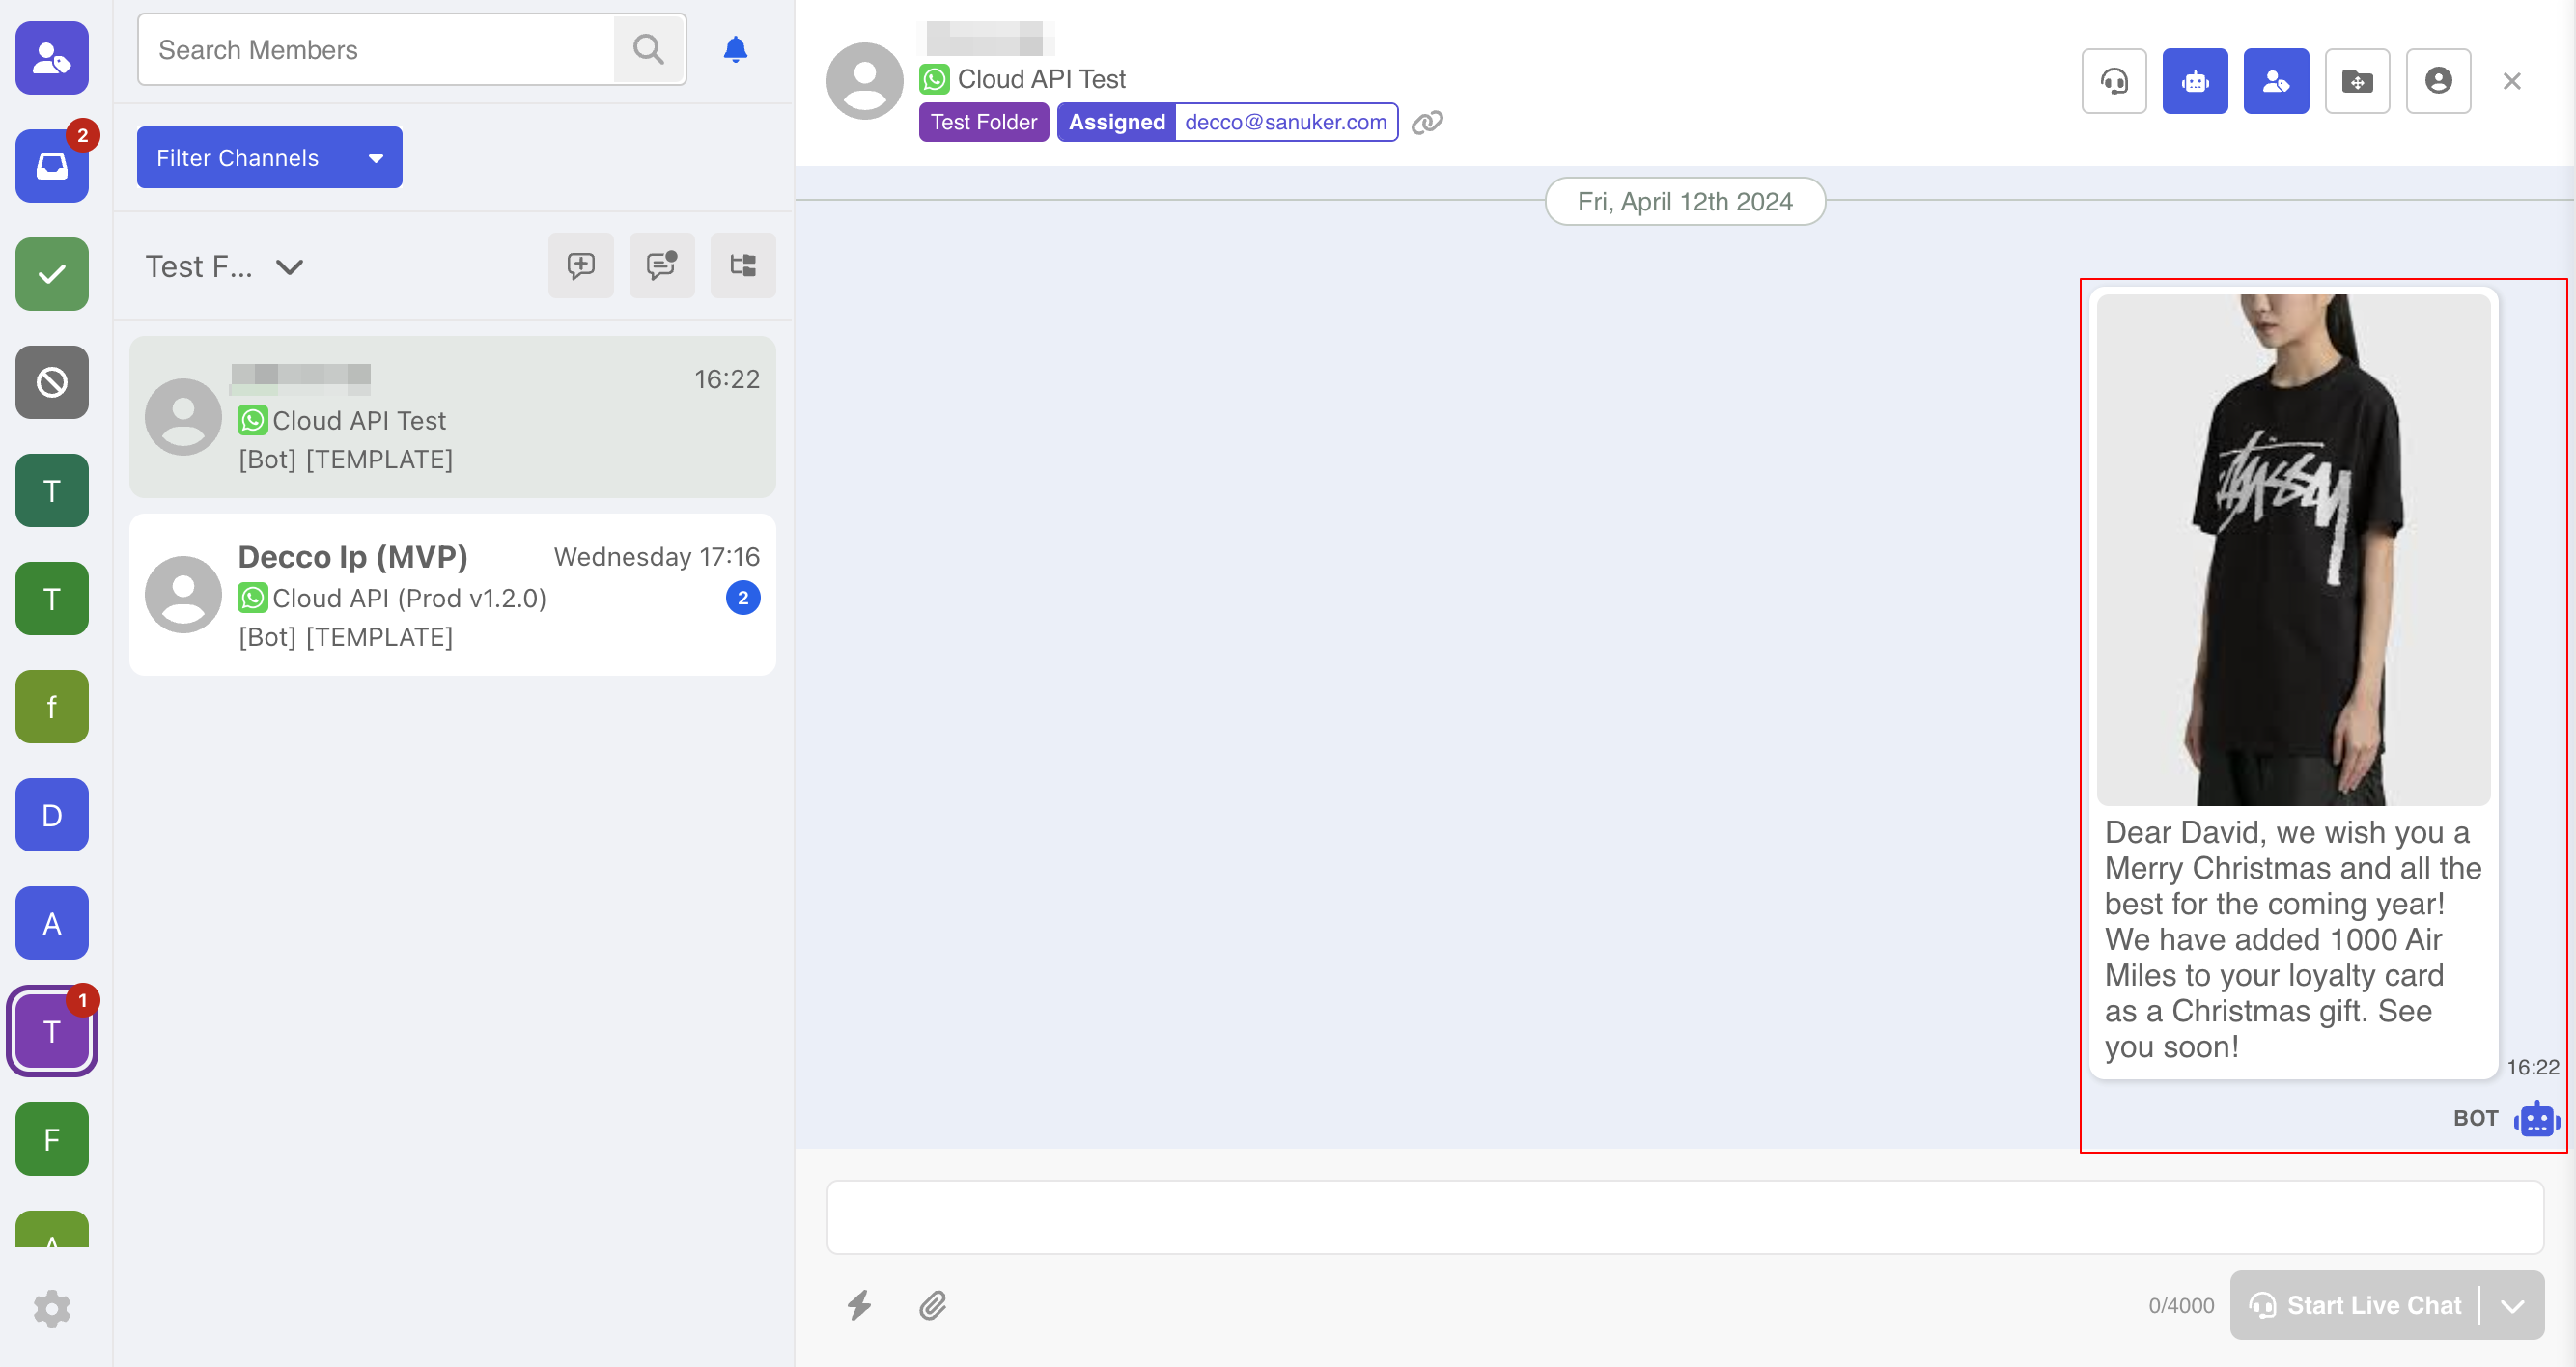
- Now, the template has been sent to this member.
NOTE
Once a message template is successfully sent using this inbox action, the corresponding thread will placed into the currently open folder, unless it belongs to a channel which is not supported in the current folder.
Resource Templates
By using the Resource Templates, you can also automate certain inbox actions by adding them to a chatbot.
Assign Thread to Folder
- In a node, add a new "Action".
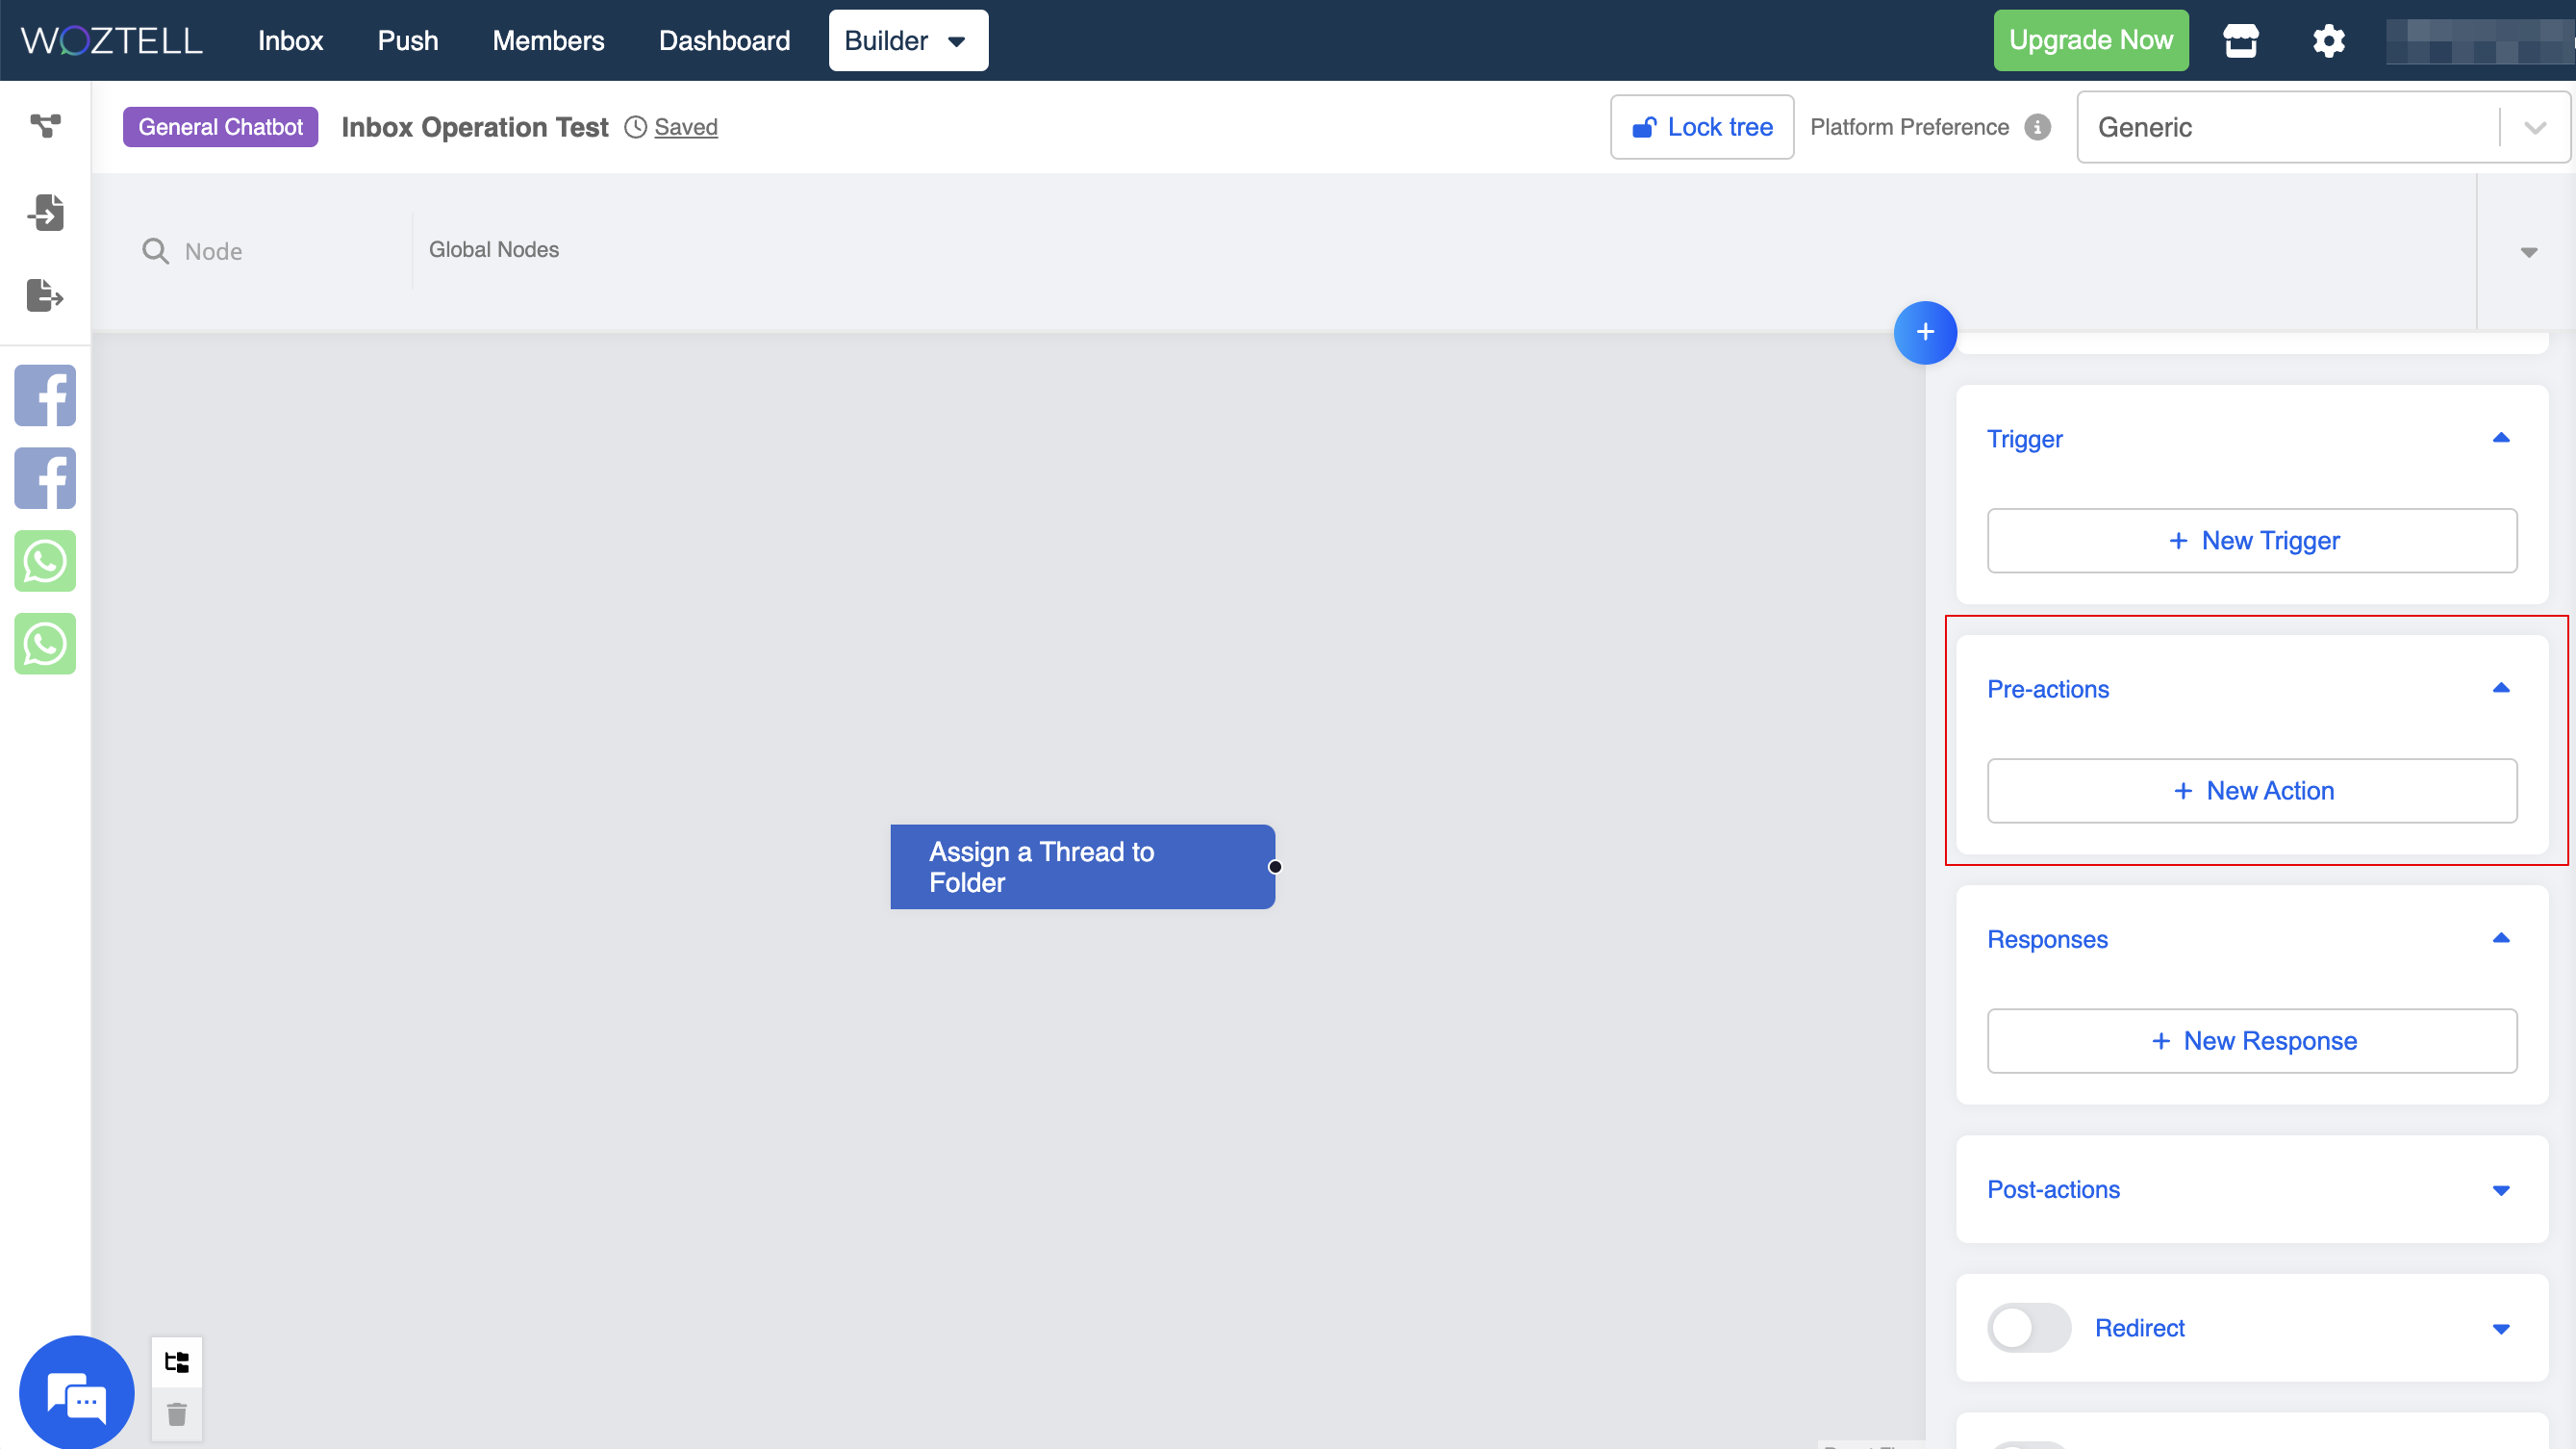
- Select the resource template "Move Thread to Folder".
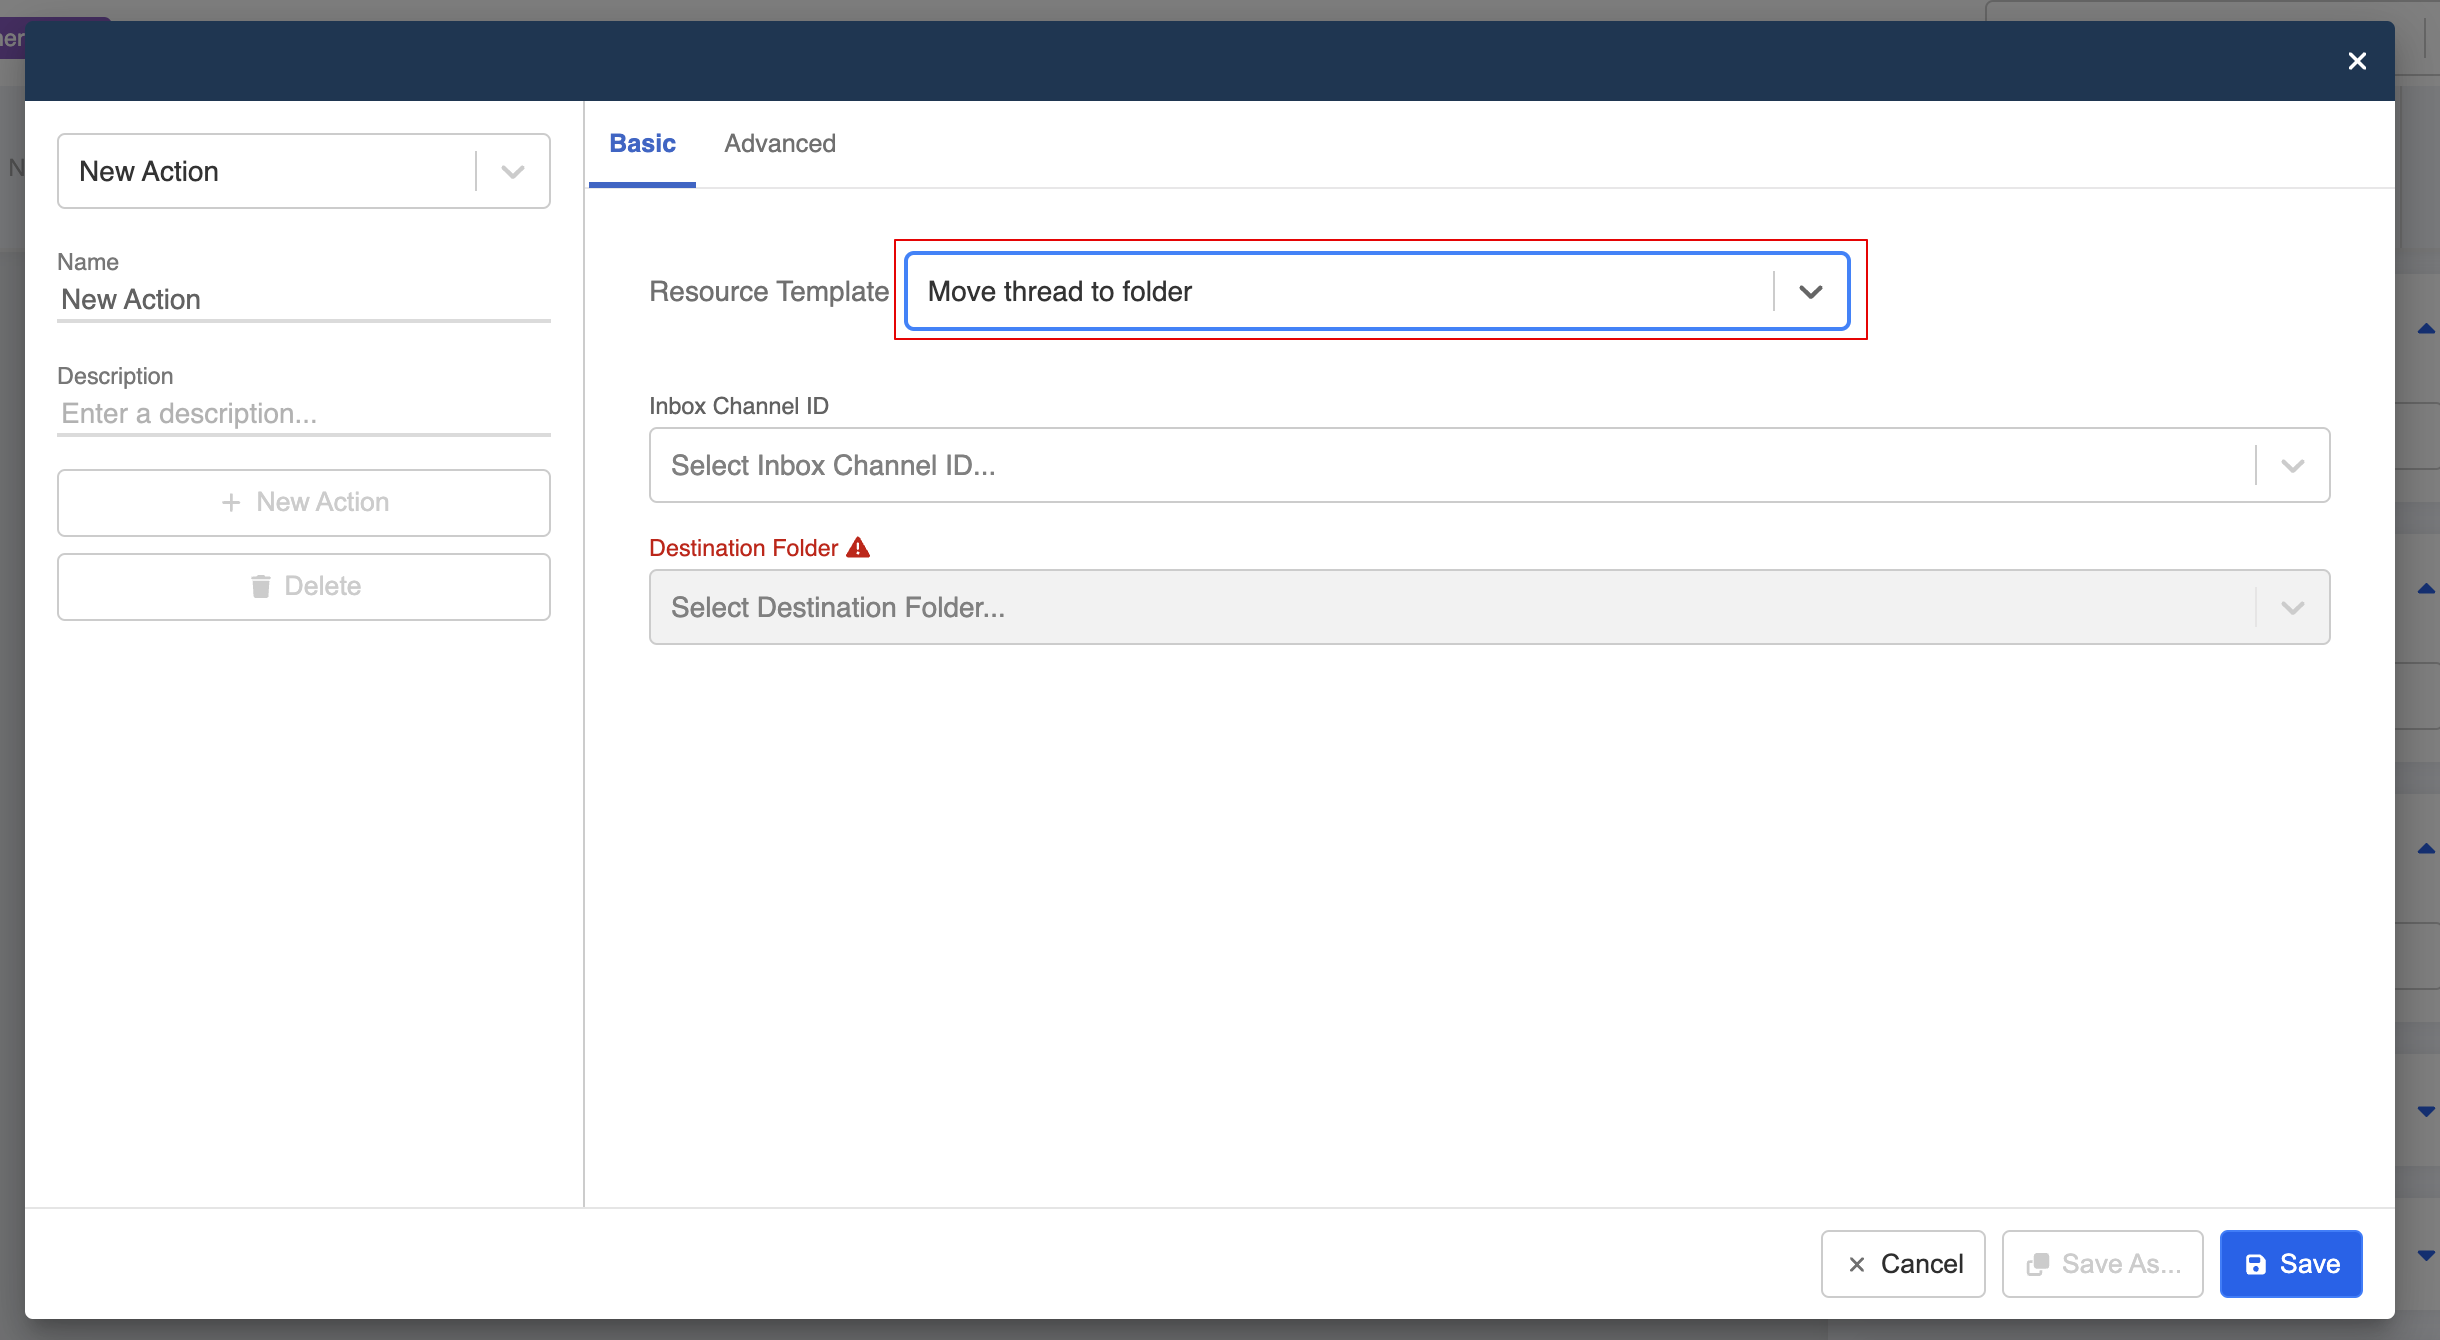
- Select Inbox Channel ID and Destination Folder. Remember to "Save" the settings.

- When the node is executed, the corresponding thread will be assigned to the destination folder.
Once a thread is moved to another folder, the MOVE_THREAD_FOLDER event will be sent to the channel webhook event. You can make use these information to create other follow-up actions in the chatbot flow.
Channel Webhook event {
  "type": "MOVE_THREAD_FOLDER",
  "data": {
    "from": "main",
    "to": "test",
    "timestamp": 1704679499346,
    "role": "ADMIN",
    "user": "603c4e11a936adcd2557389b"
  },
  "timestamp": 1704679504020,
  "messageId": "a9b205ef-13f6-4d84-863a-06ee7ef48ef9",
  "__source__": "INCOMING_WEBHOOK",
  "member": "636cd3d81daca40008296f08",
  "channel": "636aaf9ff3cfa1164f3e1b1c",
  "app": "72222b9b71780332208b18f7"
}
Assign Agent to Thread
Select "Change Thread Agent" from the action resource templates. Select the agent to be assigned under "Inbox User ID". There is an optional checkbox for switching on the live chat mode.
Agents Assignment Logic
With this action, you can create a group of agents who will be randomly assigned to the thread, based on their respective availabilities.
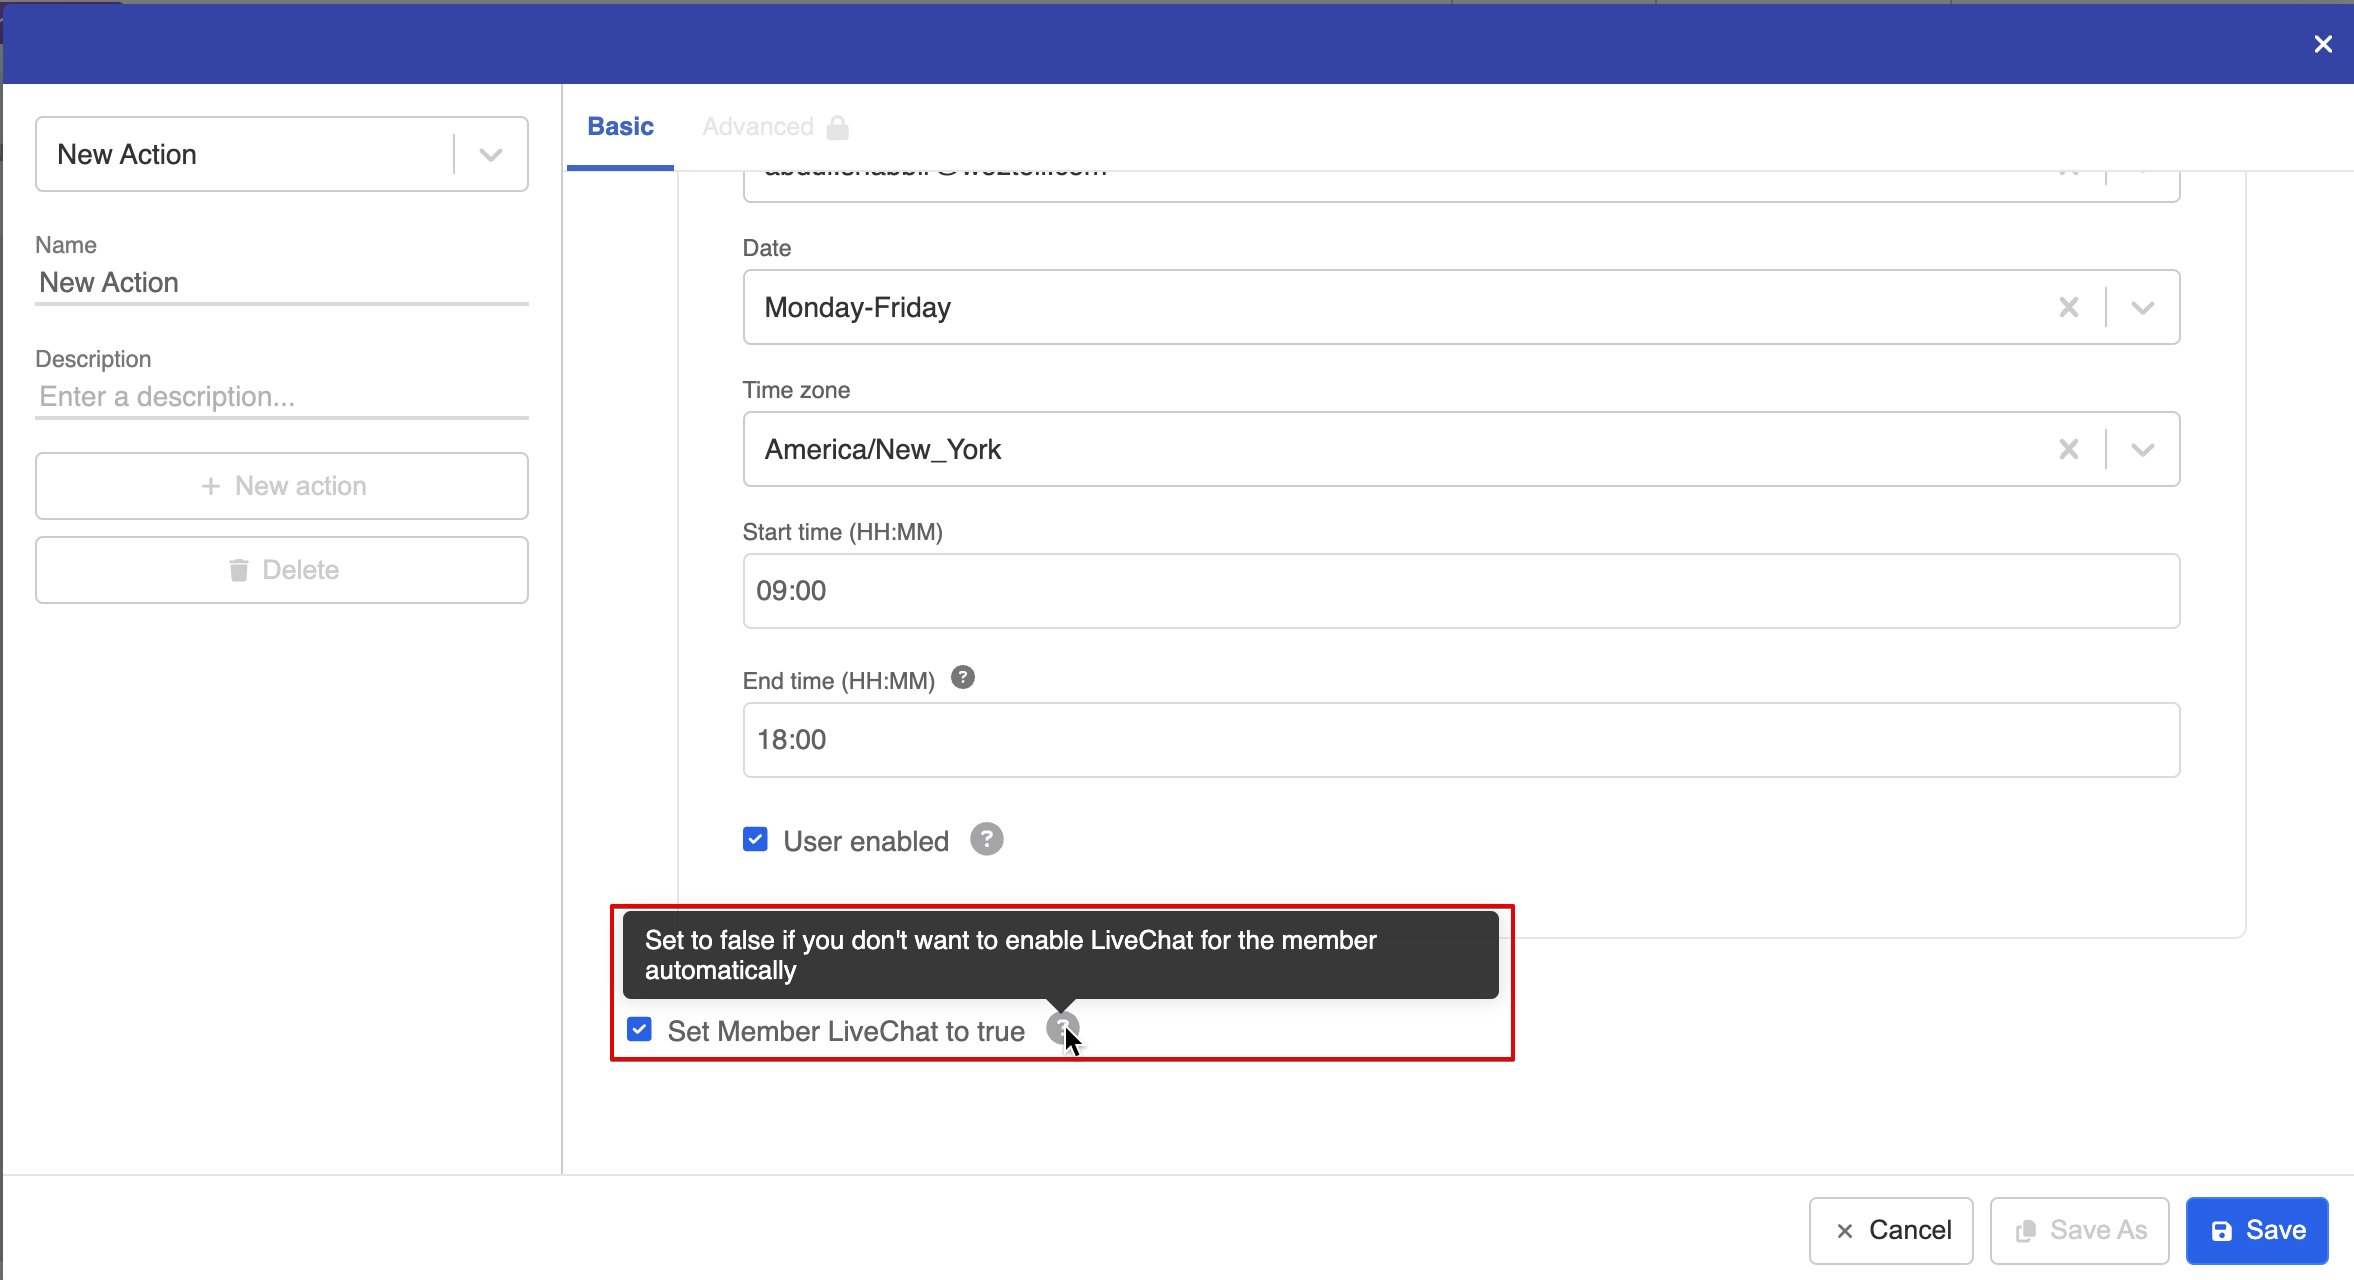
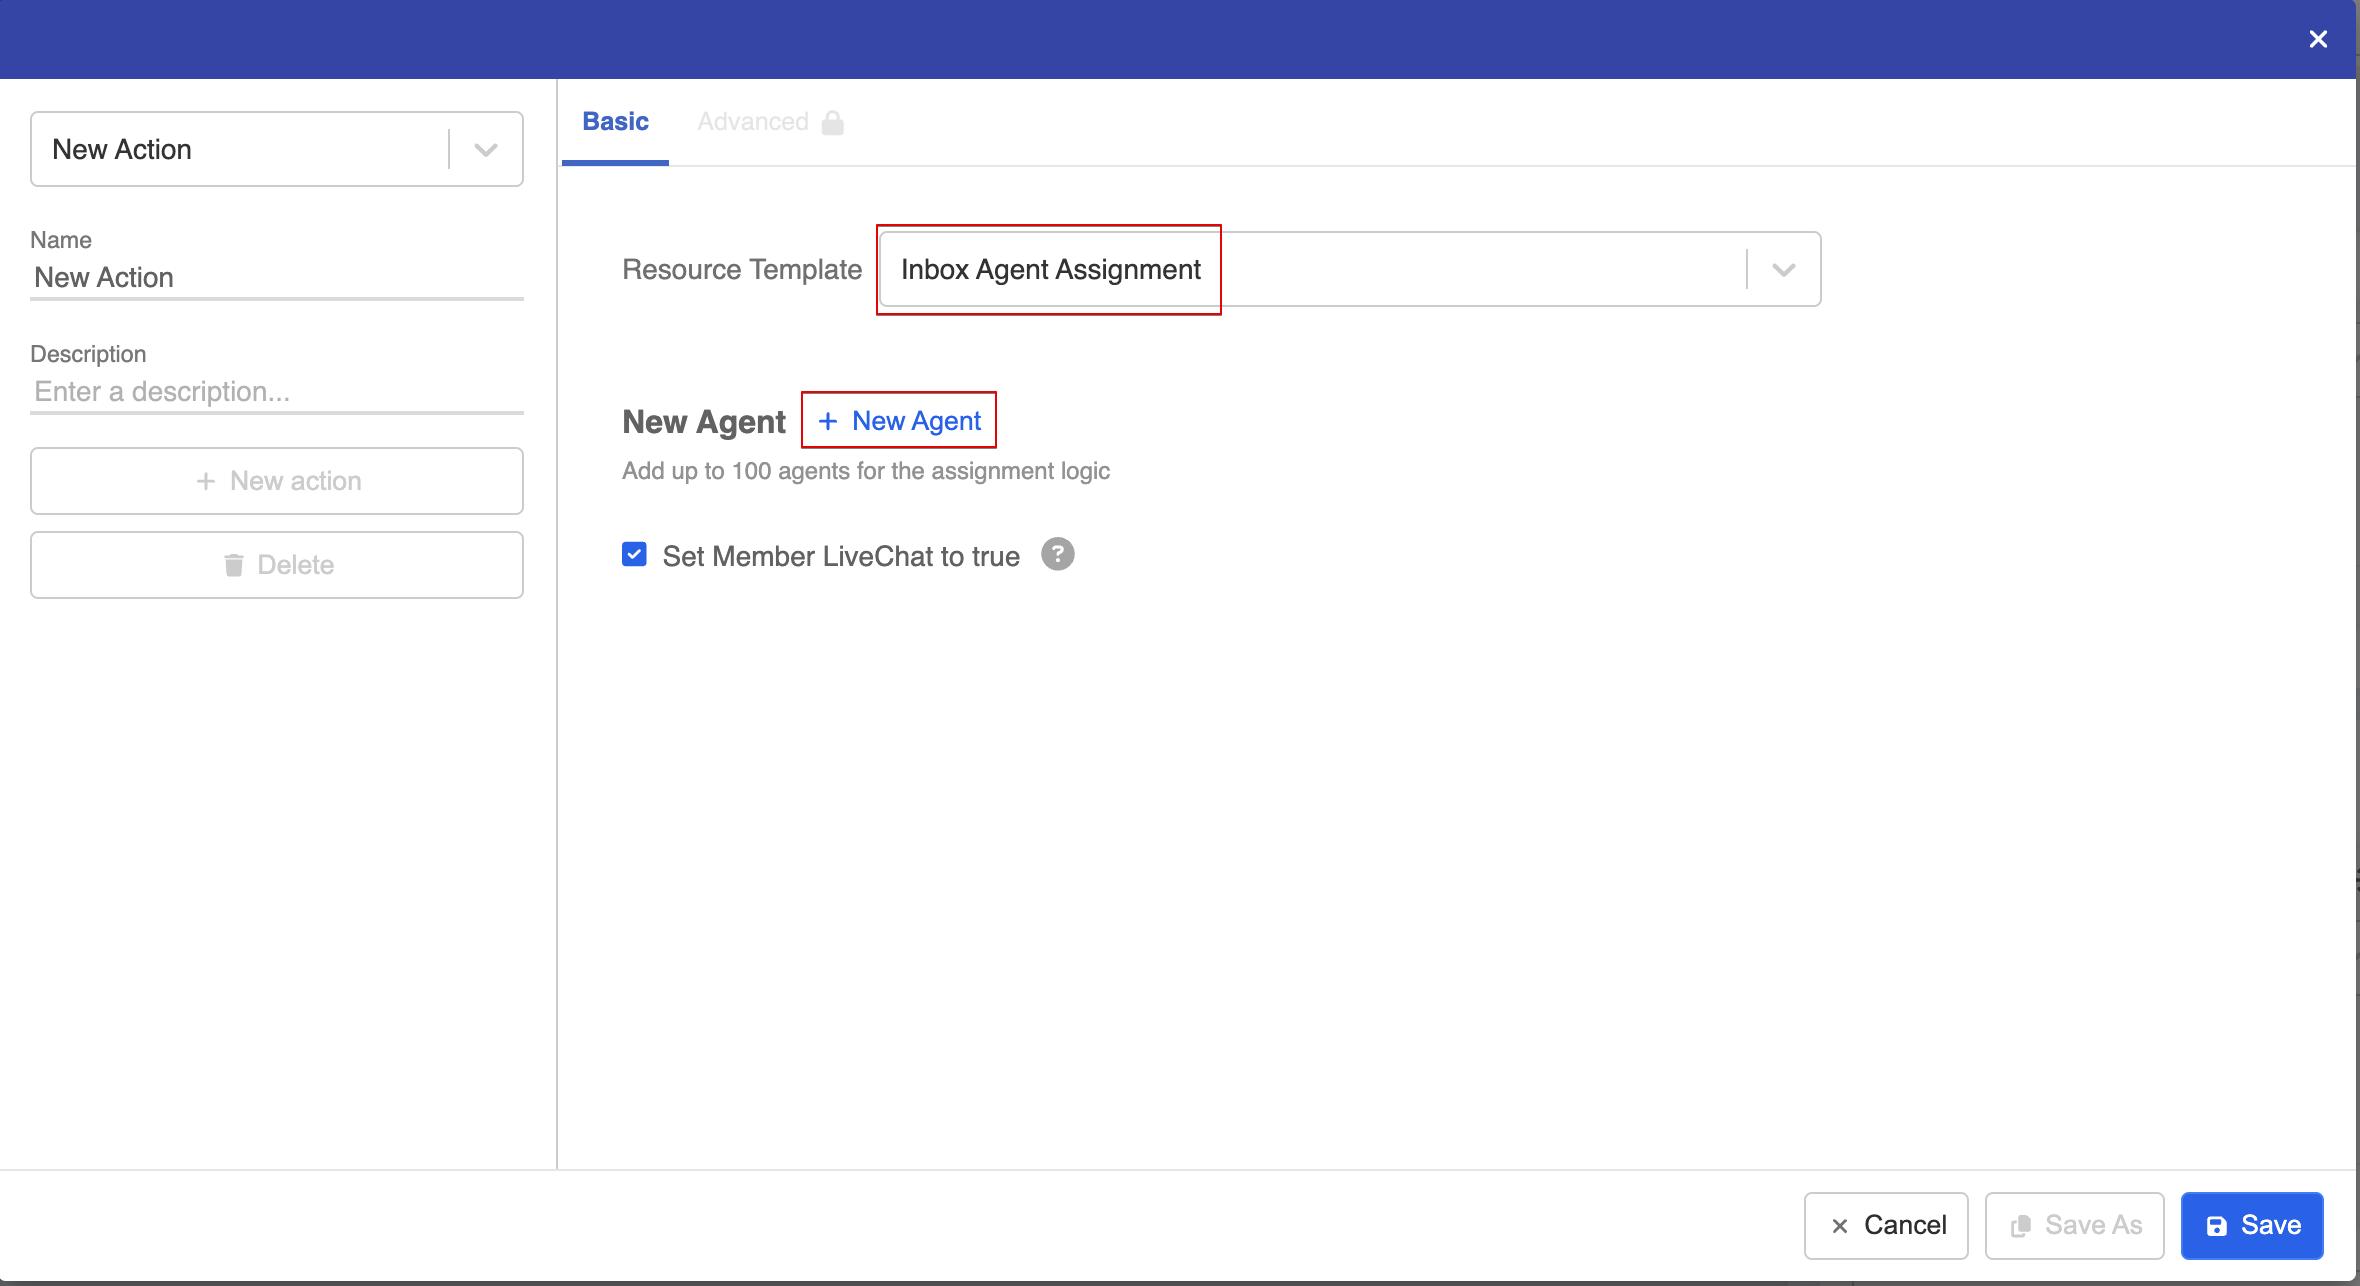
- Select "Inbox Agent Assignment" from the action resource template. Click "+ New Agent" to start adding agents into the pool for thread assignment.
- Select the "Agent" and the working hours, including "Date", "Time zone", "Start time" and "End time". Therefore, the agents will only be assigned within their available period.
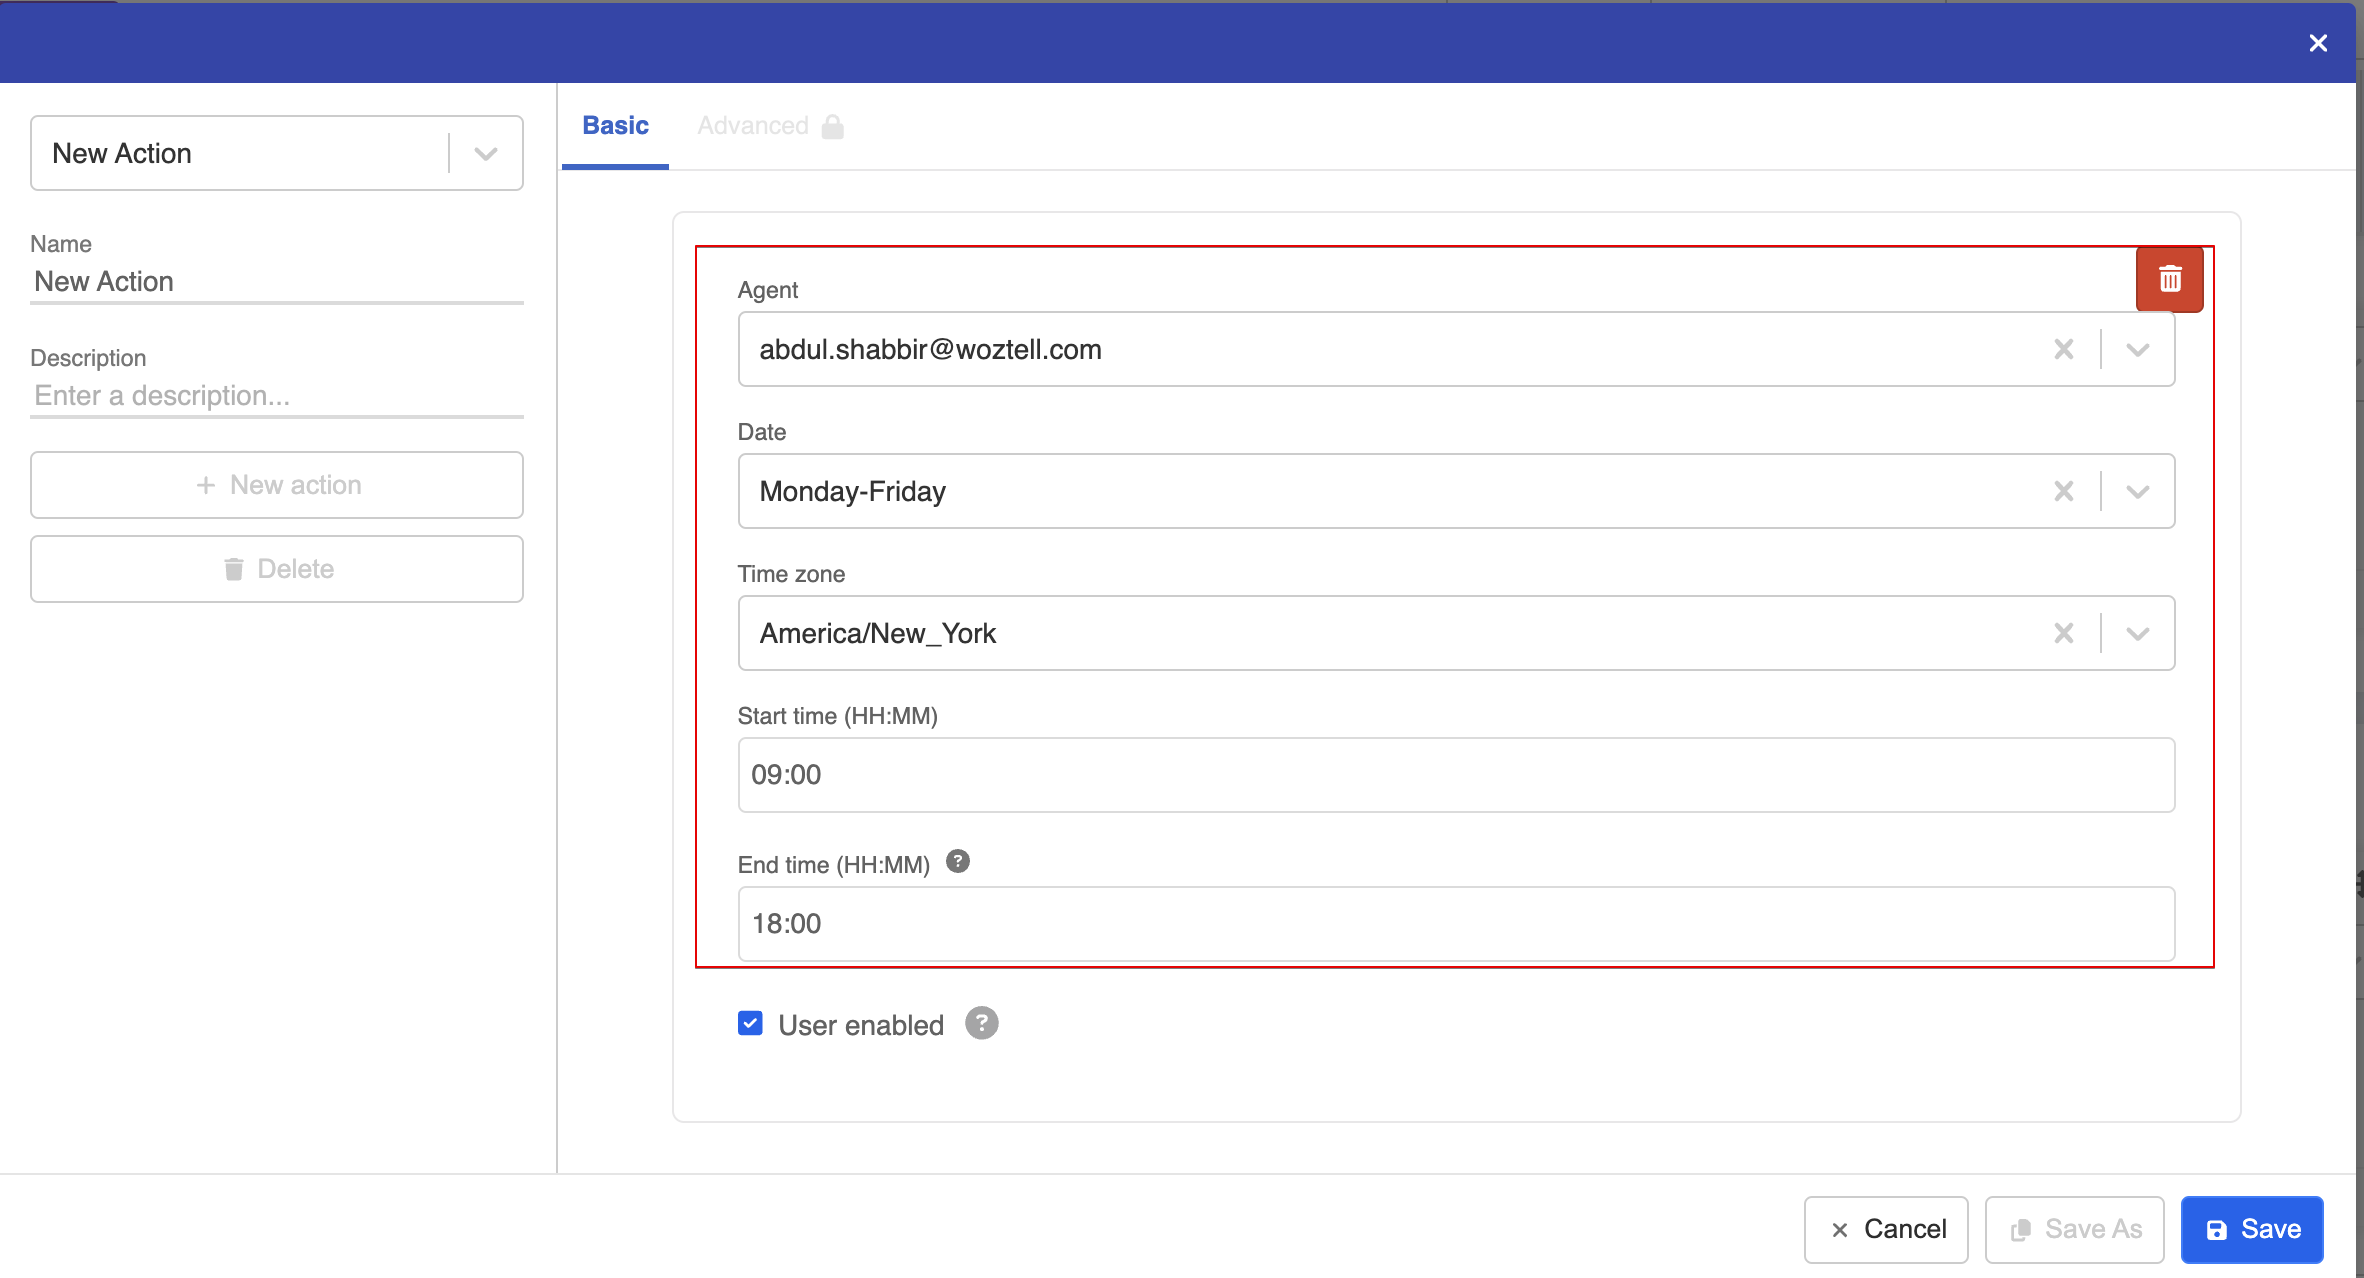
- Optionally, you can disable the agent, so he/she cannot be assigned regardless of their availability.
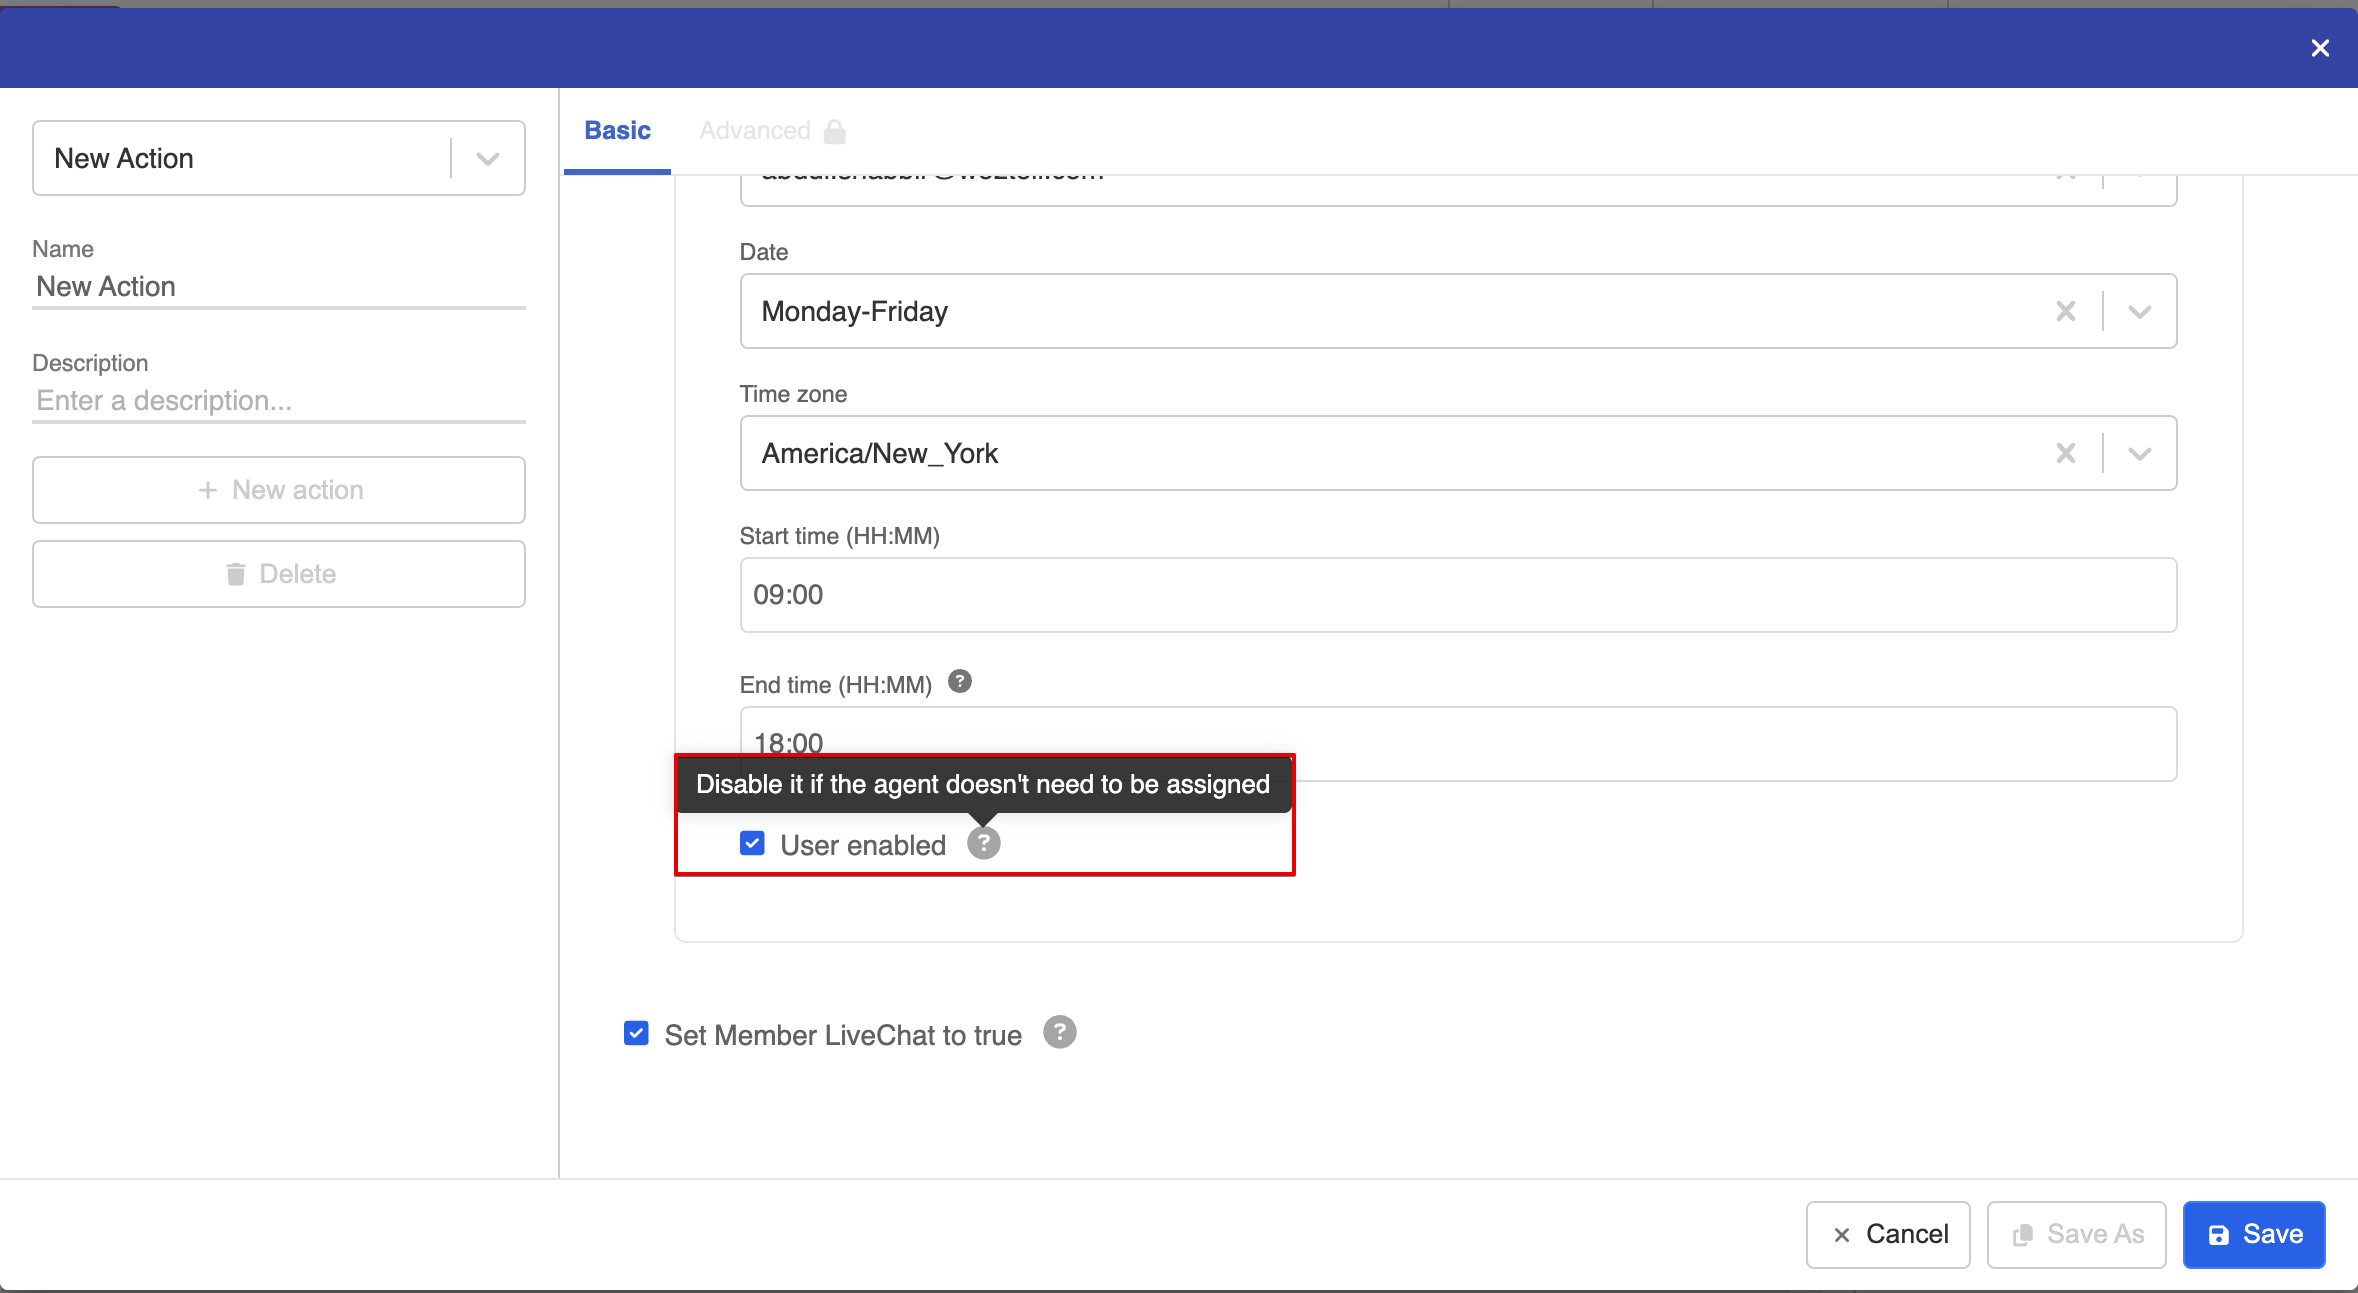
- Moreover, it is also recommended to keep "Set Member LiveChat to true" as enabled, so that the thread will be switched to live chat mode once it is assigned.