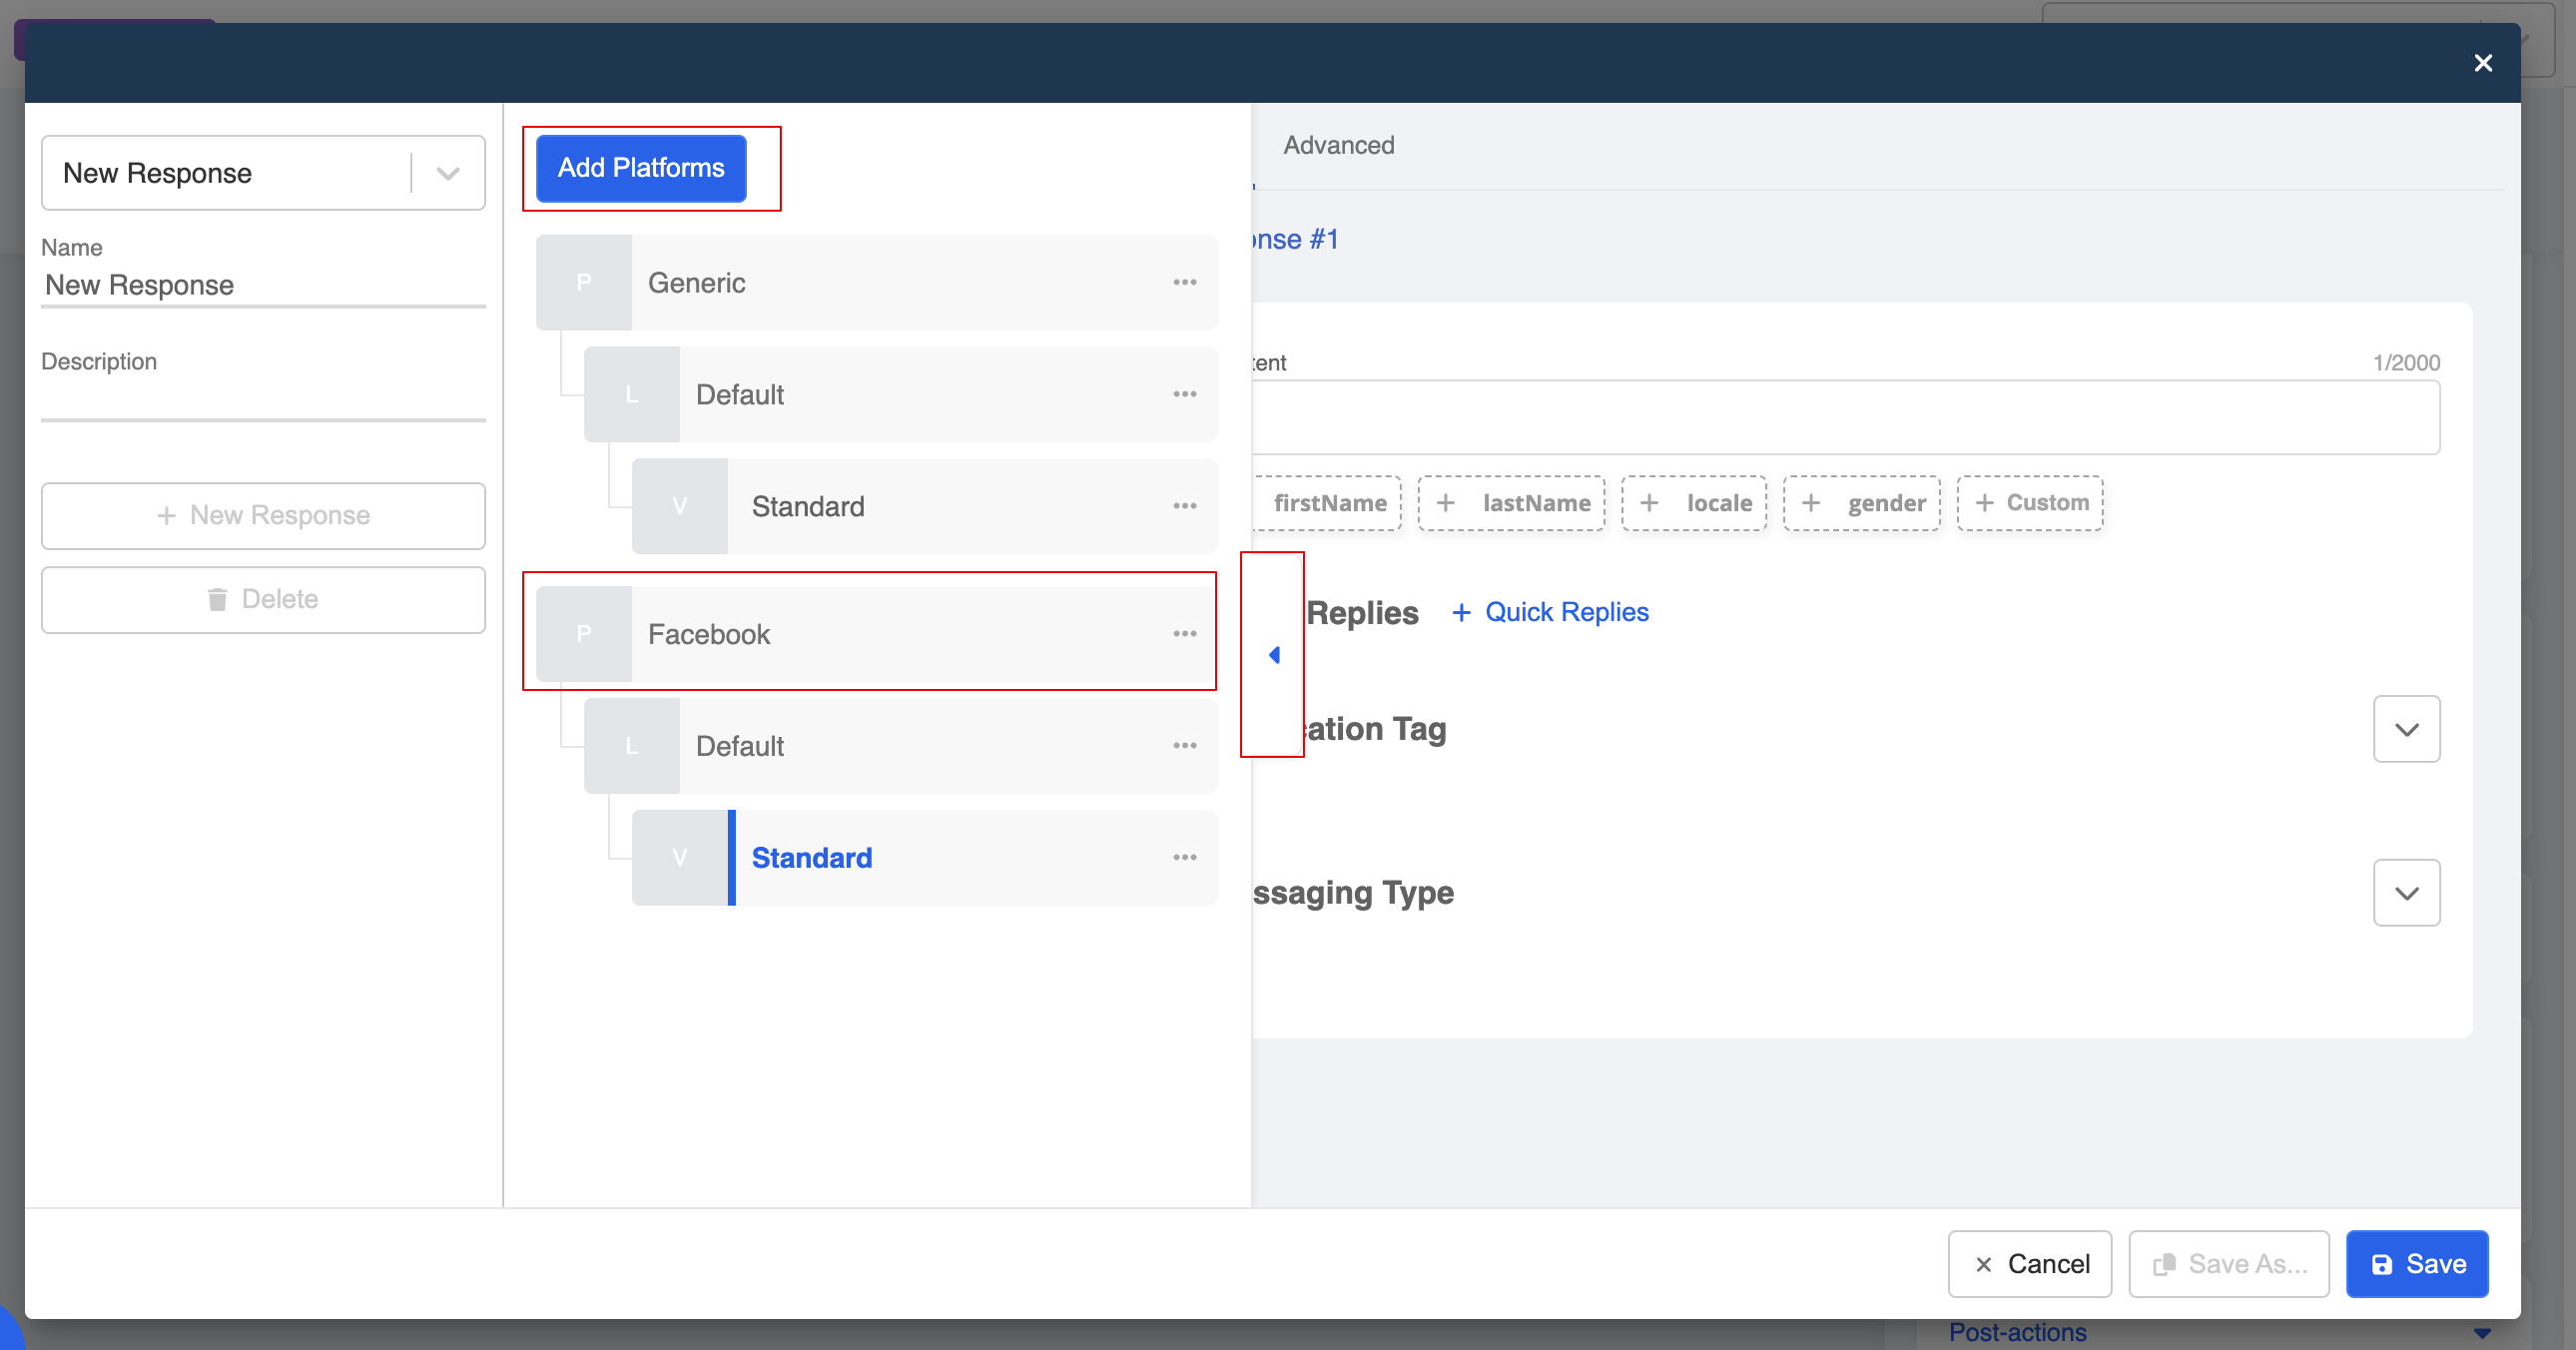
Template response for Facebook Messenger
The Facebook Messenger extension provides various interactive response templates for applying in difference use cases. With predefined templates, all you need is to fill in the information and send it out.
Coupon Template
The Coupon Template allows you to send an interactive message to your users and allow them to get a coupon code. This is useful for organizing campaign with your Messenger users.

Create Template
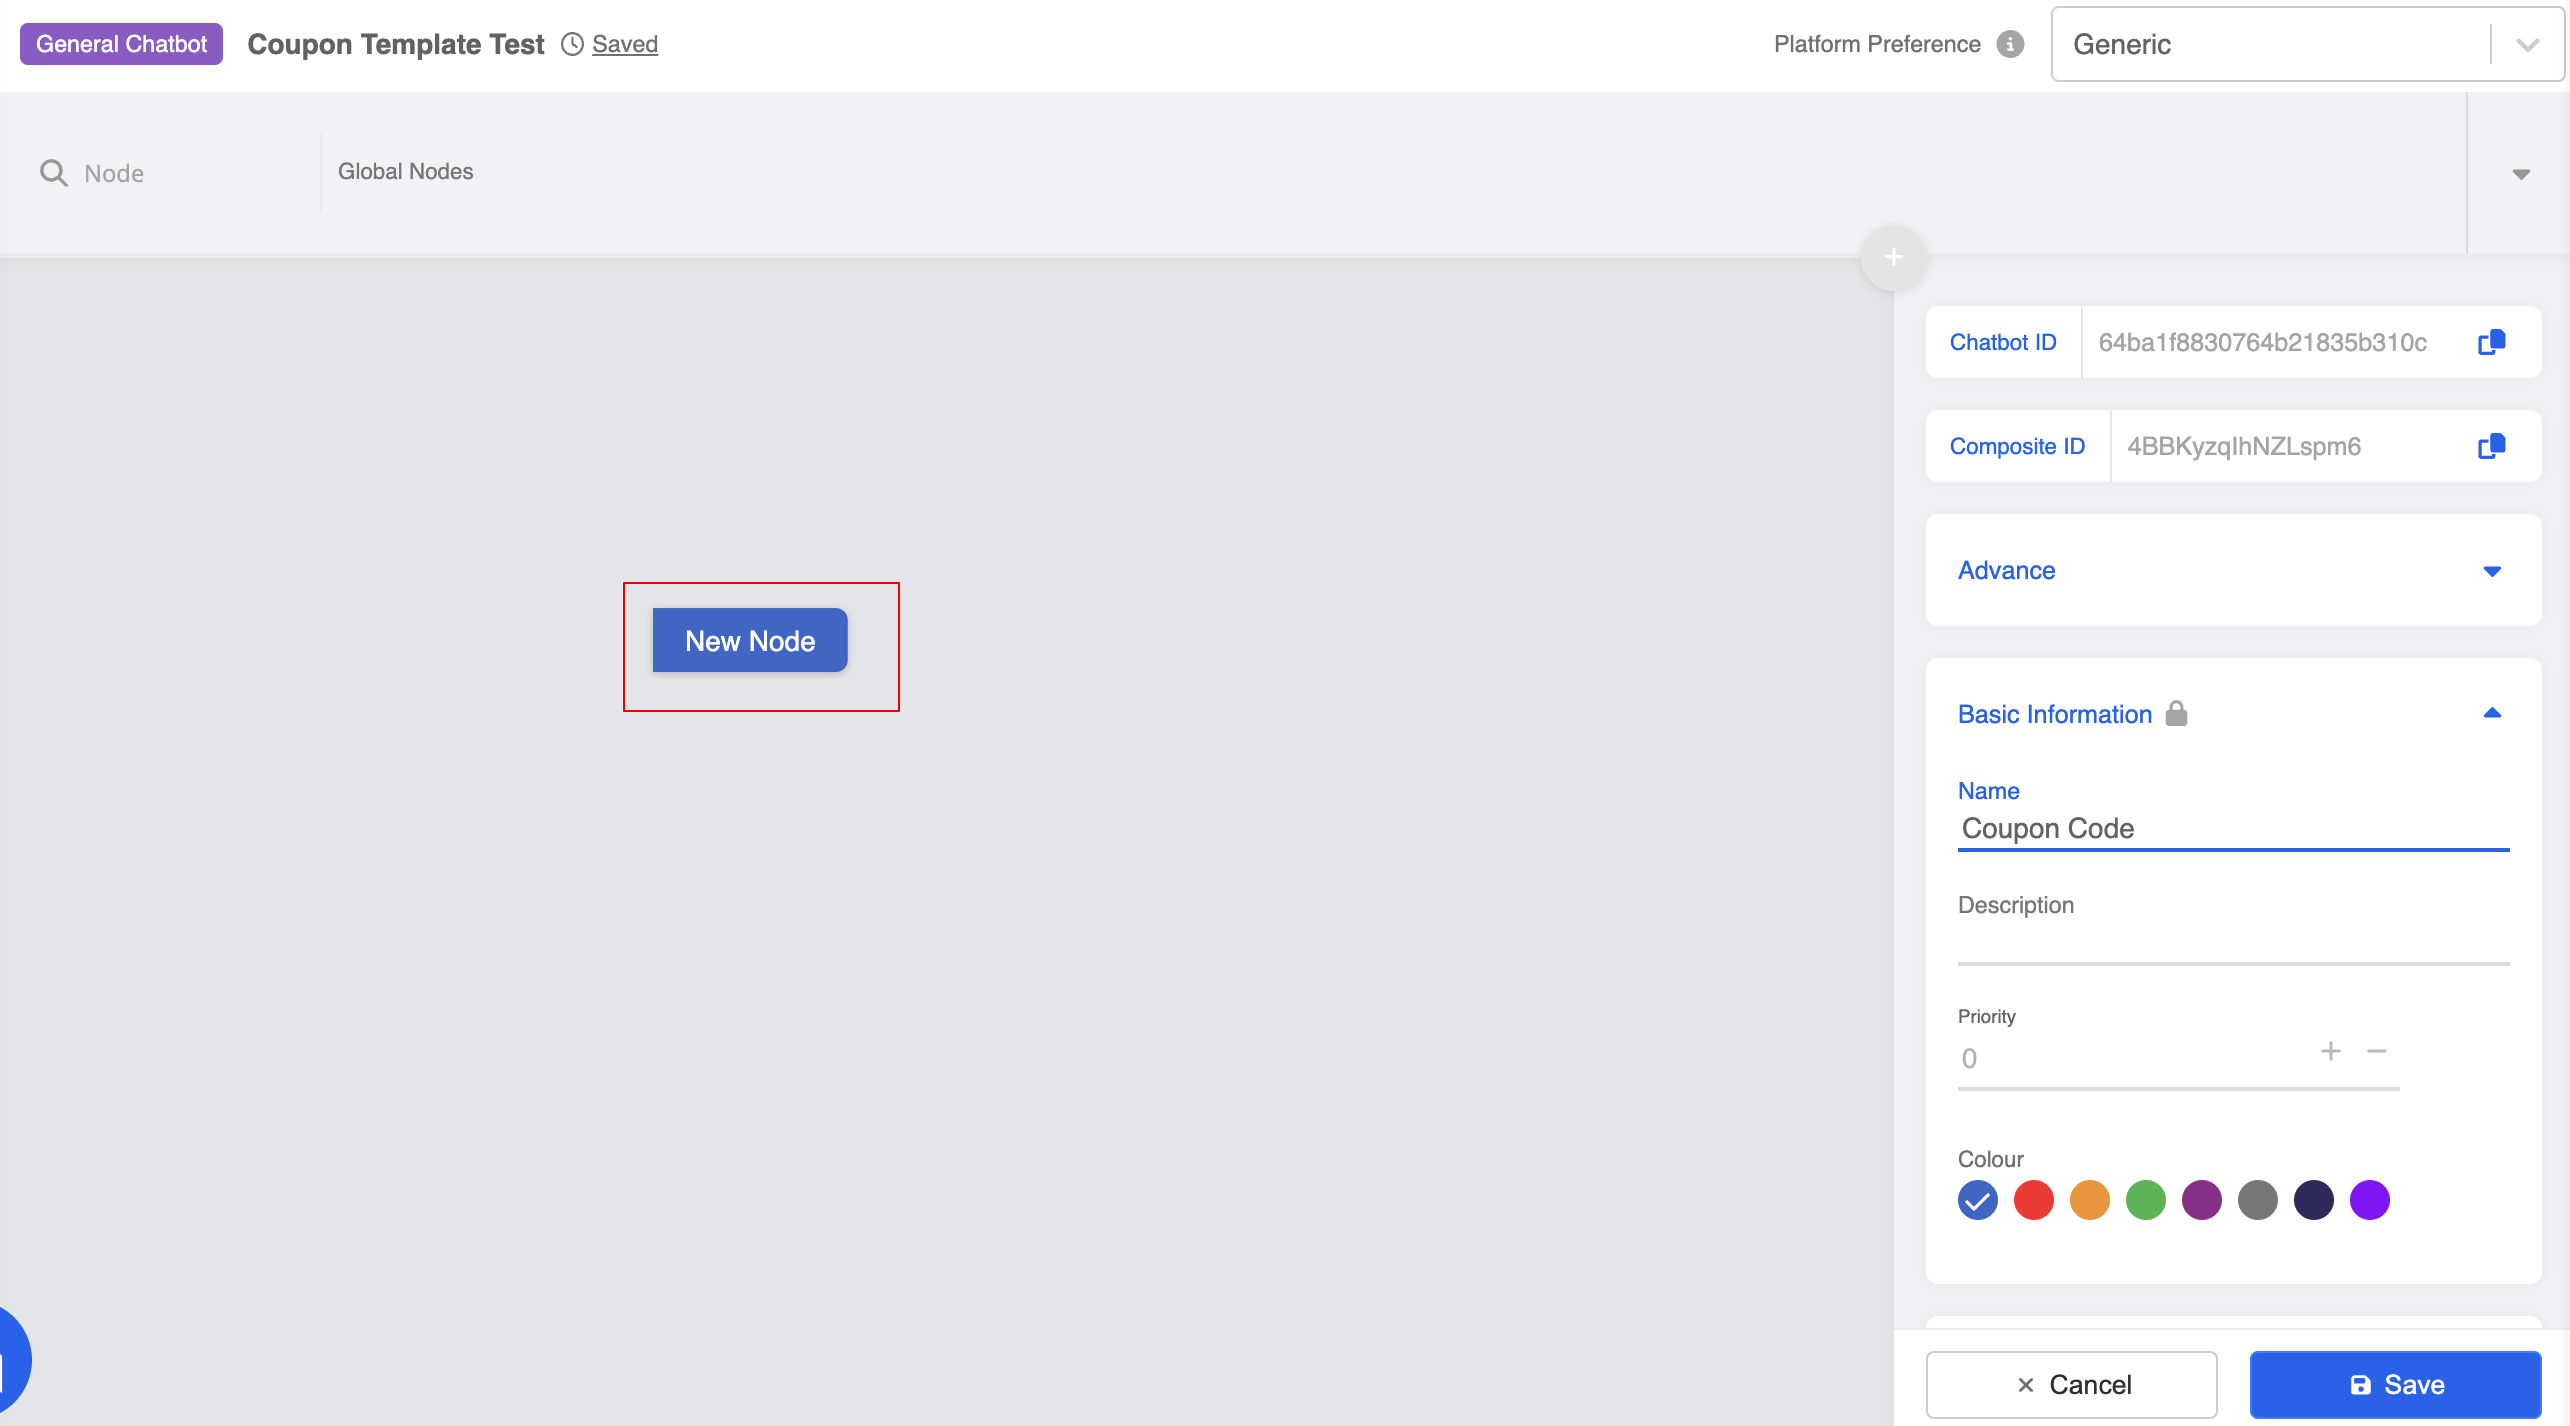
- First, create a general node in the bot builder.
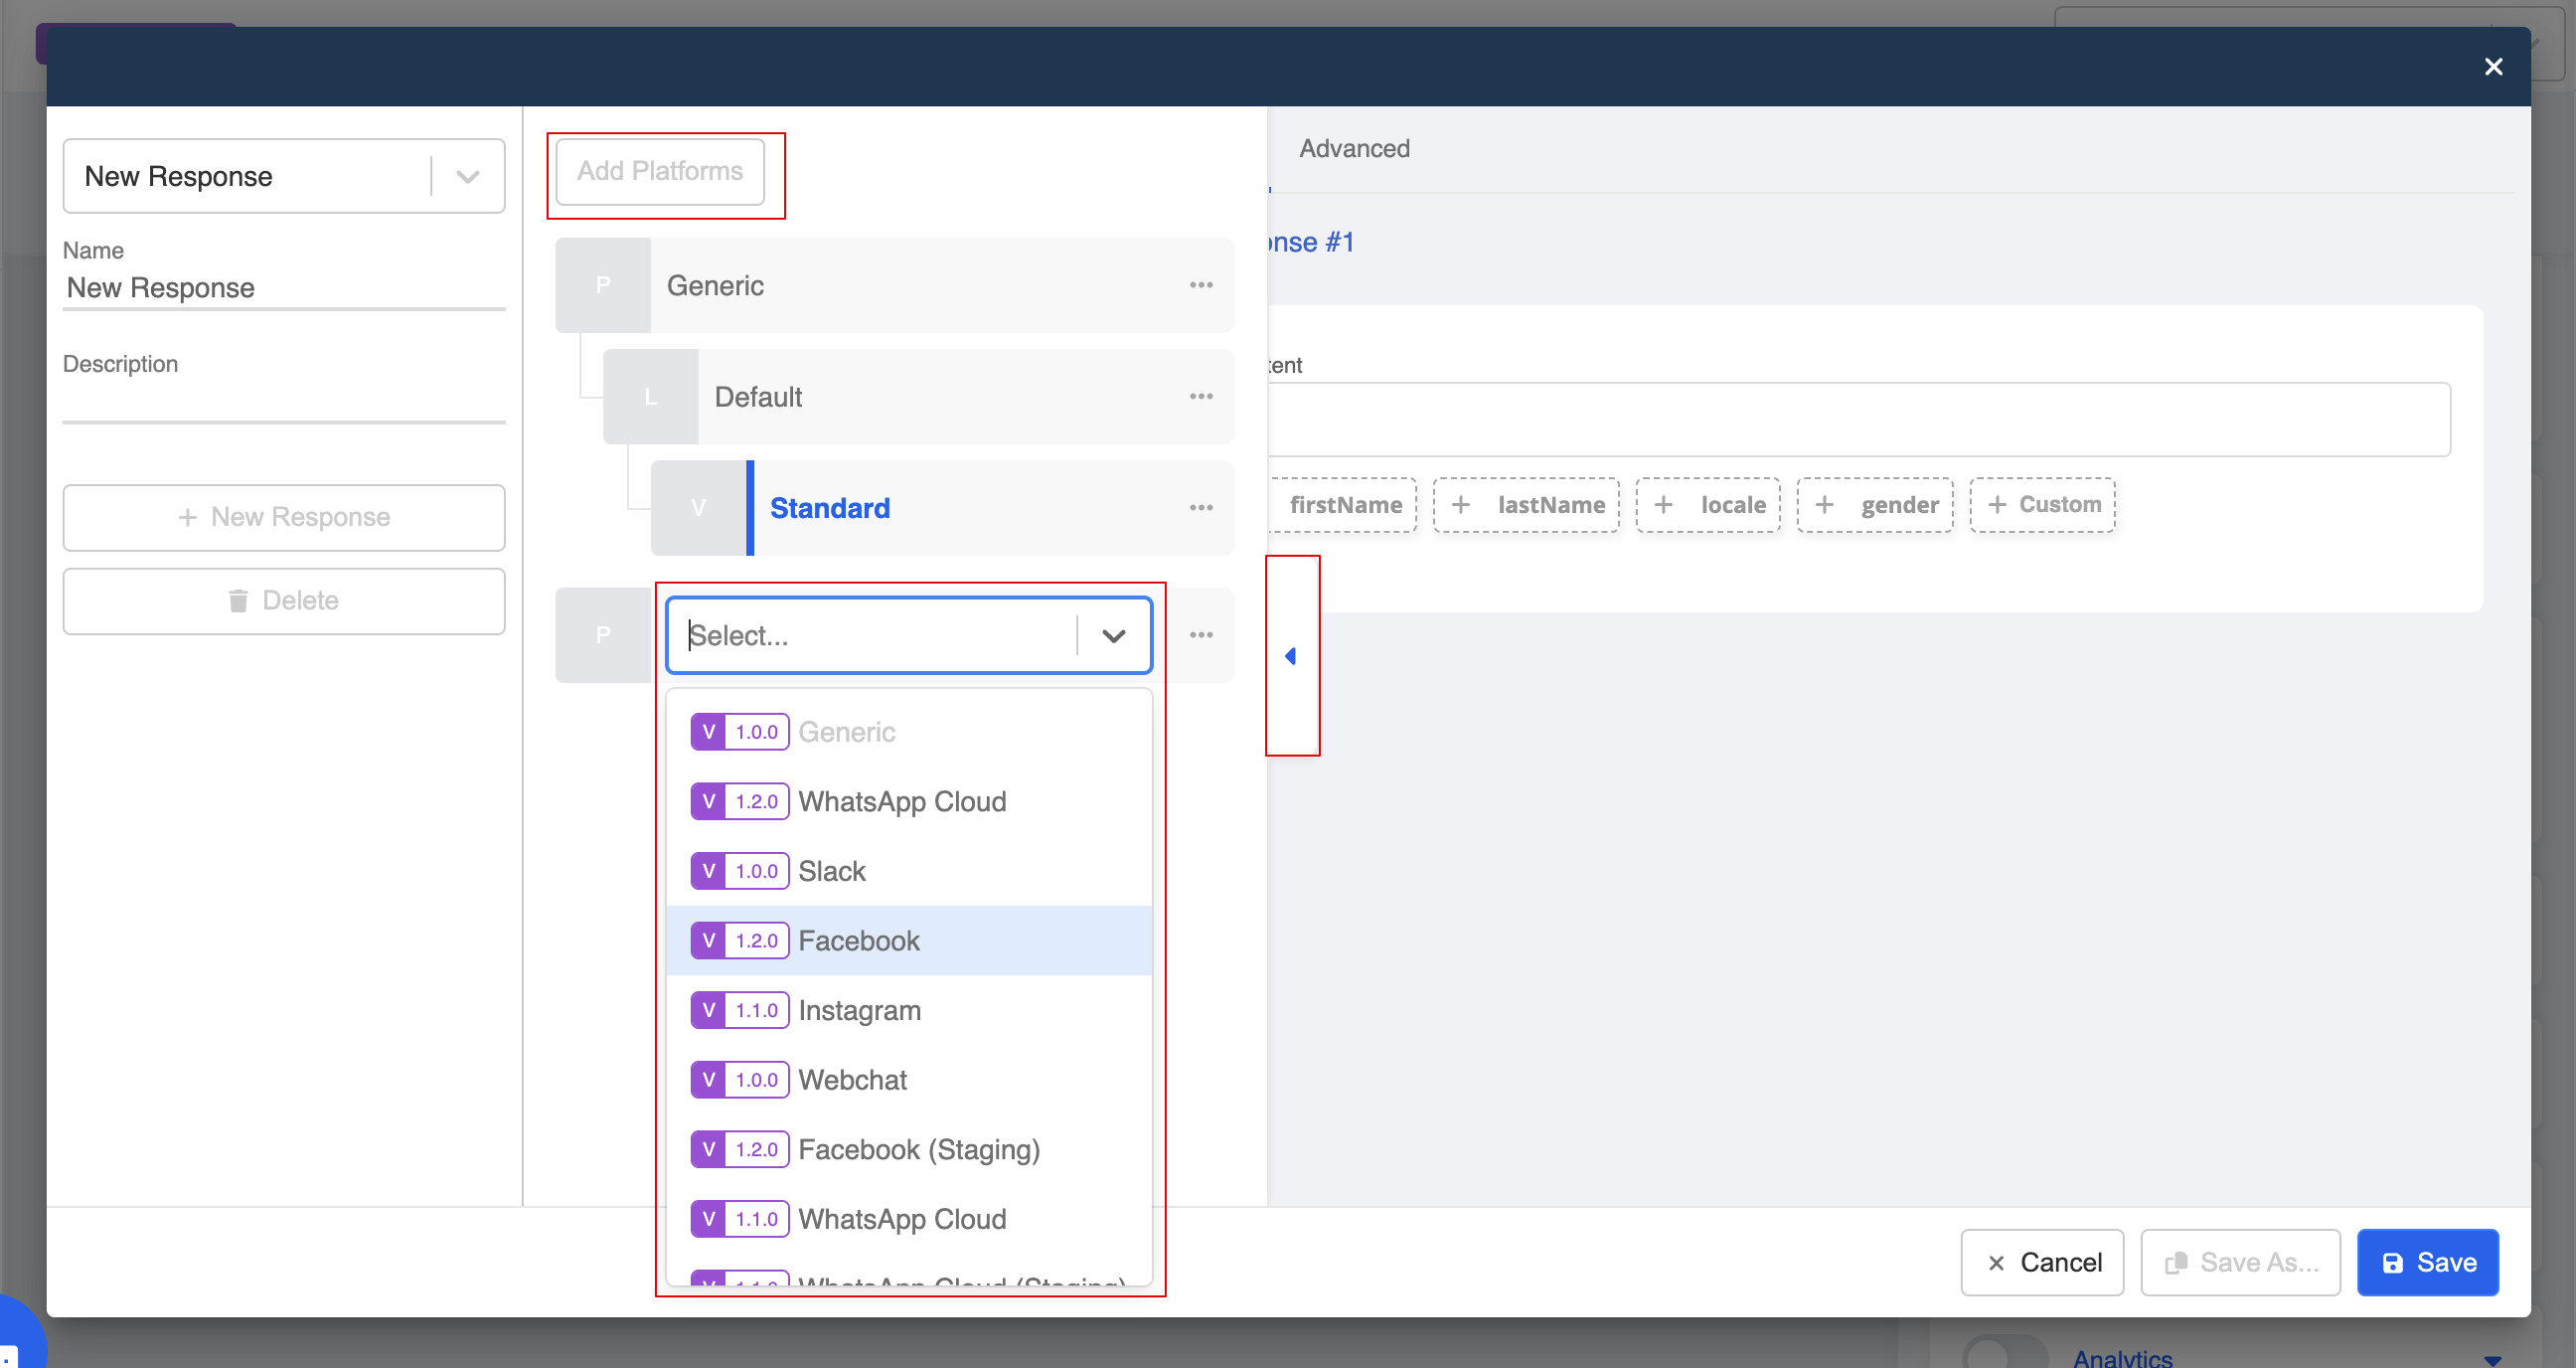
- Create a Facebook specific response.
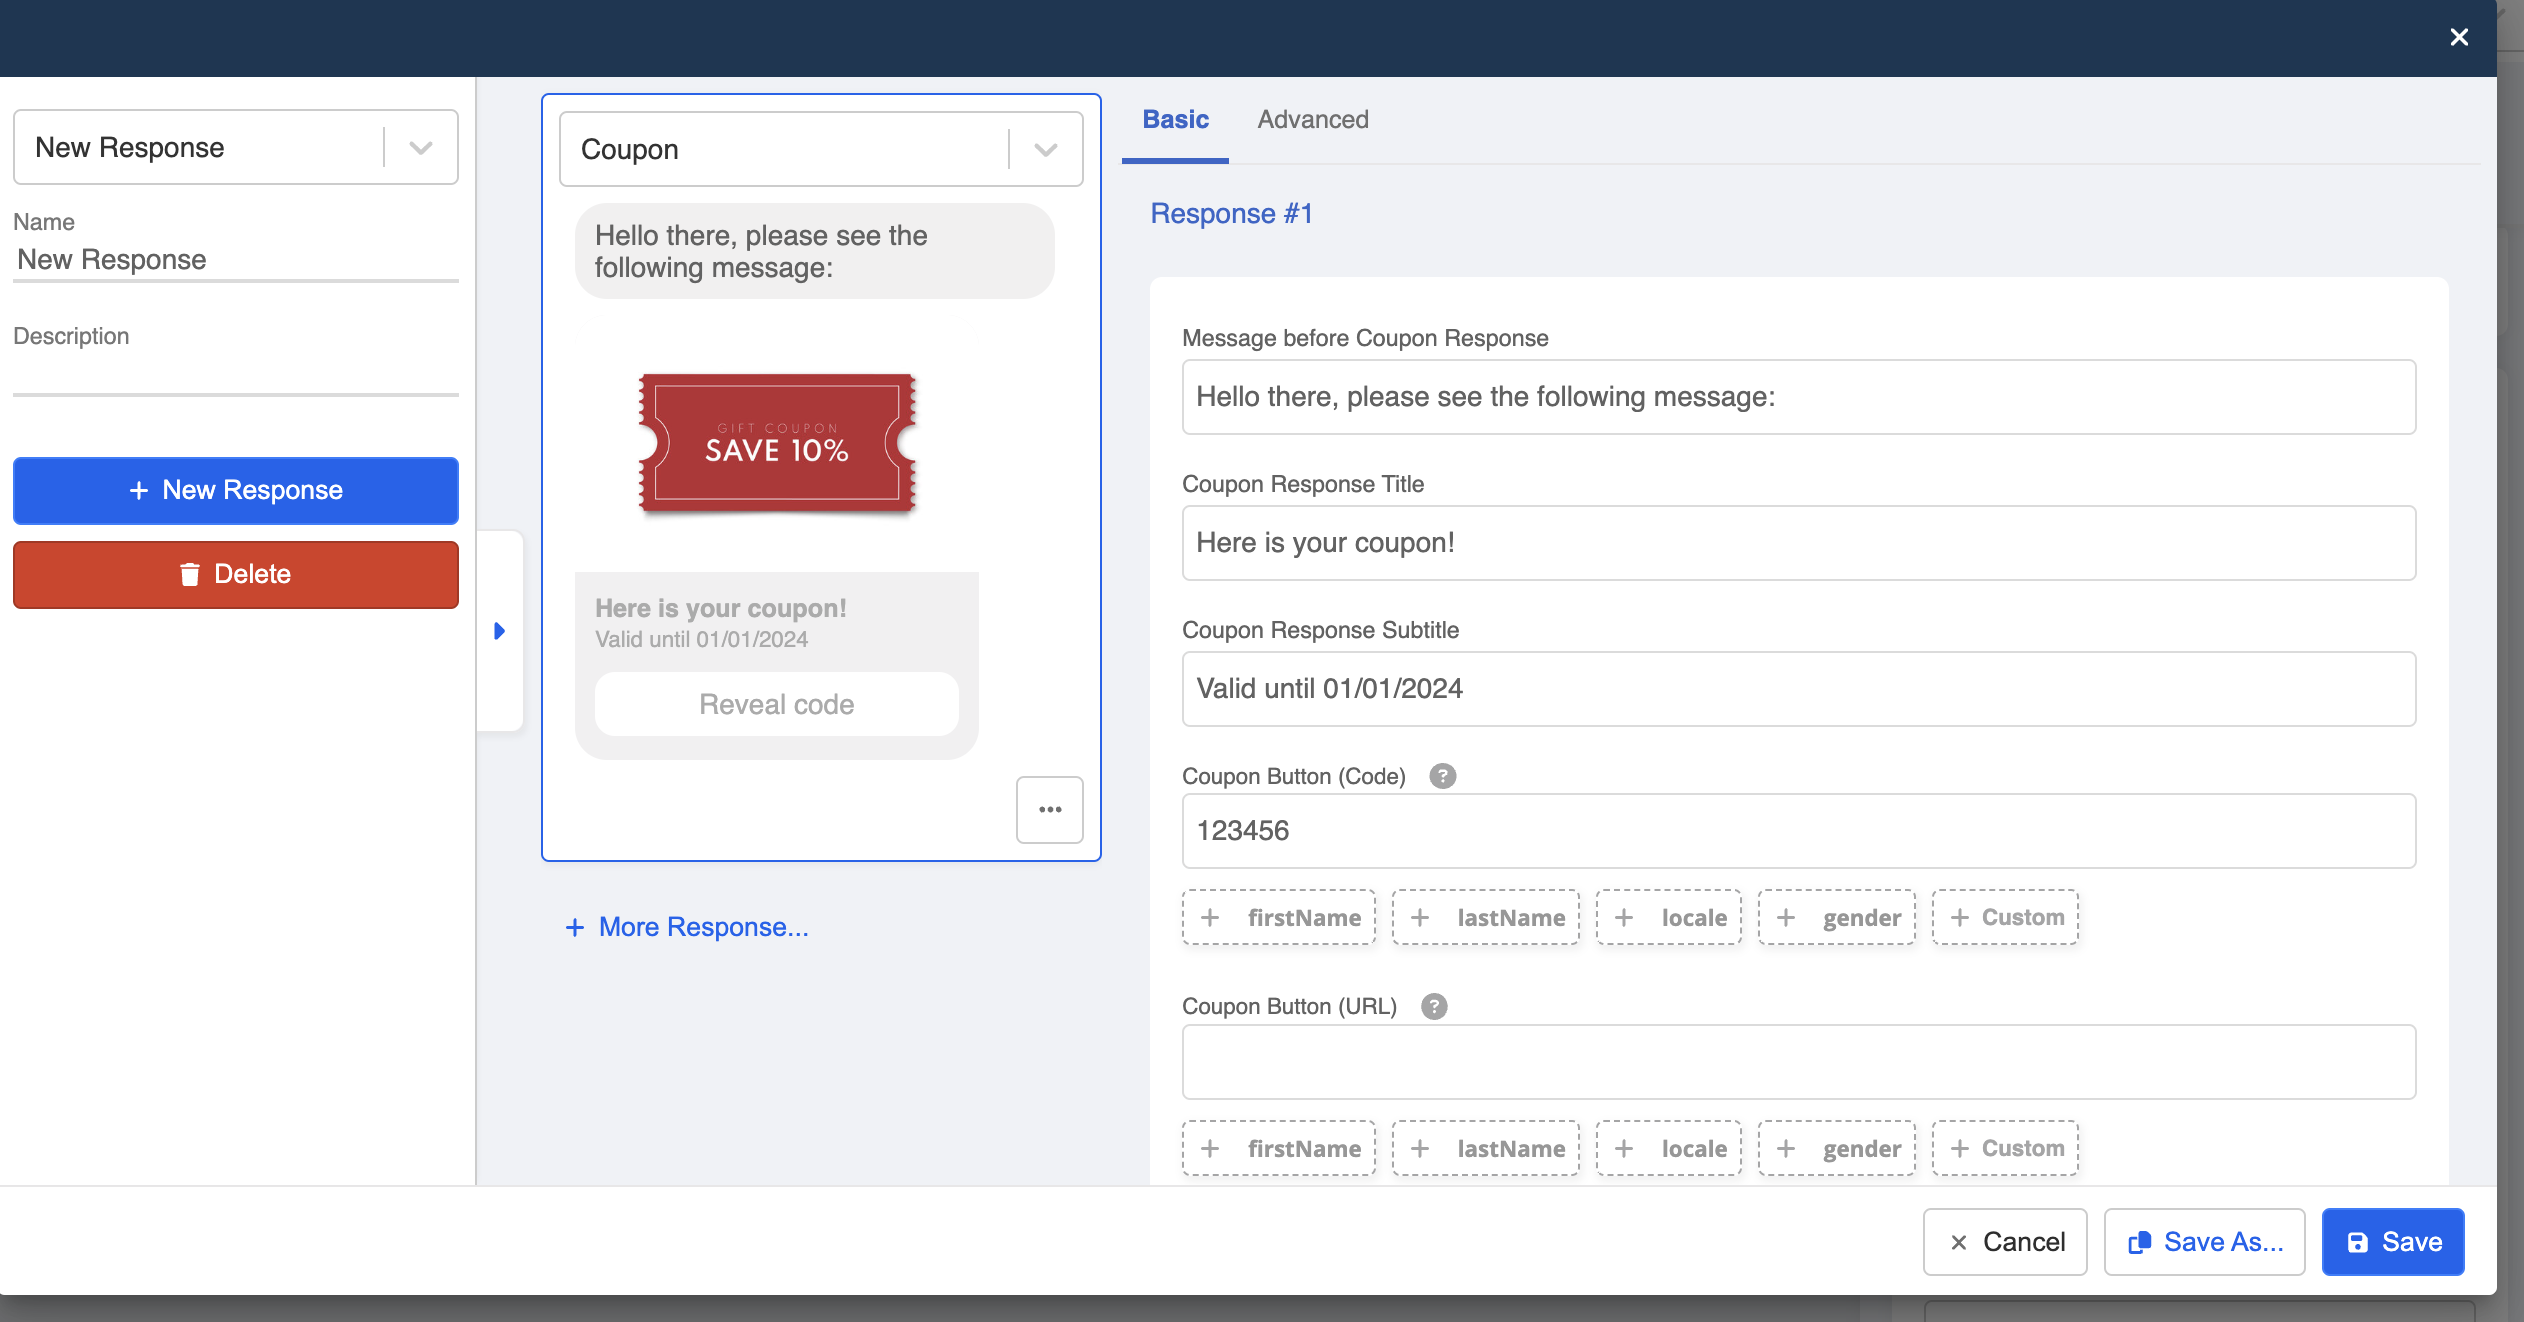
- Select "Coupon" from the dropdown

- Fill in the details in the Coupon Template.
| Fields | Description |
|---|---|
| Message before Coupon Response | Text message that is sent before the coupon template. |
| Coupon Response Title | Required. Title of the coupon template. |
| Coupon Response Subtitle | Subtitle of the coupon template. |
| Coupon Code (Code) | Required, either code or URL. The coupon code to sent offered to user. |
| Coupon Code (URL) | Required, either code or URL. The URL that allows the user to use the coupon. |
| URL Button Title | Text displayed on the coupon URL button. |
| Image URL | The URL of the image added to the coupon template. |
| Payload | Additional information to be included in the webhook, needed for the identifying a certain coupon template in Coupon Trigger. |
Coupon Trigger
Once the code is revealed to the user, an event can be received and thus trigger a follow-up response.
- Create a trigger in a global node.
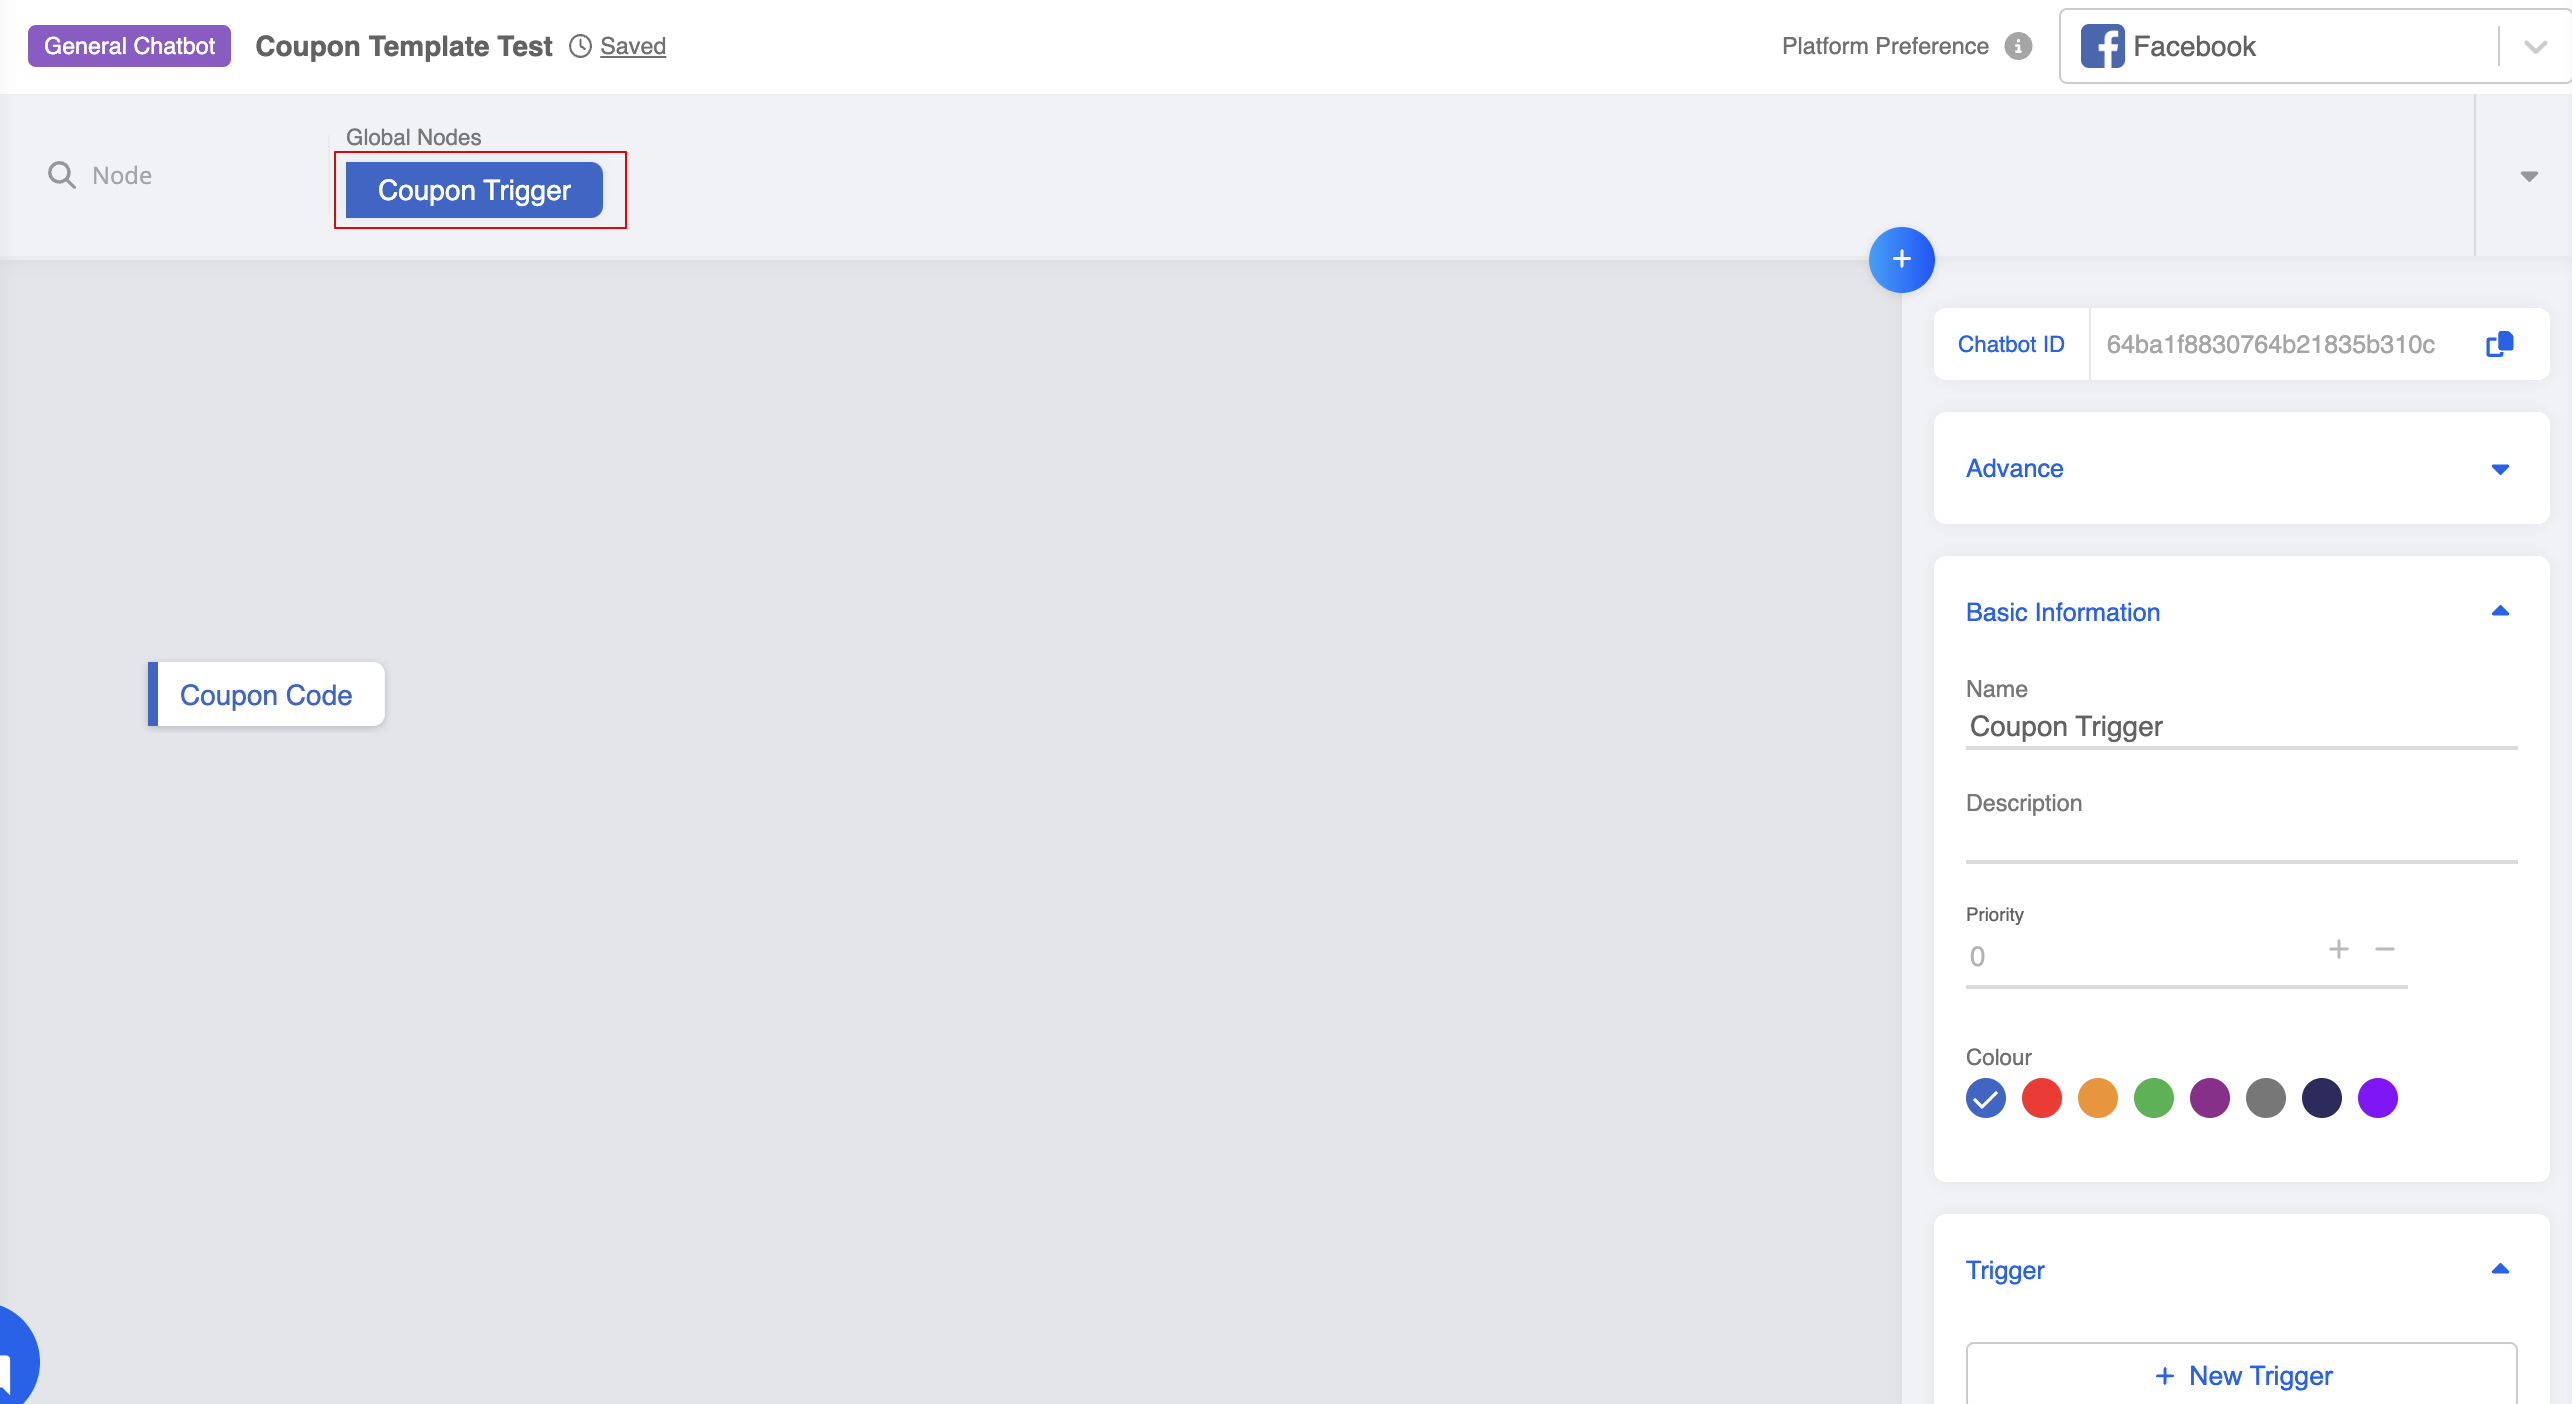
- Select "Coupon Code Shown". The trigger can accept events from any coupon templates.
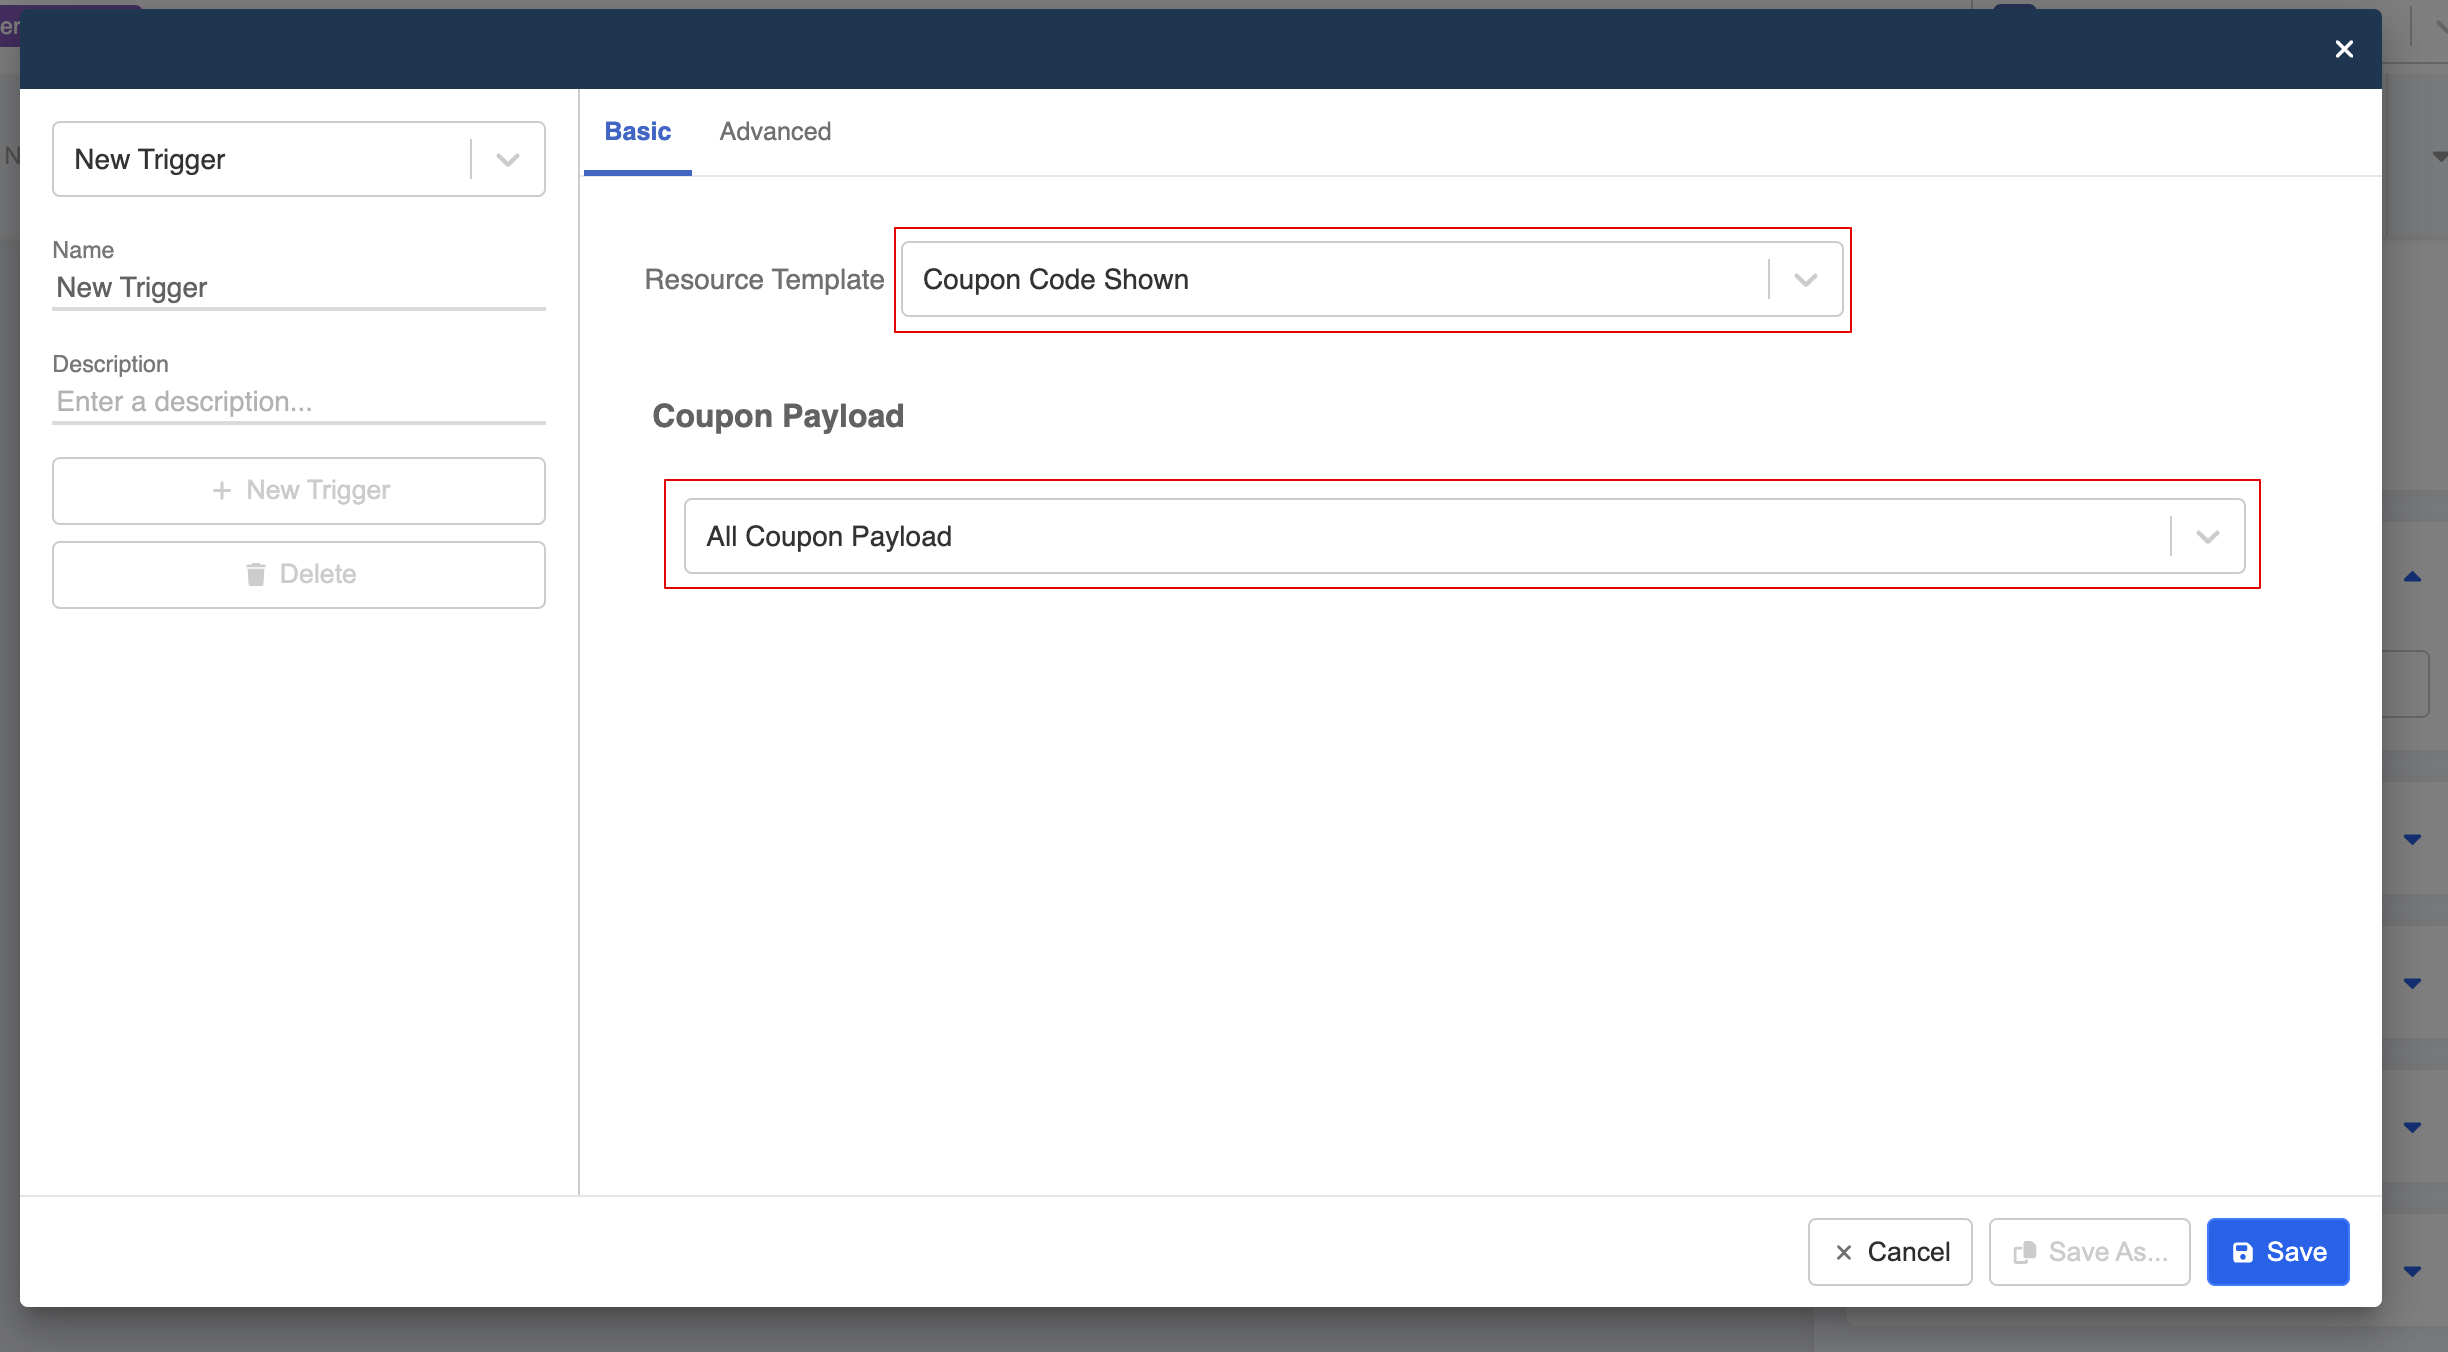
- Instead, choose "Select Coupon Payload" and specify a certain coupon template by the payload.

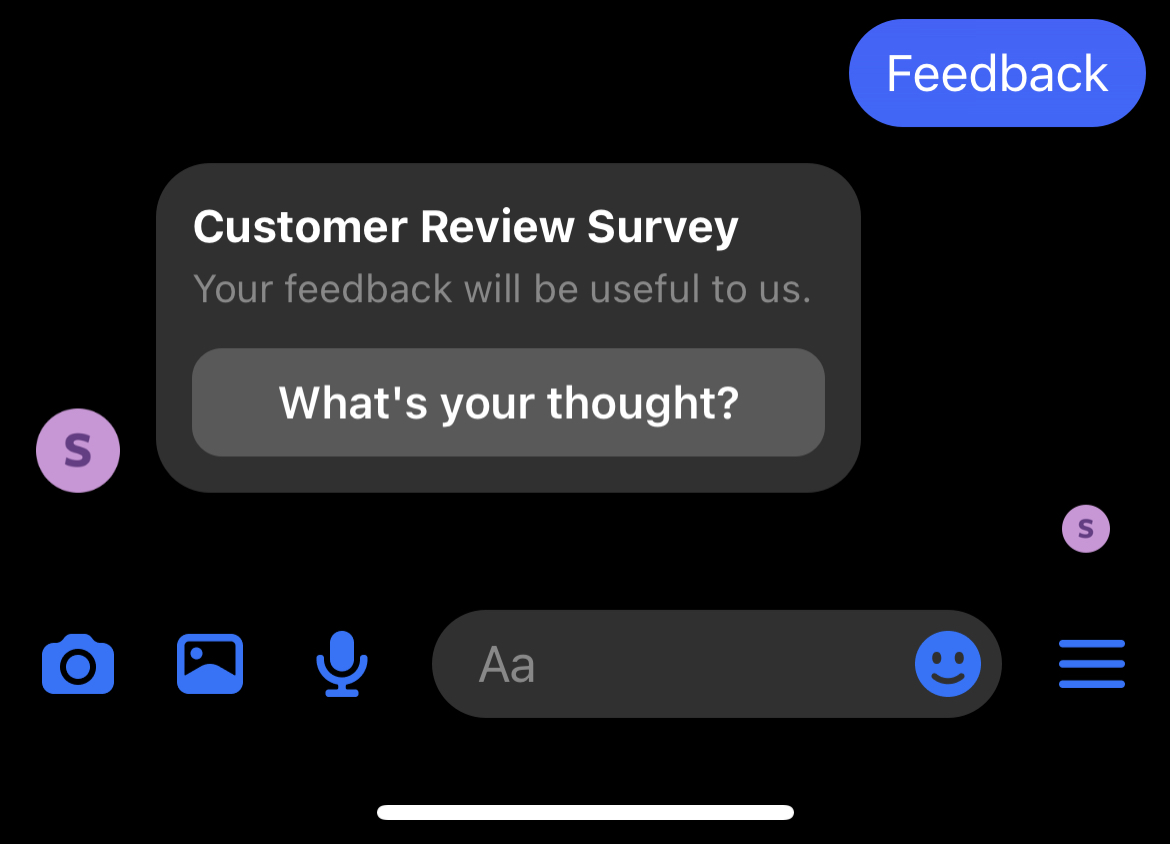
Customer Feedback Template
The Customer Feedback Template allows you create the customer feedback flow, so that users are able to rate and leave comments on their experience with your business in Messenger. Meta offers the following build-in survey template to obtain the feedback:
- Customer Satisfaction (CSAT)
- Net Promoter Score (NPS)
- Customer Effort Score (CES) surveys
Create Template
- First, create a general node in the bot builder.
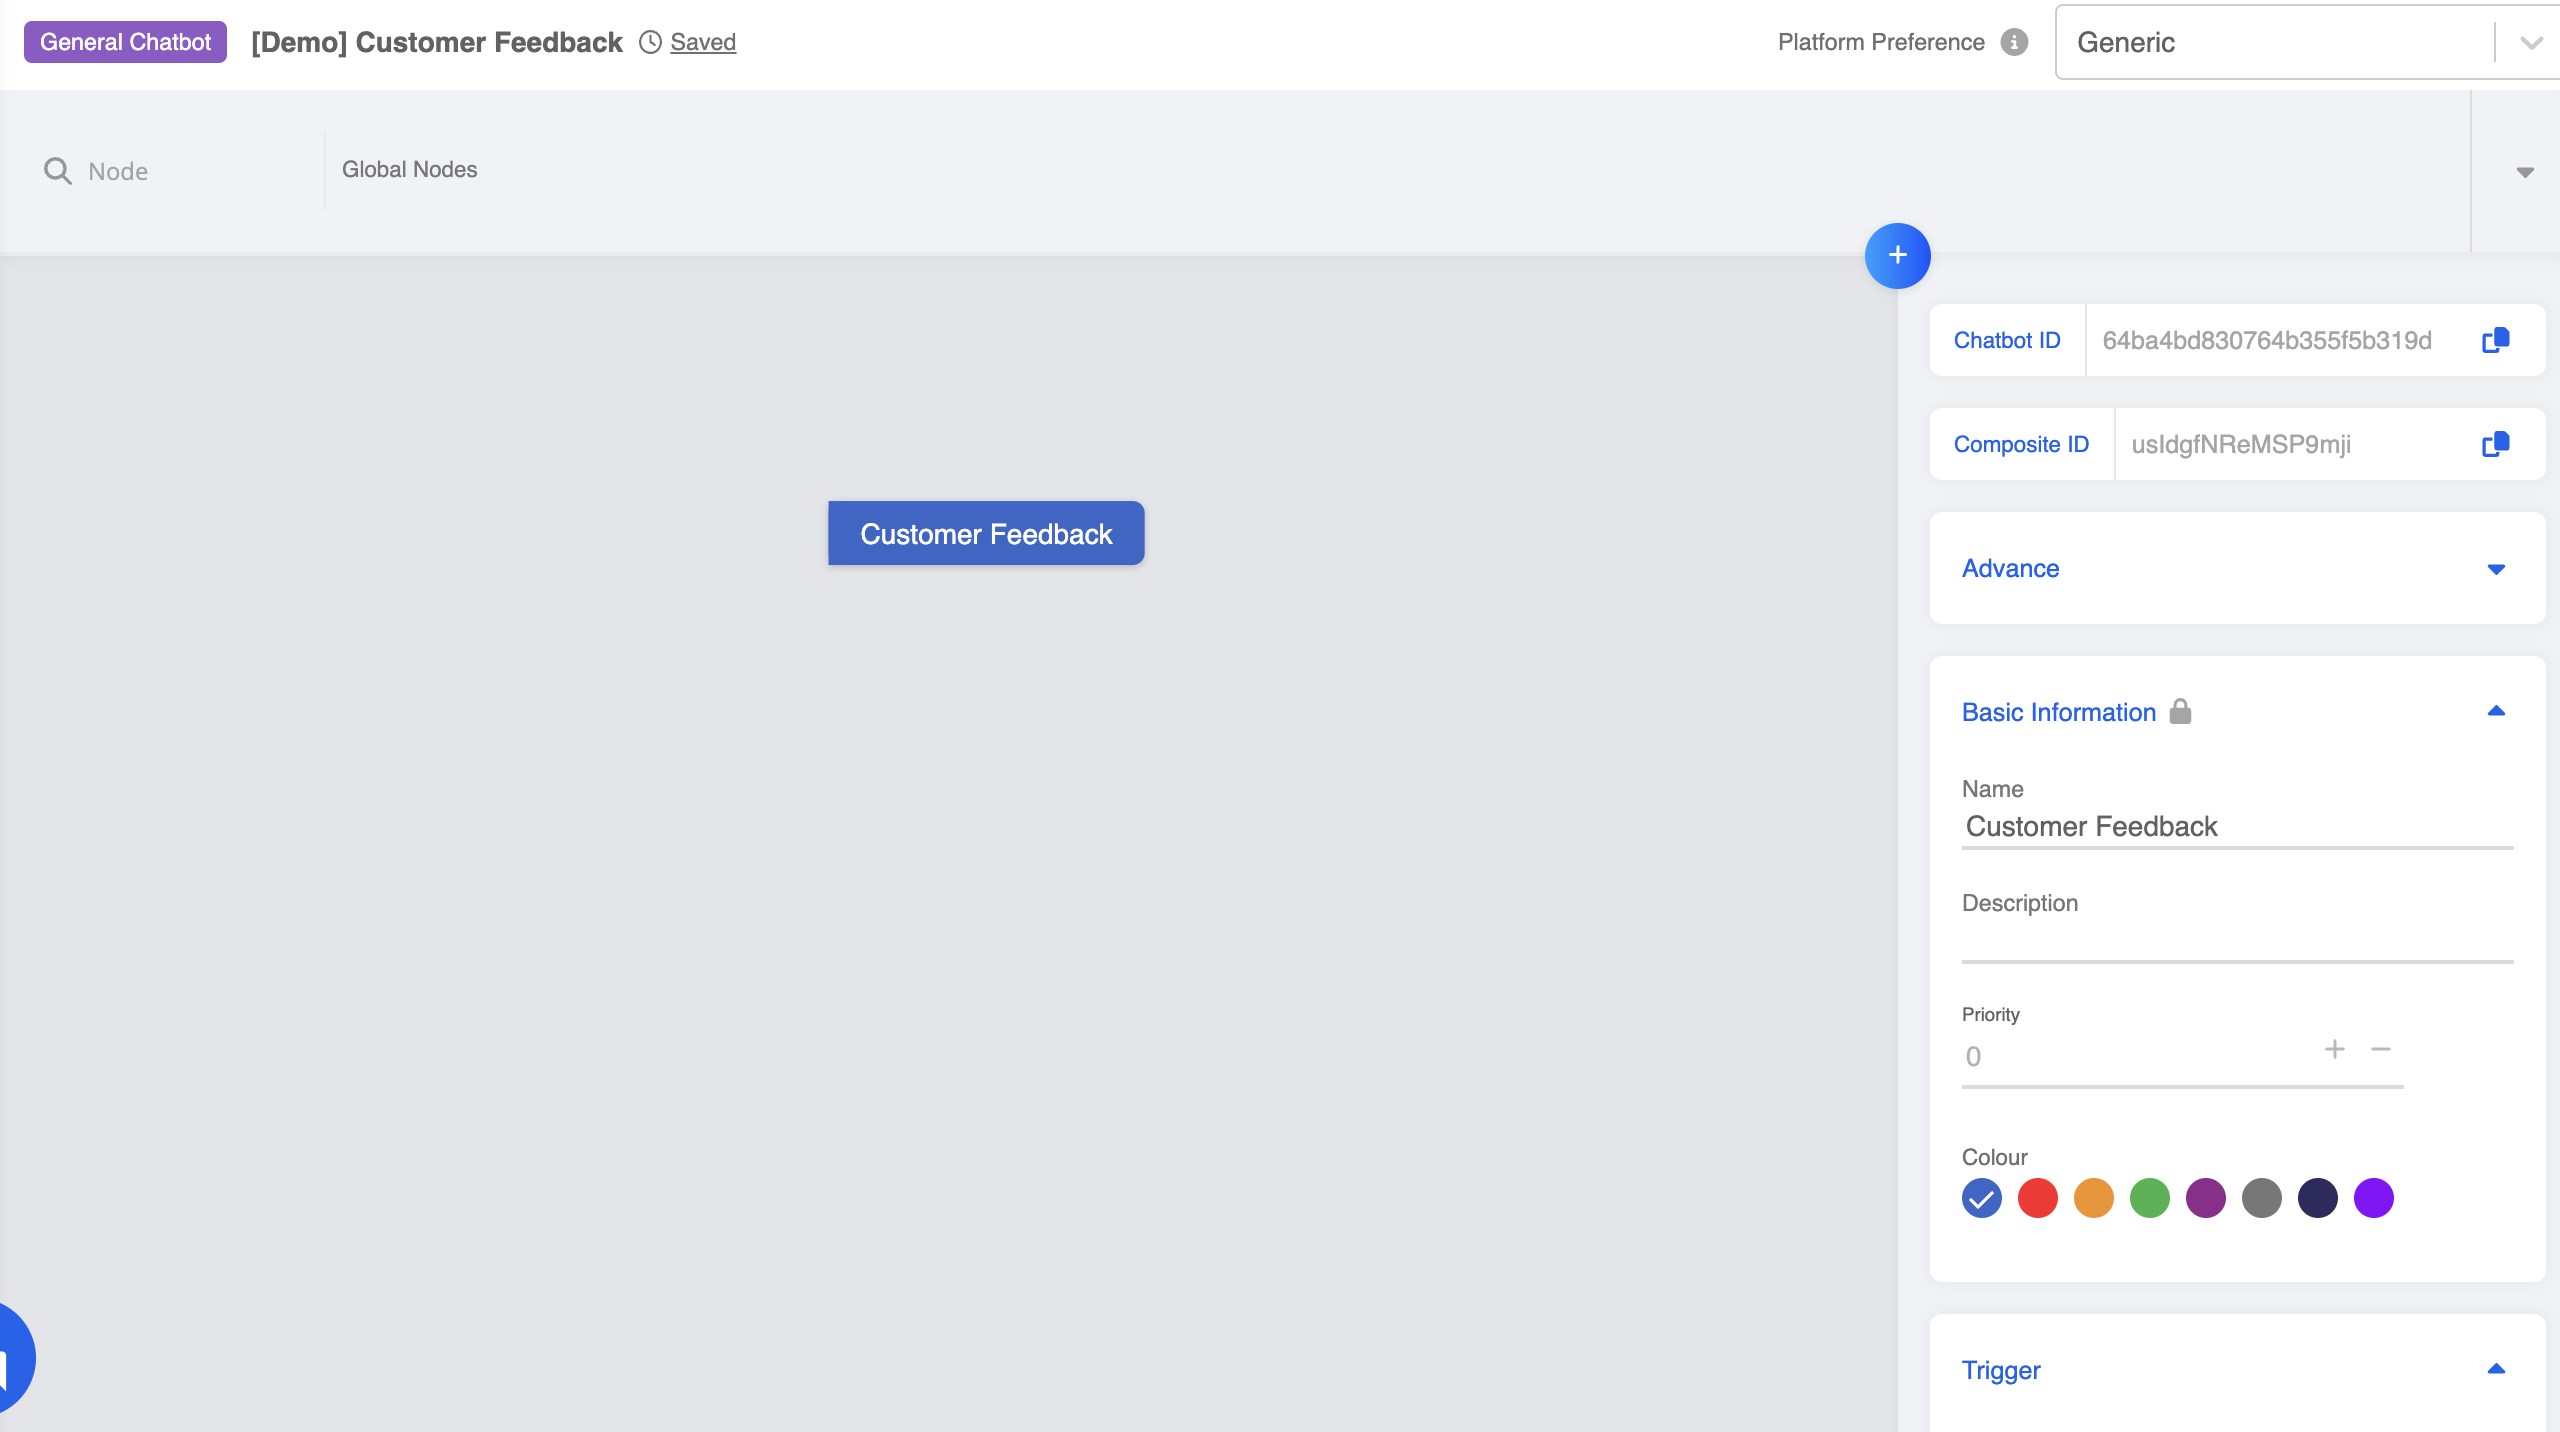
- Create a Facebook specific response.

- Select "Customer Feedback" from the dropdown.

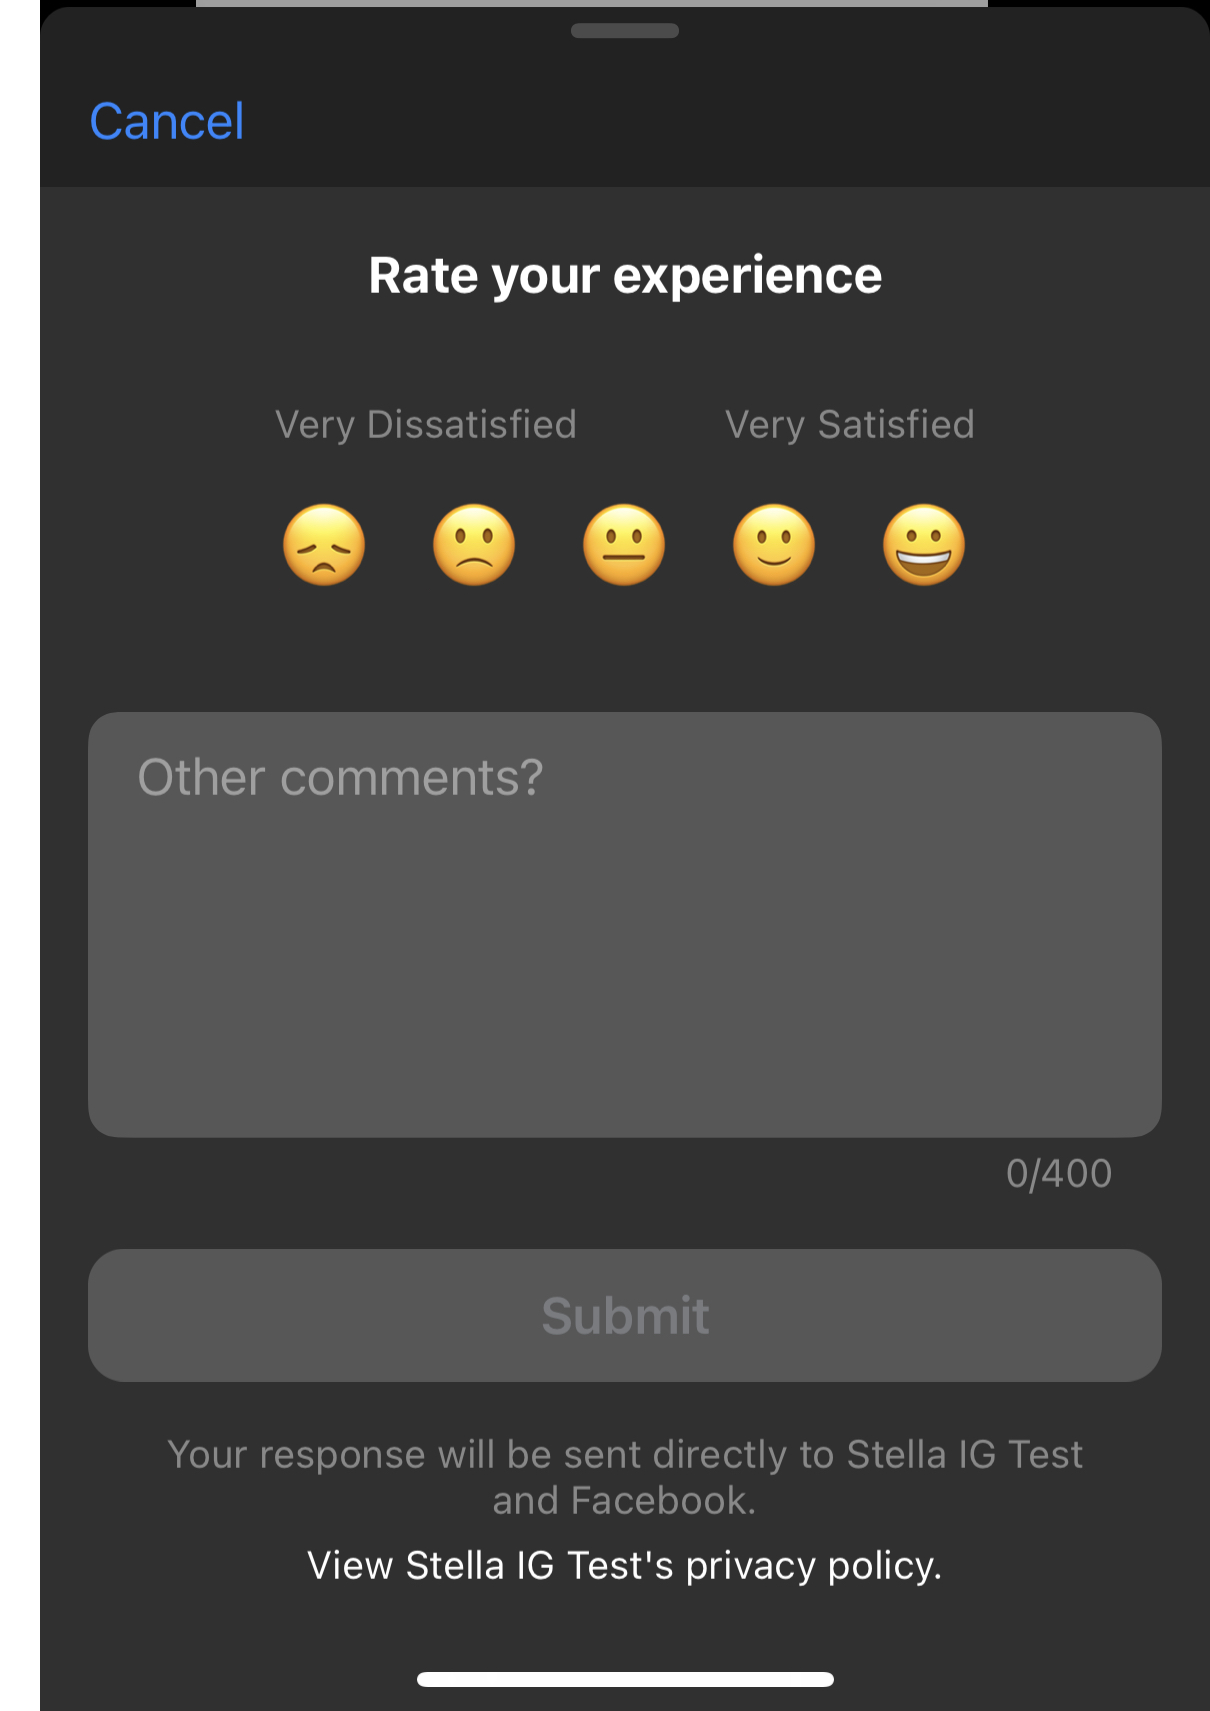
- Fill in the basic details in the template, such as "title", "subtitle" and "button title".
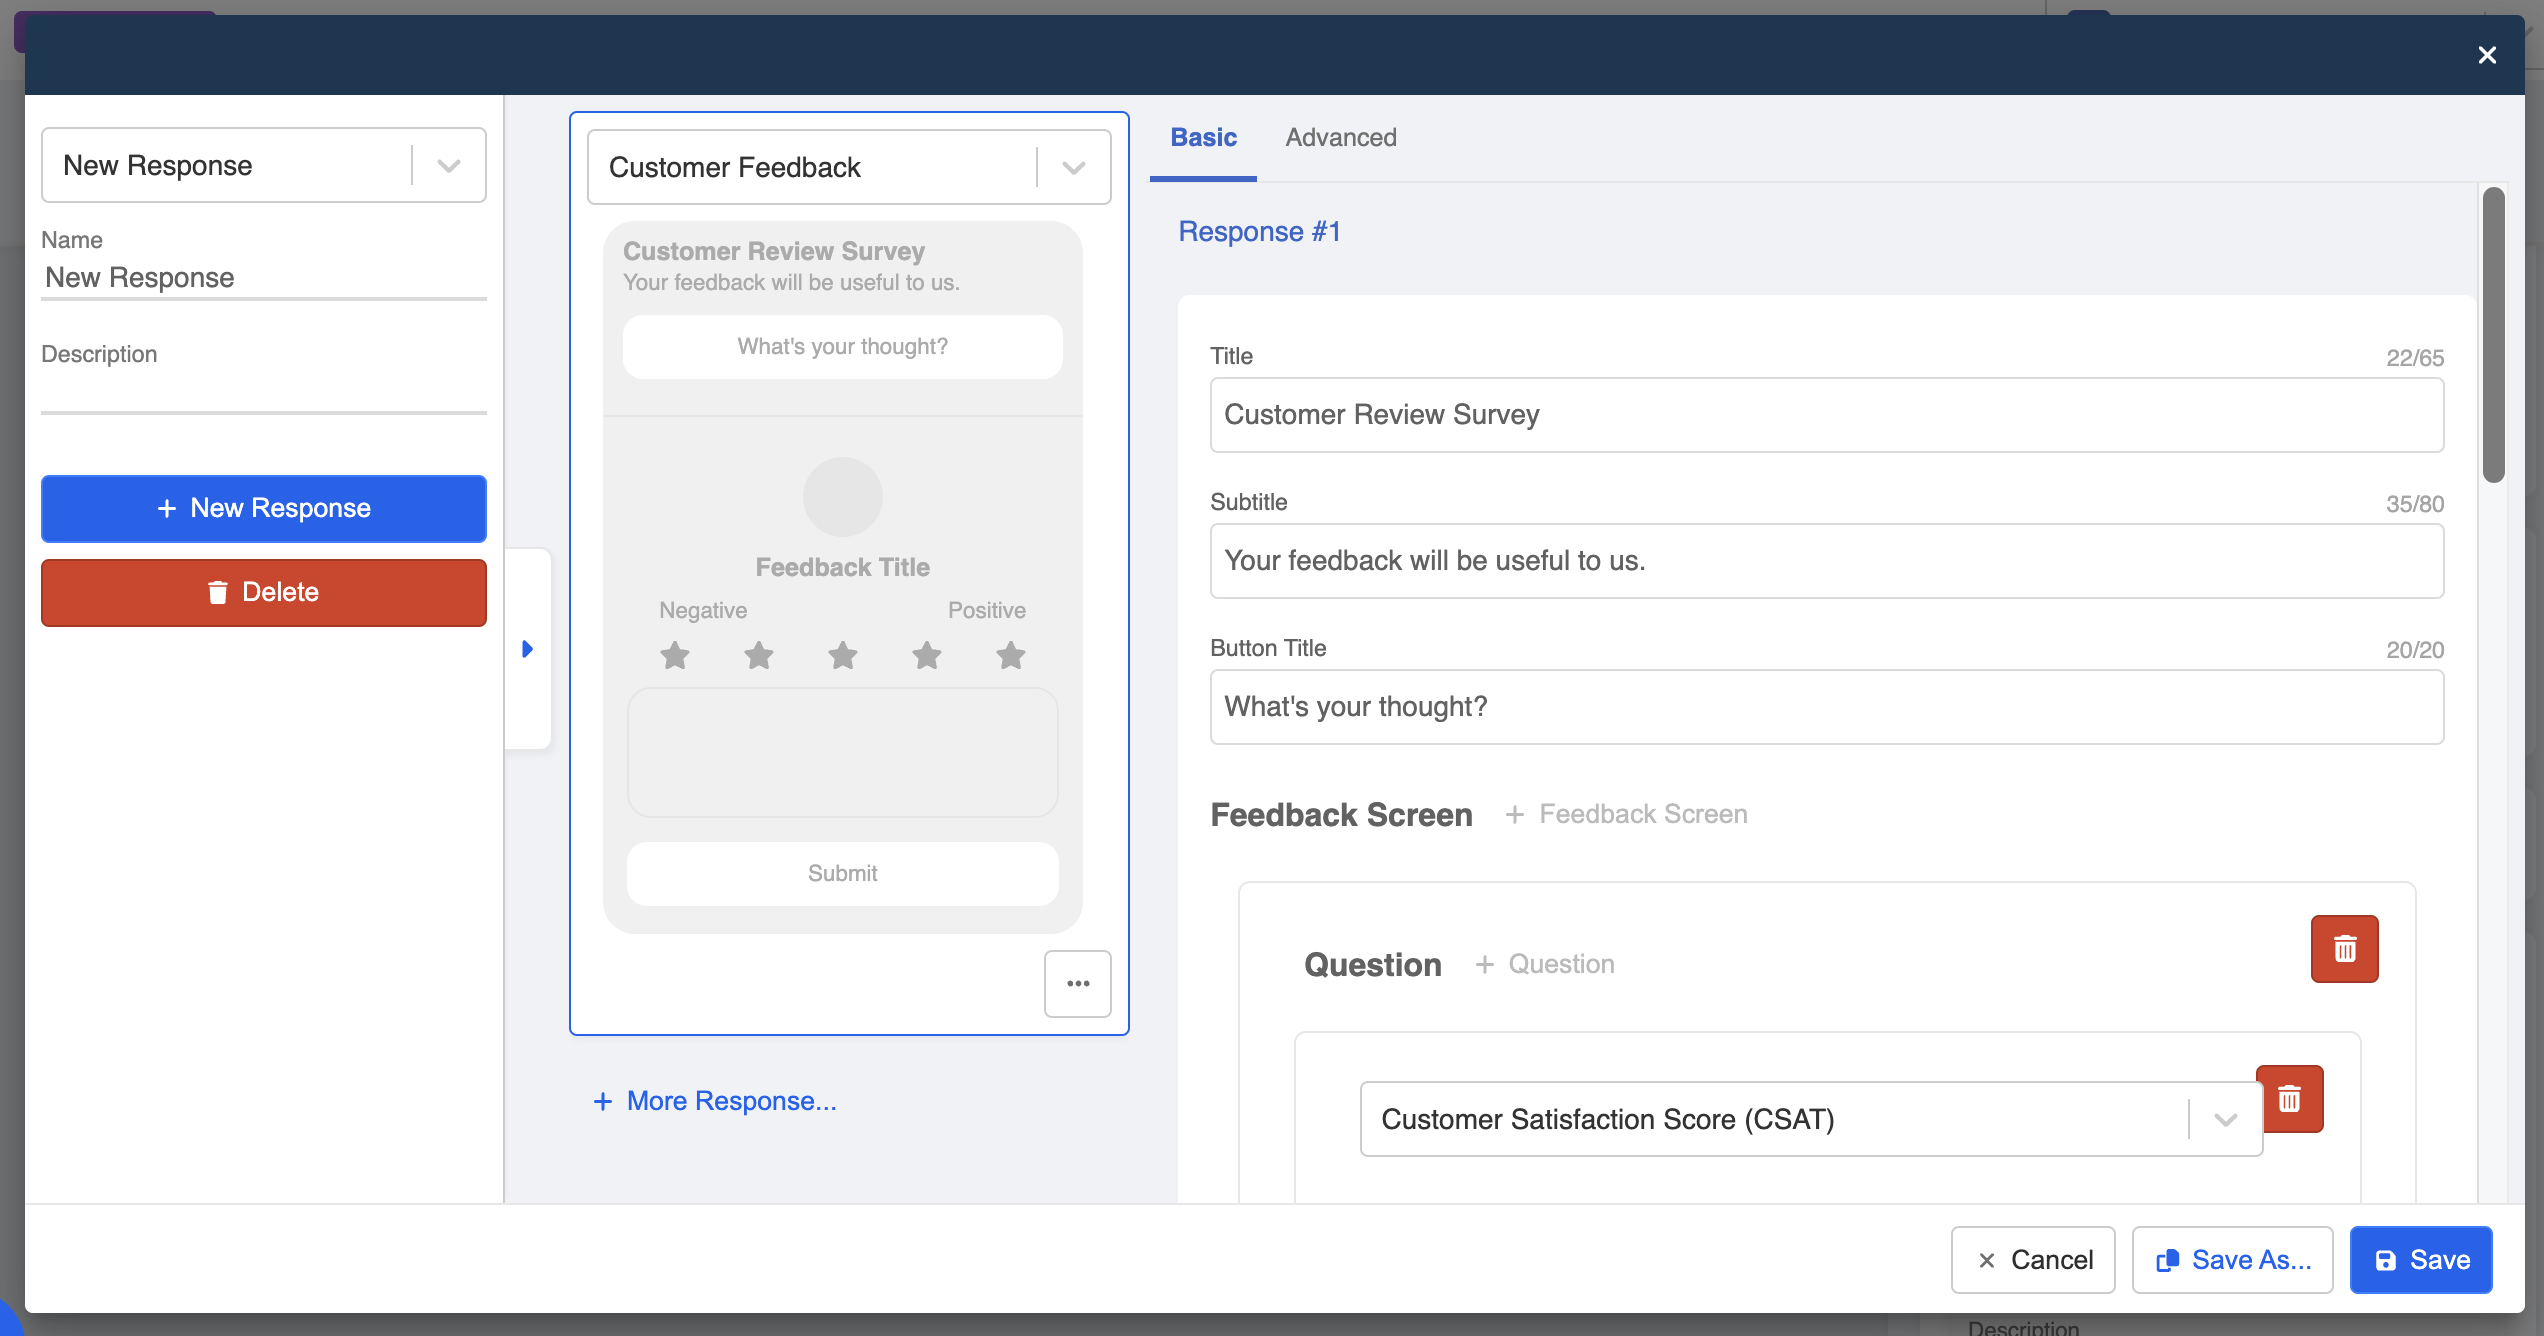
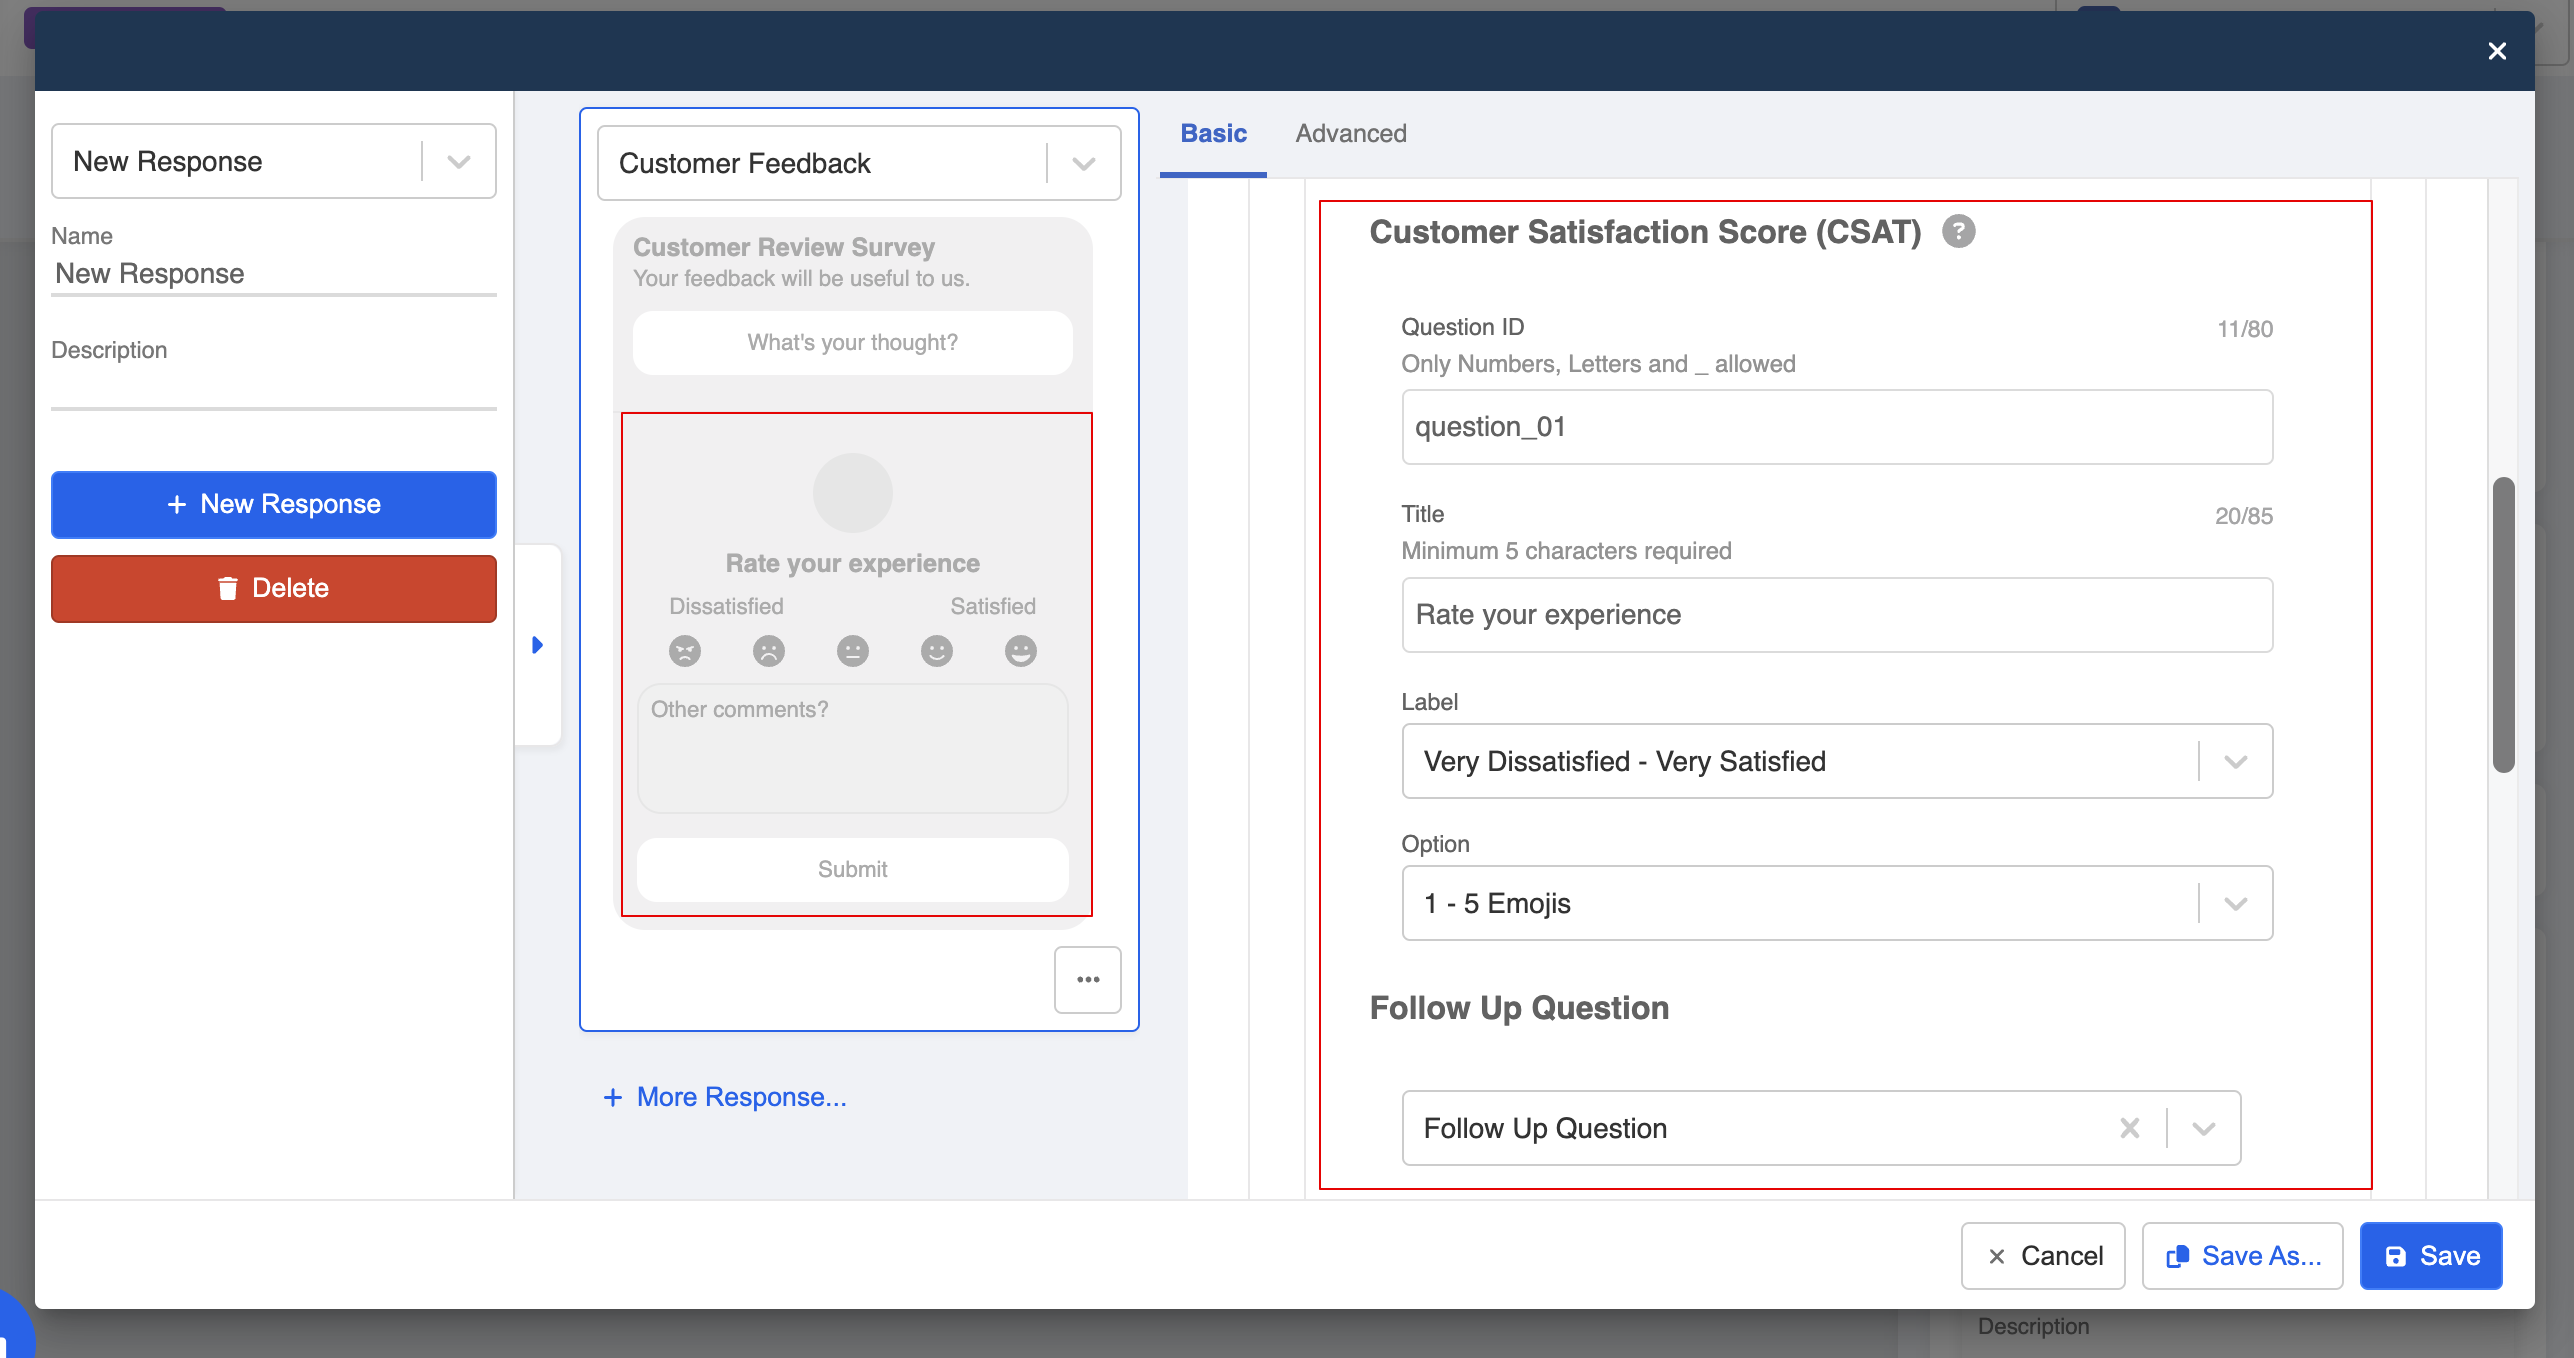
- Select the type of question, and fill in the details to create the form.
| Fields | Description |
|---|---|
| Title | Required. Title of the customer feedback form. |
| Subtitle | Required. Subtitle of customer feedback form. |
| Button Title | Required. Title displayed on the button to open the feedback form. |
| Questions Type | Required. "Customer Satisfaction (CSAT)", "Net Promoter Score (NPS)", "Customer Effort Score (CES) Survey" or "Free Form". |
| Question ID | Required. Self-defined question ID, which is useful for identifying certain question in the Customer Feedback Trigger. |
| Question Title | Title of the question. |
| Label | Options of level labels provided by Meta. |
| Option | Options of score selector view provided by Meta. |
| Follow-up Question | Free form follow-up question. |
| Privacy URL | Required. URL to the privacy policy of the business. |
| Expire Days | Template expiration, from 1 to 7. |
Customer Feedback Trigger
Once the survey is done and submitted, an event can be received and thus trigger a follow-up response.
- Create a trigger in a global node.

- Select "Customer Feedback". In default, it accepts all questions and feedback.
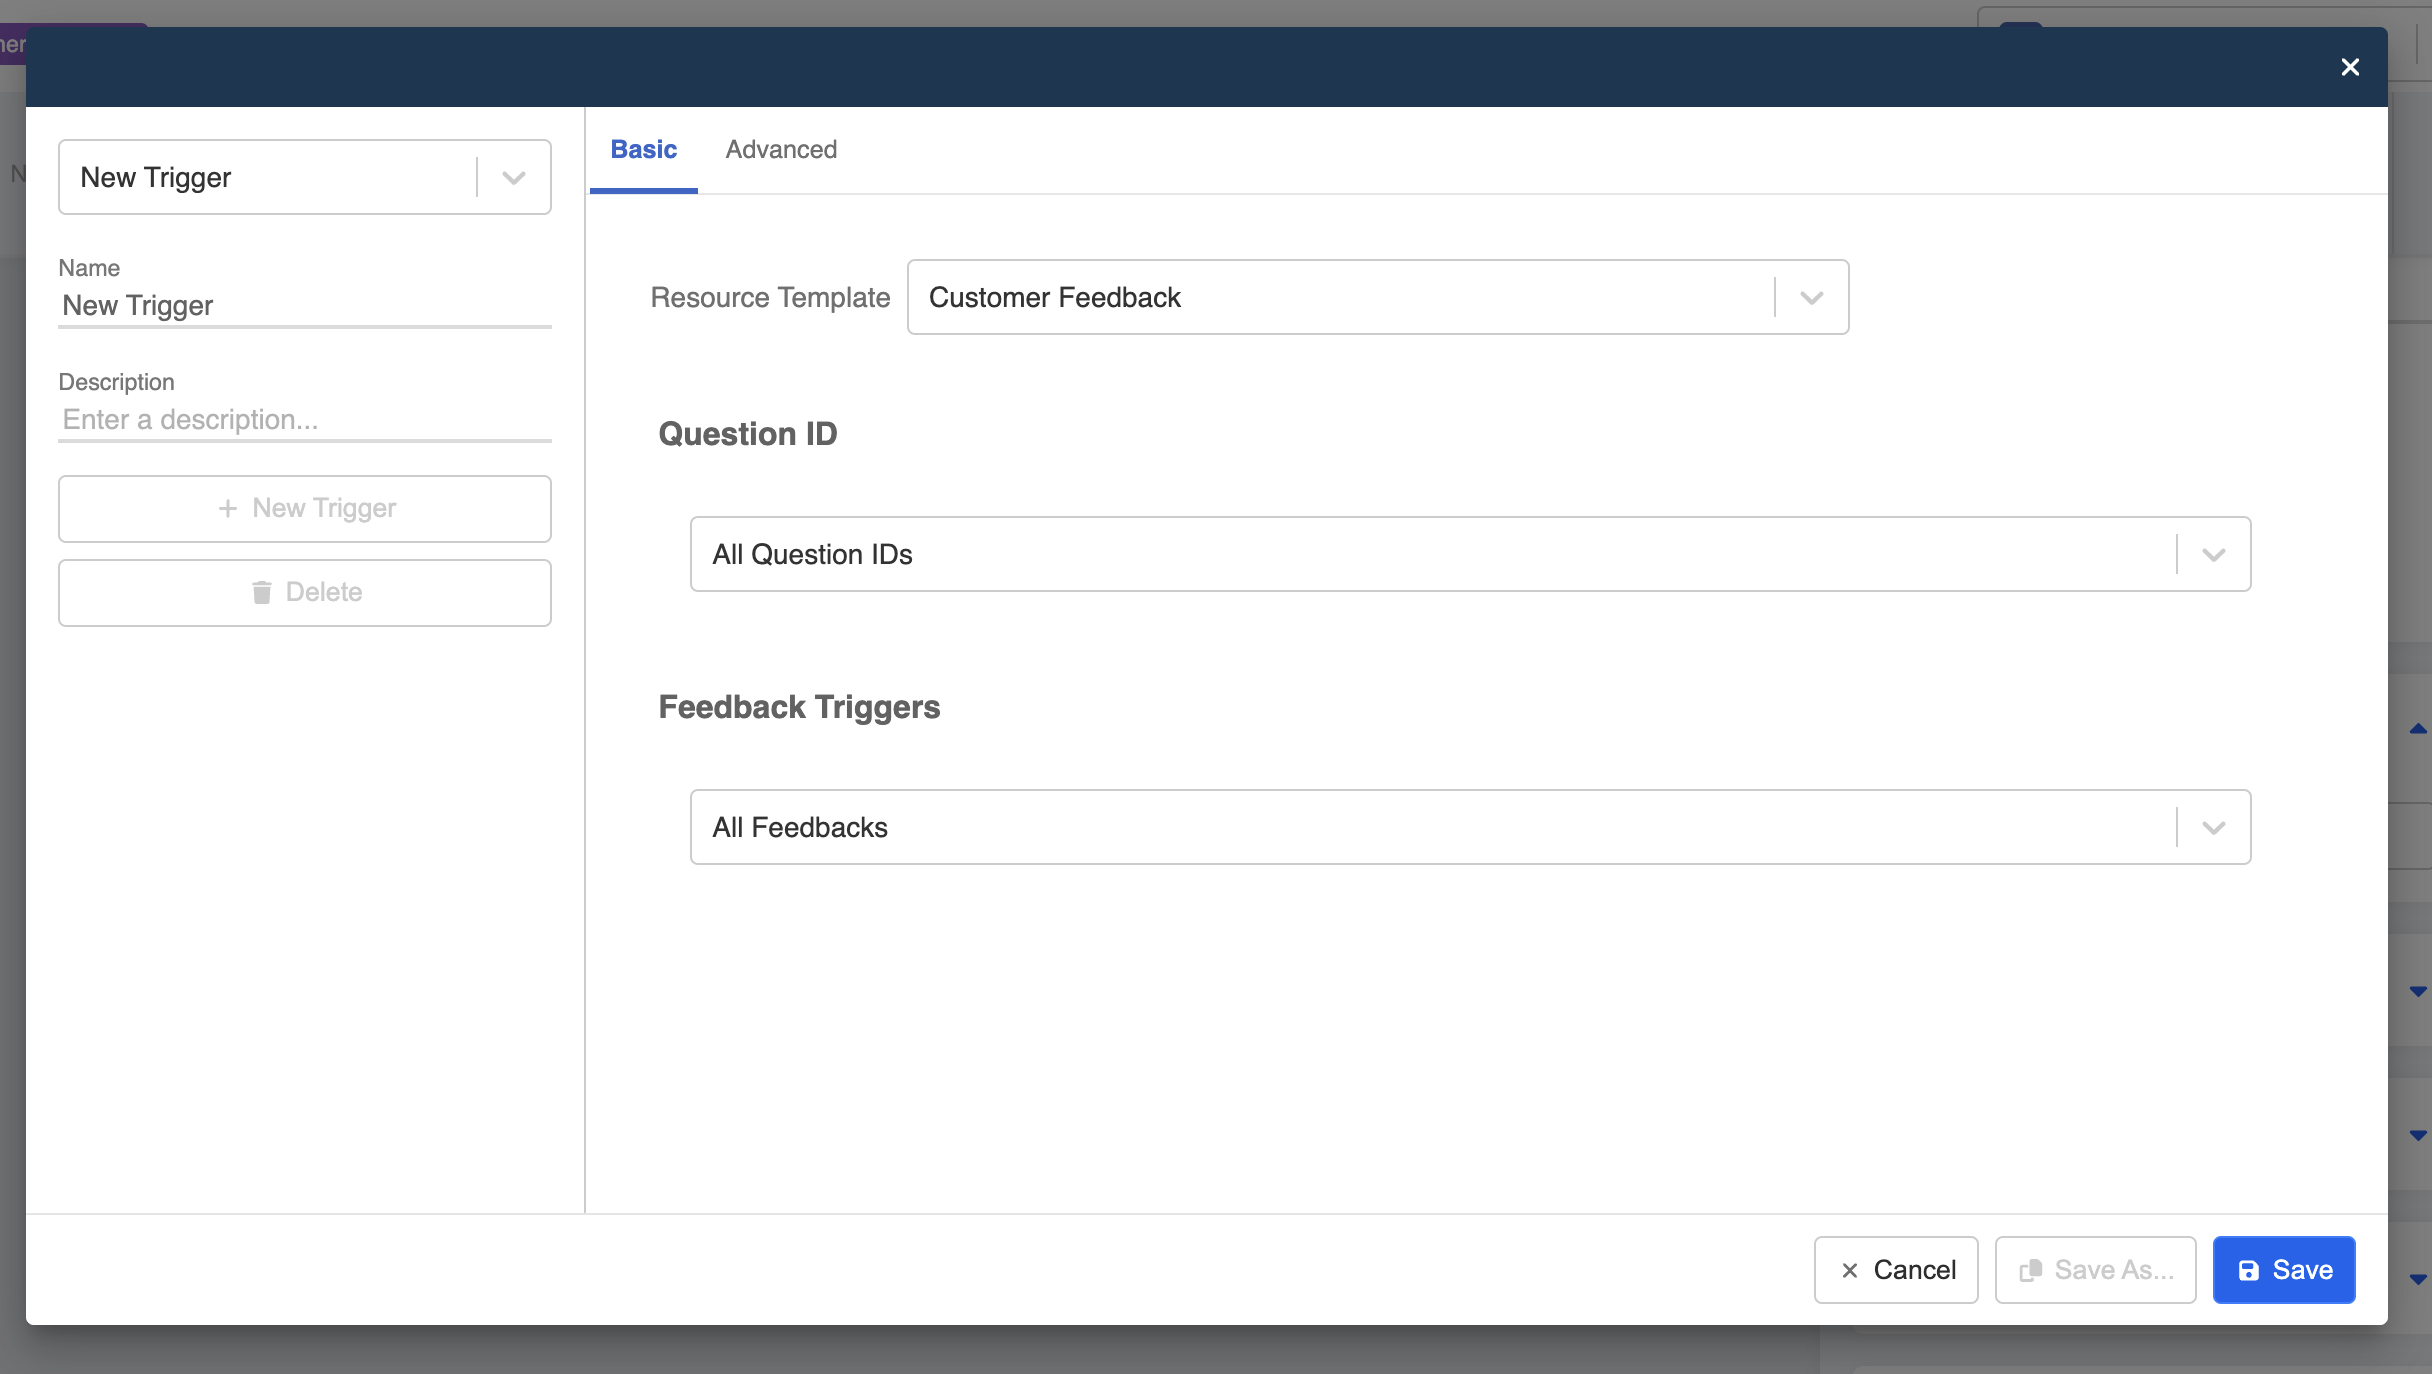
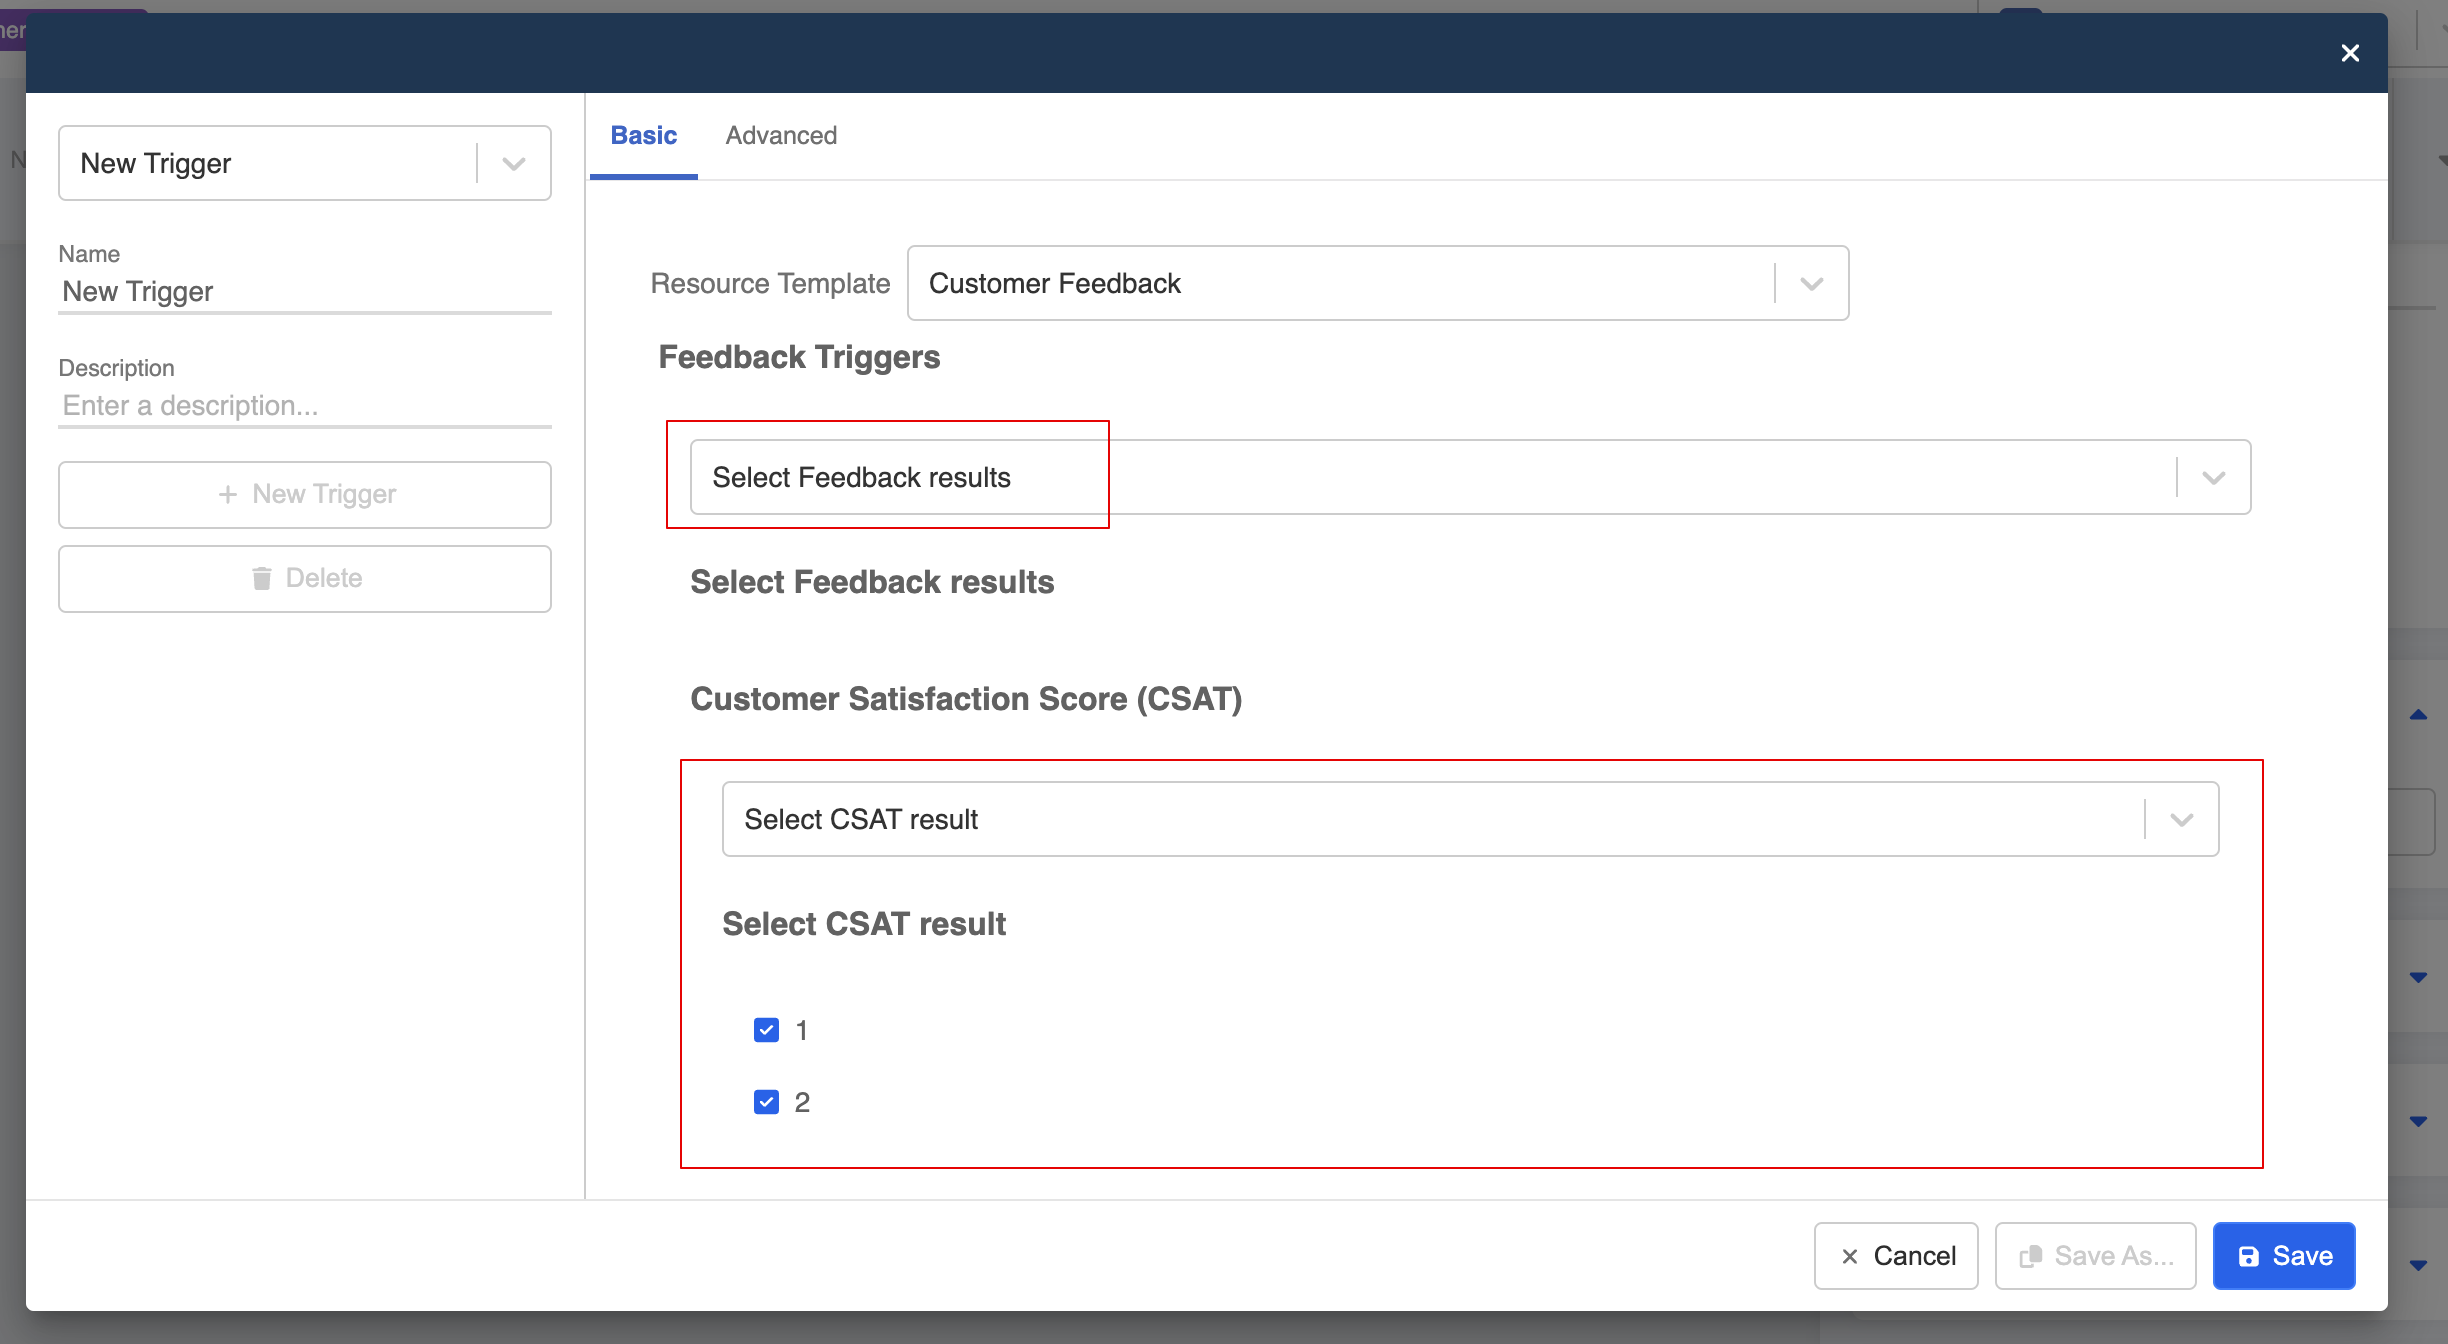
- Choose "Select Question ID" to specify a particular question.
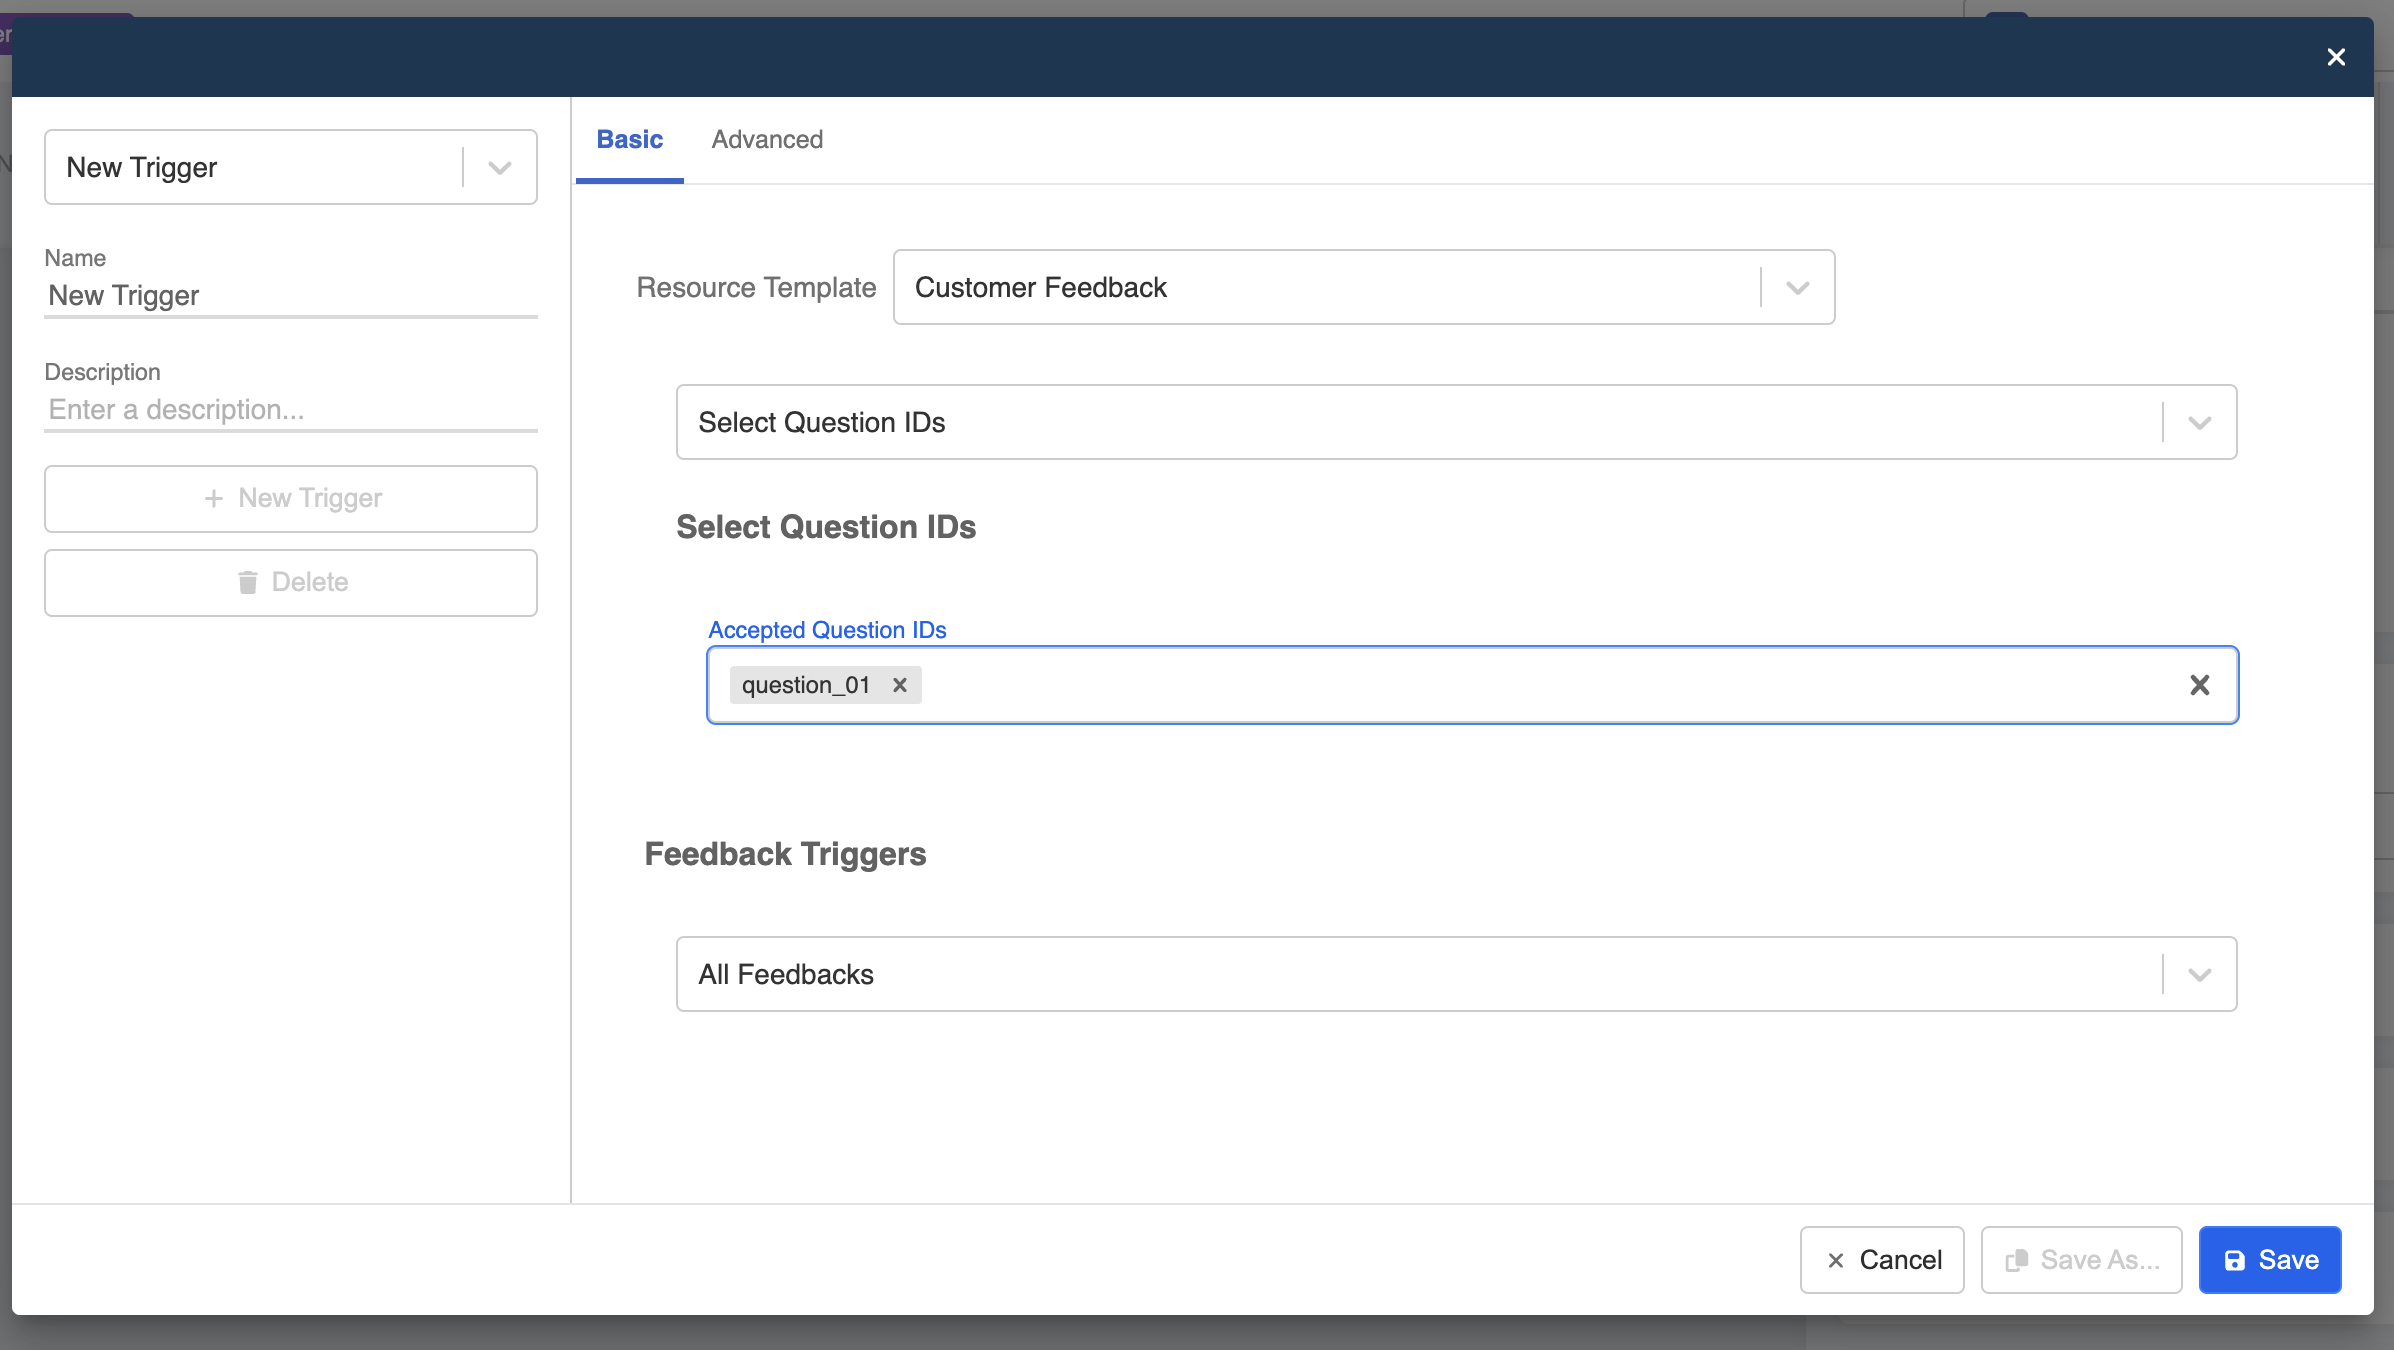
- Choose "Select Feedback results" to specify a particular type of feedback.
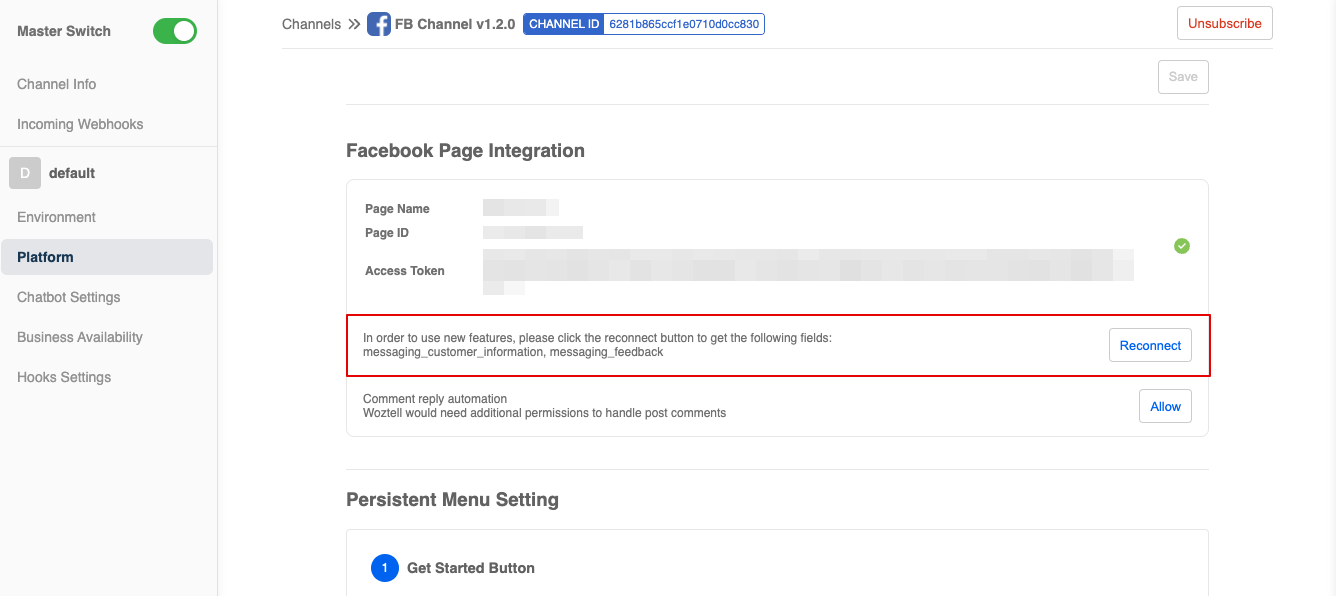
- To enable this trigger, you need to also make sure the our platform is able to receive the relevant webhook events from Meta. If you haven't the get the
messaging_feedbackfor your Facebook integration. Please head to the "Platform" page and allow our platform to subscribe to the corresponding webhook.
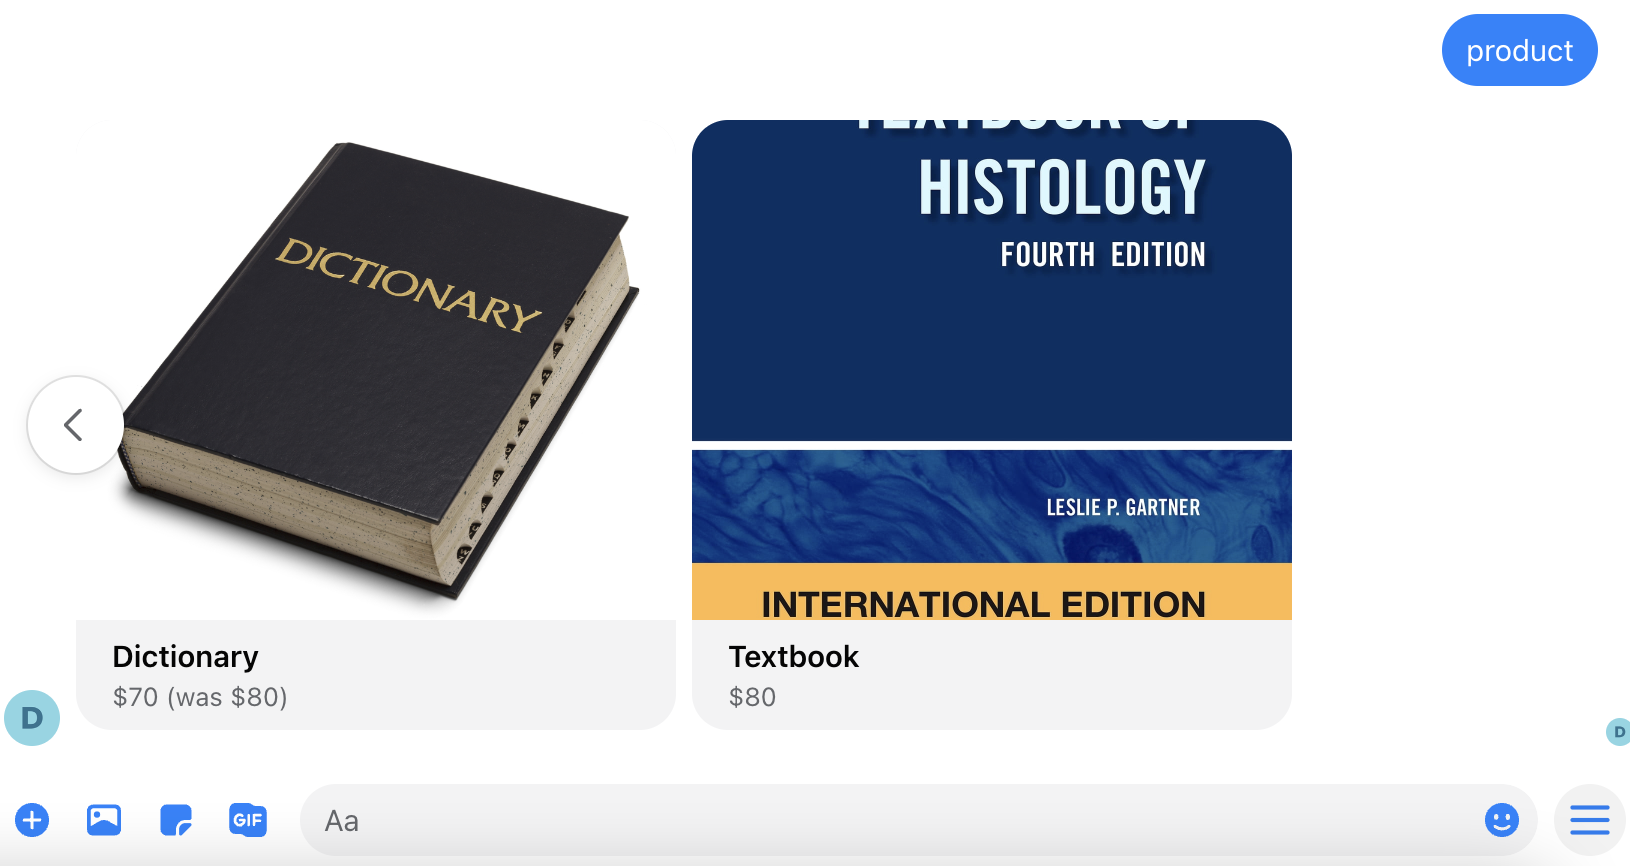
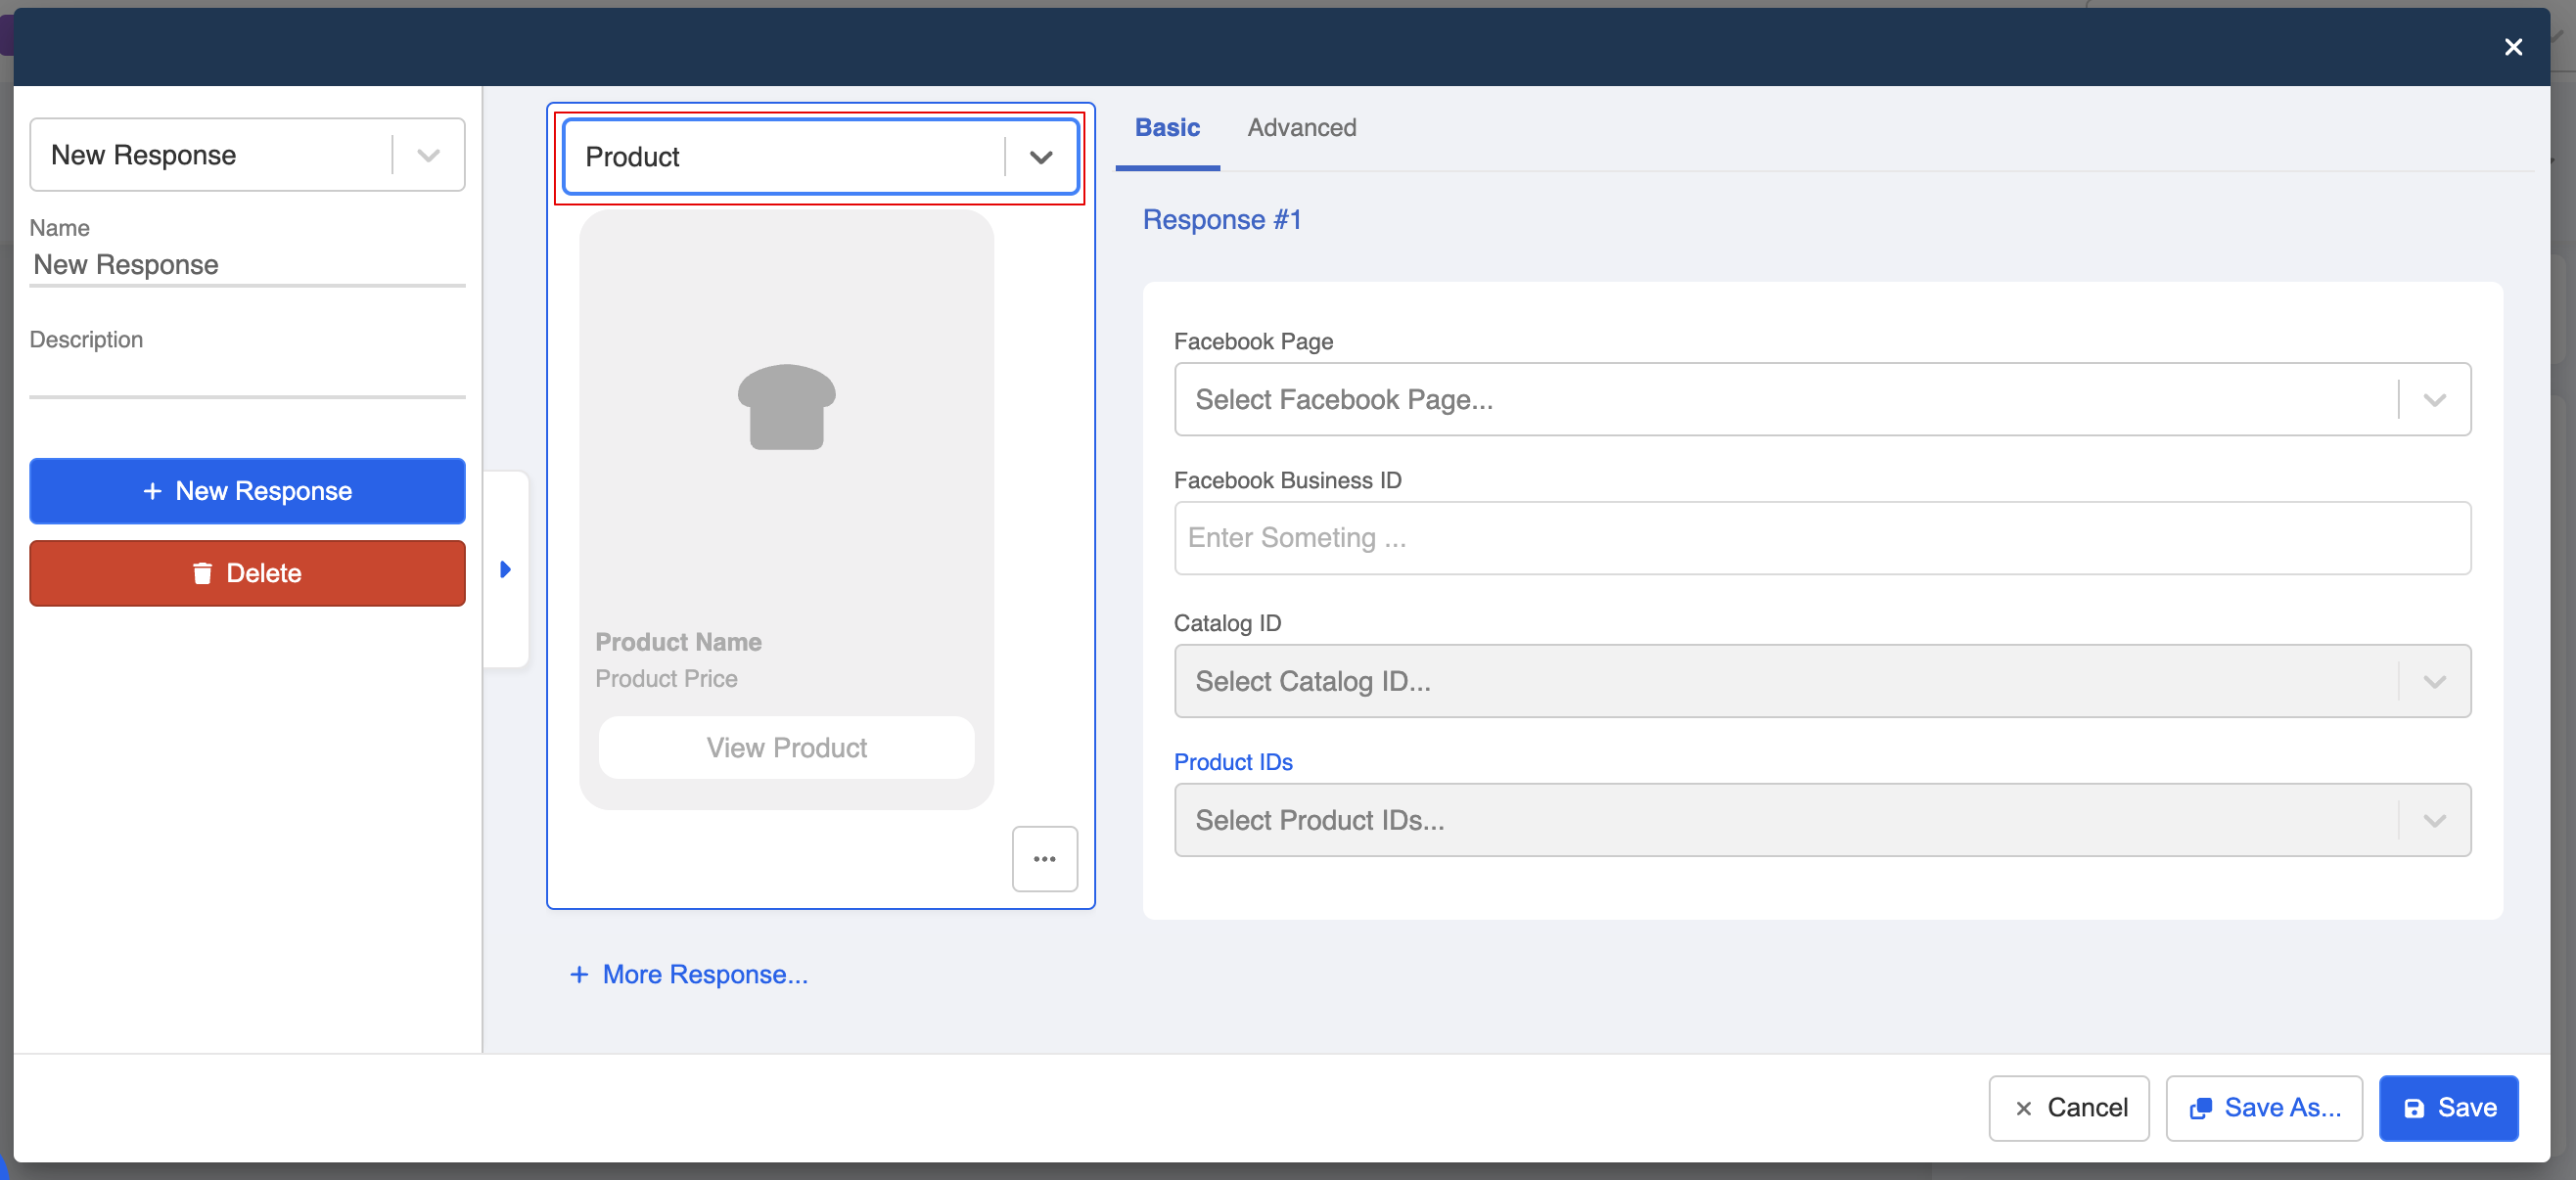
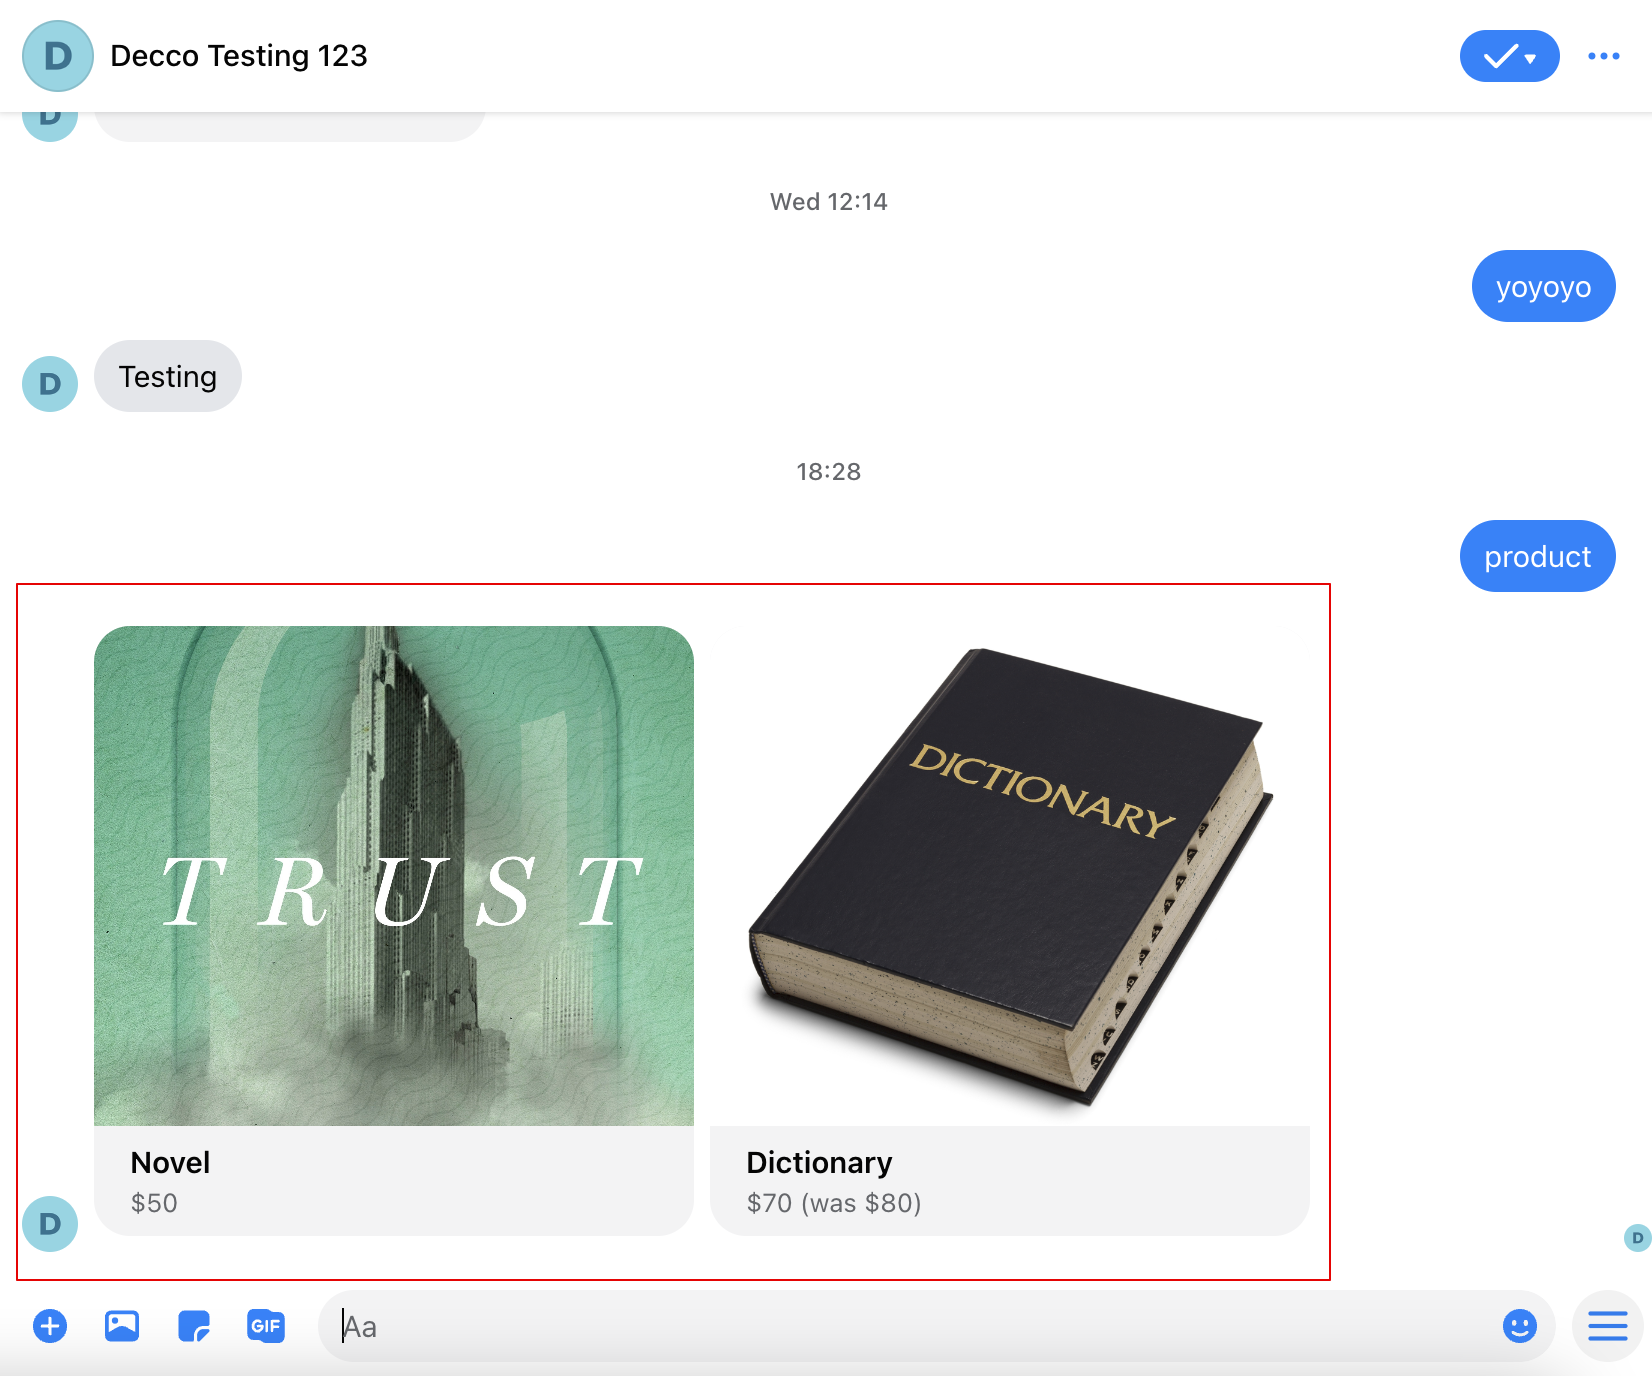
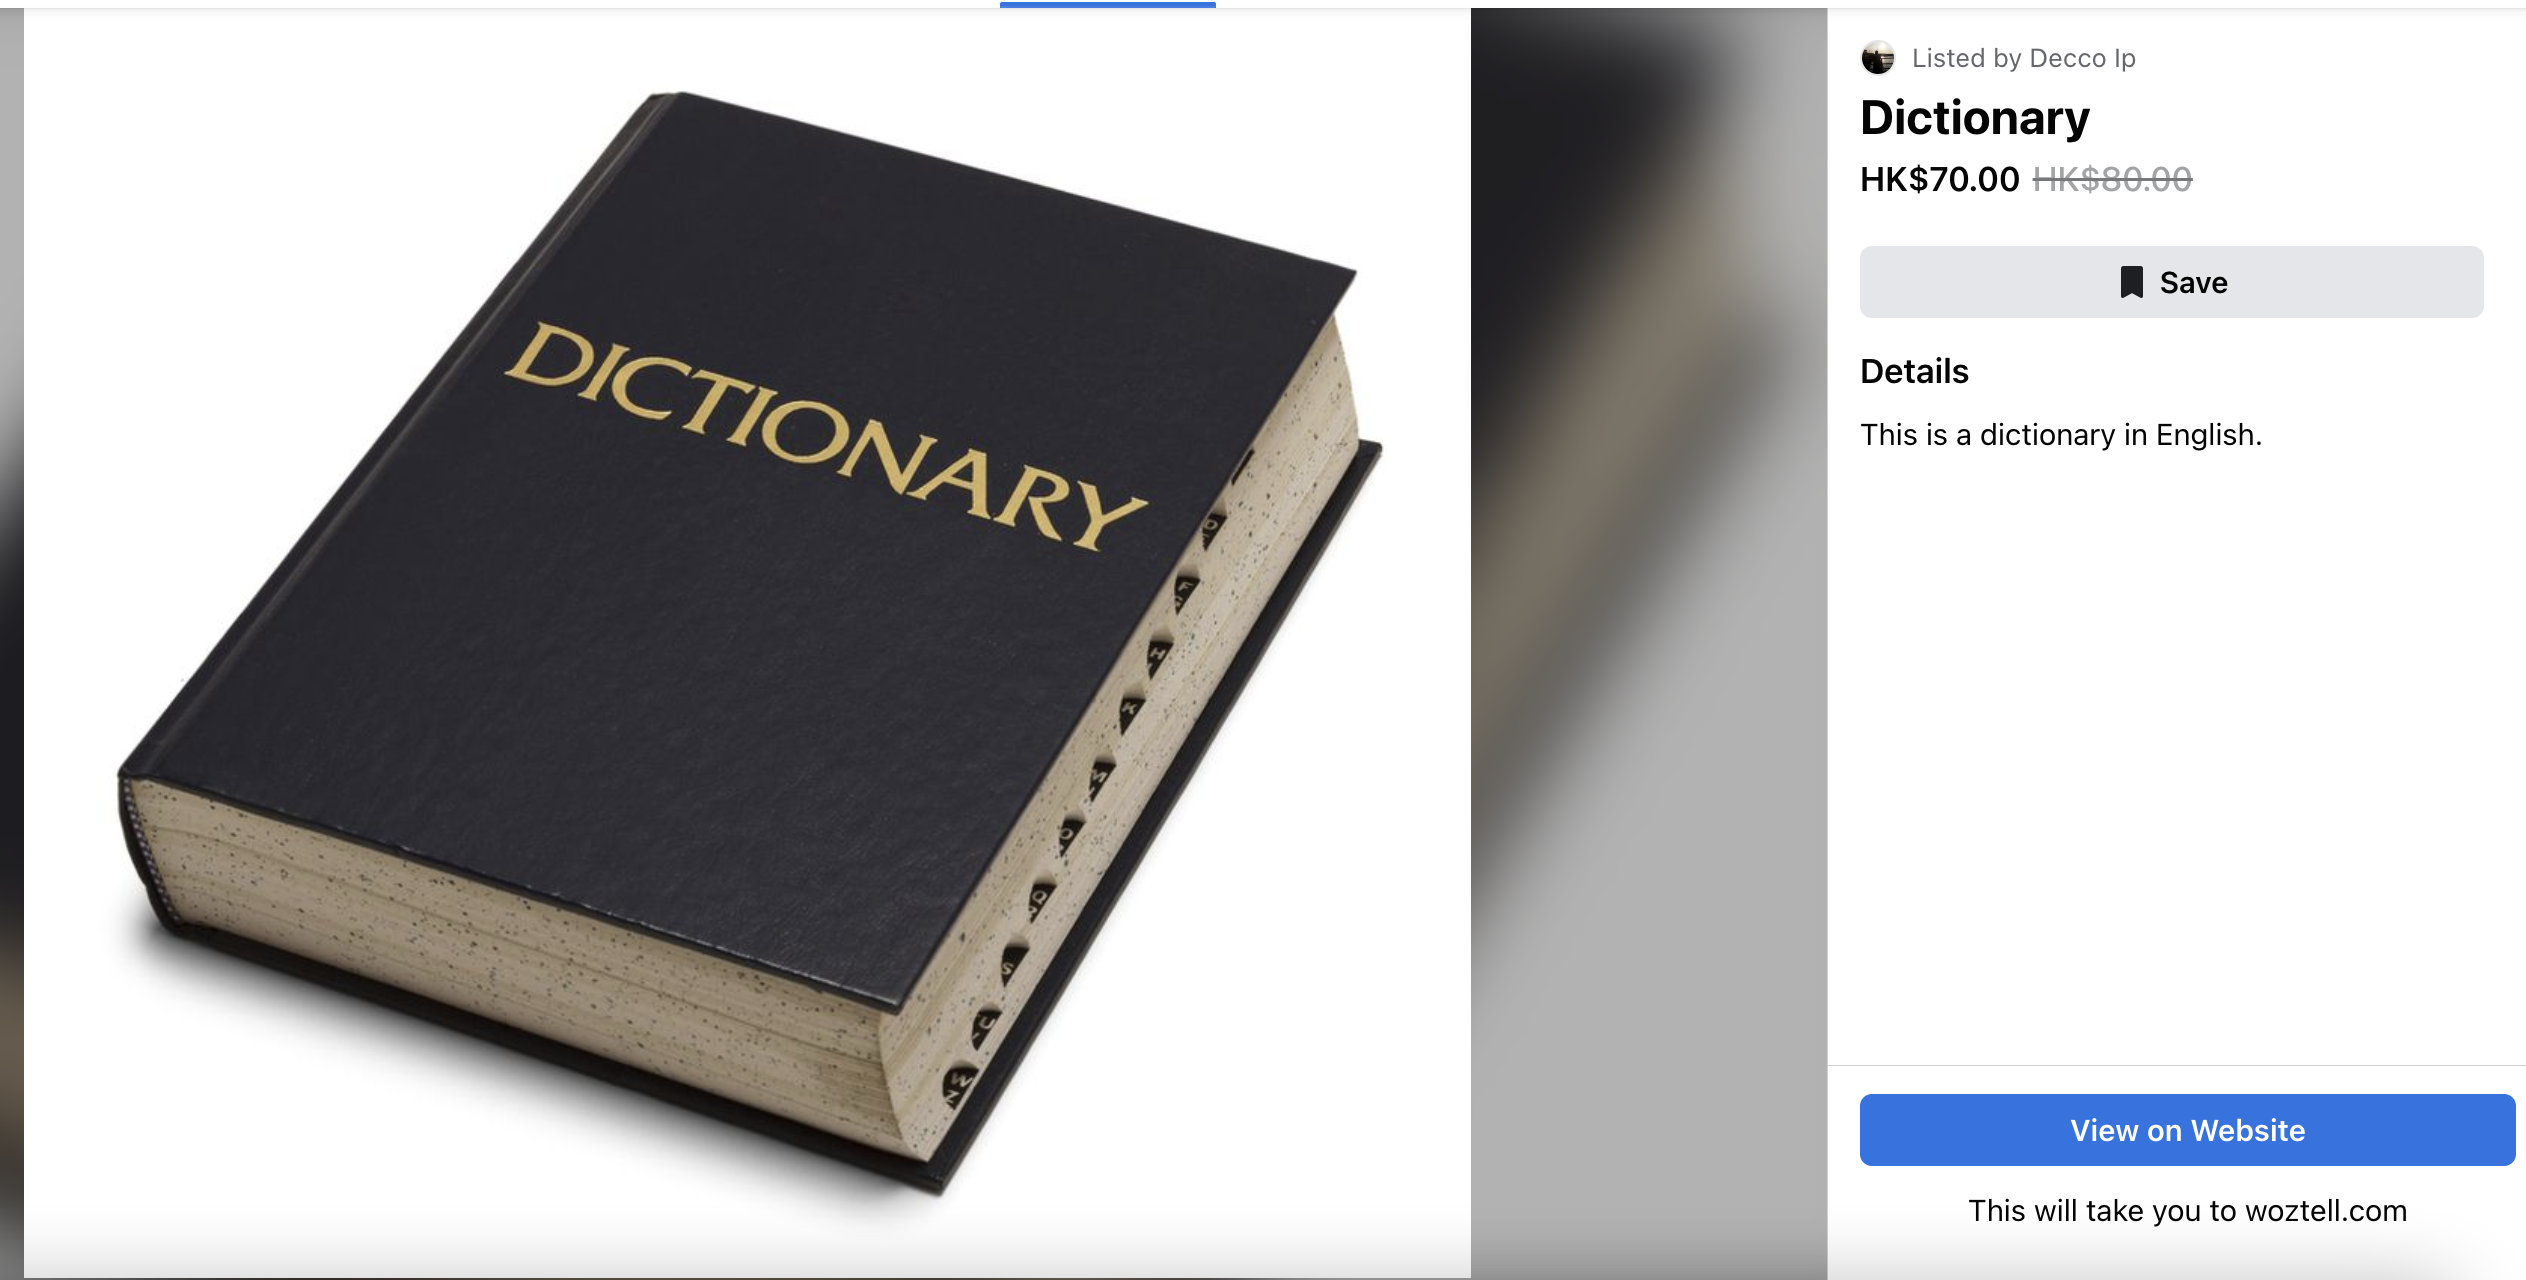
Product Template
The Facebook Product Template allows you to render the products that have been uploaded/added to the catalog under your Facebook Business Manager. The product will be displayed in the form of a carousel message, alongside with the product details extracted from the catalog.
Add page to Business Manager
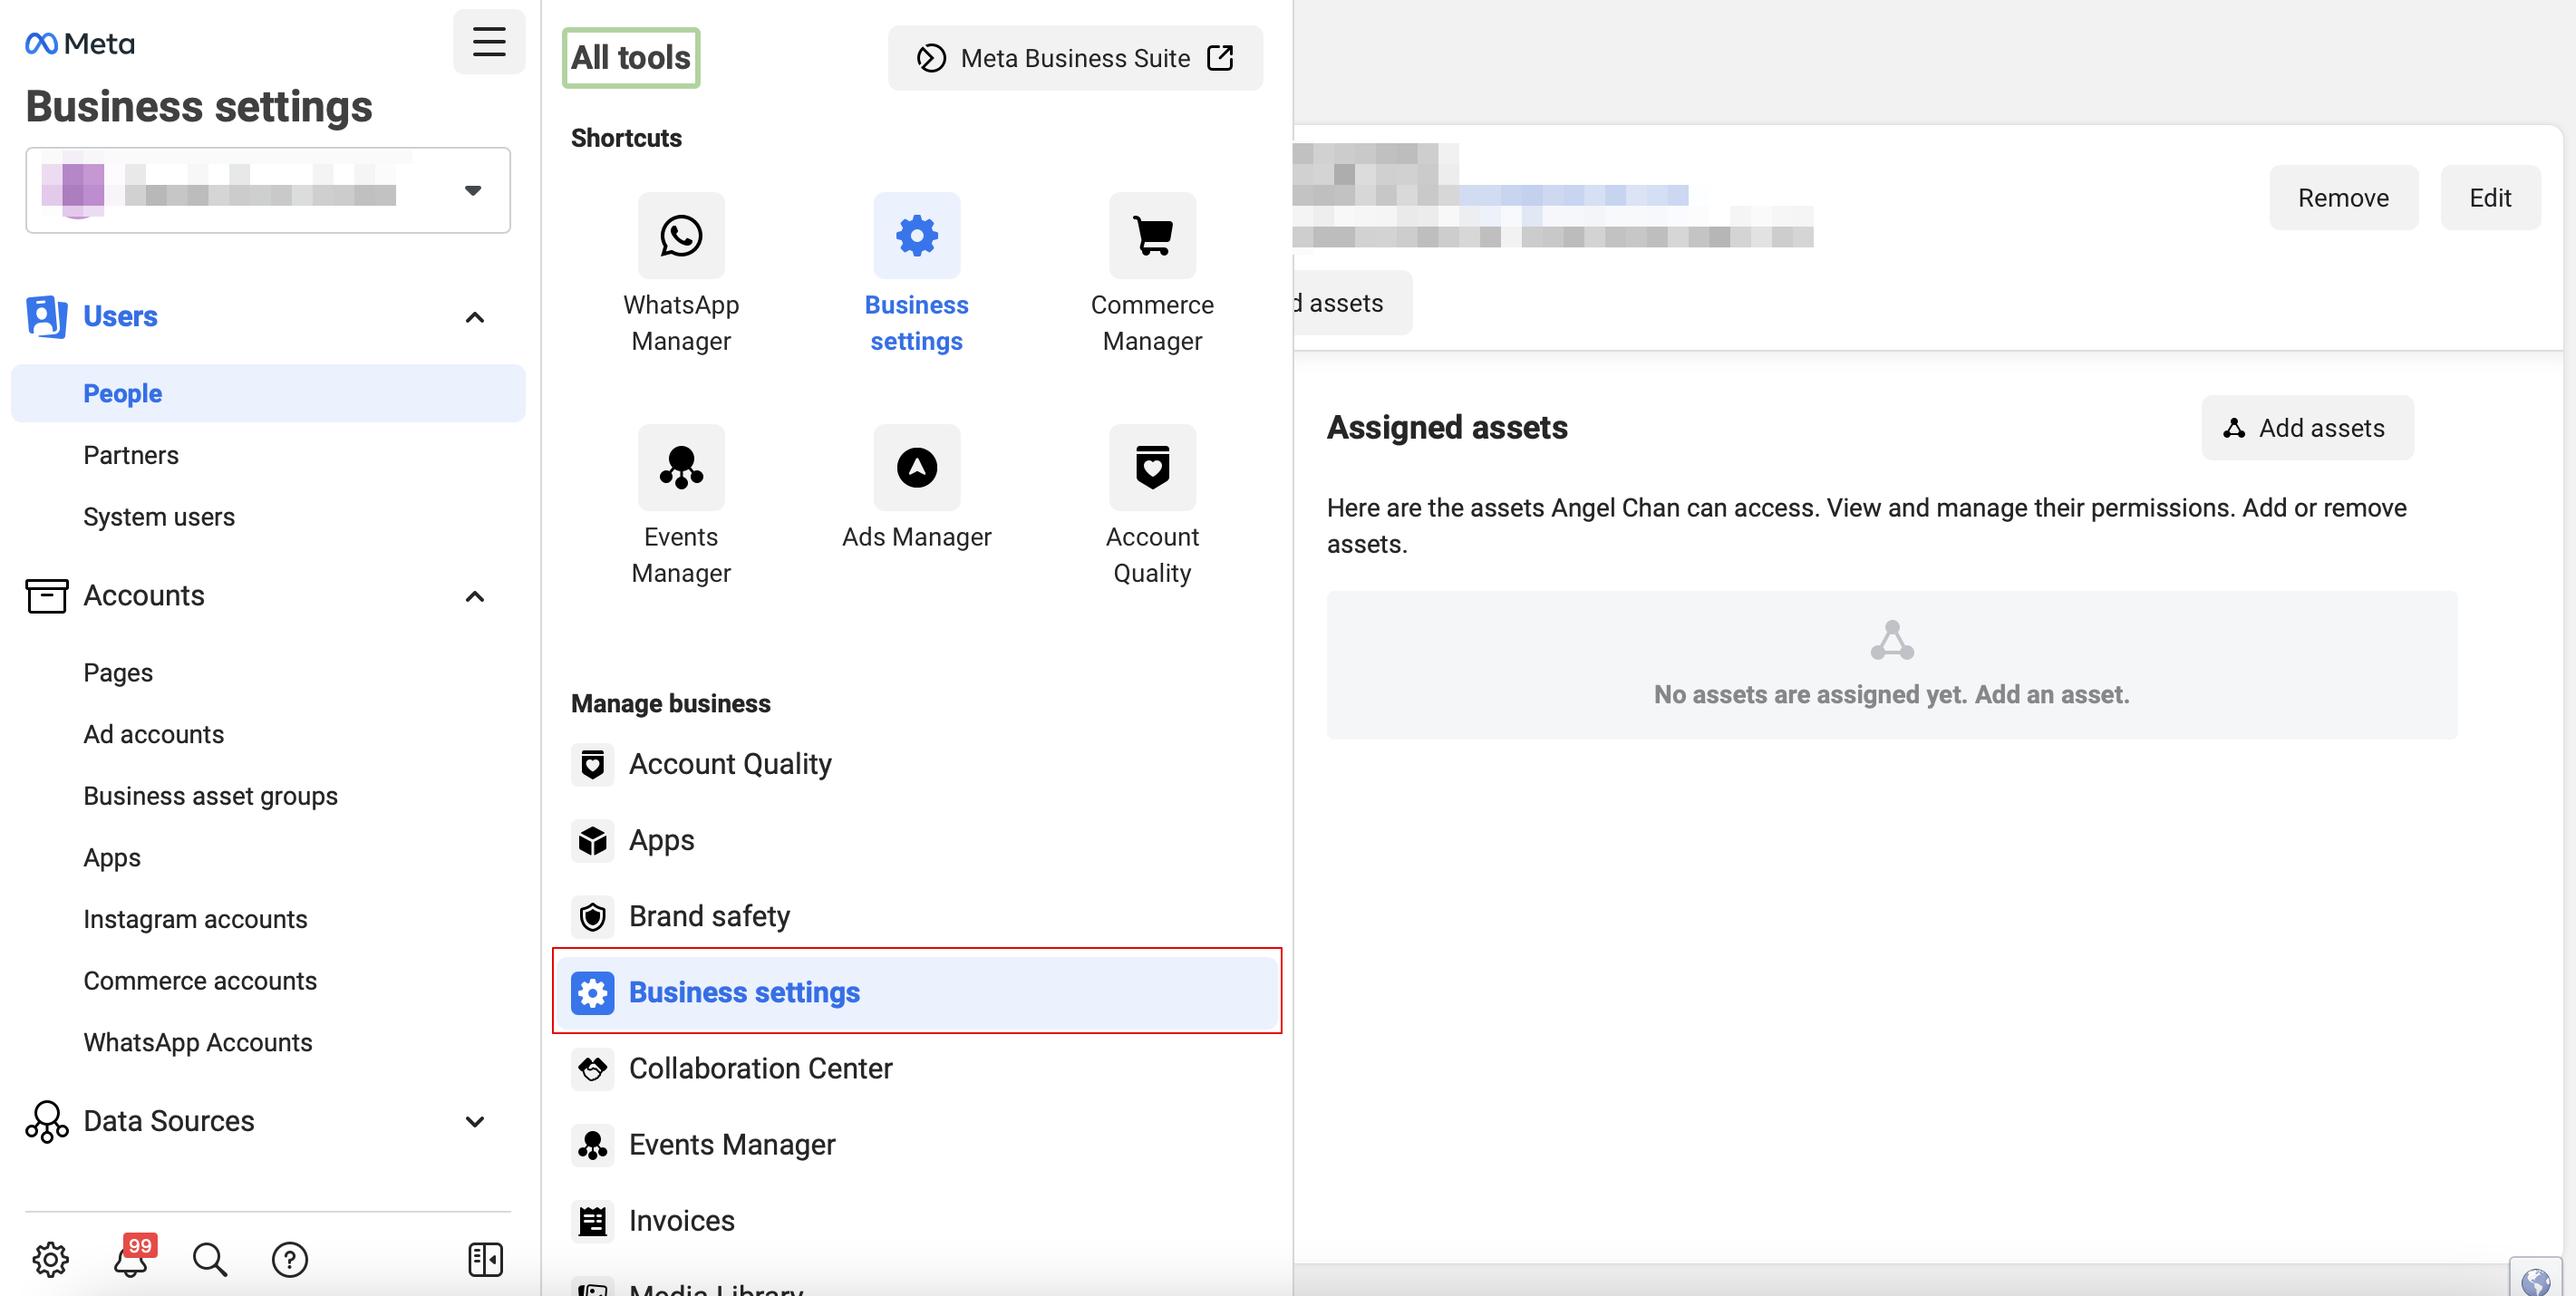
- First, log into your Facebook Business Manager account. Head to "Business settings".
- Select "Page" and make sure your Facebook page is added to your business manager.

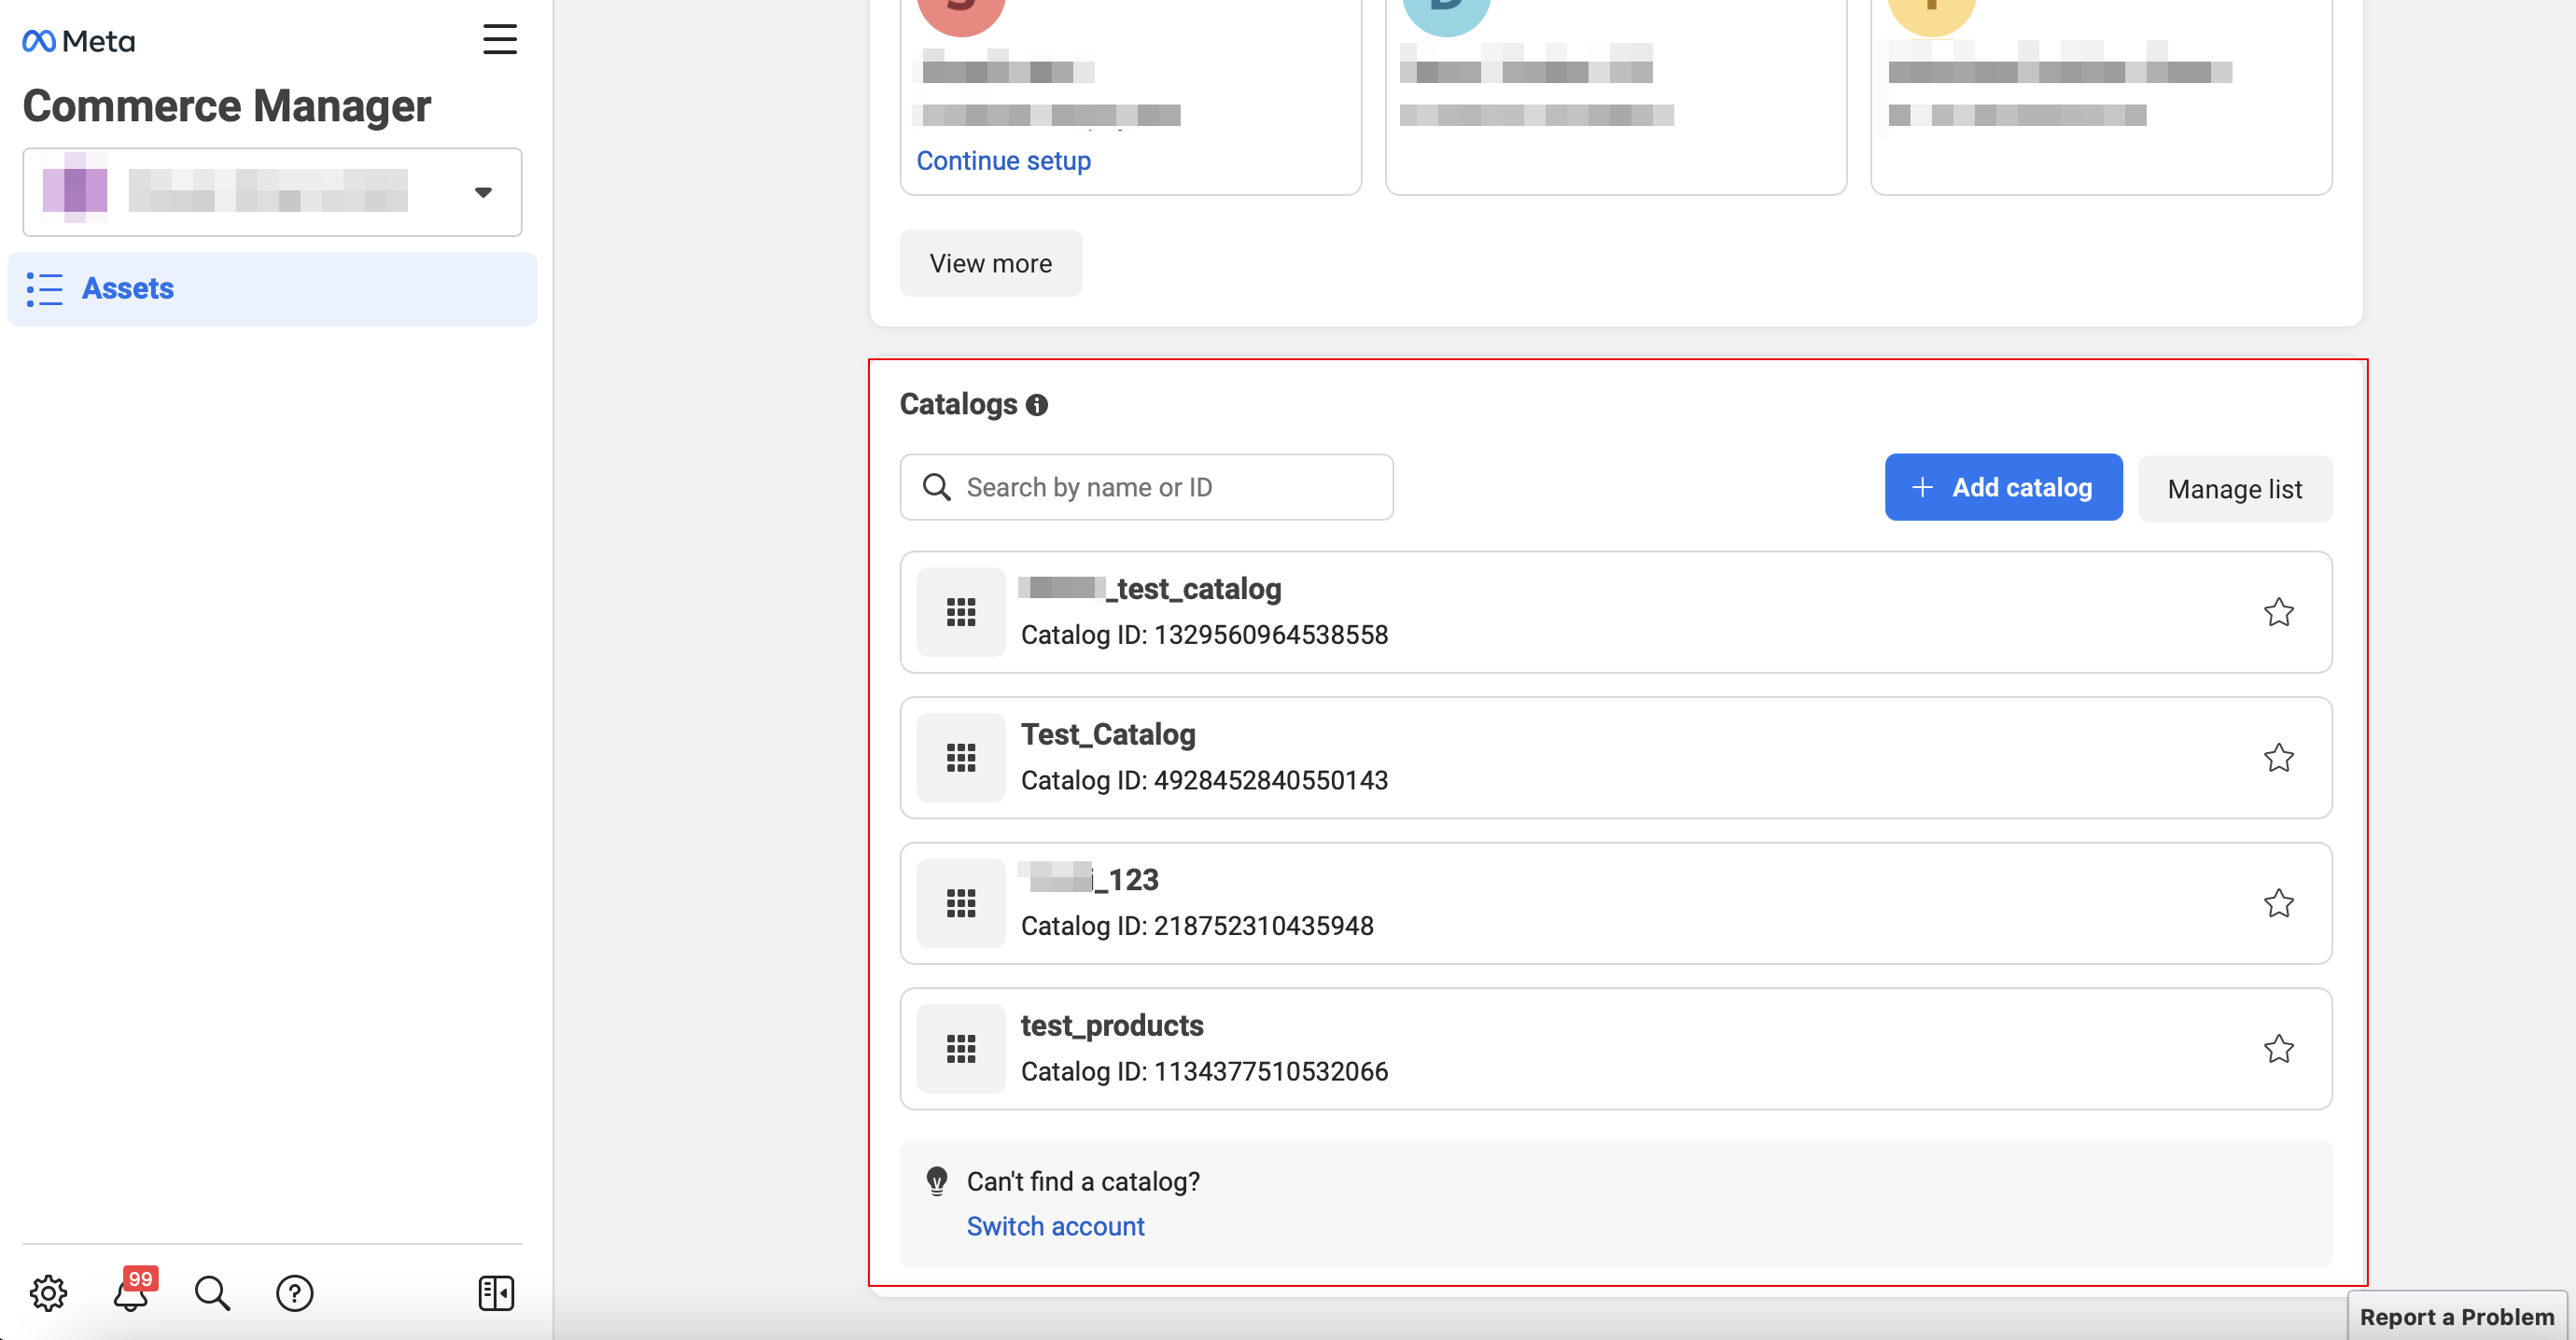
Create a Catalog
Before setting up the chatbot, the first step is to prepare a catalog in your Facebook Commerce Manager.
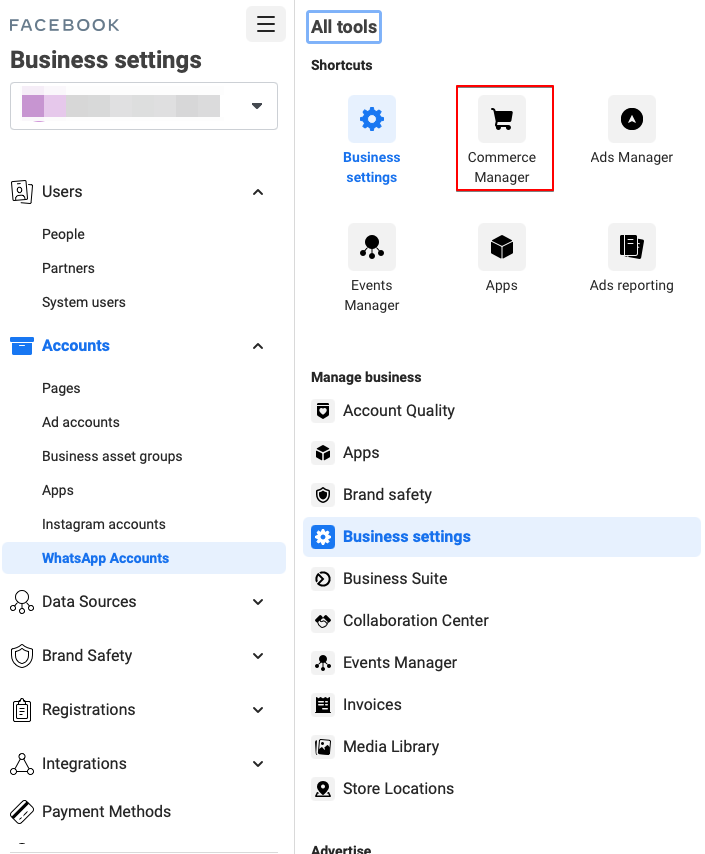
- In your Facebook Business Manager account, head to Commerce Manager under All Tools.
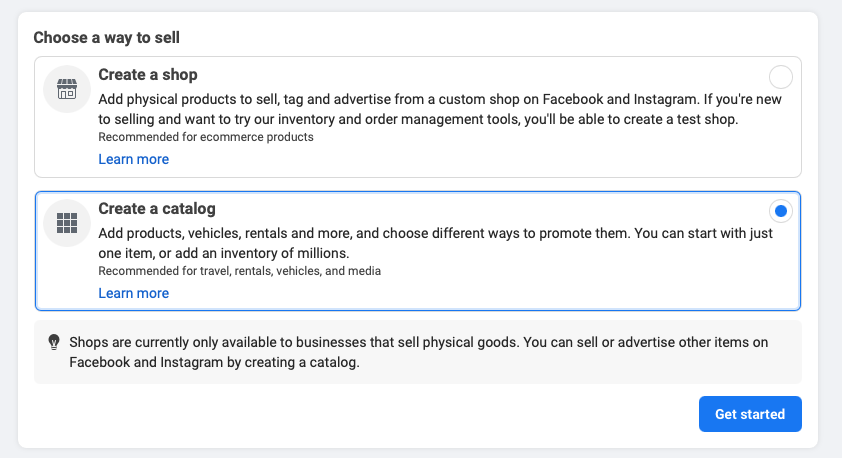
- Select Create a Catalog and then Get Started.
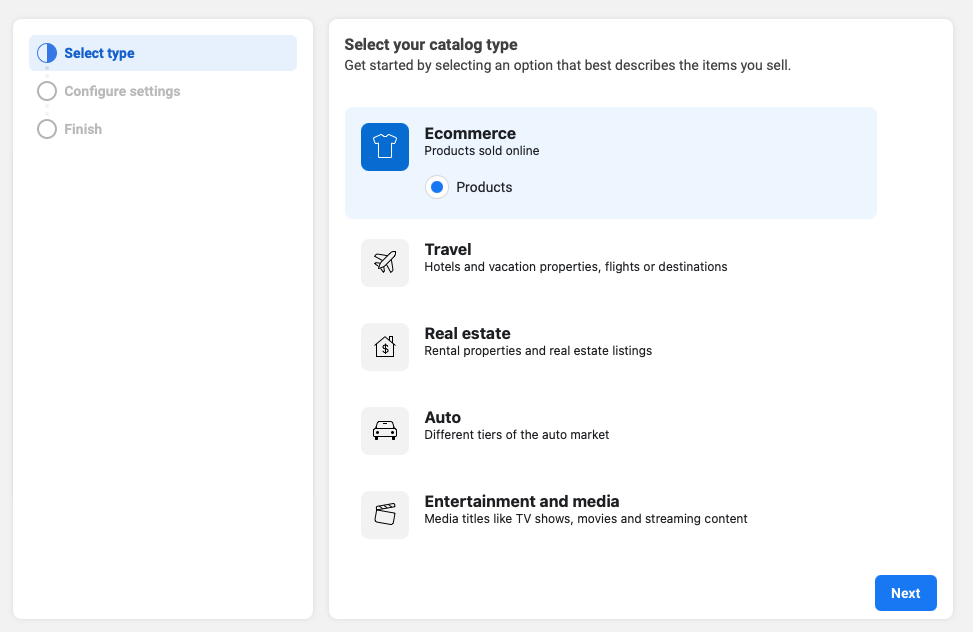
- Select a catalog type for your business.
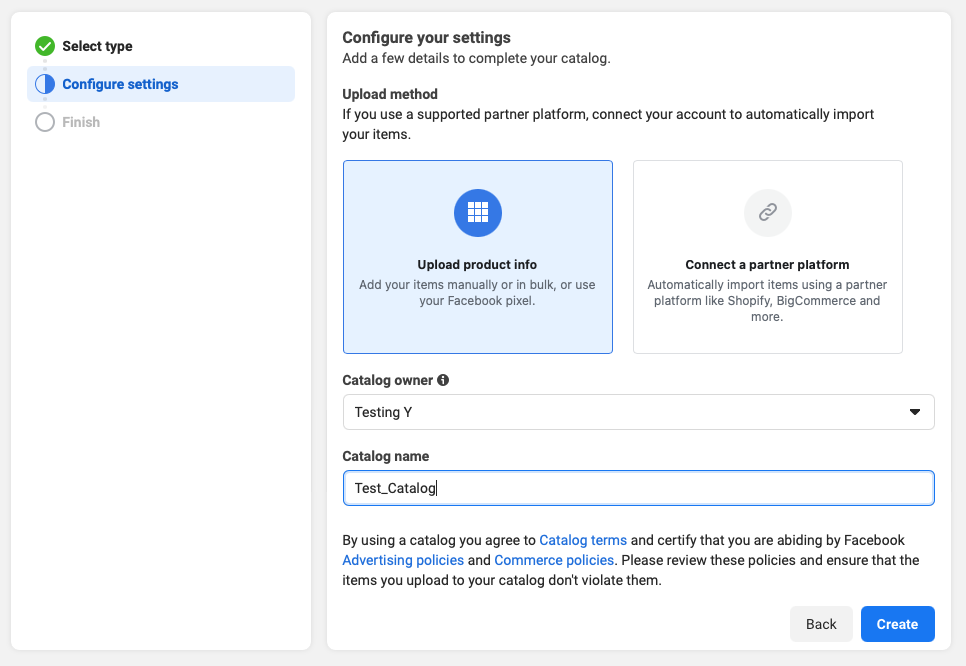
- You can choose uploading the product info manually. After that, choose the catalog owner and name the catalog.
NOTE
Besides, you can also connect to a partner platform in order to sync the products to your catalog.

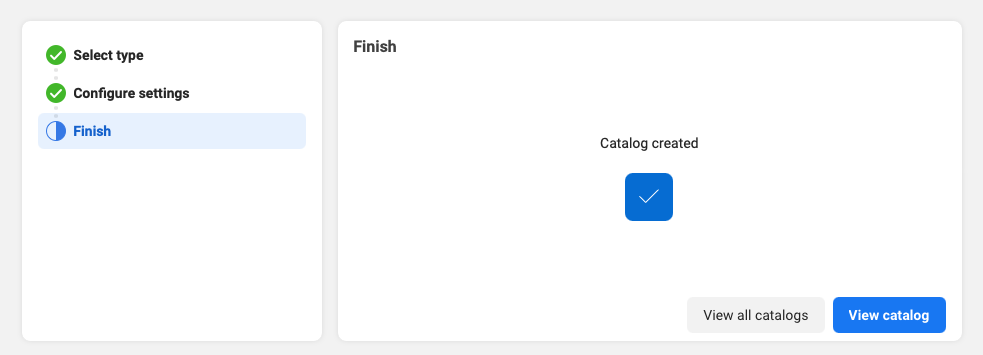
- You can view the catalog when it is created.
- In the catalog, head to Items, and select Add Items to start uploading the products. You can choose from different method.
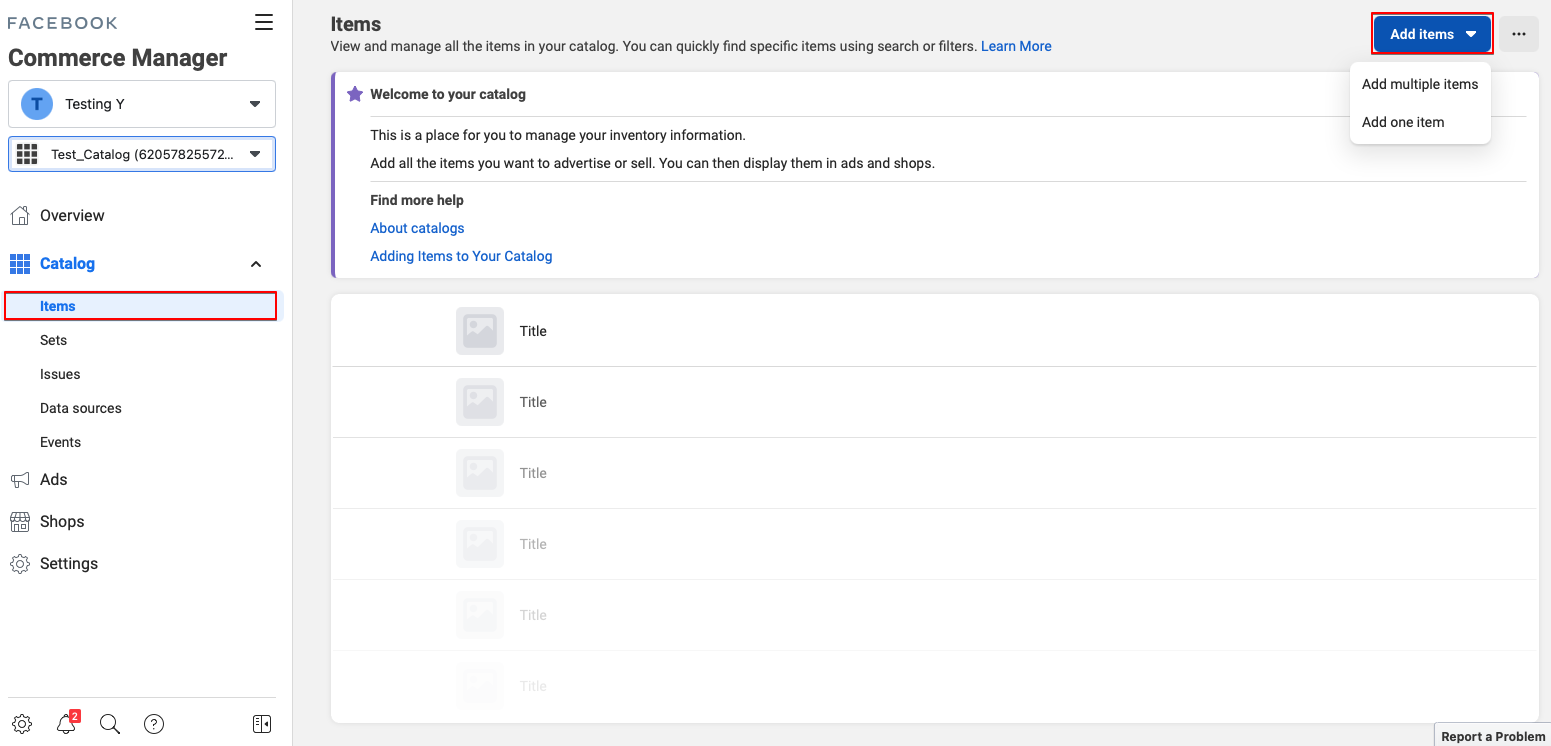
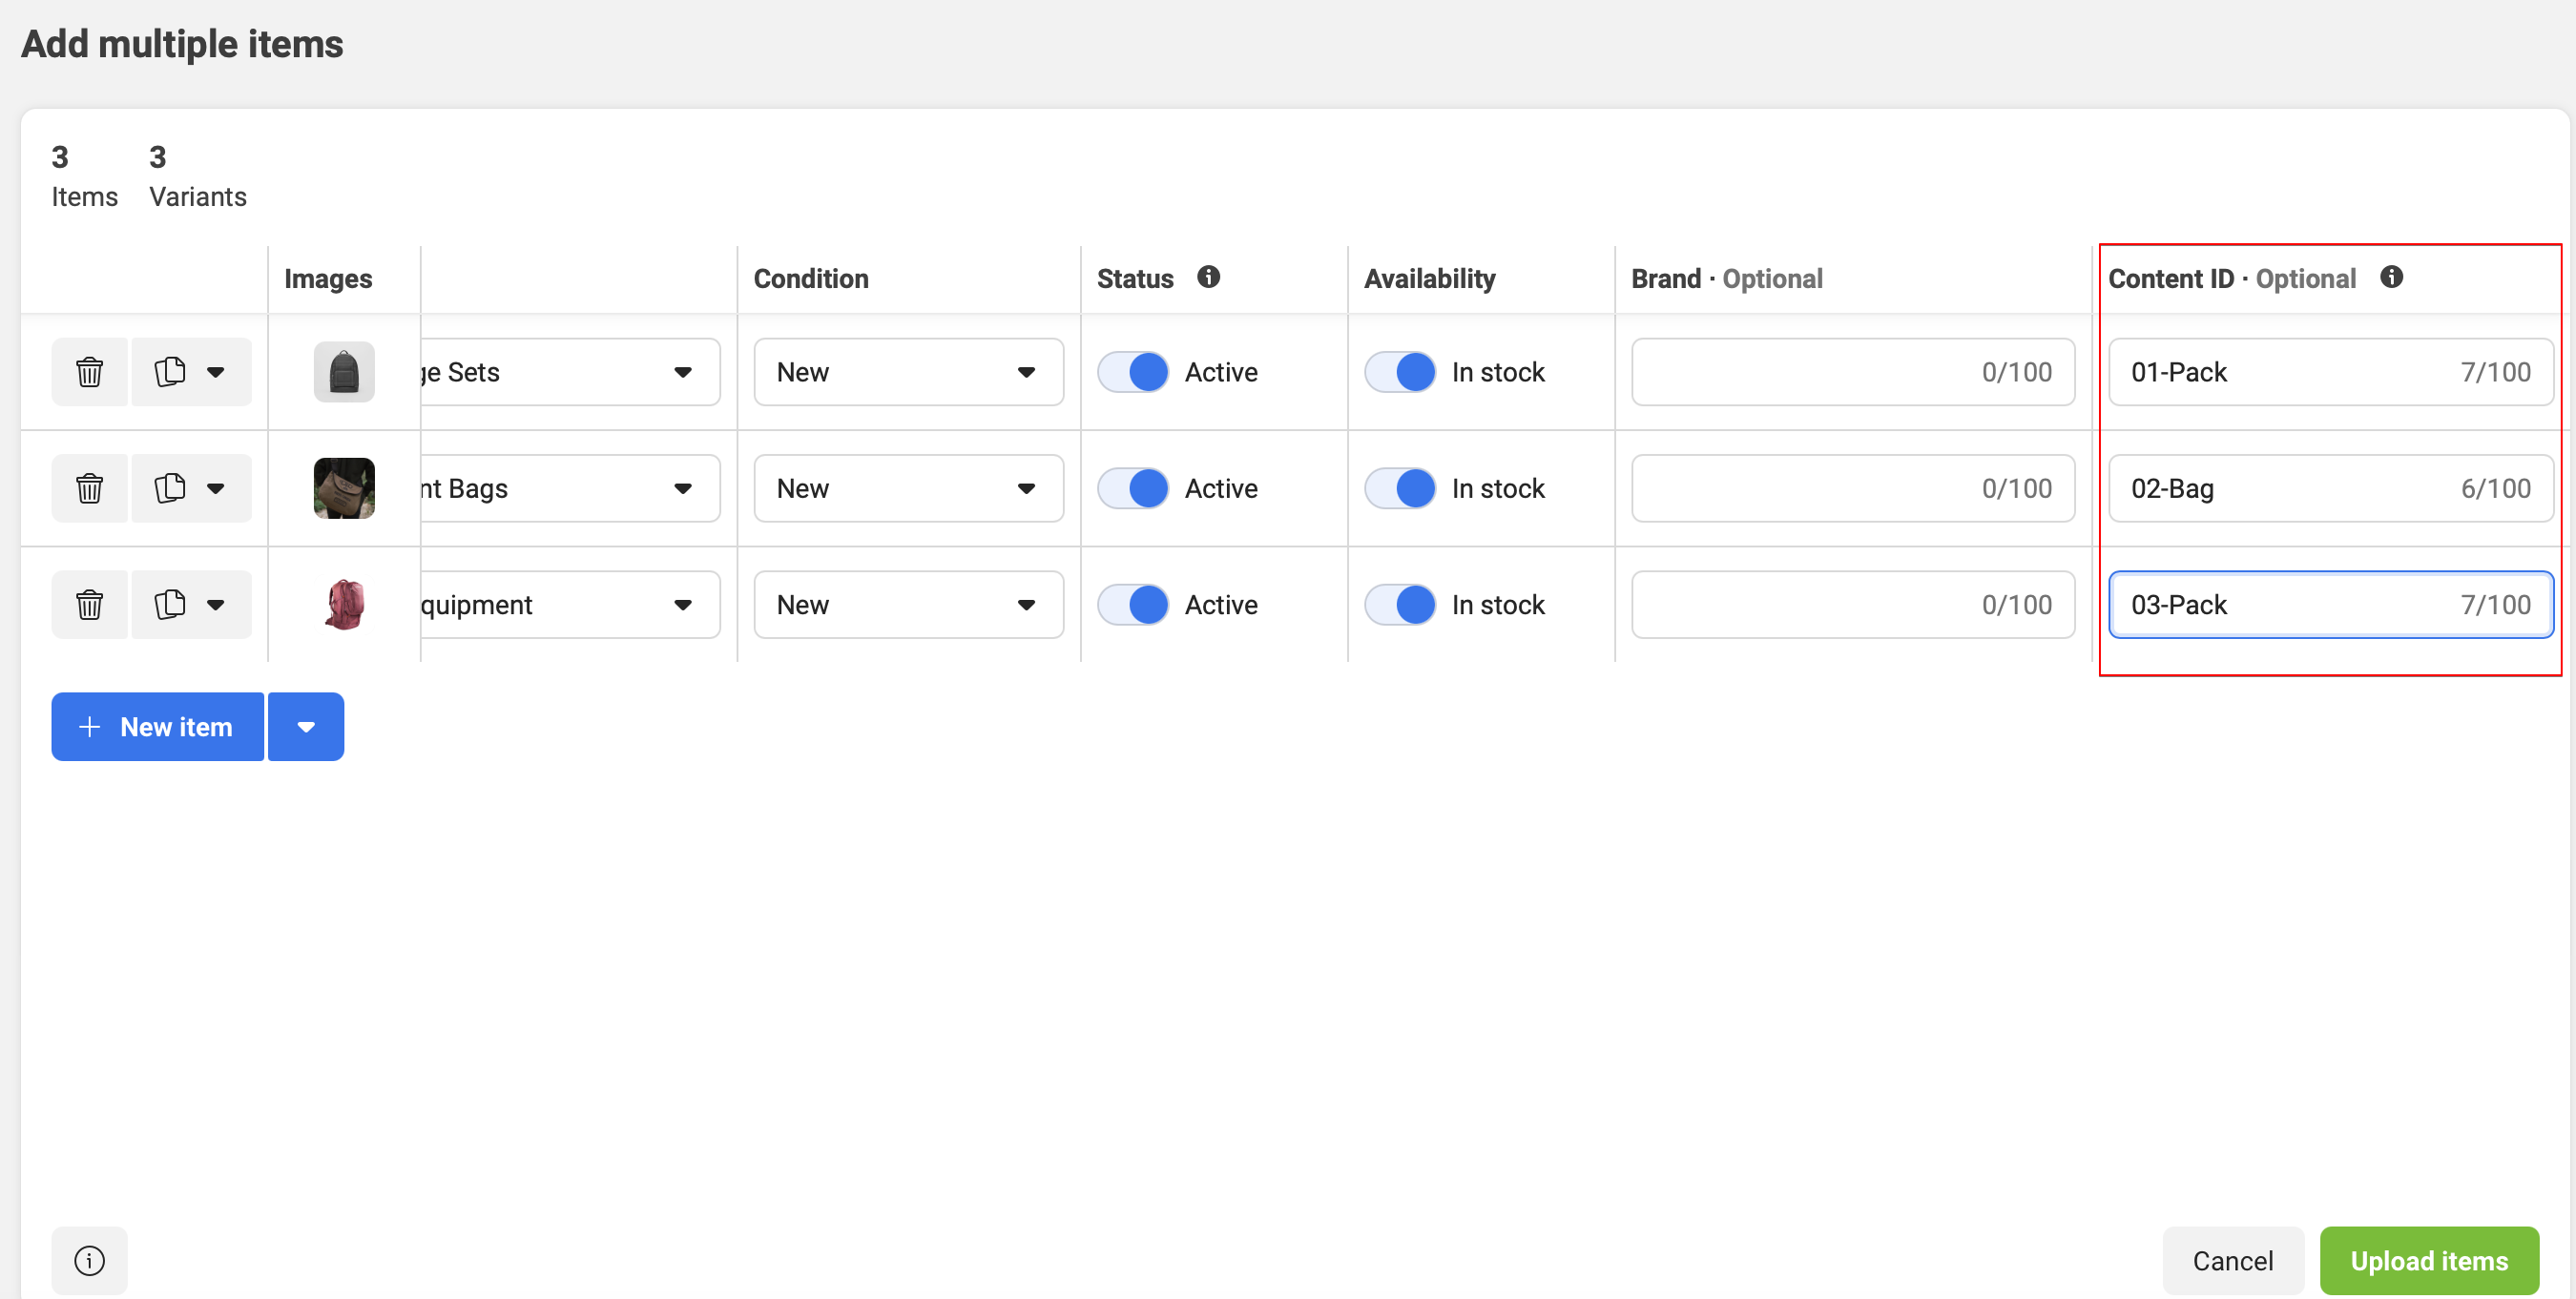
- You can manually add the product and input the product details one by one.

- For each product, they will be identified by a default Content ID, it is optional to customize the Content ID.
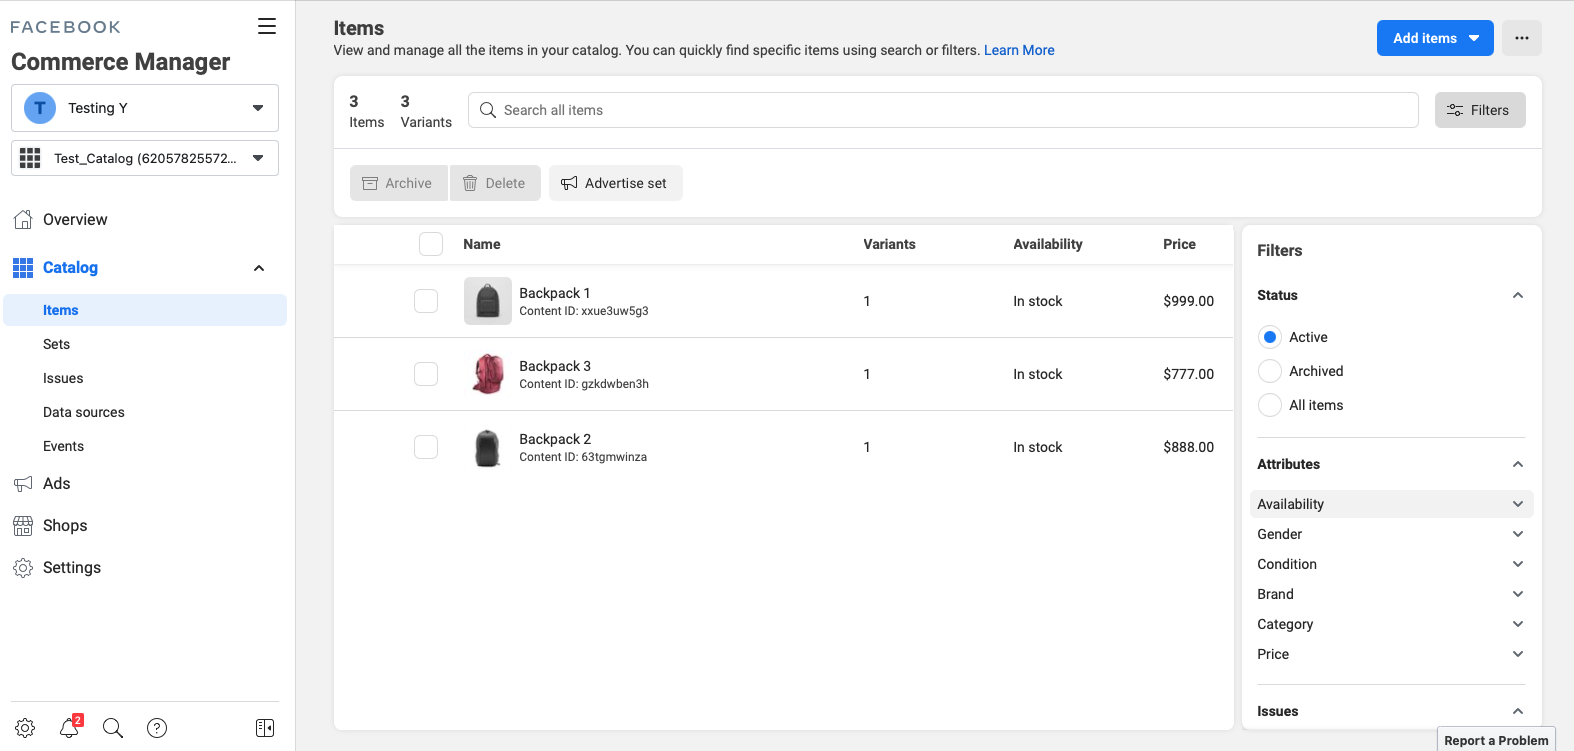
- Upon the completion of uploading products, you can view them in Items.
- You should be able to find the catalog as an asset under the Commerce Manager.
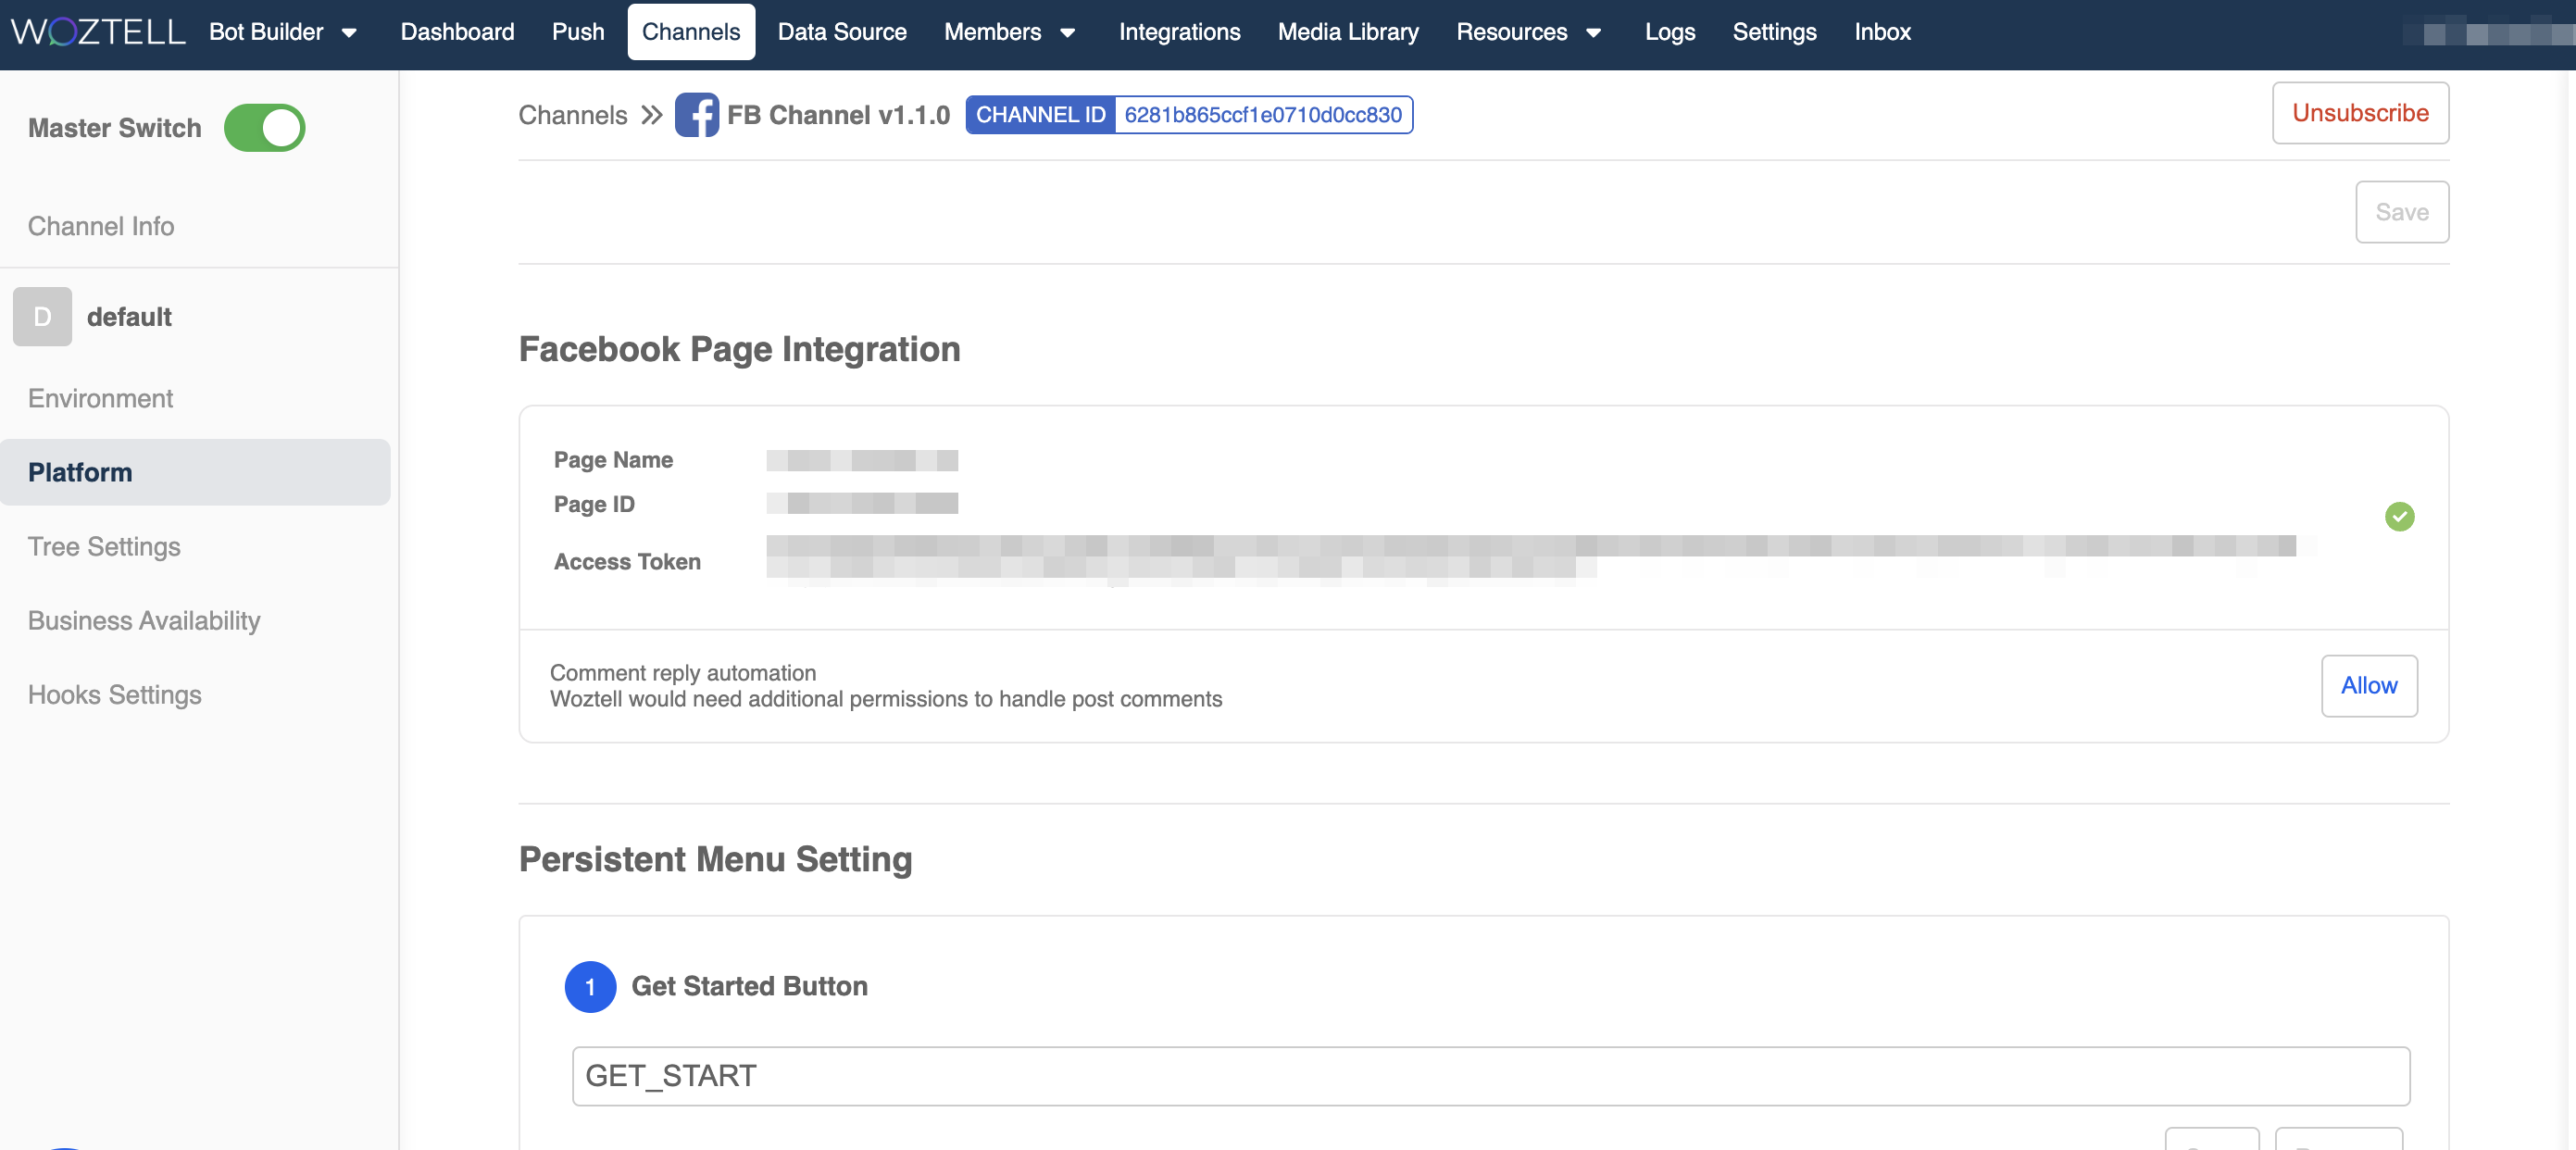
Connect to Facebook Page
Before applying the product template, please make sure you have connected the Facebook page to the channel.
Create Template
Now, we can start applying the product template.
- First, create a new chatbot and a general node.
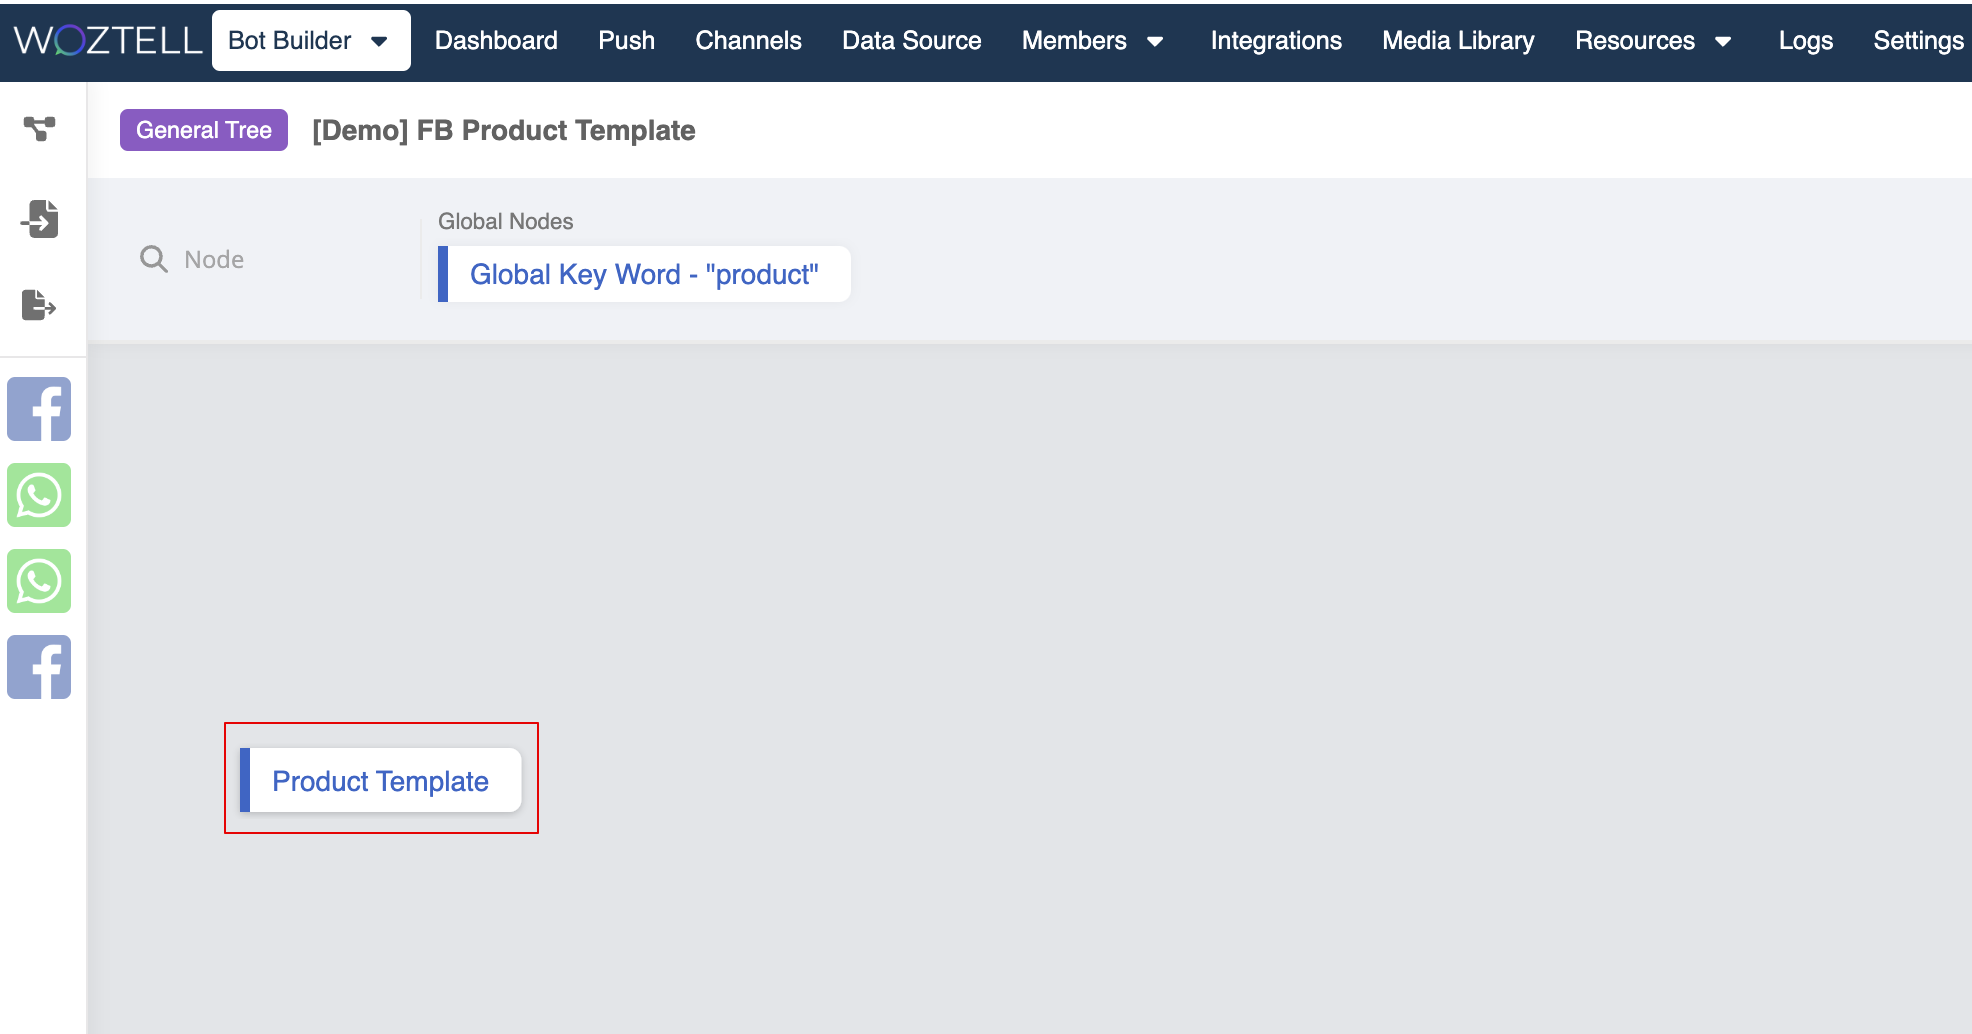
- Create a response in the general node. Then, select the Facebook specific response.
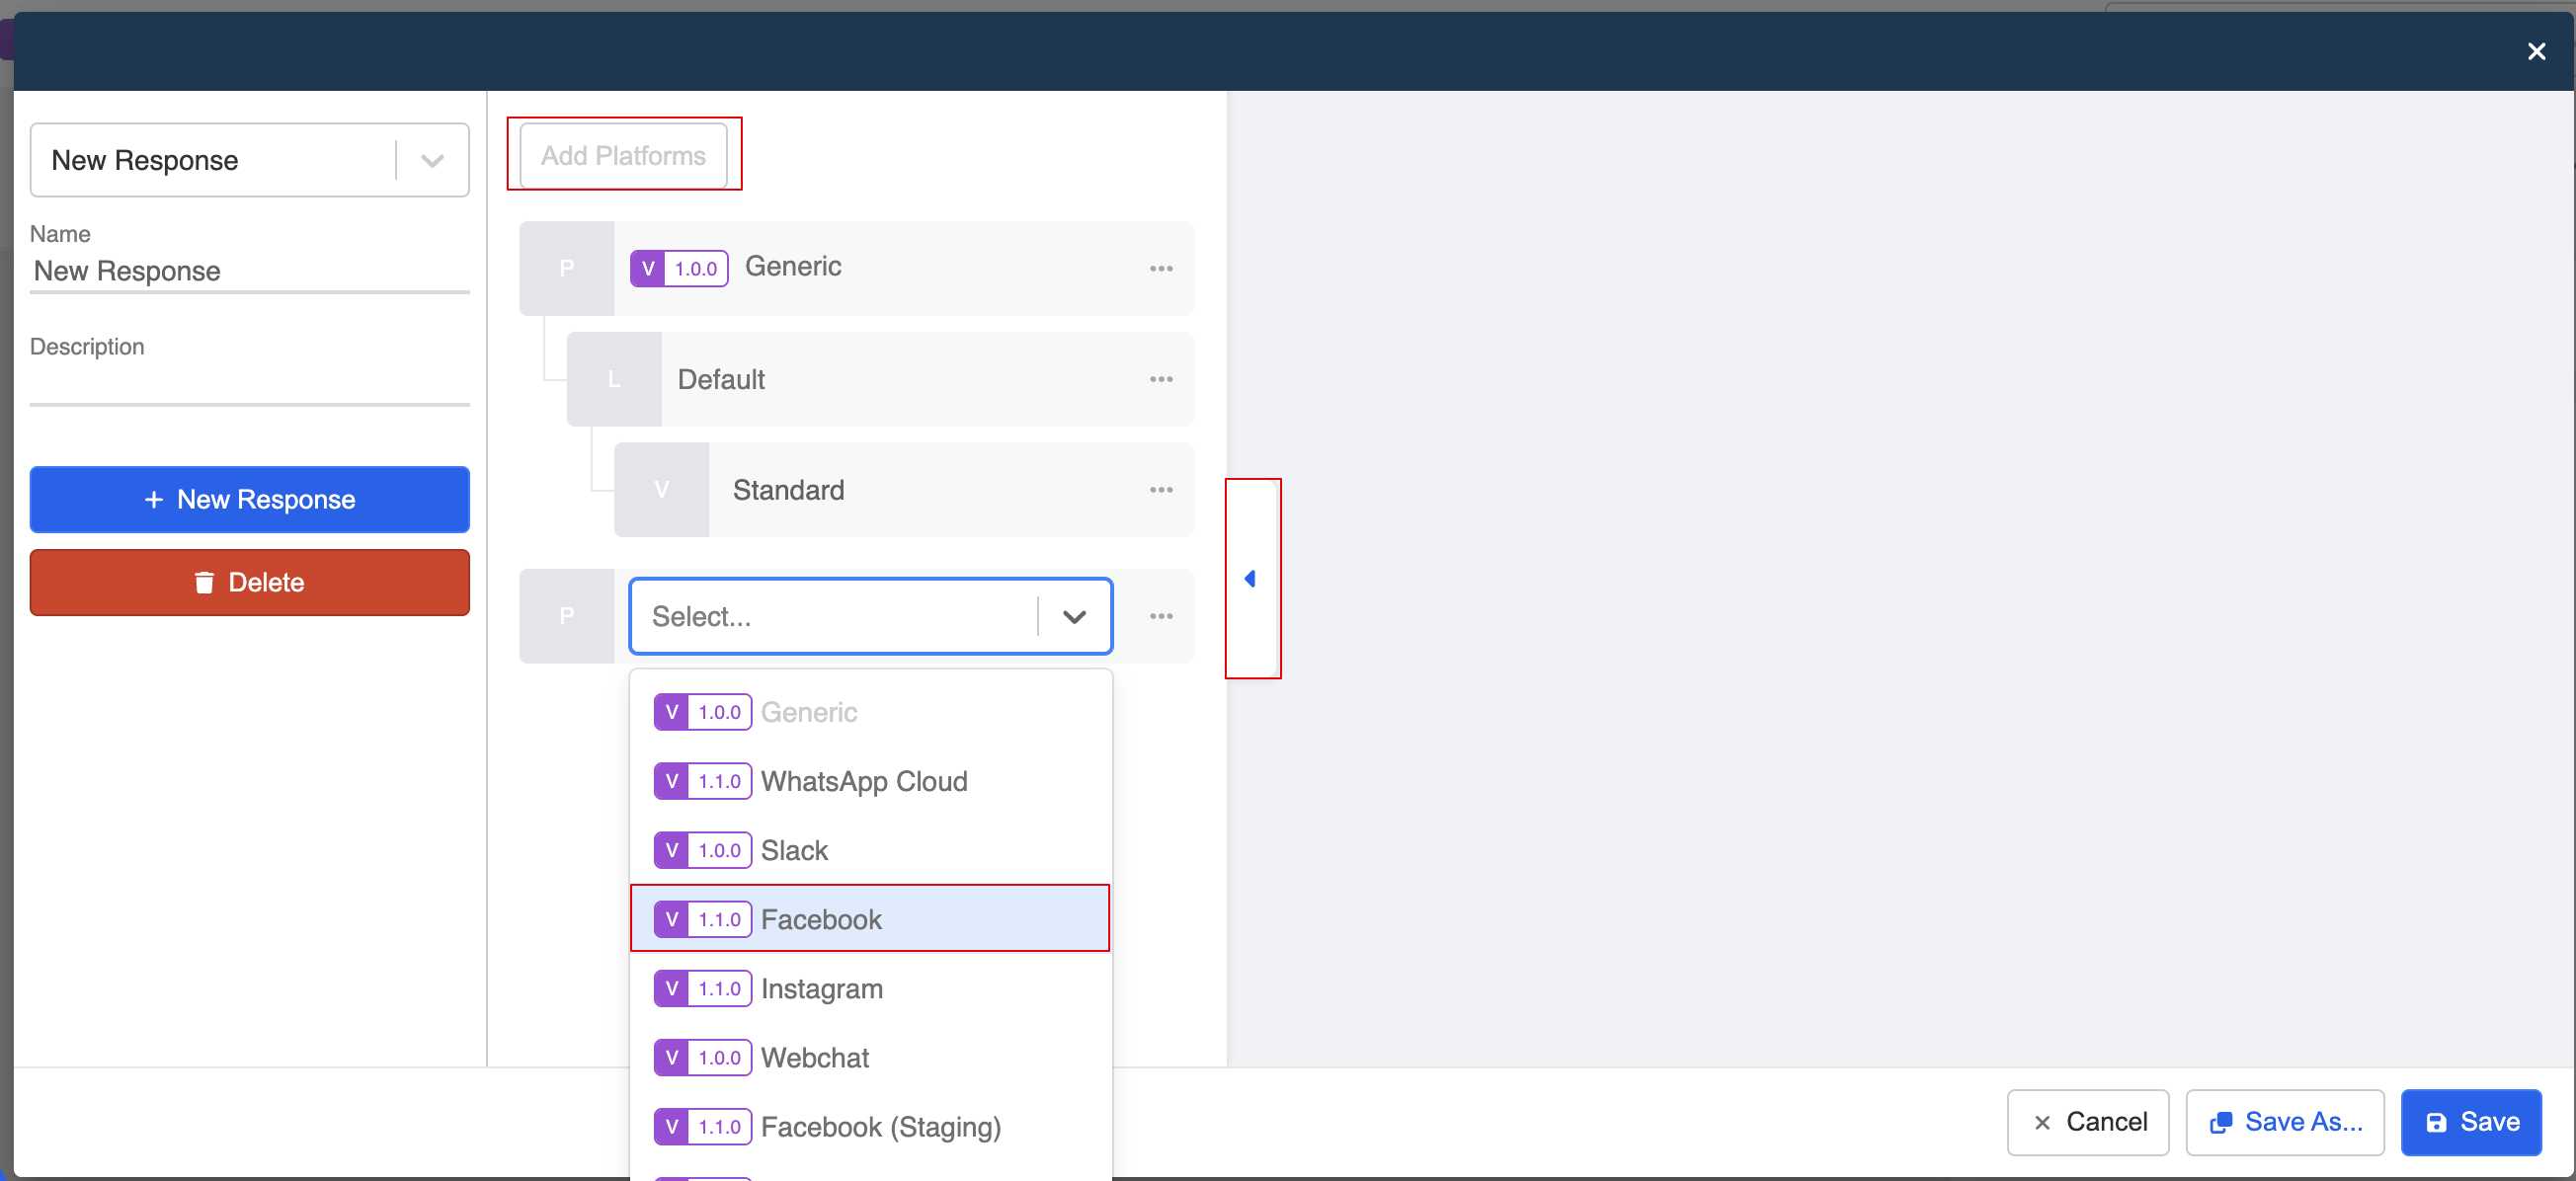
- Select "Product" as the message type.
- The first picker will display all the Facebook pages connected to your app. Please select one relevant Facebook page.
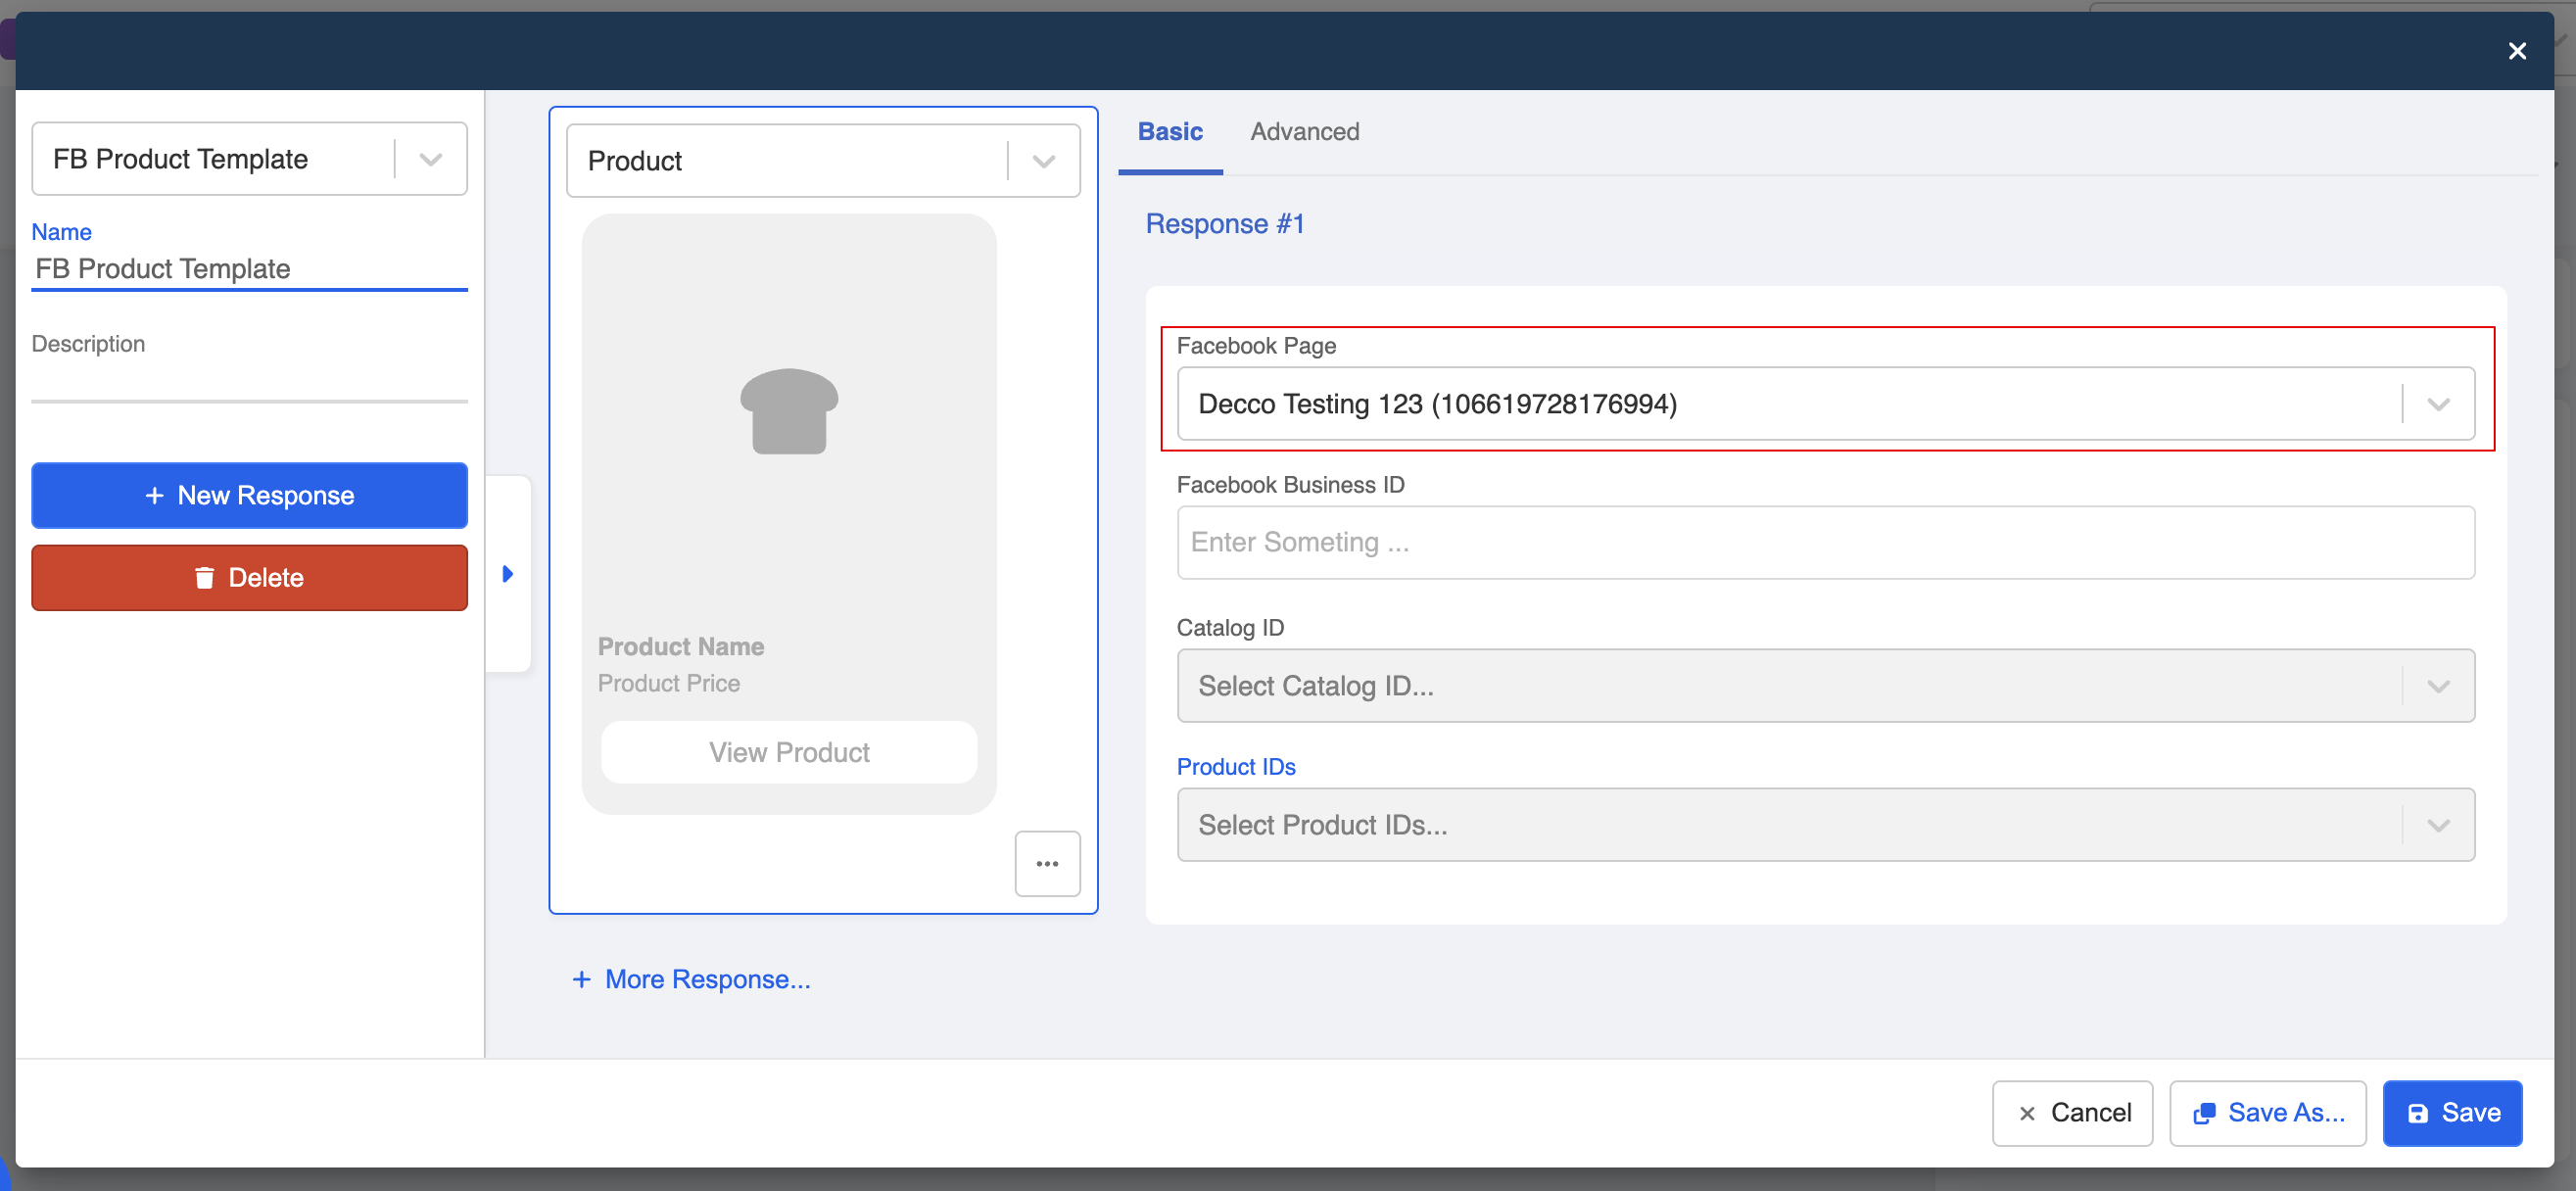
- Business Manager account, head to "Business Info" to obtain the Facebook Business ID, and enter it in the template.
NOTE
The selected page should be associated with this Business Manager account.

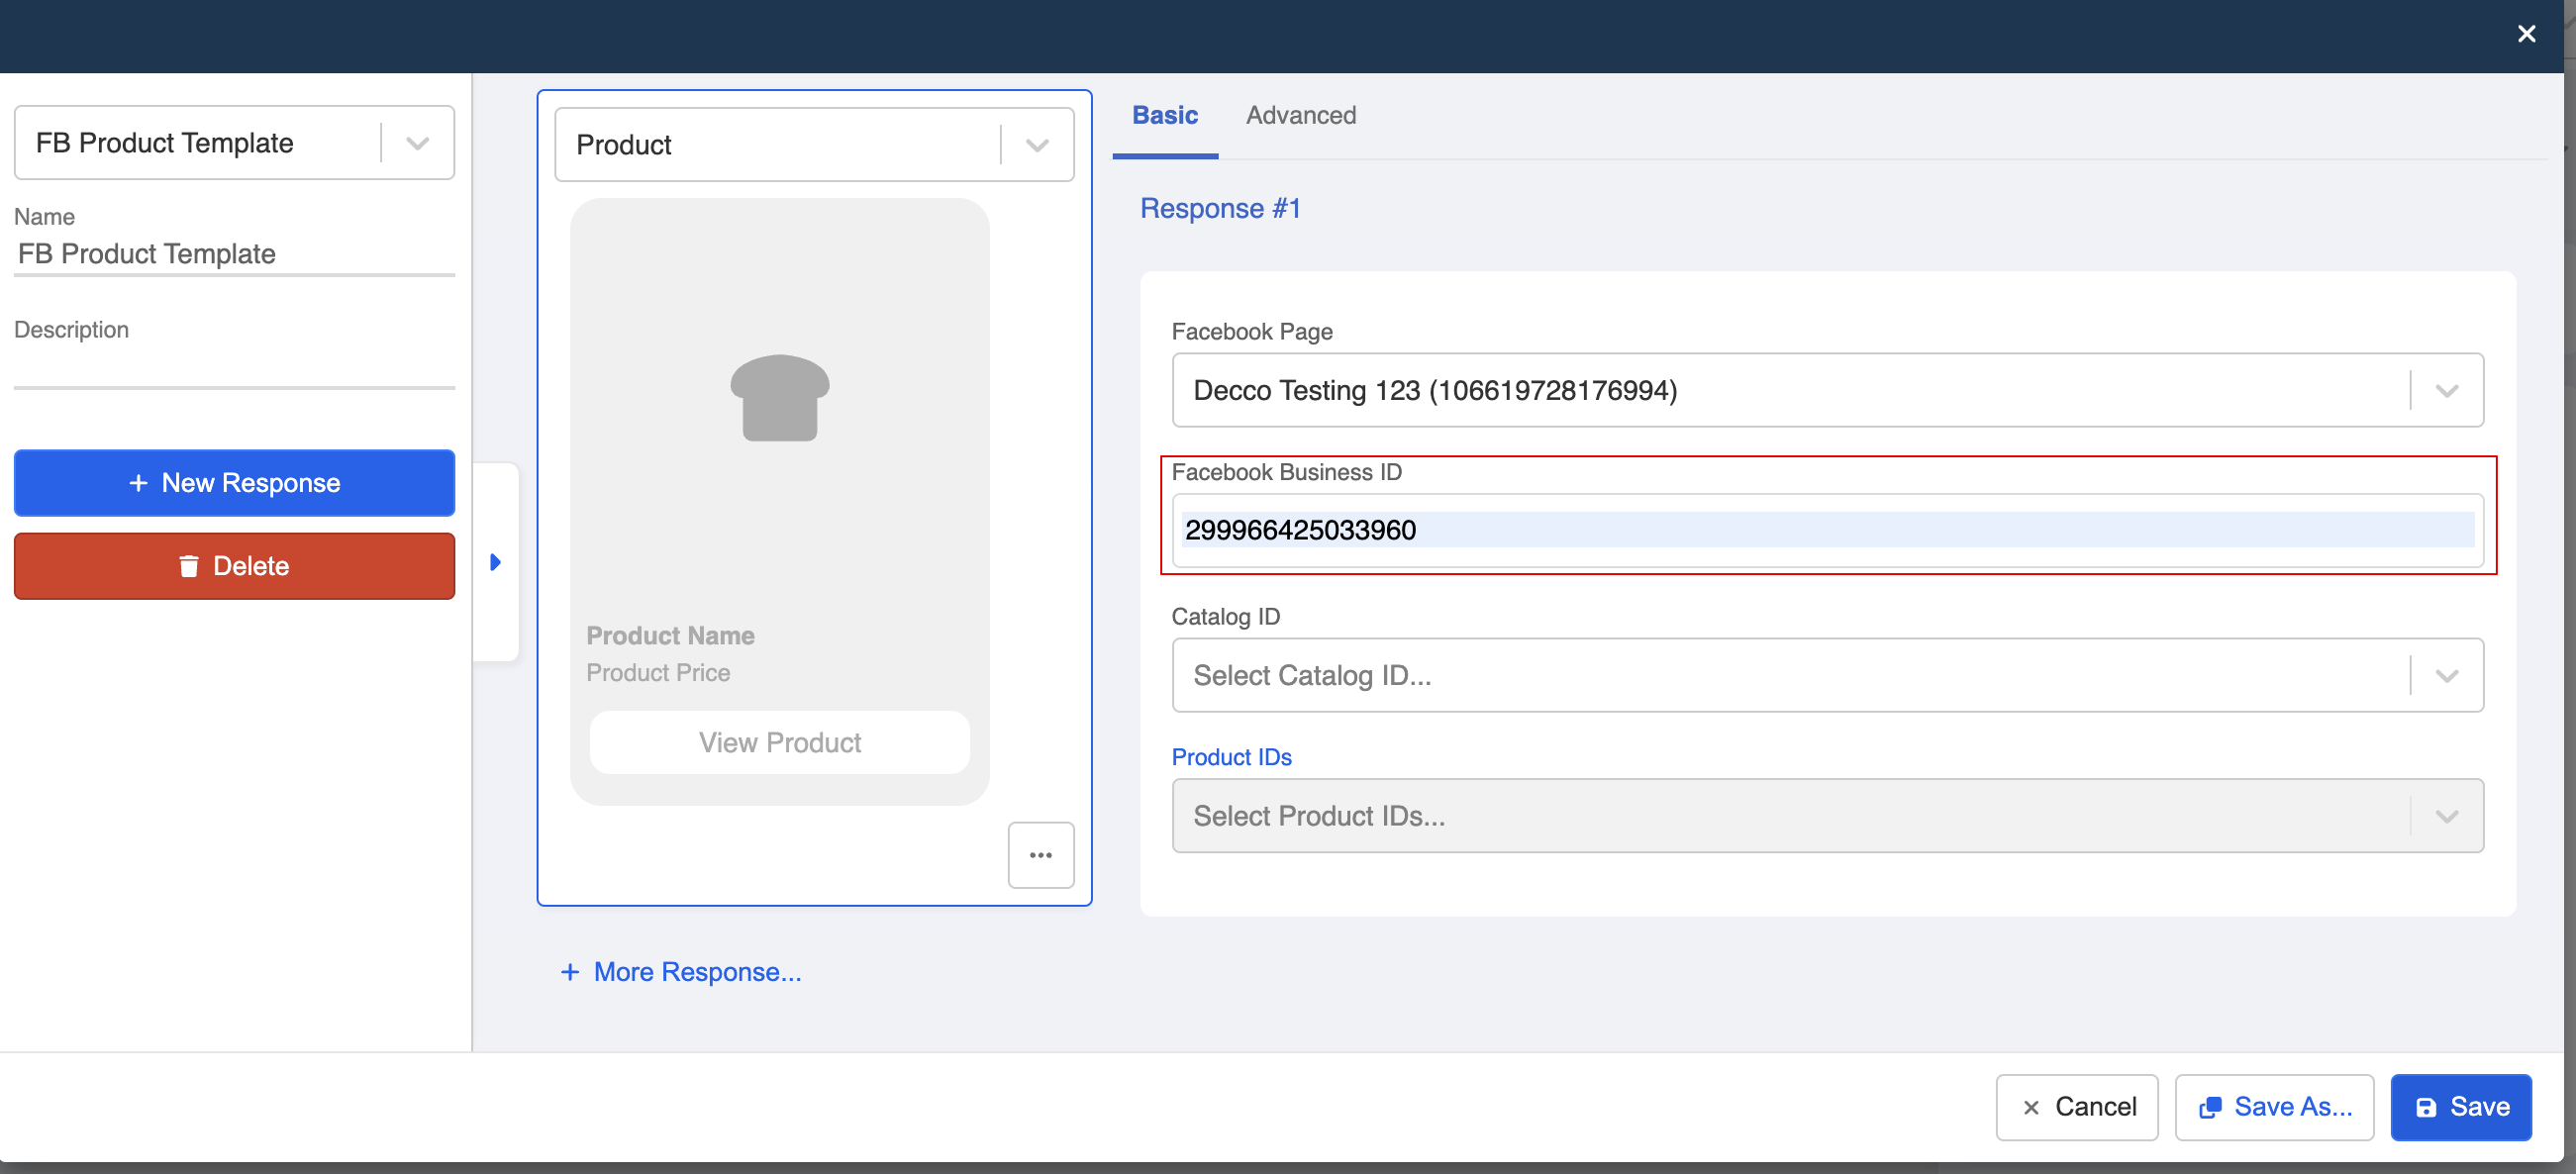
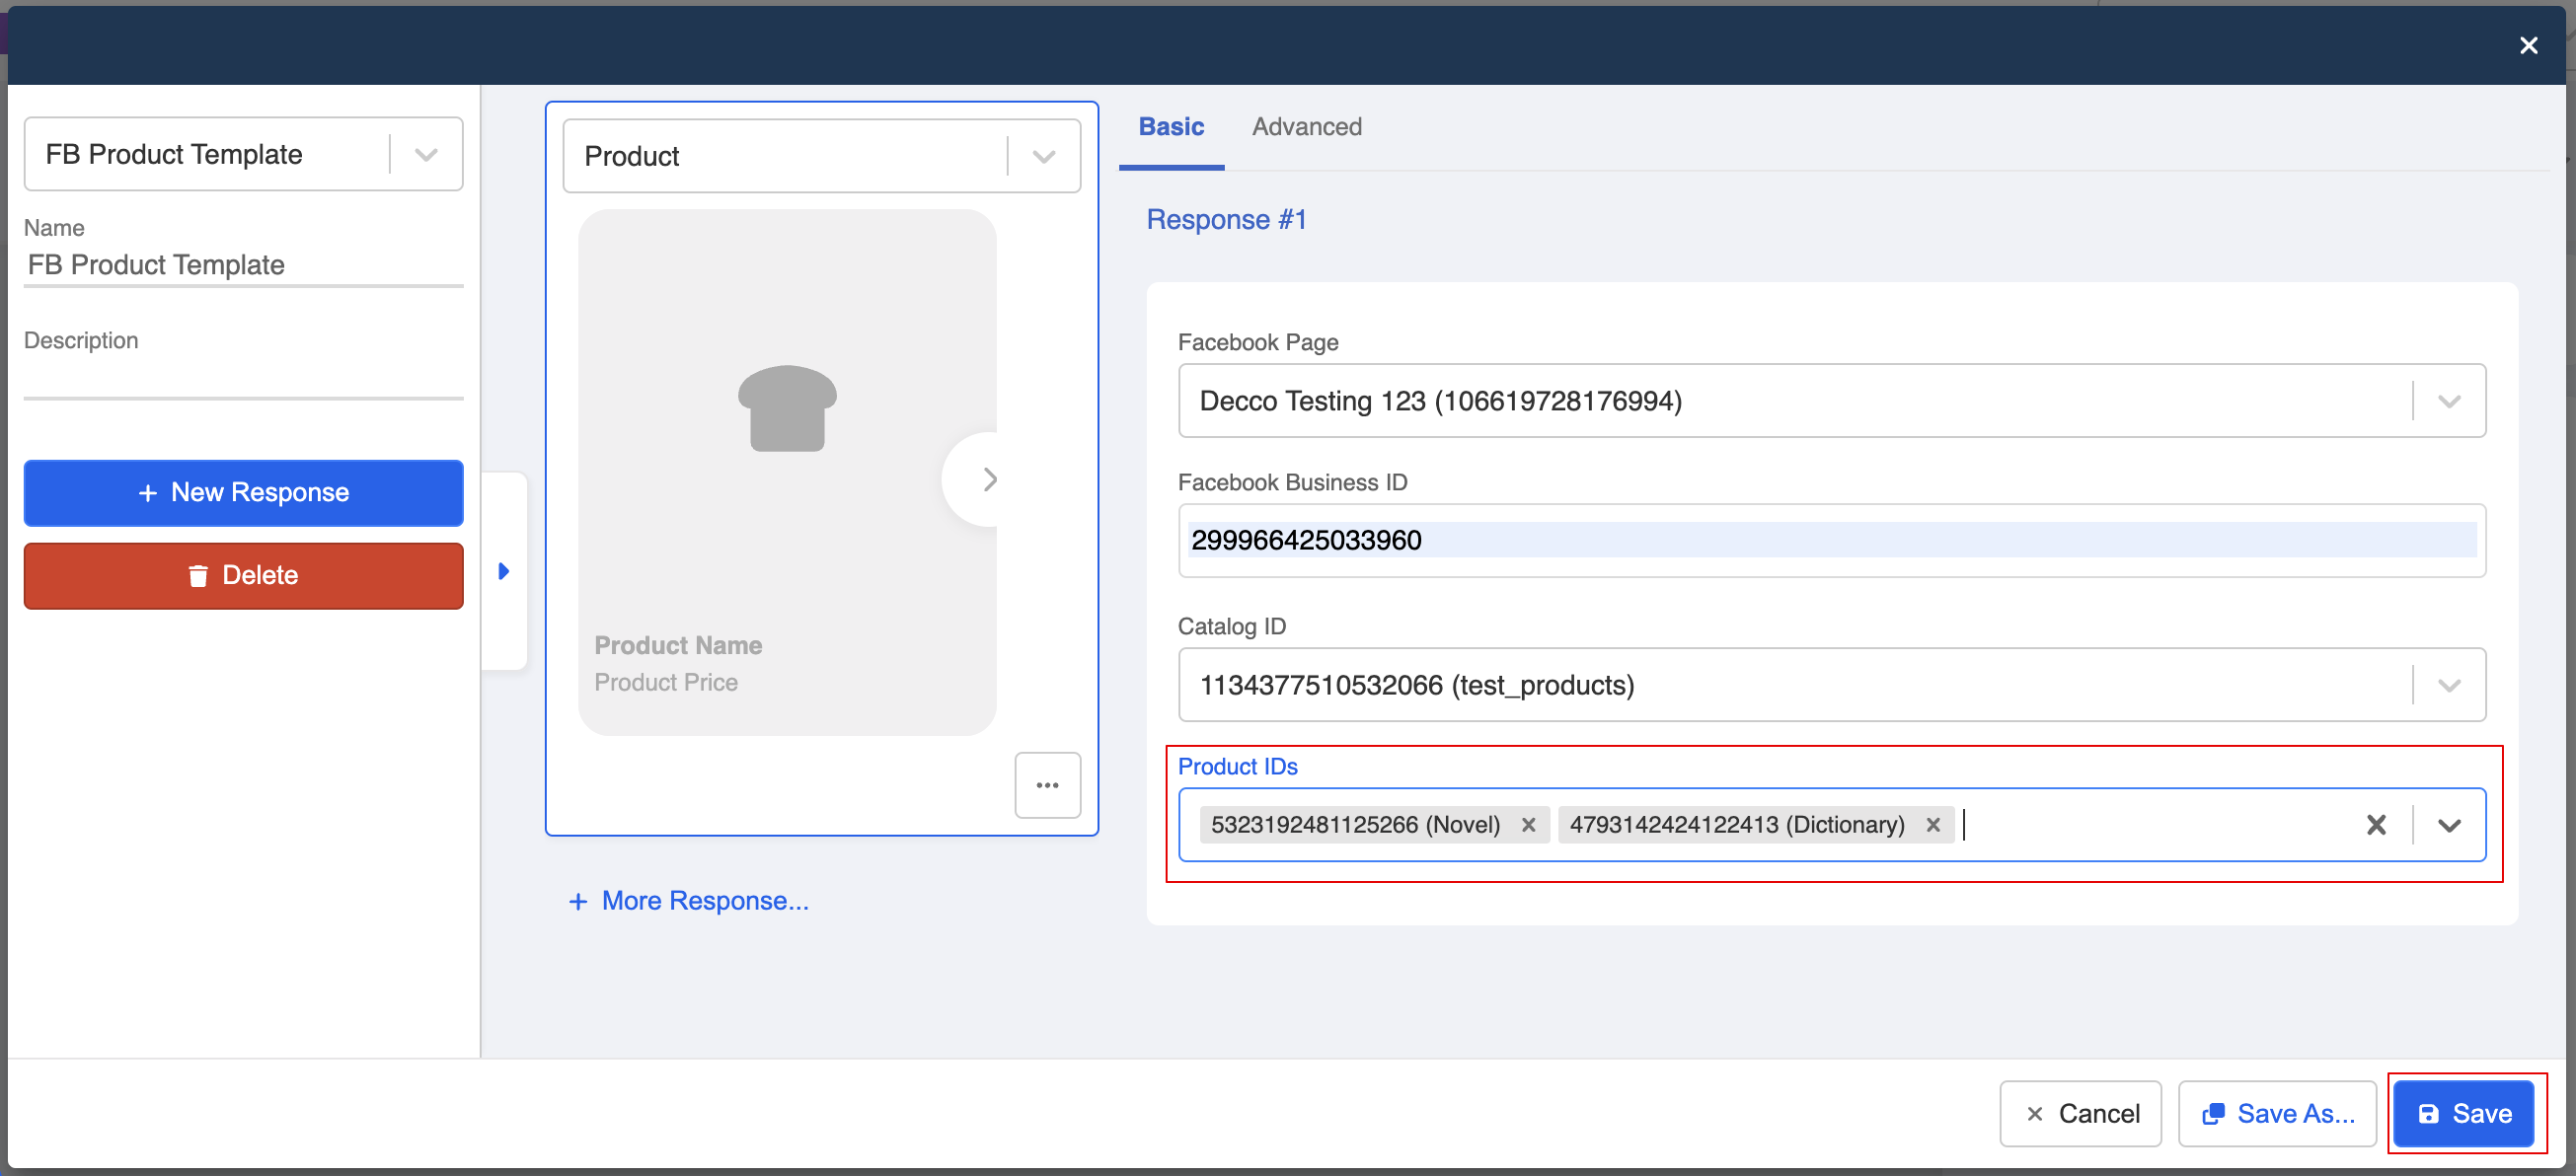
- If the first two inputs are correct, you should be able to select the catalog(s) associated to your Business Manager account, and thus the items belonging to this catalog.

- You are able to select more than 1 products from the catalog.
NOTE
A maximum number of 10 items are allowed to list in a product template.
- You might also need a global node as an entry point to your chatbot.
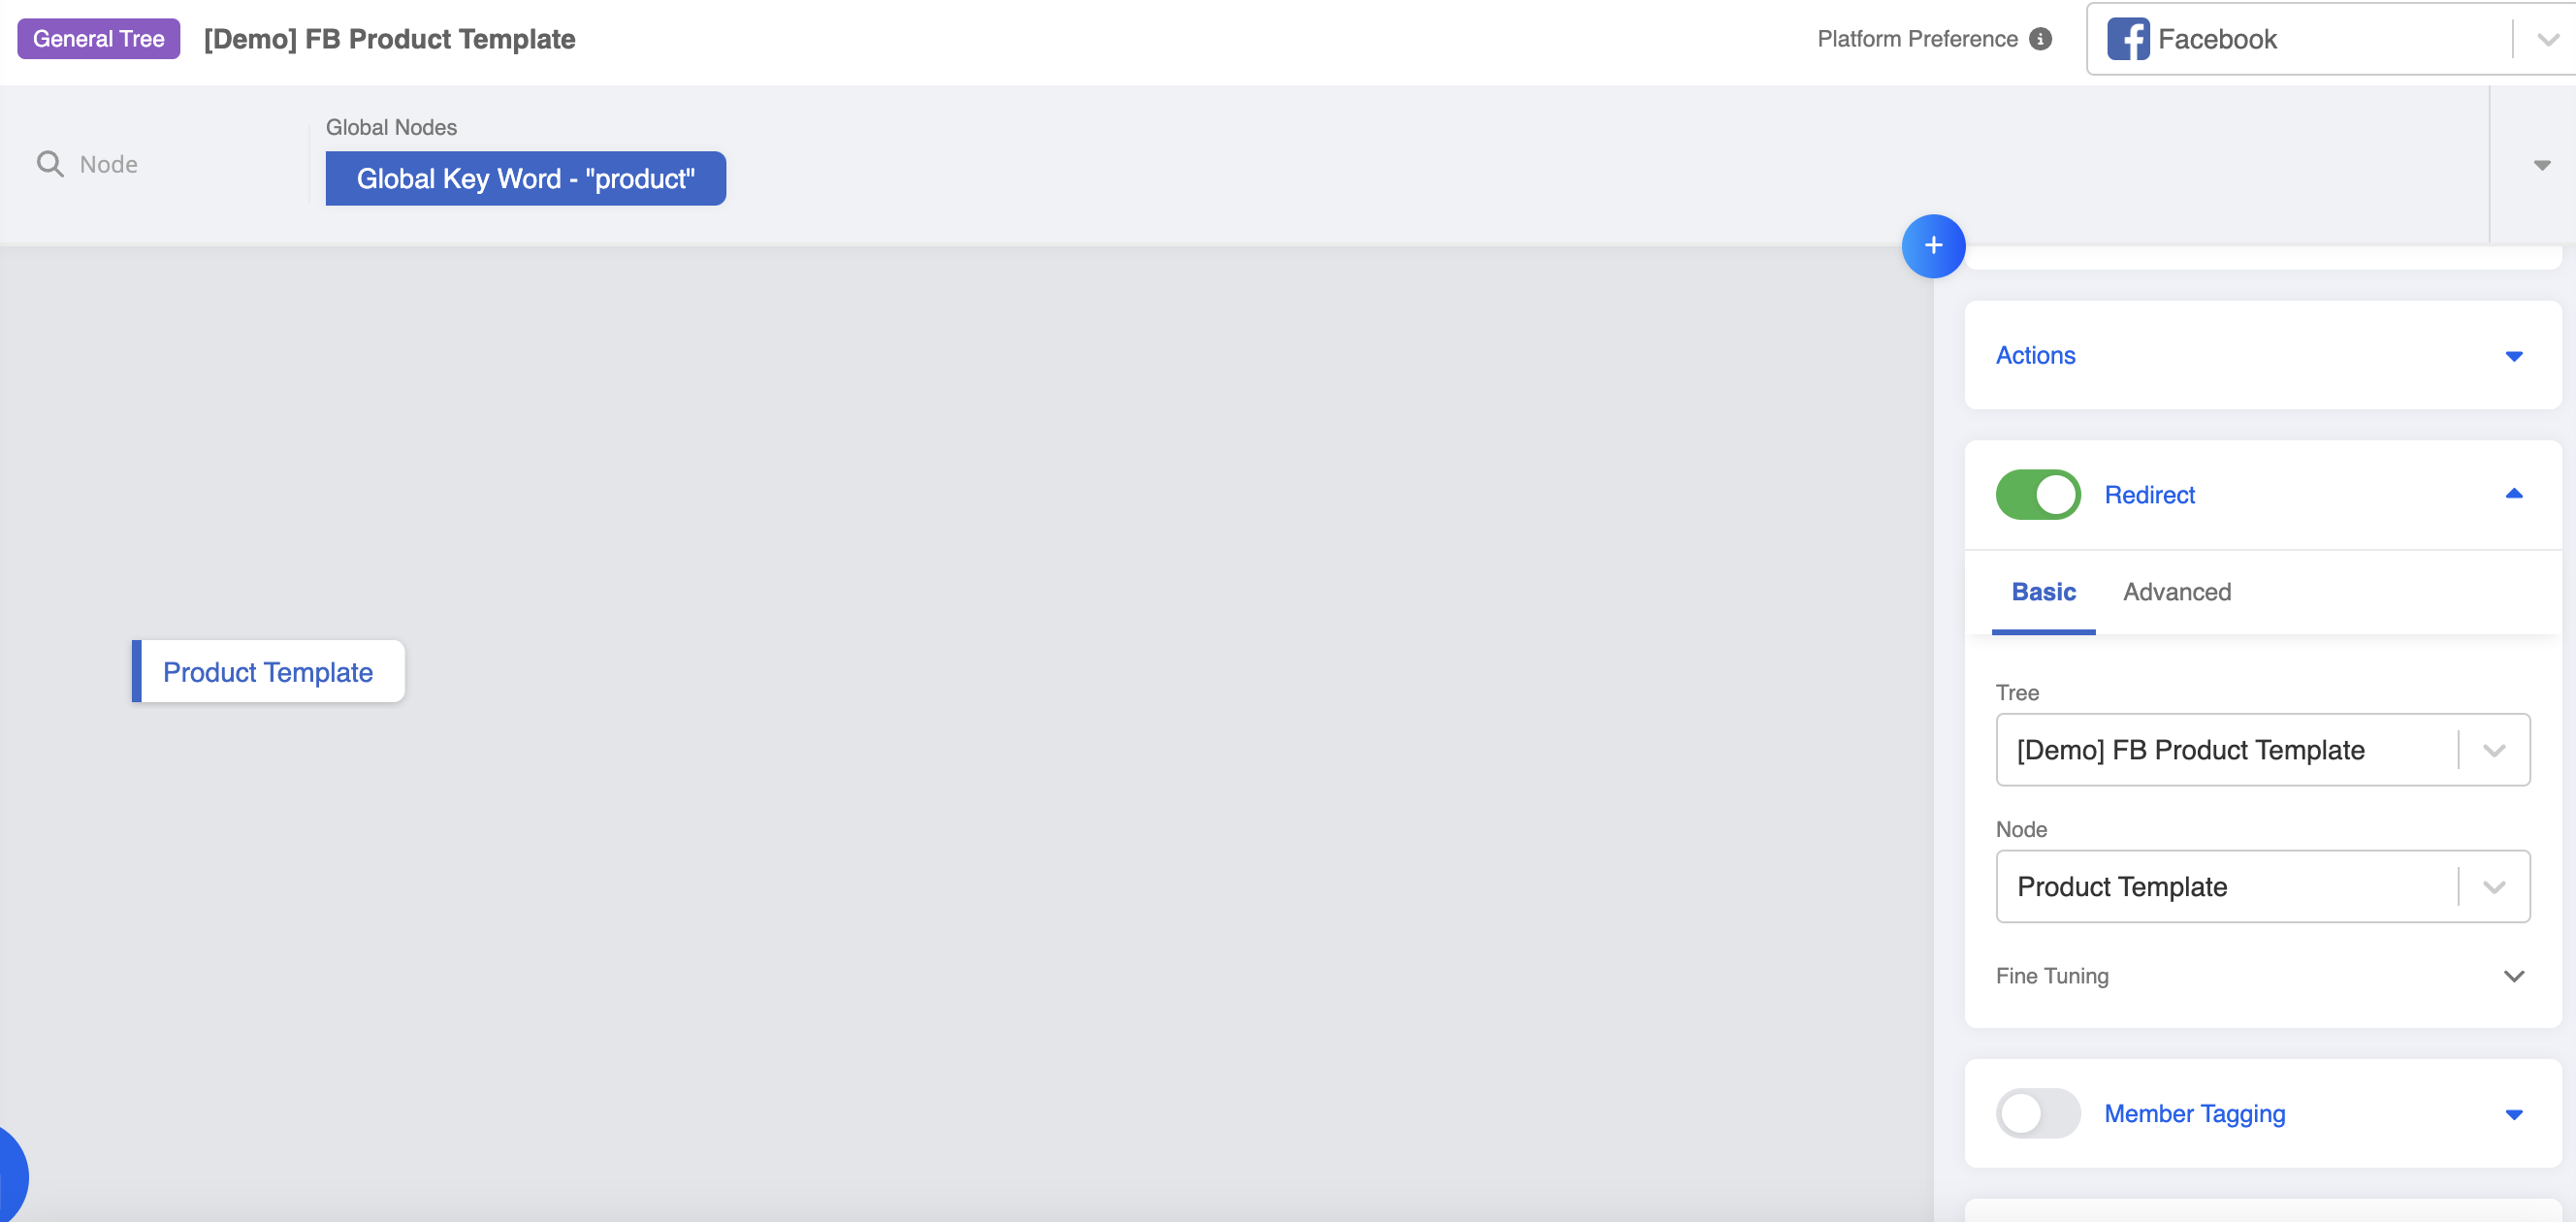
- Finally, add this chatbot to the Facebook channel and start testing!
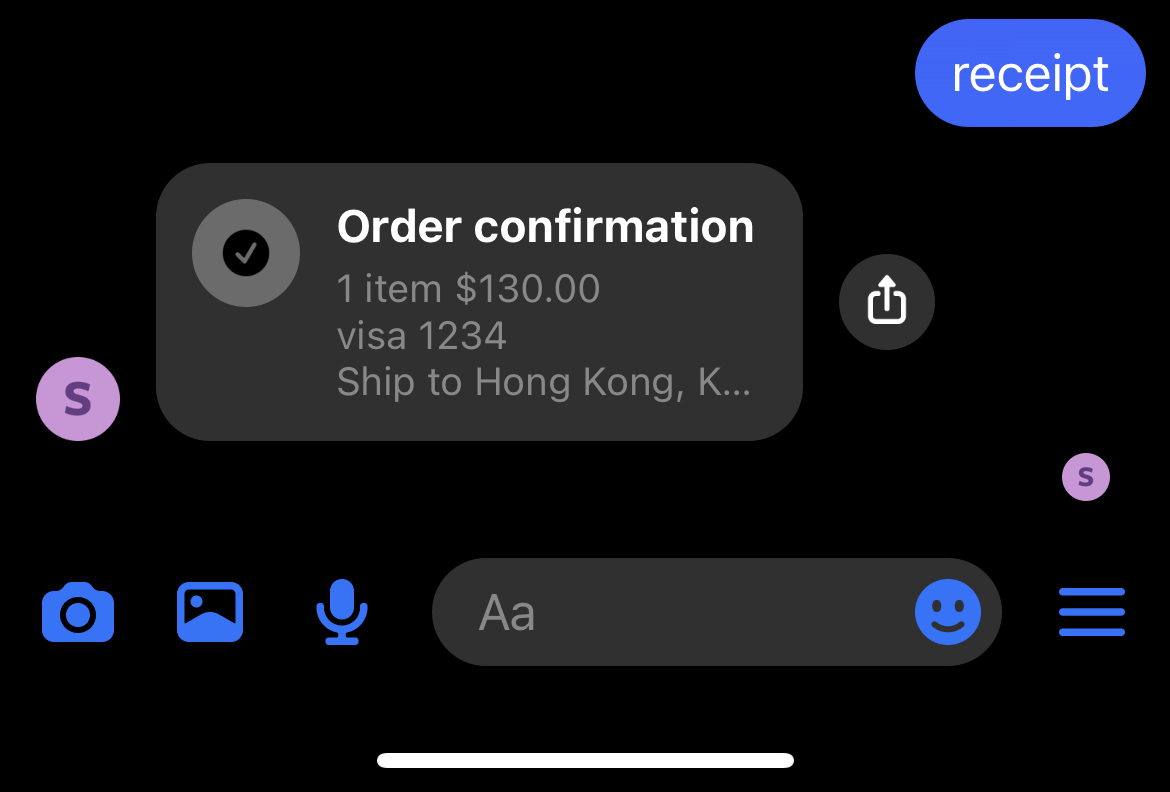
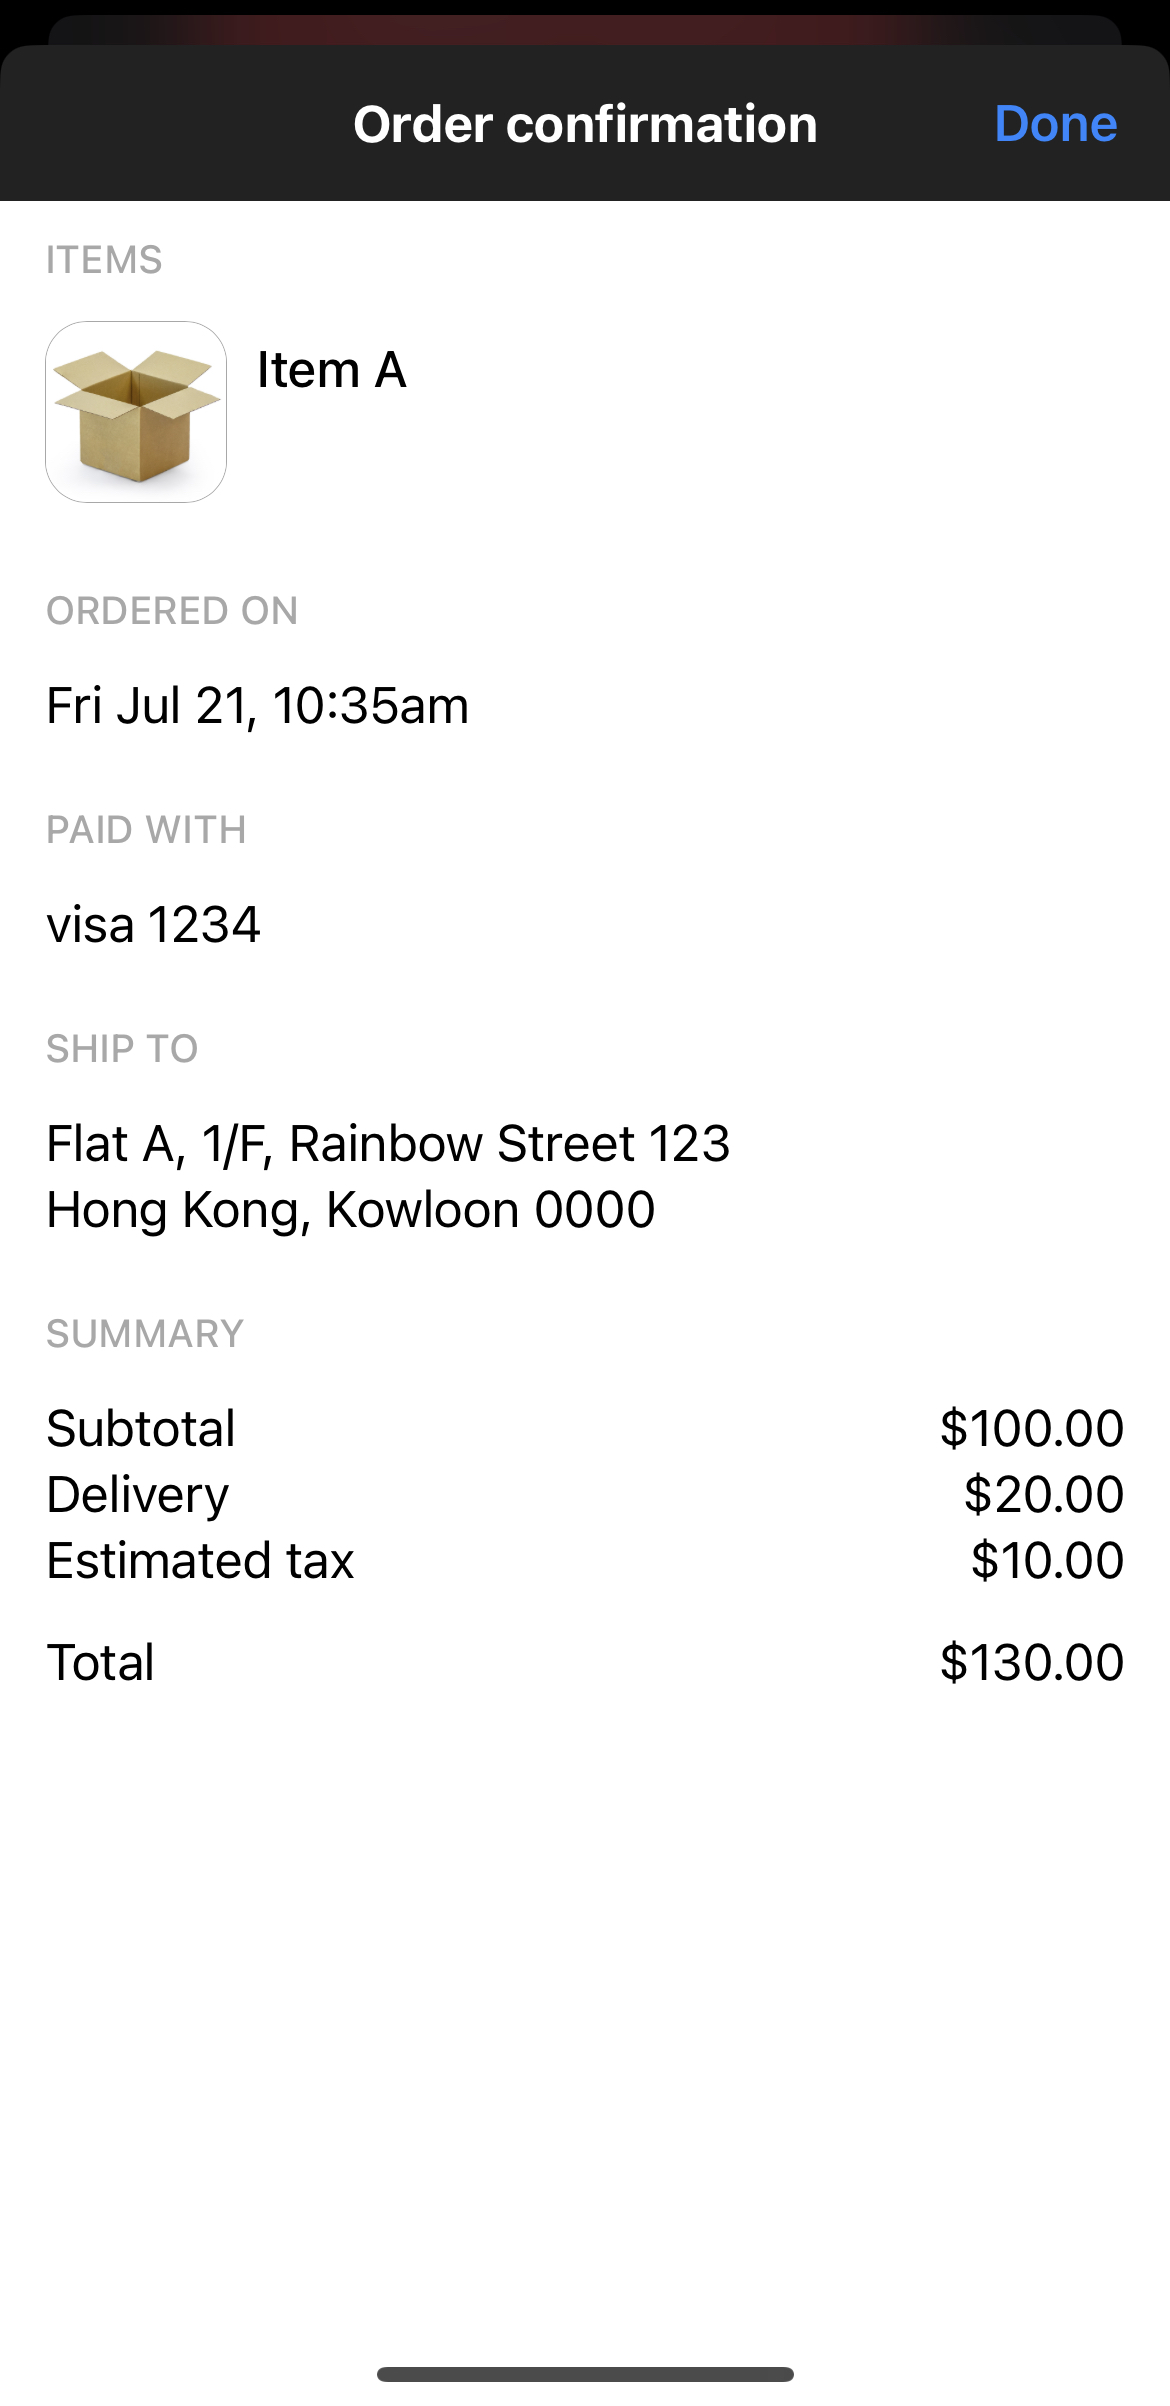
Receipt Template
The Receipt Template allows you to send an order confirmation to your customers. The template can various information including an order summary, payment details, and shipping information, etc.
Create Template
- First, create a general node in the bot builder.
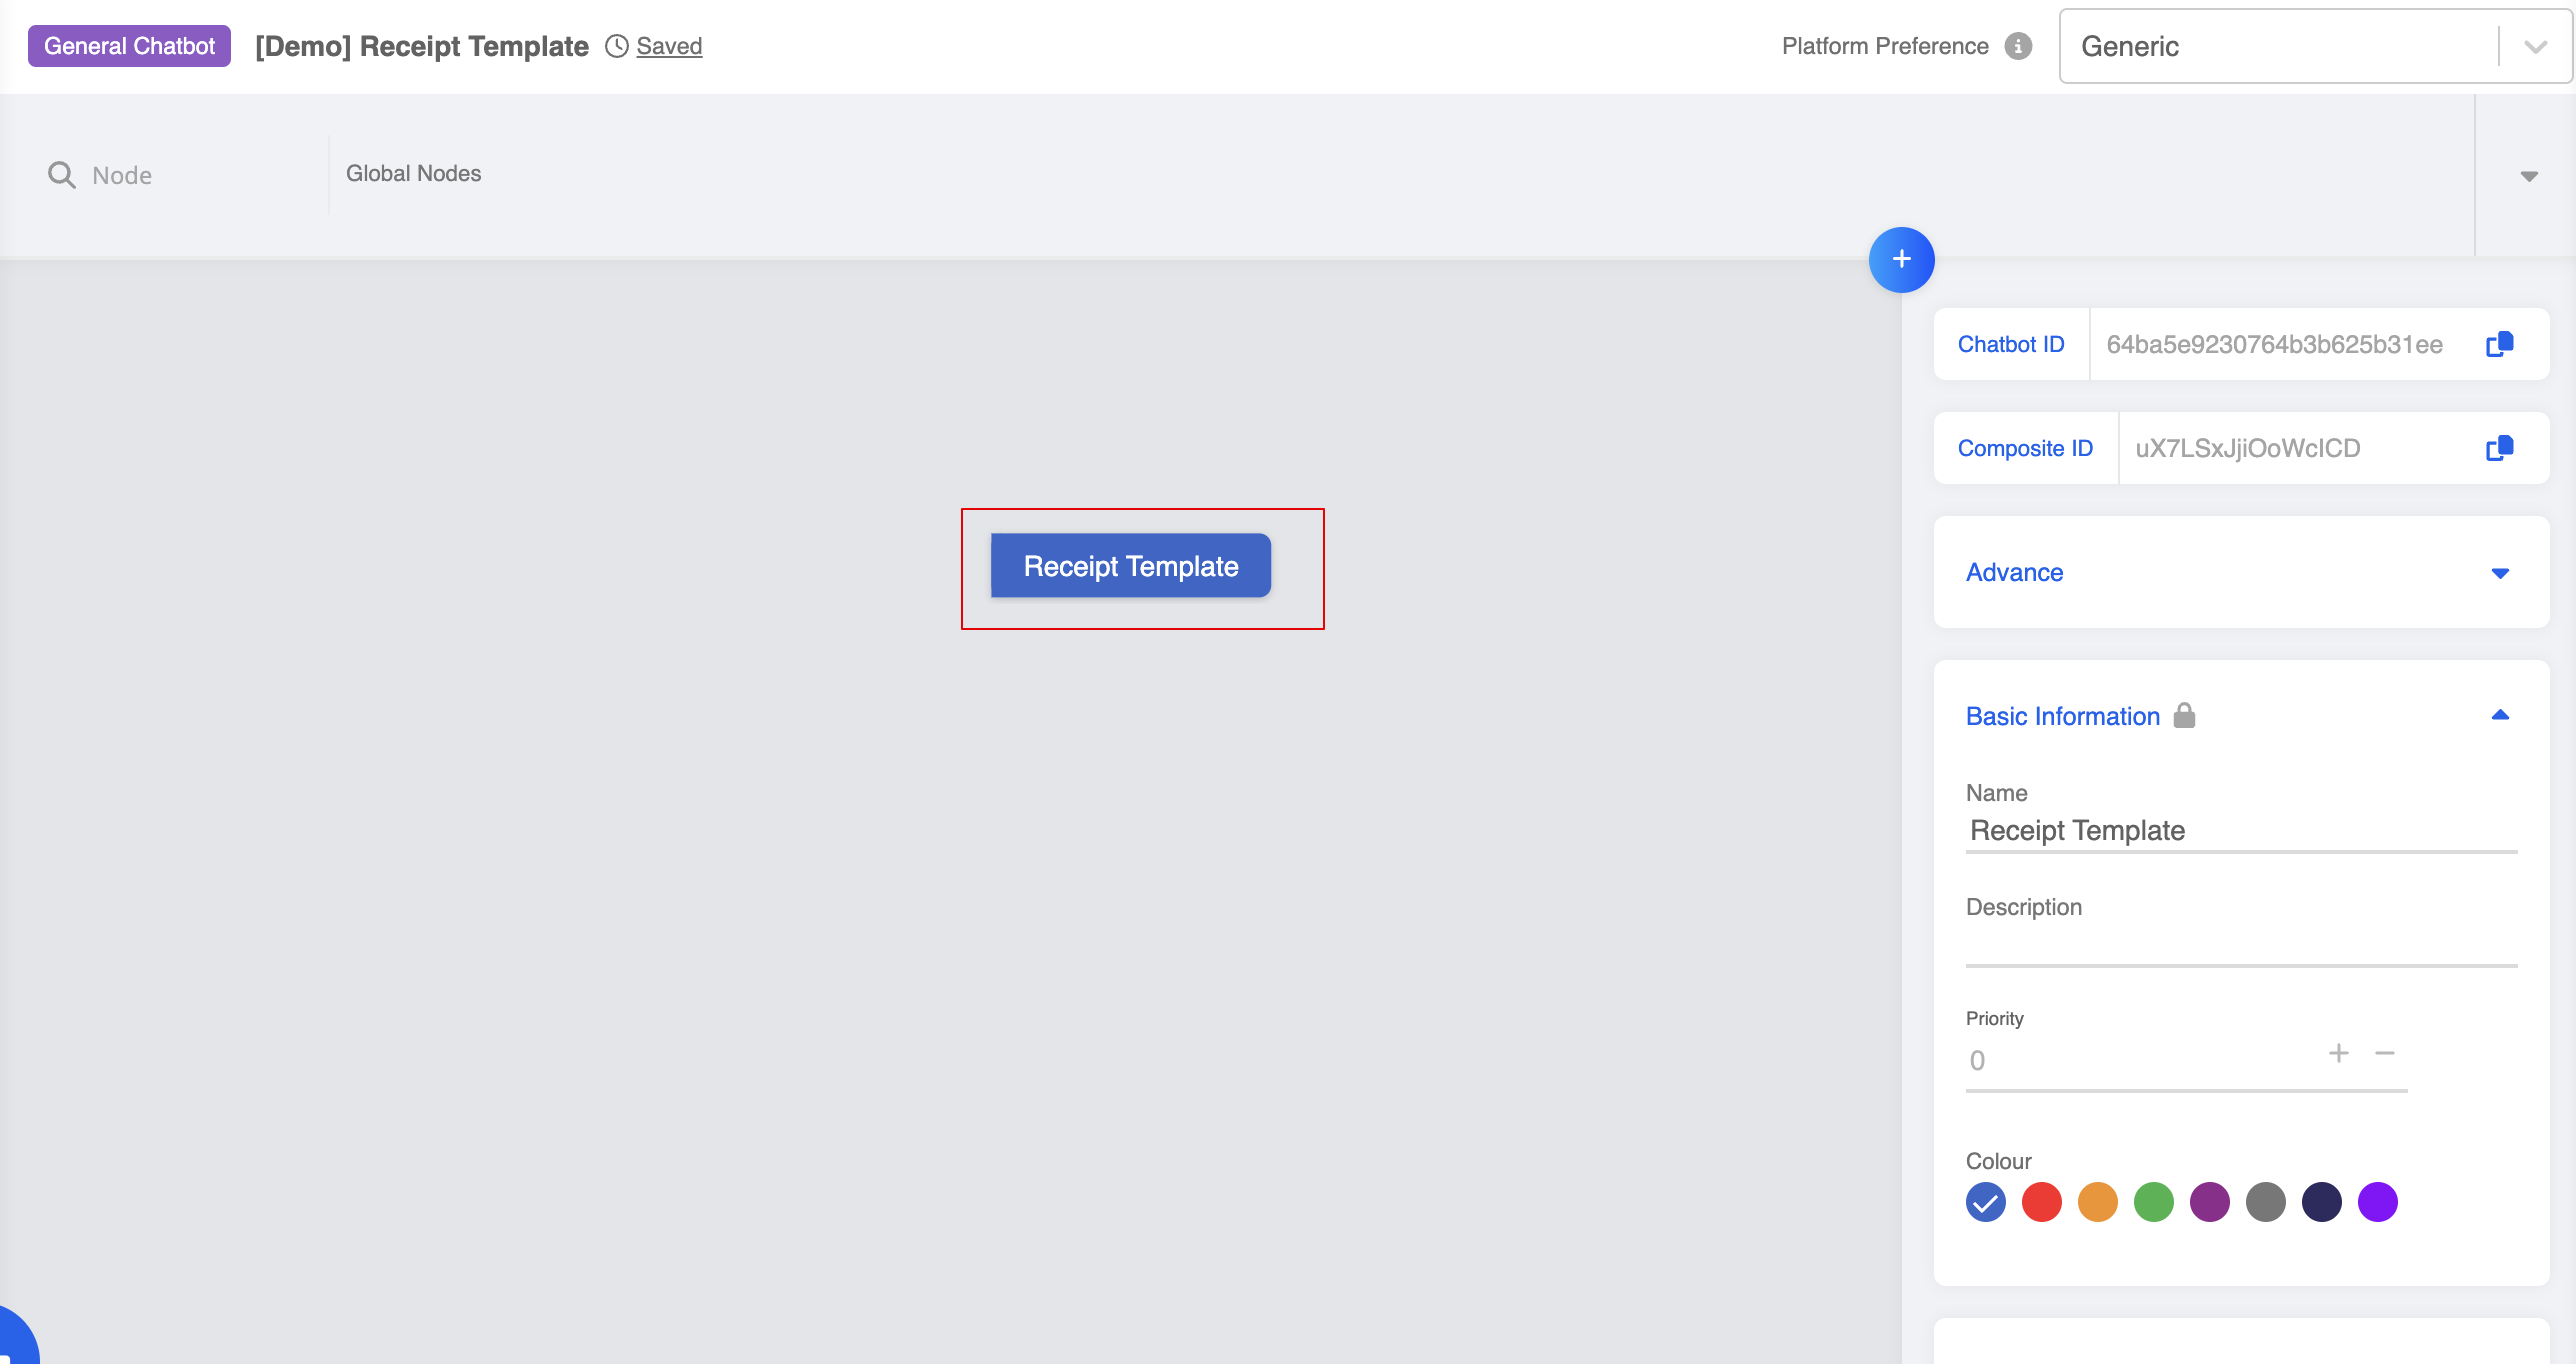
- Create a Facebook specific response.
- Select "Receipt" from the dropdown.

- Fill in the details in the template.

Recipient Details
| Fields | Description |
|---|---|
| Shareable | Optional. Defaults to false. Set to true to enable the native share button in Messenger for the template message. |
| Recipient Name | The recipient's name. |
| Merchant Name | Optional. The merchant's name. If present this is shown as logo text. |
| Order Number | The order number. Must be unique. |
| Currency | The currency of the payment. |
| Payment Method | The payment method used. This can be a custom string, such as, "Visa 1234". |
| Order URL | URL to the order. |
| Time Stamp | Optional. Timestamp of the order in seconds. |
Address
| Fields | Description |
|---|---|
| Street 1 | The street address, line 1. |
| Street 2 | Optional. The street address, line 2. |
| City | The city name of the address. |
| Postal Code | The postal code of the address. |
| State | The state abbreviation for U.S. addresses, or the region/province for non-U.S. addresses. |
| Country | The two-letter country abbreviation of the address. |
Order Summary
| Fields | Description |
|---|---|
| Subtotal | Optional. The sub-total of the order. |
| Shipping Cost | Optional. The shipping cost of the order. |
| Total Tax | Optional. The tax of the order. |
| Total Cost | The total cost of the order, including sub-total, shipping, and tax. |
Adjustment
| Fields | Description |
|---|---|
| Name | Name of the adjustment. |
| Amount | Amount of the adjustment. |
Items
| Fields | Description |
|---|---|
| Title | The name to display for the item. |
| Subtitle | Optional. The subtitle for the item, usually a brief item description. |
| Quantity | Optional. The quantity of the item purchased. |
| Price | The price of the item. For free items, '0' is allowed. |
| Currency | Optional. The currency of the item price. |
| Image URL | Optional. The URL of an image to be displayed with the item. |