Thread Operations in Inbox Integration
The inbox system comprises two primary components, namely Folder and Thread.
Thread: the conversation between a support agent and an end user in a specific channel. A thread allows an agent to engage in a conversation with the user and control various aspects of live chat support.
Folder: enables support agents to store and group threads according to their preference. It is a versatile component that can store threads from multiple channels, making it effortless for agents to access and manage conversations with end-users.
Start a Conversation
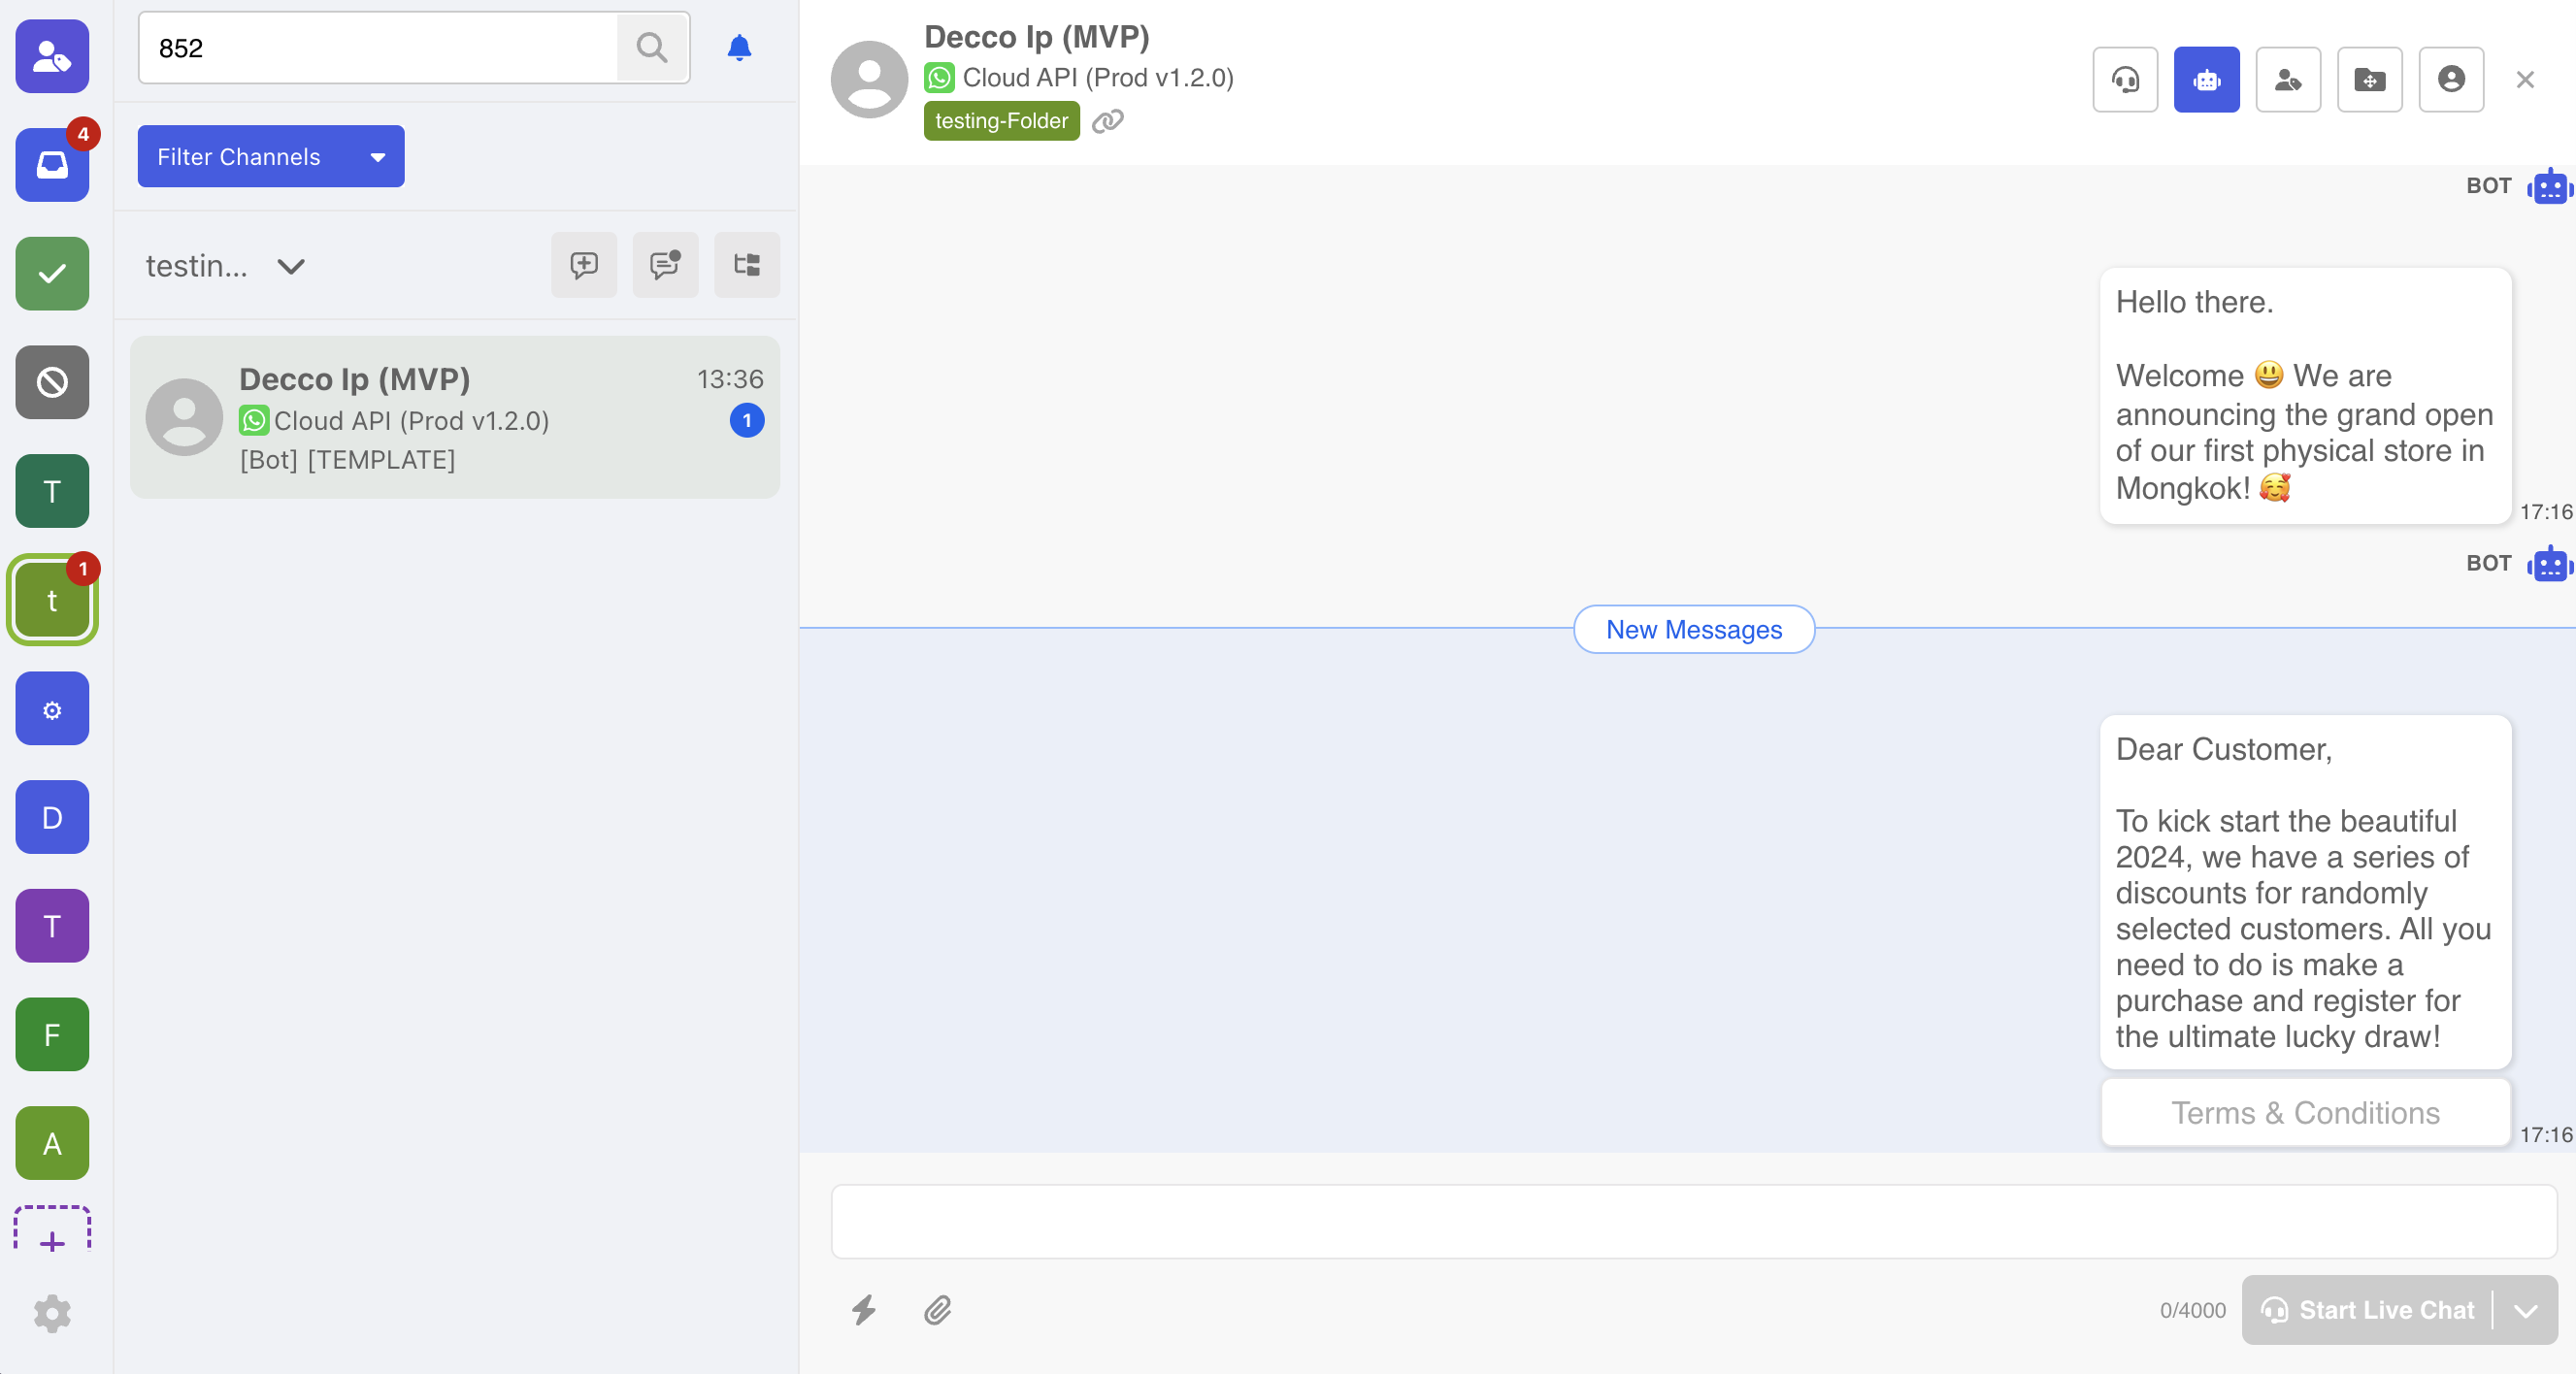
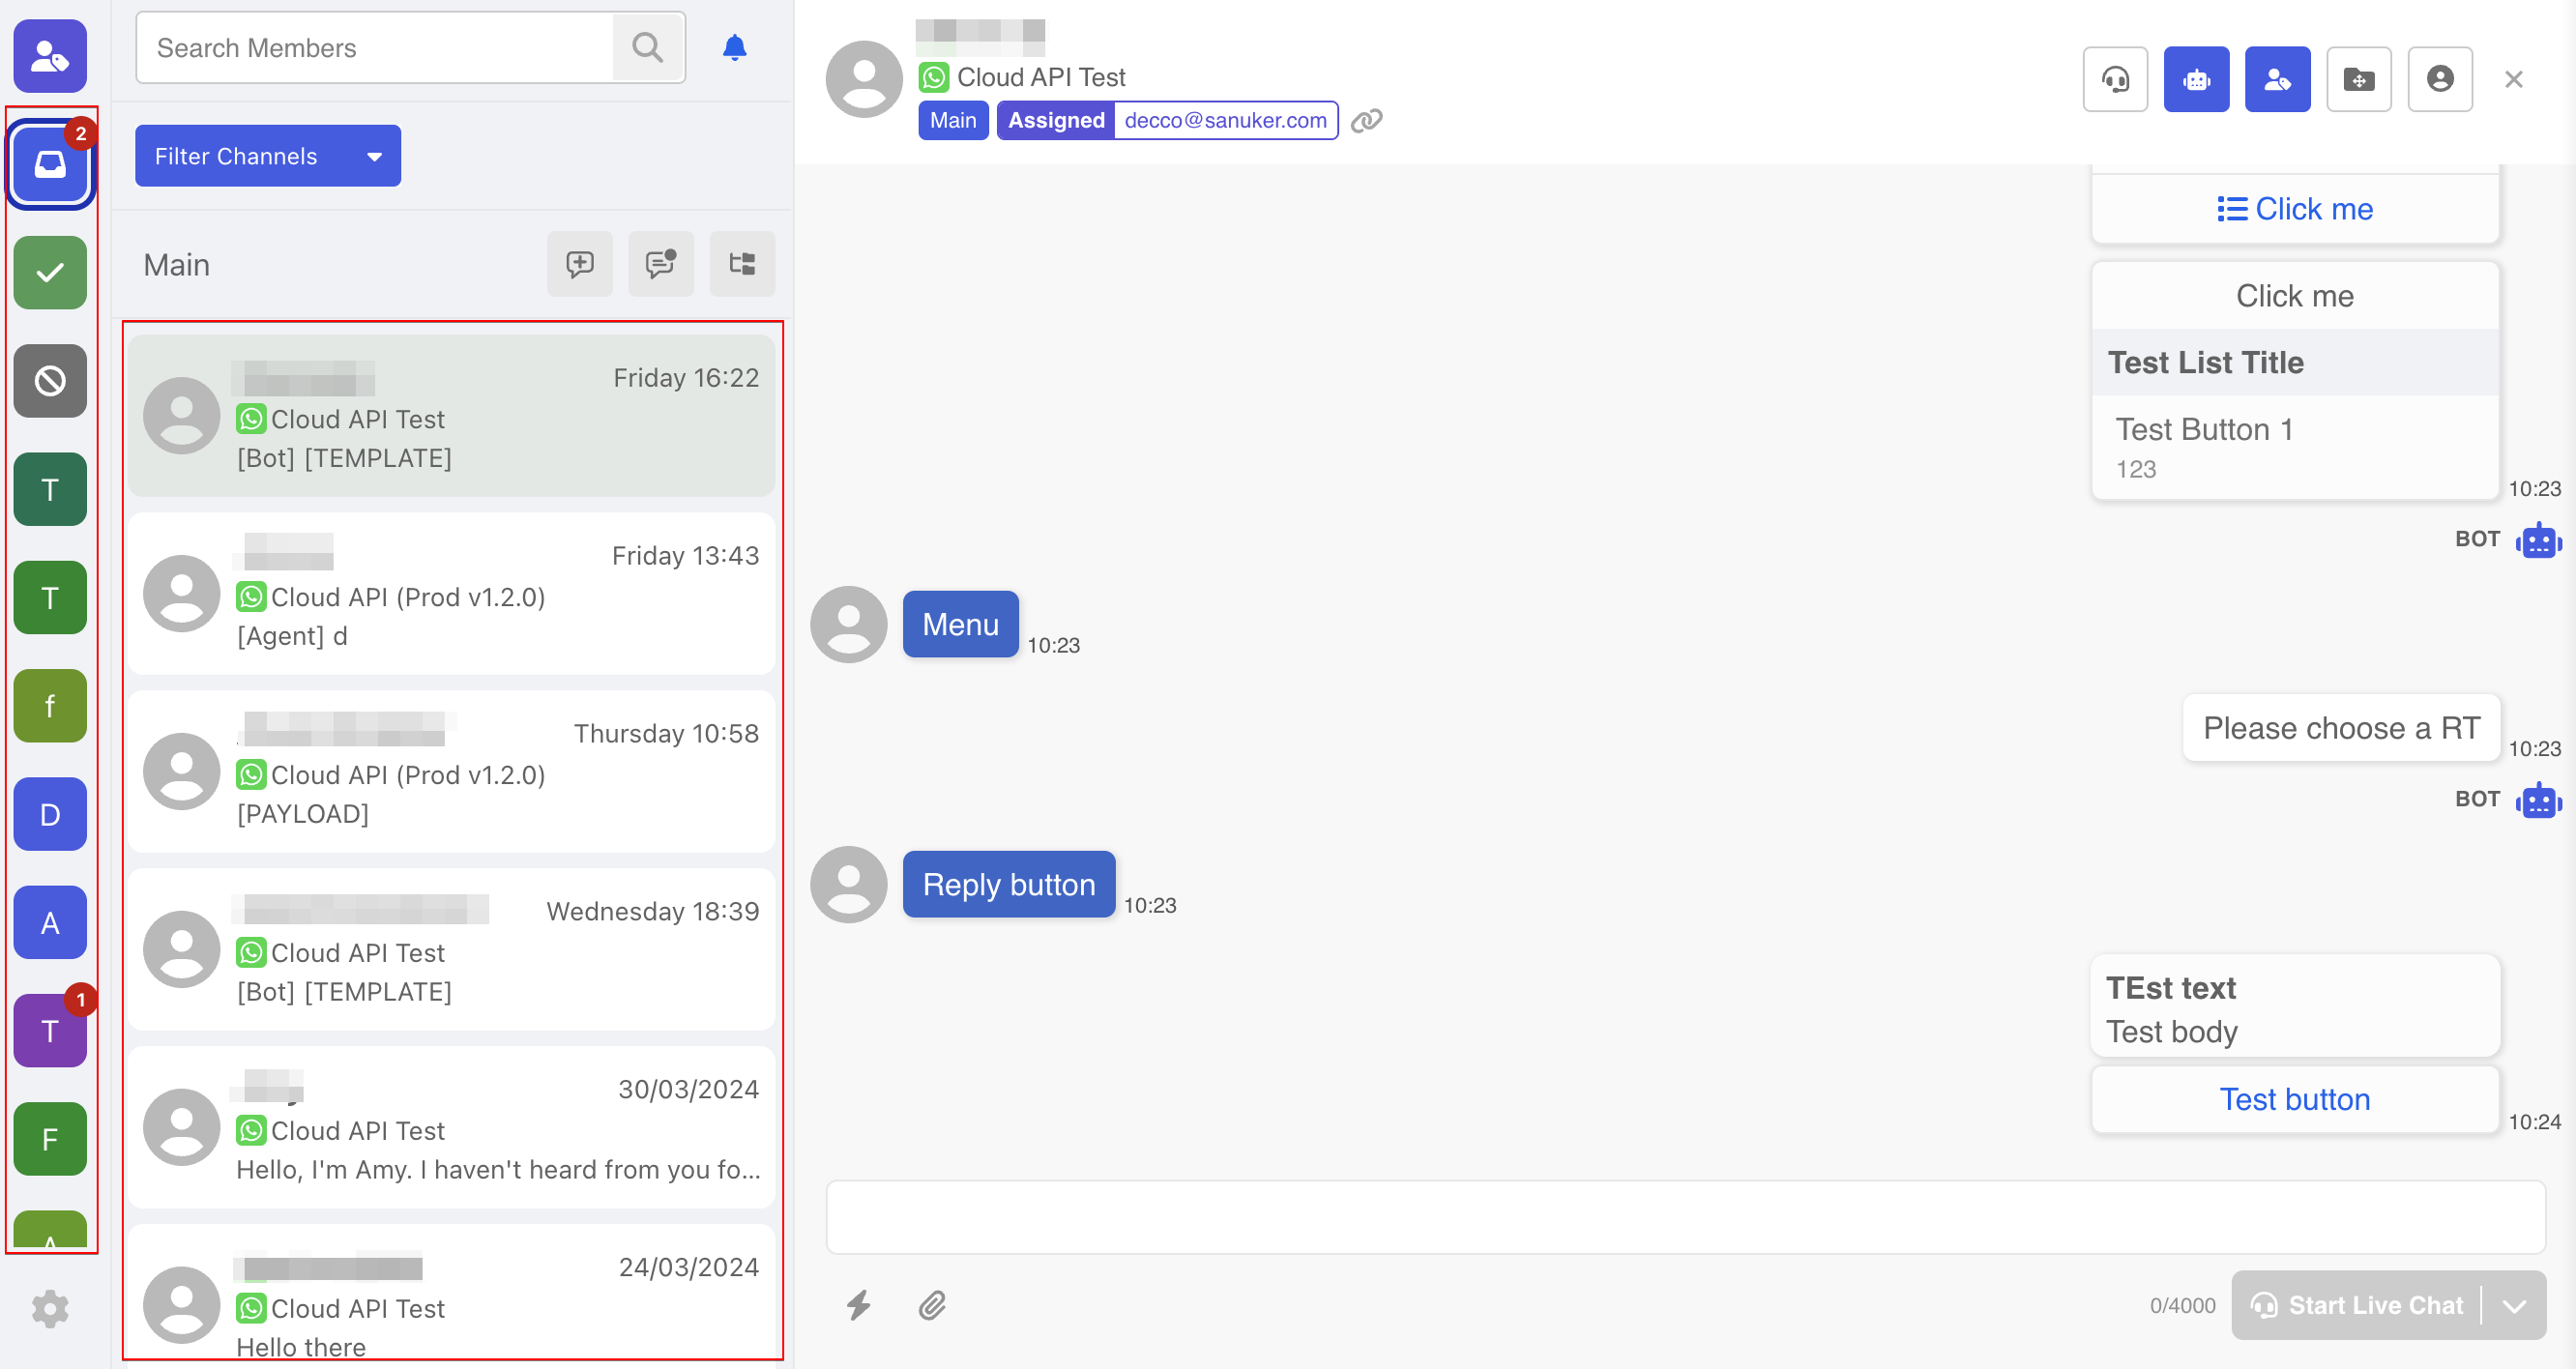
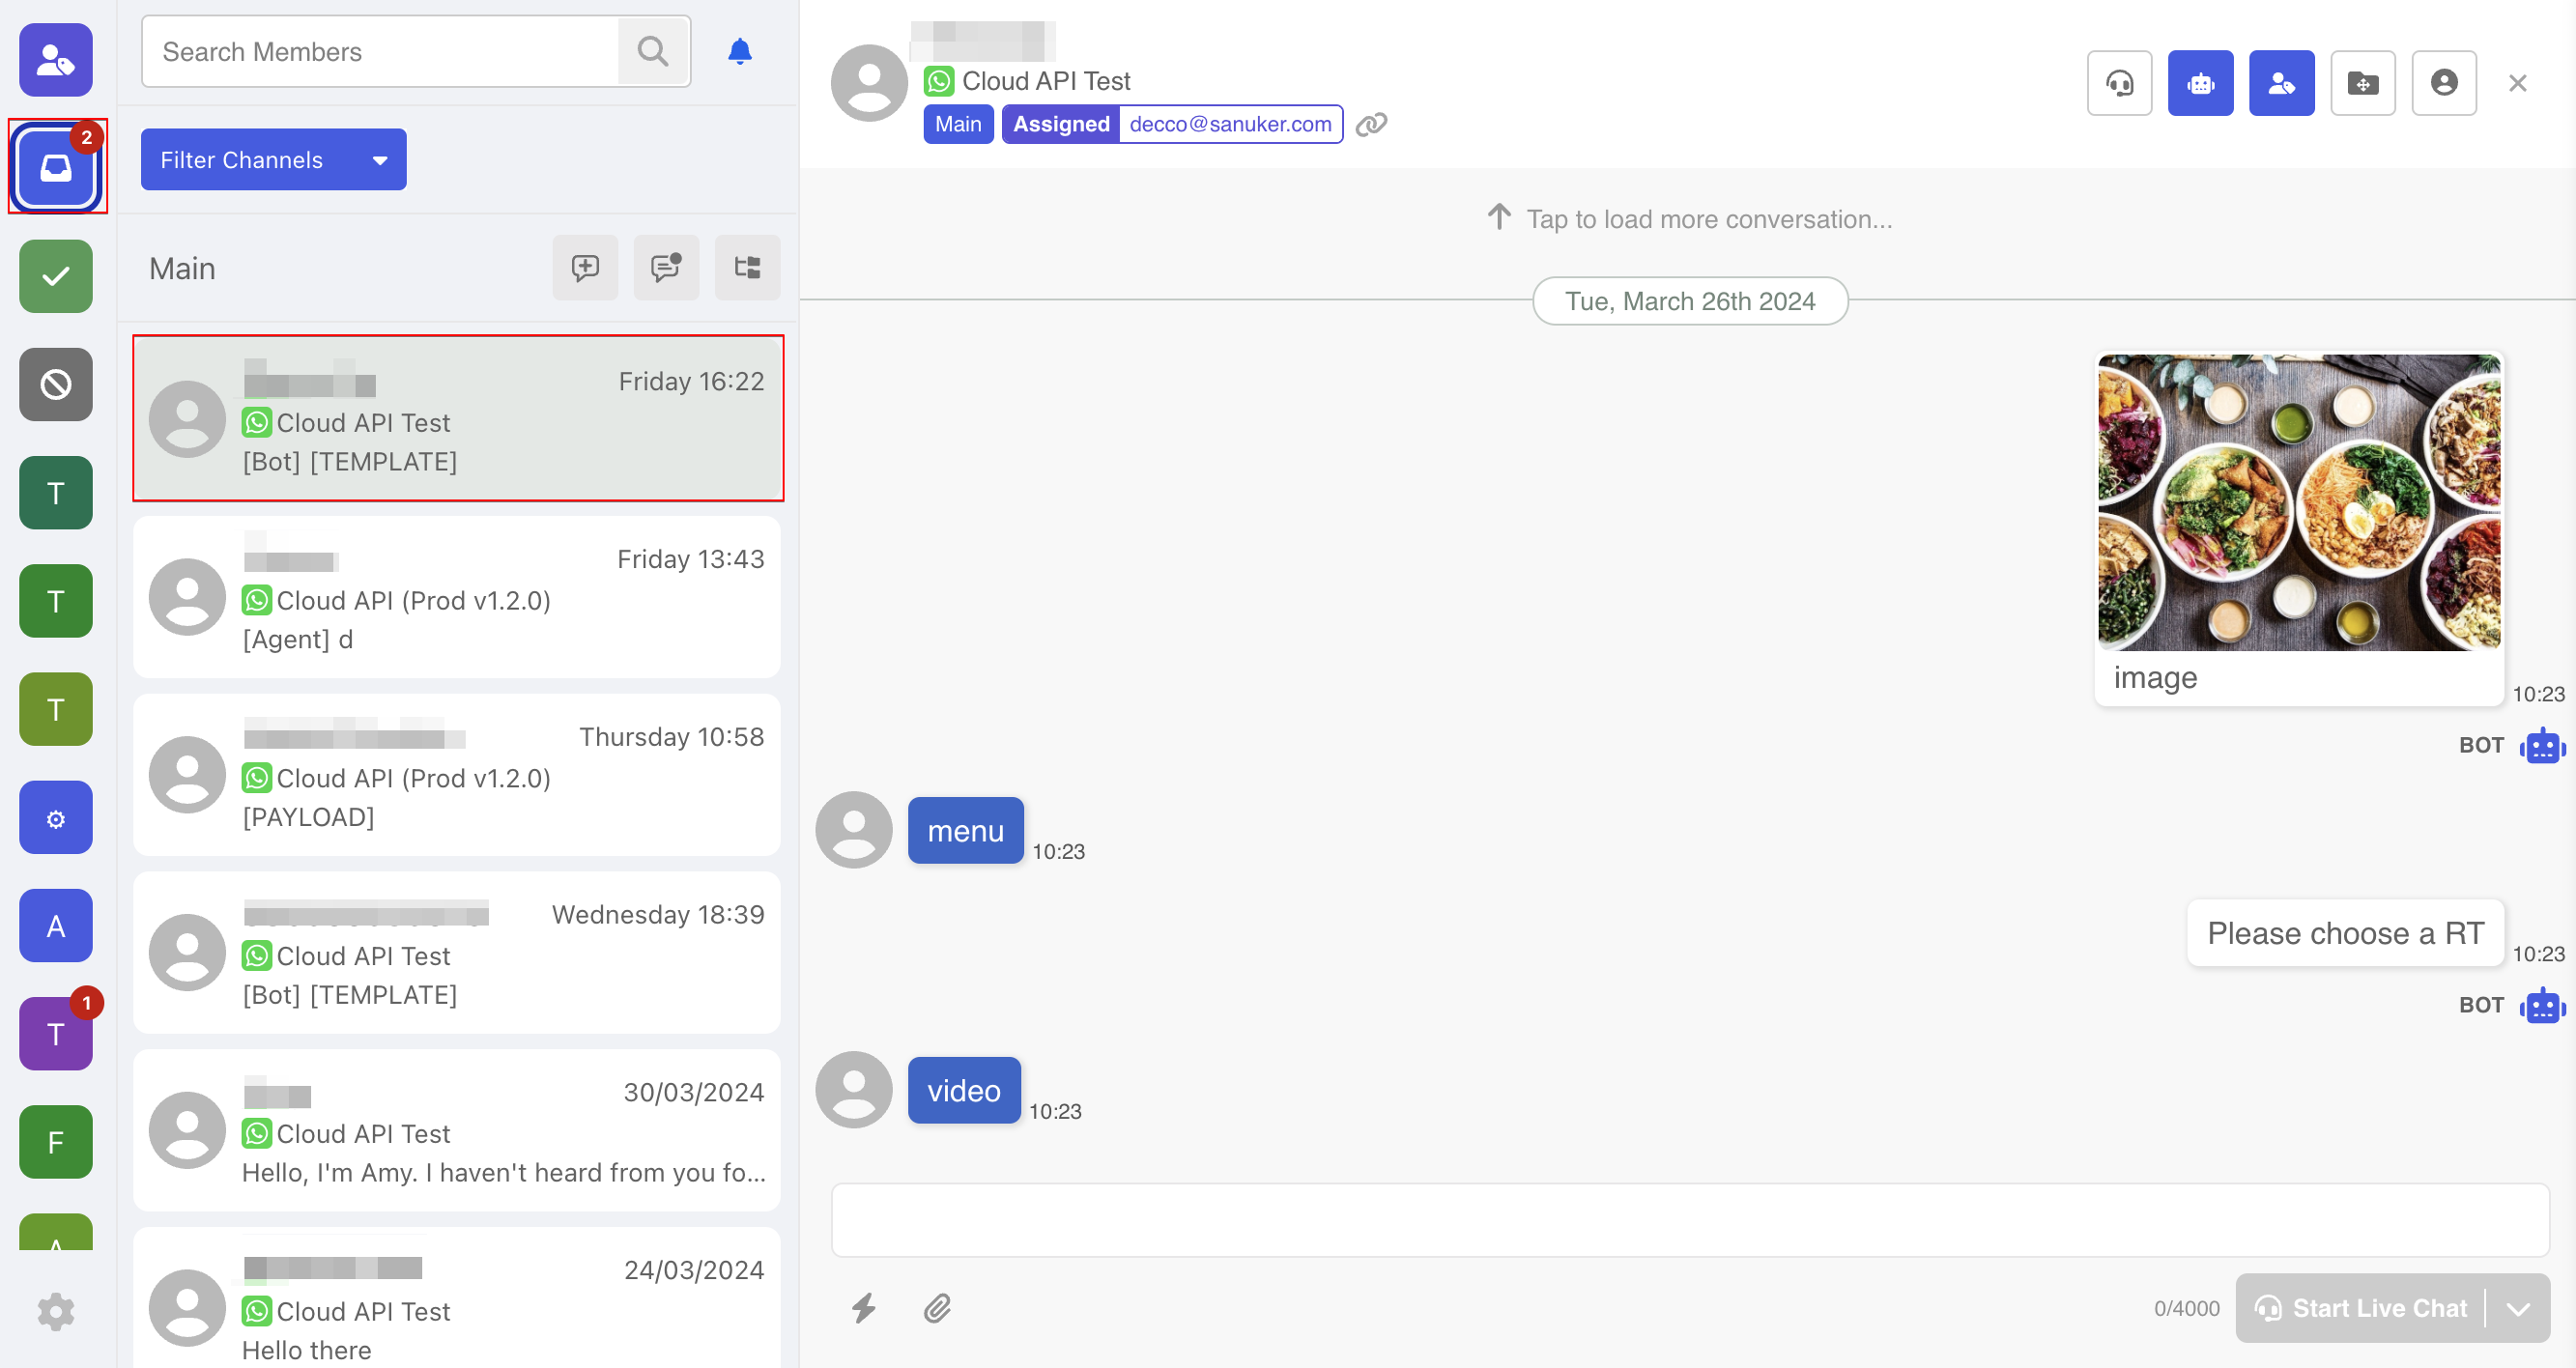
Once a channel is connected, the new messages from the channel will be reflected in the inbox as threads. Threads with unread messages will be listed in the Main Folder.
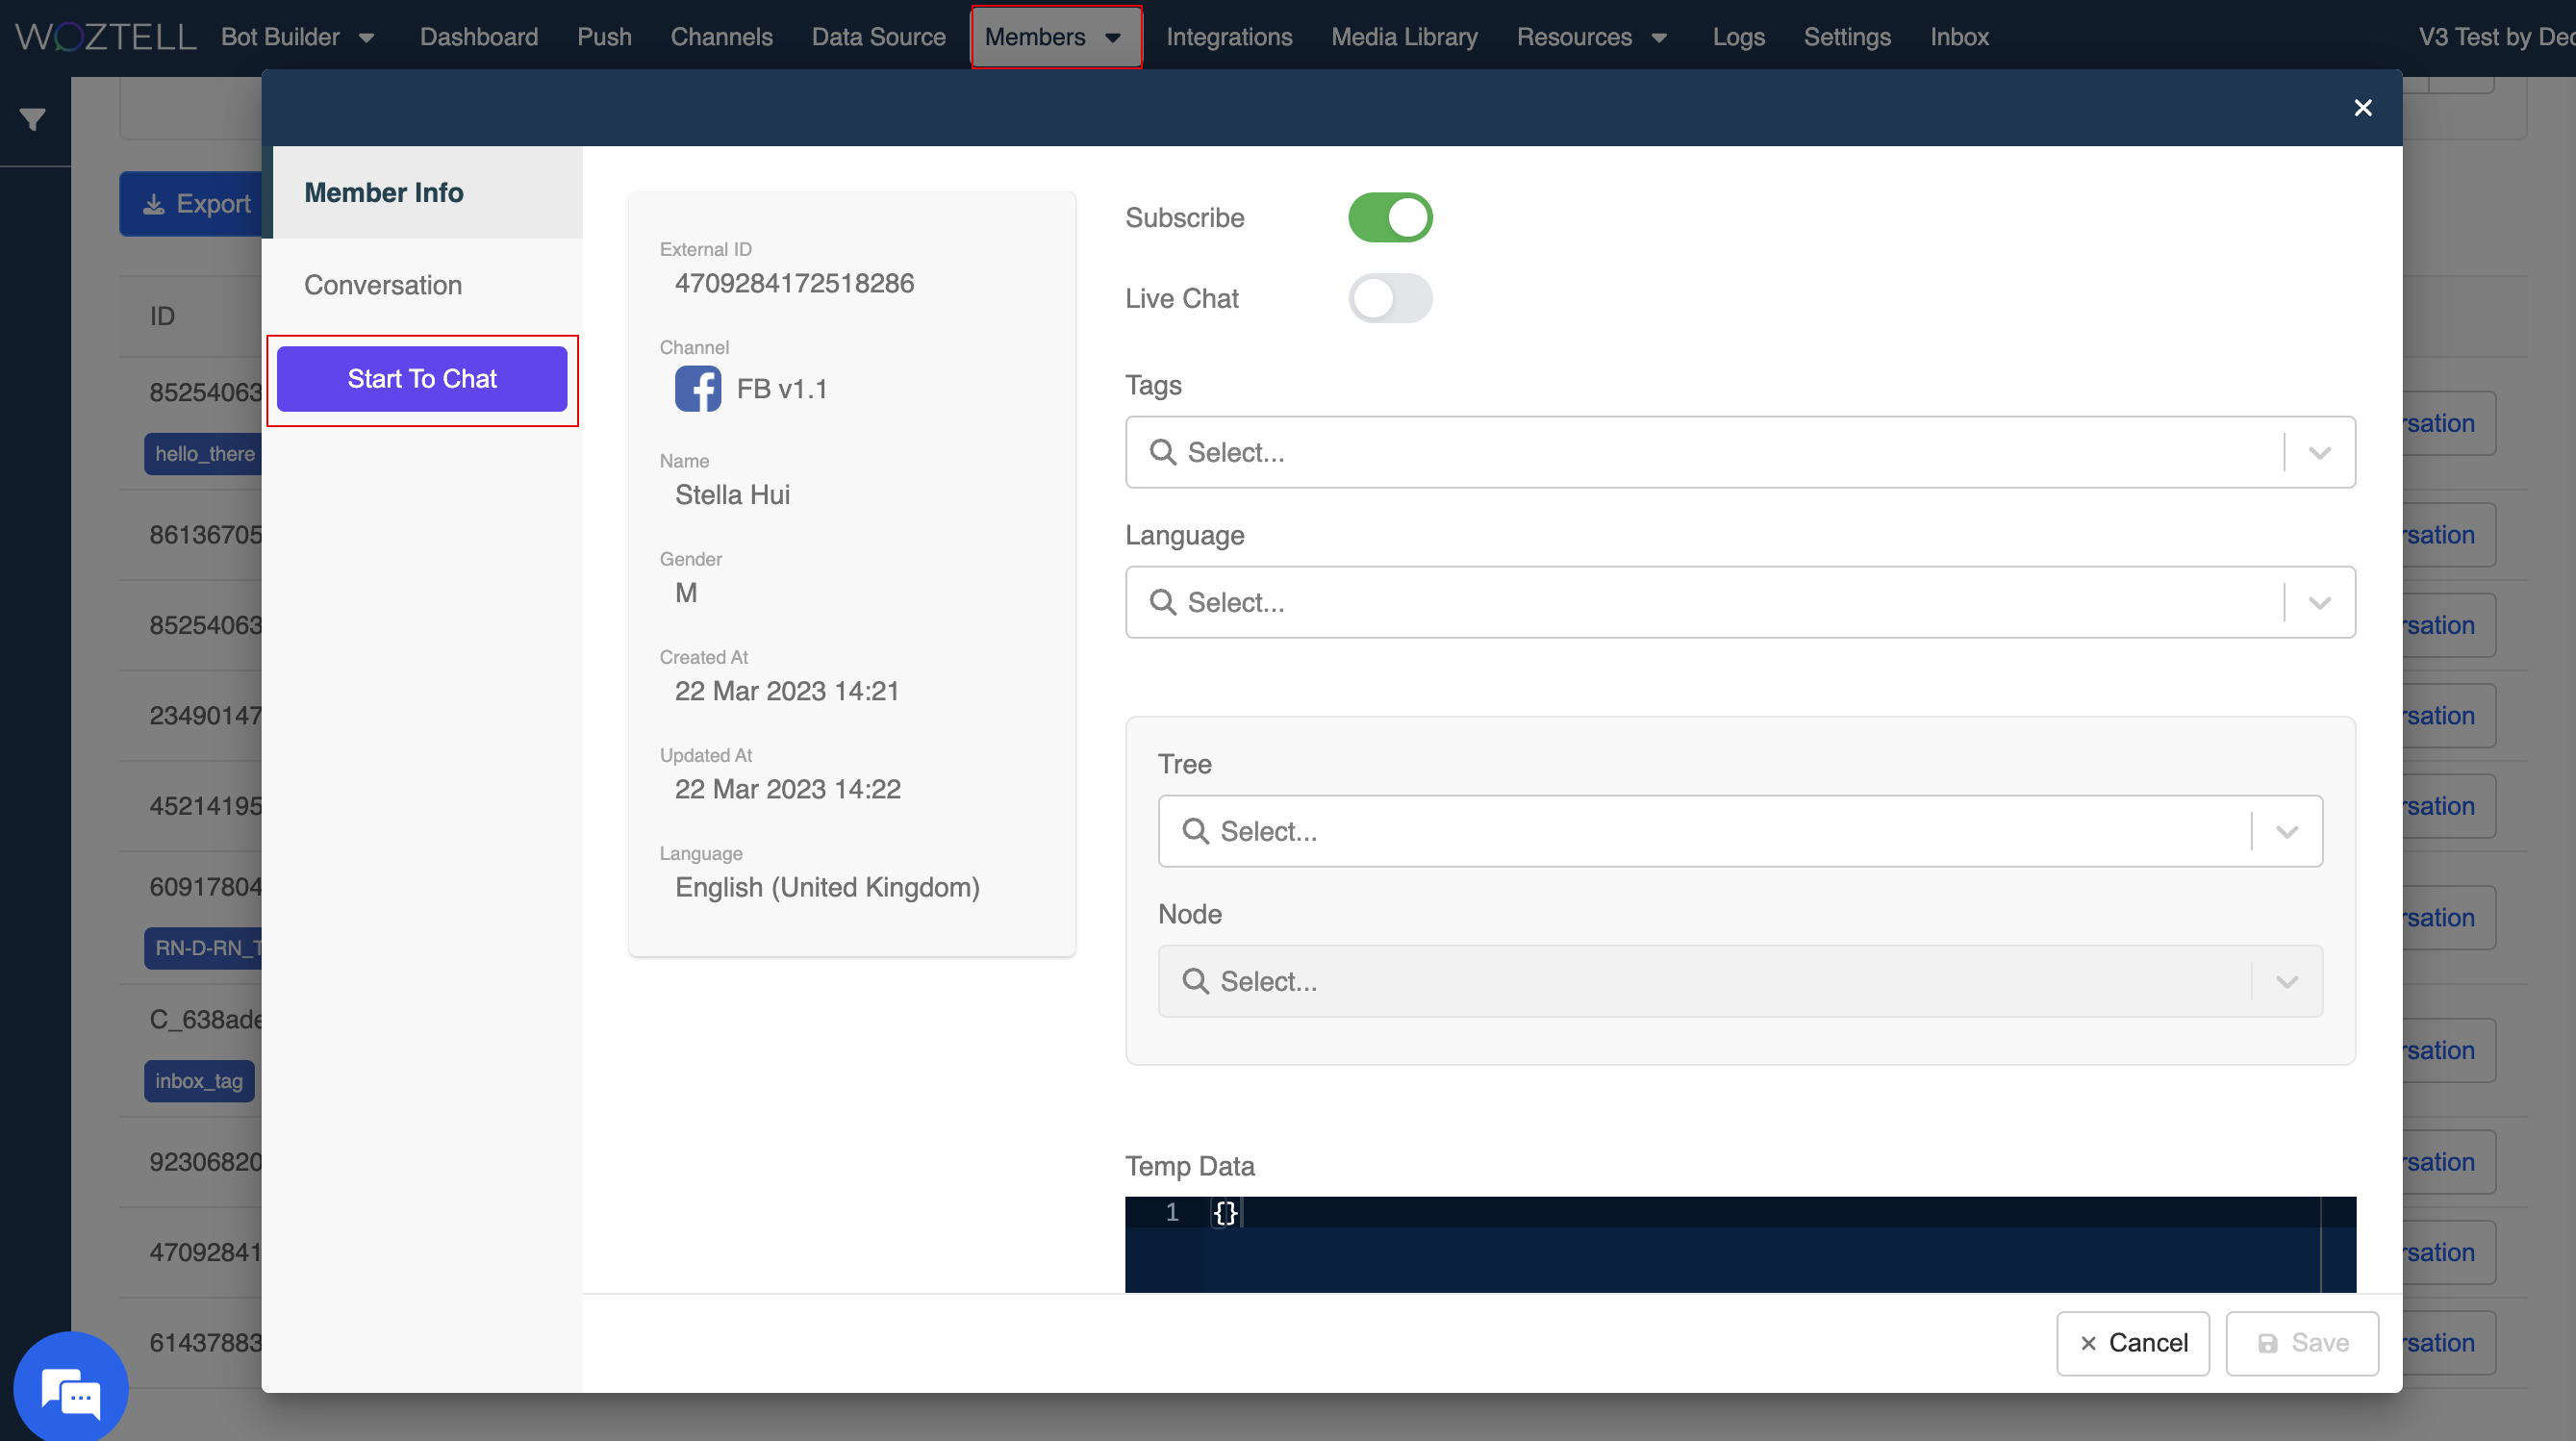
On the other hand, agents can actively start a thread by heading to the Member's details under the "Members" page, and clicking "Start to Chat".
Send Message
To send a message, you can simply open a thread and start typing. Normally, you can send the message by clicking the "Send" button or using the "Enter" key, and the behavior of the "Send" button will change based on the status of the thread.
- If the agent wants to send a message in chatbot mode, you can choose to send the message and enable the Live Chat mode as well.
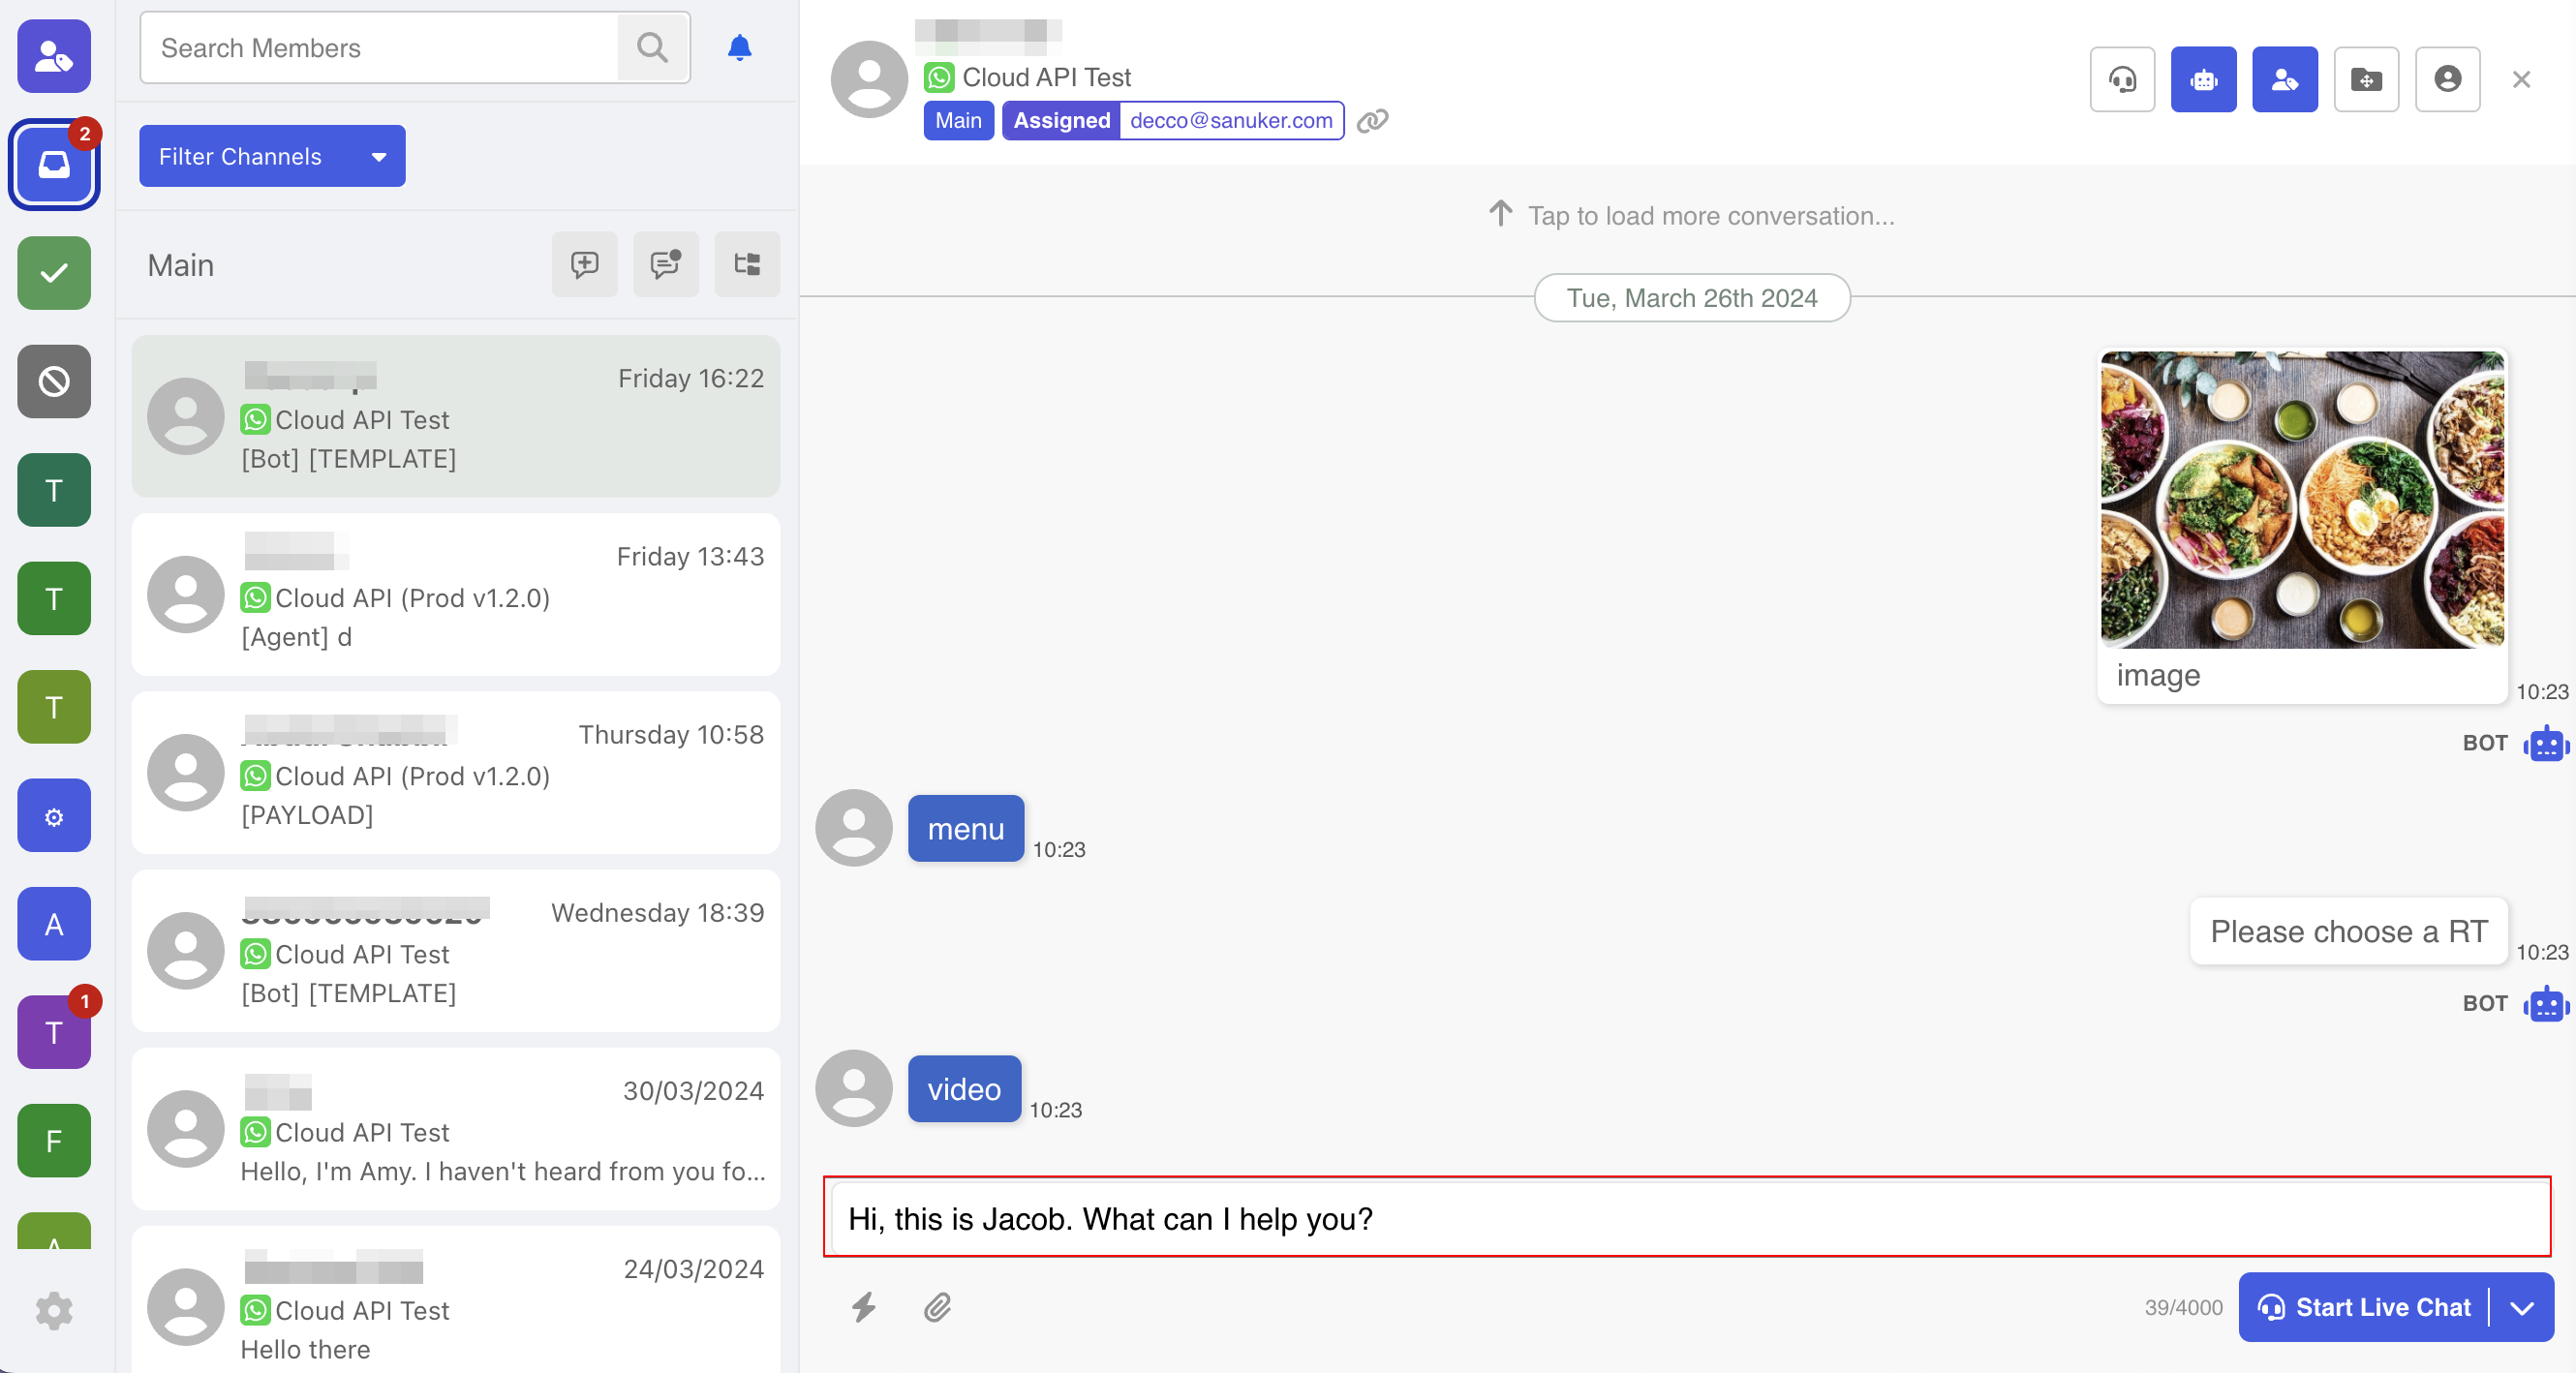
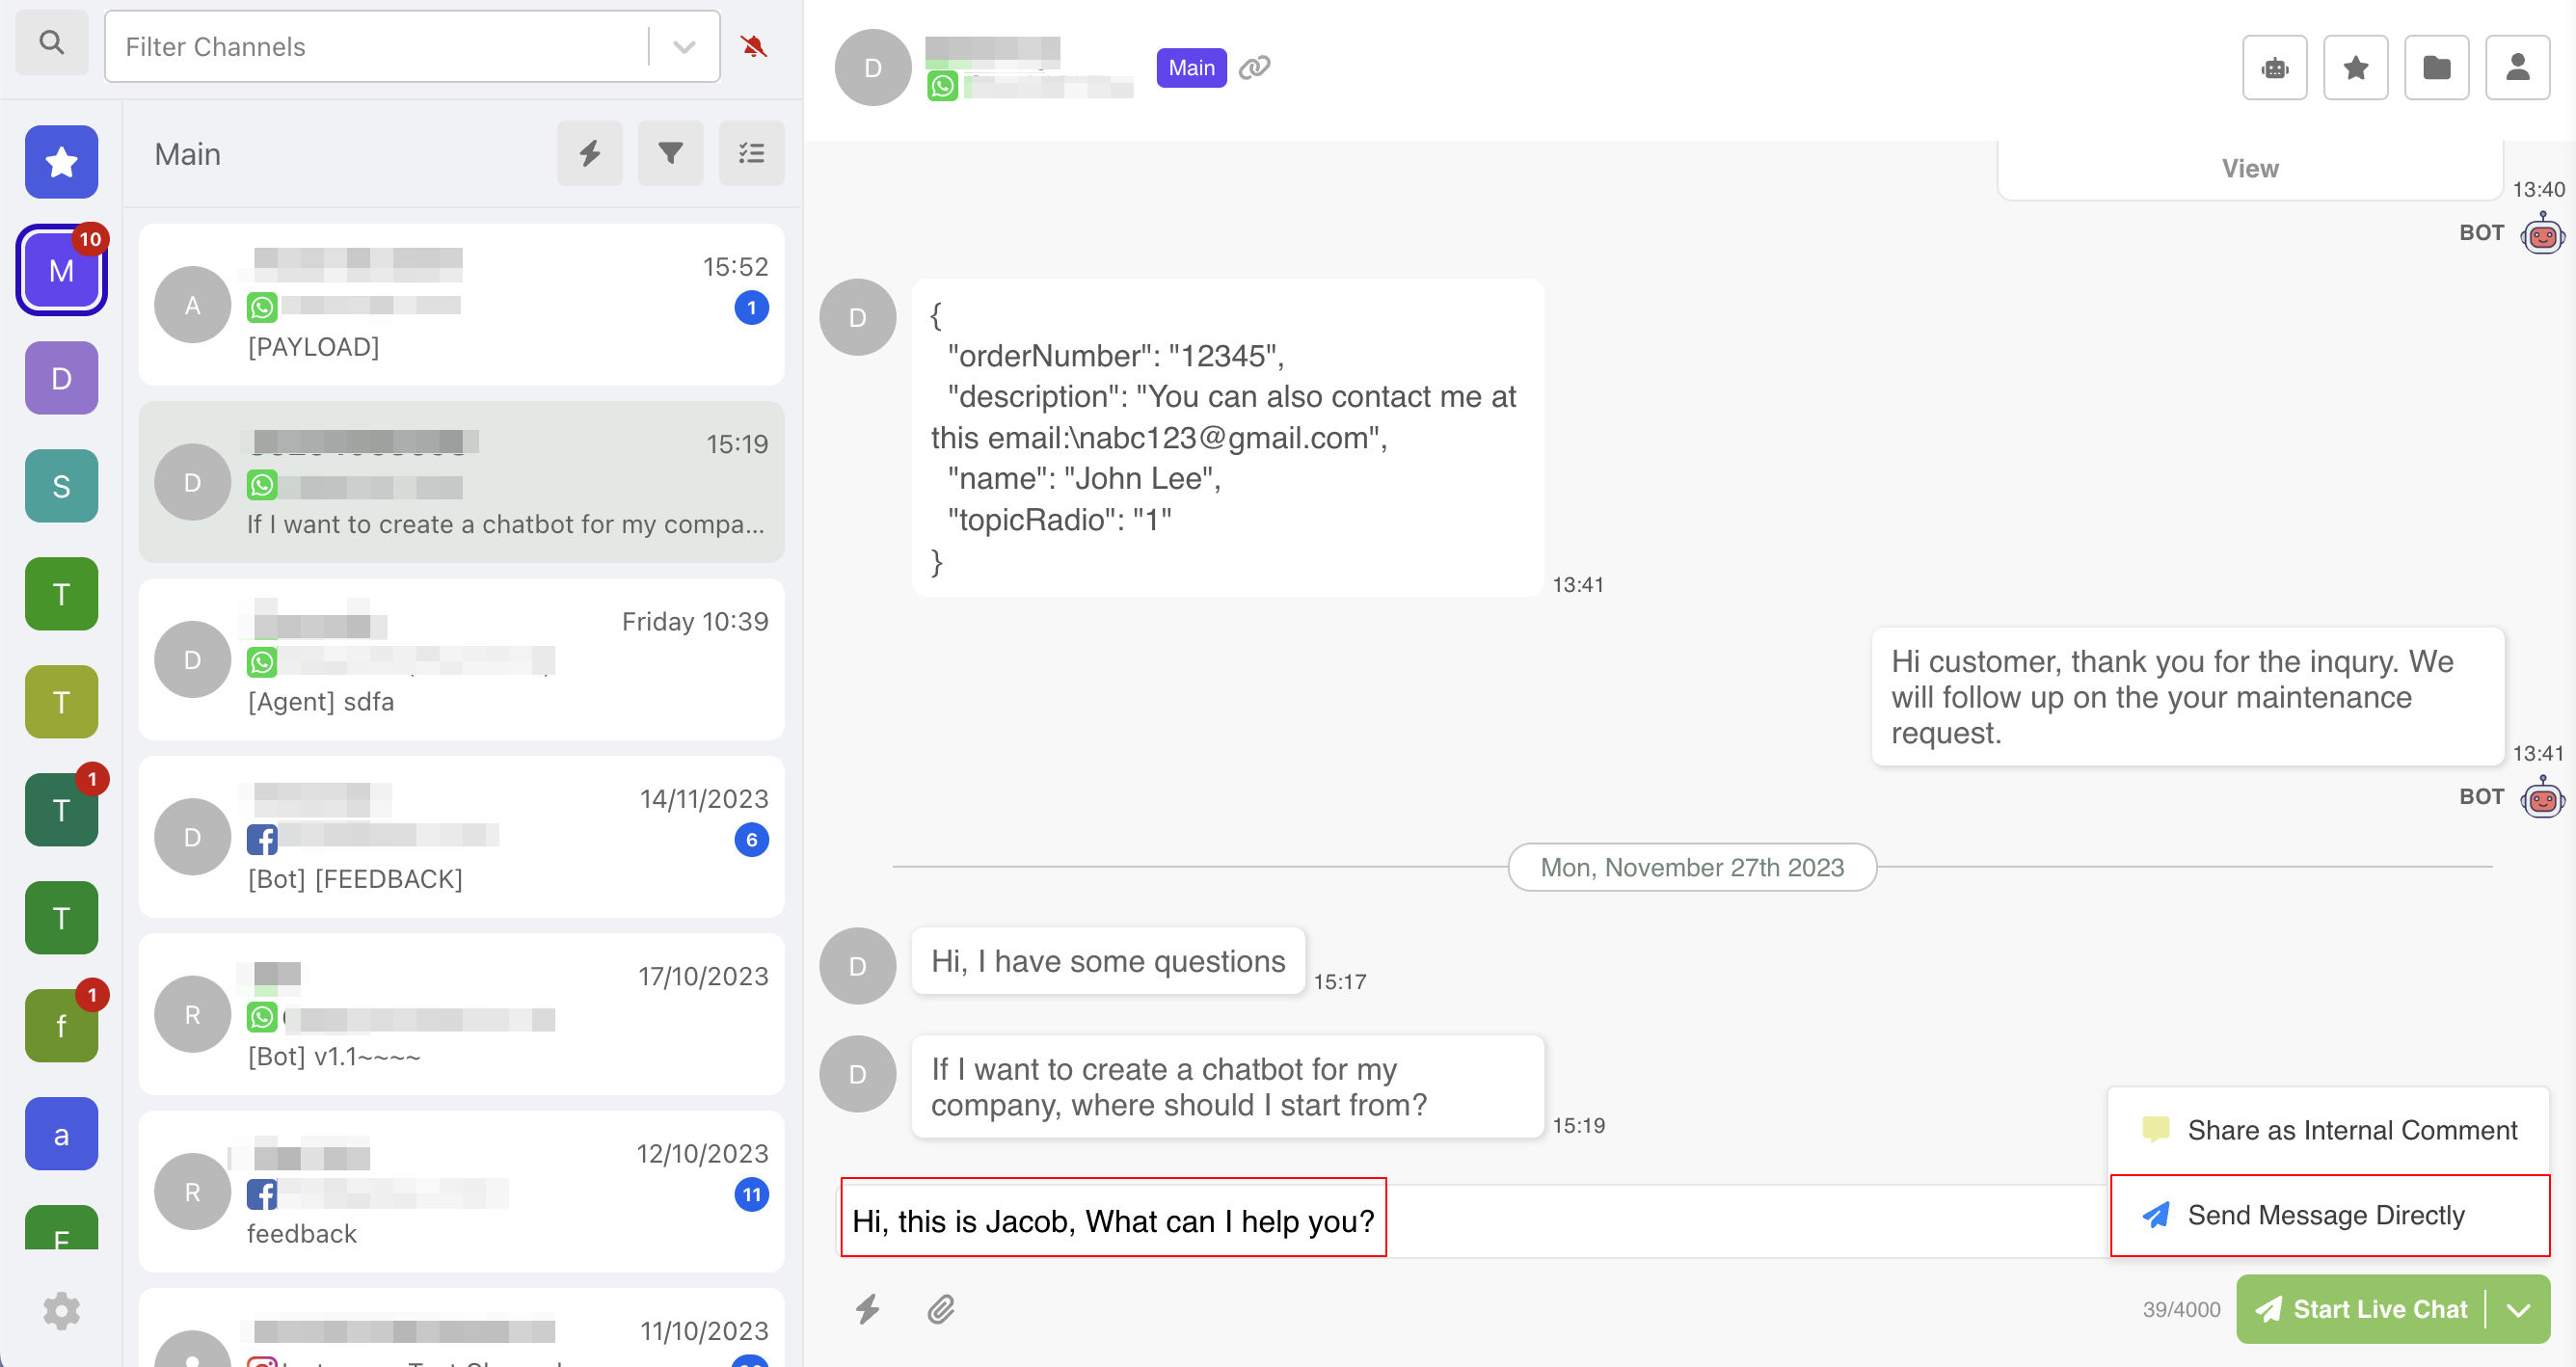
- In the chatbot mode, agent can also choose to send the message directly and keep the thread in chatbot mode.
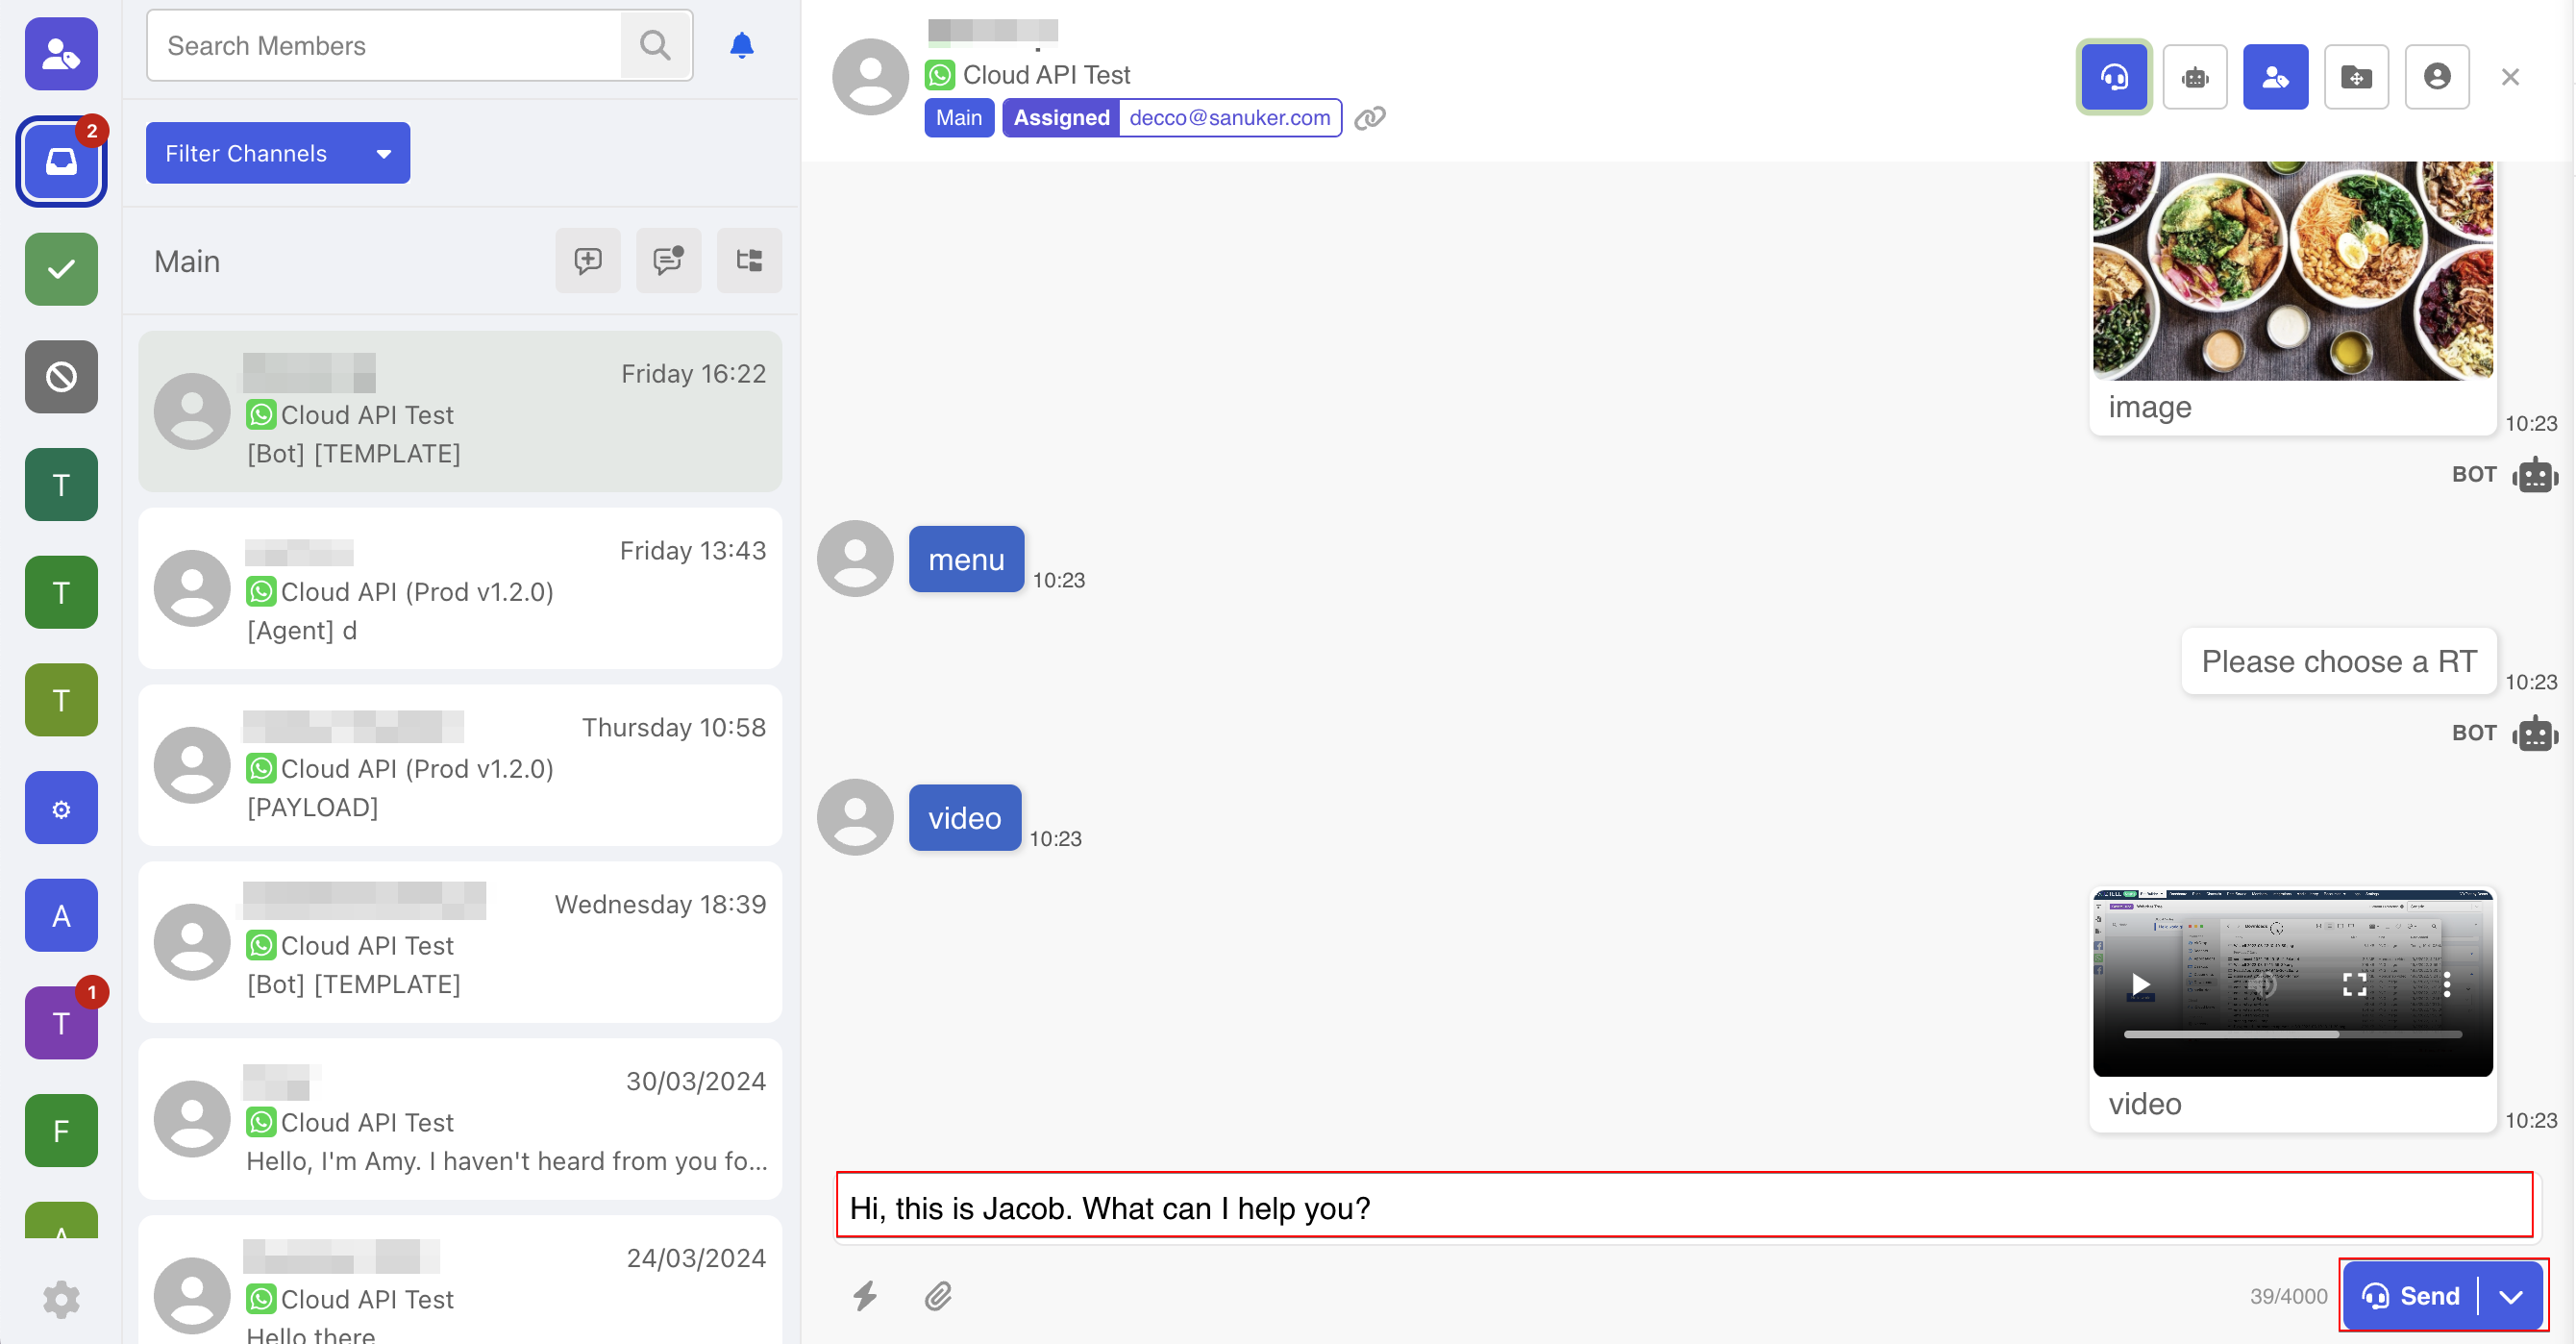
- In the live chat mode, agent can always send the message directly.
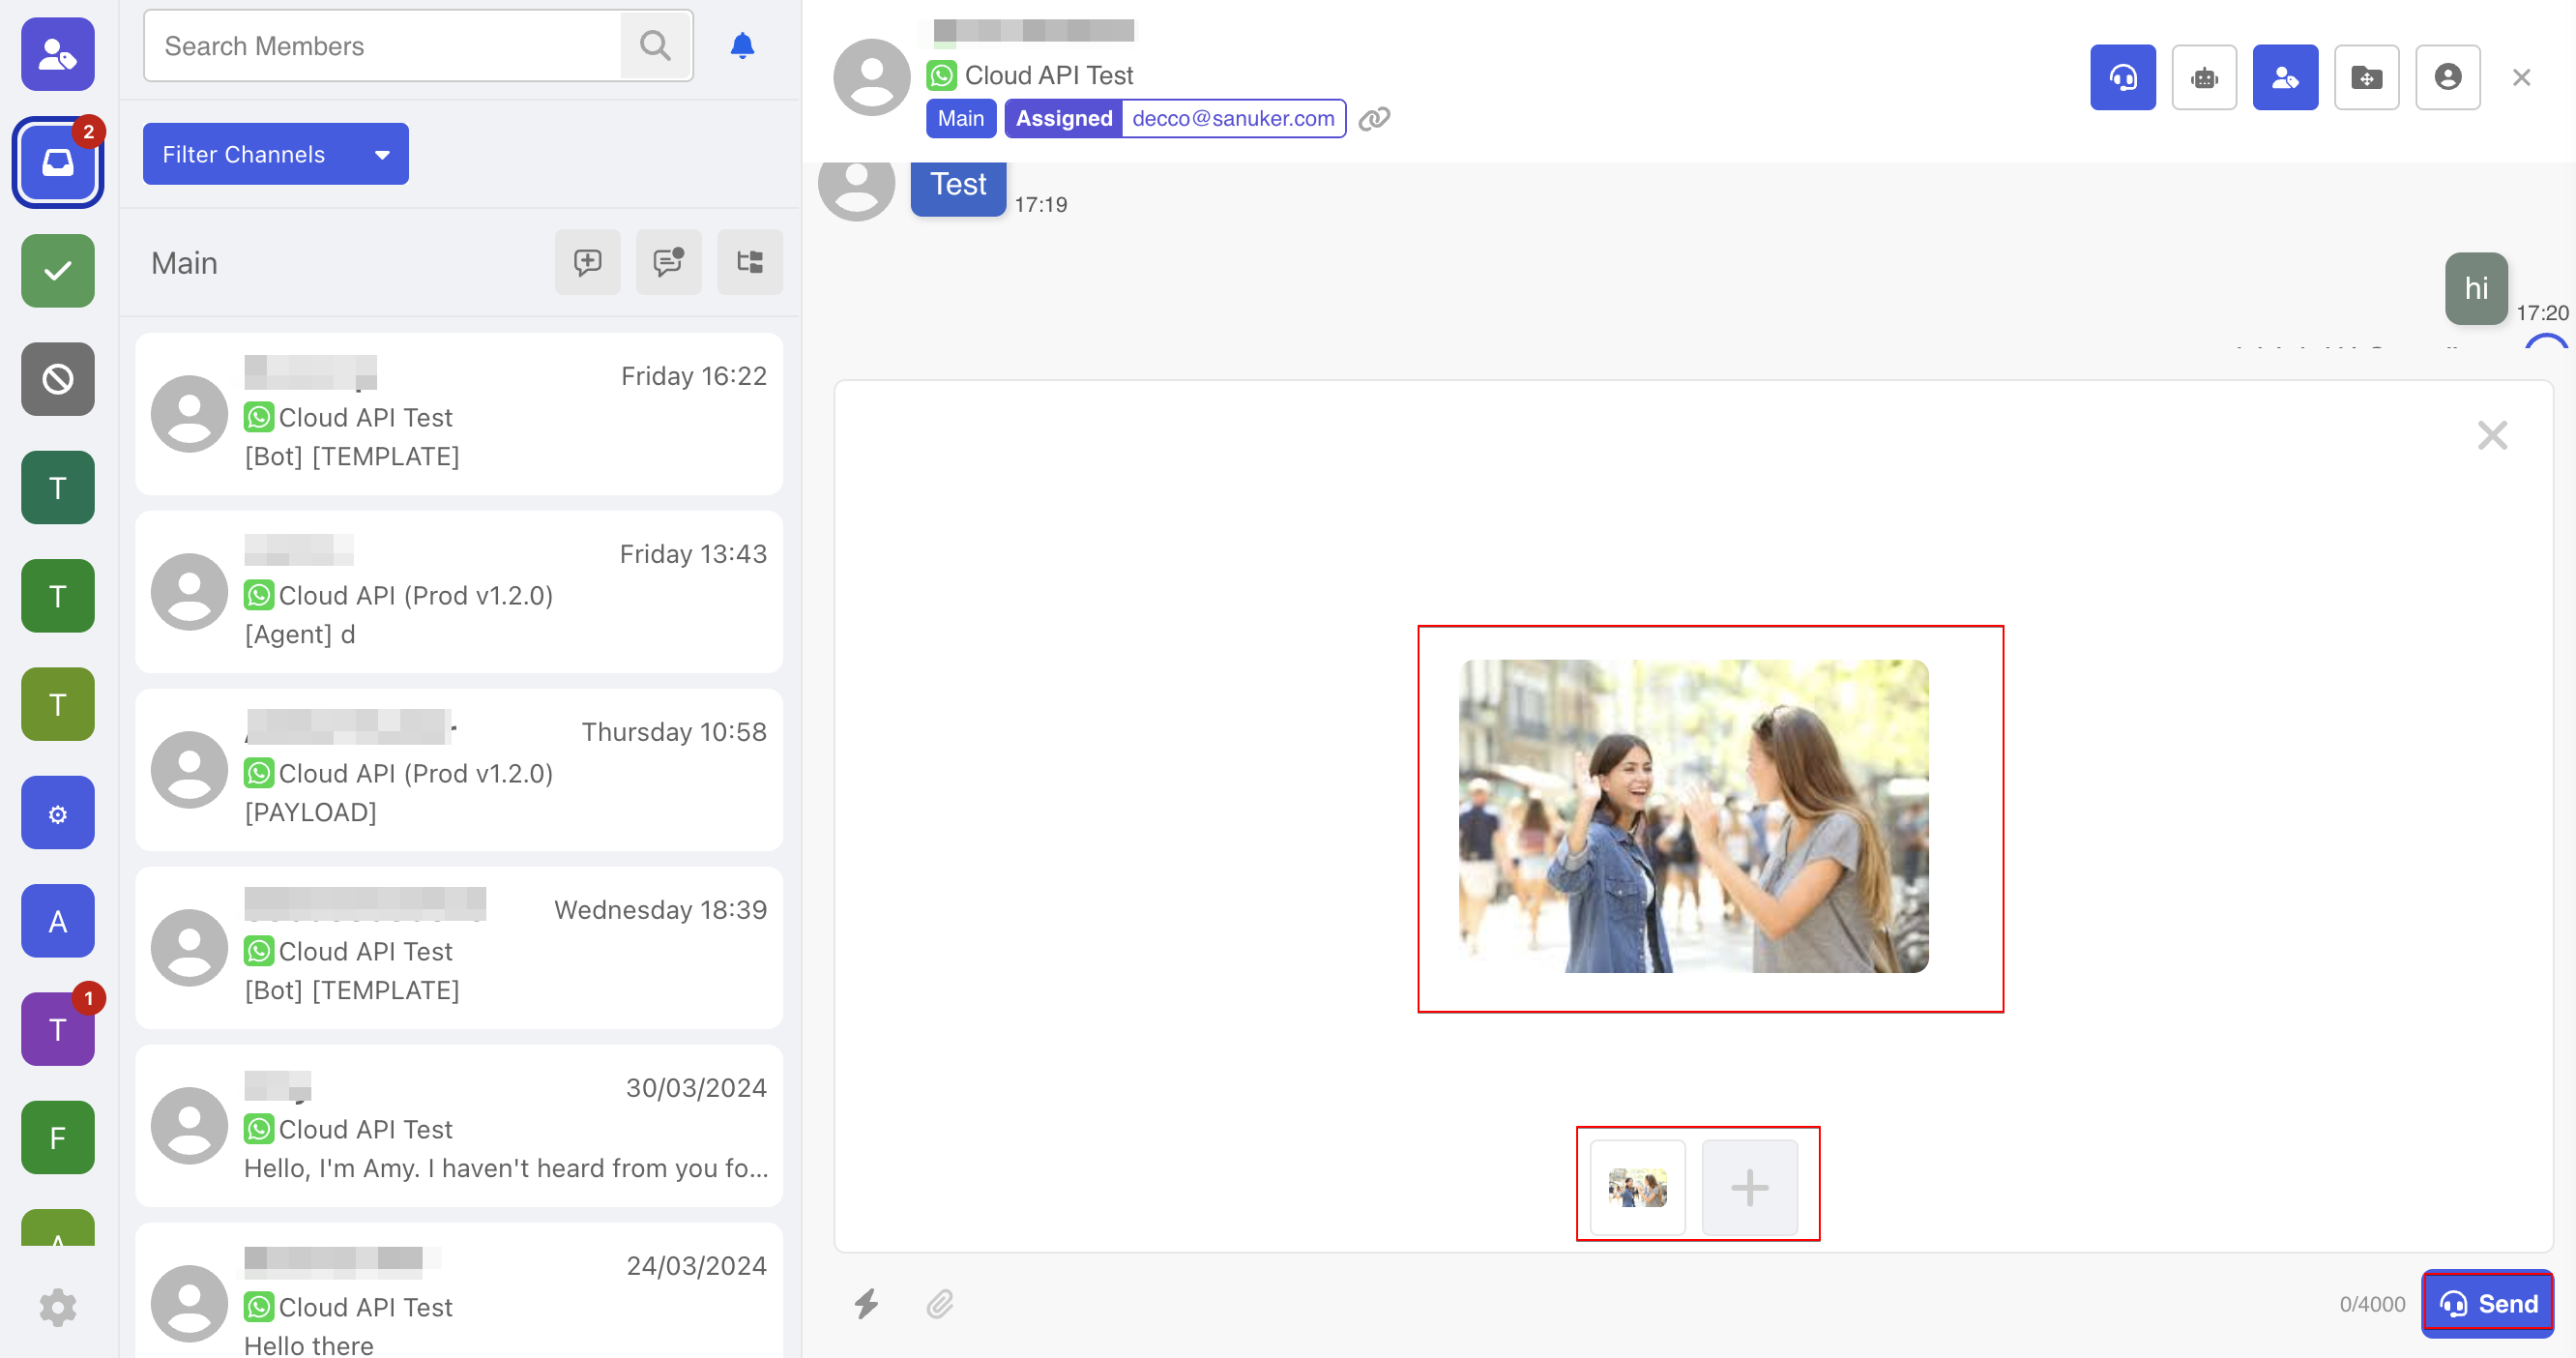
Send Attachment File
You can also sends media and files by adding attachment.
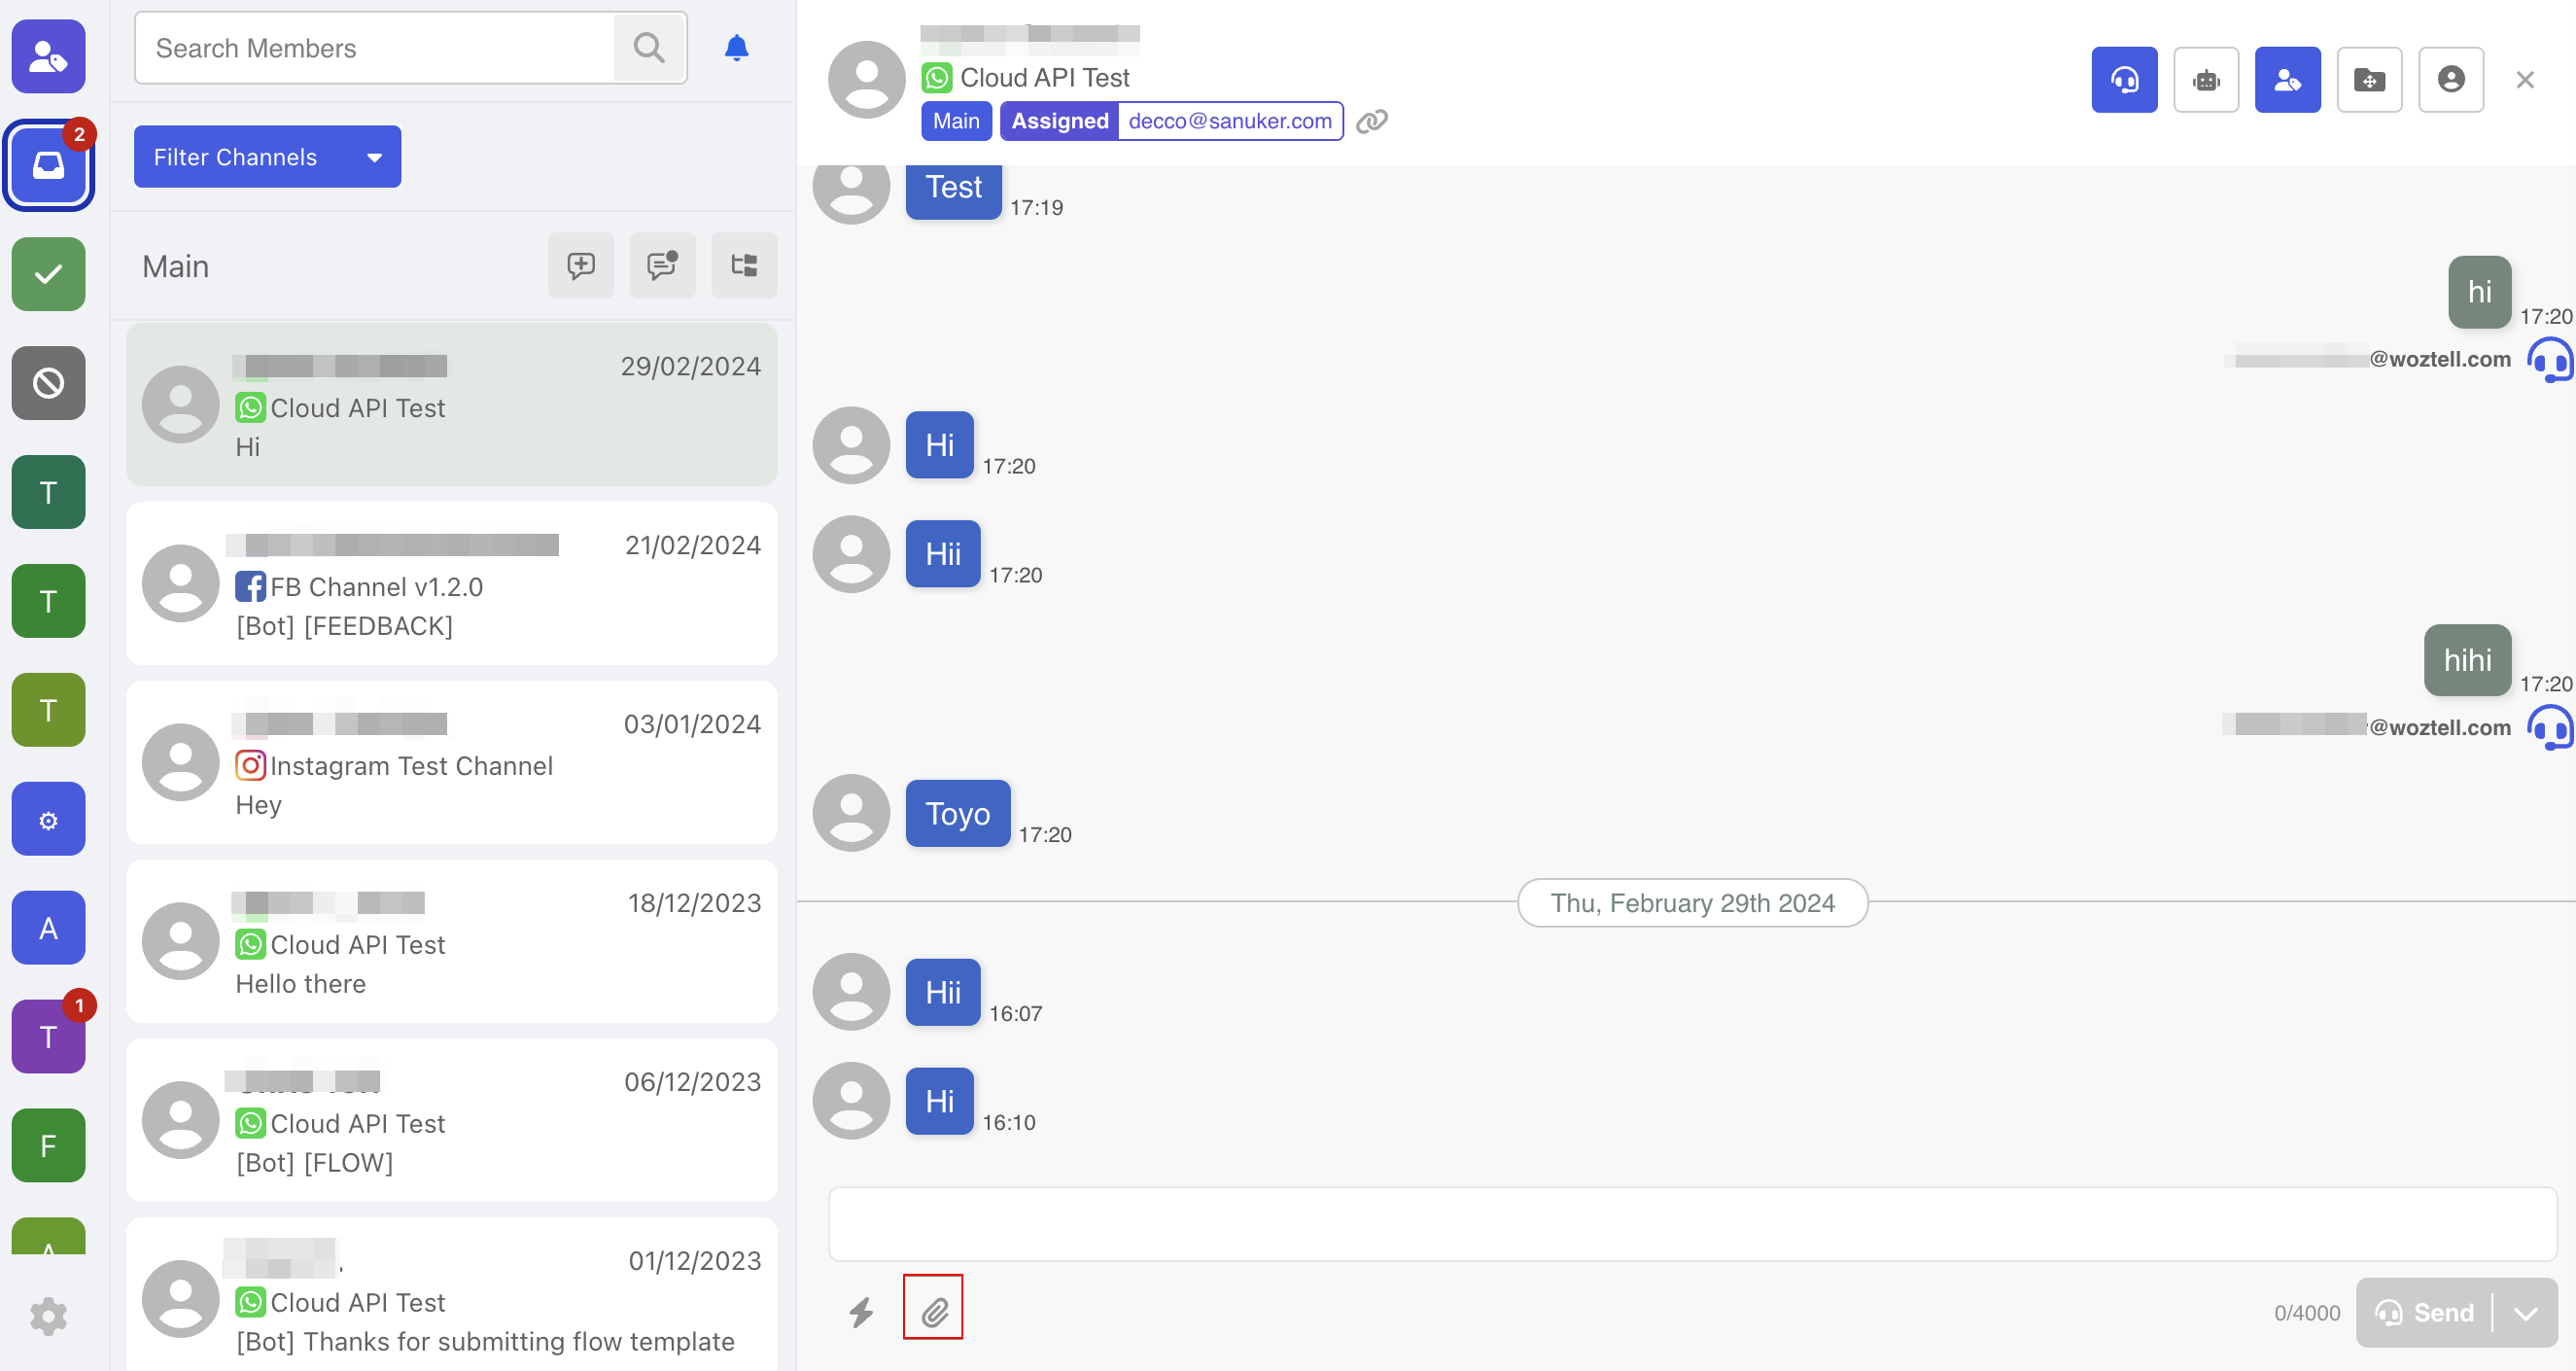
After uploading the files, you can check out the preview and decide to add or remove attachment. After that, just click "Send" to send the attachment.
Thread Control
A thread refers to a communication channel that allows support agents to interact with end users. Aside from the ability to send messages, thread management can be leveraged to optimize the quality of live chat support.
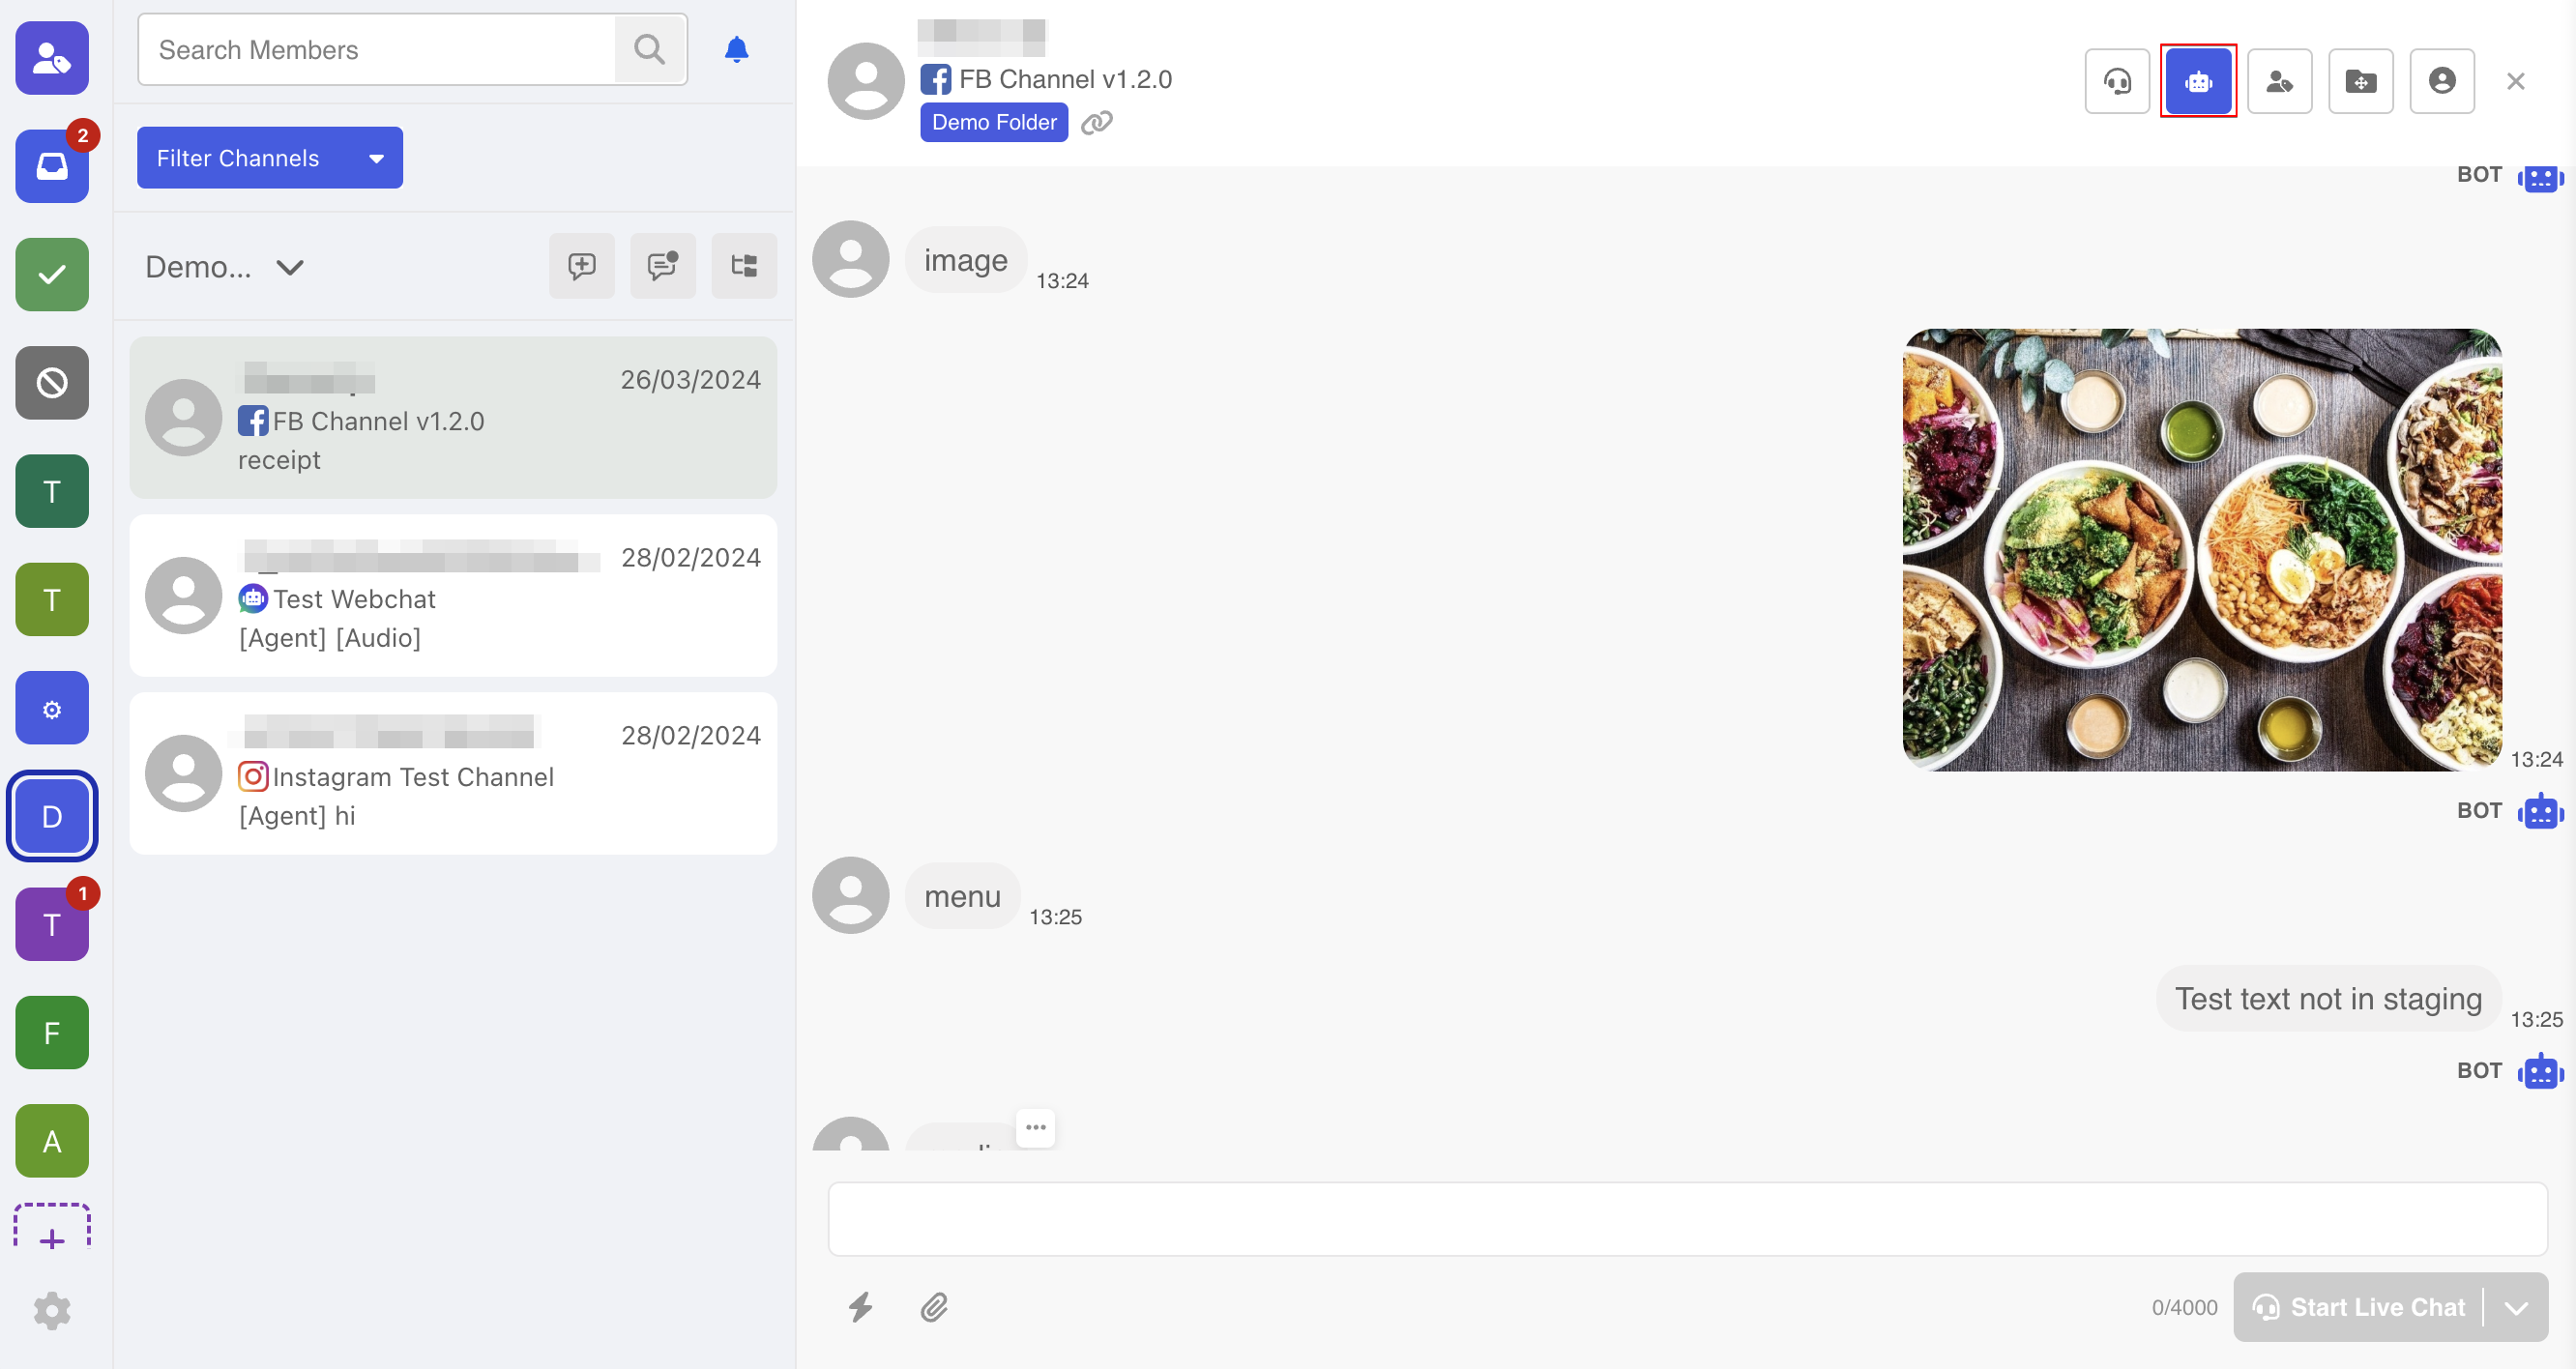
Chatbot & Live Chat Mode
This label represents what "mode" this conversation is currently in. Agents can switch between two modes with just one click.
NOTE
You can also switch between the Chatbot Mode and Live Chat Mode in the Member's Details under the Members page.
Chatbot Mode:
The chatbot is enabled and able to respond to the user automatically.
Live Chat Mode:
The chatbot is disabled and the user's input does not trigger any chatbot response.

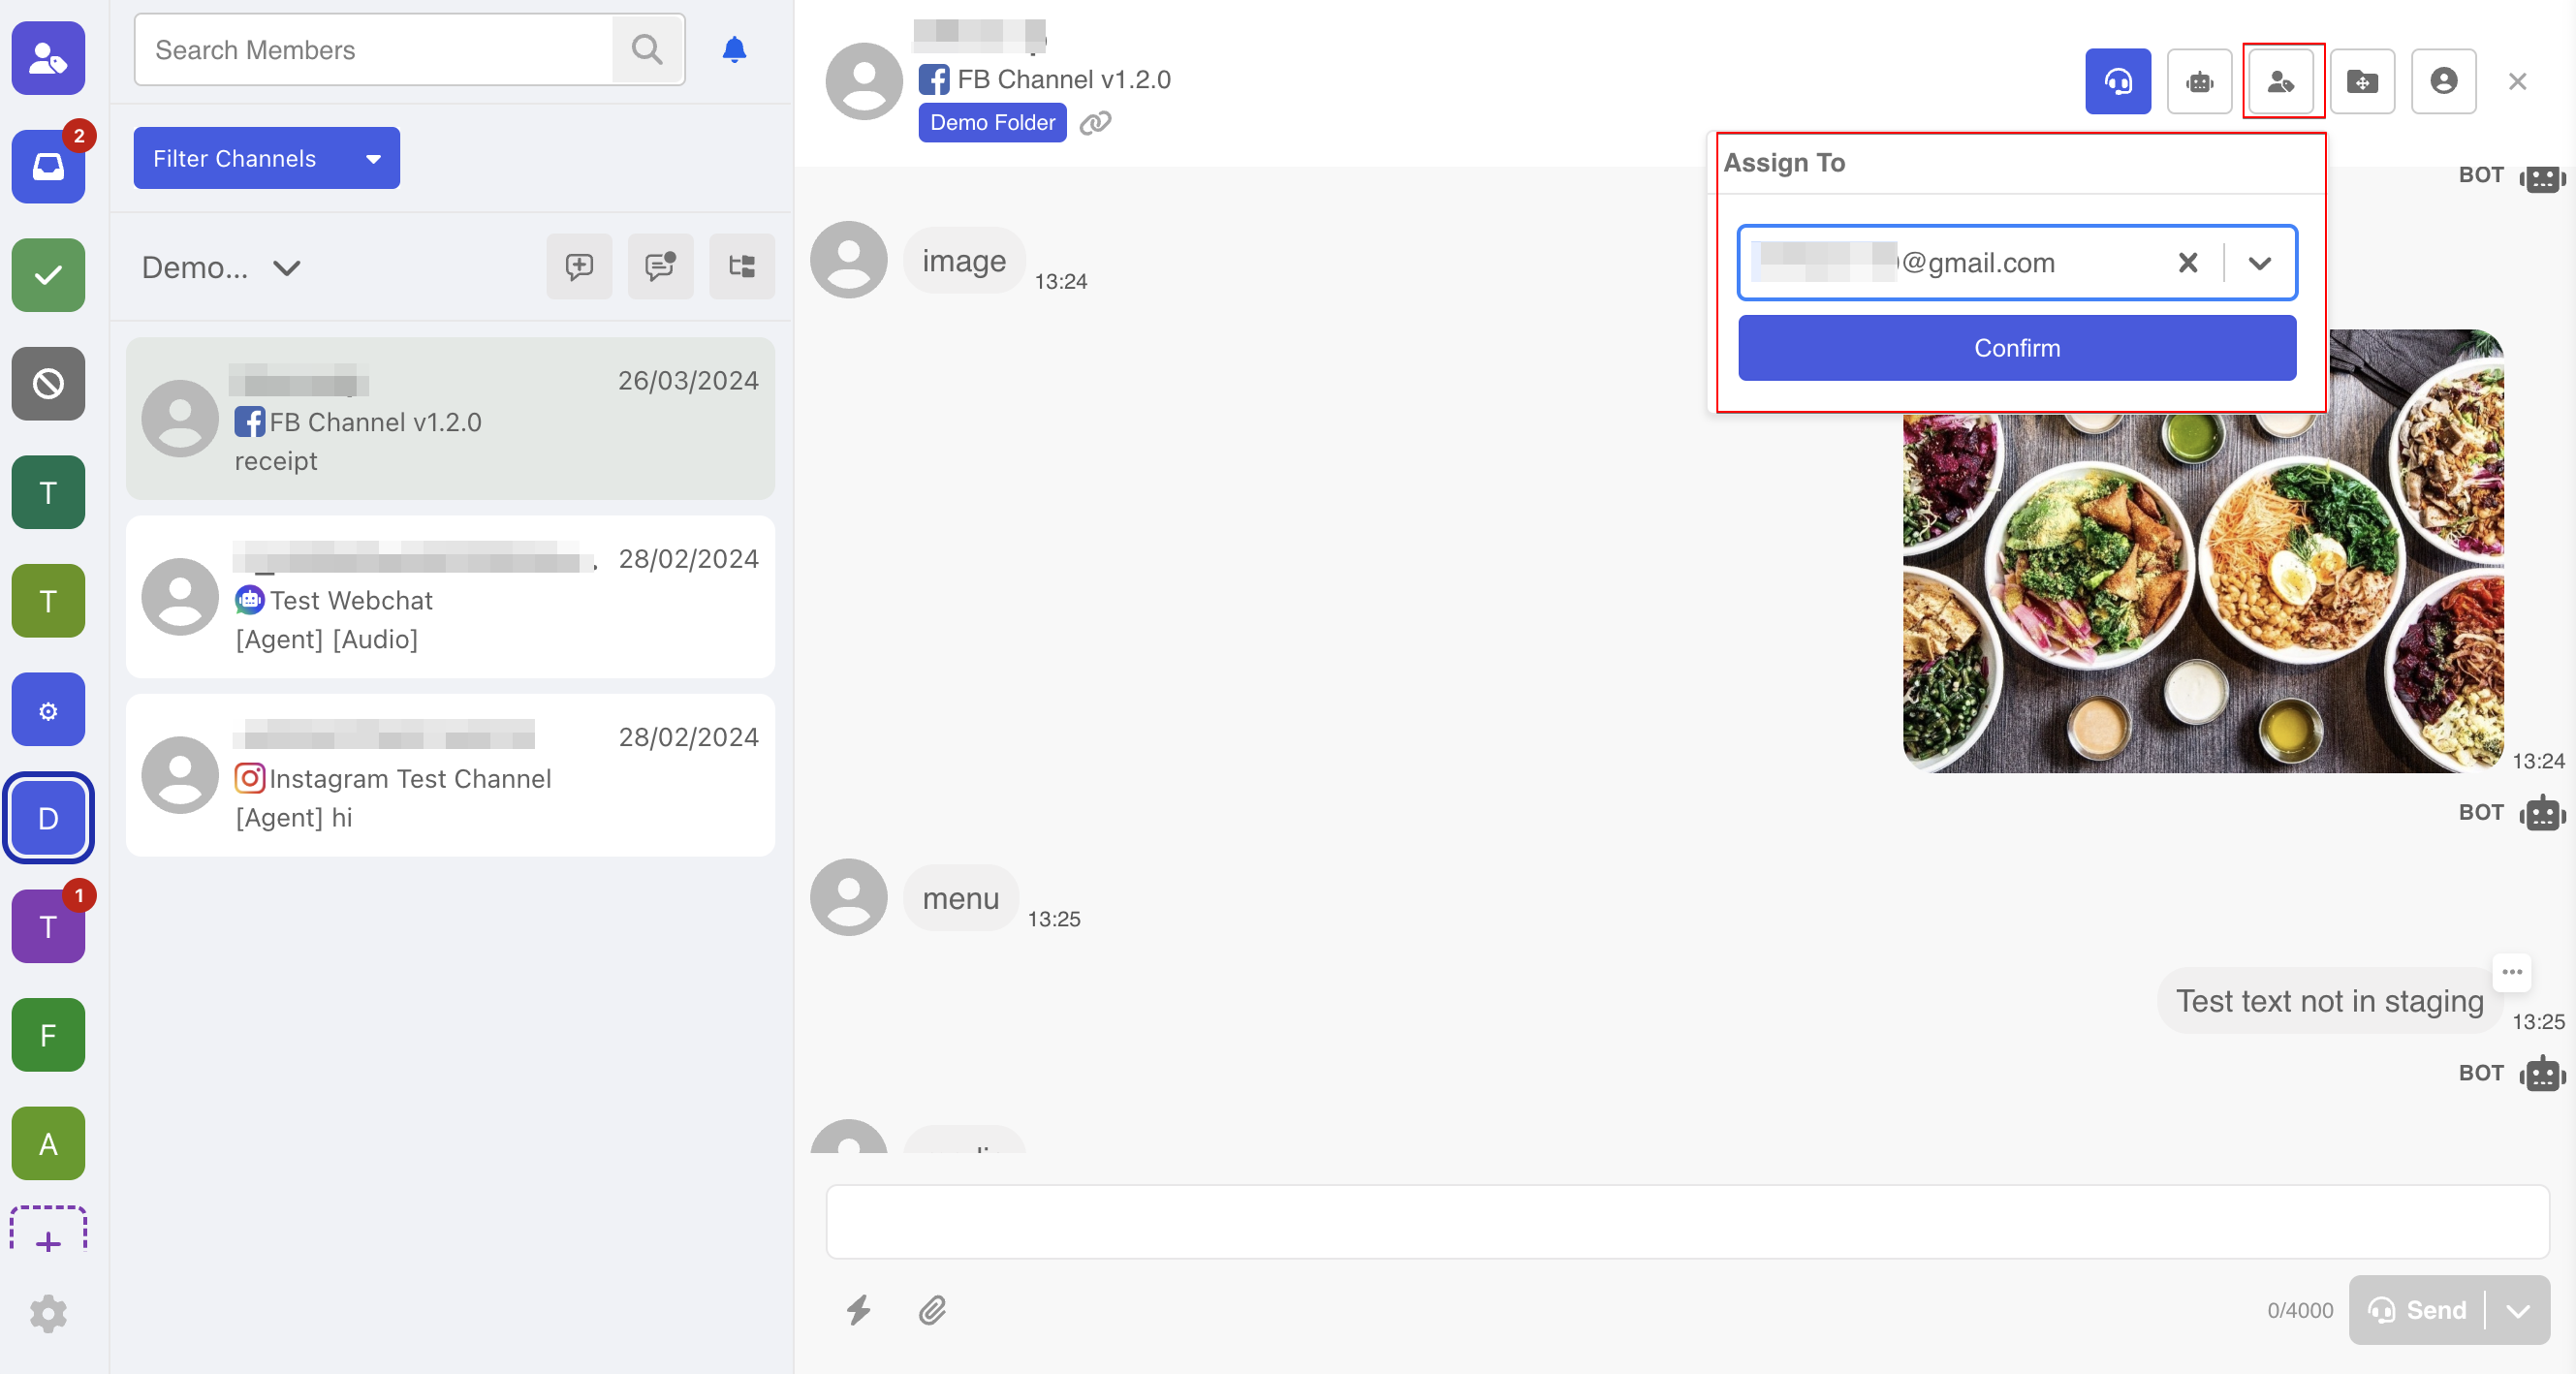
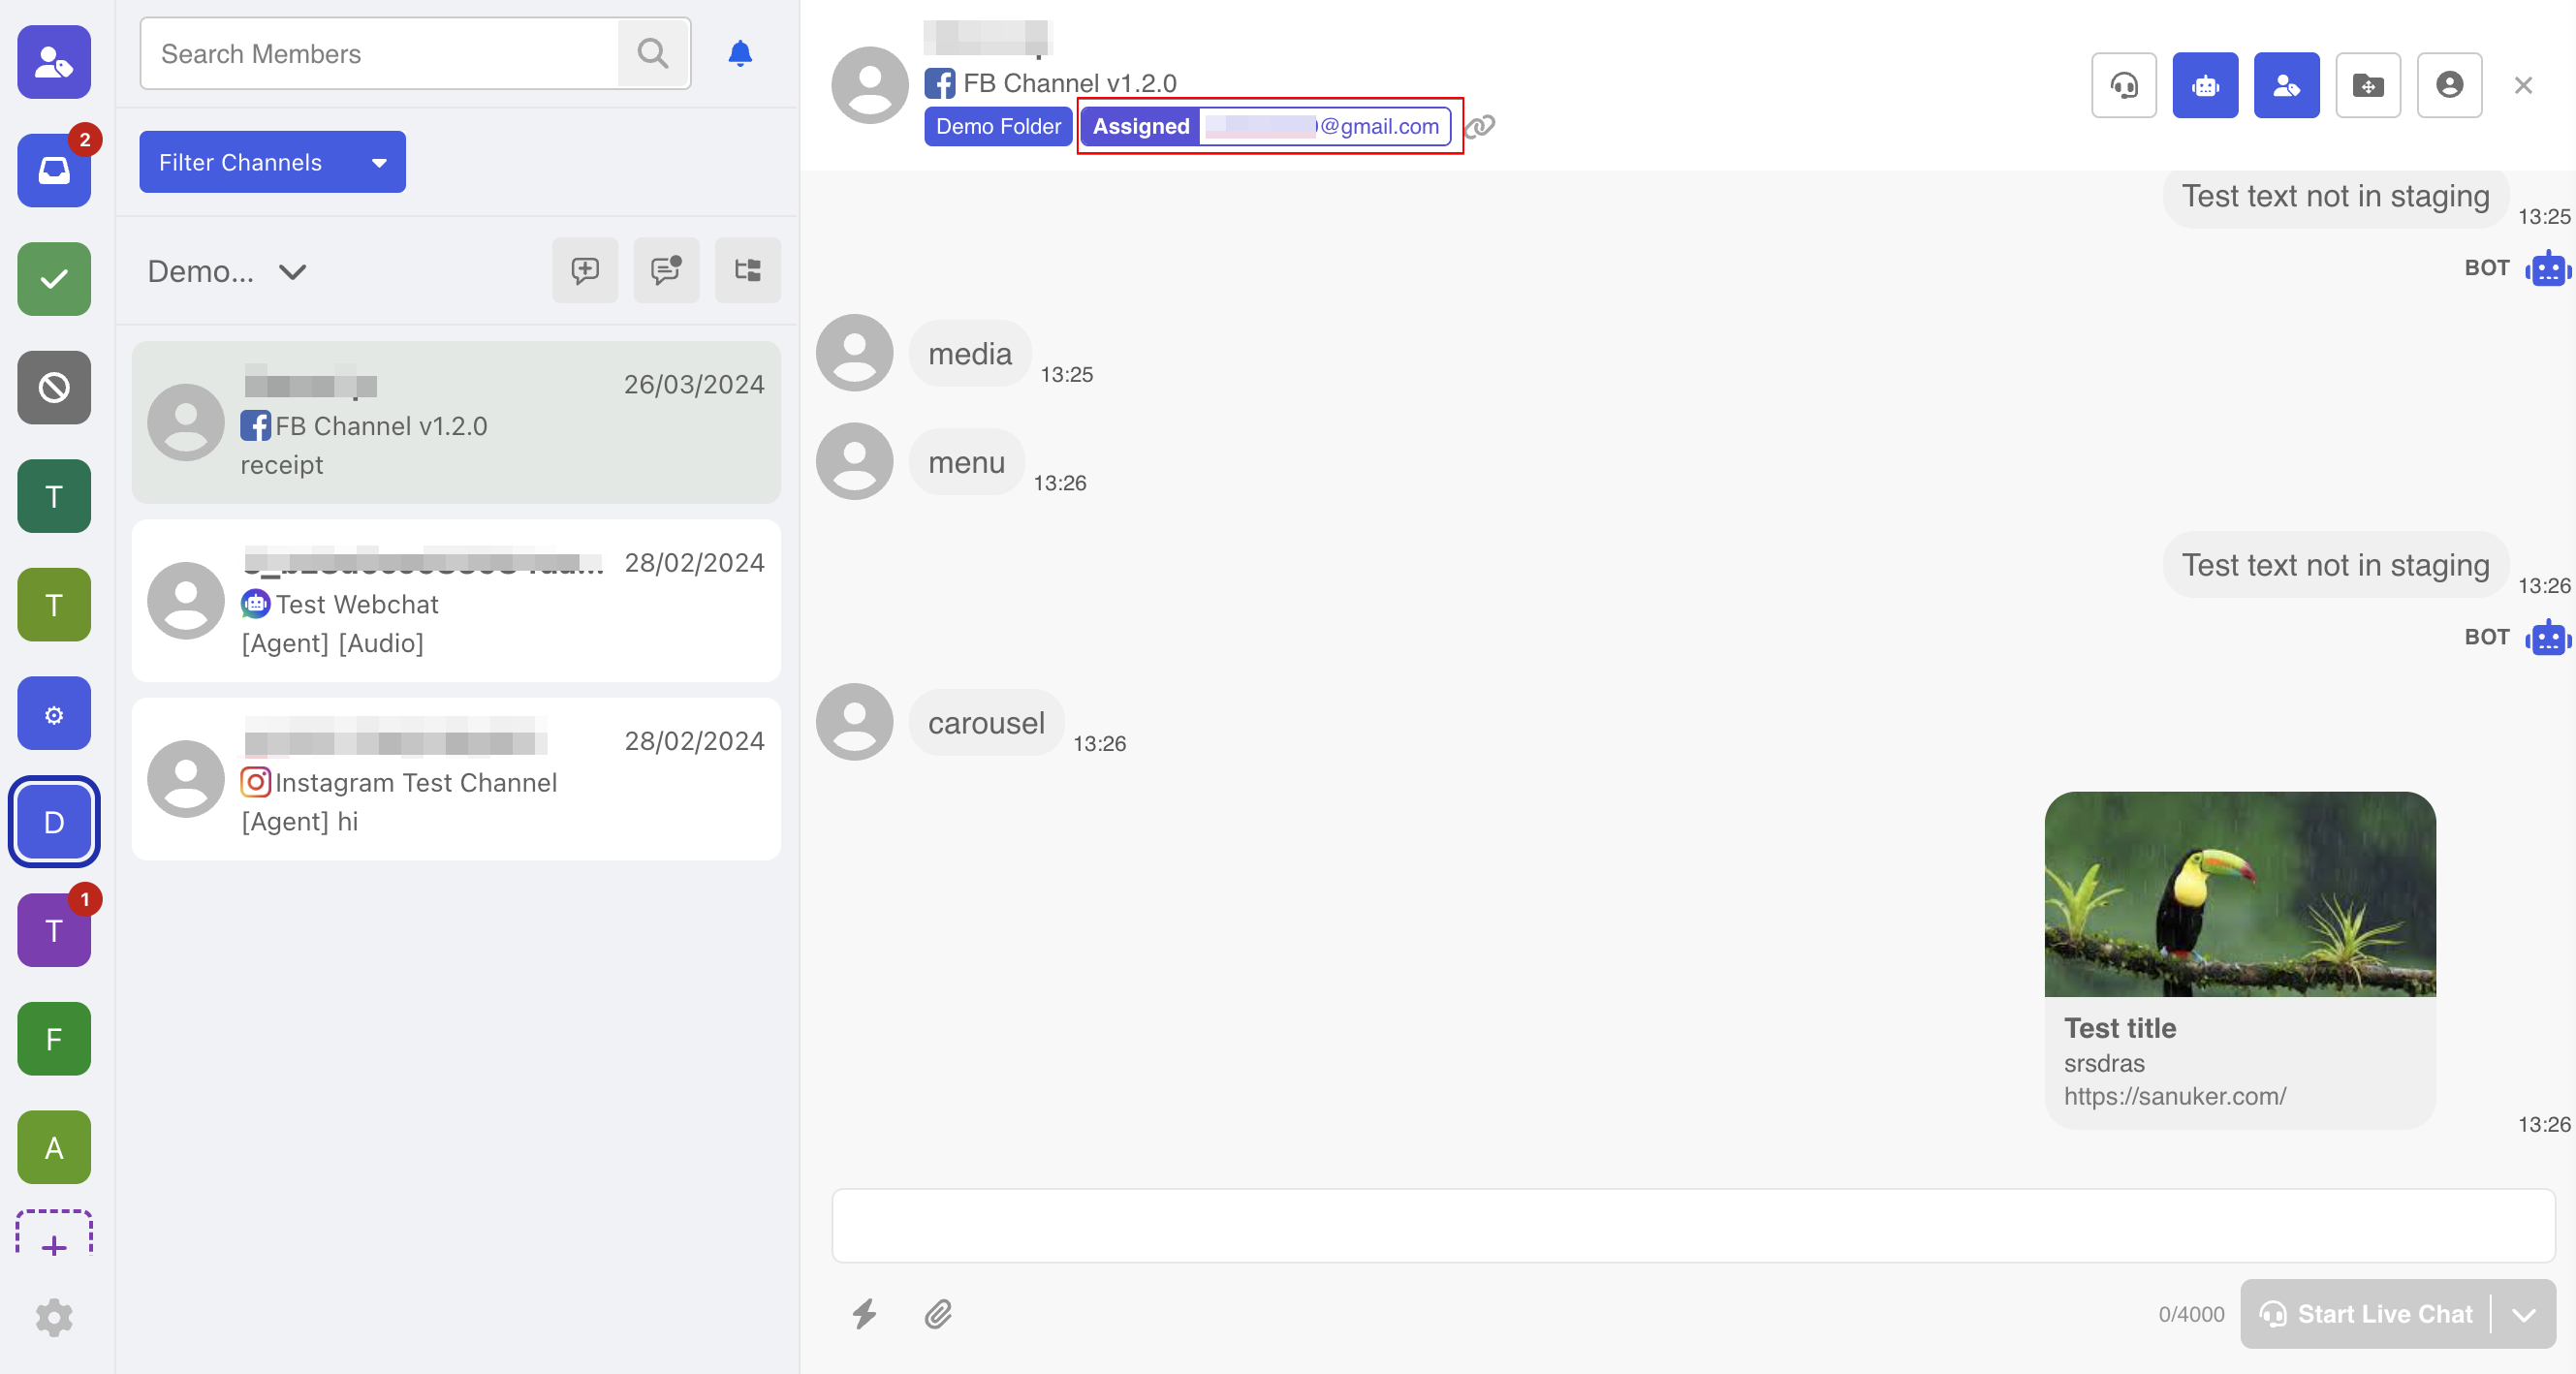
Assign to Agent
Sometimes, you might need the right person to give the right answer. The Inbox Integration allows assigning a thread to another agent to follow up.
- To do so, select "Assign to".

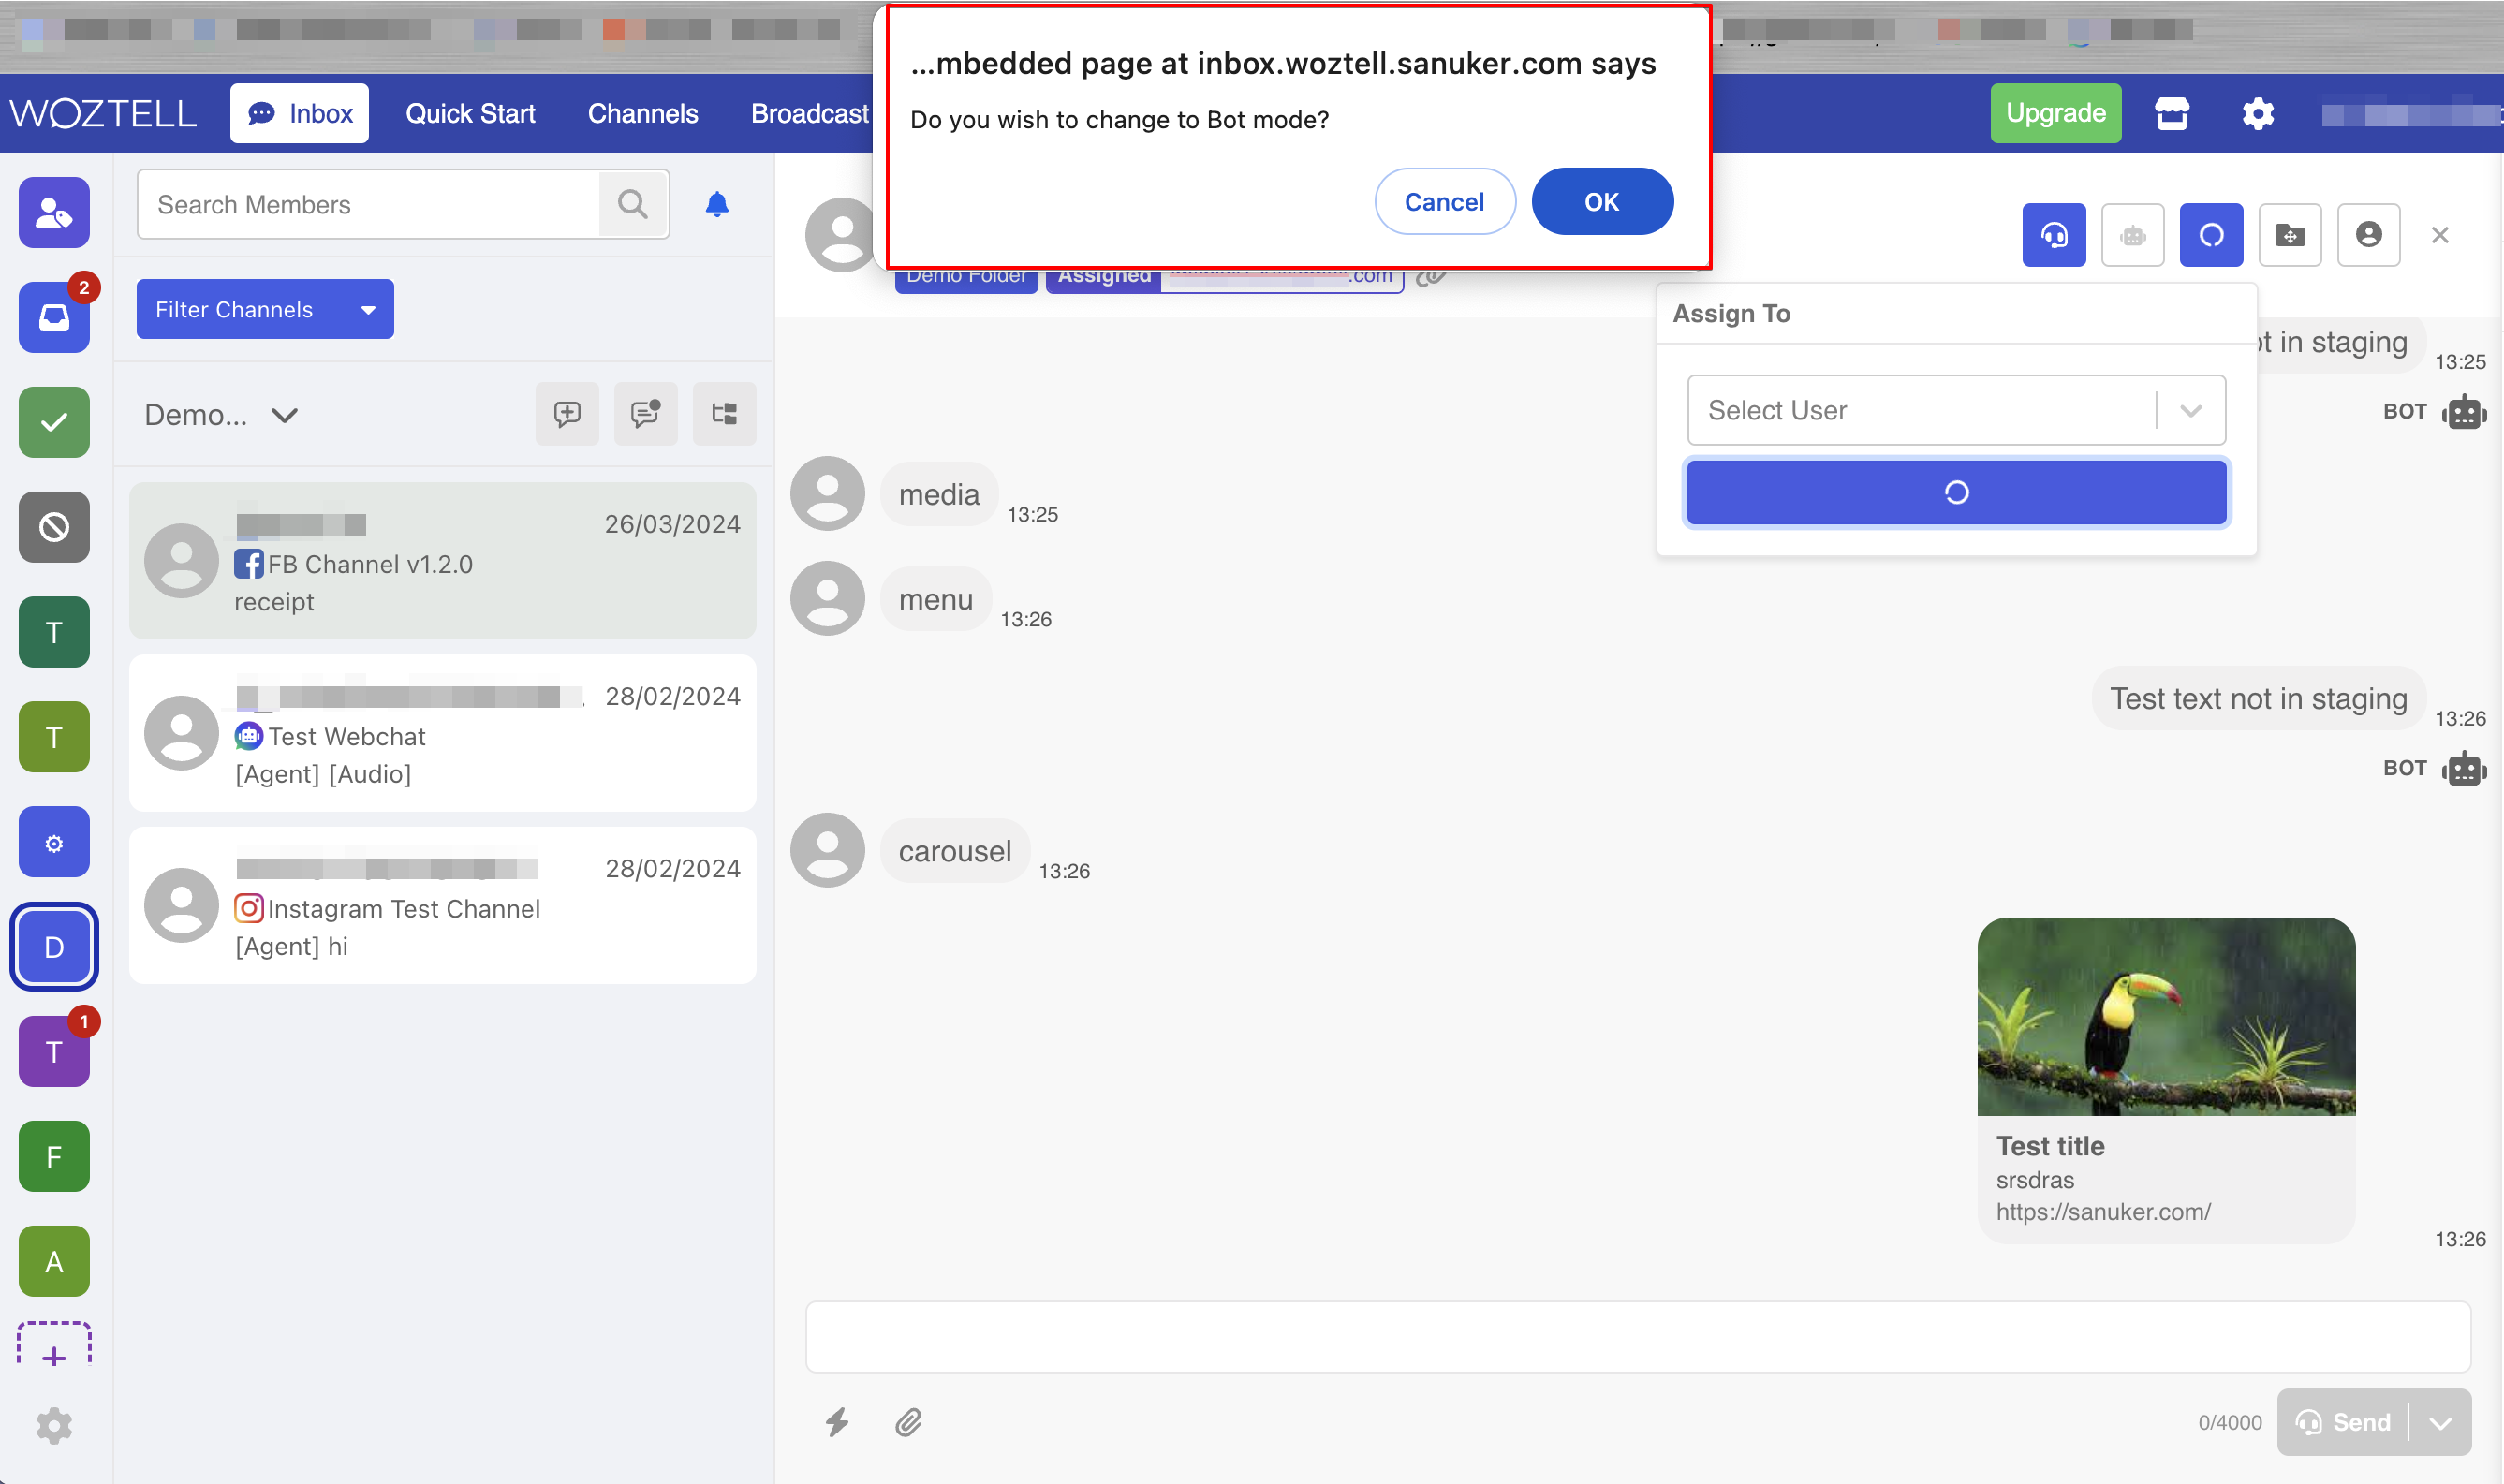
- Select an agent and click "Confirm".
- If you assign an agent while the chatbot mode is on, a pop-up will be displayed ask if you would like to switch on the live chat mode as well.
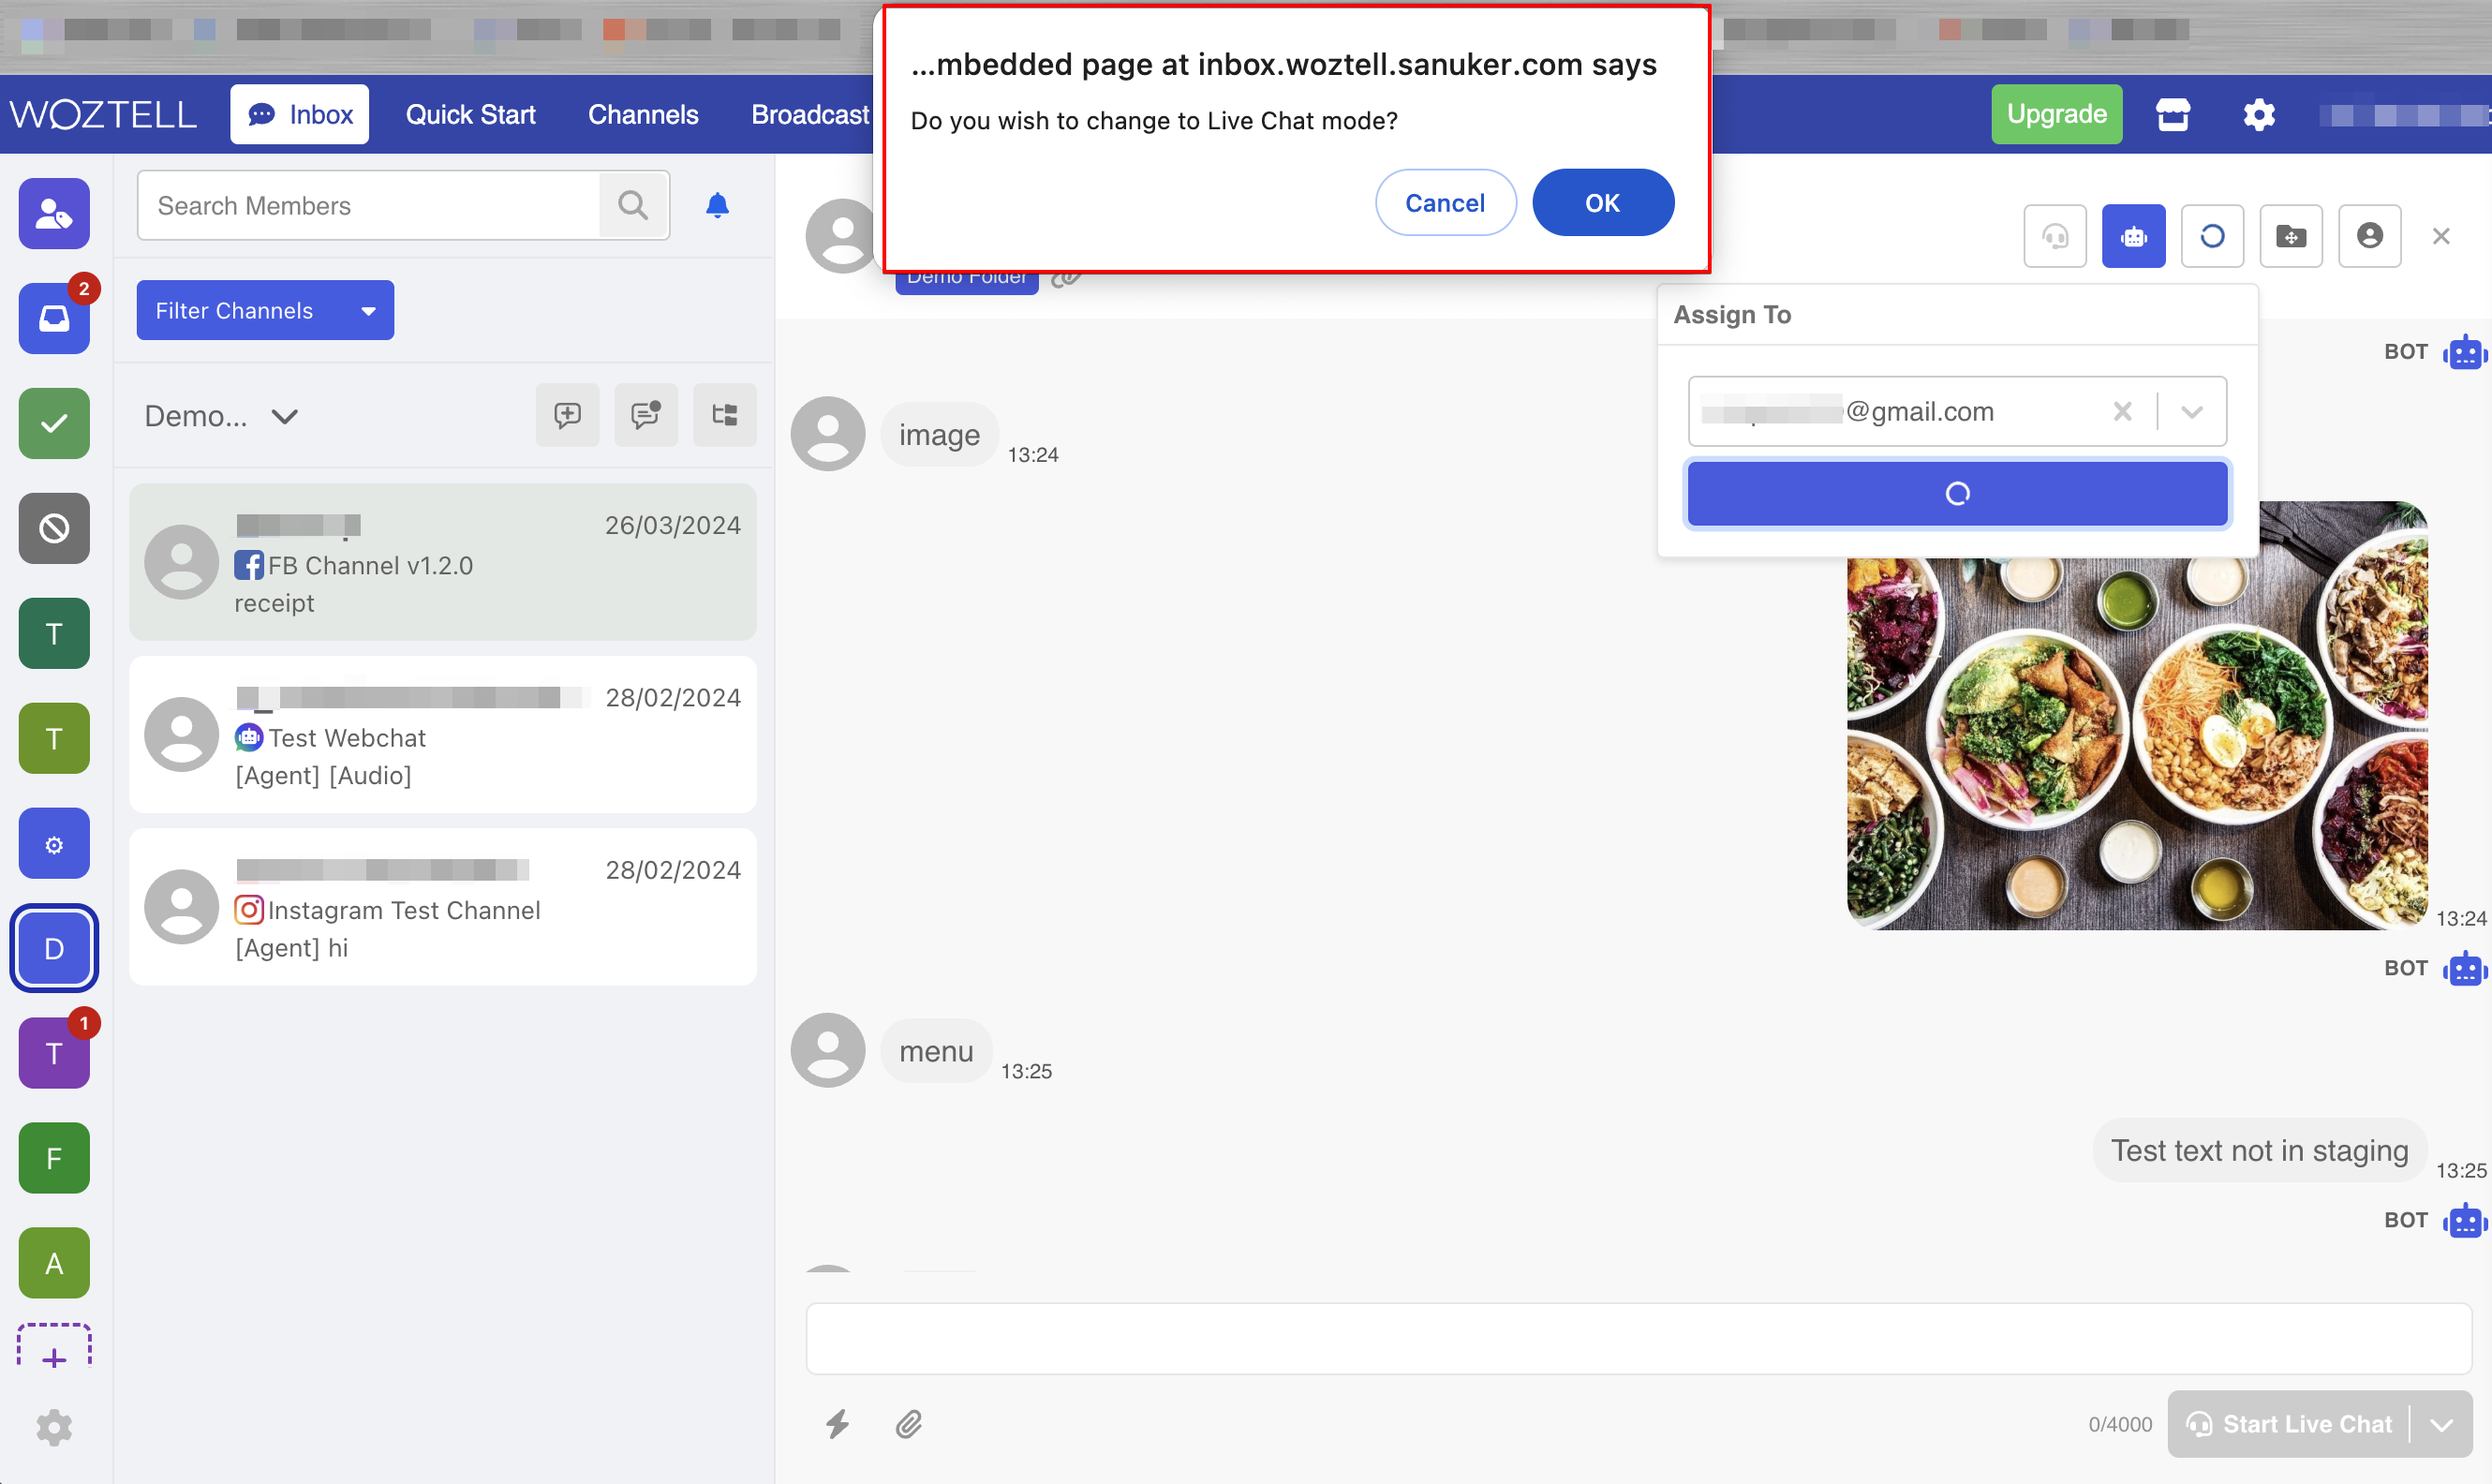
- After that, the thread will be moved to "Follow-up", which is exclusive to each agent. The live chat mode will be on if you agree to switch it on as well.
Reminder
Please note that "Follow-up" is NOT an actual folder. The assigned thread is still stored in a folder, which can be viewed by other agents as well.
- The assigned agents can be unassigned by cancelling the "Assign to".

- If you unassign an agent while the live chat mode is on, a pop-up will be displayed ask if you would like to switch on the chatbot chat mode as well.
- Alternatively, you can assign a thread to an agent using the "Change Thread Agent" action to perform the same task in the chatbot.

Move to Another Folder
- Threads can be moved across different folders. To do so, select "Move to".
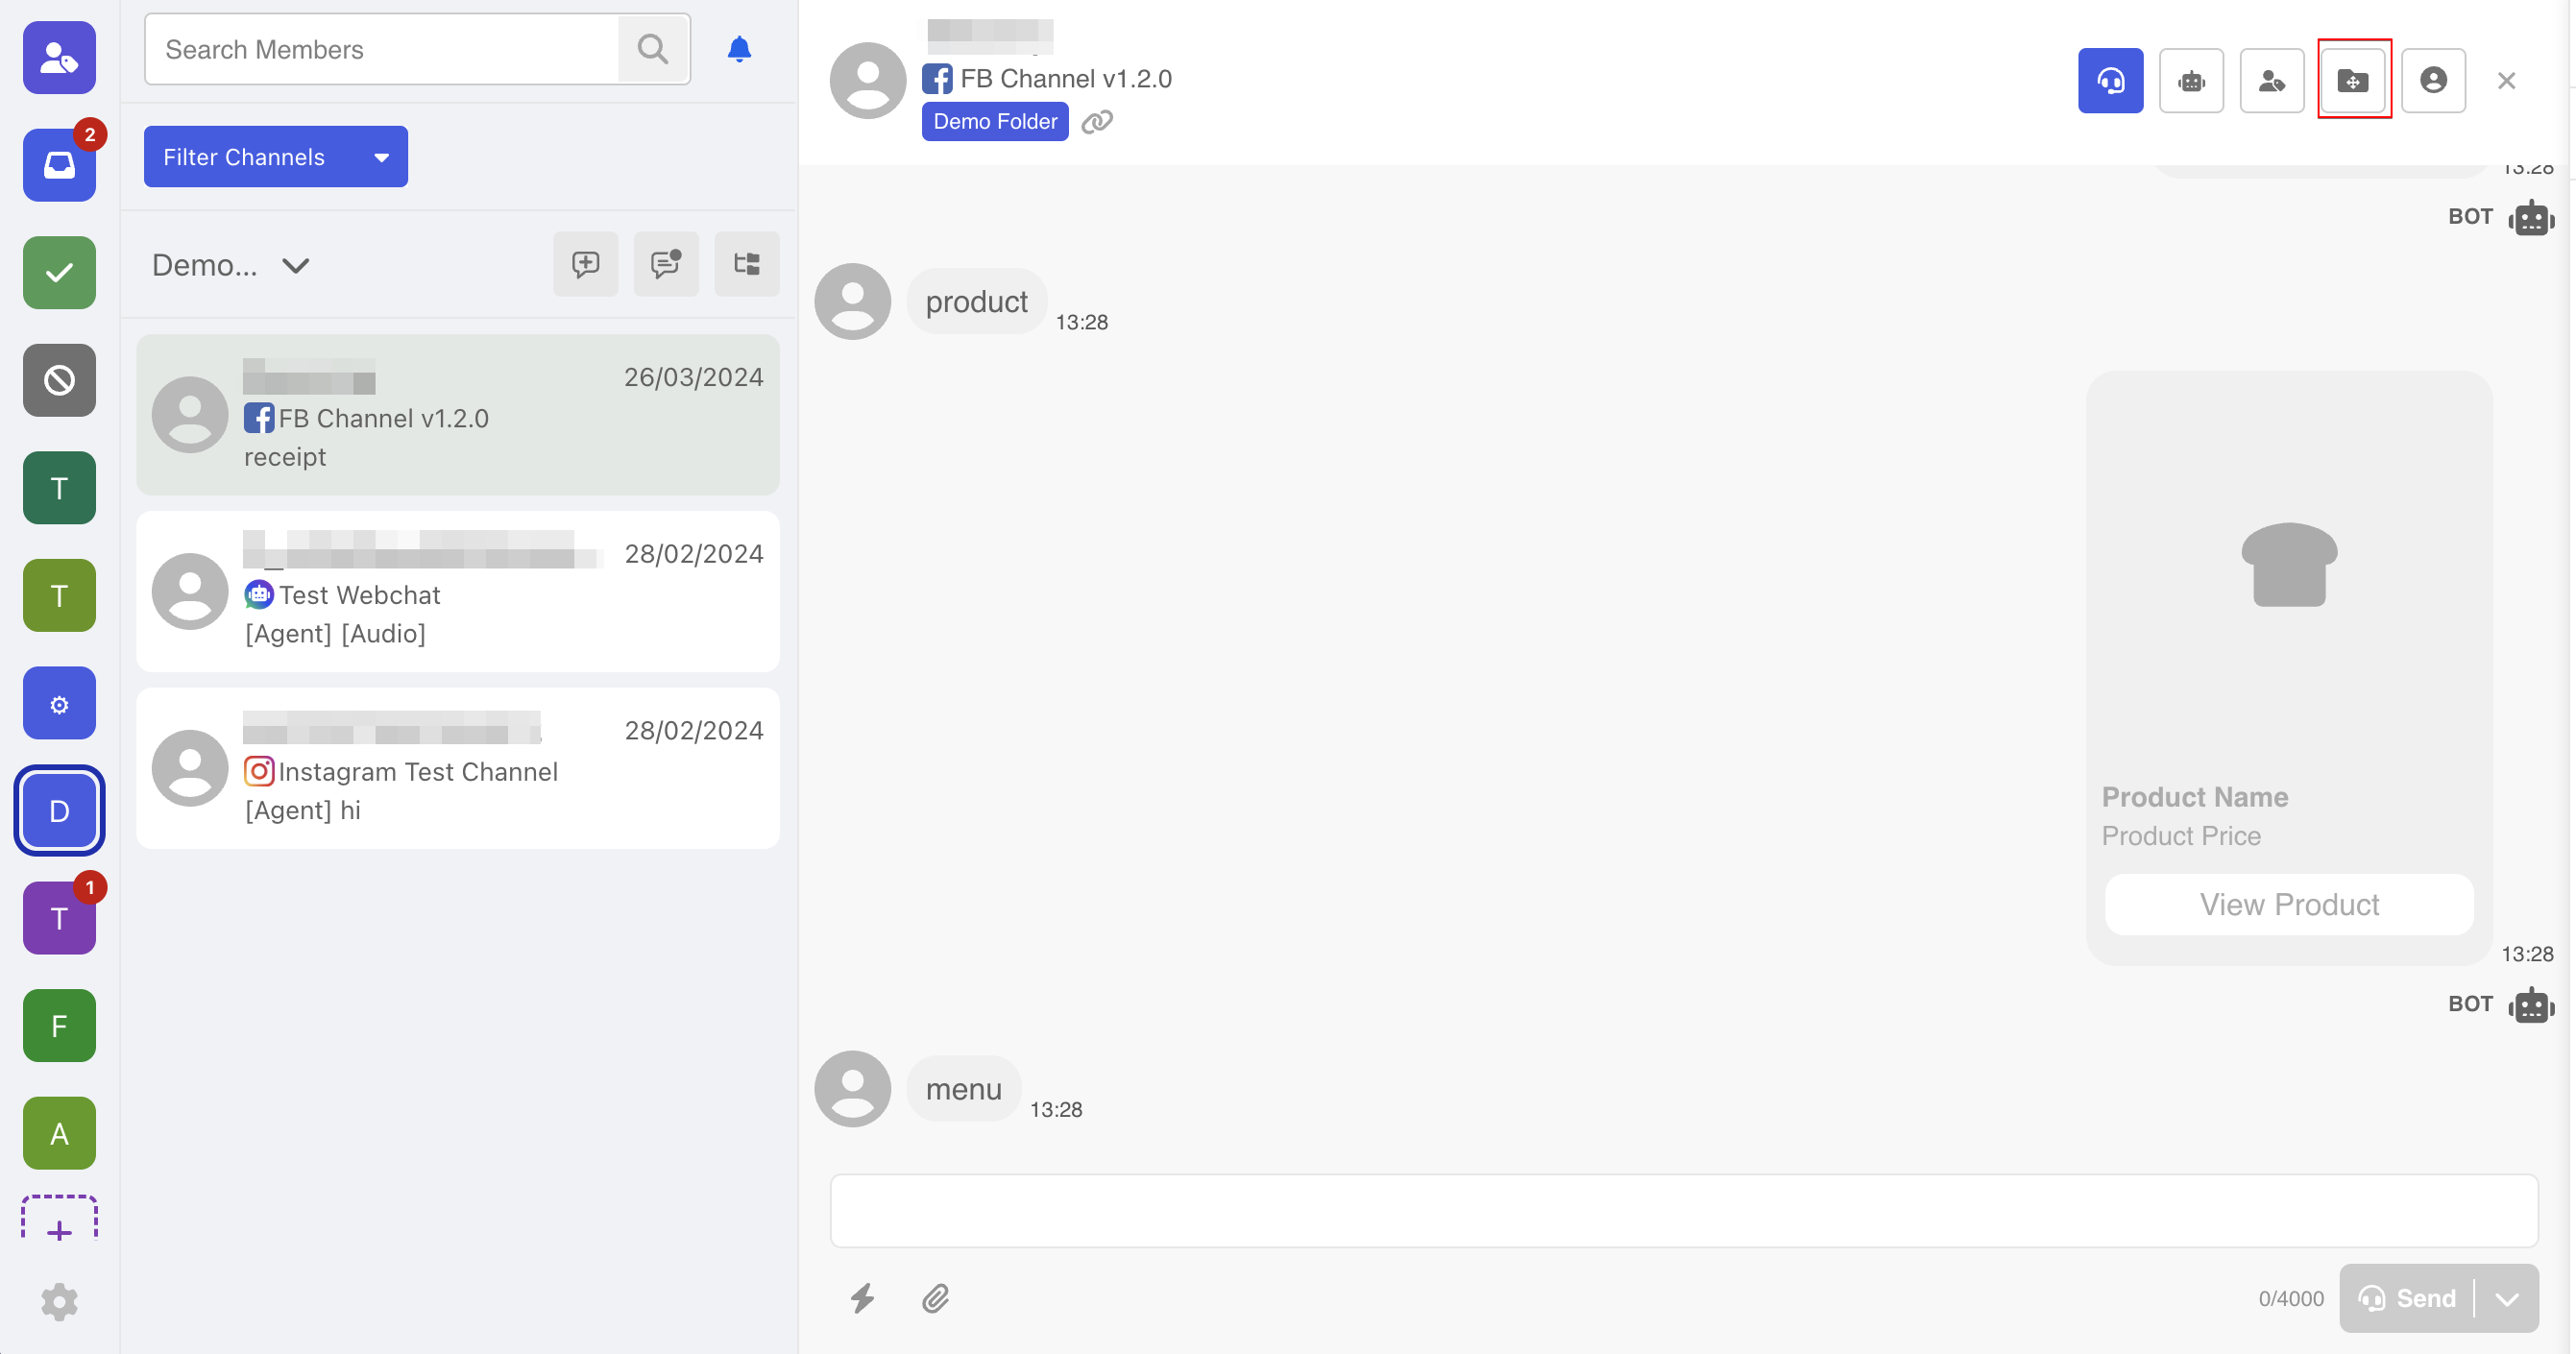
- Select a folder as the destination, then click "Confirm".

- Now the thread is transferred to another folder.
REMINDER
When a thread is transferred to another folder, a event will be sent to the channel, which will be useful for triggering relevant actions with the chatbot.
{
  "channelId": "646327315430a1f98231dfde",
  "appId": "631802d69a73fc555f1c6bc4",
  "externalId": "85254063598",
  "messageEvent": {
    "type": "MOVE_THREAD_FOLDER",
    "data": {
      "from": "main",
      "to": "done"
    }
  }
}
Move Multiple Threads
- To select and transfer multiple threads all at once, click on "Manage Threads". You can select all the threads in this folder; or manually select several threads.
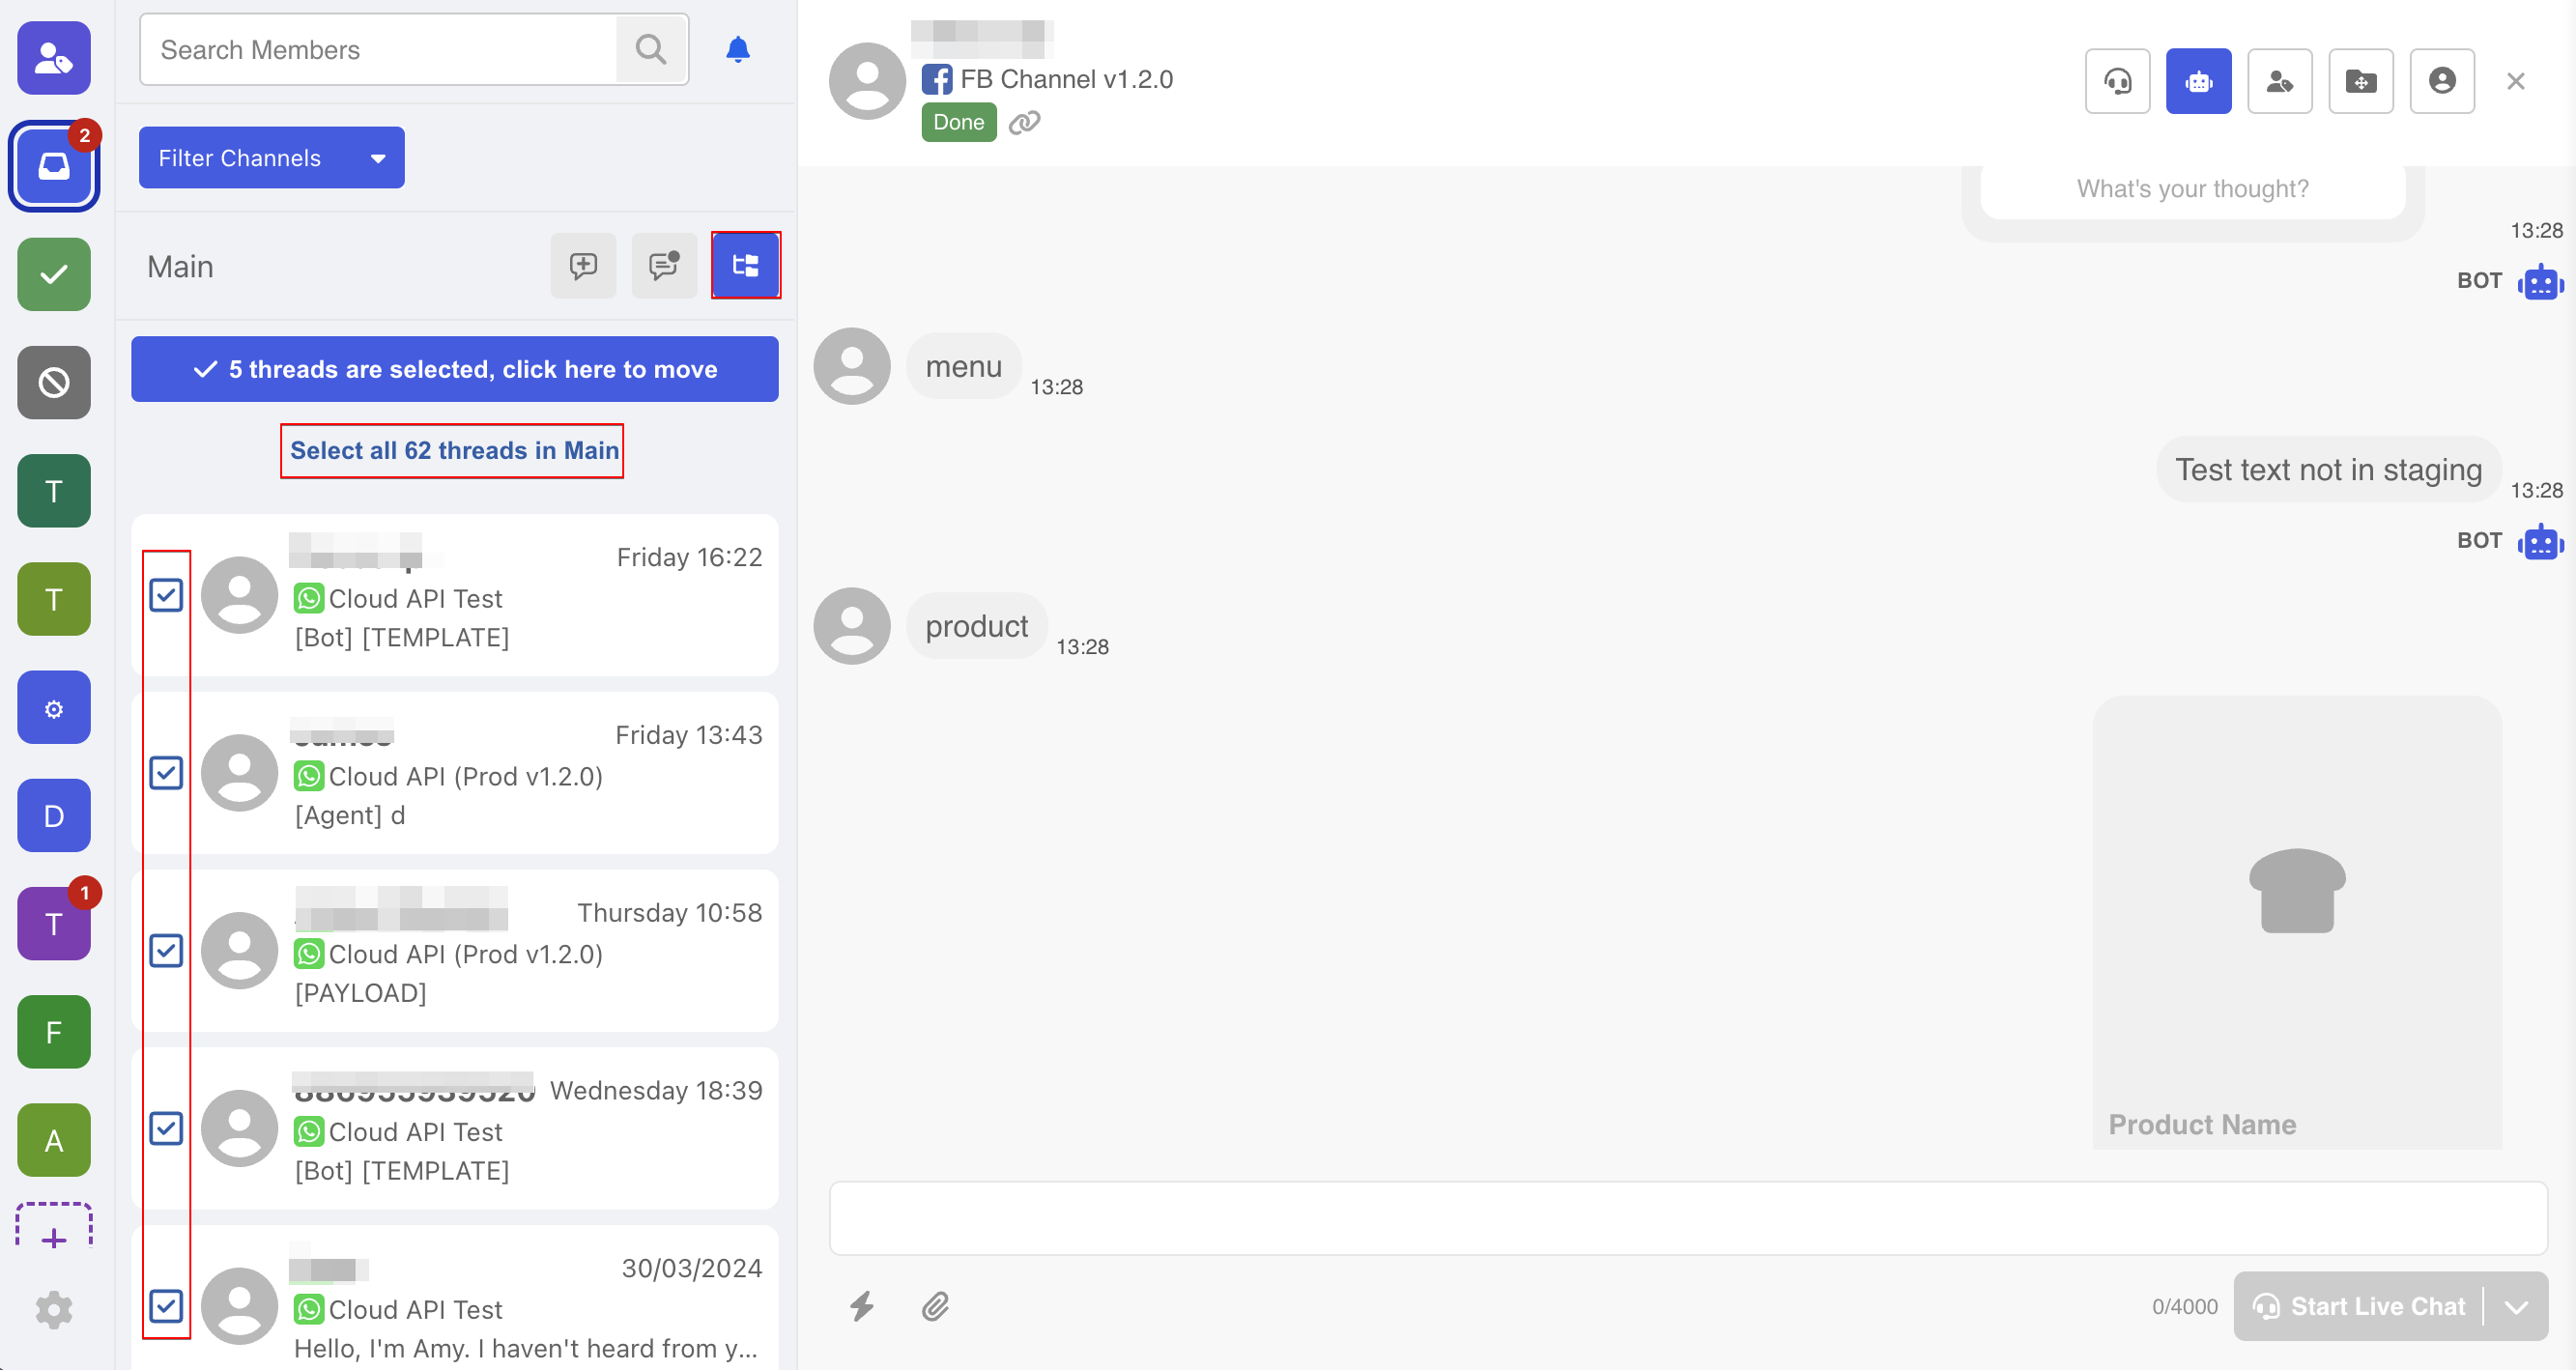
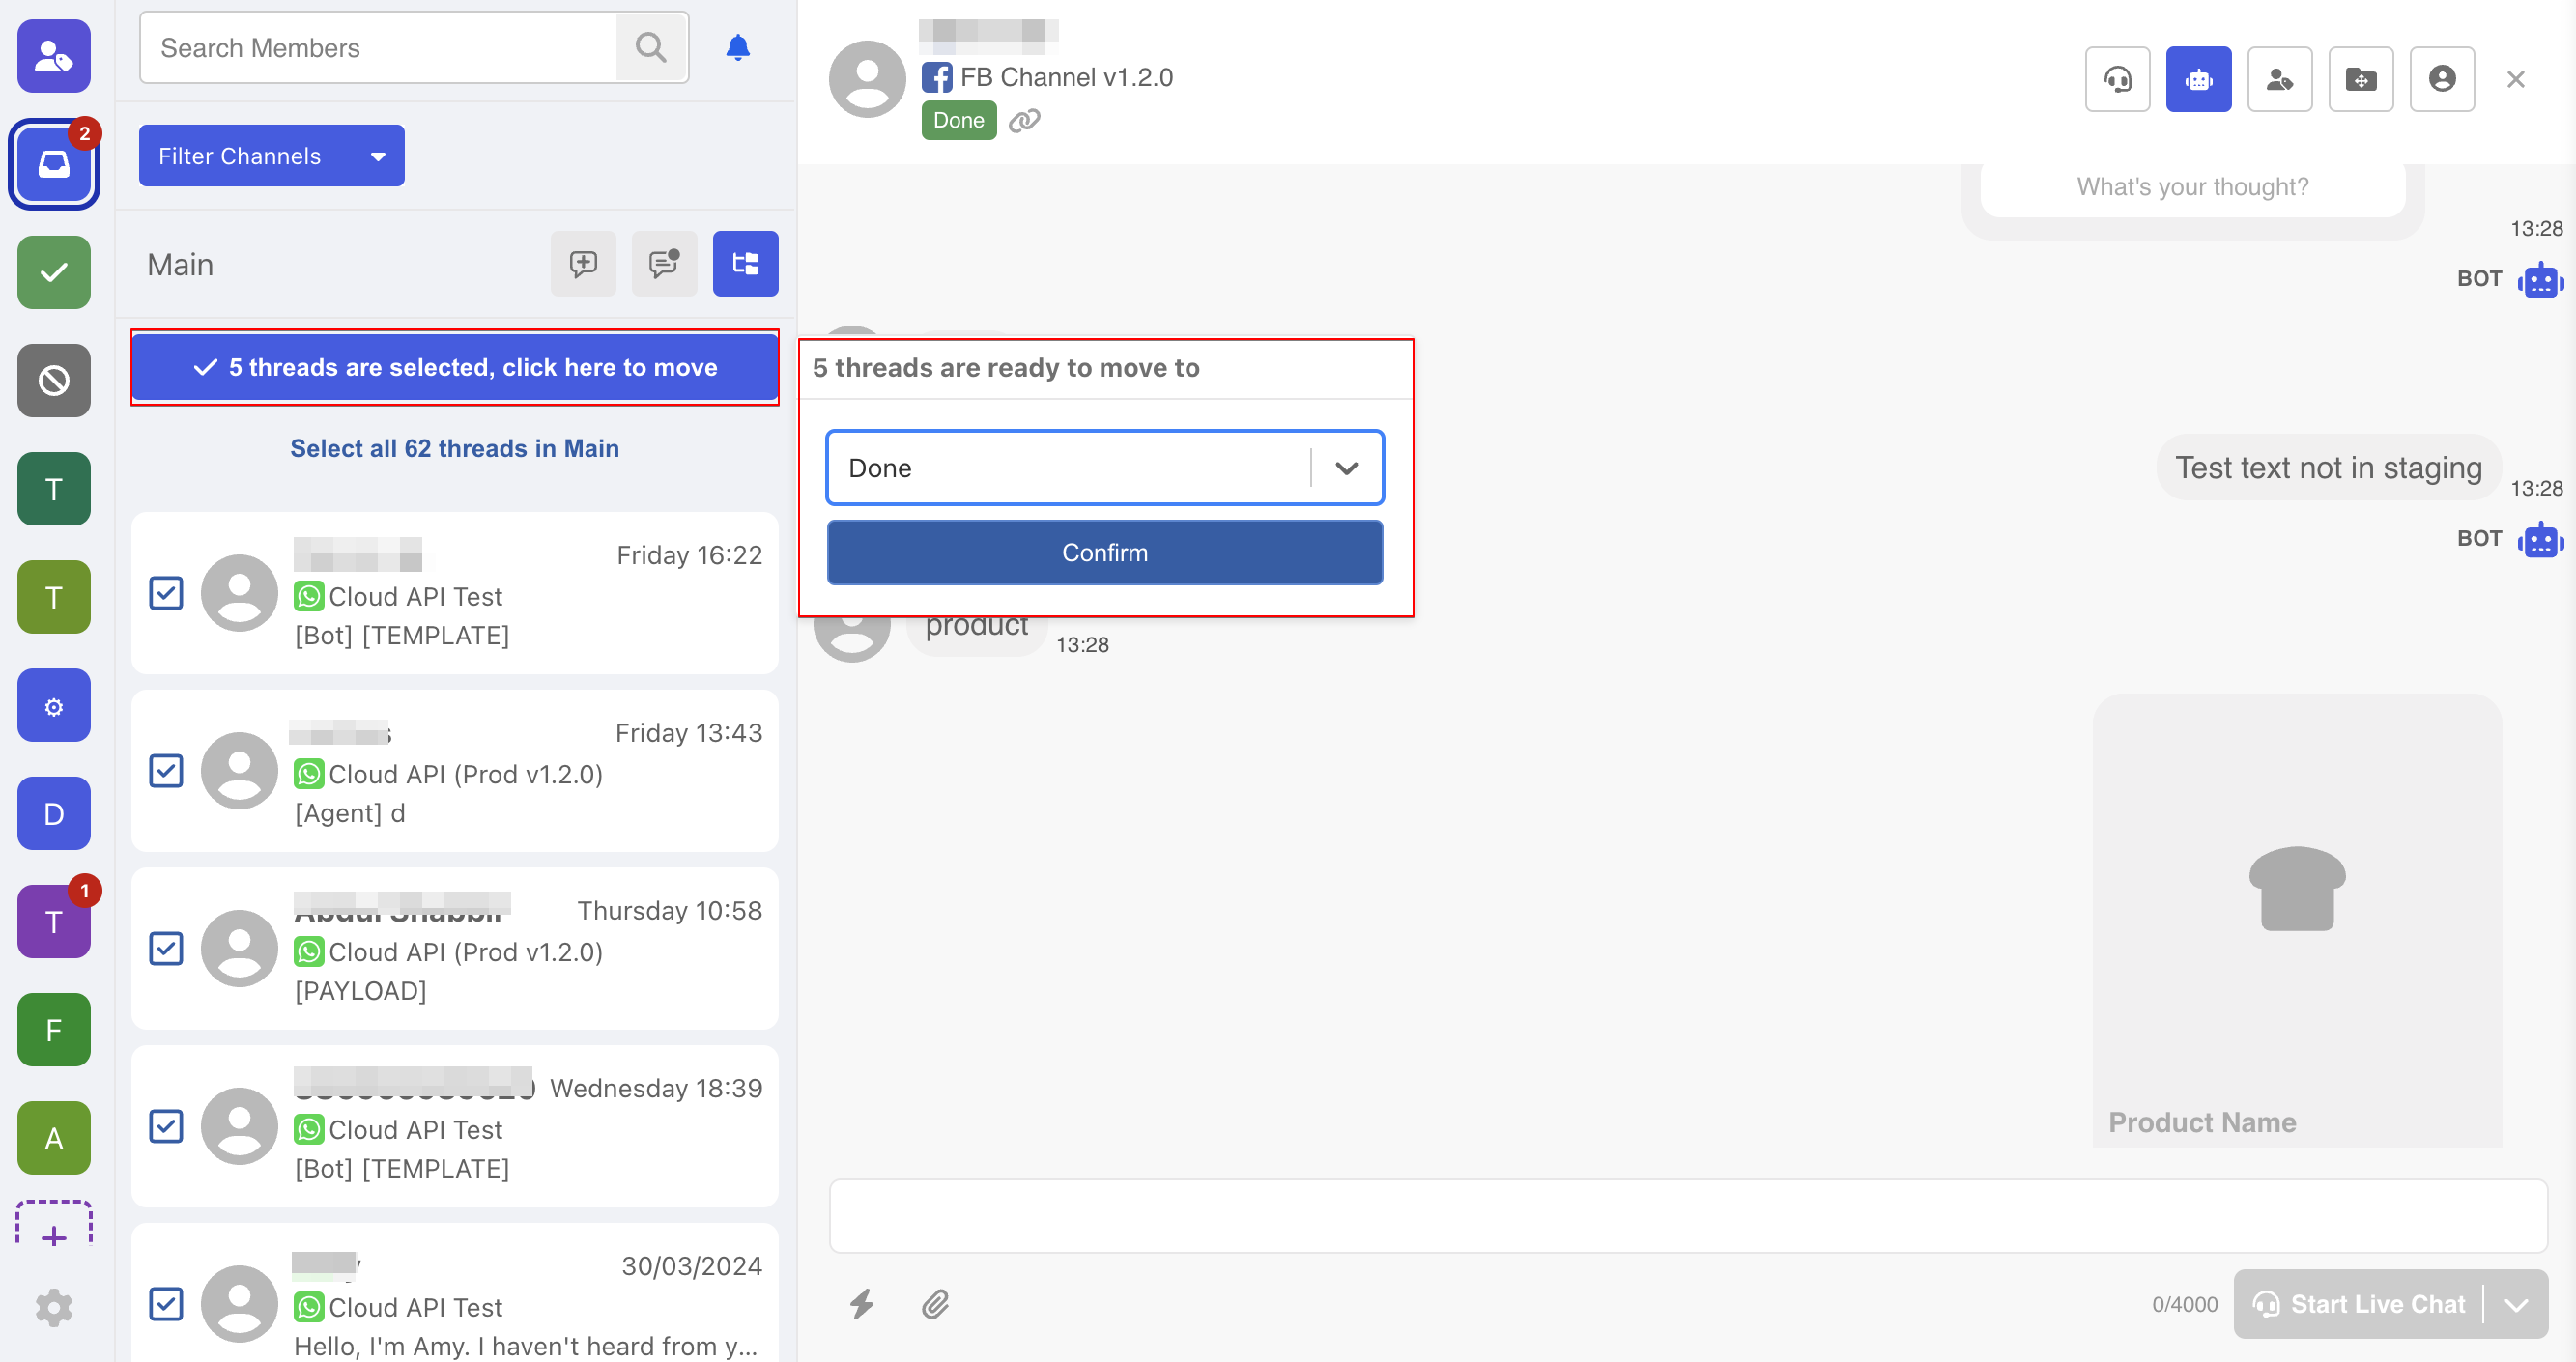
- Click to confirm the number of threads selected. Pick a folder and "Confirm" the transfer.
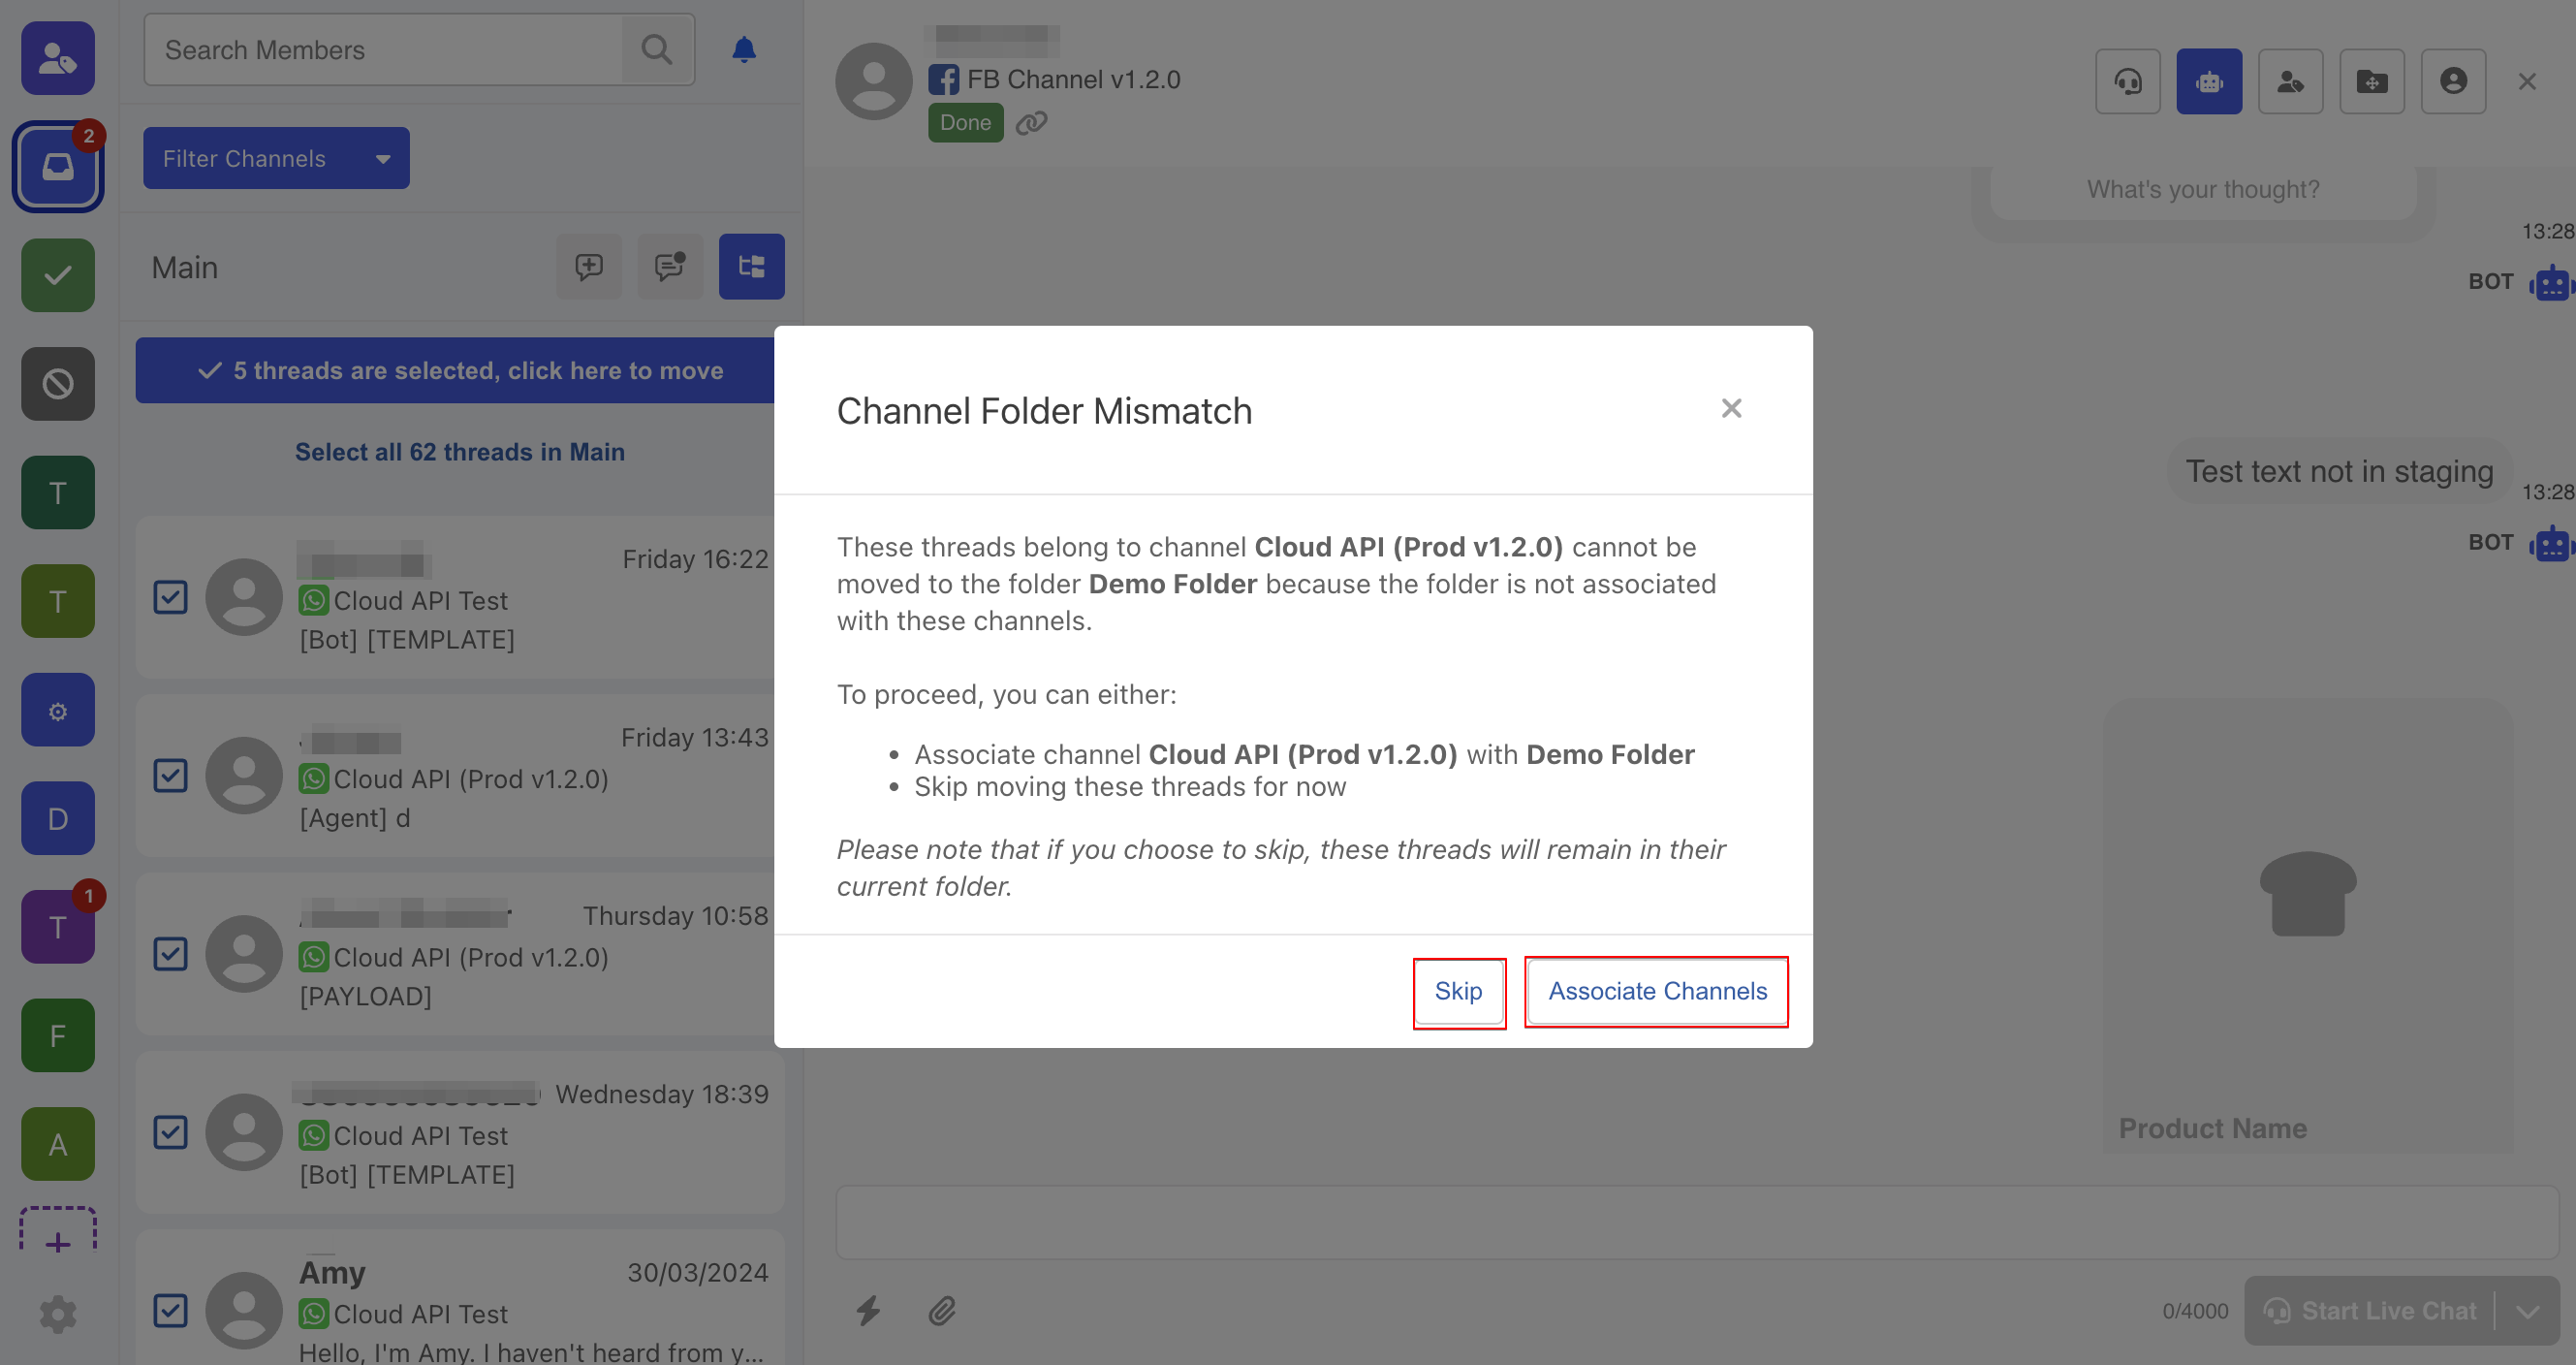
- If the selected threads come from a channel that is not supported in the destination folder, the threads cannot be transferred unless you take one of the following actions:
- Skip the threads with mismatched channels, and proceed the transfer with the rest of the threads.
- Associate the missing channel to the destination folder, so that all the selected folders can be transferred.
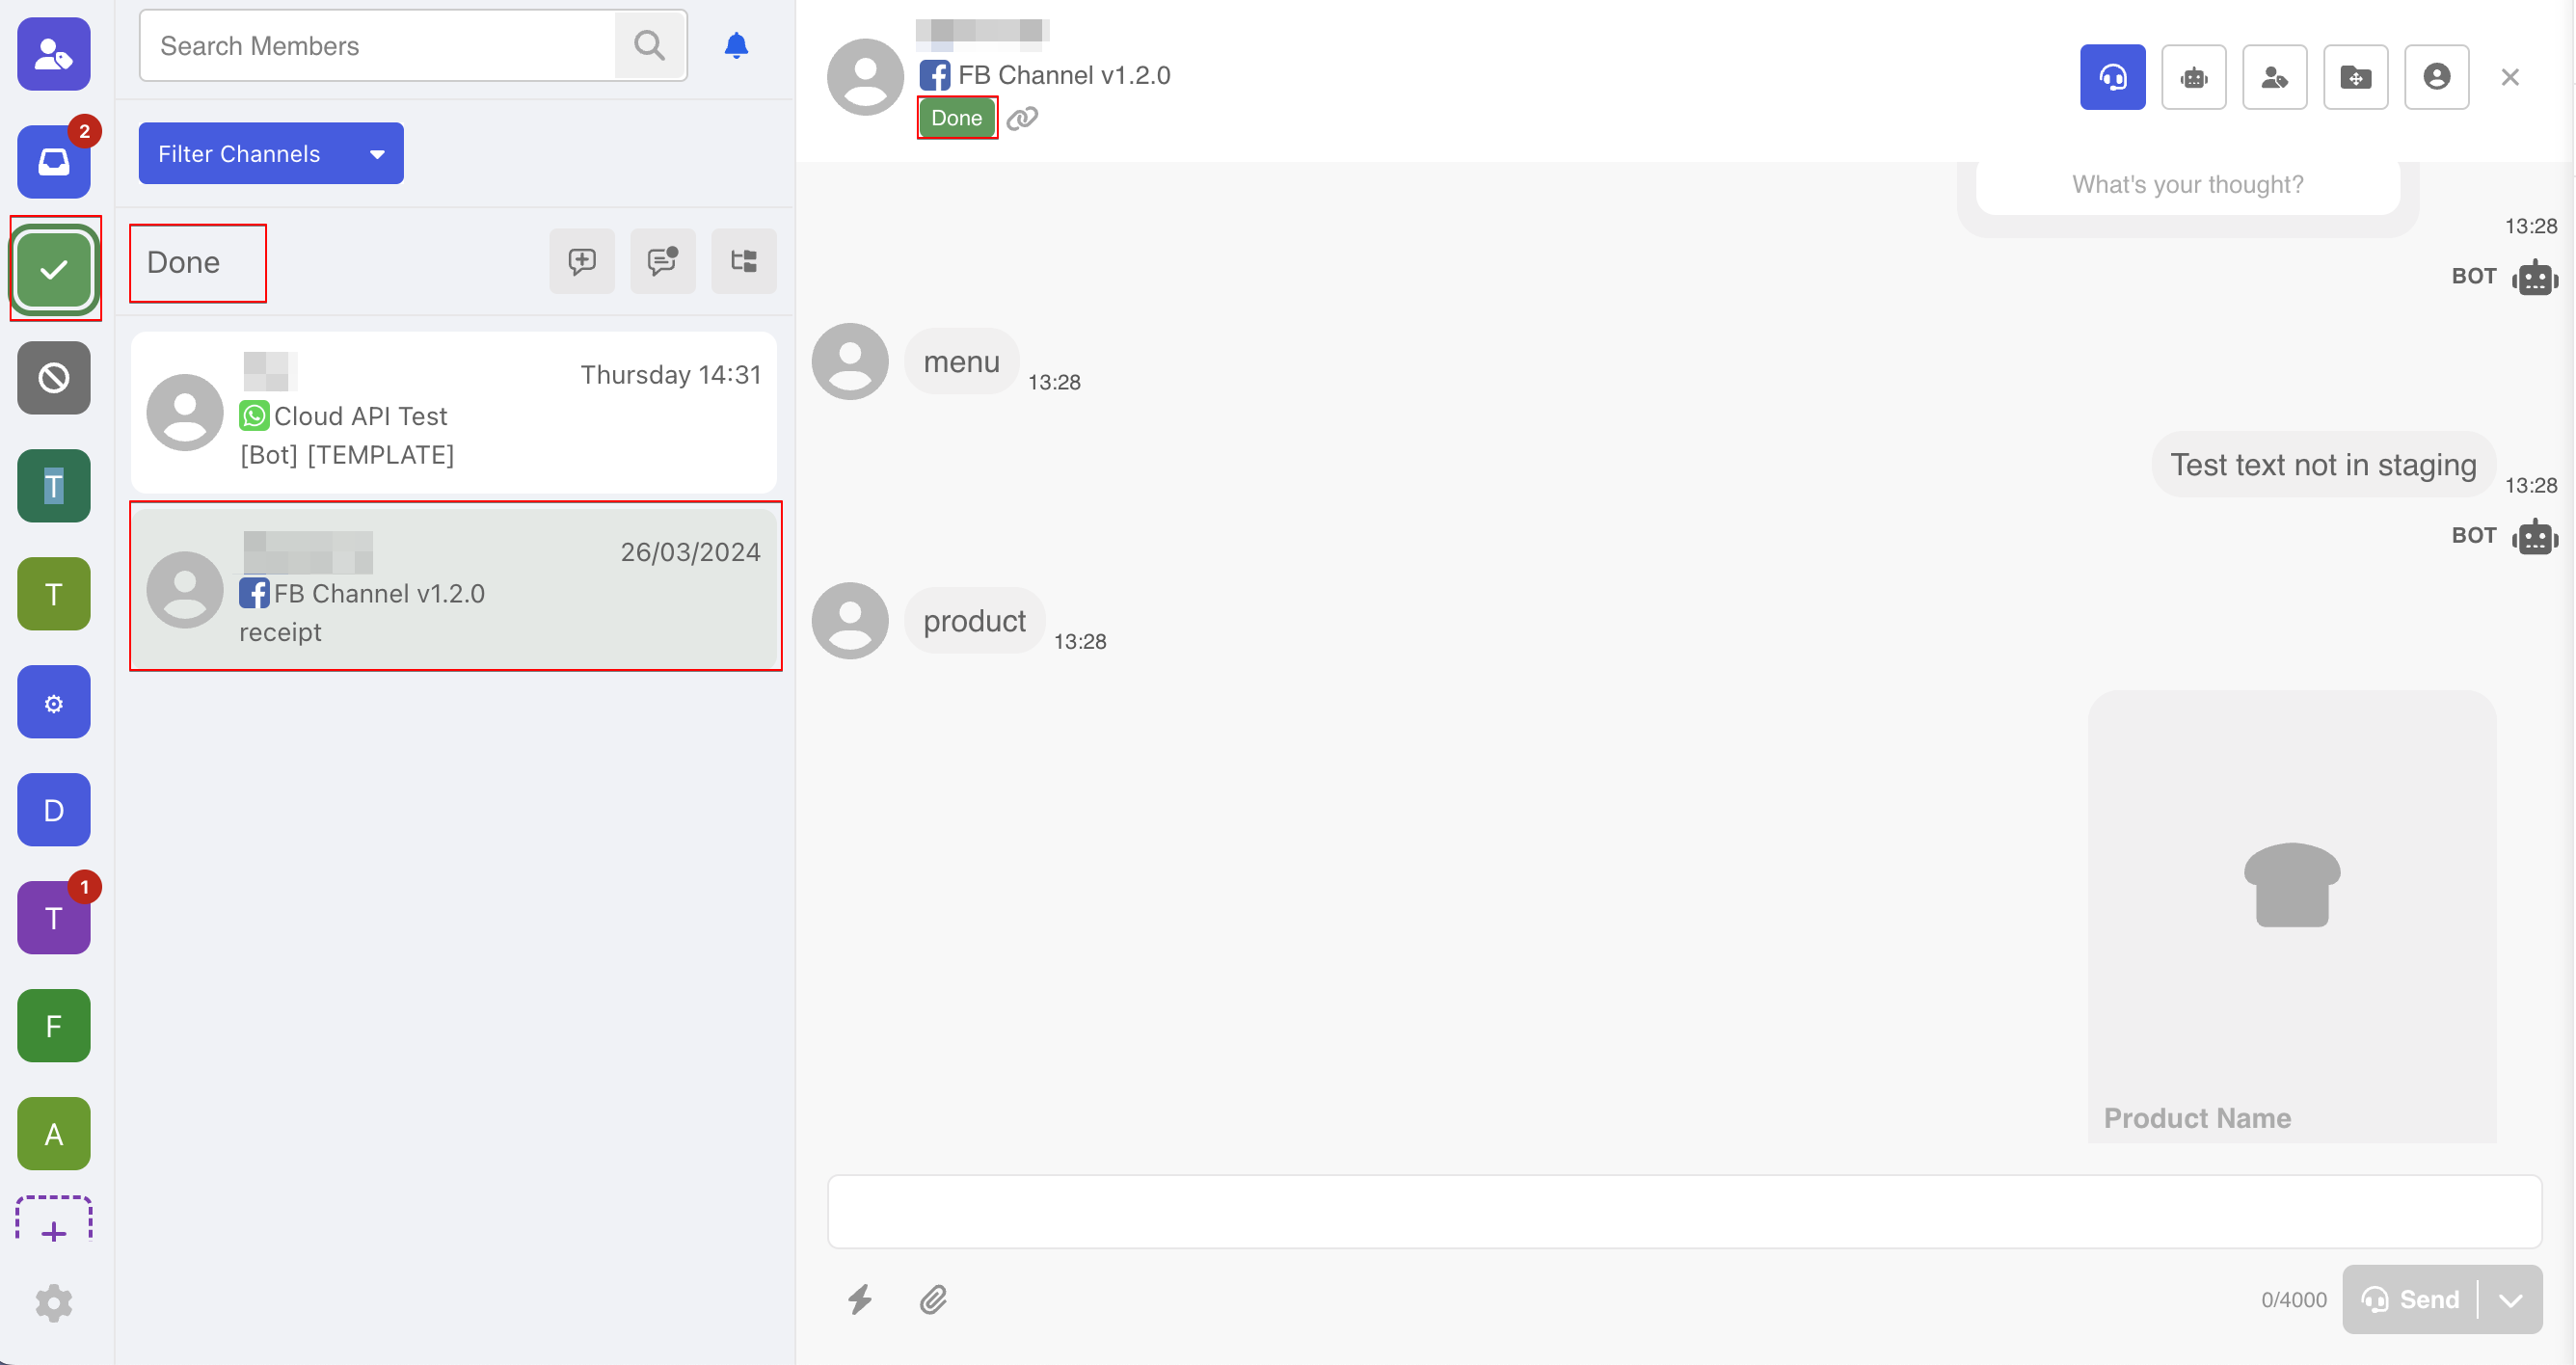
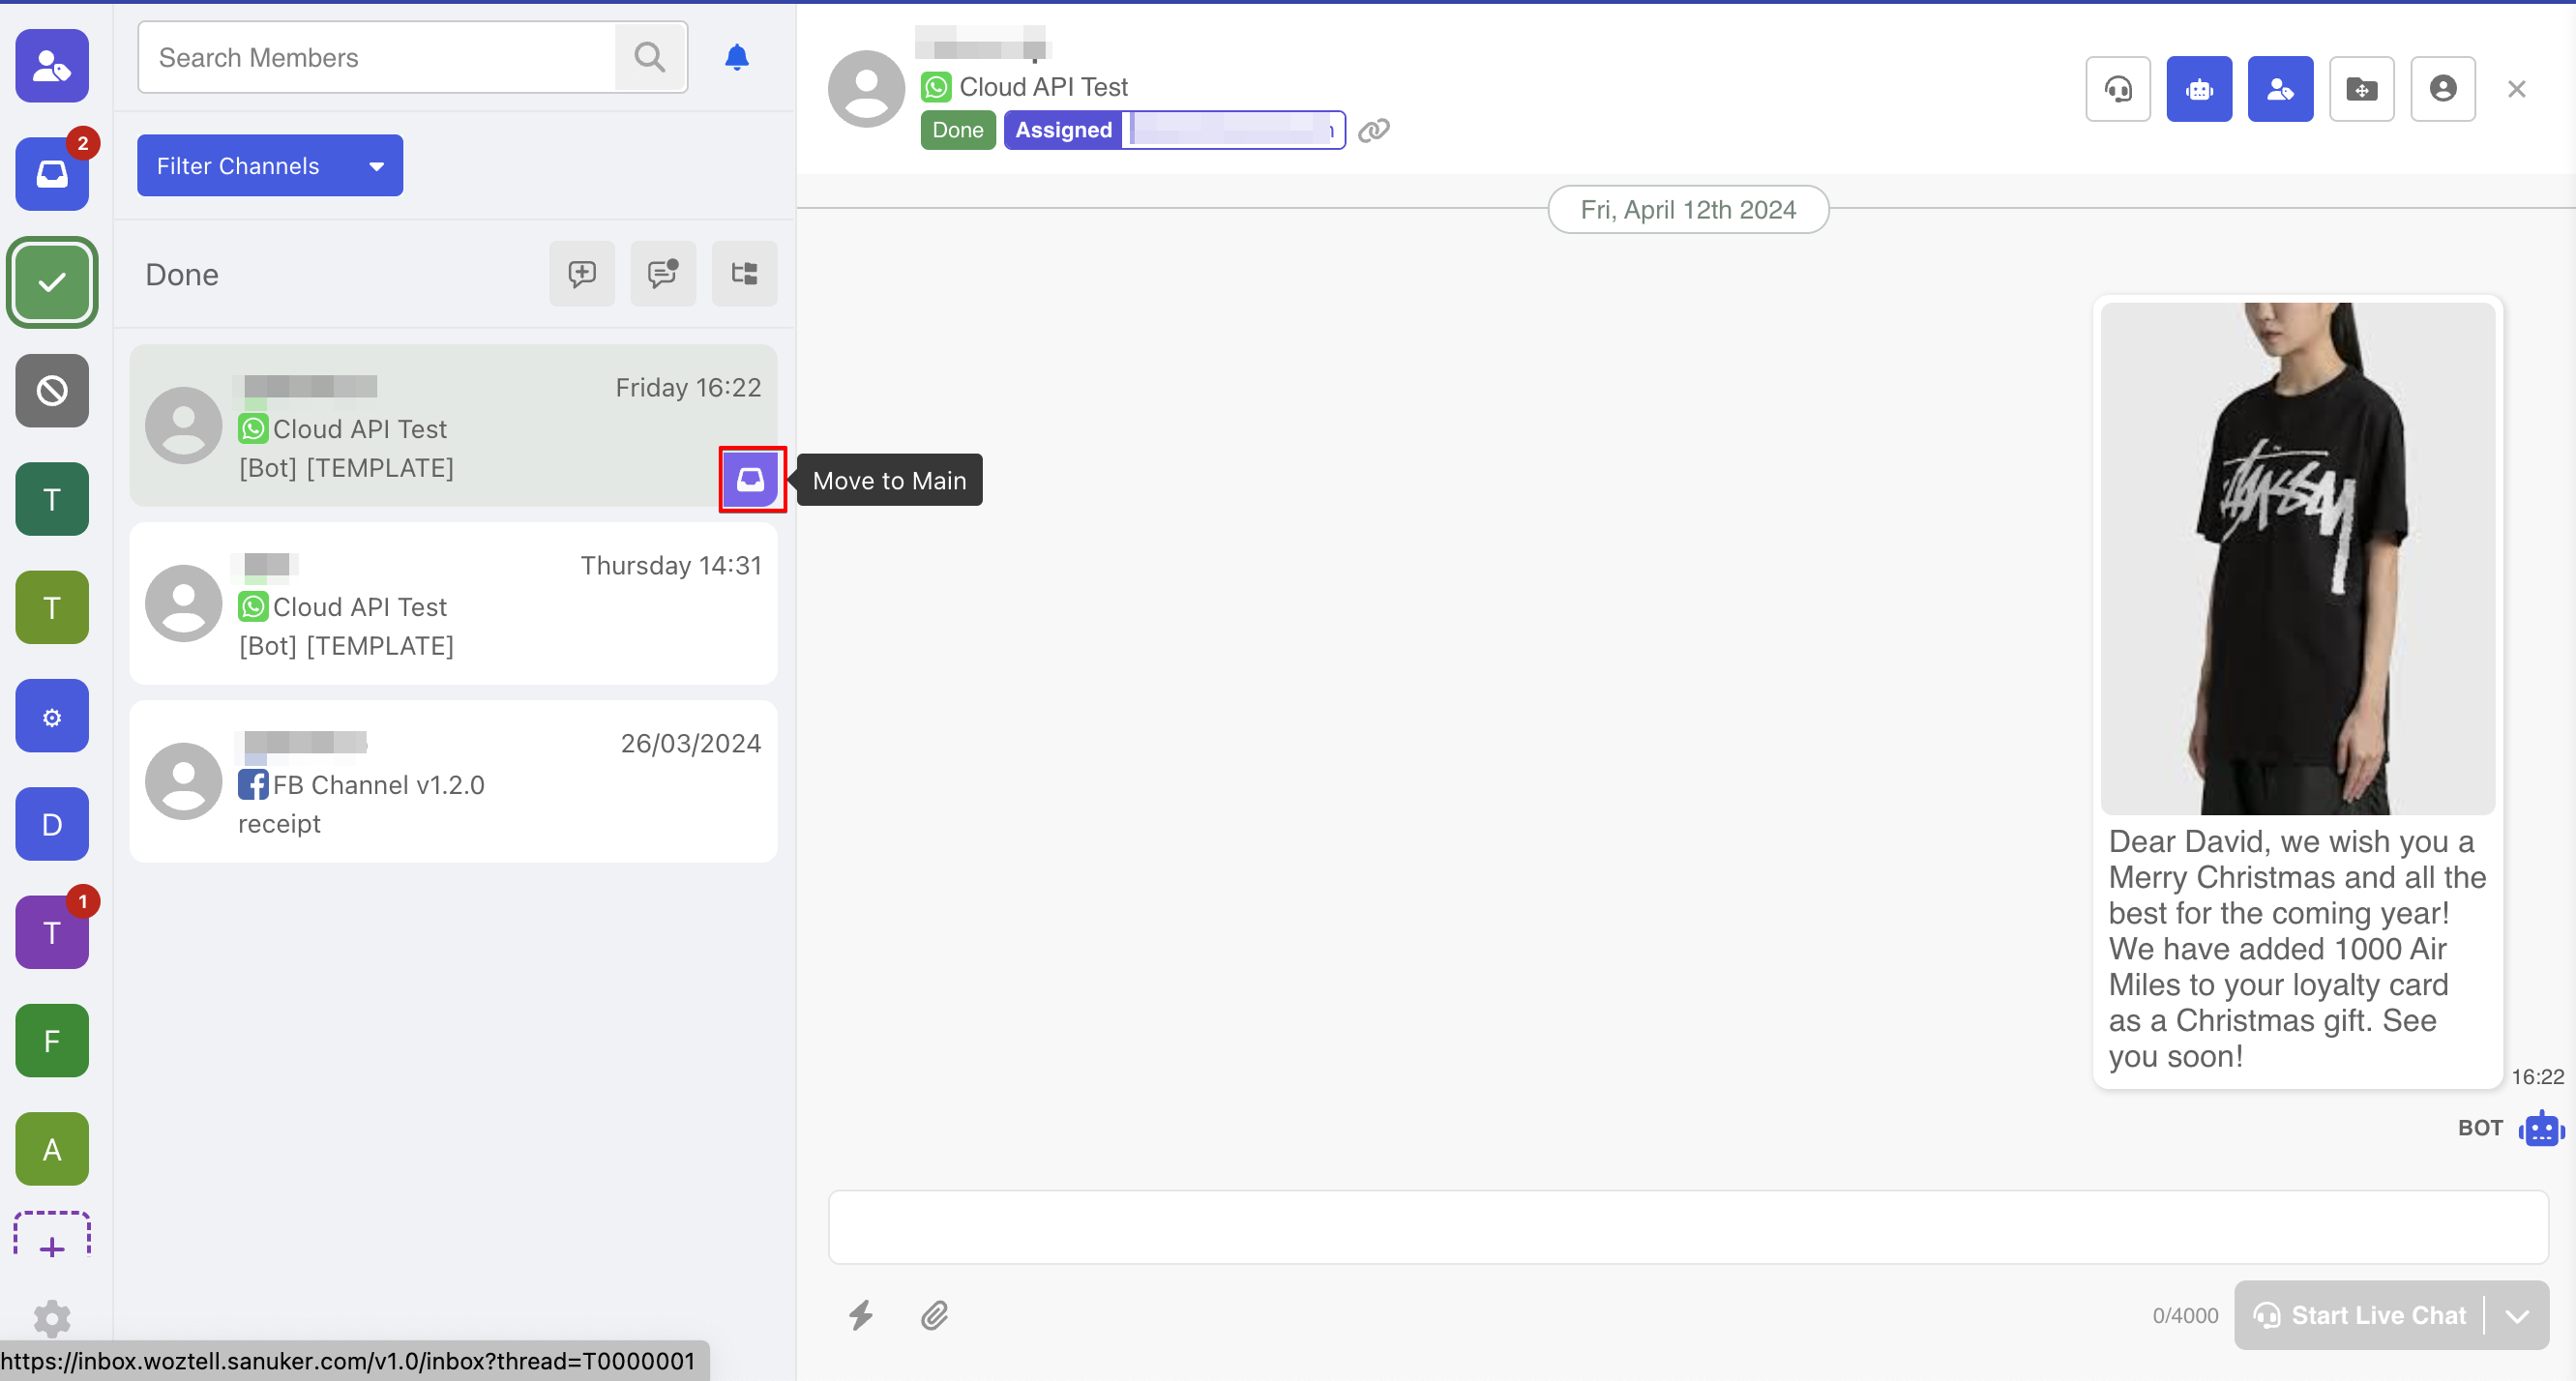
Move to "Done" Folder
The Done Folder is responsible for holding the threads that have been handled. As one of most common action for the each agent, you can make use the "Move to Done" shortcut to close a thread.
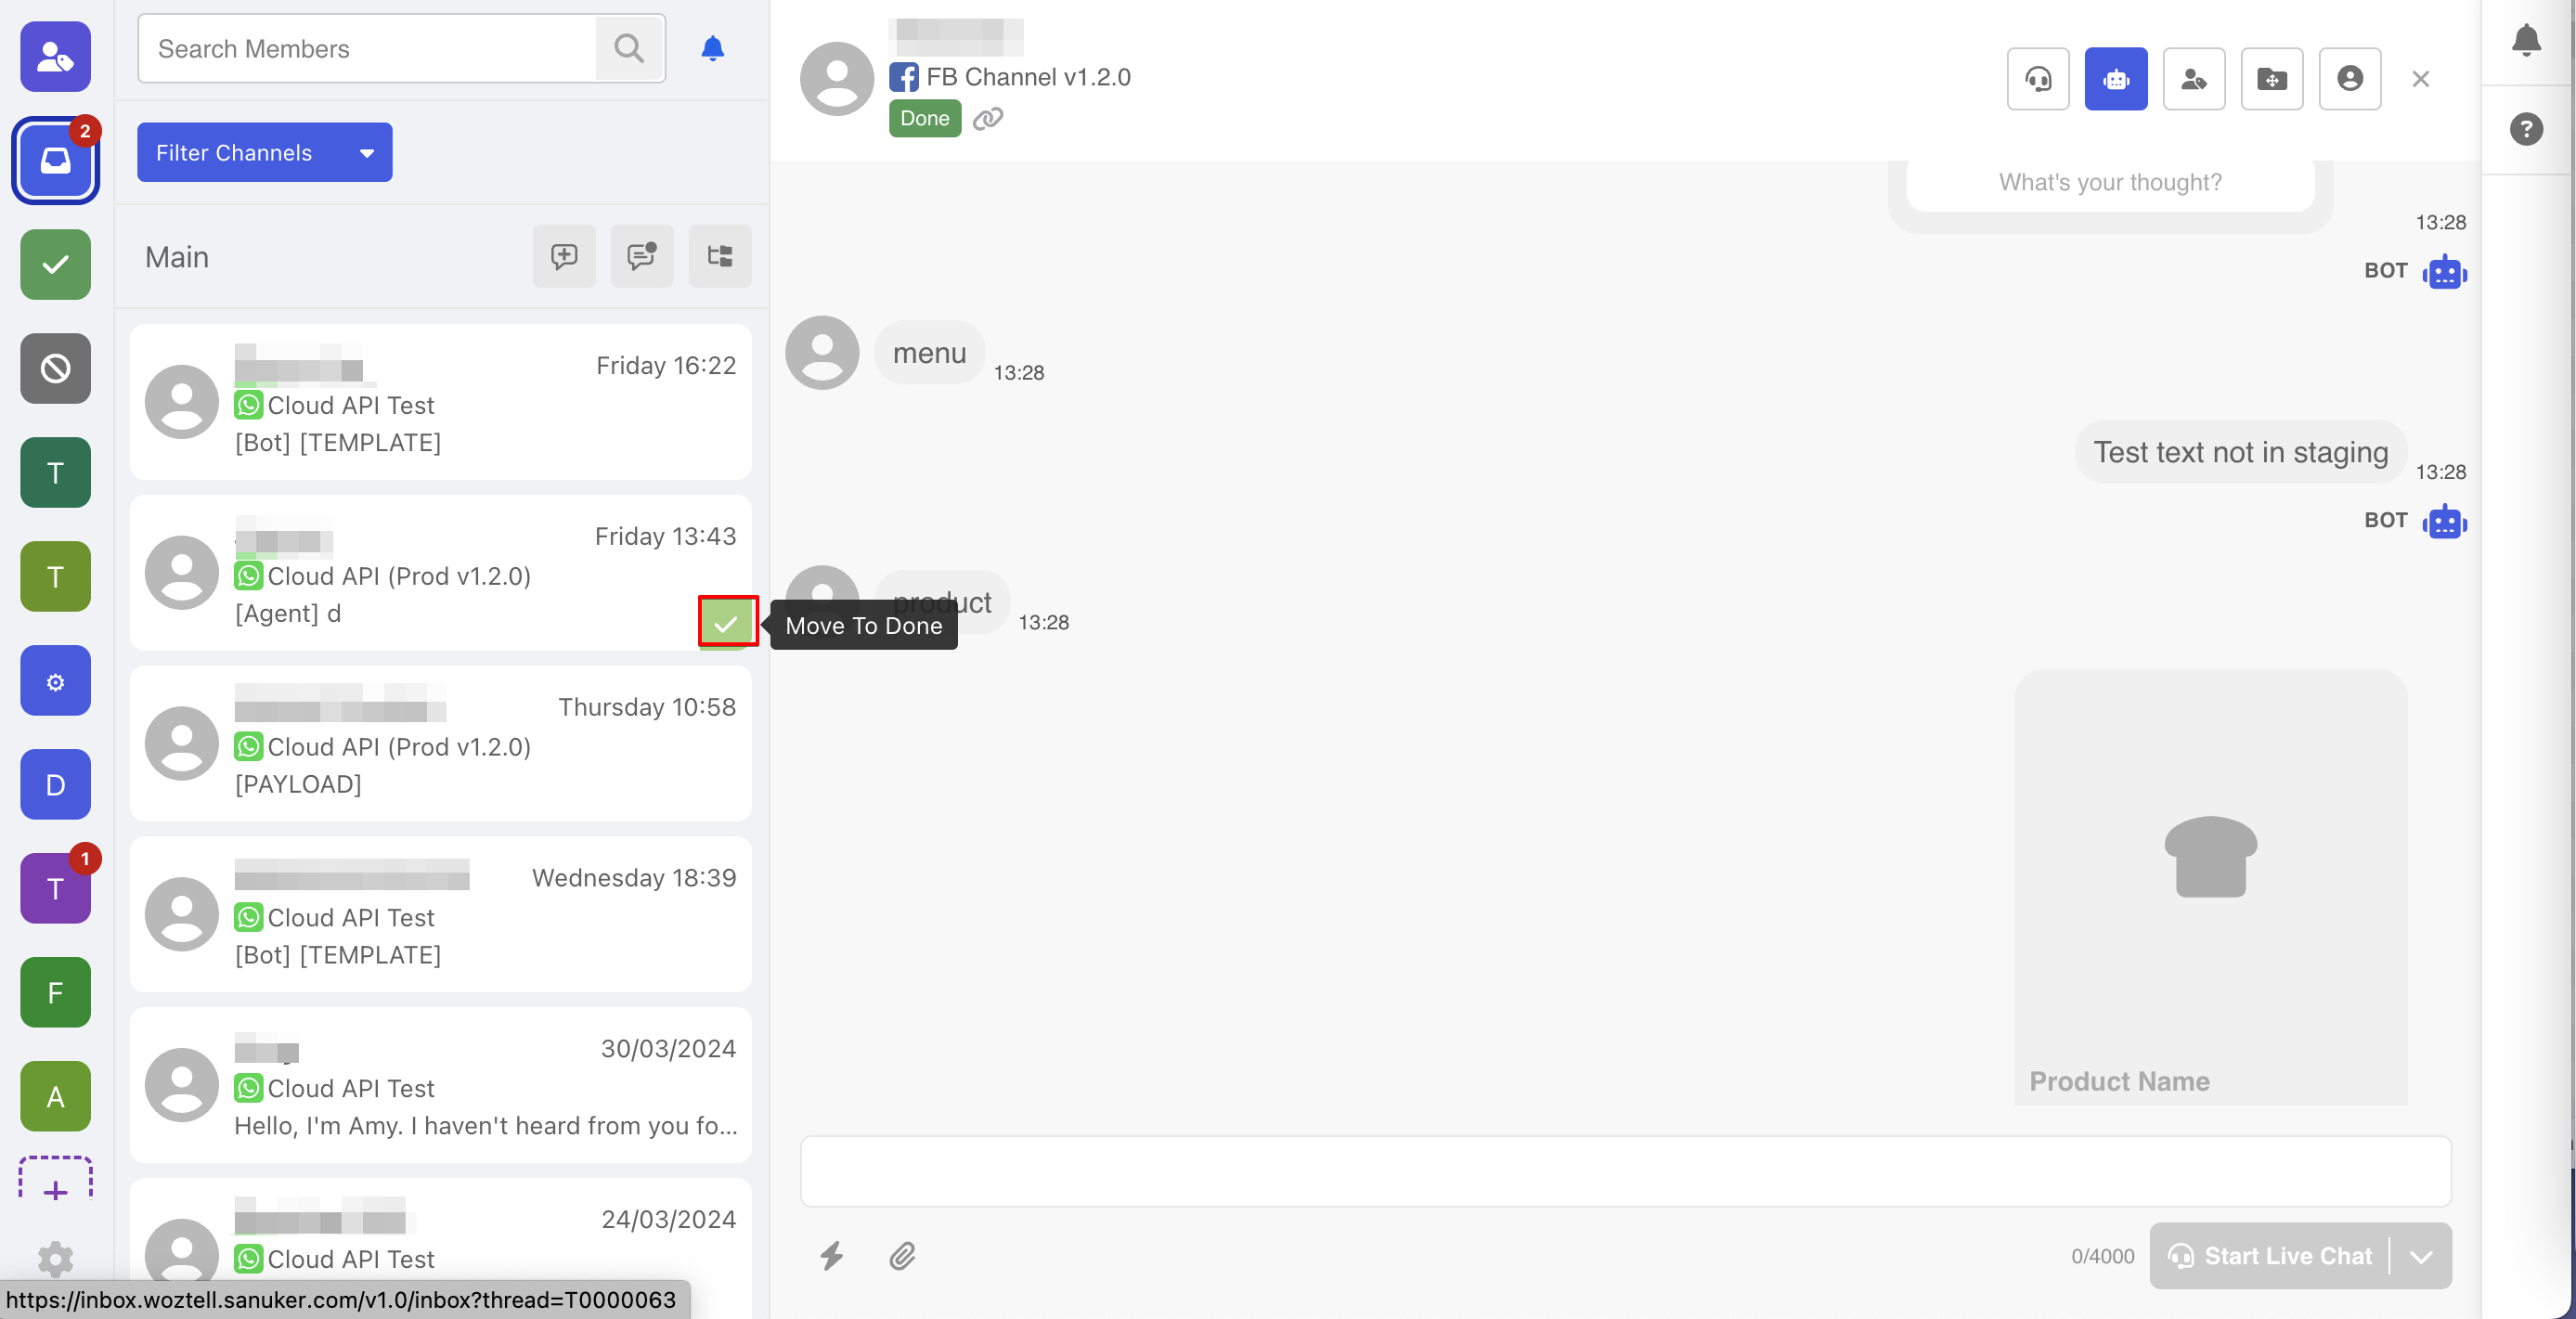
On the other hand, you can also use the "Move to Main" shortcut inside the Done Folder.
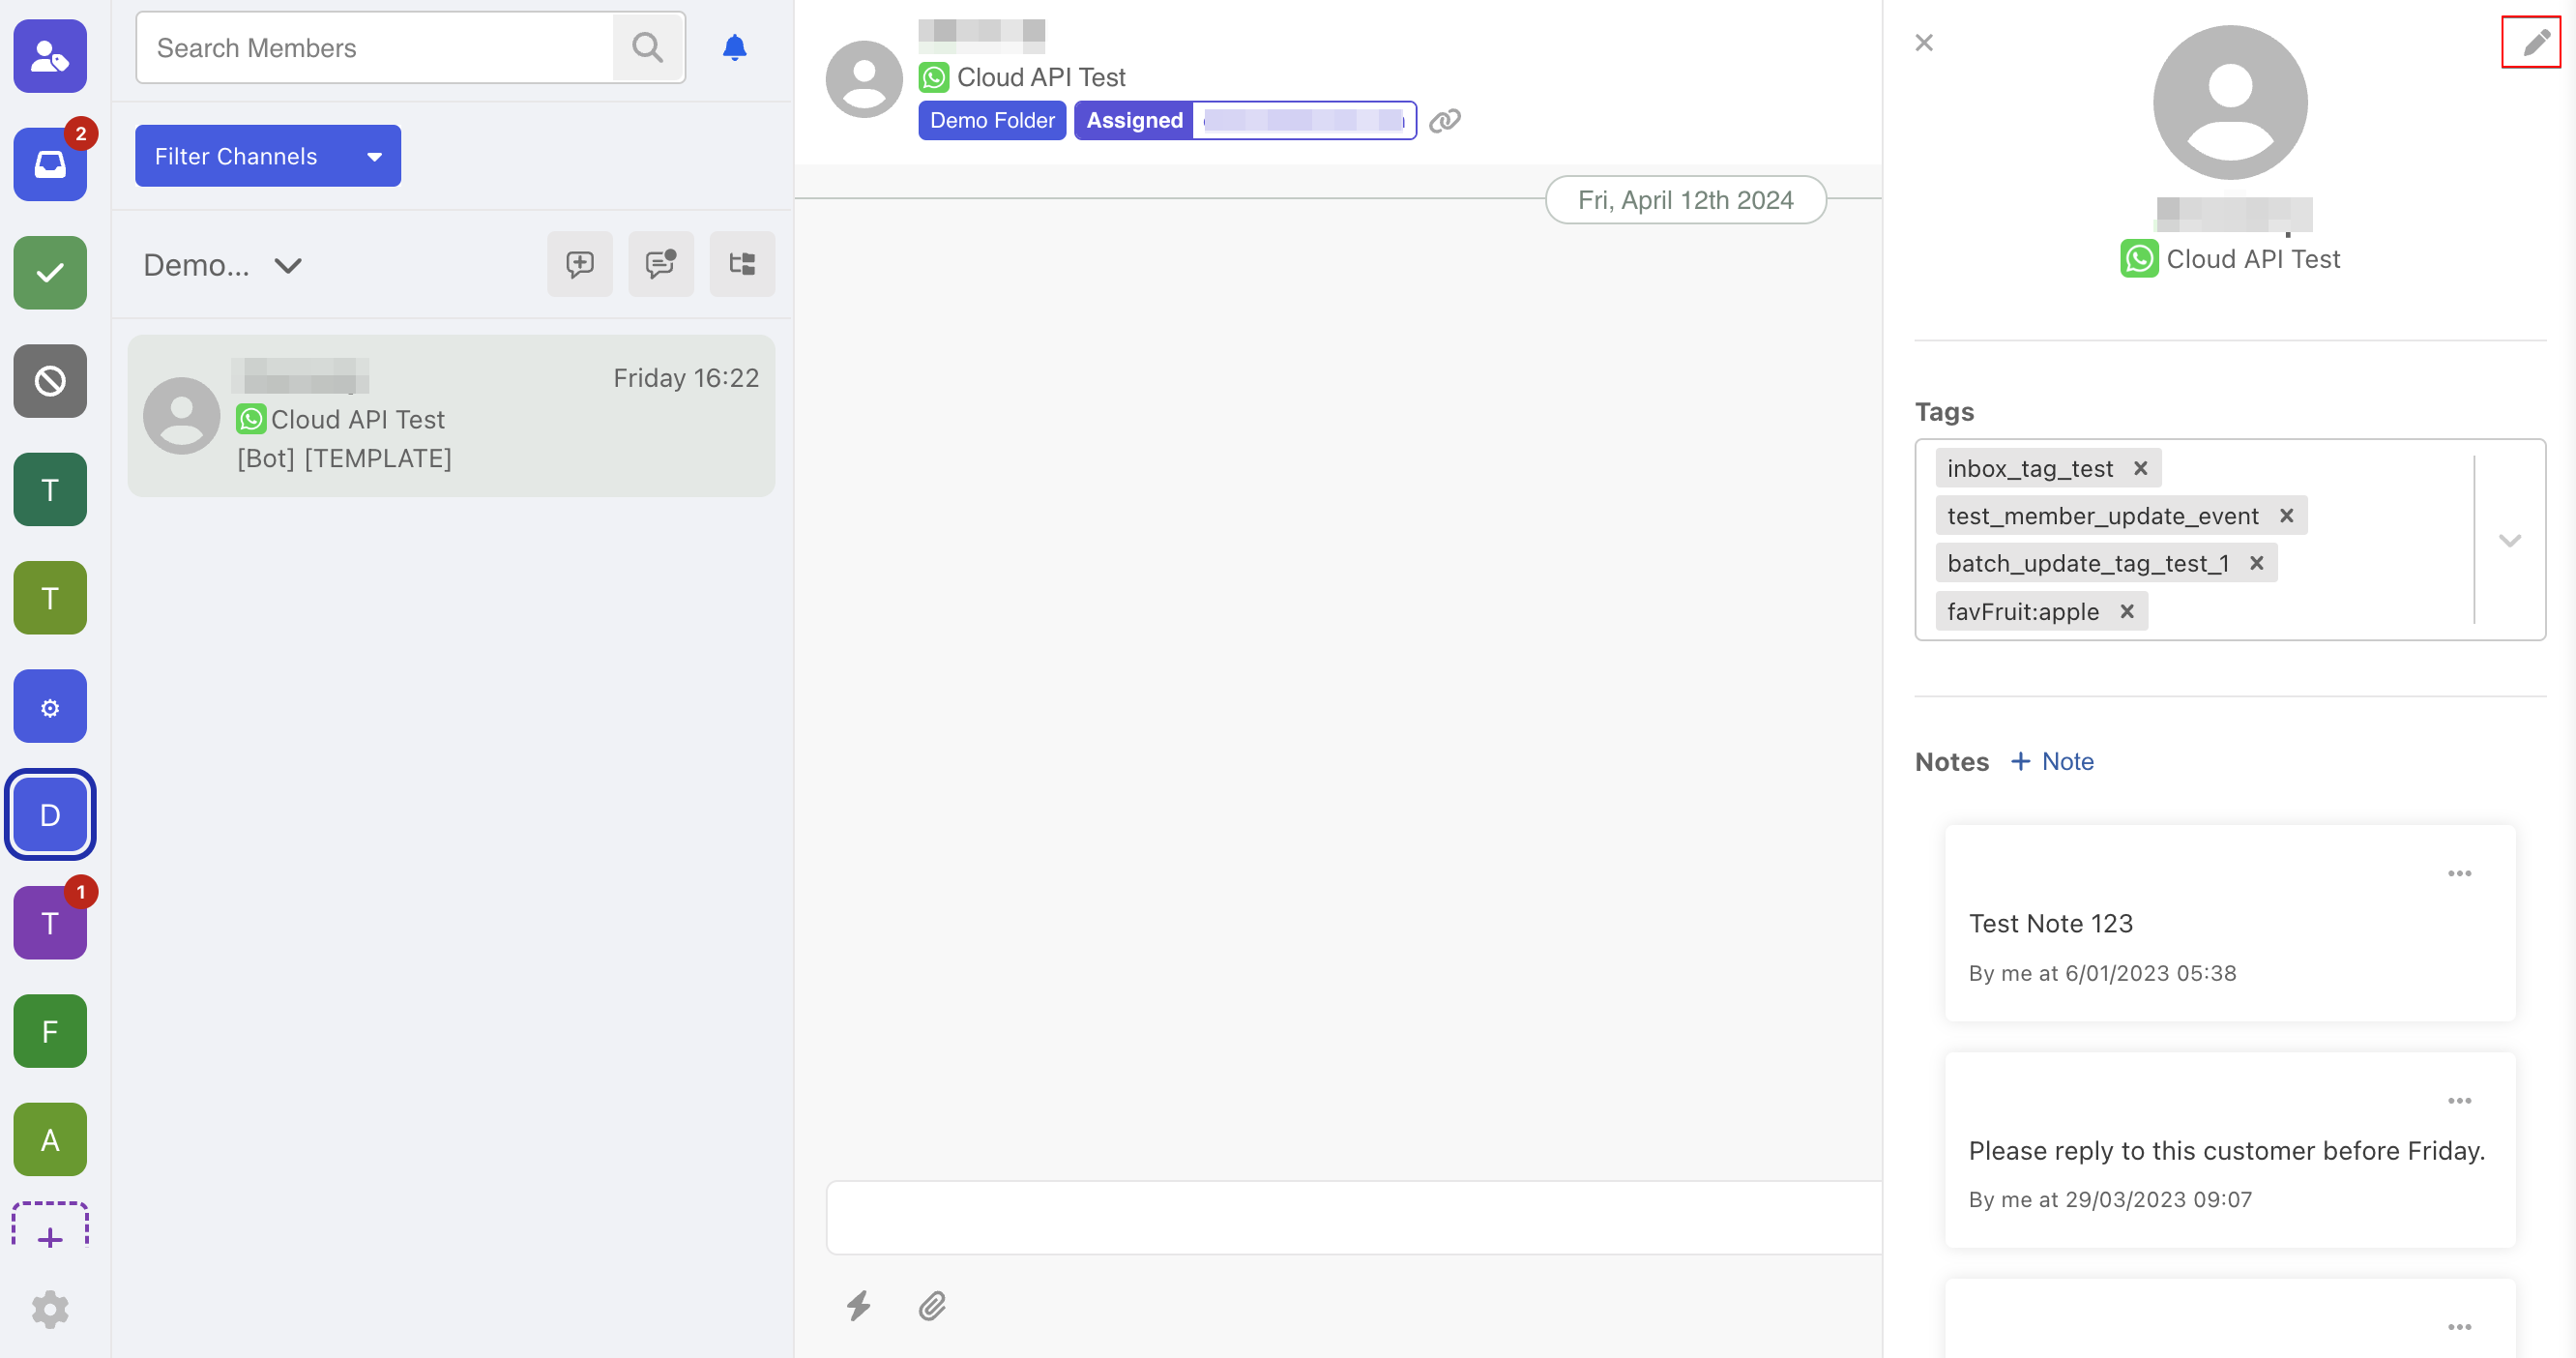
Edit Thread Member's Profile
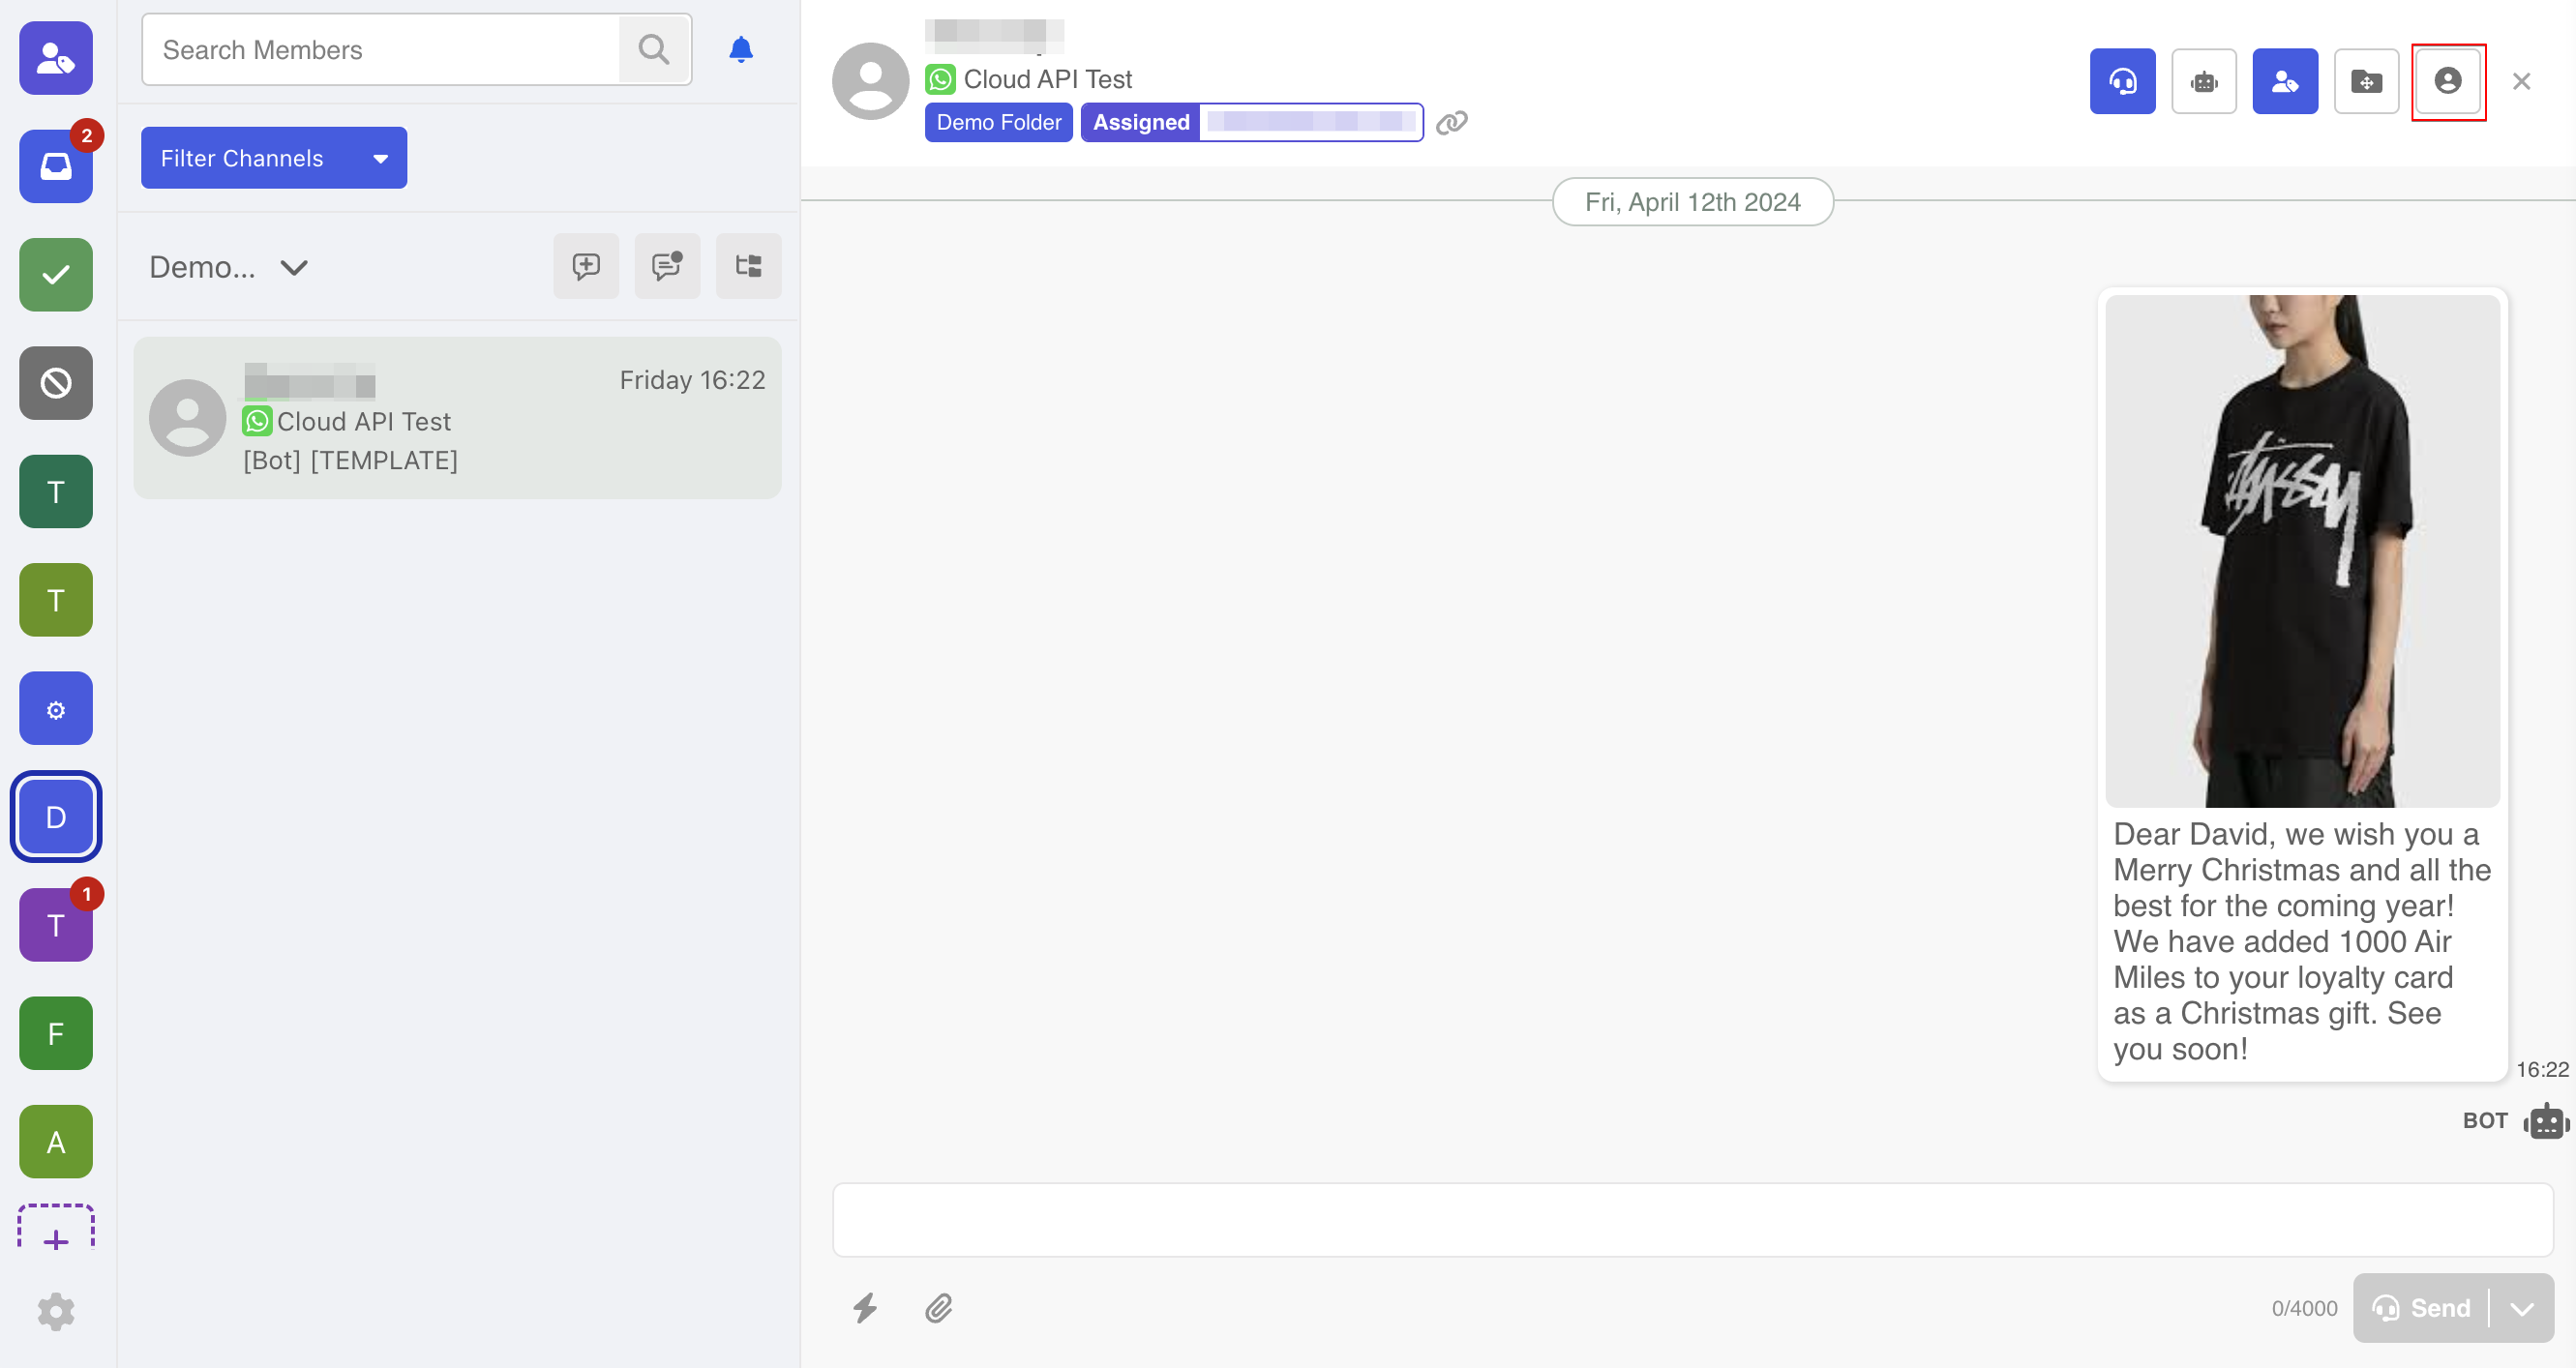
- In each thread, the agent can save the member's personal information in the profile. To do so, select the "Profile" at top right.

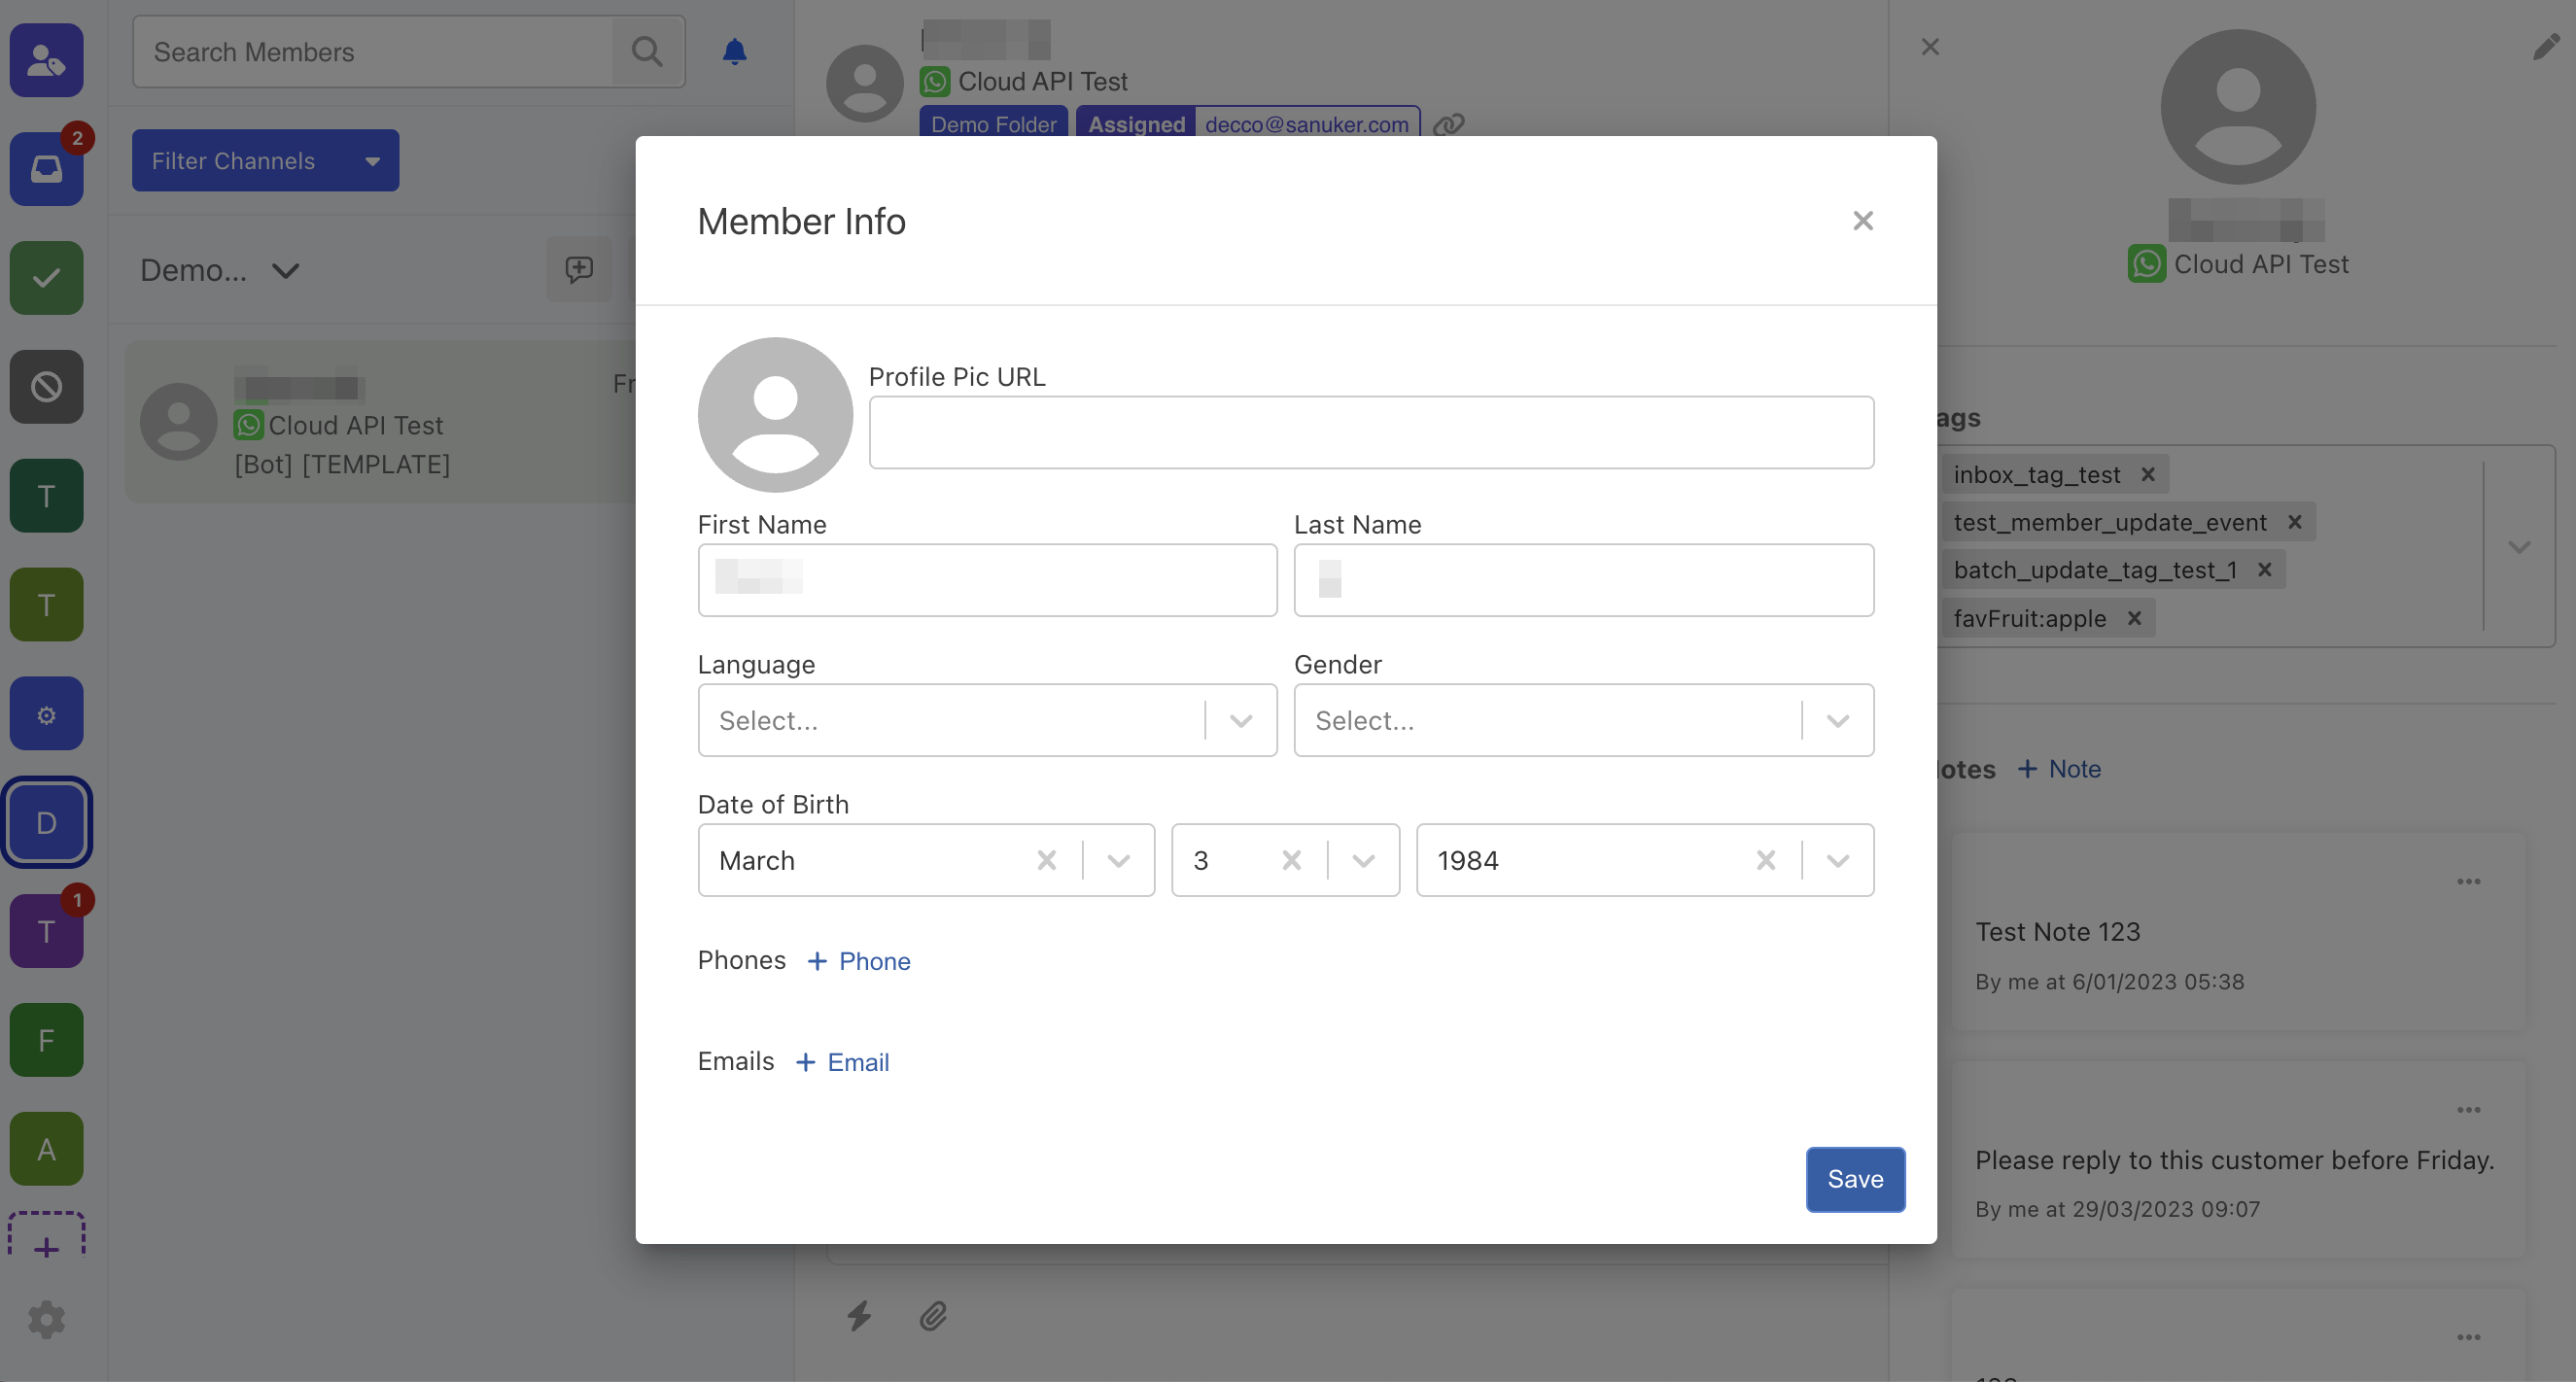
- Select "Edit".
- You can update the member profile and "Save" it.
NOTE
The member profile inside the thread only serves as a reference to other agents. It does not update the Member's Details under the "Members" page.
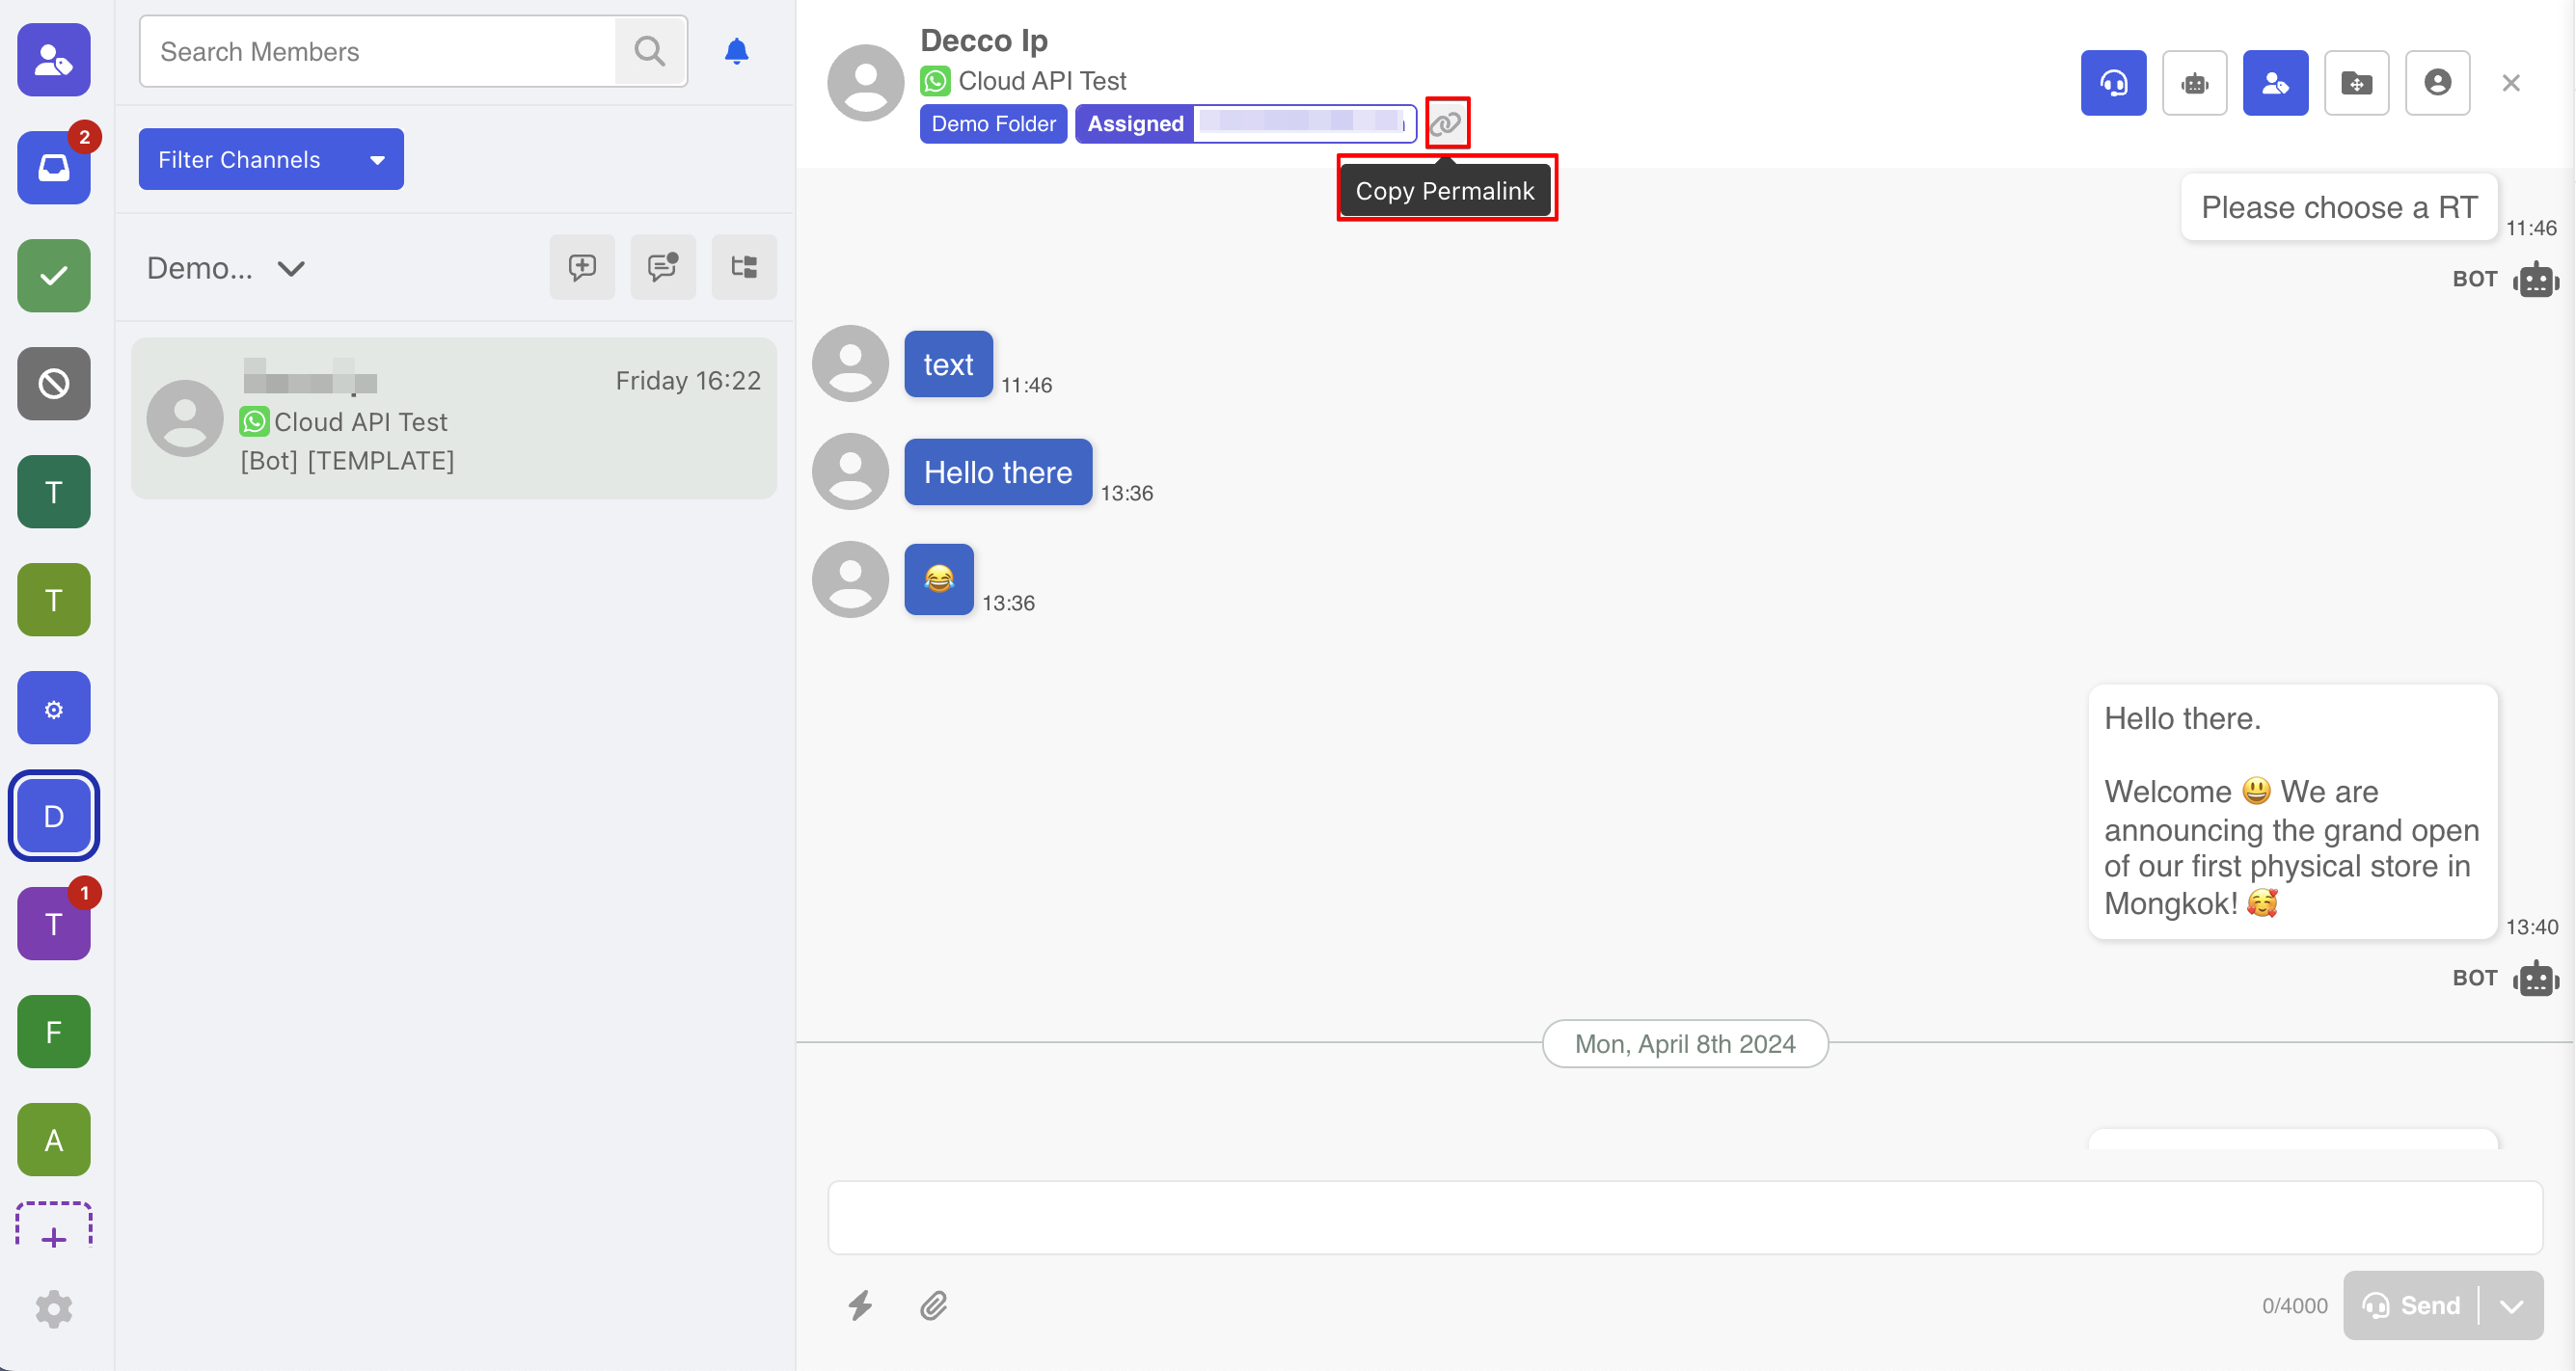
Share a Thread
For efficient collaborations, agents can share a Permalink with other agents, which will redirect to this specific thread.
tip
Alternatively, you can create a URL that redirects to a specific thread with the corresponding externalId and channelId.
Example URL:
https://platform.woztell.com/inbox?eid=EXTERNAL_ID&cid=CHANNEL_ID
Add Member Tags
- Agents can add or remove member tags in a thread. To do so, select the "Profile" at top right.
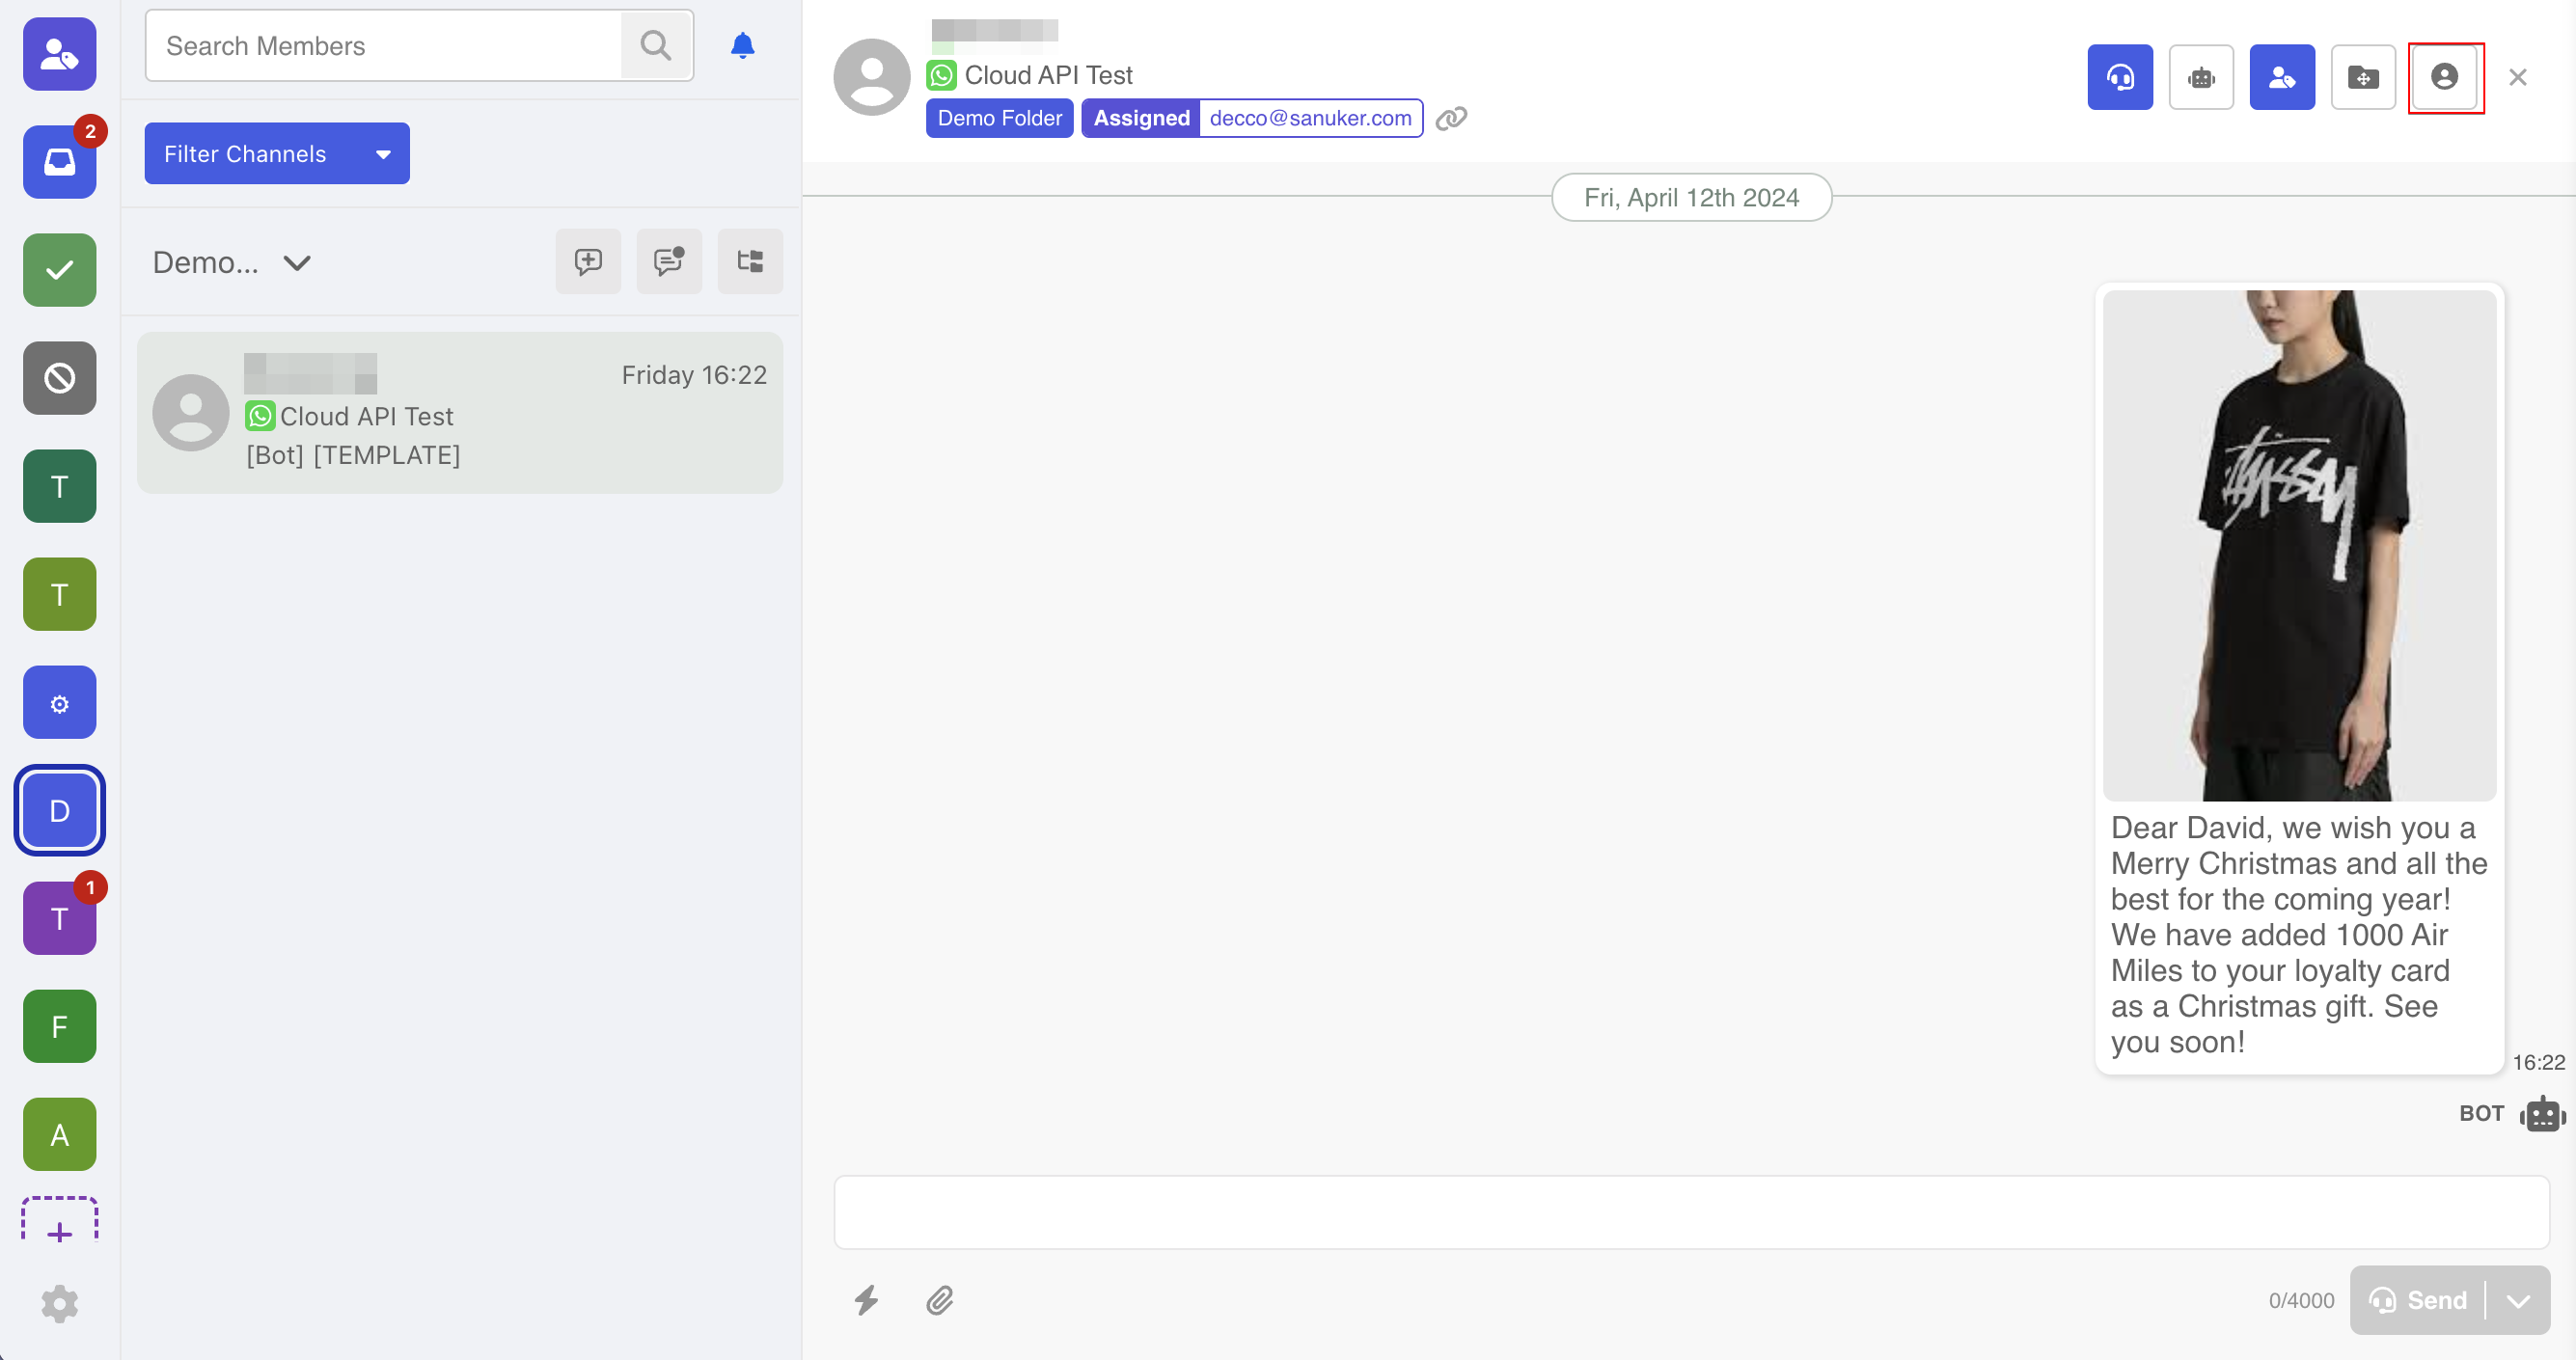
- Under "Tags", you can create new member tag by typing.
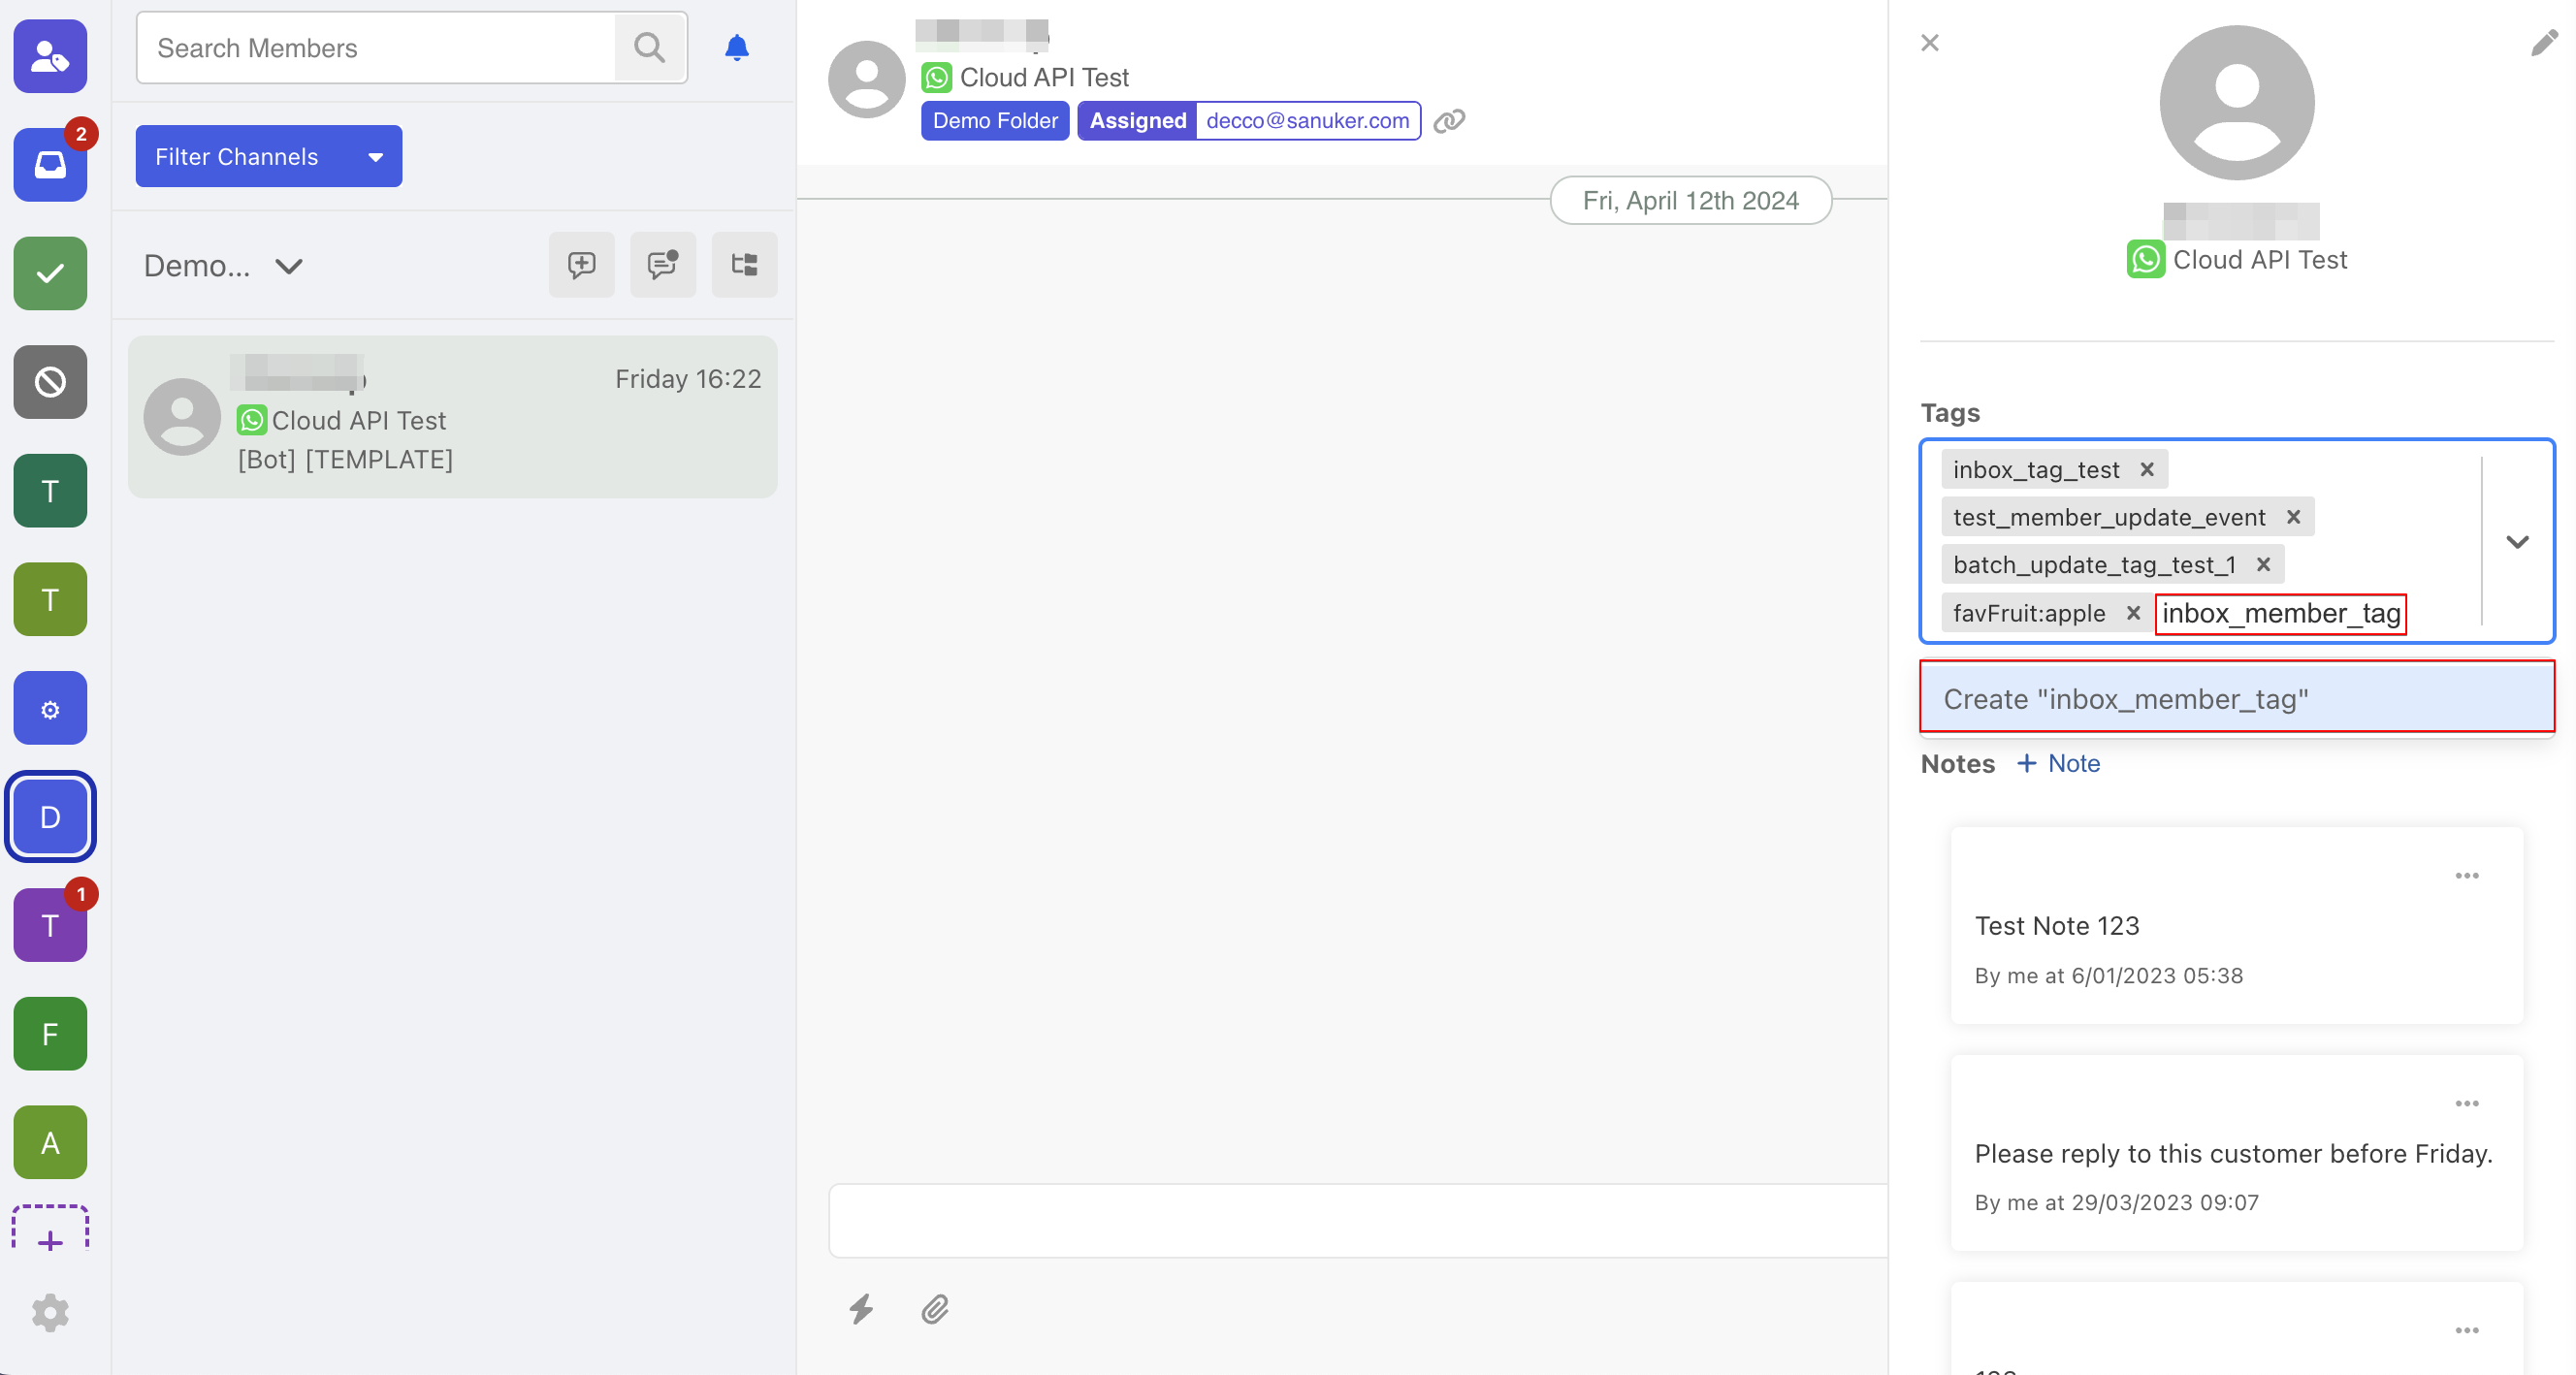
- Now the member tag is added.
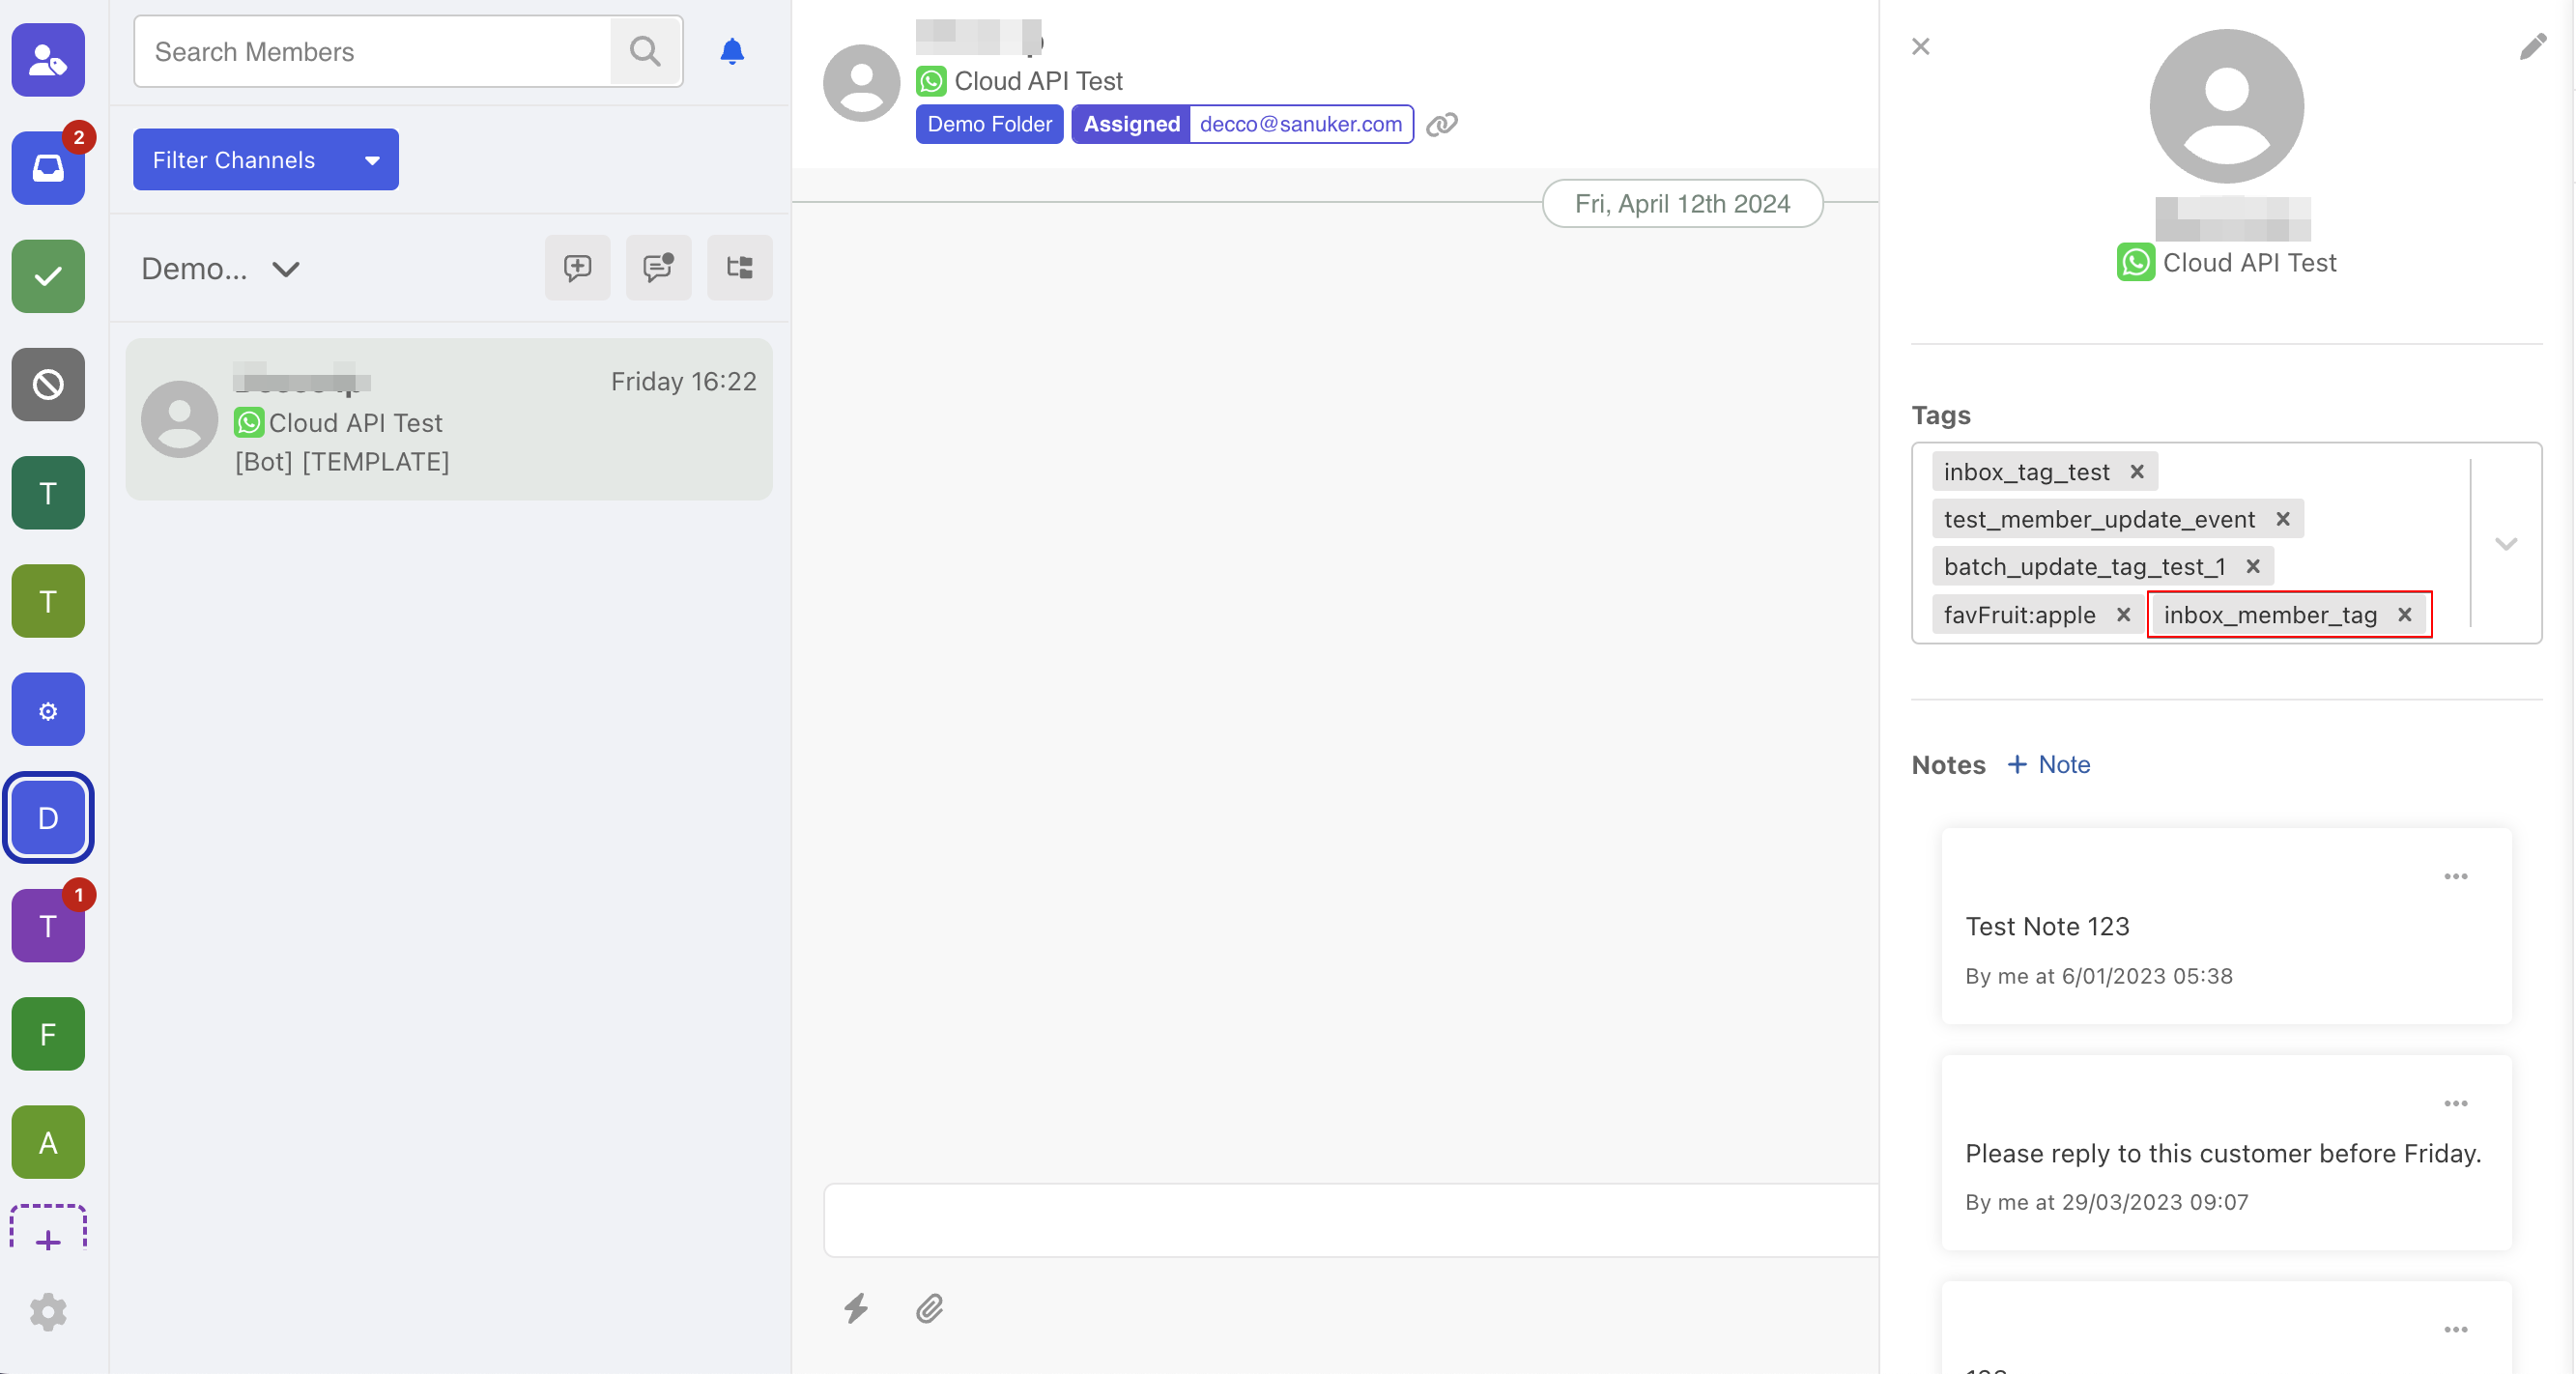
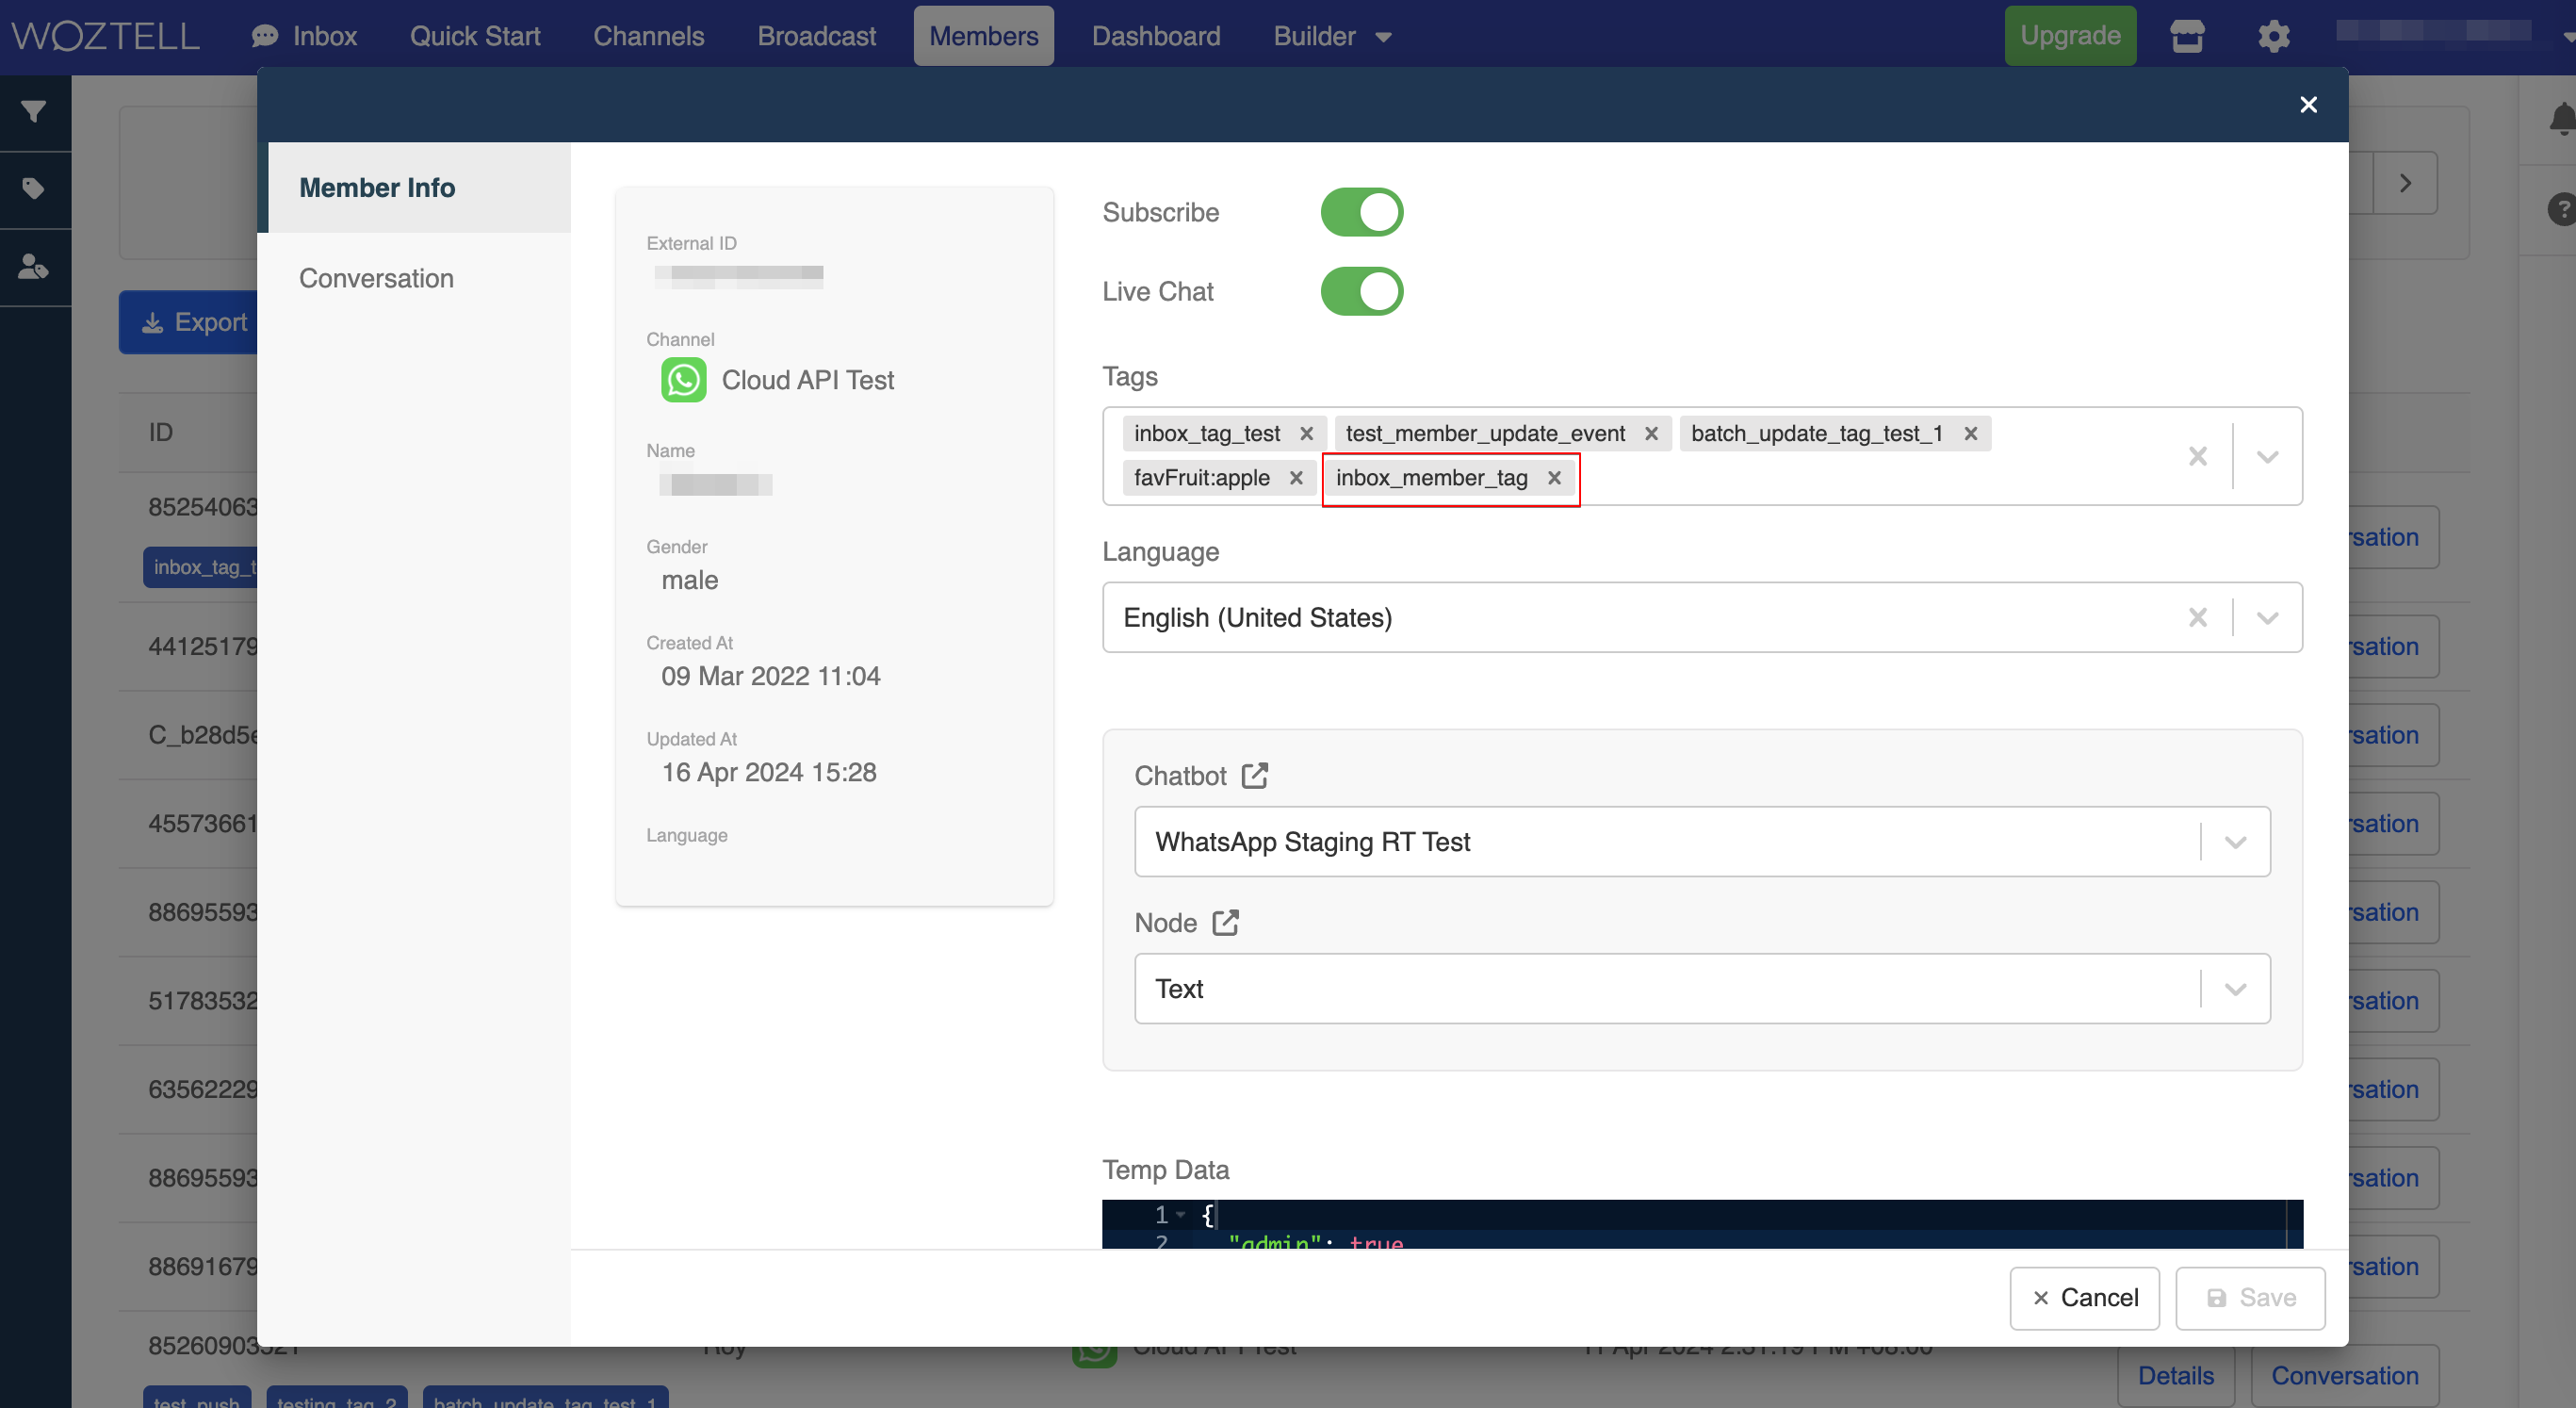
- The member tag added in the thread will also be present in the member's details.
Add Internal Notes
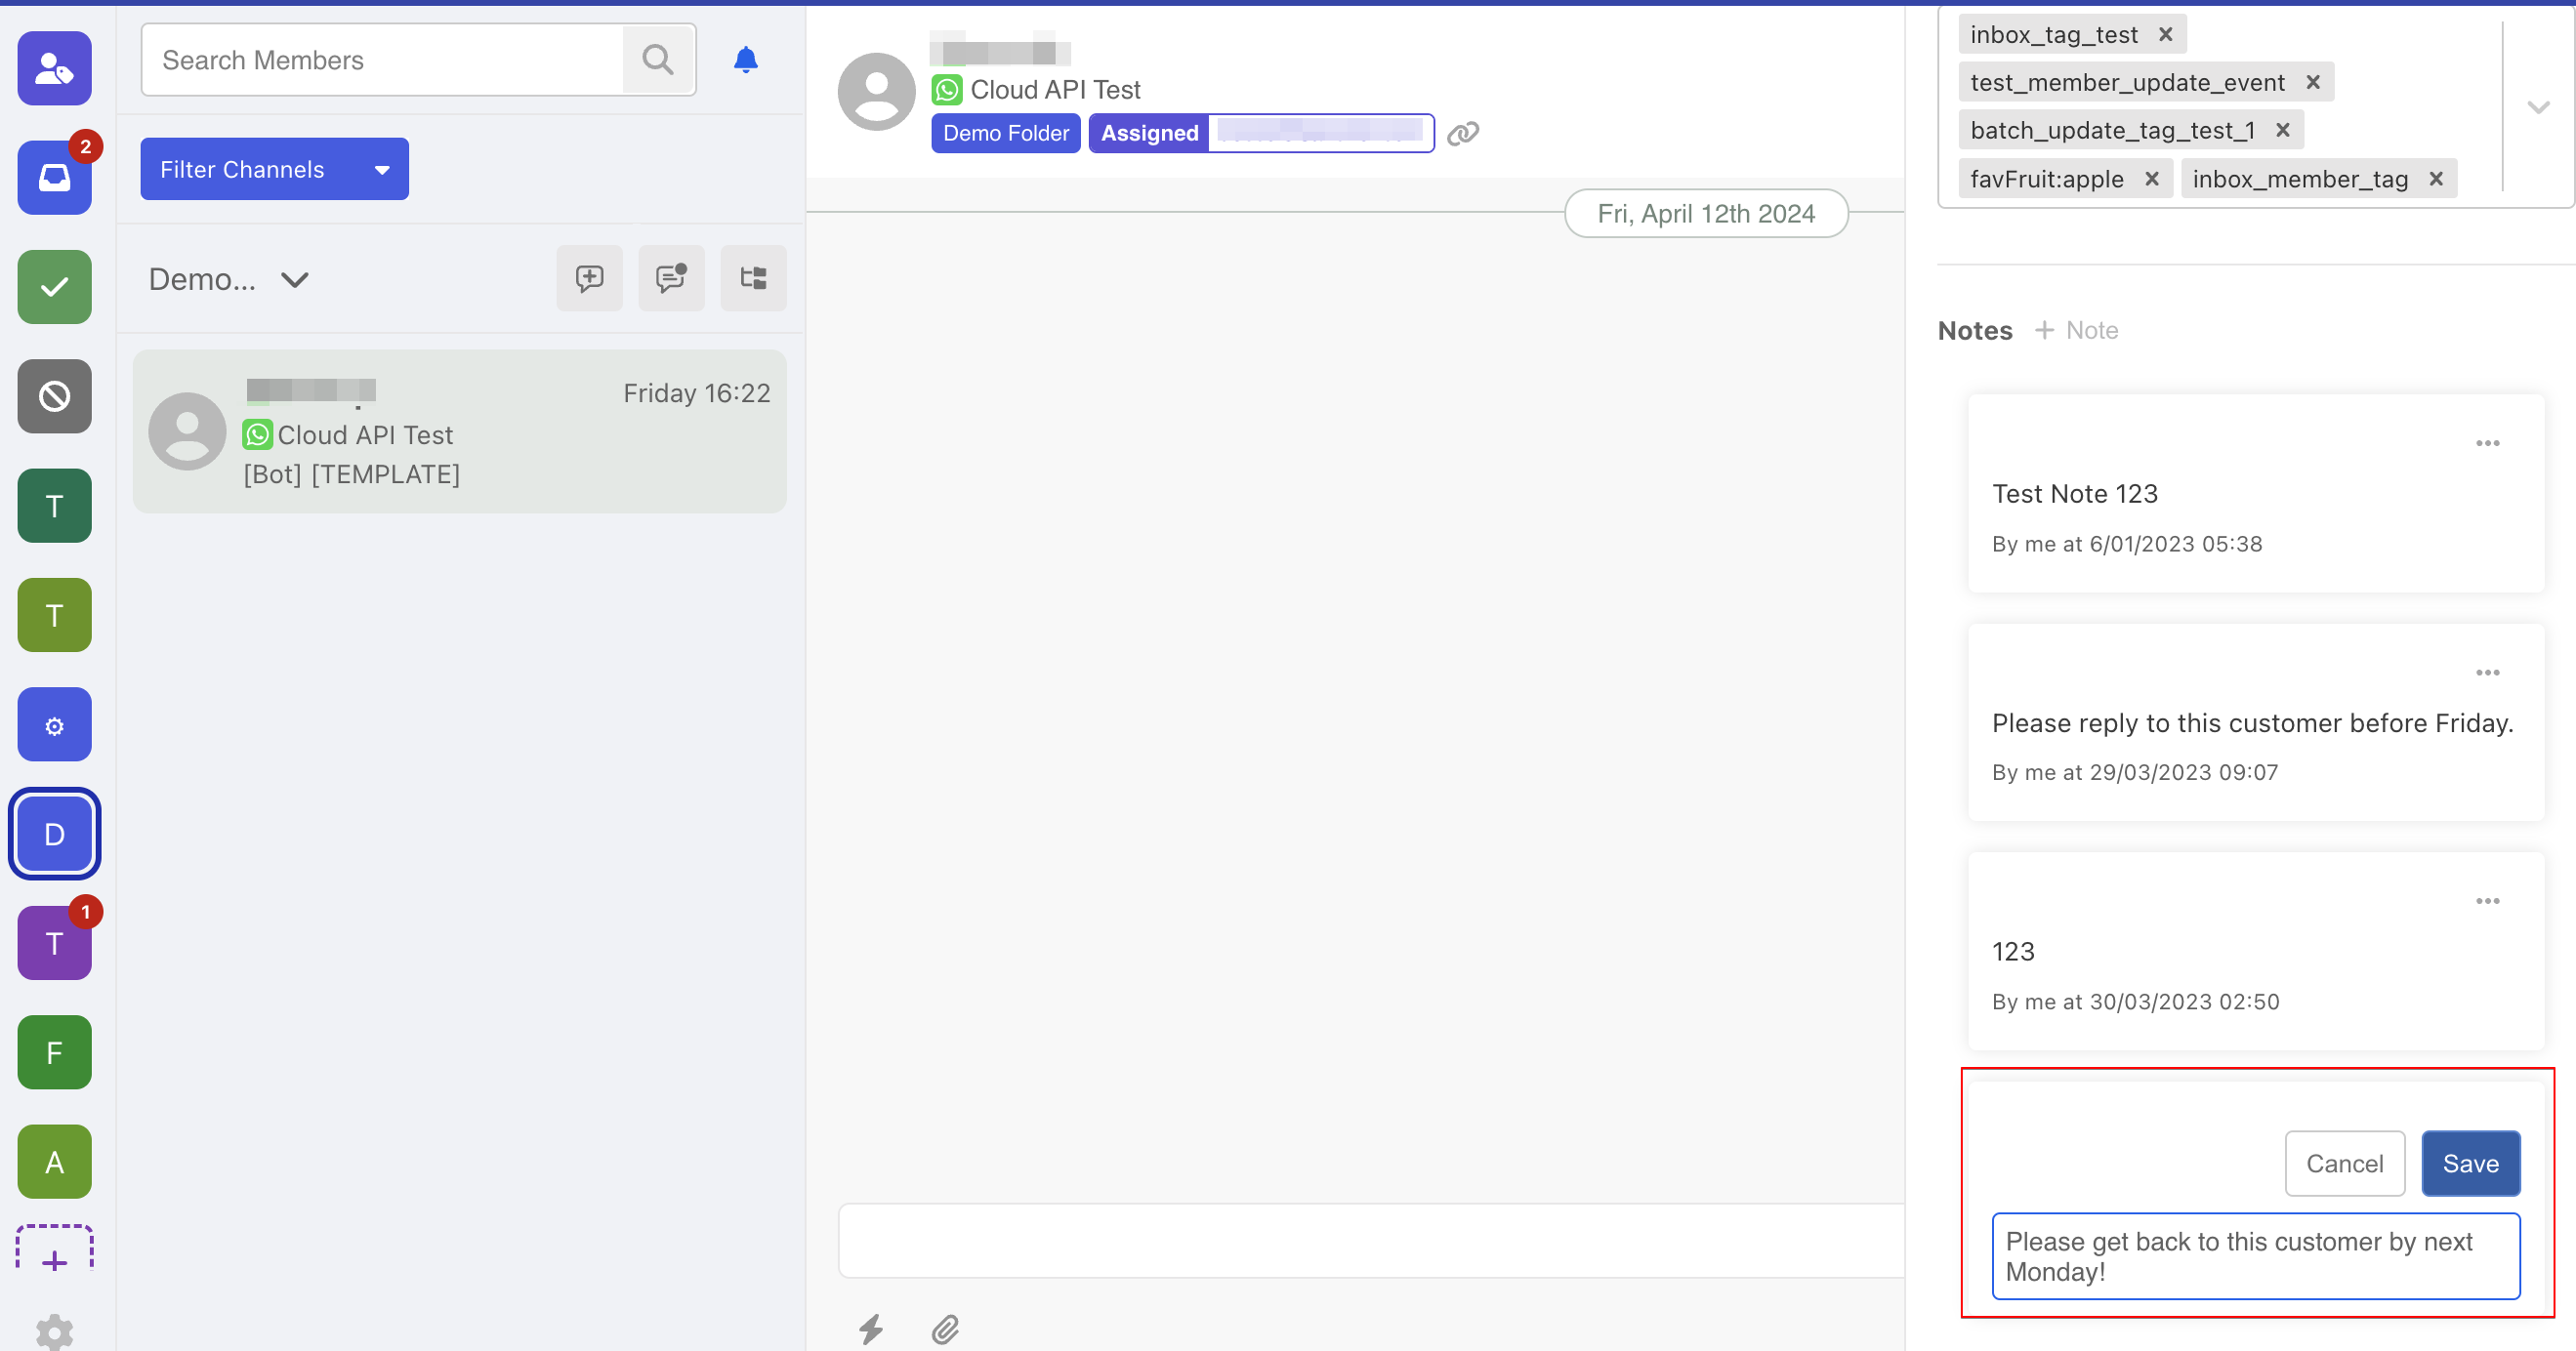
- Agents can add notes under the member's profile in the thread, these notes can only be viewed by the agents. To add the notes, select the "Profile" at top right.
- Select "+ Notes" to create new notes.

- Input the messages and "Save".
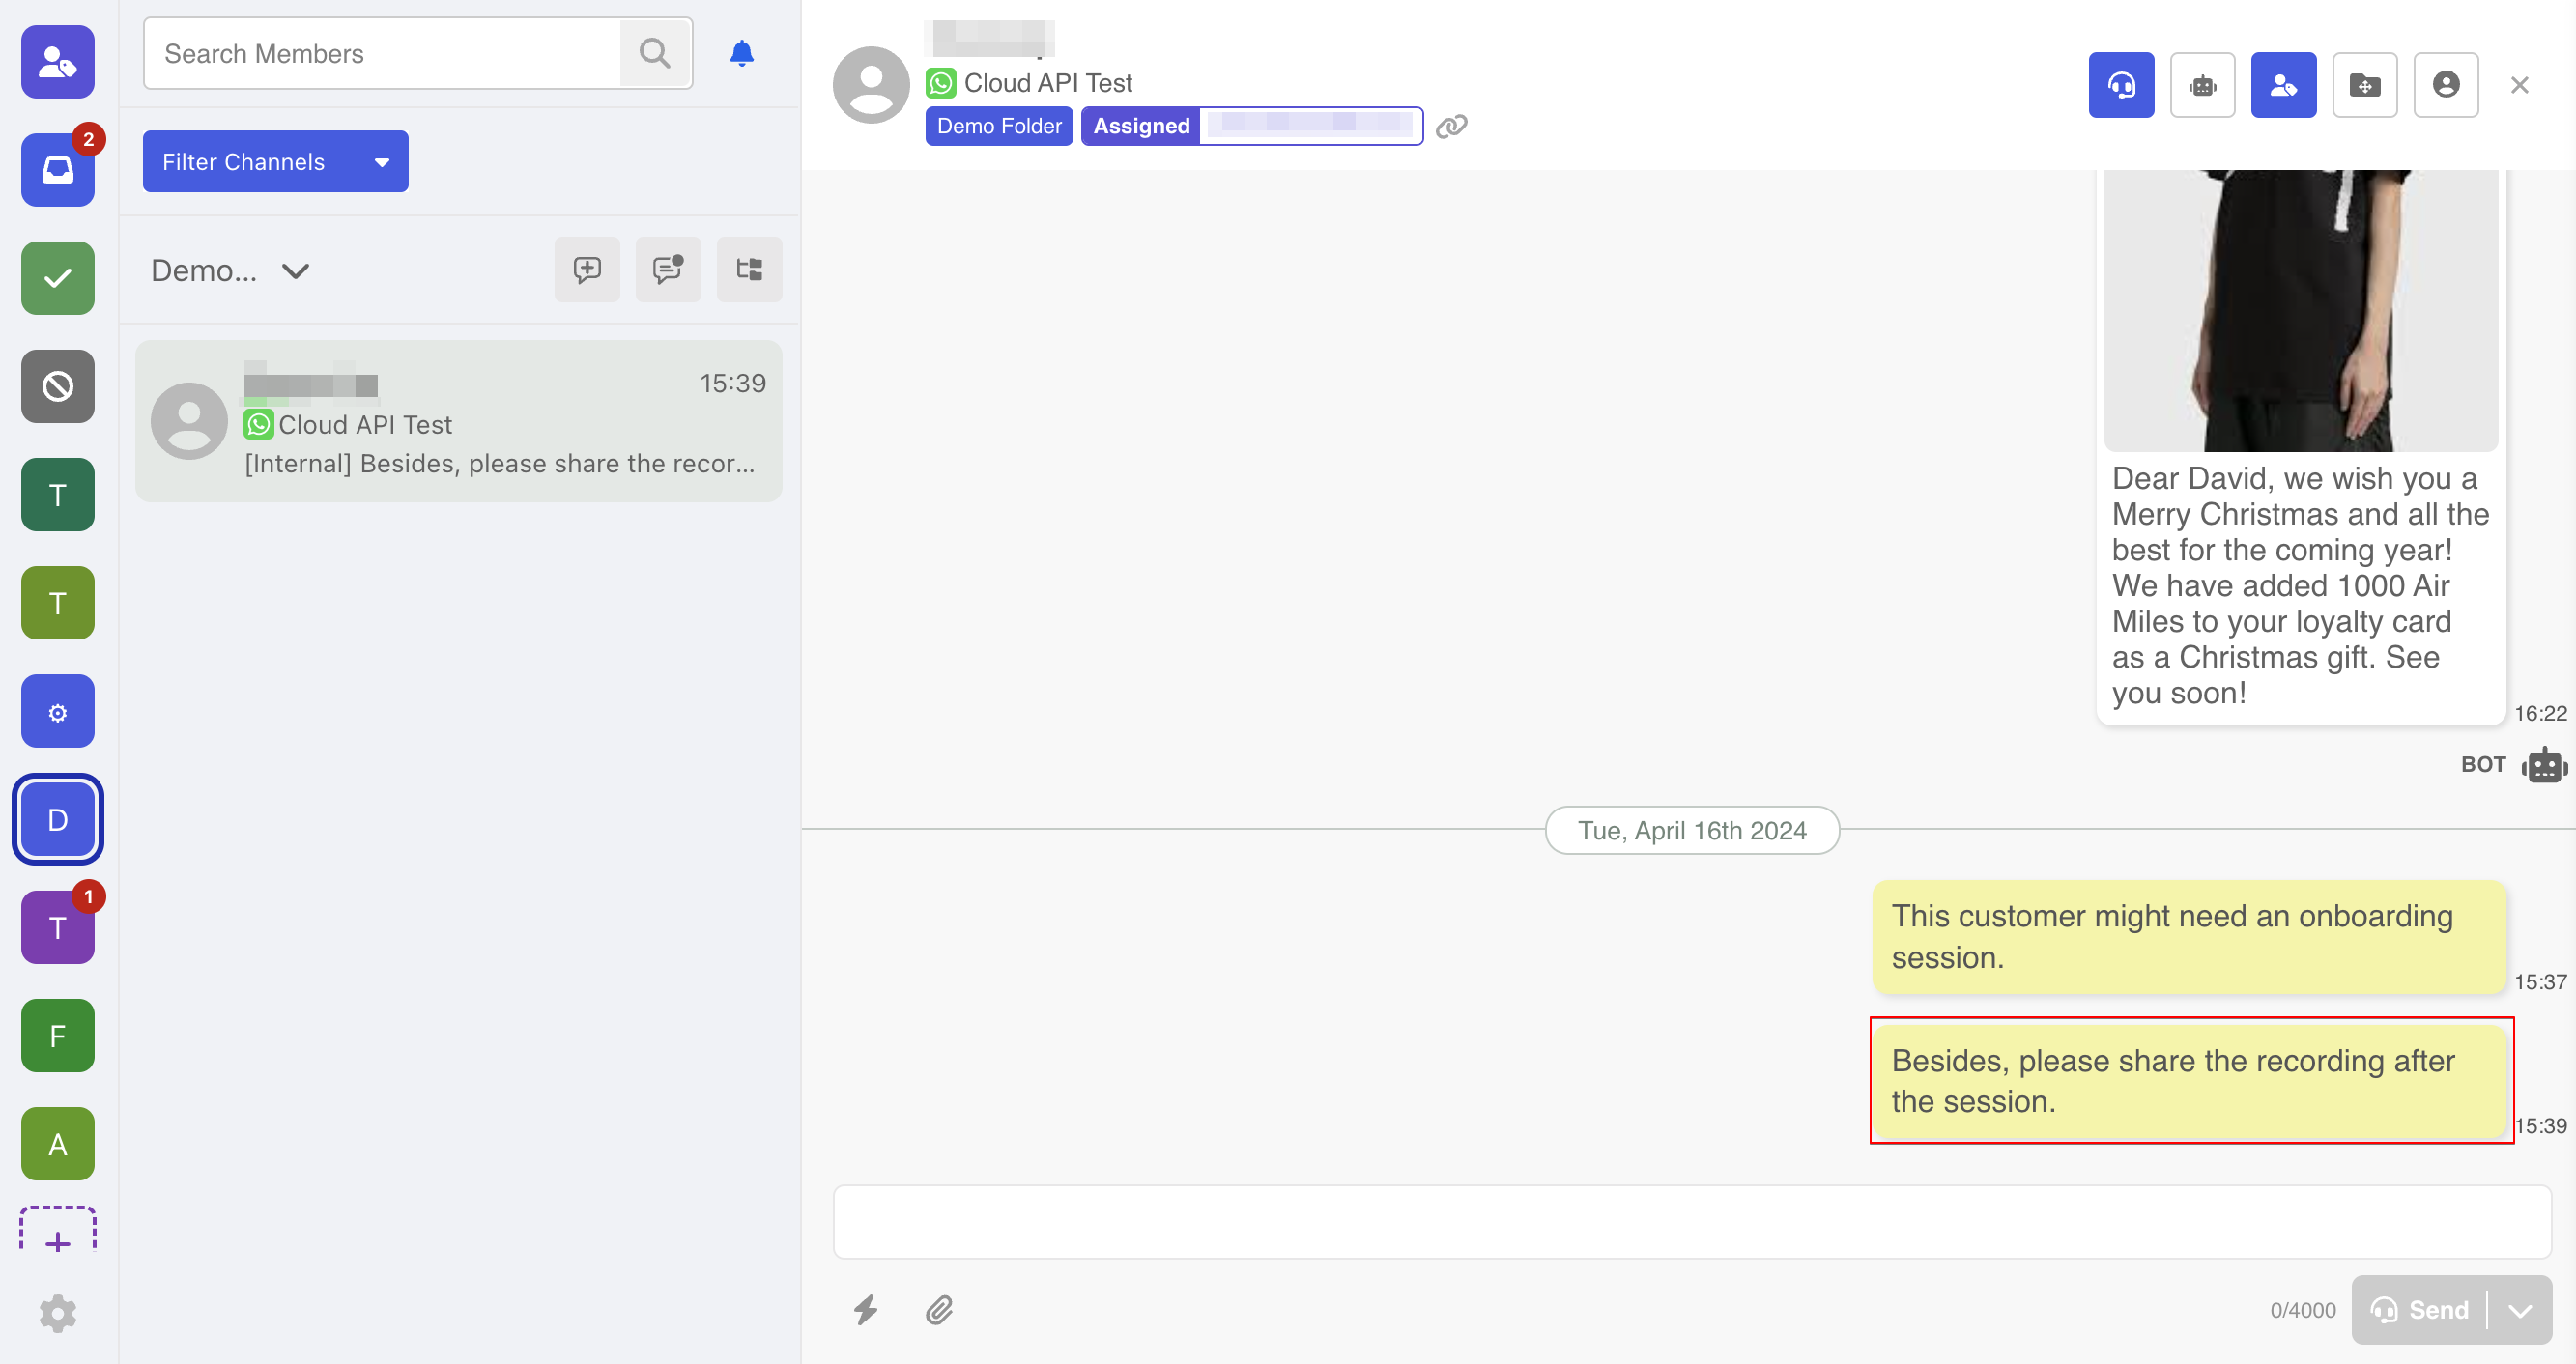
Add Internal Comment
- Agents can add comments in the thread for more efficient collaboration, as the comments can act as the contextual information for other agents. To do so, agent can select "More" next the "Send" button, then select "Send as Internal Comment".
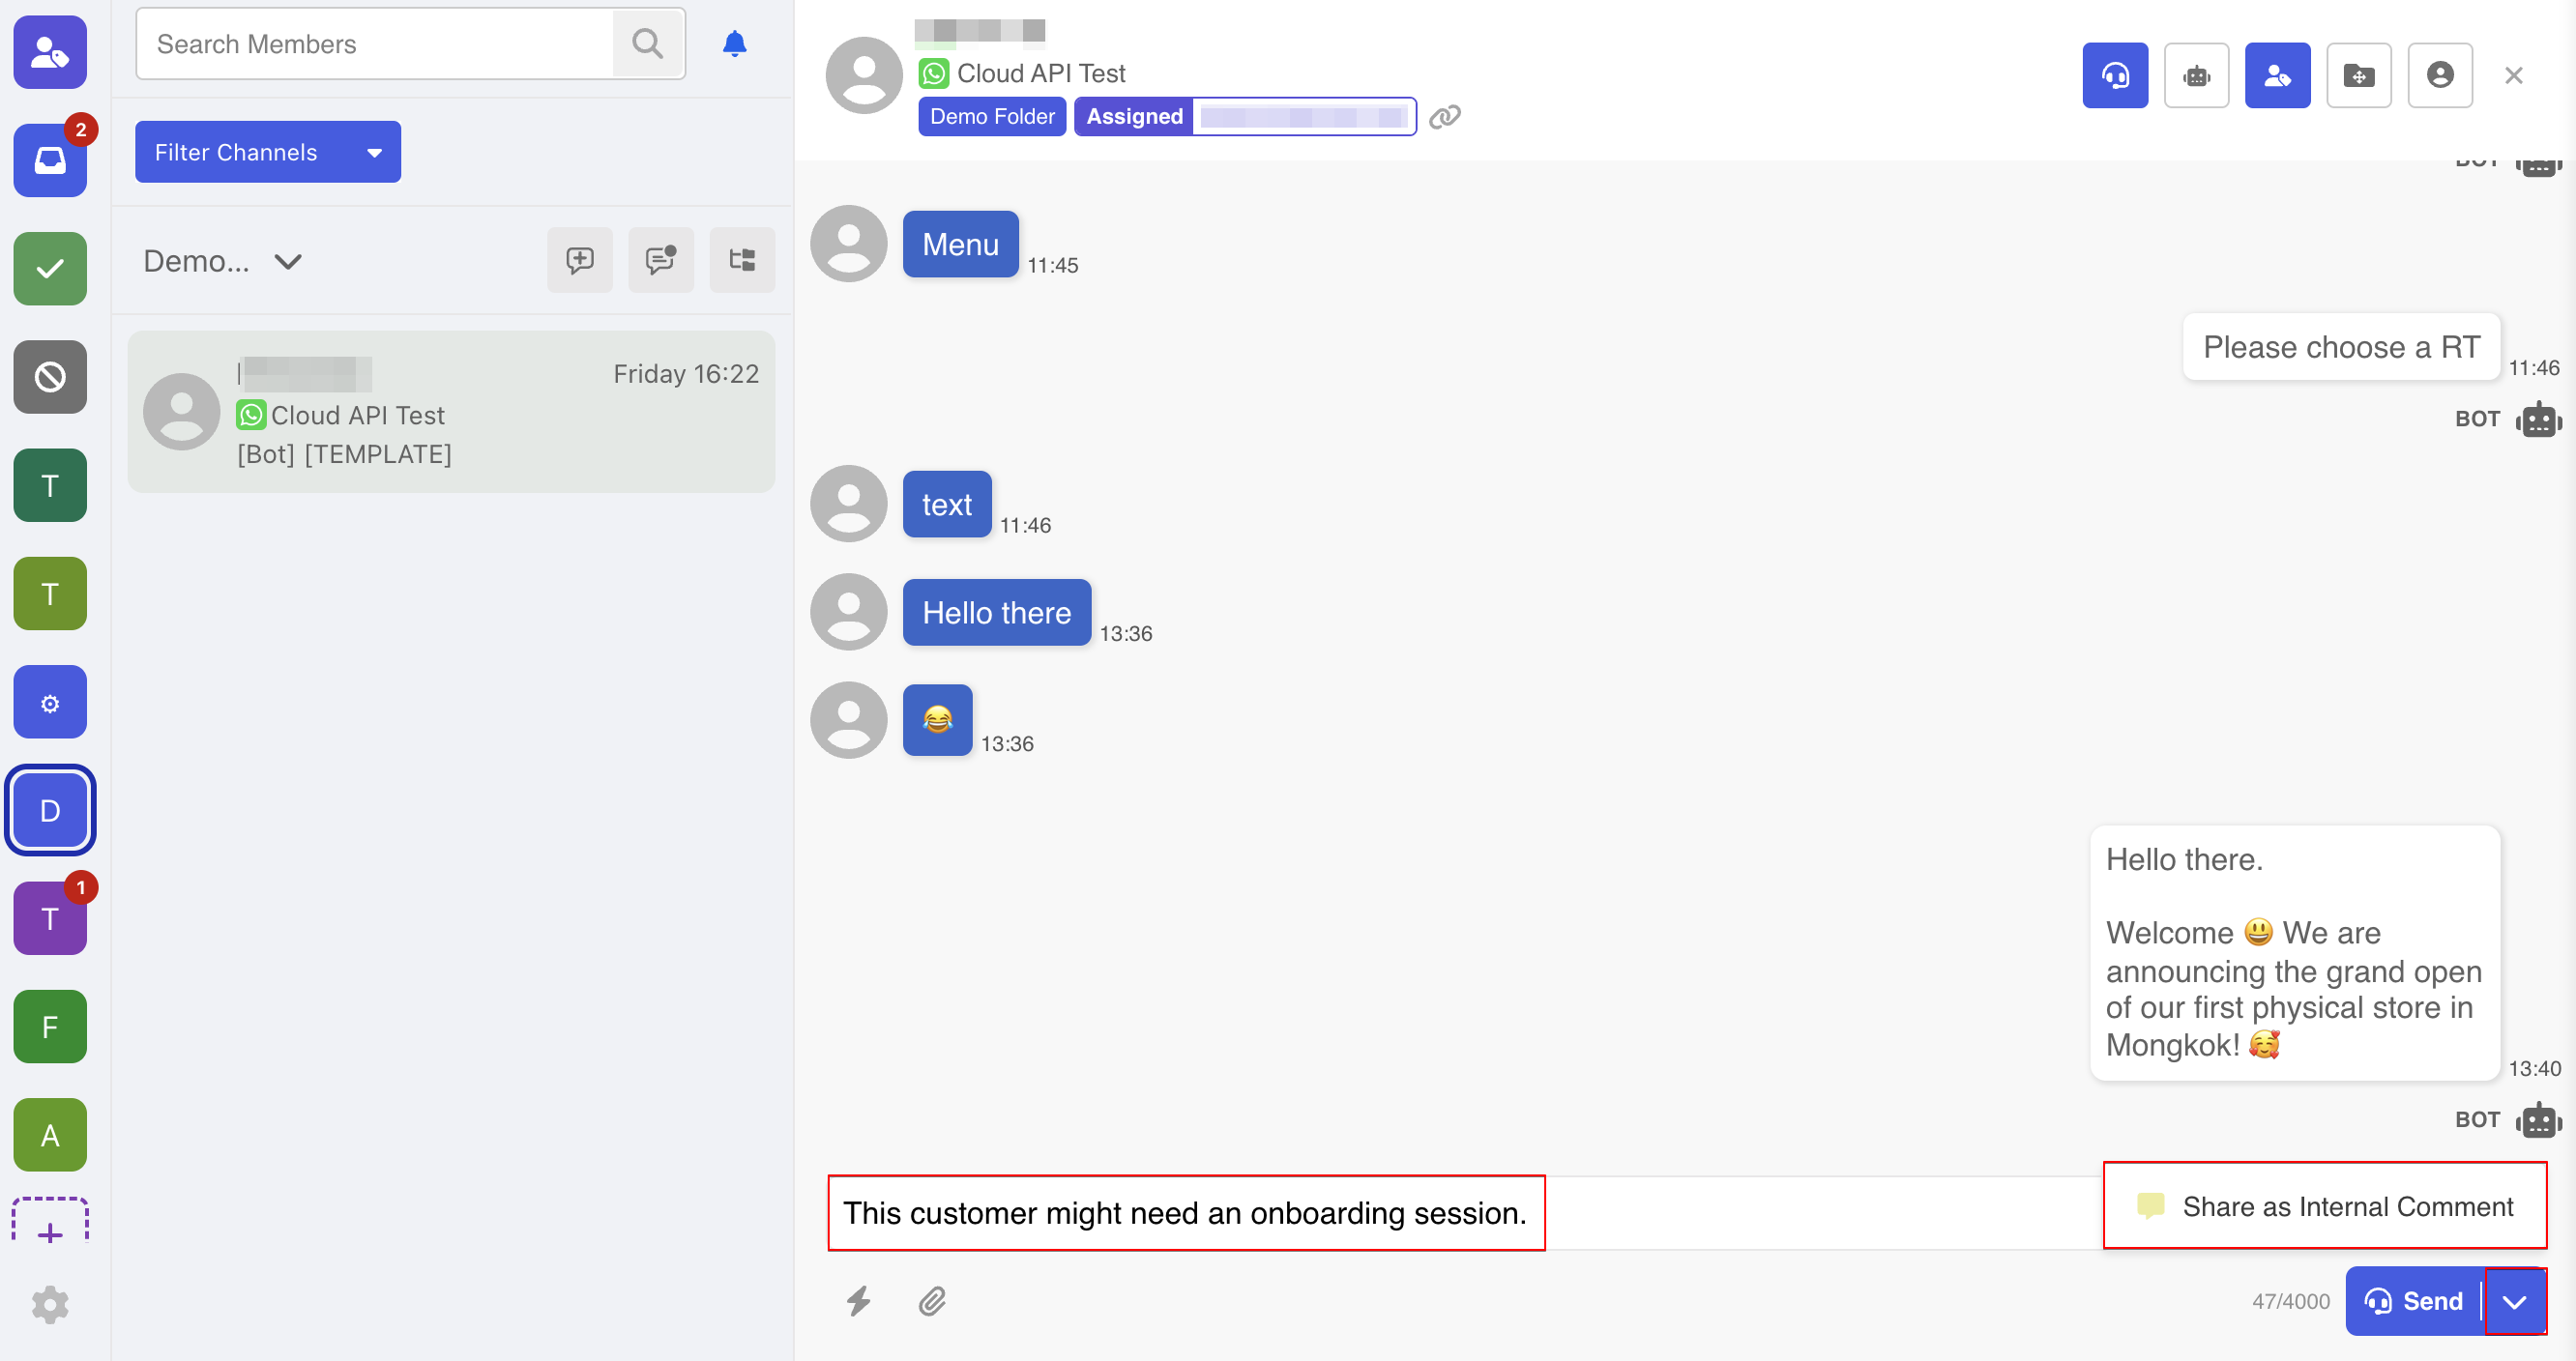
- Alternatively, agents can also add the prefix
###to the text input before sending it out.
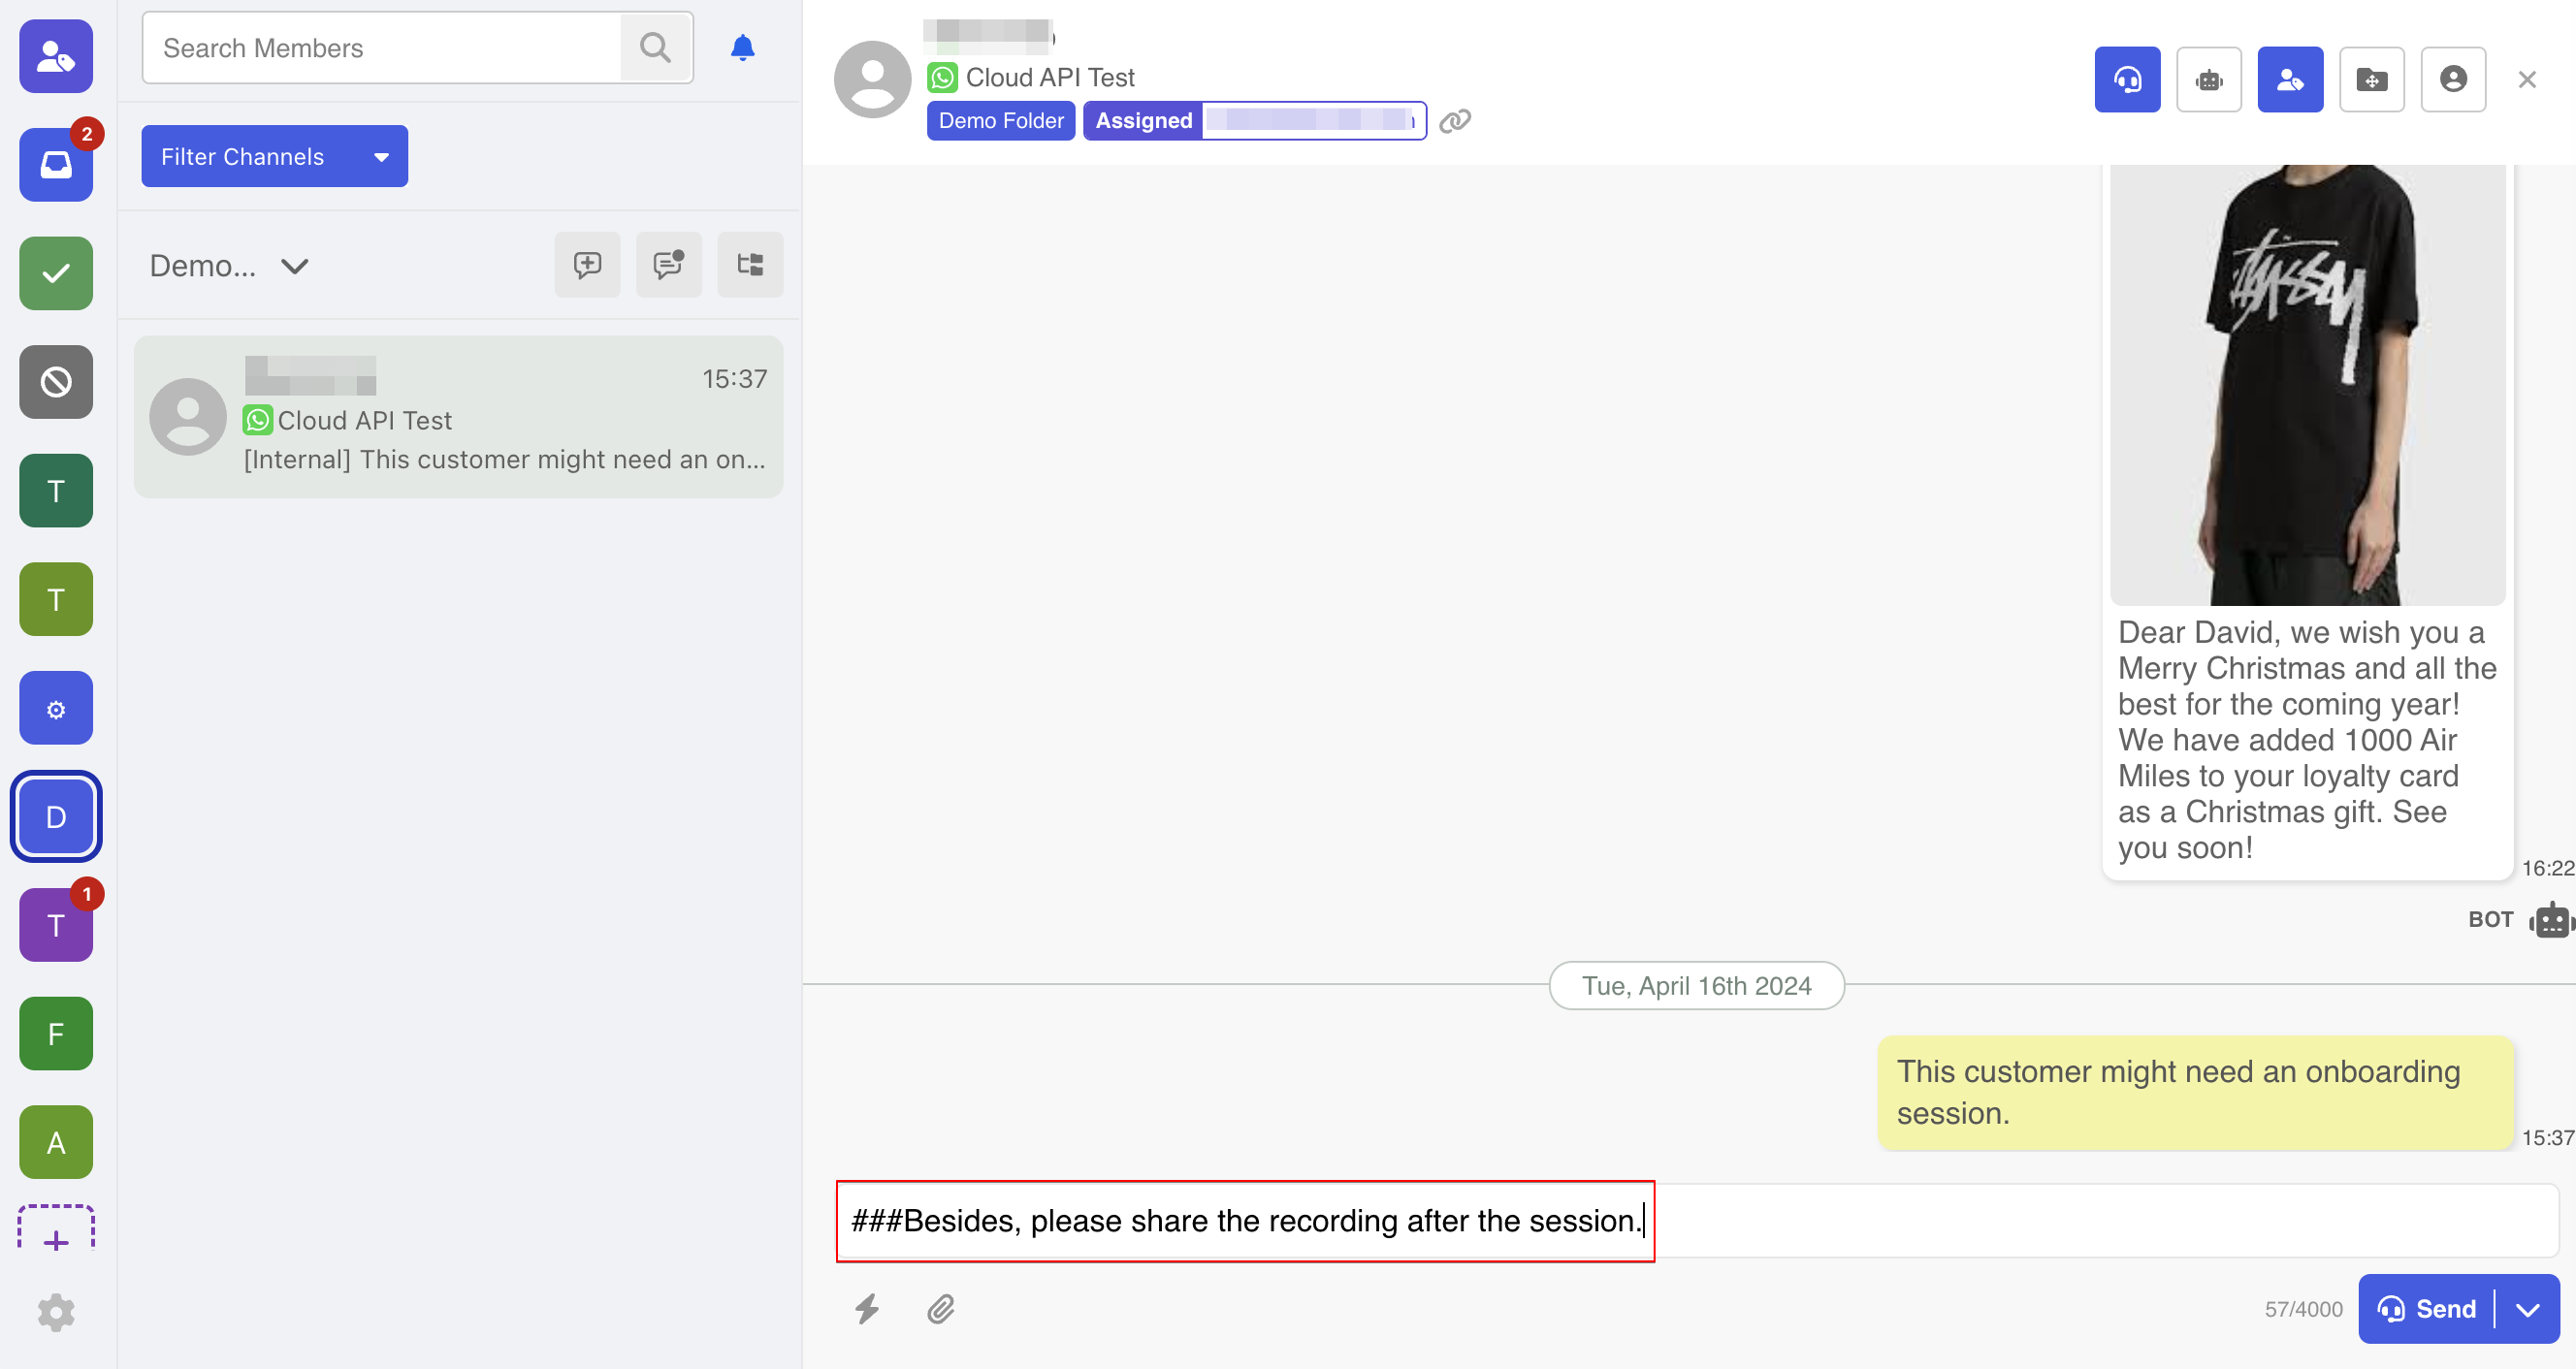
- As a result, an internal comment is sent, and it can only be viewed by the agents.
Filter Thread
Agents can filter and search threads based on their preferred criteria, which is useful for managing large amount of conversations.
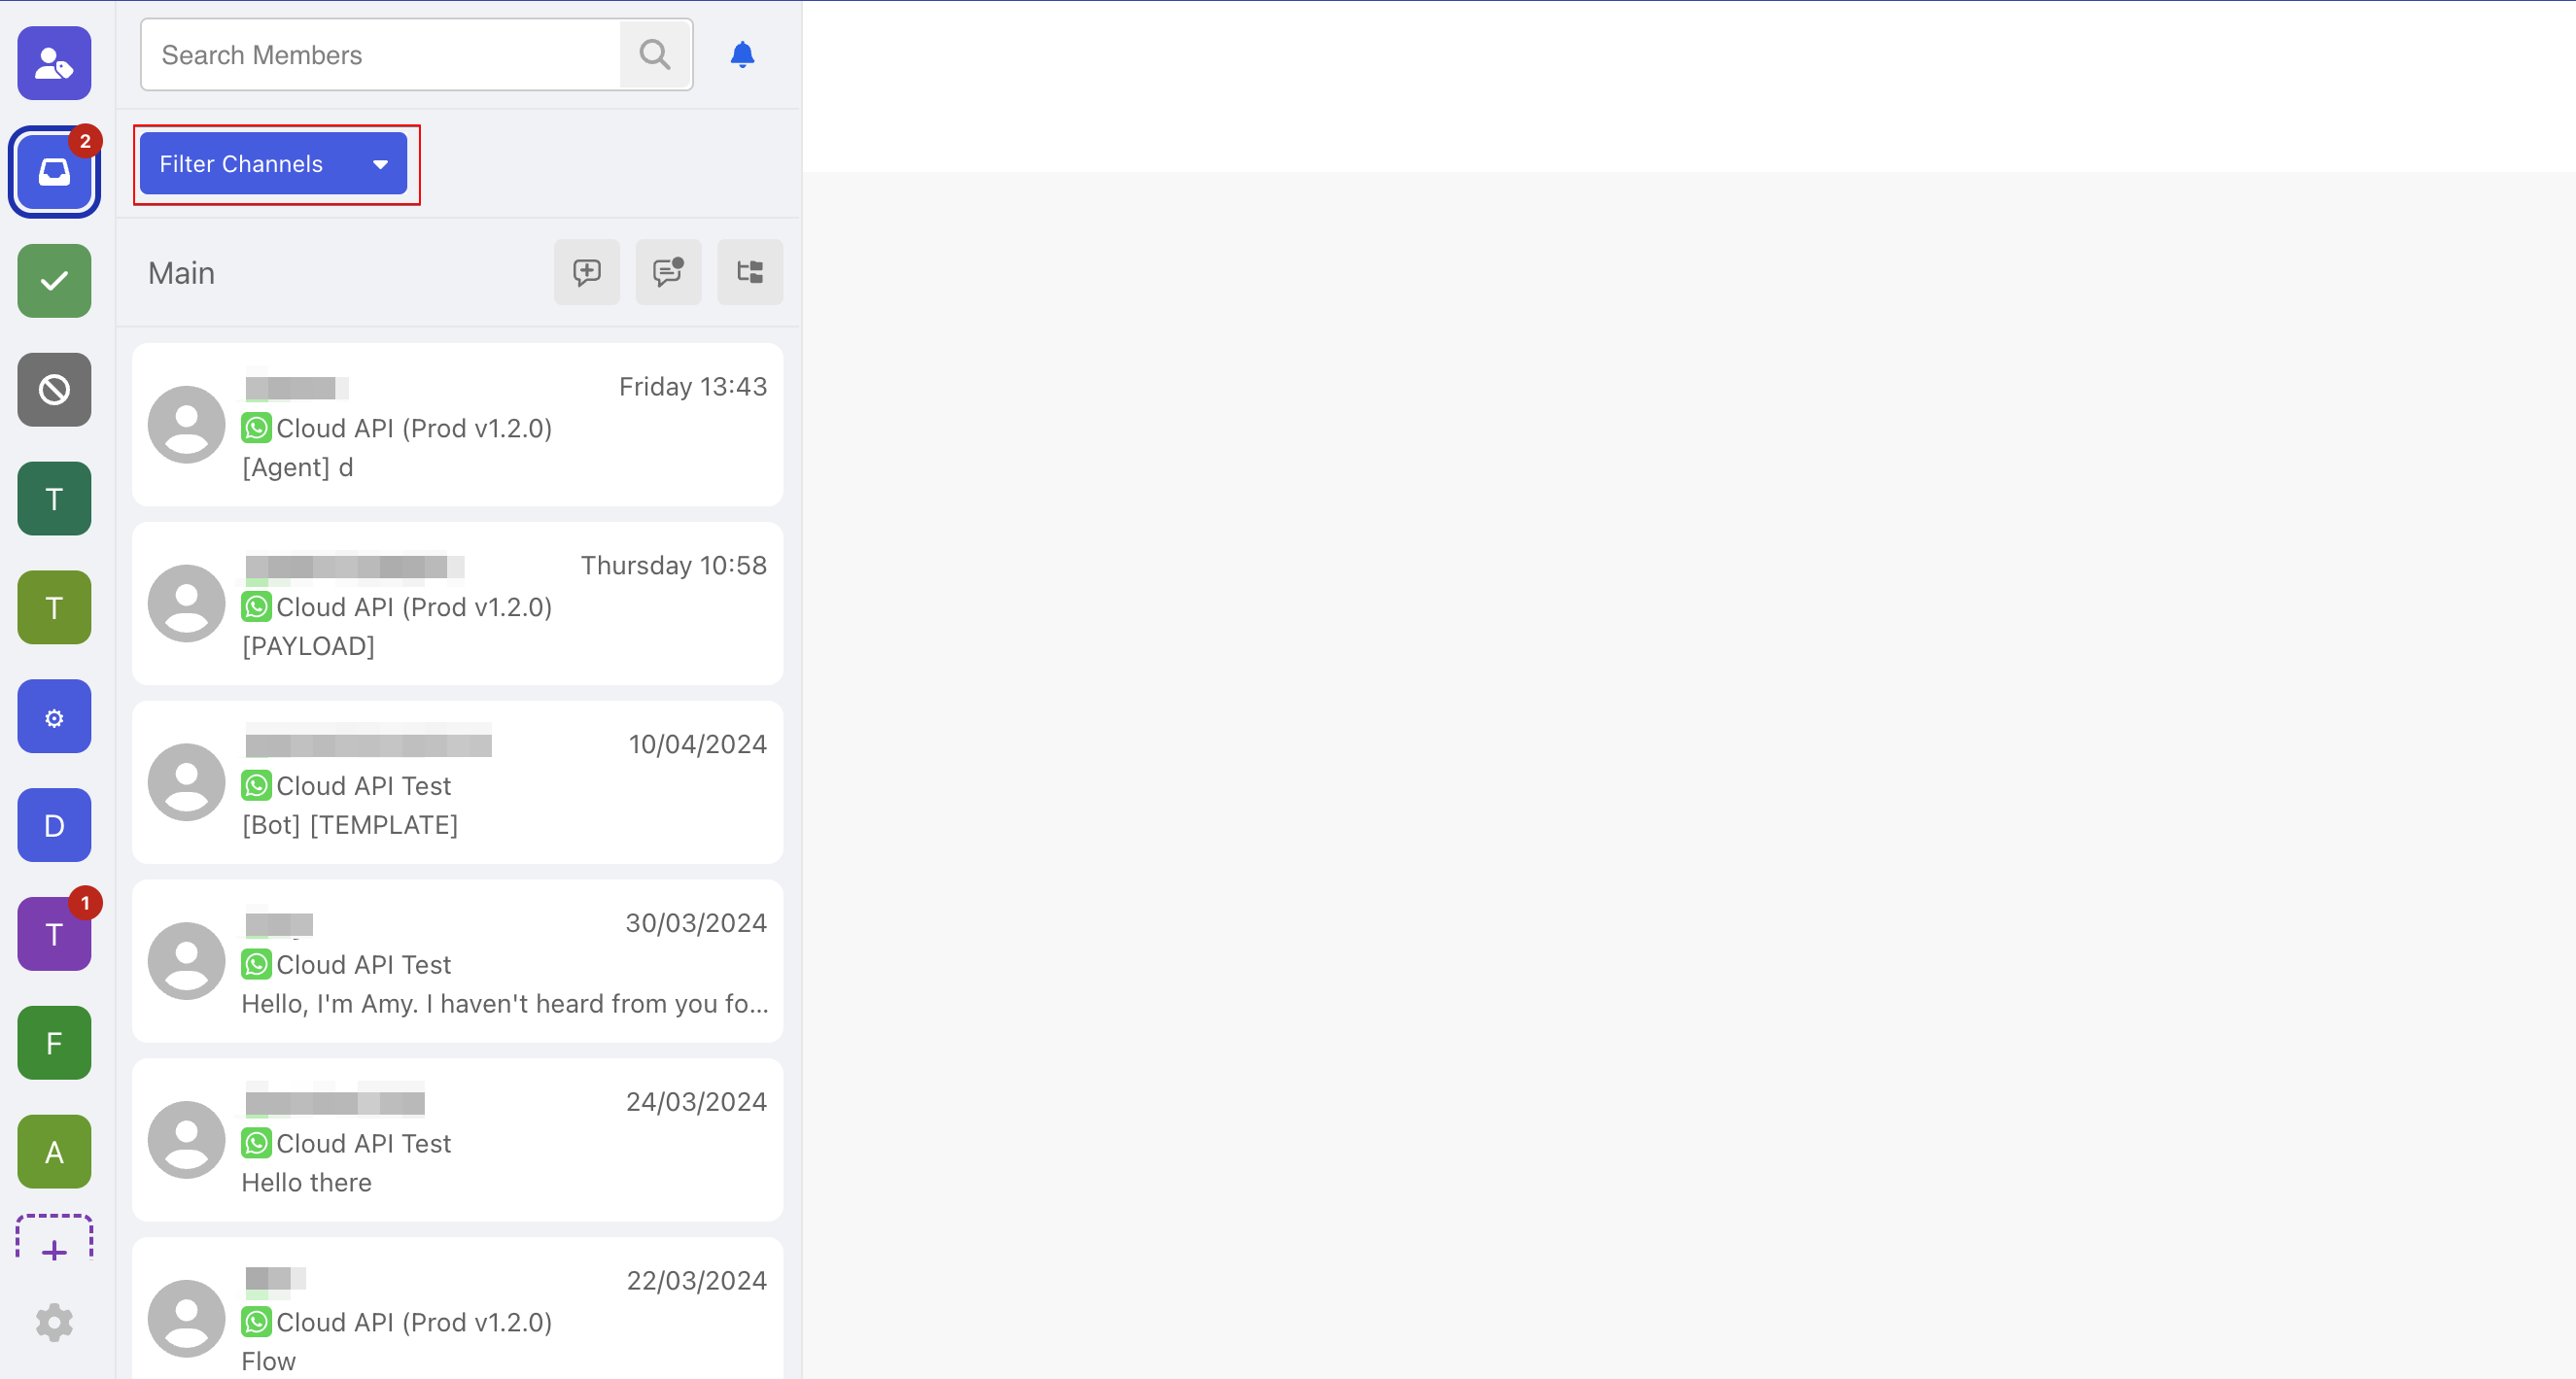
Filter Threads by Channel
- In a folder, you can filter the threads by channel. To do this, you can select "Filter Channels".
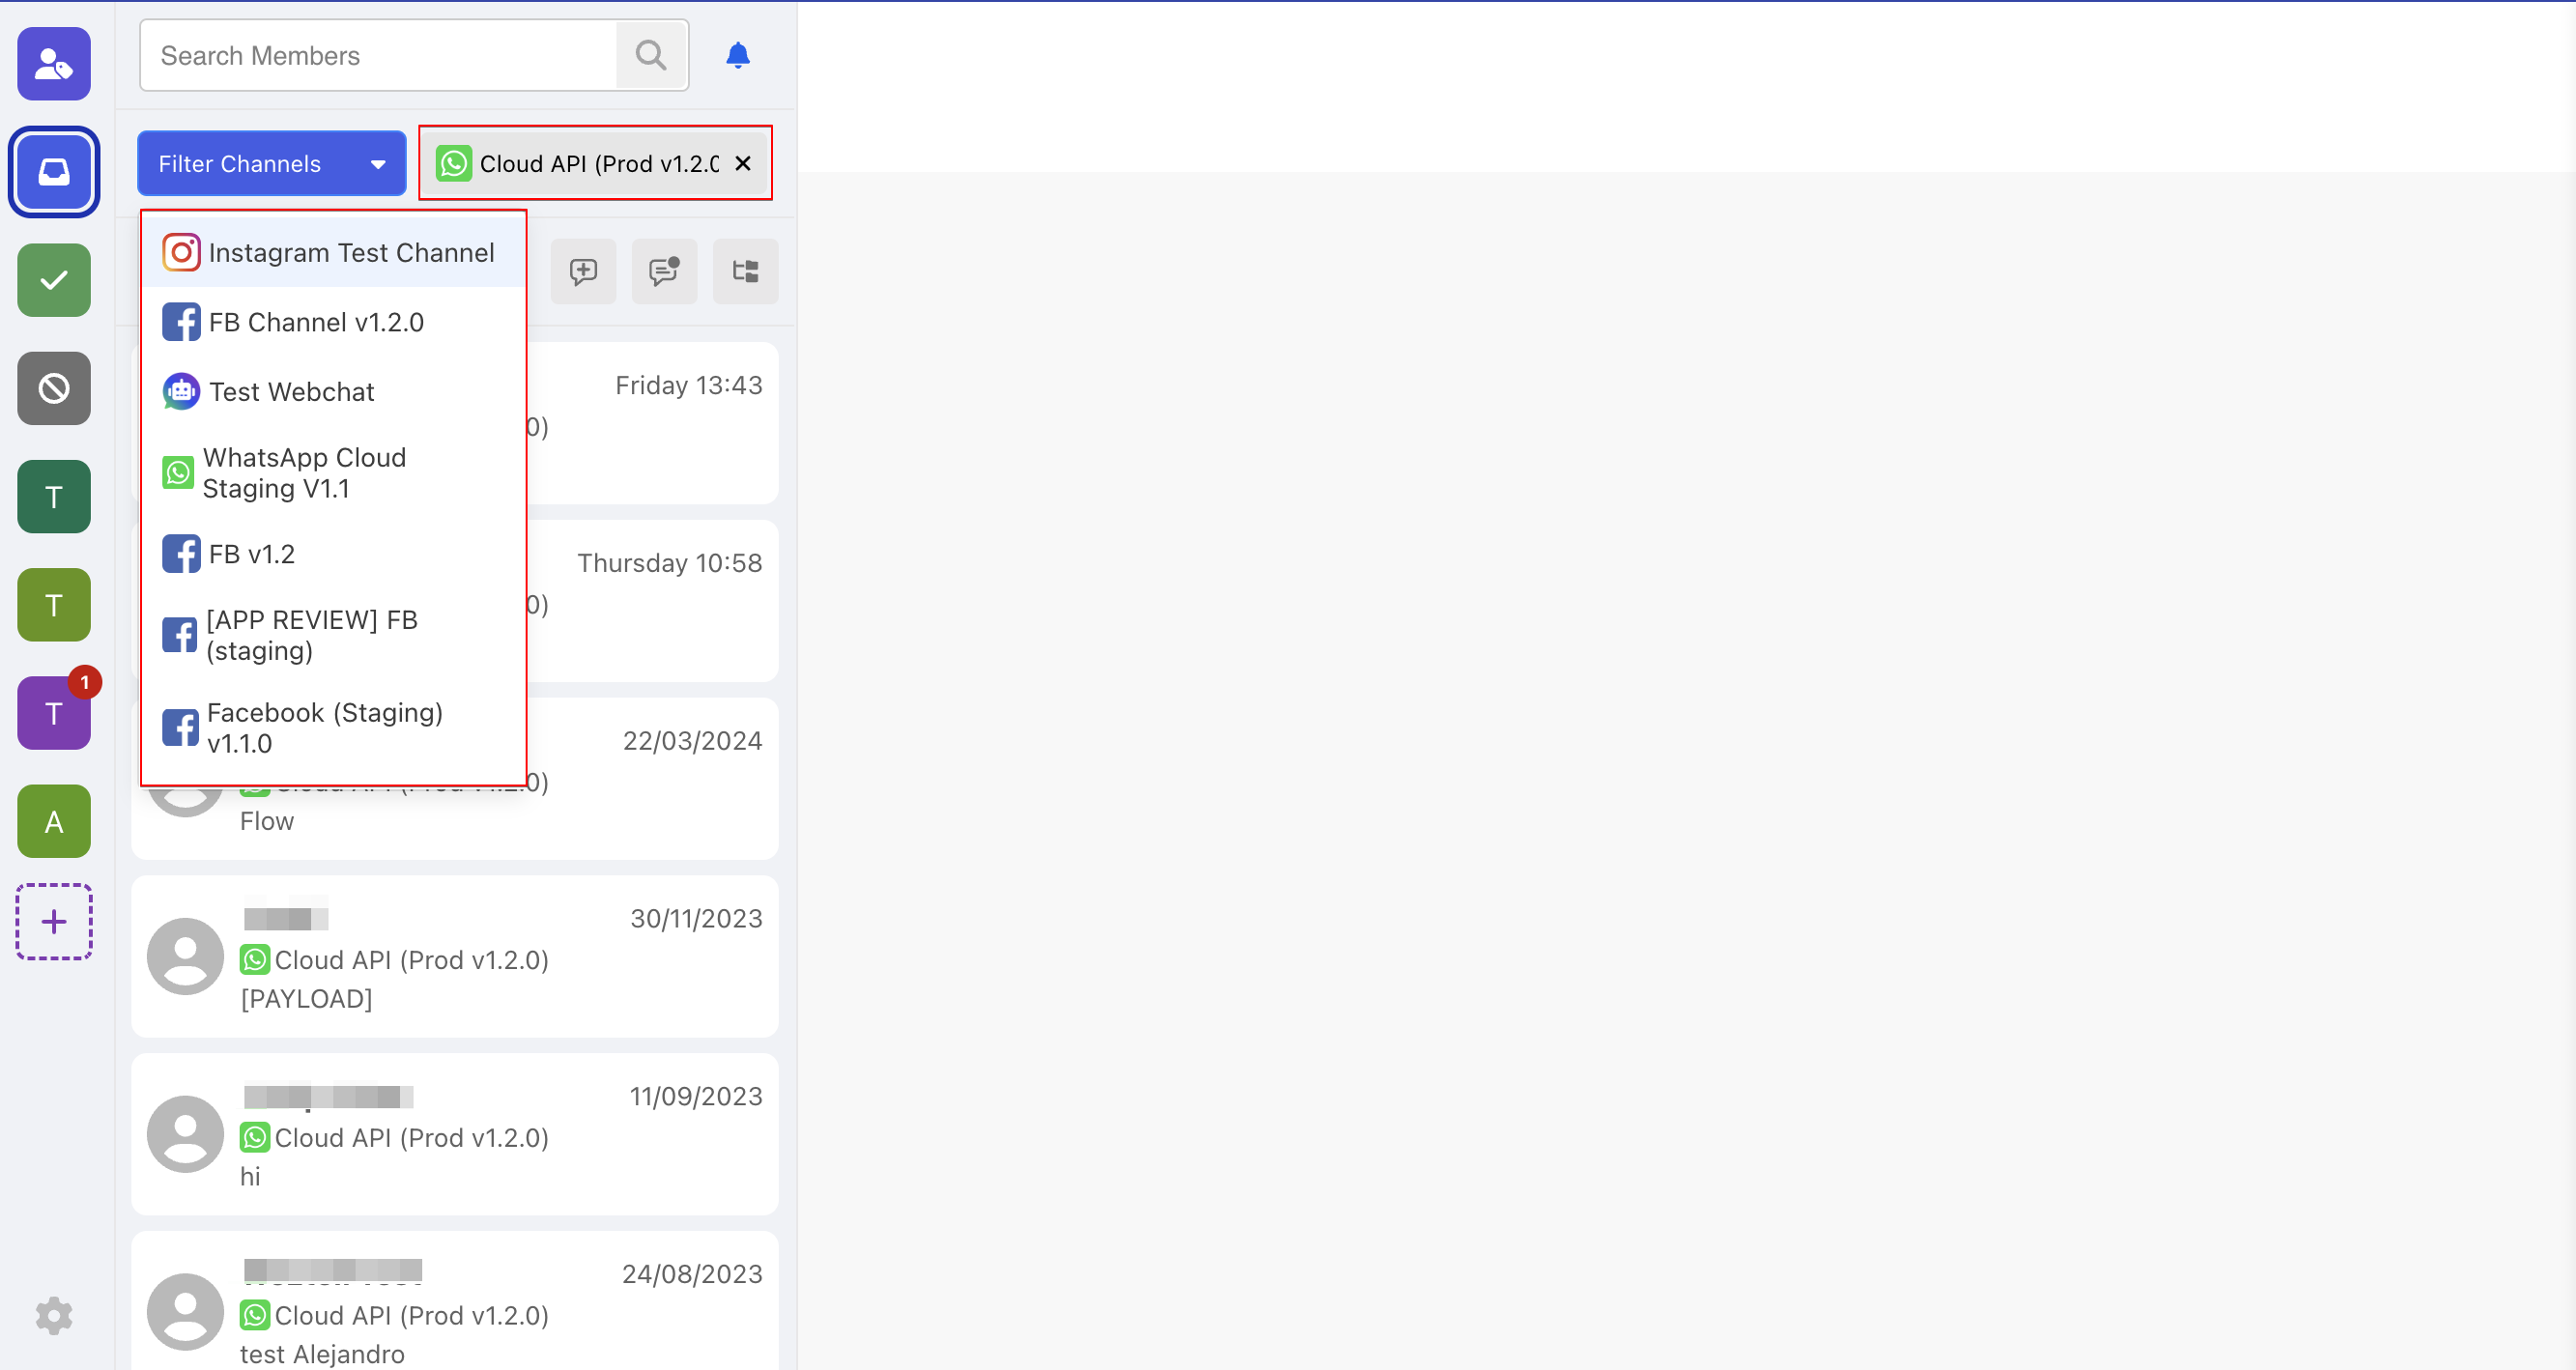
- Select one or more than one channels that you would like to filter by.
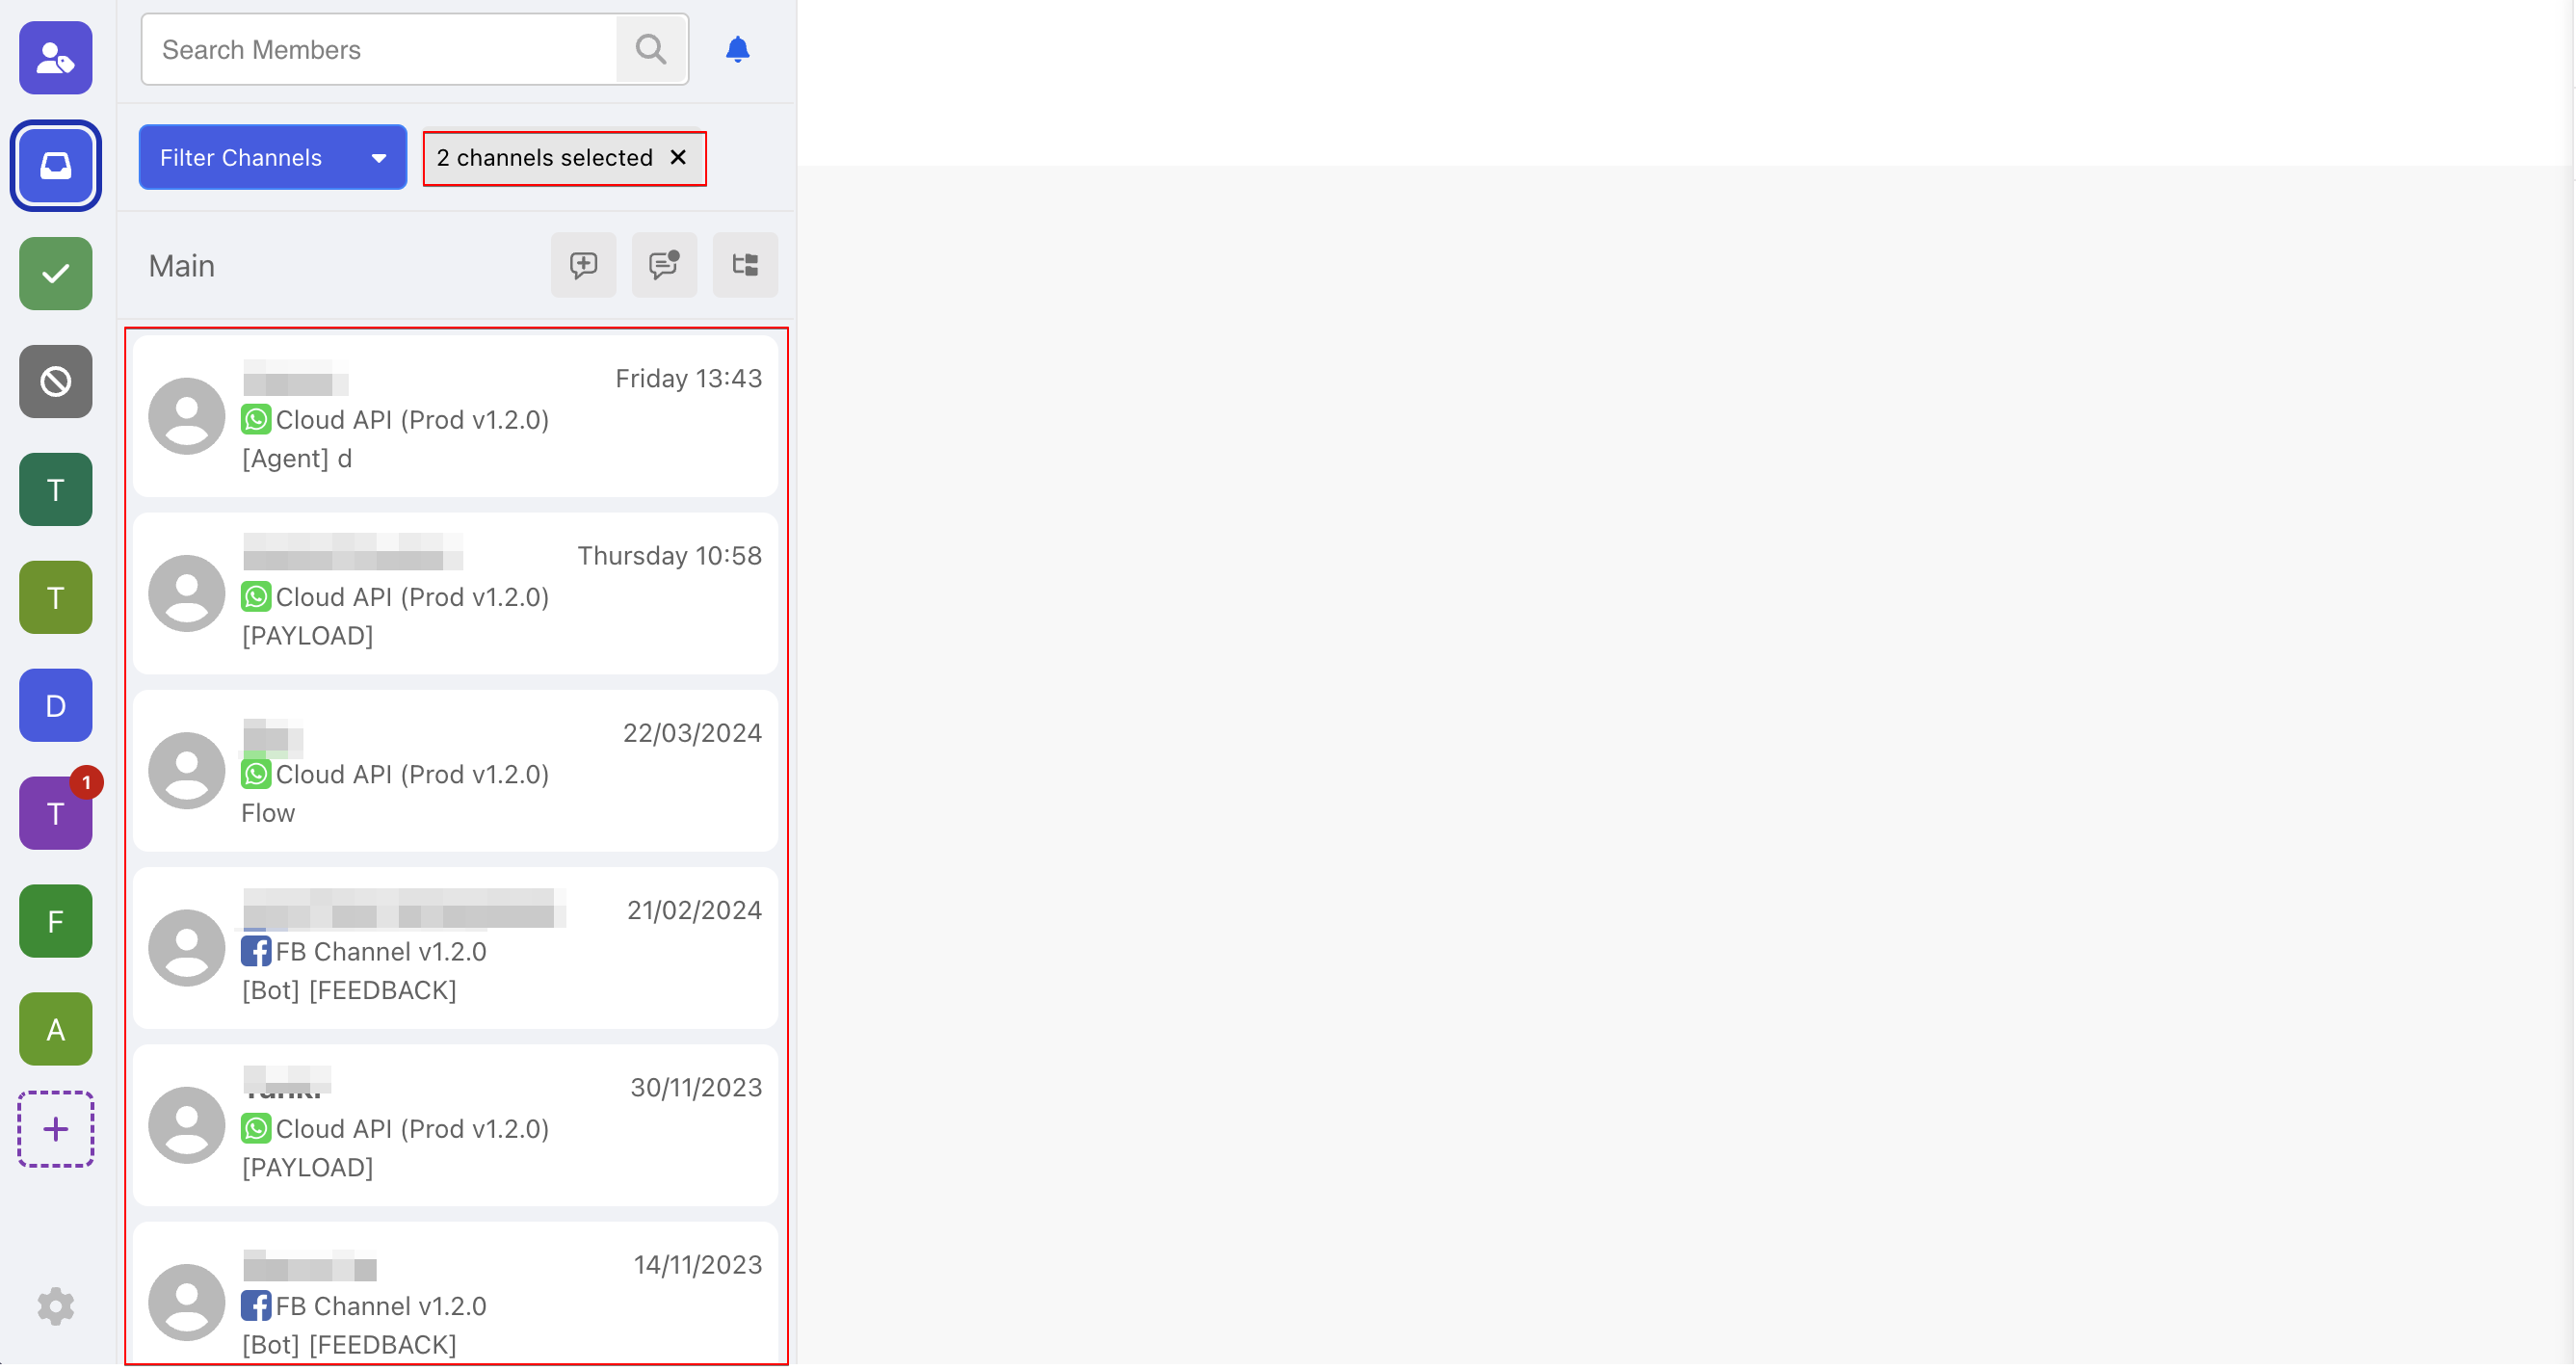
- The filtered results will be displayed in the thread list.
tip
Filter Channels is a folder-based filtering, you need to switch to another folder in order to view the filtered results of that folder.
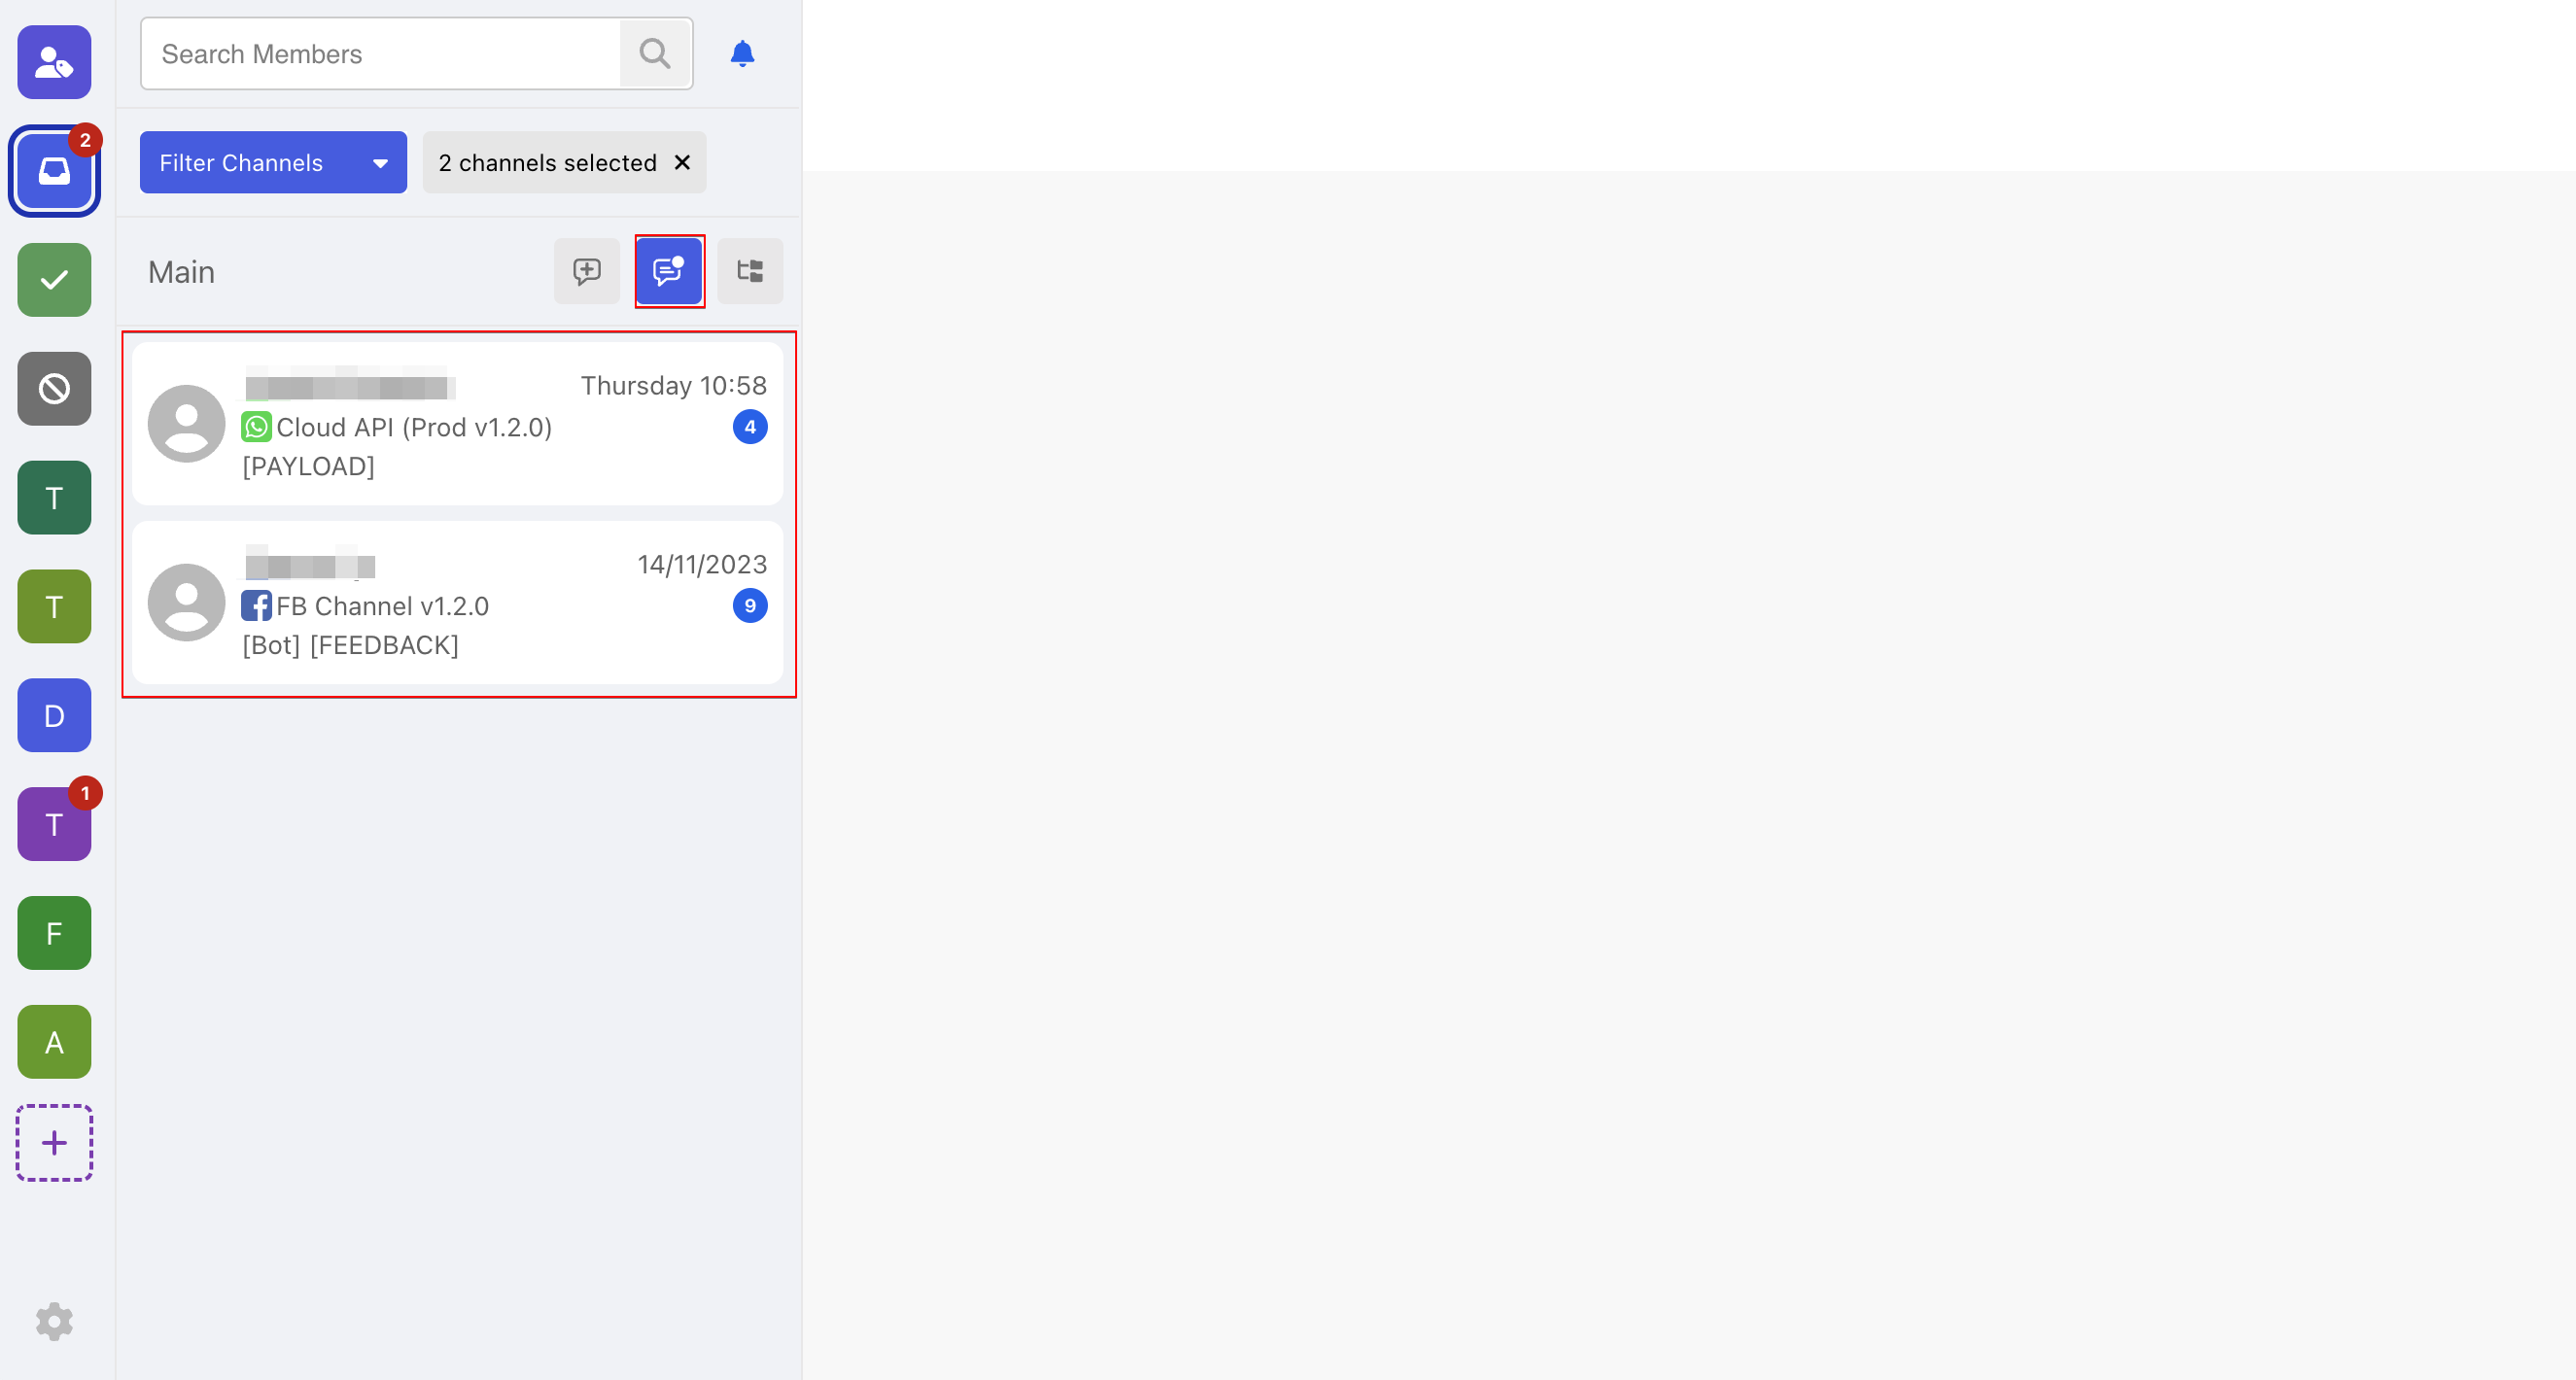
Filter Unread Threads
Click on Filter Unread Threads to only list out the threads with unread messages.
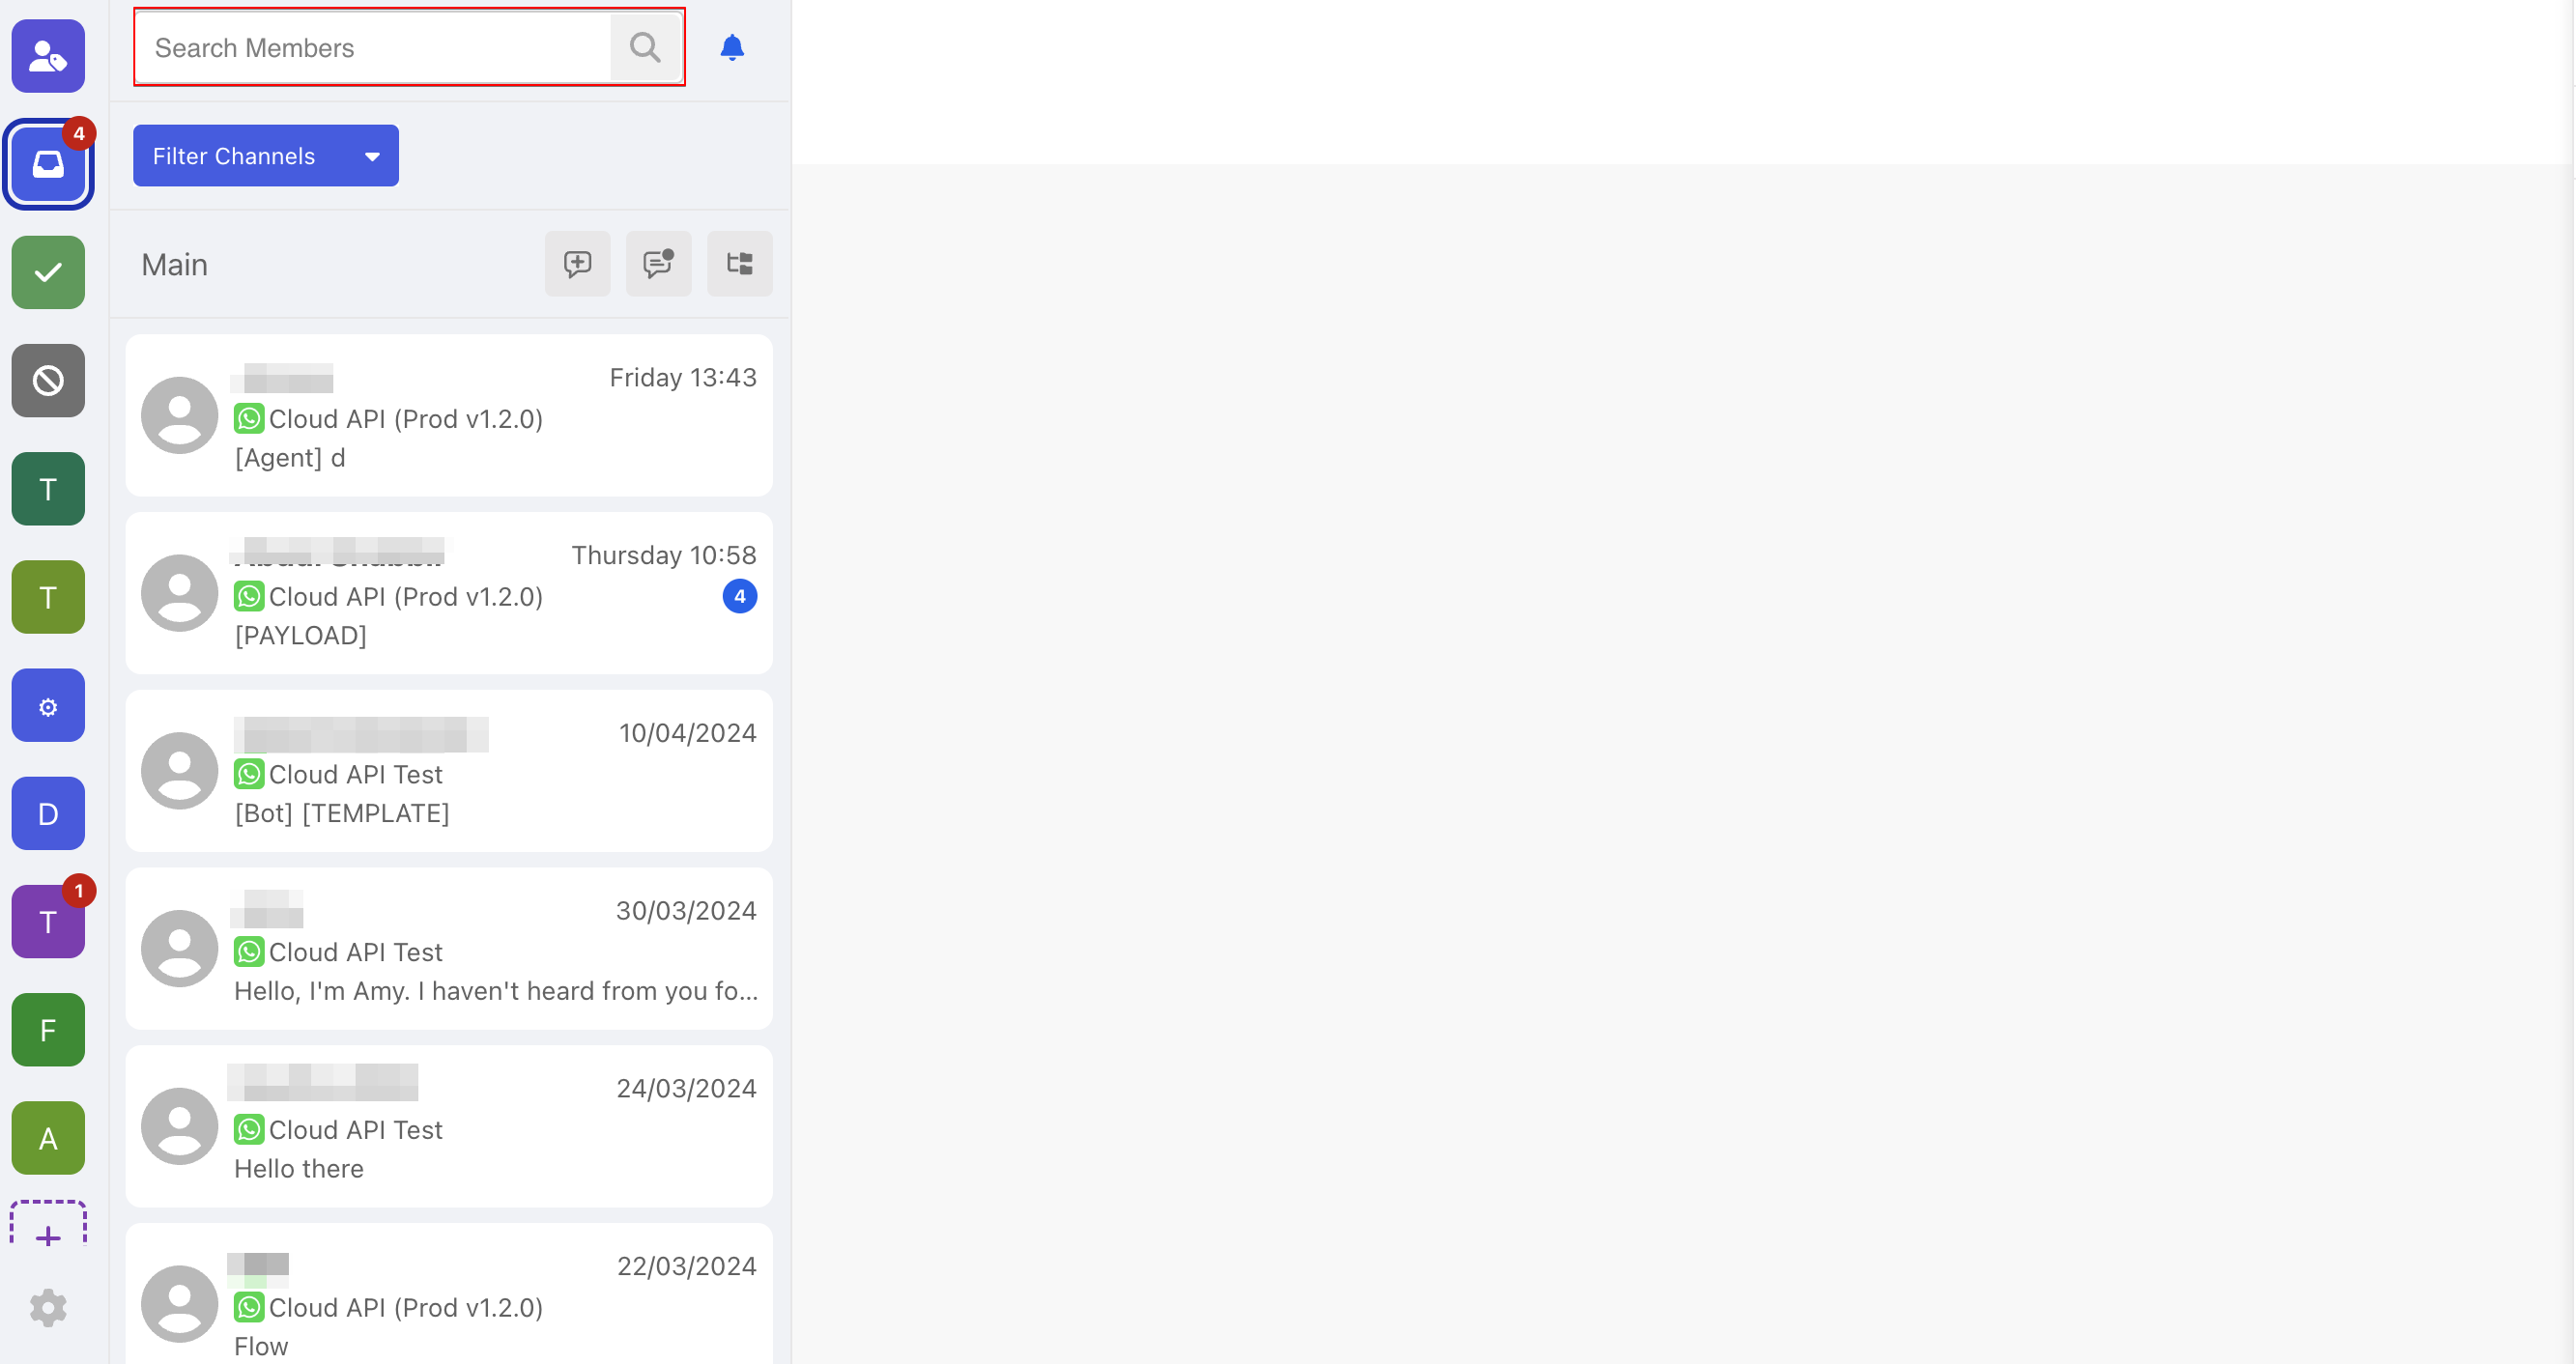
Search Threads
- To search threads, select the "Search" icon at the top left.
Reminder
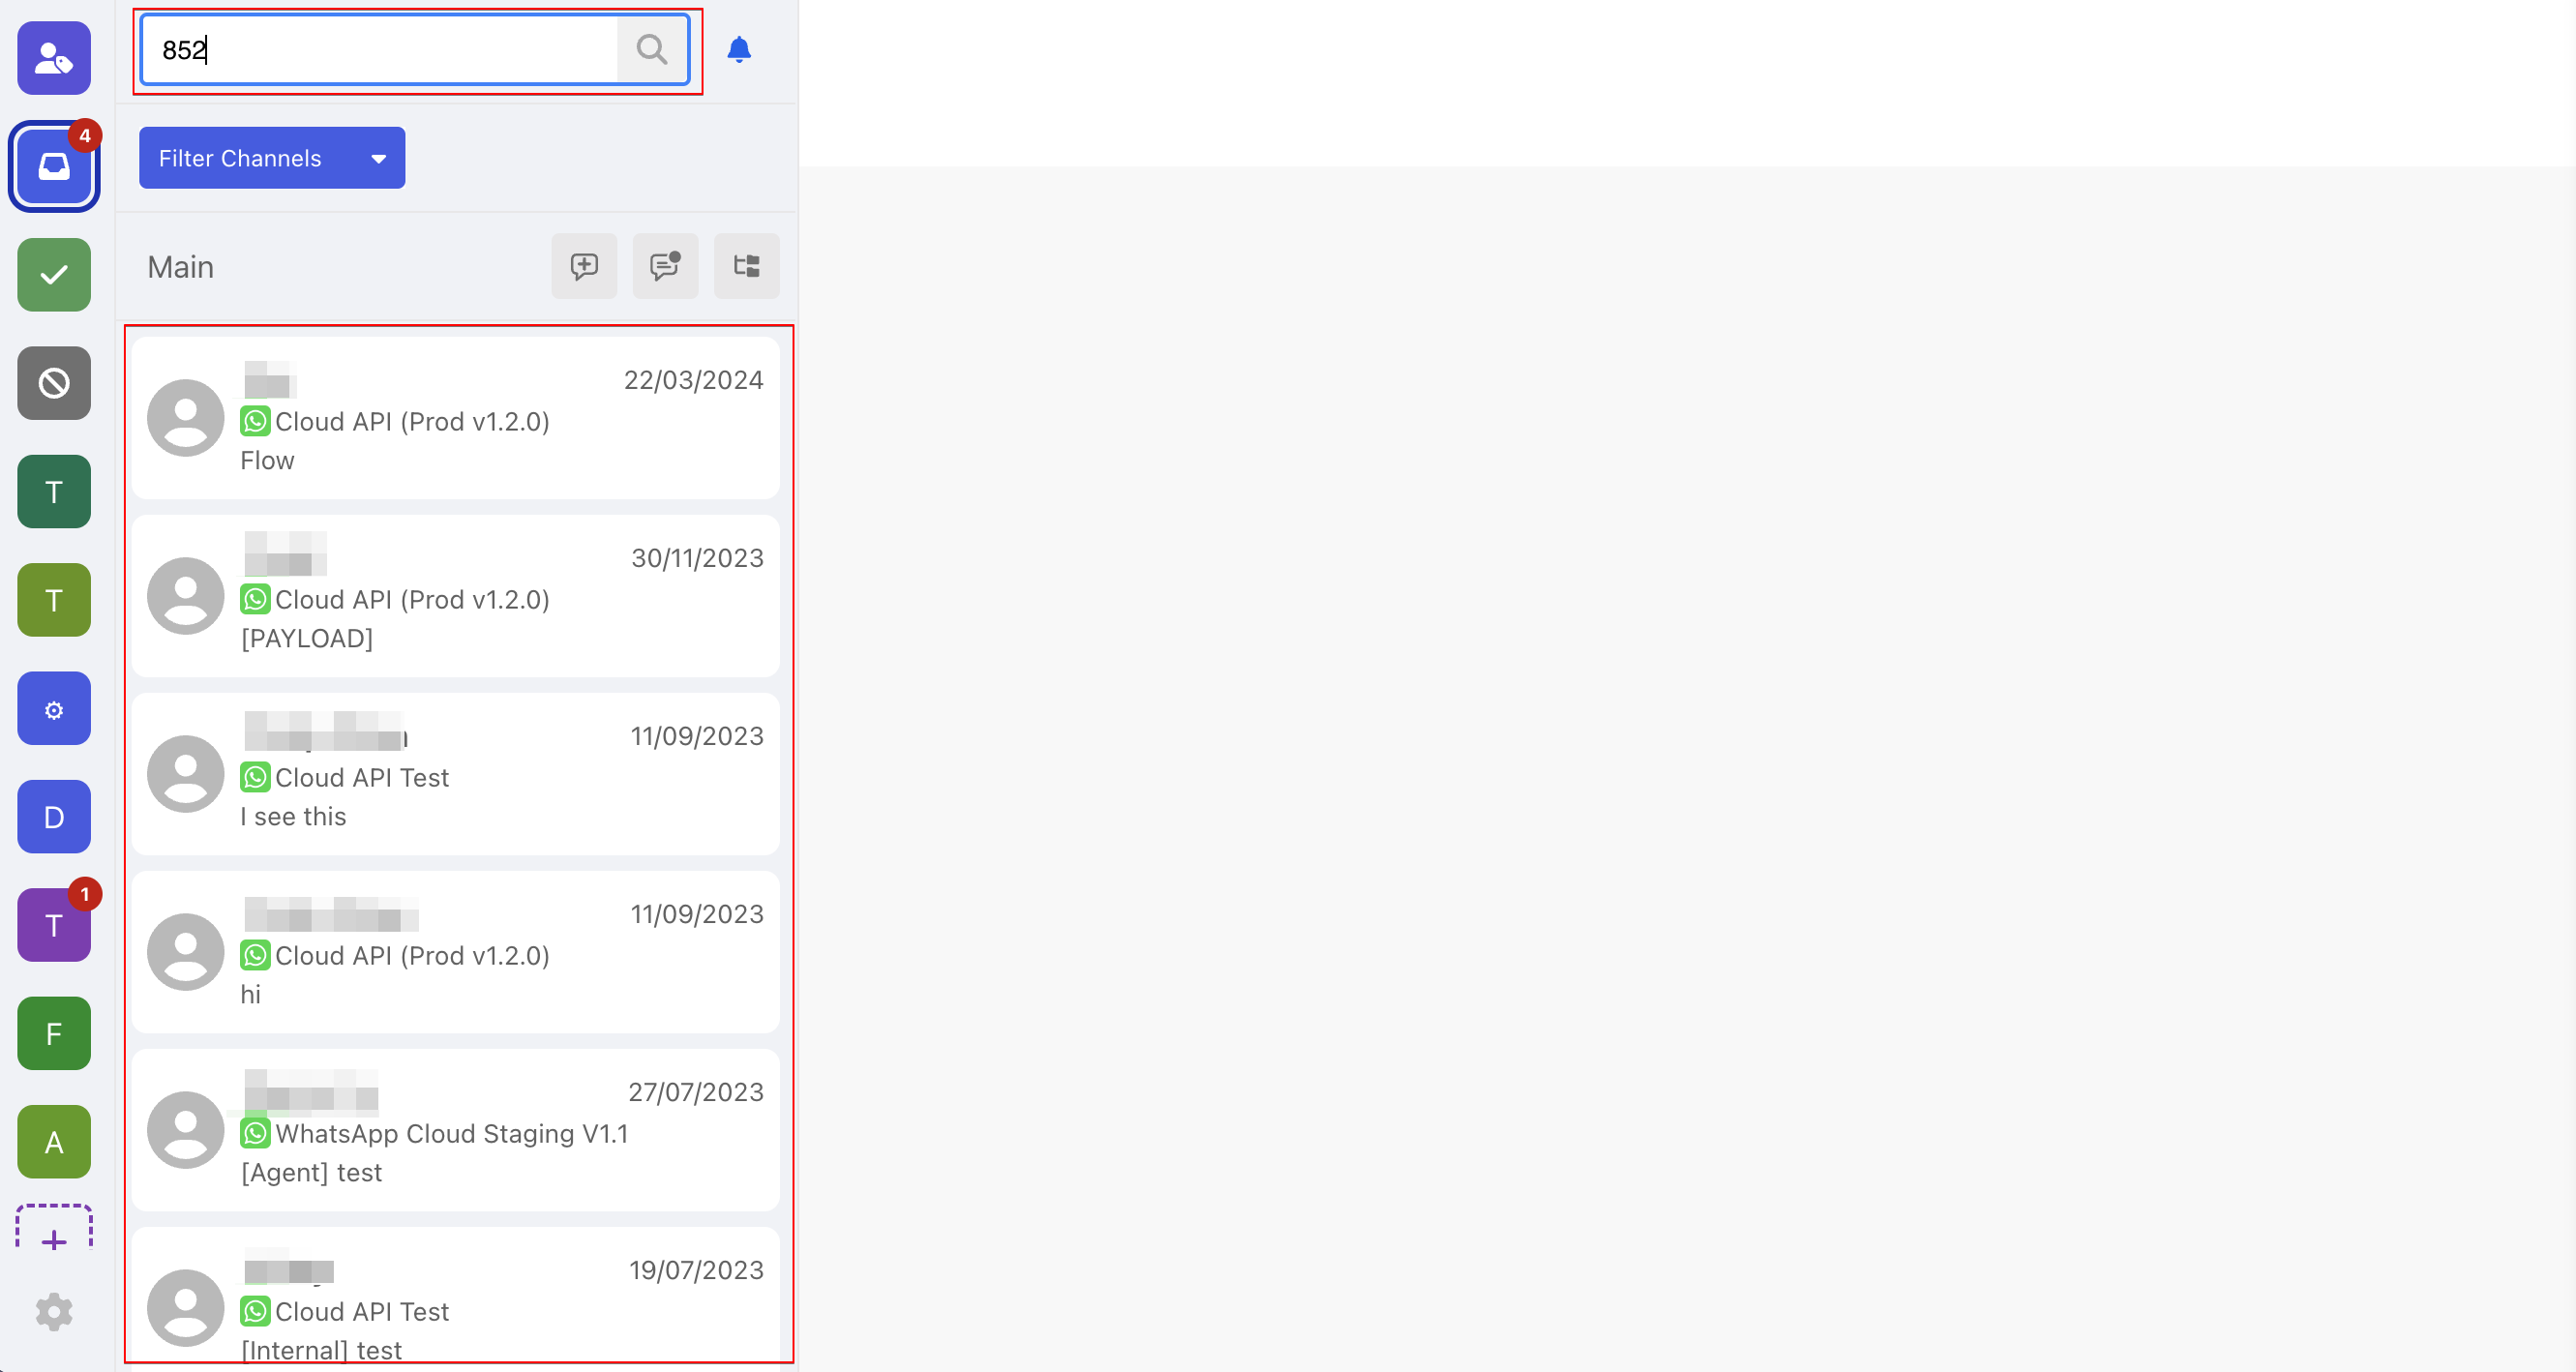
- Search Threads is not folder-based, it will present results across different folders.
- When Search Threads are applied, the result will be fixed. The new message afterwards will not be reflected until the you apply the filter again.
- You can search by the external ID or member's name.
- The search result can be reordered in chronologically ascending or descending order.
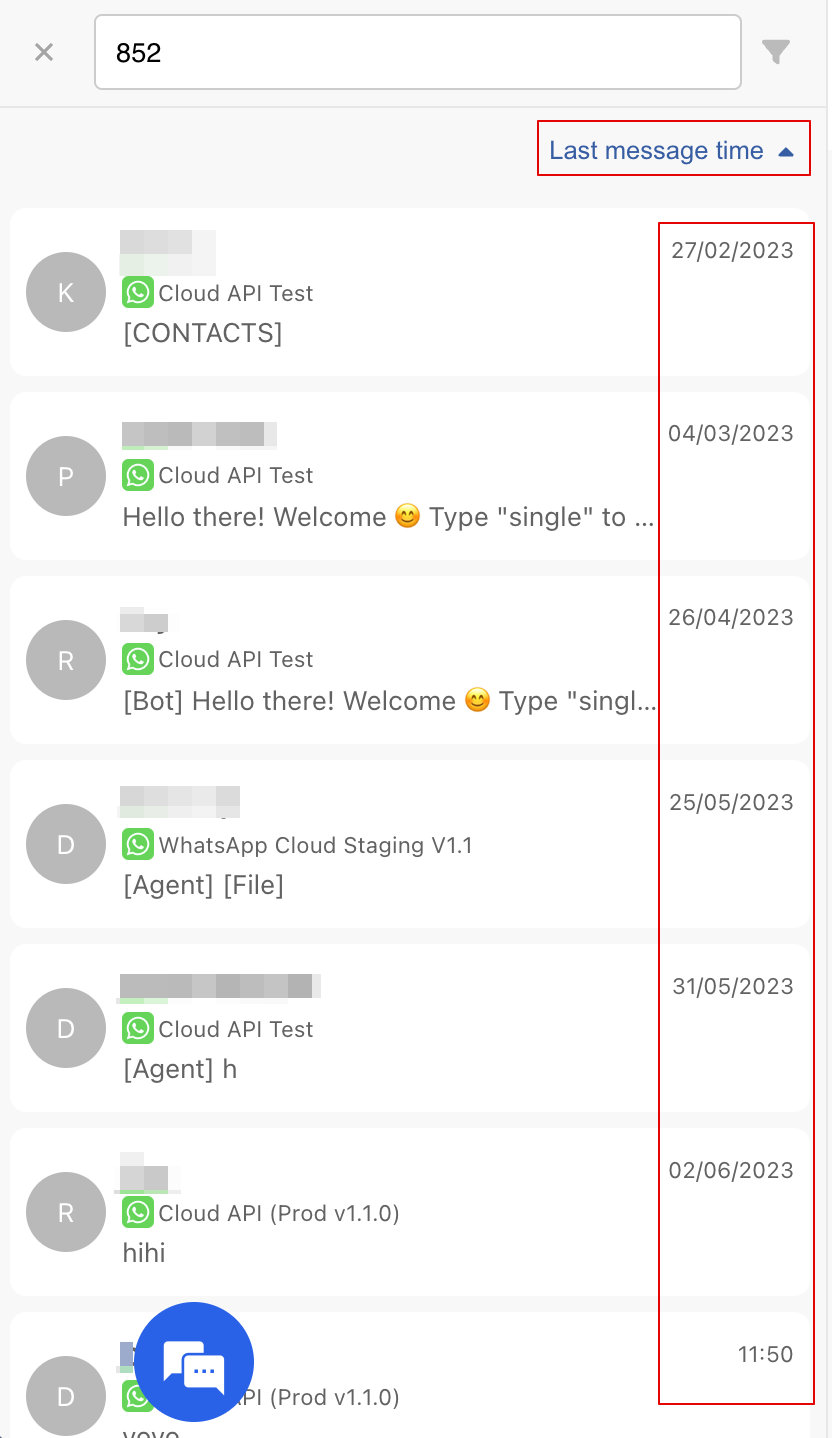
- The threads can be threaded filter by selecting the "Filter" icon.
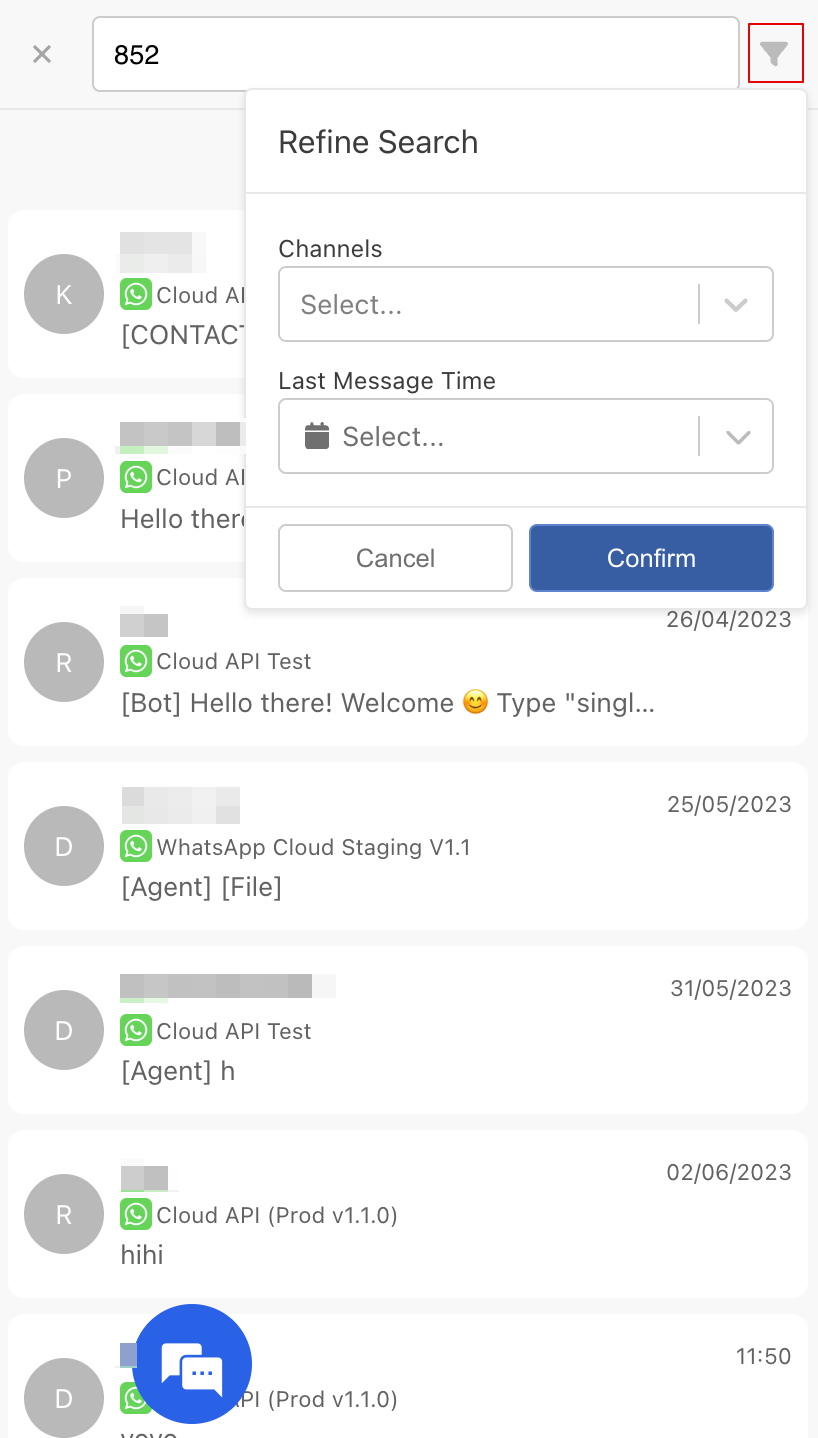
- You can filter by "Channels" and "Last Message Time".
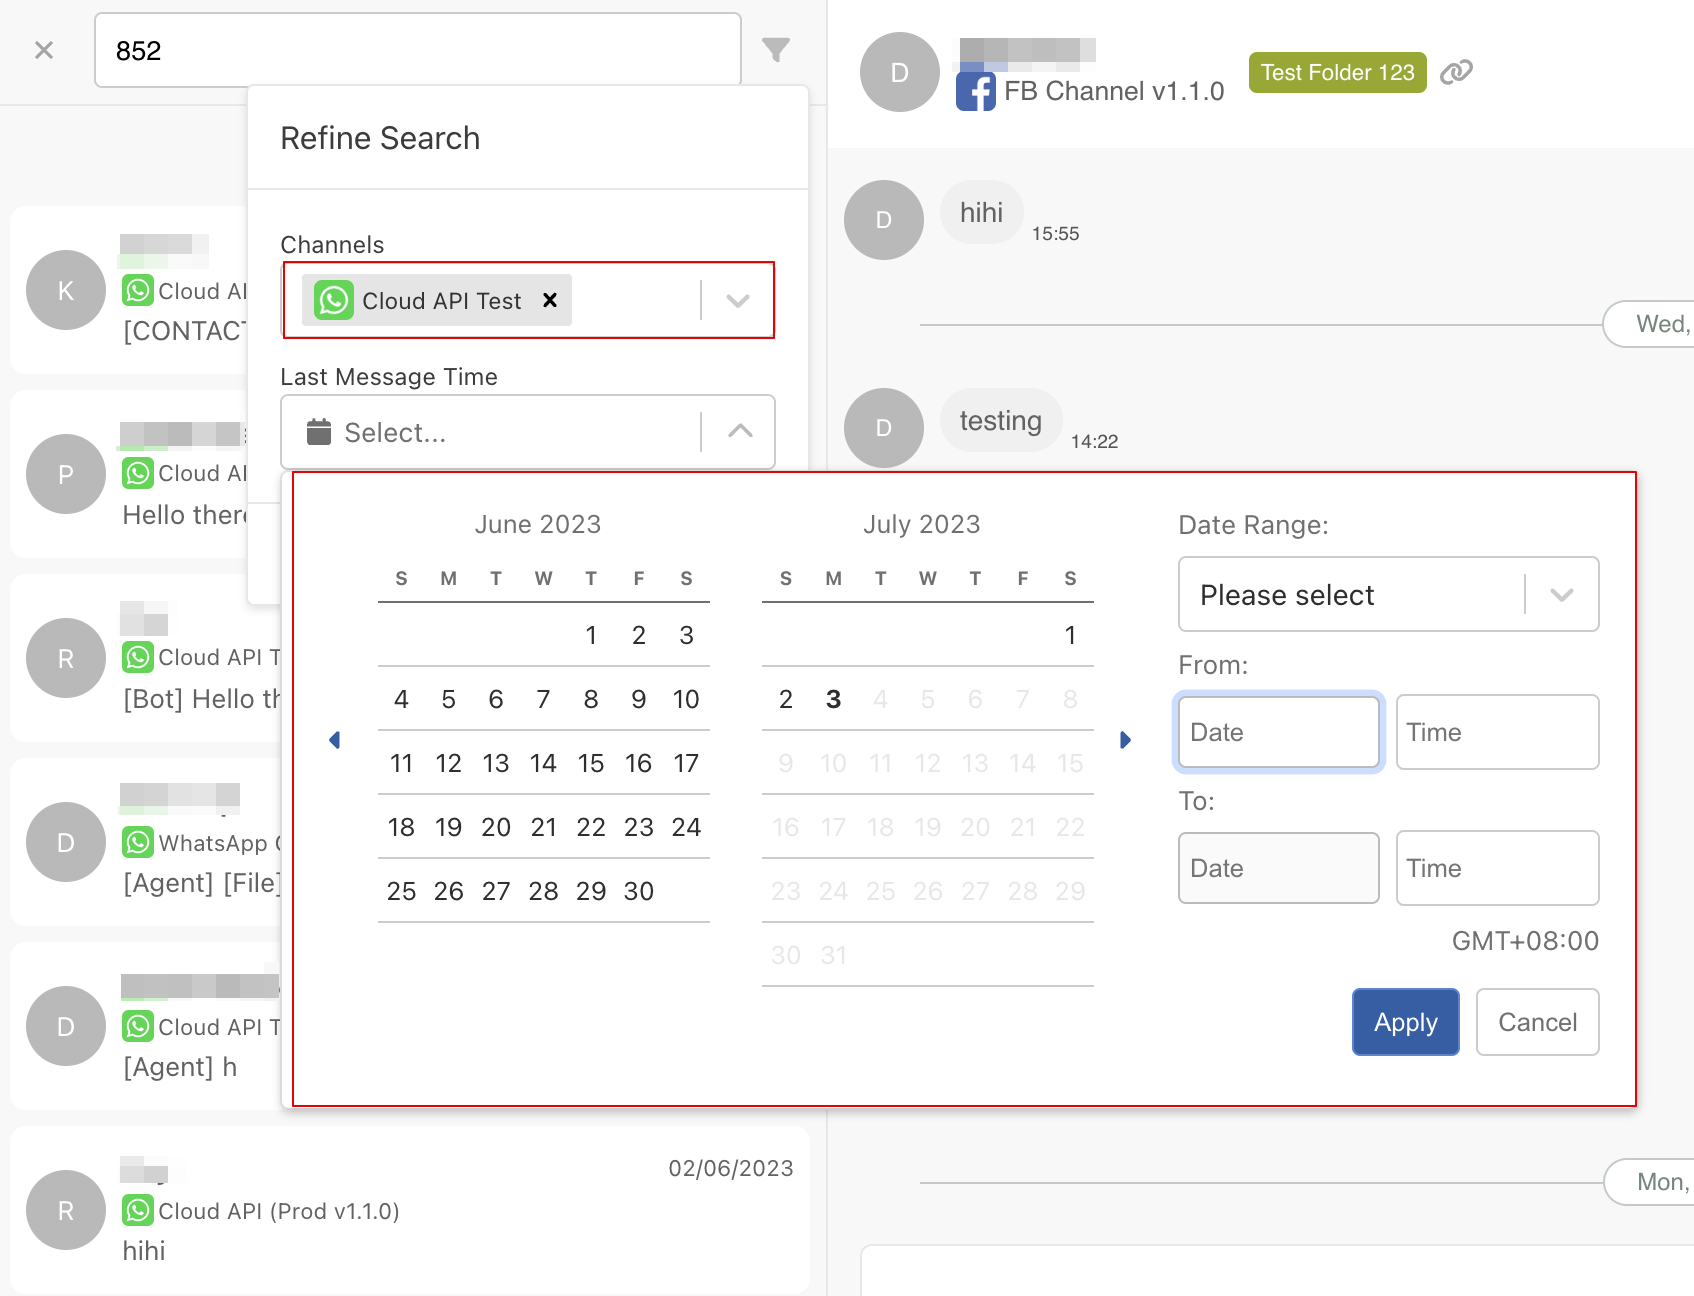
- Click "Confirm" to apply the filter.

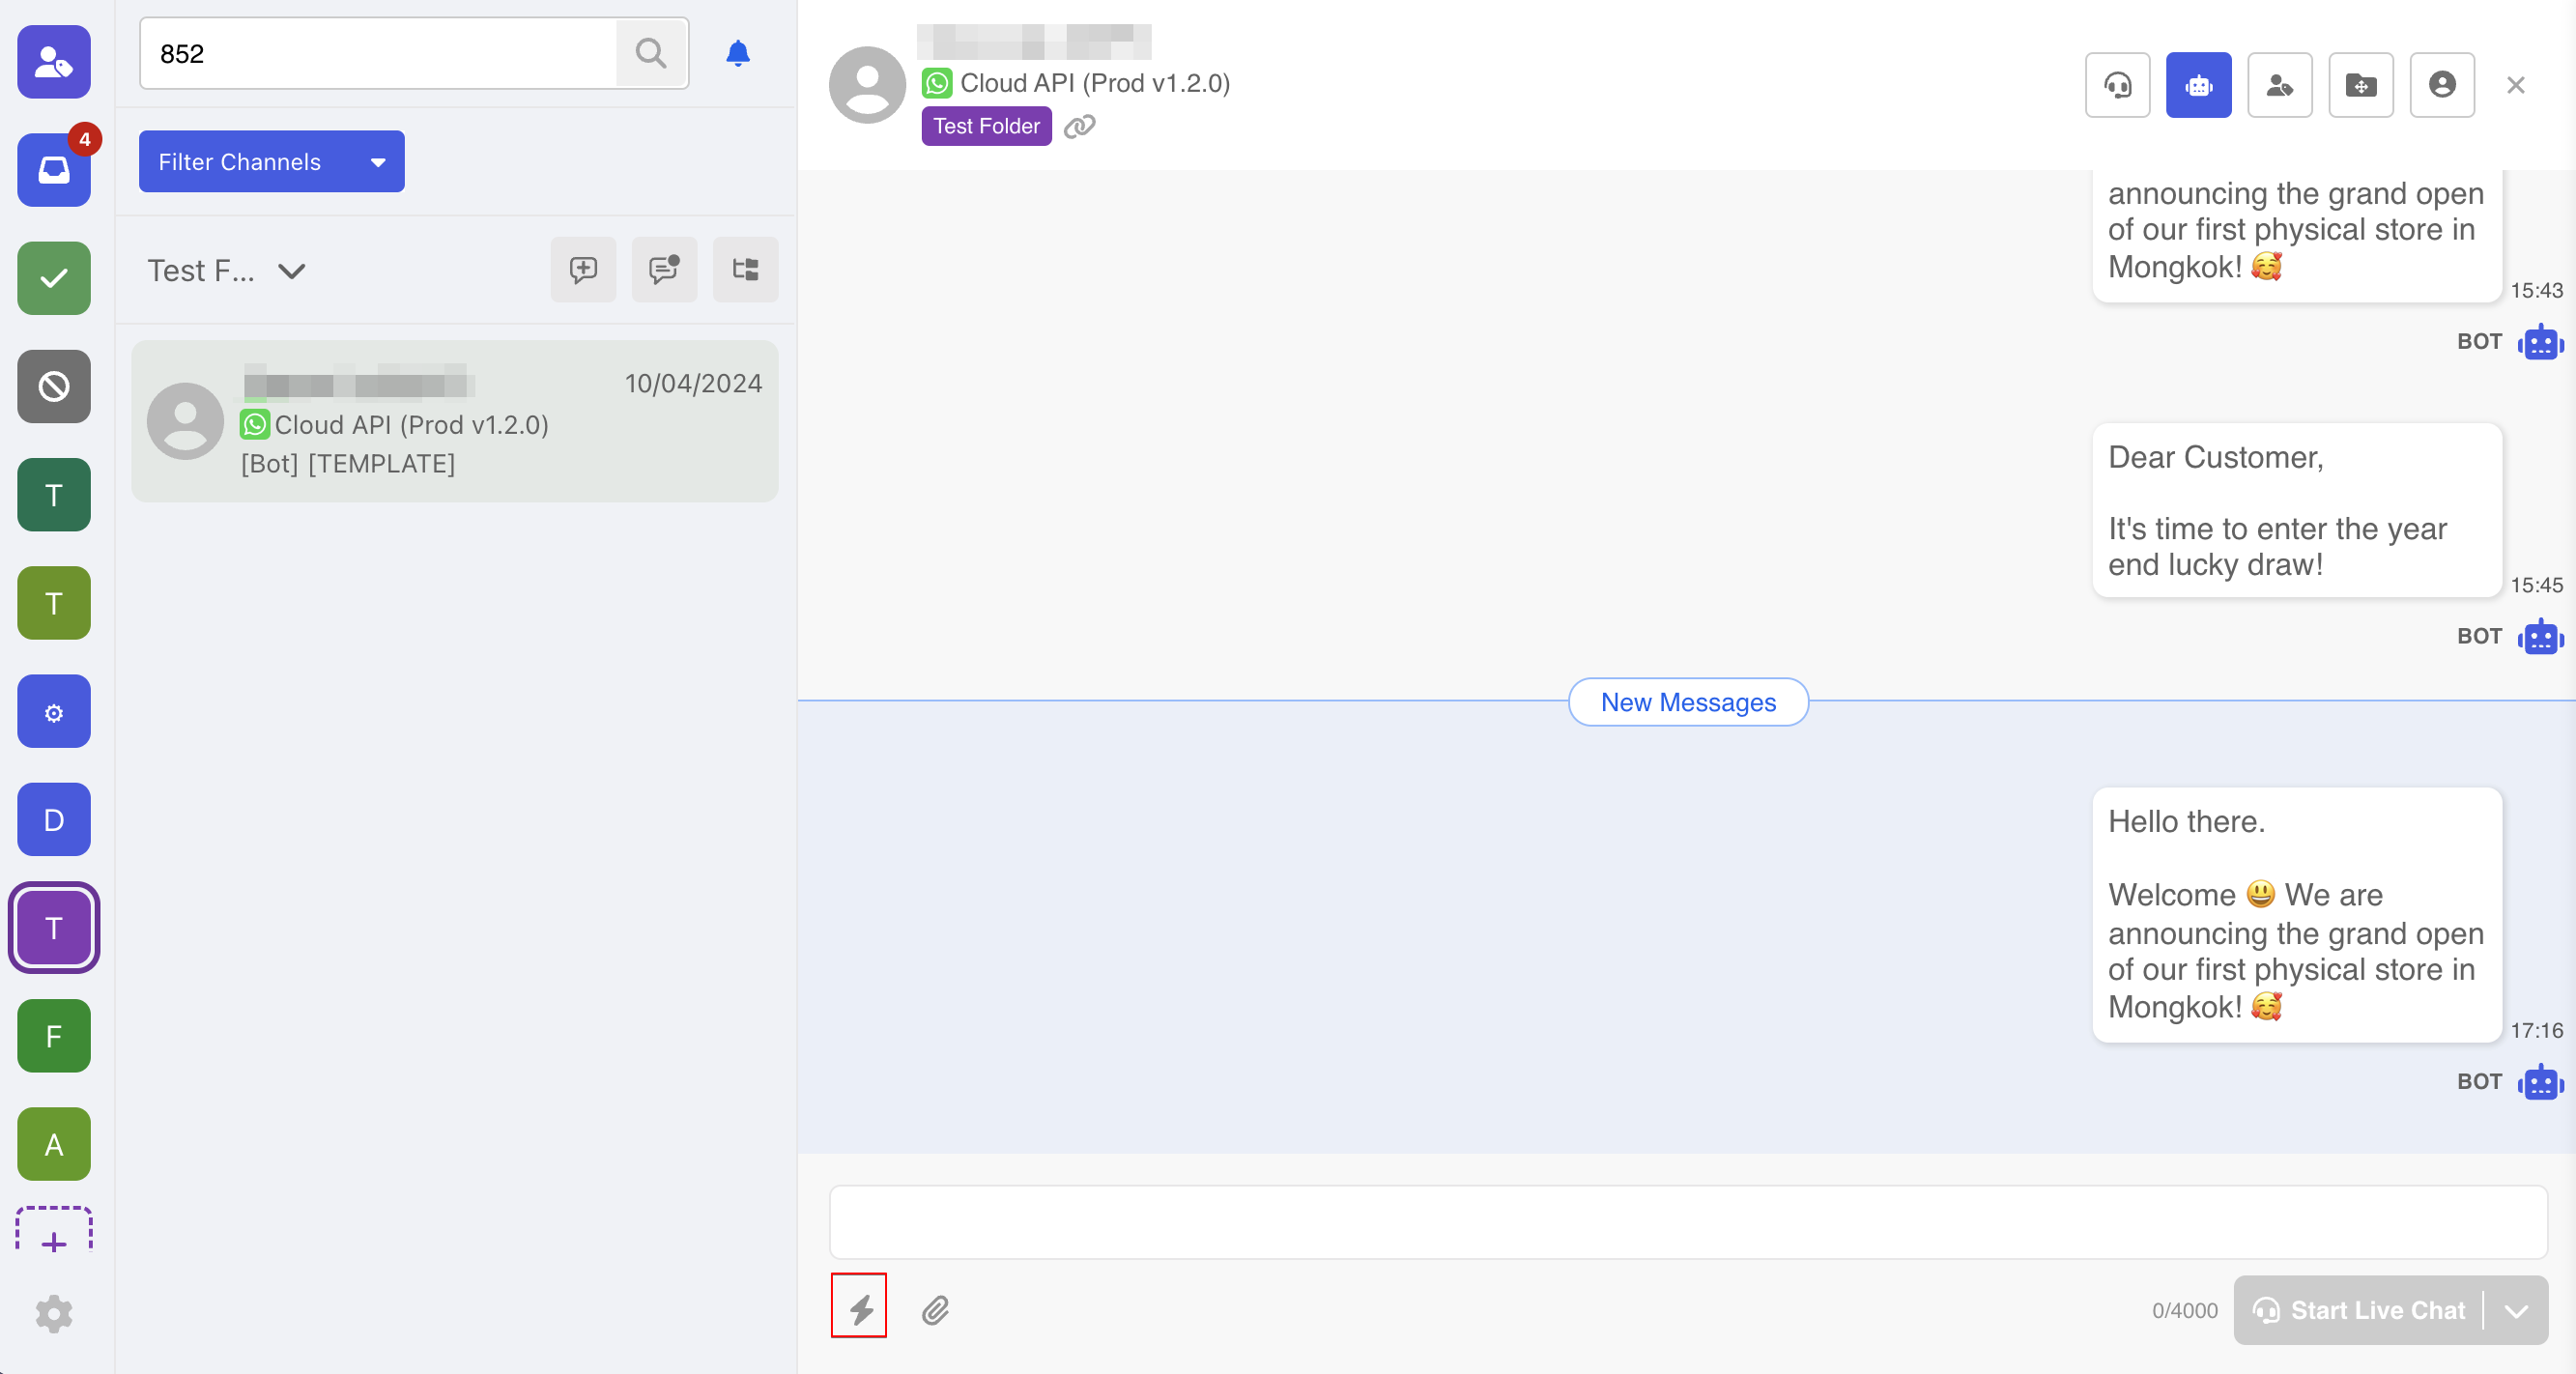
Actions
Actions enable the agents to apply features which is specific to another integration. For example, sending a WhatsApp message template directly in the thread.
Send Message Template
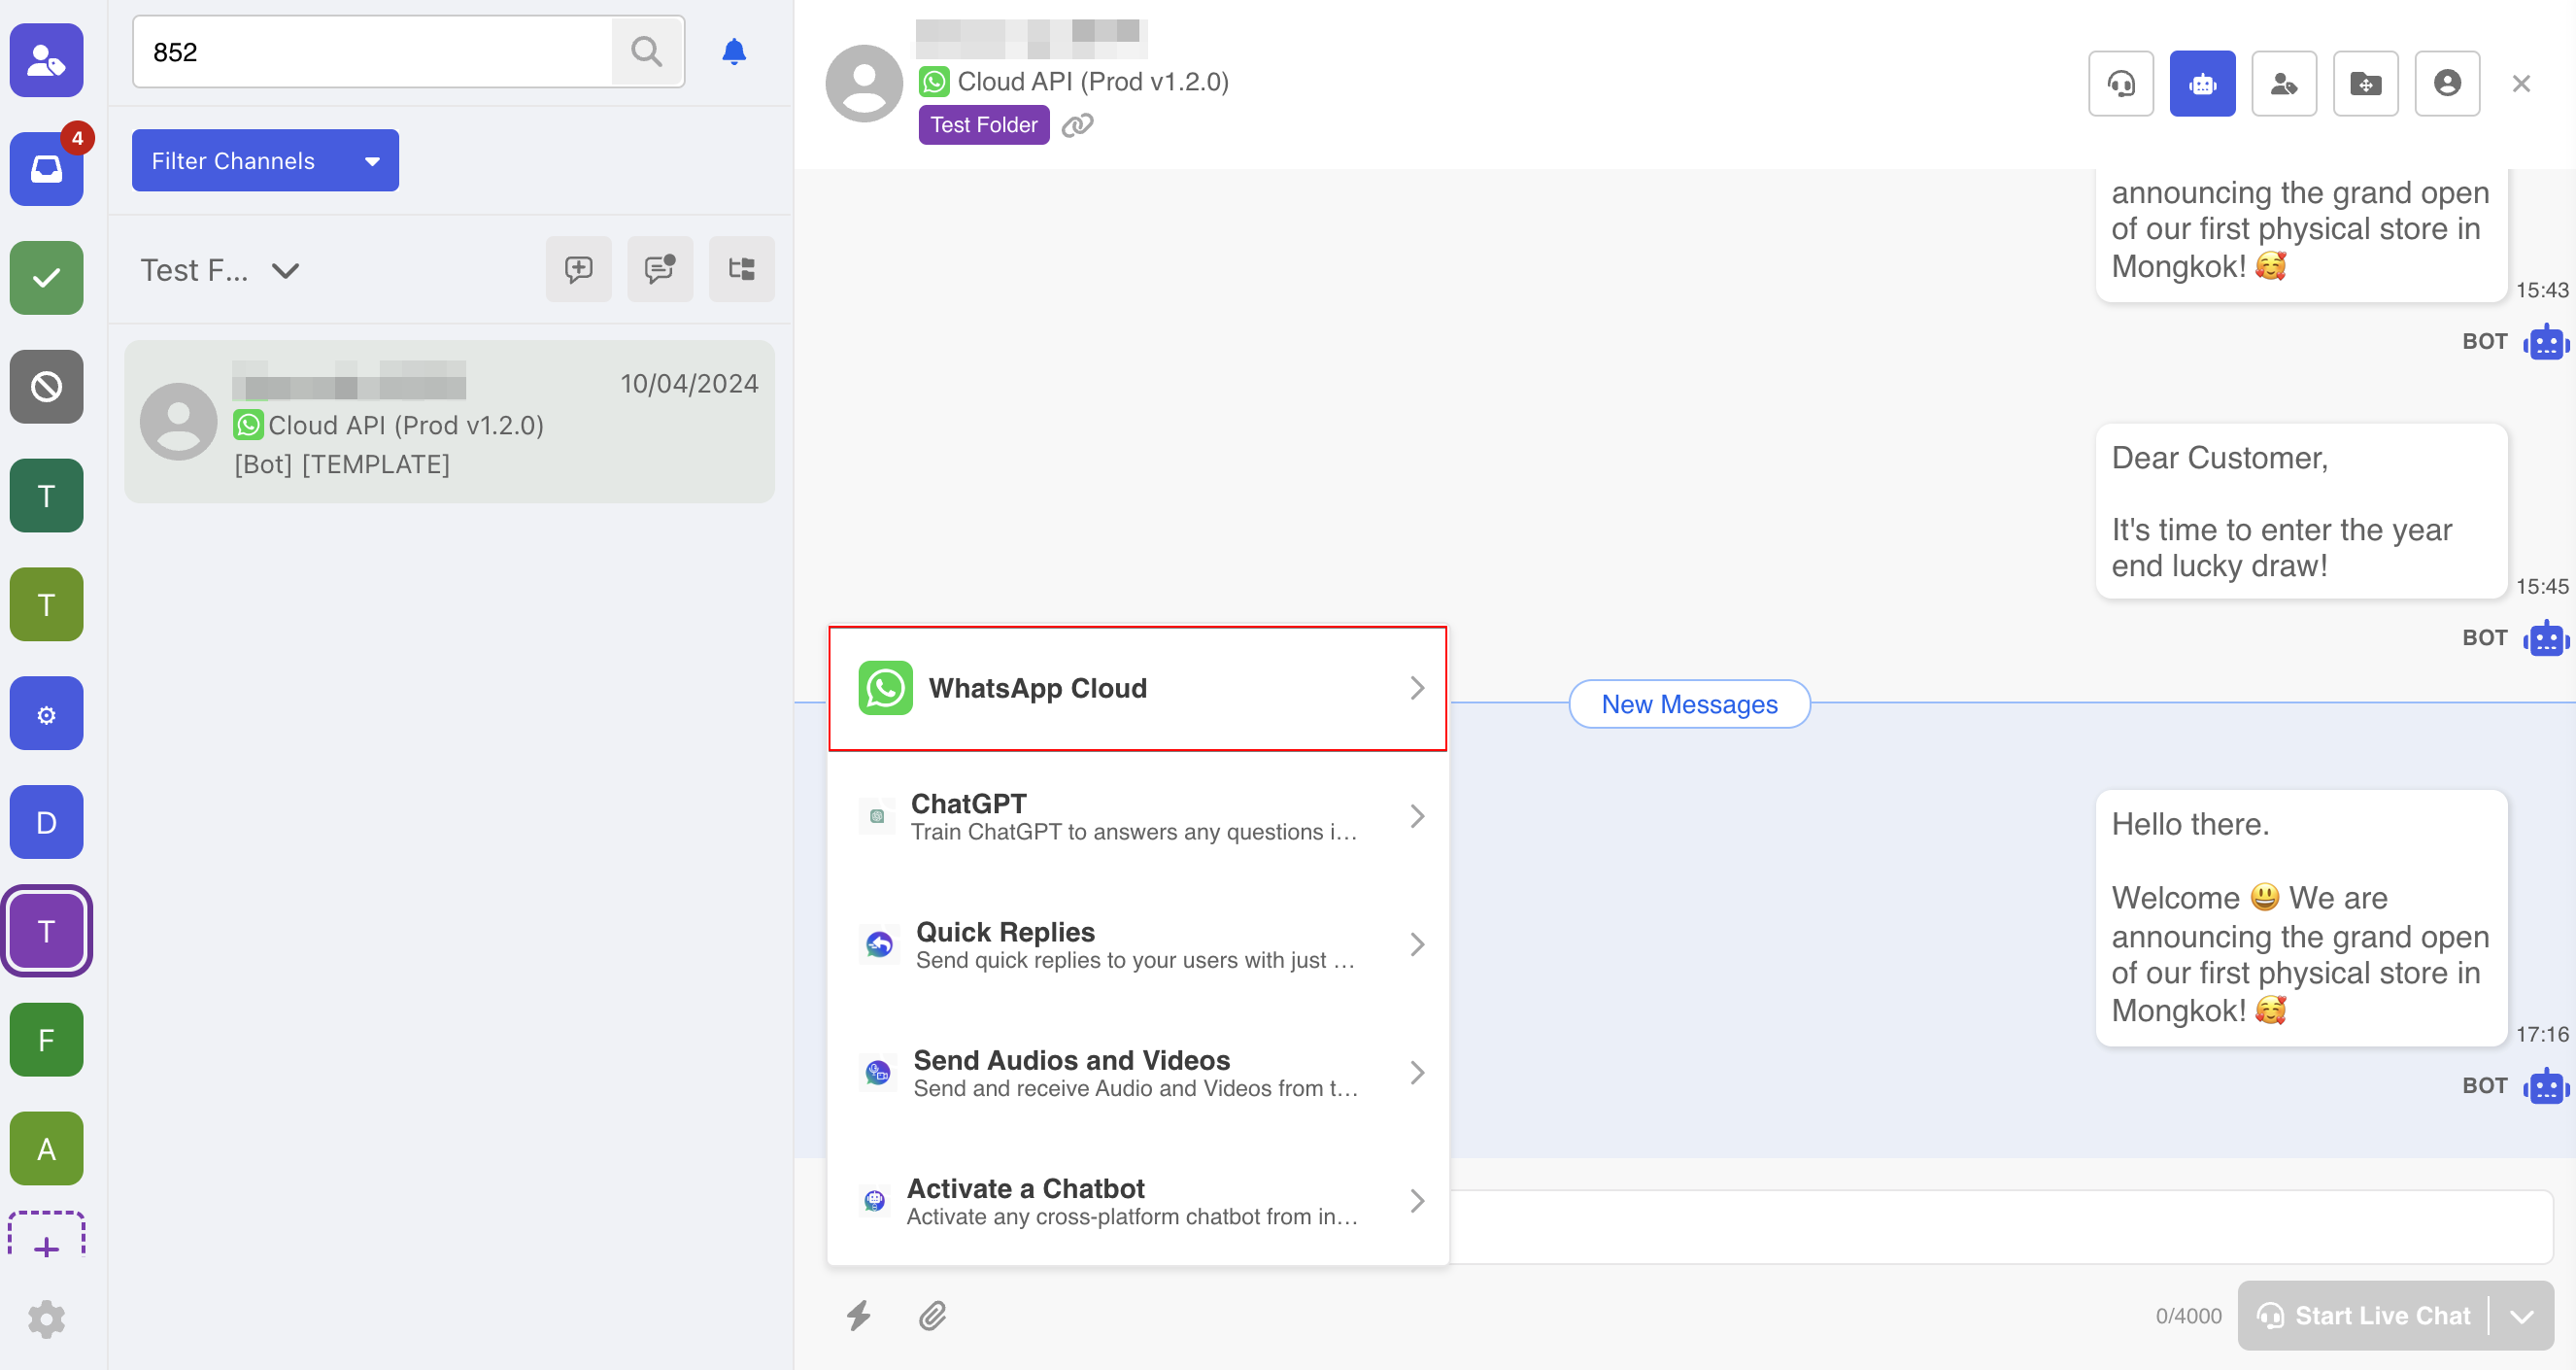
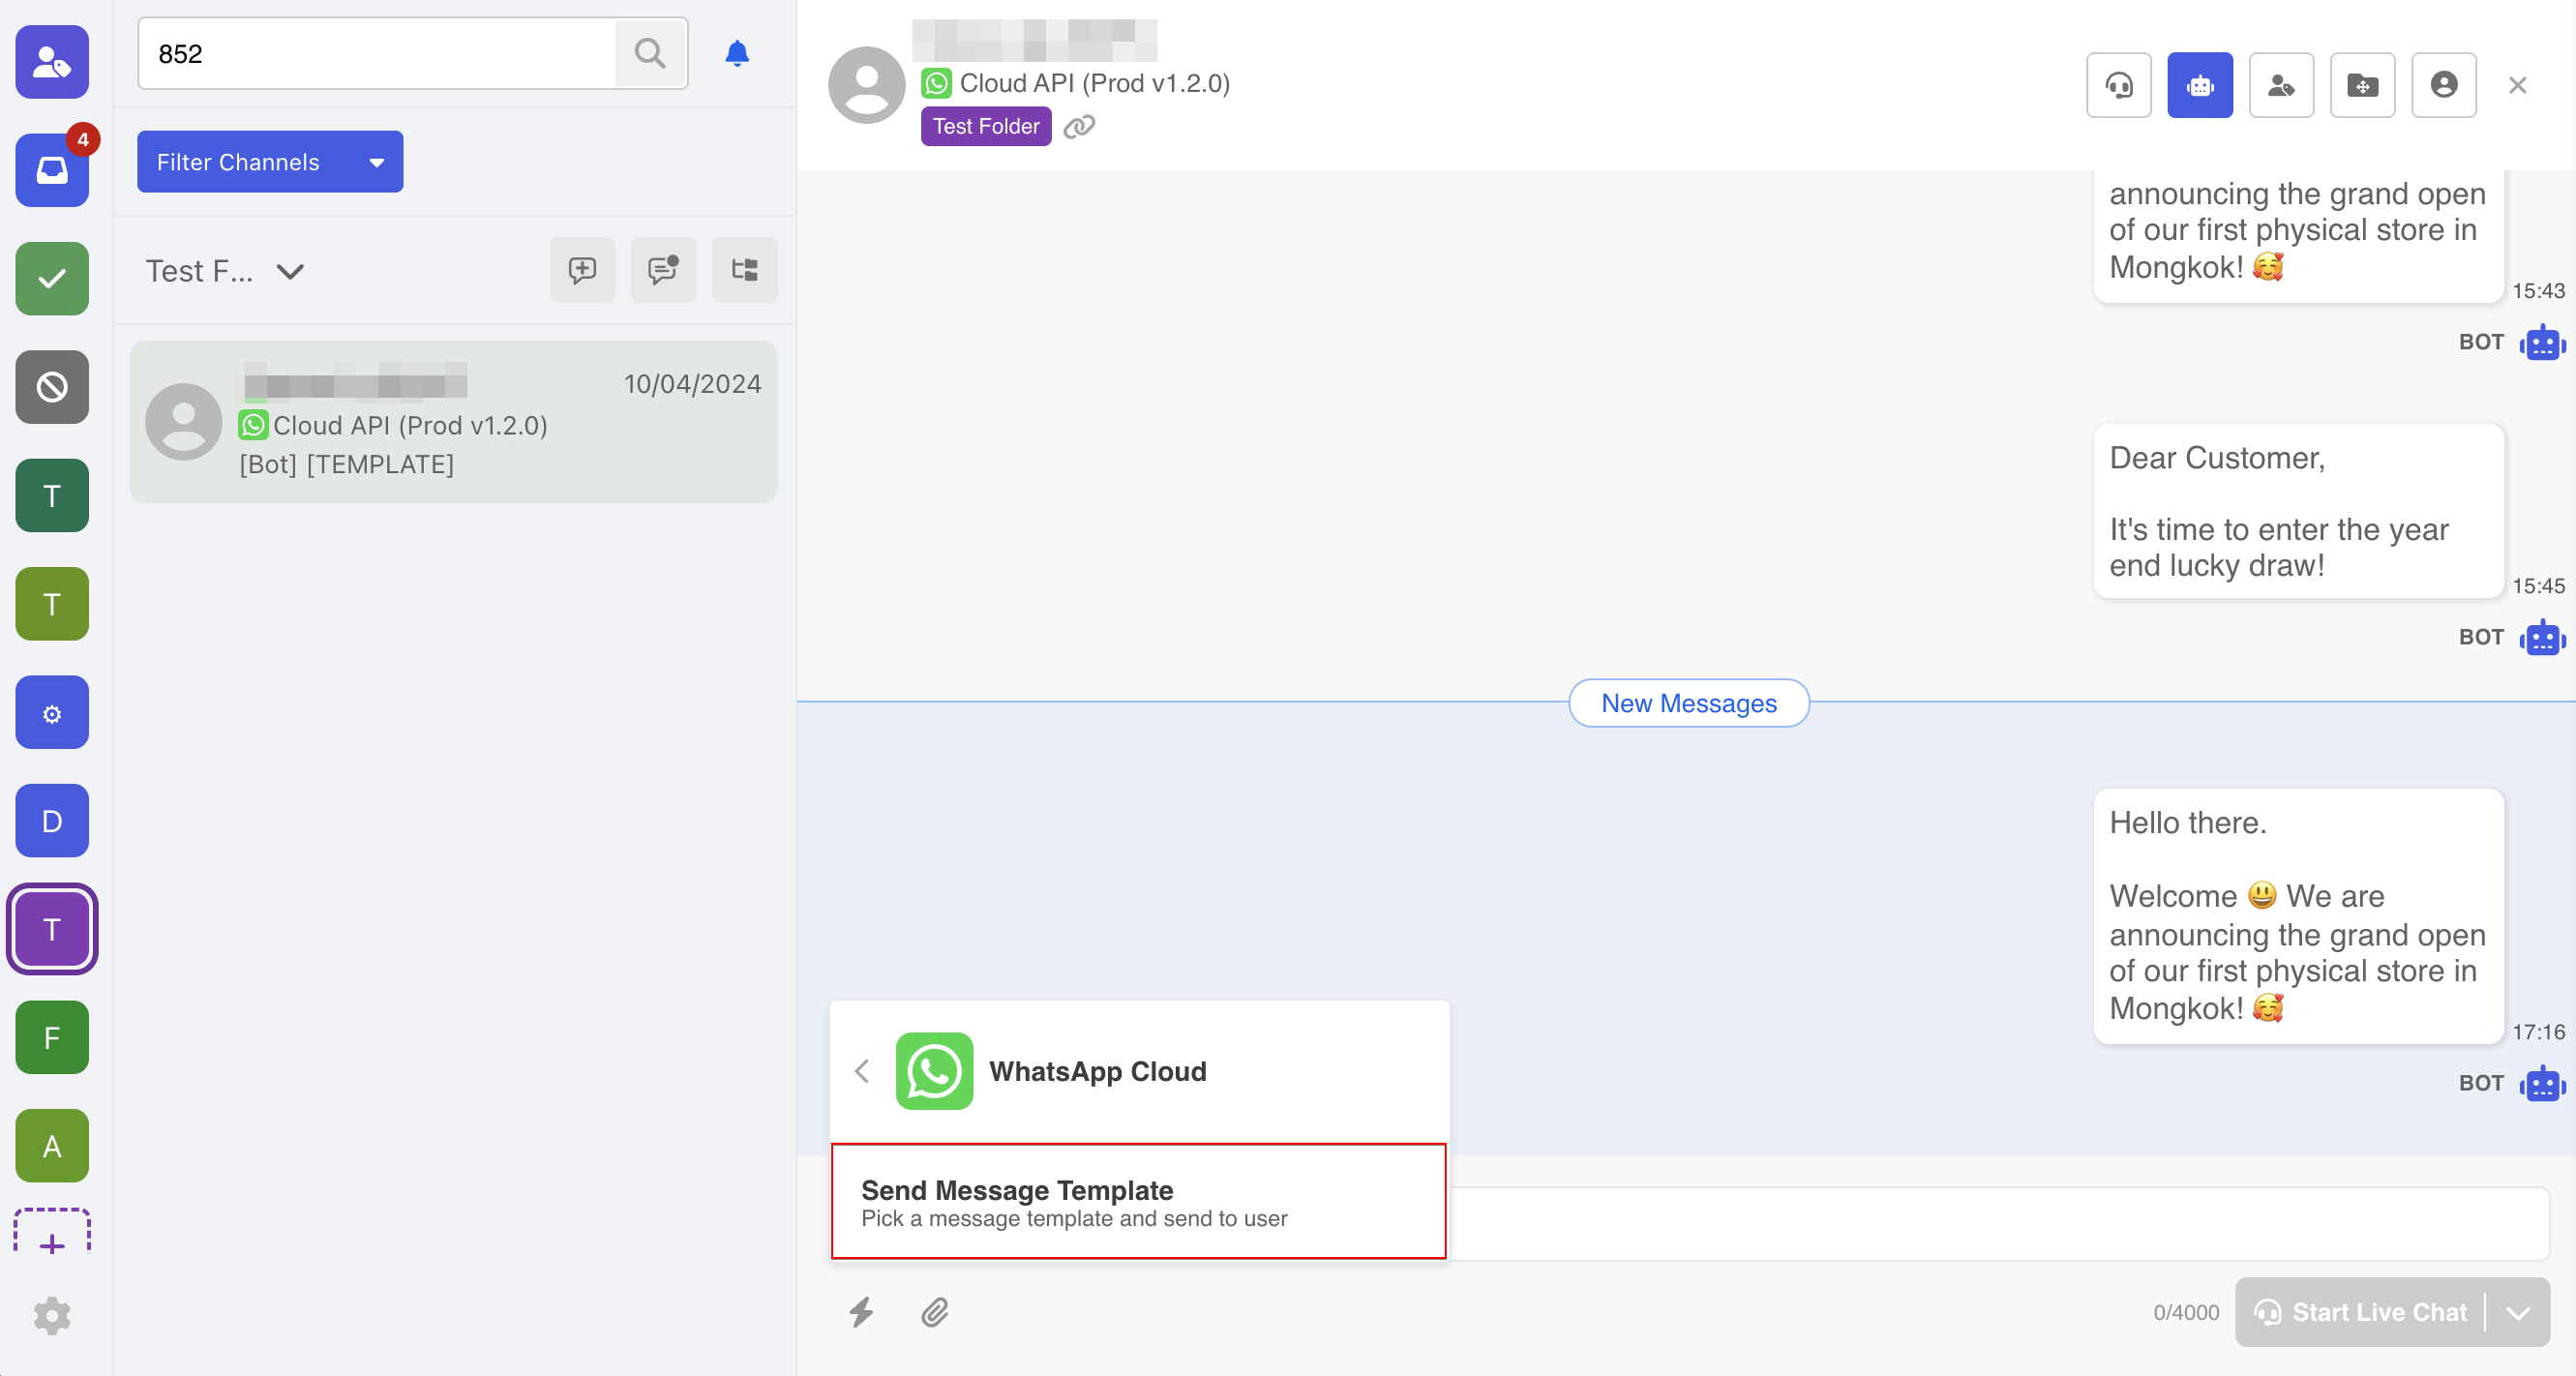
- The inbox integration provides shortcut to send WhatsApp Message Template in the thread efficiently. To do so, start by selecting "Action".
- Select "Send Message Template"
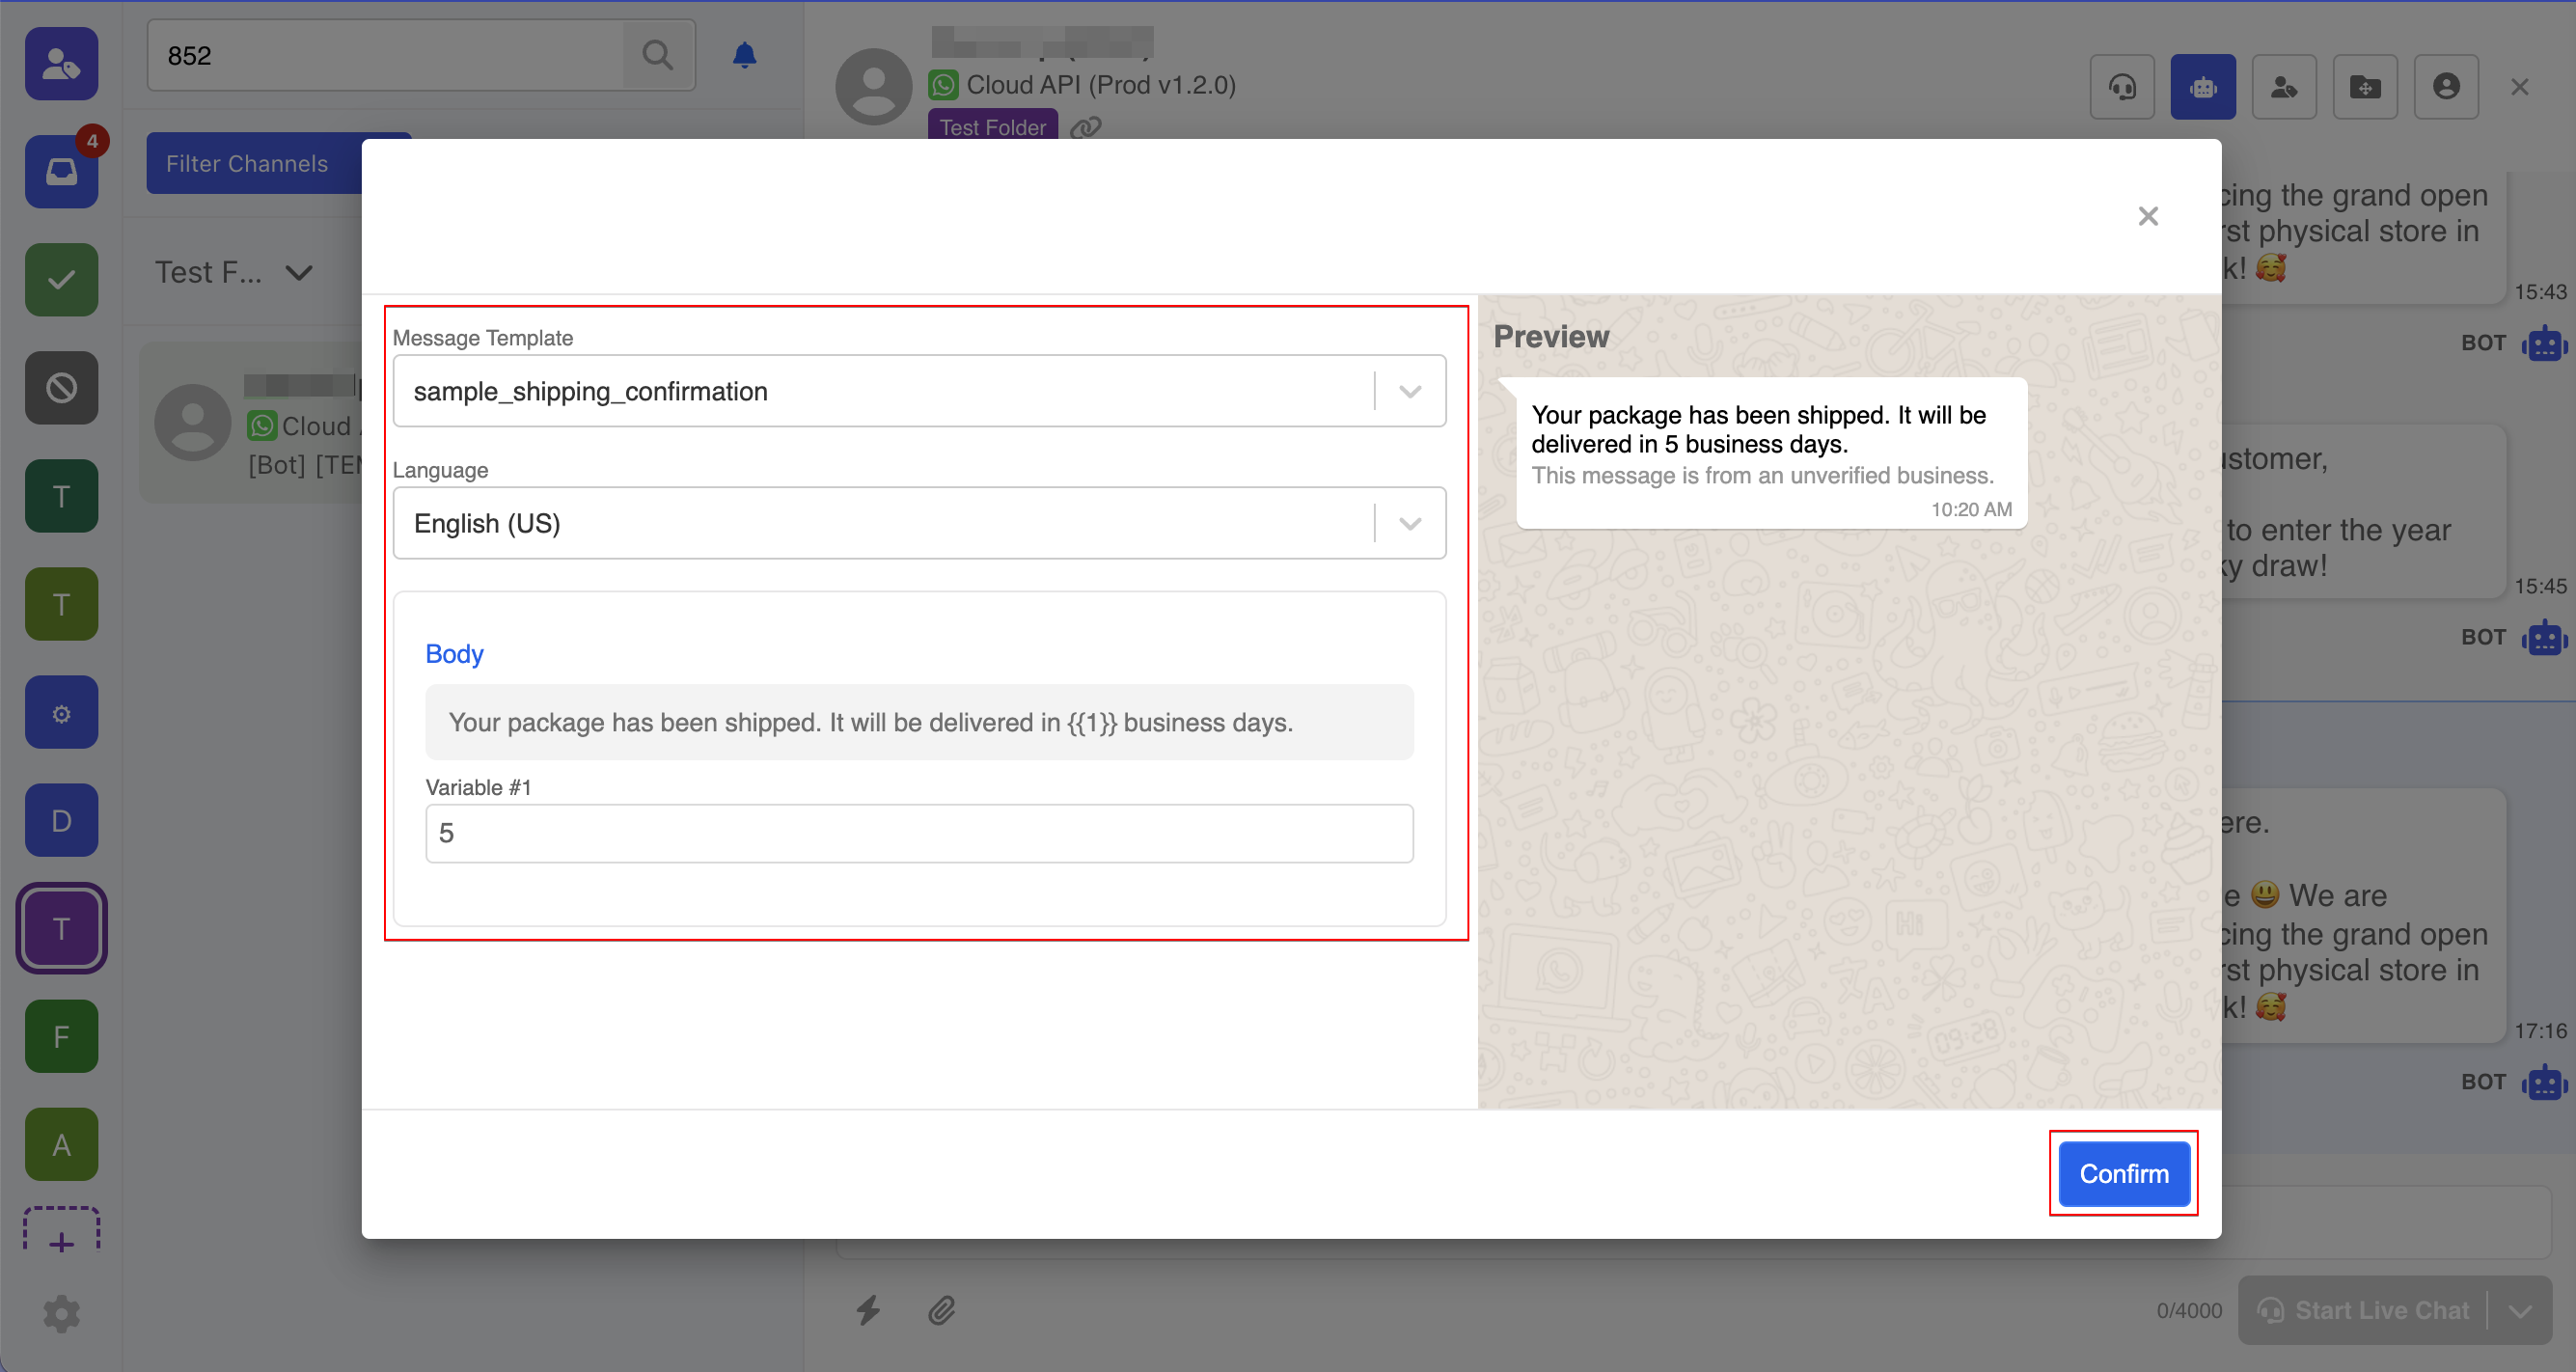
- Select the template, language and fill the variable (if any). The template will be sent when you "Confirm".
- The message template will be sent right away in the thread.
Start a thread with Message Template
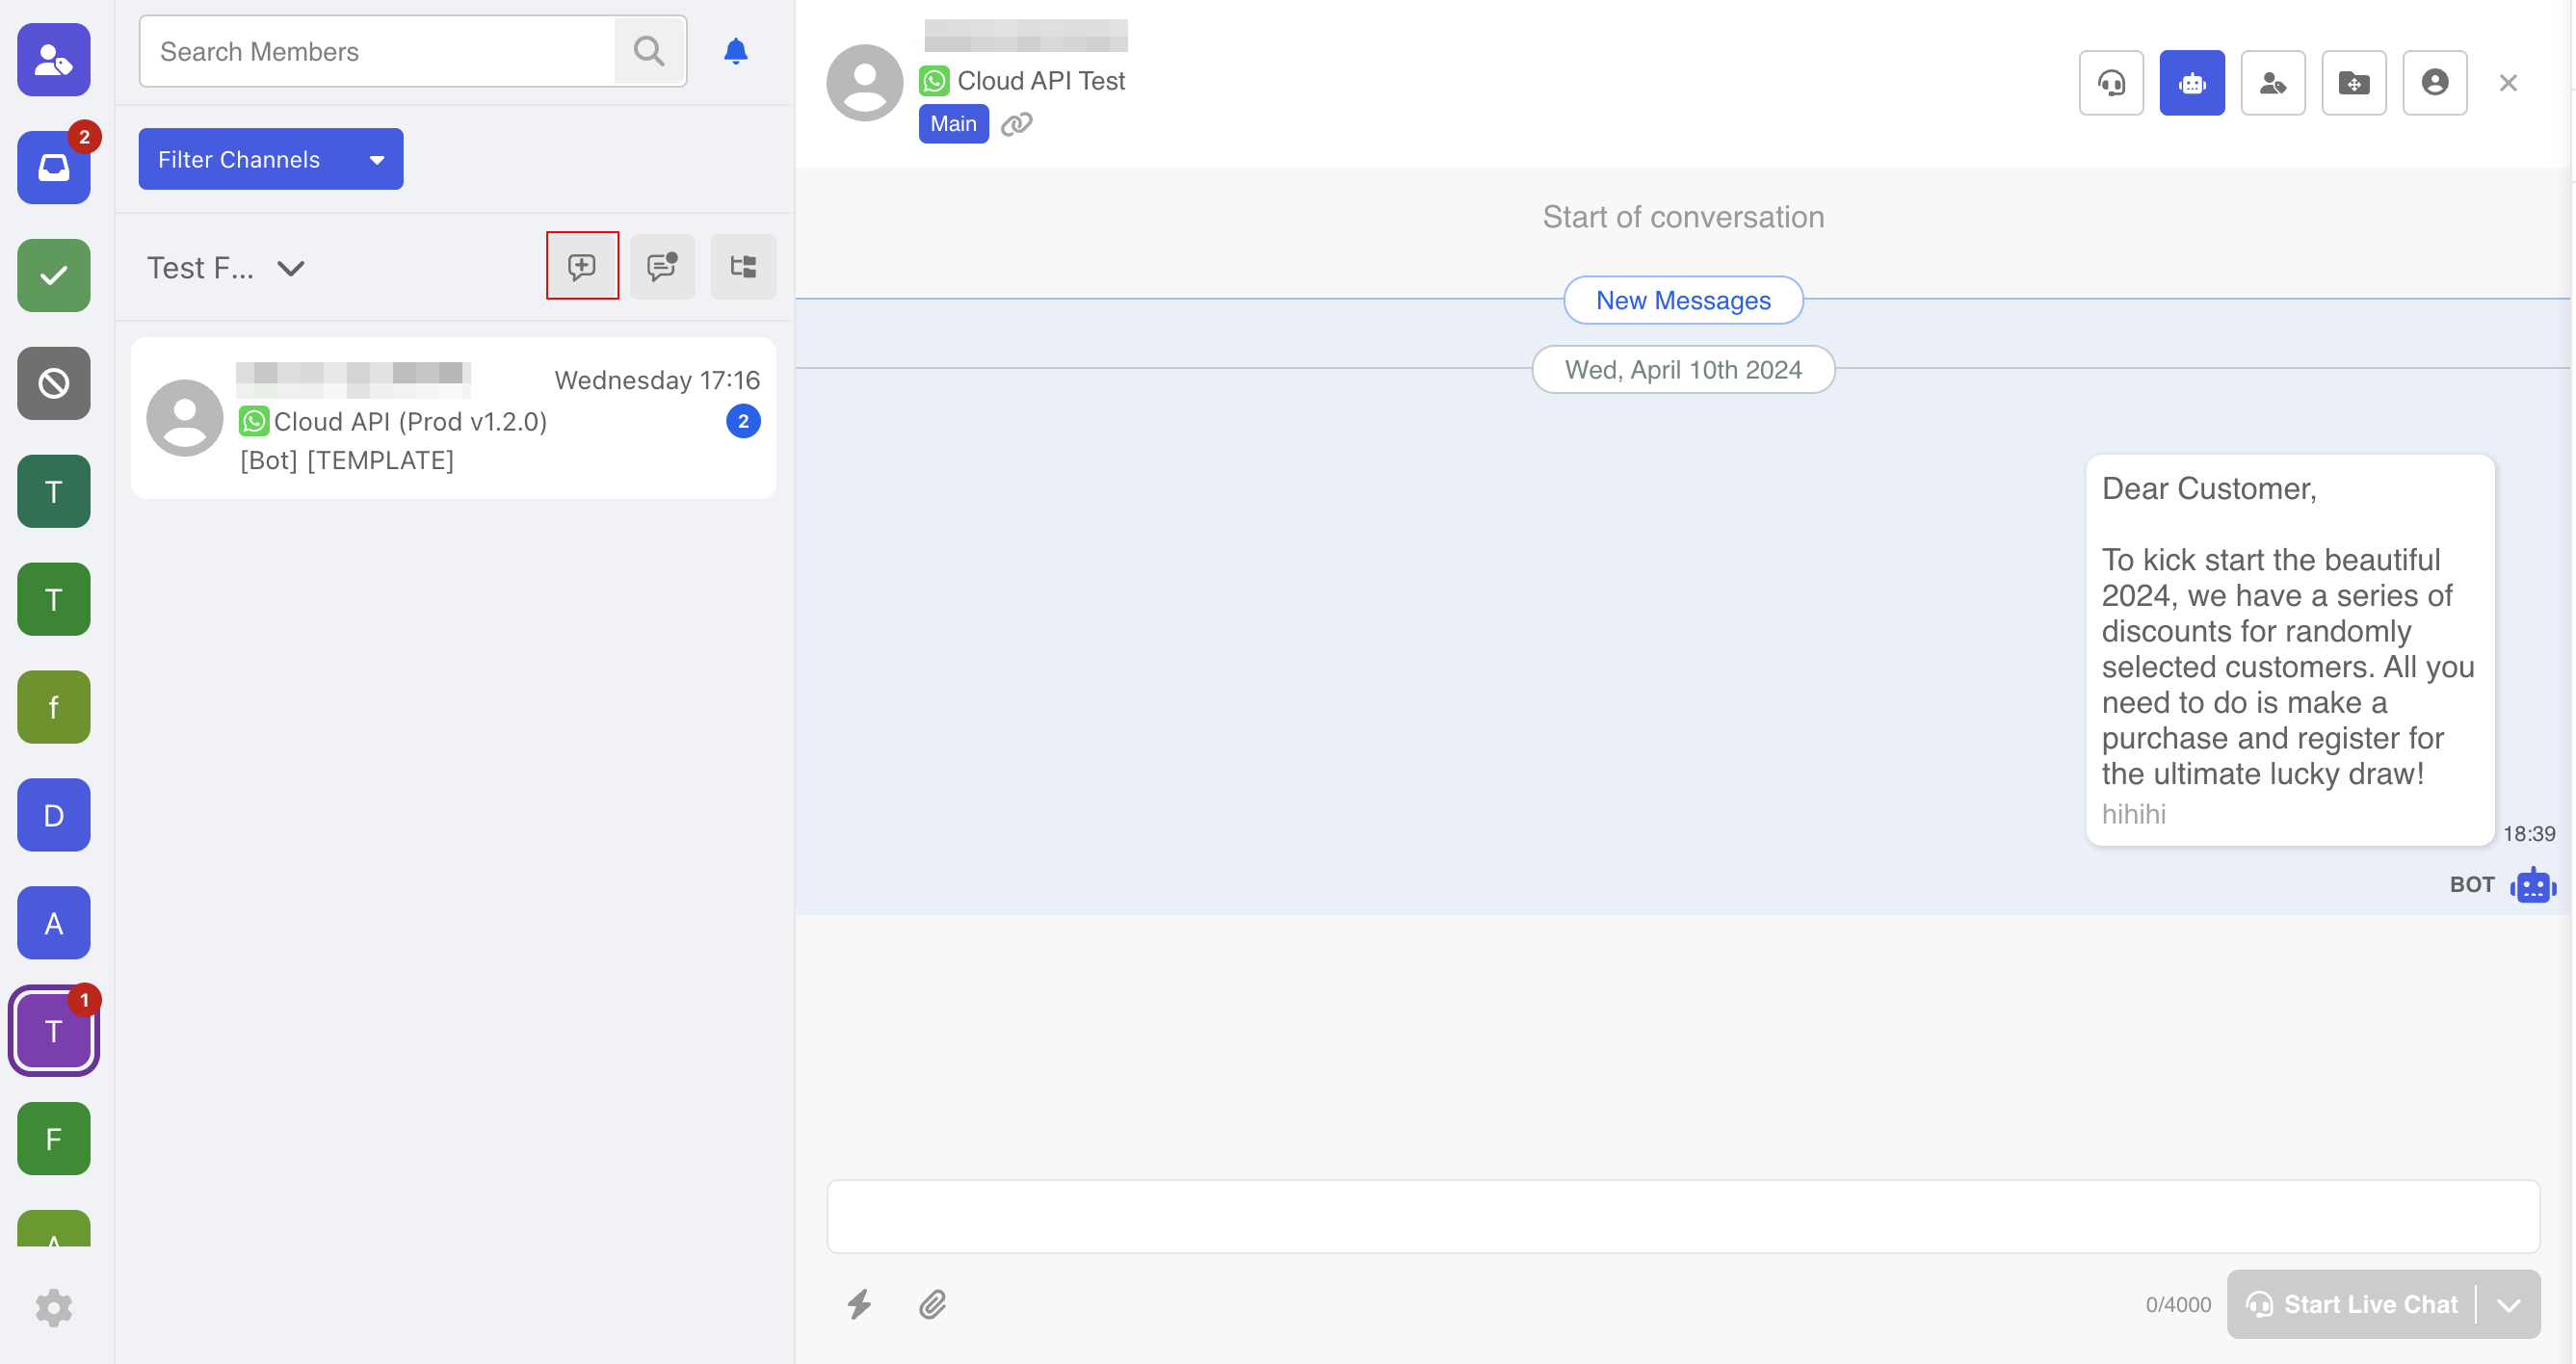
In the previous guide, we have demonstrated how to send a message template inside an existing thread. However, agents can also initial a new conversation with the message template.
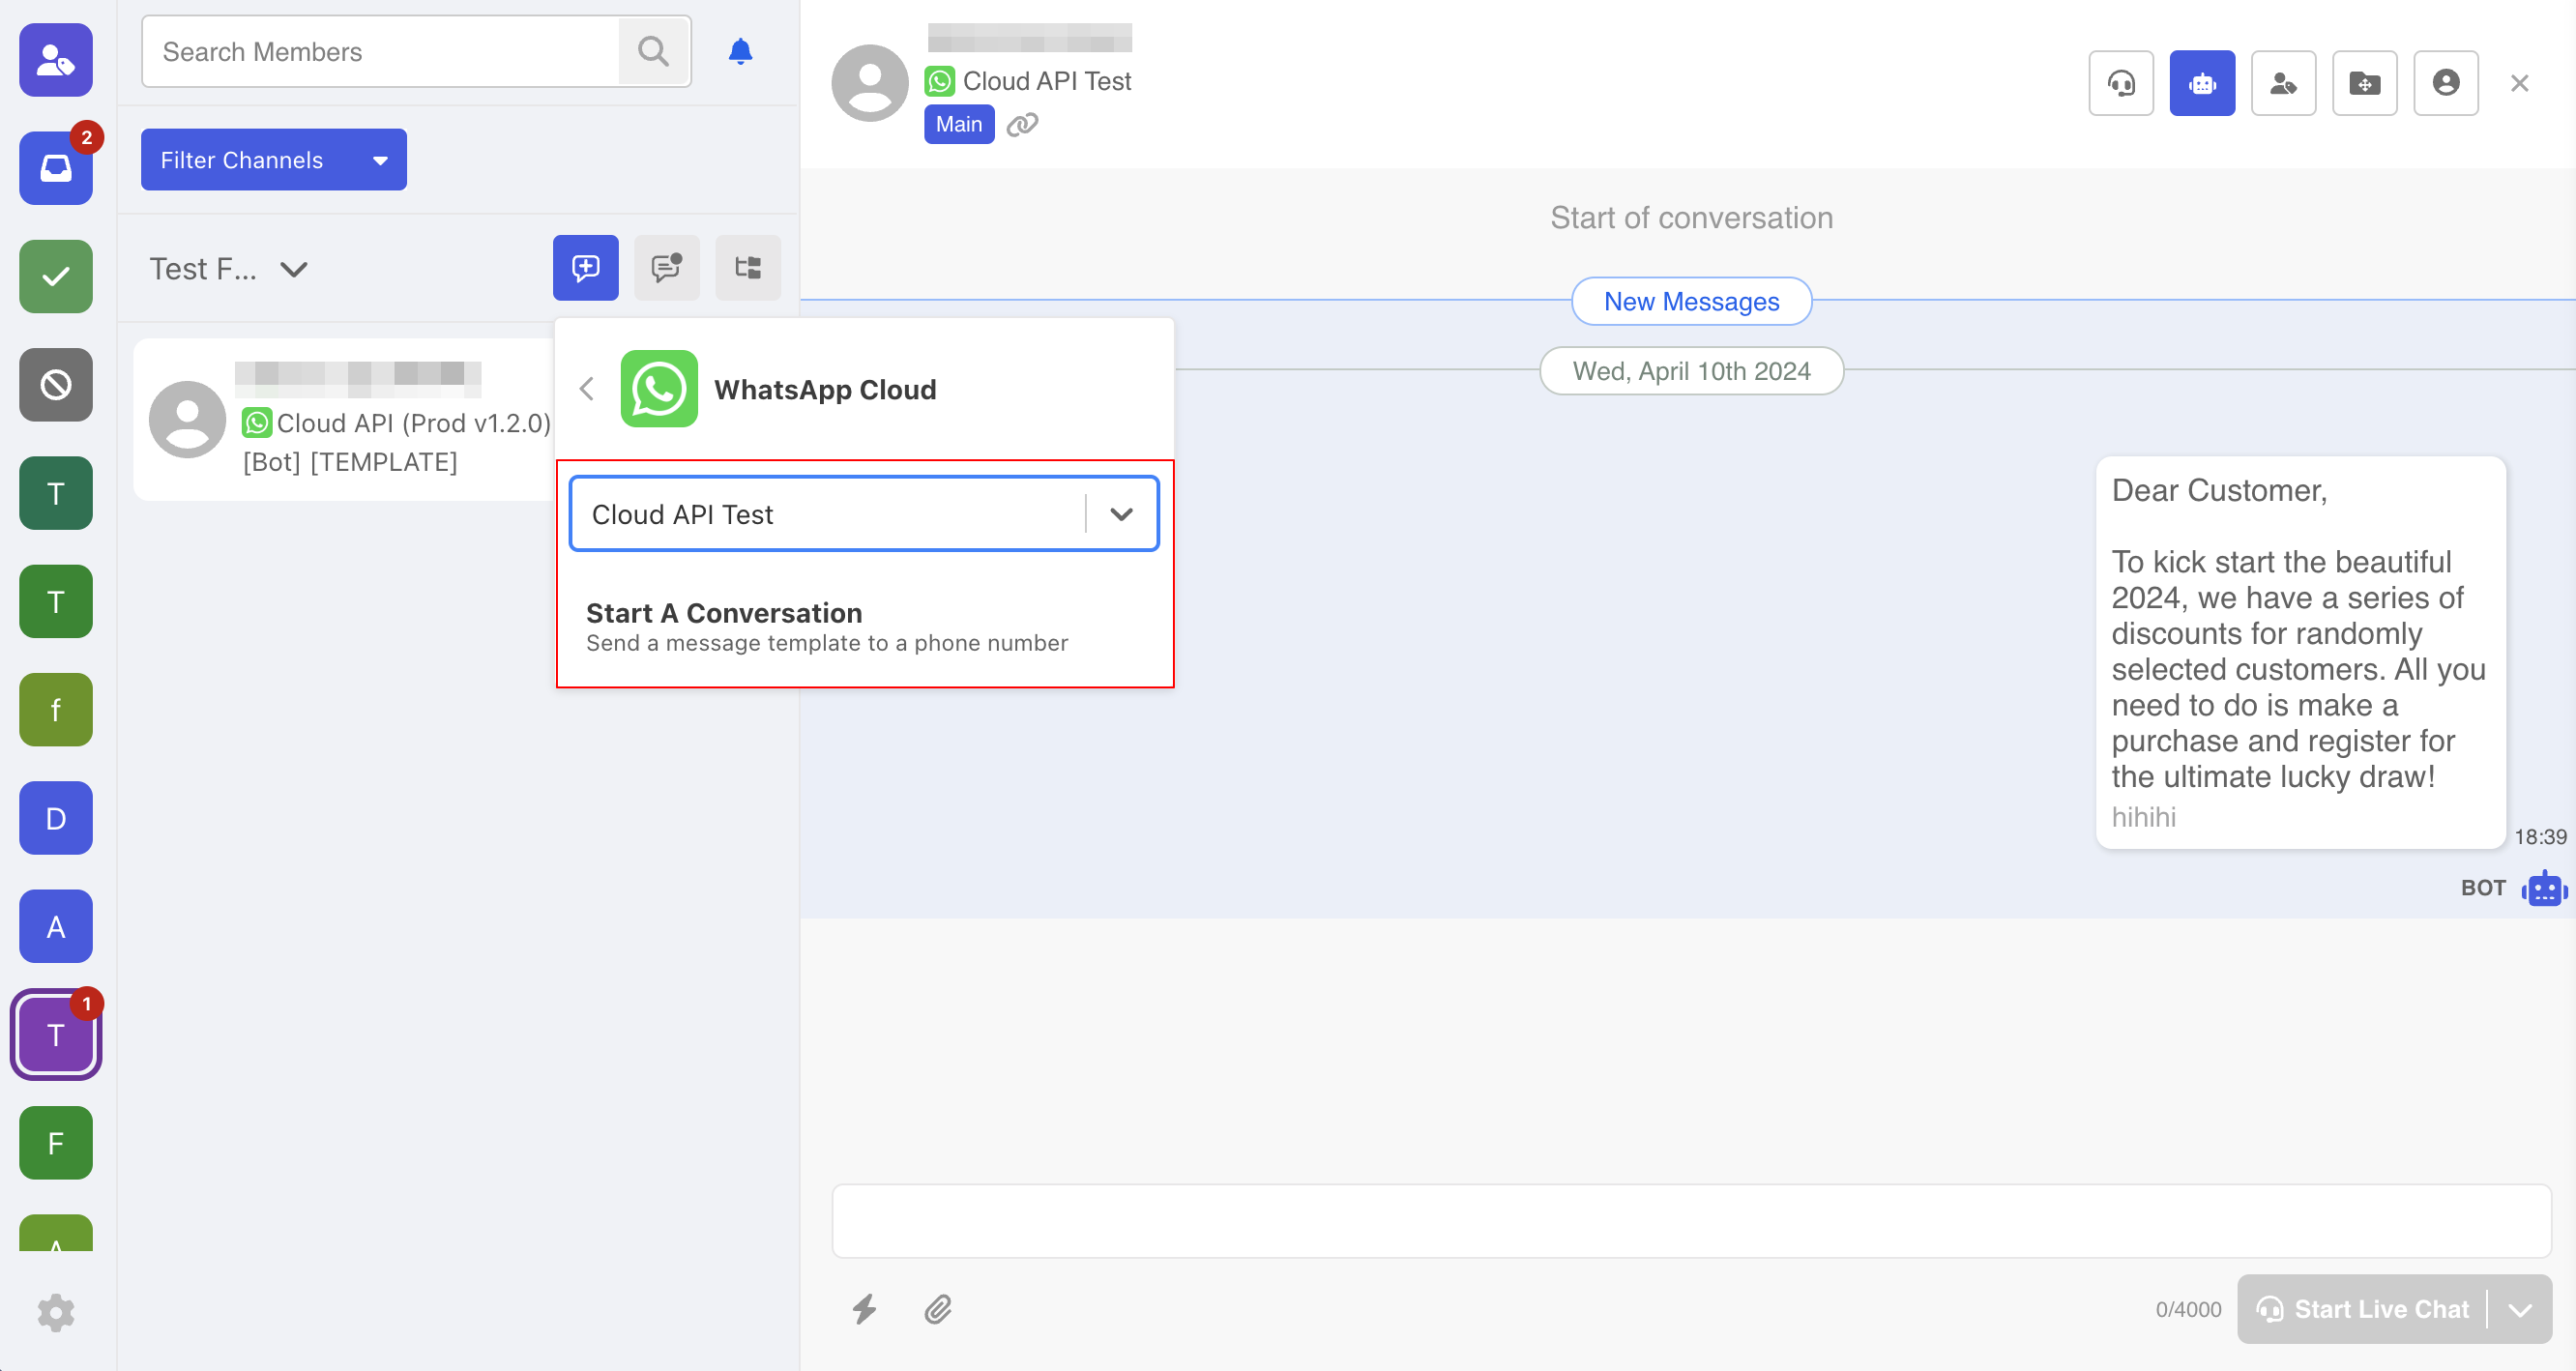
- Select "Action" next to the "Unread Thread Filter".
- Select the "Integration" and then "Start a Conversation".
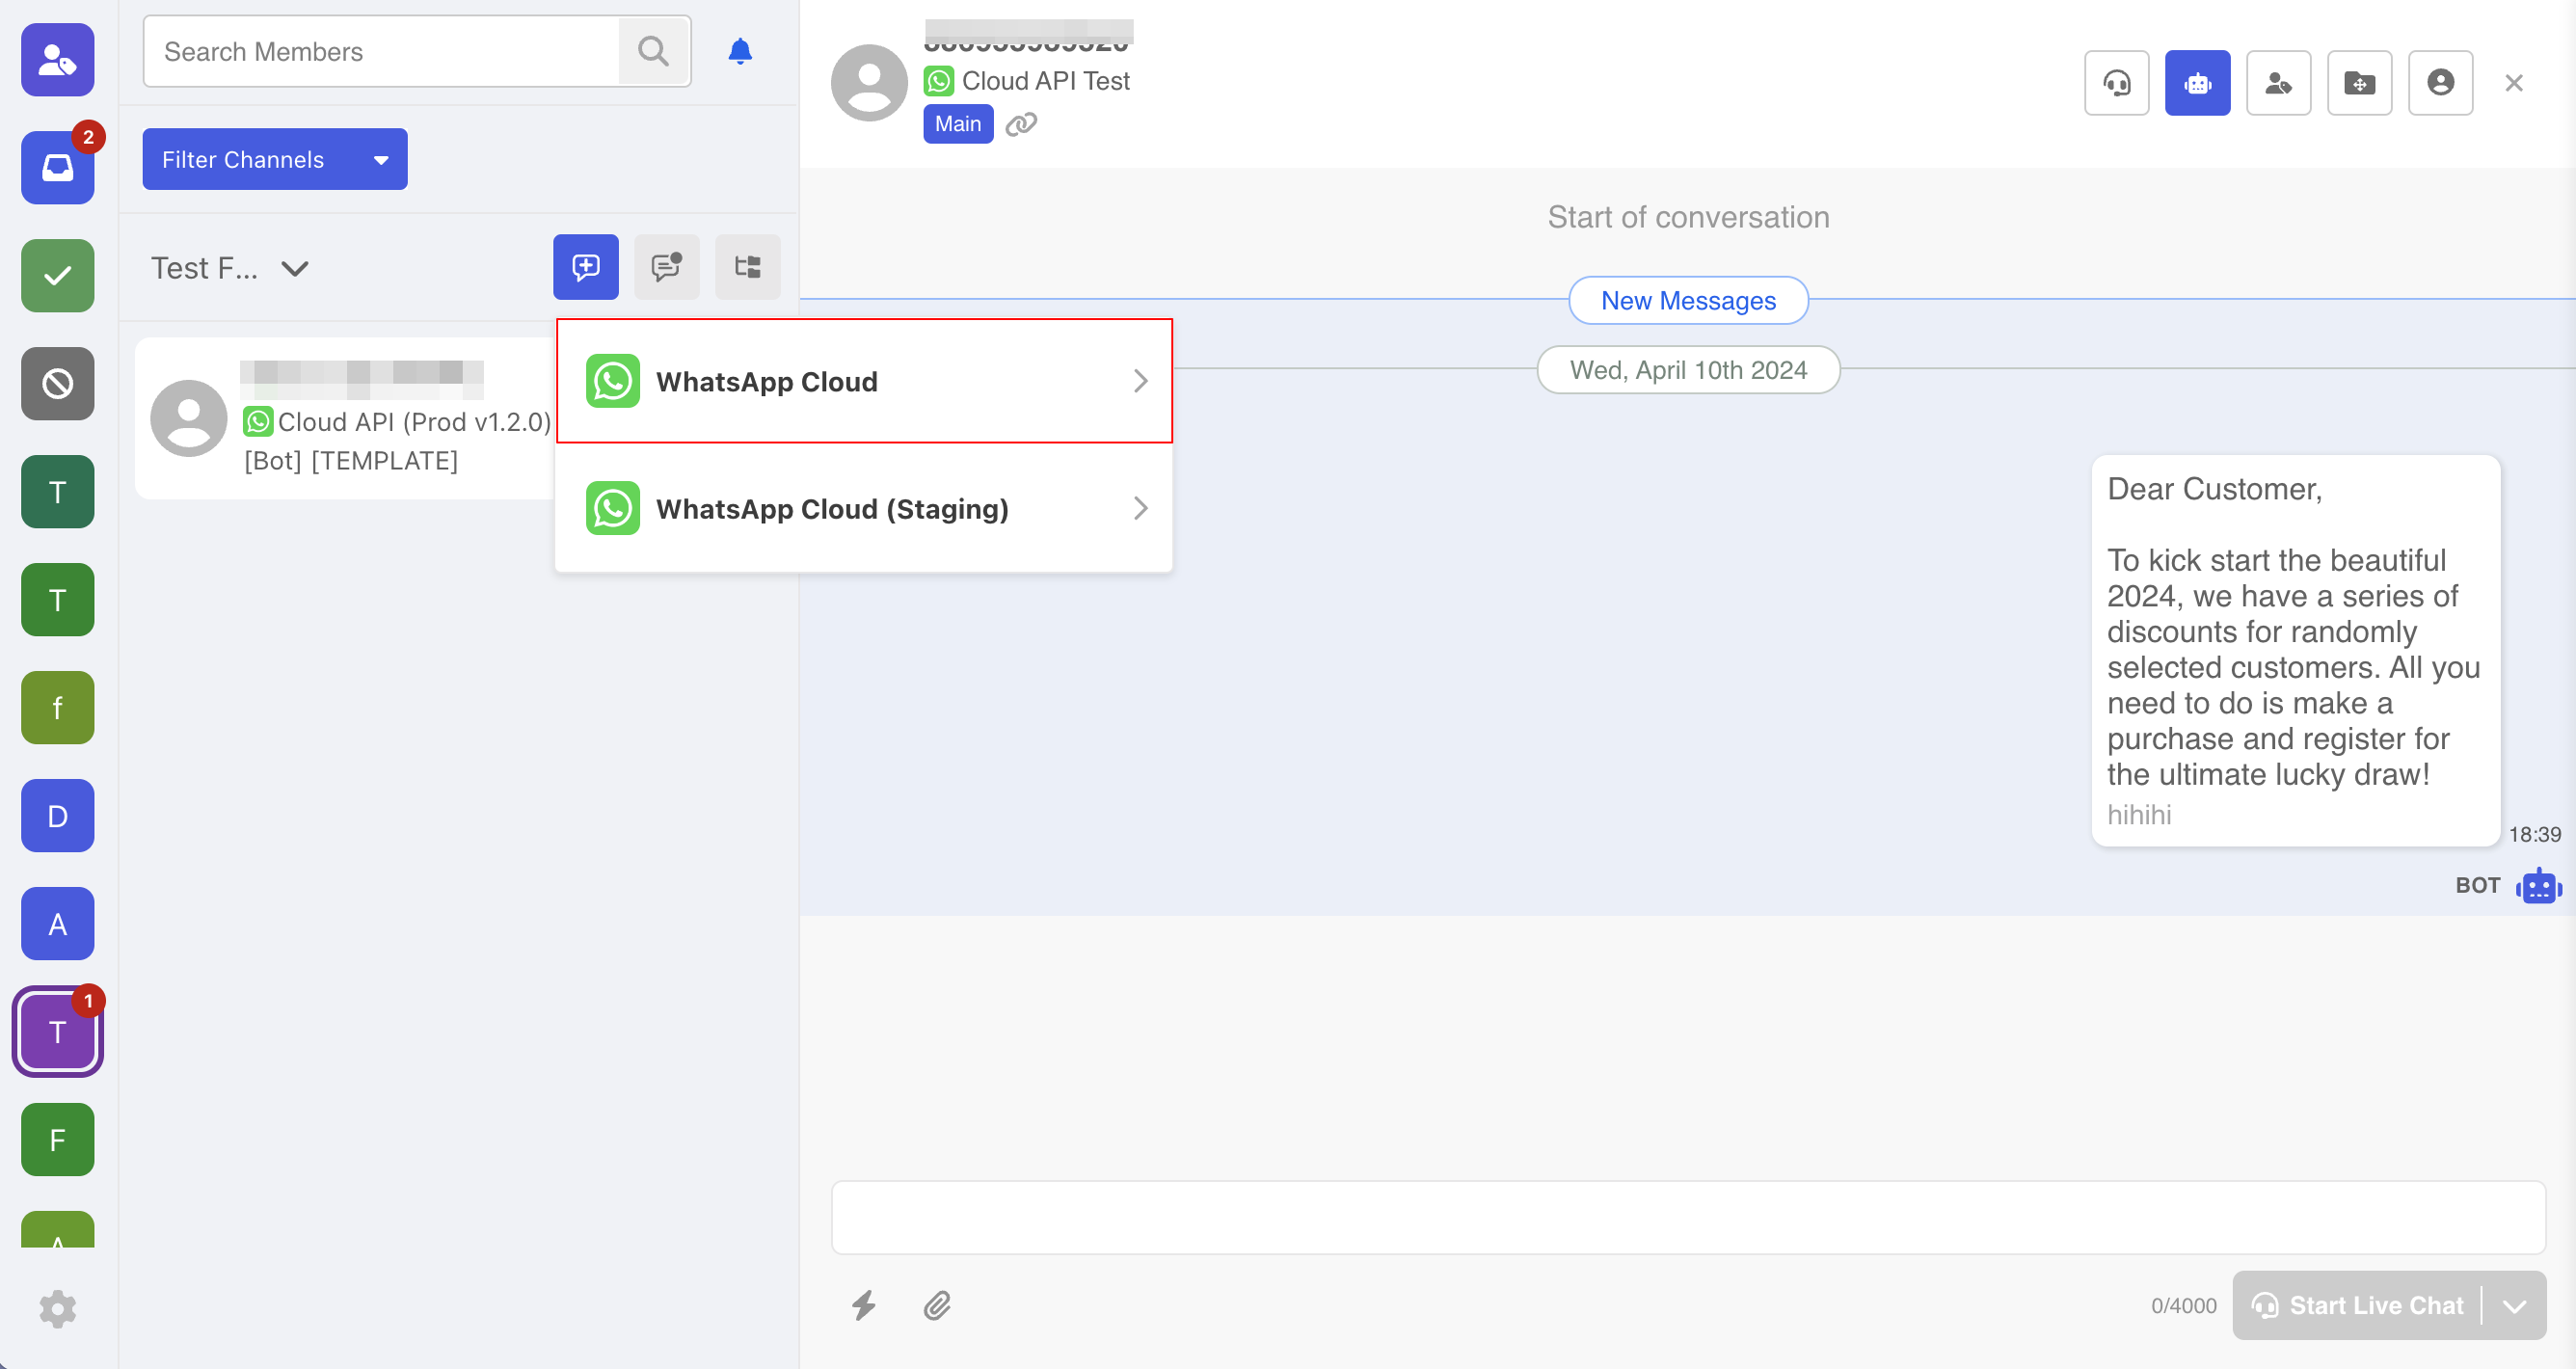
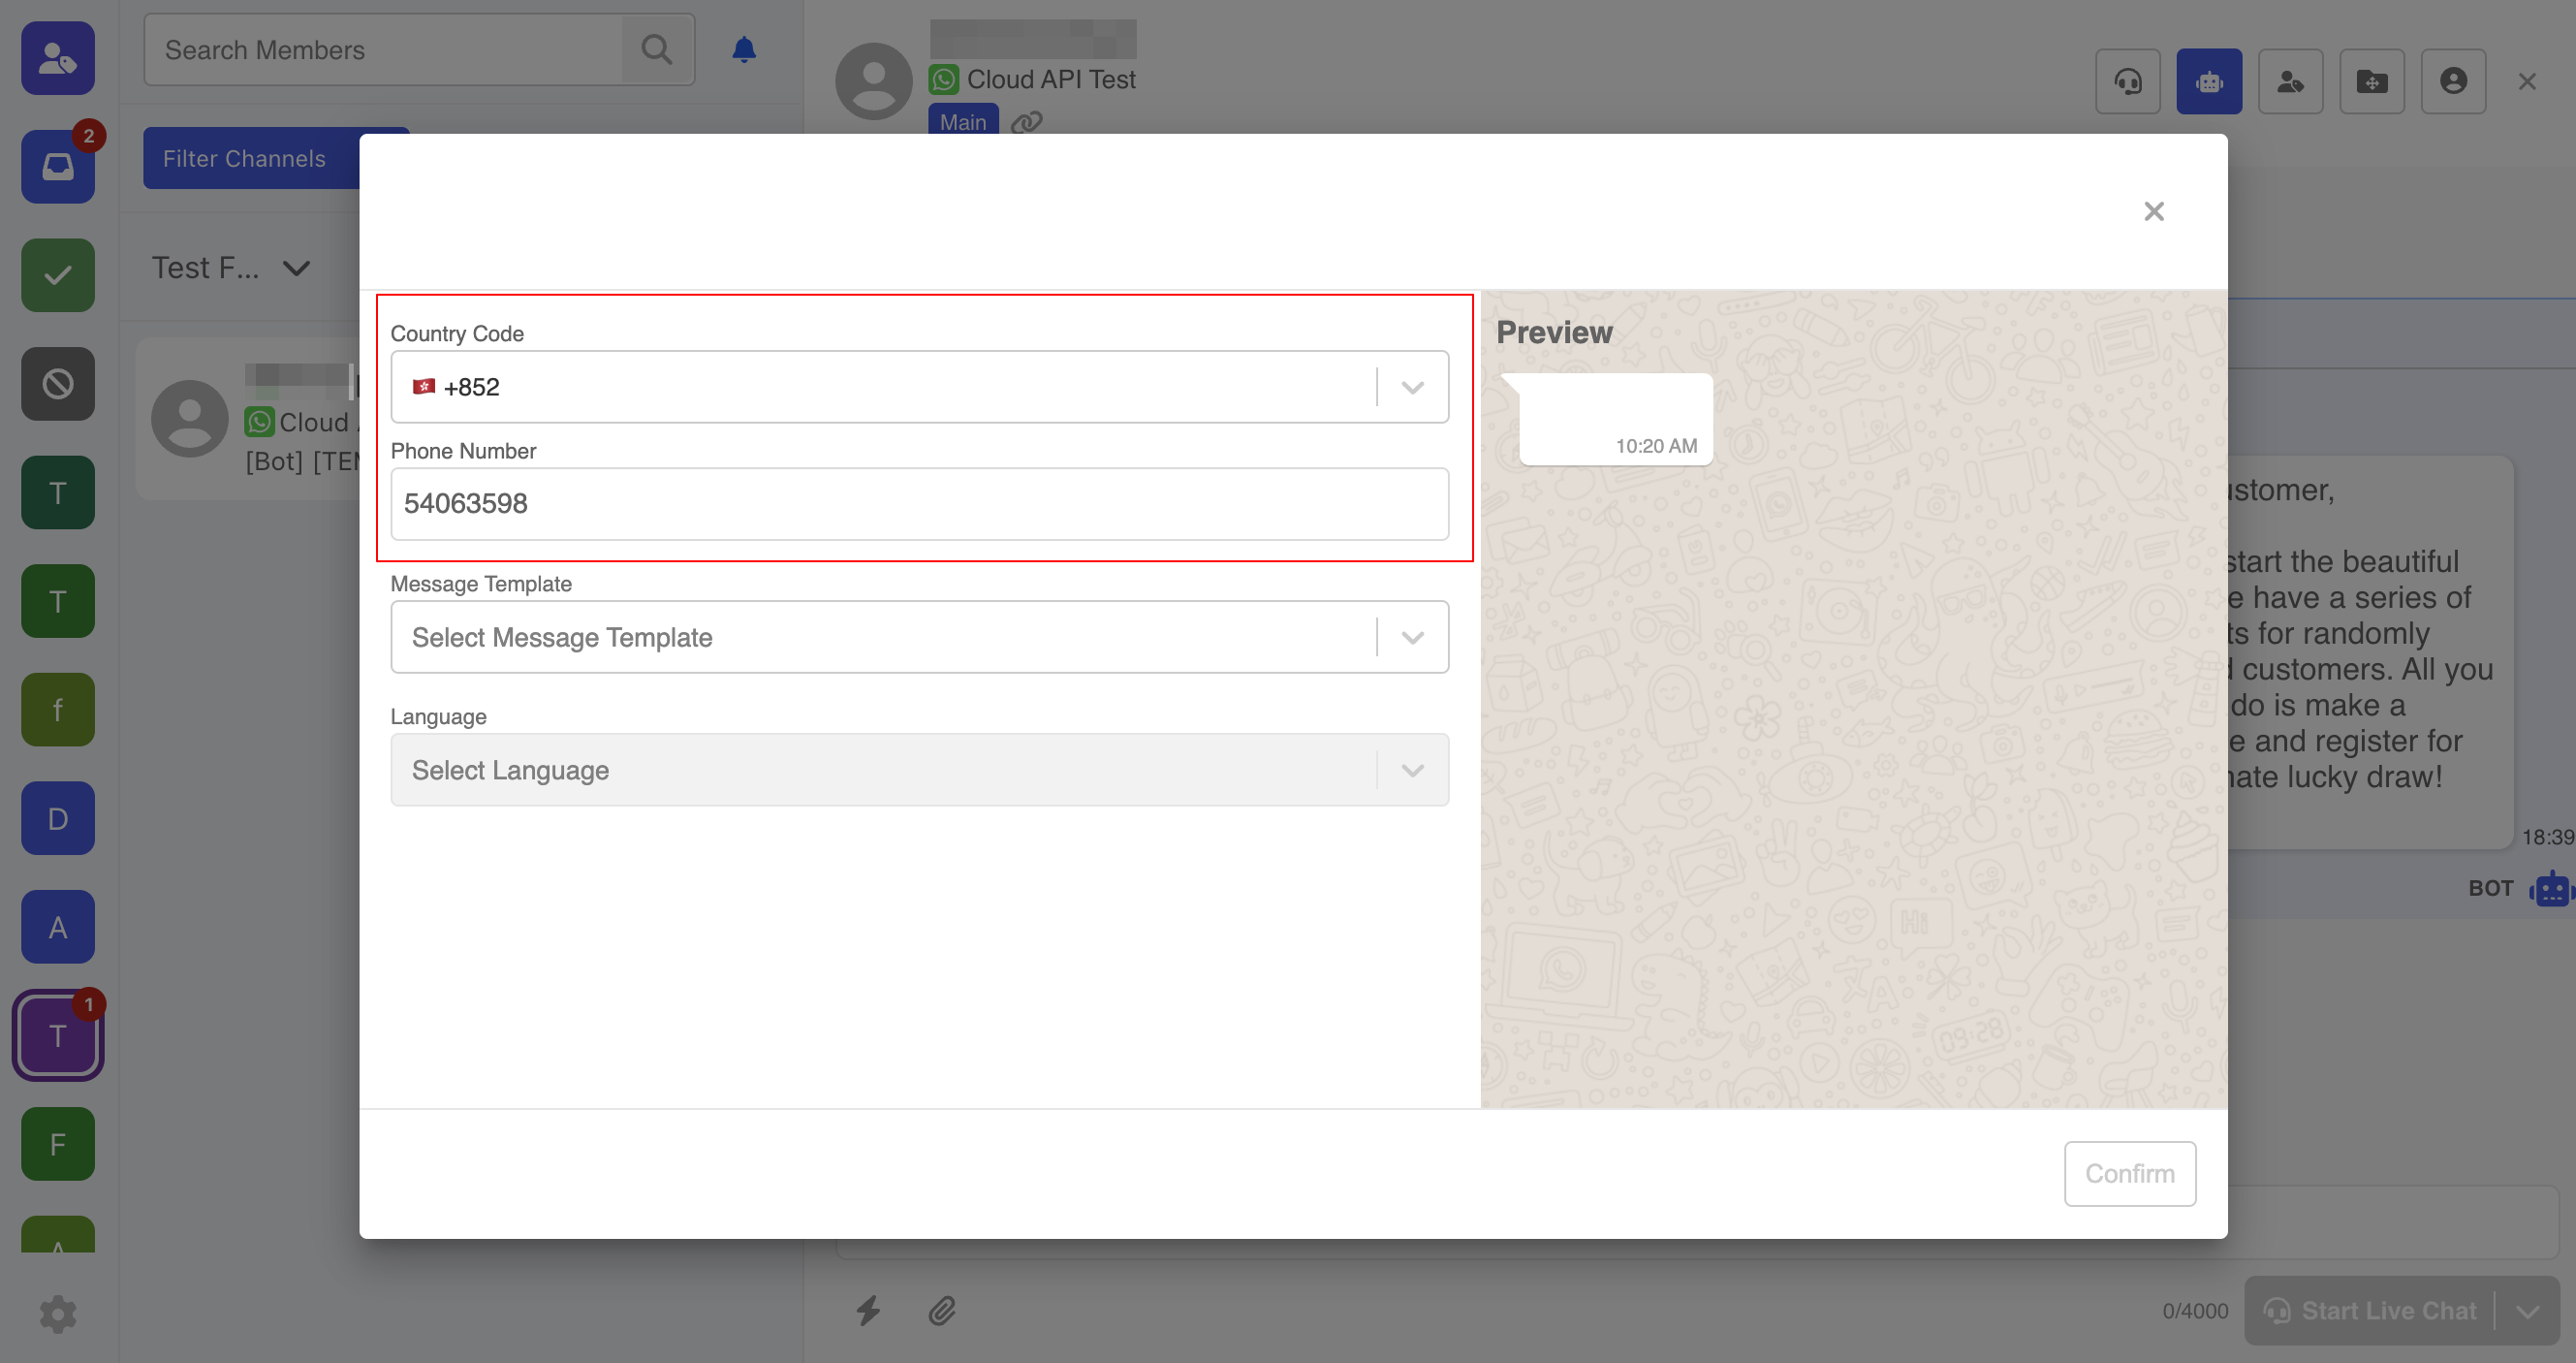
- Since you are initiating a new conversation, you need input the "Country Code" and "Phone Number" of the recipient.
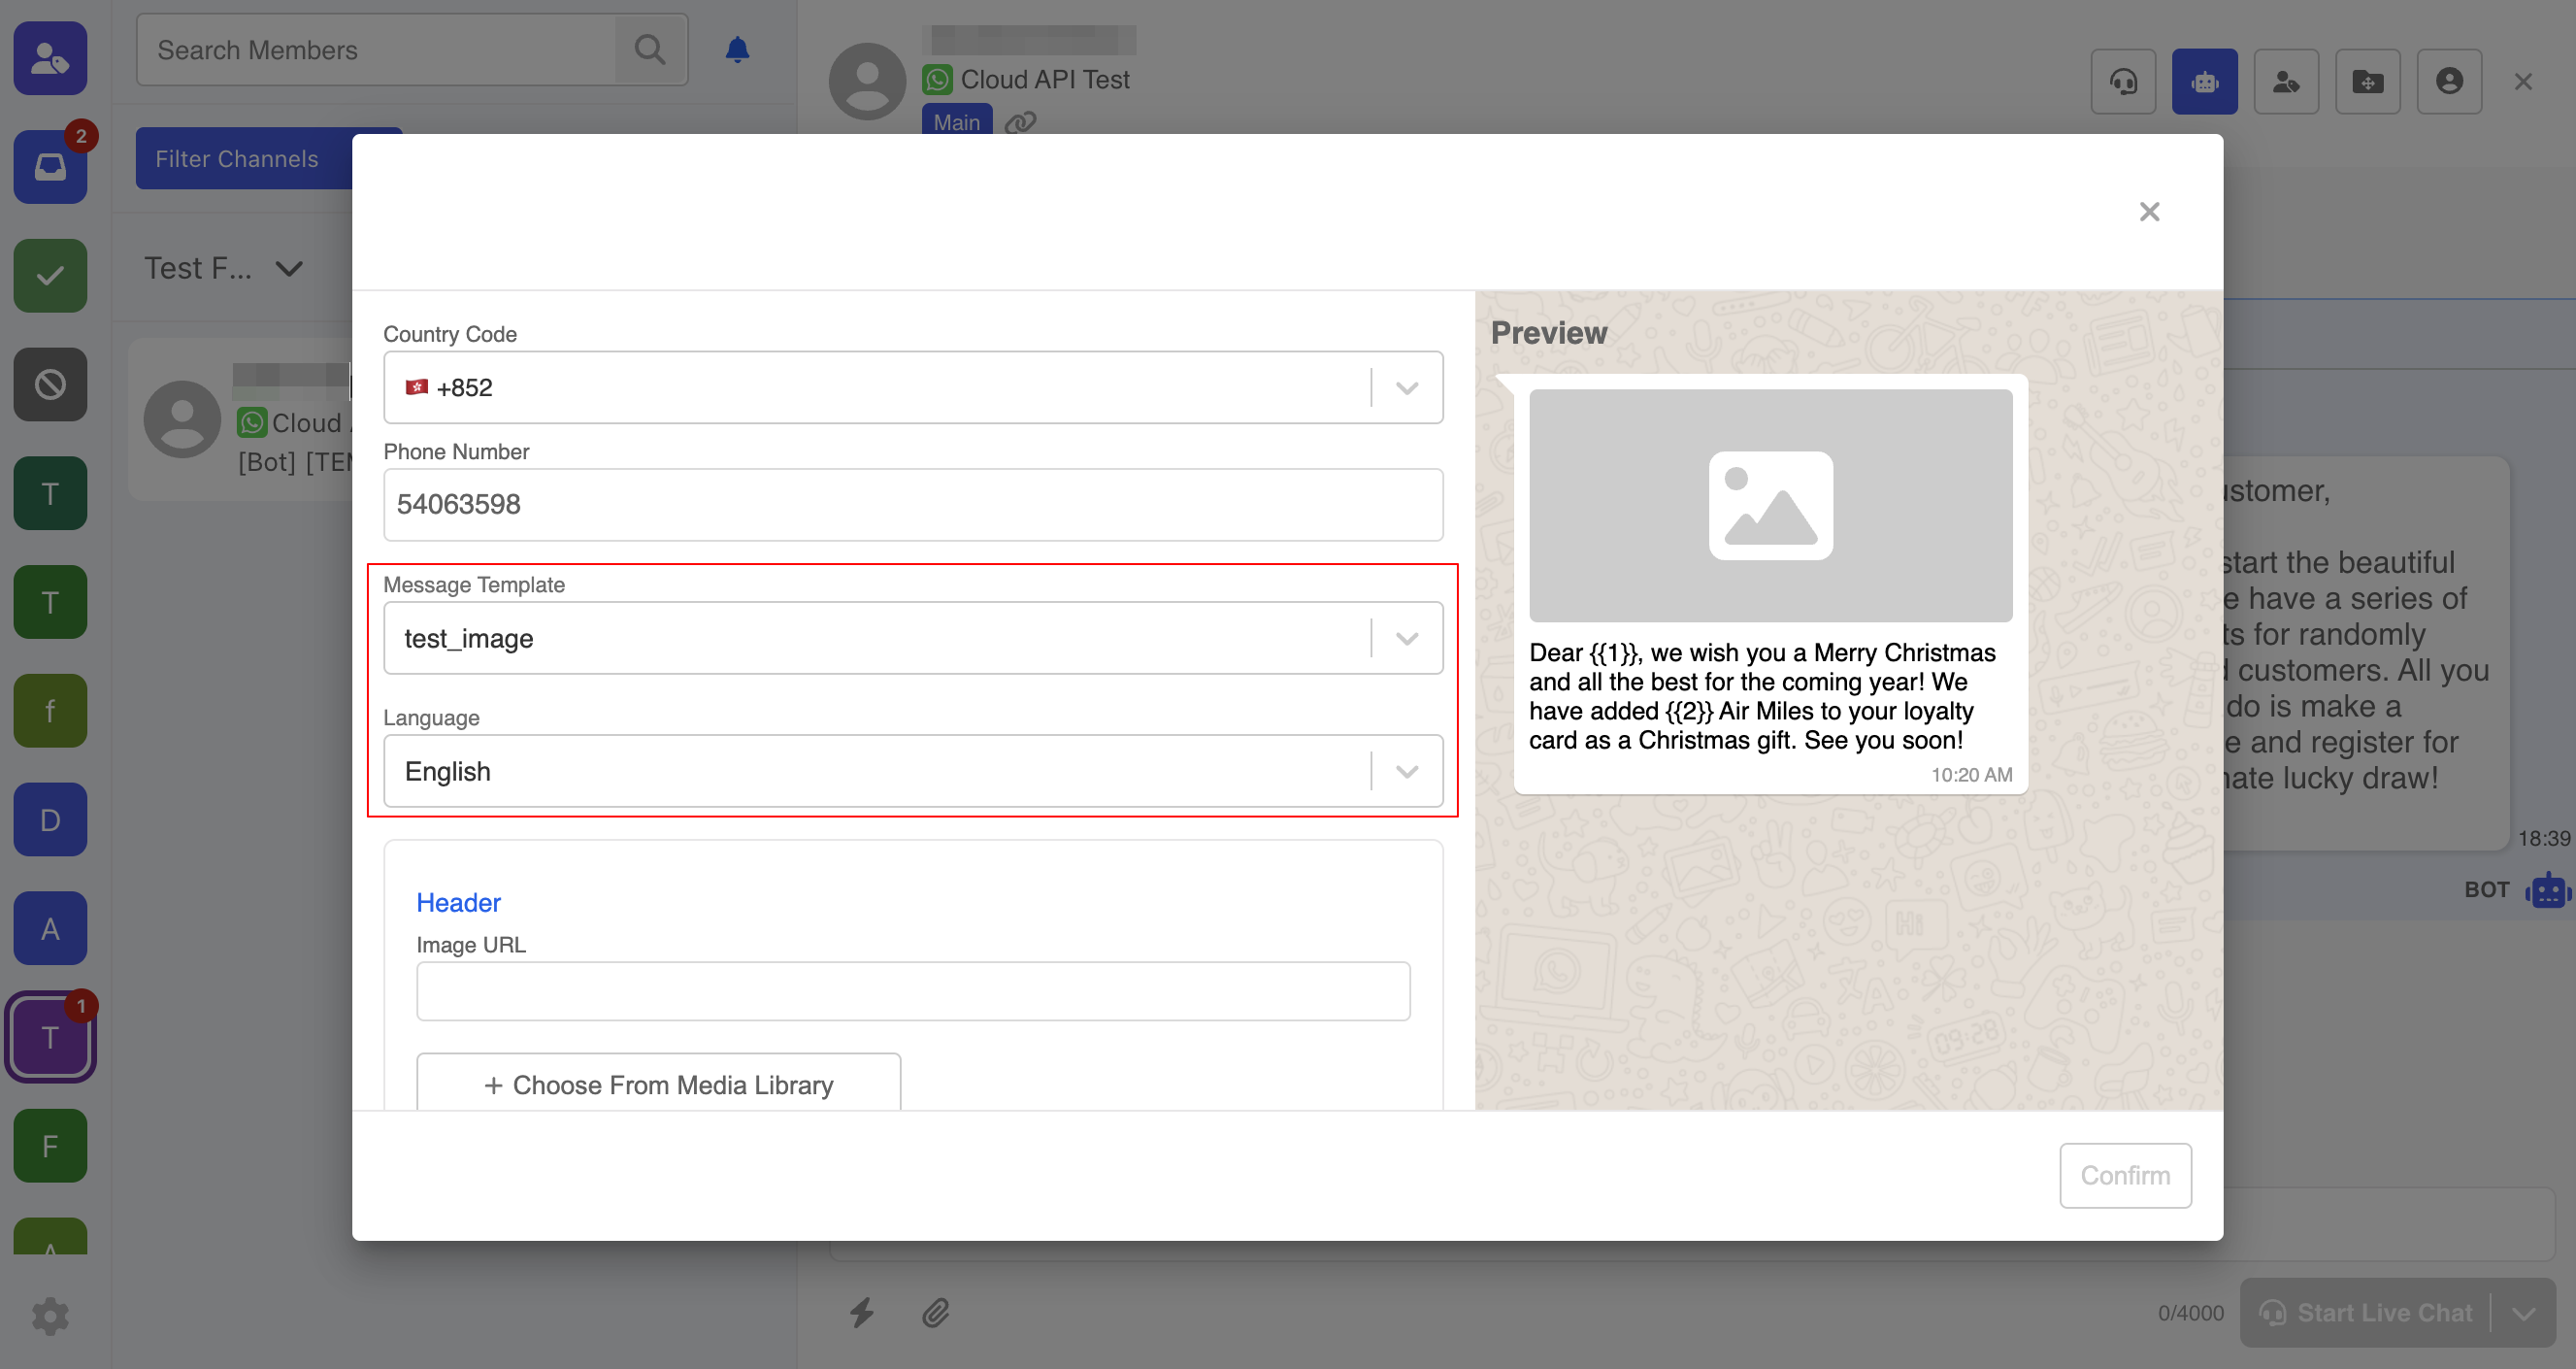
- Select the message template from the dropdown list.
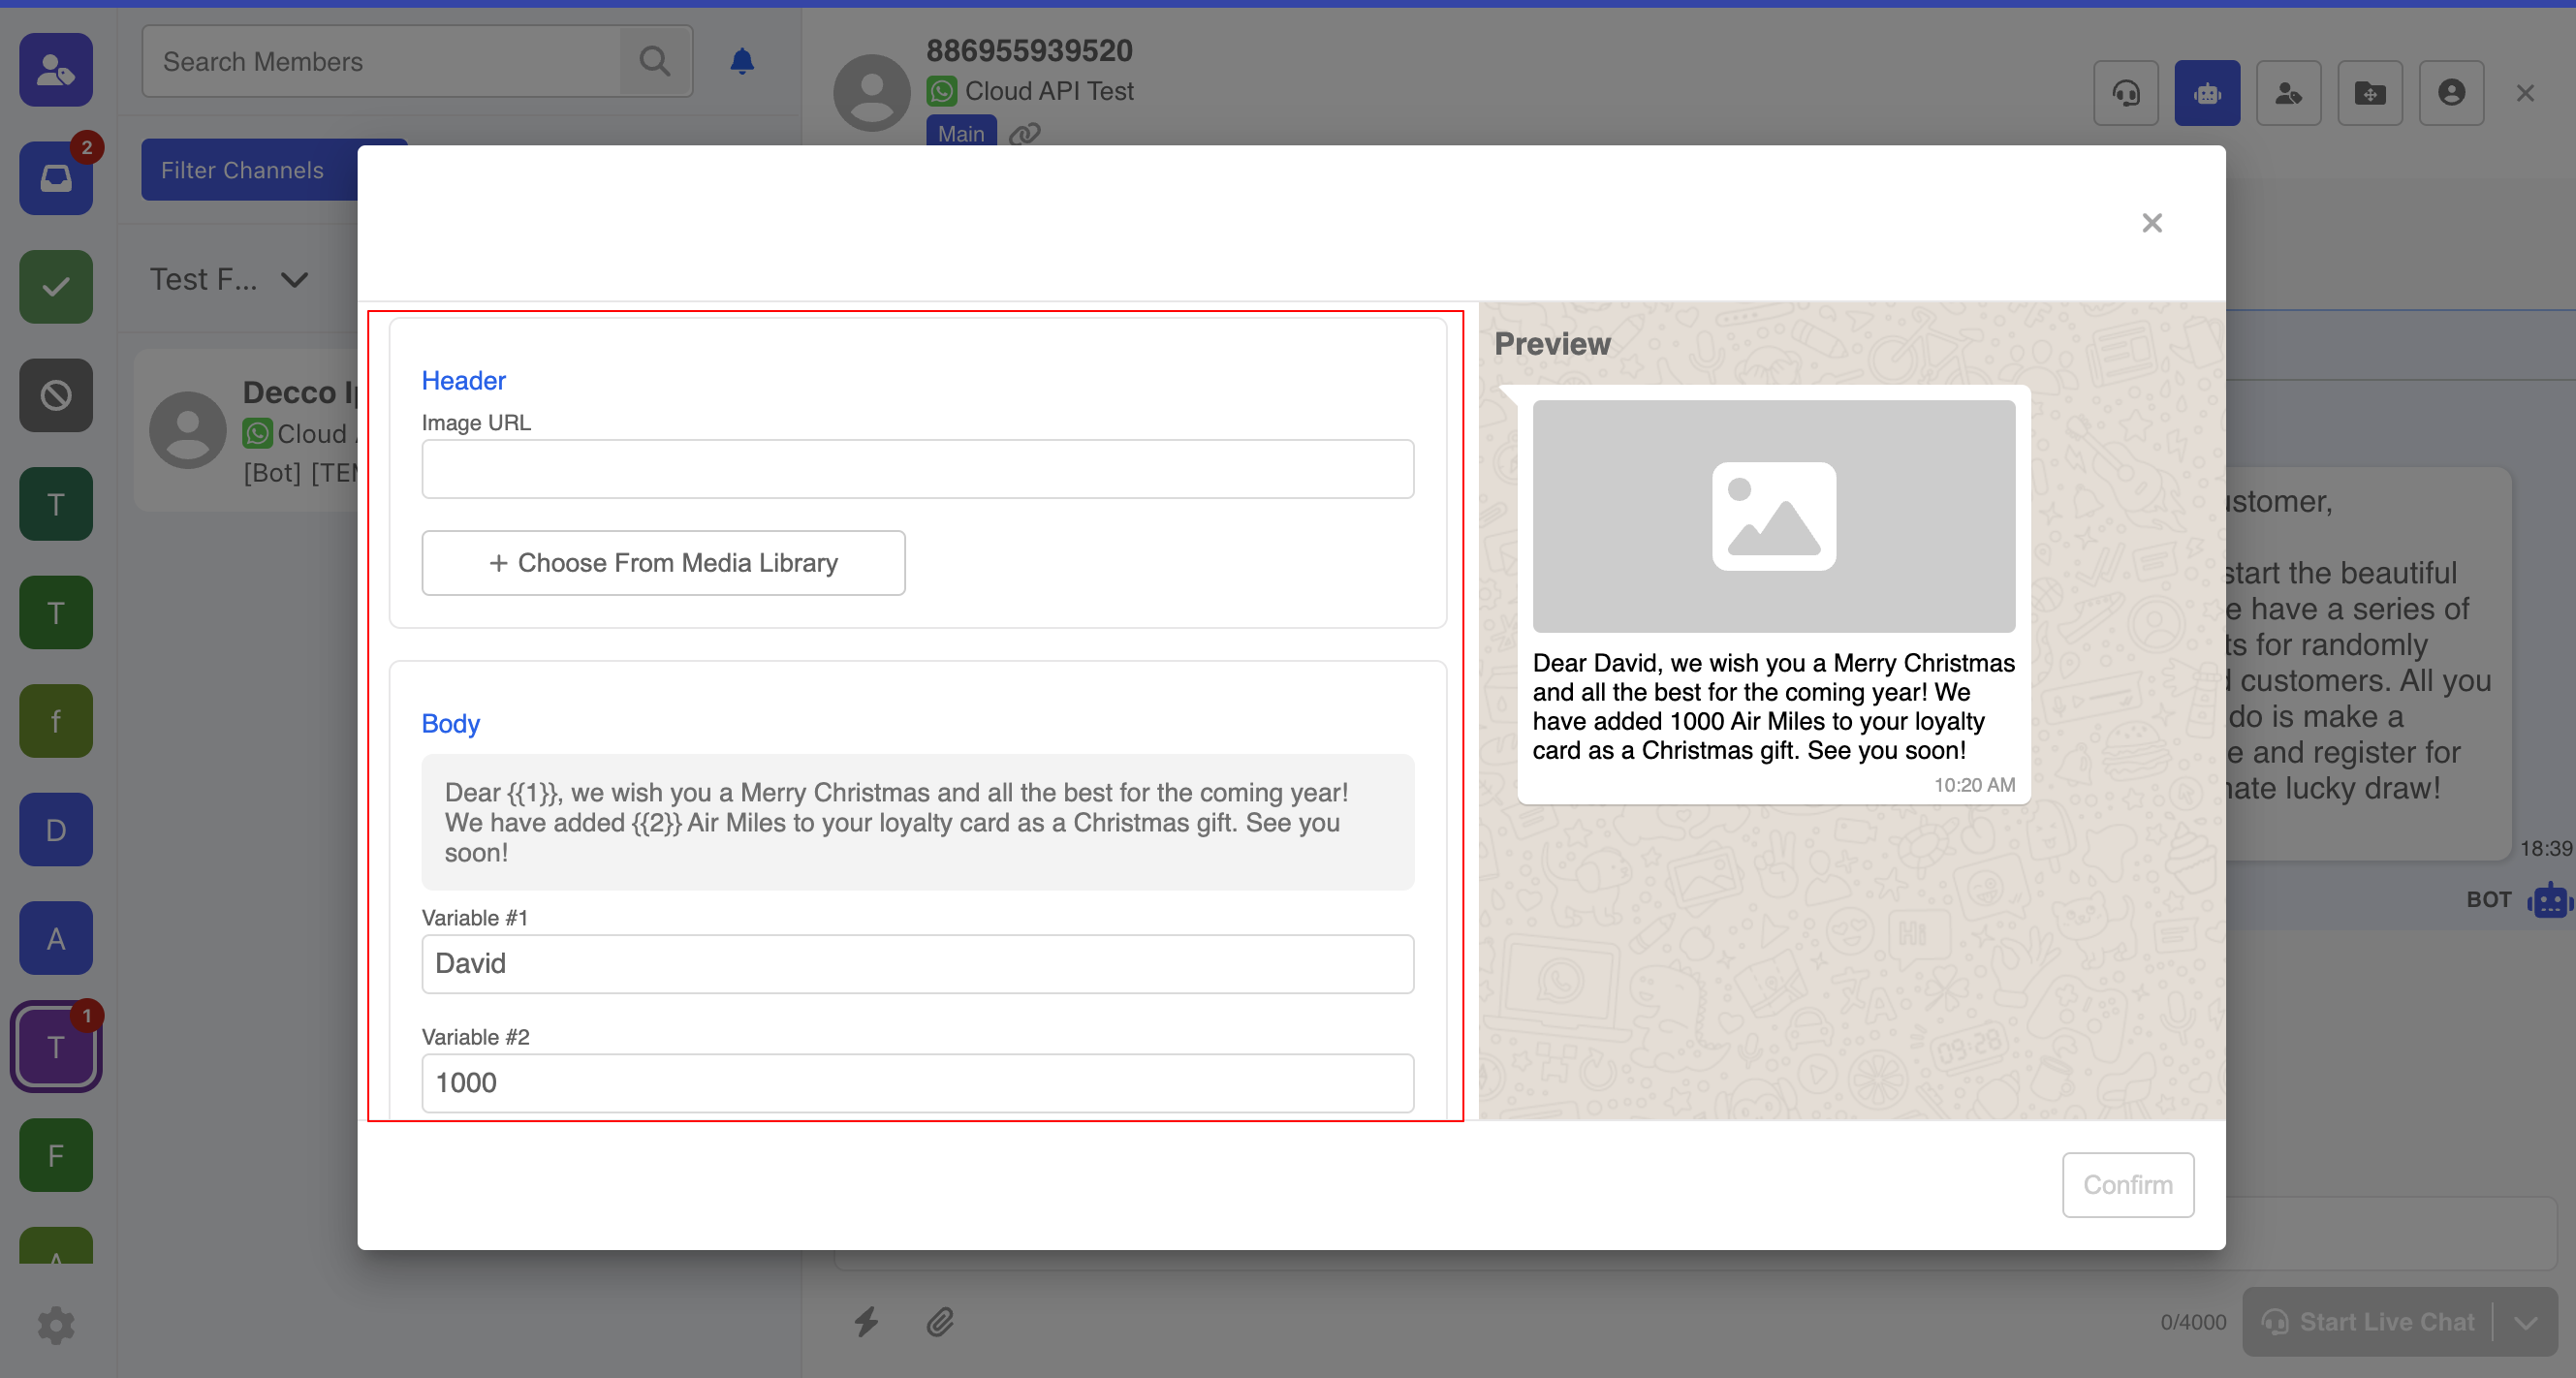
- After selecting the "Language", you can see the preview of the template. Fill in the parameters or media in the template (if any). Then, select "Confirm" to send out the template.
- If the template is sent successfully, you will see the new thread right away.
Resource Templates
By using the Resource Templates, you can also automate certain inbox actions by adding them to a chatbot.
Assign Thread to Folder
- In a node, add a new "Action".
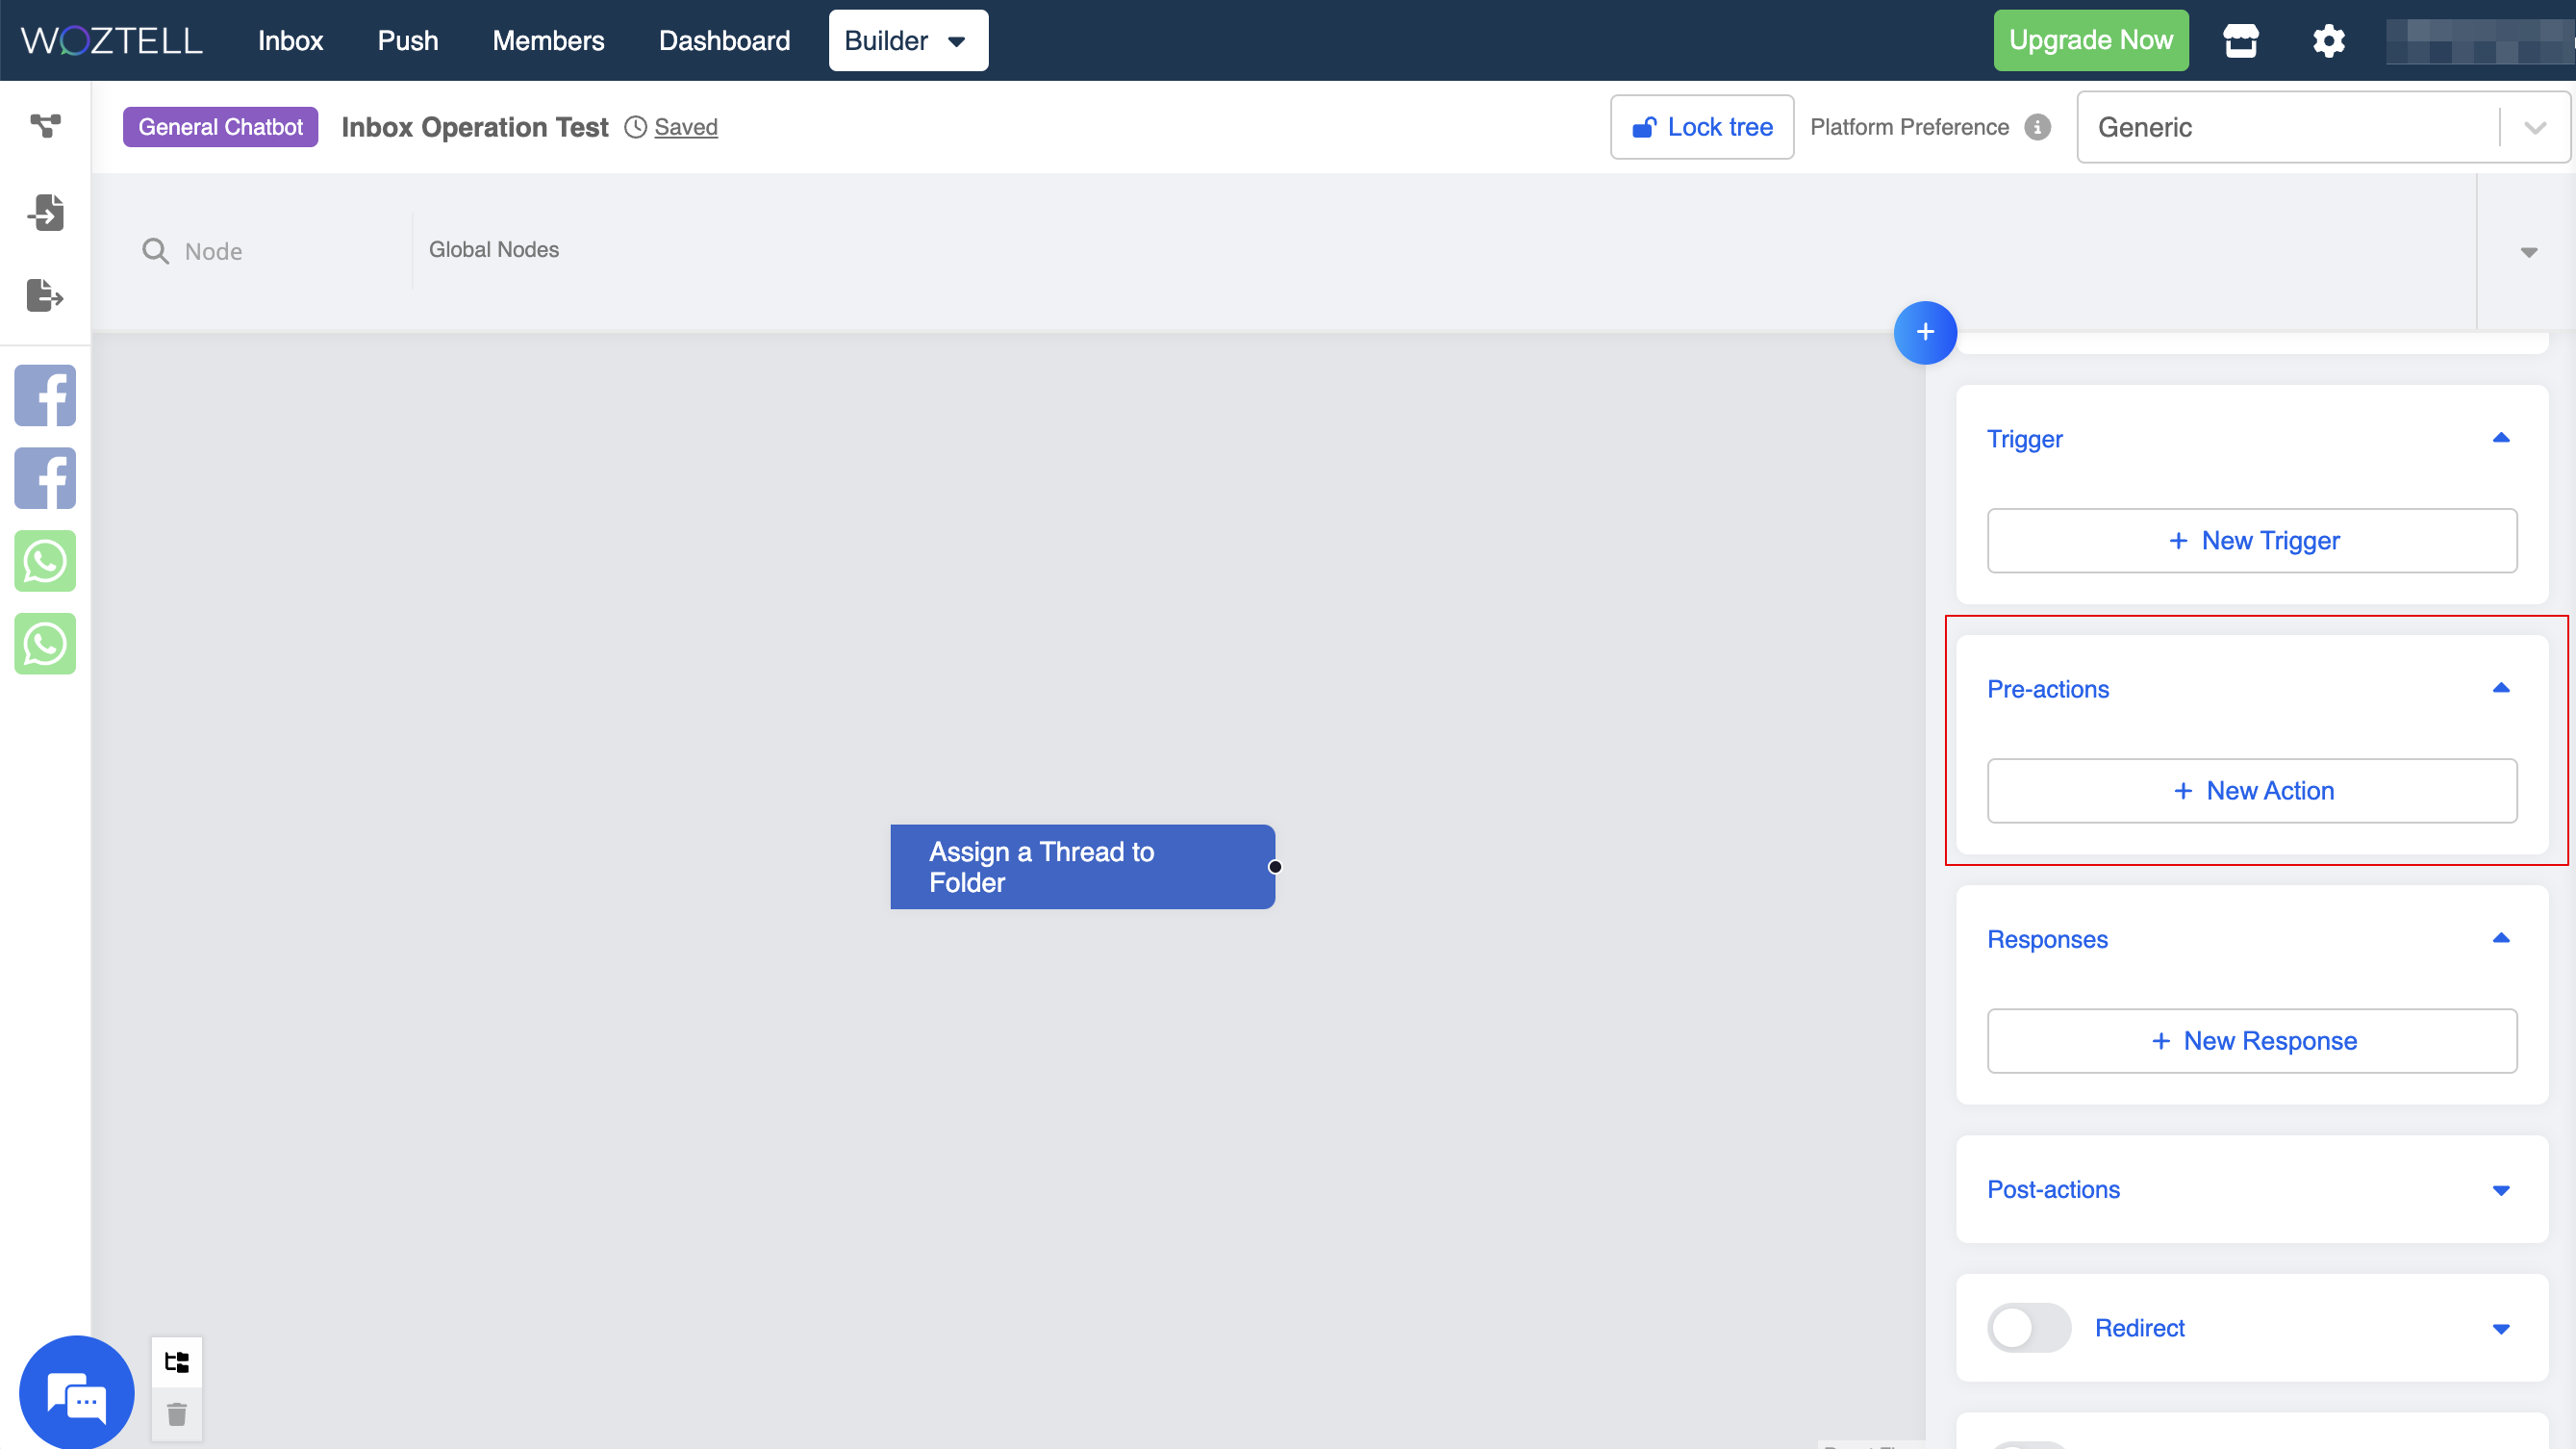
- Select the resource template "Move Thread to Folder".
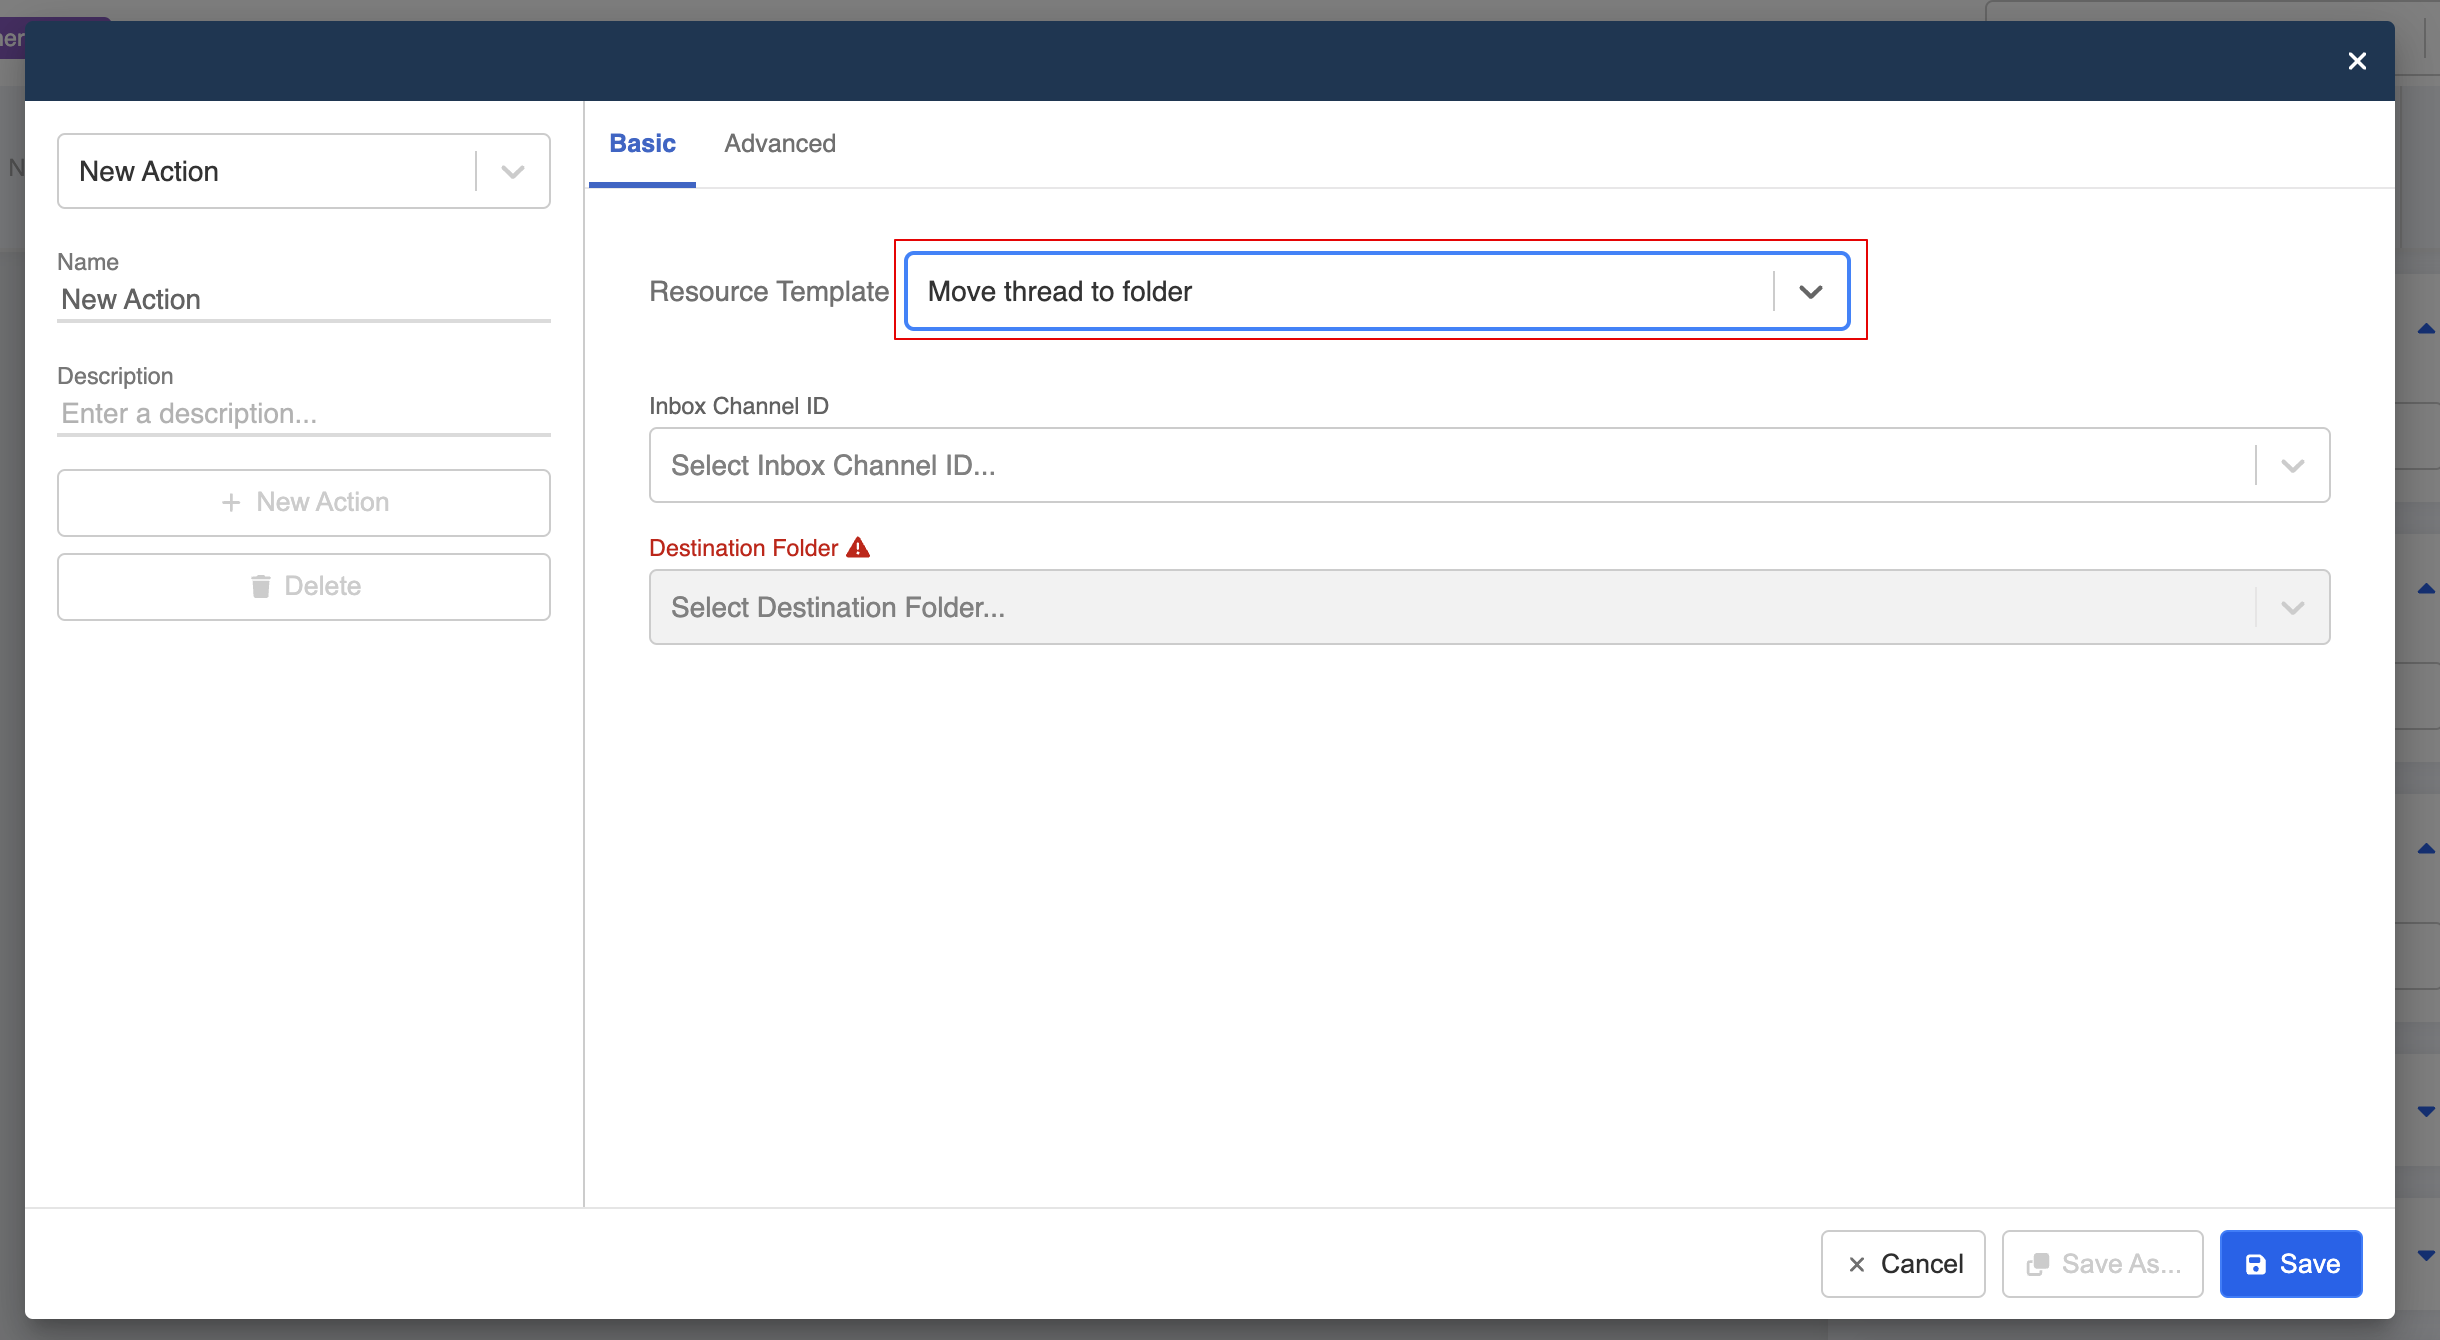
- Select Inbox Channel ID and Destination Folder. Remember to "Save" the settings.

- When the node is executed, the corresponding thread will be assigned to the destination folder.