Build the First Node of a Chatbot
What comes after the Chatbot? The Node.
A Node is a set of message response(s) that can be triggered by following a designated path and trigger. A chatbot is basically layers of connected chatbot nodes. The First Node usually refers to the first message response of a Chatbot, and it is always a Tree Node.
In the following time, we are going to adopt the following conversation tree diagram as the skeleton of your first chatbot:
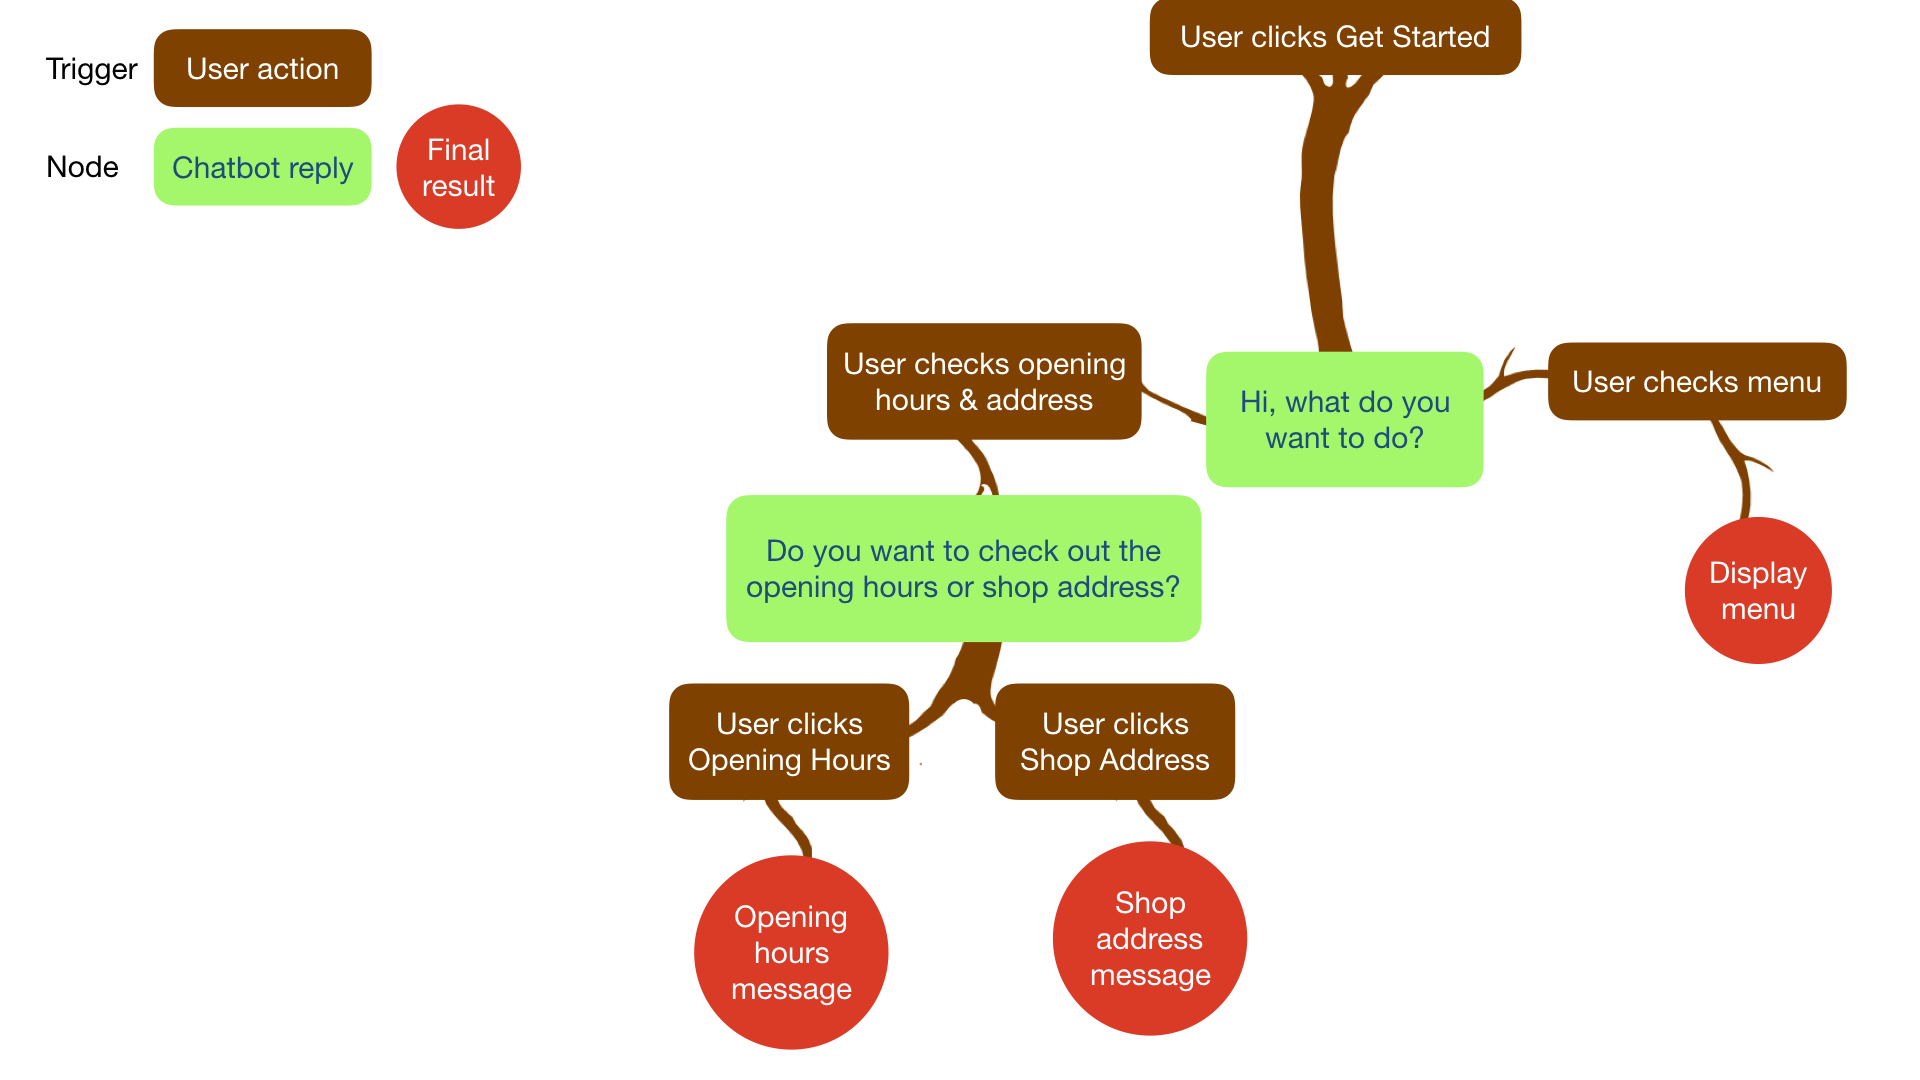
Sample tree diagram
tip
Both chatbot reply and final result are nodes while the user action is the trigger that can leads you to those nodes following the correct path. The whole structure is a conversation tree.
Expected Outcome
You should be able to find your created first node in your workspace.
Sample chatbot diagram
Add Your First Node
Enter your Bot Builder.
- Select "+" on right top corner of workspace.
- Select "+ General Node".
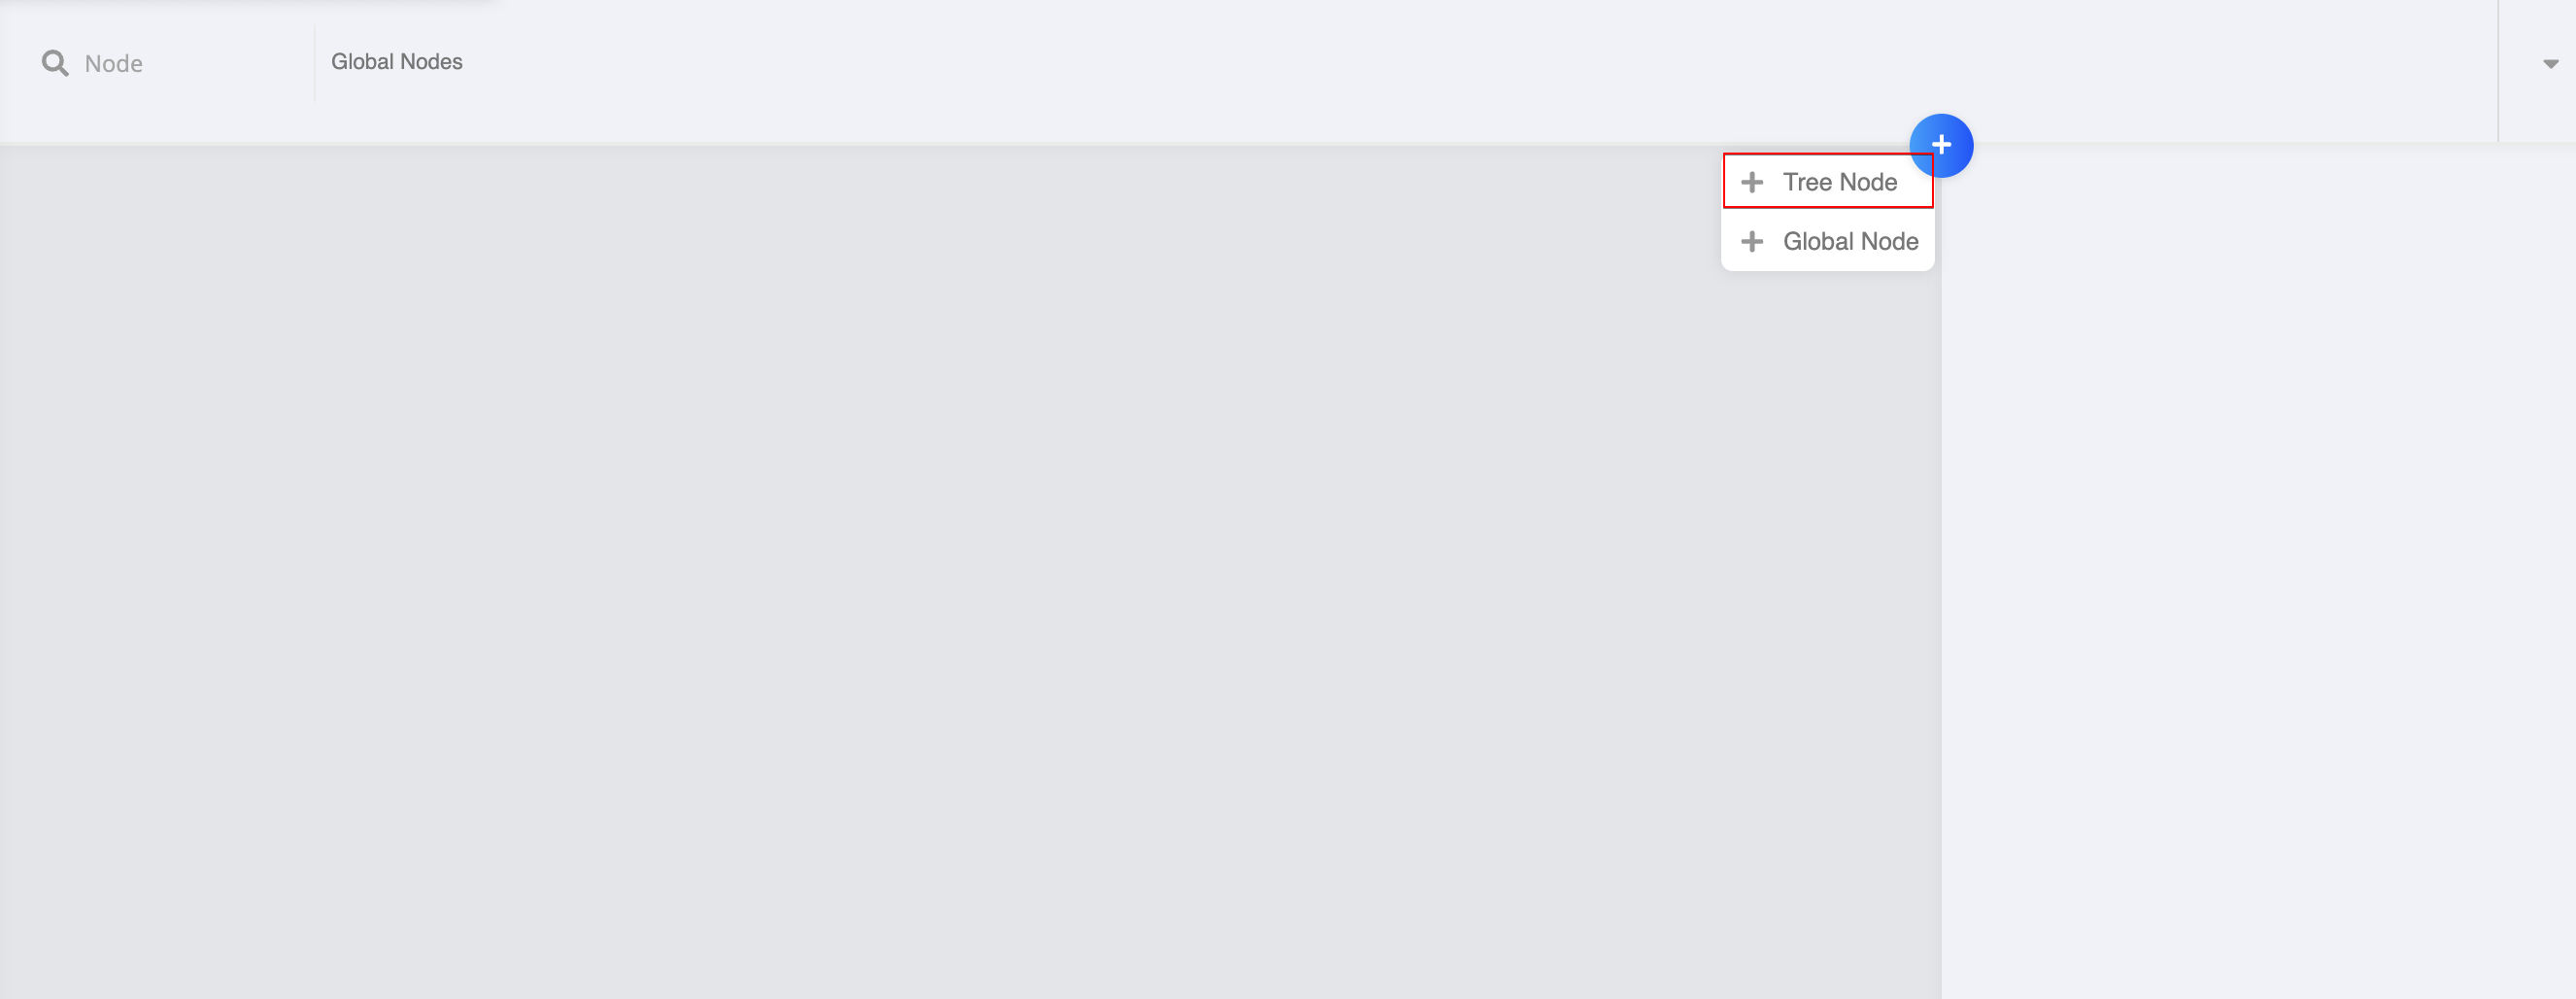
Add Node
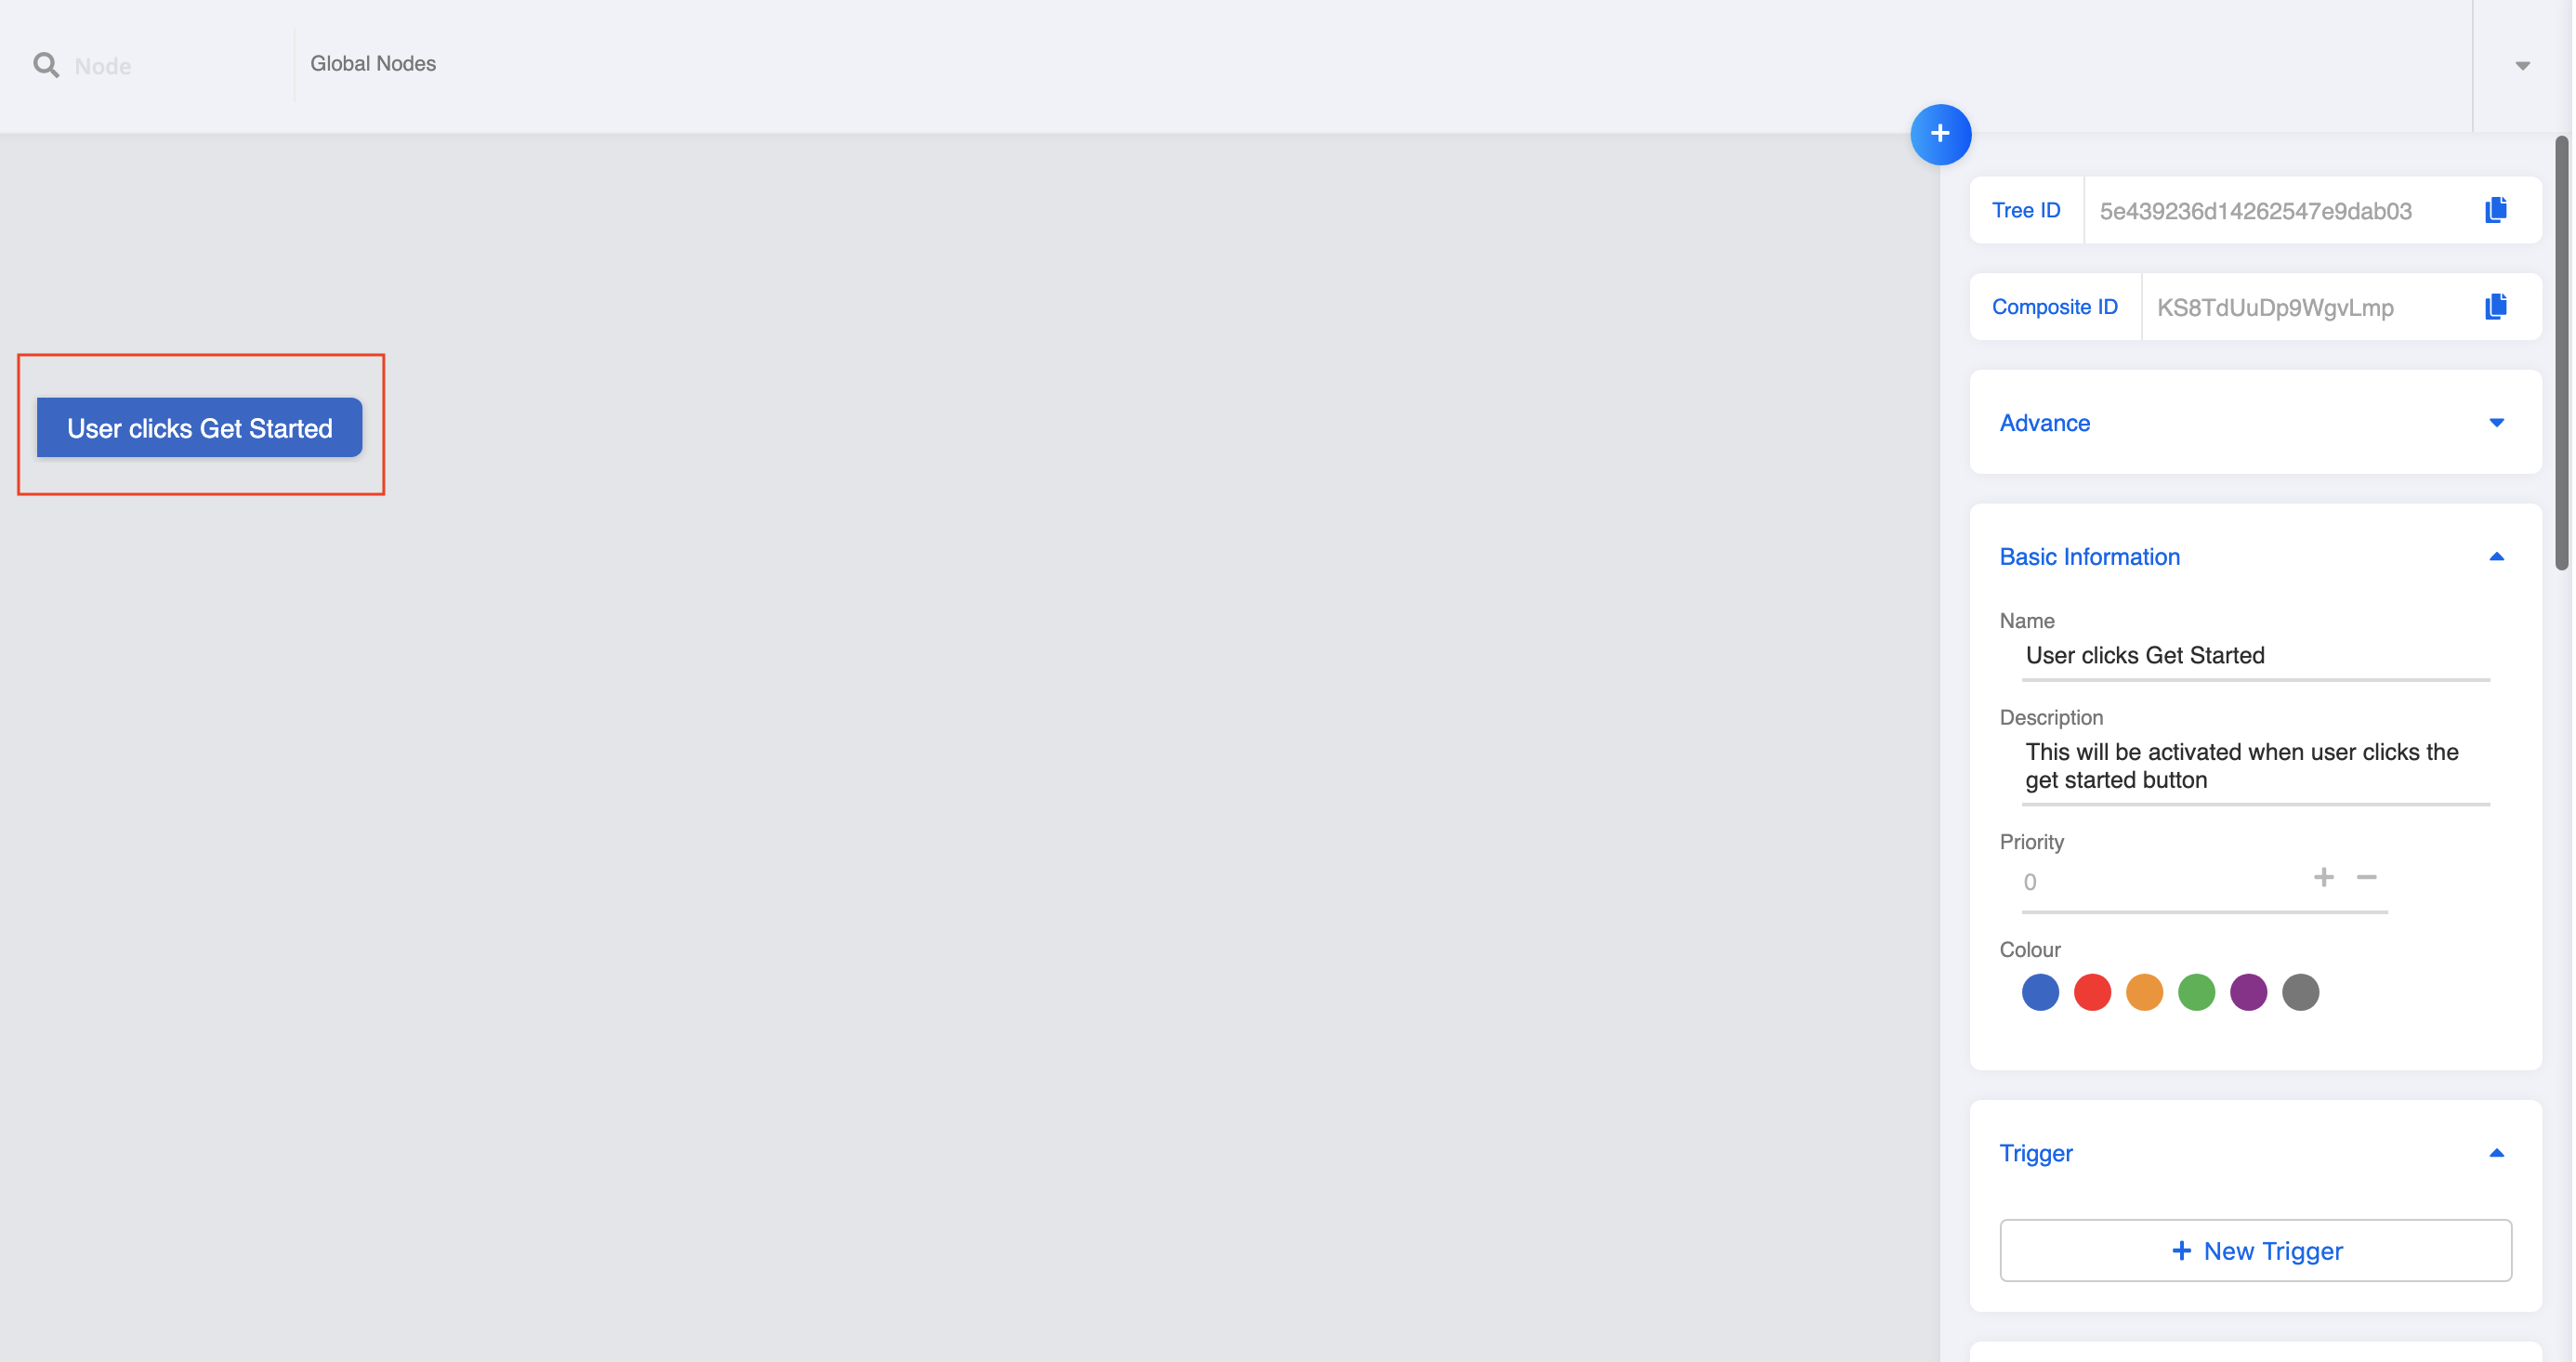
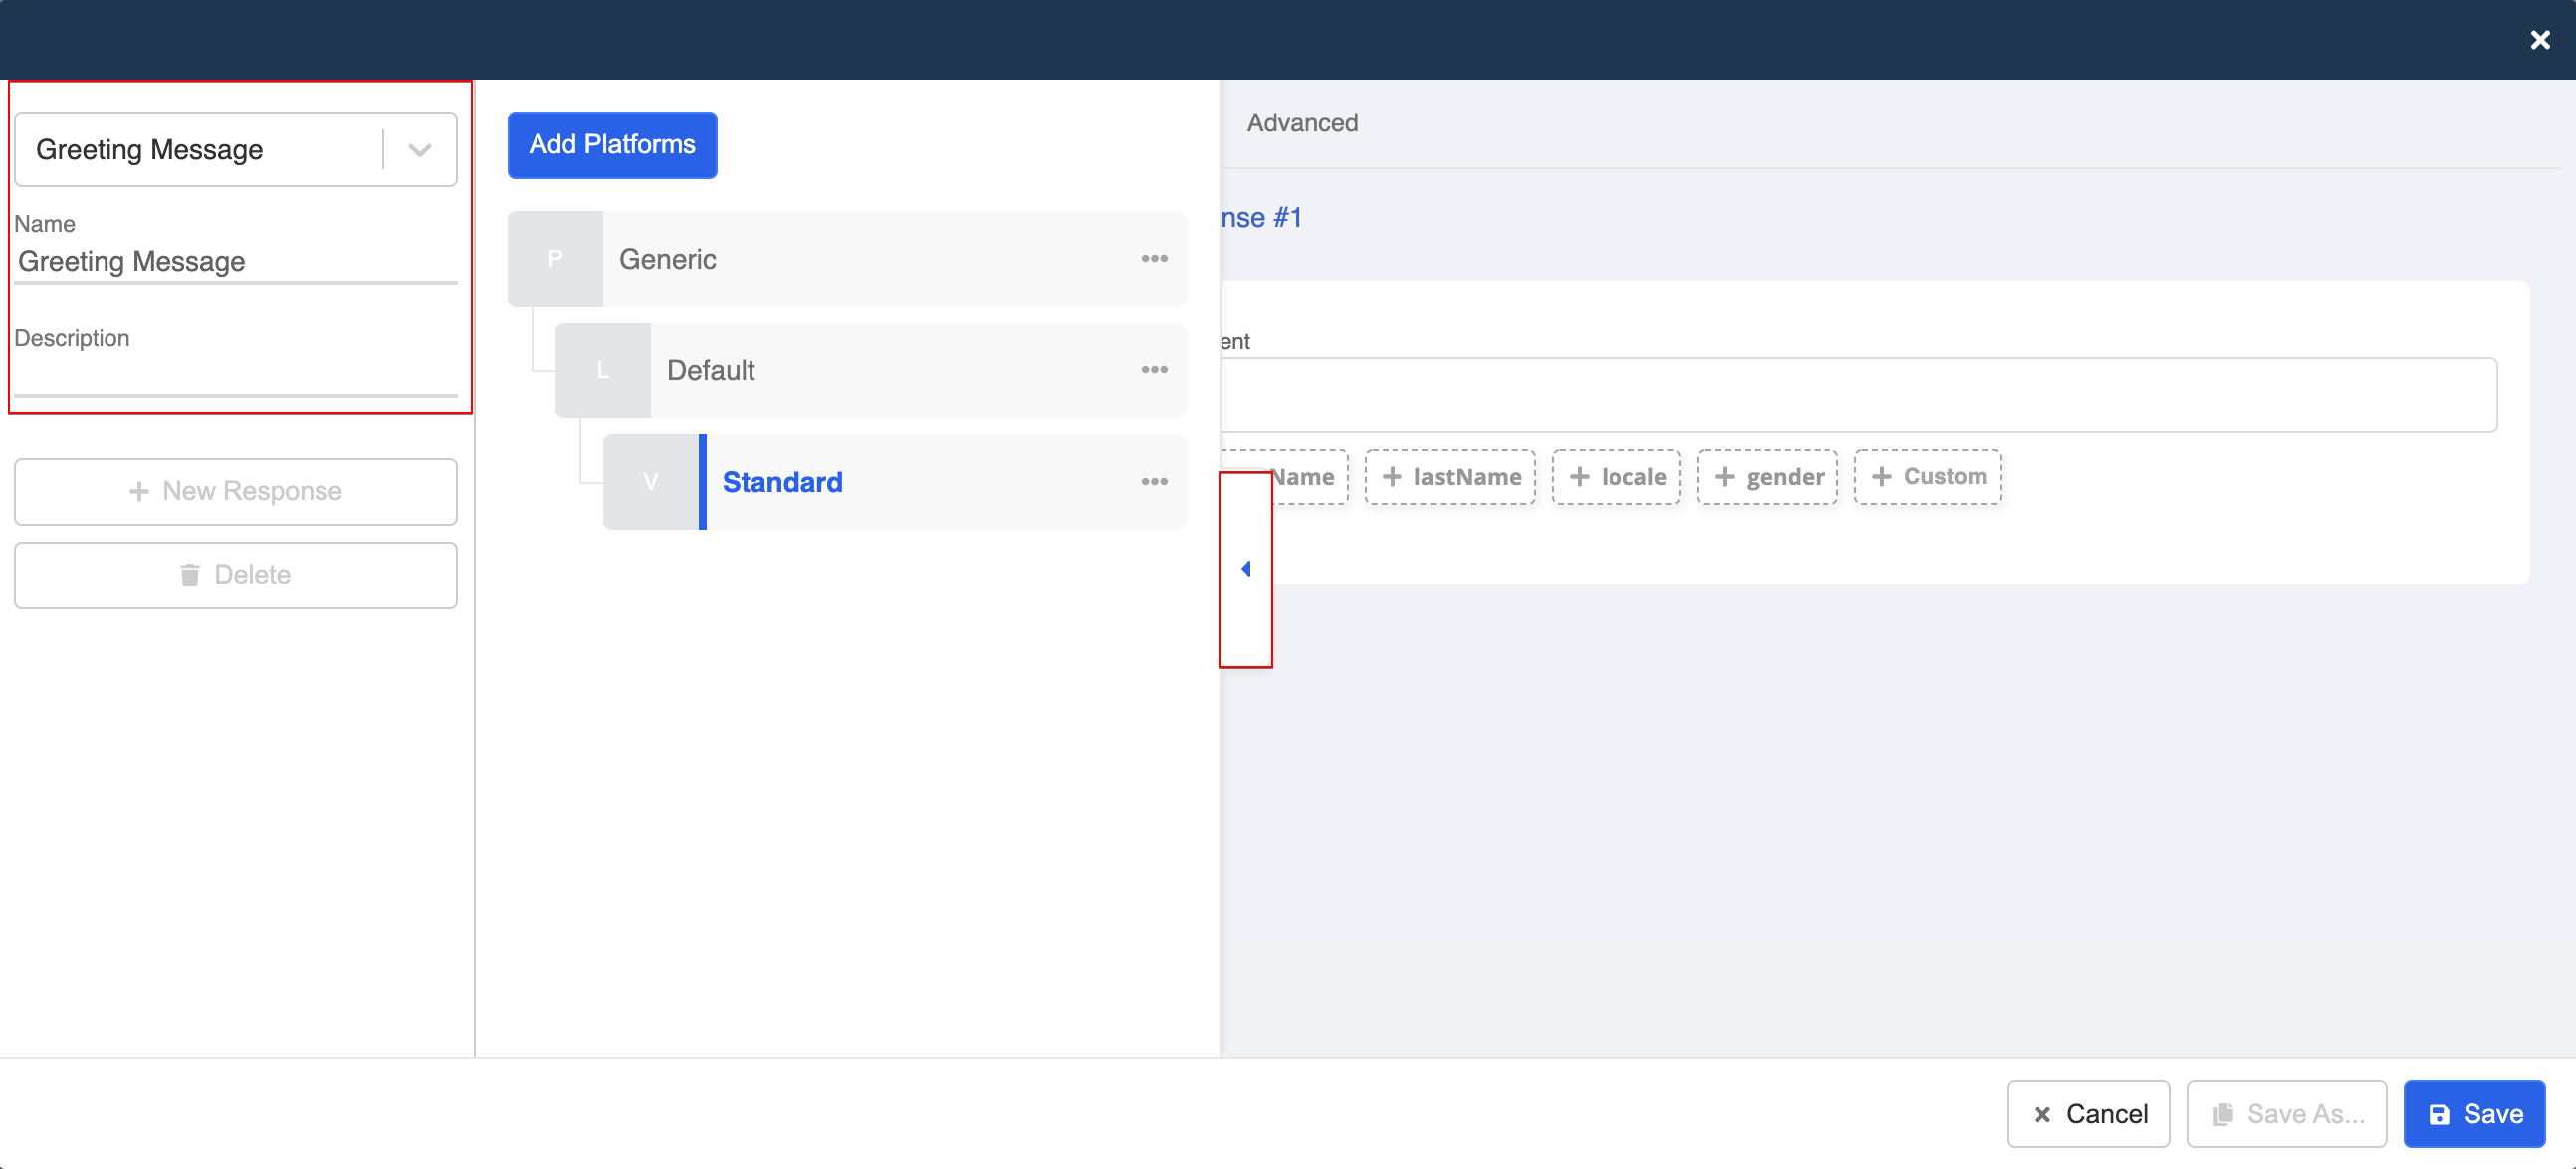
- After that, a panel will be revealed on the right. This is the Node Inspector.
- Fill in the node name and description.

Fill in node details
Build a Response
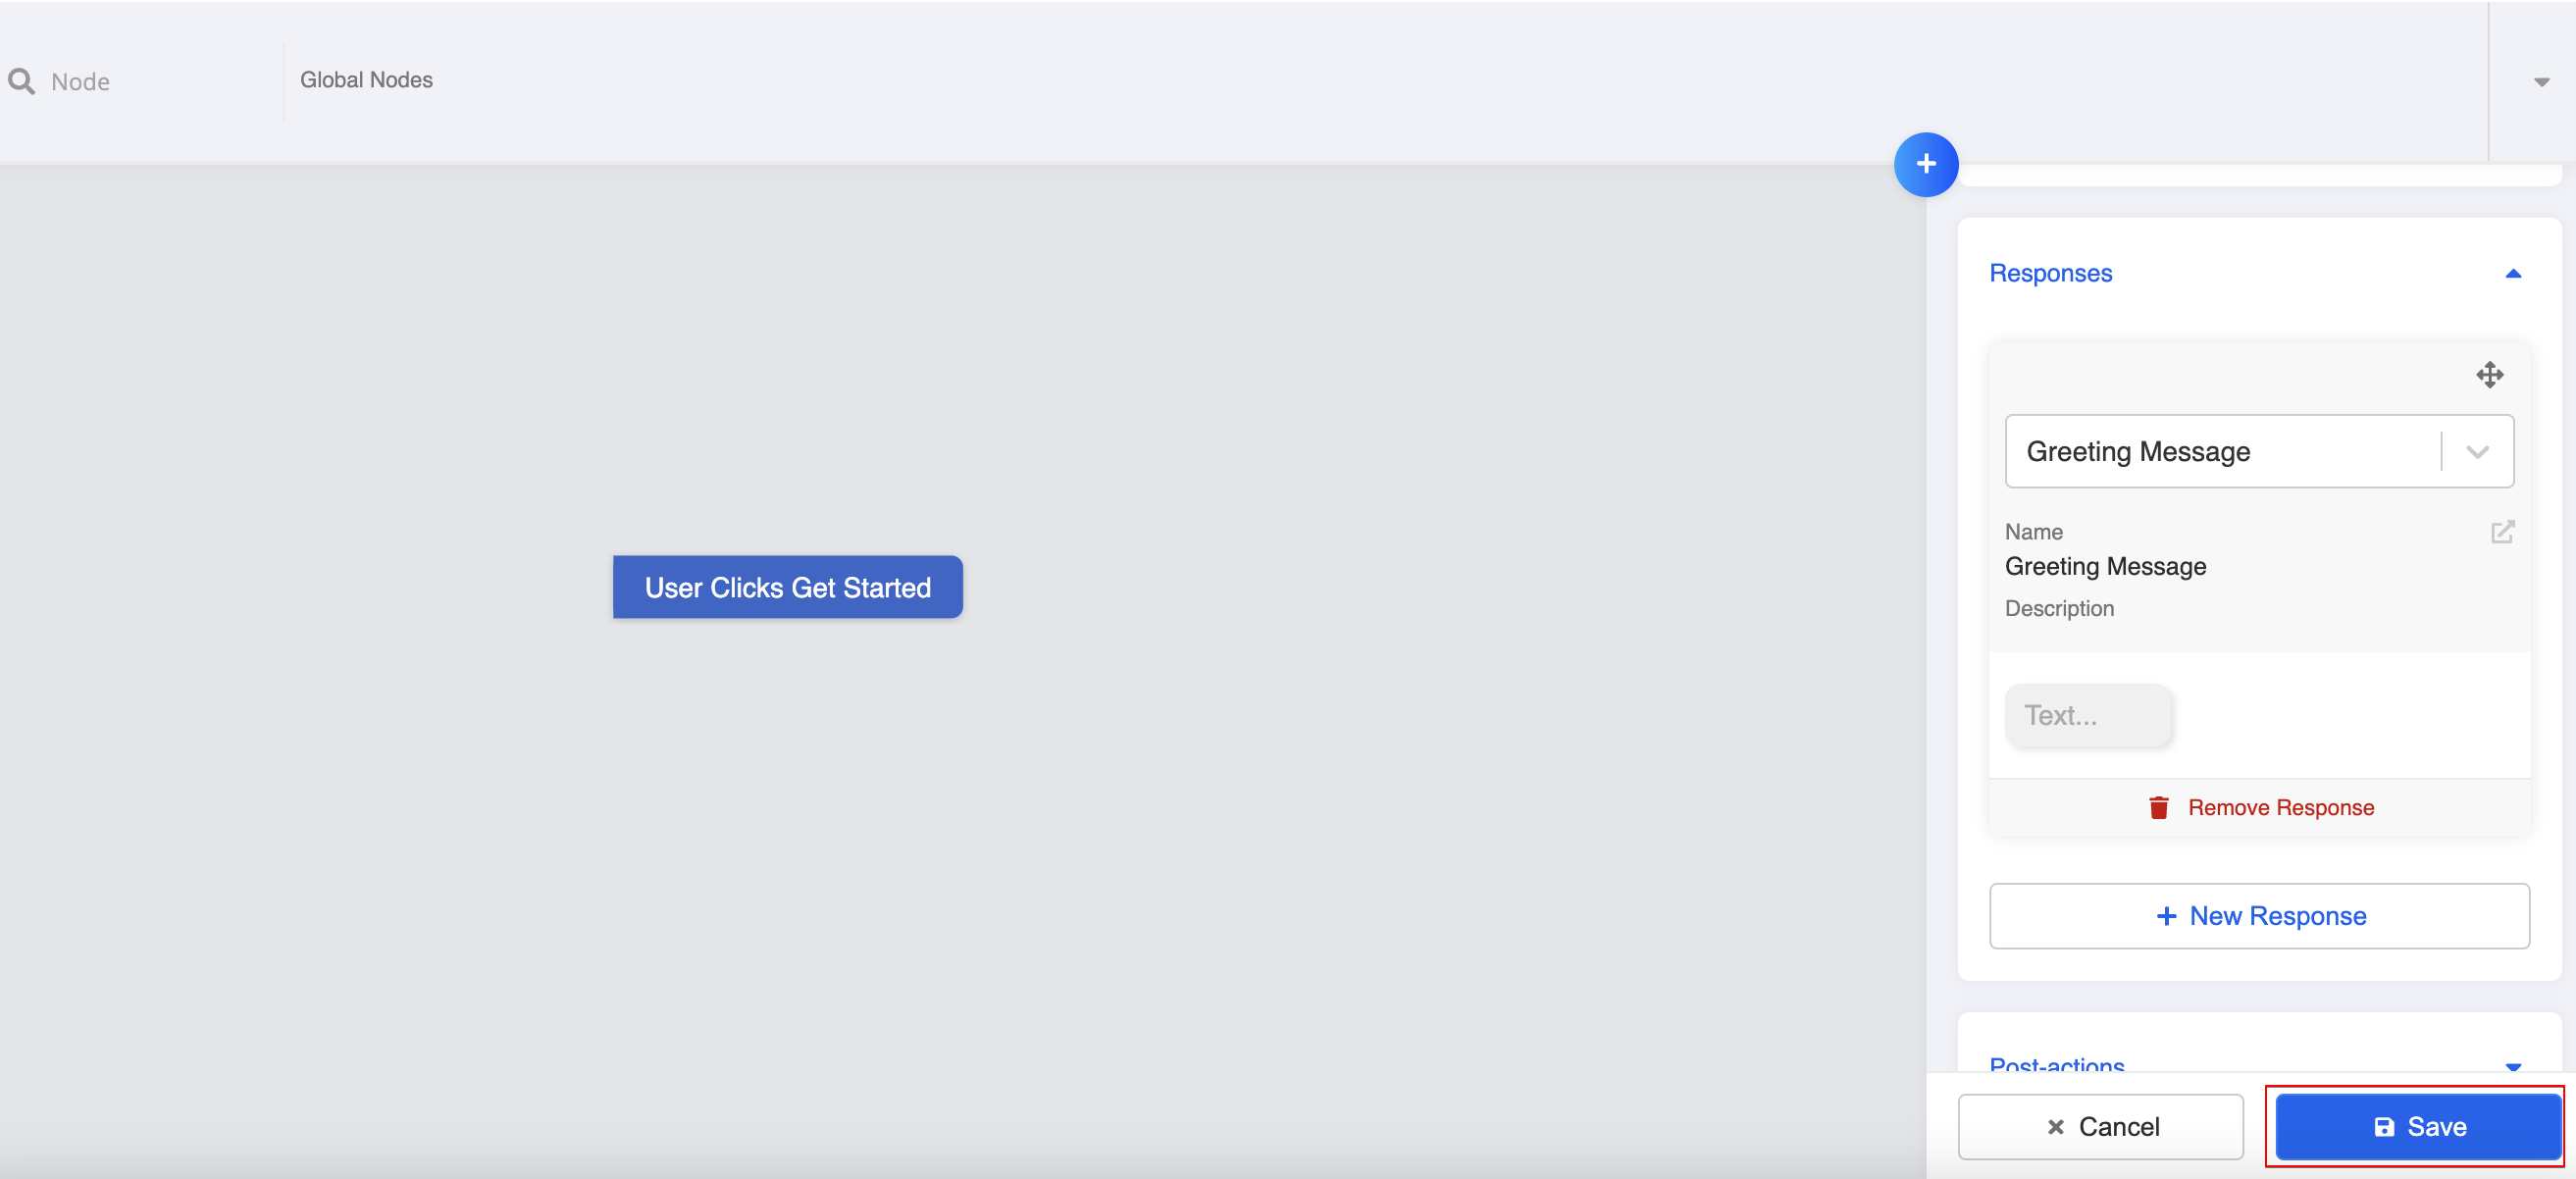
- Scroll down to "Responses" and click "+ New Response". Now, we are going to create the response of our first node, that is "Hi, what do you want to do?"
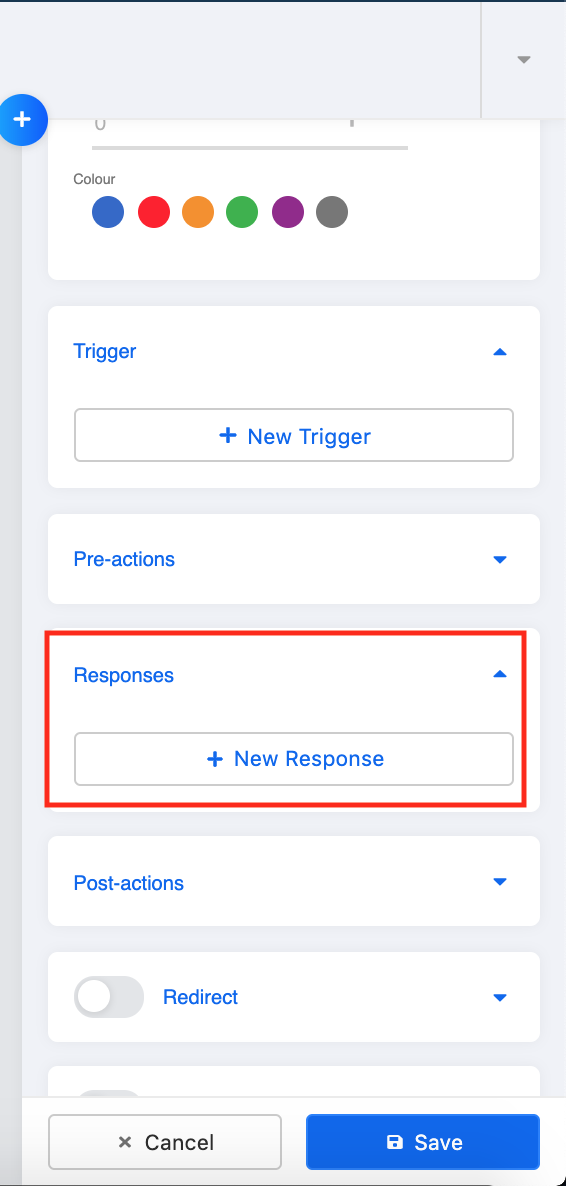
Add response
- A new window of Response Builder will be opened. Name your response, then click on the arrow sign and open a new panel.
Click New Response
- Click "Add Platform".
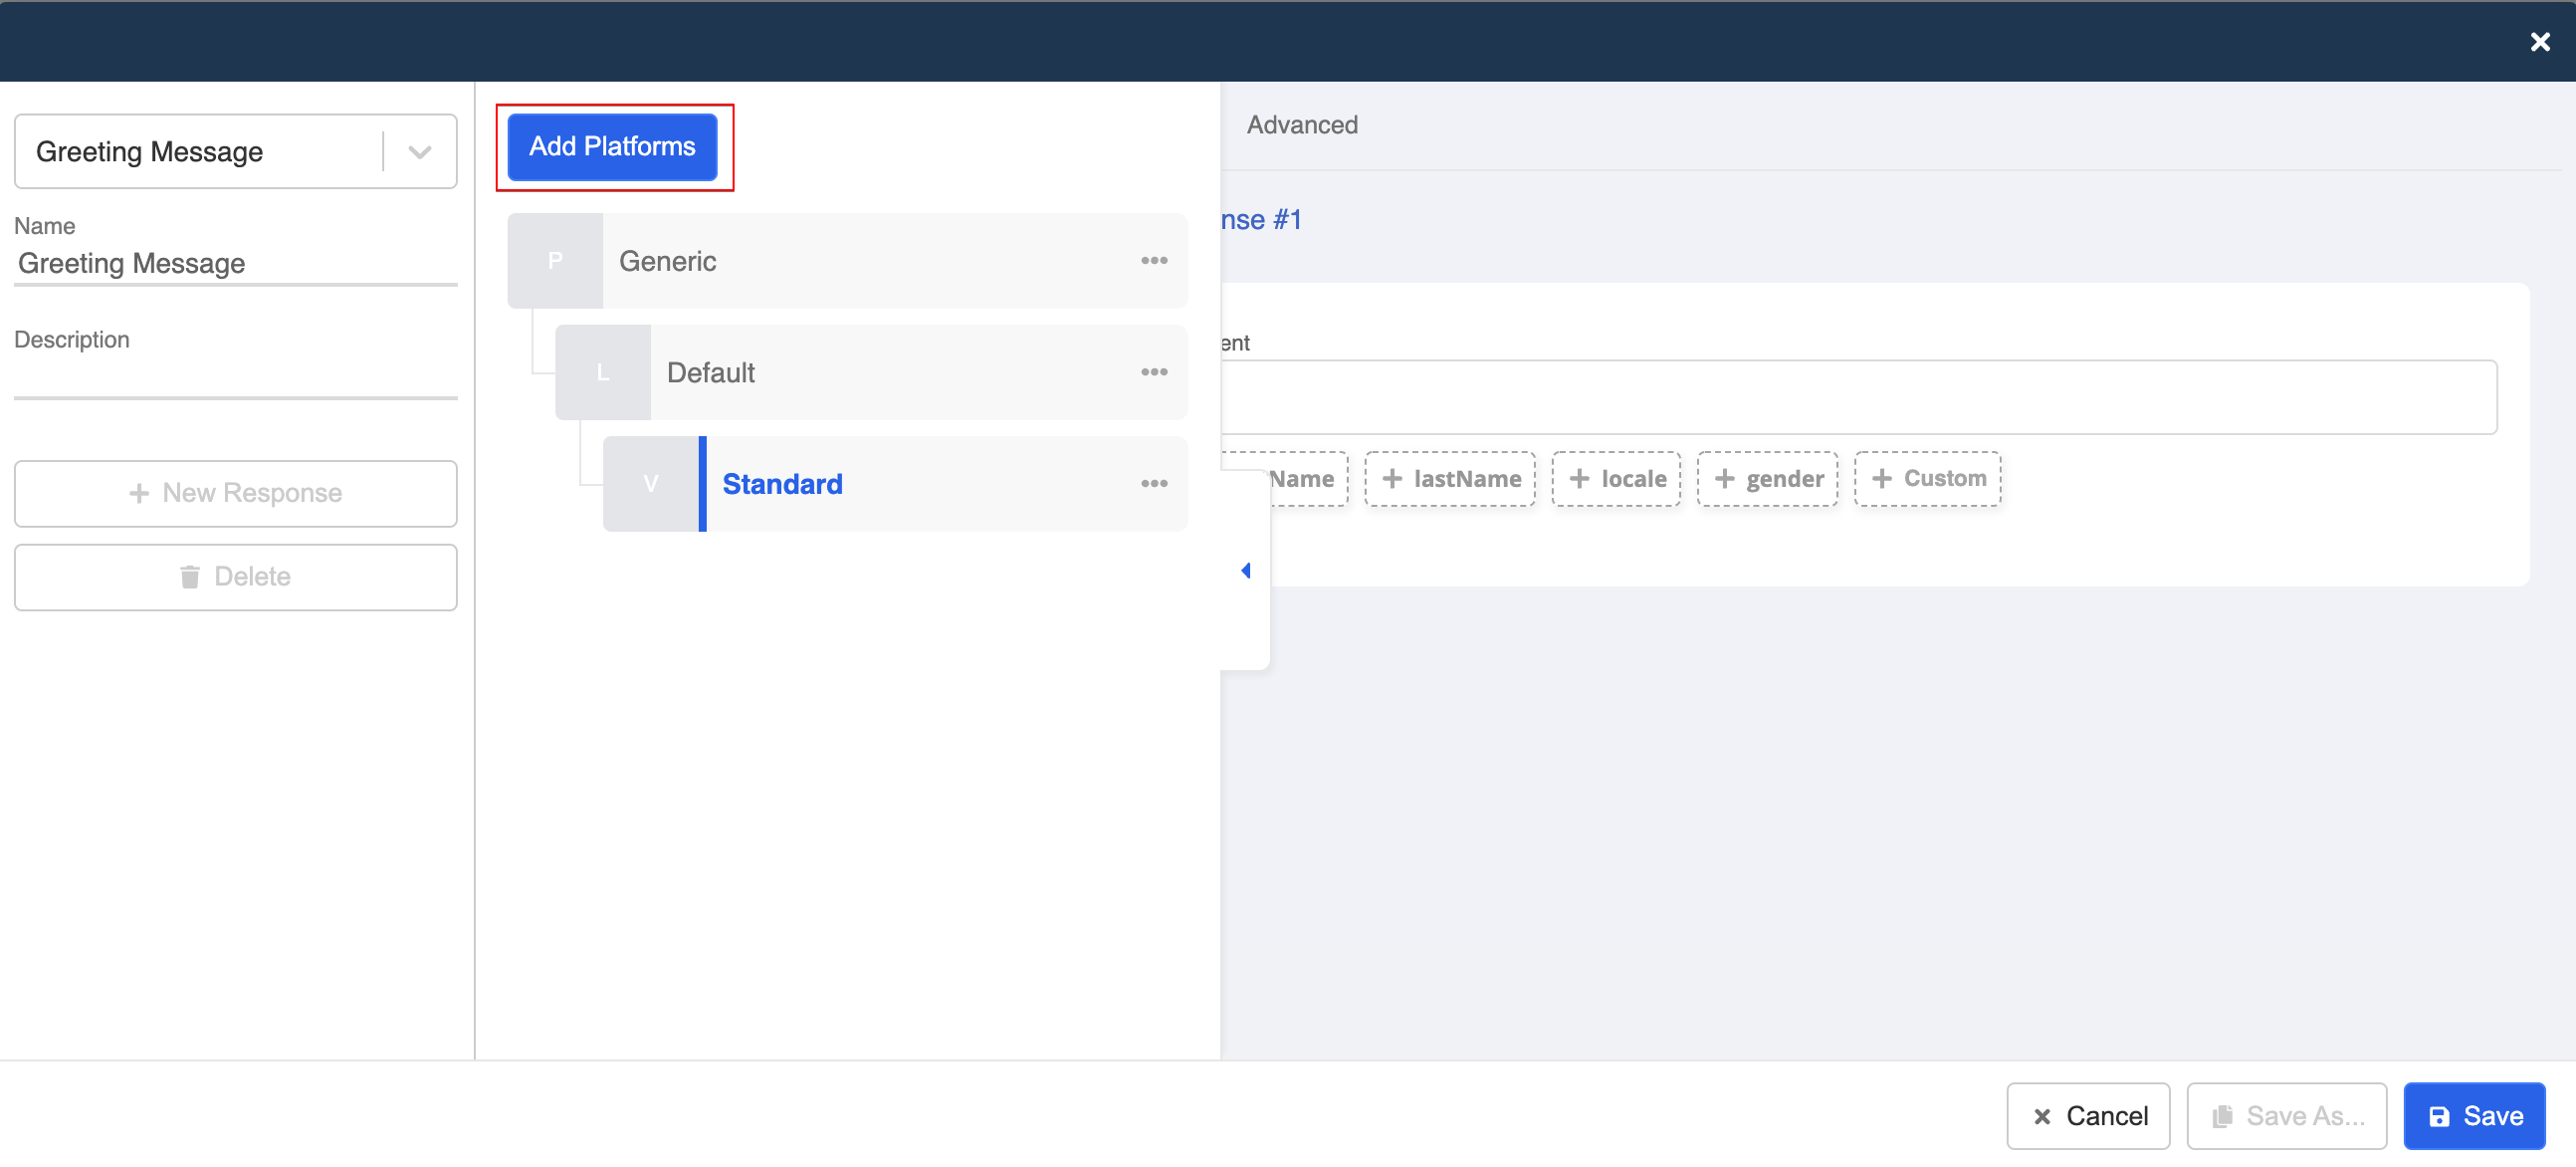
Add Platform
- Since you are building this response for Facebook, select "Facebook" from the dropdown.
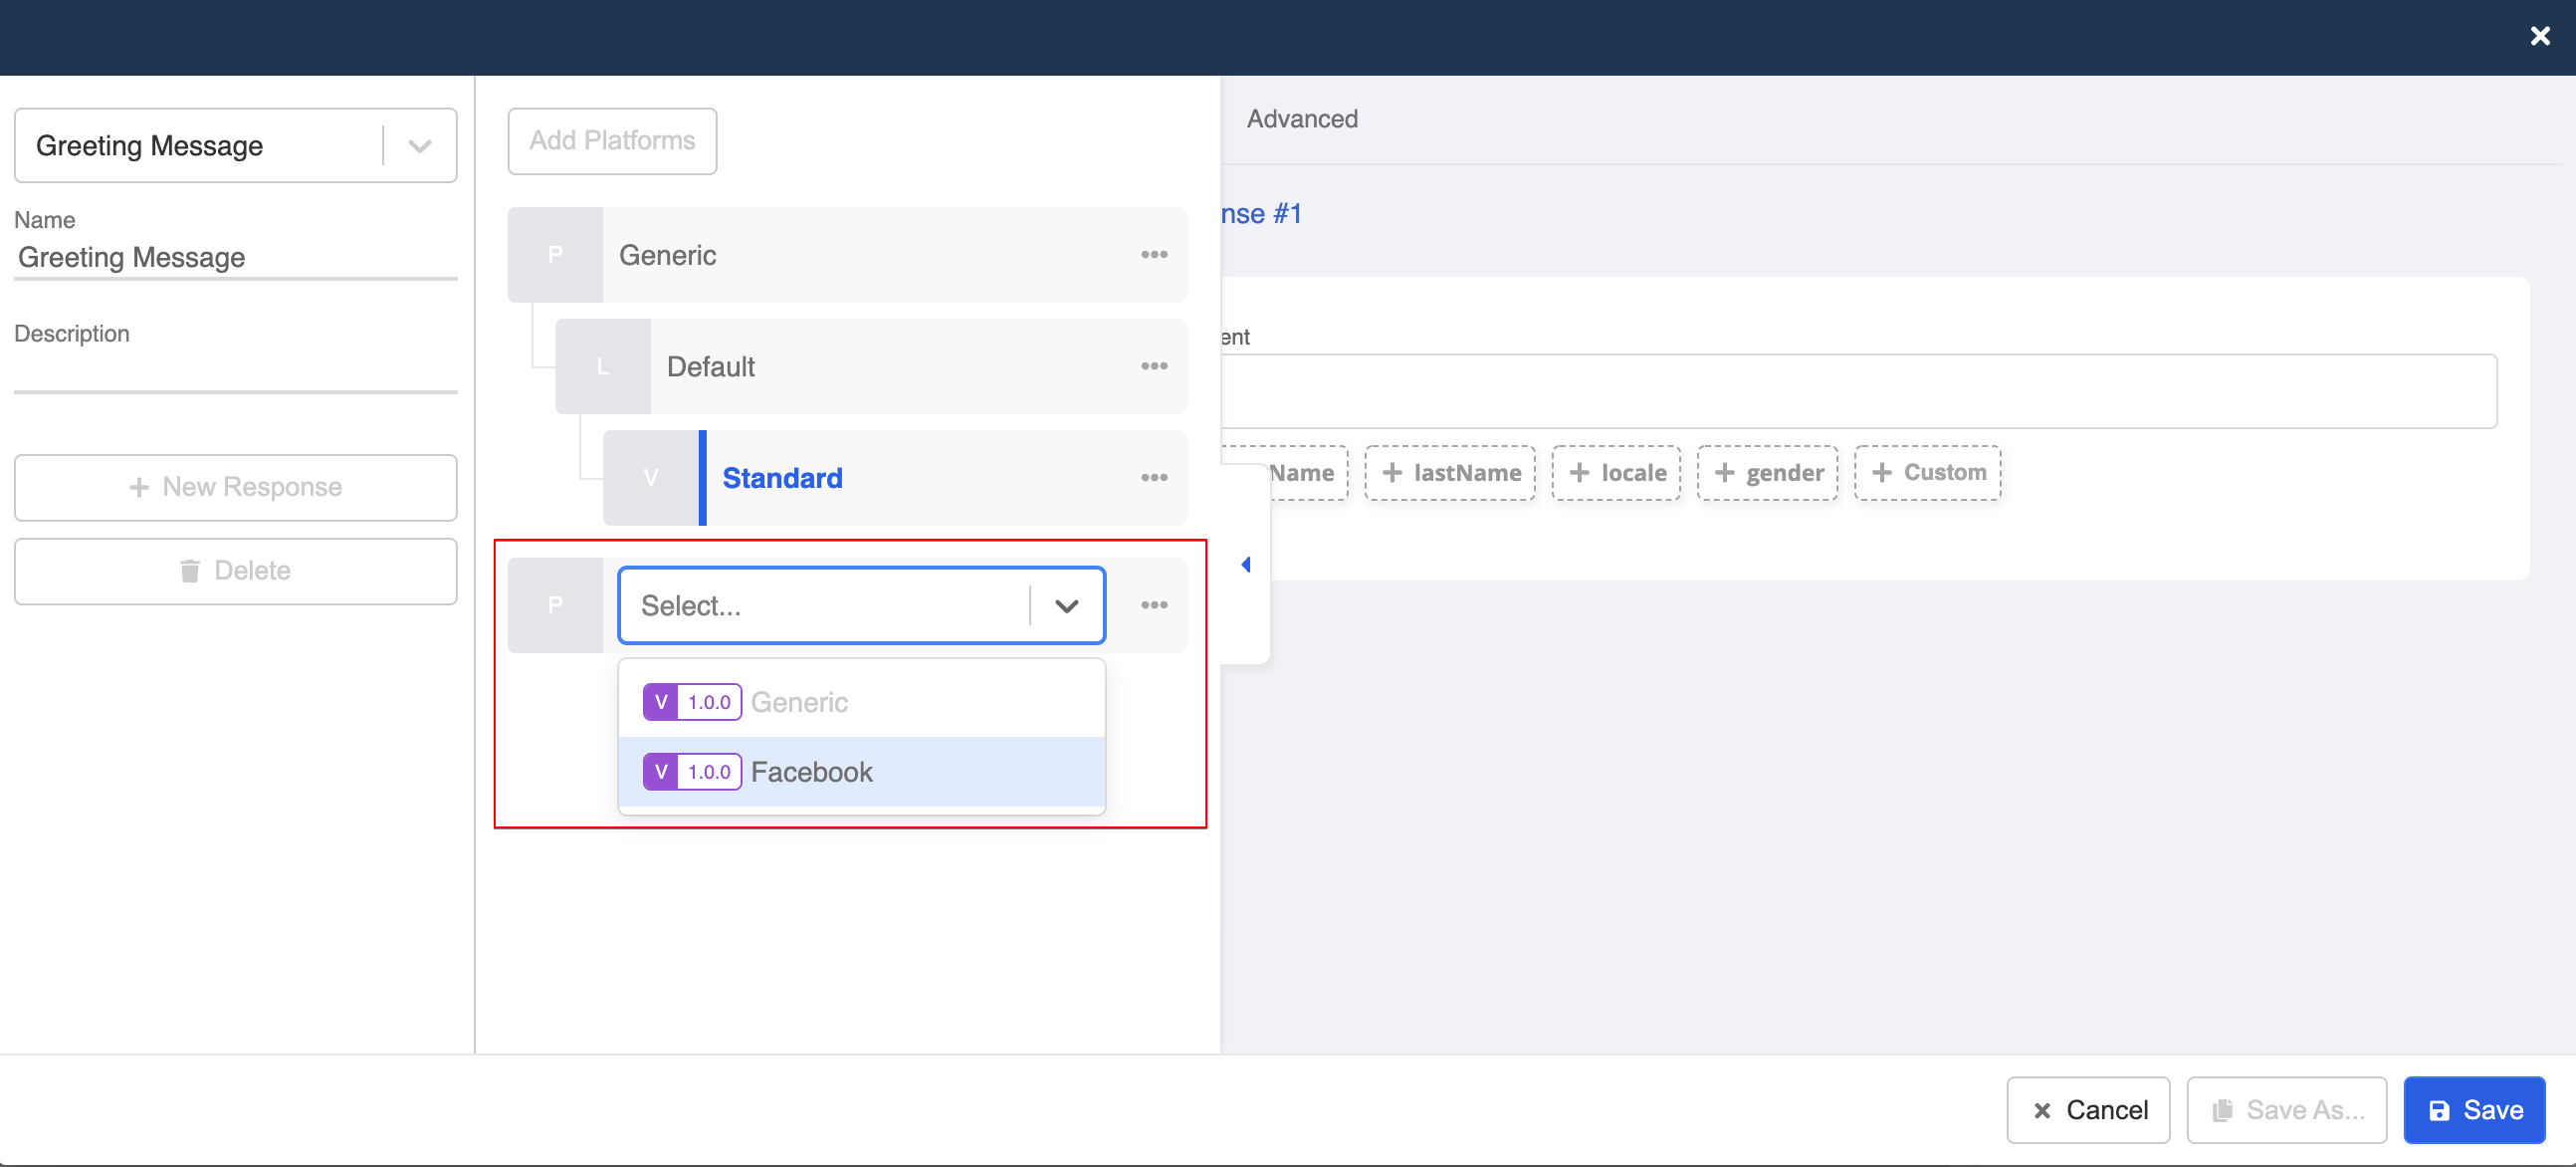
Select response type
- The set of response types for Facebook will be ready for you. Select "Text", and fill in the content.
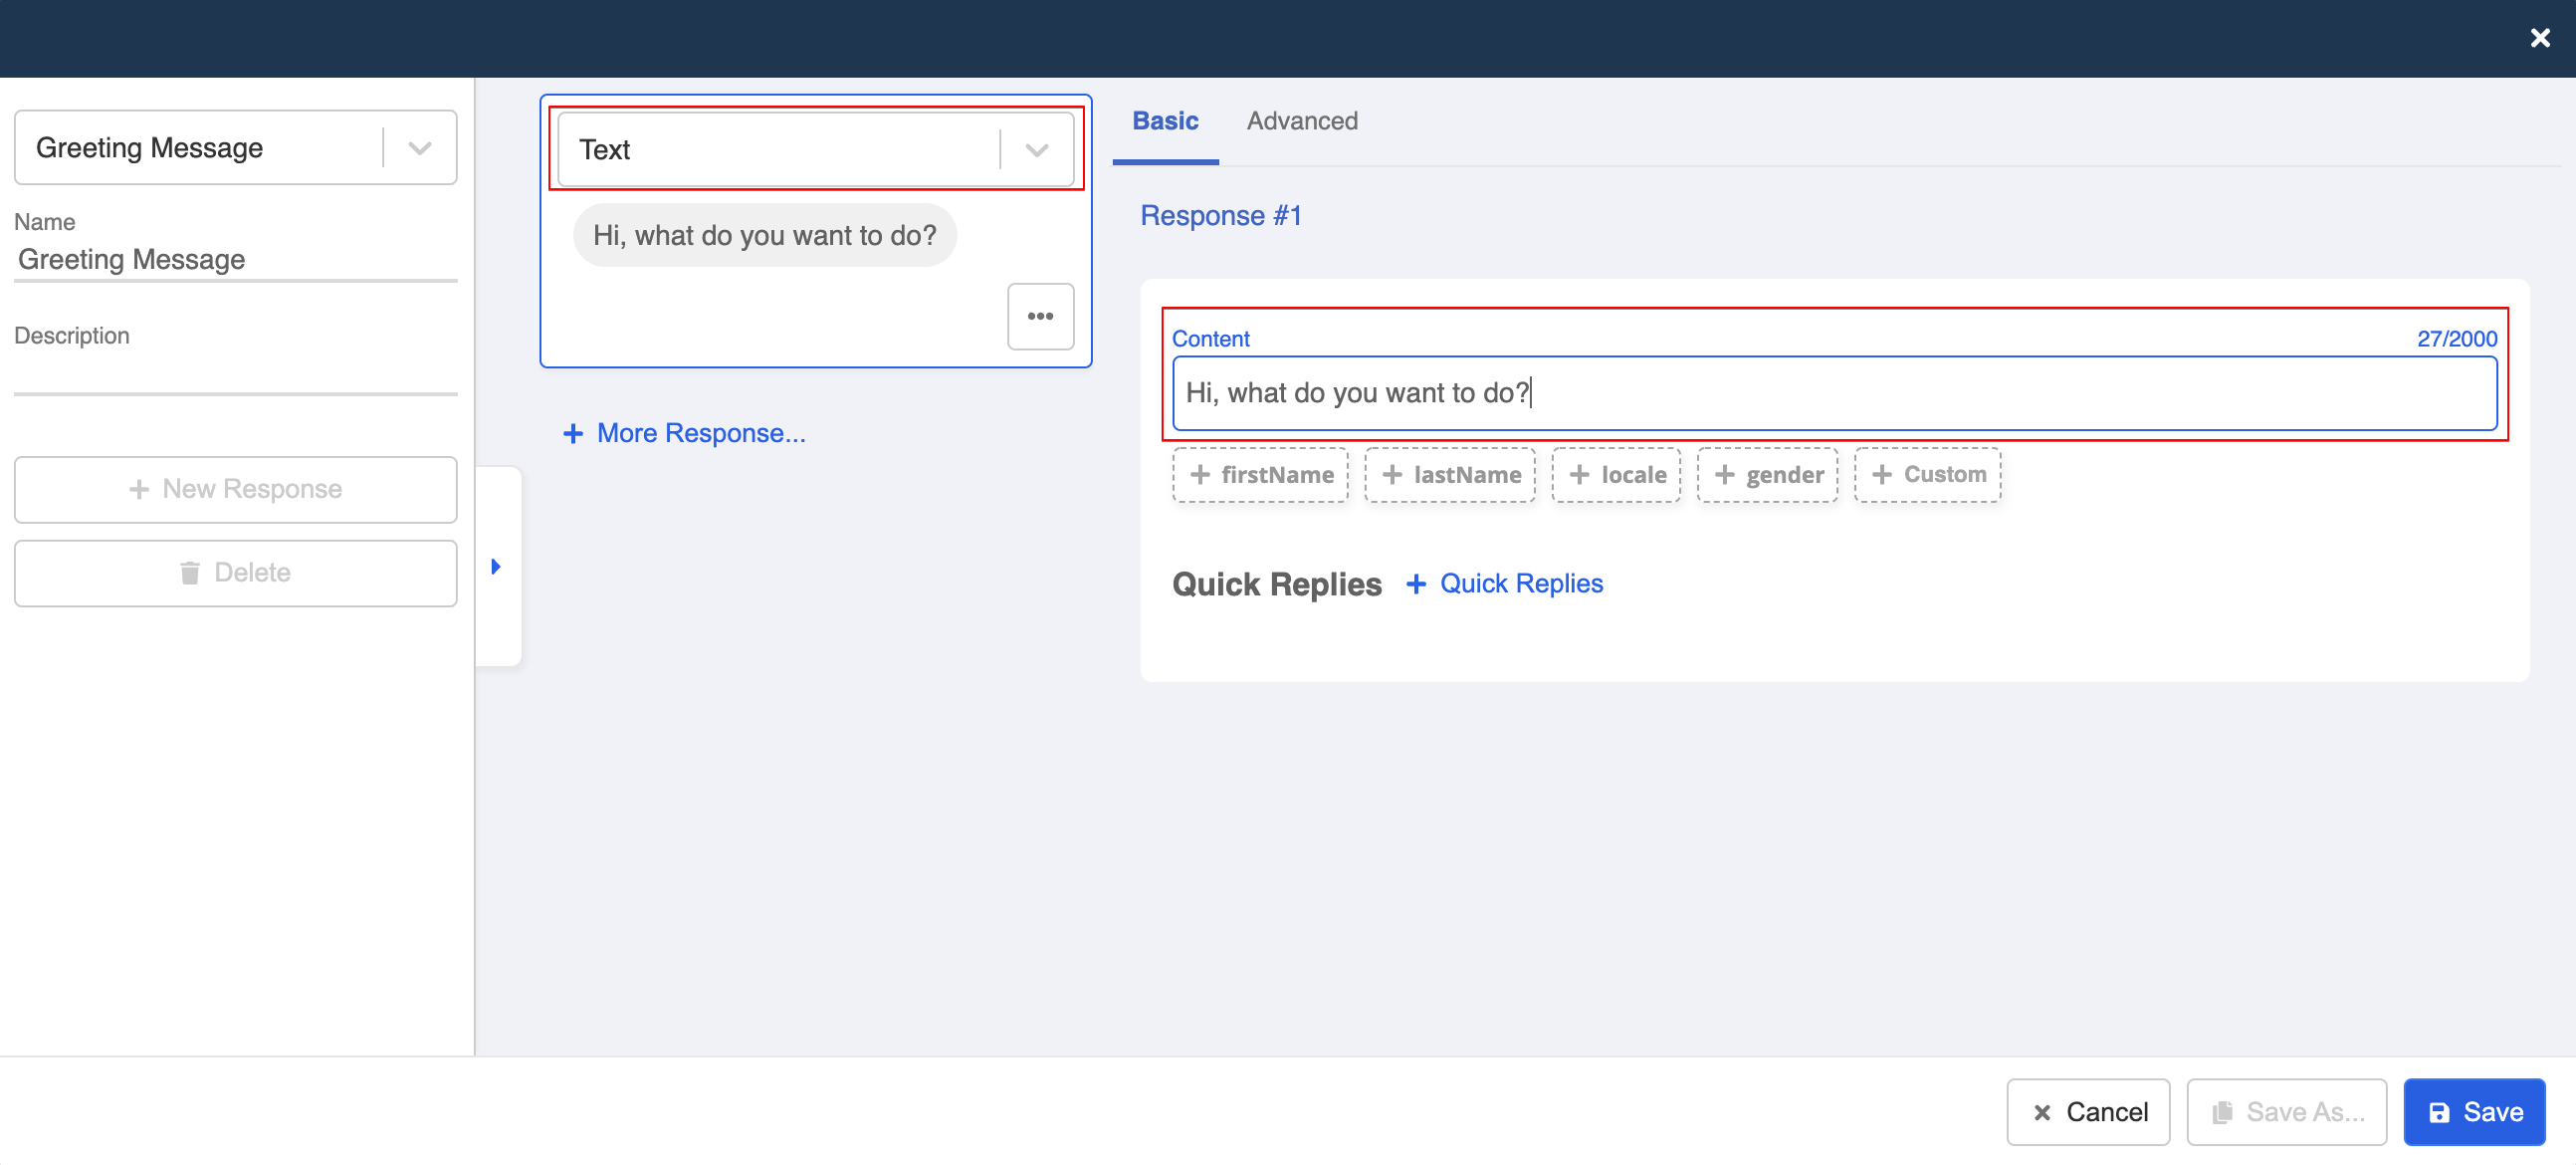
Fill in text field
- Click "+ Quick Replies".
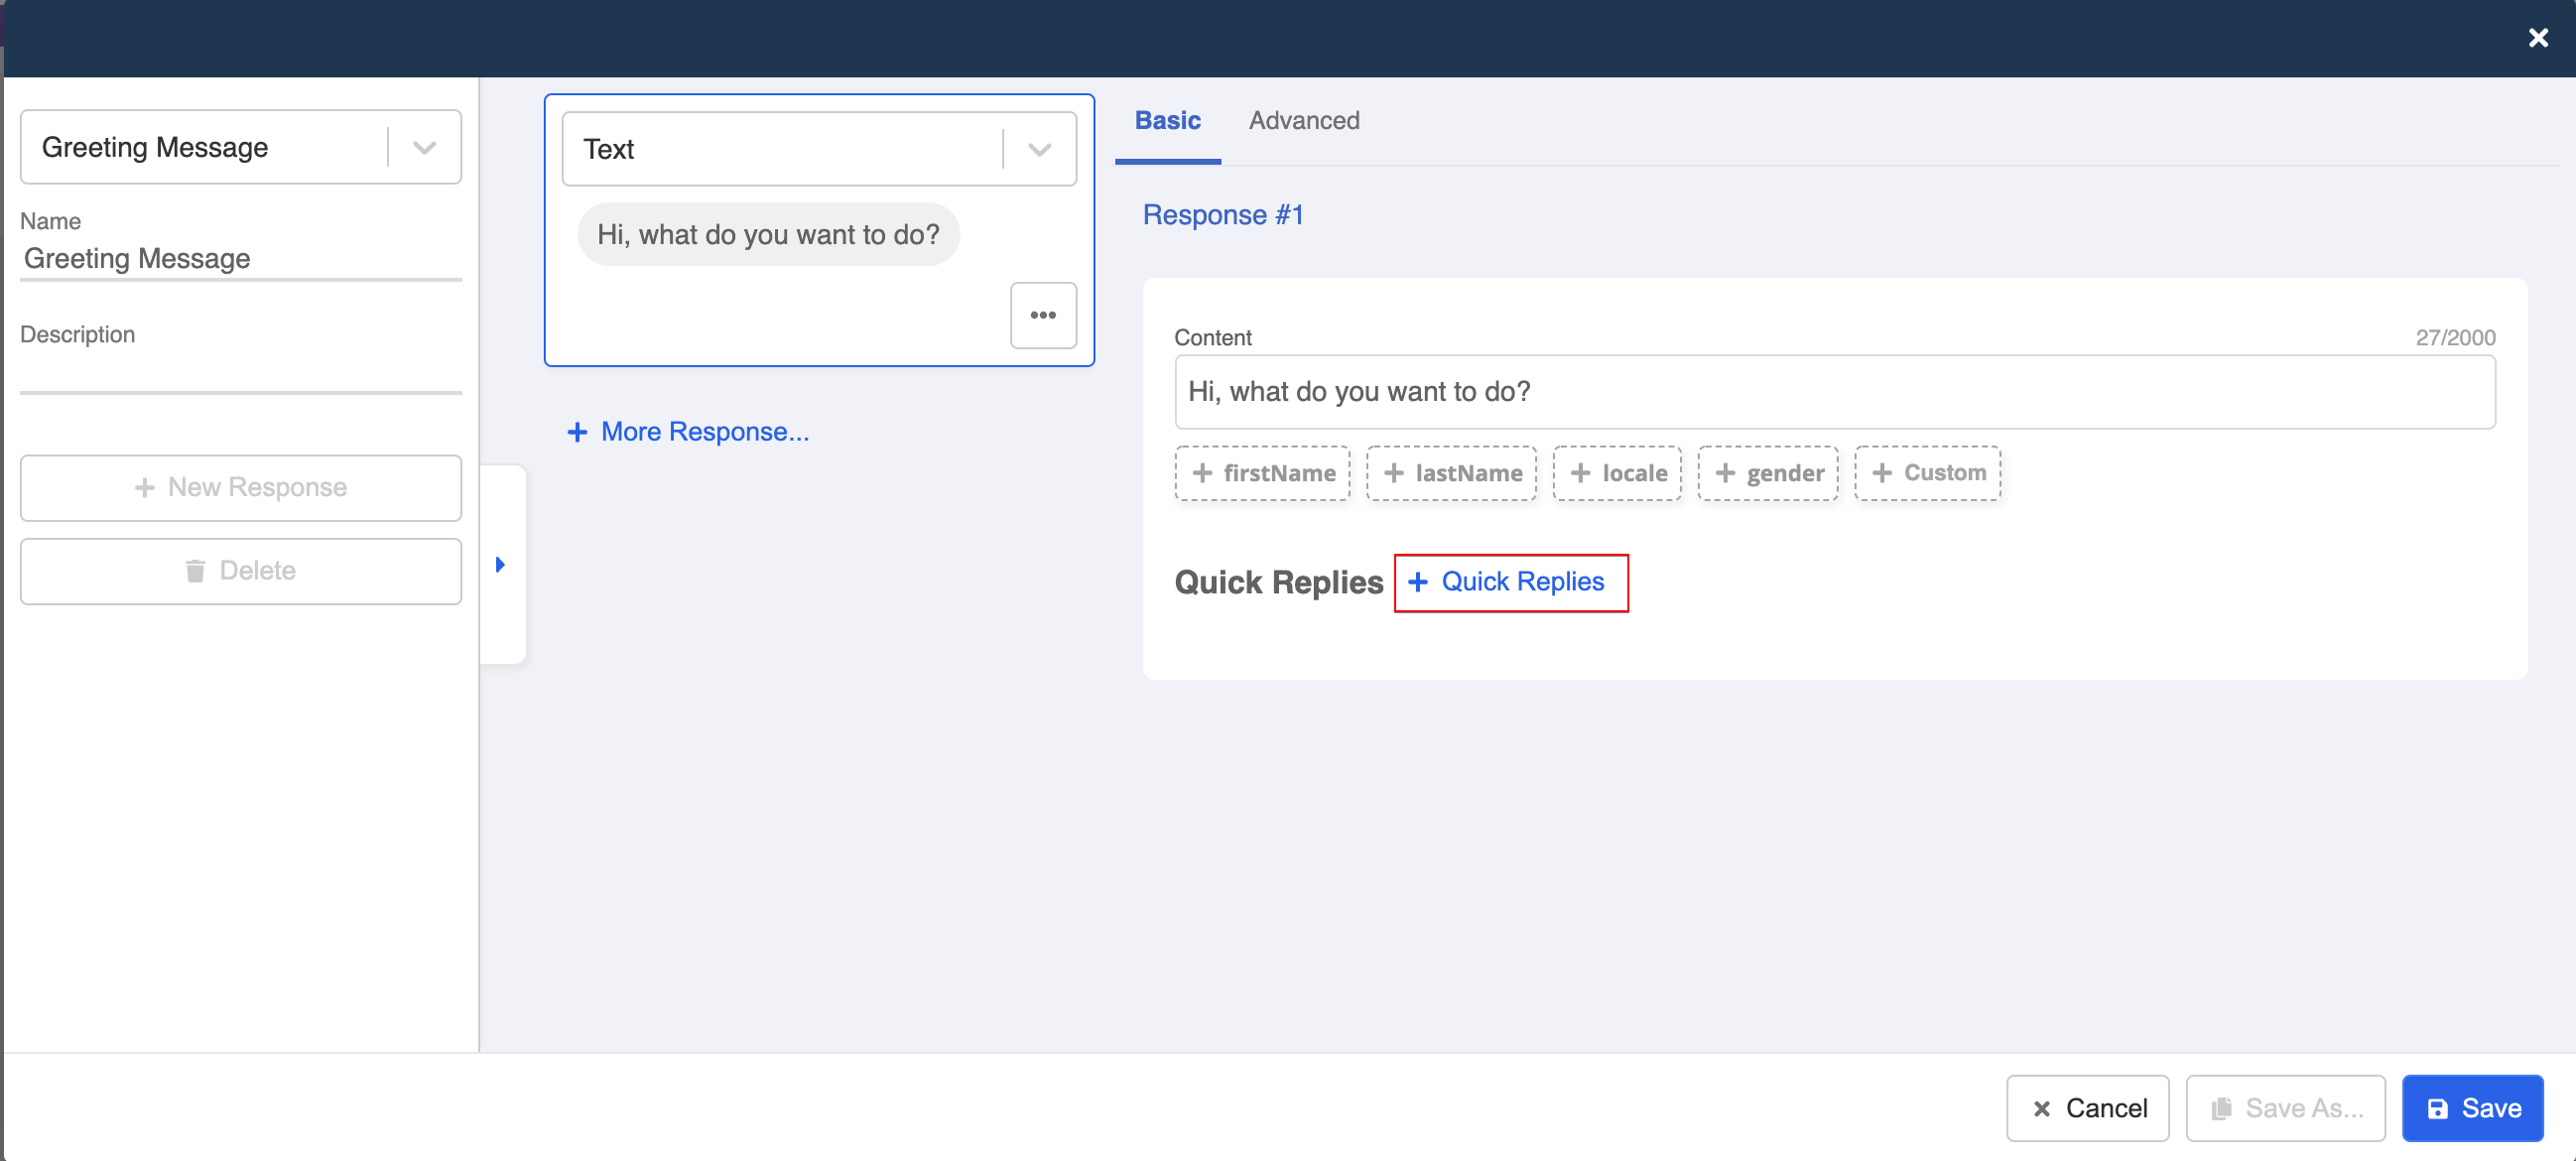
Create quick reply
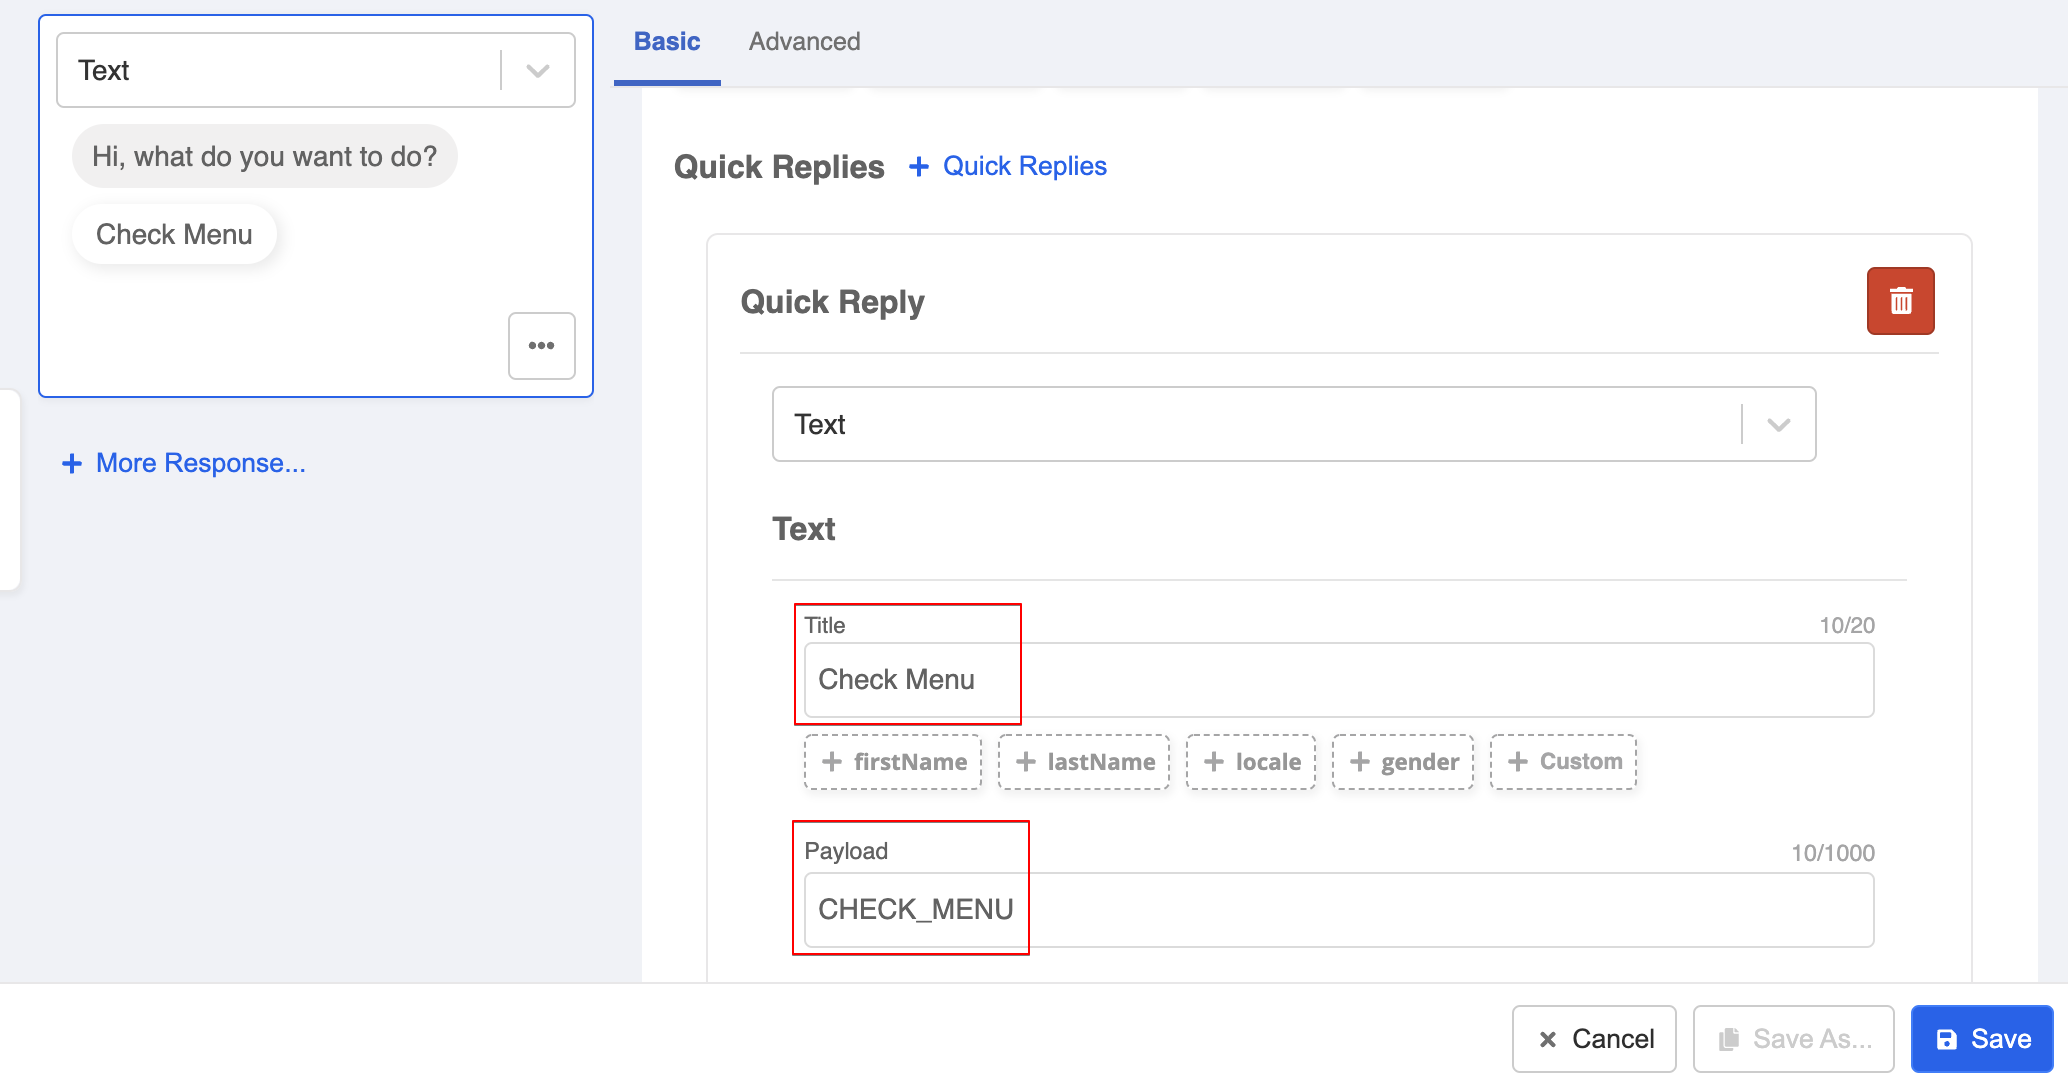
- Fill in a "Title" and a "Payload" for the quick reply. The Payload is case-sensitive and we will use "CHECK_MENU" in this example.
Fill in quick reply details
- Click "+ Quick Replies" again to create another quick reply. Fill in another name and payload.
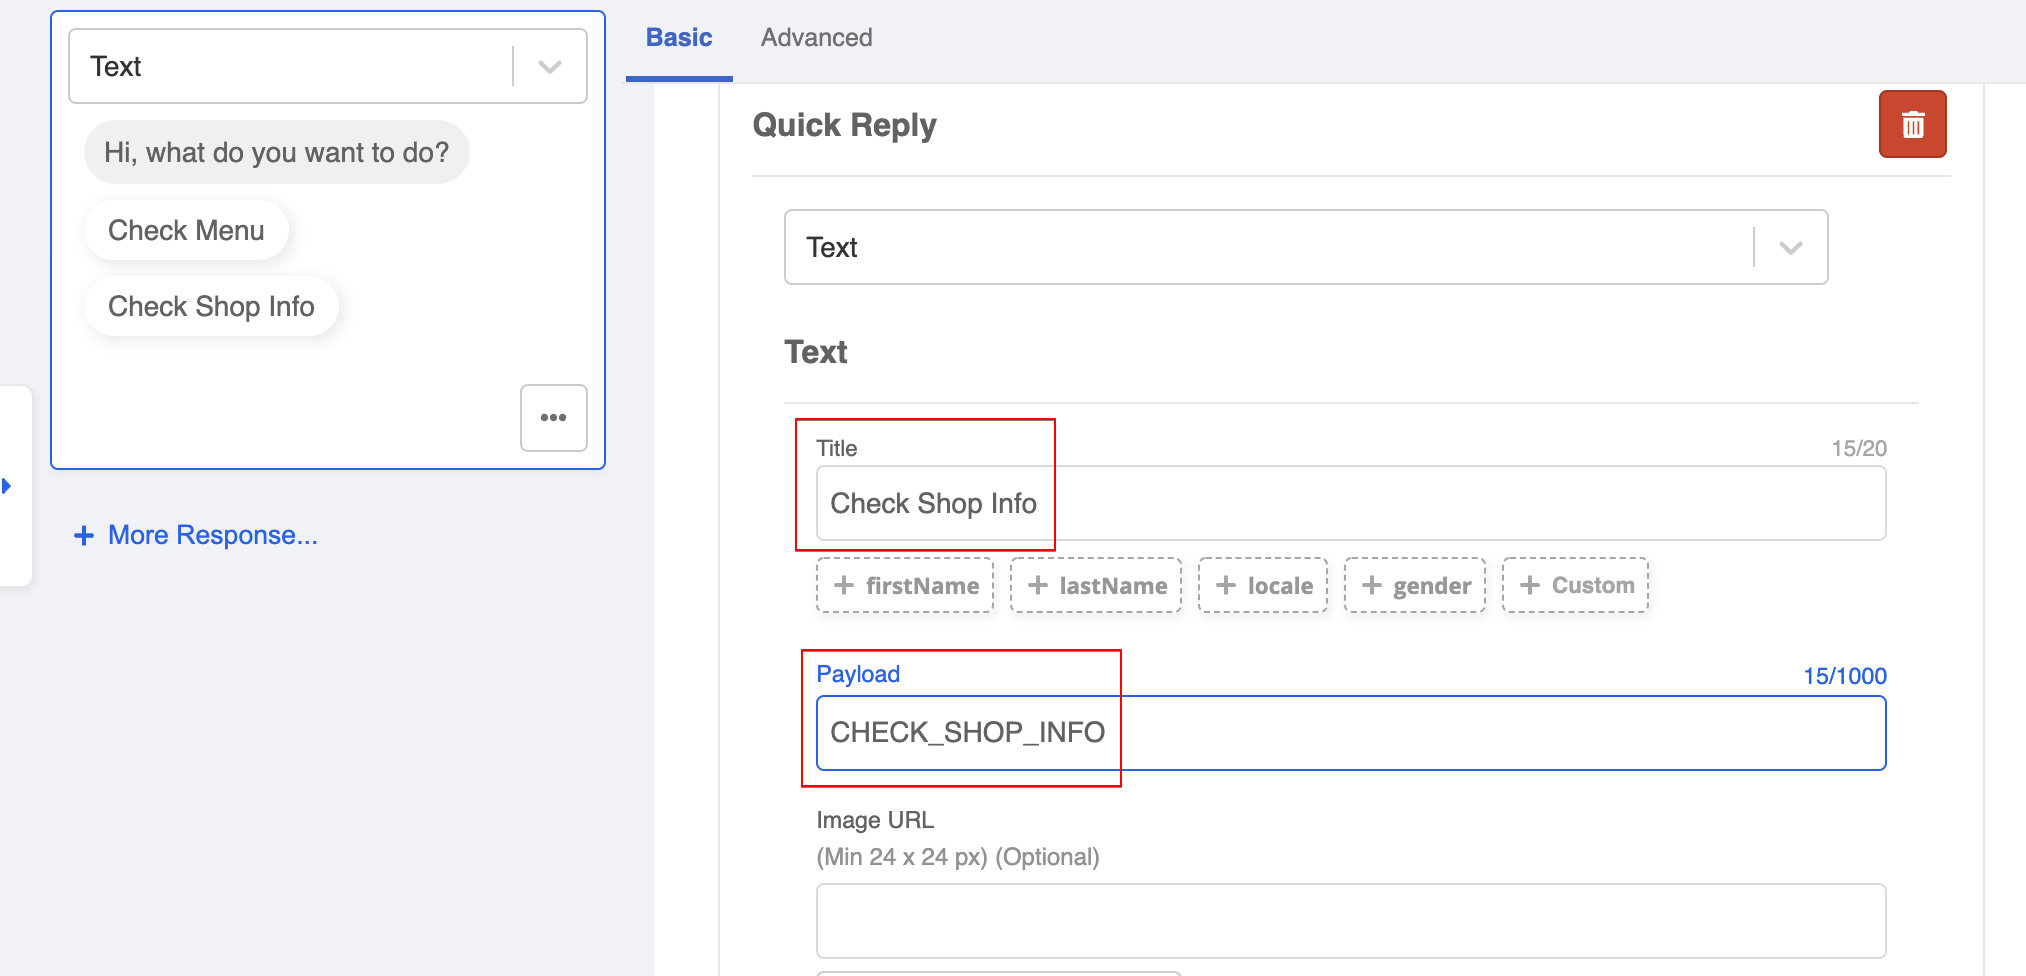
Fill in quick reply details
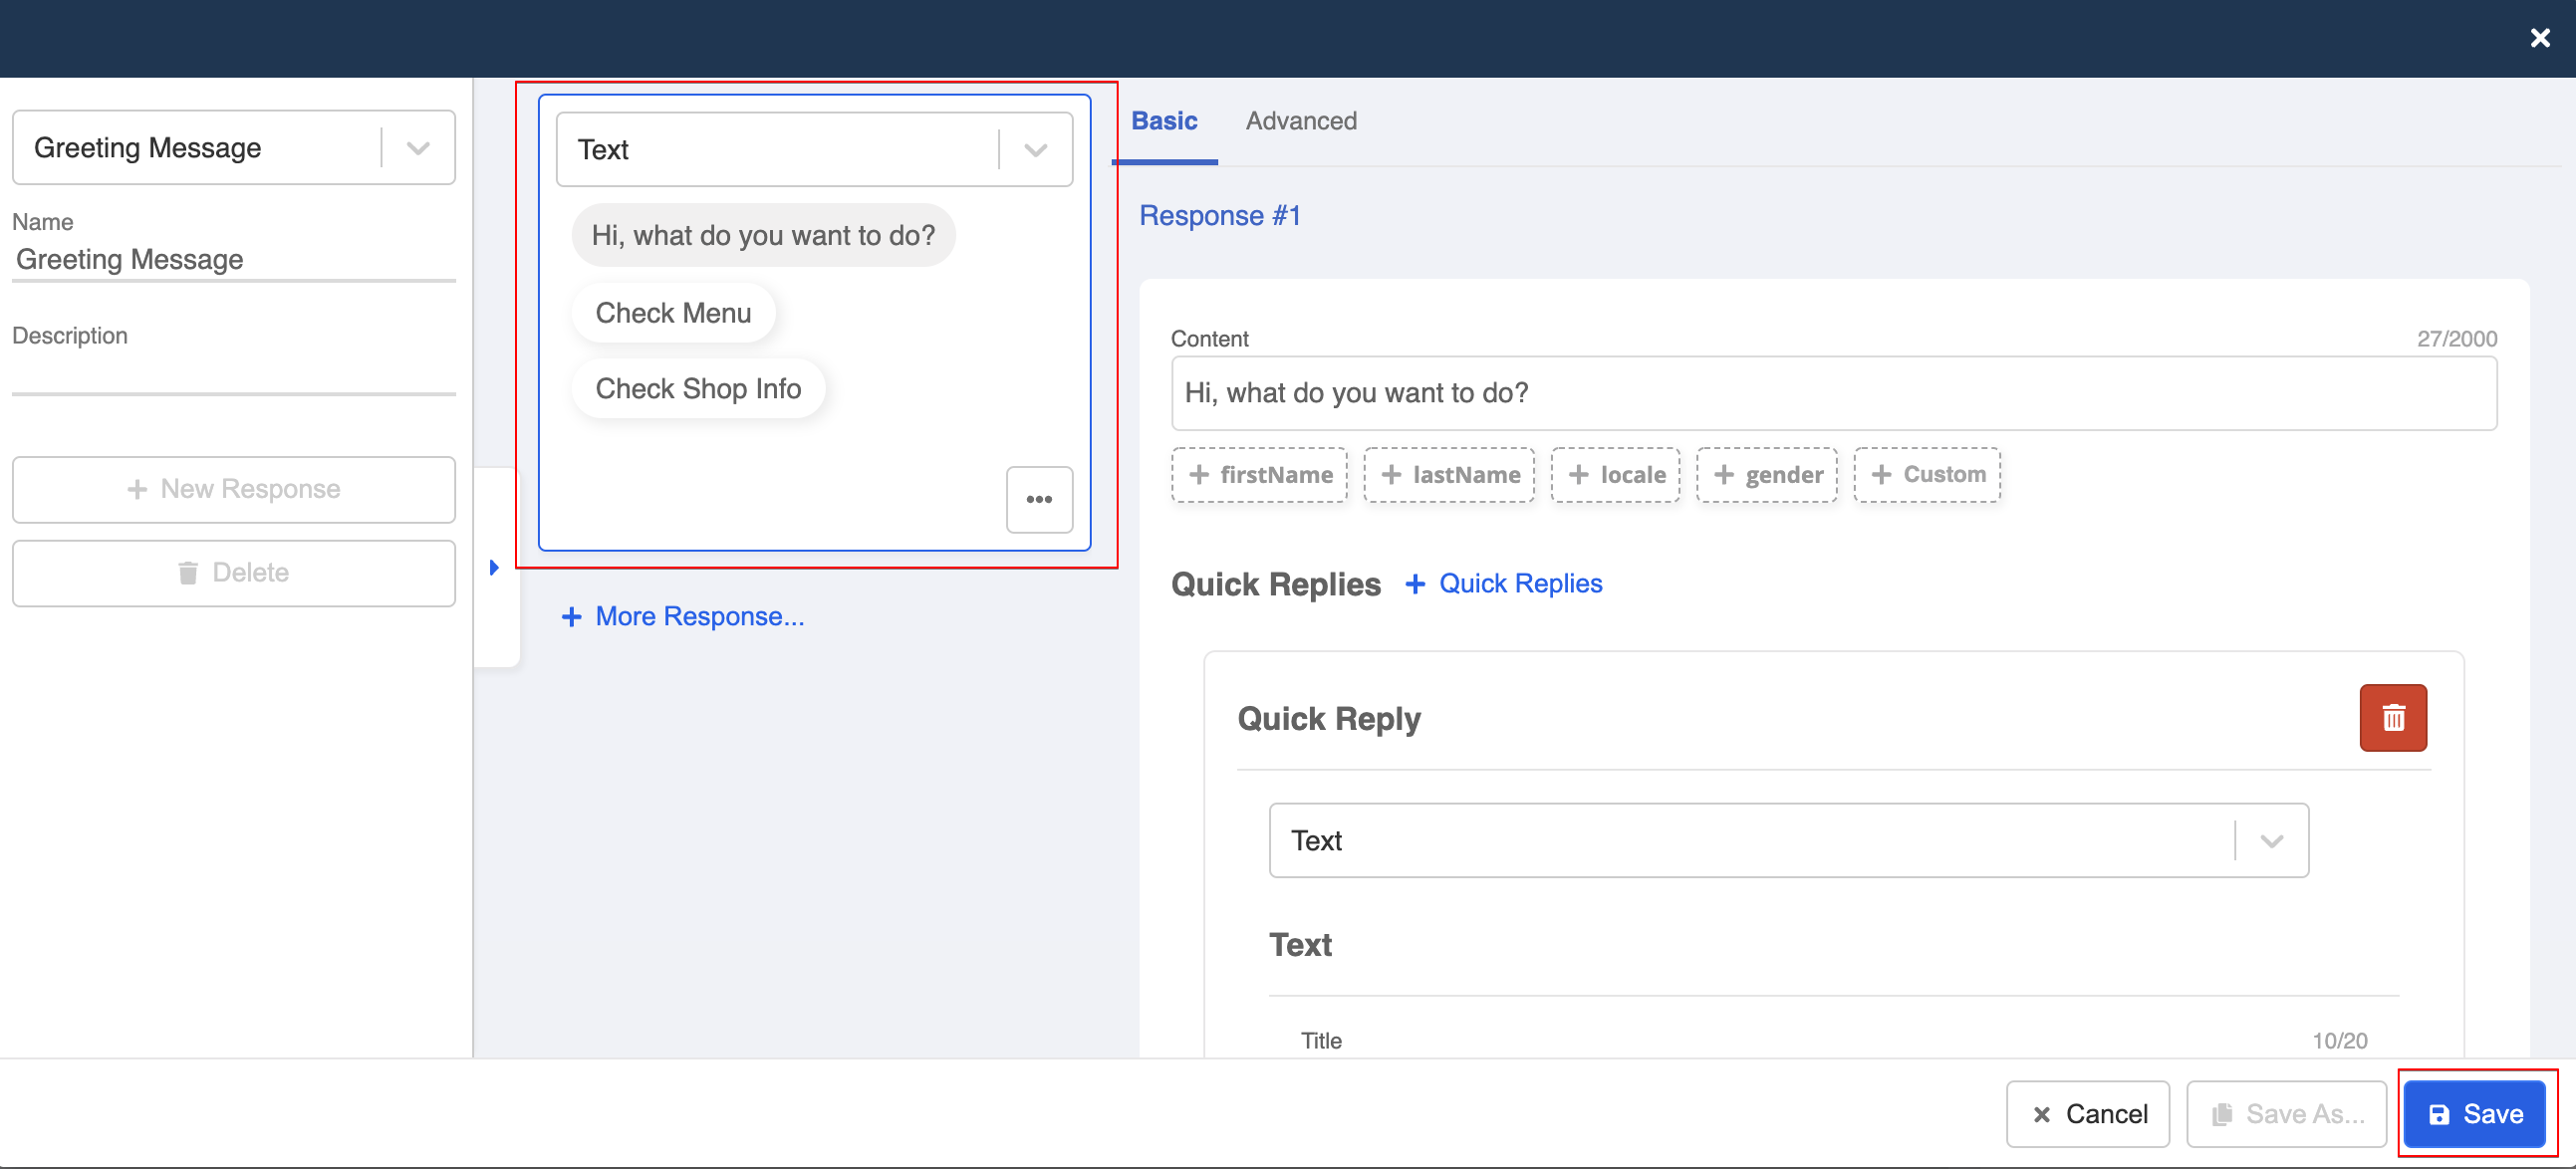
- Now you can see the response preview on the left. Remember to Save the newly created response.
Save Response
- Close the pop-up, and click Save at the bottom to save the changes made to this node.
Save node