Data Source
Chatbot can deliver more than a static piece of information, it can display dynamic and real-time data from a specified database. Data Source is the place where you create such mini-database only for your chatbot.
FAQ Data Source

We recommend you to use Data Source to facilitate the making of a FAQ chatbot. You simply just need to store the database of your frequently-asked questions in Data Source and setup the connection to the specific Data Source in responses to have the questions and answers displayed properly. You may make live changes by importing the new .CSV at any time.
Format of FAQ in .CSV
You must follow a standard format to create your FAQ database, the .CSV should include the following column heads:

| Property | Description | Required |
|---|---|---|
| Language | To indicate the language of this FAQ; "en" for English, "zh-hk" for Traditional Chinese and "zh-cn" for Simplified Chinese | Y |
| Question ID | Labelling of the question; each question should be named with an unique question ID | Y |
| Category | To indicate the question category; only applicable to Web Chat platform | N |
| Question Displayed | The FAQ that to be displayed on the chatbot within the FAQ list | Y |
| Dialogflow ID | Dialogflow intent that this question should fall into; only applicable when you enable Dialogflow in Integrations | N |
| Keyword Group 1 | The first keyword group that matches with the question displayed and triggers the corresponding answer | Y |
| Keyword Group 2 | The other keyword group if you want to add additional keyword group to specify the trigger conditions | N |
| Keyword Group 3 | The other keyword group if you want to add additional keyword group to specify the trigger conditions | N |
| Type | Type of your answer; can specify as "Text", "Image", "Text_Image" and "Button" | Y |
| Text | String; only applicable when type is "Text", "Text_Image" or "Button" | N |
| Image URL | URL of the image file; only applicable when type is "Image" or "Text_Image" | N |
| Button Name | String; caption displayed on the button; only applicable when type is "Button" | N |
| Button URL | URL of the website that the button opens; only applicable when type is "Button" | N |
tip
We recommend including at most three keyword groups for each question. Too many keyword groups will cause difficulty for user to input a text that can fulfil all keyword conditions. You may just leave the field blank if it's not applicable to the question.
How to Create a Data Source?
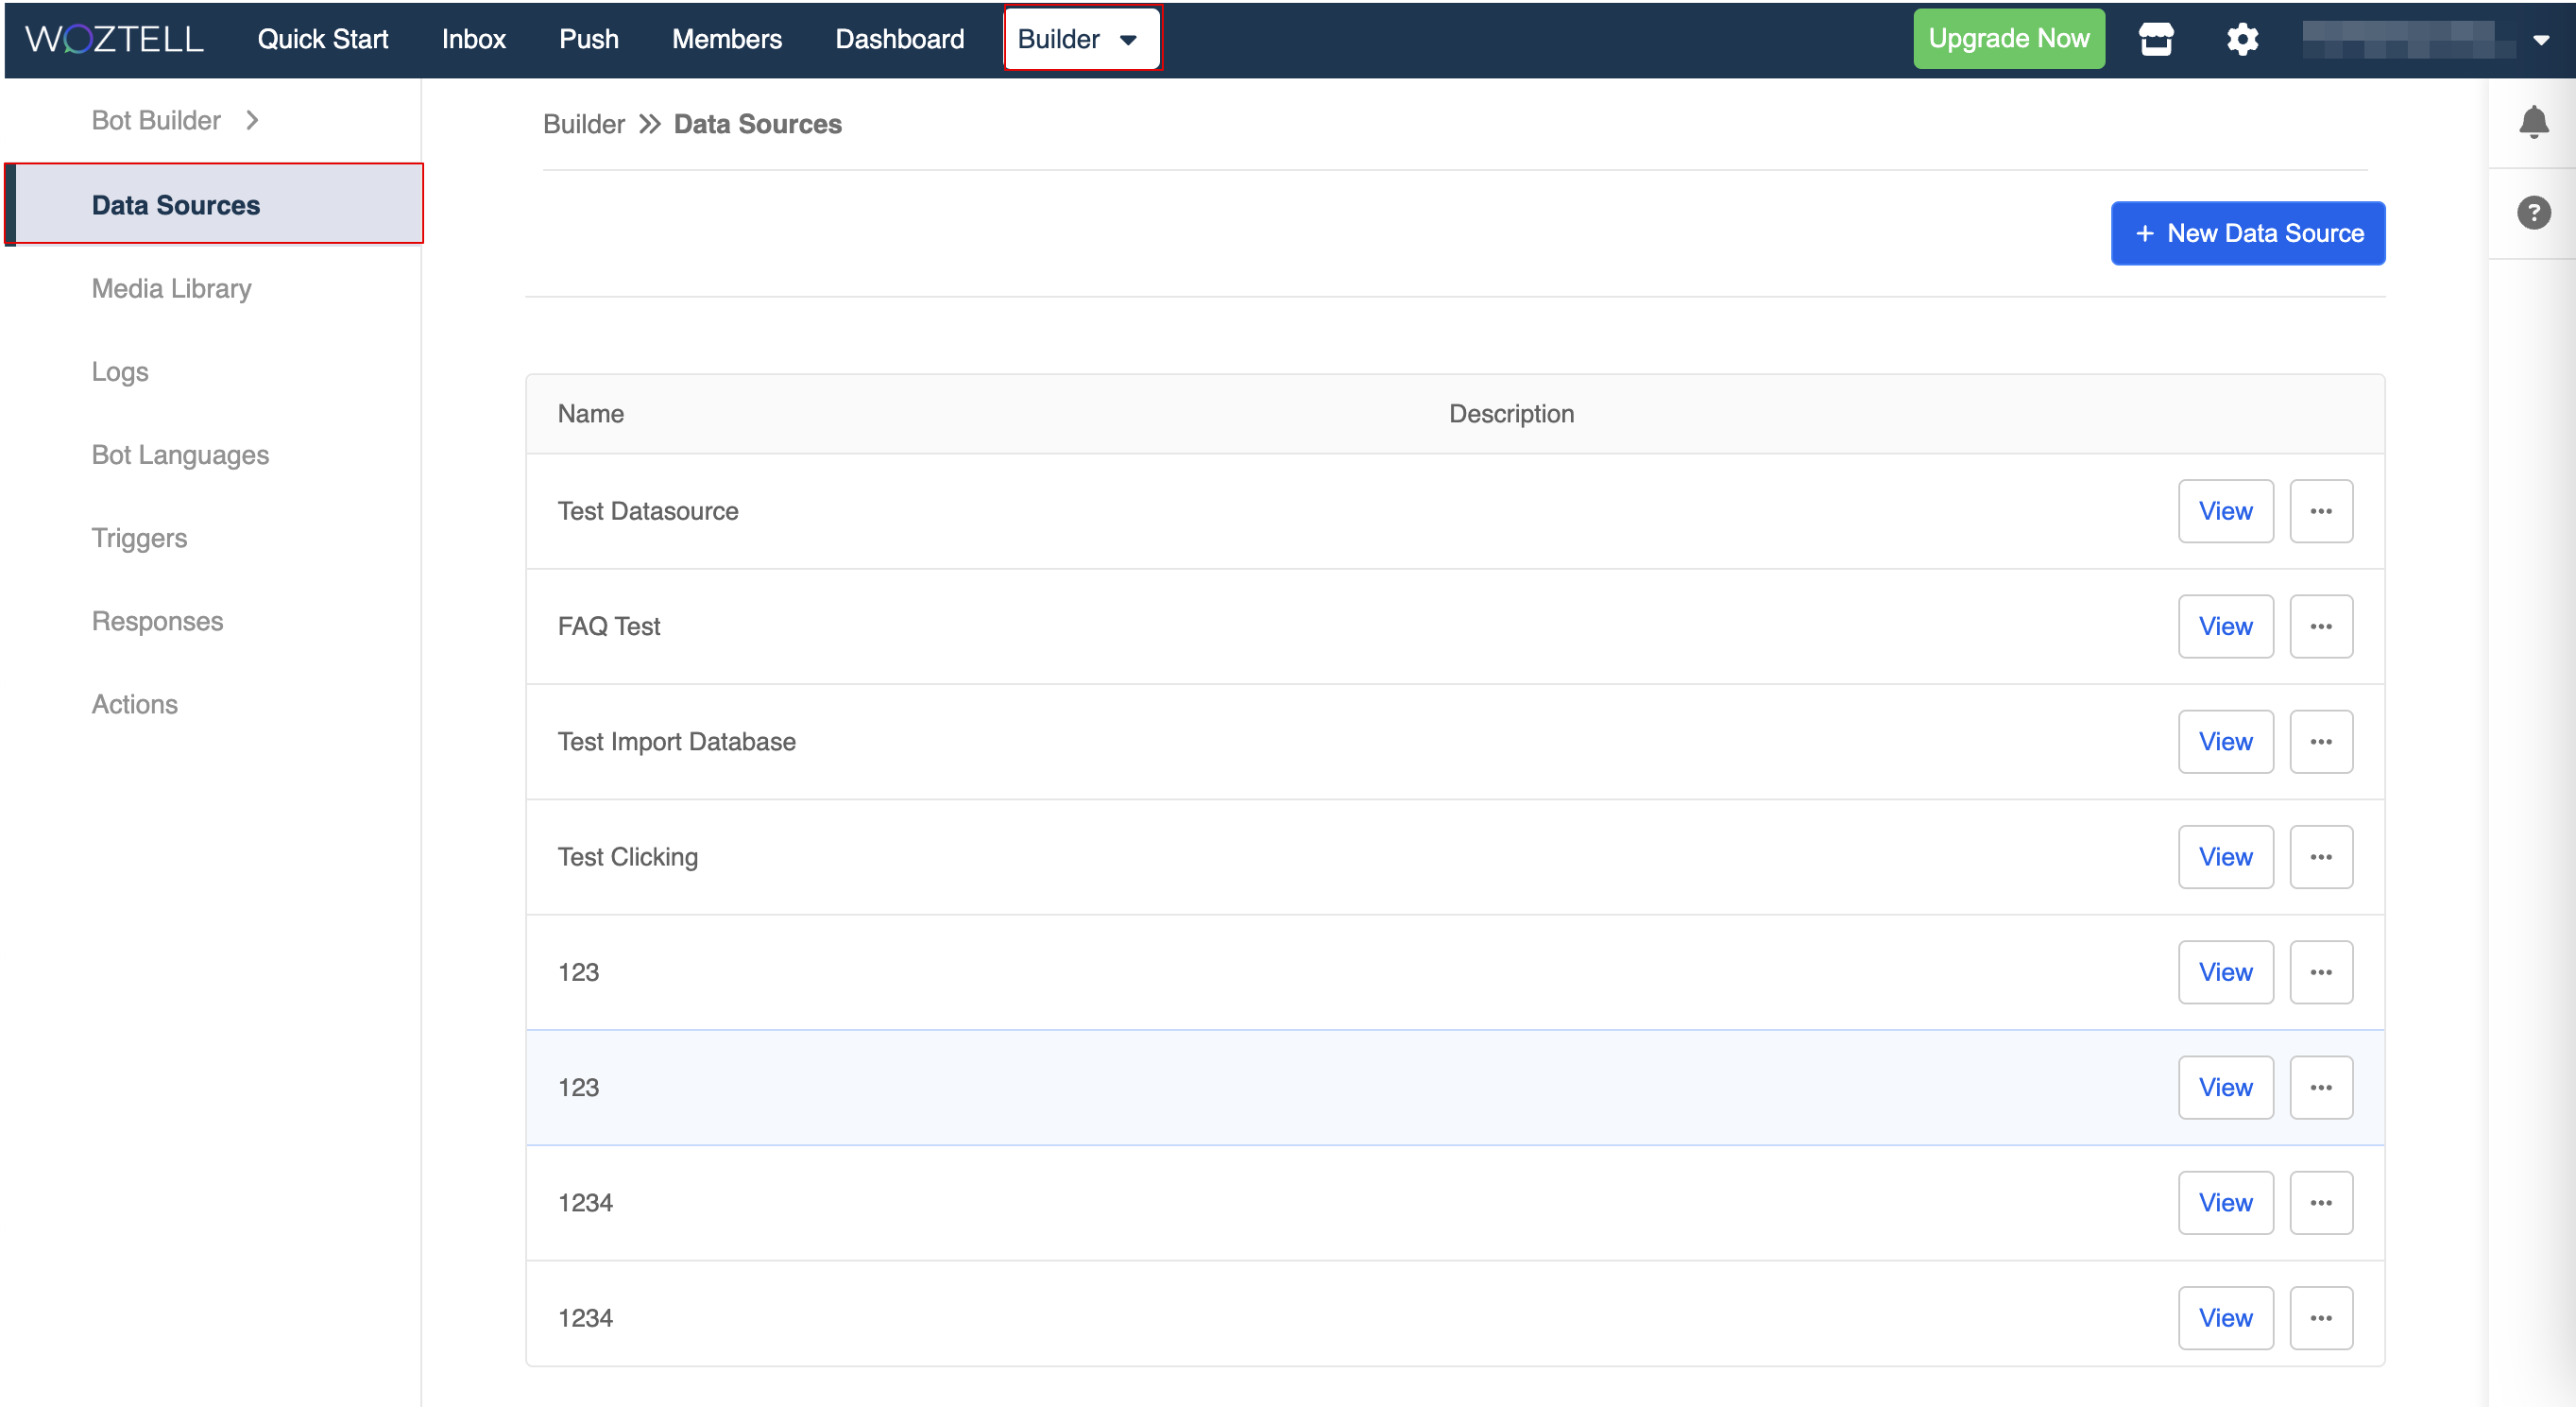
Add New Data Source
- Click "+ New Data Source".

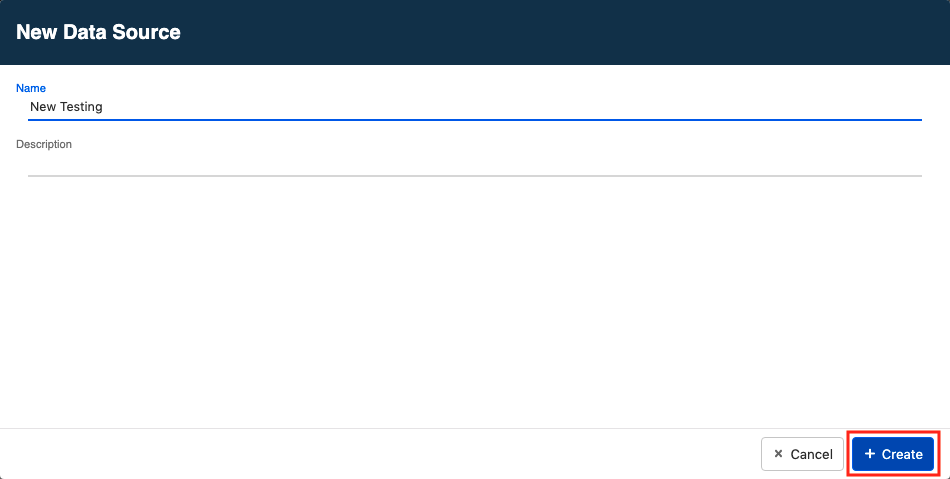
- A modal will pop up and you can fill in the data source details. Click "+ Create" to create a new data source.
- A new row for your newly created data source will be created. Click "Edit" and you will enter into a blank data source.
Import from .CSV
Instead of creating your data from zero at the Data Source, you may just want to import an external well-constructed data from your computer. We support importing of .CSV currently.
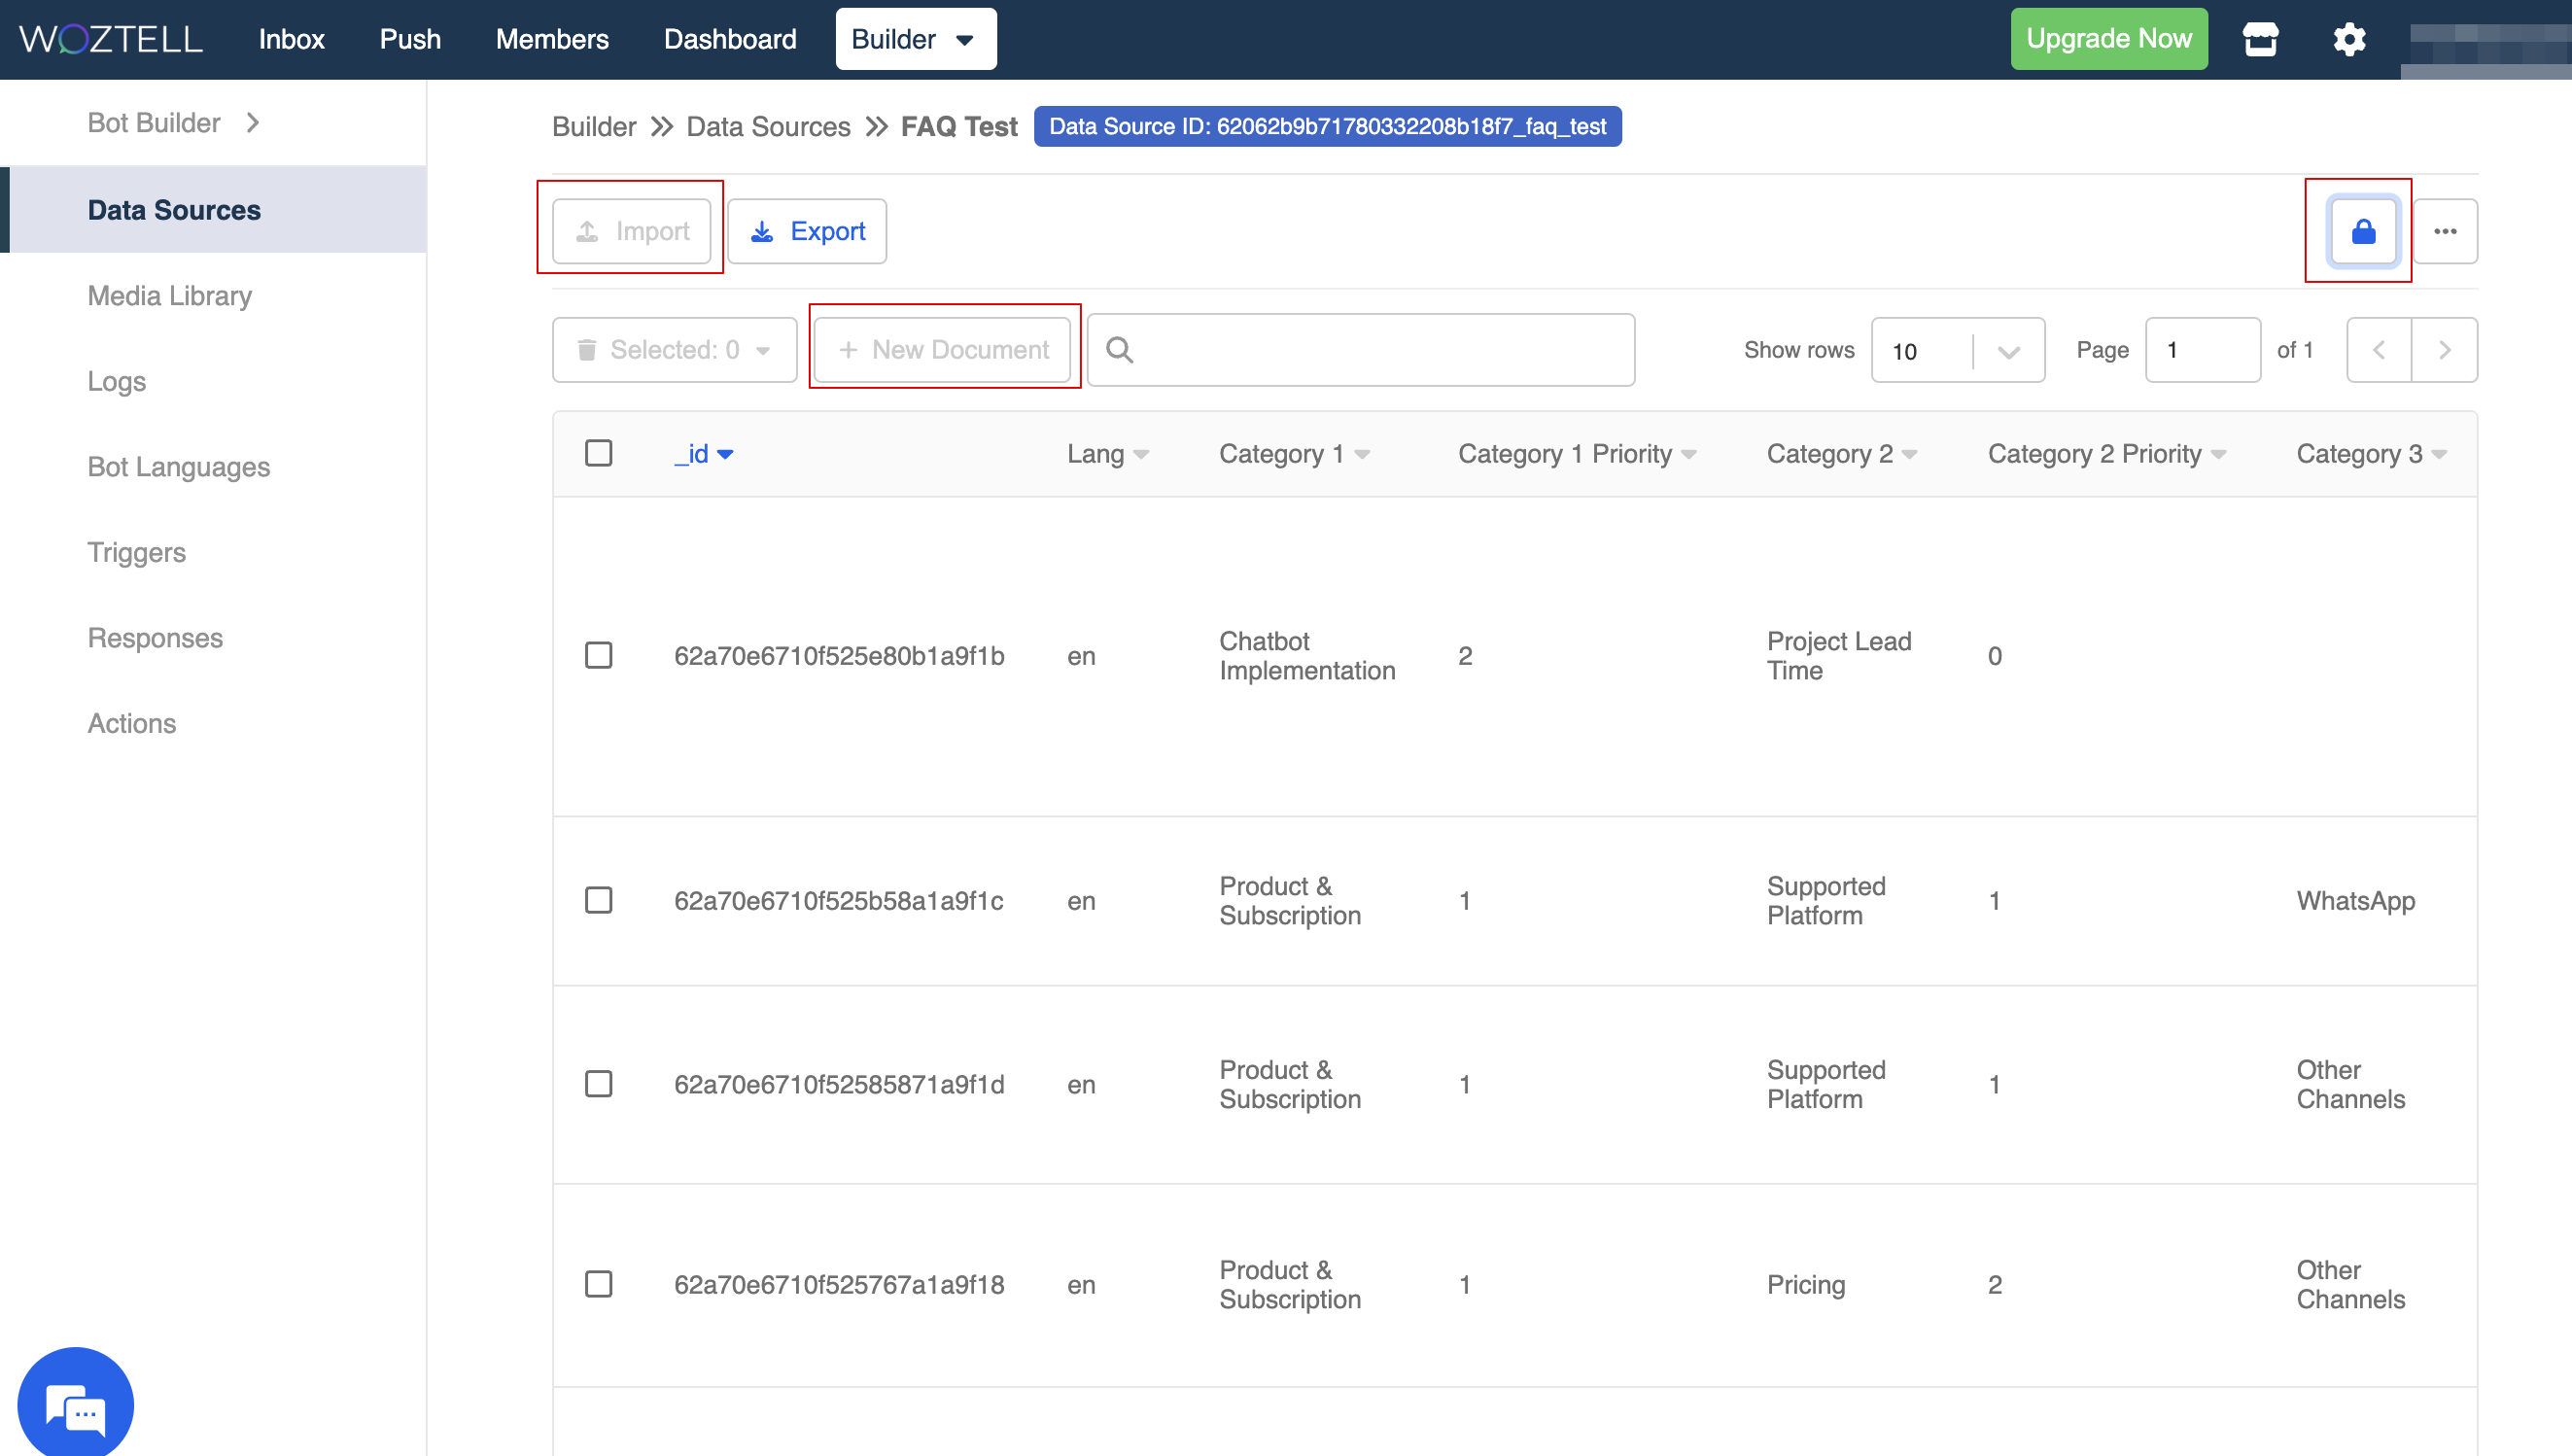
- Click "Import" to import your data.

- A new modal will pop up and you can click "Choose file" to select your
.CSVfile.
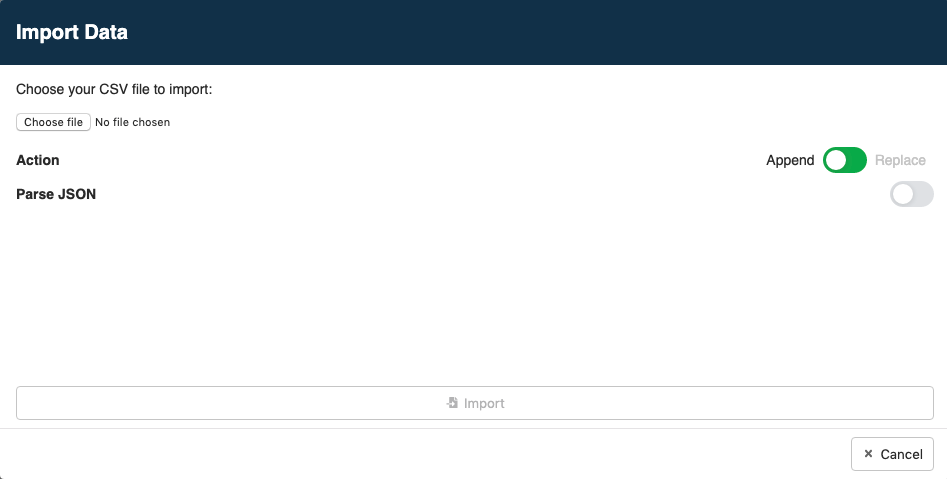
- Once selected your
.CSVfile, you can enable the following settings:

| Property | Description |
|---|---|
| Action | To indicate whether you are adding new entries to the data source by importing the file or you are replacing the whole file; toggle to "Append" if you want to add additional entries only; toggle to "replace" if you want to replace the whole data source |
| Parse JSON | To convert text inside the field into a computer-readable programming codes; must switch on for FAQ chatbot |
- Then you should see a successfully imported data source.
Edit Document
- Click on any of the row and a modal that shows the details of that specific data entry will pop up.
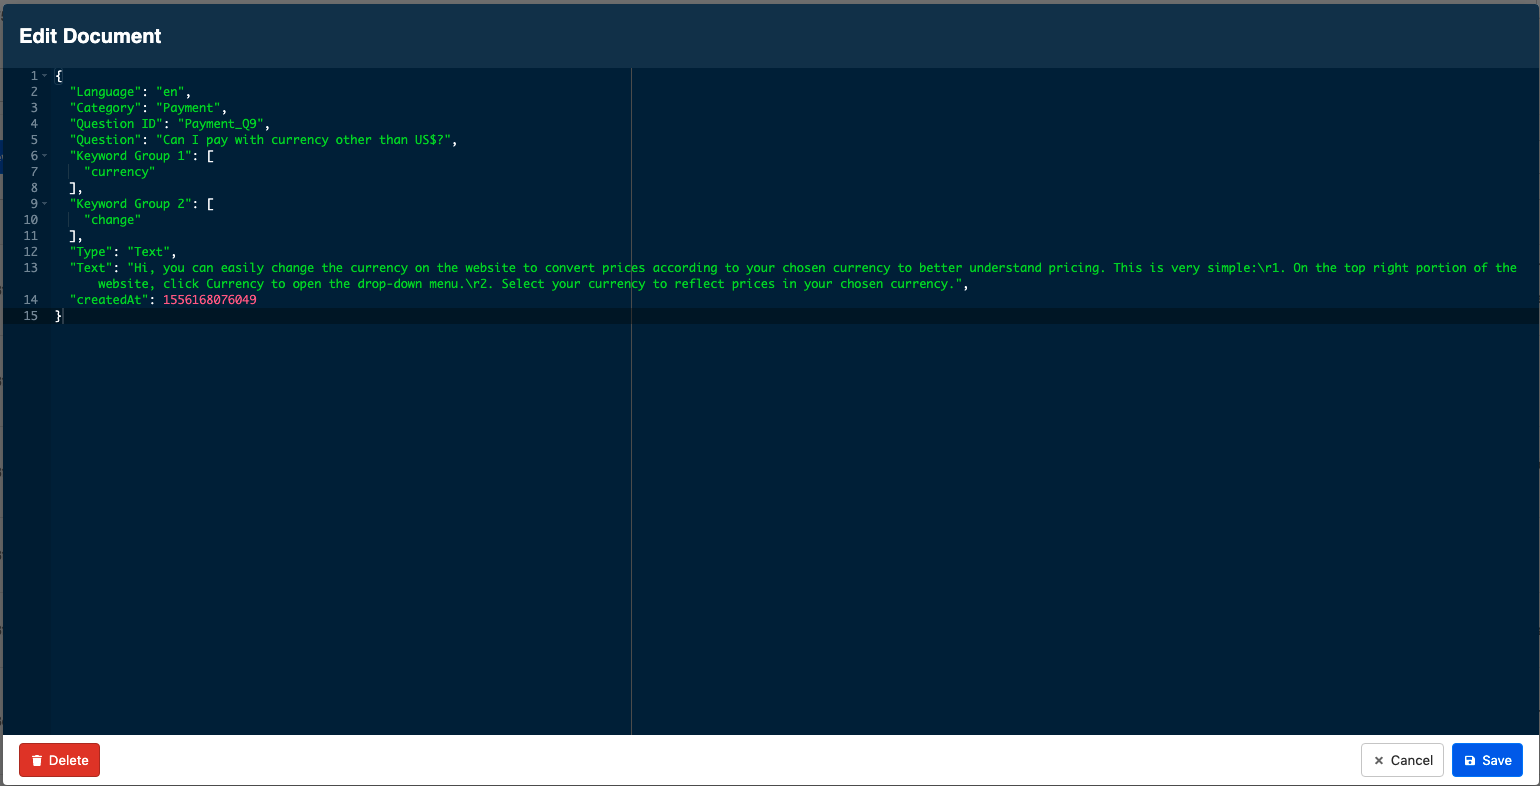
- You can edit the existing document details by editing in the above advanced-mode modal.
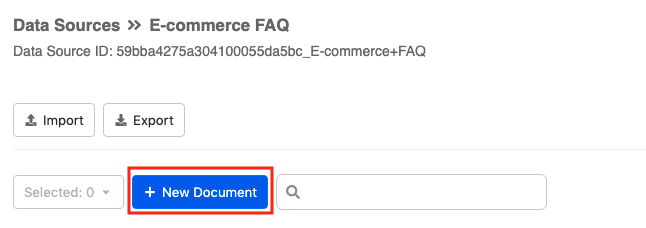
Add New Document
- Click the "+ New Document" button and a blank advanced-mode modal will pop up. You may paste the content of your own document and save it.
tip
You can always click the rubbish bin icon to remove any data entry or data source.
Lock Data Source
To prevent the data source from being modified without notice, the Admin or App Owner can lock the datasource by using the Lock Data Source button.
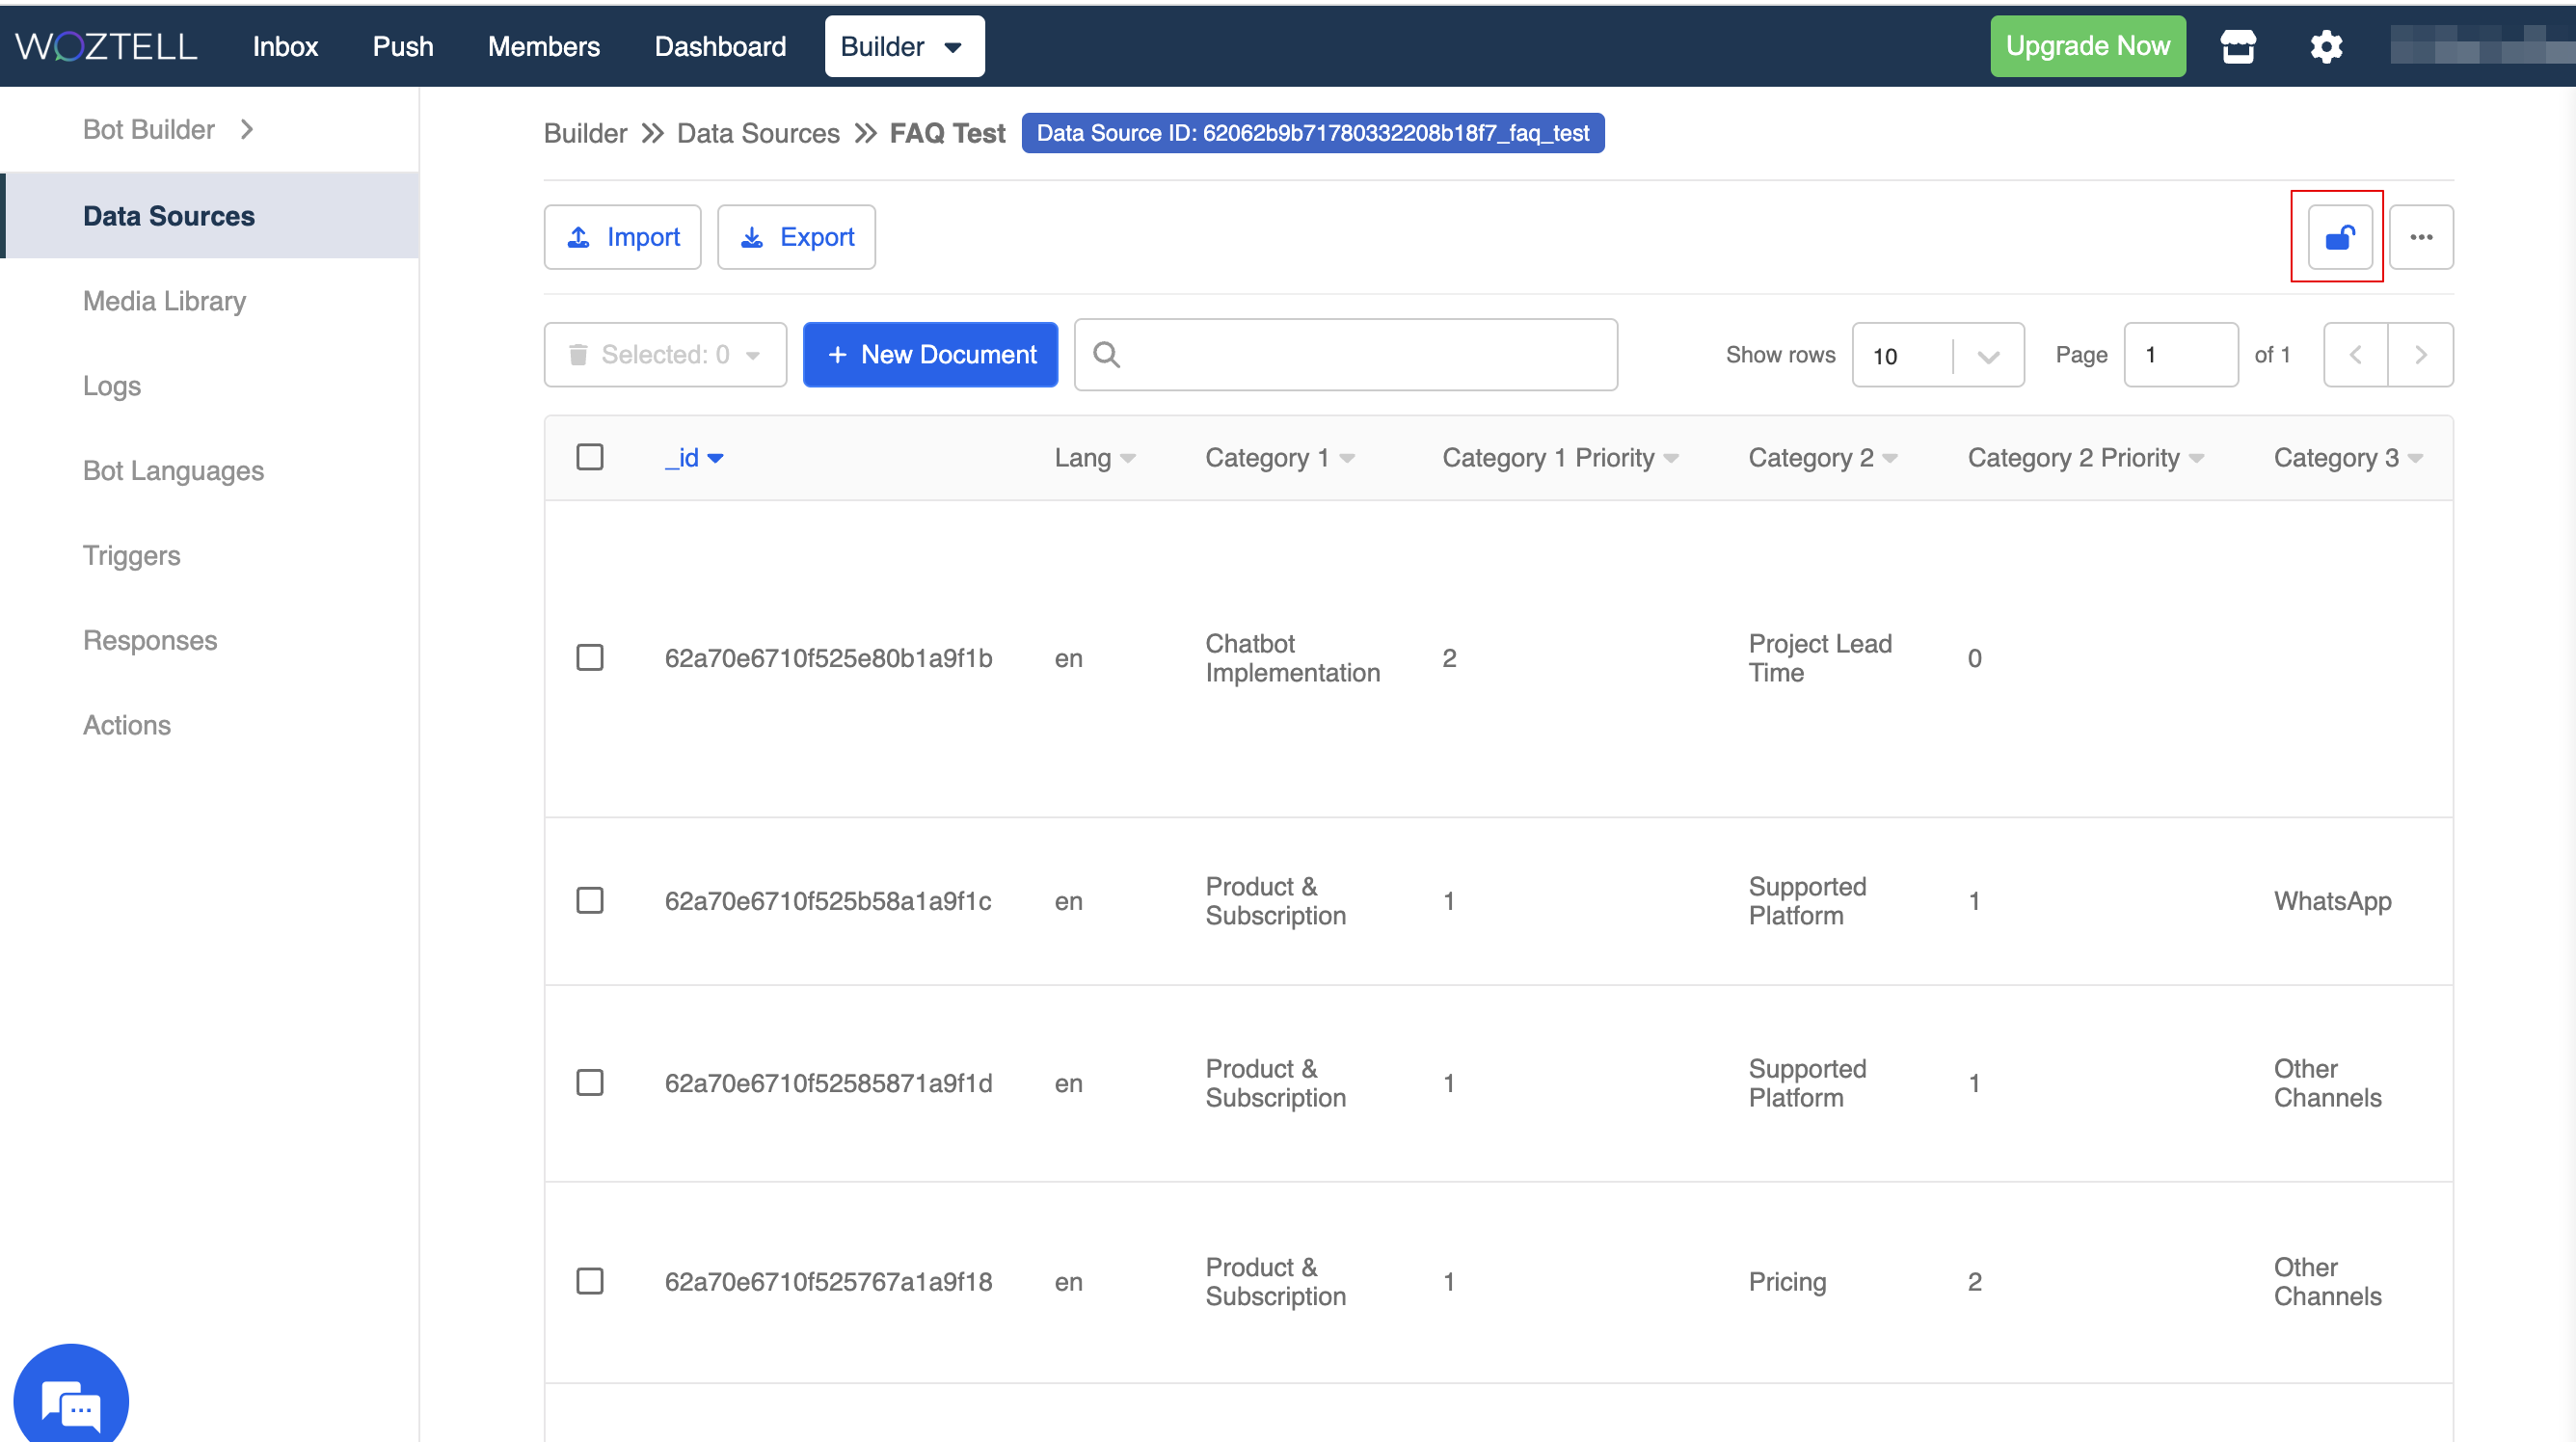
You can no longer import or add new document to this data source until it is unlocked by the Admin or App Owner.