Apply Datasource to Chatbot
For more object or method references, please refer to the Reference documentation.
Expected Outcome
The following chatbot conversation is just an example for illustrating the application of data source. Please feel free to utilize the objects/code as you see fit.
- User replies the chatbot with user's email.
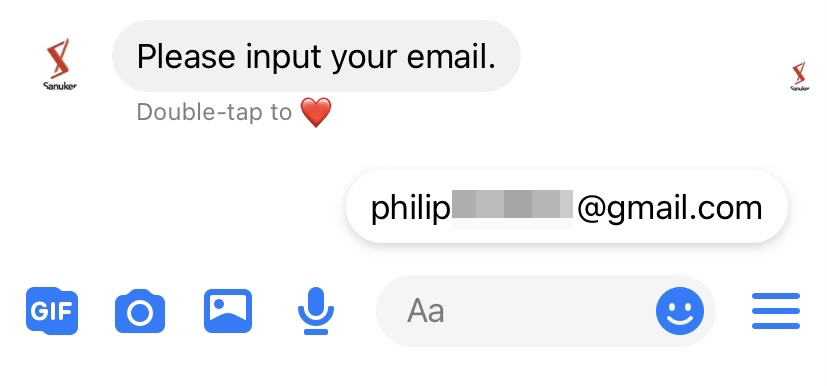
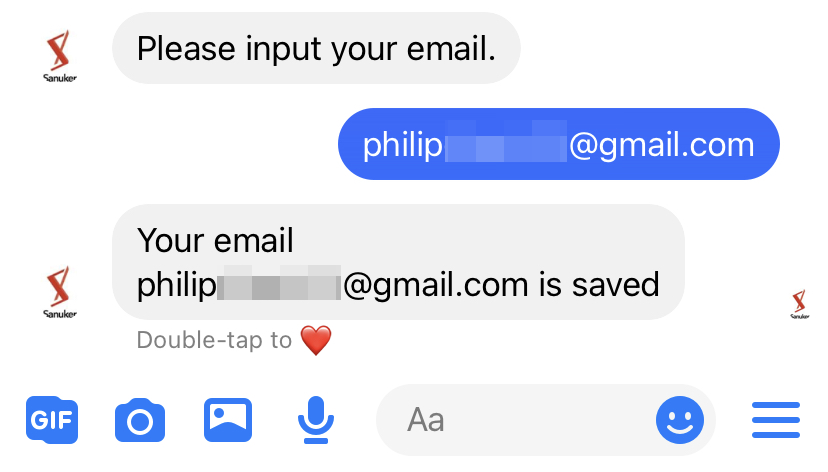
- The email is recorded in the Data Source with these fields: psid, firstName, lastName, email.

tip
PSID is an unique ID assigned to you when you interacts with a Facebook page. Stella also makes use of PSID to identify Facebook members. For other platforms like WhatsApp, Stella makes use of member's WhatsApp number. In general, these IDs are called external ID.
Sample Chatbot Structure
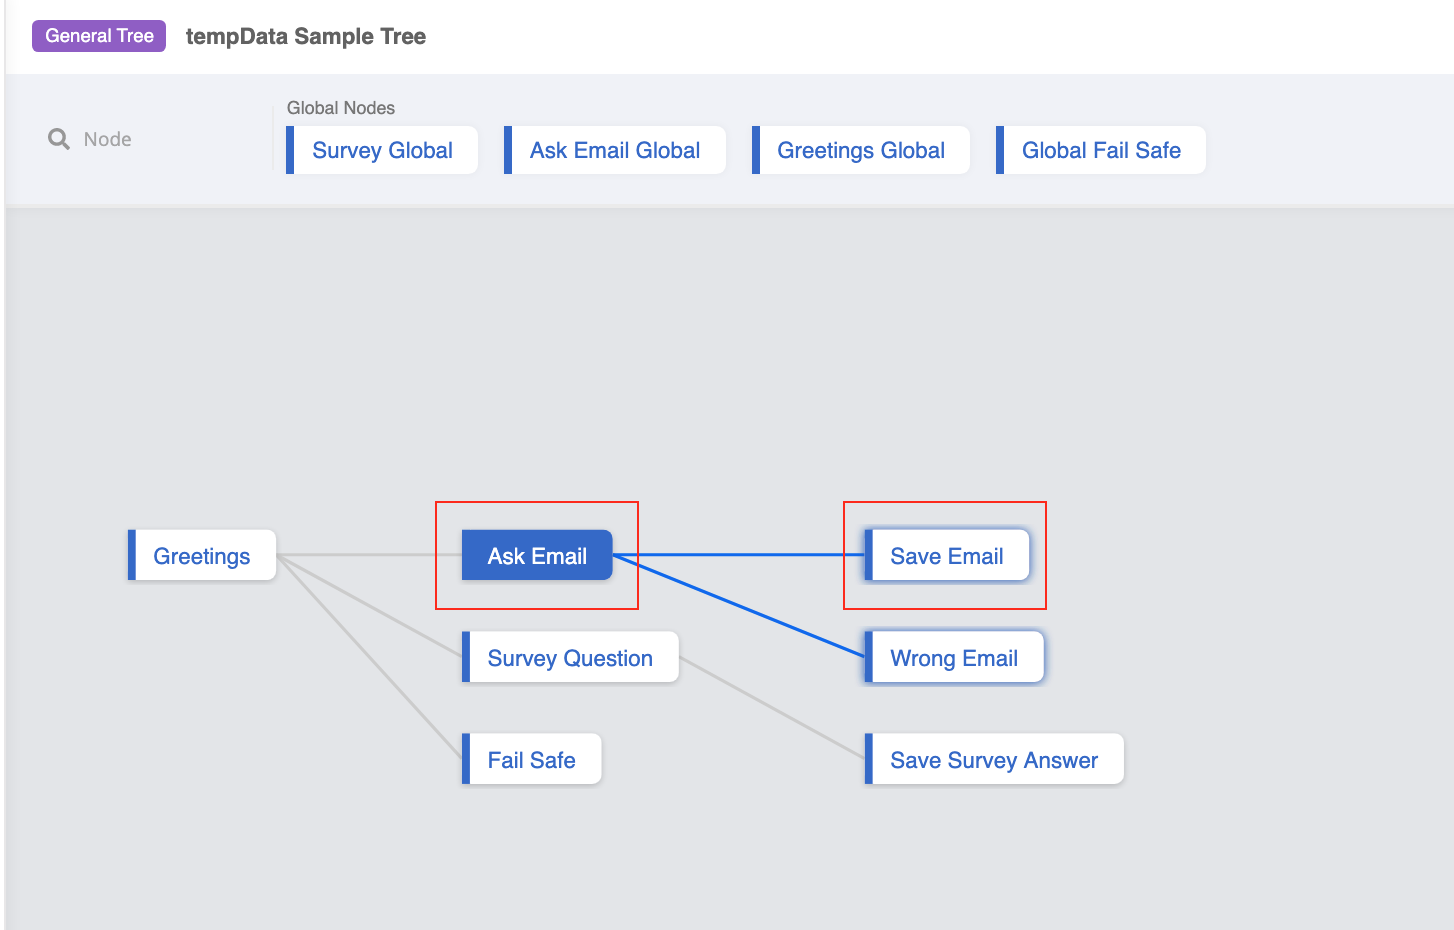
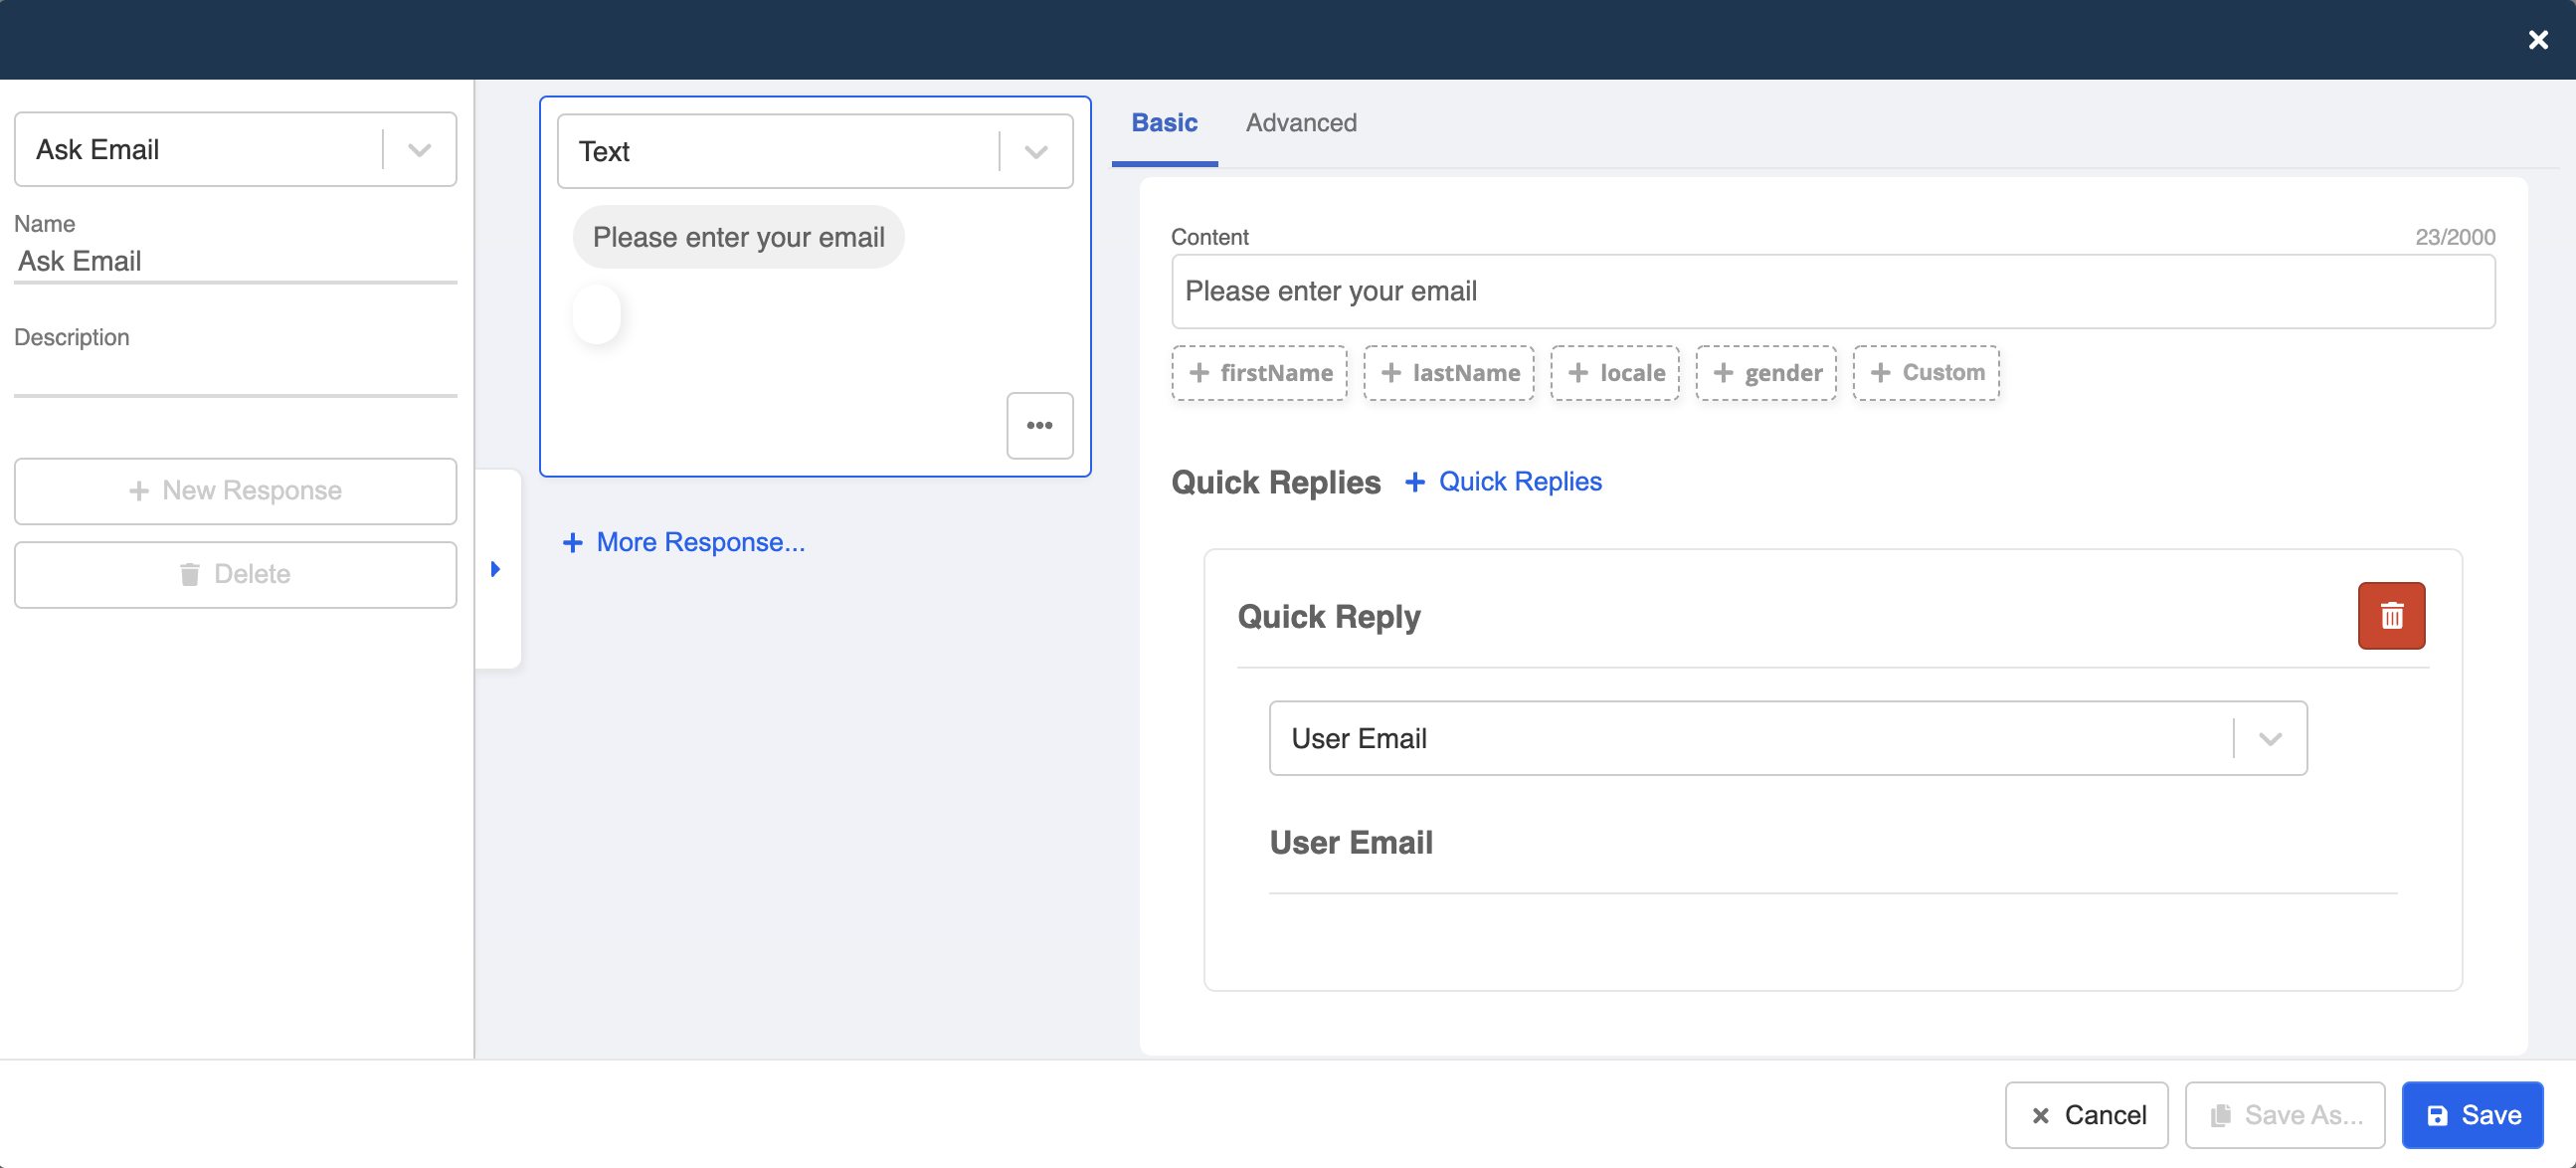
Create the 1st General Node - Ask Email
Enter your Bot Builder and starting building your chatbot.
Create the 1st General node and then create a new response.
Click on "Add Platform" and select "Facebook" from the dropdown.
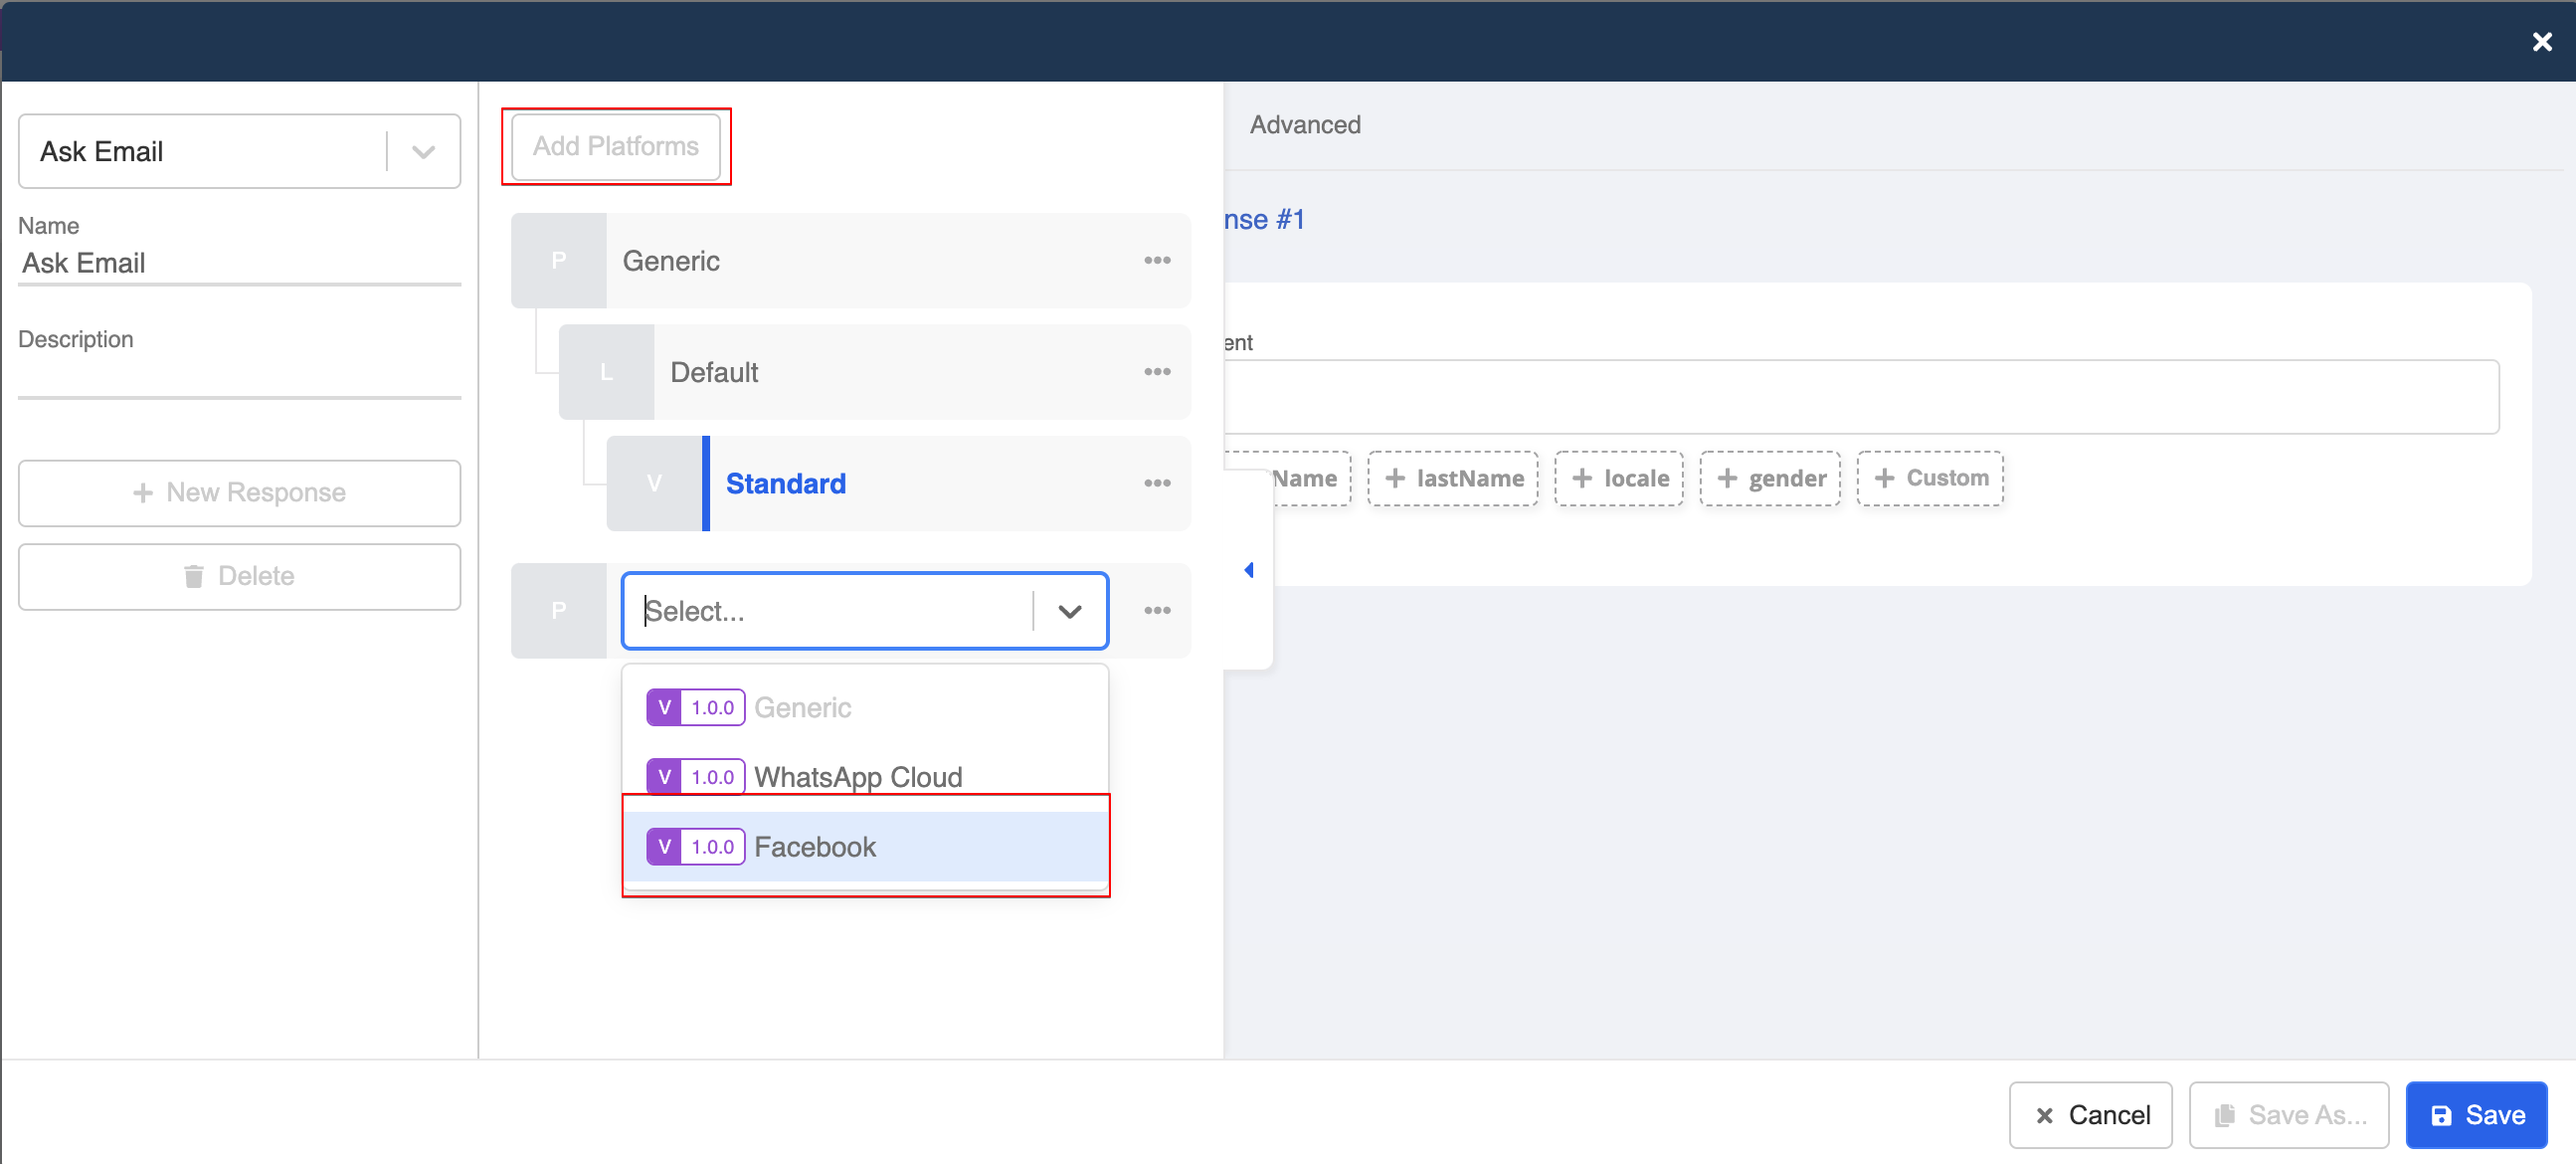
- Select "Text" and enter the text content. Click "+ Quick Replies", and select "User Email". Remember to "Save" the response and the node.
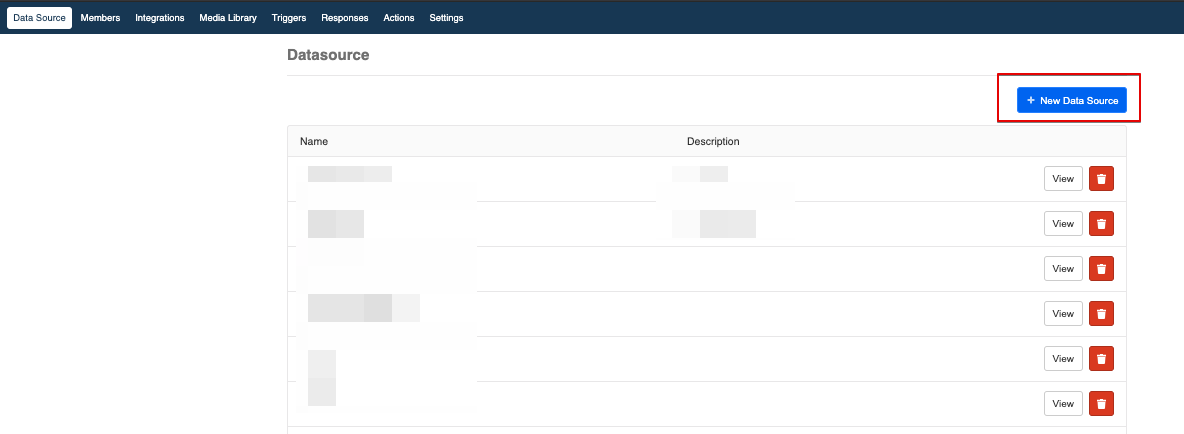
Create a Data Source
- Head to "Data Source" and create a new Data Source.
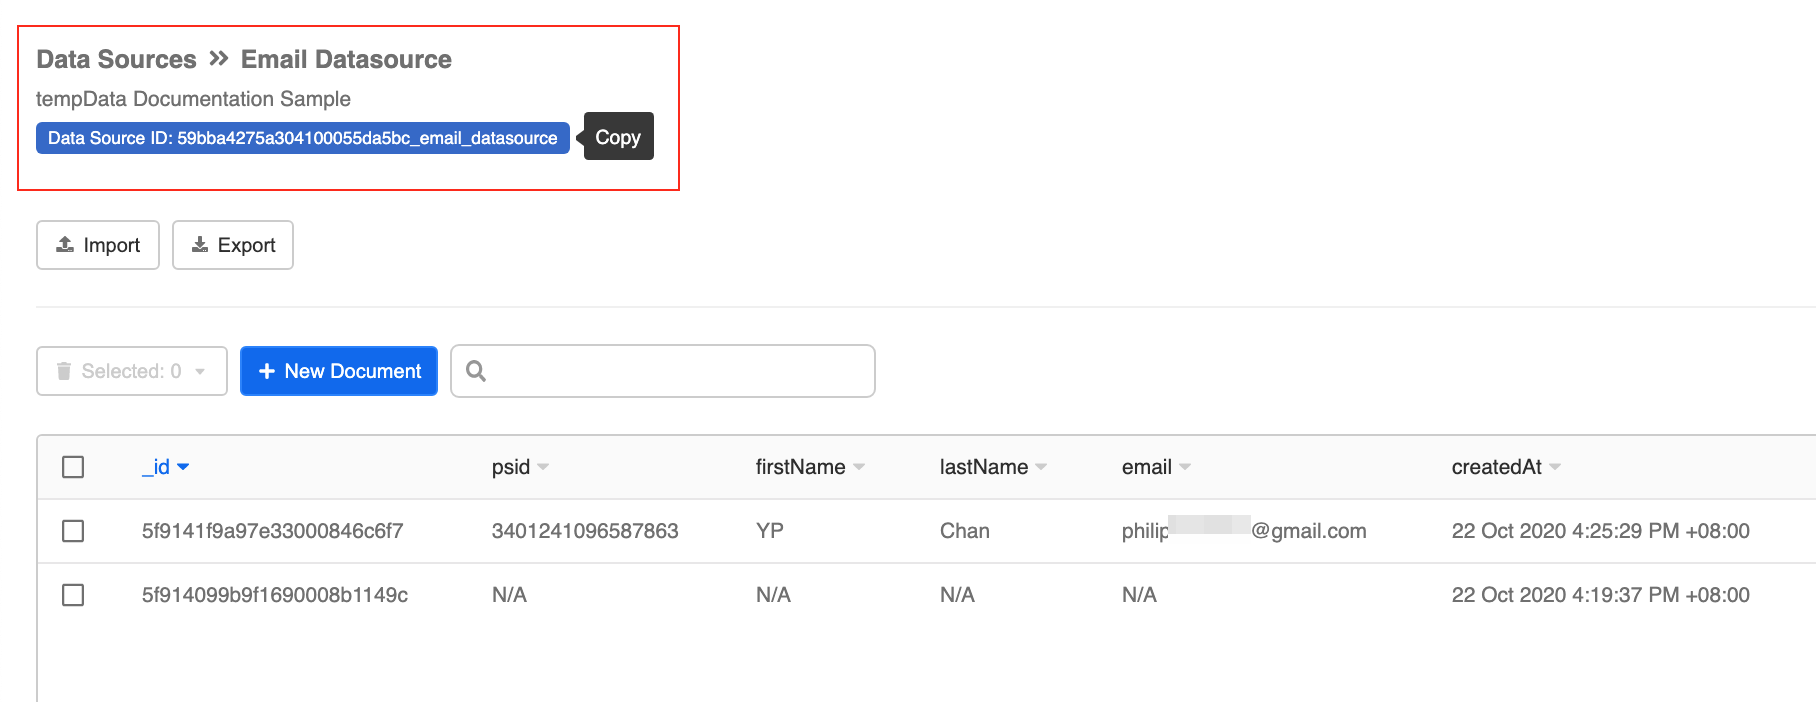
Import the file
.CSVformat to the data source. Remember to toggle on "Replace" for Action and "Parse JSON".Click the button below to download the sample datasource:

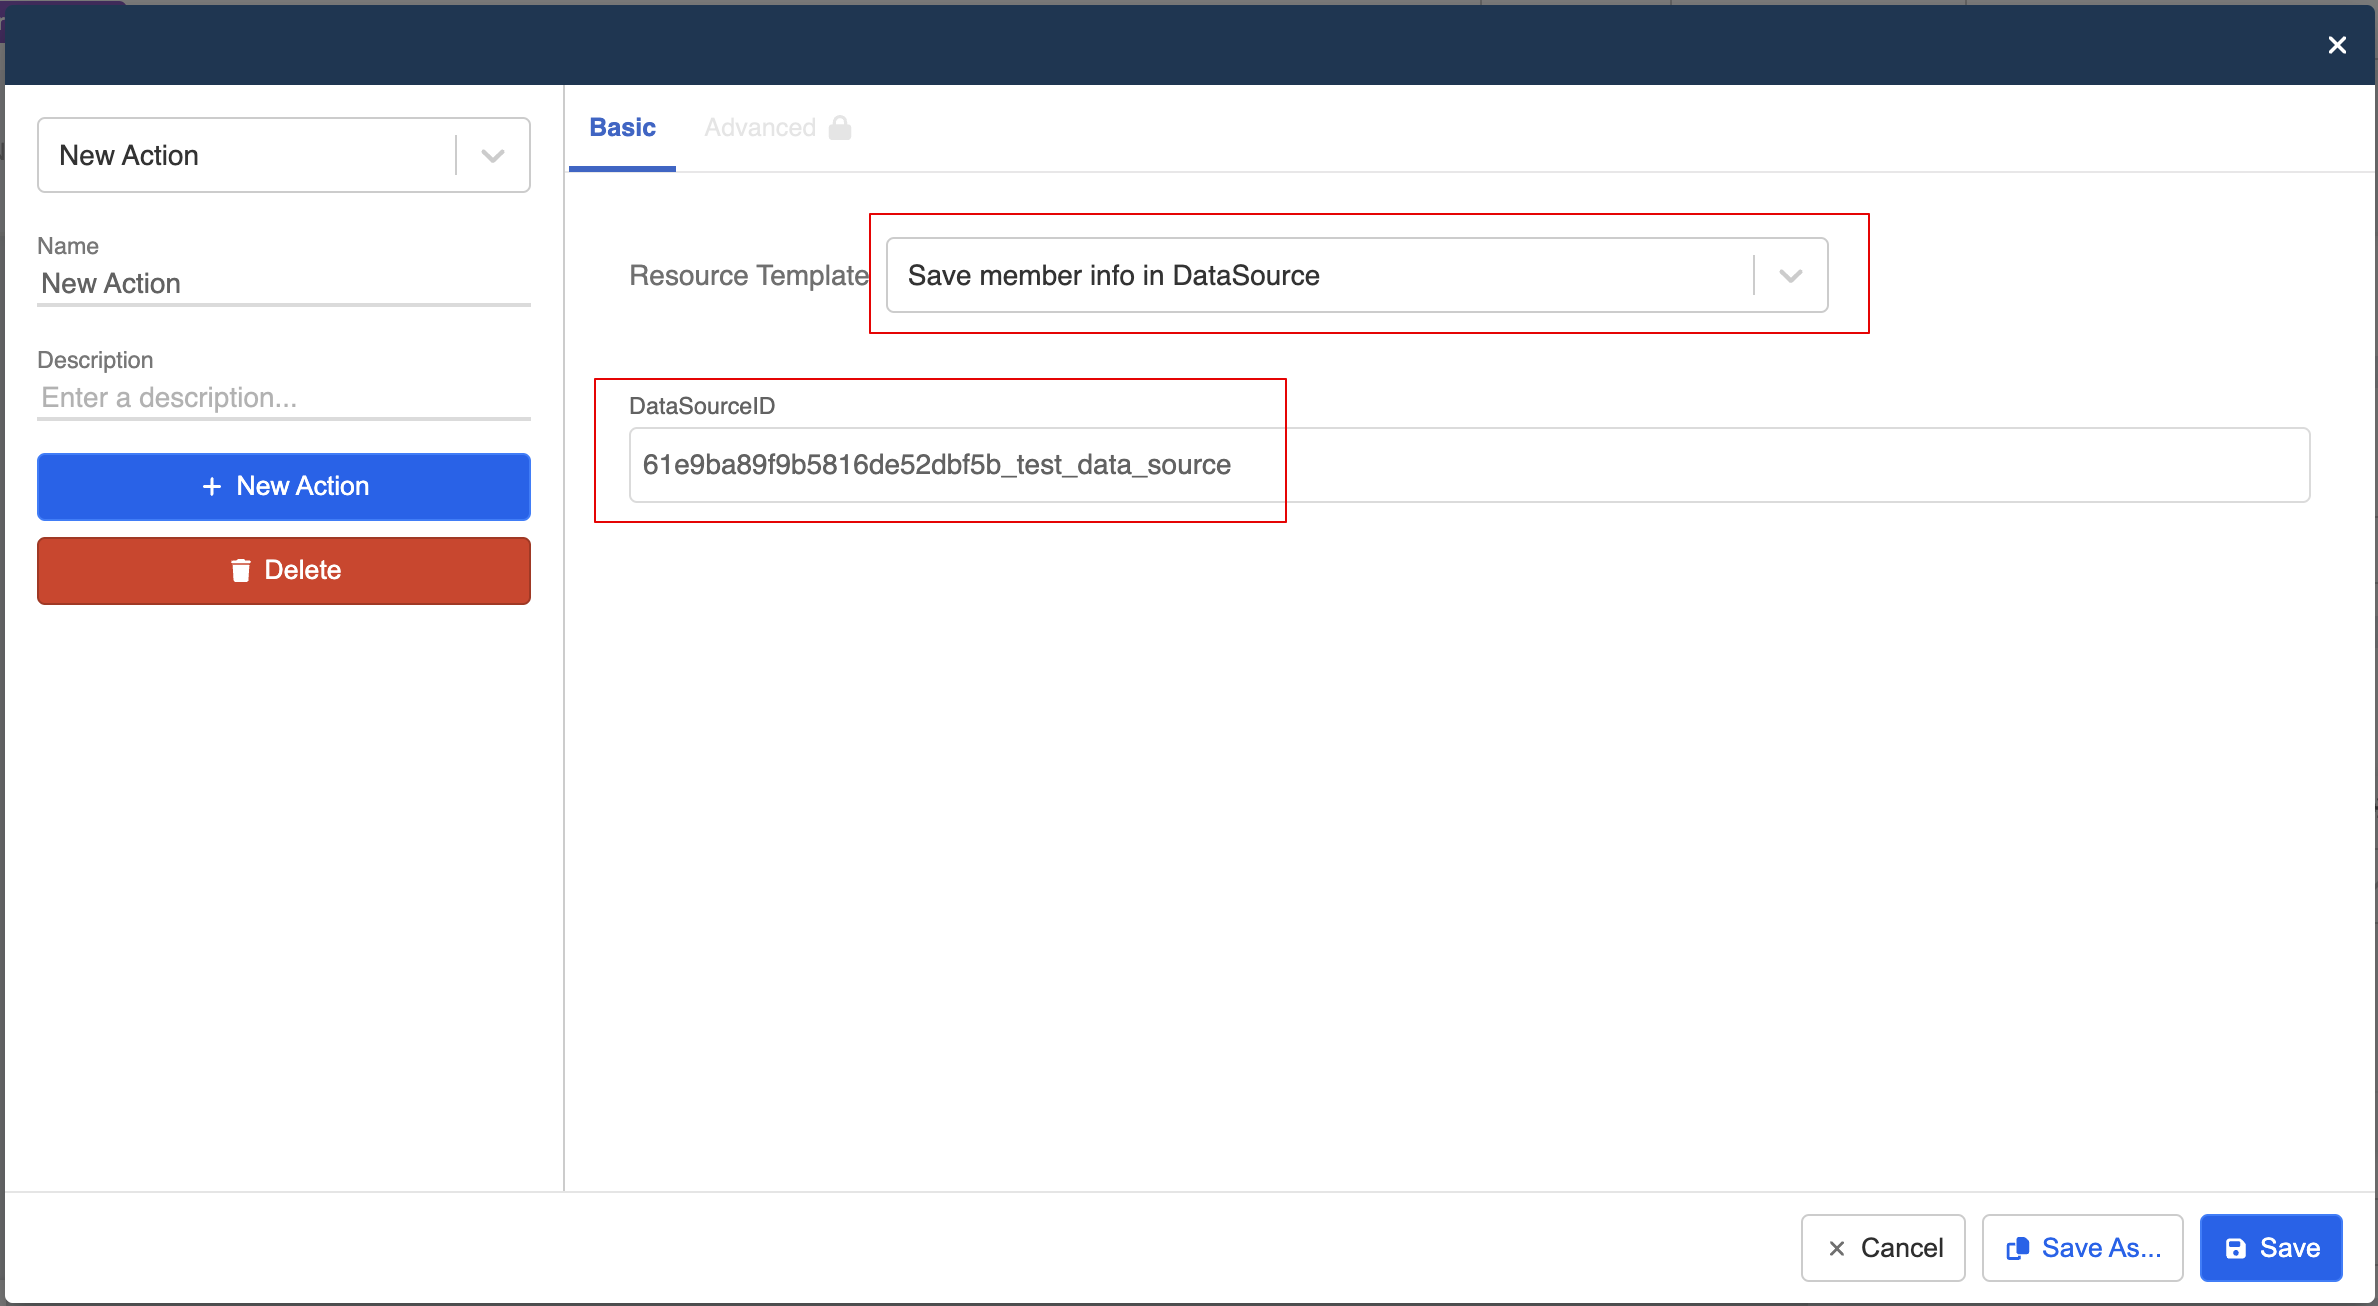
- The fields (psid, firstName, lastName, email) will appear on the Data Source. Copy the "Data Source ID" for later use.
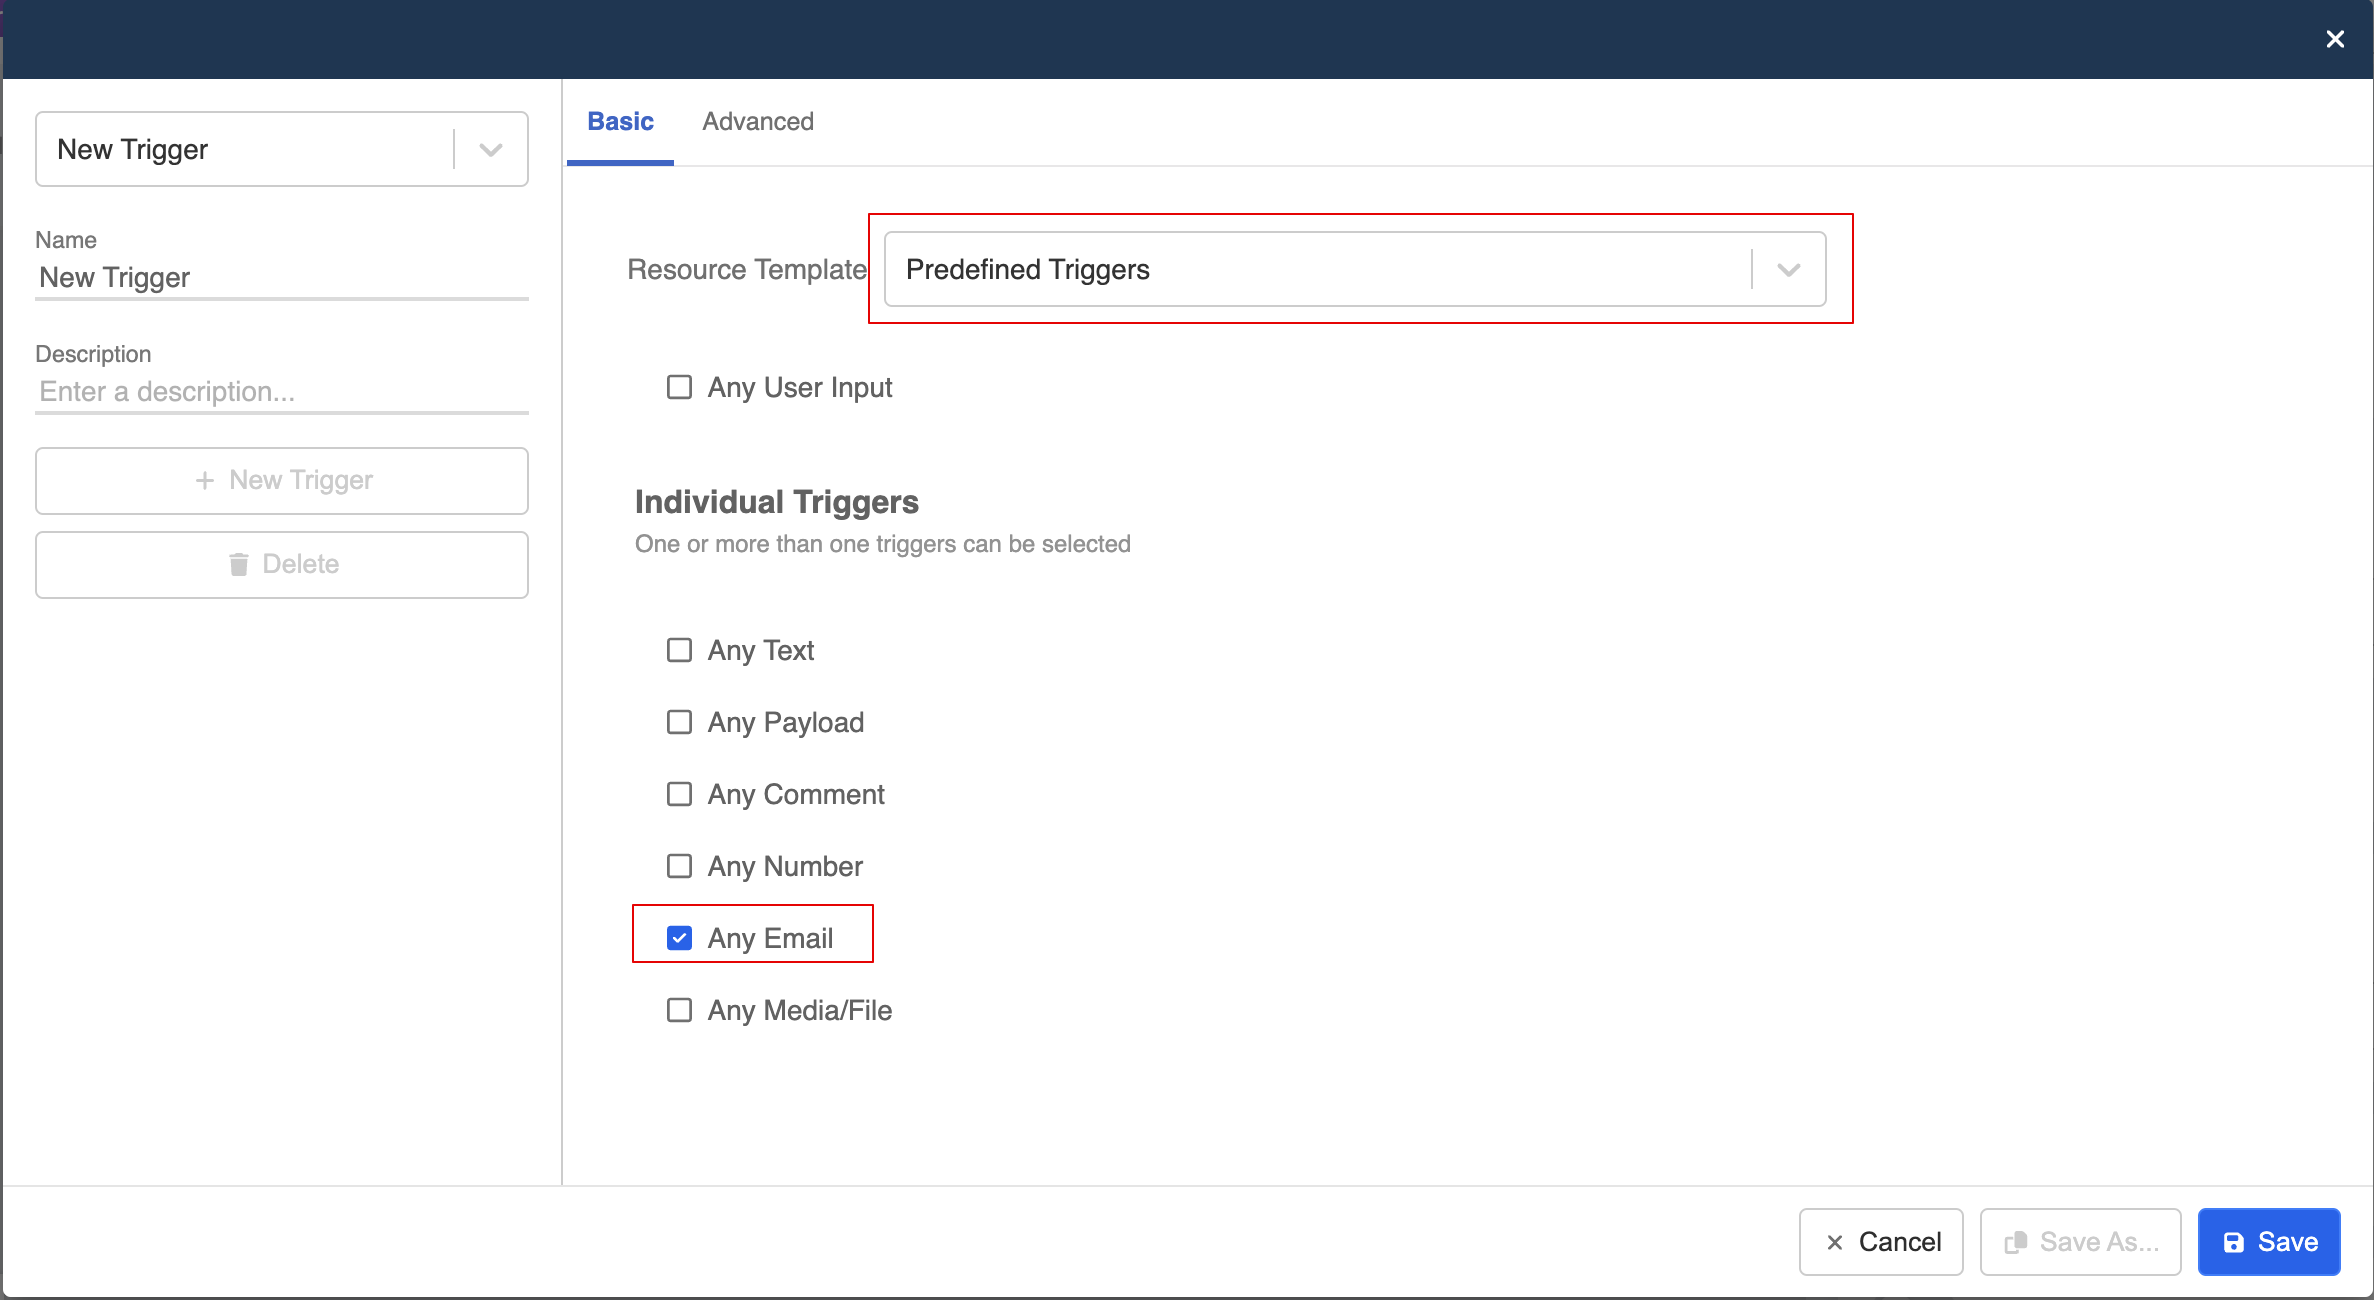
Create the 2nd General Node - Save Email
- Add the 2nd general node and rename it as "Save Email".
- Create a new trigger and select "Predefined Triggers". Apply "Any Email" to check if the email text has the correct email format.
- Create the 1st pre-action using "Save tempData" to save the email address collected to tempData of the member. To configure this action, input the variable name, select the platform and the event.
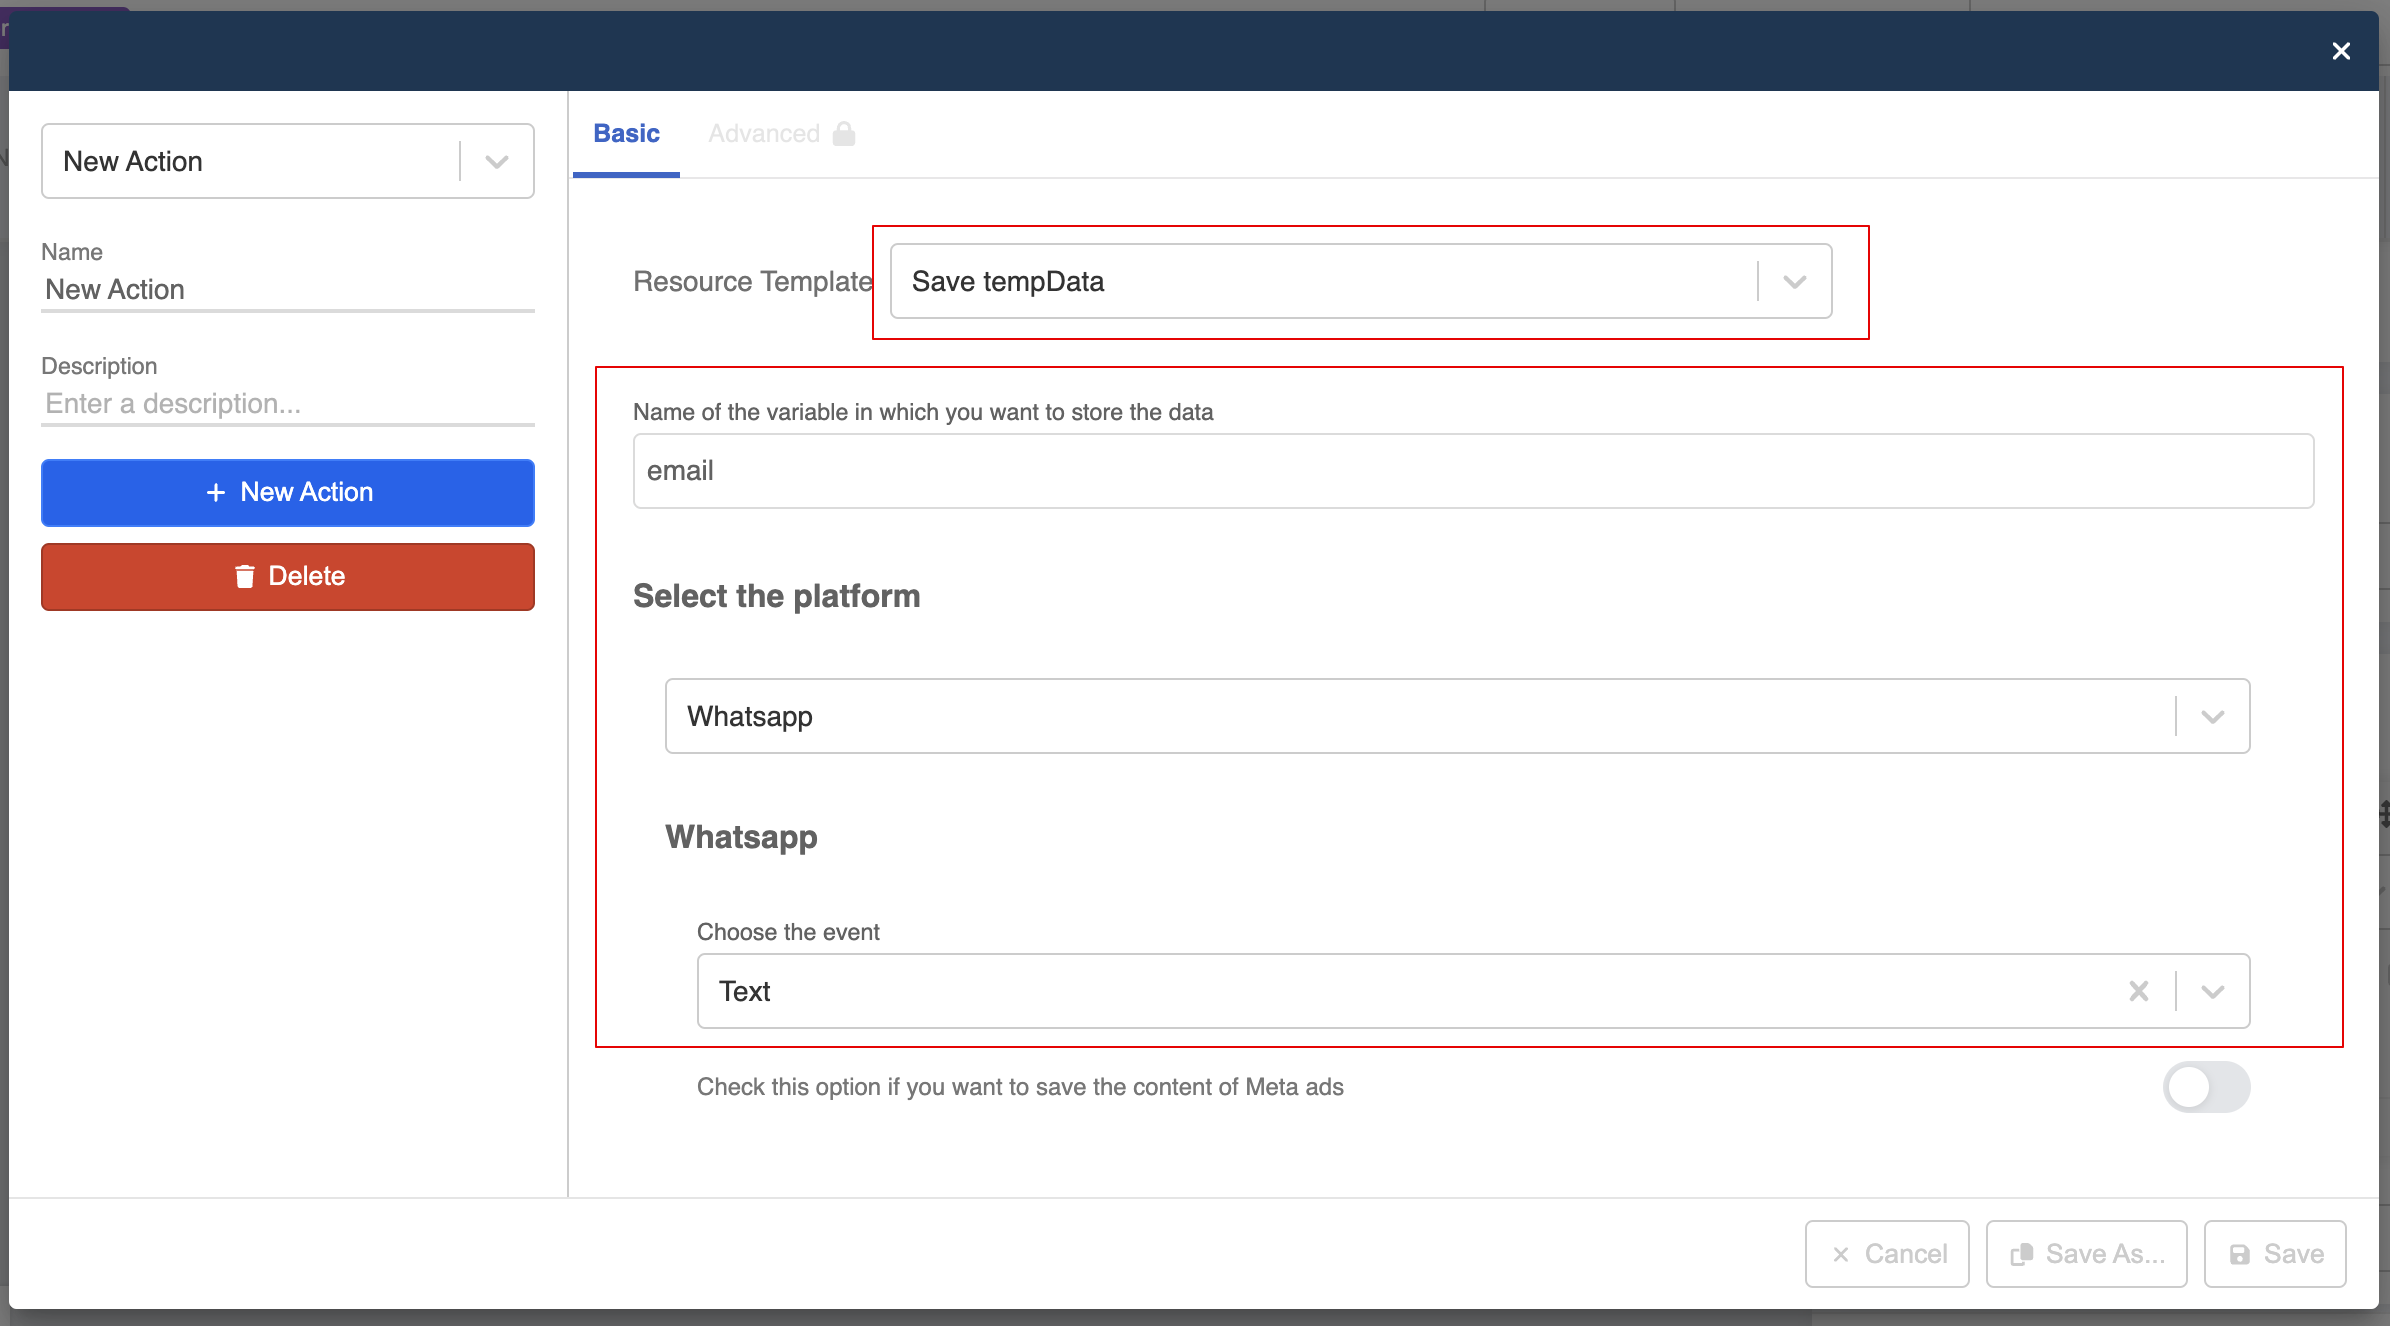
tip
The above action saves the email address from the messageEvent as tempData in the member object, so that saved data can be reused in other nodes within the same Channel.
- Create the 2nd pre-action and select "Save member info in DataSource". It will to save the member info, including the member's tempData containing the email address to the designated data source.
- If you want to display the saved email text on your chatbot response, you can apply an variable and specify the path to the tempData, where the email is stored at.
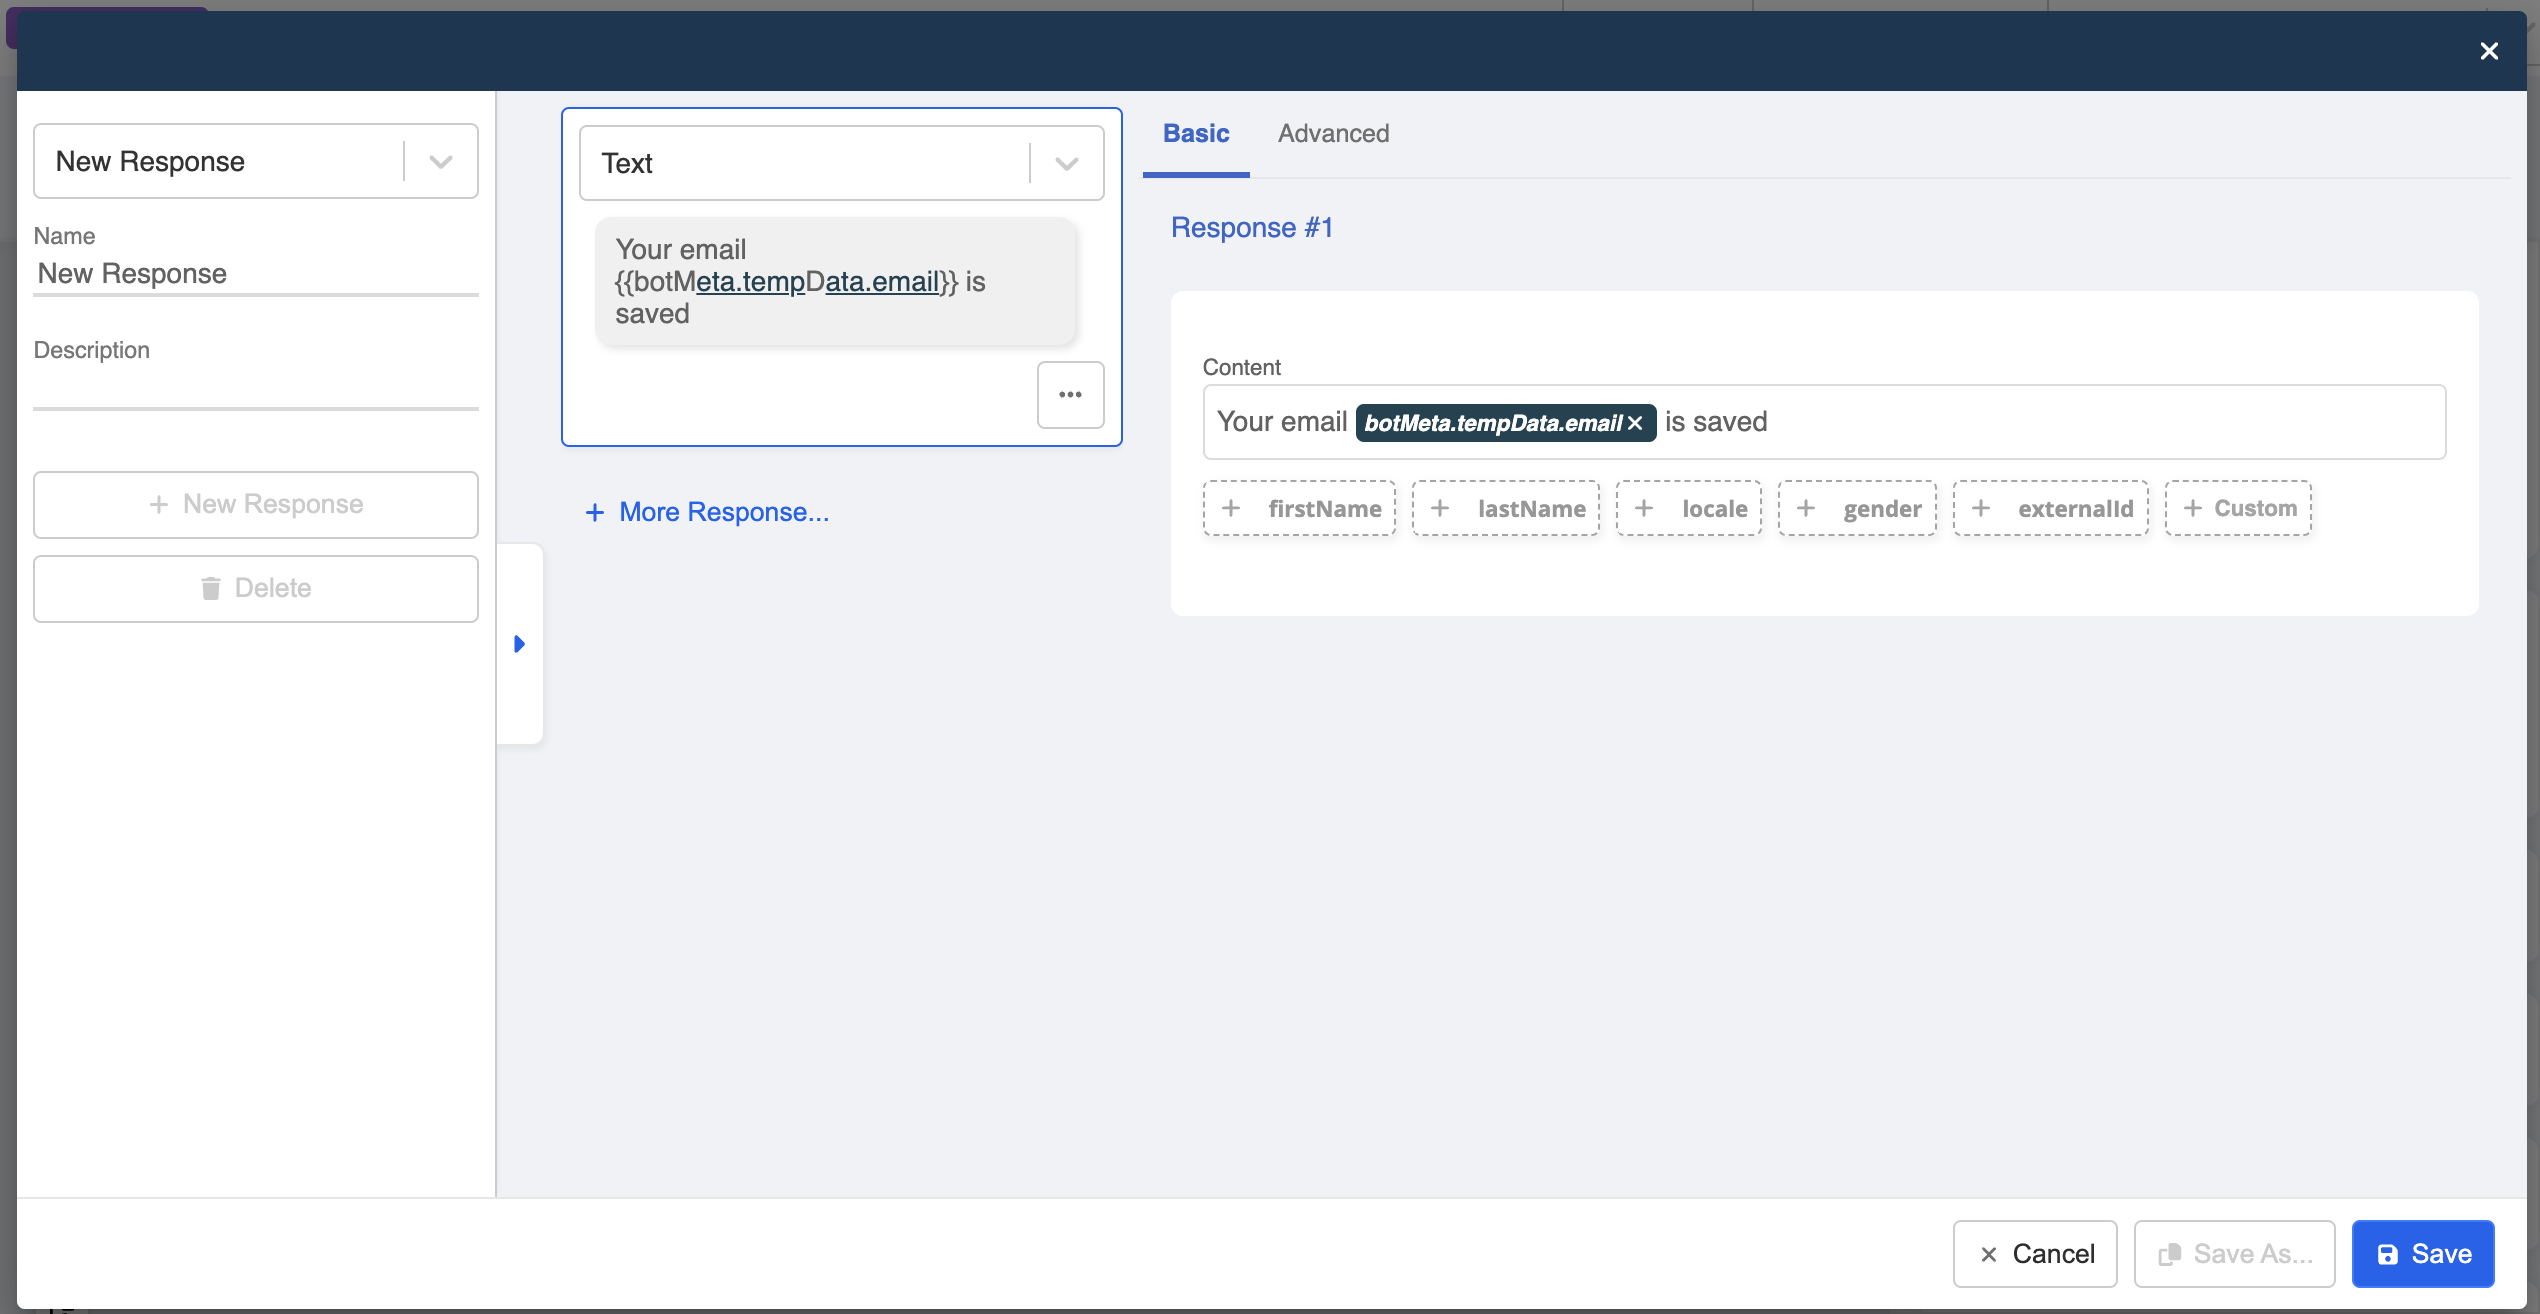
Your email {{botMeta.tempData.email}} is saved.
tip
As the email text is saved in the tempData of the member object, the above format allows Stella to retrieve the data from member and display in the response. You can use {{}} instead of this.member in the response.
- Save the node and test your chatbot!