Member Tagging
Add Member Tag
Chatbot users can come from everywhere but mainly from your ad placement. In order to place your ad or engage your users more strategically, you must first understand your users’ preferences.
“Member Tagging” could help you achieve that. By tagging the users based on their specific user journey in a chatbot, you can identify and visualize their preferences in WOZTELL.
To follow up, you may either filter the user based on their customized tags in the Member Page or send a push message to the filtered group via Push Panel.
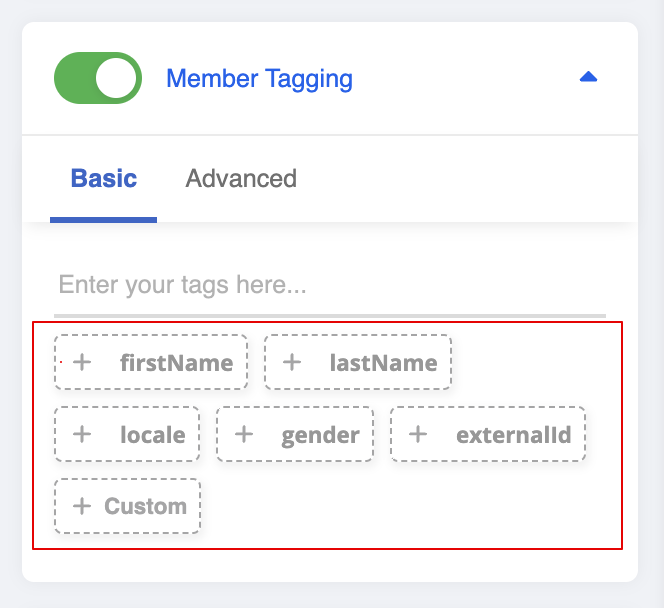
Variables
Besides, users can also directly apply variables as member tag by selecting the variable options below.
Sample Tree Structure
Imagine you are running a chatbot sales campaign for your fashion store and users would activate the chatbot from an outdoor pop-up store or from your online facebook ad . As a result, you would like to track down the chatbot users coming from different entry points into your chatbot sales campaign.
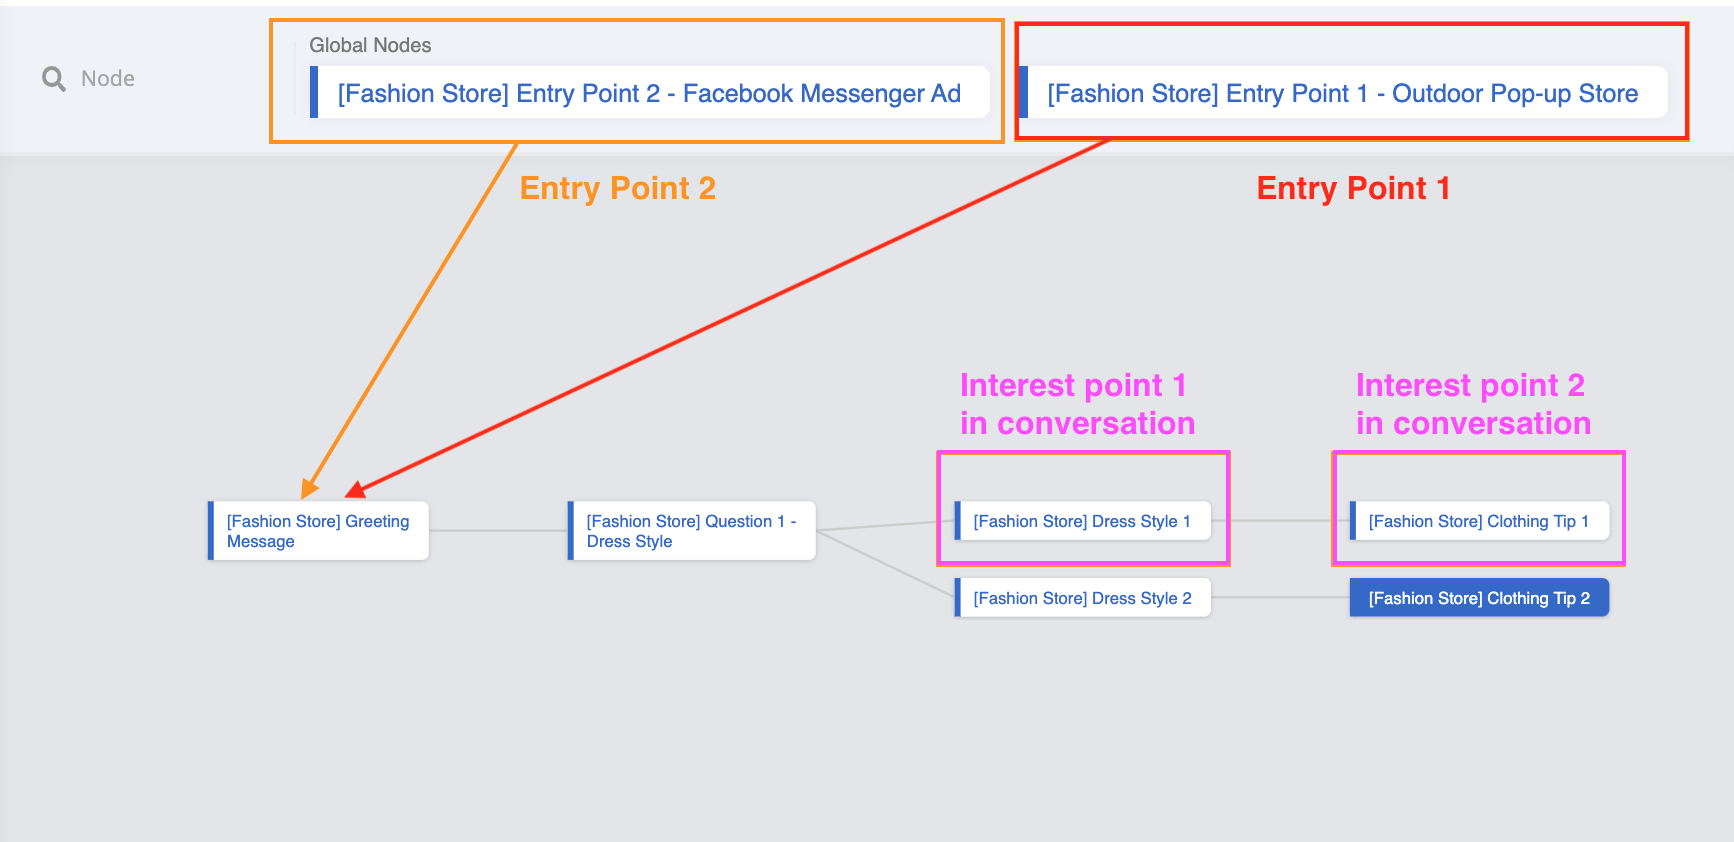
Select the nodes where you set the entry points for your outdoor pop-up store or your online facebook ad.
Toggle the Member Tagging button and add the member tag accordingly. (e.g. if you are in the node for the outdoor pop store entry point, you may add the tag as “Campaign 1 Outdoor”).
Now, whenever a user is activating the chatbot from a specific entry point, WOZTELL will apply a tag to the user accordingly.

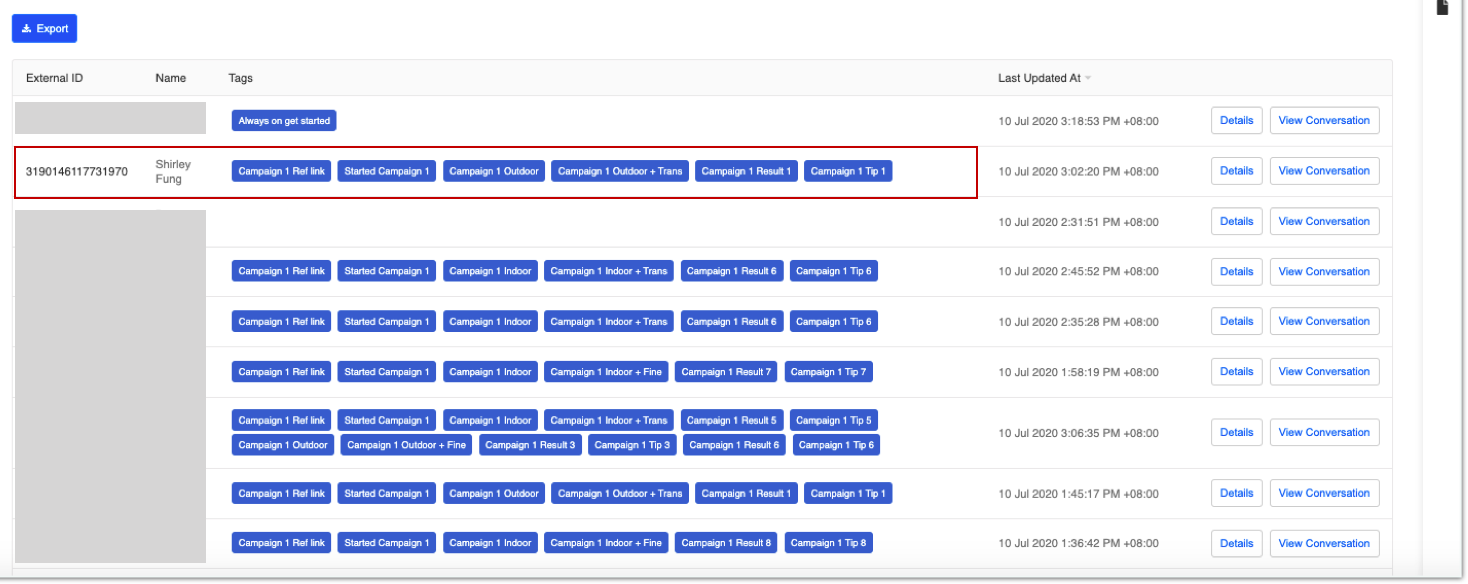
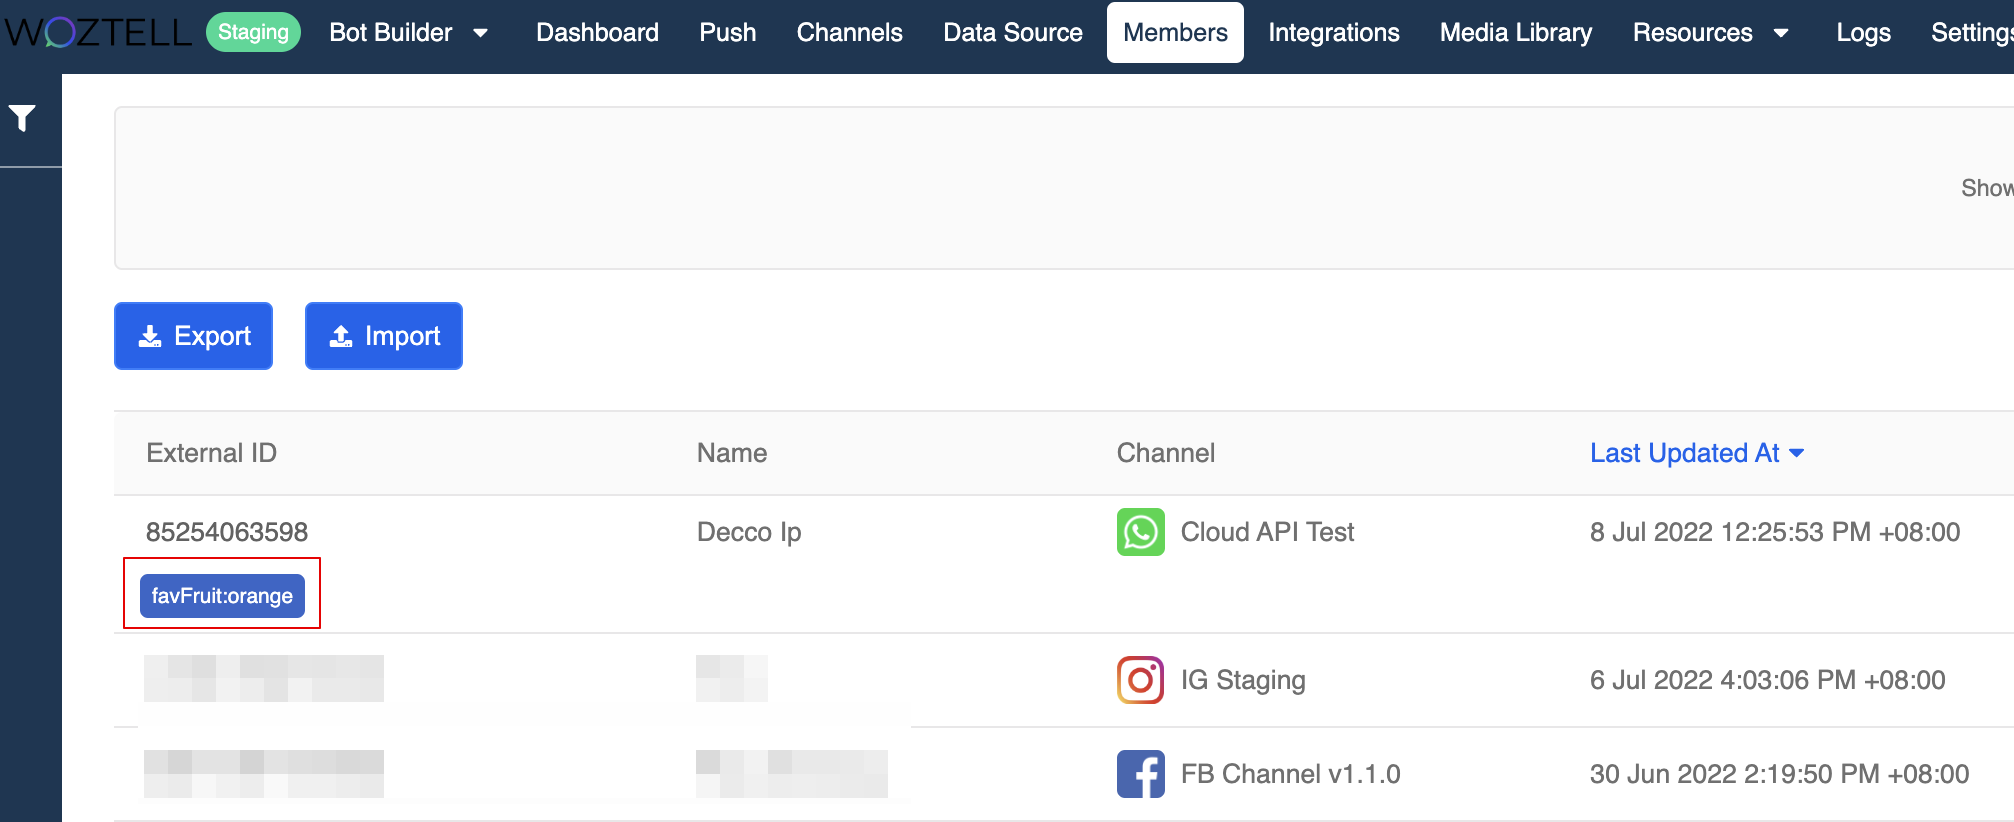
- On the top panel, select "Members" to enter the members page, which stores the list of subscribers who has chatted with your page.

- In Members page, you can simply filter the members with the tag
Campaign 1 Outdoor. Then, you should be able only see the members who activated the chatbot sales campaign from your pop up store.
tip
With your customers' user journey, you can use this information to strategize how to upsell the customers according to their preferences, i.e. send push message to target the customers who have similar preferences.
Categorized Tag
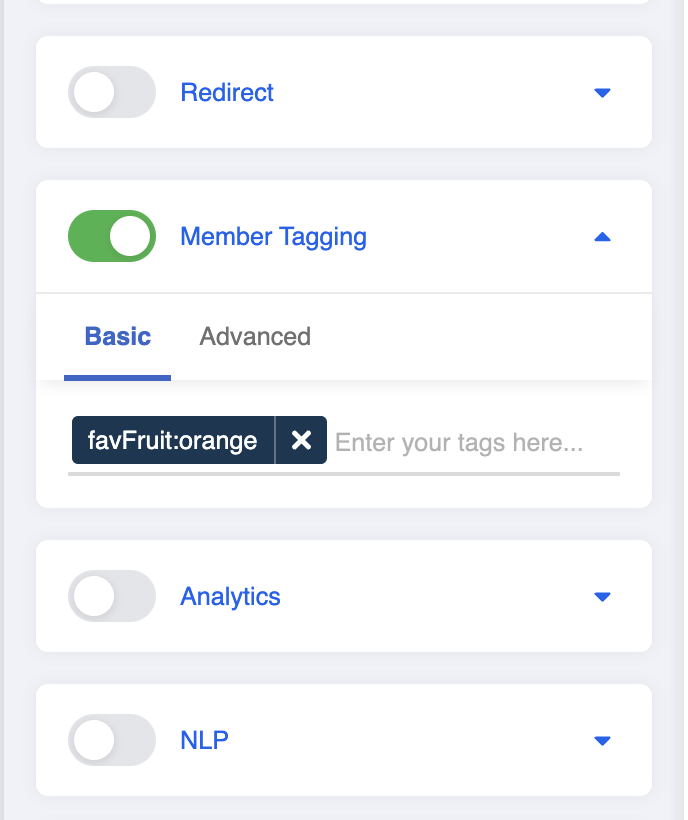
Categorized Tag is a type of member that contains a category and a object tag.
Normally, member tags add up on a member. However, Categorized Tag allow user to overwrite an existing tag, given that both the tags share the same category.
The format of Categorized Tag is adding a colon between the category and the object tag: CATEGORY:OBJECT_TAG
For example:
- A member with a categorized tag
favFruit:apple.
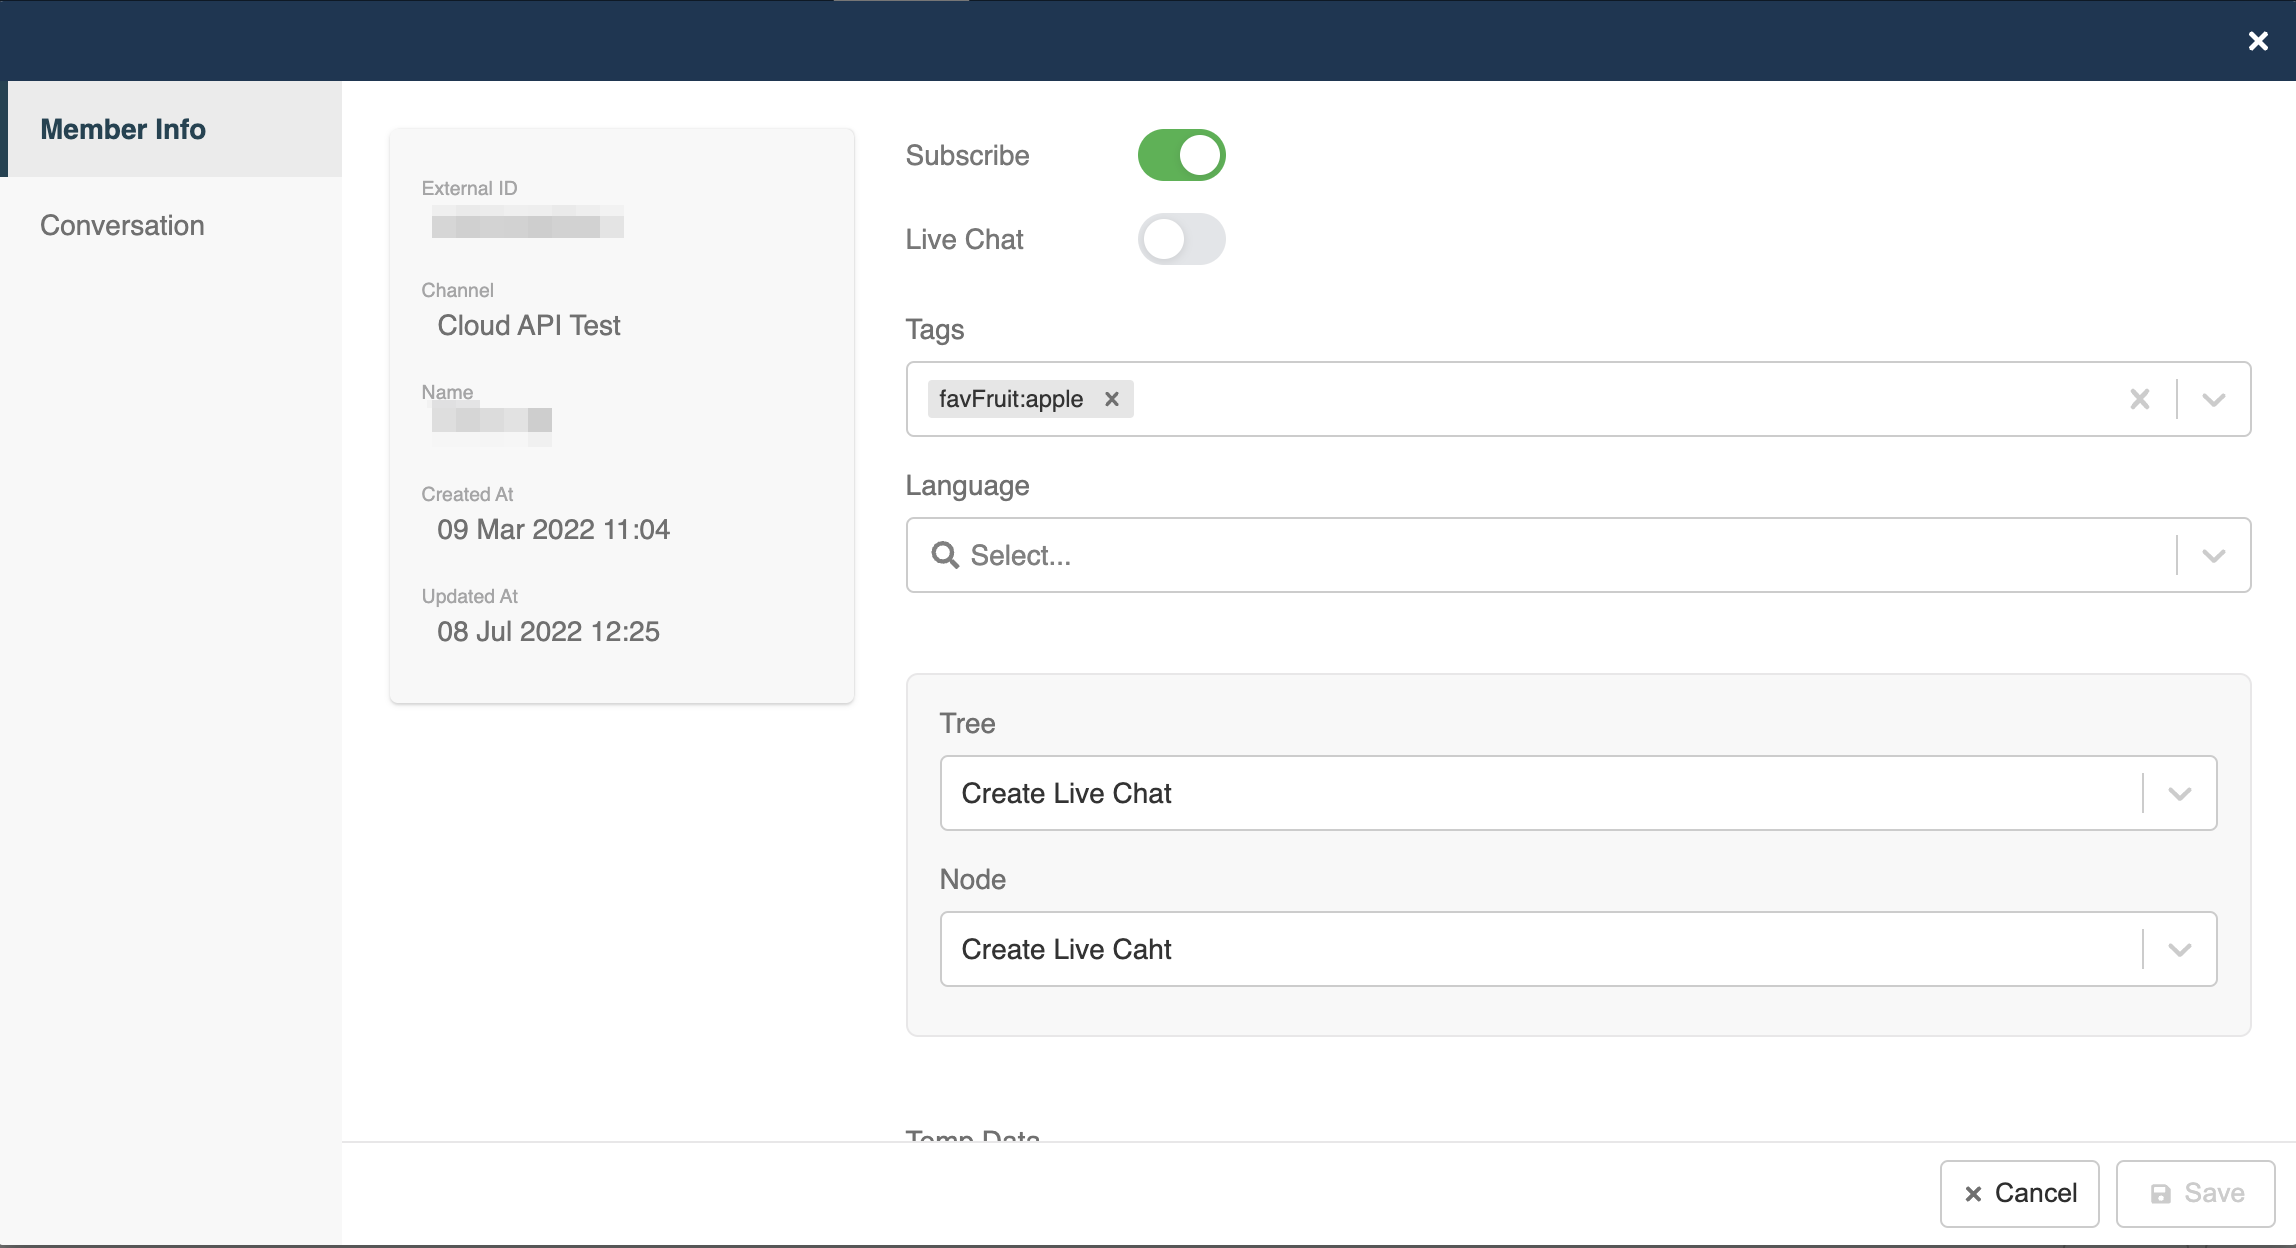
- After adding another member tag with the same category
favFruit, the new tagfavFruit:orangewill overwritefavFruit:apple.
Advanced
Member tag in the basic version is very useful because you can easily tag the users who are passing through a tree node. However, that also means you can only tag the users on a node level. If you want to tag a user based on how the user interacts with your chatbot (E.g. users have to make a choice between Product A & Product B) , then you will need to tag the member programmatically in the advanced version.
Advanced member tag is a Promise function. Use the resolve callback of the promise function to resolve an object with tags as key and an array of string representing the tags to be added as value. The array of tags will be appended to the member’s array of tags.
A tag with the colon character : is a special key-value tag. The character before the colon is the key, and the character after the colon is the value. Any previous tags with the same key will be replaced by the new tag.
For more details on the advanced chatbot concept & usage, you may visit here.
Sample Tree Structure
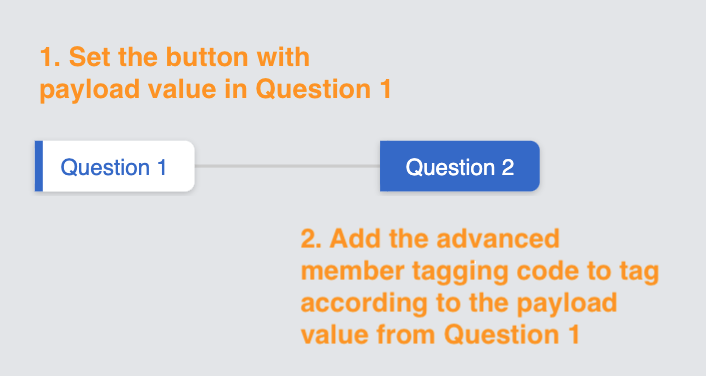
Following the above scenario, as you are tagging the member after they have answered a question, the member tagging should be done in the next node. (i.e. If your response in Question 1 is a question asking the user to choose between Product A button or Product B button, then the member tagging should be done on the next node which is Question 2). The system will match the next layer of node after the user answered your question, (i.e. Question 2).
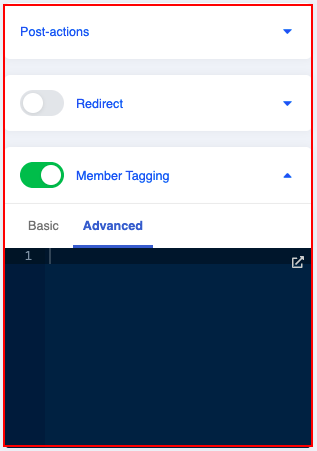
- Click Advanced after toggling on the Member Tagging, and input the following script as an example:
return new Promise((resolve) => {
  resolve({
    tags: [`Industry - Company - ${this.messageEvent.data.payload.value}`]
  })
})
- In the above example, the tag will be generated based on the payload value of the button that the user clicked. For example, if the user clicked the button Product A with a payload value of “Product A", then the tag will be “Industry - Company - Product A”.
tip
You can always change how you want to save the member tag in terms of message event. For more information on message event references, see the reference documentation.